

Page 1

BeoCom 5
Page 2

Page 3
Before you start …
3
This Guide contains instructions in how to set up and use the
handset with a BeoLine 2 base.
You can also use the handset with other bases, such as a BeoLine
base or a BeoLine PSTN base. However, note that some functions
work differently or are unavailable when you use the handset
with one of these bases.
How to use this Guide
The following examples show what a key or status display looks like in an
instruction sequence.
Examples of keys on the handset
The wheel
OK
0 – 9
The handset display
555 123 4567
Store number
Call
Edit
Primary
The key in the middle of the wheel
The hook key, which starts and ends a call
The digit keys
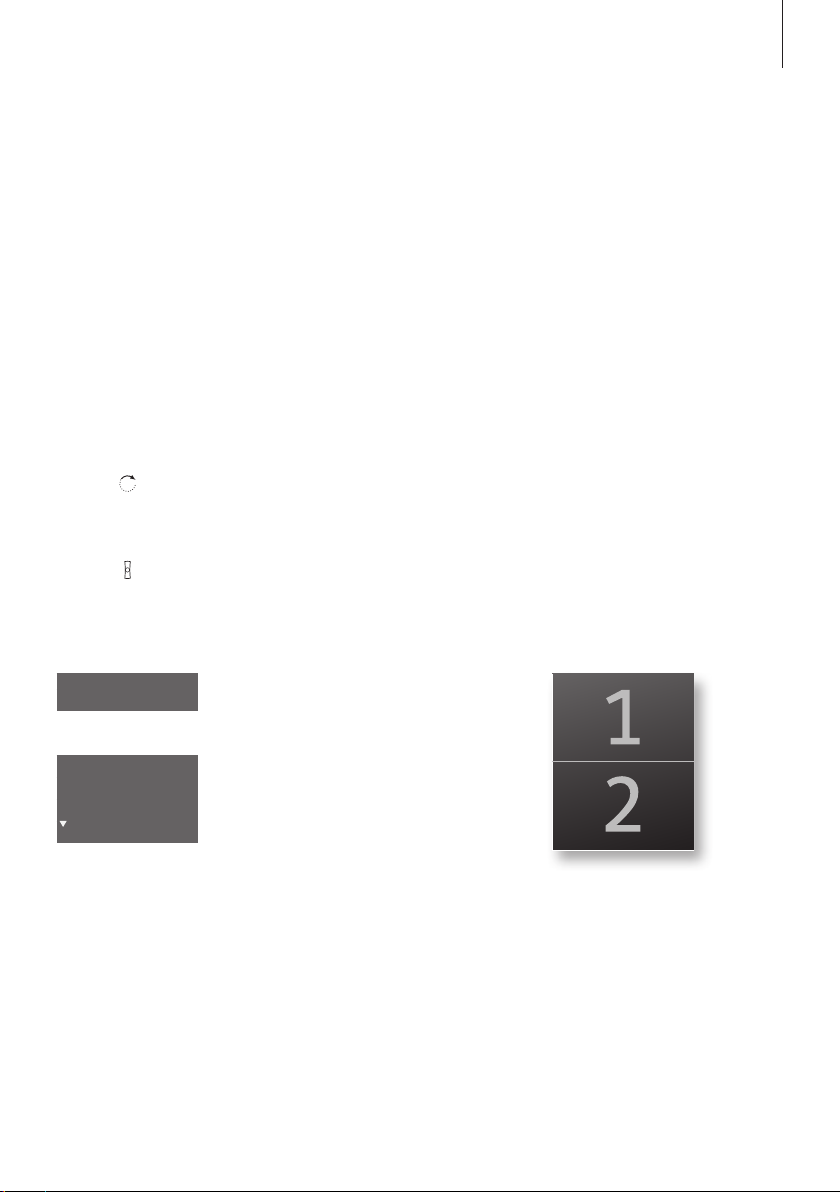
If you have chosen to use two phone lines, the
display indicates the line currently in use with
the watermarks 1 or 2.
An arrow indicates that more options are
available if you turn the wheel clockwise.
Page 4

4
Technical specifications, features and the use thereof are subject
to change without notice!
Page 5

Contents
5
Get started, 7
Find out how to connect and set up the handset, use the handset keys
and the display. You can also find information about maintenance.
Daily use, 21
Find out how to make and answer calls, adjust the handset volume, make
calls from the Phonebook, Calls list, store a number in the Phonebook
after a call, silence the handset ringer and lock the keypad.
2-line use, 35
Find out how to handle simultaneous calls on the same line, handle
simultaneous calls on both lines, make a 2-line conference call and make
a three-party call on one line.
Advanced operations, 41
Find out how to enter, edit and delete names and numbers in the
Phonebook, store numbers from the Calls list, delete the content of the
Calls list*
of some Bang & Olufsen audio or video products. This chapter also
provides an overview of the Settings menu. Find out, for example, how
to register a handset to a base, set the time and date, and select settings
for the ringer.
System use with several handsets, 59
Find out how to make a handset personal or common, call another
handset, forward external calls and make an internal conference call.
1
, call and store extension numbers, and adjust the volume level
*1 This is only possible if you use
the handset with a BeoLine 2 or a
BeoLine base.
Menu overview, 64
Handset and base compatibility, 65
Important information about the handset, 66
Index, 67
Page 6

6
Page 7

Get started
7
The battery, 8
• Chargethehandsetbattery
• Batterystatus
The handset, 10
• Thehandsetdisplay
• Handsetkeys
• Displayandkeypadbacklight
Registration of the handset to a base, 14
• First-timeregistrationofthehandsettoabase
• Chooseacolourforthehandset
• Namethehandset
• Setthetimeanddate
• Setthehandsetforusewithoneortwolines
Placement, surroundings, and cleaning, 20
Quick Start
When getting started, follow this
procedure:
1 Connect the charger or the
Speaker Phone to the power
outlet as described in the
charger’s or Speaker Phone’s
Guides;
2 Charge the handset battery;
3 Connect the BeoLine 2 base as
described in the BeoLine 2 base
Guide;
4 Register the handset to the base.
Refer to page 14.
This chapter describes the first-time
setup procedure in detail.
Page 8

8
>> Get started
Charge the handset battery
The handset controls the battery
charging, so you can always place
the handset in the charger or
Speaker Phone after use, even if
the batter y does not need
recharging. Leaving the handset in
the charger or Speaker Phone does
not reduce the lifetime of the
battery.
If the handset requires charging, this occurs automatically when
thehandsetisplacedinthechargerorintheSpeakerPhone.For
safety reasons, the battery is not charged prior to shipping. We
recommend that you charge the handset for at least one hour
beforeproceedingfurtherwithrst-timeregistrationofthe
handset.
About charging …
– The charger or Speaker Phone must be connected to the power outlet.
– It takes approximately four hours to fully charge the battery.
– The maximum talk-time is up to 12 hours.
– The maximum standby-time is up to 100 hours.
Page 9

Battery status
9
The battery indicator in the display shows the charge level of the
handset battery. If the battery require charging, you are alerted
by a message in the display and a sound signal.
To display the battery status …
OK
Battery status
OK
Press while the handset is in standby
Turn the wheel until Batter y status is highlighted
and press OK. The current charge level appears
in the display The battery symbol indicates a
Battery status
battery status of 0, 10, 25, 50, 75
or 100% depending on how much
of the symbol that is filled out.
Page 10

10
>> Get started
The handset display
3 new calls
If you do not wish to view new call
information, press
98765 432
10 :17
Wed 2 Jan
3 calls
.
Example of information about a
new call.
*1 ’Delete Calls list’ and number
types are only available if you use
the handset with a BeoLine 2 or a
BeoLine base.
2
If you have selected a primar y
*
phone line, only new calls from this
line will be shown.
Switch on the display …
> Lift up the handset.
> Press OK while the handset is in idle mode.
> Turn the wheel to view options in the display.
> Press OK to select an option.
Options in the main menu
– Lock keypad… Lock the handset keypad. Refer to page 23.
– Silence… Mute the handset ringer and battery alarm. Refer to page 24.
– Battery status … See the charge level of the battery. Refer to page 9.
– Delete Calls list … Delete the content of the Calls list. Refer to page
45*.
– Settings … Activate, adjust, or deactivate functions. Refer to page 54.
Display of new, unanswered calls
While the handset is activated but not operated, the display informs you
of any unanswered calls you have received. The menu disappears when
you have seen the calls, and the call information is moved to the Calls list.
‘3 new calls’ appears in the display …
> Press OK to see the number, time and date of the latest call. If the
1
name is stored in the Phonebook, this name and the number type*
are shown instead of the number. If you have two phone lines, you can
also see which phone line, the call was received on, as a watermark in
2
the background.*
> Turn the wheel to see the other calls.
> When you have seen the new calls, press
> … press
to call the highlighted number.
to leave the menu, or …
Page 11

11
Troubleshooting via the display
If conditions exist which impede or otherwise affect the optimal use of
your phone, an alert appears in the display while the handset is in
standby and remains as long as the conditions apply.
3
An alert appears in the display*
…
> Turn the wheel to highlight other conditions if they apply.
> Press OK to be able to adjust relevant settings, if available.
> Turn the wheel to adjust settings, and press OK to store them.
Messages in idle mode:
Regis ter handset
to base?
Base not found
The handset is not registered to a base. Press OK
to start the first-time setup procedure.
There is no contact between the base and the
handset.
No dial tone
There is no connection between the base and
the phone line. This alert is only available if you
use the handset with a BeoLine 2 or a BeoLine
base.
Recharge batter y
The clock is not
set
The battery needs to be recharged.
The clock has not been set in the system. Press
OK to bring up the Time and date menu.
*3 If you do not wish to view the
alert, press
.
When this symbol appears in idle
mode the line is busy.
Page 12
HOLD
ABC
DEF
FLASH
TUV
WXYZ
PQRS
JKL
JKL
MNO
GHI
2
1
3
5
4
6
8
7
9
0
R
AV
INT
L1
L2
12
>> Get started
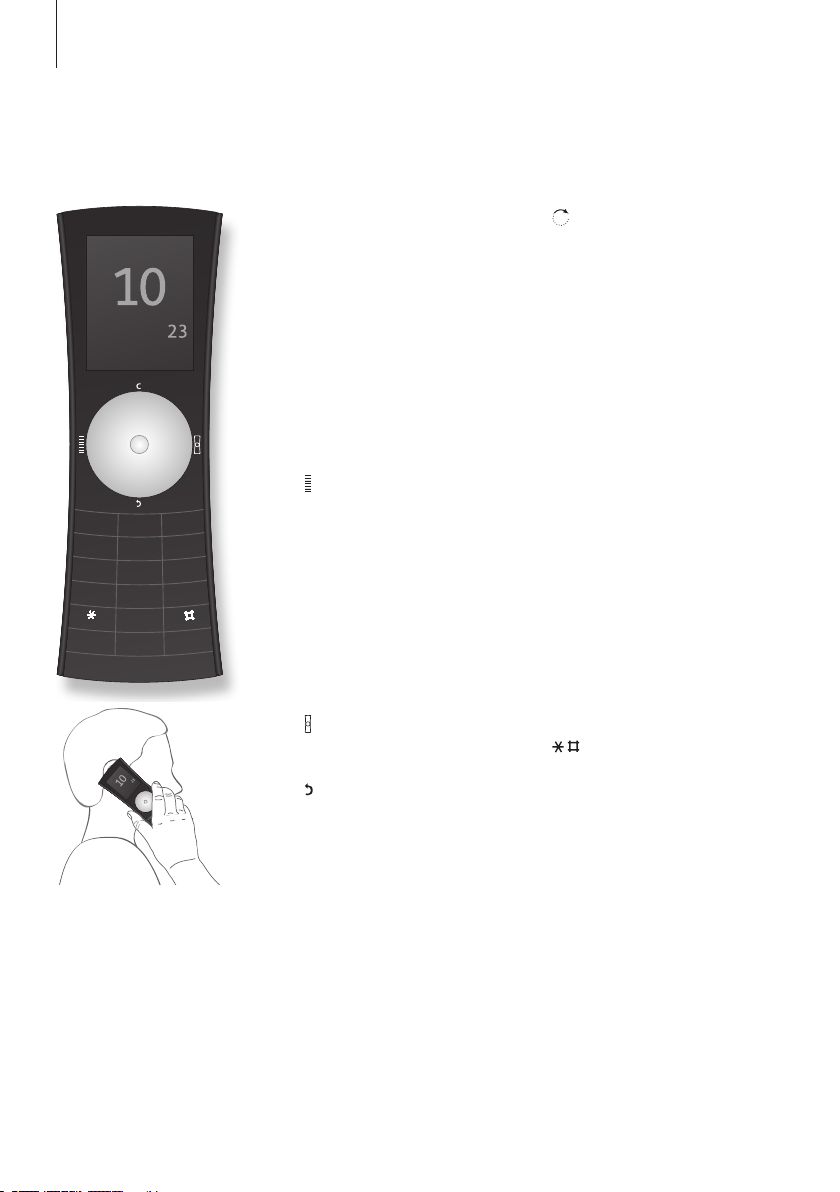
Handset keys
OK/MENU (centre of the wheel)
– Accept and store entries or
choices in the display
– Depending on the state of the
handset, pressing OK gives you
access to additional functions or
options, which you can view by
turning the wheel
– Press and hold to switch the
hand set off, and press once to
switch it on again
Calls list
Access the Calls list.
C
Delete the last digit or letter
entered or the current item in a list,
when editing names, browsing the
Phonebook or lists. In idle mode,
press and hold to enter silent
mode.
Hook key
Press to make and end a call.
Back key
Press to go back one level. Press
and hold to exit a function.
Turn the wheel to enter the
Phonebook and search in
Phonebook, Calls list and the
phone’s menu system. During a
call, turn the wheel to adjust the
volume.
[L1], [L 2]
Press [ L1] or [L2] to select phone
line before or during calls. If you
have only one phone line, store a
favourite number on each button
HOLD
Place a call on hold, if you have
two phone lines or switch the
microphone on and off, if you have
one phone line.
0–9(A-Z)
Digit keys for entering phone
numbers.
Used in phone numbers, for Call
Forwarding and other automated
services.
The handset has a ´reversed´design,
where the microphone and the
speaker are placed on the opposite
side of the display.
Page 13

13
AV
Press to be able to adjust the
volume of Bang & Olufsen audio
and video systems.
R(FLASH)
Used in conjunction with Call
Forwarding, Call Waiting and
other auto mated services.
For more information about the R
(FLASH) services available and
how to use them, contact your
local ser vice provider.
INT
Press to be able to call an internal
handset. You can then look
through the list of handsets with
the wheel, or select a handset by
pressing that handset’s number
1
(1 –8 ).*
Display and keypad backlight
Backlight on the handset
– When the handset is in sleep mode, all backlight is off.
– Duringoperationallbacklightisfullyon.
– Duringnormalcallsallbacklightisdimmed.
– Duringhands-freecalls,whenthehandsetisplacedinthe
Speaker Phone and charging, all backlight is reduced.
– When the handset is placed in the charger, the display backlight
is reduced and the keypad backlights is off.
Moreover, the backlight is switched on when you press a key, lif t
up the handset and when it is ringing.
*1 If you use a BeoLine PSTN base,
you can only register six handsets.
You can switch off the handset
indication of unanswered calls.
Refer to ‘Preference settings’ on
page 54 for more information.
Page 14

14
Indicator light
The BeoLine 2 base.
You cannot use a BeoLine 2 US
model in markets for Standard
models, and you cannot use a
BeoLine 2 Standard model in
markets for US models.
1
If you use a BeoLine PSTN base,
*
you can only register six handsets.
>> Get started
First-time registration of the handset to a base
Forthebaseandthehandsettobeabletocommunicate,the
handset must be registered to a base. Up to eight handsets can be
registered to the same base.*
more than one base.
If you want to register more handsets to a base, and one or more
of these handsets are BeoCom 6000 or BeoCom 2, the oldest
handset model should be registered first. The functional
operations will then be limited to match the operations of the
oldest handset registered.
> Disconnect the base from the mains for at least two seconds and then
reconnect it. The indicator light flashes, and the base is open for
registration for five minutes.
When your base is open for registration, follow the procedure on the
following page.
1
You cannot register a handset to
Page 15

15
To register the handset to a base …
OK
Press to switch on the handset. The Language
menu appears. Turn the wheel to select the
OK
Regis ter handset
to base?
OK
Base found
36.0 00077123456
desired menu language and press OK
Register handset to base? is shown in the display
Press OK. The handset searches for an open base
When a base is located, the PARK number*
the base is shown. Check the number against
the number on the base
If the numbers do not match, turn the wheel to
Base found
36.0 00077234567
move through the available bases, if more than
one is available. If your base is not shown, open
the base for registration once more and repeat
the procedure
OK
If the numbers match, press to register the
handset to the base
0 – 9
OK
If the base prompts you for a pincode, enter the
pincode and press OK. The display tells you
when registration is complete. You can now give
the handset a colour, as described on page 16
For more information about how
to handle, place and connect a
BeoLine 2 base, refer to the Guide
enclosed with the base.
To open the BeoLine 2 or the
BeoLine base for registration of
additional handsets at a later time,
refer to page 57.
2
2
for
Depending on which base you
*
have, the PARK number can be
found on a label behind the socket
cover, on the socket cover, or on
the bottom of the base.
Page 16

16
>> Get started
Choose a colour for the handset
With this handset, you can assign a
colour theme to the handset
display, for example, so you can
recognise in which room it is
placed, or which person uses it
most frequently.
The functions described on these
pages are also accessible via the
‘Settings’ menu. Refer to
‘Preference settings’ on page 54 for
more information.
When registration is complete, the display prompts you to assign a
colour theme to the handset display. This is practical if you have
more than one handset. You can enter this setting at any time.
The Colour menu appears in the display. Turn the
Colour
Yellow
OK
OK
wheel to highlight a colour
Press OK to store the setting
Press OK to continue first-time setup and name
the handset
Page 17

Name the handset
17
When the handset display has been assigned a colour theme, the
display prompts you to name the handset. This is practical if you
have more than one handset. You can enter this setting at a later
date, if you wish.
Enter handset
name?
OK
The display prompts you to enter a name. Press
OK to be able to do so, or press
if you wish to
skip this step
Turn the wheel to select the letters for the name.
Kitchen
ABCDEFGHIJ
OK
Both upper and lower case letters are available*
Press OK to store the selected letter
When the name is complete, turn the wheel to
store
ABCDEFGHIJ
OK
Kitchen
Stored
move the cursor to the
in the display
Press OK to store the name. You can now set the
time and date
symbol. store appears
You can name the handset, for
example, after the room in which it
is placed, or after the person who
uses it most frequently.
If you register a previously named
handset to the base, this name
appears in the display when
registration is complete. To use the
same name, move the cursor to
1
symbol and press OK.
the
1
*
Pressing OK when in the
spelling line is highlighted, switches
between upper and lower case
letters, if you use a BeoLine 2 or a
BeoLine base.
Page 18
18
>> Get started
Set the time and date
After you have registered the first handset, assigned a colour
theme to it and named it, the display prompts you to set the time
and date. The time is shown when the handset is not in use and
when there is no new information in the display. Time and date
arealsoshownwithCallerIDandRedialinformation.
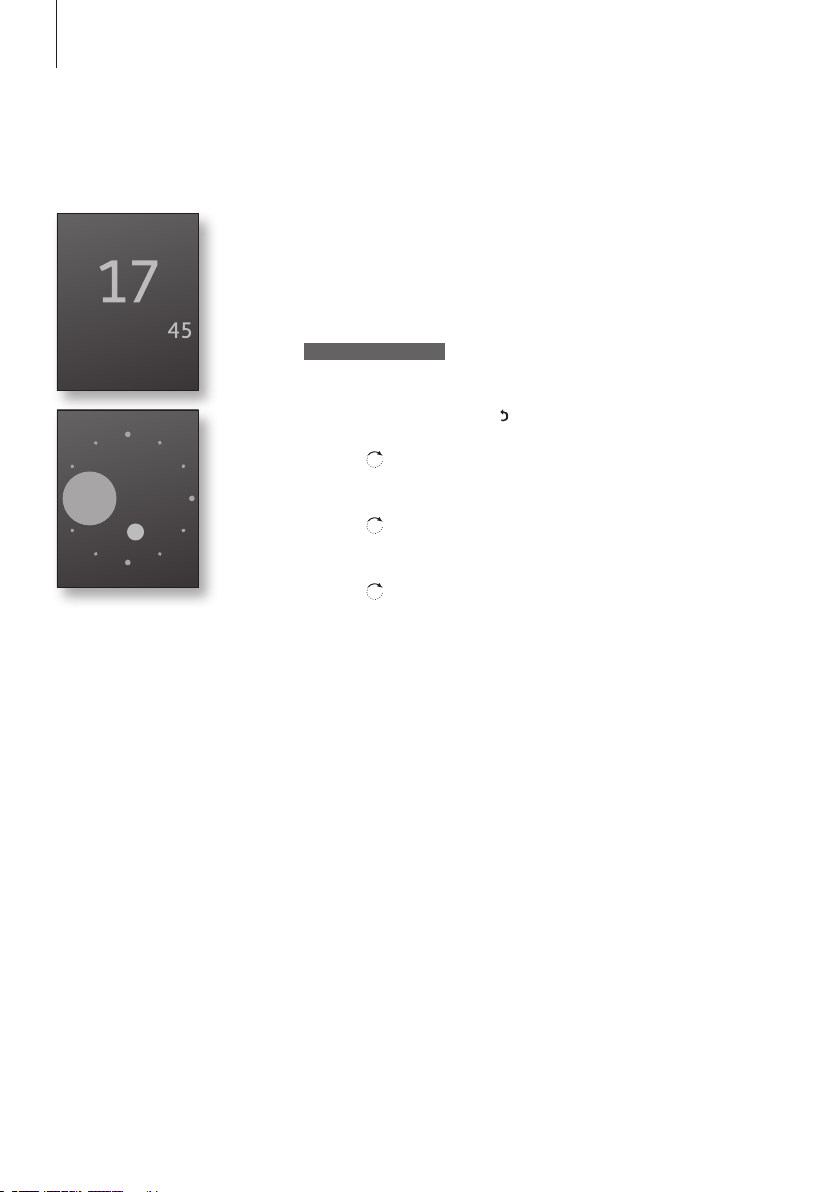
When the handset is in idle mode
and there are no new calls, the
clock is shown in the display. The
clock can be displayed in two ways,
either with digits or with circles.
The small circle shows the hours
and the large circle shows the
minutes. In the illustration above
the time is 17:45, 5:45AM or
5:45PM. For further information,
refer to page 55.
Set time and date?
OK
OK
OK
OK
Set time and date? is shown
Press OK to be able to set the time and date, or
if you wish to skip this step
press
Turn the wheel to select a time format and press
OK
Set the hour and minute by turning the wheel
and pressing OK
Set the day, month and year by turning the
wheel and pressing OK. You can now select the
number of phone lines you wish to use
Page 19

Set the handset for use with one or two lines
19
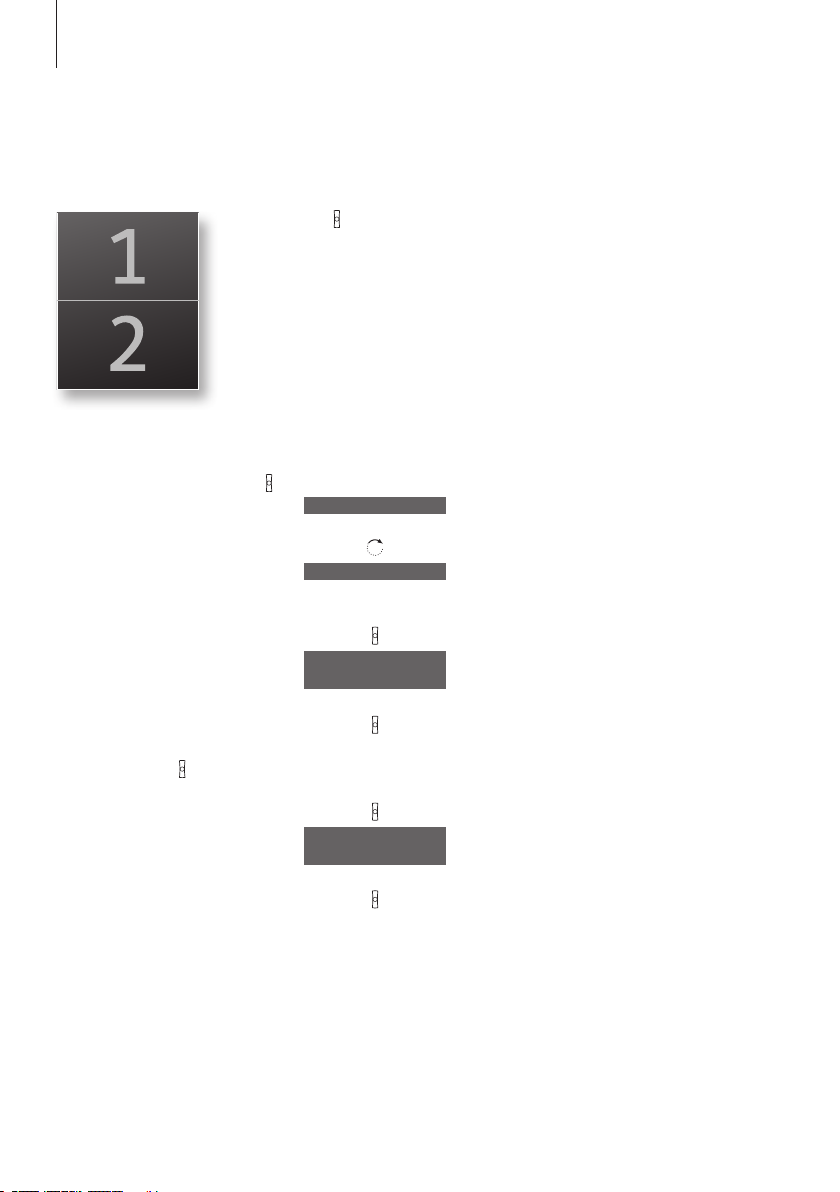
After you have set the time and date, the handset prompts you to
select the number of phone lines you have access to.
Phone lines
1
2
Phone lines appears in the display*1
Turn the wheel to select the number of lines and
OK
Register more
handsets?
OK
Base is open
for registration
press OK to store
When you have set the number of phone lines,
the handset prompts you to register more
2
handsets*
Press OK if you have more handsets to register.
The base is automatically opened for registration.
If you do not have more handsets, press
. The
registration is now complete and the base is
closed for registration
*1 This menu step is only available if
you use the handset with a
BeoLine 2. If you use other bases
proceed to the next step.
2
You can register additional hand-
*
sets in this way only if you use the
handset with a BeoLine 2 or a
BeoLine base.
Page 20

20
Placement and surroundings
The phone must not be placed in damp, dusty or polluted
surroundings and should not be exposed to direc t sunlight or
liquids. Avoid the handset charging contacts touching metal or
greasy parts.
Clean the handset
Clean your handset with a soft, damp cloth with a few drops of
mild detergent added. To clean the charging contacts of charger,
Speaker Phone and handset – and only these parts – use a cotton
swabandisopropylalcohol.Donotuseisopropylalcoholtoclean
any other part of the charger, Speaker Phone or handset!
Page 21

Daily use
21
Make and answer calls, 22
• Makeacall
• Answeracall
• Muteahandset’sringing
Lock the handset keypad, 23
Silence the handset ringer and battery alert, 24
Volume and the microphone, 25
Use the optional BeoCom 5 Speaker Phone, 26
Store a number after a call, 27
Search the Phonebook and make a call, 29
Use the Calls list , 30
Store and call a favourite number, 32
This chapter instructs you in the
daily use of the handset, such as
making and answering calls,
storing a number in the Phonebook
after a call, and using the Calls list.
Page 22
22
If you have two phone lines and
select a primary line for outgoing
calls, as described on page 40, this
line is accessed when you press
If you have not selected a primary
line, the line last used for an
outgoing call is accessed.
If you end a call to or from a
number not previously stored in
the Phonebook, the display
prompts you to do so. Refer to
‘Store a number after a call’ on
page 27 for more information.
To get a dial tone before entering
the number, press
.
>> Daily use
Make and answer calls
The keyonthehandsetisusedtostar tandendacall.Duringthe
call, the handset displays the duration of the call, the number or
name of the person called, and if you have two phone lines, also
the active line. If you do not wish to answer a call, you can mute
the ringing signal with the C key.
To make a call …
L 1 or L 2
.
0 – 9
98765 432
98765|432
98765 432
0:19
To answer a call …
23456789
0: 02
|
C
If you have two phone lines, the current line for
outgoing calls is indicated in the display as seen
in the illustration on this page. If you wish to use
another line, press the appropriate line key
Enter the phone number
To correct a digit, turn the wheel to move the
cursor to the digit and press C to delete it
Press to make the call. The call time is shown,
and if the name is stored in the Phonebook, this
is shown as well
Press to end the call. Alternatively, place the
handset in the charger
Press to answer the call
Press to end a call. Alternatively, place the
handset in the charger
To mute a handset ’s ringing …
C
Press to mute the ringing signal for the incoming
call.
Page 23

Lock the handset keypad
23
You can lock the handset keypad to avoid pressing keys when, for
example, you carry the handset in your pocket. If you lock the
handset keypad, you can still answer calls, but you have to unlock
the key pad to make a call.
To lock the handset keypad …
OK
Lock keypad
Press to bring up the main menu. Lock keypad is
highlighted
Keypad locked
OK
To unlock the handset keypad …
Unlock keypad?
OK
Press to lock the keypad
Press and hold to display Unlock keypad? Press
OK immediately after to unlock the keypad
You can also lock the handset key-
pad by pressing and holding
the handset is in idle mode.
You can set the handset to lock auto-
matically when not in use. You
activate and deactivate this function
via the Settings menu. Refer to
page 56 for more information.
when
Page 24

24
You can also silence and reactivate
the handset ringer by pressing and
holding C when the handset is in
idle mode.
>> Daily use
Silence the handset ringer and battery alert
You can silence the handset ringer if you do not want to be
disturbed. While the handset is silenced, the ringer is deactivated,
but incoming calls are still registered in the New calls menu and
shown in the display, as described on page 10.
To silence the handset ringer …
OK
Silence
OK
To reactivate the handset ringer …
OK
Silence off
OK
Silence off
Press to bring up the main menu
Turn the wheel to highlight Silence and press OK.
A watermark icon appears in the display
Press to bring up the main menu
Turn the wheel to highlight Silence off and press
OK. The watermark icon disappears and Silence
off appears briefly in the display
Page 25

Volume and the microphone
25
Duringacall,youcanadjustthevolumelevelusingthewheel.
You can also switch off the microphone if you want a conversation
you are having with a person in the room to be private.
To turn the handset volume up or down …
Turn the wheel to adjust the handset volume
To switch the microphone on or off during a call …
OK
Microphone off
OK
MIC.OFF
OK
Microphone on
OK
Press to be able to switch the microphone off.
Microphone off is highlighted in the display
Press OK. MIC. OFF appears in the display and
the handset beeps with short intervals until the
microphone is switched back on
To switch on the microphone, press OK twice
A selected volume setting – with
the exception of the two highest
settings – applies to all subsequent
calls until the next time you adjust
the volume.
If you have switched off the
microphone and then put a call on
hold, the microphone is switched
on again, when the call on hold is
resumed.
If you have only one phone line,
you can also use the HOLD button
as a toggle function to switch the
microphone on and off.
Page 26

26
>> Daily use
Use the optional BeoCom 5 Speaker Phone
If you, for example, are in a meeting, and you and the other
participants of the meeting need to involve another person who is
not present, you can use the optional Speaker Phone and have a
conference call, where all of the participants present at the meeting
can speak with the ex ternal party. It can also be used if you just
need to have your hands free to go through papers or the like.
> Put the handset in the Speaker Phone as shown on the illustration and
operate the handset as usual.
When the handset is placed in the Speaker Phone, and you have switched
off the microphone, the handset beeps at short intervals until the
microphone is switched back on. For more information about the
microphone, refer to ‘Volume and the microphone’ on page 25.
You can disconnect the Speaker Phone from the mains supply and still
continue the conference call, for example if you wish to go to another
room. When the Speaker Phone is disconnected from the mains supply,
the maximum talk-time is up to 5 hours.
Page 27

Store a number after a call
27
After a call, you will be asked whether you want to store the
number in the Phonebook, if it is not already there. You can store
1
the number type – home, work, or mobile phone*
2
name with the number*
already stored in the Phonebook.*
. You can also add numbers to names
1
– and enter a
After a call …
98765432
Store number?
The display shows the number and prompts you
to store it in the Phonebook. If a name was
received with Caller ID information, this name is
shown
OK
98765432
New name
OK
Press OK to be able to store the number. New
2
name is highlighted in the display.*
Press OK
again if the number belongs to a name not yet
stored in the Phonebook. If you wish to add a
number to a name stored in the Phonebook,
1
_
ABCDEFGHIJ
refer to the next page*
The spelling line appears in the display
Turn the wheel to select the letters for the name
OK
and press OK to store the selected letter. Both
upper and lower case letters, symbols and
3
numbers are available*
*1 You can only enter the number
type and add a number to a name
if you use the handset with a
BeoLine 2 or a BeoLine base.
2
’New name’ is only available if you
*
use the handset with a BeoLine 2
or a BeoLine base. If you use a
BeoLine PSTN base, proceed to the
next step.
3
Pressing OK when in the spelling
*
line is highlighted, switches between
upper and lower case letters, if you
use a BeoLine 2 or a BeoLine base.
store
ABCDEFGHIJ
OK
home
mobile
work
OK
Turn the wheel to move the cursor to the
symbol. store appears in the display
Press to store the name. The display prompts you
1
to select a number type*
Turn the wheel to select either home, mobile or
work and press OK to store it
Page 28

28
>> Daily use
Useful hints to make Phonebook
entries easier to find:
Mary & Robert
When entering couples’ names, put
first names in alphabetical order;
B&O Michael
When entering names of colleagues,
put the company name first;
L Jane
When entering the names of
childrens’ friends, start with the
child’s first initial.
To add a number to a name in the Phonebook …
When the display prompts you to store a new
98765432
Add to name
OK
name, turn the wheel to select Add to name?
and press OK. The first letter of names stored in
the Phonebook appear in the display
Turn the wheel to select the first letter of a name
OK
and press OK. The first name beginning with the
selected letter appears in the display
Turn the wheel to select the name and press OK
DavidJones
to be able to select a number t ype
OK
DavidJones
98765432
home
Turn the wheel to select a number type and
work
press OK to store it
OK
Page 29

Search the Phonebook and make a call
29
When the handset is not in use, you can turn the wheel to search
through the first letter of names in the Phonebook.
When the handset is not in use …
Turn the wheel to search through the first letter
of names stored in the Phonebook
OK
Press OK to be able to search through names
beginning with the letter you selected
Turn the wheel to search through the names
OK
DanSmith
home
Press to be able to select a number type to call.*1
If there is only one number type stored with a
name, the display prompts you to make the call.
Otherwise …
… turn the wheel to select a number type and
2
OK
L 1 or L 2
press OK*
If you have two phone lines, the current line for
outgoing calls is indicated in the display. If you
wish to use another line, press the appropriate
line key at any level of the Phonebook
OK
Press to make a call
Names longer than the display
width are truncated. Pausing at a
long name causes the name to
slide sideways, so that the whole
name is shown.
1
Number types are only available if
*
you use the handset with a BeoLine 2
or a BeoLine base.
2
If you have selected a primar y
*
number, this will be highlighted,
when you enter the name entry. It
will also be the number called, when
you initiate a call from the list of
names by pressing OK at a highlighted name. Refer to ‘To select a
primary number for a name in the
Phonebook’ on page 43.
Page 30

30
>> Daily use
Use the Calls list
You can call the number or name
shown in the display directly by
pressing
from all levels of the
Calls list.
If you have selected a primar y line,
as described on page 40, the Calls
list shows only those calls received
and called on the primary line.
Press the appropriate line key
when the Calls list is open to view
calls received and called on the
other line. If you have not selected
a primary line, the Calls list
contains calls received and called
on both lines.
The Redial function is only shared
by handsets set up to be common.
Refer to ‘Make a handset ‘personal’
or ‘common’’ on page 61 for more
information.
1
Number types are only available
*
if you use the handset with a
BeoLine 2 or a BeoLine base.
TheRedialandCallerIDfunctionintheCallsliststoresthelast24
phone numbers received and called. In addition to the number,
you can also view the call type, time, date, and duration of the call.
If you have entered a name in the Phone book, this is displayed
instead of the number, even if your service provider has provided
CallerIDnameinformationforanincomingcall.Identicalnumbers
are only stored once in the list – the most recent call.
To call from the Calls list …
Press to access the Calls list
Turn the wheel to select a name or number.
DavidJones
OK
L 1 or L 2
Press to open the call entry
If you have two phone lines, the current line for
outgoing calls is indicated in the display. If you
wish to use another line, press the appropriate
line key
OK
Press to make the call. If there is more than one
number type stored with a name, the display
1
prompts you to select a number type instead*
Turn the wheel to select a number type and
DavidJones
home
press OK to make the call
OK
Page 31

31
To see call information for a selected call …
OK
DavidJones
Call
Press to view your options
Turn the wheel to highlight Details in the display
DavidJones
Details
OK
Press OK. The call type, name, number type*
time, date, and call duration are shown
To delete a specific number from the list …
Press to access the Calls list
Turn the wheel to select the name or number
12345678
OK
12345678
Call
Press to view your options
Turn the wheel to highlight Delete call in the
12345678
Deletecall
OK
12345678
Call deleted
display
Press to delete the selected entry
You can store phone numbers from
the Calls list directly in the
Phonebook. Refer to ’Store
numbers from the Calls list’ on
page 48 for more information.
The Caller ID function requires a
Caller ID subscription with your
service provider.
1
,
Even if you subscribe to Caller ID,
caller information may still be
unavailable for a particular call.
The following are examples of
information that may appear in the
display during an incoming call:
– Anonymous … Calls from
unlisted numbers;
– Caller ID not possible … Caller ID
not supported by the service
provider;
– International … Information
unavailable for international calls.
Page 32

32
>> Daily use
Store and call a favourite number
*1 If you have not already stored a
favourite number, you can make a
shortcut to store a favourite
number if you press L 1 or L 2 first.
2
Number types are only available
*
if you use the handset with a
BeoLine 2 or a BeoLine base.
If you have only one phone line, you can configure two numbers
already stored in the Phonebook as your favourite numbers.
Store a favourite number …
1
and press
OK
OK
OK
OK
Turn the wheel to highlight Settings*
OK
Turn the wheel to highlight Favourites and press
OK
Turn the wheel to highlight L 1 or L 2 and press
OK
Press OK again and turn the wheel to search
through the first letter of names stored in the
Phonebook
OK
Press OK to be able to search through names
beginning with the letter you selected
Turn the wheel to highlight the desired name
OK
OK
and press OK
Turn the wheel to select a number type*
press OK to store
2
and
Call a favourite number …
L 1 or L 2
Press L 1 or L 2 depending on which favourite
number you wish to call, then press
Page 33

Remove a favourite number …
33
Turn the wheel to highlight Settings and press
OK
OK
OK
OK
OK
Turn the wheel to highlight Favourites and press
OK
Turn the wheel to highlight L 1 or L 2 and press
OK
Turn the wheel to highlight Remove and press
OK to remove the favourite
Page 34

34
Page 35

2-line use
35
Switch between two calls, 36
• Callsonseparatelines
• Callsonthesameline–CallWaiting
Conference calls, 38
• A2-lineconferencecall
• Conferencecallononeline–Three-Partycall
Choose a primary line, 40
In combination with the BeoLine 2
base, the handset is a 2-line phone,
made to handle up to four calls –
two on each line – at the same
time.
Another advantage of the two-line
system is the freedom to dedicate
each line to a specific purpose, for
example, if you wish to keep
private calls and work-related calls
separate. This is done by choosing
a primary line. Choosing a primary
line also allows you to keep
separate Calls lists.
This chapter tells you how to
switch between calls, place them
on hold, combine them in
conference calls or Three-Party
Calls, and choose a primary line for
the handset.
Page 36

36
>> 2-line use
Switch between calls on separate lines
John Smith
work
3:46
DavidJones
home
CALLING
Note that if you have an active call
and switch to the non-active line
without placing the active call on
hold first, the active call is ended!
If you have incoming calls on both
lines at the same time, press a line
key to select a line before
answering a call.
If you have kept a call on hold for
over three minutes, the handset
then beeps once every thirty
seconds to remind you of the call
on hold. A call kept on hold for ten
minutes is automatically ended.
Placing the handset in the charger
does not end calls placed on hold.
The handset makes it possible for you to handle simultaneous calls
on separate lines. The display shows which line is ac tive and
whether or not a call on the other line is placed on hold.
To handle two simultaneous calls on separate lines…
John Smith
work
0:35
DavidJones
5551212
CALLING
HOLD
John Smith
work
ONHOL D
DavidJones
5551212
CALLING
L 2
L 1
You have an active call on line 1
The display and a dampened ringing signal from
the handset loudspeaker inform you of an
incoming call on line 2
Press to put the active call on hold. In this
example, the display indicates that there is a call
on hold on line 1 and an incoming call on line 2.
If you want to end the active call before
answering the incoming call, skip this step
Answer the incoming call on line 2
Press to end the active call
You can then press the appropriate line key to
resume the call on hold
Page 37

Switch between calls on the same line – Call Waiting
37
Use the OK key to place a call on hold while you answer an
incomingcall,andtheR/FLASHkeytoswitchbetweentwocalls.
To handle two simultaneous calls on the same line…
John Smith
home
0:35
DavidJones
work
Answer?
OK
John Smith
DavidJones
R / FLASH
You have an active call on line 1
The display and a beep from the handset inform
you of an incoming call on the same line
Press if you do not wish to answer the incoming
call. Other wise…
…press to put the first call on hold and answer
the incoming call. The call established first
always appears at the top of the display. In some
cases you might have to press R / FLASH instead
of OK
Press to switch between calls
Press to end a call
Placing a call on hold in this
manner requires that you have a
subscription to the basic Call
Waiting service with your
telephone service provider.
For information on further
operation, refer to instructions
provided by your service provider.
Page 38

38
John Smith
3:46
DavidJones
>> 2-line use
A 2-line conference call
When you have simultaneous calls on both line 1 and line 2, you
can connect the calls and establish a conference call.
You have simultaneous calls on both lines…
John Smith
0:35
DavidJones
ONHOL D
The display shows the active call on line 1 and a
call or calls on hold on line 2
Note that external parties in a
conference call will hear each other
only faintly if they are located far
from the phone exchange. This
public network problem can be
reduced by subscribing to the
Three- Party Call service with your
service provider.
OK
Conf e rence
OK
John Smith
0: 40
DavidJones
Press to be able to make a conference call
Press to confirm
To split the calls in a conference…
HOLD
Press to split the calls in a conference
To end a single call in a conference…
L 1 or L 2
Press the line key for the line you wish to
continue the call on
To end a conference call…
Press to end a conference call
Page 39

Conference call on one line – Three-Party Call
39
WhenyouestablishaThree-PartyCall,therstcallmadecanbe
an incoming or outgoing call, but you must initiate the second call
yourself. Contact your ser vice provider for more information
abouttheThree-PartyCallservice.
You have a call on line 1…
R / FLASH
John Smith
Press to put the active call on hold
|
0 – 9
R / FLASH
John Smith
98 765 4 32
2:26
Place a call to the third party in your Three-Part y
Call by dialling the number
When the third party answers the call, press to
establish the Three-Party Call
Press to end the call completely
John Smith
DavidJones
3:46
To combine calls on the same line,
you must have a subscription to
your service provider’s Three-Party
Call service for that line.
If you choose to make a ThreeParty Call part of a larger
conference call, note that you must
initiate all the calls in the ThreeParty call.
For information on further
operation, refer to instructions
provided by your service provider.
Page 40

40
>> 2-line use
Choose a primary line
If you choose not to have a primary
line, but select None instead, the
Calls list will contain calls made
and received on both lines.
Choosing a primary line for outgoing calls gives you several
advantages. You can dedicate each line to a specific purpose,
makingonelineaprivatelineandtheotheralineforworkrelatedcalls.YoualsogetseparateCallslists.Finally,theindication
of new, unanswered calls will only inform you of calls received on
the primary line.
To choose a primary line…
OK
Setti ngs
OK
Pri ma r y lin e
OK
Line 2
OK
Press to bring up the main menu
Turn the wheel to highlight Settings and press
OK
Turn the wheel to highlight Primary line and
press OK
Turn the wheel to select Line 1, Line 2 or None
Press to store the setting
Page 41

Advanced operations
41
Enter a new name and number in the Phonebook, 42
Delete a name and number in the Phonebook, 44
Delete the content of the Calls list , 45
This chapter tells you how to use
the more advanced functions of
the handset, functions which,
though you may not need them as
often, make the phone most useful
and enjoyable.
Edit a name or number in the Phonebook, 46
Store numbers from the Calls list, 48
Adjust volume level on audio/video products, 49
Call and store extension numbers in the Phonebook, 50
Preference settings, 54
Find out, for example, how to edit
entries in the Phonebook, store
numbers from the Calls list, and
adjust the volume level of Bang &
Olufsen audio or video products.
Many handset functions can be
activated, adjusted, and
deactivated to help you tailor the
handset to the way you want to
use it. This is mainly done via the
Settings menu.
Page 42

42
>> Advanced operations
Enter a new name and number in the Phonebook
Names and numbers are shared by
all handsets set up to be common.
Refer to ‘Make a handset ‘personal’
or ‘common’’ on page 61 for more
information.
1
If you use a base other than a
*
BeoLine 2 or a BeoLine base…
– Names can only contain up to 16
characters
– Number types are unavailable
– You cannot add a number to a
name stored in the Phonebook
2
If you use a base other than a
*
BeoLine 2 base…
– The Phonebook only has 200
entries
3
Pressing OK when in the spelling
*
line is highlighted, switches between
upper and lower case letters, if you
use a BeoLine 2 or a BeoLine base.
At any time, you can store a new name and number in the
Phonebook, or add a new number to an existing name. A number
1
can contain up to 48 digits, and a name up to 25 characters.*
2
can store up to 400 entries.*
You
To enter a new name and number …
0 – 9
OK
98765432
Store number
OK
98765432
New name
OK
ABCDEFGHIJ
OK
D
|
abcdefghijkl
0 – 9
DavidJones|
store
Enter the phone number and press OK to be
able to store the number. Store number is
highlighted in the display
Press to be able to store the number. New name
is highlighted in the display. If you wish to add a
number to a name stored in the Phonebook,
1
refer to the next page*
Press to be able to store a new name. The
spelling line appears in the display
Turn the wheel to select the letters for the name
and press to store the selected letter. Both upper
3
and lower case letters are available*
To include digits, press the number keys
Turn the wheel to move the cursor to the
symbol. store appears in the display
DavidJones
home
OK
OK
Press to store the name. The display prompts you
1
to select a number type*
Turn the wheel to select either home, mobile or
work and press OK to store it
Page 43

43
To add a number to a name in the Phonebook …
98765432
Add to name
OK
OK
When the display prompts you to store a new
name, turn the wheel to select Add to name and
press OK. The first letters of names stored in the
Phonebook appear in the display
Turn the wheel to select the first letter of a name
and press OK. The first name beginning with the
selected letter appears in the display
DavidJones
Turn the wheel to select the name and press OK
to be able to select a number t ype
OK
DavidJones
home
work
Turn the wheel to select a number type and
press OK to store it
OK
DavidJones
98765432
work
Stored
To select a primary number for a name in the Phonebook …
mobile
OK
When you have selected a name in the
Phonebook, turn the wheel to highlight the
number type, you wish to have as the primary
number for the selected name and press OK
If you have selected a primar y
number, this will be highlighted,
when you enter the name entry. It
will also be the number called,
when you initiate a call from the
list of names by pressing
at a
highlighted name.
Primary
OK
Turn the wheel to higlight Primary and press OK
to store
Page 44

44
>> Advanced operations
Delete a name and number in the Phonebook
Provided you use the handset with
the BeoLine 2 base or the BeoLine
base, selecting Delete only deletes
the number – home, mobile, or
work – that you have selected.
Other numbers stored with the
same name are not affected, nor is
the name itself. If, however, there
is only one number stored with a
name, deleting this number also
deletes the name.
You can also delete a highlighted
number by pressing C followed by
OK.
1
If you use other bases than a
*
BeoLine 2 or a BeoLine base, this
step will be unavailable, and you
should proceed to the next step.
You can delete names and numbers stored in the Phonebook.
OK
DavidJones
Turn the wheel to enter the Phonebook, select a
first letter and press OK
Turn the wheel to select a name and press OK
OK
DavidJones
mobile
Turn the wheel to select an entry and press OK*1
OK
DavidJones
mobile
Delete
Turn the wheel to highlight Delete in the display
and press OK to delete the entry
OK
Page 45

Delete the content of the Calls list
45
You can delete the content of the Calls list at any time, if you use
the handset with a BeoLine 2 or a BeoLine base.
To delete the content of a list …
OK
DeleteCallslist
Press to bring up the main menu
Turn the wheel to highlight Delete Calls list and
press OK
OK
Line 1
OK
If you have two phone lines and have chosen a
primary line, you are asked to select which Calls
list you wish to delete. Turn the wheel to select
Line 1 or Line 2 and press OK
Delete?
OK
Delete? appears in the display. Press OK to
2
delete the content of the list*
If you have set your handset to
personal as described on page 61,
deleting the content of a list only
applies to the handset. If you have
set the handset to common, the list
is deleted for all handsets set to
common.
2
When you delete a Calls list, the
*
New Calls list will also be deleted.
Page 46

46
>> Advanced operations
Edit a name or number in the Phonebook
The menu sequences on these two
pages are only available if you use
a BeoLine 2 or a BeoLine base. If
you use other bases, the Edit menu
in a Phonebook entry allows you to
edit first the number, then the
name.
1
You can only store number types
*
and multiple numbers with a name
if you use the handset with a
BeoLine 2 or a BeoLine base.
You can edit a Phonebook entry – which typically contains a name
1
and at least one number*
– at any time.
Edit a number in the Phonebook …
Turn the wheel to select a name and press OK
OK
DavidJones
home
OK
Call
Edit
Turn the wheel to select a number type and
press OK
Press to view your options
Turn the wheel to highlight Edit and press OK to
be able to edit the number
OK
98768432|
98768|432
C
0 – 9
98765432
Turn the wheel to place the cursor after a digit
you wish to edit
Press to delete the digit
Enter a digit to replace the one you deleted
Repeat the above three steps for each digit you
wish to edit
OK
OK
Press OK when you are done editing the number
and turn the wheel to highlight a number type
Press to store
Page 47

47
To edit a name …
OK
OK
DavidJones
Rename
OK
DavidJones|
abcdefghijkl
OK
C
DavidJones|
store
OK
Turn the wheel to select a name and press OK
Turn the wheel to highlight the name and press
OK
Turn the wheel to highlight Rename and press
OK
Turn the wheel to select the letters for the name
Press to store the selected letter, or …
… press to delete letters
Finish editing the name
Turn the wheel to move the cursor to the
symbol and press OK to store the name
Pressing OK when in the spelling
line is highlighted, switches
between upper and lower case
letters, if you use a BeoLine 2 or a
BeoLine base.
Page 48

48
>> Advanced operations
Store numbers from the Calls list
Pressing OK when in the spelling
line is highlighted, switches
between upper and lower case
letters, if you use a BeoLine 2 or a
BeoLine base.
1
If you want to add the number to
*
a name already stored in the
Phonebook, select ‘Add to name’
instead, choose a letter, then a
name and a number type.
2
It is only possible to store the
*
number type if you use the
handset with a BeoLine 2 or a
BeoLine base.
Phone numbers from the Calls list can be stored and named in the
Phonebook.
L 1 or L 2
If you have two phone lines and have chosen a
primary line, first press L 1 or L 2 to select which
line’s Calls list you wish to access
Press to bring up the Calls list. The last number
in the list is shown in the display
76543210
OK
76543210
Call
Store number
Turn the wheel to select the desired number
Press to view your options
Turn the wheel to highlight Store number and
press OK
OK
OK
enter name
76543210
ABCDEFGHIJ
New name is highlighted in the display, press
1
OK*
Turn the wheel to select characters for the name
and press OK to store the selected character
OK
store
work
OK
OK
Turn the wheel to move the cursor to the
symbol and press OK to store the name
Turn the wheel to select the number type*2 and
press OK to store the entry
Page 49

Adjust volume level on audio/video products
49
You can adjust the volume of your Bang & Olufsen audio and
video products directly from your handset if you have set AV in
3
the Settings menu to Volume.*
Firstselectwhichsoundsource,
audio or video, you wish to adjust.
To adjust the volume of an audio or video system …
A.V
Audio
Press repeatedly until the desired system type
appears in the display
A.V
Video
A.V
Link audio
A.V
Link video
Turn the wheel to turn the volume up or down
Link video
Audio
While the phone is ringing, you
can adjust the volume of a Bang &
Olufsen product without pressing
the AV button first. Simply turn the
wheel. The product must, however,
be the same one on which you last
adjusted the volume with the
handset.
3
If ‘AV’ in the ‘Settings’ menu is
*
set to one of the AV equipment
types instead of ‘Volume’, this
equipment will be muted when
pressing AV.
Page 50

50
>> Advanced operations
Call and store extension numbers in the Phonebook
Used by banks and other businesses with switchboards, a pause
must be inserted before the extension number. Store the main
number, the pause and the extension number in the Phonebook.
You can then call the number from the Phonebook.
To call an extension number directly …
0 – 9
Enter the main phone number
OK
Insert pause
OK
0 – 9
OK
Press OK to be able to insert a pause, turn the
wheel to highlight Insert pause and press OK.
Enter the extension number
Press to call the number and press OK to
continue after the pause.
Press to end the call
Page 51

To store an extension number in the Phonebook …
51
0 – 9
98765432
Enter the main phone number
OK
98765432
Store number
98765432
Insert pause
OK
98765 432-
0 – 9
98765432-123
OK
OK
Press to be able to insert a pause
Turn the wheel to highlight Insert pause and
press OK
Enter the extension number
Press twice to store the entry. You can now give
the number a name and type, as described on
page 42
Page 52

52
>> Advanced operations
To call an extension number from the Phonebook …
Turn the wheel to search through the first letter
of names stored in the Phonebook.
OK
OK
DanSmith
home
OK
L 1 or L 2
OK
Continue?
OK
Press OK to be able to search through names
beginning with the letter you selected
Turn the wheel to search through the names
Press to be able to select a number type to call.
If there is only one number type stored with a
name, the display prompts you to make the call.
Otherwise …
… turn the wheel to select a number type and
press OK
If you have two phone lines, the current line for
outgoing calls is indicated in the display. If you
wish to use another line, press the appropriate
line key at any level of the Phonebook
Press to make a call. The main number is dialled
The display prompts you to continue. Press OK to
call the extension number
Page 53

53
Page 54

54
>> Advanced operations
Preference settings
Lock keypad
Silence
Battery status
Deletecalllist
Settings
If you want to register more handsets to a base, and one or more of
these handsets are BeoCom 6000
or BeoCom 2, the oldest handset
should be registered first. The
functional operations will then be
limited to match the operations of
the oldest handset registered. Refer
to ‘First-time registration of the
handset to a base’ on page 14.
If you use a BeoLine PSTN base,
you can only register six handsets.
The Settings menu contains several options which allow you to
adjust the handset functions.
To choose settings in the menu …
OK
Settings
Press to bring up the main menu
Turn the wheel to highlight Settings and press
OK to bring up the menu
OK
Time and date
OK
Time and date
Time
Date
Time format
Clock display
Time
OK
OK
Turn the wheel until the desired option is
displayed, such as Time and date
Press to bring up the menu
Turn the wheel until the desired option is
displayed, such as Time
Press to bring up the menu
Turn the wheel to select the settings and press
OK to store
Page 55

55
The Settings menu options
Ringer … This menu consists of two or three sub-menus, depending on
the number of phone lines you have: Line (Line 1 and Line 2 for two
phone lines) and Intercom. These menus contain three separate ringer
settings:
– Ringer on/off lets you switch the ringer on or off, and set a time period
in which the phone will not ring. If you switch off the ringer, the phone
does not ring, but it does register incoming calls in the Calls list. The
ringer is disconnected until you change the setting.
– Ringer level lets you set the ringer volume. The ringing signal selected
is played after a moment.
– Ringer melody lets you choose from eight melodies. The selected
ringing signal is played after a moment.
Time and date … This menu contains four separate settings:
– Time lets you enter the time.
– Date lets you enter the date.
– Time format lets you select the time format. Options are 12 and 24.
– Clock display lets you select the clock display style as shown on page
18.
Favourites… When you have only one line, you can set and remove two
favourite numbers for the buttons L 1 and L 2. The L 1 and L 2 menus
contain two settings.
– Add/Change lets you add or change a favourite number.
– Remove lets you delete a favourite number.
*1 If you have a phone system with
one or more handsets set to
personal and the others set to
common, note the following:
– Changing a handset from
Personal to Common causes the
personal Phonebook and Calls list
to be replaced, not supplemented,
by the common lists.
Handset … The Handset menu contains four sub-menus:
– Colour allows you to assign the handset a colour theme using the
wheel and OK key.
– Enter name allows you to give the handset a new name using the
wheel and OK key. Note that this menu is called Change name after
you enter a name for the handset the first time.
– Register allows you to register the handset to a BeoLine 2 base.
– Handset type allows you to set the handset to be Personal or Common,
1
as described on page 61.*
Page 56

56
>> Advanced operations
*1 This menu is only accessible if you
use the handset with a BeoLine 2
base. If you select a primar y line,
the display of new, unanswered
calls will only inform you about calls
received on that line.
Phonebook … This menu allows you to choose between two layouts:
– Standard allows you to scroll through a list of letters. Only the letters
where you have stored names, will be listed.
– Large allows you to scroll through one letter at a time. Only the letters
where you have stored names, will be listed.
Primary line … If you have two phone lines, you can select a primary
1
line for the handset.*
Auto lock … Options are On and Off. Locking the handset keypad
prevents inadvertent operation of the keys. You can still receive calls, but
the handset keypad locks again automatically after you end a call.
AV … Options are Volume, Mute audio, Mute video, Mute link audio and
Mute link video. When Volume is selected, pressing AV allows you to
adjust the volume of your Bang & Olufsen equipment. When one of the
other options are selected, pressing AV allows you to mute the selected
type of AV equipment. Refer to ‘Adjust volume level on audio/video
products’ on page 49.
Battery aler t … Alerts you audibly when the handset battery requires
charging. Options are On, Off and Timed off. If you select Timed off, you
can then use the wheel to set a daily time period during which the
battery alert will not occur – for example, at night.
Autooff-hook … Switch Auto off-hook to On if you want to answer
a call as soon as you lift the handset from the charger – that is, without
pressing
. Auto off-hook is set to Off when you purchase the phone.
Auto off-hook can only be used if the handset is placed in the charger. If
the handset is not placed in the charger, you must press
to answer a
call.
News indicator … The news indication – the display message indicating
new, unanswered calls – is set to On from the factory, so you can see
how many new calls you have received. Options are On and Off.
Page 57

57
Language … Select the language of the display texts.
Area Codes … Select options to match the requirements of your service
provider. Area Codes contains two sub-menus: Dial and Area code.*2
– Dial indicates whether or not area codes must be dialled for local calls.
Options are Ye s and No.
– Area code 1 allows you to enter up to ten area codes. When you have
entered the first area code, Area code 2 will appear and so on.
Base … This menu contains three sub-menus:
– Remove handset cancels registration of a handset to the base.
– Open base allows you to open the base for registration of additional
3
handsets.*
– Change pincode allows you to enter a new pincode for your base and
change the pincode. Use the number keys to enter the pincode and the
OK key to store it. The default pincode is 0000. If the pincode is
entered incorrectly three time, the handset returns to idle mode.
Phone lines … The phone has two lines, but can be set for use with one
4
line only. Options are 1 and 2.*
Flashtime … Choose Long, Short or Customized.*
3
The correct flash
time depends on how you have connected your phone. The milli-seconds
of a highlighted setting are shown after a few seconds. For more
information about the Flash time services available and how to use them,
contact your local service provider.
Regarding area codes:
Phone companies have different
requirements regarding how to
make local calls. The settings you
choose in the Area Codes menu
are determined by the
requirements of your particular
service provider. If your service
provider requires you to dial:
– 1+area code+number for all
calls… set Dial to Yes and do not
enter an area code for the option
Area code;
– area code+number for local
calls… set Dial to Yes. For Area
code, you can enter up to ten
area codes that fall within your
local calling area;
– neither 1 nor area code for
local calls… set Dial to No and
enter your own area code for
Area code.
2
This option and area codes in
*
general are not available in all
countries.
3
’Open base’ in the ‘Base’ menu
*
and ‘Customized’ in the ‘Flash time’
menu are only available if you use
the handset with a BeoLine 2 or a
BeoLine base.
4
The menu ‘Phone lines’ is only
*
available if you use the handset
with a BeoLine 2 base.
Page 58

58
Page 59

System use with several handsets
59
Call another handset, 60
Make a handset ‘personal’ or ‘common’, 61
Transfer external calls, 62
Make an internal conference call, 63
With several handsets registered to
one base, you can make your own
phone system. All the handsets can
receive external calls, also during
internal calls between handsets.
However, an internal call cannot be
put on hold. Handsets in the
system are numbered 1–8 and can
be named as well.
You may wish to keep private calls
and work-related calls separate in a
system. This is done by choosing a
primary line. Choosing a primary
line also allows you to keep separate
Calls lists. Refer to page 40 for more
information.
Page 60

60
>> System use with several handsets
Call another handset
The phone system allows one
internal call and one or two
external calls to take place at the
same time depending on whether
you use one or two lines.
Otherwise a maximum of four
handsets can be active at the same
time.
You can use three different ringing
signals to identify calls on line 1,
calls on line 2, and internal calls.
For further information, refer to
‘Preference settings’ on page 54.
If you misplace a handset, you can
locate it by making a call to that
handset.
You can call one handset or call all handsets simultaneously. If you
call all handsets, the handset that responds first receives the call. If
the internal call cannot be made, you will hear a busy signal.
To call a handset …
INT
1 – 8
3 Kitchen
Press to make an internal call
Press the number of the handset and the call is
made automatically. Alternatively …
… turn the wheel to search through the internal
listing of handsets and press
to make the call
To call all handsets …
INT
To end a call …
Press to make an internal call
Press to call all handsets
Press to end a call
Page 61

Make a handset ‘personal’ or ‘common’
61
Youcansetyourhandsettobe‘personal’insteadof‘common’.
The Phonebook and Calls list of a personal handset are located in
the handset and not the base.
OK
Settings
OK
Handset
OK
Handset type
OK
Common
OK
Press to bring up the main menu
Turn the wheel to select the Settings menu and
press OK to bring up the menu
Turn the wheel to select the Handset menu and
press OK to bring up the menu
Turn the wheel to select Handset type and press
OK
Turn the wheel to select Personal or Common
and press OK to store the settings
Each handset is initially set up as
common. This means that the
Phonebook and Calls list are both
updated by the base and shared
with other handsets in the system.
If you want an independent
Phonebook and Calls list in an
individual handset, make the
handset personal instead.
If you have a phone system with
one or more handsets set to
personal and the others set to
common, note the following:
– Changing a handset from
Personal to Common causes the
personal Phonebook and Calls
list to be replaced, not
supplemented, by the common
lists. Updating the Phonebook
and Calls list may take a few
minutes.
Page 62

62
>> System use with several handsets
Transfer external calls
If you have an active call and
another handset elsewhere in the
system breaks in on the line, your
handset emits a single, short beep
to notify you that a third party has
joined the call. This, however, only
happens if the system handsets are
using the same line at the time. If
the first handset is hung up, the
call is transfered to the handset
breaking in.
If a call is on hold at another
handset, any handsets can take
over the call by pressing
1
*
When the internal call has been
then OK.
answered, the called handset can
also terminate the internal call by
pressing OK or
.
You can transfer an external call to another handset or to all
hand sets. You can talk with the person answering the internal
handset before transferring the call. When you transfer an
external call to all handsets, the call goes to the handset which
answers first.
Transfer an external call …
INT
1 – 8
Press to make an internal call
Press the number of the handset and the call is
made automatically. Alternatively …
3 Living Room
… turn the wheel to search through the internal
listing of handsets and press
to make the call. If
the internal call cannot be made, you will hear a
busy signal
1
If the internal call is answered*
Transfer
OK
The display prompts you to transfer the call
Press to enter your choice
…
Retrieve the external call if the internal call is not answered …
Retrieve?
OK
Press OK or to retrieve the external call on
hold
Page 63

Make an internal conference call
63
Duringanexternalcall,youcancallanotherhandsetinthesystem
to establish a conference call. If one of the participants hangs up,
the call continues with those remaining.
Start a conference call with one internal and one external party …
INT
1 – 8
3 Kitchen
If the internal call is answered …
Conference
OK
Retrieve the external call if the internal call is not answered …
Retrieve?
OK
During an external call, press to make an internal
call
Press the number of the handset and the call is
made automatically. Alternatively …
… turn the wheel to search through the internal
listing of handsets and press
the internal call cannot be made, you will hear a
busy signal
Turn the wheel to select Conference and press
OK to start the conference call
Press to end the conference call
Press OK or
hold
to retrieve the external call on
to make the call. If
If you use a BeoLine 2 or a BeoLine
base, you can also establish an
internal conference call by
‘breaking in’ on a call in progress.
from idle mode, then OK.
Press
For further information, refer to
page 11.
Page 64

64
Menu overview
1
This menu is only available when
*
you have two phone lines and a
primary line has been set.
2
If you have only one phone line,
*
the option ‘Line’ will be available
instead of ‘Line 1’ and ‘Line 2’.
3
The ‘Favourites’ menu is only
*
avail able when you have one phone
line.
4
This menu is only available when
*
you have selected two phone lines.
5
If ‘Dial’ is set to ‘No’, ‘Area code 1’
*
is called ‘Area code’ and ‘Area
code 2’ to ‘Area code 10’ are not
available in the menu.
Lock keypad
Silence /Silence off
Battery status
DeleteCallslist
1
Line 1*
Line 2*
1
Settings
Ringer
2
Line 1*
Line 2*
2
Intercom
Time and date
Time
Date
Time format
Clock display
3
Favourites*
L1
L2
Handset
Colour
Enter/ Change name
Register
Handset type
Phonebook
4
Primary line*
Auto lock
AV
Battery aler t
Autooff-hook
News indicator
Language
Base
Remove handset
Open base
Change pincode
Phone lines
Flashtime
Lock keypad
Silence /Silence off
Battery status
DeleteCallslist
1
Line 1*
Line 2*
1
Settings
Ringer
Line 1*2
2
Line 2*
Intercom
Time and date
Time
Date
Time format
Clock display
3
Favourites*
L1
L2
Handset
Colour
Enter/ Change name
Register
Handset type
Phonebook
4
Primary line*
Auto lock
AV
Battery aler t
Autooff-hook
News indicator
Area Codes
Dial
5
Area code 1*
…
Area code 10
Language
Base
Remove handset
Open base
Change pincode
Phone lines
Flashtime
Standard version US version
Page 65

Handset and base compatibility
65
InEuropeanmarketsandothernon-USmarketsthatusesthestandardmodeloftheBeoLine2base,
you have the possibility to combine different types of handsets and bases. In the tables on this page,
you can see which bases you can use with BeoCom 5 and which handsets you can use with BeoLine 2.
Note that menus and functions will always be limited to those available in the oldest handset
registered to a base.
You can use the handset with
BeoCom 5 – compatibility with Bang & Olufsen bases:
BeoLine 2
Full function.
One line only, if the handset is in a system
which also includes BeoCom 6000 MKII or
BeoCom 2 MKII handsets.
different Bang & Olufsen bases.
Note however, that there might be
some limitations in function if you
use the handset with other bases
than BeoLine 2.
BeoLine
BeoLine PSTN
BeoLine 2 – compatibility with Bang & Olufsen handsets:
BeoCom 5
BeoCom 6000 MKI
BeoCom 6000 MKII
BeoCom 2 MKI
BeoCom 2 MKII
One line only. Limited functions.
One line only. Limited functions.
Full function.
One line only, if the handset is in a system
which also includes BeoCom 6000 MKII or
BeoCom 2 MKII handsets.
One line only. Limited functions.
One line only.
One line only. Limited functions.
One line only.
You can use the BeoLine 2 base
with different Bang & Olufsen
handsets. Note however, that there
might be some limitations in
function if you use BeoLine 2 with
other handsets than BeoCom 5.
Page 66

66
Important information
Technical data
The phone is intended for use on
the public analogue network. It
supports Caller ID, provided you
have the proper subscription with
your service provider. Not all
supplementary services offered by
the different service providers are
available in all countries.
The phone can only be expected to
function in the country for which it
was manufactured, as transmission
systems, legal requirements and
automated ser vices may var y from
country to country. The packaging
will state for which country your
handset is manufactured. The
national identity letters can be
found above the lowest bar code
on the label.
If you are in any doubt about the
use of your handset, contact your
retailer for fur ther information.
If you use a BeoLine PSTN base,
you can only register six handsets.
Number of handsets per base: 8
Talk time per charging: Up to 12 hours
Standby time per charging: Up to 100 hours
Charging time: 4 hours
Range: The handset has an indoor range of approximately 50 metres
(165 feet), and an outdoor range of approximately 300 metres
(1000 feet). However, both figures are dependent on conditions
System: Standard: DECT 1,9 GHz, US: DECT 6.0 1,92 GHz
Power supply: Lithium-ion battery, 830 mAh
Power output: ( EIRP) 250 mW/10 mW
Temperature and humidity: The phone should be placed in
surroundings with an ambient temperature of 5–40° C (40 –105° F) and
a relative humidity of 15–95%
Display: 176 × 220 pixels. Full colour LCD
FCCSARlimit: 1.6 mW/g. The maximum SAR value measured for
DECT (Europe) was 0,043 mW/g and the maximum SAR values for
DECT 6.0 (US) was: body SAR 0,015 mW/g and head SAR 0.012mW/g.
Page 67

Index
67
Backlight
Displayandkeypadbacklight,13
Base
Cancel registration of a handset, 57
First-timeregistrationofthehandsettoa
base, 14
Handset and base compatibility, 65
Makeahandset‘personal’or‘common’,61
Manual registration of a handset, 14
Open a base for registration, 57
PARK numbers, 15
The Base menu, 57
The BeoLine 2 base, 14
Battery
Battery status, 9
Charge the handset battery, 8
Silence the handset ringer and battery alert, 24
The Battery Alert menu, 56
Calls
2-lineconferencecall,38
Call and store extension numbers in the
Phonebook, 50
Call another handset, 60
Call from the Calls list, 30
Conference call on one line – Three Party Call, 39
Make and answer calls, 22
Make an internal conference call, 63
New Calls list, 10
Search the Phonebook and make a call, 29
Store a number after a call, 27
Switch between calls on separate lines, 36
Transfer external calls, 62
Switch between calls on the same line – Call
Waiting, 37
Call Waiting
Switch between calls on the same line – Call
Waiting, 37
Charging
BeoLink
Adjust volume level on audio /video products, 49
Caller ID
Call from the Calls list, 30
Deleteaspecicnumberfromthelist,31
DeletethecontentoftheCallslist,45
Store numbers from the Calls list, 48
Use the Calls list, 30
Battery status, 9
Charge the handset battery, 8
Clock
Select clock display, 18 and 55
Set the time and date, 18
Conference calls
2-lineconferencecall,38
Conference call on one line – Three Party Call, 39
Make an internal conference call, 63
Page 68

68
>> Index
Delete
Deleteanameandnumberinthe
Phonebook, 44
Deleteaspecicnumberfromthelist,31
DeletethecontentoftheCallslist,45
Displays and menus
Battery status, 9
Displayandkeypadbacklight,13
Displayofnew,unansweredcalls,10
Menu over view, 64
Options in the main menu, 10
See call information for a selected outgoing
call, 31
The handset display, 10
Troubleshooting via the display, 11
Edit
Deleteanameandnumberinthe
Phonebook, 44
Edit a name or number in the Phonebook, 46
Enter a new name and number in the
Phonebook, 42
Select a primar y number for a name in the
Phonebook, 43
Extension numbers
Call and store extension numbers in the
Phonebook, 50
Favourites
Call a favourite number, 32
Remove a favourite number, 33
Store a favourite number, 32
The Favourites menu, 55
Handset
Call another handset, 60
Charge the handset battery, 8
Choose a colour for the handset, 16
Displayandkeypadbacklight,13
First-timeregistrationofthehandsettoa
base, 14
Handset and base compatibility, 65
Handset keys, 12
Lock the handset keypad, 23
Makeahandset‘personal’or‘common’,61
Name the handset, 17
Set the time and date, 18
Silence the handset ringer and battery alert, 24
Switch on or off, 10
The handset display, 10
The Handset menu, 55
Page 69

69
Intercom
Call another handset, 60
Make an internal conference call, 63
Transfer external calls, 62
Keypad
Displayandkeypadbacklight, 13
Handset keys, 12
Lock the handset keypad, 23
Maintenance
Clean the handset, 20
Microphone
Volume and the microphone, 25
Phonebook
Call and store extension numbers in the
Phonebook, 50
Deleteanameandnumberinthe
Phonebook, 44
Edit a name or number in the Phonebook, 46
Enter a new name and number in the
Phonebook, 42
Search the Phonebook and make a call, 29
Select a primar y number for a name in the
Phonebook, 43
Select phonebook layout, 56
Store a number after a call, 27
Store numbers from the Calls list, 48
PIN code
Change the base PIN code, 57
Placement
Placement and surroundings, 20
Redial
Call from the Calls list, 30
Deleteaspecicnumberfromthelist,31
DeletethecontentoftheCallslist,45
See call information for a selected outgoing
call, 31
Store numbers from the Calls list, 48
Use the Calls list, 30
Registration
Cancel registration of a handset, 57
First-timeregistrationofthehandsettoa
base, 14
Manual registration of a handset, 14
Open a base for registration, 57
PARK numbers, 15
Ringing signal
Silence the handset ringer and battery alert, 24
The Ringer menu, 55
Page 70

>> Index
Search
Call from the Calls list, 30
Search the Phonebook and make a call, 29
Settings
Adjust volume level on audio /video products, 49
Choose a colour for the handset, 16
Choose a primary line, 40
Lock the handset keypad, 23
Makeahandset‘personal’or‘common’,61
Name the handset, 17
Set the handset for use with one or two lines , 19
Set the time and date, 18
Silence the handset ringer and battery alert, 24
The Area Codes menu, 57
The Auto lock menu, 56
The Auto off-hook menu, 56
The AV menu, 56
The Base menu, 57
The Battery alert menu, 56
The Favourites menu, 55
The Flash Time menu, 57
The Handset menu, 55
The Language menu, 57
The News Indicator menu, 56
The Phone lines menu, 57
The Primary line menu, 56
The Ringer menu, 55
The Time and date menu, 55
Volume and the microphone, 25
Switchboard
Call and store extension numbers in the
Phonebook, 50
The Flash Time menu, 57
System
Call another handset, 60
Makeahandset‘personal’or‘common’,61
Make an internal conference call, 63
Transfer external calls, 62
Technical data
Handset specifications, 66
Transfer calls
Transfer external calls, 62
Volume
Adjust volume level on audio /video products, 49
Volume and the microphone, 25
Speaker Phone
Use the optional Speaker Phone, 26
Page 71

71
For the Canadian market
only …
NOTICE: The Industry Canada label
identifies certified equipment. This
certification means that the equip ment meets telecommunications
network protective, operational and
safety requirements as prescribed in
the appropriate Terminal Equipment
Technical Requirements document(s).
The Department does not guarantee
the equipment will operate to the
user’s satisfaction.
Before installing this equipment,
users should ensure that it is permissible to be connected to the facilities
of the local telecommunications
company. The equip ment must also
be installed using an acceptable
method of connection. The customer
should be aware that compliance
with the above conditions may not
prevent degradation of service in
some situations. Repairs to cer tified
equipment should be coordinated by
a representative designated by the
supplier. Any repairs or alterations
made by the user to this equipment,
or equipment malfunctions, may give
the tele communications company
cause to request the user to disconnect the equipment.
Users should ensure for their own
protection that the electrical ground
connections of the power utility,
telephone lines and internal metallic
water pipe system, if present, are
connected together. This precaution
may be particularly important in rural
areas.
NOTICE: The Ringer Equivalence
Number (REN) assigned to each terminal device provides an indication
of the maximum number of terminals
allowed to be connected to a telephone interface. The termination
on an interface may consist of any
combination of devices subject only
to the requirement that the sum of
the Ringer Equivalence Numbers of all
the devices does not exceed 5.
To prevent radio inter ference to
the licensed service, this device is
intended to be operated indoors
and away from windows to provide
shielding. Equipment (or its transmit
antenna) that is installed outdoors is
subject to licensing.
This device complies with Part 15 of
the FCC Rules. Operation is subject
to the following two conditions: (1)
this device may not cause harmful
interference, and (2) this device must
accept any interference received,
including interference that may cause
undesired operation.
CAUTION: Users should not attempt
to make such connec tions themselves, but should contact the appropriate electric inspection authority, or
electrician, as appropriate.
Page 72

72
For the American market only …
This equipment complies with Part 68
of the Federal Communications
Commission ( FCC) rules for the
United States.
If the equipment is causing harm to
the telephone network, the telephone
company may request that you
disconnec t the equipment until the
problem is resolved.
This equipment cannot be used on
public coin phone service provided by
the telephone company. Connection
to party line service is subjec t to state
tariffs.
Your telephone company may
discontinue your ser vice if your
equip ment causes harm to the
tele phone network. They will notify
you in advance of disconnection,
if possible. During notification,
you will be informed of your right to
file a complaint to the FCC.
Occasionally, your telephone company
may make changes in its faci lities,
equipment, operation, or procedures
that could affect the operation of
your equipment. If so, you will be
given advance notice of the change
to give you an opportu nity to
maintain uninterrupted service.
Changes or modifications not expressly
approved by the party responsible for
compliance could void the user’s
authority to operate the equipment.
This equipment complies with FCC
radiation exposure limits set forth for
an uncontrolled environment. This
device complies with FCC SAR limit of
1.6mW/g. The maximum body SAR
value measured was 0.015mW/g and
the maximum head SAR value was
0.012mW/g. This device must not be
co-located or operating in conjunction
with any other antenna or transmitter.
NOTE: This equipment has been
tested and found to comply with the
limits for a Class B digital device,
pursuant to Par t 15 of the FCC Rules.
These limits are designed to provide
reasonable protection against harmful
interference in a residential installation.
This equipment generates, uses and
can radiate radio frequenc y energy
and, if not installed and used in
accordance with the instructions,
may cause harmful interference to
radio communications. However,
there is no guarantee that interference
will not occur in a particular installation.
If this equipment does cause harmful
interference to radio or television
reception, which can be determined
by turning the equipment off and on,
the user is encouraged to try to
correct the interference by one or
more of the following measures:
– Reorient or relocate the receiving
antenna.
– Increase the separation between
the equipment and receiver.
– Connect the equipment into an
outlet on a circuit different from
that to which the receiver is
connected.
– Consult the dealer or an
experienced radio /TV technician for
help. This device complies with Part
15 of the FCC Rules. Operation is
subject to the following two
conditions: (1) this device may not
cause harmful interference, and (2)
this device must accept any
interference received, including
interference that may cause
un desired operation.
Page 73

73
Page 74

74
Waste Electrical and Electronic
Equipment (WEEE) –
Environmental protection
Electrical and electronic equipment,
parts and batteries marked with
this symbol must not be disposed of
with normal household wastage; all
electrical and electronic equipment,
parts and batteries must be collected
and disposed of separately. If a
product is too small to be marked
with the symbol, it will appear in
the User guide, or on the packaging.
When disposing of electrical and
electronic equipment and batteries
by use of the collection systems
available in your country, you
This product is in conformity with
the provisions of the Directives
1999/5/EC and 2006/ 95/EC.
Please recycle waste batteries.
For the Canadian market only!
This class B digital apparatus meets
all require ments of the Canadian
Interference-Causing Equipment
Regulations.
protect the environ ment, human
health and contribute to the
prudent and rational use of natural
resources. Collecting elec trical and
electronic equipment, batteries and
waste prevents the potential contamination of nature with the
hazardous substances which may
be present in electrical and electronic products and equipment.
Your Bang & Olufsen retailer will
advise you of the correct way of
disposal in your country.
3510973 Version 1.0 1109
www.bang-olufsen.com
Page 75

Page 76

 Loading...