

Page 1

g
AM7100NF Installation Guide
Package Contents:
y AM7100NF Main unit
y Power Cable/USB Cable/Quick Guide
y CD-ROM/Registration Card
Note: To learn the details on how to install and operate the machine, please refer to the manual in the supplied CD.
Unpacking the Machine
Remove the plastic bag and tapes on
the machine.
Removing the Tapes on the
Toner Cartridge
Caution: To prevent the toner from
damage, do not expose the toner cartridge
to light for more than a few minutes.
1. Open the toner cartridge door by
pressing the button indicated.
2. Pull out the toner cartridge as shown.
Loading Paper
1. Fan your paper first.
3. Remove the tapes as shown.
2. Pull out the Main Input Tray.
www.avision.com
3. Press the paper guide release lever
and slide the paper guide to your
desired paper size.
4. Move the paper-size dial to your
desired paper size and orientation.
5. Load the paper into the input tray
and insert the input tray to the
machine.
4. Insert the cartridge to the machine and
close the toner cartridge door.
Unlockin
1. Open the document cover.
2. Locate the lock switch at the left side.
Your Machine
Connecting Your Telephone Cord
1. Connect one end of the telephone cord
into the “LINE” port of the machine.
2. Connect the other end of the telephone
cord into an active telephone wall jack.
Connecting Your Power Cable
1. Connect one end of the power cable
to the power jack of the machine.
2. Connect the other end to an
appropriate power outlet.
Important: Whenever you wish to
change your paper size and
orientation, you need to make the
same change in the paper-size dial to
ensure proper copy result.
Important: If you need to transport the
product, lock the product first to protect the
scan unit.
Page 2
AM7100NF Operation Guide
^ _ `
Advanced Copy Features:
y Auto Rotate
y Auto Size
y Book Mode
y ID Card Copy
y Colllate
y Copy & Fax Modes
Turning on the Machine
T o turn on the product, press the switch at
the front toward the "ON" position.
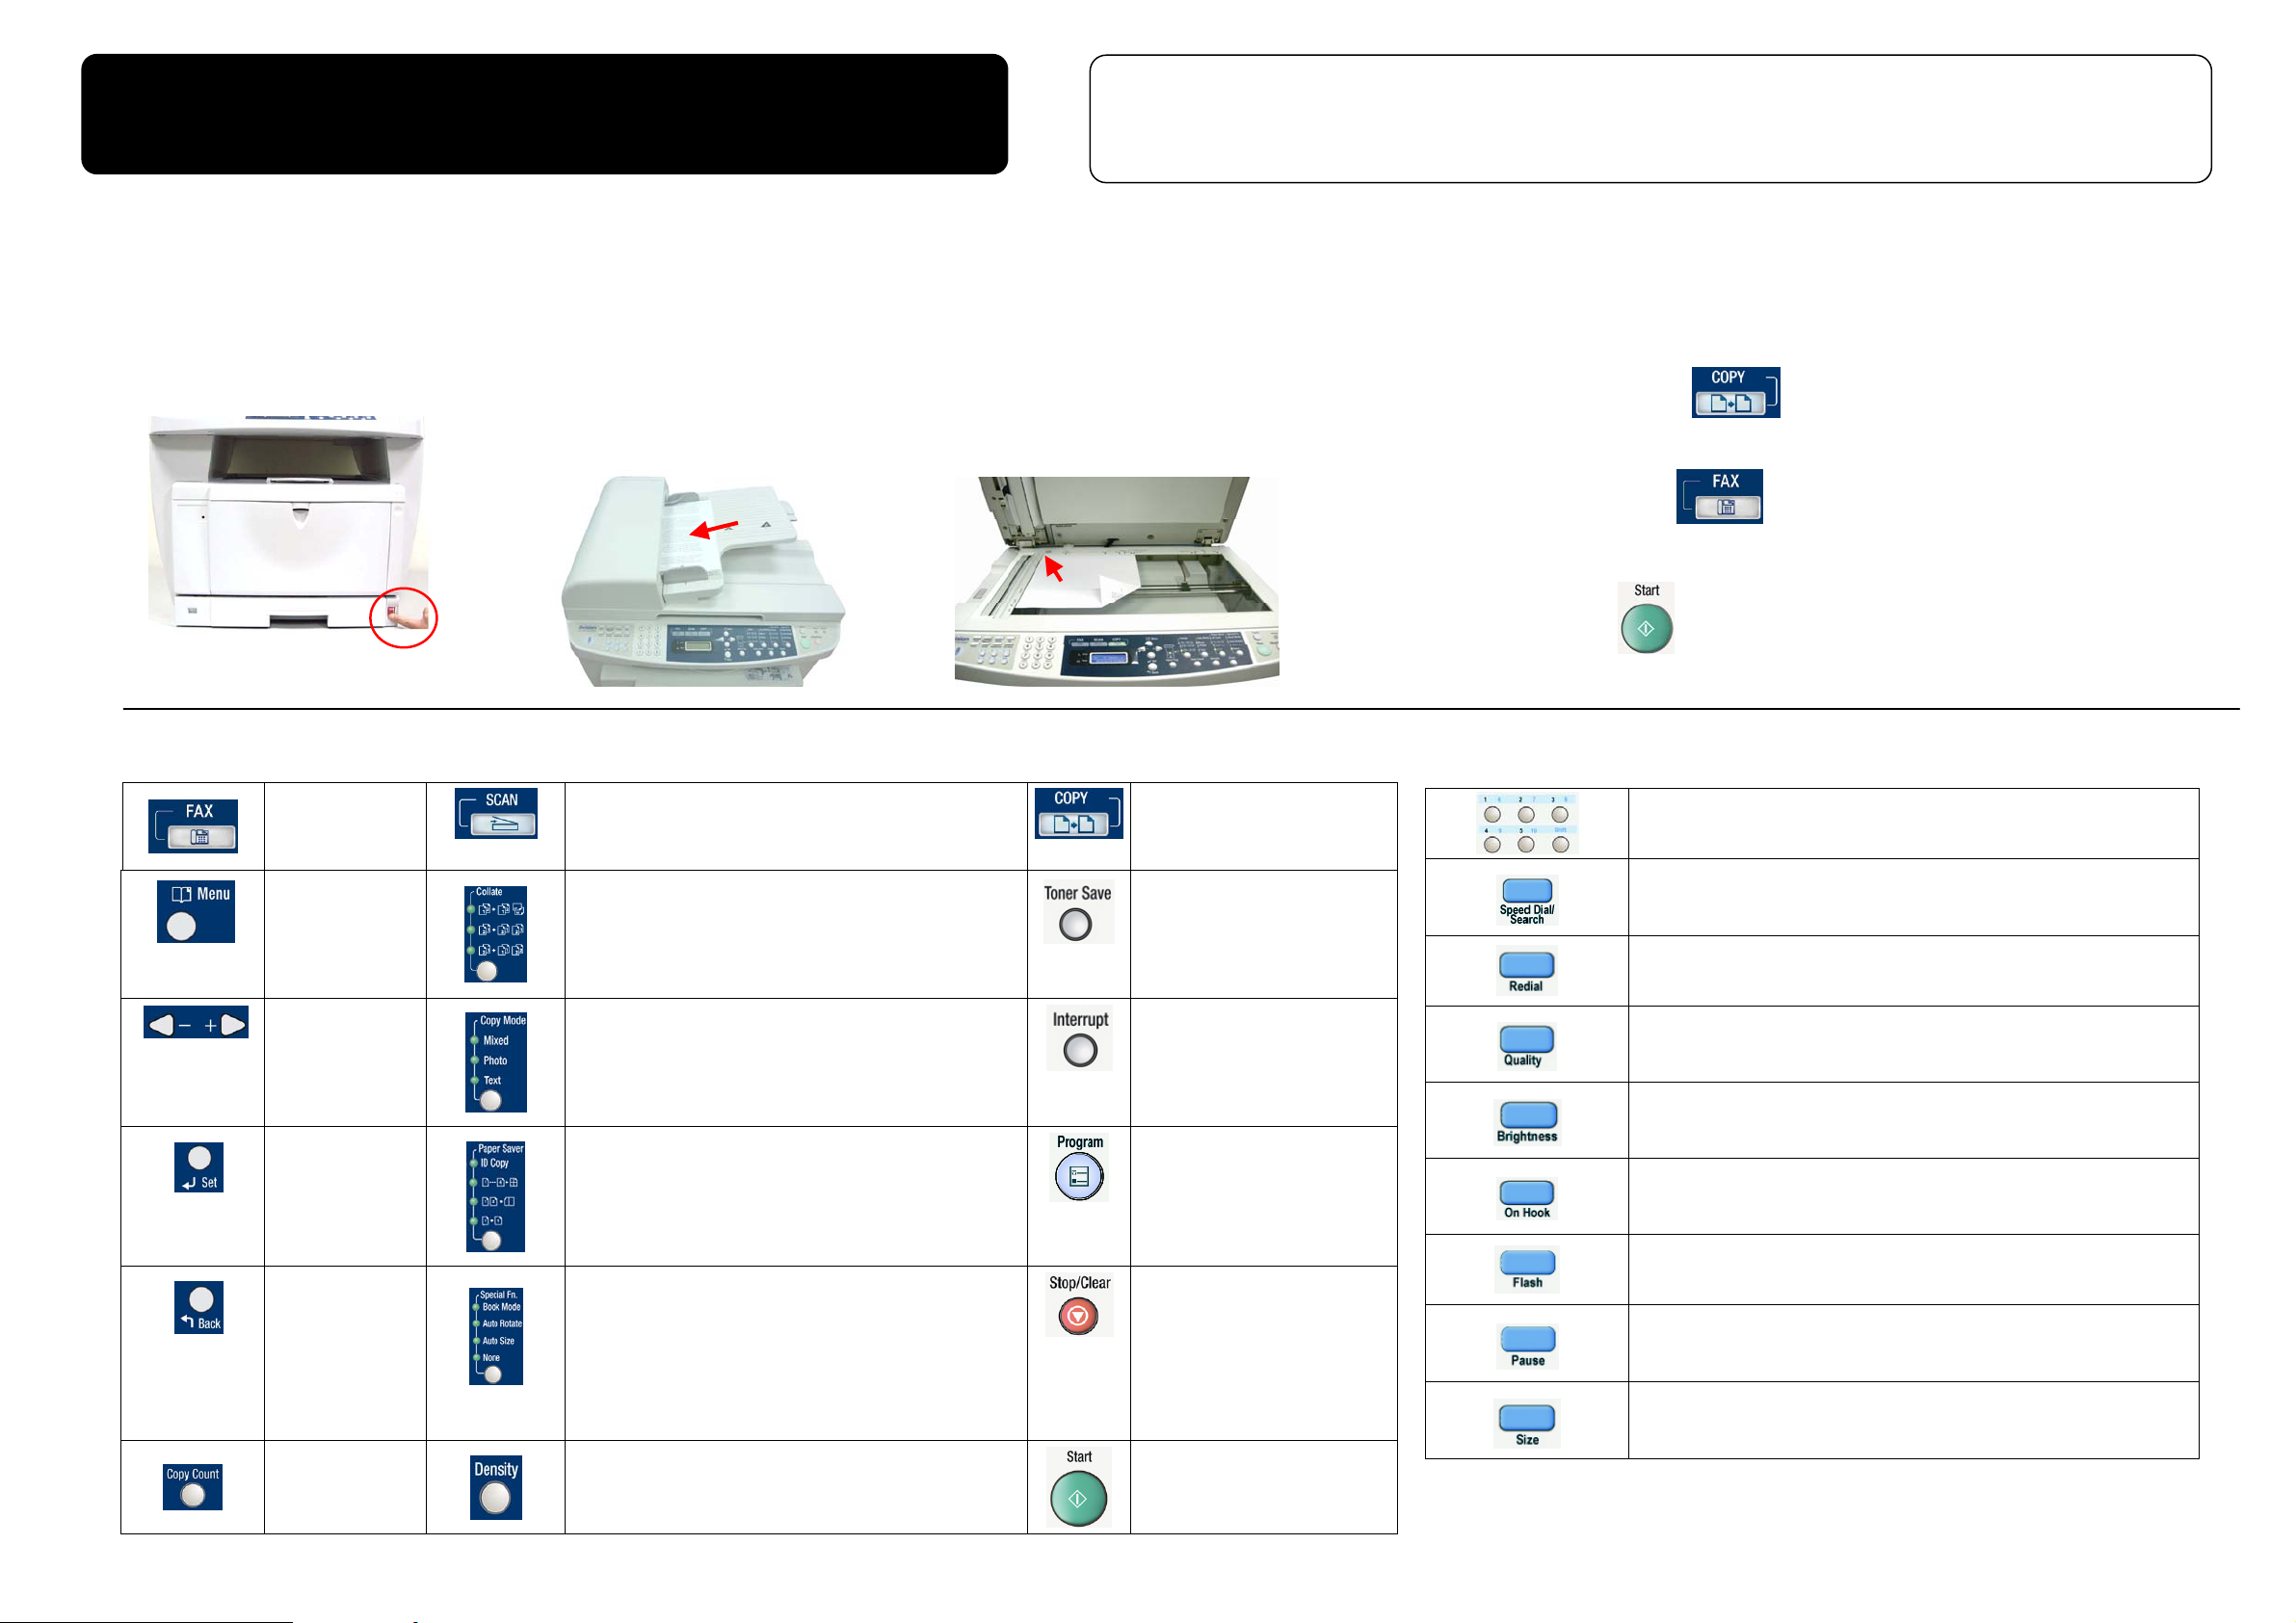
Description of Buttons on the Control Panel
Buttons used for Operation and Making Copies
Press to use the Fax
function.
Access the menu.
Scrolls through the
options.
Placing Your Document
on the ADF
Place the documents FACE UP onto
the ADF input tray with the long edge
pointing to the feeder.
Press to use the Scan function.
Choose your copies to be placed in “Sort” (e.g. pages
1,2,3/1,2,3/1,2,3) order, in “Stack” (e.g. pages 1,1,1/2,2,2/3,3,3)
order, or in “Rotate Collate” (e.g. pages 1,2,3/1,2,3
(rotated)/1,2,3/1,2,3 (rotated) )order.
Chooses your copy mode.
Mixed: Suitable for most typed originals.
Photo: Suitable when your original contains photos.
Text: Select to sharpen your text.
Placing Your Document
on the Flatbed
Place your paper vertically on the
glass FACE DOWN and align it with
the paper size mark.
Press to use the Copy function.
Allows you to enter a toner saving
mode.
Interrupts a current PC-print job and to
do a copy job first. When the copy is
finished, the PC-print job will continue.
Making A Simple Copy Or Sending A Simple Fax
1. Press the COPY button ( ) to use the copy function.
Or
Press the FAX button (
) to use the fax function, and enter your fax
number with the numeric keypad.
2. Press the Start ( ) button to start copying or faxing.
Buttons used for sending fax
Gives you instant access to 10 previously sto red dial numbers.
Lets you dial stored numbers.
Dials the last number you have called.
Choose your quality type for outgoing faxes.
Choice: Standard, Fine, Extra Fine, Photo
Adjusts brightness of your document for outgoing faxes.
Accept an option.
Returns to the
previous menu level.
Increase your copy
count. (Default value
is 1.)
ID Copy: Allows you to copy the front and rear side of your ID card on
one side of paper.
Paper Saver: Allows you to copy 1, 2, or 4 pages of document into
one single sheet of paper.
Book Mode: Copies two specified pages of a book to two separated
pages on the printer output tray.
Auto Rotate: Automatically rotates your document orientation to
match with your output paper.
Auto Size: Automatically rescale your document to copy the entire
contents on your output paper.
None: Uses none of the above functions.
Lighten or darken your original.
Used for “storage copy” in the copy
working mode.
Used as fax hotkeys in the fax working
mode.
Stops an operation at any time and lets
you exit the menu.
Starts an operation such as making
copies or sending a fax.
Lets you to dial a telephone number while listening to the call through a speaker.
Dials the representative number outsid e conn ection num ber of the telep hone ex ch ange
system.
Press to insert a three-second pause in the number you are entering to wait for an
outside line or get through an automated answering system.
The available output paper sizes for sending a fax.
Choice: A4, B4, A3, and Letter.
 Loading...