

Page 1
IE763
®
P4T Update
Modifications to the motherboard CPU mounting assembly on pages
25 to 29, Section 3, Hardware Setup.
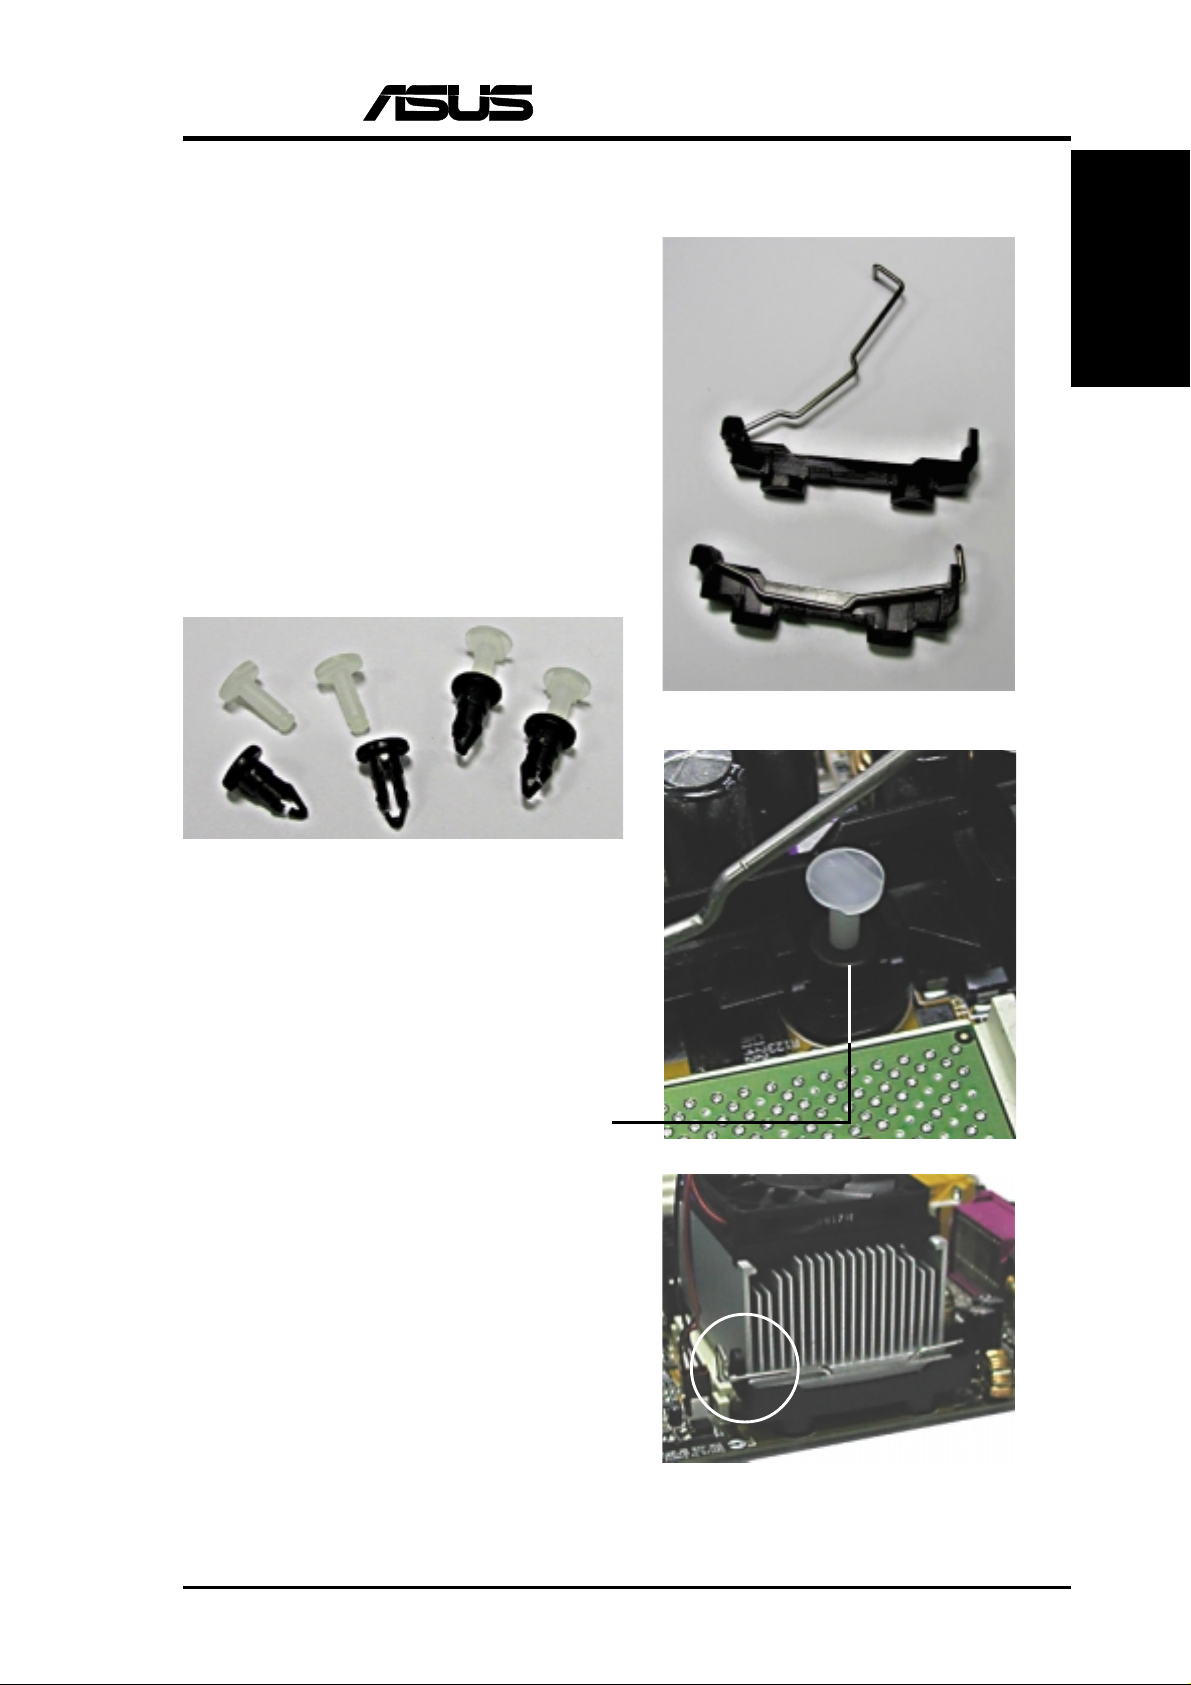
If your P4T -M does not have the rubber and
metal baseboard mounting plates, please
follow these instructions. The baseboard
installation step on page 26 is omitted.
Since the CPU heatsink mount is modified,
new parts for mounting the heatsink
assembly are pictured here. The black
plastic heatsink support braces have built-
in retaining clips, right. The pan head
screws are replaced with a new two-piece
plastic collar and plug assembly, below.
P4T
Update
1. Mount the CPU as shown on page 27.
Mount the heatsink support braces as
shown on page 28 and insert the four
black plastic collars from the top through
to the bottom of the motherboard. Insert
the white plastic plugs into the middle
of the black collars and pop them firmly
out the bottom of the motherboard.
2. Open the retaining clips, place the heatsink on the CPU, then close and snap the
clips into the locked position.
SPECIFICATIONS AND INFORMATION CONTAINED HERE
ARE FURNISHED FOR INFORMATIONAL USE ONLY, AND
ARE SUBJECT TO CHANGE AT ANY TIME WITHOUT
NOTICE, AND SHOULD NOT BE CONSTRUED AS A
COMMITMENT BY ASUSTeK COMPUTER INC. ASUS
ASSUMES NO RESPONSIBILITY OR LIABILITY FOR ANY
ERRORS OR INACCURACIES THAT MAY APPEAR IN THIS
MANUAL, INCLUDING THE PRODUCTS AND SOFTWARE
DESCRIBED IN IT.
Copyright © 2001 ASUSTeK COMPUTER INC. All Rights Reserved.
ASUS P4T Update 1
 Loading...