

Page 1

ASUSTeK COMPUTER INC.
Test SOP
Doc. No:
Date:
Revision:
Page:
Grade:
Authorize
by
Review
by
Originator
By
Rev.
Modified
Chapters
Modification Description
Issued
Dept.
Issued by
Revised Date
E0313
Add Wireless Charger.
GTSD
Sumu
2014.03.13
E0401
Add Device Label (p33)
GTSD
Sumu
2014.04.01
E0422
Add AFT setting (p10), Add P92L test (p28)
GTSD
Sumu
2014.04.22
E0508
Remove AST2, modify (p31)
GTSD
Sumu
2014.05.08
1. Objective: Test procedure.
2. Scope: A91 / P92L
3. Relevant Document: None.
4. Test Flow:
Form No : T2-009-01 Rev.01
Page 2
ASUSTeK COMPUTER INC
Test SOP
Doc. No:
Date:
Rev.: Page: 1
5. Prepare item:
PC
A91 / P92L
Headset
Micro SD card
Micro SIM card
Micro USB cable
Slim port cable
HDMI cable
HDMI LCD Monitor
NFC card
OTG micro USB cable
Wireless Charger
Internet is required.
User Image: Download from SIP \ Bulletin \ Mobile System info (Padfone & Pad) \ Recovery Image \
Driver: Download from RMA Support Web \ A91 \ Test Program.
CSC Image: Download from RMA Support Web \ A91 \ Firmware/BIOS
ASUS Flash Tool: Download from RMA Support Web \ A91 \ Test Program.
MiniAST: Download from below path:
AST2: For LV3/4 Repair. Download from below path:
http://sip.asus.com/document/FolderLauncher.aspx?action=open_folder&folder_type=PUB&folder_id=22465
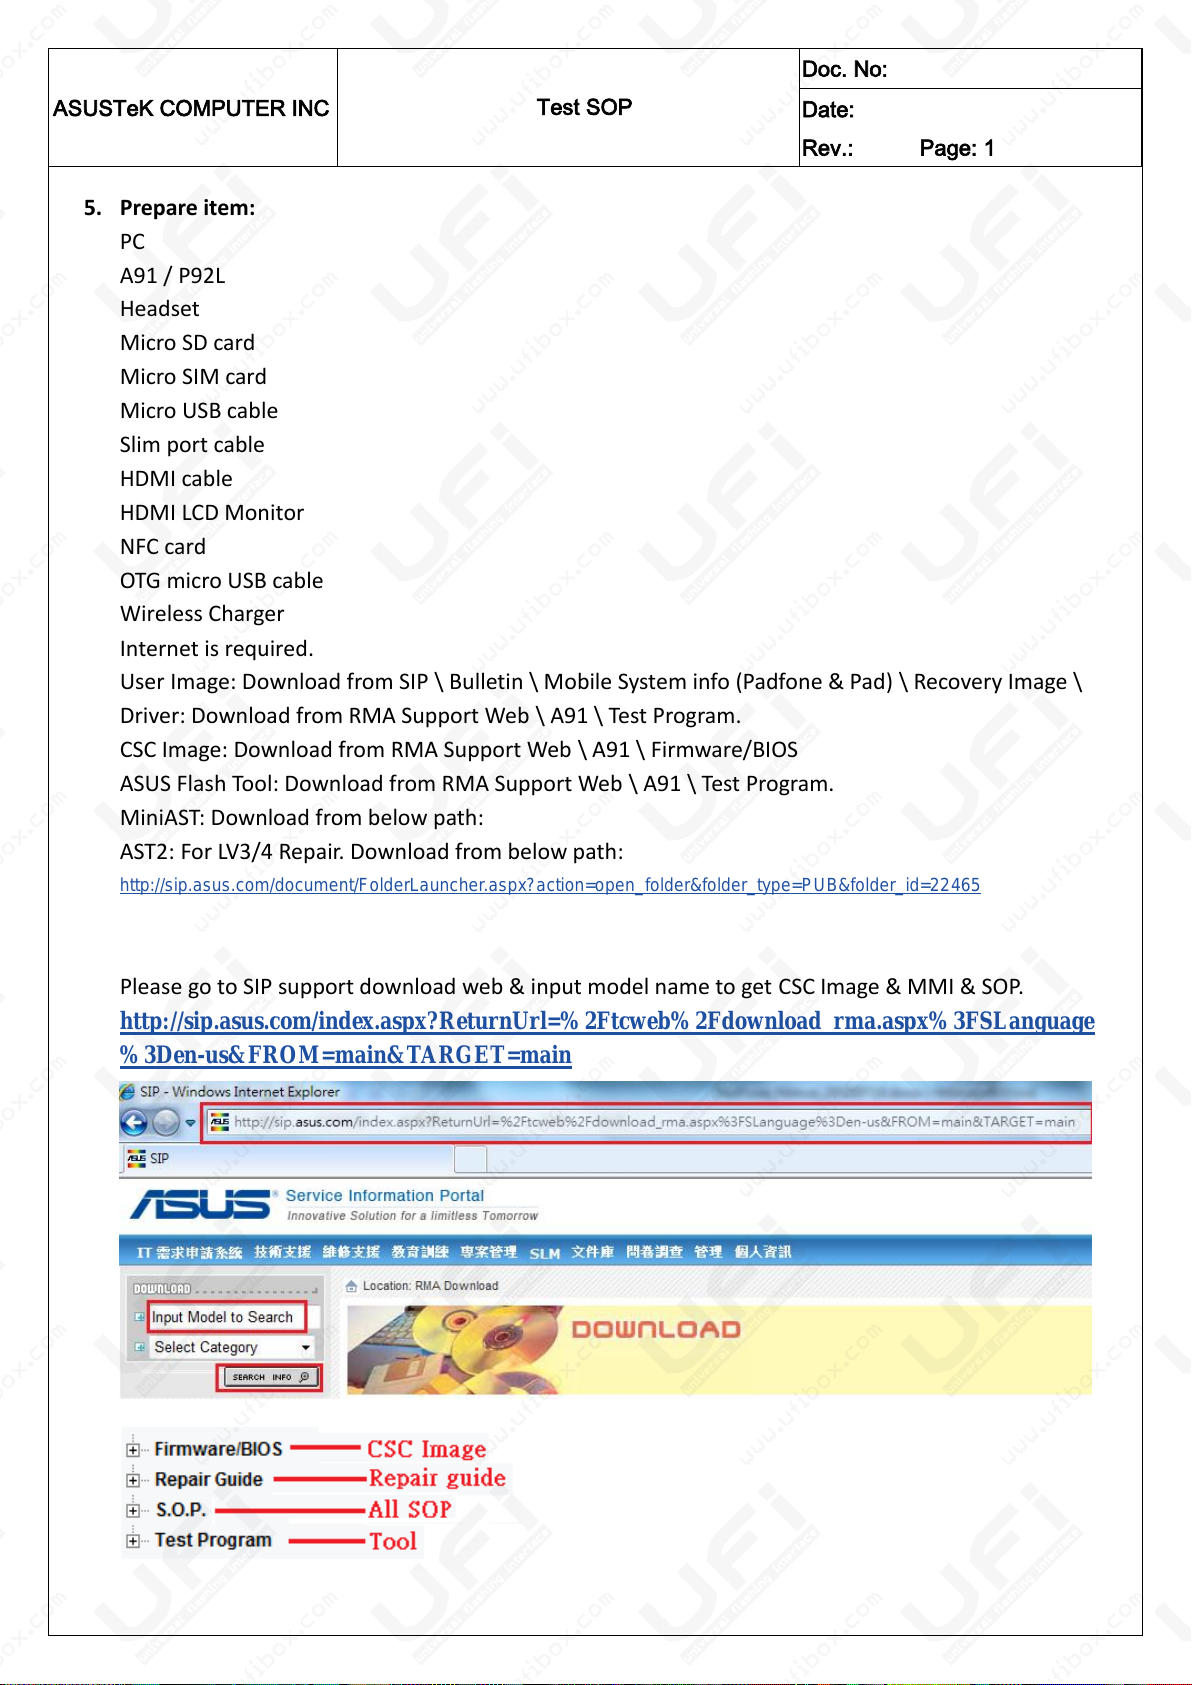
Please go to SIP support download web & input model name to get CSC Image & MMI & SOP.
http://sip.asus.com/index.aspx?ReturnUrl=%2Ftcweb%2Fdownload_rma.aspx%3FSLanguage
%3Den-us&FROM=main&TARGET=main
Page 3
ASUSTeK COMPUTER INC
Test SOP
Doc. No:
Date:
Rev.: Page: 2
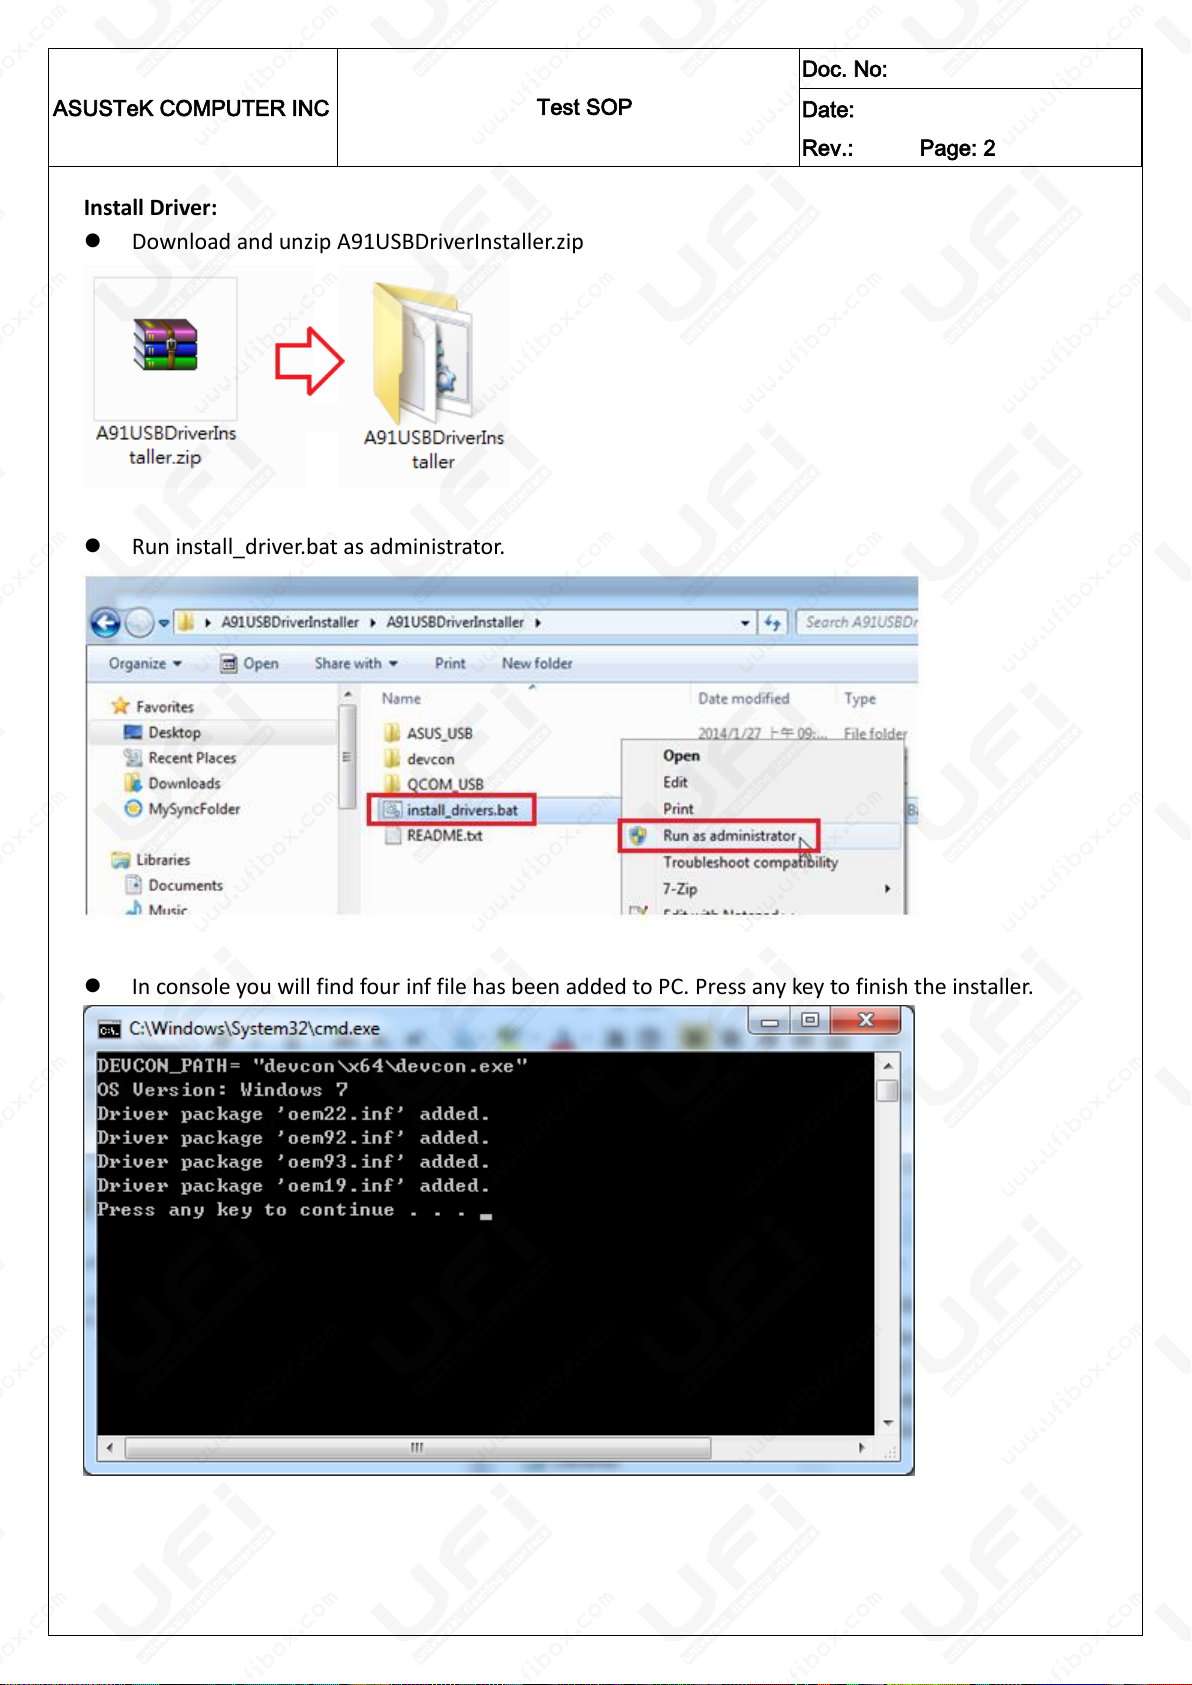
Install Driver:
Download and unzip A91USBDriverInstaller.zip
Run install_driver.bat as administrator.
In console you will find four inf file has been added to PC. Press any key to finish the installer.
Page 4
ASUSTeK COMPUTER INC
Test SOP
Doc. No:
Date:
Rev.: Page: 3
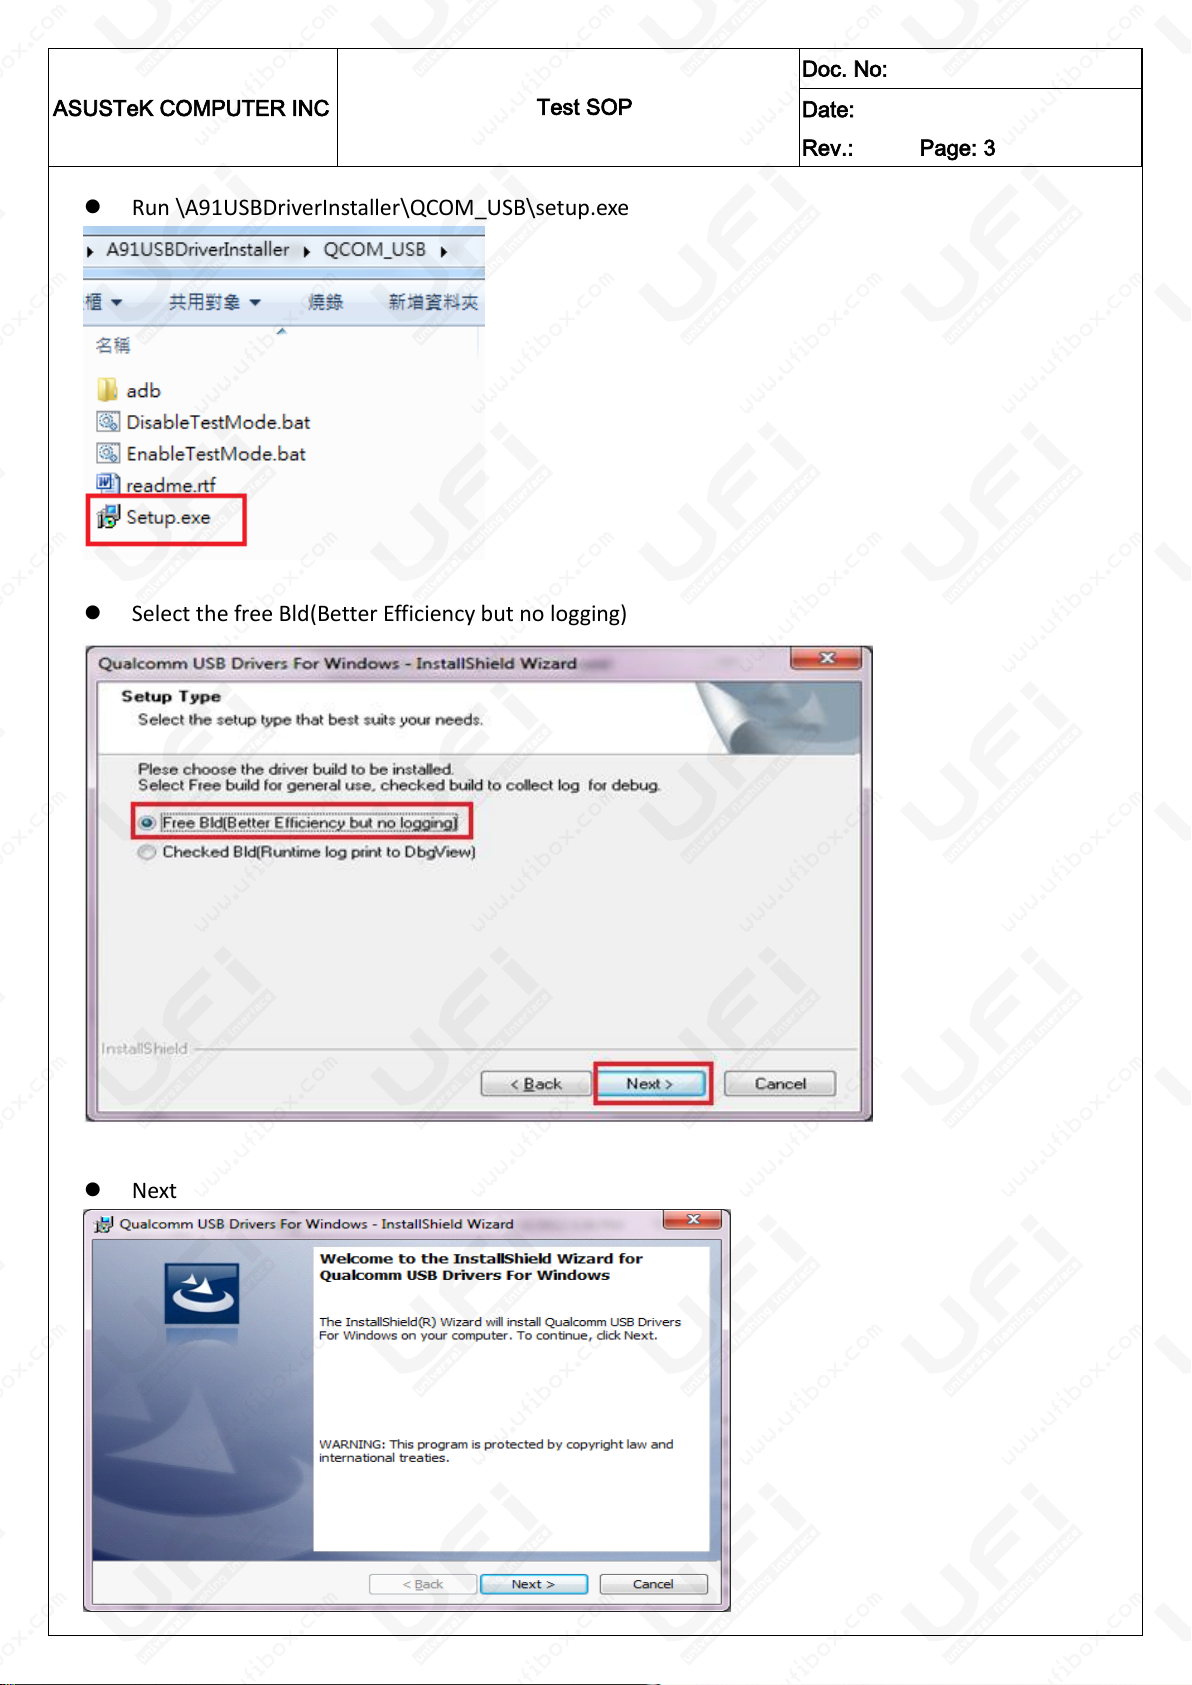
Run \A91USBDriverInstaller\QCOM_USB\setup.exe
Select the free Bld(Better Efficiency but no logging)
Next
Page 5
ASUSTeK COMPUTER INC
Test SOP
Doc. No:
Date:
Rev.: Page: 4
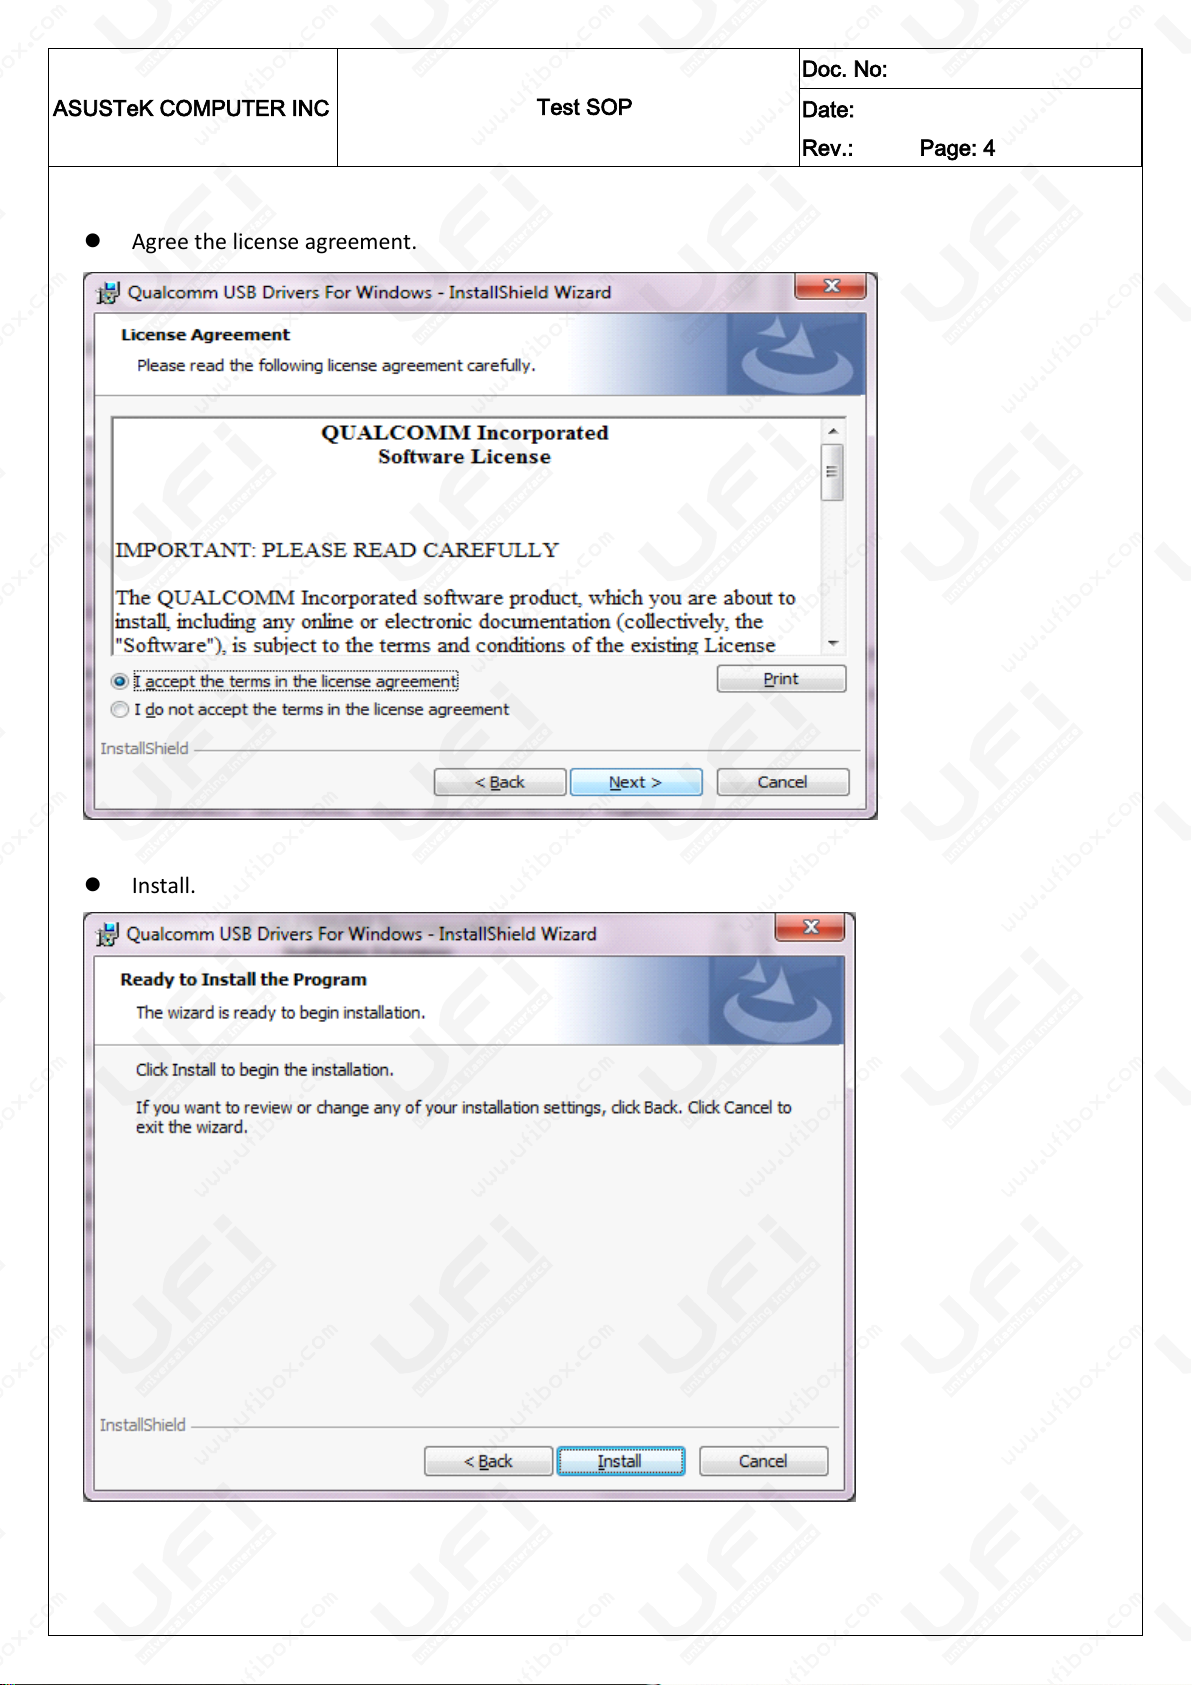
Agree the license agreement.
Install.
Page 6
ASUSTeK COMPUTER INC
Test SOP
Doc. No:
Date:
Rev.: Page: 5
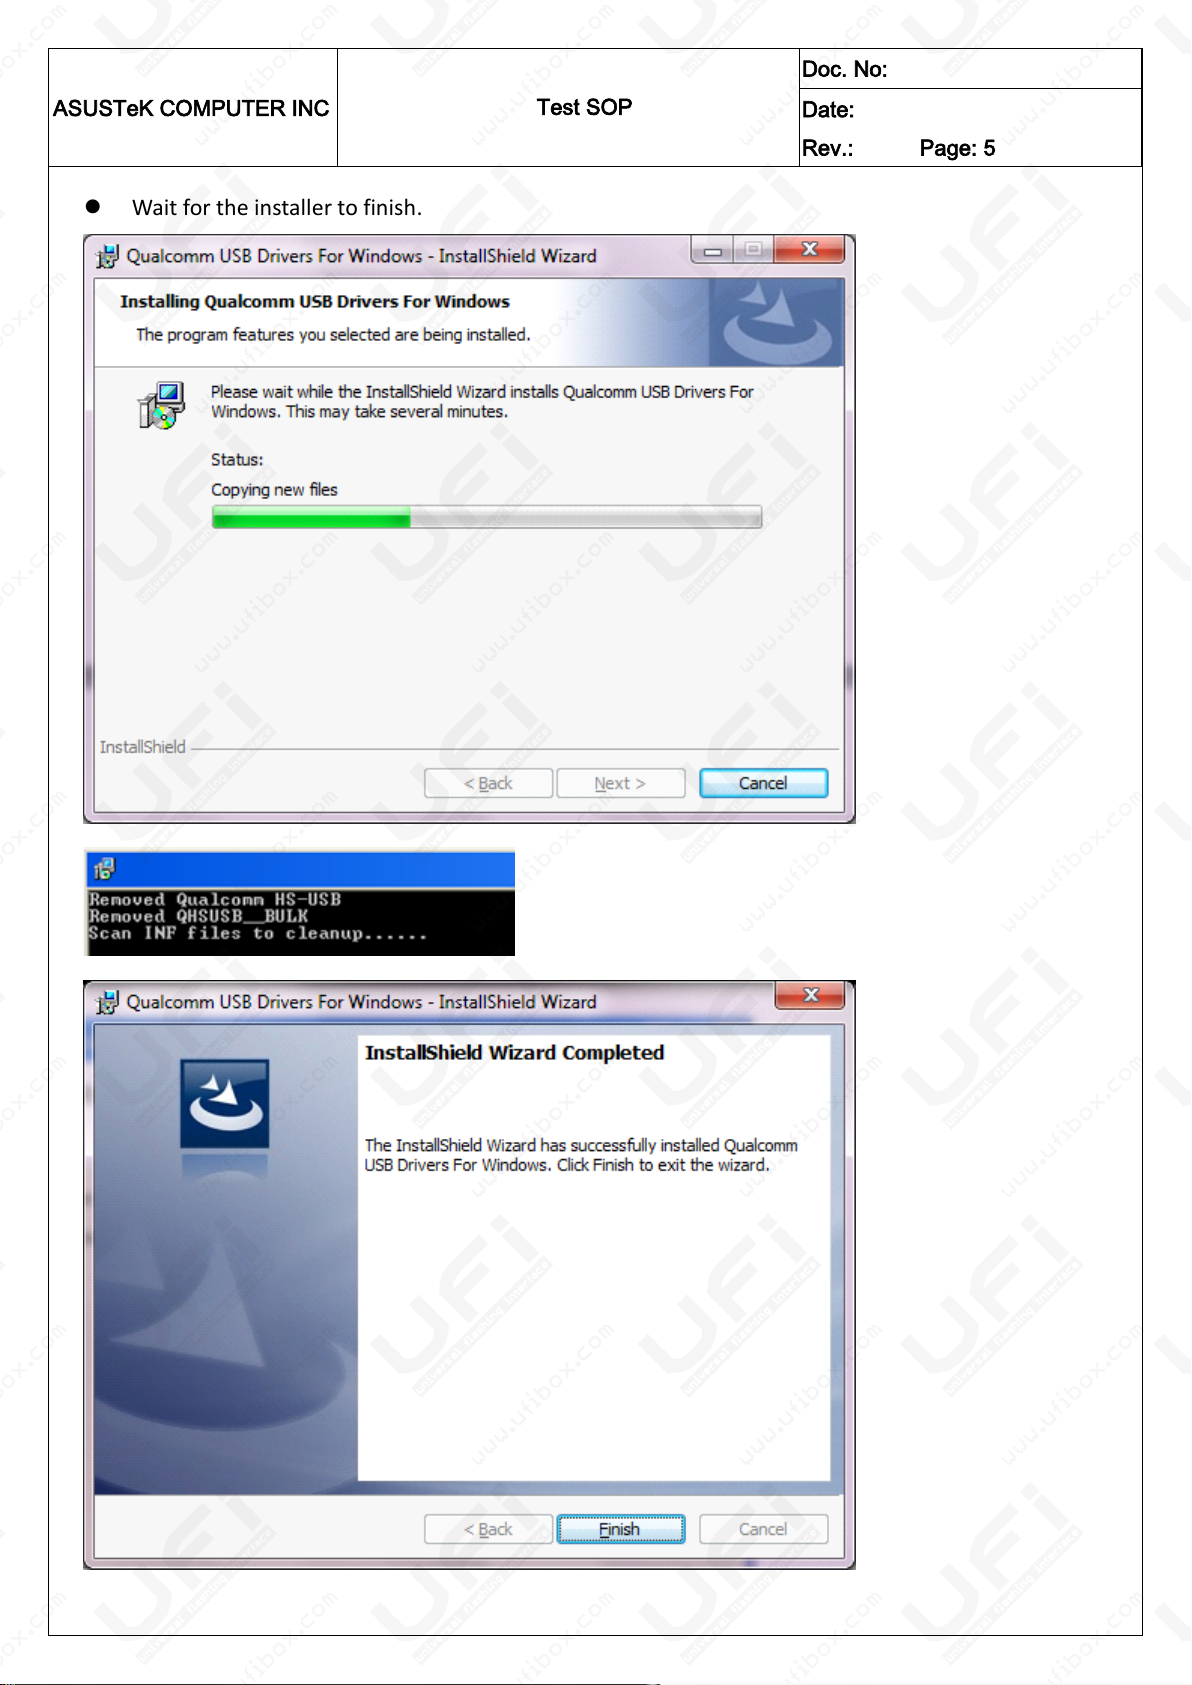
Wait for the installer to finish.
Page 7
ASUSTeK COMPUTER INC
Test SOP
Doc. No:
Date:
Rev.: Page: 6
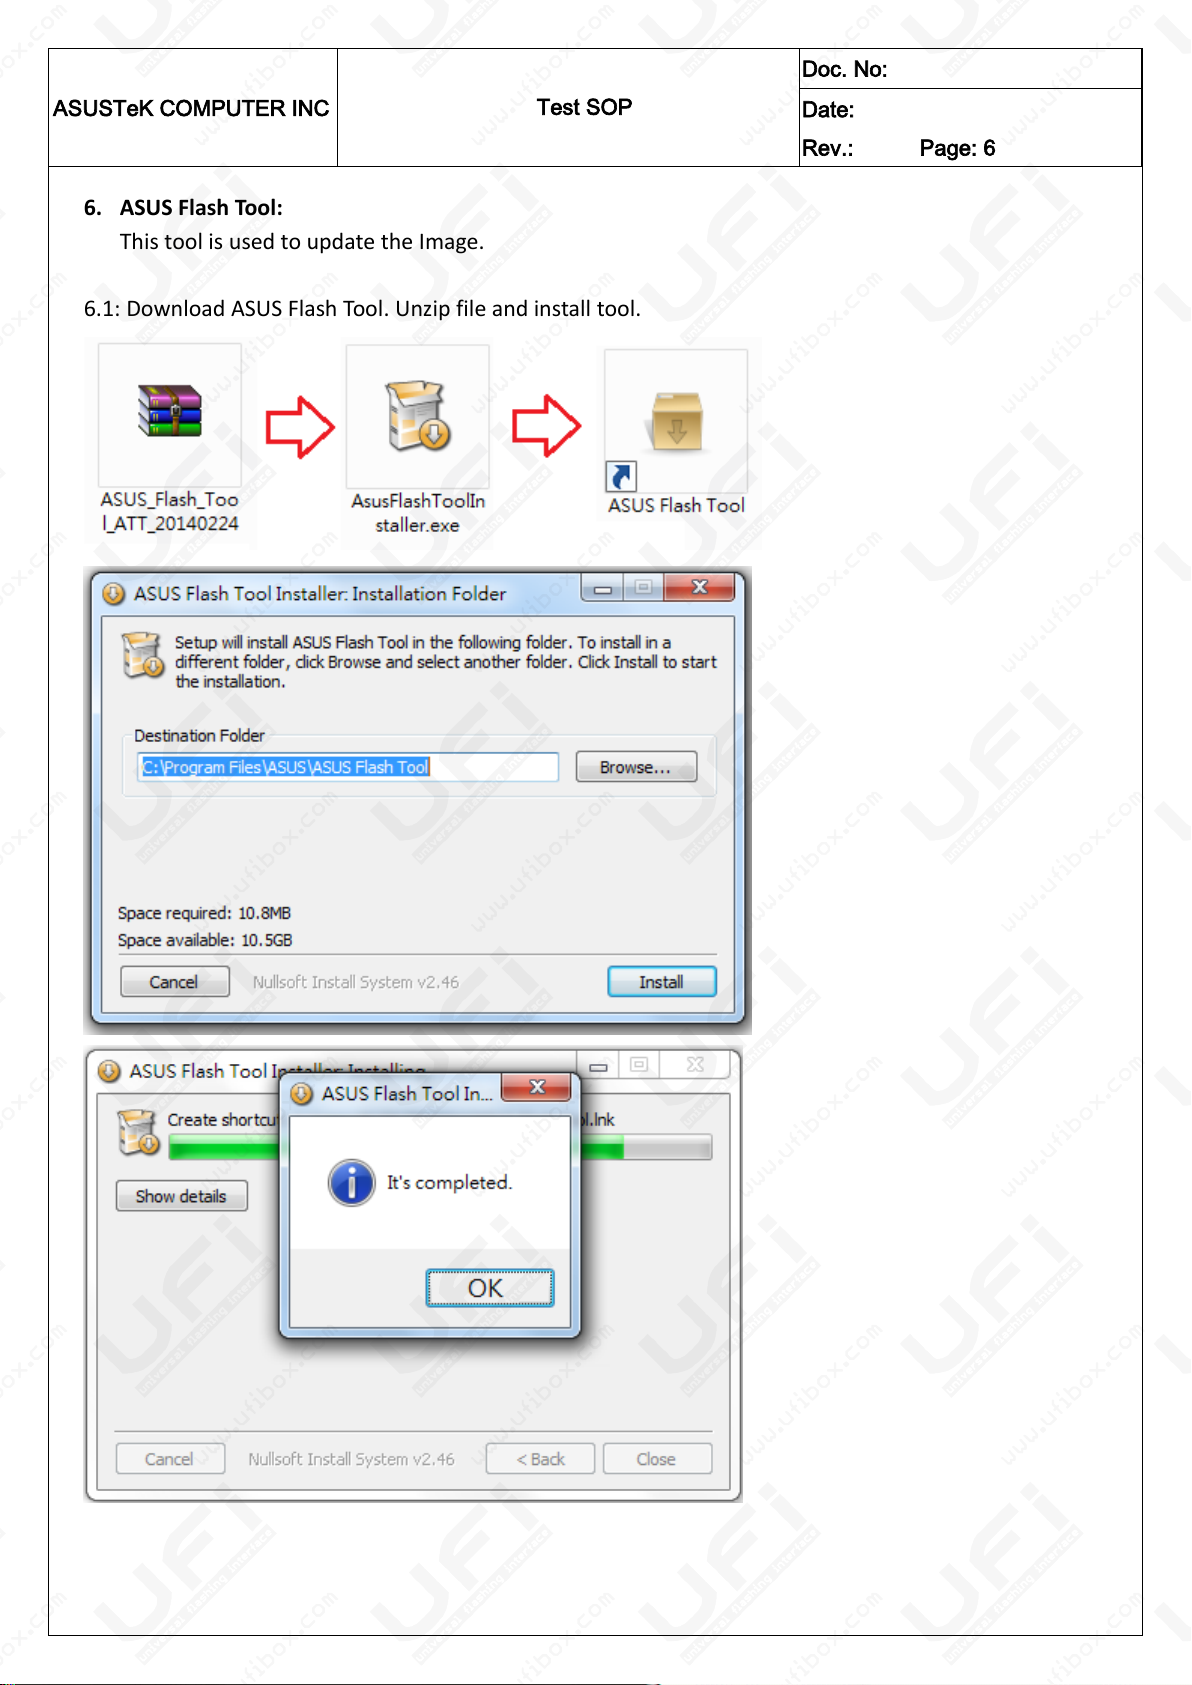
6. ASUS Flash Tool:
This tool is used to update the Image.
6.1: Download ASUS Flash Tool. Unzip file and install tool.
Page 8
ASUSTeK COMPUTER INC
Test SOP
Doc. No:
Date:
Rev.: Page: 7
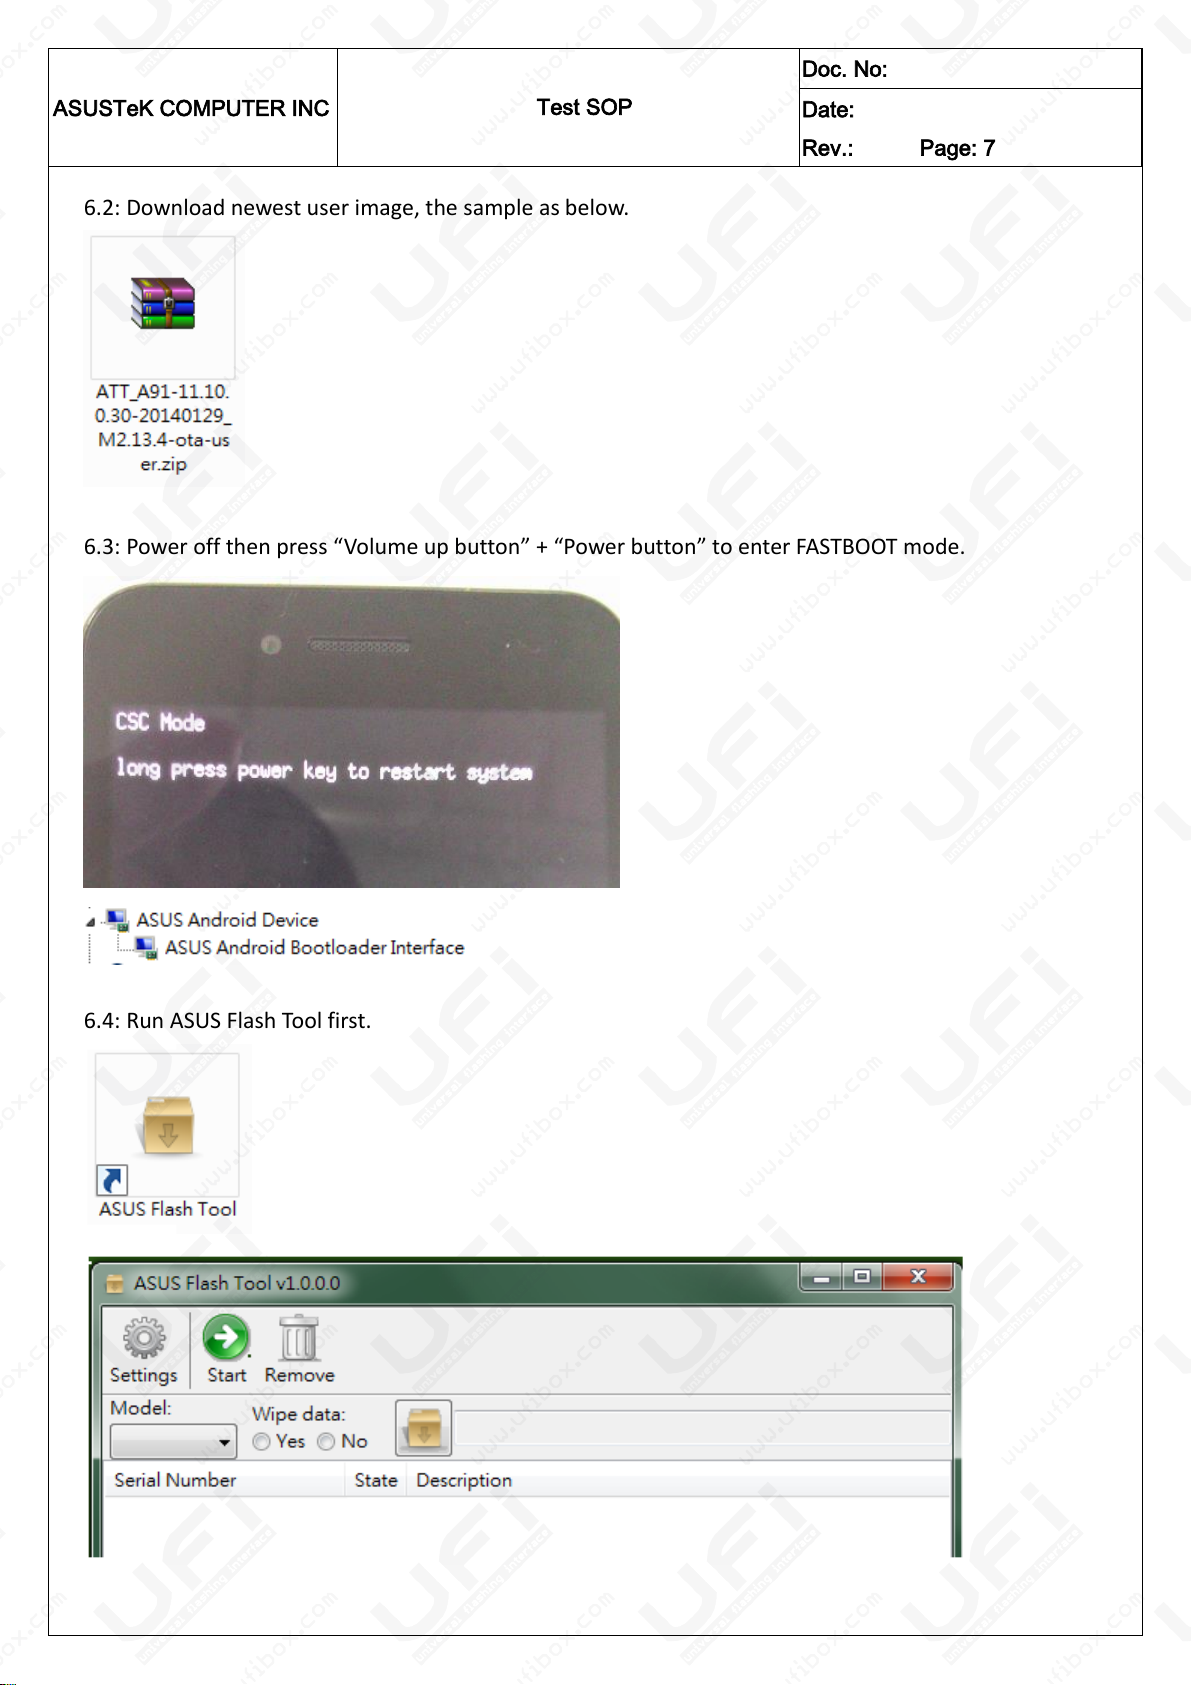
6.2: Download newest user image, the sample as below.
6.3: Power off then press “Volume up button” + “Power button” to enter FASTBOOT mode.
6.4: Run ASUS Flash Tool first.
Page 9
ASUSTeK COMPUTER INC
Test SOP
Doc. No:
Date:
Rev.: Page: 8
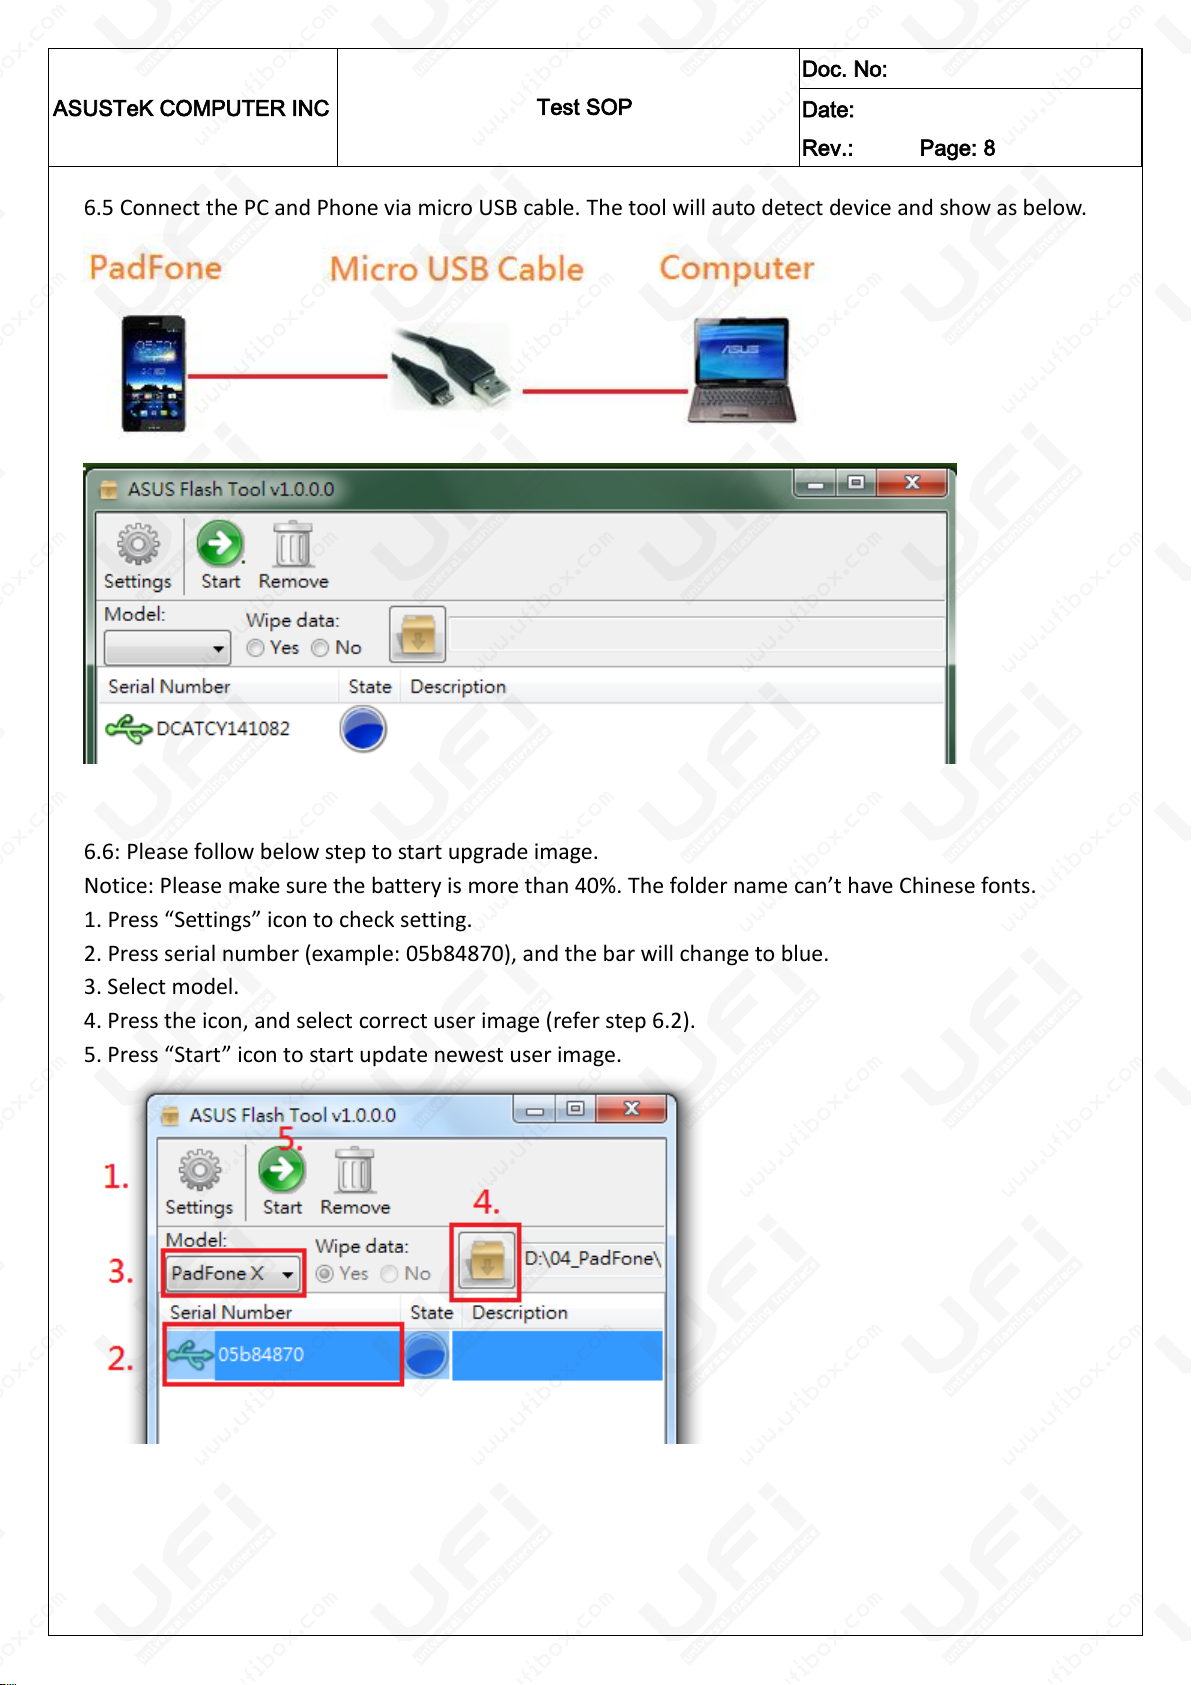
6.5 Connect the PC and Phone via micro USB cable. The tool will auto detect device and show as below.
6.6: Please follow below step to start upgrade image.
Notice: Please make sure the battery is more than 40%. The folder name can’t have Chinese fonts.
1. Press “Settings” icon to check setting.
2. Press serial number (example: 05b84870), and the bar will change to blue.
3. Select model.
4. Press the icon, and select correct user image (refer step 6.2).
5. Press “Start” icon to start update newest user image.
Page 10
ASUSTeK COMPUTER INC
Test SOP
Doc. No:
Date:
Rev.: Page: 9
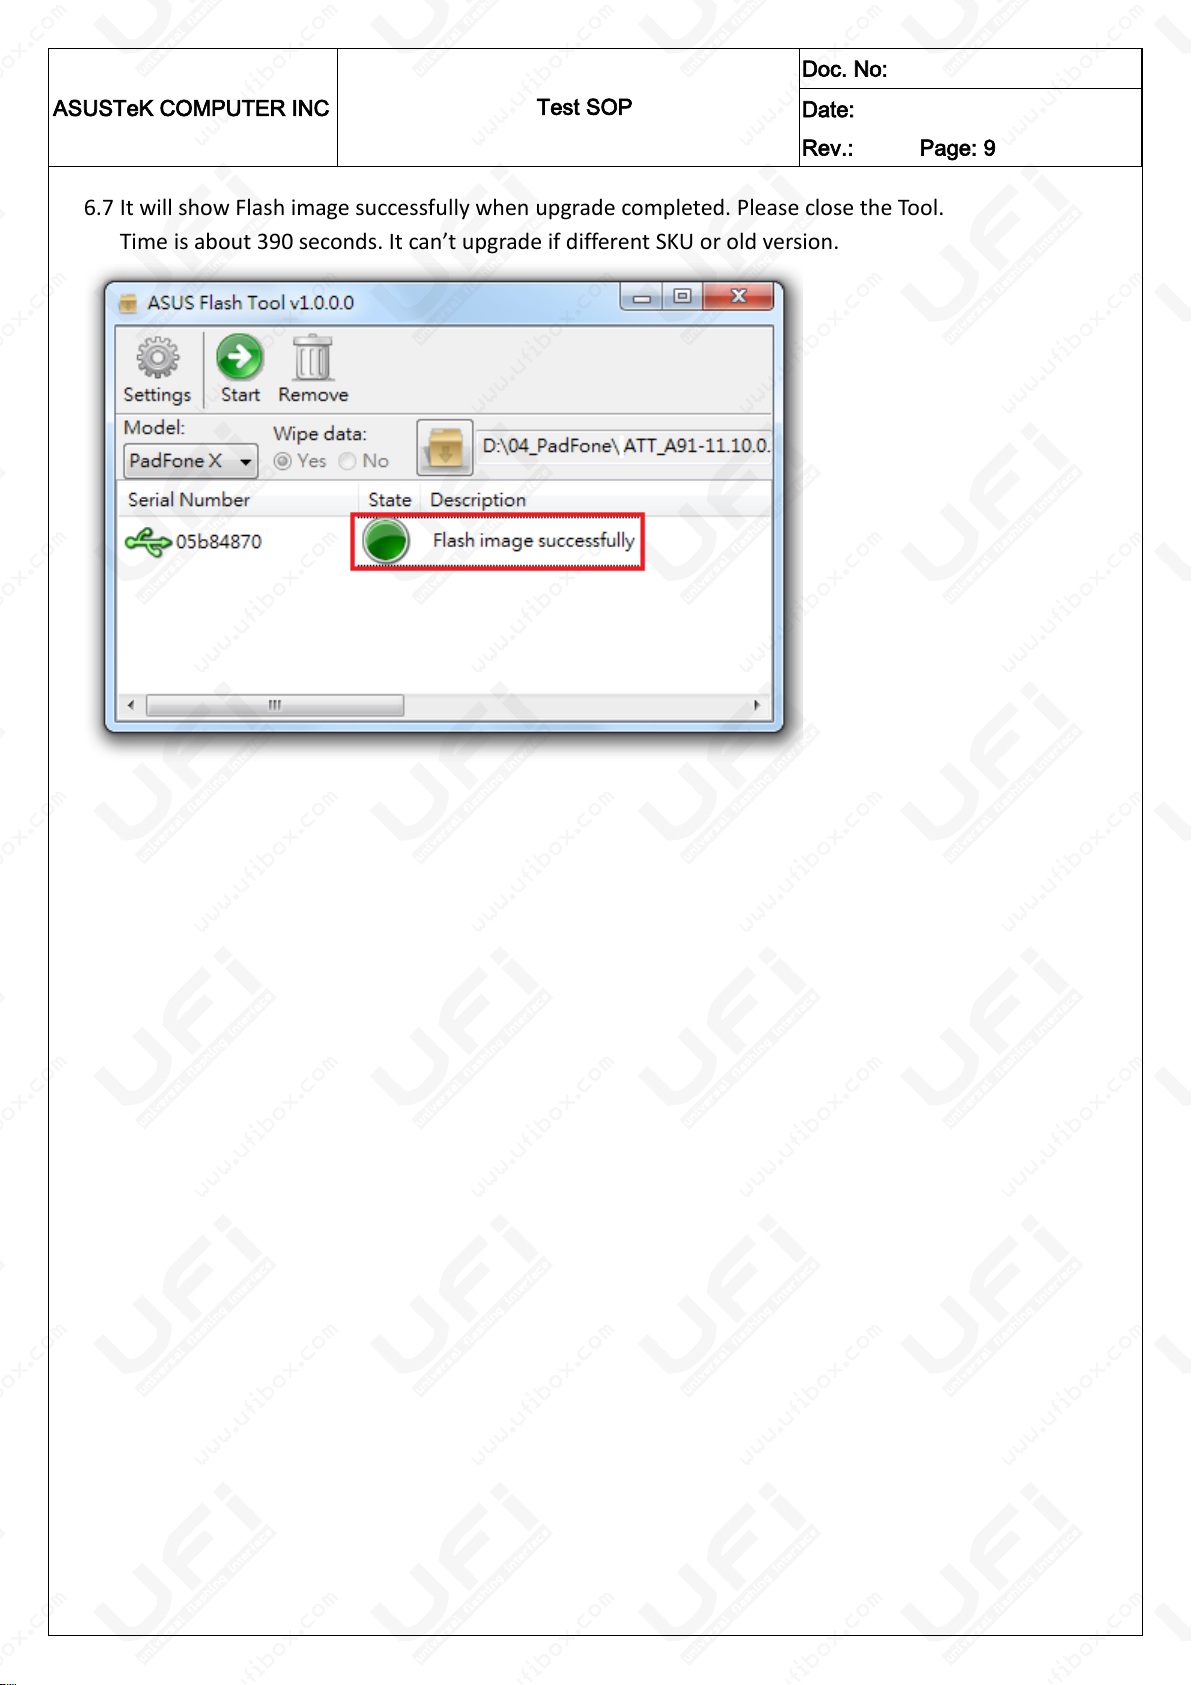
6.7 It will show Flash image successfully when upgrade completed. Please close the Tool.
Time is about 390 seconds. It can’t upgrade if different SKU or old version.
Page 11

ASUSTeK COMPUTER INC
Test SOP
Doc. No:
Date:
Rev.: Page: 10
Settings:
If the ASUS Flash Tool is the first run, please remember run this setting!!
Upload XML log to FTP: Please select this item and use default setting (only for ATT).
Transfer mode: Please keep the default (Active).
Save XML log in local: Please keep the default (Upload failure).
XML log location: Please select the XML log storage path.
Timeout: If it exceeds the set value, an error message will appear.
eService Host: Please select local server (am.eservice.asus.com for US).
OK: After setting, press this button to save.
Page 12

ASUSTeK COMPUTER INC
Test SOP
Doc. No:
Date:
Rev.: Page: 11
7. MiniAST.
This tool is used to test function and feedback test result.
7.1 Enable A500CG \ Settings \ Developer options \ USB debugging (enable ADB).
If you can’t find the item of “Developer options”, please click “Settings \ About \ Software Information \
Build number” for 5 times to unlock it.
Page 13

ASUSTeK COMPUTER INC
Test SOP
Doc. No:
Date:
Rev.: Page: 12
7.2 Connect the PC and Phone via micro USB cable.
7.3 Download miniAST and unzip file. Run miniAST.cmd.
Page 14

ASUSTeK COMPUTER INC
Test SOP
Doc. No:
Date:
Rev.: Page: 13
7.4 The PC will auto run miniAST.exe and show as below. The PadFone will start SMMI test. If screen show
“Allow USB debugging?”, please select “Always allow from this computer” and select “OK”.
Page 15

ASUSTeK COMPUTER INC
Test SOP
Doc. No:
Date:
Rev.: Page: 14
7.5 User Image Test Item List:
Touch_Test
BT_Test (Automation)
WiFiBus_Test (Automation)
Battery_Test (Automation)
ECompass_Test (Automation)
GSensor_Test
Gyroscope_Test(Automation)
ModemBus_Test (Automation)
Wireless_Charging_Test
Keypad_Test
MultiTouch_Test
Vibrator_Test
Reciever_Test
Speaker_Test
BoardMic_Test
MainCamCapture_Test
VGACamCapture_Test
Display_Test
Headset_Test
HeadsetMic_Test
HeadsetKey_Test
Proximity_Test
LightSensor_Test
CMD_Mouse_Test
SDcard_Test (Automation)
SIMcard_Test
NFC_TagReader_Test
HDMI_Test
Page 16

ASUSTeK COMPUTER INC
Test SOP
Doc. No:
Date:
Rev.: Page: 15
Before the test, please insert the micro SIM card and micro SD card.
Please acquire the standardized micro SIM card from your mobile service provider.
Do not cut the SIM card by yourself!!!
7.6.1 Below items will be check automatically:
BT_Test
WiFiBus_Test
Battery_Test
ECompass_Test
Gyroscope_Test
ModemBus_Test
SDcard_Test
SIMcard_Test
7.6.2 Touch Test:
Please touch screen and move, if test ok, please select “Pass”, otherwise, please select “Fail.
Page 17

ASUSTeK COMPUTER INC
Test SOP
Doc. No:
Date:
Rev.: Page: 16
7.6.3 GSensor_Test:
The test item will test X, Y, Z axis to make sure G sensor function is good.
Please stand the unit (Y+ pass) and turn right 90 degree three times to test X-, Y-, X+
Page 18

ASUSTeK COMPUTER INC
Test SOP
Doc. No:
Date:
Rev.: Page: 17
Z+: Put the unit on the table (panel face to up)
Z-: Put the unit on the table (panel face to down)
Page 19

ASUSTeK COMPUTER INC
Test SOP
Doc. No:
Date:
Rev.: Page: 18
7.6.4 Wireless_Charger_Test:
Please prepare wireless charger and make sure power cable is connected properly.
Put the mobile on the wireless charger then the test will auto pass.
Make sure the wireless charging sensors put on the correct place.
7.6.5 Keypad_Test:
Please press “power button”, “volume up”, and “volume down”.
Page 20

ASUSTeK COMPUTER INC
Test SOP
Doc. No:
Date:
Rev.: Page: 19
7.6.6 MultiTouch_Test:
Please put your five fingers on the screen.
7.6.7 Vibrator_Test:
Press the switch (ON or OFF button) to turn on the vibrator and confirm vibrator is normal?
If normal please select “Pass”, otherwise, please select “Fail”.
Page 21

ASUSTeK COMPUTER INC
Test SOP
Doc. No:
Date:
Rev.: Page: 20
7.6.8 Receiver2_Test:
Press “Start button” and listen the sound.
If it has sound, please select “Pass”, otherwise, please select “Fail”.
7.6.9 Speaker_Test:
Press “Start button” and listen the sound.
If it has sound, please select “Pass”, otherwise, please select “Fail”
Page 22

ASUSTeK COMPUTER INC
Test SOP
Doc. No:
Date:
Rev.: Page: 21
7.6.10 BoardMic_Test:
Press the “Start button” and say “Hello, Hello” to bottom of the phone, and then listen the sound, if it has
sound, please select “Pass”, otherwise, please select “Fail”
7.6.11 MainCamCapture_Test:
Press “Capture button” and check the picture is good or bad.
If normal please select “Pass”, otherwise, please select “Fail”
7.6.12 VGACamCapture_Test:
Press “Capture button” and check the picture is good or bad.
If normal please select “Pass”, otherwise, please select “Fail”
Page 23

ASUSTeK COMPUTER INC
Test SOP
Doc. No:
Date:
Rev.: Page: 22
7.6.13 Display_Test:
Please click screen and check it until show below pic. Screen will light from dark after six colors.
7.6.14 Headset_Test:
Please plug in the headset and press “OK button”. Press “Start button” to test headset.
Press the “Start button” and listen the sound from headset.
If it has sound, please select “Pass”, otherwise, please select “Fail”
Page 24

ASUSTeK COMPUTER INC
Test SOP
Doc. No:
Date:
Rev.: Page: 23
7.6.15 HeadsetMic_Test:
Press the “Start button” and say “Hello, Hello” to the phone of headset, and then listen the sound from
headset, if it has sound, please select “Pass”, otherwise, please select “Fail”
7.6.16 HeadsetKey_Test:
Please press the key of the headset. If pass, it will end the test.
Page 25

ASUSTeK COMPUTER INC
Test SOP
Doc. No:
Date:
Rev.: Page: 24
7.6.17 Proximity_Test:
Cover the top of the proximity sensor, and do not cover, and then cover.
7.6.18 LightSensor_Test:
Placed under light source (ADC>300), then cover the sensor (ADC<5), and then under light source
(ADC>300).
Page 26

ASUSTeK COMPUTER INC
Test SOP
Doc. No:
Date:
Rev.: Page: 25
7.6.19 CMD_Mouse_Test:
Please prepare the OTG micro USB cable (local buy), and a mouse, connection as below and press OK.
The program will automatically check for this feature.
7.6.20 NFC_TagReader_Test:
Took a card with NFC, near and under the back cover as below picture, if it works, the test will show pass.
7.6.21 HDMI_Test:
Use slim port cable (local buy) and HDMI cable (local buy) to link A86 and HDMI LCD monitor.
Press “Start” to test and check the screen on the HDMI LCD monitor. If you can see the animation and
sound, without any unusual, please select “PASS”, otherwise, please select “FAIL”.
Page 27

ASUSTeK COMPUTER INC
Test SOP
Doc. No:
Date:
Rev.: Page: 26
Page 28

ASUSTeK COMPUTER INC
Test SOP
Doc. No:
Date:
Rev.: Page: 27
7.7 Input SSN, Test ID and select local server, then press Submit. Finish!!
If can’t show as below, please try remove and insert the USB cable one times.
Page 29

ASUSTeK COMPUTER INC
Test SOP
Doc. No:
Date:
Rev.: Page: 28
P72L Test:
Please insert A91 to P72L first if you want test P72L. Please run “Clear cache” first, and select “Exit”
to exit tool. Then execution MMI tool again.
After restrt MMI, the screen will show as below. Press the item to start test.
Page 30

ASUSTeK COMPUTER INC
Test SOP
Doc. No:
Date:
Rev.: Page: 29
P72L Test Item List:
Keypad_Test
LightSensor_Test
VGACamCapture_Test
PadFone_Bettery
Touch_Test
MultiTouch_Test
Speaker_Test
BoardMic_Test
Display_Test
Keypad_Test:
Please press “power button”, “volume up”, and “volume down”.
LightSensor_Test:
Placed under light source (ADC>300), then cover the sensor (ADC<5), and then under light source
(ADC>300).
Page 31

ASUSTeK COMPUTER INC
Test SOP
Doc. No:
Date:
Rev.: Page: 30
VGACamCapture_Test:
Please refer step 7.6.12 VGACamCapture_Test.
PadFone_Bettery:
Test P92L battery, if fail, please check P92L battery.
Touch_Test:
Please refer step 7.6.2 Touch_Test.
MultiTouch_Test:
Please put your ten fingers on the screen.
Speaker_Test:
Please refer step 7.6.9 Speaker_Test
BoardMic_Test:
Please refer step 7.6.10 BoardMic_Test
Display_Test:
Please refer step 7.6.13 Display Test.
Page 32

ASUSTeK COMPUTER INC
Test SOP
Doc. No:
Date:
Rev.: Page: 31
8. LV3/4 Repair
AST2:
Replace EMMC:
Due to FOTA server is in AT&T, so you don’t need feedback data by AST2.
Please remember do RF calibration and test again.
Please remember to write back the original data after EMMC replaced.
Original Data:
SSN, IMEI, BT MAC, WIFI MAC, ISN, Country code, DM file, keybox file, DHCP, SIM Lock.
How to write:
1. Please download A91_EMMC_Write_Tool_E0508.zip & Java7u45.zip.
2. Unzip Java7u45.zip and install Java 7u45 (i586 for 32bit, x64 for 64bit).
3. Unzip A91_EMMC_Write_Tool_E0508.zip and run A91_EMMC_Write_Tool \
A91_EMMC.cmd, then the screen will show as below.
4. Insert Dongle first, select 1~11 and press enter then follow the instructions on the screen.
Page 33

ASUSTeK COMPUTER INC
Test SOP
Doc. No:
Date:
Rev.: Page: 32
9. Refurbish & Replace MB:
Please note!!
After replaced MB, due to IMEI already different, please replace new device label (15100-09020300).
Please use new IMEI number and original SSN/SKU/MFG number, printed on the new device label.
The CSC MB will attach a label with the new IMEI number for your reference when printed.
 Loading...