

Page 1
Via Toscana, 57 a-b - Località Macrolotto
59100 Prato (PO) - Italy
E-mail: info@ariete.net
Internet: www.ariete.net
Prodotto da: X Type Engineering S.r.l. - Ponsacco (PI) COD. 5095103000 Rev. 0 del 04/06/2004
MOD. 4210 - 4210/1
4210/2 - 4210/5
copertina 4-06-2004 9:58 Pagina 1
SERVIZIO CONSUMATORI
EROVERDE
NUM
800-215834
Page 2
18
19
21
20
22
23
24
11
14
17
16
10
36
35
32/A
33
34
9
36
12
8
7
31
6
25
26
5
4
3
27
1
28
29
30
13
2
37
38
35
33
32
15
38
interno_copertina 3-06-2004 18:23 Pagina 1
Page 3
1
RUSTRGRPENLFDGBI
INSTRUCTIONS FOR USE . . . . . . . . . . . . . . . . . . . . . .11
GEBRAUCHSANLEITUNG . . . . . . . . . . . . . . . . . . . . . . .21
MODE D’EMPLOI . . . . . . . . . . . . . . . . . . . . . . . . . . . .31
GEBRUIKSAANWIJZINGEN . . . . . . . . . . . . . . . . . . . . . .41
INSTRUCCIONES DE USO . . . . . . . . . . . . . . . . . . . . . .51
NSTRUÇÕES DE UTILIZAÇÃO . . . . . . . . . . . . . . . . . . . .61
KULLANMA KILAVUZU . . . . . . . . . . . . . . . . . . . . . . . .81
ISTRUZIONI PER L’USO . . . . . . . . . . . . . . . . . . . . . . . .2
. . . . . . . . . . . . . . . . . . . . . .71
. . . . . . .91
1_interno_I 3-06-2004 8:55 Pagina 1
Page 4
2
I
Gentile Cliente,
La ringraziamo per la preferenza che ci ha voluto accordare.
Il modello da Lei scelto fa parte della linea Vaporì, una gamma di prodotti ideali per la pulizia di tutta
la casa, grazie alla forza sgrassante e igienizzante del vapore. Una pulizia ecologica, che non richiede
l’uso di detergenti chimici.
La linea Vaporì è costituita da prodotti specifici per ogni esigenza:
Vaporì, pavimenti il primo spazzolone a vapore per un’igiene immediata e quotidiana dei pavimenti.
Vaporì Glass, pulisce a fondo vetri, specchi e tante altre superfici lavabili ogni giorno, senza fatica.
Vaporì Jet, la prima pistola a vapore con caldaia in pressione ideale per la pulizia rapida delle super-
fici difficili (sanitari, termosifoni, tapparelle).
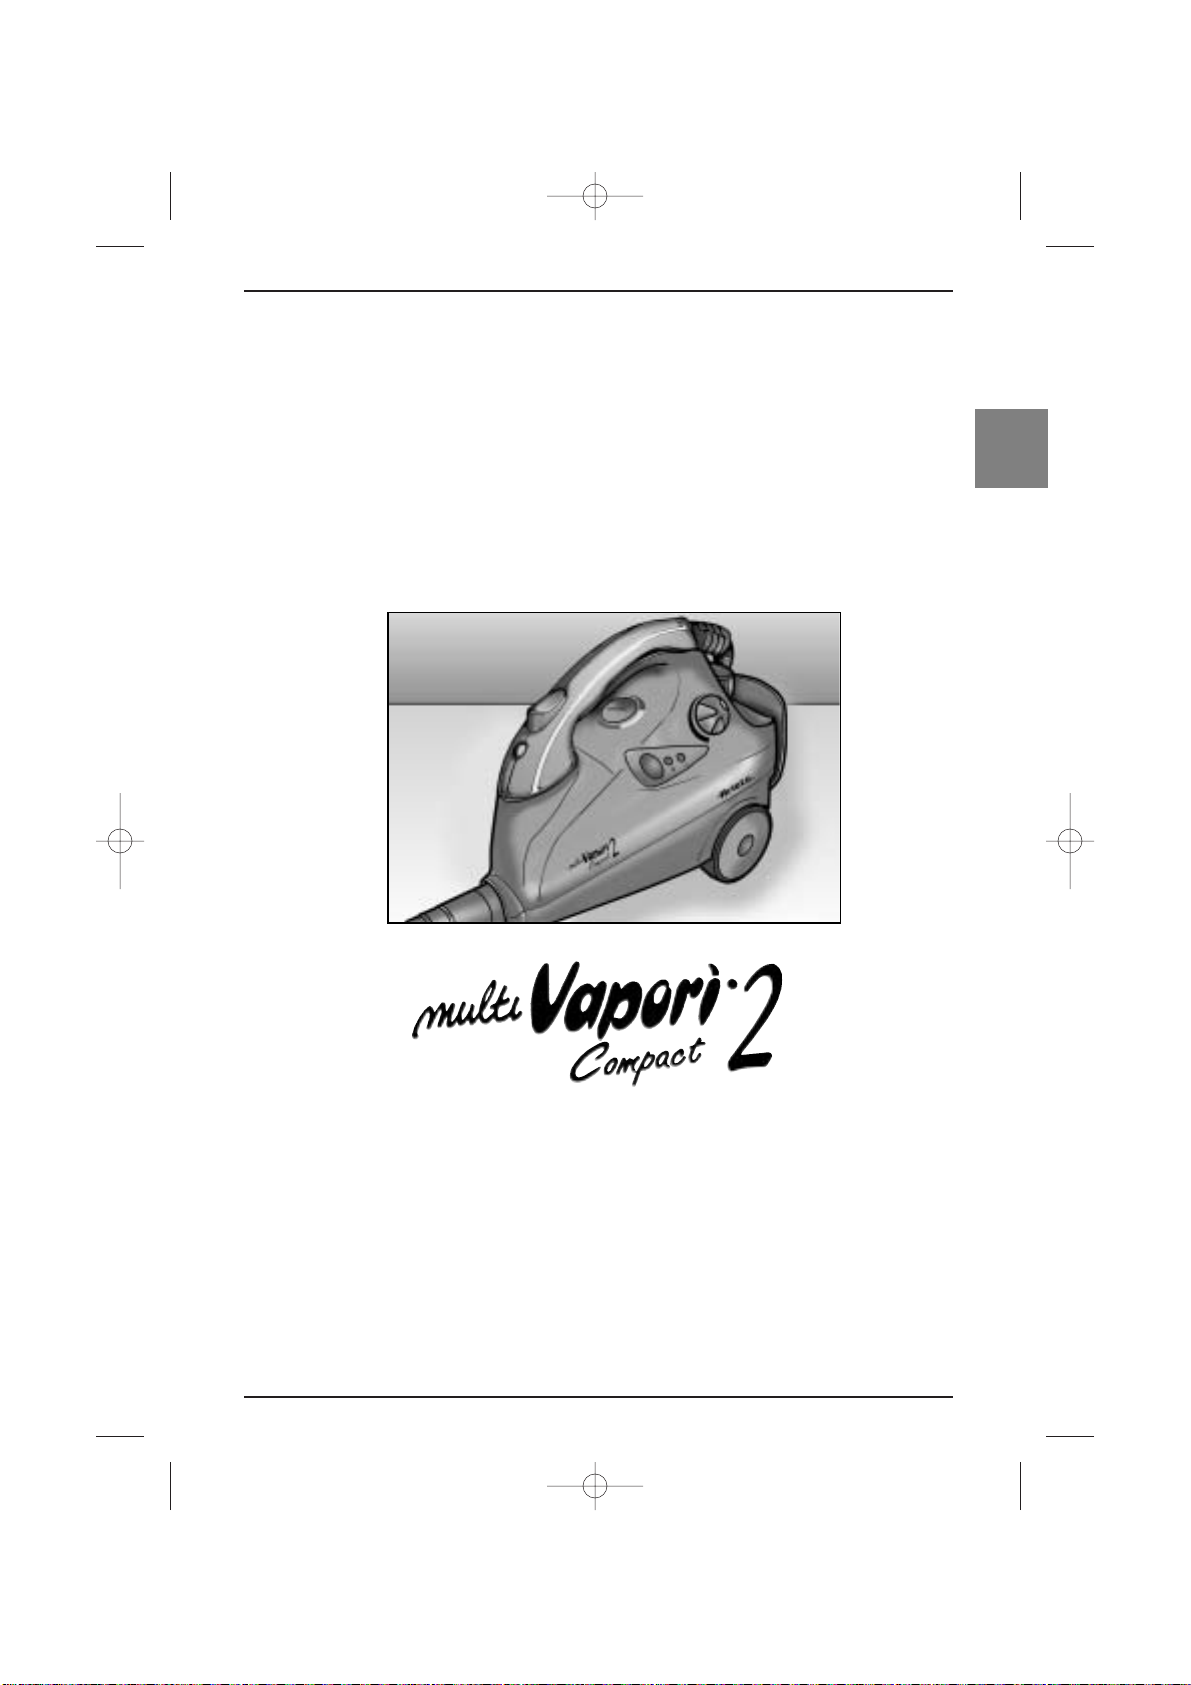
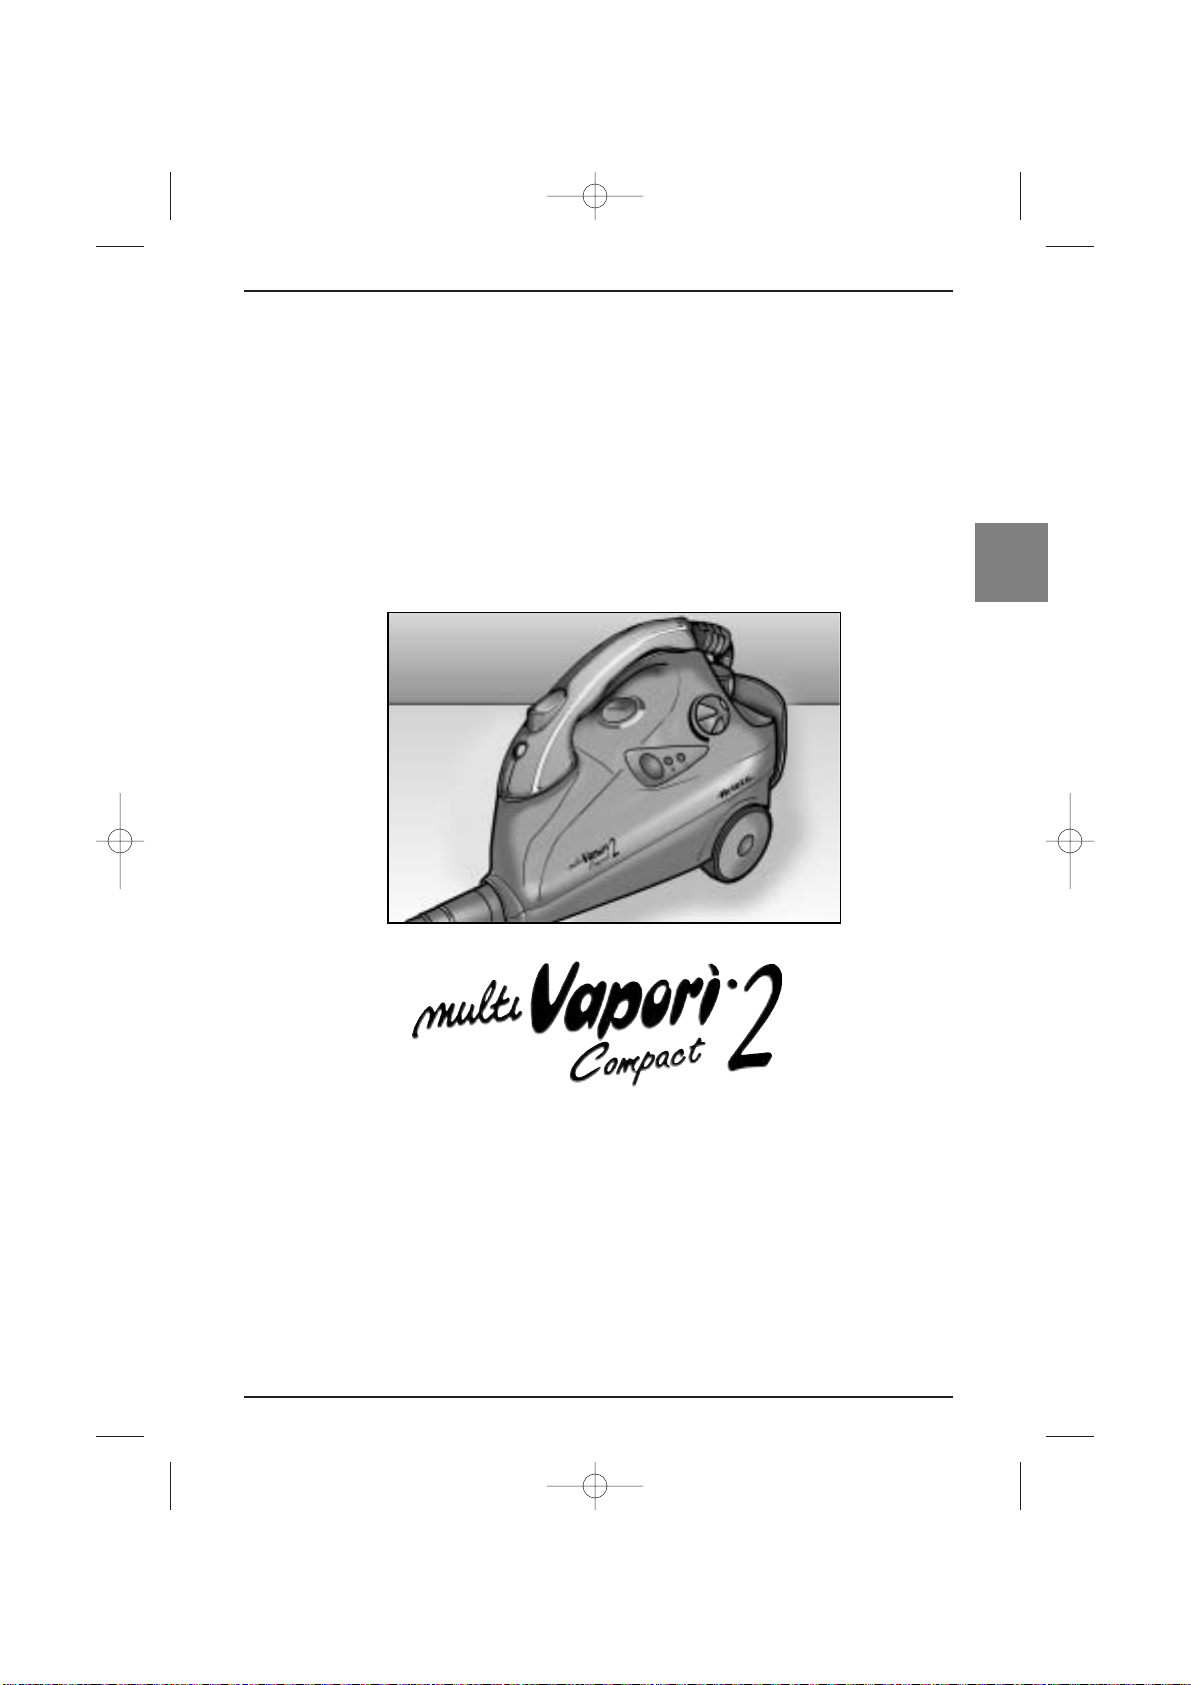
Multi Vaporì, prodotto versatile e compatto, con una dotazione completa di accessori, per igienizzare
in profondità tutte le superfici.
IMPORTANTE: PRIMA DELL’UTILIZZO LEGGERE ATTENTAMENTE LE ISTRUZIONI E AVVERTENZE
CONTENUTE NEL PRESENTE LIBRETTO E CONSERVARLE CON CURA.
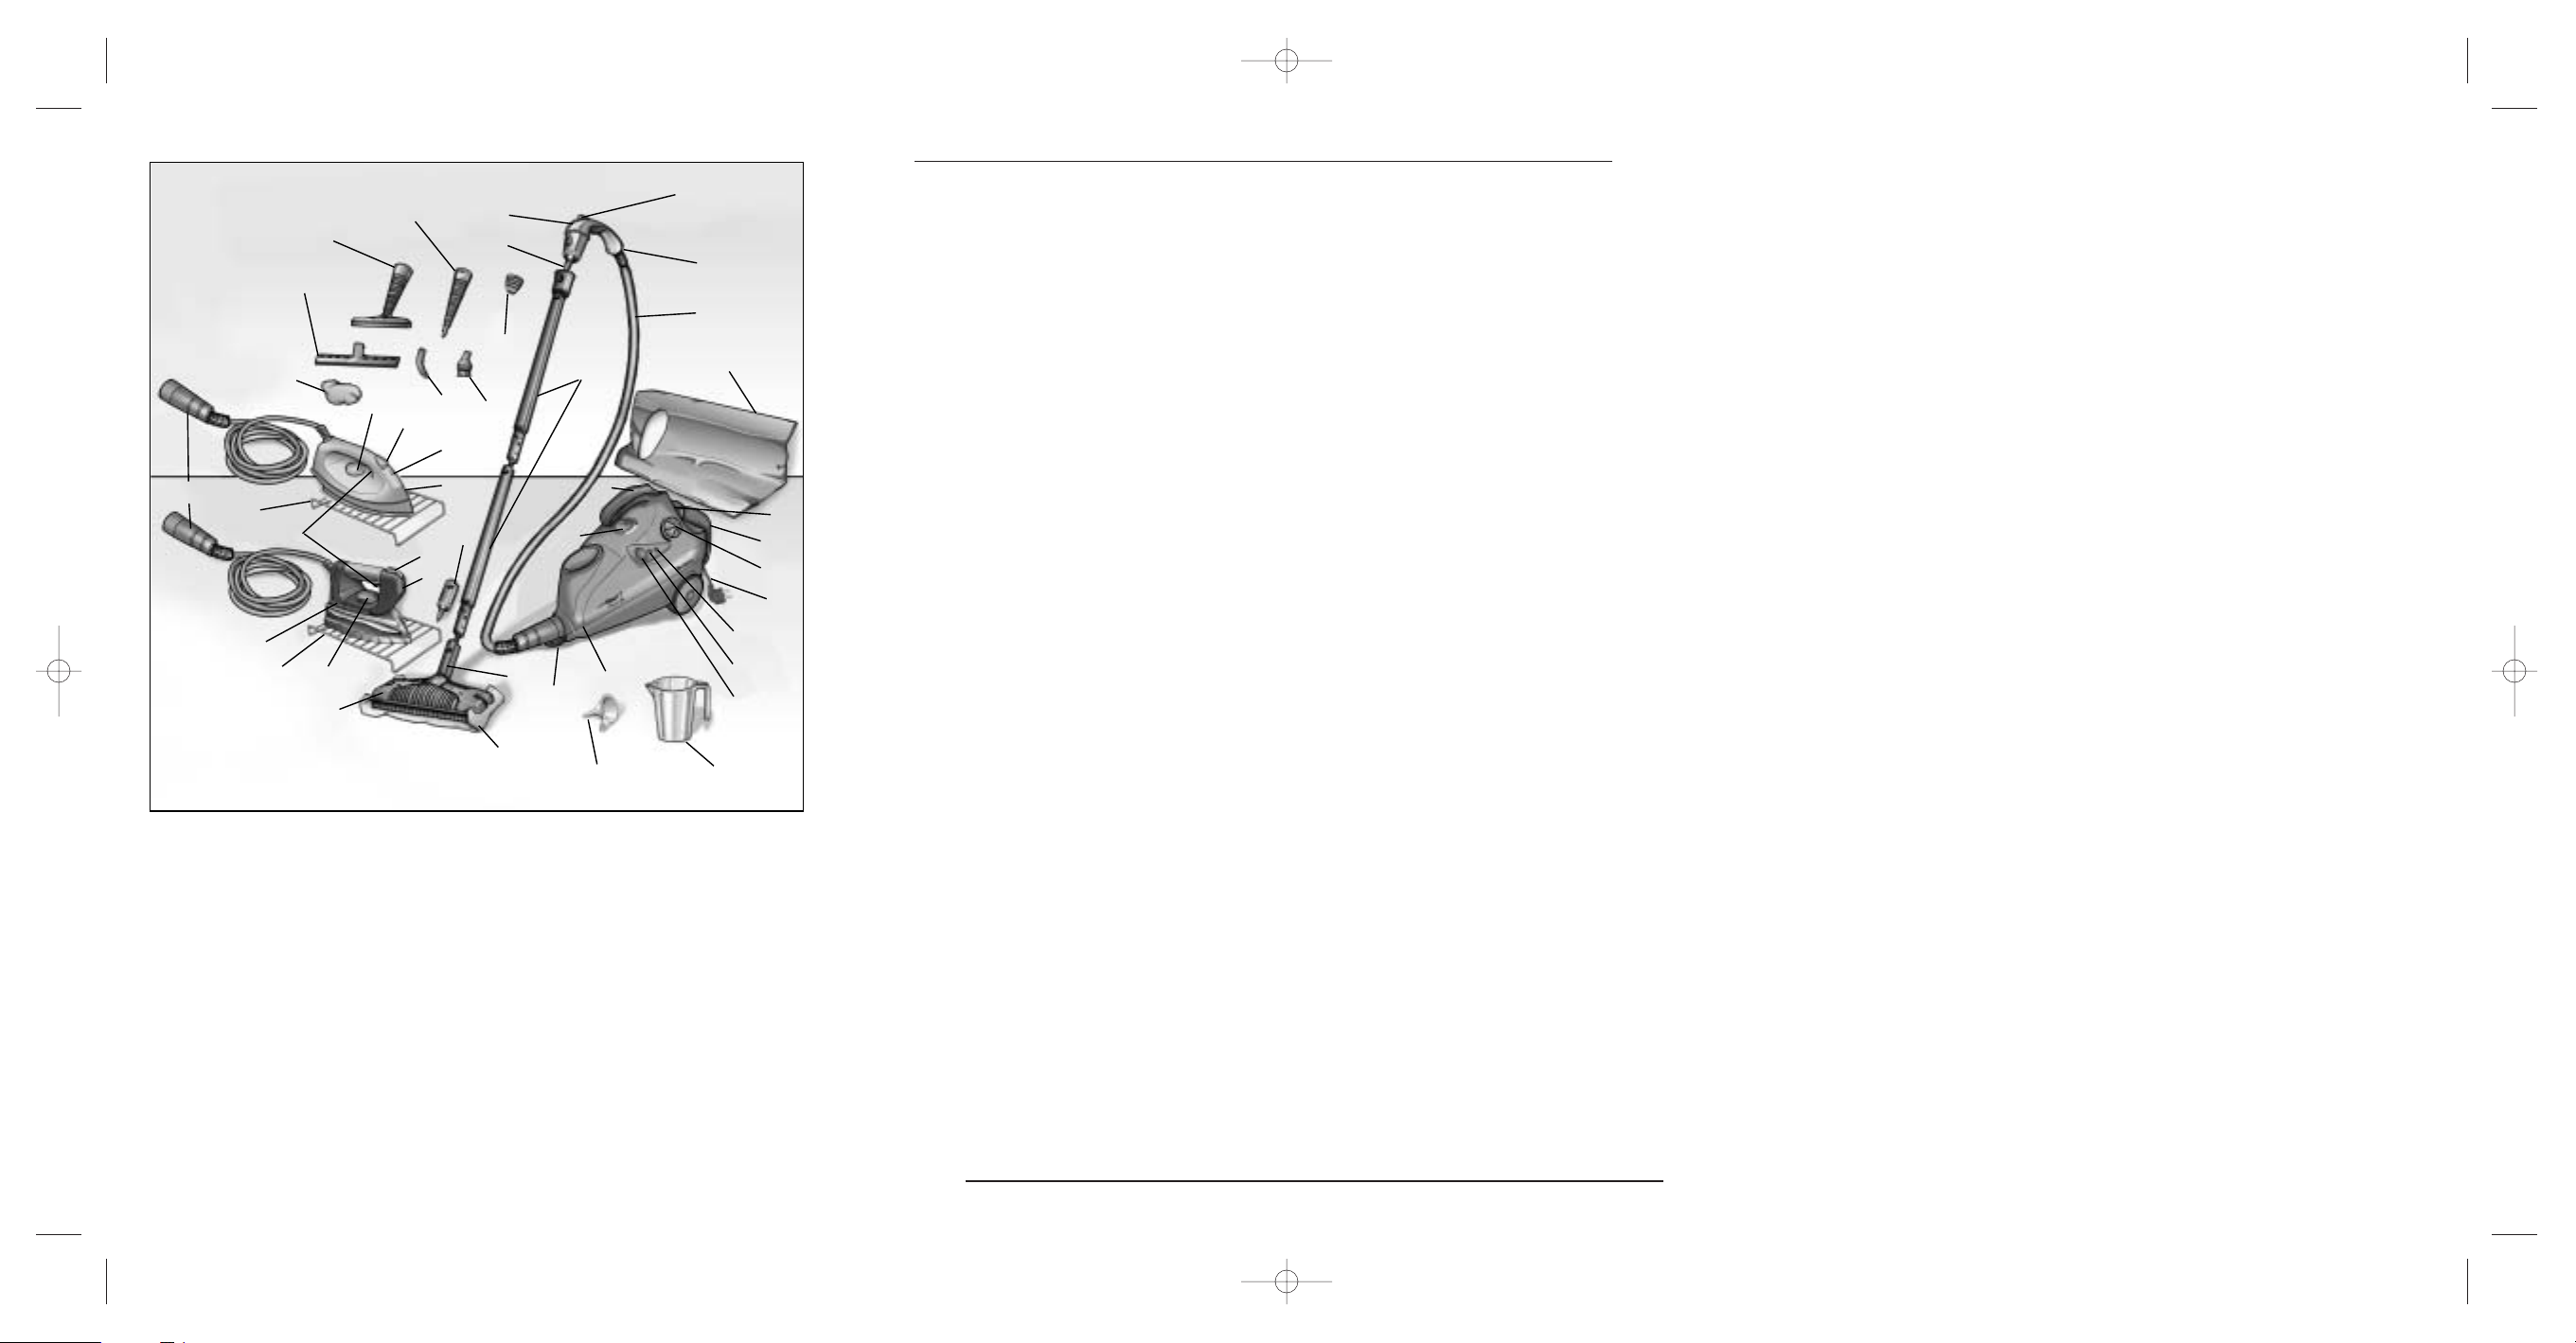
DESCRIZIONE DELL’APPARECCHIO
1 Maniglia
2 Tappo di sicurezza
3 Lampada spia arancione (pronto vapore)
4 Lampada spia verde (in linea)
5 Interruttore ON/OFF
6 Corpo dell’apparecchio
7 Panno per pavimenti
8 Spazzola pavimenti
9 Raccordo puliscivetro
10 Sacca
11 Tubi prolunga
12 Raccordo Spazzola
13 Cappuccio
14 Spazzolino rotondo
15 Beccuccio inclinato
16 Cuffia per tessuti
17 Tergivetro
18 Spazzola per tessuti
19 Beccuccio di prolunga
20 Ugello pistola
21 Cursore di sicurezza
22 Pulsante erogazione vapore
23 Pistola
24 Tubo flessibile sconnettibile
25 Misurino
26 Imbuto
27 Manometro
28 Manopola regolazione vapore
29 Avvolgicavo
30 Cavo di alimentazione
31 Sportellino
Ferro da stiro
32 Ferro da stiro (Solo per Mod. 4210/2)
32/A Ferro da stiro (Solo per Mod. 4210/5)
33 Pulsante vapore continuo
34 Pulsante vapore
35 Manopola termostato regolazione tempe-
ratura
36 Cavo di interconnessione
37 Spia luminosa di controllo
38 Griglia
1_interno_I 3-06-2004 8:55 Pagina 2
Page 5

AVVERTENZE IMPORTANTI
LEGGERE ATTENTAMENTE QUESTE ISTRUZIONI
•L’apparecchio è dotato di un termostato che limita la temperatura, di un termofusibile e di un tappo
di sicurezza. La sua costruzione è conforme alle norme europee relative agli elettrodomestici.
•Prima di collegare l’apparecchio alla rete di alimentazione, controllate che la tensione indicata sulla
targhetta corrisponda a quella della rete locale.
•Collegare sempre l’apparecchio ad una presa collegata a terra.
•Non lasciare incustodito l’apparecchio mentre è collegato alla rete elettrica.
•Non dirigere mai il getto di vapore verso persone, animali, piante oppure verso apparecchiature che contengono parti elettriche (es: interno dei forni).
•Non immergere l’apparecchio in acqua o in altri liquidi.
• Spegnere sempre l’apparecchio mediante l’interruttore (5) e staccare la spina dalla presa di alimentazione durante i rifornimenti.
•Non lasciare l’apparecchio alla portata dei bambini. Quando l’apparecchio non viene utilizzato bloccare sempre il pulsante di erogazione vapore tramite l’apposito cursore di sicurezza (21).
•Non aggiungere mai prodotti disincrostanti, aromatici, alcolici o detergenti all’interno del prodotto,
in quanto potrebbero danneggiarlo o renderlo meno sicuro.
ATTENZIONE: pericolo di scottature.
•Non toccare le superfici calde durante l’uso del prodotto.
Lasciare raffreddare gli accessori prima di sostituirli.
• NON APRIRE IL TAPPO DI SICUREZZA (2) DURANTE L’USO.
•ATTENZIONE: prima di svitare il tappo (2) procedete come segue:
- spegnere l’apparecchio mediante l’interruttore (5);
- far scaricare la pressione premendo il pulsante (22);
- scollegare il cavo di alimentazione dalla presa di corrente;
- svitare lentamente il tappo (2) ed attendere alcuni secondi prima di averlo completamente
svitato.
•Al primo utilizzo o dopo una lunga pausa, svuotare l’acqua in un recipiente.
•Non usare l’apparecchio se risulta danneggiato. Tutte le riparazioni, compresa la sostituzione del cavo
di alimentazione, devono essere eseguite solamente dal Centro Assistenza Ariete o da tecnici autorizzati Ariete, per prevenire ogni rischio.
•
Prima di utilizzare il prodotto assicurarsi che gli oggetti, le superfici ed i tessuti da
trattare siano resistenti o compatibili con l'elevata temperatura del vapore.
In particolare su pavimenti in cotto trattato, superfici di legno e tessuti delicati, quali
seta o velluto, si consiglia di consultare le istruzioni del fabbricante ed eseguire una
prova su una parte nascosta o su un campione.
3
I
1_interno_I 3-06-2004 8:55 Pagina 3
Page 6
4
I
•Si consiglia l’utilizzo di acqua del rubinetto o in alternativa acqua demineralizzata.
•ATTENZIONE: NON UTILIZZARE LA SPAZZOLA TERGIVETRO SE LA SUPERFICIE DA TRATTARE È
FREDDA. L’ eventuale sbalzo termico potrebbe provocarne la rottura.
•Questo prodotto è stato costruito per uso domestico e non per uso industriale.
•Questo apparecchio dovrà essere destinato esclusivamente all’uso per il quale è stato concepito e nel
modo indicato nelle istruzioni d’uso. Ogni altro utilizzo è da considerarsi improprio e quindi pericoloso.
Il costruttore non può essere considerato responsabile per eventuali danni derivanti da usi impropri
o errati.
•L’apparecchio è conforme alla Direttiva CEE 89/336 relativa alla compatibilità elettromagnetica.
CONSERVARE QUESTE ISTRUZIONI
MODALITÀ D’USO
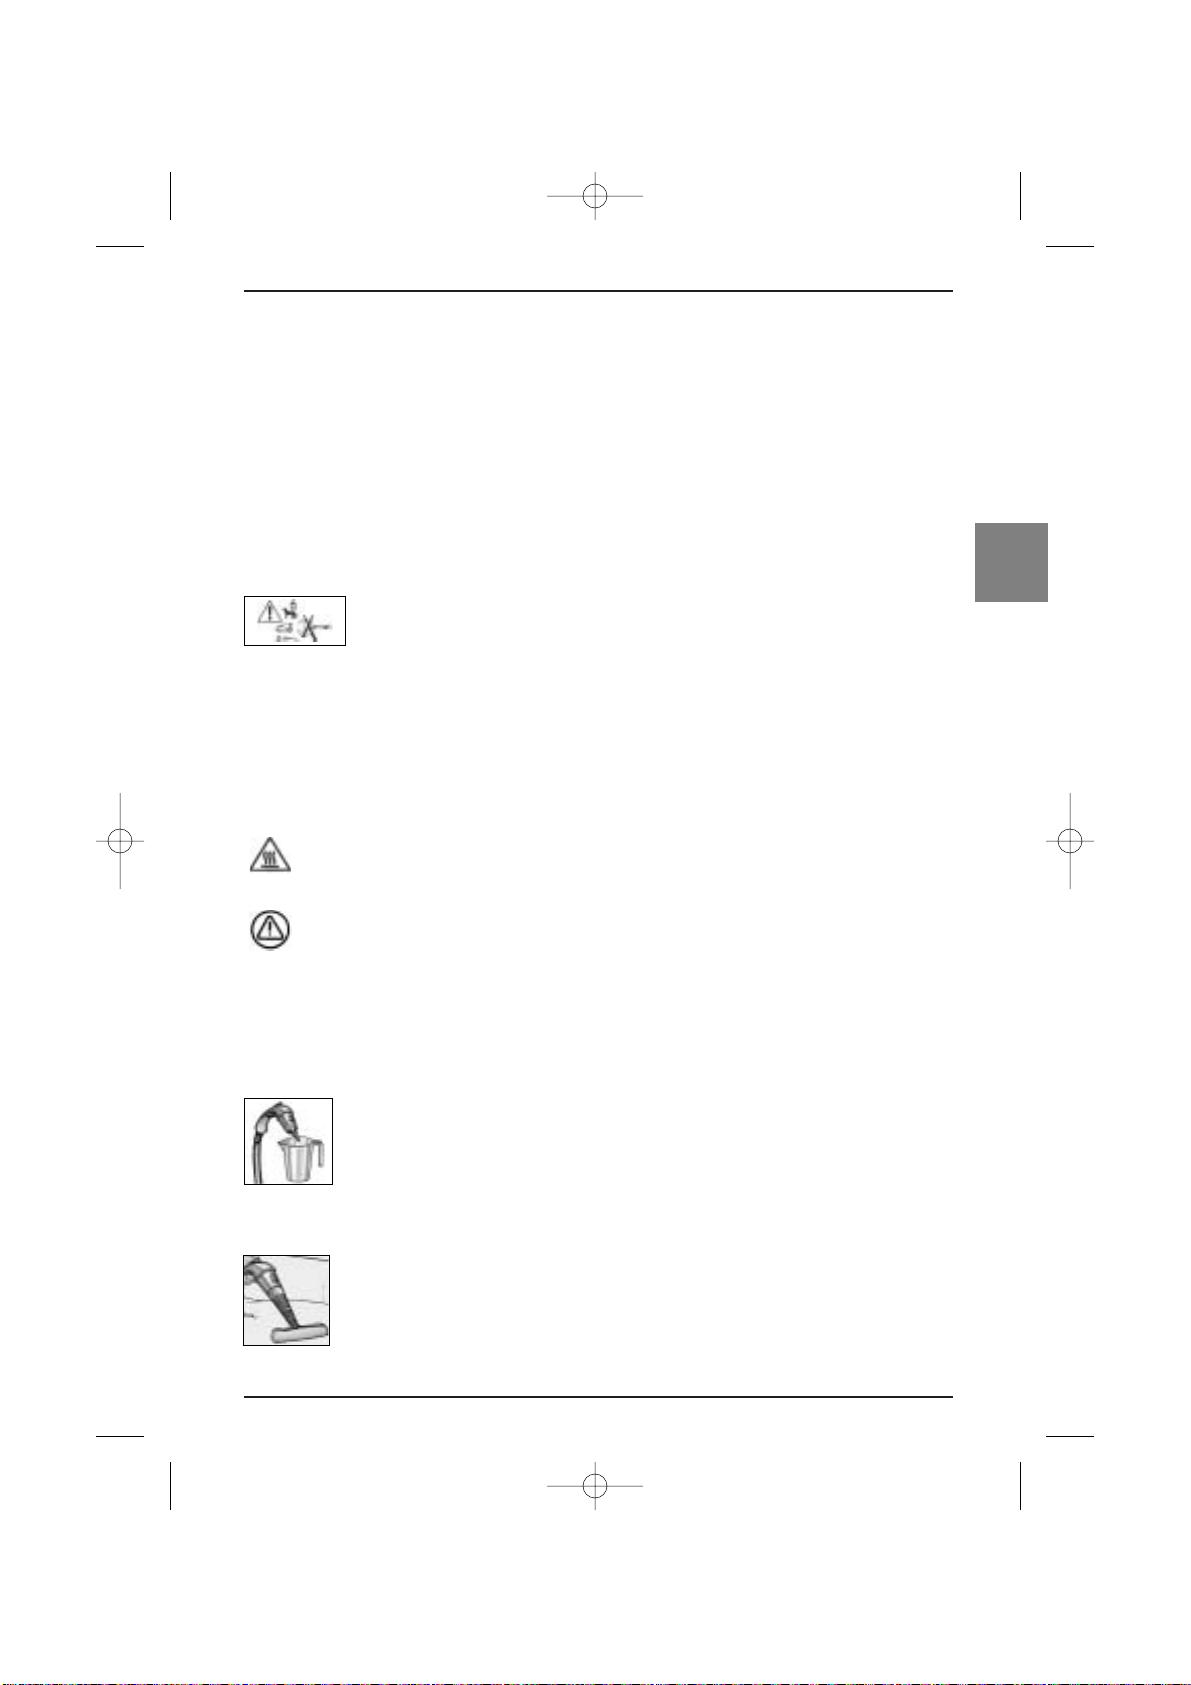
Riempimento del serbatoio caldaia prima dell’uso:
Non collegare la spina del cavo di alimentazione nella presa di corrente.
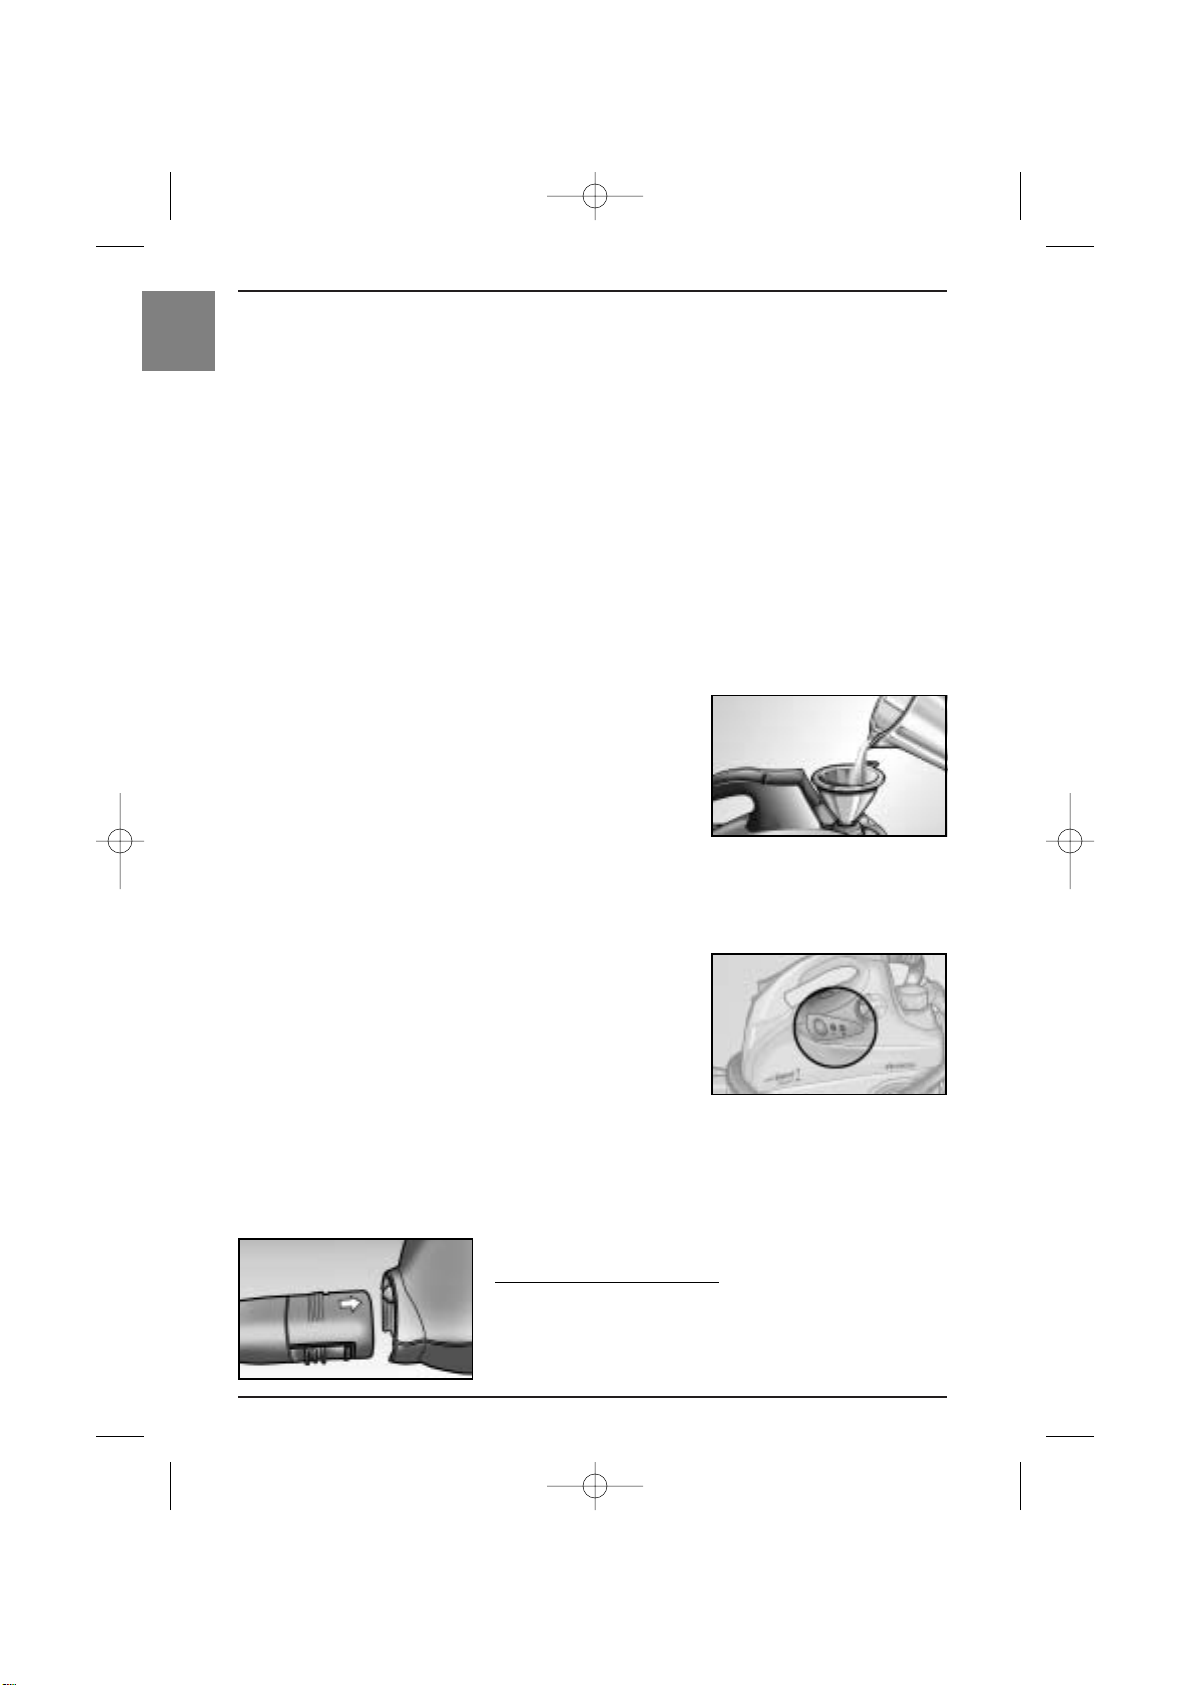
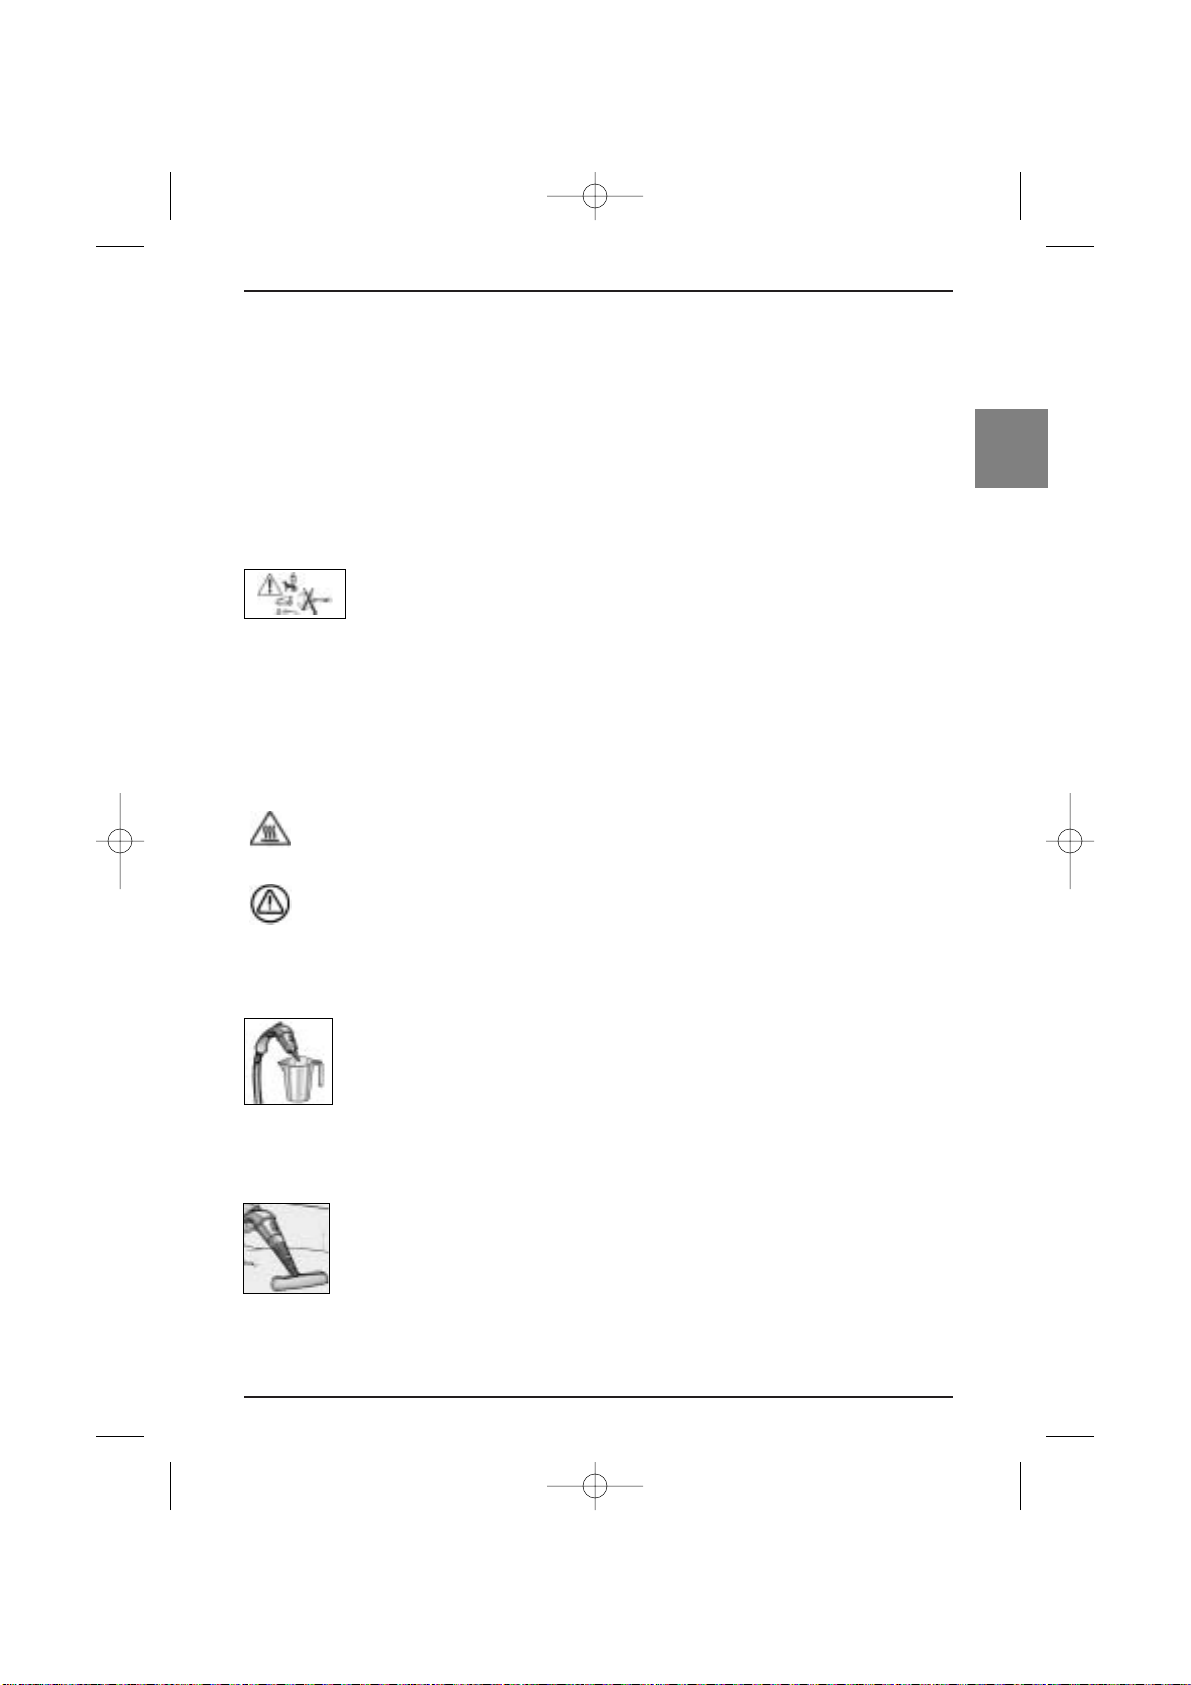
Svitare il tappo di sicurezza (2) e per mezzo dell’imbuto (26) versare nella caldaia due misurini (25) d’acqua, riempiti fino al livello
massimo (Fig. A). Riavvitare il tappo di sicurezza (2).
NON SVITARE MAI IL TAPPO DEL SERBATOIO PRIMA DI ESSERSI ASSICURATI CHE L’APPARECCHIO SIA SPENTO E SCOLLEGATO DALLA PRESA DI CORRENTE.
ACCENSIONE DELL’APPARECCHIO
Per accendere l’apparecchio inserire la spina del cavo di alimentazione nella presa di corrente.
Premere l’interruttore di accensione (5), la lampada spia verde (4)
e la lampada spia arancione (3) si accenderanno (Fig. B). Appena
la lampada spia arancione (3) si spegne l’apparecchio è pronto per
l’uso. Per impedire l’attivazione accidentale dell’erogazione vapore
spostare all’indietro il cursore di sicurezza (21) in posizione ••.
Attraverso la manopola Regola Vapore (28), è possibile dosare la quantità di vapore. Questo consente di
utilizzare l’apparecchio su ogni tipo di superficie o di tessuto.
APPLICAZIONE DEI VARI ACCESSORI
Tubo flessibile sconnettibile
PRIMA DI INSERIRE E DISINSERIRE IL TUBO FLESSIBILE NELLA
PRESA DEL CORPO MACCHINA SPEGNERE L’APPARECCHIO
DALL’APPOSITO INTERRUTTORE E SCOLLEGARE LA SPINA DI
Fig. A
Fig. B
Fig. C
1_interno_I 3-06-2004 8:55 Pagina 4
Page 7
5
I
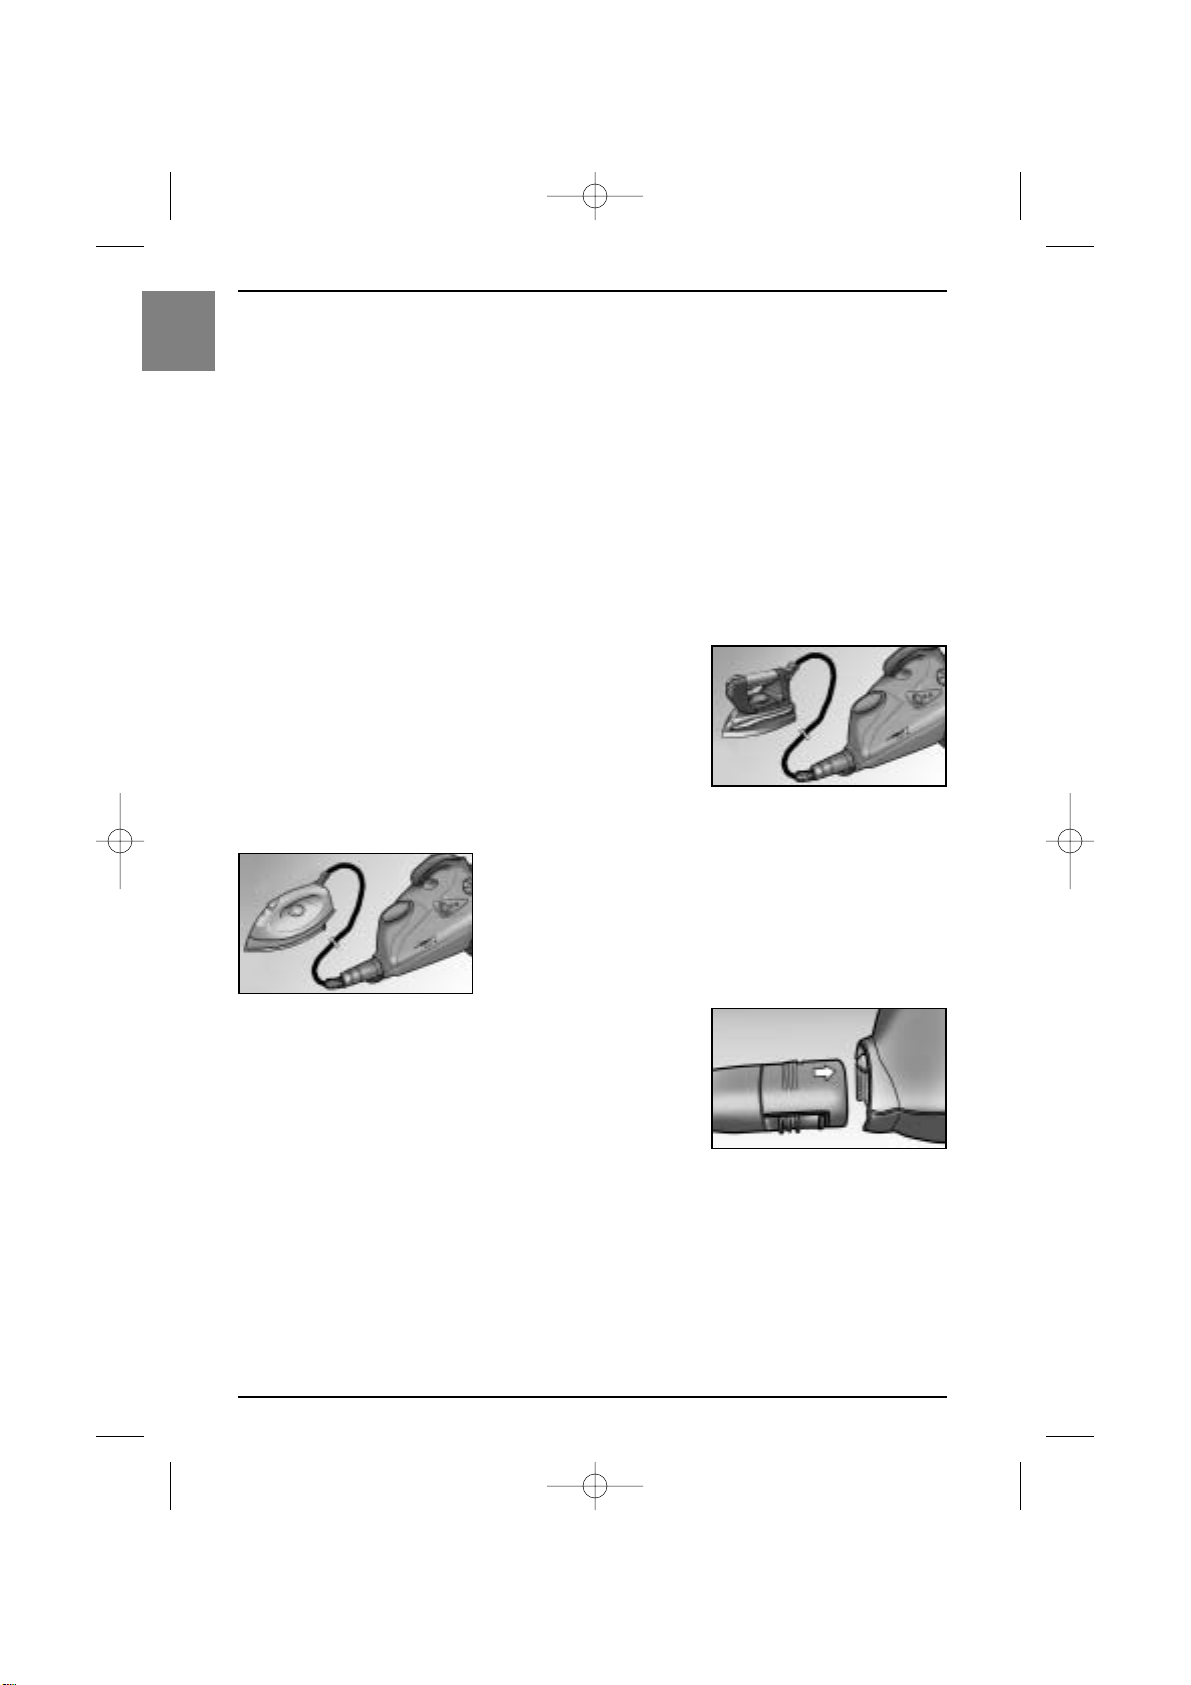
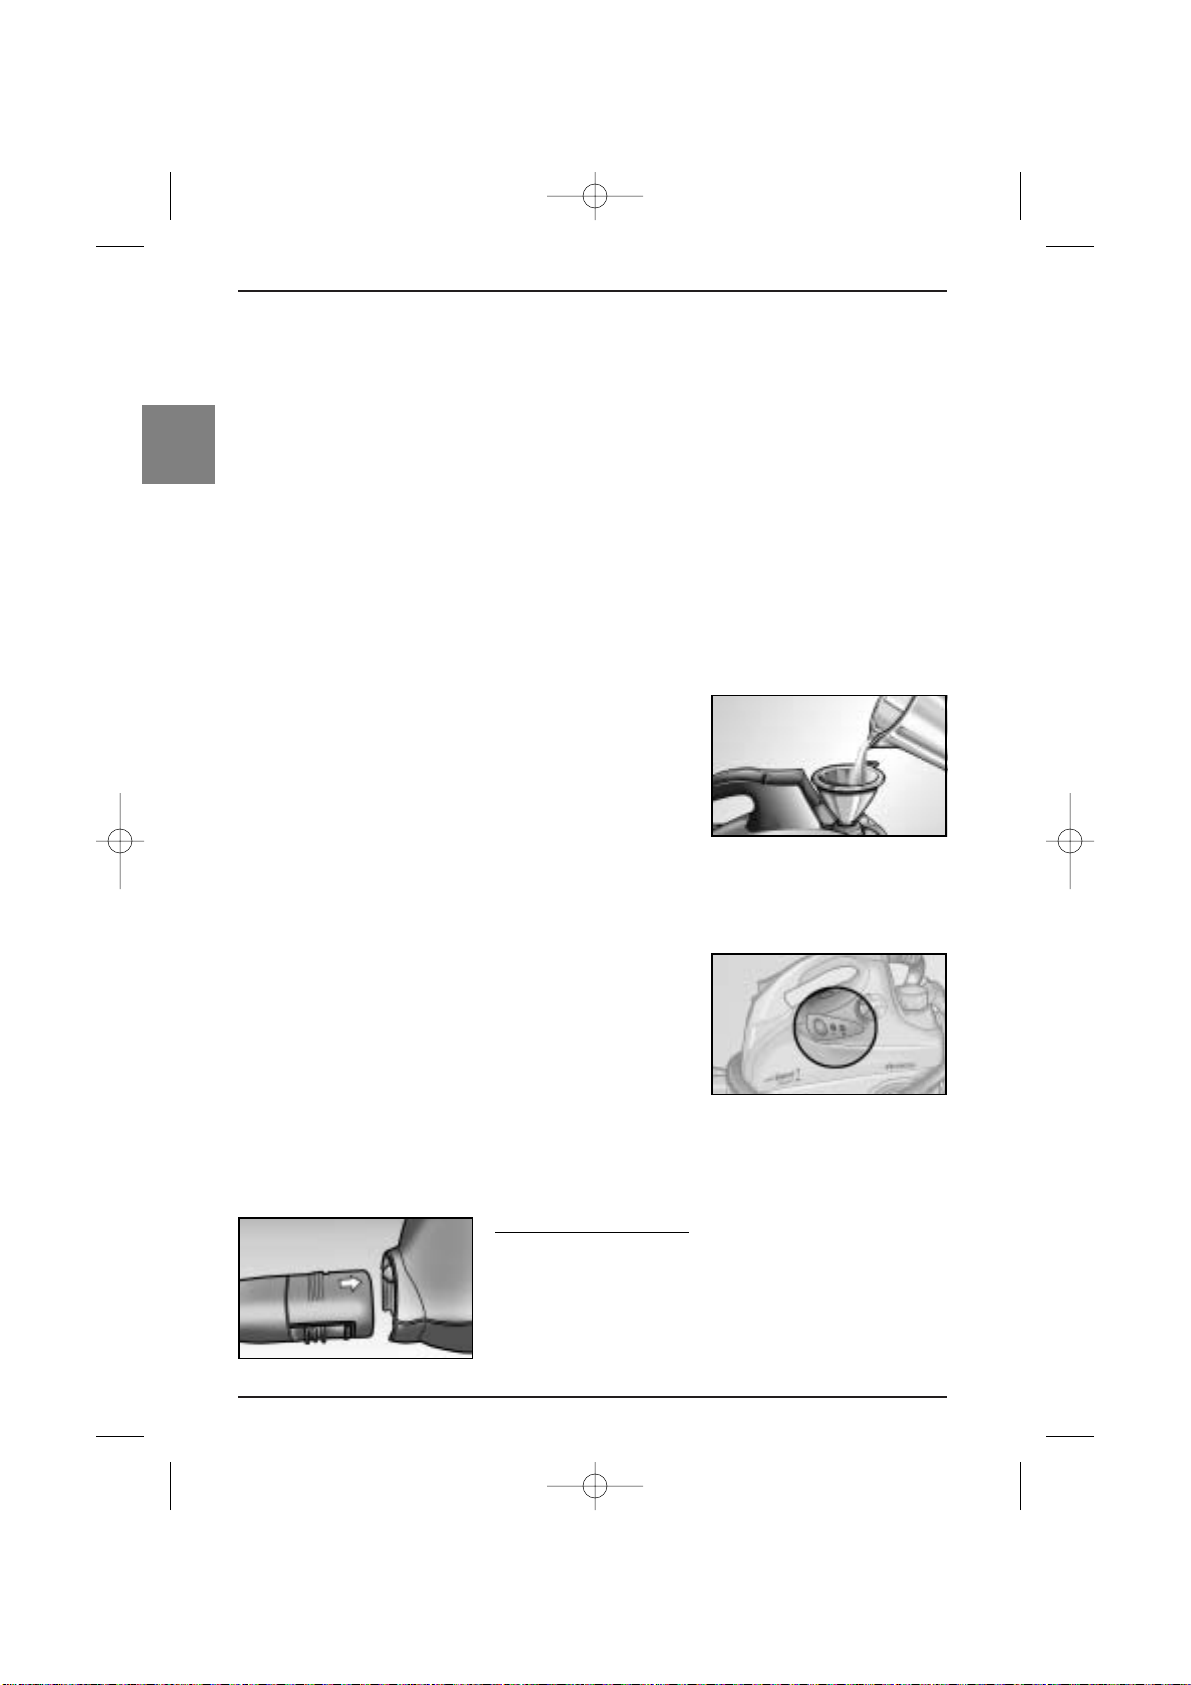
ALIMENTAZIONE. Prima di inserire la spina del tubo flessibile (24)
nella presa del corpo macchina (6), aprire lo sportellino (31)
facendo attenzione che la freccia della spina del tubo flessibile sia
rivolta verso l’alto come indicato in figura C, ed esercitando una
leggera pressione sulle molle poste al lato della presa.
Inserire la spina di alimentazione dell’apparecchio, ed azionare l’in-
terruttore.
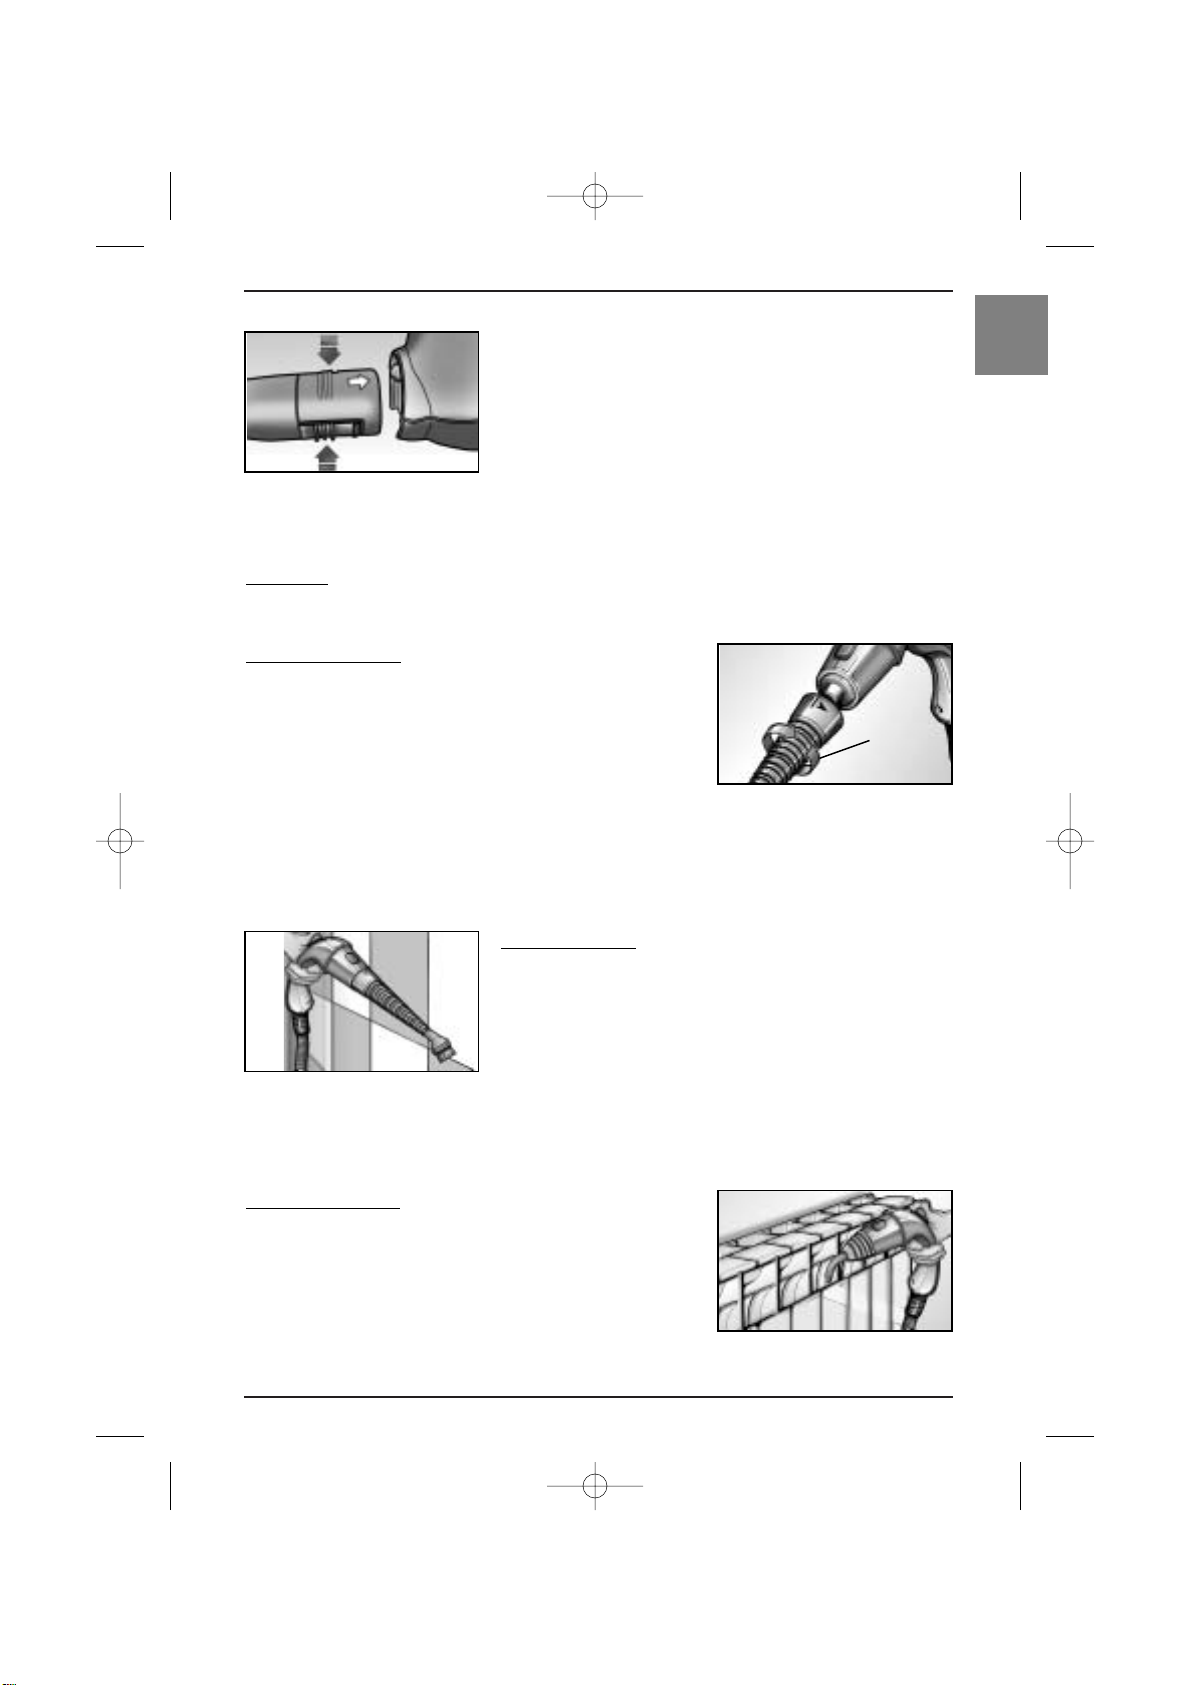
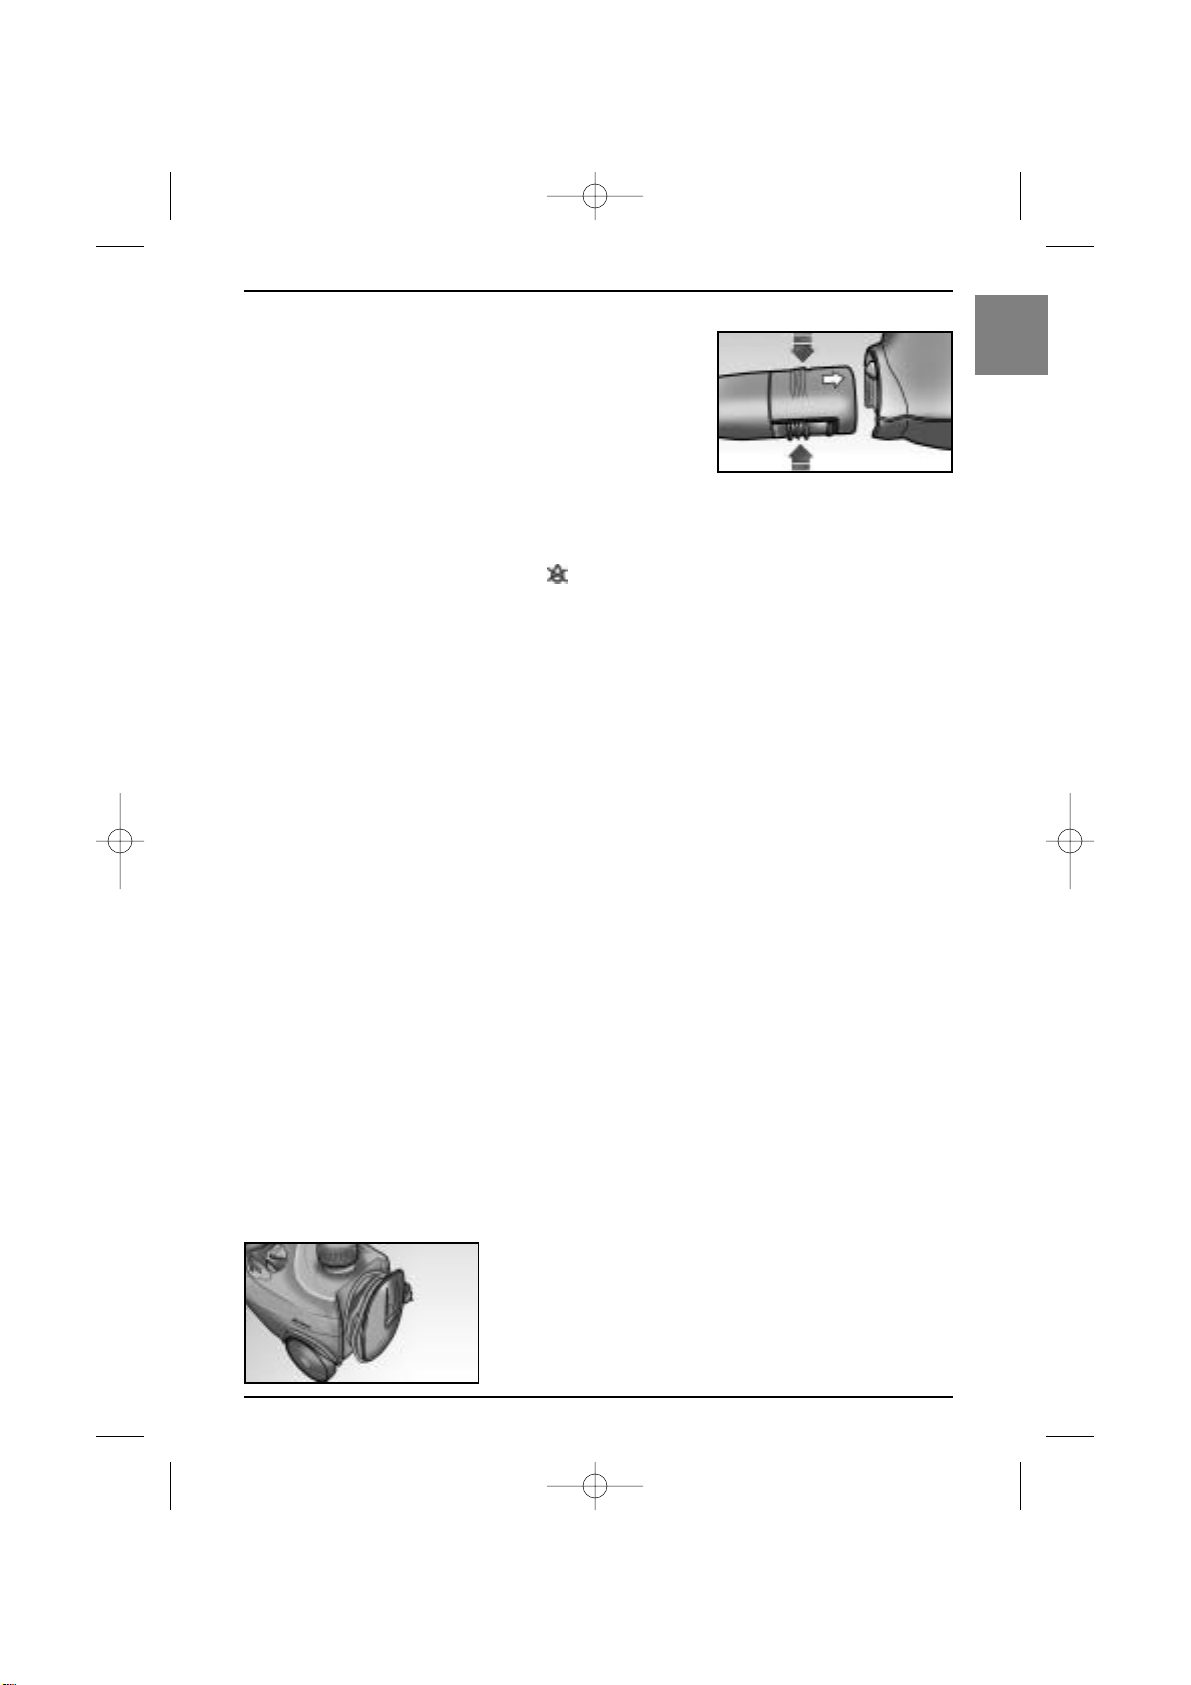
Per l’estrazione del tubo flessibile premere le due alette laterali e tirare come indicato in fugura D.
Cappuccio
Il cappuccio (13) si può applicare all’ugello pistola (20) per proteggere l’estremità dell’ugello stesso.
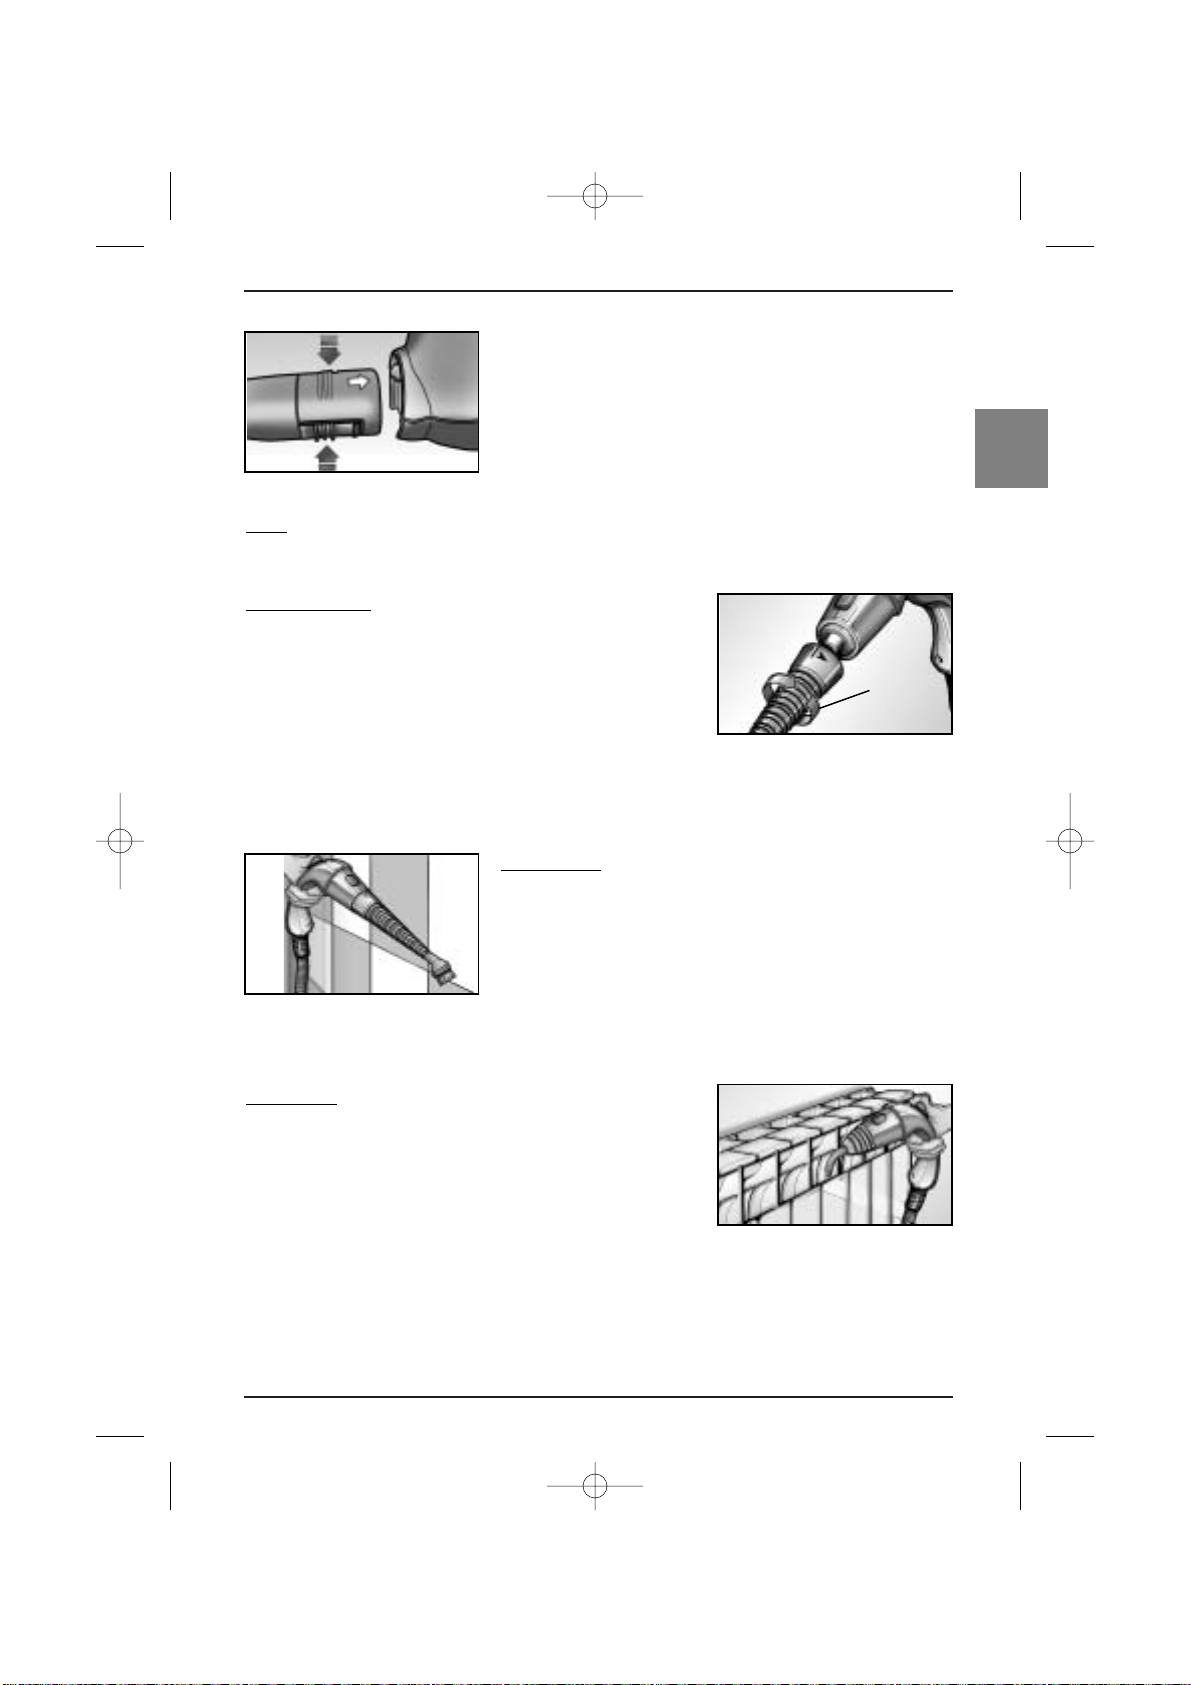
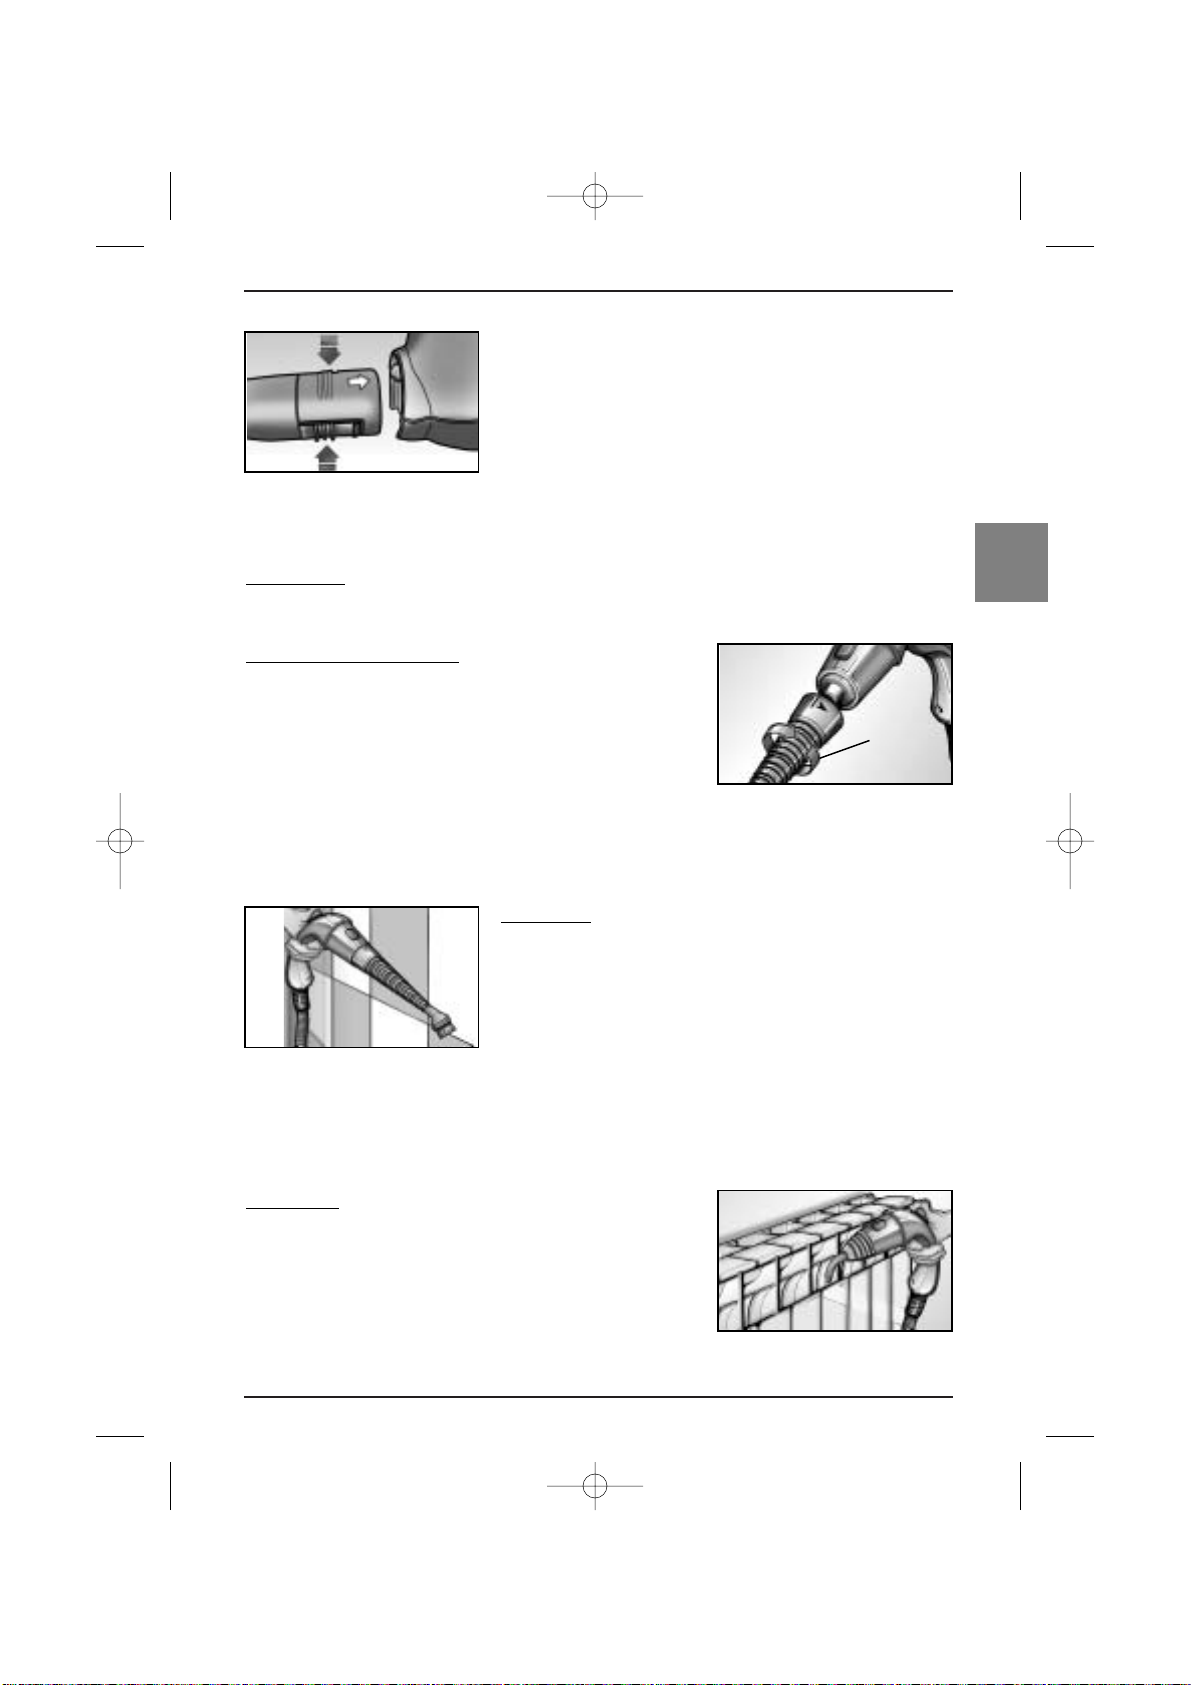
Beccuccio prolunga
Inserire l’accessorio spingendolo fino alla parte fissa della pistola
e allineando la linea incisa sul beccuccio con la linea posta sulla
pistola (Fig. E).
Dopodichè ruotare il beccuccio di 90° nel senso (orario) indicato
dalla freccia (B). In questo modo l’accessorio rimane fisso nella
posizione di blocco.
Con questo accessorio è possibile ottenere una pulizia veloce, dove normalmente si annida lo sporco più
ostinato, come intorno al piano cottura, dove grazie al vapore possiamo sciogliere ogni untuosità, in
modo naturale e senza aggiunta di detergenti chimici.
Spazzolino tondo
Questo accessorio da applicare sul beccuccio iniettore, aiuta a
sgretolare le incrostazioni più resistenti, come quelle che si formano sui fornelli del piano cottura.
Può essere utilizzato per la pulizia di sanitari, lavelli, griglie di cottura, doccia o vasche da bagno, eliminando ogni traccia di calcare
(Fig. F).
(Presso i centri Assistenza Ariete è possibile acquistare singolarmente gli spazzolini in vari colori, per utilizzarli nei diversi ambienti).
Beccuccio inclinato
Si può applicare questo accessorio sul beccuccio di prolunga
oppure sull’ugello pistola (Fig. G). Utile per raggiungere e igienizzare punti difficili, quali lo sporco che si annida su radiatori, persiane, sanitari, eliminandolo in modo semplice e veloce.
Fig. D
Fig. E
Fig. F
Fig. G
B
1_interno_I 3-06-2004 8:55 Pagina 5
Page 8
6
I
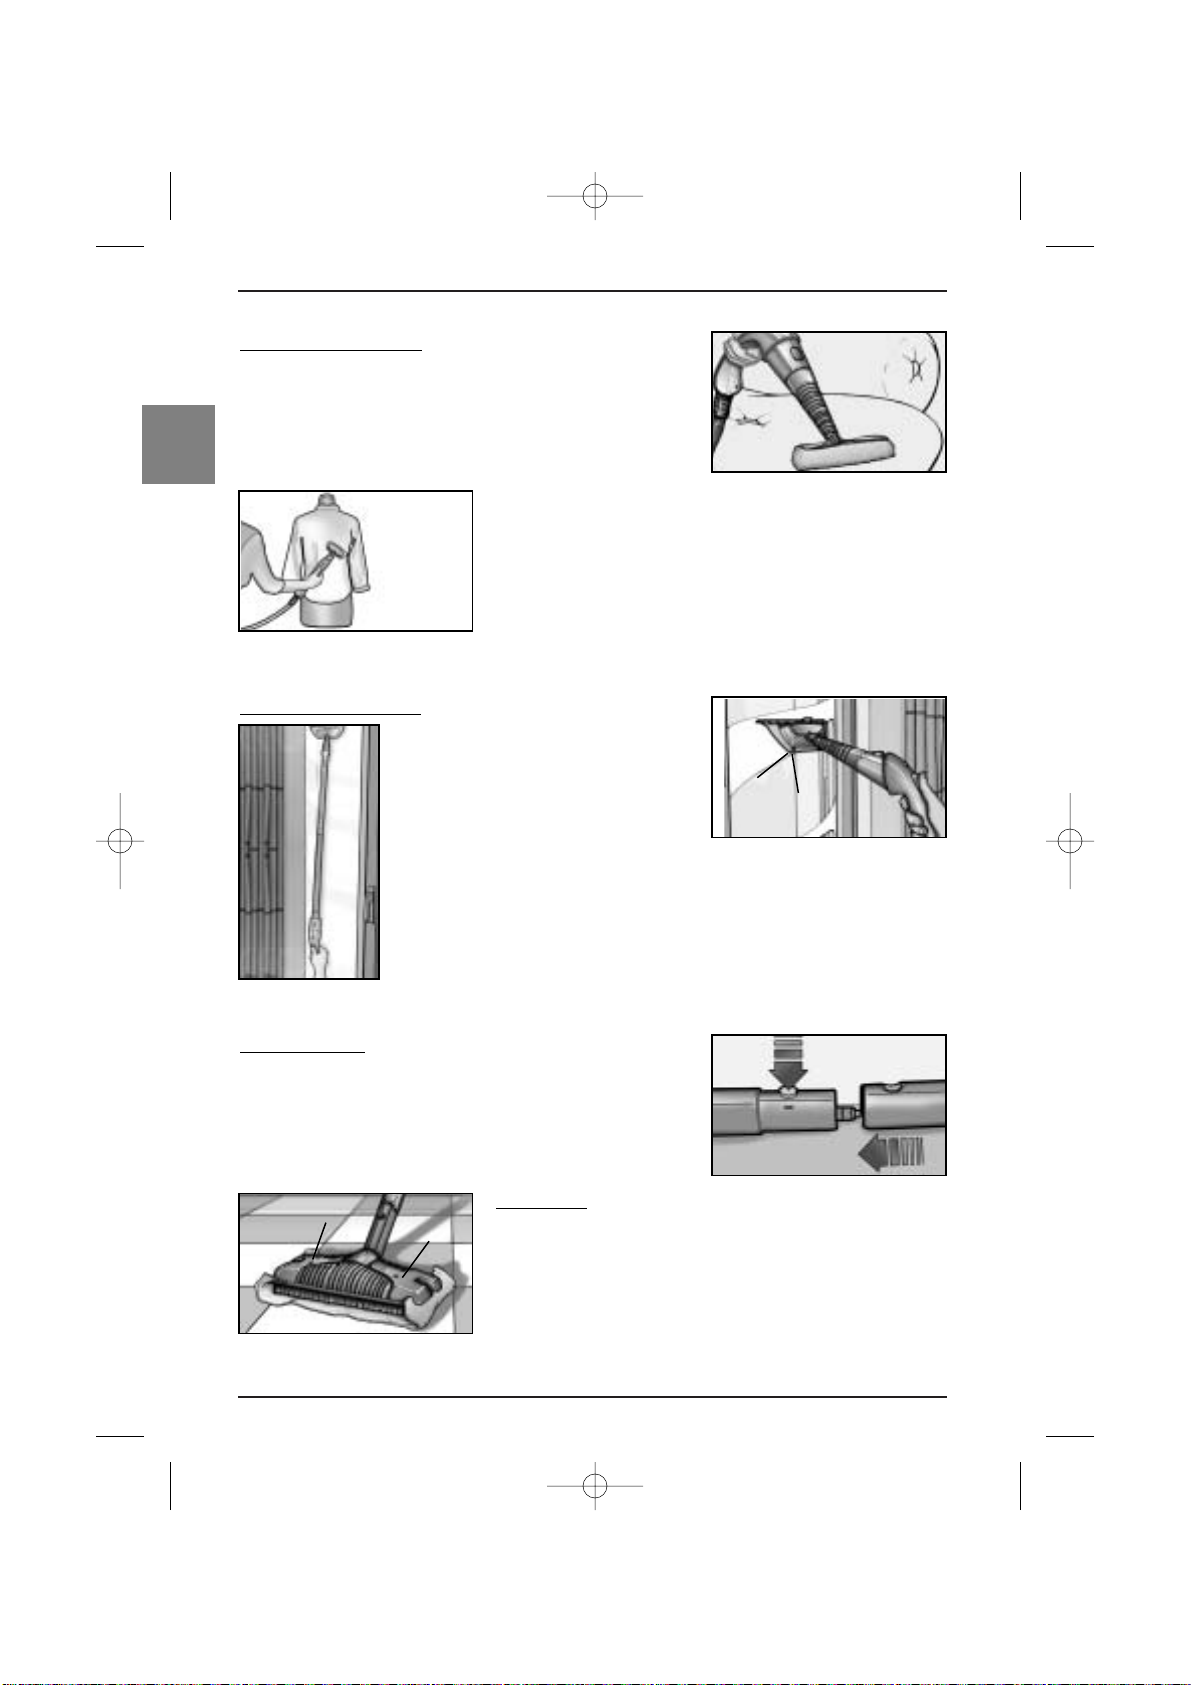
Spazzola tessuti con panno
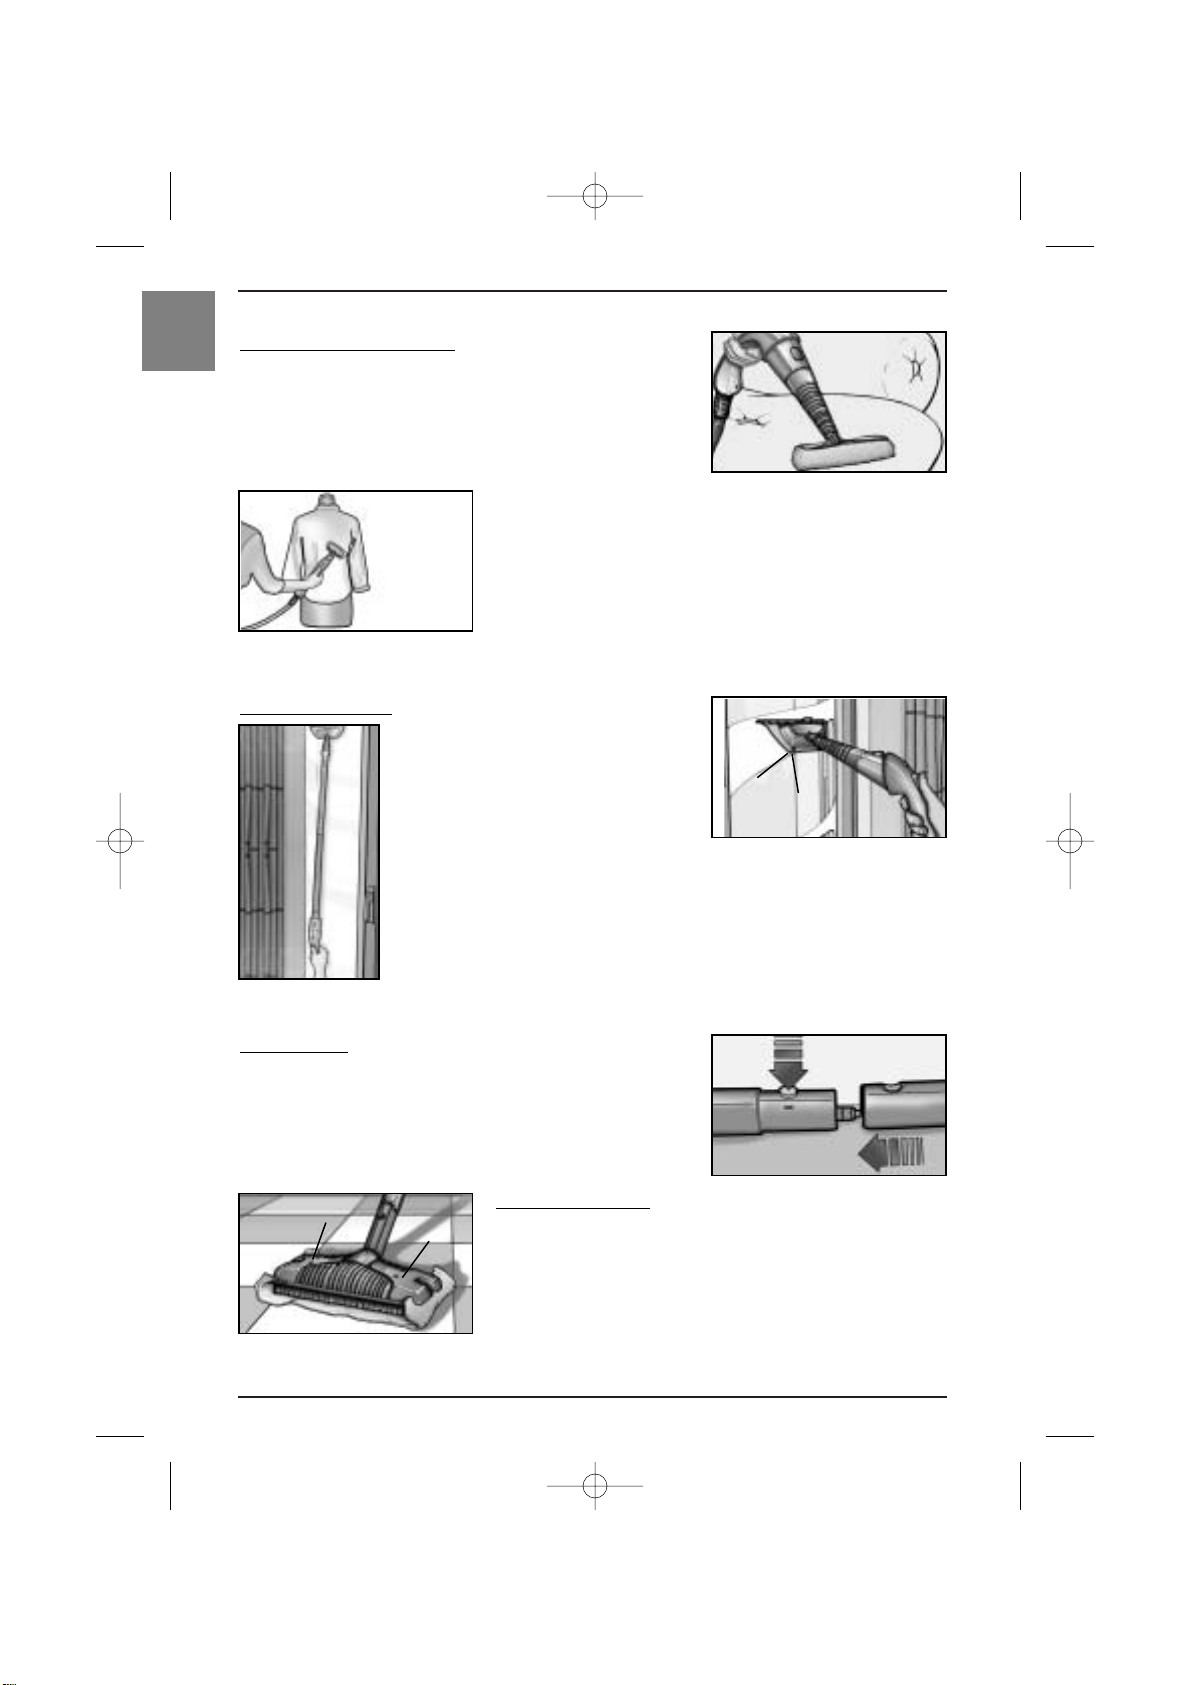
La spazzola per tessuti (18) si può montare sull’ugello pistola (20).
Utilizzando la pratica cuffia, è possibile utilizzare la spazzola, nella
pulizia quotidiana di divani, poltrone (Fig. H), ma anche in camera
da letto, su coperte, materassi e cuscini.
La spazzola consente anche di rinfrescare i tessuti (Fig. I), togliendo ogni traccia di piega. In ogni caso si consiglia sia al primo utilizzo che durante l’uso di scaricare la condensa di vapore in un
recipiente.
E’ possibile regolare la fuoriscita di vapore, per mezzo dell’apposita manopola (28) per adattare il flusso ad ogni tipo di tessuto. (Si
raccomanda di leggere attentamente le istruzioni del fabbricante).
Spazzola tergivetro
Alla spazzola per tessuti (18) si può applicare il tergivetro (17), inserendo i ganci
(L1) posti ai lati dello stesso, dentro le
linguette (L2) della spazzola (Fig. L) e
unendo i due pezzi (Fig. M).
Con la spazzola tergivetri, ogni vetrata ed ogni specchio riacquisterà brillantezza. E’ facile da usare anche sui vetri dei Box doccia.
Utilizzando le apposite prolunghe (11) con la spazzola tergivetro, è possibile raggiungere punti difficili e alti, come grandi vetrate o finestre alte. ATTENZIONE:
NON UTILIZZARE LA SPAZZOLA TERGIVETRO SE LA SUPERFICIE DA TRATTARE È FREDDA. L’ eventuale sbalzo termico potrebbe provocarne la rottura.
Tubi prolunga
Possono essere utilizzati per raggiungere le superfici più alte. Si
utilizzano con la spazzola tessuti, con la spazzola tergivetri, o con
la spazzola pavimenti (Fig. N).
Spazzola pavimenti
Questo accessorio si utilizza con le prolunghe (11) ed è dotato di
pratiche pinze reggipanno (G1) in grado di ospitare ogni tipo di
panno lavabile in lavatrice, per un efficace e veloce pulizia di ogni
superfice.. Per applicare il panno poggiarvi sopra la spazzola,
dopodichè tirare una dopo l’altra le estremità del panno sotto le
mollette di arresto (Fig. O).
Fig. H
Fig. I
Fig. L
Fig. M
Fig. N
Fig. O
L1
L2
G1
G1
1_interno_I 3-06-2004 8:55 Pagina 6
Page 9
7
I
Panno
Viene fornito 1 panno pavimenti (7). Grazie alle pratiche pinze reggipanno potrete inserire sulla spazzola
ogni tipo di panno, purchè resistente al vapore.
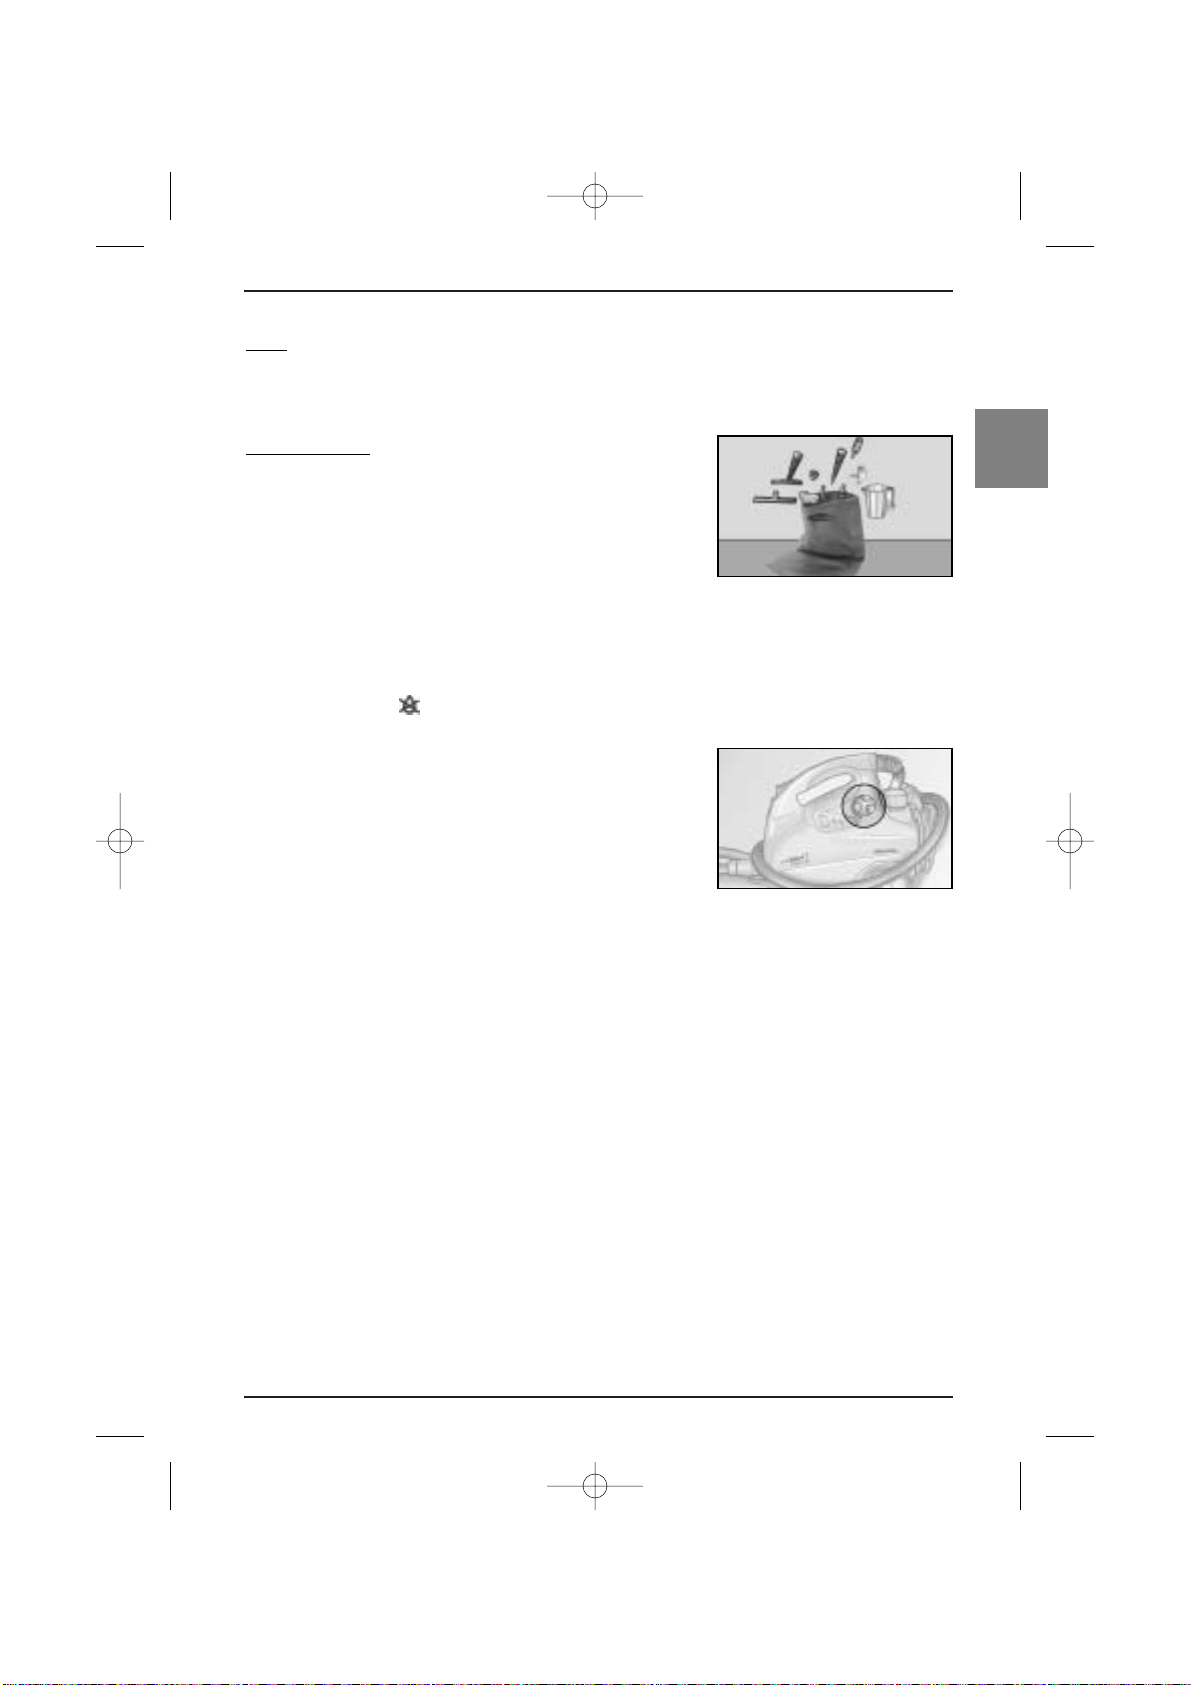
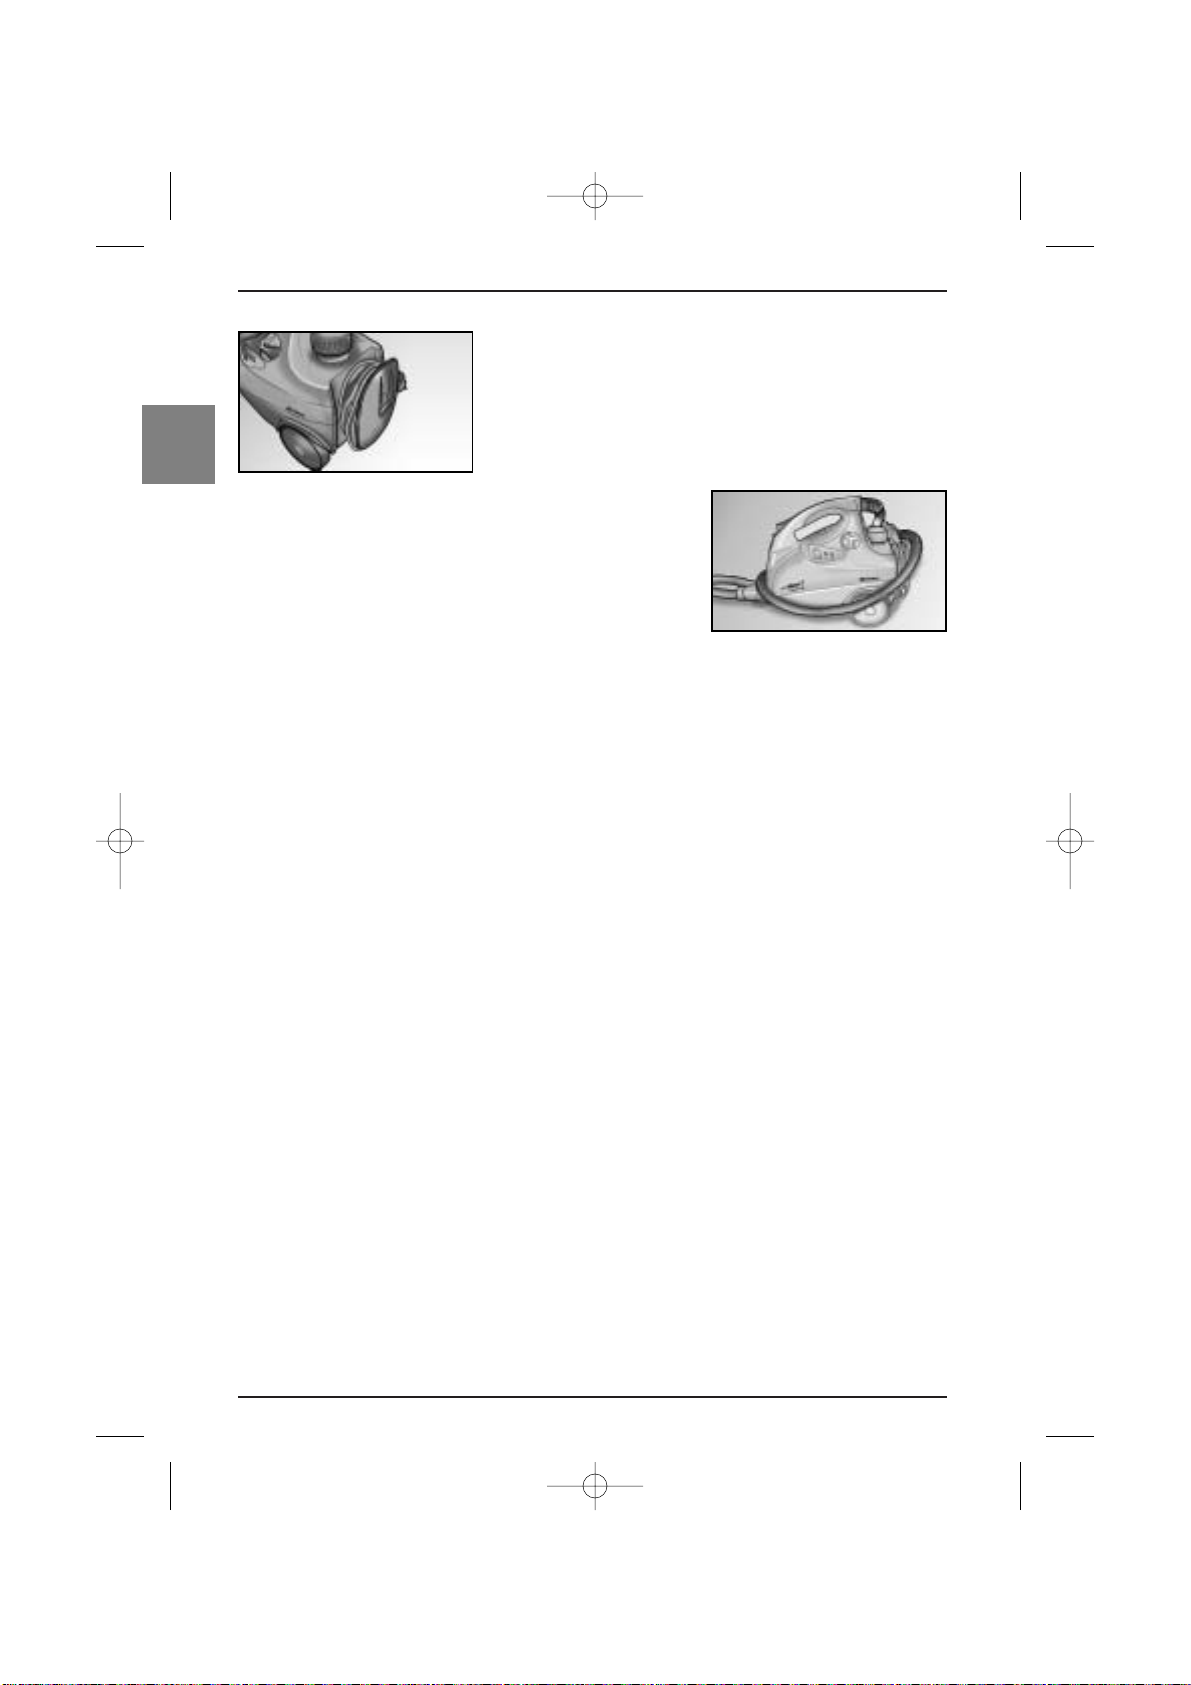
Sacca Accessori
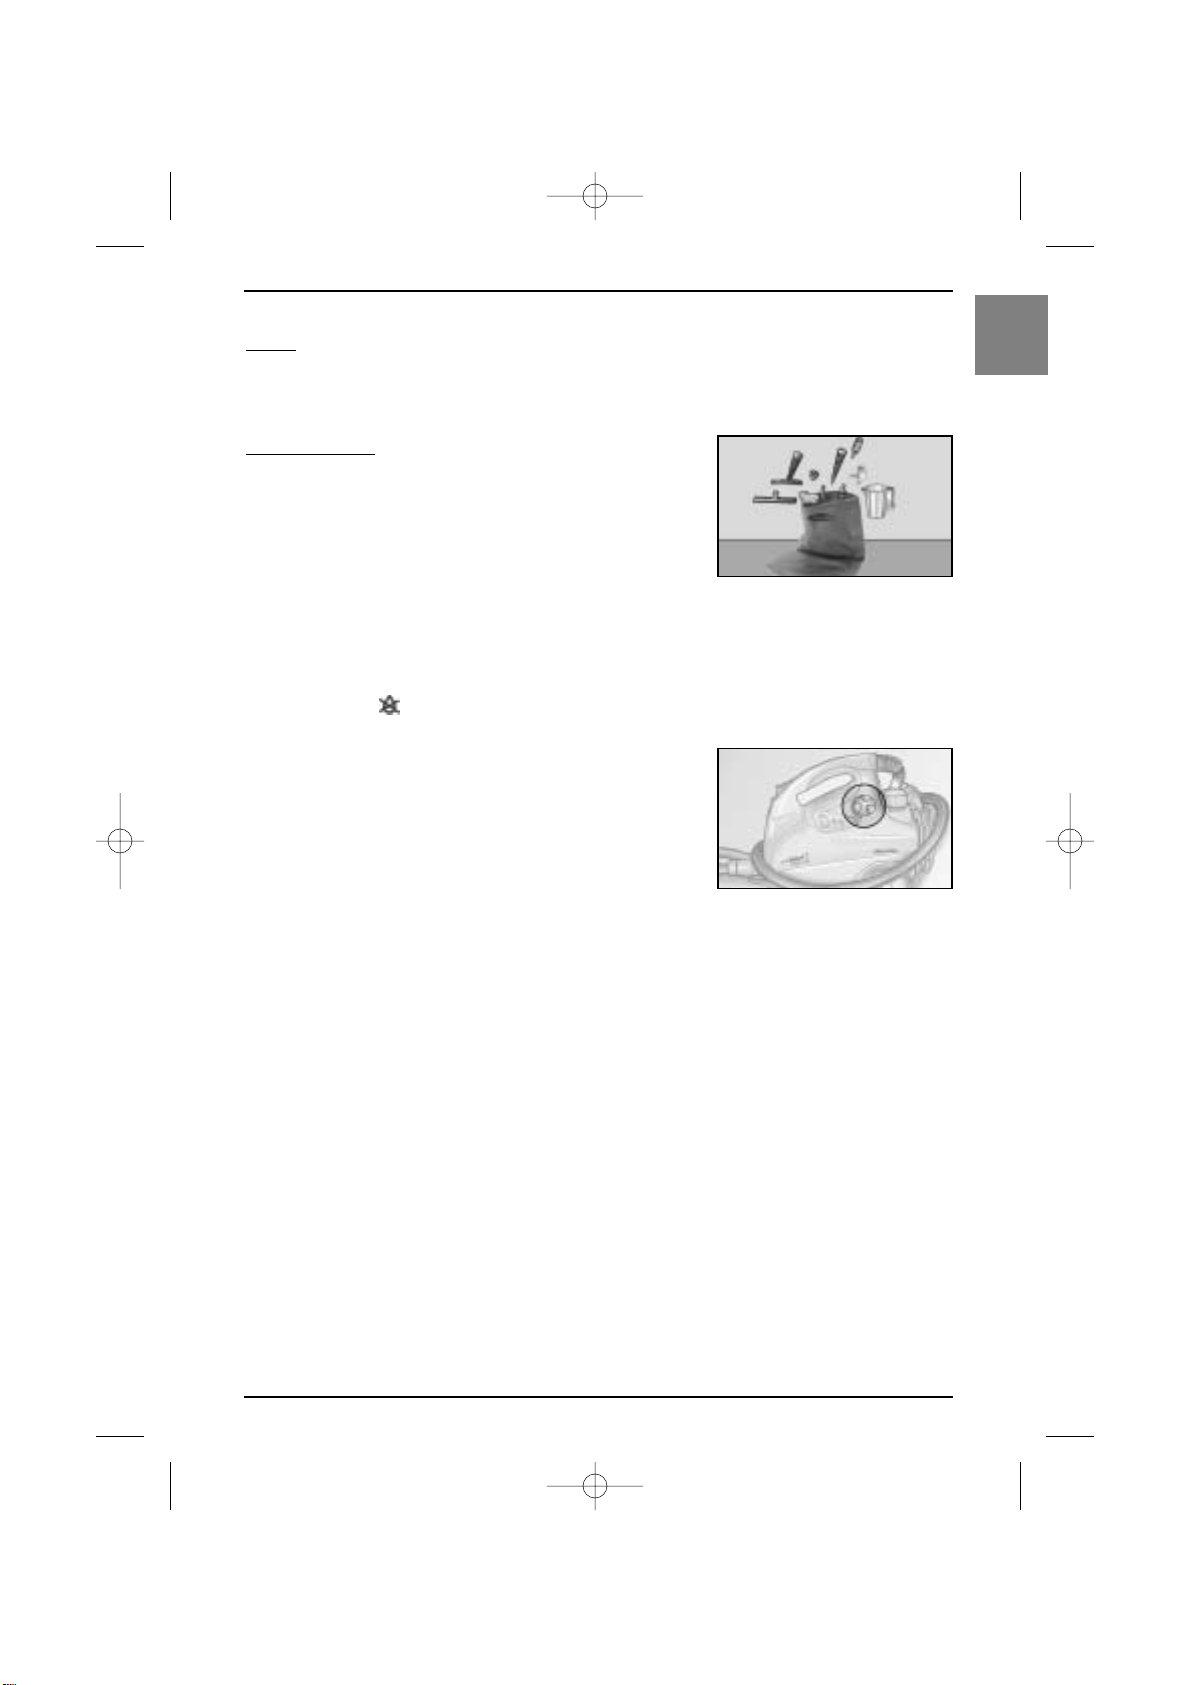
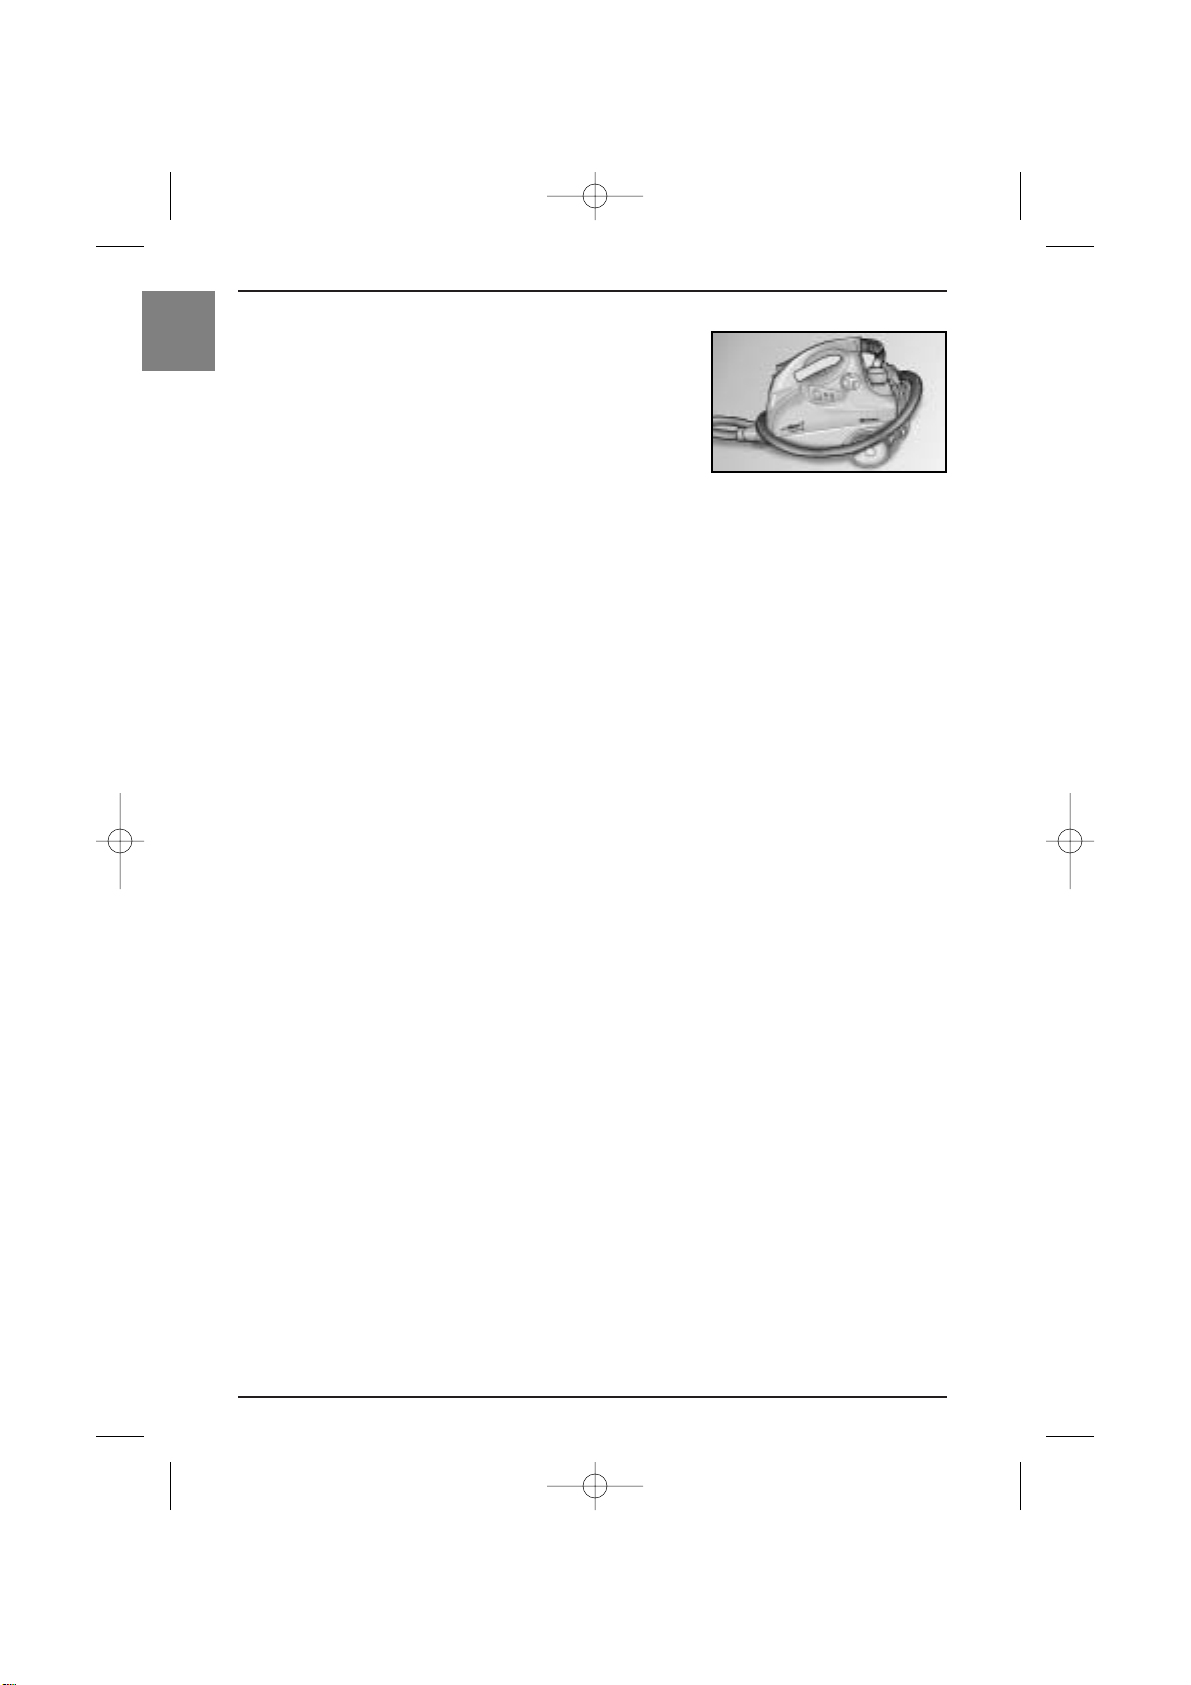
L’ apparecchio è corredato da una sacca accessori per poter riporre
tutti gli accessori e averli sempre a portata di mano. (Fig. P).
ELEMENTI DELL’APPARECCHIO
Manometro
Con il manometro è facile controllare la pressione del vapore. Quando l’acqua finisce la lancetta del
manometro segna ( ).
Manopola regola vapore
Ruotando la manopola verso destra si diminuisce la quantità di
vapore, per eliminare sporco leggero da superfici più delicate.
Ruotando la manopola verso sinistra la quantità di vapore aumenta e questo vi consente di sciogliere anche lo sporco molto resistente. (Fig. Q).
Ruote gommate
Grazie alla gommatura intorno alle ruote, non dovrete più preoccuparvi di trascinare il prodotto, che scorre facilmente su tutte le superfici.
Avvolgicavo
Si ricorda di svolgere completamente il cavo durante l’uso. Una volta utilizzato il prodotto è possibile
avvolgere il cavo di alimentazione intorno al pratico avvolgicavo, per avere sempre il prodotto in ordine.
Parcheggio asta verticale
Grazie all’asola posta nella parte posteriore del prodotto, è possibile parcheggiare l’asta in verticale per
brevi periodi.
Ferro da stiro (32)
Norme di sicurezza
•Non immergere nell’acqua l’apparecchio stesso.
• Il ferro da stiro deve essere usato da persona adulta.
•Tenere il ferro fuori dalla portata dei bambini.
Fig. P
Fig. Q
1_interno_I 3-06-2004 8:55 Pagina 7
Page 10
1_interno_I 3-06-2004 8:55 Pagina 8
I
•Non lasciare incustodito il ferro da stiro.
•Staccare sempre la spina di alimentazione della macchina (30) e la presa di collegamento del ferro
(36) dalla macchina quando non viene utilizzato.
•Durante il funzionamento appoggiare il ferro sull'apposita griglia (38) in dotazione.
•Non usare il ferro da stiro nel caso si verificassero rotture o anomalie durante il funzionamento.
•Ènecessario portarlo ad un Centro Assistenza autorizzato ARIETE per qualsiasi operazione di manutenzione compresa quella di sostituzione del cavo di interconnessione.
Istruzioni per l’uso del ferro:
PRIMA DI INSERIRE E DISINSERIRE IL FERRO DAL CORPO MACCHINA (6) SPEGNERE L’APPARECCHIO
DALL’APPOSITO INTERRUTTORE E SCOLLEGARE LA SPINA DI ALIMENTAZIONE PRIMA DI OGNI OPERAZIONE.
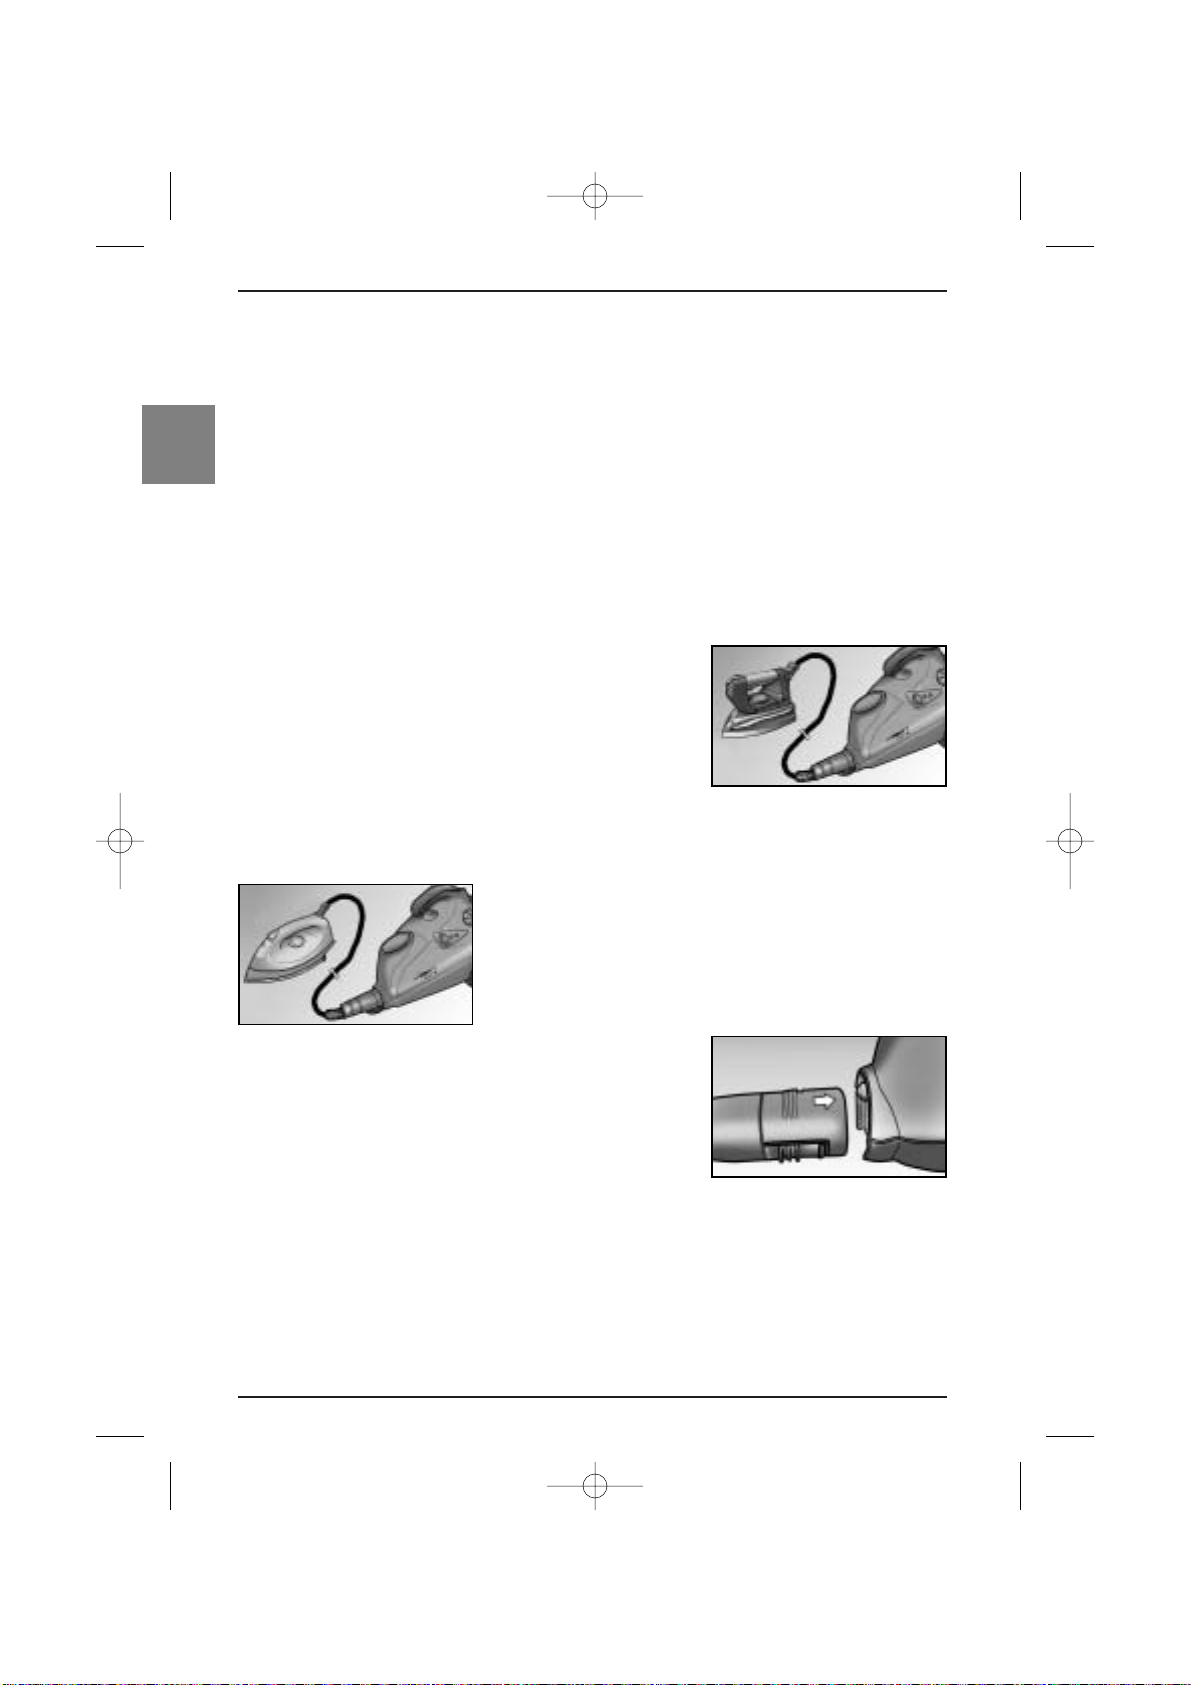
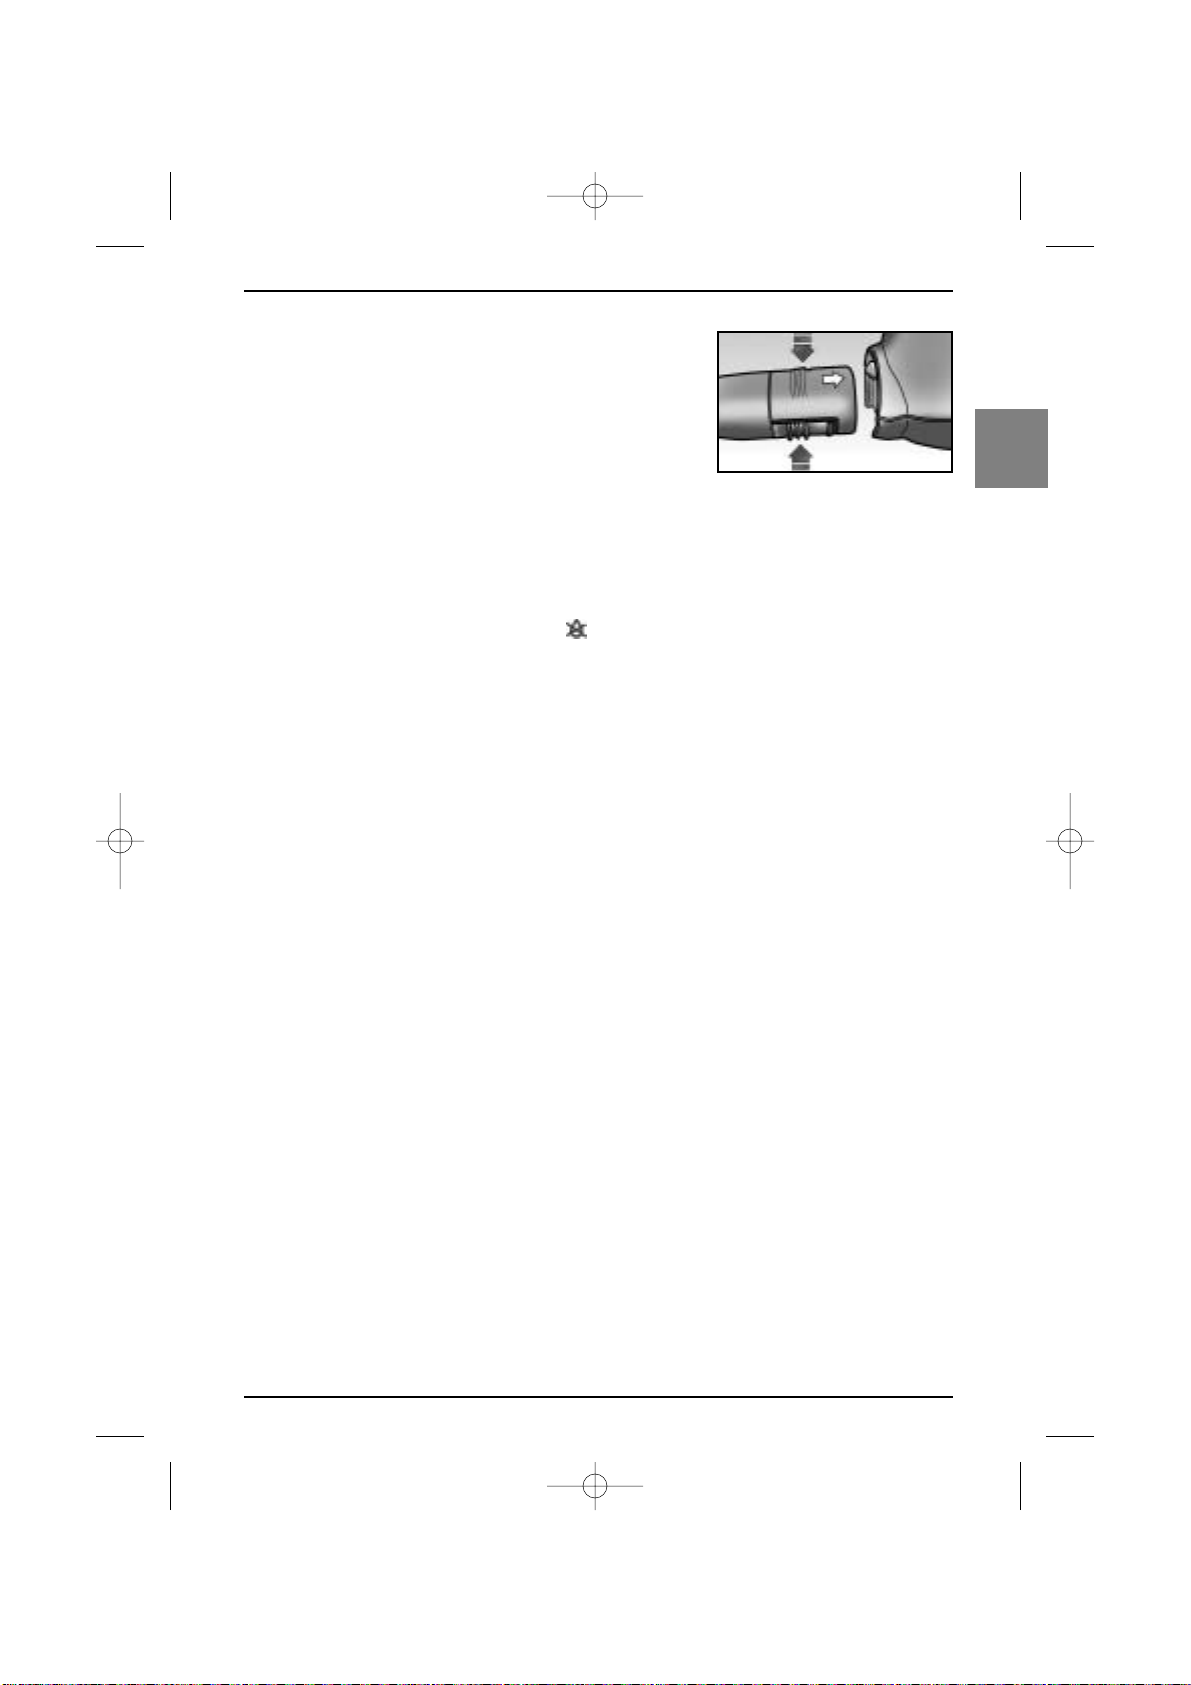
- Prima di inserire la spina del cavo di connessione (36) nella
presa della macchina aprire lo sportellino (31) ed esercitare una
lieve pressione sulle alette all’estremità della spina come indicato in figura T. Dopodichè inserire il connettore come indicato
in figura R (per ferro Mod. 4210/2) e in figura S (per ferro Mod.
4210/5).
Infine inserire la presa di alimentazione dell’apparecchio, ed azionare l’interruttore (5) per stirare a
vapore. Se si vuole stirare senza vapore non accendere la caldaia.
Fig. S
- Azionare il termostato regolazione temperatura (35) secondo il
tipo di tessuto che si deve stirare.
IMPORTANTE!
Quando si devono stirare i capi di diversa qualità di tessuto è
necessario dividere gli stessi ed iniziare la stiratura dei capi di tessuto a bassa temperatura.
- Il vapore in verticale permette di stirare comodamente e perfettamente capi appesi e tendaggi.
- Per ottenere l’uscita del vapore è sufficiente azionare uno degli
interruttori vapore che si trovano sul ferro da stiro (34 vapore
intermittente; 33 vapore fisso).
ATTENZIONE!
All’inizio di ogni stiratura è possibile che dai fori della piastra del ferro escano delle gocce di acqua formatesi dalla condensa del vapore nel passaggio attraverso l’apposito tubo. Per evitare l’inconveniente è
sufficiente azionare il pulsante vapore fino all’esaurimento dell’uscita delle goccioline d’acqua, mantenendo il ferro lontano dai tessuti.
- Al termine della stiratura a vapore è possibile esaurire il vapore rimasto in caldaia ruotando la manopola regolazione vapore (35) in senso antiorario in posizione “MAX” e continuando a premere l’interruttore del ferro fino a giungere al completo esaurimento del vapore.
Questo vi consente di poter stirare con il vapore alcuni capi pur avendo spento la caldaia.
Fig. R
Fig. T
8
Page 11
9
I
Per l’estrazione del tubo flessibile premere le due alette laterali e
tirare come indicato in fugura U.
ATTENZIONE!
Prima di riporre il ferro da stiro, dopo l’uso, lasciarlo raffreddare
completamente.
COME PROCEDERE AL RIEMPIMENTO DELLA CALDAIA DURANTE L’USO
Quando l’acqua è finita azionando il pulsante (22) o (33) o (34) non si avrà l’erogazione del vapore.
Attraverso il manometro (27) viene indicata la quantità di vapore presente nella caldaia. Se durante l’uso
la freccia del manometro indica il simbolo significa che l’acqua in caldaia è esaurita. Pertanto per
eseguire un nuovo rifornimento procedere come segue:
a) spegnere l’apparecchio azionando l’interruttore (5);
b) premere il pulsante (22) per scaricare il vapore residuo e il pulsante (34) nel caso di utilizzo del ferro;
c) togliere la spina dalla presa di alimentazione;
d) svitare lentamente il tappo di sicurezza (2) e attendere alcuni secondi affinchè cessi il sibilo di vapo-
re prima di svitarlo completamente;
ATTENDERE QUALCHE MINUTO PRIMA DI INTRODURRE DI NUOVO ACQUA ALL’INTERNO DELLA CALDAIA.
e) Introdurre di nuovo l’acqua, versando lentamente le prime quantità per evitare sbuffi
di vapore; si consiglia di attendere almeno 3 minuti dal momento che si è scollegato l’apparecchio
dalla presa di corrente, prima di versare nuova acqua nella caldaia;
f) riavvitare completamente il tappo di sicurezza;
g) reinserire la spina nella presa di corrente;
h) premere l’interruttore di accensione (5).
PULIZIA E MANUTENZIONE
Prima di procedere a qualsiasi operazione scollegare la spina di alimentazione. Prima di riporre l’apparecchio procedere alla sua pulizia, attendere che si sia raffreddato. Per garantire un funzionamento ottimale e prolungato nel tempo, è sufficiente sciacquare con acqua ogni mese l’interno della caldaia per eliminare i residui calcarei accumulati. Non usare aceto o altre sostanze decalcificanti.
DOPO L’USO
Al termine della pulizia o della stiratura a vapore spegnere la caldaia ed esaurire il vapore rimasto azionando il pulsante (22) o (33) o (34). Per svuotare la caldaia dalla eventuale acqua avanzata dopo l'utilizzo,tenere presente che l'acqua si mantiene in caldaia ad elevata temperatura per tempi lunghi.
Quindi attendere almeno 1 ora prima di aprire il tappo e poi svuotare con cautela la caldaia.
Riavvolgere il cavo di alimentazione (30) dentro l’apposito avvolgicavo (Fig. V).
Fig. V
Fig. U
1_interno_I 3-06-2004 8:55 Pagina 9
Page 12
10
I
Avvolgere il tubo flessibile (24) al corpo dell’apparecchio (Fig. Z) e
riporre la pistola sopra l’apposita maniglia, dopo avere riposizionato il cursore di sicurezza (21) nella posizione di blocco.
Fig. Z
1_interno_I 3-06-2004 8:55 Pagina 10
Page 13
11
GB
INSTRUCTIONS FOR USE
2_interno_GB 3-06-2004 8:58 Pagina 11
Page 14
12
GB
Dear Customer,
Thank you for choosing one of our products.
The model you have chosen is from the Vaporì line - the ideal range of products for cleaning your
home, thanks to the degreasing, hygienic cleansing power of steam. This ecological method of cleaning does not require the use of chemical detergents.
The Vaporì line includes products specifically designed for different requirements:
Vaporì, Pavimenti is the first steam broom that cleans and sanitises floors in seconds.
Vaporì Glass, thoroughly and effortlessly cleans windows, mirrors and other washable surfaces.
Vaporì Jet, is ideal for cleaning difficult surfaces (sanitary fittings, radiators, shutters).
Multi Vaporì, is a compact and versatile product with numerous accessories for thoroughly sanitising
all types of surfaces
IMPORTANT WARNING: BEFORE USING, CAREFULLY READ THE INSTRUCTIONS AND WARNINGS
IN THIS BOOKLET, WHICH MUST BE KEPT IN A SAFE PLACE.
DESCRIPTION OF THE APPLIANCE
1 Handle
2 Safety cap
3 Amber indicator lamp (steam ready)
4 Green indicator lamp (power on)
5 ON/OFF switch
6 Appliance body
7 Floor cloth
8 Floor brush
9 Glass cleaner connector
10 Bag
11 Extension tubes
12 Brush connector
13 Hood
14 Round brush
15 Inclined spout
16 Cap for fabrics
17 Glass wiper
18 Textile brush
19 Extension spout
20 Gun nozzle
21 Safety slider
22 Steam supply button
23 Gun
24 Detachable flexible tube
25 Measure
26 Funnel
27 Steam gauge
28 Steam regulation knob
29 Cable winder cavity
30 Power supply cable
31 Hatch
Iron
32 Iron (Mod. 4210/2 version only)
32/A Iron (Mod. 4210/5 version only)
33 Continuous steam button
34 Steam button
35 Temperature adjustment thermostat knob
36 Inter-connecting cable
37 Check indicator lamp
38 Grille
2_interno_GB 3-06-2004 8:58 Pagina 12
Page 15
13
GB
IMPORTANT WARNINGS
READ THESE INSTRUCTIONS CAREFULLY:
• The cleaner is equipped with a temperature-limiting thermostat, thermfuse and a safety filler cap.
Construction complies with EU regulations on domestic appliances.
• Before connecting the appliance to the power supply, ensure that the voltage shown on the rating plate
matches the local supply voltage.
•Always connect the cleaner to an earthed socket.
•Never leave the cleaner unattended while it is connected to the power supply.
•Never direct the steam jet towards people, animals or devices that contain electrical
parts (e.g. the inside of an oven).
•Do not immerse the cleaner in water or other liquids.
•Always turn off the appliance by operating switch (5) and unplug it before replenishing.
•Do not leave the appliance within the reach of children. When not in use, the appliance steam push
button must always be locked with the relevant safety catch (21).
•To avoid damaging the appliance or making it unsafe, never introduce descalers, detergents, aromatic or alcoholic products into the boiler tank.
CAUTION: risk of scalds or burns.
•Do not touch the hot surfaces during use.
Allow the accessories to cool down before changing them.
•NEVER OPEN THE SAFETY CAP (2) DURING USE.
•WARNING: Follow these steps before unscrewing filler cap (2):
- turn off the cleaner by operating button (5);
- discharge the pressure by pressing the button (22);
- unplug the appliance;
- slowly start to unscrew the filler cap, wait a few seconds, then screw it off completely.
•When first using the appliance or after a long pause, pour the water into a container.
•Do not use the appliance if it is damaged. To avoid all risks, any repairs - (including the replacement
of the power cord) - must be carried out by an Ariete Service Centre or an Ariete authorized technician.
• Before using the appliance, ensure that the objects, surfaces and fabrics to be cleaned
are resistant to or compatible with the high temperature of the steam.
In particular, follow the directions provided by the manufacturer and carry out a test on
a hidden part or a sample before using the appliance on terracotta floors, wooden surfaces or delicate fabrics such as silk and velvet.
2_interno_GB 3-06-2004 8:58 Pagina 13
Page 16
14
GB
•We recommend using tap water or alternatively, distilled water.
•CAUTION: DO NOT USE THE GLASS WIPER ATTACHMENT IF THE SURFACE TO BE CLEANED IS
COLD. Changes in temperature could cause it to break.
• The cleaner has been designed for domestic, not industrial use.
• This appliance must be used exclusively for the purpose for which it was designed and in the manner indicated in the instructions for use. Any other use will be considered improper and therefore,
dangerous.
The manufacturer refuses to accept any liability for damages deriving from improper or incorrect use.
• The appliance complies with Electromagnetic Compatibility Directive 89/336/EEC.
SAVE THESE INSTRUCTIONS FOR FUTURE REFERENCE
DIRECTIONS FOR USE
Filling the boiler tank before use.
Do not connect the power cord plug to the mains socket.
Unscrew safety cap (2) and, using funnel (26), pour into the tank
two measures (25) of water to the maximum level (fig. A). Screw
safety cap (2) back on again.
BEFORE UNSCREWING THE TANK CAP, ALWAYS ENSURE THAT THE CLEANER IS SWITCHED OFF AND DISCONNECTED FROM THE POWER SUPPLY.
TURNING ON THE APPLIANCE
To turn on the appliance, insert the power cord plug into an electrical socket and press ON/OFF switch (5); green indicator (4) and
amber indicator (3) will come on (fig.B). As soon as amber indicator (3) goes out, the appliance is ready for use. Press button (22)
to supply steam. To prevent steam from being accidentally supplied, move the safety slider (21) to the •• position.
Using the Steam Regulation (28) knob, it is possible to regulate the amount of steam. This means that
the appliance can be used on any type of surface or fabric.
FITTING ACCESSORIES
Detachable flexible tube
THE APPLIANCE ITSELF MUST BE SWITCHED OFF AND
UNPLUGGED FROM THE MAINS BEFORE THE FLEXIBLE PIPE
CAN BE INSERTED INTO OR REMOVED FROM THE INLET ON THE
APPLIANCE BODY. Before inserting the attachment of the flexible
pipe (24) into the inlet on the appliance body (6), open the hatch
Fig. A
Fig. B
Fig. C
2_interno_GB 3-06-2004 8:58 Pagina 14
Page 17
15
GB
(31), making sure that the arrow on the flexible pipe attachment is
facing upwards, as illustrated in figure C and pressing slightly on
the springs to the side of the inlet.
Plug the appliance into the mains and switch it on.
To remove the flexible pipe, press the two side tabs and pull, as
illustrated in figure D.
Hood
This accessory (13) can be fitted to the gun nozzle (20) to protect the nozzle end.
Extension spout
Insert the accessory by pushing it into the fixed section of the gun
and aligning the groove in the spout with the line on the gun. Align
the spout groove with the line on the gun (fig.E), then rotate the
spout 90 degrees (clockwise) in the direction of the arrow (B) until
it locks into place.
This attachment is used for rapid cleaning in places where stubborn dirt is more likely to collect - places
like around cooker tops where, thanks to the steam, you can melt away any greasy build up naturally and
without the use of chemical detergents.
Round brush
This attachment, which fits to the steam nozzle, helps to break up
stubborn encrusted dirt, such as around the rings on a cooker top.
It can also be used to clean bathroom fittings, sinks, grills, and
showers or baths, where it will remove all traces of lime scale (fig.
F).
(Different-coloured brushes for use in different areas can be purchased individually from Ariete
Assistance Centres).
Bent nozzle
This attachment can be fitted on the extension nozzle or on the
nozzle of the handheld pistol (fig. G). It is useful in reaching and
hygienically cleansing difficult spots - such as the dirt that builds
up on radiators, shutters, and bathroom fittings - removing it
quickly and easily.
Fig. D
Fig. E
Fig. F
Fig. G
B
2_interno_GB 3-06-2004 8:58 Pagina 15
Page 18
16
GB
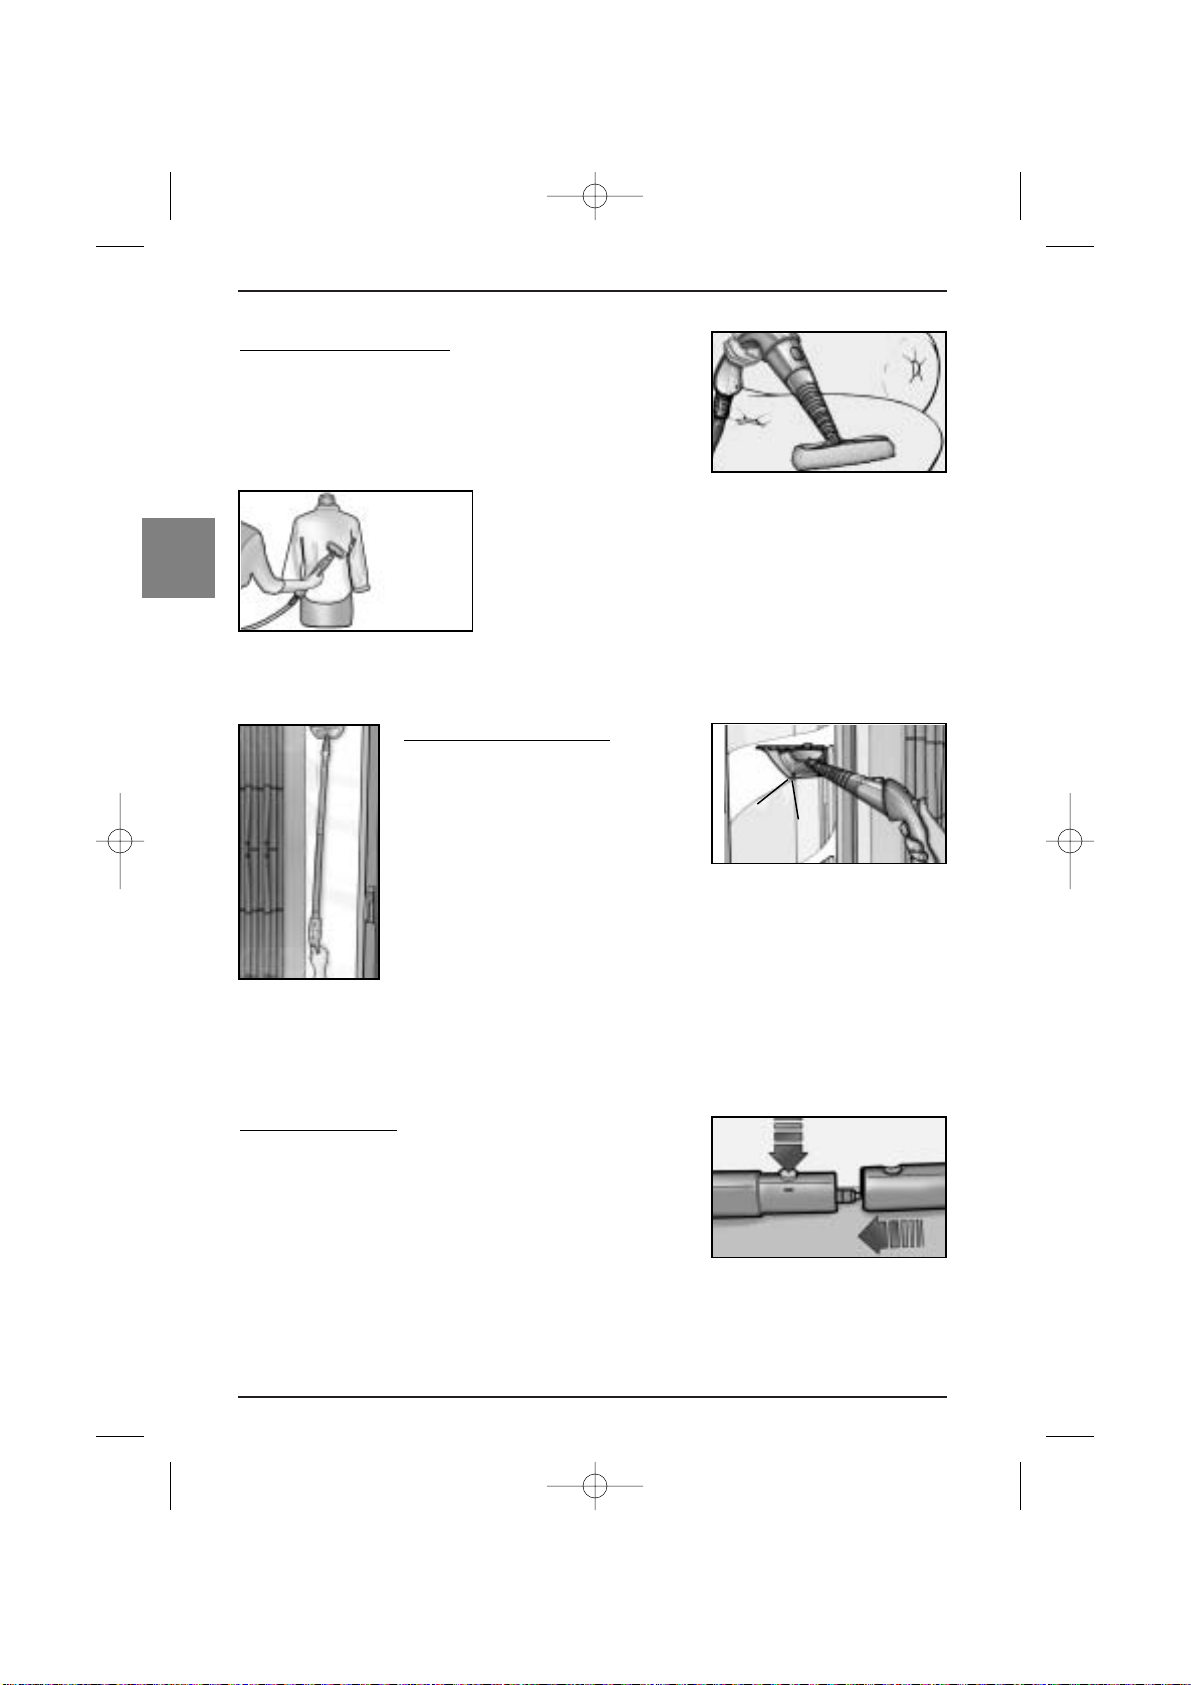
Fabric brush with cloth
The fabric brush (18) can be fitted onto the nozzle of the handheld
pistol (20). Using the practical cap, the brush can be used to clean
sofas and armchairs on a daily basis (fig. H) as well as on blankets,
covers, mattresses, and pillows, in the bedroom.
This brush can also be used to freshen up fabrics (fig. I), removing
all traces of creasing. In any case, both when using for the first time
and during normal use, we recommend emptying the condensation
from the steam into a container.
It is possible to adjust the steam dispensed by the appliance using
the relevant knob (28) to adapt the jet to each type of fabric (we
recommend that you read the manufacturer’s instructions).
Brush with glass wiper
The brush (18) can be fitted with glass
wiper (17). Insert wiper side hooks (L1)
into brush tabs (L2) (fig.L) and join the
two parts together (fig. M).
Every window and mirror will shine like
new, thanks to the glass wiper.
This attachment is also easy to use on the panels of shower cubicles.
Using the relevant extensions (11), it is possible to reach even the highest, most
difficult areas - such as large or high windows - with the glass wiper.
CAUTION: DO NOT USE THE GLASS WIPER ATTACHMENT IF THE SURFACE TO
BE CLEANED IS COLD. Changes in temperature could cause it to break.
Extension tubes
23 These can be used to reach high surfaces. They are suitable for
the fabric brush, glass wiper or floor brush (Fig. N).
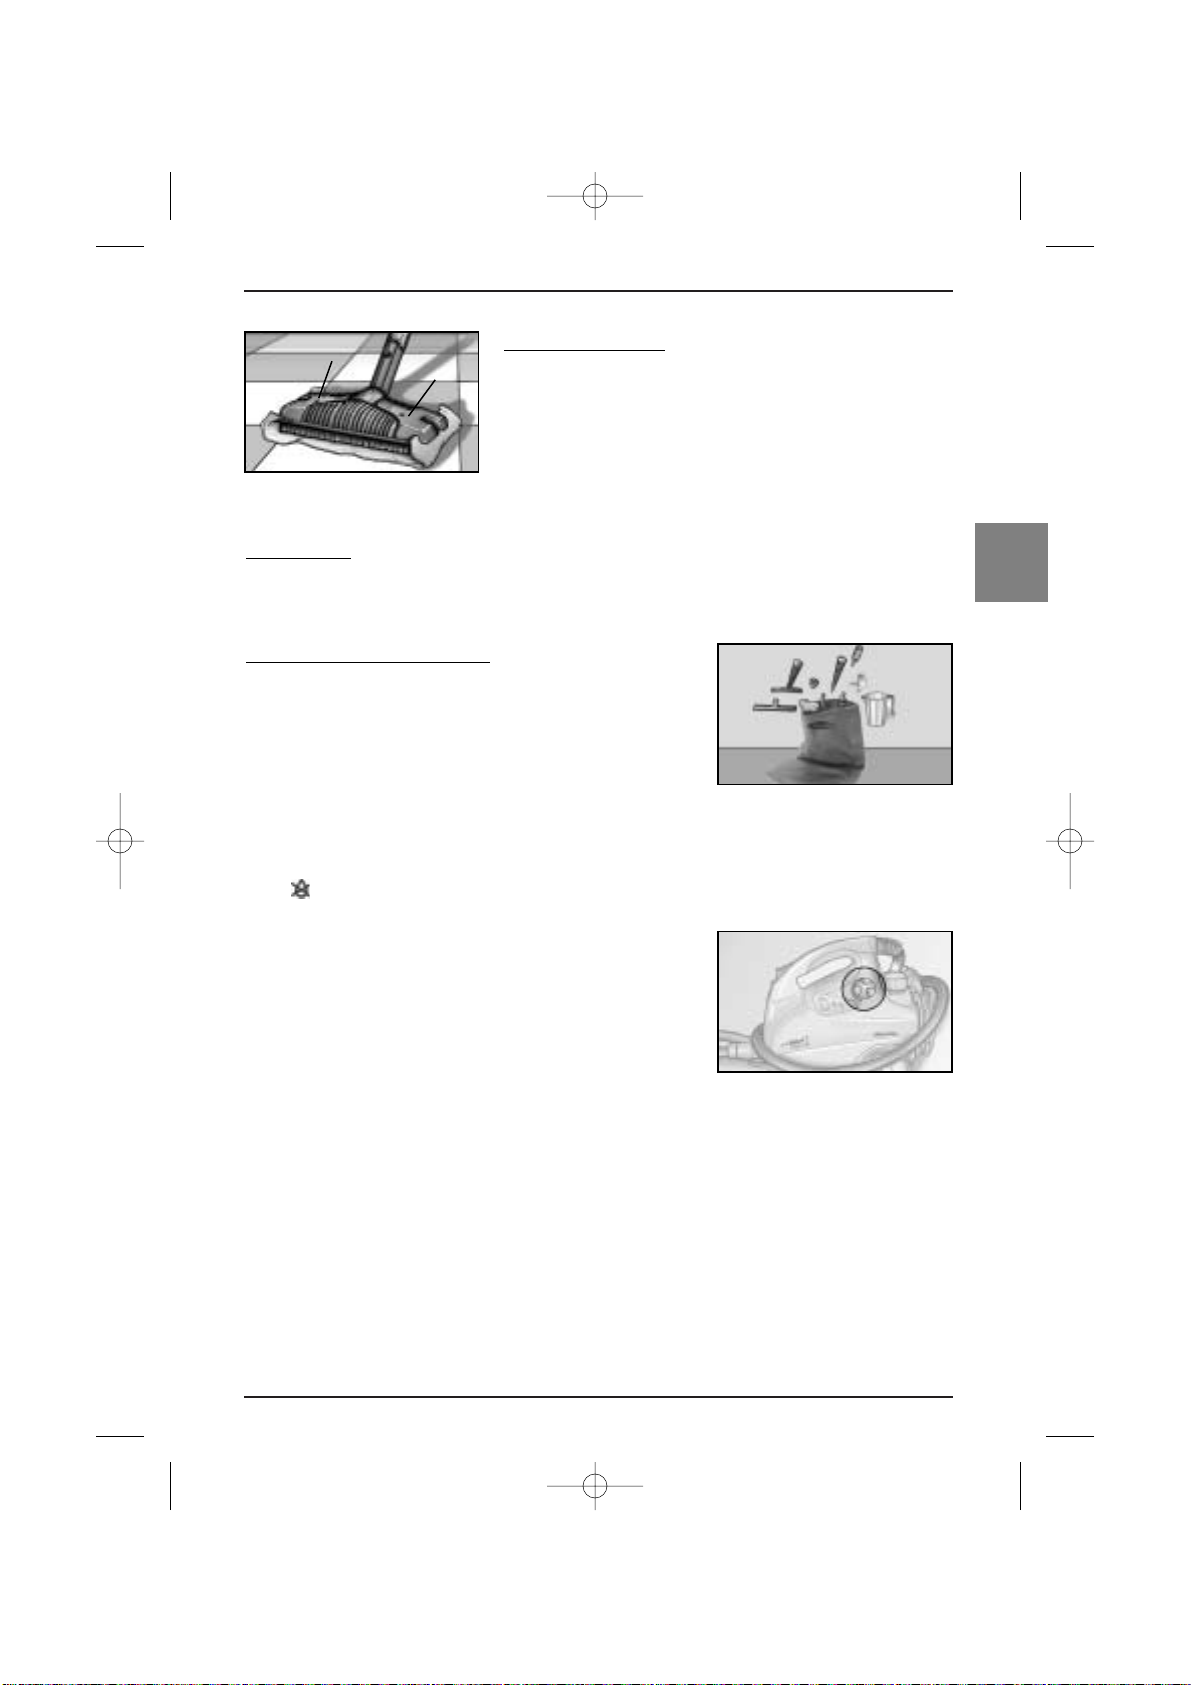
Floor brush
This attachment is used with the extensions (11) and is equipped
with a handy cloth grip (G1) that will hold any type of machinewashable cloth, for fast and efficient cleaning of all surfaces. To
attach the cloth, rest the brush on it and then pull the cloth projections one by one under retaining springs.
Fig. H
Fig. I
Fig. L
Fig. M
Fig. N
Fig. O
L1
L2
G1
G1
2_interno_GB 3-06-2004 8:58 Pagina 16
Page 19
17
GB
Cloth
One floor cloth (7) is supplied. Thanks to the cloth grip, you can use any type of cloth, as long as it can
withstand steam.
Attachment bag
The appliance comes with a special bag for storing all of the
attachments so that they are always at hand. (Fig. P).
APPLIANCE PARTS
Pressure gauge
The pressure gauge makes it easy to check the steam pressure. When the water is finished, the pressure gauge dial shows ( ).
Steam regulation knob
Turning the knob to the right will reduce the amount of steam for
cases of slight soiling on delicate surfaces. Turning the knob to the
left will increase the amount of steam, which will then dissolve
even the most stubborn dirt (Fig. Q).
Rubberised wheels
Thanks to the rubber surface all around the wheels, pulling the appliance around is no longer a problem,
since it will slide easily over any type of surface.
Cord winder hook
Do not forget to unwind the power cord completely during use. Once the appliance has been used, it is
possible to wind the power cord around the practical hook so that the appliance is always in order.
Upright rod parking function
Thanks to the slot at the rear of the appliance, it is possible to park the rod in an upright position for short
amounts of time.
Iron (32)
Safety measures
•Do not immerse the appliance in water.
• The iron must be used by an adult.
• Keep the iron out of the reach of children.
Fig. P
Fig. Q
2_interno_GB 3-06-2004 8:58 Pagina 17
Page 20
2_interno_GB 3-06-2004 8:58 Pagina 18
•Do not leave the iron unattended.
•Always disconnect the iron’s connecting plug (30) from the machine and the machine’s power supply
plug (36) when not in use.
•During use, rest the iron on the iron rest (38) provided.
•Do not use the iron if any breakage or malfunction is noted.
GB
•Take it to an ARIETE Authorised Assistance Centre for all maintenance operations, including replacement of the inter-connecting cable.
Instructions for using the iron:
BEFORE INSERTING OR REMOVING THE IRON FROM THE APPLIANCE BODY (6) SWITCH OFF THE
APPLIANCE USING THE RELEVANT SWITCH AND UNPLUG IT FROM THE MAINS ELECTRICITY BEFORE ALL OPERATIONS.
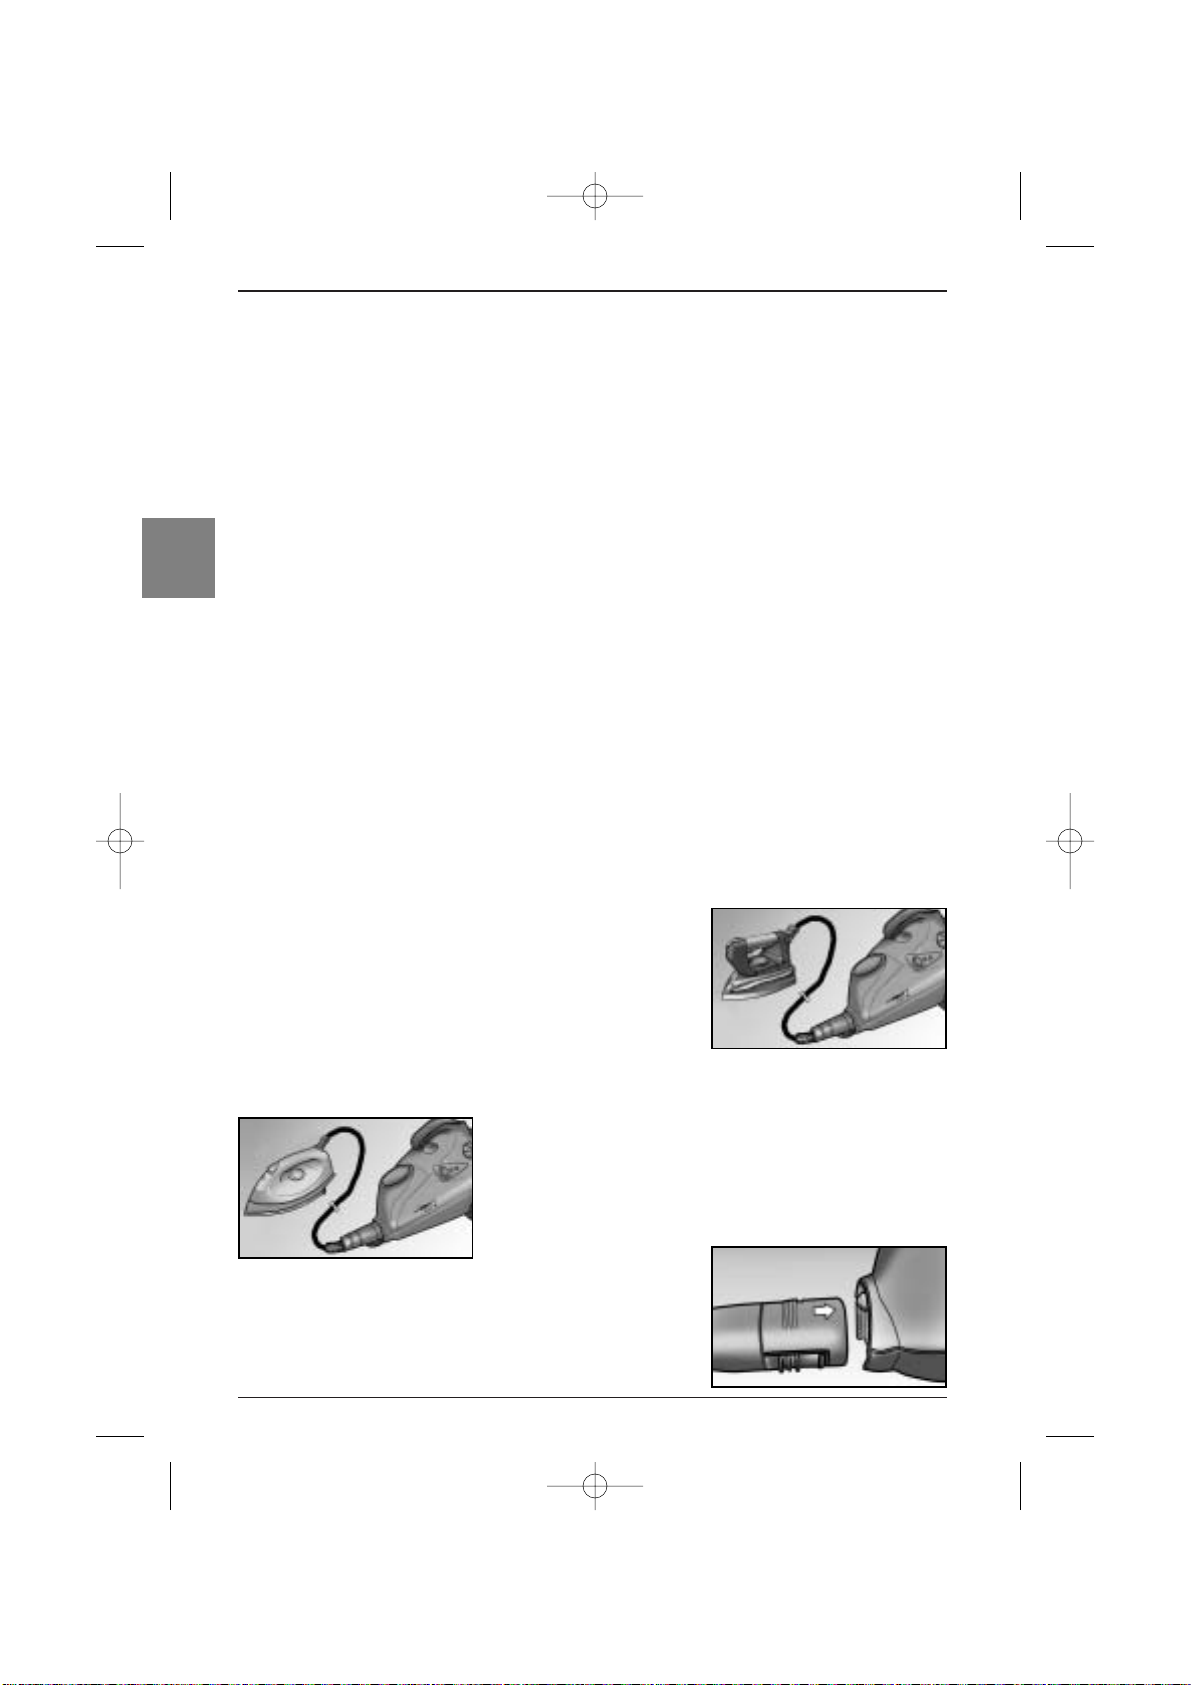
- Before inserting the plug of the connecting cord (36) into the
appliance inlet, open the hatch (31) and press lightly on the tabs
at the end of the plug, as illustrated in figure T. After this, insert
the connector as illustrated in figure R (for Mod. 4210/2 irons)
or in figure S (for Mod. 4210/5 irons).
-Insert the connector plug of the iron into the socket of the machi-
ne.
Plug the power supply cable into the mains and operate switch (5) to iron with steam.
If you wish to iron without steam, do not switch on the boiler.
Fig. S
- Set the temperature adjustment thermostat (35) according to the
type of fabric to be ironed.
IMPORTANT!
When it is necessary to iron articles made from different types of
fabric, divide them into groups and start by ironing those which
require the lowest temperature.
- The vertical steam facility allows hanging garments and curtains
to by ironed perfectly and with ease.
- To obtain a supply of steam it is only necessary to operate one
of the steam switches located on the iron (34 intermittent steam,
33 continuous steam).
CAUTION!
At the start of each ironing session, it is possible that drops of water may come from the holes in the plate.
This is due to the condensation of steam as it passes through the tube. To avoid this happening, just operate the steam button until the droplets stop being emitted, holding the iron well away from the articles
to be ironed.
- At the end of a steam ironing session, it is possible to expel any steam remaining in the boiler by tur-
ning the steam adjustment knob (35) anti-clockwise to the “MAX” position and continue pressing the
switch on the iron until all the steam has been used up.
Fig. R
Fig. T
18
Page 21
This allows you to steam iron a few garments, even when the boiler tank is switched off.
To remove the flexible pipe, press the two side tabs and pull, as
illustrated in figure U.
CAUTION!
Before putting the iron away after use, leave it to cool down completely.
REFILLING THE BOILER WHILE THE IRON IS IN USE
When the water is finished, by pressing the push button (22) or (33) or (34), the steam jet function will
be disengaged. The pressure gauge (27) shows the amount of steam inside the boiler tank.
If during use the steam gauge arrow shows the symbol, it means that the water in the boiler has been
used up.
To refill the boiler, proceed as follows:
a) switch off the appliance by operating switch (5)
b) press button (22) to expel any residual steam and button (34) using iron;
c) remove the plug from the mains socket;
d) slightly unscrew the safety cap (2) and wait a few seconds until the hissing noise created by residual
steam stops before unscrewing it completely;
WAIT SOME MINUTES BEFORE REFILLING THE BOILER WITH WATER.
e) Refill with water, adding it slowly at first to avoid puffs of steam; we recommend waiting
at least 3 minutes after unplugging the appliance from the mains before pouring more water into the
boiler tank;
f) screw the safety cap on again tightly;
g) plug the power supply cable in again;
h) press the ON/OFF switch (5).
CLEANING AND MAINTENANCE
Always unplug the appliance before performing any cleaning or servicing operation. Before storing or
cleaning the appliance, allow it to cool down. To keep the appliance in full working order for many years,
remember to rinse out the boiler inside once a month in order to remove the limescale deposits. Do not
use vinegar or other decalcifiers.
AFTER USE
After you have finished cleaning or ironing, switch off the boiler tank and discharge all remaining steam
using the push button (22) or (33) or (34). When emptying out any water left in the boiler tank after use,
remember that this water remains very hot for a long period of time.
19
GB
Fig. U
2_interno_GB 3-06-2004 8:58 Pagina 19
Page 22
20
GB
Therefore, you should wait at least 1 hour before opening the cap
and then empty the tank with care.
Wind the power cord (30) on the relevant cord winder (Fig. V).
Wind the flexible tube hose (24) around the cleaner body (fig.Z)
and set safety slider (21) back to the lock position. Replace the gun
on the handle provided.
Fig. Z
Fig. V
2_interno_GB 3-06-2004 8:58 Pagina 20
Page 23
21
D
GEBRAUCHSANLEITUNG
3_interno_D 3-06-2004 18:25 Pagina 21
Page 24

22
D
Sehr geehrter Kunde!
Wir danken Ihnen, dass Sie uns den Vorzug gegeben haben.
Ihr gewähltes Modell gehört zur Linie Vaporì, eine Produktpalette, die sich dank der entfettenden und
hygienischen Dampfwirkung für die Reinigung des ganzen Hauses eignet. Ein umweltgerechtes Putzen
ohne chemische Reinigungsmittel!
Die Vaporì Gerätereihe besteht aus spezifischen Geräten für alle Anforderungen:
Vaporì, Fußboden, der erste Dampf-Schrubber für die sofortige und tägliche Reinigung von Fußböden.
Vaporì Glass, für die gründliche Reinigung von Fenstern, Spiegeln und vielen anderen Oberflächen, die
jeden Tag ohne Mühe gereinigt werden sollen.
Vaporì Jet, die einzige Dampfpistole mit Druckkessel, ideal für die schnelle Reinigung schwer zugänglicher Oberflächen (Sanitäreinrichtungen, Heizkörper, Rollläden).
Multi Vaporì, ein vielseitiges und kompaktes Dampfreinigungsgerät mit komplettem Zubehör für die
gründliche Reinigung aller Oberflächen.
WICHTIG: LESEN SIE DIE ANWEISUNGEN DIESER ANLEITUNG VOR DEM PRODUKTGEBRAUCH
SORGFÄLTIG DURCH. BEWAHREN SIE SIE SORGFÄLTIG AUF.
GERÄTEBESCHREIBUNG
1 Griff
2 Sicherheitsverschluss
3 Orangene Kontrolllampe (Dampf bereit)
4 Grüne Kontrolllampe
(Strom angeschlossen)
5 EIN/AUS Schalter
6 Gehäuse
7 Tuch für Fußböden
8 Bürste für Fußböden
9 Anschluss Fenstergummi
10 Sack
11 Verlängerungsrohre
12 Anschluss Bürste
13 Schutzkappe
14 Runde Bürste
15 Gebogene Düse
16 Stoffhaube
17 Fenstergummi
18 Stoffbürste
19 Düse für Verlängerungsrohr
20 Pistolendüse
21 Sicherheitsverriegelung
22 Dampfschalter
23 Pistole
24 Abnehmbarer Schlauch
25 Messbecher
26 Trichter
27 Manometer
28 Dampfregler
29 Kabel-Aufwickelvorrichtung
30 Anschlusskabel + Stecker
31 Luke
Bügeleisen
32 Bügeleisen (nur Modell 4210/2)
32/A Bügeleisen (nur Modell 4210/5)
33 Dampfschalter Dauerbetrieb
34 Dampfschalter
35 Temperaturregler
36 Verbindungskabel
37 Kontrolllampe
38 Gitter
3_interno_D 3-06-2004 18:25 Pagina 22
Page 25
23
D
WICHTIGE HINWEISE
LESEN SIE VOR GEBRAUCH AUFMERKSAM DIE VORLIEGENDE GEBRAUCHSANWEISUNG
•Das Gerät ist mit einem Thermostat zur Temperaturbegrenzung, einer Schmelzsicherung Rücksetzung
sowie einem Sicherheitsverschluss ausgestattet. Das Gerät entspricht den europäischen Normen für
Elektrohaushaltsgeräte.
• Bevor das Gerät angeschlossen wird, muss kontrolliert werden, ob die Netzspannung den Angaben
auf dem Typenschild des Geräts entspricht.
•Das Gerät muss an eine geerdete Steckdose angeschlossen werden.
•Das Gerät nie unbeaufsichtigt lassen solange es am Stromnetz angeschlossen ist.
•Den Dampfstrahl nie auf Personen, Tiere und elektrische Geräte richten (z.B. in die
Backofenröhre).
•Das Gerät nie in Wasser oder andere Flüssigkeiten tauchen.
• Beim Nachfüllen stets das Gerät am Schalter (5) abschalten und den Netzstecker aus der Steckdose
ziehen.
•Gerät nicht in der Nähe von Kindern lassen. Dampftaste mittels des Sicherheitsschalters (21) sperren, falls das Gerät nicht benutzt wird.
• Keine Entkalkungsmittel, Duftstoffe, Alkohol oder Reinigungsmittel beigeben, sie können das Gerät
beschädigen oder gefährlich werden lassen.
ACHTUNG: Verbrennungsgefahr.
• Bei Gebrauch niemals die heißen Oberflächen am Gerät berühren.
Die Zubehörteile vor Austausch abkühlen lassen.
•SICHERHEITSVERSCHLUSS (2) WÄHREND DES GEBRAUCHS NICHT ÖFFNEN.
•ACHTUNG: Vorm Abschrauben des Verschlusses (2) wie folgt vorgehen:
- Das Gerät mit dem Schalter (5) ausschalten.
- Druck über die Drucktaste (22) ablassen.
-Das Anschlusskabel aus der Steckdose ziehen.
- Den Verschluss (2) etwas lösen. Einige Sekunden warten, bevor Sie den Verschluss vollständig abschrauben.
•Nach dem ersten Gebrauch oder nach längerer Pause das Wasser vollständig entleeren.
• Beschädigte Geräte nicht benutzen. Um Gefahren zu vermeiden, müssen alle
Reparaturen, einschließlich Austausch des Anschlusskabels, vom Ariete Kundendienst
oder einem Fachelektriker ausgeführt werden.
•Vorm Einsatz des Gerätes feststellen, ob die zu behandelnden Gegenstände und
Oberflächen für den heißen Dampf geeignet sind.
Besonders bei behandelten Terracotta-Böden, Holzböden, empfindlichen Stoffen, wie
Seide oder Samt, die Anweisungen des Herstellers beachten. Machen Sie zuerst an
einer nicht sichtbaren Stelle oder an einem Muster einen Versuch.
3_interno_D 3-06-2004 18:25 Pagina 23
Page 26

24
D
•Verwenden Sie Leitungswasser oder, alternativ dazu, demineralisiertes Wasser.
•ACHTUNG: VERWENDEN SIE BITTE NICHT DEN FENSTERWISCHER, WENN DIE ZU BEHANDELNDE OBERFLÄCHE KALT IST. Der eventuelle Temperaturunterschied könnte das Glas zerbrechen.
•Das Gerät ist nur für den Hausgebrauch und nicht für gewerblichen Einsatz vorgesehen.
• Dieses Gerät dient ausschließlich dem in der Bedienungsanleitung angegebenen und bestimmungs-gemäßen Gebrauch. Alle weiteren Anwendungen sind unsachgemäß und folglich gefährlich.
Der Hersteller haftet nicht für eventuelle Schäden, die auf einen unsachgemäßen oder falschen
Gebrauch zurückzuführen sind.
•Dieses Gerät entspricht der EWG-Richtlinie 89/336 (elektromagnetischer Verträglichkeit).
GEBRAUCHSANLEITUNG GUT AUFHEBEN
GEBRAUCHSANLEITUNG:
Auffüllen des Heizkessels vor Gebrauch:
Den Stecker des Speisekabels nicht in die Steckdose einfügen.
Den Sicherheitsverschluss (2) abschrauben und durch den Trichter
(26) zwei mit Wasser gefüllte Messbecher (25) in den Kessel einfüllen (Abb. A). Den Sicherheitsverschluss (2) wieder festschrauben.
VORM ÖFFNEN DES TANKVERSCHLUSSES MUSS DAS GERÄT AUSGESCHALTET UND DER
NETZSTECKER AUS DER STECKDOSE GEZOGEN WERDEN.
EINSCHALTEN DES GERÄTS
Zum Einschalten des Geräts muss der Stecker des Anschlusskabels
in die Steckdose gesteckt werden. Den EIN/AUS Schalter (5) betätiten, anschließend leuchtet die grüne Kontrolllampe (4) und die
orangene Kontrolllampe (3) auf (Abb.B). Sobald die orangene
Kontrolllampe (3) erlischt, ist das Gerät betriebsbereit.
Zur Dampferzeugung Dampfschalter (21) drücken. Damit der Dampfschalter nicht unbeabsichtigt betätigt
werden kann, die Sicherheitsverriegelung (21) auf Position •• stellen.
Der Dampfregelknopf (28) regelt die Dampfmenge, so dass das Gerät auf allen Oberflächen oder Geweben
einsetzbar ist.
ANBRINGEN DER ZUBEHÖRTEILE
Abnehmbarer Schlauch
GERÄT ABSCHALTEN UND NETZSTECKER ABTRENNEN, BEVOR
DER SCHLAUCH IN DEN MASCHINENKÖRPER EINGEFÜHRT
ODER ABGETRENNT WIRD. Vor dem Einführen des
Abb. A
Abb. B
Abb. C
3_interno_D 3-06-2004 18:25 Pagina 24
Page 27
25
D
Schlauchsteckers (24) in die Steckdose des Maschinengehäuses
(6) ist die Luke (31) zu öffnen. Dabei muss der Pfeil des
Schlauchsteckers nach oben zeigen (siehe Abb. C) und ein leichter Druck auf die Federn an den Steckdosenseiten ausgeübt werden.
Gerätestecker anschließen und einschalten. Um den Schlauch
herauszuziehen: Die beiden Seitenlaschen andrücken und gemäß
Abb. D ziehen.
Schutzkappe
Dieses Zubehörteil kann zum Schutz auf die Pistolendüse (20) gesteckt werden.
Düse für Verlängerungsroh
Das Zubehörteil bis zum Anschlag auf die Pistole schieben, dabei
müssen die Markierung auf der Düse und die Markierung auf der
Pistole aufeinander ausgerichtet sein (Abb.E). Anschließend um
90° in Pfeilrichtung (Uhrzeigersinn) (B) drehen. Das Zubehörteil
bleibt in dieser Position blockiert.
18 Mit diesem Zubehörteil ist eine schnelle Reinigung an all den Stellen erzielbar, an denen sich normalerweise der hartnäckigste Staub festsetzt wie z.B. am Kochfeld. Hier löst der Dampf jegliche Art von
Fettigkeit auf ganz natürliche Weise, ohne Chemiereinigungsmittel verwenden zu müssen.
Rundbürste
Dieses Zubehörteil wird auf die Einspritzdüse montiert und hilft
auch die widerstandfähigsten Verkrustungen zu lösen wie z.B. diejenigen, die sich auf dem Kochfeld ablagern.
Für die Reinigung der Sanitäranlagen, Spülbecken, Bratroste,
Duschen oder Badewannen verwendbar. Beseitigt
Kalkablagerungen (Abb. F).
(In den Kundenservice-Centern Ariete sind die Bürsten in verschiedenen Farben für den Einsatz in unterschiedlichen Räumen erhältlich).
Schrägdüse
Dieses Zubehörteil ist auf die Verlängerungsdüse oder auf die
Spritzdüse montierbar (Abb. G). Erreicht und hygienisiert
Problemzonen wie z.B. Heizkörper, Rollläden, Sanitäranlagen und
beseitigt den Schmutz mühelos schnell.
Abb. D
Abb. E
Abb. F
Abb. G
B
3_interno_D 3-06-2004 18:25 Pagina 25
Page 28
26
D
Stoffbürste mit Wischtuch:
Die Bürste für Stoffe (18) ist auf die Spritzdüse (20) montierbar.
Dank der praktischen Haube kann die Bürste bei der täglichen
Reinigung von Sofas, Sesseln (Abb. H), aber auch im
Schlafzimmer, auf Decken, Matratzen und Kissen eingesetzt werden.
Die Bürste dient außerdem dem Auffrischen der Stoffe (Abb. I) und
beseitigt alle Falten. Es empfiehlt sich, das Kondenswasser sowohl
beim ersten als auch während des Gebrauchs in einen Behälter
abfließen zu lassen.
Der Dampfaustritt ist durch den hierzu vorgesehenen Drehknopf
(28) regelbar. Auf diese Weise kann die Dampfmenge ganz nach
dem zu behandelnden Gewebe eingestellt werden. (Bitte lesen Sie
die Herstelleranweisungen sorgfältig durch!)
Stoffbürste Fenstergummi
An der Bürste kann das Fenstergummi
(17) befestigt werden. Hierzu die Haken
(L1) an der Seite des Fenstergummis in
die Zungen (L2) an der Bürste einhaken
und die beiden Teile miteinander verbinden (Abb. L-M).
Der Fensterwischer bringt alle Glasscheiben und Spiegel zum Glänzen und ist
auch auf den Duschkabinenwänden leicht benutzbar.
Mit der Kombination Verlängerungsrohre (11) und Fensterwischer sind auch die
besonders schwierig zu erreichenden und hohen Stellen erreichbar wie z.B.
Glaswände oder hohe Fenster.
ACHTUNG: VERWENDEN SIE BITTE NICHT DEN FENSTERWISCHER, WENN DIE ZU BEHANDELNDE
OBERFLÄCHE KALT IST. Der eventuelle Temperaturunterschied könnte das Glas zerbrechen.
Verlängerungsrohre
Zum Erreichen der höher liegenden Oberflächen einsetzbar. Mit der
Stoff-, Fensterwisch- oder Fußbodenbürste verwendbar (Abb. N).
Abb. H
Abb. I
Abb. L
Abb. M
Abb. N
L1
L2
3_interno_D 3-06-2004 18:25 Pagina 26
Page 29
27
D
Bürste für Fußböden
Dieses Zubehörteil ist mit den Verlängerungsrohren (11)einsetzbar
und mit praktischen Tuchklammern (G1) ausgestattet, die sich für
alle Arten von spülmaschinenfesten Tüchern eignen. Für eine wirksame und schnelle Reinigung aller Oberflächen! Um das Tuch an
der Bürste zu befestigen, das Tuch unter die Bürste legen und die
überstehenden Tuchecken unter den Befestigungsklammern an der
Bürste befestigen (Abb.O).
Aufwischtuch
In der Lieferung ist 1 Aufwischtuch (7) inbegriffen. Dank der praktischen Tuchklammern können auf der
Bürste alle Arten von Wischtüchern angebracht werden. Nur dampfbeständige Wischtücher verwenden.
Zubehör-Aufbewahrungstasche
Das Gerät ist mit einer Zubehörtasche zur Aufnahme aller
Zubehörteile ausgestattet, damit sie stets in griffbereiter Nähe sind
(Abb. P).
GERÄTEELEMENTE
Druckmesser
Mit dem Druckmesser ist der Dampfdruck mühelos leicht kontrollierbar. Der Zeiger des Druckmessers
zeigt ( ) an, sobald kein Wasser mehr vorhanden ist.
Dampfregler
Die Drehung des Dampfregelknopfes nach rechts verringert die
Dampfmenge und ist für empfindlichere Oberflächen und geringe
Schmutzablagerungen geeignet. Die Drehung nach links erhöht
dagegen die Dampfmenge, so dass auch der hartnäckigste
Schmutz beseitigt werden kann. (Abb. Q).
Gummiräder
Dank der internen Rädergummierung braucht das Produkt nicht mehr „mitgeschleppt“ zu werden, da es
geradezu leicht auf allen Oberflächen gleitet.
Kabelaufwicklung
Kabel während des Gebrauchs ganz abwickeln. Das Speisekabel ist nach dem Geräteeinsatz ganz leicht
um die praktische Kabelaufwicklung aufrollbar, so dass das Produkt stets in ordentlichem Zustand vorliegt.
Abb. P
Abb. Q
Abb. O
G1
G1
3_interno_D 3-06-2004 18:25 Pagina 27
Page 30
28
D
Vertikale Rohrstellung
Das Rohr ist durch den rückseitigen Produktschlitz für kurze Zeiten senkrecht aufstellbar.
Bügeleisen (32)
Sicherheitsvorschriften
•Vorm Gebrauch kontrollieren, ob die Netzspannung den Angaben auf dem Typenschild des
Bügeleisens entspricht.
•Das Gerät nie in Wasser tauchen.
•Das Bügeleisen darf nur von Erwachsenen benutzt werden.
•Das Bügeleisen für Kinder unzugänglich aufbewahren.
•Das Bügeleisen nie unbeaufsichtigt lassen.
•Wird das Bügeleisen nicht benutzt, stets das Anschlusskabel und Dampfleitung (30) vom Gerät tren-
nen und den Netzstecker des Geräts (36) abziehen.
•Während des Betriebs muss das Bügeleisen auf der mitgelieferten Bügeleisenablage (38) abgestellt
werden.
• Bei Schäden oder Funktionsstörungen das Bügeleisen nicht benutzen.
•Alle Reparaturen, einschließlich Austausch des Anschluss- bzw. Verbindungskabels, müssen vom
ARIETE Kundendienst oder einem Fachelektriker ausgeführt werden.
Bedienungsanleitung für das Bügeleisen:
GERÄT ABSCHALTEN UND NETZSTECKER ABTRENNEN, BEVOR DAS BÜGELEISEN EINGESCHALTET
UND VOM MASCHINENKÖRPER (6) ABGETRENNT WIRD. DIES GILT FÜR ALLE EINSÄTZE.
- Vor dem Einführen des Kabelsteckers (36) in die Steckdose des
Maschinengehäuses ist die Luke (31) zu öffnen. Dabei ist gemäß
der Abb. T ein leichter Druck auf die Federn an den
Steckerendseiten auszuüben. Anschließend Steckverbinder
gemäß der Abb. R (für Bügeleisen Mod. 4210/2) und Abb. S (für
Bügeleisen Mod. 4210/5) einfügen.
Den Gerätestecker in die Steckdose stecken und zum Dampfbügeln den EIN/ AUS Schalter (5) betätigen. Den Heizkessel nicht einschalten, wenn ohne Dampf gebügelt werden soll.
- Den Temperaturregler (35) entsprechend der Stoffart auf die
gewünschte Temperatur einstellen.
WICHTIG!
Bei unterschiedlichen Stoffarten bügeln Sie zunächst die
Kleidungsstücke, die mit der niedrigsten Temperatur gebügelt werden müssen.
- Bei senkrechtem Bügel können bequem aufgehängte
Kleidungsstücke und Vorhänge gebügelt werden.
- Zur Dampfabgabe braucht nur einer der Dampfaschalter am
Bügeleisen betätigt zu werden (34 Dampfstoß, 33 DampfDauerbetrieb).
Abb. R
Abb. T
Abb. S
3_interno_D 3-06-2004 18:25 Pagina 28
Page 31

29
D
ACHTUNG!
Jedes Mal, wenn mit dem Bügeln begonnen wird, können Kondenswassertropfen, die sich in der Leitung
gebildet haben, aus der Bügelfläche austreten. Um dies zu vermeiden, den Dampfschalter fern vom Stoff
solange betätigen, bis keine Wassertropfen mehr austreten.
- Nach dem Dampfbügeln kann der im Heizkessel verbliebene Dampf entfernt werden, indem der
Dampfregler (35) gegen den Uhrzeigersinn auf "MAX" gedreht und der Dampfschalter solange betätigt
wird, bis kein Dampf mehr austritt.
Auf diese Weise können einige Bekleidungsstücke auch bei abgeschaltetem Kessel dampfgebügelt werden. Um den Schlauch
herauszuziehen: Die beiden Seitenlaschen andrücken und gemäß
Abb. U ziehen.
ACHTUNG!
Das Bügeleisen vollständig abkühlen lassen, bevor es nach dem
Gebrauch weggestellt wird.
AUFFÜLLEN DES WASSERKESSELS WÄHREND DES GERÄTEBETRIEBS
Falls kein Wasser mehr vorhanden ist, stoppt die Betätigung des Druckknopfes (22) oder (33) oder (34)
den Dampfaustritt. Der Druckmesser (27) zeigt die im Kessel vorhandene Dampfmenge an. Zeigt der
Manometerzeiger während des Betriebs auf das Symbol , bedeutet dies, dass kein Wasser mehr im
Heizkessel ist. Das Auffüllen des Wassers muss wie folgt vorgenommen werden:
a) Das Gerät mit dem Schalter (5) abschalten.
b) Druckknopf (22) für den restlichen Dampfauslass und Druckknopf (34) bei einem Gebrauch des
Bügeleisens drücken;
c) Stecker aus der Steckdose ziehen.
d) Den Sicherheitsverschluss (2) langsam aufdrehen und vor vollständigem Öffnen einige Sekunden
warten, bis das Zischen des Wasserdampfs aufgehört hat.
EINIGE MINUTEN WARTEN. ERST DANN KESSEL WIEDER MIT WASSER FÜLLEN.
e) Neues Wasser einfüllen. Um ein Spritzen von Wasser und Dampf zu vermeiden, soll-
te das Wasser langsam eingefüllt werden. Es empfiehlt sich nach der Gerätabtrennung von der
Steckdose mindestens 3 Minuten zu warten, bevor der Dampfkessel wieder mit Wasser gefüllt wird;
f) Den Sicherheitsverschluss wieder festschrauben.
g) Den Stecker wieder in die Steckdose stecken.
h) Den Schalter (5) drücken.
REINIGUNG UND WARTUNG
Reinigungs- und Wartungsarbeiten dürfen nur ausgeführt werden wenn der Stecker aus der Steckdose
abgezogen ist. Bevor das Gerät weggestellt oder gereinigt wird, muss es vollständig abgekühlt sein. Um
ein gutes und lang anhaltendes Funktionieren zu gewährleisten, muss das Innere des Heizkessels einmal
im Monat zur Beseitigung von Kalkresten ausgespült werden. Keinen Essig oder andere Entkalkungsmittel
verwenden.
Abb. U
3_interno_D 3-06-2004 18:25 Pagina 29
Page 32

30
D
NACH GEBRAUCH
Dampfkessel abschalten und restlichen Dampf durch den Druckknopf (22) oder (33) oder (34) ausfließen
lassen, wenn man mit den Reinigungsarbeiten oder dem Bügeln fertig ist. Bei der Entleerung des nach
dem Gebrauch noch im Kessel verbliebenen Dampfes stets vor Augen halten, dass das darin enthaltene
Wasser noch lange äußerst heiß bleibt.
Folglich mindestens 1 Stunde warten. Erst dann den Verschluss
öffnen und den Dampfkessel vorsichtig entleeren.
Speisekabel (30) um die Kabelwicklung wieder wickeln (Abb. V).
Den Schlauch (24) um das Gehäuse wickeln (Abb.Z), die
Sicherheitsverriegelung (21) sperren und die Pistole auf dem entsprechenden Griff ablegen.
Abb. Z
Abb. V
3_interno_D 3-06-2004 18:25 Pagina 30
Page 33

31
F
MODE D’EMPLOI
4_interno_F 3-06-2004 9:03 Pagina 31
Page 34

32
F
Cher Client,
Nous vous remercions pour la préférence que vous nous avez accordée.
Le modèle que vous avez choisi fait partie de la ligne Vaporì, une gamme de produits idéaux pour le
nettoyage de toute la maison grâce à la force dégraissante et nettoyante de la vapeur. Un nettoyage
écologique qui ne requiert l’usage d’aucun détergent chimique.
La ligne Vaporì se compose de différents produits adaptés à toutes les nécessités:
Vaporì, le premier balai-brosse à vapeur pour une hygiène quotidienne et immédiate des sols.
Vaporì Glass, nettoie à fond les vitres, les miroirs et de nombreuses superficies lavables chaque jour et
sans effort.
Vaporì Jet, le seul pistolet à vapeur avec une chaudière sous pression, idéal pour le nettoyage rapide des
surfaces difficiles (sanitaires, radiateurs, stores).
Multi Vaporì, produit polyvalent et compact, doté de nombreux accessoires pour l’hygiène en profondeur
de toutes les surfaces.
IMPORTANT: LISEZ ATTENTIVEMENT CE MODE D’EMPLOI AVANT D’UTILISER L’APPAREIL ET
CONSERVEZ-LE AVEC SOIN.
DESCRIPTION DE L’APPAREIL
1
Poignée
2
Bouchon de sûreté
3
Voyant orange (vapeur prête)
4
Voyant vert (en ligne)
5
Interrupteur ON/OFF
6
Corps de l’appareil
7
Chiffon pour les sols
8
Brosse pour les sols
9
Raccord pour nettoyage vitres
10
Sac
11
Tuyau rallonge
12
Raccord Brosse
13
Capuchon
14
Brosse ronde
15
Bec coudé
16 Cache pour tissus
17
Essuie-vitres
18
Brosse pour tissus
19
Bec de rallonge
20
Buse pistolet
21
Curseur de sûreté
22
Bouton de vapeur
23
Pistolet
24
Tuyau souple à désassembler
25
Doseur
26
Entonnoir
27
Manomètre
28
Bouton de réglage vapeur
29
Enrouleur cordon
30
Cordon d’alimentation + fiche
31 Portillon
Fer à repasser
32
Fer à repasser(Seulement Vers.
4210/2)
32/A
Fer à repasser(Seulement Vers.
4210/5)
33
Bouton de vapeur continue
34
Bouton vapeur
35
Bouton thermostat de réglage température
36
Cordon d’interconnexion
37
Témoin lumineux de contrôle
38 Grille
4_interno_F 3-06-2004 9:03 Pagina 32
Page 35

33
F
AVERTISSEMENTS IMPORTANTS
LIRE ATTENTIVEMENT CES INSTRUCTIONS
•L’appareil est équipé d’un thermostat qui limite la température, d’un thermofusible et d’un bouchon de
sûreté. Sa conception est conforme aux normes européennes concernant les appareils électroménagers.
•Avant de brancher l’appareil, contrôlez que la tension du réseau corresponde à celle qui est indiquée
sur la plaquette.
•Branchez toujours l’appareil sur une prise de courant reliée à la terre.
•Ne laissez jamais l’appareil sans surveillance lorsqu’il est branché au réseau électrique.
•Ne dirigez jamais le jet de vapeur vers des personnes ou des animaux, ou vers des
appareils ayant des parties électriques (par ex. des fours).
•Ne trempez pas l’appareil dans l’eau ou autres liquides.
•Eteignez toujours l’appareil au moyen de l’interrupteur (5) et débranchez la prise de courant pendant
les remplissages.
•Ne laissez pas l’appareil à la portée des enfants. Lorsque l’appareil n’est pas utilisé, bloquez toujours
le bouton de distribution de la vapeur avec le curseur de sécurité spécial (21).
•N’ajoutez jamais de produits détartrants, aromatiques, alcoolisés ou détergents dans l’appareil car ils
pourraient l’endommager ou le rendre dangereux.
ATTENTION: Risque de brûlures.
•Ne touchez pas les parties chaudes; au cours de l’utilisation.
Laissez refroidir les accessoires avant de les remplacer.
•N’OUVREZ JAMAIS LE BOUCHON DE SECURITE (2) EN COURS D’UTILISATION.
•
ATTENTION
: avant de dévisser le bouchon (2) procédez de la manière suivante:
- éteignez l’appareil au moyen de l’interrupteur (5);
- evacuer la vapeur en appuyant sur le bouton (22);
- débranchez le cordon d’alimentation de la prise de courant;
- dévissez lentement le bouchon (2) et attendez quelques secondes avant de le dévisser complètement.
• Lors de la première utilisation ou après un arrêt prolongé, vidanger l’eau dans un récipient.
•N’utilisez pas l’appareil s’il est endommagé. Toutes les réparations, y compris le rem-
placement du cordon d’alimentation, doivent être effectuées impérativement par un
Service Après-Vente Ariete ou par des techniciens agréés Ariete, car des outils spéciaux sont nécessaires afin de prévenir les risques.
•Avant d’utiliser le produit, assurez-vous que les objets, les surfaces et les tissus à trai-
ter sont résistants ou compatibles avec la température élevée de la vapeur. En particulier sur les sols en terre cuite traitée, les surfaces en bois et les tissus délicats comme
la soie et le velours, on recommande de consulter les instructions du fabricant et d’effectuer un essai sur un coin caché ou sur un échantillon.
4_interno_F 3-06-2004 9:03 Pagina 33
Page 36

34
F
• Il est conseillé d’utiliser l’eau du robinet ou, en alternative, de l’eau minéralisée.
•ATTENTION: N’UTILISEZ JAMAIS LA BROSSE LAVE-VITRE SUR UNE SURFACE FROIDE. L’écart de
température pourrait en provoquant la rupture.
•Ce produit est conçu pour un usage ménager et n’est pas destiné à un usage industriel.
•Cet appareil devra être destiné exclusivement à l’usage pour lequel il a été conçu et selon les instructions de mode d’emploi. Toute autre utilisation doit être considérée abusive et par conséquent dangereuse.
Le constructeur ne pourra en aucun cas être retenu responsable des éventuels dommages dérivant
d’un emploi abusif ou erroné.
•L’appareil est conforme à la Directive CEE 89/336 relative à la compatibilité électromagnétique.
CONSERVEZ CES INSTRUCTIONS
MODE D’EMPLOI
Remplissage du réservoir de la chaudière avant l’emploi:
Ne branchez pas la fiche du câble d’alimentation dans la prise de
courant.
Dévissez le bouchon de sûreté (2) et au moyen de l’entonnoir (26),
versez dans la chaudière deux doseurs (25) d’eau, remplis jusqu’au
niveau maximum, dans la chaudière (Fig. A). Revissez le bouchon
de sûreté (2).
NE DÉVISSEZ JAMAIS LE BOUCHON DU RÉSERVOIR AVANT DE VOUS ÊTRE ASSURÉ QUE
L’ APPAREIL EST ÉTEINT ET DÉBRANCHÉ DE LA PRISE DE COURANT.
ALLUMAGE DE L’APPAREIL
Pour allumer l’appareil, branchez la fiche du cordon d’alimentation
dans la prise de courant. Appuyez sur l’interrupteur de marche (5);
le voyant vert (4) et le voyant orange (3) s’allument (Fig. B). Dès
que le voyant orange (3) s’éteint, l’appareil est prêt pour l’emploi.
Pour empêcher la production accidentelle de vapeur, déplacer vers
l’arrière le curseur de sûreté (21) dans la position ••.
La poignée Regola Vapore (28) permet de doser la quantité de vapeur, pour pouvoir utiliser l’appareil sur
toutes les surfaces et sur tous les tissus.
APPLICATION DES DIFFÉRENTS ACCESSOIRES
Tuyau flexible à désassembler
AVANT DE RELIER LE TUBE FLEXIBLE A LA PRISE DU CORPS
MACHINE OU AVANT DE LE RETIRER, ETEINDRE L’APPAREIL
AVEC L’INTERRUPTEUR ET DEBRANCHER LA FICHE D’ALIMENTATION. Avant d’introduire la prise du tube flexible (24) dans la
prise du corps machine (6), ouvrir le portillon (31) en vérifiant que
Fig. A
Fig. B
Fig. C
4_interno_F 3-06-2004 9:03 Pagina 34
Page 37

35
F
la flèche de la prise du tube flexible soit dirigée vers le haut comme
illustré en figure C, et en exerçant une légère pression sur les ressorts situés à côté de la prise.
Introduire la fiche d’alimentation de l’appareil et actionner l’interrupteur.
Pour retirer le tube flexible, appuyer sur les deux ailettes latérales
et tirer comme illustré en figure D.
Capuchon
Cet accessoire (13) peut être appliqué sur la buse pistolet (20) pour protéger l’extrémité de la buse.
Bec de rallonge
Introduisez l’accessoire en le poussant jusqu’à la partie fixe du
pistolet et en alignant le repère du bec sur celui du pistolet (Fig. E).
Ensuite, tournez le bec de 90° dans le sens (horaire) indiqué par la
flèche (B). De cette manière, l’accessoire reste fixe dans la position
de blocage.
Cet accessoire permet de nettoyer rapidement les endroits où le gras le plus persistant s’installe habituellement, comme le pourtour des plans de cuisson; la vapeur permet de dissoudre le gras de façon
naturelle et sans devoir ajouter de détergents chimiques.
Brosse ronde
Cet accessoire doit être appliqué sur le bec injecteur pour éliminer
les incrustations les plus résistantes comme celles qui se forment
sur les plaques du plan de cuisson.
Il peut être utilisé pour le nettoyage des sanitaires, des éviers, des
grilles de cuisson, de la douche ou de la baignoire car il aide à éli-
miner toute trace de calcaire (Fig. F).
(Il est possible d’acheter, auprès des centres d’Assistance Ariete, des brosses de plusieurs couleurs pour
les utiliser dans les différentes ambiances).
Bec incliné
Cet accessoire peut être appliqué sur le bec de la rallonge ou sur
la buse à pistolet (Fig. G). Utile pour nettoyer les points les plus
difficiles à atteindre, tels que les radiateurs, les persiennes, les
sanitaires, éliminant la saleté de façon simple et rapide.
Fig. D
Fig. E
Fig. F
Fig. G
B
4_interno_F 3-06-2004 9:03 Pagina 35
Page 38

36
F
Brosse pour tissus avec chiffon
La brosse pour tissus (18) peut être installée sur la buse à pistolet
(20). A travers le cache spécial pour tissus, il est possible d’utiliser la brosse pour le nettoyage quotidien des canapés, des fauteuils (Fig. H), ainsi que, dans la chambre à coucher, des couvertures, des matelas et des coussins.
La brosse permet aussi de rafraîchir les tissus (Fig. I), en éliminant
les plis. Il est conseillé dans tous les cas, aussi bien lors de la première utilisation qu’au cours du nettoyage quotidien, de décharger
l’eau de condensation de la vapeur dans un récipient.
Il est possible de régler la sortie de vapeur à travers la poignée (28)
pour adapter le flux à chaque tissu. (Il est recommandé de lire
attentivement les instructions du fabricant).
Brosse essuie-vitre
On peut appliquer l’essuie-vitre (17) à la
brossepour tissus (18) en introduisant les
crochets (L1) présents sur les côtés dans
les languettes (L2) de la brosse (Fig. L) et
en unissant les deux pièces (Fig. M).
La brosse lave-vitre permet de nettoyer parfaitement et de faire briller toutes les
surfaces vitrées et tous les miroirs. Elle est facile à utiliser aussi sur les vitres de
la cabine de la douche. Pour nettoyer les points hauts difficiles à atteindre, tels
que les grandes baies vitrées ou les fenêtres surélevées, il faut utiliser la brosse
lave-vitre avec les rallonges spéciales (11). ATTENTION: N’UTILISEZ JAMAIS LA
BROSSE LAVE-VITRE SUR UNE SURFACE FROIDE. L’écart de température pourrait en provoquant la rupture.
Tubes rallonge
23 Ils peuvent être utilisés pour atteindre les surfaces les plus hautes. Ils peuvent être utilisés avec la brosse pour tissus, avec la
brosse lave-vitre ou avec la brosse pour sols (Fig. N).
Brosse pour les sols
Cet accessoire s’utilise avec les rallonges (11) et il est muni de pinces d’accrochage pratiques (G1) capables de recevoir tout type de
chiffon lavable en machine à laver, pour un nettoyage efficace et
rapide de toutes les surfaces. Pour monter le chiffon, poser la brosse dessus puis tirer les extrémités du chiffon qui dépassent sous
les pinces d’arrêt (G1) d’après la figure O.
Fig. H
Fig. I
Fig. L
Fig. M
Fig. N
Fig. O
L1
L2
G1
G1
4_interno_F 3-06-2004 9:03 Pagina 36
Page 39

37
F
Chiffon
La fourniture comprend 1 chiffon pour sols (7). Grâce aux pinces d’accrochage, vous pourrez appliquer
sur la brosse tout type de chiffon à condition qu’il soit résistant à la vapeur.
Poche à accessoires
L’ appareil est muni d’une poche à accessoires qui permet de ranger tous les accessoires et de les avoir toujours à portée de main.
(Fig. P).
ELEMENTS DE L’APPAREIL
Manomètre
Le manomètre permet de contrôler facilement la pression de la vapeur. Lorsque l’eau est terminée, l’aiguille du manomètre indique ( ).
Poignée de réglage de la vapeur
En tournant la poignée vers la droite, on diminue la quantité de
vapeur, pour le nettoyage léger des surfaces les plus délicates.
En tournant la poignée vers la gauche, on augmente la quantité de
vapeur, pour éliminer le gras et la saleté les plus résistants (Fig. Q).
Roues en caoutchouc
Les roues en caoutchouc permettent de tirer sans difficulté l’appareil qui roule facilement sur toutes les
surfaces.
Enrouleur du câble
Rappelez-vous de dérouler entièrement le câble pendant l’utilisation. Lorsque l’appareil a été utilisé, il est
possible d’enrouler le câble d’alimentation autour de l’enrouler pour ranger l’appareil.
Rangement de la tige verticale
L’ orifice pratiqué sur la partie arrière de l’appareil permet de ranger la tige verticalement pendant une
brève période.
Fer à repasser (32)
Règles de sécurité
•Ne trempez pas l’appareil dans l’eau.
• Le fer à repasser doit être utilisé par une personne adulte.
•Gardez le fer hors de portée des enfants.
•Ne laissez pas le fer à repasser sans surveillance.
Fig. P
Fig. Q
4_interno_F 3-06-2004 9:03 Pagina 37
Page 40

4_interno_F 3-06-2004 9:03 Pagina 38
•Toujours débrancher la fiche de raccordement du fer (30) de la machine ainsi que la fiche o d’alimentation de la machine (36) lorsqu’on ne l’utilise pas.
•Durant le fonctionnement, posez le fer sur le tapis spécifique (38) fourni.
•N’utilisez pas le fer à repasser en cas de dégâts ou d’anomalies durant le fonctionnement.
• Il est nécessaire de le porter dans un Centre d’Assistance agréé ARIETE pour toute opération d’entretien y compris pour le remplacement du cordon d’interconnexion.
Mode d’emploi du fer:
AVANT DE BRANCHER ET DE DEBRANCHER LE FER A REPASSSER DU CORPS DE LA MACHINE (6),
ETEINDRE L’APPAREIL A TRAVERS L’INTERRUPTEUR ET DEBRANCHER LA FICHE D’ALIMENTATION
AVANT TOUTE OPERATION.
- Avant d’introduire la prise du câble de connexion (36) dans la
prise de la machine, ouvrir le portillon (31) et exercer une légè-
F
re pression sur les ailettes qui se trouvent à l’extrémité de la
fiche, comme illustré en figure T. Introduire ensuite le connecteur comme illustré en figure R (pour fer à repasser Modèle
4210/2) et en figure S (pour fer à repasser Modèle 4210/5).
Brancher la fiche d’alimentation de l’appareil et actionner l’interrupteur (5) pour repasser à la vapeur.
Si vous souhaitez repasser sans vapeur, n’allumez pas la chaudière.
Fig. S
- Actionnez le thermostat de réglage de la température (35) suivant le type de tissu à repasser.
IMPORTANT!
Si vous devez repasser des vêtements de différents types de tissu,
séparez-les et commencez le repassage des tissus à basse température.
- Le repassage vertical permet de repasser facilement et parfaitement les pièces suspendues et les rideaux.
- Pour obtenir de la vapeur, il suffit d’actionner un des interrupteurs de vapeur présents sur le fer à repasser (34 vapeur intermittente; 33 vapeur fixe).
ATTENTION!
Au début de chaque séance de repassage, des gouttes d’eau peuvent s’écouler par les trous de la plaque
du fer; elles se sont formées par condensation de la vapeur dans le passage à travers le tuyau spécifique.
Pour éviter ce problème, il suffit d’actionner le bouton de vapeur jusqu’à la fin de l’écoulement des gouttes d’eau, en gardant le fer loin des tissus.
Fig. R
Fig. T
- Au terme du repassage à la vapeur, on peut vider la vapeur restée dans la chaudière en tournant le bouton de réglage de la vapeur (35) dans le sens inverse horaire sur “MAX” et en continuant à appuyer
sur l’interrupteur du fer jusqu’à l’épuisement de la vapeur.
Cela permet de repasser quelques vêtements avec la vapeur tout en ayant éteint la chaudière.
38
Page 41

39
F
Pour retirer le tube flexible, appuyer sur les deux ailettes latérales
et tirer comme illustré en figure U.
ATTENTION!
Avant de ranger le fer à repasser, après l’emploi, laissez-le refroidir
complètement.
COMMENT EFFECTUER LE REMPLISSAGE DE LA CHAUDIÈRE PENDANT L’EMPLOI
Lorsque l’eau est terminée, le flux de vapeur ne sort plus lorsque l’on actionne le bouton (22) (33) ou
(34). Le manomètre (27) indique la quantité de vapeur présente dans la chaudière. Si durant l’emploi la
flèche du manomètre indique le symbole , cela signifie que l’eau dans la chaudière est épuisée.
Il faut donc effectuer un nouvel approvisionnement en procédant de la manière suivante:
a) éteignez l’appareil en actionnant l’interrupteur ON/OFF (5);
b) frapper le poussoir (22) pour évacuer la vapeur résiduelle et le poussoir (34) en cas d’utilisation du
fer à repasser;
c) débrancher la fiche de la prise d’alimentation;
d) dévisser lentement le bouchon de sécurité (2) et attendre quelques secondes que le sifflement de
vapeur s’arrête avant de le dévisser complètement.;
ATTENDRE QUELQUES MINUTES AVANT D’INTRODUIRE A NOUVEAU DE L’EAU DANS LA CHAUDIERE.
e) versez l’eau lentement au début pour éviter les bouffées de vapeurs; après avoir débran-
ché l’appareil de la prise de courant, il est conseillé d’attendre au moins 3 minutes avant de verser à
nouveau de l’eau dans la chaudière;
f) revissez à fond le bouchon de sûreté;
g) rebranchez l’appareil sur la prise de courant;
h) appuyez sur l’interrupteur de marche (5).
NETTOYAGE ET ENTRETIEN
Avant toute opération, débranchez l’appareil. Avant de ranger l’appareil ou le nettoyer, attendez qu’il ait
refroidi. Pour assurer un fonctionnement parfait et durable, il suffit de rincer une fois par mois l’intérieur
de la chaudière à l’eau pour éliminer les résidus de calcaire accumulés. N’utilisez pas de vinaigre ni d’autres substances anti-calcaire.
APRÈS L’UTILISATION
A la fin du nettoyage et du repassage avec la vapeur, éteindre la chaudière et évacuer la vapeur résiduelle en actionnant le bouton (22) (33) ou (34).
Avant de vider l’eau qui est restée dans la chaudière après l’utilisation, rappelez-vous que l’eau dans la chaudière se maintient à une
température élevée pendant longtemps.
Attendre, donc, au moins 1 heure avant d’ouvrir le bouchon puis
vider la chaudière avec prudence.
Enrouler le câble d’alimentation (30) autour de l’enrouleur (Fig. V).
Fig. V
Fig. U
4_interno_F 3-06-2004 9:03 Pagina 39
Page 42

40
F
Enroulez le tuyau souple (24) sur le corps de l’appareil (Fig. Z) et
remettez le pistolet sur la poignée prévue après avoir remis le curseur de sûreté (21) dans la position de blocage..
Fig. Z
4_interno_F 3-06-2004 9:03 Pagina 40
Page 43

41
NL
GEBRUIKSAANWIJZINGEN
5_interno_NL 3-06-2004 9:05 Pagina 41
Page 44

42
NL
Vriendelijke klant,
Hartelijk dank voor de voorkeur die u aan ons product heeft gegeven.
Het door u gekozen model maakt deel uit van de lijn Vaporì, een reeks producten, ideaal voor het reinigen van het hele huis, dankzij de ontvettende en hygiënische kracht van stoom. Ecologisch reinigen,
zonder gebruik van chemische reinigingsmiddelen.
De Vaporì lijn bestaat uit specifieke produkten voor elke behoefte:
Vaporì, de eerste borstel met stoom voor een snelle en dagelijkse reiniging van de vloeren.
Vaporì Glass, reinigt grondig en zonder enige moeite ruiten, spiegels en veel andere oppervlakten die
iedere dag dienen te worden schoongemaakt.
Vaporì Jet, de enige stoomspuit met ketel onder druk ideaal voor de snelle reiniging van moeilijke oppervlakten (w.c. en wasbakken, verwarmingselementen, rolgordijnen).
Multi Vaporì, een veelzijdig en compact produkt met een complete accessoires uitrusting, om alle oppervlakten diep te reinigen.
BELANGRIJK: LEES VOOR HRT GEBRUIK AANDACHTIG DE INSTRUCTIES EN AANWIJZINGEN IN
DEZE HANDLEIDING DIE MET ZORG BEWAARD MOET WORDEN.
BESCHRIJVING VAN HET APPARAAT
1
Handvat
2
Veiligheidsdop
3
Oranje controlelampje (stoom klaar)
4
Groen controlelampje (in werking)
5
Uit/aan schakelaar
6
Apparaat lichaam
7
Doek voor de vloer
8
Borstel voor de vloer
9
Aansluiting voor het reinigen van de ruiten
10
Buidel
11
Verlengstukken
12
Borstel aansluitstuk
13
Dop
14
Rond borsteltje
15
Gebogen mondstuk
16 Kap voor stoffen
17
Ruitenwasser
18
Kledingborstel
19
Verleng mondstuk
20
Spuit mondstuk
21
Veiligheidscursor
22
Knop voor stoomverstrekking
23
Spuit
24
Ontkoppelbare slang
25
Maatbeker
26
Trechter
27
Manometer
28
Stoomafstel knop
29
Kabel opwikkelaar
30
Voedingskabel
31 Klepje
Strijkijzer
32
Strijkijzer(Alleen
4210/2
versie
)
32/A
Strijkijzer(Alleen
4210/5
versie
)
33
Continu stoom knop
34
Stoom knop
35
Thermostaat knop voor temperatuur afstelling
36
Aansluitingskabel
37
Verlicht controlelampje
38 Rooster
5_interno_NL 3-06-2004 9:05 Pagina 42
Page 45

43
NL
BELANGRIJKE AANWIJZINGEN
LEES DEZE INSTRUCTIES AANDACHTIG DOOR
•Het apparaat is uitgerust met een thermostaat die de temperatuur regelt, en een veiligheidsdop. De
constructie is in overeenstemming met de veiligheidsvoorschriften voor huishoudelijke artikelen.
•Alvorens het apparaat aan het lichtnet aan te sluiten, controleer of de op het etiket aangeduide net-
spanning overeenstemt met het lichtnet.
•Sluit het apparaat altijd aan aan een geaard stopkontakt.
• Laat het apparaat nooit onbeheerd achter als deze is aangesloten aan het lichtnet.
•Richt de stoom nooit in de richting van personen of dieren, of in de richting van apparaten die elektrische onderdelen bevatten (bijv. ovens binnenkant).
•Dompel het apparaat nooit onder in water of andere vloeistoffen.
• Schakel het apparaat altijd uit met de schakelaar (5) en trek de stekker uit het stopkontakt tijdens het
bijvullen.
•Het apparaat buiten bereik van kinderen houden. Wanneer het apparaat niet wordt gebruikt moet de
knop voor de stoomuitstraling geblokkeerd worden met de speciale veiligheidschuif. (21).
•Voeg nooit ontkalking, aromatische, alcoholische of reinigingsmiddelen toe in het interne gedeelte
van het apparaat omdat dit schade aan het apparaat of gevaar voor de veiligheid kan veroorzaken.
ATTENTIE: Verbrandingsgevaar.
• Raak de warme gedeelten niet aan gedurende het gebruik.
Laat de accessoires afkoelen alvorens ze te vervangen.
•TIJDENS HET GEBRUIK DE VEILIGHEIDSDOP (2) NIET OPENEN.
• LET OP: alvorens de dop (2) te vervangen handel als volgt:
- zet het apparaat af met de schakelaar (5);
- de druk uitlaten door op de knop (22) te drukken;
- trek de toevoerkabel uit het stopkontakt;
- draai de dop (2) langzaam los en wacht enkele seconden alvorens de dop geheel los te
draaien.
•Bij het eerste gebruik of nadat het apparaat voor langere tijd niet gebruikt is, het water
verwijderen.
•Gebruik het apparaat niet als deze beschadigd is. Alle reparaties, ook de vervanging van de toevoerkabel, dienen uitsluitend te worden uitgevoerd door de Ariete Assistentie Centrum of door een door
Ariete erkende technicus, om elk risico te vermijden.
•Verzeker u ervan, alvorens het apparaat te gebruiken, dat de voorwerpen, de oppervlakten en de te behandelen stoffen weerbaar of geschikt zijn voor de hoge temperatuur van de stoom. Vooral voor behandelde stenen vloeren, houten vloeren en delicate
stoffen, zoals zijde en fluweel, wordt aanbevolen de raadgevingen van de constructeur
op te volgen en een test uit te voeren op een niet zichtbaar gedeelte of op een monster.
5_interno_NL 3-06-2004 9:05 Pagina 43
Page 46

44
NL
•Het wordt aangeraden om kraanwater of als alternatief gedemineraliseerd water te gebruiken.
•ATTENTIE: DE BORSTEL RUITENWISSER NIET GEBRUIKEN ALS HET TE BEHANDELEN OPPERVLAKTE KOUD IS. Het eventuele temperatuurverschil kan het glas breken.
•Dit produkt is uitsluitend geschikt voor huishoudelijk en niet voor industrieel gebruik.
•Dit apparaat is bestemd voor het aangegeven gebruik waarvoor het ontworpen is, en op de manier
zoals aangegeven in de gebruiksaanwijzing. Ander gebruik wordt als ongeoorloofd gebruik
beschouwt en is dus gevaarlijk. De constructeur kan niet verantwoordelijk gehouden worden voor
eventuele schade veroorzaakt door ongeoorloofd of fout gebruik.
•Het apparaat stemt overeen met de EEG Richtlijn 89/336 m.b.t. de elektromagnetische verenigbaarheid.
BEWAAR DEZE INSTRUCTIES
GEBRUIKSAANWIJZING
Het vullen van het warm water reservoir voor gebruik:
De stekker van de voedingskabel niet in het stopcontact steken.
Draai de veiligheidsdop (2) los en giet met de trechter (26) twee
maatbekers (25) water in het reservoir, tot het maximum niveau
gevuld (Fig. A). Draai de veiligheidsdop opnieuw aan. (2).
DRAAI DE DOP VAN HET RESERVOIR NOOIT LOS ZONDER U ERVAN TE VERZEKEREN DAT
HET APPARAAT IS UITGESCHAKELD EN DE STEKKER UIT HET STOPKONTAKT IS GETROKKEN.
HET INSCHAKELEN VAN HET APPARAAT
Voor het inschakelen van het apparaat steek de stekker in het stopkontakt. Druk de schakelaar (5) in; het groene controlelampje (4) en
het oranje controlelampje (3) lichten dan op. Zodra het oranje controlelampje (3) uit gaat, is het apparaat klaar voor gebruik. Om te
voorkomen dat per abuis stoom verstrekt wordt verzet de veiligheidsknop (21) naar achteren in •• stand.
16 Met de draaiknop Stoomregelaar (28), kan de hoeveelheid stoom geregeld worden. Hierdoor kan het
apparaat op ieder oppervlakte of bekleding gebruikt worden.
HET AANBRENGEN VAN DE VERSCHILLENDE ACCESSOIRES
Ontkoppelbare slang
VOORDAT DE FLEXIBELE BUIS AAN DE MACHINE WORDT VERBONDEN OF ERVAN WORDT LOSGEHAALD, HET APPARAAT UITZETTEN MET DE SPECIALE SCHAKELAAR EN DE STEKKER UIT
HET STOPCONTACT HALEN. Voordat de verbinding van de flexibele buis (24) aan de verbinding van het machinelichaam (6) wordt
Fig. A
Fig. B
Fig. C
5_interno_NL 3-06-2004 9:05 Pagina 44
Page 47

45
NL
verbonden, open het klepje (31) en let erop dat de pijl op de verbinding van de flexibele buis naar boven staat zoals aangegeven op
figuur C, en druk zacht op de veren aan op de zijkant van de verbinding.
De stroomstekker van het apparaat in het stopcontact steken en op
de schakelaar drukken.
Om de flexibele buis uit het machinelichaam te halen, druk op de twee laterale vleugeltjes en trek de buis
eruit zoals aangegeven op figuur D.
Kapje
Dit onderdeel (13) kan worden aangebracht op het spuit mondstuk (20) om het uiteinde van de pijp te
beschermen.
Verleng mondstuk
Breng het onderdeel aan tot deze het vaste gedeelte van de spuit
heeft bereikt en breng het teken op het verleng mondstuk in lijn met
het teken op de spuit (Fig. E).
Draai vervolgens het mondstuk 90° met de wijzers van de klok
mee, zoals aangegeven door de pijl (B). Op deze wijze blijft het
onderdeel geblokkeerd.
Met dit accessoire kan moeilijk verwijderbaar vuil, zoals rondom de kookplaat, snel gereinigd worden,
dankzij de stoom dat al het vet op een natuurlijk manier oplost zonder toevoeging van chemische reinigingsmiddelen.
Ronde borstel
Dit accessoire dat op het pomptuitje wordt gezet, helpt bij het ver-
brokkelen van harde korsten zoals korsten die op de kookplaat van
het fornuis kunnen ontstaan. Het kan ook gebruikt worden voor het
reinigen van sanitairs, gootstenen, roosters, douches of badkuipen
waarvan alle kalksporen verwijderd kunnen worden (Fig. F).
(Bij de Assistentiecentra Ariete kunnen afzonderlijk borstels in verschillende kleuren worden aangeschaft,
om ze in verschillende ruimtes te gebruiken).
Schuin tuitje
Dit accessoire kan op het verlengtuitje gezet worden of op het
spuitpistool (Fig. G). Handig voor het reinigen van moeilijk bereikbare punten zoals vuil rondom verwarmingselementen, luiken,
sanitairs. Het vuil wordt op deze manier snel en eenvoudig verwijderd.
Fig. D
Fig. E
Fig. F
Fig. G
B
5_interno_NL 3-06-2004 9:05 Pagina 45
Page 48

46
NL
Stofborstel met doek
De stofborstel (18) kan op het spuitpistool (20) gezet worden.
Door het handige kapje te gebruiken kan de borstel gebruikt worden bij de dagelijkse reiniging van bankstellen en stoelen (Fig. H),
en ook in de slaapkamer op de dekens, materassen en kussens.
Met de borstel kunnen stoffen (Fig. I) ook opgefrist worden door
iedere vouw eruit te halen. Het wordt in ieder geval aangeraden om
zowel aan het begin en gedurende het gebruik de stoomcondens op
te vangen in een bakje.
De stoomuitstraling kan geregeld worden met de speciale knop
(28) om de stoomstroom aan te passen aan iedere soort stof. (Lees
aandachtig de aanwijzingen van de fabrikant).
Borstel ruitenreiniger
Op de borstel (18) kan de ruitenreiniger
(17) worden aangebracht, door de klemmen (L1) die zich aan de zijkant bevinden
in de lipjes (L2) van de borstel (Fig. L) te
bevestigen en door de twee uiteinden te
verbinden (Fig. M).
Met de borstel ruitenwisser wordt ieder raam en iedere spiegel weer glanzend
schoon. Ook eenvoudig te gebruiken op het glas van de douchebox.
Gebruik de speciale verlengstukken (11) met de borstel ruitenwisser, het is
mogelijk om moeilijk bereikbare of hoge punten te bereiken, zoals grote of hoge
ramen.
ATTENTIE: DE BORSTEL RUITENWISSER NIET GEBRUIKEN ALS HET TE BEHANDELEN OPPERVLAKTE
KOUD IS. Het eventuele temperatuurverschil kan het glas breken.
Verlengstukken
Kunnen gebruikt worden om hoge plaatsen te bereiken. Kunnen
gebruikt worden met de stofborstel, de borstel ruitenwisser of met
de vloerborstel (Fig. N).
Borstel voor vloeren
Dit accessoire wordt samen met de verlengstukken gebruikt (11) en
heeft praktische doekklemmen (G1) waarop iedere soort doek, uitwasbaar in de wasmachine, gebruikt kan worden voor het doeltreffend en snel reinigen van ieder oppervlakte.
Fig. H
Fig. I
Fig. L
Fig. M
Fig. N
Fig. O
L1
L2
G1
G1
5_interno_NL 3-06-2004 9:05 Pagina 46
Page 49

47
NL
Voor het aanbrengen van het doek plaats de borstel erop, dan de uitstekende uiteinden van het doek
onder de blokkeer veren trekken, zoals aangeduid in figuur O.
Doek
Er wordt 1 vloerdoek bijgeleverd (7). Dankzij de handige doekklemmen kan iedere soort doek op de borstel worden gezet, mits deze doek stoombestendig is.
Zak accessoires
Het apparaat heeft een zak voor de accessoires zodat deze altijd in
de buurt van de machine blijven (Fig. P).
ELEMENTEN VAN HET APPARAAT
Manometer
Met de manometer kan eenvoudig de stoomdruk gecontroleerd worden. Wanneer het water op is geeft de
wijze van de manometer ( ) aan.
Knop stoomregelaar
Door de knop naar rechts te draaien verminderd de hoeveelheid
stoom, voor het reinigen van weinig vuil en delicate oppervlaktes.
Door de knop naar links te draaien verhoogd de hoeveelheid stoom
waardoor ook hardnekkig vuil opgelost kan worden. (Fig. Q).
Rubberen wielen
Dankzij het rubber rondom de wielen hoeft het apparaat niet gesleept te worden maar rijdt het eenvoudig
over alle oppervlaktes.
Kabelopwinder
De kabel moet altijd helemaal afgewonden worden tijdens het gebruik van het apparaat. Aan het einde van
het gebruik kan de kabel opgewonden worden rondom de eenvoudige kabelopwinder om het product
altijd in orde te hebben.
Verticale parkeerstang
Dankzij de opening aan de achterkant van het product kan het voor korte tijd geparkeerd worden op de
verticale stang.
Fig. P
Fig. Q
5_interno_NL 3-06-2004 9:05 Pagina 47
Page 50

48
NL
Strijkijzer (32)
Veiligheidsvoorschriften
•Dompel het apparaat zelf niet onder in water.
•De strijkijzer moet door een volwassene gebruikt worden.
•Houd de strijkijzer buiten bereik van kinderen.
• Laat de strijkijzer nooit onbeheerd achter.
•Ontbindt altijd de strijkijzer aansluitingsstekker (30) aan de machine en de voedingsstakker van de
machine (36) wanneer deze niet gebruikt wordt.
•Gedurende de werking plaats de strijkijzer op het bijgeleverde matje (38).
•Gebruik de strijkijzer niet in het geval dat zich tijdens de werking storingen of defecten voordoen.
•Voor elke onderhoud handeling, ook voor de vervanging van de toevoerkabel, dient het apparaat naar
een bevoegd ARIETE Assistentie Centrum gebracht worden.
Instructies voor het gebruik van de strijkijzer:
VOORDAT HET IJZER AAN HET MACHINELICHAAM (6) WORDT VERBONDEN OF ERVAN WORDT
LOSGEHAALD, HET APPARAAT UITZETTEN MET DE SPECIALE SCHAKELAAR EN DE STEKKER UIT HET
STOPCONTACT HALEN VOORDAT EEN HANDELING WORDT VERRICHT.
- Voordat de stekker van de verbindingskabel (36) in het contact
van de machine wordt gestoken, open het klepje (31) en druk
zacht op de vleugeltjes aan het uiteinde van de stekker zoals
aangegeven op figuur T. Steek vervolgens de verbinding erin
zoals aangegeven op figuur R (voor ijzer Mod. 4210/2) en in
figuur S (voor ijzer Mod. 4210/5).
Voer de voedingskabel stekker van het apparaat en handel op de AAN/UIT schakelaar (5) om met
stoom te strijken. Om zonder stoom te strijken zet de ketel niet aan.
- Activeer de temperatuur afstelling thermostaat (35) volgens het
type stof dat gestreken moet worden.
BELANGRIJK!
Wanneer kledingstukken met verschillend stofkwaliteit gestreken
moeten worden, verdeel deze en begin met de kledingstukken
waarvoor lagere temperatuur nodig is.
- Verticale stoom staat toe hangende stoffen en gordijnen gemakkelijk te strijken.
- Om stoom te verstrekken is het voldoende op een van de knoppen op de strijkijzer te drukken (34 intermitterende stoom; 33
continue stoom).
LET OP!
Elke keer dat men begint met strijken kan het voorkomen dat er druppels water uit de strijkijzerplaat
vloeien door de condens die zich in de slang gevormd heeft. Het is voldoende even de stoomknop te activeren ver van de kledingstukken en zodoende de waterdruppels verwijderen.
Fig. R
Fig. T
Fig. S
5_interno_NL 3-06-2004 9:05 Pagina 48
Page 51

5_interno_NL 3-06-2004 9:05 Pagina 49
- Wanneer men klaar is met strijken kan de overgebleven stoom
in de ketel verwijderd worden door de stoomafstel knop (35)
tegen de klok in te draaien, op “MAX” stand brengen en stoomknop van de strijkijzer indrukken tot de stoom op is.
Hierdoor kunnen enkele kledingstukken gestreken worden terwijl de verwarming uit is gezet.
Om de flexibele buis eruit te trekken, druk op de twee vleugeltjes zoals aangegeven op figuur U.
LET OP!
De strijkijzer helemaal laten afkoelen alvorens deze op te bergen na gebruik.
HOE TE HANDELEN VOOR HET VULLEN VAN HET WARM WATER RESERVOIR GEDURENDE
HET GEBRUIK
Wanneer het water op is en er op de knoppen (22) of (33) of (34) wordt gedrukt, wordt er geen stoom uitgestraald. Op de manometer (27) wordt de hoeveelheid stoom aangegeven dat in het verwarmingselement
aanwezig. Wanneer gedurende het gebruik de manometer pijl het symbool aanwijst betekent het dat
het water in de ketel op is. Om een nieuwe vulling uit te voeren dient als volgt te worden gehandeld:
a) schakel het apparaat uit middels de schakelaar (5);
b) druk op de knop (22) om de stoomrest uit te laden en op de knop (34) om het strijkijzer te gebruiken;
c) haal de stekker uit het stopcontact;
d) draai langzaam de veiligheidsdop (2) los en wacht enkele seconden totdat het sissen van de stoom
ophoud voordat de dop helemaal eraf te draaien;
WACHT ENKELE MINUTEN VOORDAT OPNIEUW WATER IN HET VERWARMINGSELEMENT WORDT
GEGOTEN.
e) giet er opnieuw water in, heel langzaam, om eventuele stoomspuiten te vermijden; het
wordt aangeraden om ten minste 3 minuten te wachten vanaf het moment dat het apparaat los is
gehaald van de elektrische stroom voordat nieuw water in het verwarmingselement wordt gegoten;
f) draai de veiligheidsdop helemaal vast;
g) doe de stekker opnieuw in het stopkontakt;
h) druk op de startschakelaar (5).
Fig. U
NL
REINIGING EN ONDERHOUD
Alvorens over te gaan tot welke reiniging dan ook, eerst de stekker uit het stopkontakt trekken. Alvorens
het apparaat weg te bergen of te reinigen, deze altijd laten afkoelen. Om een goede en langdurige werking
te garanderen volstaat het het warm water reservoir maandelijks door te spoelen om eventuele kalkresten
te verwijderen. Gebruik geen azijn of andere ontkalkingsmiddel.
NA HET GEBRUIK
Aan het einde van het reinigen of het strijken met stoom, zet het verwarmingselement uit en de overgebleven stoom uitladen door op de knoppen (22) of (33) of (34) te drukken.
49
Page 52

50
NL
Om het water dat in het verwarmingselement is overgebleven te verwijderen, denk eraan dat het water
lange tijd op een hoge temperatuur blijft in het verwarmingselement.
Wacht daarom tenminste 1 uur voordat de dop wordt losgedraaid
en voorzichtig het water wordt verwijderd.
De voedingskabel weer opwinden (30) in de speciale kabelopwinder (Fig. V).
Wikkel de slang (24) rondom het lichaam van het apparaat (Fig. Z)
en bevestig de spuit op de daarvoor bestemde houder, na de veiligheidscursor (21) in de blokkering stand te hebben gezet.
Fig. Z
Fig. V
5_interno_NL 3-06-2004 9:05 Pagina 50
Page 53

51
E
INSTRUCCIONES DE USO
6_interno_E 3-06-2004 9:07 Pagina 51
Page 54

52
E
Estimado cliente,
Le agradecemos la preferencia que nos ha otorgado.
El modelo que usted ha elegido forma parte de la línea Vaporí, una gama de productos ideales para la
limpieza de toda la casa, gracias a la fuerza desengrasante e higienizante del vapor. Una limpieza ecológica, que no necesita el uso de detergentes químicos.
La línea Vaporì está formada por productos específicos para cada exigencia:
Vaporì, la primera fregona a vapor para una higiene inmediata y diaria de los suelos.
Vaporì Glass, pu limpia a fondo cristales, espejos y todas las demás superficies lavables cada día, sin
esfuerzo.
Vaporì Jet, ideal para la limpieza de las superficies difíciles (sanitarios, radiadores, persianas arrollables).
Multi Vaporì, producto versátil y compacto, con tantos accesorios para higienizar en profundidad todas
las superficies.
IMPORTANTE: ANTES DE USARLO LEER ATENTAMENTE LAS INSTRUCCIONES Y ADVERTENCIAS
CONTENIDAS EN EL PRESENTE MANUAL Y CONSERVARLAS CON ATENCIÓN.
DESCRIPCIÓN DEL APARATO
1
Asa
2
Tapón de seguridad
3
Lámpara testigo naranja (vapor listo)
4
Lámpara testigo verde (en línea)
5
Interruptor ON/OFF
6
Cuerpo del aparato
7
Paño para suelos
8
Cepillo suelos
9
Empalme limpiacristales
10
Bolsa
11
Tubos prolongación
12
Empalme cepillo
13
Capuchón
14
Cepillo redondo
15
Boquilla inclinada
16 Funda para tejidos
17
Limpiacristales
18
Cepillo para tejidos
19
Boquilla de prolongación
20
Boca pistola
21
Cursor de seguridad
22
Pulsador erogación vapor
23
Pistola
24
Tubo flexible desmontable
25
Medida
26
Embudo
27
Manómetro
28
Botón regulación vapor
29
Enrollacable
30
Cable de alimentación
31 Puertecilla
Plancha
32
Plancha(Sólo versión
4210/2)
32/A
Plancha(Sólo versión
4210/5)
33
Pulsador vapor continuo
34
Pulsador vapor
35
Botón termostato regulación temperatura
36
Cable de interconexión
37
Indicador luminoso de control
38 Rejilla
6_interno_E 3-06-2004 9:07 Pagina 52
Page 55

53
E
ADVERTENCIAS IMPORTANTES
LEA ATENTAMENTE ESTAS INSTRUCCIONES
•El aparato está equipado con un termostato que limita la temperatura, un termofusible y un tapón de
seguridad. Ha sido fabricado conforme a las normas europeas relativas a los electrodomésticos.
• Antes de conectar el aparato a la red de alimentación, controle que la tensión indicada en la chapa
corresponda a la de la red local.
•Conecte siempre el aparato a una toma con puesta a tierra.
•No deje sin vigilancia el aparato mientras está conectado a la red eléctrica.
•No dirija nunca el chorro de vapor hacia personas, animales o bien hacia aparatos que
contengan partes eléctricas (ej.: interior de hornos).
•No sumerja el aparato en agua u otros líquidos.
• Apague siempre el aparato mediante el interruptor (5) y desconecte el enchufe de la toma de alimentación durante los abastecimientos.
•No dejar el aparato al alcance de los niños. Cuando el aparato no se esté utilizando bloquear siempre el pulsante de erogación vapor mediante el adecuado cursor de seguridad (21).
•No añada nunca productos desincrustantes, aromáticos, alcohólicos o detergentes en el interior del
aparato ya que podrían dañarlo o hacerlo menos seguro.
ATENCIÓN: peligro de quemaduras.
•No toque las superficies calientes durante el uso del producto.
Deje enfriar los accesorios antes de sustituirlos.
• NO ABRIR EL TAPÓN DE SEGURIDAD (2) DURANTE EL USO.
•ATENCIÓN: antes de desenroscar el tapón (2) efectúe las siguientes operaciones:
- apague el aparato mediante el interruptor (5);
- dejar que la presión se descargue apretando el pulsante (22);
- desenchufe el cable de alimentación de la toma de corriente;
- desenrosque lentamente el tapón (2) y espere algunos segundos antes de desenroscarlo
completamente.
• La primera vez que utilice el aparato o después de una larga pausa, vacíe el agua en
un recipiente.
•No utilice el aparato si está dañado. Todas las reparaciones, comprendida la sustitución del cable de
alimentación, se deben efectuar únicamente en un Centro de Asistencia Ariete o por técnicos autorizados Ariete para prevenir cualquier riesgo.
• Antes de utilizar el producto asegúrese que los objetos, las superficies y los tejidos
que se desean tratar sean resistentes o compatibles con la elevada temperatura del
vapor. En concreto para suelos de terracota tratada, superficies de madera y tejidos
delicados, como seda o terciopelo, se aconseja consultar las instrucciones del fabricante y efectuar una prueba en una parte escondida o en una muestra.
6_interno_E 3-06-2004 9:07 Pagina 53
Page 56

54
E
• Se aconseja el empleo de agua del grifo o como alternativa agua desmineralizada.
•ATENCIÓN: NO UTILIZAR EL CEPILLO LIMPIACRISTALES SI LA SUPERFICIE QUE HAY QUE LIMPIAR ESTÁ FRÍA. El cambio brusco de temperatura podría provocar la rotura de los mismos.
• Este producto ha sido fabricado para uso doméstico y no para uso industrial.
• Este aparato tiene que ser destinado exclusivamente al empleo para el cual ha sido creado y en el
modo indicado en las instrucciones de empleo. Cualquier otro uso se considera no adecuado y por
lo tanto peligroso.
El constructor no se considera responsabile de posibles daños provocados por empleos inadecuados o erroneos.
•El aparato cumple con la Norma CEE 89/336 correspondiente a la compatibilidad electromagnética.
GUARDE ESTAS INSTRUCCIONES
MODO DE EMPLEO
Llenado del depósito caldera antes del empleo:
No conectar el enchufe del cable de alimentación a la toma de corriente.
Desenrosque el tapón de seguridad (2) y mediante el embudo (26)
vierta en la caldera dos medidas (25) de agua, llenas hasta el nivel
máximo (Fig. A). Enrosque el tapón de seguridad (2).
NO DESENROSQUE NUNCA EL TAPÓN DEL DEPÓSITO SI ANTES NO SE HA ASEGURADO
QUE EL APARATO ESTÁ APAGADO Y DESCONECTADO DE LA TOMA DE CORRIENTE.
ENCENDIDO DEL APARATO
Para encender el aparato introduzca el enchufe del cable de alimentación del aparato en la toma de corriente. Apriete el interruptor de encendido (5) la lámpara testigo verde (4) y la lámpara testigo naranja (3) se encenderán (Fig. B). Apenas la lámpara testigo
naranja (3) se apaga el aparato está listo para el uso. Para impedir
la activación accidental de la erogación vapor desplace hacia atrás
el cursor de seguridad (21) en posición ••.
Mediante el pomo Regulador Vapor (28), es posible graduar la cantidad de vapor. Ésto consiente utilizar
el aparato sobre cualquier tipo de superficie o tejido.
APLICACIÓN DE LOS DIFERENTES ACCESORIOS
Tubo flexible desmontable
ANTES DE INTRODUCIR O QUITAR EL TUBO FLEXIBLE DE LA
TOMA DEL CUERPO MÁQUINA APAGAR EL APARATO CON EL
INTERRUPTOR ADECUADO Y DESCONECTAR EL ENCHUFE DE LA
Fig. A
Fig. B
Fig. C
6_interno_E 3-06-2004 9:07 Pagina 54
Page 57

55
E
ALIMENTACIÓN. Antes de introducir el enchufe del tubo flexible
(24) en la toma del cuerpo máquina (6), abrir la puertecilla (31)
poniendo atención en que la flecha del enchufe del tubo flexible
esté dirigida hacia arriba como se indica en la figura C, y ejerciendo una ligera presión sobre los resortes situados en el lado de la
toma. Introducir el enchufe de alimentación del aparato y accionar
el interruptor.
Para la extracción del tubo flexible apretar las dos aletas laterales y tirar como se indica en la figura D.
Capuchón
Este accesorio (13) se puede aplicar a la boca de la pistola (20) para proteger el extremo de la misma.
Boquilla de prolongación
Introduzca el accesorio empujándolo hasta la parte fija de la pistola y alineando la línea grabada sobre la boquilla con la línea colocada sobre la pistola (Fig. E). Después gire la boquilla 90° en el
sentido (horario) indicado por la flecha (B). De esta manera el
accesorio permanece fijo en la posición de bloqueo.
18 Con este accessorio es posible obtener una limpieza rápida, donde normalmente se acumula la suciedad más obstinada, como alrededor de la superficie de cocción, donde gracias al vapor podemos deshacer cualquier grasa, de modo natural y sin añadir detergentes químicos.
Cepillito redondo
Este accessorio, que se aplica en la boquilla inyectora, ayuda a eli-
minar las incrustaciones más resistentes, como las que se forman
en los fogones de la superficie de la cocina.
Se puede utilizar para la limpieza de sanitarios, lavabos, parrillas
de cocción, duchas o bañeras, eliminando todos los restos de cal
(Fig. F).
(En los centros de Asistencia Ariete es posible adquirir por separado los cepillitos en varios colores, para
utilizarlos en los diferentes ambientes).
Boquilla inclinada
Se puede aplicar este accesorio en la boquilla de extensión o bien
en la boca de la pistola (Fig. G). Útil para alcanzar e higienizar puntos difíciles, como la suciedad que se acumula en los radiadores,
persianas, sanitarios, eliminandola de modo sencillo y rápido.
Fig. D
Fig. E
Fig. F
Fig. G
B
6_interno_E 3-06-2004 9:07 Pagina 55
Page 58

56
E
Cepillo con paño para tejidos
El cepillo para tejidos(18) se puede montar en la boca pistola(20).
Utilizando la práctica funda, se puede utilizar el cepillo, para la limpieza cotidiana de sofás, butacones (Fig. H), pero también en las
habitaciones de dormir, en mantas, colchones y almohadones.
El cepillo permite también refrescar los tejidos (Fig. I), eliminando
cualquier arruga. De todas formas aconsejamos ya sea en el primer
empleo que durante el uso descargar la condensación de vapor en
un recipiente.
Es posible graduar la salida de vapor, por medio del adecuado
pomo(28) para adaptar el flujo a cada tipo de tejido. (Se aconseja
leer atentamente las instrucciones del fabricante).
Cepillo limpiacristales
Al cepillo (18) se le puede aplicar el limpiacristales (17), introduciendo los ganchos
(L1), colocados a los lados del mismo,
dentro de las lengüetas (L2) del cepillo
(Fig. L) y uniendo las dos piezas (Fig. M).
Con el cepillo limpiacristales, ventanas y espejos volverán a recuperar brillo. Es
fácil de usar incluso en los cristales de los box de ducha.
Utilizando las adecuadas extensiones (11) con el cepillo limpiacristales, es posible llegar a puntos difíciles y altos, como grandes cristaleras o ventanas altas.
ATENCIÓN: NO USAR EL CEPILLO LIMPIACRISTALES SI LA SUPERFICIE QUE
HAY QUE TRATAR ESTÁ FRÍA. Un posible cambio brusco de temperatura podría
provocar la rotura.
Tubos de prolongación
Pueden ser utilizados para llegar a las superficies más altas. Se utilizan con el cepillo para tejidos, con el cepillo limpiacristales, o
con el cepillo para pavimentos (Fig. N).
Cepillo suelos
Este accesorio se utiliza con las extensiones (11) y está dotato con
prácticas pinzas para sujetar el paño (G1) en grado de alojar cualquier
tipo di paño lavable en lavadora, para una eficaz y rápida limpieza de
cualquier superficie. Para aplicar el paño, apóyelo sobre el cepillo
después sujete los extremos que sobresalen del paño, uno tras otro,
con las tenacillas de sujeción (G1), tal como se indica en la figura O.
Fig. H
Fig. I
Fig. L
Fig. M
Fig. N
Fig. O
L1
L2
G1
G1
6_interno_E 3-06-2004 9:07 Pagina 56
Page 59

57
E
Paño
Hay en dotación un paño pavimentos (7). Gracias a las prácticas pinzas para sujetar el paño se puede
aplicar al cepillo cualquier tipo de paño, siempre que sea resistente al vapor.
Bolsa Accesorios
El aparato va acompañado de una bolsa accesorios para poder
guardar todos los accesorios y tenerlos siempre a mano. (Fig. P).
ELEMENTOS DEL APARATO
Manómetro
Con el manómetro es fácil controlar la presión del vapor. Cuando el agua se termina la aguja del manómetro señala ( ).
Pomo regulador- vapor
Girando el pomo hacia la derecha disminuye la cantidad de vapor,
para eliminar suciedad ligera de las superficies más delicadas.
Girando el pomo hacia la izquierda la cantidad de vapor aumenta y
ésto consiente eliminar también la suciedad muy resistente. (Fig. Q).
Ruedas de goma
Gracias a la cámara de goma alrededor de las ruedas, ya no hay que preocuparse de arrastrar el producto, que se desliza fácilmente sobre todas las superficies.
Rebobinador de cable
Recordamos que hay que desenrollar el cable completamente durante el uso. Después de haber utilizado el productoes posible enrollar el cable de la alimentación en torno al práctico recogedor del cable,
para tener siempre el producto en orden.
Alojamiento asta vertical
Gracias al ojal situado en la parte posterior del producto, es posible alojar el asta en posición vertical
durante breves espacios de tiempo.
Plancha (32)
Normas de seguridad
•No sumerja la plancha en agua.
• La plancha debe ser usada por una persona adulta.
•Mantenga la plancha fuera del alcance de los niños.
Fig. P
Fig. Q
6_interno_E 3-06-2004 9:07 Pagina 57
Page 60

6_interno_E 3-06-2004 9:07 Pagina 58
•No deje la plancha sin vigilancia.
•Desconecte siempre la toma de conexión de la plancha (30) de la máquina y el enchufe de alimentación de la máquina (36) cuando no se utiliza.
•Durante el funcionamiento apoye la plancha sobre la correspondiente alfombrilla (38) suministrada
con el aparato.
•No use la plancha en el caso en que se produzcan roturas o anomalías durante el funcionamiento.
• Para cualquier operación de mantenimiento, comprendida la sustitución del cable de interconexión,
lleve la plancha a un Centro Asistencia Autorizado Ariete.
Instrucciones para el empleo de la plancha:
ANTES DE INSERTAR O DESINSERTAR LA PLANCHA DEL CUERPO DE LA MÁQUINA (6) APAGAR EL
APARATO CON EL INTERRUPTOR ADECUADO Y DESCONECTAR EL ENCHUFE DE LA ALIMENTACIÓN
ANTES DE CADA OPERACIÓN.
- Antes de introducir el enchufe del cable de conexión (36) en la
toma de la máquina abrir la puertecilla (31) y efectuar una ligera presión sobre las aletas en la extremidad del enchufe como se
indica en la figura T. Después introducir el conector como se
indica en la figura R (para plancha Mod. 4210/2) y en la figura
S (para plancha Mod. 4210/5).
Introduzca la toma de alimentación del aparato, y accione el interruptor (5) para planchar con vapor.
Si se desea planchar sin vapor no encienda la caldera.
Fig. S
E
- Accione el termostato regulación temperatura (35) según el tipo
de tejido que se debe planchar.
IMPORTANTE!
Cuando se deben planchar prendas de diferente tipo de tejido es
necesario dividirlas y empezar a planchar las prendas que requieren la temperatura más baja.
- El vapor en vertical permite planchar cómodamente y perfectamente prendas colgadas y cortinas.
- Para obtener la salida del vapor es suficiente accionar uno de los
interruptores vapor que se encuentran en la plancha (34 vapor
intermitente, 33 vapor fijo).
ATENCIÓN!
Al inicio del planchado es posible que por los orificios de la suela de la plancha salgan gotas de agua
formadas por la condensación del vapor en su paso a través del tubo. Para evitar tal inconveniente es
suficiente accionar el pulsador vapor hasta hacer salir todas las gotas de agua, manteniendo la plancha
lejos de los tejidos.
- Al final del planchado a vapor es posible vaciar el vapor que queda en la caldera girando el botón de
regulación vapor (35) en sentido contrario a las agujas del reloj en posición “MAX” y apretando el
interruptor de la plancha hasta lograr el completo agotamiento del vapor.
Fig. R
Fig. T
58
Page 61

59
E
Ésto os consiente poder planchar con el vapor algunos indumentos aún teniendo apagada la caldera.
Para extraer el tubo flexible presionar las dos aletas laterales y tirar
come está indicado en la figura U.
ATENCIÓN! Antes de guardar la plancha, después del uso, déjela
enfriar completamente.
INSTRUCCIONES PARA EL LLENADO DE LA CALDERA DURANTE EL EMPLEO
Cuando el agua se acaba, accionando el pulsante (22) o (33) o (34) no tendremos erogación de vapor.
Por medio del manómetro (27) se indica la cantidad de vapor presente en la caldera. Si durante el uso la
flecha del manómetro indica el símbolo significa que el agua en la caldera se ha acabado. Por lo tanto
para un nuevo llenado efectúe las siguientes operaciones:
a) apague el aparato accionando el interruptor (5);
b) apretar el pulsante (22) para descargar el vapor que queda y el pulsante (34) en el caso de empleo de
la plancha;
c) quitar el enchufe de la toma de alimentación;
d) desenrosque lentamente el tapón de seguridad (2) y espere algunos segundos para que pare el silbi-
do de vapor antes de desenroscarlo completamente;
ESPERAR ALGUNOS MINUTOS ANTES DE INTRODUCIR OTRA VEZ AGUA EN EL INTERIOR DE LA CALDERA.
e) Introduzca de nuevo el agua, vertiendo lentamente las primeras cantidades para evi-
tar bufidos de vapor; se aconseja esperar por lo menos 3 minutos desde el momento que se ha
desconectado el aparato de la toma de corriente, antes de verter nueva agua en la caldera;
f) enrosque completamente el tapón de seguridad;
g) enchufe el aparato a la toma de corriente;
h) apriete el interruptor de encendido (5).
LIMPIEZA Y MANTENIMIENTO
Desenchufe el aparato de la toma de alimentación antes de efectuar cualquier tipo de operación. Antes de
guardar el aparato o de limpiarlo, espere hasta que se haya enfriado. Para garantizar un funcionamiento
óptimo y prolongado a lo largo del tiempo, es suficiente una vez al mes enjuagar con agua el interior de
la caldera para eliminar los restos de calcáreo acumulados. No use vinagre u otras sustancias descalcificantes.
DESPUÉS DEL USO
Al final de la limpieza o del planchado a vapor apagar la caldera y terminar el vapor que ha quedado accionando el pulsante (22) o (33) o (34). Para vaciar la caldera de posibles restos de agua después del uso,
tener presente que el agua se mantiene en la caldera a elevada temperatura durante tiempos largos.
Así pues, esperar por lo menos 1 hora antes de abrir el tapón y despues vaciar con cautela la caldera.
Fig. U
6_interno_E 3-06-2004 9:07 Pagina 59
Page 62

60
E
Rebobinar el cable de alimentación (30) dentro del adecuado recogedor (Fig. V).
Enrolle el tubo flexible (24) al cuerpo del aparato (Fig. Z) y coloque
la pistola sobre la correspondiente asa, después de haber colocado el cursor de seguridad (21) en la posición de bloqueo.
Fig. Z
Fig. V
6_interno_E 3-06-2004 9:07 Pagina 60
Page 63

61
P
INSTRUÇÕES DE UTILIZAÇÃO
7_interno_P 3-06-2004 9:09 Pagina 61
Page 64

62
P
Gentil Cliente,
Agradecemos pela preferência que nos foi concedida.
O modelo escolhido faz parte da linha Vapores, uma gama de produtos ideais para a limpeza de toda
a casa, graças à capacidade do vapor de desengordurar e higienizar. Uma limpeza ecológica, que não
exige o uso de detergentes químicos.
A linha Vaporì constitui-se de produtos específicos para cada exigência:
Vaporì pisos, o primeiro escovão a vapor para uma higiene imediata e quotidiana dos pisos.
Vaporì Glass, limpa profundamente vidros, espelhos e várias outras superfícies diariamente laváveis, sem
esforço.
Vaporì Jet, a única pistola a vapor com caldeira sob pressão, ideal para a limpeza de superfícies difíceis
(sanitários, termossifões, persianas).
Multi Vaporì, produto versátil e compacto, com uma dotação completa de acessórios, para higienizar
todas as superfícies em profundidade.
IMPORTANTE: ANTES DA UTILIZAÇÃO, LEIA ATENTAMENTE AS INSTRUÇÕES E ADVERTÊNCIAS
CONTIDAS NESTE MANUAL E CONSERVE-AS COM CUIDADO.
DESCRIÇÃO DO APARELHO
1
Alça
2
Tampa de segurança
3
Lâmpada piloto laranja (vapor pronto)
4
Lâmpada piloto verde (em linha)
5
Interruptor ON/OFF
6
Corpo do aparelho
7
Pano para pisos
8
Escova para pisos
9
União limpador vidro
10
Bolsa
11
Tubos extensão
12
Junção Escova
13
Cobertura
14
Escova redonda
15
Bico inclinado
16 Capa para tecidos
17
Limpa vidro
18
Escova para tecidos
19
Bico de extensão
20
Pistola ejectora
21
Cursor de segurança
22
Botão alimentação vapor
23
Pistola
24
Tubo flexível desconectável
25
Medidor
26
Funil
27
Manómetro
28
Manopla regulação vapor
29
Dispositivo enrolamento cabo
30
Cabo de alimentação
31 Portinhola
Ferro de passar
32
Ferro de passar(Somente Versão
4210/2)
32/A
Ferro de passar(Somente Versão
4210/5)
33
Botão vapor contínuo
34
Botão vapor
35
Manopla termóstato regulação temperatura
36
Cabo de interconexão
37
Lâmpada piloto de controlo
38 Grelha
7_interno_P 3-06-2004 9:09 Pagina 62
Page 65

63
P
ADVERTÊNCIAS IMPORTANTES
LER CUIDADOSAMENTE ESTAS INSTRUÇÕE
•Oaparelho é dotado de um termóstato que limita a temperatura, de um fusível térmico e de uma
tampa de segurança. A sua construção está em conformidade com as normativas europeias relativas
aos electrodomésticos.
• Antes de conectar o aparelho à rede de alimentação, verificar que a tensão indicada na placa de carac-
terísticas corresponda àquela da rede local.
• Sempre conectar o aparelho a uma tomada aterrada.
•Manter sempre em observação o aparelho enquanto este estiver conectado à rede eléctrica.
•Nunca dirigir o jacto de vapor na direcção de pessoas, animais, ou mesmo de aparelhos que contenham partes eléctricas (p. ex.: interiores de fornos).
•Não imergir o aparelho em água ou em outros líquidos.
• Sempre desligar o aparelho por meio do interruptor (5) e desligar a tomada do ponto de alimentação
durante os reabastecimentos.
•Manter o aparelho longe do alcance das crianças. Quando o aparelho não estiver sendo utilizado,
bloquear o botão de distribuição de vapor através do cursor de segurança (21).
•Nunca adicionar produtos desincrustantes, aromáticos, alcoólicos ou detergentes no interior do produto, já que poderiam danificá-lo ou torná-lo menos seguro.
ATENÇÃO: perigo de queimaduras.
•Não tocar as superfícies quentes durante o uso do produto.
Deixar que os acessórios esfriem antes de substituí-los.
•NÃO ABRIR A TAMPA DE SEGURANÇA (2) DURANTE A UTILIZAÇÃO.
•ATENÇÃO: antes de desenroscar a tampa (2) proceder como segue:
- desligar o aparelho por meio do interruptor (5);
- descarregar a pressão carregando no botão (22);
-retirar o cabo de alimentação da tomada de corrente;
- desenroscar lentamente a tampa (2) e aguardar alguns segundos antes de soltá-la completamente.
•Quando da primeira utilização ou após uma longa pausa, esvaziar a água em um recipiente.
•Não utilizar o aparelho se este estiver danificado. Todos os reparos, inclusive a substituição do cabo de alimentação, devem ser executados somente pelo Centro de
Assistência Ariete ou por técnicos autorizados Ariete, de modo a prevenir qualquer
risco.
• Antes de utilizar o produto, certificar-se que os objectos, as superfícies e os tecidos a
serem tratados sejam resistentes ou compatíveis à elevada temperatura do vapor.
Especialmente em pisos de cerâmica tratada, superfícies de madeira e tecidos delicados, como seda ou veludo, aconselha-se consultar as instruções do fabricante e executar um teste em uma parte mais escondida ou em uma amostra.
7_interno_P 3-06-2004 9:09 Pagina 63
Page 66

64
P
• Aconselha-se a utilização de água da torneira ou, como alternativa, água desmineralizada.
•ATENÇÃO: NÃO UTILIZAR A ESCOVA LIMPA-VIDROS SE A SUPERFÍCIE A SER TRATADA ESTIVER
FRIA. O eventual choque térmico pode provocar a sua ruptura.
• Este produto foi fabricado para uso doméstico e não para uso industrial.
• Este aparelho deverá ser destinado exclusivamente para a utilização conforme foi concebido e da
forma indicada nas instruções de utilização. Qualquer outro uso deve ser considerado impróprio e,
portanto, perigoso. O fabricante não pode ser considerado responsável por eventuais danos causados pela utilização imprópria ou errada.
•Oaparelho encontra-se em conformidade com a Directiva CEE 89/336 relativa à compatibilidade
electromagnética.
CONSERVAR ESTAS INSTRUÇÕES
MODALIDADE DE USO
Enchimento do tanque da caldeira antes do uso:
Não inserir a ficha do cabo de alimentação na tomada eléctrica.
Desaparafusar a tampa de segurança (2) e, por meio do funil (26)
introduzir na caldeira dois medidores (25) de água, cheios até o nível
máximo, (Fig. A). Rosquear novamente a tampa de segurança (2).
NUNCA DESAPARAFUSAR A TAMPA DO TANQUE ANTES DE TERSE CERTIFICADO QUE O
APARELHO ESTEJA DESLIGADO E DESCONECTADO DA TOMADA DE CORRENTE.
LIGAÇÃO DO APARELHO
Para ligar o aparelho, inserir a tomada do cabo de alimentação no
ponto de corrente. Pressionar o interruptor (5); a lâmpada piloto
verde (4) e a lâmpada piloto laranja (3) acender-se-ão (Fig. B). Tão
logo a lâmpada piloto laranja (3) se apague, o aparelho estará
pronto para o uso. Pressionar o botão (22) para iniciar o fornecimento de vapor.
Para impedir a activação acidental do fornecimento de vapor deslocar para trás o cursor de segurança
(21) na posição ••.
Através do botão de Regulação do Vapor (28), é possível dosar a quantidade de vapor. Isso permite utilizar o aparelho com qualquer tipo de superfície ou de tecido.
APLICAÇÃO DOS VÁRIOS ACESSÓRIOS
Tubo flexível desconectável
ANTES DE INSERIR OU EXTRAIR O TUBO FLEXÍVEL DO ENCAIXE
DO CORPO DA MÁQUINA, DESLIGAR O APARELHO ATRAVÉS DO
INTERRUPTOR ESPECÍFICO E DESLIGAR A FICHA DE
Fig. A
Fig. B
Fig. C
7_interno_P 3-06-2004 9:09 Pagina 64
Page 67

65
P
ALIMENTAÇÃO. Antes de inserir o pino do tubo flexível (24) no
encaixe do corpo da máquina (6), abrir a portinhola (31) prestando atenção para que a seta do pino do tubo flexível esteja virada
para cima, como indicado na figura C, e pressionando levemente
as molas colocadas ao lado do encaixe.
Inserir a ficha de alimentação do aparelho e accionar o interruptor.
Para a extracção do tubo flexível, premir as duas alavancas laterais e puxar, como indicado na figura D.
Cobertura
Este acessório (13) pode ser aplicado à pistola ejectora (20) para proteger a extremidade do próprio ejector.
Bico de extensão
Inserir o acessório empurrando-o até a parte fixa da pistola e
alinhando a linha marcada no bico com a linha posta na pistola
(Fig. E).
Em seguida girar o bico de 90° no sentido (horário) indicado pela
seta (B). Deste modo o acessório permanece fixo na posição de
bloqueio.
Com este acessório é possível obter um limpeza veloz, onde normalmente se aloja a sujidade mais obstinada, como ao redor do fogão, onde graças ao vapor podemos dissolver qualquer untuosidade, de forma
natural e sem utilizar detergentes químicos.
Escova redonda
Este acessório que é aplicado no bico injector, ajuda a triturar as
incrustações mais resistentes, como aquelas que se formam nos
fogões.
Pode ser utilizado para a limpeza de sanitários, bancas, grelhas
para cozinhar, duche ou banheira, eliminando qualquer resíduo de
calcário (Fig. F).
(Nos centros de Assistência Ariete é possível adquirir individualmente as escovas em cores diversas, para
utilizá-las nos vários ambientes).
Bico inclinado
Pode-se aplicar este acessório no bico de prolongamento ou no
bico da pistola (Fig. G). Útil para alcançar e higienizar pontos difíceis, como a sujidade que se aloja nos radiadores, persianas, sanitários, eliminando-a de forma simples e rápida.
Fig. D
Fig. E
Fig. F
Fig. G
B
7_interno_P 3-06-2004 9:09 Pagina 65
Page 68

66
P
Escova para tecidos com pano
A escova para tecidos (18) pode ser montada no bico da pistola (20).
Utilizando a prática capa, é possível utilizar a escova para a limpeza diária de sofás, poltronas (Fig. H) e também, no quarto, para
limpar cobertas, colchões e travesseiros.
A escova também permite refrescar os tecidos (Fig. I), removendo
vestígios de vinco. De qualquer forma, aconselhamos que descarregue, tanto na primeira utilização quanto durante o uso, a condensação de vapor em um recipiente.
É possível regular a saída de vapor, através do botão específico
(28), para adaptar o fluxo conforme o tipo de tecido.
(Recomendamos que leia atentamente as instruções do fabricante).
Escova limpador de vidros
À escova (18) pode-se aplicar o limpador
de vidros (17), inserindo os ganchos (L1)
postos lateralmente ao mesmo, dentro das
linguetas (L2) da escova (Fig. L) e unindo
as duas partes (Fig. M).
Com a escova limpa-vidros, qualquer vidraça e qualquer espelho adquirirá novamente brilho. Também é fácil de ser utilizada para a limpeza dos vidros da cabina do duche. Utilizando os prolongamentos apropriados (11) com a escova
limpa-vidros, é possível alcançar pontos difíceis e altos, como grandes vidraças
e janelas altas. ATENÇÃO: NÃO UTILIZAR A ESCOVA LIMPA-VIDROS SE A
SUPERFÍCIE A SER TRATADA ESTIVER FRIA. O eventual choque térmico pode
provocar a sua ruptura.
Tubos de extensão
Podem ser utilizados para alcançar as superfícies mais altas. São
utilizados com a escova para tecidos, com a escova limpa-vidros,
ou com a escova para pavimentos (Fig. N).
Escova para pisos
Este acessório é utilizado com os prolongamentos (11) e é equipado com práticas pinças para a fixação do pano (G1), capaz de abrigar qualquer tipo de pano que possa ser lavado em máquina de
lavar roupa, para uma limpeza eficaz e rápida de qualquer superfície. Para aplicar o pano, apoiar em cima deste a escova, em seguida puxar as extremidades salientes do pano, uma após a outra,
para os pontos de engate, como indicado na figura O.
Fig. H
Fig. I
Fig. L
Fig. M
Fig. N
Fig. O
L1
L2
G1
G1
7_interno_P 3-06-2004 9:09 Pagina 66
Page 69

67
P
Pano
É fornecido 1 pano para pavimentos (7). Graças às práticas pinças para a fixação do pano, pode ser inserido na escova qualquer tipo de pano, desde que resistente ao vapor.
Saco de Acessórios
O aparelho é equipado com um saco de acessórios para poder
repor todos os acessórios e tê-los sempre ao alcance das mãos.
(Fig. P).
ELEMENTOS DO APARELHO
Manómetro
Com o manómetro é fácil controlar a pressão do vapor. Quando a água termina, o ponteiro do manómetro indica ( ).
Botão de regulação do vapor
Girando o botão para a direita diminui-se a quantidade de vapor,
para eliminar sujidade leve de superfícies mais delicadas. Girando
o botão para a esquerda, a quantidade de vapor aumenta, permitindo dissolver inclusive sujidade muito resistente. (Fig. Q).
Rodas emborrachadas
Graças à borracha presente ao redor das rodas, não deverá mais se preocupar ao arrastar o produto, que
desliza facilmente sobre todas as superfícies.
Alojamento do cabo
Lembramos que deve-se desenrolar completamente o cabo durante o uso. Depois de utilizado o produto, é possível enrolar o cabo de alimentação em torno ao prático alojamento do cabo, para manter o produto sempre em ordem.
Alojamento da haste vertical
Graças à fenda da parte traseira do produto, é possível alojar a haste em posição vertical durante breves
períodos.
Ferro de passar (32)
Normas de segurança
•Não imergir o aparelho em água.
•Oferro de passar deve ser usado por pessoas adultas.
•Manter o ferro fora do alcance das crianças.
Fig. P
Fig. Q
7_interno_P 3-06-2004 9:09 Pagina 67
Page 70

7_interno_P 3-06-2004 9:09 Pagina 68
•Não deixar o ferro de passar sem vigilância.
•Desligar sempre a tomada de ligação do ferro (30) e a tomada de alimentação da máquina (36) quando não for utilizada.
•Durante o funcionamento, apoiar o ferro no respectivo tapete em dotação (38) em dotação.
•Não usar o ferro de passar caso se verifiquem quebras ou anomalias durante o funcionamento.
•Énecessário levá-lo a um Centro Assistência autorizado ARIETE para qualquer operação de manutenção compreendida aquela de substituição do cabo de interconexão.
Instruções para o uso do ferro:
ANTES DE INSERIR OU EXTRAIR O FERRO DO CORPO DA MÁQUINA (6), DESLIGAR O APARELHO
ATRAVÉS DO INTERRUPTOR ESPECÍFICO E DESLIGAR A FICHA DE ALIMENTAÇÃO ANTES DE QUALQUER OPERAÇÃO.
- Antes de inserir o pino do cabo de conexão (36) na tomada da
máquina, abrir a portinhola (31) e pressionar levemente as alavancas na extremidade da tomada como indicado na figura T.
Então, inserir o conector como indicado na figura R (para ferro
Mod. 4210/2) e na figura S (para ferro Mod. 4210/5).
Fig. R
Inserir a tomada de alimentação do aparelho e accionar o interruptor (5) para passar com vapor. Caso
se deseje passar sem vapor não ligar a caldeira.
Fig. S
- Accionar o termóstato regulação temperatura (35) segundo o
tipo de tecido que deve ser passado.
IMPORTANTE!
Quando devem ser passadas peças com diferentes qualidades de
tecido, é necessário dividir as mesmas e iniciar a passar pelas
peças de tecido a baixa temperatura.
P
- O vapor na vertical permite passar de maneira cómoda e perfei-
Fig. T
ta peças penduras e cortinas.
- Para obter a saída do vapor basta accionar um dos interruptores
vapor que se encontram no ferro de passar.(34 vapor intermitente; 33 vapor fixo)
ATENÇÃO!
No início de cada passada é possível que saiam gotas de água, formadas pela condensação do vapor na
passagem pelo tubo, pelos furos da placa do ferro. Para evitar o inconveniente basta accionar o botão
vapor até o fim da saída das gotículas de água, mantendo o ferro longe dos tecidos.
- No fim da passada a vapor é possível exaurir o vapor que ficou na caldeira girando a manopla regulação vapor (35) em sentido anti-horário até a posição “MAX” e continuando a pressionar o interruptor
do ferro até alcançar a saída completa do vapor.
Desta maneira é possível passar com o vapor algumas peças mesmo tendo desligado a caldeira.
68
Page 71

69
P
Para a extracção do tubo flexível, premir as duas alavancas laterais
e puxar como indicado na figura U.
ATENÇÃO!
Antes de guardar o ferro de passar, após o uso, deixá-lo esfriar
completamente
COMO PROCEDER AO ENCHIMENTO DA CALDEIRA DURANTE O USO
Quando a água terminar, accionando o botão (22) ou (33) ou (34) o vapor não será distribuído. Através
do manómetro (27) é indicada a quantidade de vapor presente na caldeira. Se durante o uso a seta do
manómetro indica o símbolo significa que a água na caldeira acabou.
Portanto, para executar um novo abastecimento, proceder como segue:
a) desligar o aparelho accionando o interruptor (5);
b) carregar no botão (22) para descarregar o vapor restante e no botão (34) em caso de utilização do
ferro;
c) retirar a ficha da tomada de alimentação;
d) desaparafusar lentamente a tampa de segurança (2) e esperar alguns segundos até que cesse o sibi-
lo de vapor antes de desaparafusá-la completamente;
ESPERAR ALGUNS MINUTOS ANTES DE INTRODUZIR ÁGUA NOVAMENTE NA CALDEIRA.
e) Alimentar novamente com água, introduzindo lentamente as primeiras quantidades de
água para evitar baforadas de vapor; aconselha-se esperar pelo menos 3 minutos, a partir do
momento em que o aparelho foi desligado da tomada de corrente, antes de reabastecer a água da caldeira;
f) tornar a rosquear completamente a tampa de segurança;
g) reintroduzir a tomada no ponto de alimentação eléctrica;
h) pressionar o interruptor de acendimento (5).
LIMPEZA E MANUTENÇÃO
Antes de proceder a qualquer operação, desligar a tomada de alimentação. Antes de guardar o aparelho
ou proceder à sua limpeza, aguardar que este se tenha esfriado. Para garantir um funcionamento óptimo
e prolongado no tempo, basta enxaguar com água, mensalmente, o interior da caldeira para eliminar os
resíduos de calcário acumulados. Não usar vinagre ou outras substâncias descalcificantes.
APÓS O USO
Após a limpeza ou após passar com o vapor, desligar a caldeira e exaurir o vapor remanescente accionando o botão (22) ou (33) ou (34).
Para esvaziar o eventual resto de água na caldeira depois do uso,
lembre-se que a água permanece na caldeira com uma elevada
temperatura por muito tempo. Portanto, esperar pelo menos 1 hora
antes de abrir a tampa e, então, esvaziar a caldeira com cuidado.
Enrolar o cabo de alimentação (30) dentro do alojamento do cabo
específico (Fig. V).
Fig. V
Fig. U
7_interno_P 3-06-2004 9:09 Pagina 69
Page 72

70
P
Envolver o tubo flexível (24) ao corpo do aparelho (Fig. Z) e colocar a pistola sobre a alça específica, após ter reposicionado o cursor de segurança (21) na posição de bloqueio.
Fig. Z
7_interno_P 3-06-2004 9:09 Pagina 70
Page 73

71
GR
8_interno_GR 3-06-2004 9:29 Pagina 71
Page 74

72
GR
Η σειρά Vaporµ αποτελείται απ συσκευέσ ειδικέσ για κάθε ανάγκη:
V
aporµ Pavimenti (∆άπεδα): η πρώτη σκούπα ατµού για άµεση και καθηµερινή
καθαριτητα των δαπέδων.
V
aporµ Glass (Τζάµια): καθαρίζει σε βάθοσ καθηµερινά και χωρίσ κπο, τζάµια,
καθρέπτεσ και άλλεσ πλενµενεσ επιφάνειεσ.
V
aporµ Jet: ιδανικ για τον καθαρισµ δύσκολων επιφανειών (είδη υγιεινήσ, σώµατα
καλοριφέρ, ρολά).
Multi
Vaporµ: ευέλικτη συσκευή µε πολλά αξεσουάρ, για την καθαριτητα σε βάθοσ
λων των επιφανειών.
ΠΕΡΙΓΡΑΦΗ ΤΗΣ ΣΥΣΚΕΥΗΣ
1 Χερούλι
2 Τάπα ασφαλείασ
3 Πράσινο λαµπάκι (έτοιµοσ ατµσ)
4 Πορτοκαλί λαµπάκι
(αναµµένη συσκευή)
5 ∆ιακπτησ ON / OFF
6 Σώµα συσκευήσ
7 Πανί για δάπεδα
8 Βούρτσα για δάπεδα
9 Ρακρ καθαρισµού για τα τζάµια
10 Σακούλα
11 Σωλήνεσ προέκτασησ
12 Ρακρ βούρτσασ
13 Καπάκι µπεκ
14 Στρογγυλ βουρτσάκι
15 Κεκλιµένο ράµφοσ
16
17 Εξάρτηµα καθαρισµού για
τα τζάµια
18 Βούρτσα για υφάσµατα
19 Ράµφοσ προέκτασησ
20 Ακροφύσιο εκτοξευτήρα
21 ∆ροµέασ (κινητ λαµάκι
ρύθµισησ) ασφαλείασ
22 Κουµπί παροχήσ ατµού
23 Εκτοξευτήρασ (πιστλι)
24 Εύκαµπτοσ σωλήνασ
25 Μεζούρα
26 Χωνί
27 Μανµετρο
28 ∆ιακπτησ ρύθµισησ ατµού
29 Υποδοχή περιτύλιξησ καλωδίου
30 Καλώδιο ηλεκτροδτησησ + φισ
31
Σίδερο
32 Σίδερο (Μνο στα µοντέλα 4210/2)
32/A Σίδερο (Μνο στα µοντέλα 4210/5)
33 Κουµπί συνεχούσ παροχήσ ατµού
34 Κουµπί παροχήσ ατµού
35 Θερµοστάτησ
36 Καλώδιο διασύνδεσησ
37 Ενδεικτική λυχνία ελέγχου
38
8_interno_GR 3-06-2004 9:29 Pagina 72
Page 75

73
GR
ΣΗΜΑΝΤΙΚΕΣ ΠΡΟΕΙ∆ΟΠΟΙΗΣΕΙΣ
∆ΙΑΒΑΣΤΕ ΠΡΟΣΕΚΤΙΚΑ ΤΙΣ ΠΑΡΑΚΑΤΩ Ο∆ΗΓΙΕΣ
• Η συσκευή είναι εφοδιασµένη µε θερµοστάτη που ελέγχει τη θερµοκρασία, µε
θερµοστάτη χειροκίνητησ αποκατάστασησ και µε µια τάπα ασφαλείασ. Η
κατασκευή τησ είναι σύµφωνη µε τουσ ευρωπαϊκούσ κανονισµούσ που αφορούν
τισ οικιακέσ ηλεκτρικέσ συσκευέσ.
• Πριν συνδέσετε τη συσκευή στο ρεύµα, ελέγξτε αν η τάση που αναφέρεται στην
ταµπελίτσα τησ συσκευήσ, αντιστοιχεί στην τάση του ηλεκτρικού δικτύου τησ
περιοχήσ.
• Η συσκευή πρέπει να συνδέεται πάντα σε µια γειωµένη πρίζα.
• ταν η συσκευή είναι στη πρίζα, πρέπει να την παρακολουθείτε.
• Μην κατευθύνετε ποτέ τον ατµ πάνω σε πρσωπα ή ζώα, ή πάνω σε
συσκευέσ που περιέχουν ηλεκτρικά εξαρτήµατα (π.χ. µέσα στο
φούρνο). ∆εν πρέπει ποτέ να βυθίζετε τη συσκευή σε νερ ή άλλο υγρ.
• Να σβήνετε πάντα τη συσκευή (διακπτησ 5) και να βγάζετε το φισ απ την
πρίζα, κάθε φορά που γεµίζετε το λέβητα µε νερ.
•
• Μην χύνετε µέσα στη συσκευή αρωµατικέσ, αλκολούχεσ, απορρυπαντικέσ ή
ουσίεσ για την αποφυγή αλάτων, που µπορεί να προξενήσουν ζηµιά ή να
µειώσουν την αφάλεια τησ συσκευήσ.
• Περιµένετε να κρυώσουν τα εξαρτήµατα, πριν τα αντικαταστήσετε.
•
• Προσοχή: πριν ξεβιδώσετε την τάπα (2) εκτελέστε τα παρακάτω:
- σβήστε τη συσκευή πατώντασ το διακπτη (5);
-
- βγάλτε το φισ απ την πρίζα;
- ξεβιδώστε αργά την τάπα (2) και περιµένετε µερικά δευτερλεπτα, πριν
την ξεβιδώσετε τελείωσ.
• Κατά την πρώτη χρήση ή µετά απ παρατεταµένη αδράνεια τησ
συσκευήσ, πρέπει πρώτα να αδειάζετε το νερ σε ένα δοχείο.
• Μην χρησιµοποιείτε τη συσκευή αν παρουσιάζει ζηµιέσ. λεσ οι
επισκευέσ, συµπεριλαµβανοµένησ τησ αντικατάστασησ του
ηλεκτρικού καλωδίου, πρέπει να εκτελούνται αποκλειστικά απ ένα
εξουσιοδοτηµένο κέντρο Τεχνικήσ εξυπηρέτησησ (Σέρβισ) Ariete, ή
απ έναν εξουσιοδοτηµένο τεχνικ για να αποφεύγονται λοι οι
ενδεχµενοι κίνδυνοι.
• Πριν χρησιµοποιήσετε τη συσκευή, βεβαιωθείτε πωσ τα αντικείµενα,
οι επιφάνειεσ και τα υφάσµατα που πρκειται να καθαρίσετε,
αντέχουν στισ υψηλέσ θερµοκρασίεσ του ατµού. Ιδιαίτερα ταν
πρκειται για δάπεδα µε επεξεργασµένο "κττο", ξύλινεσ επιφάνεισ
και ευαίσθητα υφάσµατα, πωσ τα µεταξωτά και τα βελούδινα,
συνιστάται να διαβάζετε τισ οδηγίεσ του κατασκευαστή και να κάνετε
µια δοκιµή σε µια γωνιά που δεν αίνεται ή σε ένα δείγµα.
8_interno_GR 3-06-2004 9:29 Pagina 73
Page 76

74
GR
• Η συσκευή αυτή κατασκευάστηκε για οικιακή και χι για biolgwamij χρήση.
• Η συσκευή τηρεί τουσ κανονισµούσ τησ ΕΟΚ 89/336, περί ηλεκτροµαγνητικήσ
συµβαττητασ.
ΦΥΛΑΞΤΕ ΤΙΣ Ο∆ΗΓΙΕΣ ΑΥΤΕΣ
ΤΡΟΠΟΣ ΧΡΗΣΗΣ
Γεµίστε το δοχείο του λέβητα, πριν απ( τη χρήση.
Ξεβιδώστε την τάπα ασφαλείασ (2) και µε τη βοήθεια
του χωνιού (26) χύστε στο δοχείο του λέβητα δύο
µεζούρεσ (25) γεµάτεσ νερ, µέχρι τη µέγιστη στάθµη
(εικ. Α). Ξαναβιδώστε την τάπα ασφαλείασ (2).
Μην ξεβιδώνετε ποτέ την τάπα του δοχείου, αν δεν
βεβαιωθείτε προηγουµένως πως είναι σβηστή η
συσκευή και πως έχετε βγάλει το φις απ( την πρίζα.
Πώς θα ανάψετε τη συσκευή
Για να ανάψετε τη συσκευή βάλτε το φισ του
καλωδίου στην πρίζα. Πατήστε το διακπτη
λειτουργίασ (5), οπτε θα ανάψουν τα ενδεικτικά
λαµπάκια πράσινο (4) και πορτοκαλί (3). Μλισ σβήσει
το πορτοκαλί λαµπάκι (3), η συσκευή θα είναι έτοιµη
για τη χρήση. Μετακινήστε προσ τα πίσω το δροµέα
ασφαλείασ (21), στη θέση, για να αποκλείσετε το
ενδεχµενο τυχαίασ εκτξευσησ του ατµού.
εικ. Α
εικ. B
8_interno_GR 3-06-2004 9:29 Pagina 74
Page 77

75
GR
Πώς να τοποθετήσετε τα διάφορα εξαρτήµατα
Αποσυνδε(µενος εύκαµπτος σωλήνας
Καπάκι µπεκ
Αυτ το εξάρτηµα τοποθετείται στο µπεκ του εκτοξευτήρα (20) για να το
προστατεύει.
Ράµφος προέκτασης
Τοποθετήστε το ράµφοσ σπρώχνοντάσ το µέχρι το
σταθερ τµήµα του εκτοξευτήρα και
ευθυγραµµίζοντασ τη γραµµή που είναι χαραγµένη
στο ράµφοσ µε τη γραµµή που υπάρχει στον
εκτοξευτήρα. Στη συνέχεια περιστρέψτε το ράµφοσ
κατά 90 (προσ τα δεξιά), πωσ δείχνει το βέλοσ στην
εικνα (Β). Με αυτ τον τρπο, το ράµφοσ
ασφαλίζεται στην υποδοχή του.
εικ. D
εικ. E
εικ. F
B
εικ. C
8_interno_GR 3-06-2004 9:29 Pagina 75
Page 78

76
GR
Βούρτσα εξάρτηµα που καθαρίζει τα τζάµια
Πάνω στη βούρτσα µπορείτε να
εφαρµσετε και το εξάρτηµα που
καθαρίζει τα τζάµια (17),
περνώντασ τουσ πλευρικούσ
γάντζουσ (L1), µέσα στα
γλωσσάκια (L2) τησ βούρτσασ, για
να ενώσετε τα δύο εξαρτήµατα
(εικ. M).
Σωλήνες προέκτασης
εικ. H
εικ. I
εικ. L
εικ. M
εικ. N
L1
L2
εικ. G
8_interno_GR 3-06-2004 9:29 Pagina 76
Page 79

77
GR
Βούρτσα για δάπεδα
Για να steqe~sete το πανί πάνω στη βούρτσα,
απλώστε το καλά και πιάστε τα άκρα του µε τα
τσιµπιδάκια (G1), πωσ αίνεται στην εικνα O.
εικ. P
εικ. Q
εικ. O
G1
G1
8_interno_GR 3-06-2004 9:29 Pagina 77
Page 80

78
GR
Σίδερο (32)
Καννες ασφαλείας
• Μη βυθίζετε τη συσκευή στο νερ.
• Το σίδερο πρέπει να χρησιµοποιείται αποκλειστικά απ ενήλικα άτοµα.
• Μην επιτρέπετε στα µικρά παιδιά να πλησιάζουν το σίδερο.
• Μην αφήνετε το σίδερο χωρίσ επίβλεψη.
• Να αποσυνδέετε πάντα το φισ σύνδεσησ του σίδερου (30) απ τη συσκευή και το
φισ του καλωδίου ηλεκτροδτησησ (36) ταν δεν χρησιµοποιείτε τη συσκευή.
• ταν είναι αναµµένο το σίδερο, να το ακουµπάτε στο ειδικ λαστιχένιο ταπέτο
(38).
• Μη χρησιµοποιείτε το σίδερο αν παρουσιαστεί ζηµιά ή ανωµαλία κατά τη χρήση
του. Πρέπει να απευθύνεστε σε ένα Κέντρο Τεχνικήσ Εξυπηρέτησησ (Σέρβισ)
ARIETE για οποιαδήποτε εργασία συντήρησησ ή για αντικατάσταση του καλωδίου
διασύνδεσησ.
Οδηγίες για τη χρήση του σίδερου
:
Βάλτε το φισ στην πρίζα και πατήστε το διακπτη
λειτουργίασ (5) για να σιδερώσετε µε ατµ. Αν
θέλετε να σιδερώσετε χωρίσ ατµ, µην ανάψετε το
λέβητα.
- Ρυθµίστε το θερµοστάτη (35) στη σωστή
θερµοκρασία, ανάλογα µε τον τύπο υφάσµατοσ που
πρκειται να σιδερώσετε.
ΣΗΜΑΝΤΙΚΟ
!
ταν πρκειται να σιδερώσετε ρούχα µε διαφορετική
ποιτητα υφασµάτων, πρέπει να τα ξεχωρίσετε και να
αρχίσετε απ τα υφάσµατα που απαιτούν τη
χαµηλτερη θερµοκρασία.
- Η χρήση του ατµού κατακρυφα (ρθιο σίδερο)
σασ επιτρέπει να σιδερώσετε κρεµασµένα ρούχα
και κουρτίνεσ.
- Για να επιτύχετε την εκτξευση του ατµού, πατήστε
έναν απ τουσ διακπτεσ που υπάρχουν στο
σίδερο (34 διαλειπτική παροχή ατµού), (33 συνεχήσ
παροχή ατµού).
εικ. R
εικ. T
εικ. S
8_interno_GR 3-06-2004 9:29 Pagina 78
Page 81

79
GR
ΠΡΟΣΟΧΗ!
Κάθε φορά που ανάβετε το σίδερο, µπορεί στην αρχή
να στάξει νερ απ τισ οπέσ τησ πλάκασ, που
οφείλεται στο σχηµατισµ συµπυκνώµατοσ ατµού
κατά τη διέλευσή του απ το σωλήνα. Για να
αποφύγετε αυτ το πρβληµα, πατήστε το διακπτη
παροχήσ ατµού µέχρι να εξαντληθούν οι σταγνεσ
νερού, κρατώντασ ταυτχρονα το σίδερο µακριά απ
τα υφάσµατα.
- ταν τελειώσετ το σιδέρωµα µε ατµ, µπορείτε να
εξαντλήσετε τον ατµ που έµεινε στη συσκευή,
γυρίζοντασ το διακπτη ρύθµισησ (35) προσ τα
αριστερά στη θέση "MAX" (µέγιστο) και πατώντασ
συνέχεια το διακπτη του σίδερου, µέχρι να
εξαντληθεί τελείωσ ο ατµσ.
ΠΡΟΣΟΧΗ
!
Αφήστε το σίδερο να κρυώσει τελείωσ µετά τη
χρήση, πριν το φυλάξετε.
ΠΩΣ ΘΑ ΓΕΜΙΣΕΤΕ ΤΟ ΛΕΒΗΤΑ ΚΑΤΑ ΤΗ ΧΡΗΣΗ ΜΕ ΣΤΑΘΕΡΟ ΕΚΤΟΞΕΥΤΗΡΑ
Αν κατά τη χρήση, το βέλοσ του µανµετρου δείξει το σύµβολο, σηµαίνει πωσ το
νερ στο λέβητα έχει εξαντληθεί.
σβήστε τη συσκευή, πατώντασ το διακπτη λειτουργίασ (5);
βγάλτε το φισ απ την πρίζα;
ξεβιδώστε σιγά - σιγά την τάπα ασφαλείασ (2), περιµένετε για λίγα δευτερλεπτα
µέχρι να σταµατήσει το σφύριγµα του ατµού και ύστερα ξεβιδώστε την τάπα τελείωσ
χύστε µέσα νερ(, στην αρχή σιγά - σιγά, για να αποφύγετε πιτσιλίσµατα έξω απ( το
λέβητα.
ξαναβιδώστε καλά την τάπα ασφαλείασ;
ξαναβάλτε το φισ του καλωδίου στην πρίζα;
ανάψτε τη συσκευή, πατώντασ το διακπτη (5).
εικ. U
8_interno_GR 3-06-2004 18:41 Pagina 79
Page 82

80
GR
ΚΑΘΑΡΙΣΜΟΣ ΚΑΙ ΣΥΝΤΗΡΗΣΗ
Πριν εκτελέσετε οποιαδήποτε εργασία, βγάλτε το φισ απ την πρίζα. Περιµένετε να
κρυώσει η συσκευή πριν την βάλετε στη θέση τησ ή πριν αρχίσετε τον καθαρισµ
τησ.
Για να εξασφαλίσετε σωστή και µακρχρονη λειτουργία τησ συσκευήσ, είναι αρκετ
να ξεπλένετε µια φορά το µήνα το εσωτερικ του λέβητα. ώστε να αφαιρούνται τα
συσσωρευµένα ασβεστούχα κατάλοιπα (πέτρα). Μη χρησιµοποιείτε ξύδι ή άλλα
χηµικά προϊντα.
ΜΕΤΑ ΤΗ ΧΡΗΣΗ
Τυλίξτε τον εύκαµπτο σωλήνα (24) στο σώµα τησ
συσκευήσ (Εικ. Z) και τοποθετήστε τον εκτοξευτήρα
στην ειδική βάση, αφού επαναφέρετε το δροµέα
ασφαλείασ (21) στη θέση "κουµπώµατοσ".
εικ. Z
εικ. V
8_interno_GR 3-06-2004 9:29 Pagina 80
Page 83

81
KULLANMA KILAVUZU
TR
9_interno_TR 3-06-2004 18:29 Pagina 81
Page 84

82
TR
9_interno_TR 3-06-2004 18:29 Pagina 82
Page 85

83
TR
9_interno_TR 3-06-2004 18:29 Pagina 83
Page 86

84
A
TR
B
9_interno_TR 3-06-2004 18:29 Pagina 84
Page 87

85
B
TR
C
D
E
F
9_interno_TR 3-06-2004 18:29 Pagina 85
Page 88

86
L1
L2
TR
G
H
I
M
L
N
9_interno_TR 3-06-2004 18:29 Pagina 86
Page 89

87
G1
G1
TR
O
P
Q
9_interno_TR 3-06-2004 18:29 Pagina 87
Page 90

88
TR
R
S
T
(35)
9_interno_TR 3-06-2004 18:29 Pagina 88
Page 91

89
TR
U
9_interno_TR 3-06-2004 18:29 Pagina 89
Page 92

90
TR
V
Z
9_interno_TR 3-06-2004 18:29 Pagina 90
Page 93

91
RUS
10_interno_RU 3-06-2004 18:31 Pagina 91
Page 94

92
RUS
10_interno_RU 3-06-2004 18:31 Pagina 92
Page 95

93
RUS
10_interno_RU 3-06-2004 18:31 Pagina 93
Page 96

94
A
RUS
B
10_interno_RU 3-06-2004 18:31 Pagina 94
Page 97

95
B
RUS
C
D
E
F
10_interno_RU 3-06-2004 18:31 Pagina 95
Page 98

96
L1
L2
RUS
G
H
I
M
L
N
10_interno_RU 3-06-2004 18:31 Pagina 96
Page 99

97
G1
G1
RUS
O
P
Q
10_interno_RU 3-06-2004 18:31 Pagina 97
Page 100

98
RUS
R
S
T
(35)
10_interno_RU 3-06-2004 18:31 Pagina 98
 Loading...