

Page 1
af-5077_5087_5107psms_manual_03_en_253243477-a.book Seite 1 Donnerstag, 2. Juli 2009 11:41 11
User Manual
AF 5077/5087/5107PS
AF 5077/5087/5107MS
Page 2

GEFAHR!
Hinweis
af-5077_5087_5107psms_manual_01_de_253243477-a.book Seite 2 Donnerstag, 2. Juli 2009 11:37 11
DE
Einleitung
Sehr geehrter Kunde
Vielen Dank, dass Sie sich für unseren digitalen
Bilderrahmen entschieden haben. Machen Sie sich
auf ein ganz neues Fotoerlebnis gefasst! Mit Ihrem neuen digitalen Bilderrahmen lassen sich Fotos und Videos anschauen und Musik abspielen –
alles ohne Computer.
Qualitativ hochwertiger TFT-LCD-Bildschirm
Speicher
Ihr digitaler Fotorahmen hat einen internen Speicher, einen Speicherkartenleser und eine USBSchnittstelle. Dateien können vom internen Speicher gelöscht und von Speicherkarten oder USBStick kopiert werden.
Übersichtliche Kleinbildvorschau (Miniaturanzeige
von 20 Bildern gleichzeitig). Ihr digitaler Fotorahmen unterstützt Drehen und Ändern des Seitenformates.
Betrachten Sie Ihre Fotos ganz einfach mit der automatisch laufenden Diashow mit Hintergrundmusik.
Mit der mitgelieferten Fernbedienung können Sie
Foto-, Musik- und Videodateien einfach auswählen, Einstellungen ändern und vieles mehr.
Außerdem stehen Ihnen zusätzliche Funktionen
wie Uhrzeit- und Datumsanzeige, Wecker und
eine automatische Ein- und Ausschaltfunktion zur
Verfügung.
Viel Spaß mit Ihrem Gerät und seinen vielfältigen
Funktionen!
Zu dieser Bedienungsanleitung
Mit der Installationshilfe auf den folgenden Seiten
nehmen Sie Ihr Gerät schnell und einfach in Betrieb. Detaillierte Beschreibungen finden Sie in
den folgenden Kapiteln dieser Bedienungsanleitung.
Lesen Sie die Bedienungsanleitung aufmerksam
durch. Beachten Sie vor allem die Sicherheitshinweise, um einen einwandfreien Betrieb Ihres Gerätes zu gewährleisten. Der Hersteller übernimmt
keine Haftung, sollten Sie die Hinweise nicht beachten.
In dieser Bedienungsanleitung sind mehrere Modelle der Gerätereihe beschrieben. Bitte beachten
Sie, dass manche Funktionen nur bei bestimmten
Modellen verfügbar sind.
Verwendete Symbole
Gefahrenwarnung
GEFAHR!
Warnt vor Gefahren für Personen, Schäden am Gerät oder anderen Gegenständen sowie vor möglichem Datenverlust.
Verletzungen oder Schäden können
durch unsachgemäße Handhabung entstehen.
Tipps und Tricks
Tipps und Tricks
Mit diesem Symbol sind Tipps gekennzeichnet, mit deren Hilfe Sie Ihr Gerät effektiver und einfacher verwenden.
2
Page 3

af-5077_5087_5107psms_manual_01_de_253243477-a.book Seite 3 Donnerstag, 2. Juli 2009 11:37 11
Sicherheitshinweise und Empfehlungen
Einleitung 2
Nehmen Sie keine Einstellungen und Veränderungen vor, die nicht in dieser Bedienungsanleitung
beschrieben sind. Durch unsachgemäße Handhabung können körperliche Verletzungen oder Schäden, Geräteschäden oder Datenverlust entstehen.
Beachten Sie alle gegebenen Warn- und Sicherheitshinweise.
Gerät aufstellen
Das Gerät ist ausschließlich für den Gebrauch im Innenbe reich bestimmt.
Das Gerät ist ausschließlich für den Gebrauch im
Innenbereich bestimmt. Das Gerät soll sicher und
stabil auf einer ebenen Oberfläche stehen. Verlegen Sie alle Kabel so, dass niemand darüber stolpern und sich verletzen kann oder das Gerät beschädigt wird.
LCD-Bildschirm
Gehen Sie immer sorgsam mit dem Gerät um. Vermeiden Sie Berührungen des LCD-Bildschirmes.
Stellen Sie niemals schwere oder scharfkantige
Gegenstände auf den Bildschirm, den Rahmen
oder das Netzanschlusskabel.
Schützen Sie das Gerät vor direkter Sonneneinstrahlun g
Schützen Sie das Gerät vor direkter Sonneneinstrahlung, Hitze, großen Temperaturschwankungen und Feuchtigkeit. Stellen Sie das Gerät nicht
in die Nähe von Heizungen oder Klimaanlagen. Beachten Sie die Angaben zu Temperatur und Luftfeuchtigkeit in den technischen Daten.
Gerät nicht unmittelbar nach Transport einschalten
Das Gerät sollte nicht unmittelbar nach dem
Transport von einem kalten in einen warmen
Raum bzw. umgekehrt oder in einem kalten Raum,
der schnell aufgeheizt wurde, eingeschaltet werden. Warten Sie in diesen Fällen mindestens drei
Stunden bis sich das Gerät den veränderten Bedingungen (Temperatur, Luftfeuchtigkeit,...) angepasst hat.
Wird das Gerät zu heiß, oder kommt Rauch aus dem Gerät
Wird das Gerät zu heiß, oder kommt Rauch aus
dem Gerät, ziehen Sie sofort den Netzstecker aus
der Steckdose. Lassen Sie Ihr Gerät von einer
technischen Servicestelle untersuchen. Um das
Ausbreiten von Feuer zu vermeiden, sind offene
Flammen von dem Gerät fernzuhalten.
Schließen Sie das Gerät nicht in Feuchträumen an.
Schließen Sie das Gerät nicht in Feuchträumen an.
Berühren Sie weder Netzstecker noch Netzanschluss mit nassen Händen.
Es dürfen keine Flüssigkeiten in das Gerät kommen.
Es dürfen keine Flüssigkeiten in das Gerät kommen. Trennen Sie das Gerät vom Stromnetz, wenn
Flüssigkeiten oder Fremdkörper in das Gerät gelangt sind und lassen Sie Ihr Gerät von einer technischen Servicestelle untersuchen.
Lassen Sie Kinder nicht unbeaufsichtigt am Gerät hant ieren.
Lassen Sie Kinder nicht unbeaufsichtigt am Gerät
hantieren. Die Verpackungsfolien dürfen nicht in
Kinderhände gelangen.
Stromversorgung
Verwenden Sie nur das mitgelieferte Netzteil
Verwenden Sie nur das mitgelieferte Netzteil (siehe Anhang / Technische Daten). Prüfen Sie, ob die
Netzspannung Ihres Gerätes (Typenschild) mit der
vorhandenen Netzspannung am Aufstellort übereinstimmt. Sämtliche Teile entsprechen der auf
dem Gerät angegebenen Spannungsart.
Berühren Sie niemals das Netzkabel, wenn die Isolation beschä digt ist.
Berühren Sie niemals das Netzkabel, wenn die Isolation beschädigt ist. Tauschen Sie beschädigte
Kabel sofort aus. Verwenden Sie nur geeignete
Kabel; wenden Sie sich gegebenenfalls an unseren technischen Kundendienst oder an Ihren
Fachhändler.
Trennen Sie Ihr Gerät vom Stromnetz, bevor Sie die Oberfläche reinigen .
Trennen Sie Ihr Gerät vom Stromnetz, bevor Sie
die Oberfläche reinigen. Verwenden Sie ein weiches, fusselfreies Tuch. Verwenden sie auf keinen
Fall flüssige, gasförmige oder leicht entflammbare
Reinigungsmittel (Sprays, Scheuermittel, Polituren, Alkohol). Es darf keine Feuchtigkeit in das Innere des Gerätes gelangen.
Reinigen Sie das Display mit einem trockenen, weichen Tuch.
Reinigen Sie das Display mit einem trockenen,
weichen Tuch. Bricht das Display, kann eine
schwach ätzende Flüssigkeit austreten. Vermeiden Sie Haut- und Augenkontakt.
Reparaturen
Reparaturen
Nehmen Sie keine Reparaturarbeiten am Gerät
vor. Unsachgemäße Wartung kann zu Personenoder Geräteschäden führen. Lassen Sie Ihr Gerät
ausschließlich von einer autorisierten Servicestelle reparieren.
Entfernen Sie nicht das Typenschild von Ihrem Gerät, anderenfalls erlischt die Garantie.
Fotospeichermedien
Fotospeichermedien
Verwenden Sie nur Speichermedien, die mit dem
Gerät kompatibel sind. Um Beschädigungen an
der Karte oder dem Gerät vorzubeugen, darf die
Karte nur in das Gerät eingeführt bzw. entfernt
werden, wenn es ausgeschaltet ist.
Ziehen Sie die eingesetzte Speicherkarte keinesfalls heraus, während das Gerät darauf zugreift.
Dadurch können Daten beschädigt werden oder
verloren gehen.
DE
3
Page 4
af-5077_5087_5107psms_manual_01_de_253243477-a.book Seite 4 Donnerstag, 2. Juli 2009 11:37 11
DE
Übersicht
Geräteübersicht
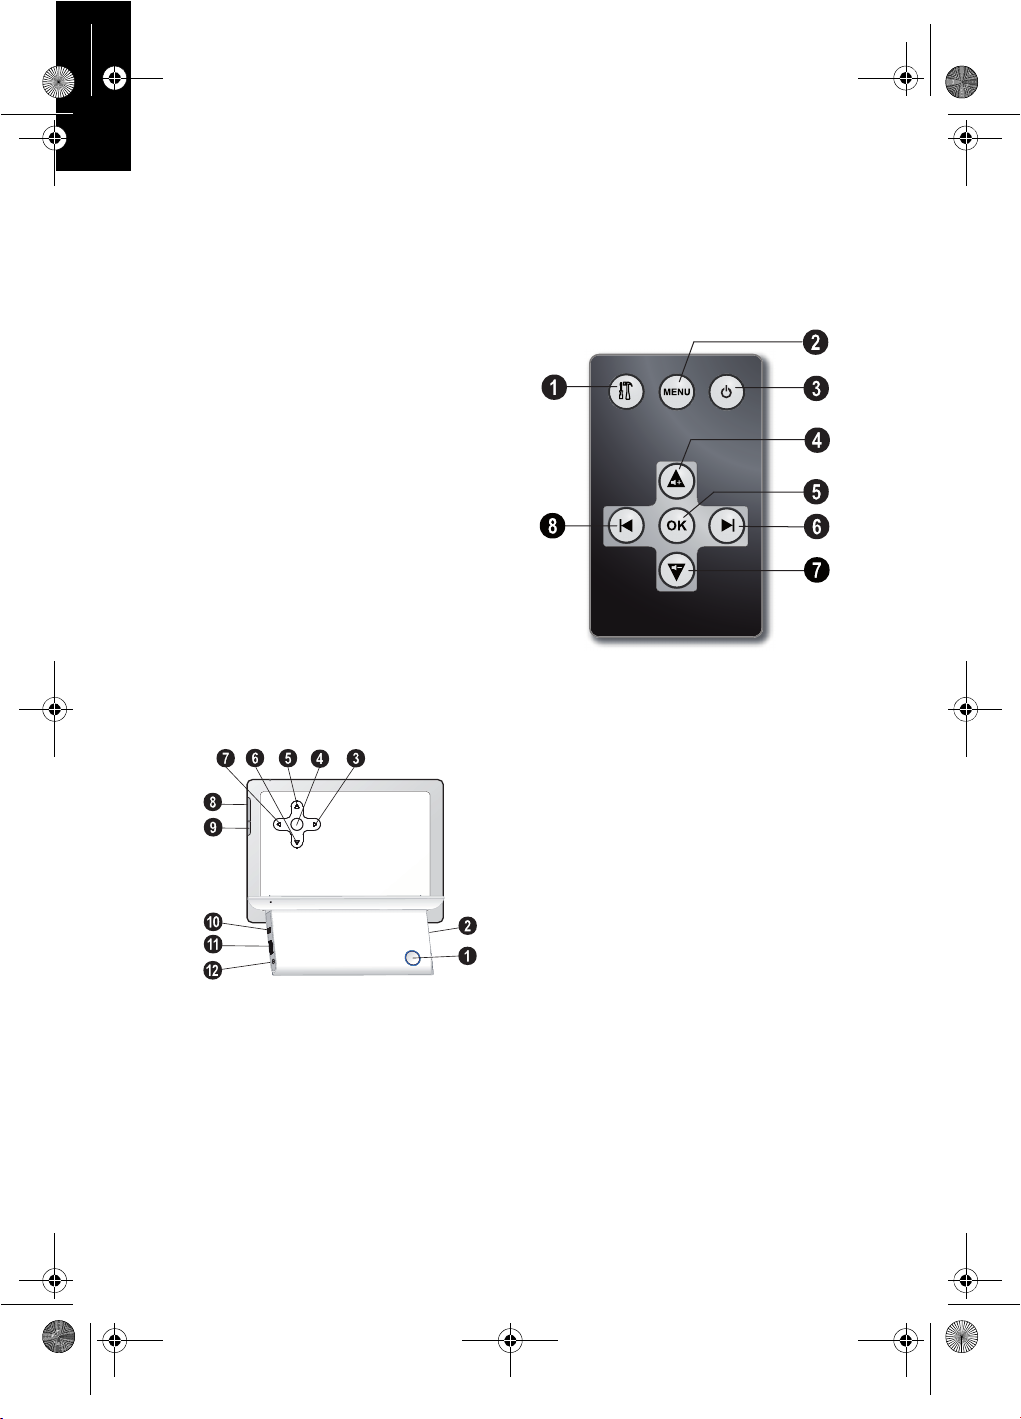
Ein-/Ausschalter
1 B – Ein-/Ausschalter
Steckplatz für Speicherkarte
2 – Steckplatz für Speicherkarte
Pfeiltasten links
3 J – Im Menü navigieren / Verringern von Helligkeit, Kontrast, Farbsättigung / Springen zum
vorherigen Bild, vorherige Spalte oder Seite
OK
4 OK – Auswahl bestätigen / Starten, Unterbrechen der Diashow
Pfeiltasten nach oben
5 G – Im Menü navigieren / Erhöhen der Lautstärke / Hintergrundmusik während der Diashow
einschalten
Pfeiltasten nach unten
6 I – Im Menü navigieren / Verringern der Lautstärke
Pfeiltasten rechts
7 H – Im Menü navigieren / Erhöhen von Helligkeit, Kontrast, Farbsättigung / Springen zum
nächsten Bild, nächste Spalte oder Seite
Menütaste
8 MENU – Hauptmenü aufrufen / Analog Uhr
einschalten (Taste gedrückt halten)
Einstellungsmenü
9 ù – Einstellungsmenü aufrufen
Mini USB
‹ ý – Mini-USB Anschluss – für den Anschluss
eines Computers
USB Buchse
Œ ý Buchse – USB-Anschluss für ein Speichermedium
USB-Anschluss Speichermedium
÷ Í-Buchse – Anschluss Netzteil
Rückseite AF5077
Spaltenumbruch
Fernbedienung
(AF¦5077/¦5087/5107MS)
Fernbedienung AF5077
1 – Einstellungsmenü aufrufen
2 – Hauptmenü aufrufen / Analog Uhr einschal-
ten (Taste gedrückt halten)
3 – Ein-/Ausschalten
4 – Im Menü navigieren / Erhöhen der Lautstärke
/ Hintergrundmusik während der Diashow einschalten
5 – Auswahl bestätigen / Starten, Unterbrechen
der Diashow
6 – Im Menü navigieren / Erhöhen von Helligkeit,
Kontrast, Farbsättigung / Springen zum nächsten
Bild, nächste Spalte oder Seite
7 – Im Menü navigieren / Verringern der Lautstärke
8 – Im Menü navigieren / Verringern von Helligkeit, Kontrast, Farbsättigung / Springen zum vorherigen Bild, vorherige Spalte oder Seite
4
Page 5
Hinweis
VORSICHT!
GEFAHR!
Hinweis
Hinweis
af-5077_5087_5107psms_manual_01_de_253243477-a.book Seite 5 Donnerstag, 2. Juli 2009 11:37 11
Erste Inbetriebnahme
DE
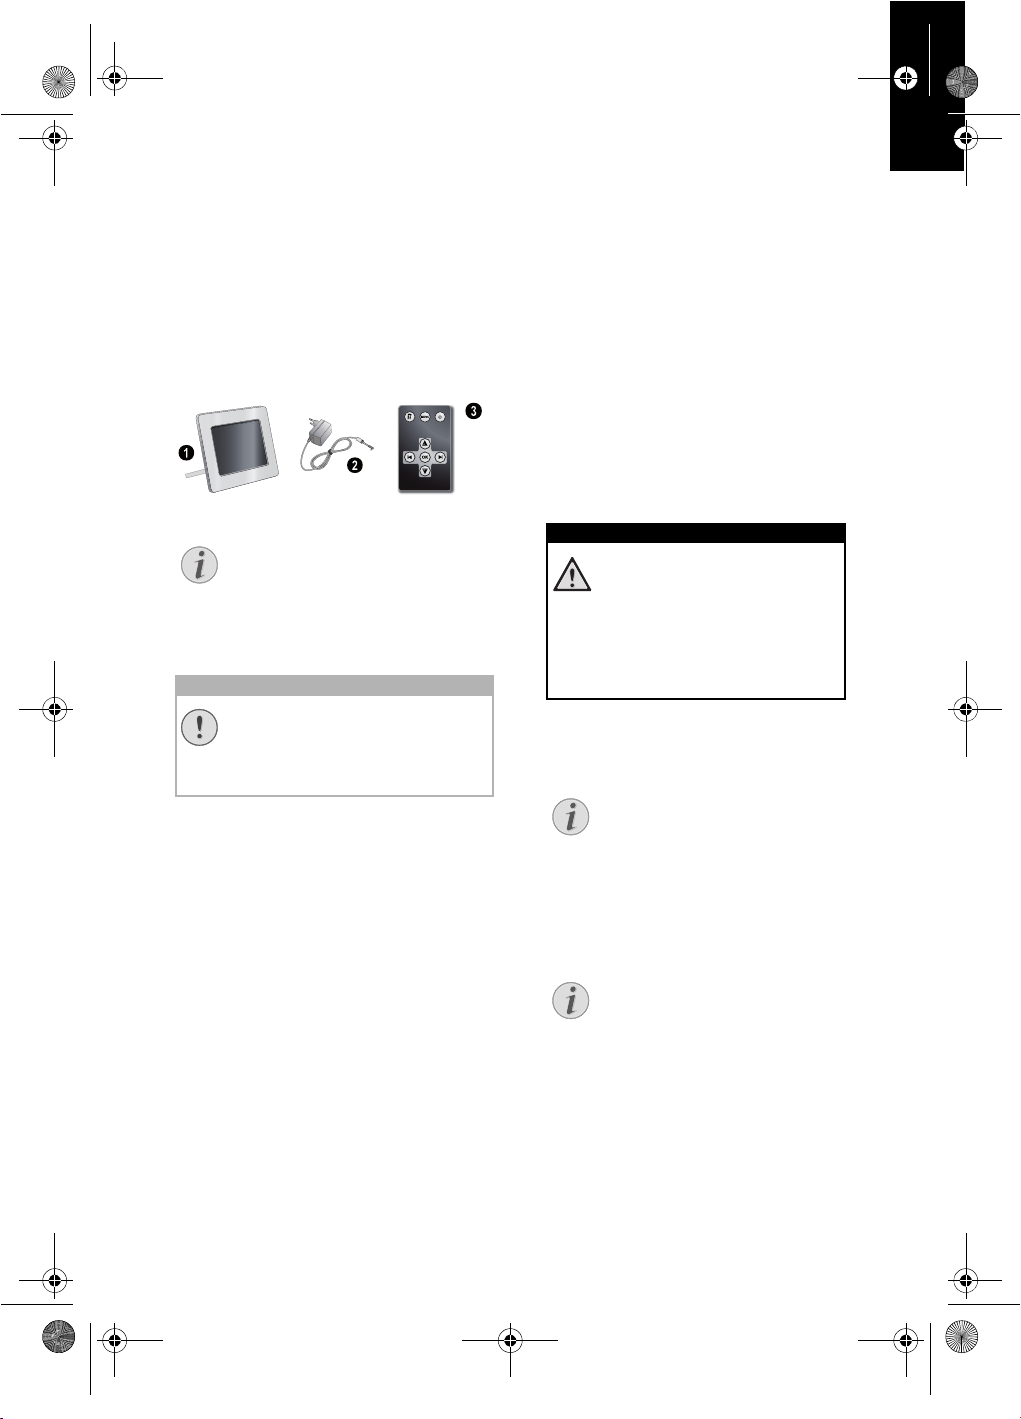
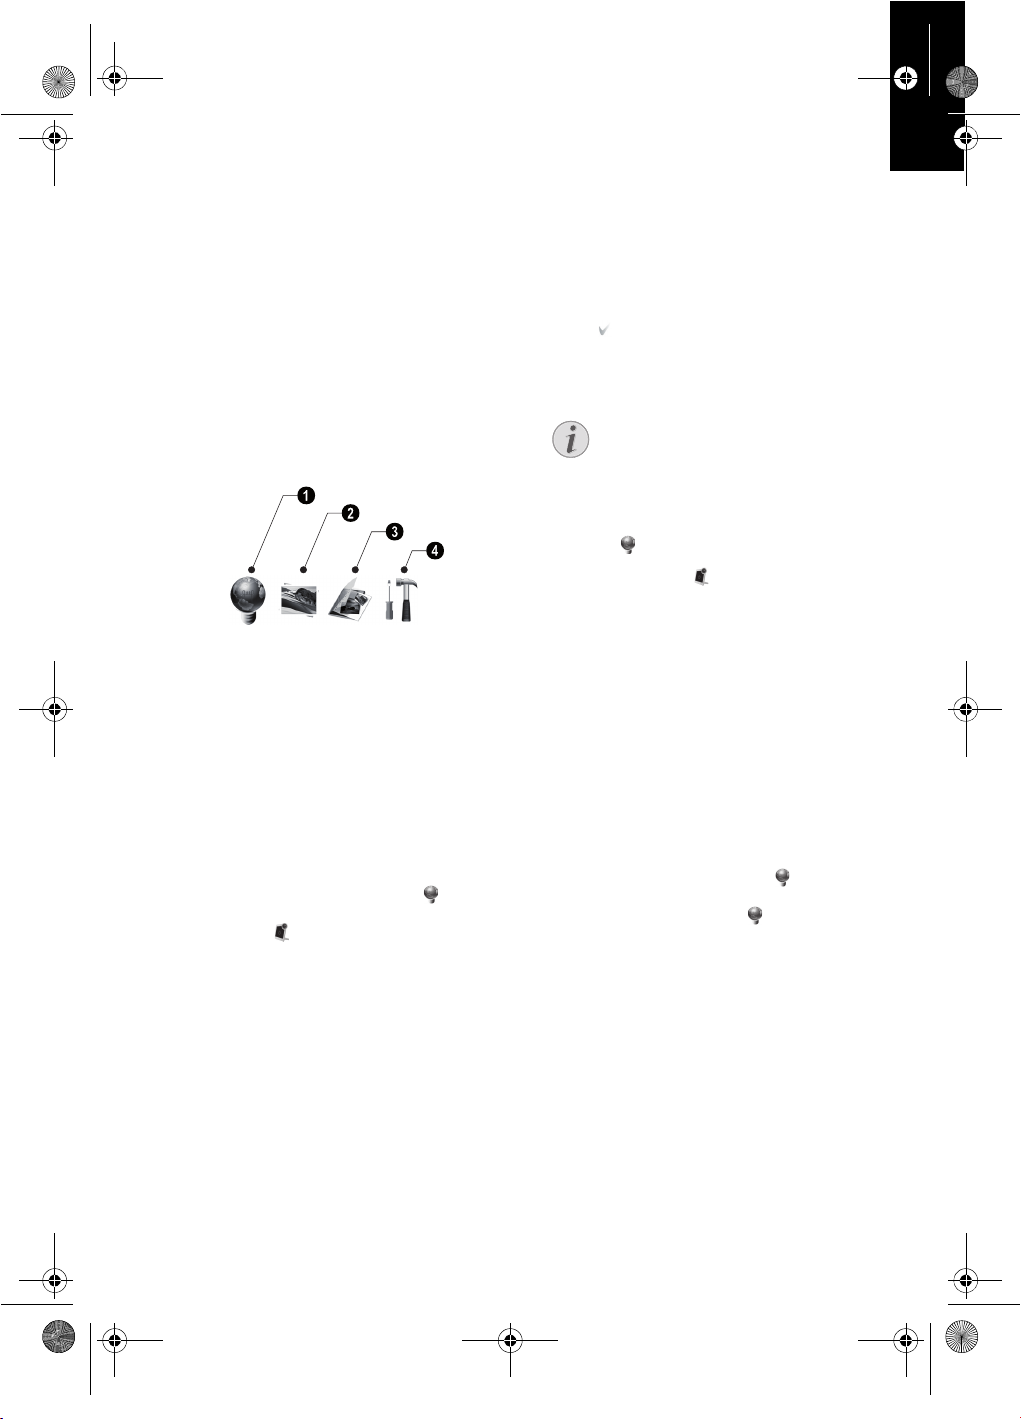
Verpackungsinhalt
Bilderrahmen
‚ Digitaler Bilderrahmen mit Standfuß
Netzteil mit auswechselbaren Netzsteckern
ƒ Netzteil mit auswechselbaren Netzsteckern
Fernbedienung (mit Batterie) Variable
„ Fernbedienung (mit Batterie)
(AF¦5077/¦5087/5107MS)
Bedienungsanleitung (ohne Abbildung)
Bedienungsanleitung (ohne Abbildung)
Verpackungsinhalt AF 5077
Fehlender Verpackungsinhalt
Fehlender Verpackungsinhalt
Sollte eines der Teile fehlen oder Beschädigungen aufweisen, wenden Sie
sich bitte an Ihren Fachhändler oder an
unseren Kundendienst.
Netzteil anschließen
Netzspannung am Aufstellort
Netzspannung am Aufstellort!
Prüfen Sie, ob die Netzspannung Ihres
Gerätes (Typenschild) mit der vorhandenen Netzspannung am Aufstellort übereinstimmt.
1 Wählen Sie den richtigen Netzstecker für Ihr
Land und schieben Sie diesen auf das Netzteil.
Achten Sie darauf, dass der Netzstecker auf
dem Netzteil vollständig einrastet.
2 Stecken Sie den kleinen Stecker des Netzteils
in den Anschluss auf der Rückseite des Gerätes. Stecken Sie das Netzteil in die Steckdose.
An den Computer anschließen
Mit den USB Kabel können Sie den Bilderrahmen
mit einem Computer verbinden, um Dateien zwischen dem internen Speicher und dem Computer
zu übertragen.
1 Schalten Sie das Gerät mit dem Ein-/Ausschal-
ter auf der Rückseite aus.
2 Verbinden Sie das schmale Ende des Kabels
mit dem ausgeschalteten digitalen Bilderrahmen und das dicke Ende mit dem Computer.
3 Schalten Sie das Gerät mit dem Ein/Ausschal-
ter auf der Rückseite ein. Warten Sie einen Moment, bis der Computer die neue Hardware erkannt hat. Kompatible Foto-, Musik- und Videodateien können auf den internen Speicher
kopiert werden.
4 Wird die Verbindung zum Computer getrennt,
startet der digitale Bilderrahmen neu.
Speicherkarte einsetzen
1 Setzen Sie eine Speicherkarte in den entspre-
chenden Steckplatz auf der Rückseite des Gerätes ein. Ihr Gerät unterstützt folgende Speicherkarten: SD/MMC/MS/SDHC/XD.
Speicherkarte einsetzen!
Verwenden Sie nur Speichermedien,
die mit dem Gerät kompatibel sind.
Ziehen Sie die eingesetzte Speicherkarte keinesfalls heraus, während
das Gerät darauf zugreift. Dadurch
können Daten beschädigt werden
oder verloren gehen.
2 Schalten Sie das Gerät mit dem Ein-/Ausschal-
ter auf der Rückseite ein. Nach der Anzeige
des Startbildschirms startet die Diashow.
Viele Fotos auf der Speicherkarte
vorhanden
Sind auf der Speicherkarte viele Fotos gespeichert, kann es einige Zeit
dauern, bis die Diashow startet.
3 Drücken Sie während der Diashow auf der
Rückseite die Taste OK um die Diashow zu
stoppen.
USB-Speicher und Speicherkarte
gleichzeitig verwenden
Wird ein USB-Speichergerät gleichzeitig mit einer Speicherkarte verwendet, werden zuerst die Bilder der
Speicherkarte angezeigt.
5
Page 6
GEFAHR!
Hinweis
af-5077_5087_5107psms_manual_01_de_253243477-a.book Seite 6 Donnerstag, 2. Juli 2009 11:37 11
DE
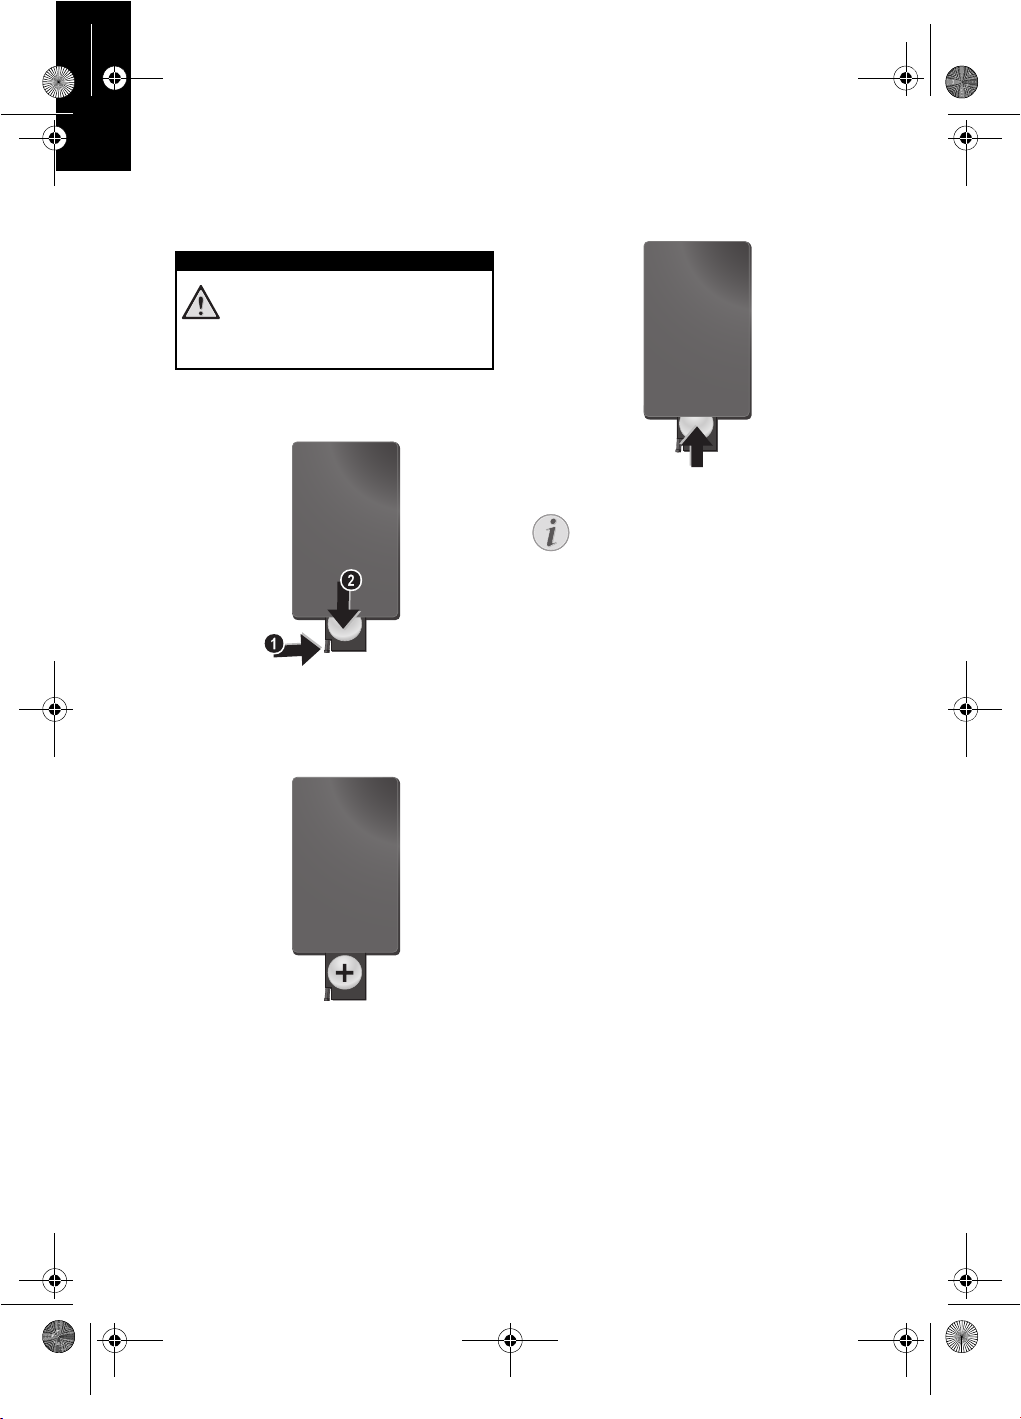
Batterie der Fernbedienung einlegen oder wechseln
Explosionsgefahr bei falschem Batterietyp
WARNUNG! BEI VERWENDUNG DES
FALSCHEN BATTERIETYPS BESTEHT
EXPLOSIONSGEFAHR.
1 Nehmen Sie das Batteriefach aus der Fernbe-
dienung, indem Sie die Verriegelung öffnen (1)
und das Batteriefach herausziehen (2).
2 Legen Sie die neue Batterie so mit den Plus-
und Minuspolen in das Batteriefach ein, wie auf
der Zeichnung auf der Rückseite der Fernbedienung beschrieben. Achten Sie dabei auf die
Polarität!
3 Schieben Sie das Batteriefach in die Fernbe-
dienung bis die Verriegelung einrastet.
In der Regel halten die Batterien ungefähr ein Jahr. Sollte die Fernbedienung
nicht funktionieren, ersetzen Sie bitte
die Batterien. Wenn Sie den Bilderrahmen über einen längeren Zeitraum nicht
benutzen, entnehmen Sie bitte die Batterien. So laufen sie nicht aus und können keine Schäden an der Fernbedienung verursachen.
Die verwendeten Batterien sind entsprechend den Recycling-Bestimmungen Ihres Landes zu entsorgen.
Fernbedienung verwenden
Richten Sie die Fernbedienung auf den Sensor an
der Vorderseite des Gerätes. Die Fernbedienung
funktioniert nur, wenn der Winkel weniger als 30
Grad und die Entfernung höchstens 2 Meter beträgt. Wenn Sie die Fernbedienung verwenden,
sollten sich keine Gegenstände zwischen ihr und
dem Sensor befinden.
6
Page 7

Hinweis
Hinweis
Hinweis
af-5077_5087_5107psms_manual_01_de_253243477-a.book Seite 7 Donnerstag, 2. Juli 2009 11:37 11
Wiedergabe
DE
Übersicht der Menüfunktionen
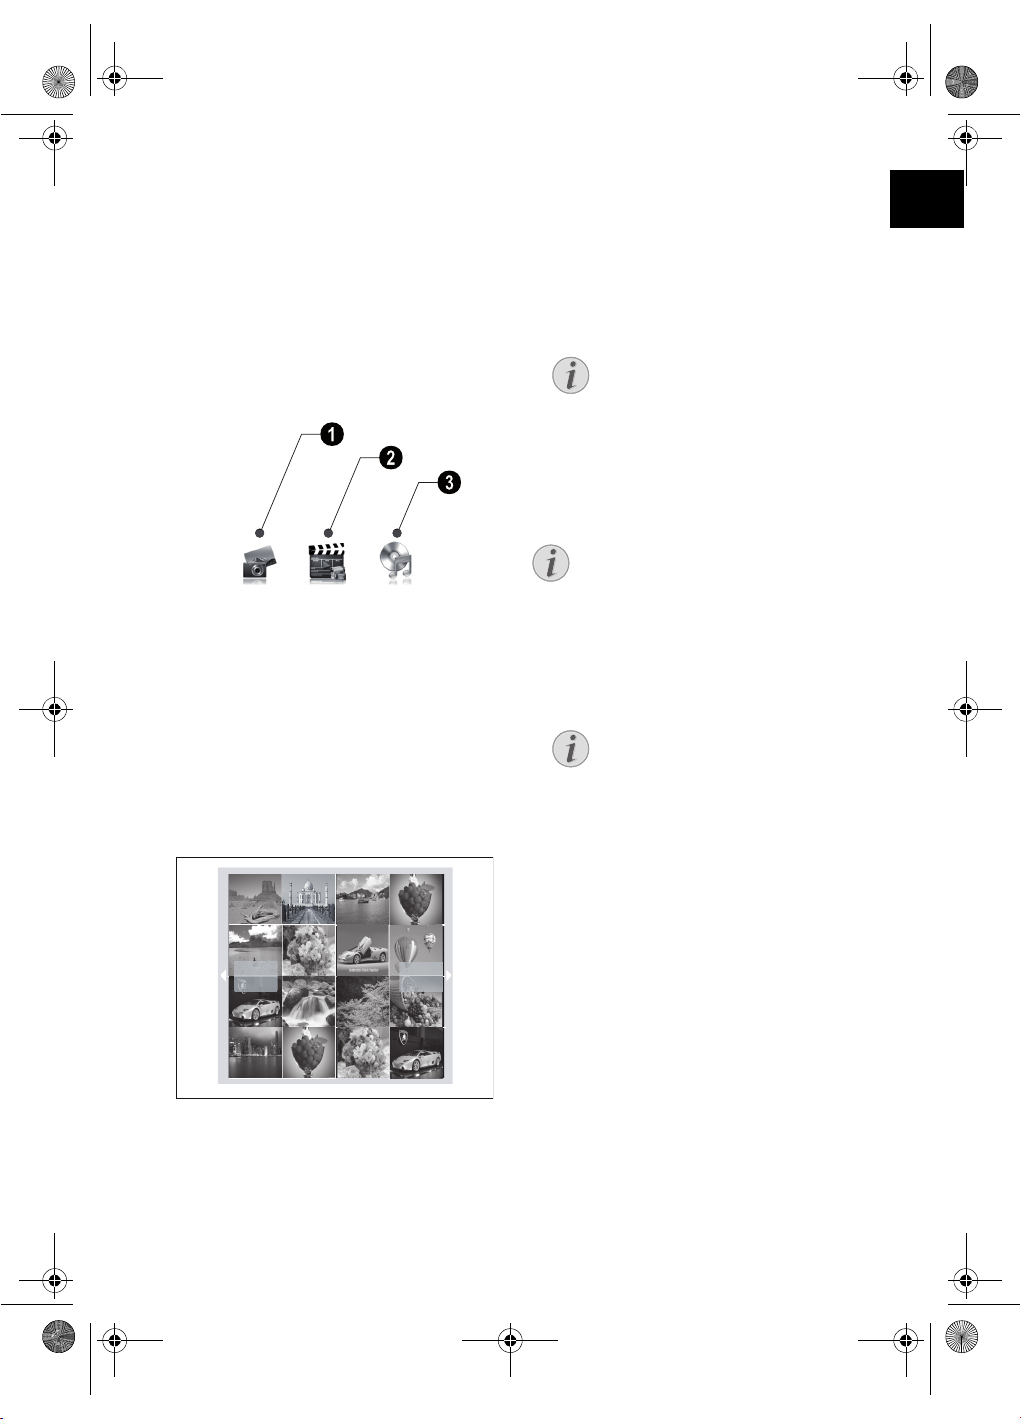
Das Hauptmenü beinhaltet drei Symbole.
1 Fotomenü
2 Videomenü
(AF¦5077/¦5087/5107MS)
3 Musikmenü
(AF¦5077/¦5087/5107MS)
Photomenü AF 5077
Im Menü navigieren
1 Drücken Sie auf der Fernbedienung MENU
oder am Gerät MENU.
2 Wählen Sie mit Ý/Þ das gewünschte Menü.
3 Bestätigen Sie mit .
Foto-Wiedergabe
1 Wählen Sie das Fotomenü im Hauptmenü, und
bestätigen Sie mit OK.
2 Auf dem Bildschirm werden je 16 Miniaturfotos
pro Seite angezeigt.
6 Drücken Sie J/H, um zum vorherigen oder
nächsten Bild zu springen.
7 Beenden Sie die Diashow mit MENU.
Menü aufrufen
Während der Diashow können Sie jederzeit das Hauptmenü mit MENU
aufrufen.
Diashow-Hintergrundmusik einstellen
(AF¦5077/¦5087/5107MS)
Als Hintergrundmusik können Sie nur
Dateien verwenden, die zusammen mit
den Fotos im internen Speicher, auf der
Speicherkarte oder der USB-Verbindung
gespeichert sind.
1 Drücken Sie während einer Diashow auf die
Taste Û der Fernbedienung oder G am Gerät,
um die Hintergrundmusik zu starten.
Mit Û/Ü stellen Sie die Lautstärke
ein.
Musik-Wiedergabe
(AF¦5077/¦5087/5107MS)
1 Wählen Sie das Musikmenü im Hauptmenü, und
bestätigen Sie mit .
2 Wählen Sie mit Ý/Þ oder Û/Ü den Musiktitel,
den Sie wiedergeben möchten.
3 Drücken Sie OK, um die Wiedergabe zu star-
ten.
Während der Wiedergabe werden zusätzliche
Informationen zum Titel angezeigt.
4 Zum Stoppen drücken Sie OK.
3Wählen Sie mit G/I oder J/H das Bild, von
dem aus Sie die Diashow starten möchten.
4 Drücken Sie OK, um die Diashow zu starten.
5 Drücken Sie OK, um die Diashow zu unterbre-
chen. Am Bildschirm erscheint ein ’Pause-Sym-
bol’
7
Page 8

Hinweis
af-5077_5087_5107psms_manual_01_de_253243477-a.book Seite 8 Donnerstag, 2. Juli 2009 11:37 11
DE
Video-Wiedergabe
(AF¦5077/¦5087/5107MS)
1 Wählen Sie das Videomenü im Hauptmenü, und
bestätigen Sie mit .
2 Wählen Sie mit Ý/Þ oder Û/Ü die Videodatei,
die Sie wiedergeben möchten.
3 Drücken Sie OK, um die Wiedergabe zu star-
ten. Zum Stoppen drücken Sie OK.
Zusätzliche Wiedergabefunktionen
Während der Wiedergabe können Sie
mit Ý/Þ oder Û/Ü zum vorherigen
oder nächsten Titel springen.
Drücken Sie auf der Fernbedienung
OK, um die Wiedergabe anzuhalten
und um fortzufahren.
Lautstärke einstellen
(AF¦5077/¦5087/5107MS)
Während der Wiedergabe können Sie auf der
Fernbedienung die Lautstärke mit Ü/Û einstellen.
Drücken Sie wiederholt Ü, um die Lautstärke
ganz auszuschalten.
8
Page 9
Hinweis
af-5077_5087_5107psms_manual_01_de_253243477-a.book Seite 9 Donnerstag, 2. Juli 2009 11:37 11
Einstellungen
DE
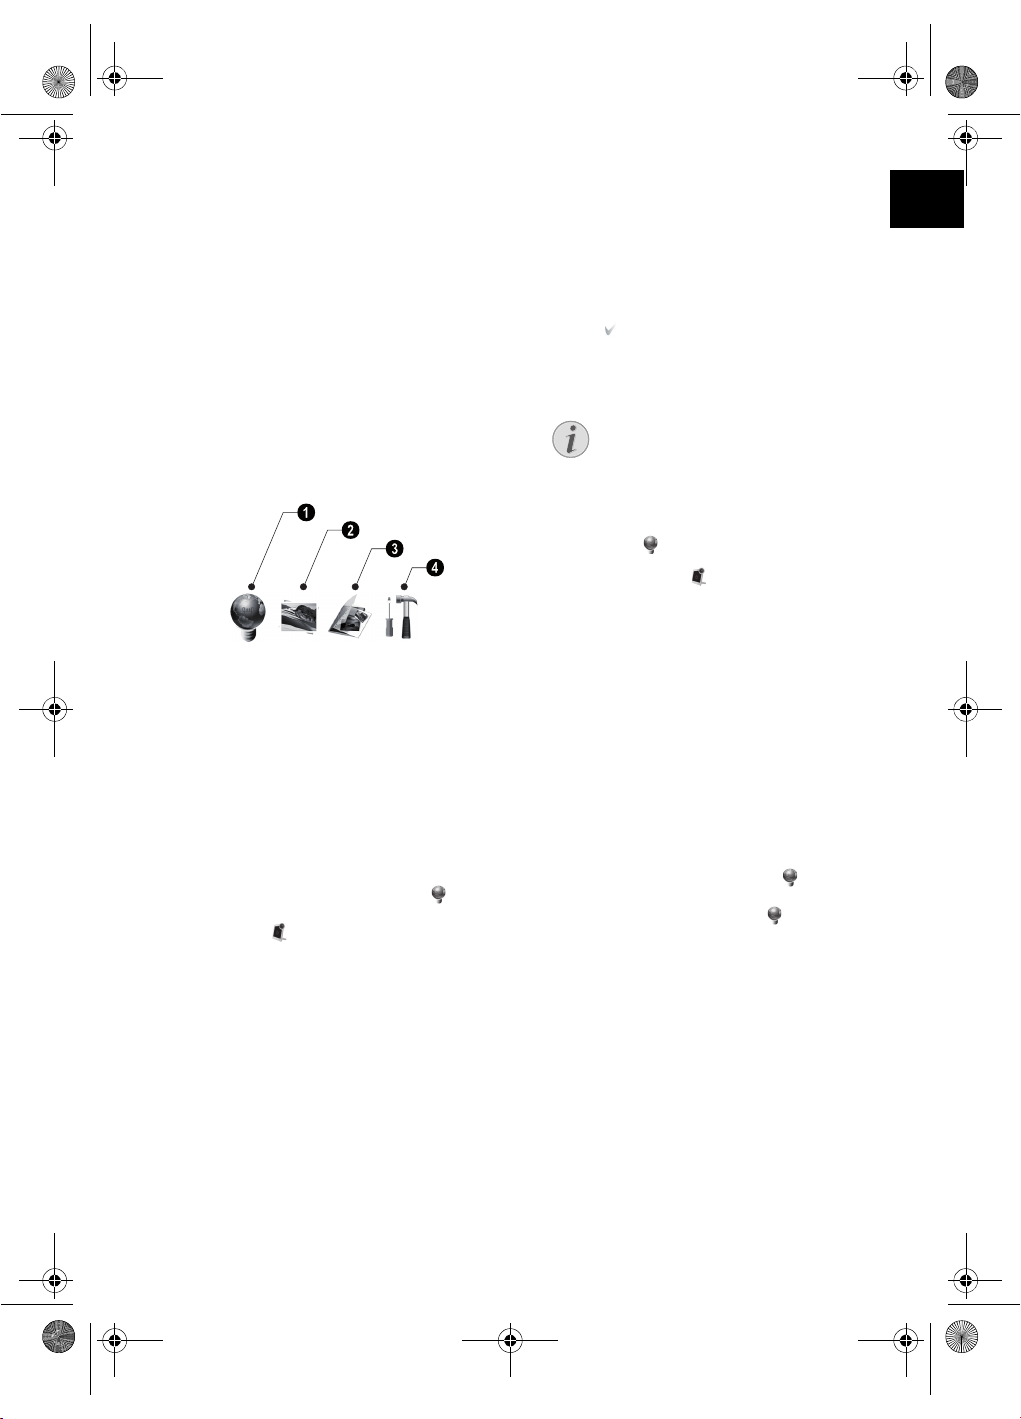
Das Einstellungsmenü beinhaltet vier Symbole
und wird mit der Taste ù am Gerät oder ù auf der
Fernbedienung aufgerufen.
1 ECO - Einstellungen (Automatisches Ein-Aus-
schalten, Automatische Anpassung der Displayhelligkeit (AF¦5077/¦5087/5107MS))
2 Bildeinstellungen (Einstellungen für die Dia-
show, Bild drehen)
3 Dateiverwaltung (Dateien kopieren, löschen,
Wiedergabelisten)
4 Grundeinstellungen (Helligkeit, Kontrast, Da-
tum, Uhrzeit)
Settingsmenü AF 5077
ECO-Einstellungen
Sie können den digitalen Bilderrahmen zu festgelegten Zeiten automatisch Ein-/Ausschalten oder
die Displayhelligkeit automatisch an die Beleuchtung der Umgebung anpassen (AF¦5077/¦5087/
5107MS).
Wählen Sie dazu aus folgenden Einstellungen:
Automatisches Ein-/Ausschalten
Sie können den digitalen Bilderrahmen zu festgelegten Zeiten automatisch Ein-/Ausschalten.
1 Drücken Sie ù.
2 Wählen Sie mit J/H das Symbol und be-
stätigen Sie mit OK.
3 Das Symbol ist bereits markiert.
4 Wählen Sie mit J/H das farbige Symbol und
bestätigen Sie mit OK.
5 Wählen Sie mit J/H den Zeitpunkt an dem
sich der digitale Fotorahmen einschalten soll.
6 Bestätigen Sie mit OK. Der Rahmen des Cur-
sors ändert sich von weiß auf rot.
7 Wählen Sie mit J/H den Zeitpunkt an dem
sich der digitale Fotorahmen ausschalten soll.
8 Bestätigen Sie mit OK. Der Rahmen des Cur-
sors ändert sich von rot auf weiß. Der Zeitraum
an dem der digitale Fotorahmen eingeschaltet
bleibt ist grün markiert.
9 Um einen Zeitraum zu löschen, markieren Sie
den Bereich erneut. Die grüne Markierung wird
dabei gelöscht.
10 Drücken Sie I und wählen Sie mit J/H das
Symbol .
11 Bestätigen Sie mit OK.
12 Beenden Sie mit ù.
Automatik ein-/ausschalten
Sie können das automatische Ein-/
Ausschalten deaktivieren. Die Einstellungen bleiben jedoch erhalten.
1Drücken Sie ù.
2Wählen Sie mit J/H das Symbol
und bestätigen Sie mit OK.
3 Das Symbol ist bereits markiert.
4 Wählen Sie mit J/H das schwarz/
weiße Symbol (Automatik ausgeschaltet) oder das farbige Symbol
(Automatik eingeschaltet).
5 Bestätigen Sie mit OK.
6 Beenden Sie mit ù.
Displayhelligkeit automatisch anpassen
(AF¦5077/¦5087/5107MS)
Mit dieser Funktion passt sich die Helligkeit des
Displays automatisch an die Helligkeit der Umgebung an.
1 Drücken Sie ù.
2 Wählen Sie mit J/H das Symbol und be-
stätigen Sie mit OK.
3Wählen Sie mit I das Symbol und bestäti-
gen Sie mit OK.
4 Wählen Sie mit J/H das schwarz/weiße
Symbol (Automatik ausgeschaltet) oder das
farbige Symbol (Automatik eingeschaltet).
5 Bestätigen Sie mit OK.
6 Beenden Sie mit ù.
9
Page 10
Hinweis
Hinweis
Hinweis
af-5077_5087_5107psms_manual_01_de_253243477-a.book Seite 10 Donnerstag, 2. Juli 2009 11:37 11
DE
Bildeinstellungen ändern
Hier können Sie die Bilder drehen, das Seitenverhältnis einstellen, die Übergangseffekte der Diashow festlegen oder die Ablösezeit der Diashow
einstellen.
1 Drücken Sie ù.
2 Wählen Sie mit J/H (Bildeinstellungen)
und bestätigen Sie mit OK.
3Wählen Sie mit G/I das entsprechende
Symbol.
Bild drehen – Lage des Bildes verändern
Seitenverhältnis – Der Bildschrim des Digitalen Bilderrahmen hat ein Seitenverhältnis im
Format 4:3. Wählen Sie, ob das Bild im Originalformat, im Breitbildformat (16:9) oder das Bild
an die Bildschirmgröße angepasst werden soll.
Übergangseffekte – Verschiedene Übergangseffekte für den Diashow-Modus einstellen
Diashow - Ablösezeit – Aus den angezeig-
ten Zeiten wählen.
Persönlicher Rahmen – Wählen Sie aus unterschiedlichen Rahmen für die Darstellung der
Fotos.
4 Wählen Sie die entsprechende Einstellung mit
J/H.
5 Bestätigen Sie mit OK.
6 Beenden Sie mit ù.
Dateiverwaltung
Von einer Speicherkarte oder einem USB-Stick
können Sie Dateien kopieren. Aus dem internen
Speicher können Sie Dateien löschen.
Dateien kopieren, löschen
1 Drücken Sie ù.
2Wählen Sie mit J/H (Dateiverwaltung)
und bestätigen Sie mit OK.
3 Wählen Sie mit G (Kopieren) oder (Lö-
schen) und bestätigen Sie mit OK.
4 Wählen Sie mit G/I, J/H die Datei, die Sie
kopieren oder löschen möchten.
5 Markieren Sie die Datei mit OK.
Markierung aufheben
Drücken Sie nochmals OK um die
Markierung aufzuheben.
6 Wählen Sie mit I die Symbolzeile am unteren
Bildschirmrand.
7Wählen Sie mit J/H das Symbol , und
drücken Sie OK, um den Kopier- oder Löschvorgang zu starten.
Alle Dateien der Speicherkarte kopieren
Wählen Sie und bestätigen Sie
OK um alle Dateien der Speicherkarte in den internen Speicher zu kopieren.
Vorgang abbrechen
Wählen Sie und bestätigen Sie mit
OK um den Vorgang abzubrechen.
8 Auf dem Display erscheint ein Bearbeitungs-
balken. Nach dem Kopieren, finden Sie die Datei im internen Speicher.
Einschaltmodus
Wählen Sie, ob nach dem Einschalten automatisch
Fotos, Filme oder Fotos und Filme abgespielt werden sollen.
1 Drücken Sie ù.
2Wählen Sie mit J/H (Dateiverwaltung)
und bestätigen Sie mit OK.
3 Wählen Sie mit G und bestätigen Sie mit
OK.
4Wählen Sie mit J/H aus den angezeigten
Möglichkeiten und bestätigen Sie mit OK.
5 Beenden Sie mit ù.
Wiedergabelisten
Stellen Sie sich Ihre perönlichen Wiedergabelisten
für Fotos, Filme und Musik zusammen.
Nur jene Fotos, Filme oder Musik, die sich in diesen
Wiedergabelisten befinden werden abgespielt. Sie
können bis zu fünf Wiedergabelisten erstellen.
Wiedergabeliste erstellen
1 Drücken Sie ù.
2Wählen Sie mit J/H (Dateiverwaltung)
und bestätigen Sie mit OK.
3Wählen Sie mit G/I (Wiedergabelisten)
und drücken Sie H.
4Wählen Sie mit J/H ob Sie eine Wiedergabe-
liste für Musik, Bilder oder Filme erstellen
möchten.
5 Bestätigen Sie mit OK.
6 Bestätigen Sie ’OFF’ mit OK um eine neue Wie-
dergabeliste zu erstellen.
10
Page 11
Hinweis
af-5077_5087_5107psms_manual_01_de_253243477-a.book Seite 11 Donnerstag, 2. Juli 2009 11:37 11
DE
7 Wählen Sie mit J/H z.B.: playlist 1 und bestä-
tigen Sie mit OK.
8 Wählen Sie mit G/I oder J/H jene Datei,
die Sie der Wiedergabeliste zufügen möchten.
Markieren Sie die Datei mit OK.
9 Markieren Sie weitere Dateien mit OK.
10 Wählen Sie mit I die Symbolzeile am unteren
Bildschirmrand.
11 Wählen Sie mit J/H das Symbol , und
drücken Sie OK, um die Wiedergabeliste zu
speichern.
12 Beenden Sie mit ù.
Wiedergabeliste ein-/ausschalten
1 Drücken Sie ù.
2Wählen Sie mit J/H (Dateiverwaltung)
und bestätigen Sie mit OK.
3 Wählen Sie mit G/I (Wiedergabelisten)
und drücken Sie H.
4 Wählen Sie mit J/H ob Sie eine Wiedergabe-
liste für Musik, Bilder oder Filme einschalten
möchten.
5 Bestätigen Sie mit OK.
6 Bestätigen Sie z.B. playlist1 mit OK.
7Wählen Sie mit J/H die gewünschte Wieder-
gabeliste.
Wiedergabelisten ausschalten
Wählen Sie mit J/H ’OFF’, wird die
Wiedergabeliste ausgeschaltet. Bei
der Wiedergabe sind wieder alle Bilder, Filme oder Musikdateien verfügbar.
Grundeinstellungen ändern
1 Drücken Sie ù.
2 Wählen Sie mit J/H das Symbol und be-
stätigen Sie mit OK.
3Wählen Sie mit Û/Ü, welche Einstellung Sie
vornehmen möchten.
4 Bestätigen Sie mit .
Sie können folgende Einstellungen vornehmen:
, , (Helligkeit, Kontrast, Farbsättigung)
– Einstellung von Helligkeit, Kontrast und Farbsättigung des LCD-Displays
(Uhrzeit) – Einstellung von Uhrzeit und Datum.
(Alarm) (AF¦5077/¦5087/5107MS) – Einstellung der Alarmzeit, Ein-/Ausschalten des
Alarms und Wahl des Alarmtones.
(Kalender) – Einstellung von Jahr, Monat,
Tag.
(Werkseinstellung) – Einstellungen auf
Werkseinstellung zurückzusetzen.
5 Wählen Sie die gewünschte Einstellung mit G/
I.
6 Bestätigen Sie mit
7 Ändern Sie die Einstellung mit J/H.
8 Bestätigen Sie die geänderte Einstellung mit .
9 Beenden Sie mit ù.
11
Page 12

af-5077_5087_5107psms_manual_01_de_253243477-a.book Seite 12 Donnerstag, 2. Juli 2009 11:37 11
DE
Service
Rahmen wechseln
Sie können den Rahmen des Gerätes mit den mitgelieferten Wechselrahmen austauschen. Die
Rahmen werden mit Magneten gehalten.
Probleme Lösungen
Der Bilderrahmen lässt sich nicht einschalten. Stellen Sie sicher, dass das Netzteil ordnungsge-
Kann keine Dateien speichern Stellen Sie sicher, dass ausreichend interner Spei-
Kein Ton Stellen Sie sicher, dass das Dateiformat unter-
Speicherkarte wird nicht erkannt Wenn Sie den Rahmen an einen Computer ange-
Es werden für die Diashow, Film und Musikwiedergabe nicht alle Dateien des Speichermediums angezeigt
1 Drücken Sie auf den Knopf für den Rahmen-
wechsel auf der Rückseite des Gerätes. Nehmen Sie den Rahmen ab.
2 Setzen Sie den Wechselrahmen auf das Gerät,
bis er auf den Magneten einrastet.
mäß mit dem Rahmen verbunden ist.
cher Speicherplatz zur Verfügung steht. Starten
Sie den Bilderrahmen erneut und löschen Sie einige Dateien, um Speicherplatz freizugeben
stützt wird, dass Bilderrahmen und Computer ordnungsgemäß verbunden sind und dass die Speicherkarte nicht beschädigt ist.
schlossen haben, wird die eingelegte Speicherkarte nicht erkannt.
Überprüfen Sie, ob eine Wiedergabeliste eingeschaltet ist.
12
Page 13

af-5077_5087_5107psms_manual_01_de_253243477-a.book Seite 13 Donnerstag, 2. Juli 2009 11:37 11
Anhang
DE
Technische Daten AF 5077PS
Abmessungen (Type 1)
Abmessungen (B¦×¦H¦×¦T)................. 190¦×¦153¦×¦80¦mm
Gewicht (Type 1)
Gewicht.............................................................................. 0,4¦kg
Eingang
Netzanschluss. Eingang: 100¦–¦240¦V¦~ / 50¦–¦60¦Hz
Ausgang
....................................................... Ausgang: 5¦V¦† / 2¦A
Empfohlene Geräteumgebung
Empfohlene Geräteumgebung........................ 5¦–¦45¦ºC
Relative Luftfeuchtigkeit
Relative Luftfeuchtigkeit ..................................20¦–¦80¦%
Leistungsaufnahme
Leistungsaufnahme
Gerät eingeschaltet
Gerät ist eingeschaltet (Diashow) ................5,0¦W
Bilddiagonale..........................................................................7¦“
Seitenverhältnis.................................................................. 4:3
Auflösung......................................................800¦×¦600 Pixel
Interner Speicher
Interner Speicher128¦MB¦MB oder bis zu 500¦Fotos
USB-Anschluss (Type 1)
USB-Anschluss .................................................... USB-Host
Kompatible Speicherkarten
Kompatible Speicherkarten.....SD/MMC/MS/SDHC/
XD
Fotoformate
Fotoformate.......................................................................JPEG
Technische Daten AF 5077MS
Abmessungen (Type 2)
Abmessungen (B¦×¦H¦×¦T)................. 190¦×¦153¦×¦80¦mm
Gewicht (Type 2)
Gewicht.............................................................................. 0,4¦kg
Eingang
Netzanschluss. Eingang: 100¦–¦240¦V¦~ / 50¦–¦60¦Hz
Ausgang
....................................................... Ausgang: 5¦V¦† / 2¦A
Empfohlene Geräteumgebung
Empfohlene Geräteumgebung........................ 5¦–¦45¦ºC
Relative Luftfeuchtigkeit
Relative Luftfeuchtigkeit ..................................20¦–¦80¦%
Leistungsaufnahme
Leistungsaufnahme
Gerät eingeschaltet
Gerät ist eingeschaltet (Diashow) ................4,3¦W
Bilddiagonale..........................................................................7¦“
Seitenverhältnis.................................................................. 4:3
Auflösung......................................................800¦×¦600 Pixel
Interner Speicher
Interner Speicher 256¦MB¦MB oder bis zu 1000¦Fotos
USB-Anschluss (Type 2)
USB-Anschluss ........................ USB-Host, USB Device
Kompatible Speicherkarten
Kompatible Speicherkarten.....SD/MMC/MS/SDHC/
XD
Fotoformate
Fotoformate.......................................................................JPEG
Musikformate
Musikformate .................................................................... MP3
Videoformate
Videoformate .................................Motion Jpeg, Mpeg-4
Spaltenumbruch
Technische Daten AF 5087PS
Abmessungen (Ty pe 3)
Abmessungen (B¦×¦H¦×¦T)................. 203¦×¦163¦×¦90¦mm
Gewicht (Type 3)
Gewicht..............................................................................0,5¦kg
Eingang
Netzanschluss.Eingang: 100¦–¦240¦V¦~ / 50¦–¦60¦Hz
Ausgang
........................................................Ausgang: 5¦V¦† / 2¦A
Empfohlene Geräteumgebung
Empfohlene Geräteumgebung........................ 5¦–¦45¦ºC
Relative Luftfeuchtigkeit
Relative Luftfeuchtigkeit ..................................20¦–¦80¦%
Leistungsaufnahme
Leistungsaufnahme
Gerät eingeschaltet
Gerät ist eingeschaltet (Diashow) ................5,4¦W
Bilddiagonale..........................................................................8¦“
Seitenverhältnis.................................................................. 4:3
Auflösung......................................................800¦×¦600 Pixel
Interner Speicher
Interner Speicher128¦MB¦MB oder bis zu 500¦Fotos
USB-Anschluss (Type 3)
USB-Anschluss ....................................................USB-Host
Kompatible Speicherkarten
Kompatible Speicherkarten..... SD/MMC/MS/SDHC/
XD
Fotoformate
Fotoformate...................................................................... JPEG
Technische Daten AF 5087MS
Abmessungen (Ty pe 4)
Abmessungen (B¦×¦H¦×¦T)................. 203¦×¦163¦×¦90¦mm
Gewicht (Type 4)
Gewicht..............................................................................0,5¦kg
Eingang
Netzanschluss.Eingang: 100¦–¦240¦V¦~ / 50¦–¦60¦Hz
Ausgang
........................................................Ausgang: 5¦V¦† / 2¦A
Empfohlene Geräteumgebung
Empfohlene Geräteumgebung........................ 5¦–¦45¦ºC
Relative Luftfeuchtigkeit
Relative Luftfeuchtigkeit ..................................20¦–¦80¦%
Leistungsaufnahme
Leistungsaufnahme
Gerät eingeschaltet
Gerät ist eingeschaltet (Diashow) ................6,3¦W
Bilddiagonale..........................................................................8¦“
Seitenverhältnis.................................................................. 4:3
Auflösung......................................................800¦×¦600 Pixel
Interner Speicher
Interner Speicher..1¦GB¦MB oder bis zu 4000¦Fotos
USB-Anschluss (Type 4)
USB-Anschluss ........................ USB-Host, USB Device
Kompatible Speicherkarten
Kompatible Speicherkarten..... SD/MMC/MS/SDHC/
XD
Fotoformate
Fotoformate...................................................................... JPEG
Musikformate
Musikformate .................................................................... MP3
Videoformate
Videoformate.................................. Motion Jpeg, Mpeg-4
Spaltenumbruch
13
Page 14
af-5077_5087_5107psms_manual_01_de_253243477-a.book Seite 14 Donnerstag, 2. Juli 2009 11:37 11
DE
Technische Daten AF 5107PS
Abmessungen (Type 5)
Abmessungen (B¦×¦H¦×¦T)................. 255¦×¦203¦×¦90¦mm
Gewicht (Type 5)
Gewicht.............................................................................. 0,8¦kg
Eingang
Netzanschluss. Eingang: 100¦–¦240¦V¦~ / 50¦–¦60¦Hz
Ausgang
....................................................... Ausgang: 5¦V¦† / 2¦A
Empfohlene Geräteumgebung
Empfohlene Geräteumgebung........................ 5¦–¦45¦ºC
Relative Luftfeuchtigkeit
Relative Luftfeuchtigkeit ..................................20¦–¦80¦%
Leistungsaufnahme
Leistungsaufnahme
Gerät eingeschaltet
Gerät ist eingeschaltet (Diashow) ................6,1¦W
Bilddiagonale...................................................................10,4¦“
Seitenverhältnis.................................................................. 4:3
Auflösung......................................................800¦×¦600 Pixel
Interner Speicher
Interner Speicher128¦MB¦MB oder bis zu 500¦Fotos
USB-Anschluss (Type 5)
USB-Anschluss .................................................... USB-Host
Kompatible Speicherkarten
Kompatible Speicherkarten.....SD/MMC/MS/SDHC/
XD
Fotoformate
Fotoformate.......................................................................JPEG
Technische Daten AF 5107MS
Abmessungen (Type 6)
Abmessungen (B¦×¦H¦×¦T)................. 255¦×¦203¦×¦90¦mm
Gewicht (Type 6)
Gewicht.............................................................................. 0,8¦kg
Eingang
Netzanschluss. Eingang: 100¦–¦240¦V¦~ / 50¦–¦60¦Hz
Ausgang
....................................................... Ausgang: 5¦V¦† / 2¦A
Empfohlene Geräteumgebung
Empfohlene Geräteumgebung........................ 5¦–¦45¦ºC
Relative Luftfeuchtigkeit
Relative Luftfeuchtigkeit ..................................20¦–¦80¦%
Leistungsaufnahme
Leistungsaufnahme
Gerät eingeschaltet
Gerät ist eingeschaltet (Diashow) ................6,6¦W
Bilddiagonale..........................................................................8¦“
Seitenverhältnis.................................................................. 4:3
Auflösung......................................................800¦×¦600 Pixel
Interner Speicher
Interner Speicher .1¦GB¦MB oder bis zu 4000¦Fotos
USB-Anschluss (Type 6)
USB-Anschluss ........................ USB-Host, USB Device
Kompatible Speicherkarten
Kompatible Speicherkarten.....SD/MMC/MS/SDHC/
XD
Fotoformate
Fotoformate.......................................................................JPEG
Musikformate
Musikformate .................................................................... MP3
Videoformate
Videoformate .................................Motion Jpeg, Mpeg-4
Alle Daten dienen nur als Richtbestimmung. Agfa-
Photo behält sich das Recht vor, ohne vorhergehende Ankündigungen Änderungen vorzunehmen.
Spaltenumbruch
AgfaPhoto wird unter Lizenz von Agfa-Gevaert
NV & Co. KG oder Agfa-Gevaert NV verwendet.
Weder Agfa-Gevaert NV & Co. KG noch Agfa-Gevaert NV stellen diese Produkte her oder bieten
Gewährleistung oder Support.
Für Informationen zu Service, Support oder Gewährleistungen wenden Sie sich bitte an Ihren
Händler oder den Hersteller.
Kontakt: AgfaPhoto Holding GmbH,
www.agfaphoto.com
Hersteller: Sagem Communications,
www.sagem-communications.com
Das CE-Zeichen gewährleistet, dass dieses Produkt hinsichtlich Sicherheit und Gesundheit des
Benutzers sowie elektromagnetischer Interferenz
der Richtlinie 1999/5/CE des Europäischen Parlaments und des Rates zu Telekommunikationsendgeräten entspricht.
Die Einhaltungserklärung können Sie auf der Internetseite www.agfaphoto.com nachlesen.
Die Erhaltung der Umwelt im Rahmen eines Konzepts nachhaltiger Entwicklung liegt AgfaPhoto
sehr am Herzen. AgfaPhoto ist bestrebt, umweltfreundliche Systeme zu betreiben. Daher hat
AgfaPhoto beschlossen, der ökologischen Leistung in allen Produktphasen, von der Herstellung
über die Inbetriebnahme bis hin zum Gebrauch
und zur Entsorgung, einen hohen Stellenwert beizumessen.
Verpackung: Das Logo (Grüner Punkt) drückt aus,
dass eine anerkannte nationale Organisation eine
Beitragszahlung erhält, um die Verpackungserfassung und die Recycling-Infrastrukturen zu verbessern. Bitte halten Sie sich bei der Entsorgung dieser Verpackung an die bei Ihnen geltenden Vorschriften zur Mülltrennung.
Batterien: Sollte Ihr Produkt Batterien enthalten,
müssen diese an den dafür vorgesehenen Sammelstellen entsorgt werden.
14
Page 15
af-5077_5087_5107psms_manual_01_de_253243477-a.book Seite 15 Donnerstag, 2. Juli 2009 11:37 11
Alle Rechte vorbehalten. Kein Teil dieser Publikation darf ohne vorherige schriftliche Zustimmung
durch AgfaPhoto vervielfältigt, in einem Archivsystem gespeichert oder in irgendeiner Form oder
auf sonstigem Wege – elektronisch, mechanisch,
durch Fotokopie, Aufnahme oder anderweitige
Möglichkeit – übertragen werden. Die im vorlie-
Produkt: Der durchgestrichene Mülleimer auf dem
Produkt bedeutet, dass es sich bei diesem Produkt um ein elektrisches oder elektronisches Gerät handelt. Die europäische Gesetzgebung
schreibt hierfür eine gesonderte Entsorgung vor:
• An Verkaufsstellen, falls Sie ein ähnliches Gerät
kaufen.
• An den örtlichen Sammelstellen (Wertstoffhof,
Sonderabholdienste etc.).
So können auch Sie Ihren Beitrag zu Wiederverwendung und Recycling von elektronischen und
elektrischen Altgeräten leisten, was sich auf die
Umwelt und die Gesundheit der Menschen auswirken kann.
Die verwendeten Verpackungen aus Papier und
Karton können wie Altpapier entsorgt werden. Die
Plastikfolien und Styroporverpackungen geben
Sie zum Recycling oder in den Restmüll, je nach
den Anforderungen Ihres Landes.
Warenzeichen: Die im vorliegenden Handbuch genannten Referenzen sind Warenzeichen der jeweiligen Firmen. Das Fehlen der Symbole É und
Ë rechtfertigt nicht die Annahme, dass es sich
bei den entsprechenden Begriffen um freie Warenzeichen handelt. Andere im vorliegenden Dokument verwendete Produktnamen dienen lediglich Kennzeichnungszwecken und können Warenzeichen der jeweiligen Inhaber sein. AgfaPhoto
lehnt jegliche Rechte an diesen Marken ab.
Weder AgfaPhoto noch angeschlossene Gesellschaften sind gegenüber dem Käufer dieses Produktes oder Dritten haftbar in Bezug auf Schadenersatzansprüche, Verluste, Kosten oder Ausgaben, die dem Käufer oder Dritten in Folge eines
Unfalles, des falschen Gebrauches oder Missbrauches dieses Produktes oder nicht autorisierten
Modifikationen, Reparaturen, Veränderungen des
Produktes oder der Nichteinhaltung der Betriebsund Wartungshinweise von AgfaPhoto erwachsen.
AgfaPhoto übernimmt keine Haftung für Schadensersatzansprüche oder Probleme in Folge der
Verwendung jeglicher Optionen oder Verbrauchsmaterialien, die nicht als Originalprodukte von
AgfaPhoto oder von AgfaPhoto genehmigte Produkte gekennzeichnet sind.
AgfaPhoto übernimmt keine Haftung für Schadensersatzansprüche in Folge elektromagnetischer Interferenzen bedingt durch den Einsatz
von Verbindungskabeln, die nicht als Produkte
von AgfaPhoto gekennzeichnet sind.
genden Dokument enthaltenen Informationen
sind ausschließlich zur Verwendung mit diesem
Produkt gedacht. AgfaPhoto übernimmt keine
Verantwortung, wenn diese Informationen auf andere Geräte angewendet werden.
Diese Bedienungsanleitung ist ein Dokument
ohne Vertragscharakter.
Irrtümer, Druckfehler und Änderungen vorbehalten.
Copyright © 2009 Sagem Communications
DE
15
Page 16

DANGER !
Remarque
af-5077_5087_5107psms_manual_02_fr_253243477-a.book Seite 1 Donnerstag, 2. Juli 2009 11:39 11
FR
Introduction
Cher client
Nous vous remercions d’avoir choisi notre cadre
numérique. Préparez-vous à une toute nouvelle
expérience photo ! Avec votre nouveau cadre numérique, regardez des photos et des vidéos et
écoutez de la musique – tout cela sans ordinateur.
Ecran LCD-TFT haute valeur qualitiative
Mémoire
Votre cadre photo numérique possède une mémoire interne, un lecteur de carte mémoire et une
interface USB. Les fichiers peuvent être supprimés de la mémoire interne et copiés de la carte
mémoire ou de la clé USB.
Aperçu clair de photos en petit format (affichage
miniature de 20 images en même temps). Votre
cadre photo numérique supporte la rotation et la
modification du format de la page.
Regardez vos photos en toute simplicité avec le
diaporama automatique accompagné d’une musique de fond.
Avec la télécommande fournie, vous pouvez facilement échanger des photos, de la musique et des
fichiers vidéo, modifier les paramètres et beaucoup d’autres choses.
En outre, vous avez également à votre disposition
des fonctions additionnelles comme l’heure, l'affichage de date, un réveil et une fonction de marche/arrêt automatique.
Nous vous souhaitons bien du plaisir avec votre
appareil et ses multiples fonctions !
A propos du guide d’utilisation
L’aide à l’installation des pages suivantes vous
permet de mettre en service votre appareil rapidement et facilement. Vous trouverez des descriptions détaillées dans les chapitres suivants de ce
guide d’utilisation.
Lisez attentivement le présent guide d’utilisation.
Veillez surtout aux consignes de sécurité pour assurer un parfait fonctionnement de votre appareil.
Le fabricant n’endosse aucune responsabilité si
vous ne respectez pas ces consignes.
Ce guide d’utilisation décrit plusieurs modèles de
cette gamme d’appareils. Veillez que certaines
fonctions ne sont disponibles que sur certains
modèles.
Symboles utilisés
Avertissements concernant les risques
DANGER !
Avertit des risques pour les personnes,
des dommages pour l’appareil ou de
d’autres objets ainsi que d’une éventuelle perte de données. Les dommages corporels ou matériels ne peuvent provenir
que d’une manipulation non conforme.
Trucs et astuces
Trucs et astuces
Ce symbole désigne les astuces qui vous
aident à utiliser votre appareil de manière plus efficace et plus simple.
1
Page 17

af-5077_5087_5107psms_manual_02_fr_253243477-a.book Seite 2 Donnerstag, 2. Juli 2009 11:39 11
Conseils de sécurité et recommandations
Introduction 2
Ne procédez à aucun réglage et changement qui
ne sont pas décrits dans le présent mode d’emploi. Une application inadéquate peut entraîner
des blessures corporelles, des dommages ou des
pertes de données. Respectez toutes les indications de prévention et de sécurité prescrites.
Installation de l’appareil
L’appareil est exclusivement destiné à un usage privé.
L’appareil est exclusivement destiné à un usage
privé. L’appareil doit reposer sur une surface stable et plane. Posez tous les câbles de façon à ce
que personne ne puisse trébucher ni se blesser ou
que l’appareil ne soit endommagé.
Ecran LCD
Soyez toujours soigneux avec l'appareil. Evitez de
toucher l'écran LCD. Ne jamais déposer d’objets
lourds ou à extrémité tranchante sur l'écran, le cadre où le câble de branchement secteur.
Protégez l’appareil du rayonnement solaire direct
Protégez l’appareil du rayonnement solaire direct,
de la chaleur, des grandes variations de températures et de l’humidité. Ne placez pas l’appareil à
proximité d’un chauffage ou d’une climatisation.
Veillez aux indications concernant la température
et l’humidité de l’air dans les caractéristiques
techniques.
Ne pas allumer l’appareil immédiatement a près le transport
Après le transport, l’appareil ne doit pas être déplacé d’une pièce froide à une pièce chaude ou
être allumé dans une pièce froide qui se réchaufferait rapidement. Dans ces situations, attendez
au moins trois heures que l'appareil se soit accommodé de ces changements de conditions
(Température, humidité de l'air...).
Si votre appareil devient trop ch aud ou si de la fumée sort de l’appareil
Si votre appareil devient trop chaud ou si de la fumée sort de l’appareil, retirez aussitôt la prise du
secteur. Laissez examiner votre appareil par un
spécialiste. Afin d’éviter la propagation d’un feu
en cas d’incendie, tenez cet appareil éloigné des
flammes.
N’installez pas l’appareil dans des salles humides.
N’installez pas l’appareil dans des salles humides.
Ne touchez jamais les fiches/prises secteur avec
les mains humides.
Aucun liquide ou corps étranger ne doit entrer dans l’appareil.
Aucun liquide ou corps étranger ne doit entrer
dans l’appareil. Séparez l’appareil du secteur au
cas où des liquides ou corps étrangers parviennent dans l’appareil et faites contrôler votre appareil par un technicien.
Ne laissez pas les enfants sans surveillance autour de l’appareil.
Ne laissez pas les enfants sans surveillance
autour de l’appareil. Ne pas laisser les feuilles
d’emballage à portée des enfants.
Alimentation électrique
Utilisez uniquement l e bloc d’alimen tation de four ni avec votre a ppareil
Utilisez uniquement le bloc d’alimentation de fourni avec votre appareil (Cf. chapitre Annexe / Caractéristiques techniques). Contrôlez si la tension
secteur de votre appareil (plaque signalétique) est
identique à celle du lieu d’installation. Les parties
complètes correspondent au mode de tension indiqué sur l'appareil.
Ne touchez jamais les câbles électriques s’ils sont endommagés.
Ne touchez jamais les câbles électriques s’ils sont
endommagés. Echangez immédiatement le câble
endommagé. Utilisez uniquement un câble
approprié ; adressez-vous le cas échéant à notre
service technique ou à votre magasin spécialisé.
Débranchez votre appareil d u réseau électrique av ant de nettoyer la surface.
Débranchez votre appareil du réseau électrique
avant de nettoyer la surface. Utilisez un chiffon
doux et non pelucheux. N’utilisez en aucun cas
des produits de nettoyage liquides, gazeux ou légèrement inflammables (sprays, produits abrasifs,
vernis brillants, alcools). Veillez à ce qu’aucune humidité ne pénètre à l’intérieur de l’appareil.
Nettoyez l’écran avec un chiffon doux et sec.
Nettoyez l’écran avec un chiffon doux et sec. En
cas de bris de l’écran d’affichage, un liquide légèrement corrosif peut se répandre. Evitez tout contact avec la peau et les yeux.
Réparations
Réparations
Ne réparez pas vous-même l’appareil. Une maintenance non conforme peut occasionner des dommages corporels ou matériels. Laissez examiner
votre appareil exclusivement par un spécialiste
agréé.
N’enlevez pas la plaque signalétique de votre appareil, autrement la garantie s’éteint.
Supports mémoire photo
Supports mémoire photo
Utilisez uniquement les supports d'enregistrement compatibles avec l’appareil. Afin de prévenir
tout dommage sur la carte ou sur l’appareil, la carte doit être uniquement introduite dans l'appareil
ou en être retirée quand ce dernier est éteint.
Ne retirer en aucun cas la carte mémoire installée
pendant que l'appareil y accède. Ceci pourrait endommager ou effacer des données.
FR
2
Page 18
af-5077_5087_5107psms_manual_02_fr_253243477-a.book Seite 3 Donnerstag, 2. Juli 2009 11:39 11
FR
Aperçu
Aperçu de l’appareil
Commutateur Marche/Arrêt
1 B – Commutateur marche/arrêt
Connecteur pour carte mémoire
2 – Fiche pour carte mémoire
Touches fléchées gauche
3 J – Naviguer dans le menu / diminution de la
clarté, du contraste, saturation des couleurs /
passer à l’image, la colonne ou la page précédente
OK
4 OK – Confirmer la sélection / Démarre, interrompre le diaporama
Touches flèche vers le haut
5 G – Naviguer dans le menu / Augmenter le volume / Allumer la musique de fond pendant le diaporama
Touches flèche vers le bas
6 I – Naviguer dans le menu / diminuer le volume
Touches fléchées droite
7 H – Naviguer dans le menu / augmentation de
la clarté, du contraste, de la saturation des couleurs / Passer à l’image, à la colonne ou à la page
suivante suivante
Touche menu
8 MENU – Appeler le menu principal / Allumer la
montre analogique (Maintenir la touche appuyée)
Paramètres
9 ù – Appeler le menu de réglage
Mini USB
‹ ý – Connexion Mini-USB – pour la connexion
d’un ordinateur
Port USB
Œ ý Prise femelle – Connexion USB pour un
support d’enregistrement
Support d’enregistrement avec connexion USB
÷ Í-Prise femelle – Connexion bloc d’alimentation
Rückseite AF5077
Télécommande
(AF¦5077/¦5087/5107MS)
Fernbedienung AF5077
1 – Appeler le menu de réglage
2 – Appeler le menu principal / Allumer la montre
analogique (Maintenir la touche appuyée)
3 – Allumer/éteindre
4 – Naviguer dans le menu / Augmenter le volu-
me / Allumer la musique de fond pendant le diaporama
5 – Confirmer la sélection / Démarre, interrompre
le diaporama
6 – Naviguer dans le menu / augmentation de la
clarté, du contraste, de la saturation des couleurs
/ Passer à l’image, à la colonne ou à la page suivante suivante
7 – Naviguer dans le menu / diminuer le volume
8 – Naviguer dans le menu / diminution de la clar-
té, du contraste, saturation des couleurs / passer
à l’image, la colonne ou la page précédente
Spaltenumbruch
3
Page 19
Remarque
ATTENTION !
DANGER !
Remarque
Remarque
af-5077_5087_5107psms_manual_02_fr_253243477-a.book Seite 4 Donnerstag, 2. Juli 2009 11:39 11
Première mise en service
FR
Contenu de l’emballage
Cadre d’images
‚ Cadre photo numérique avec support
Alimentation électrique avec fiche secteur intercha ngeable
ƒAlimentation électrique avec fiche secteur interchangeable
Télécommande (avec Piles) variable
„ Télécommande (avec Piles)
(AF¦5077/¦5087/5107MS)
Manuel d’utilisation (sans illustration)
Manuel d’utilisation (sans illustration)
Verpackungsinhalt AF 5077
Contenu de l’emballage incomplet
Contenu de l’emballage incomplet
S’il manquait un des composants ou si
vous constatiez des dommages, adressez-vous à votre revendeur ou à notre
service après-vente.
Connecter le bloc d'alimentation
Tension réseau sur le lieu d’installat ion
Tension réseau sur le lieu d’installation !
Contrôlez si la tension secteur de votre
appareil (plaque signalétique) est identique à celle du lieu d’installation.
1 Sélectionnez la bonne prise d’adaptateur pour
votre pays et insérez-la dans l’alimentation
électrique. Veillez à ce que la prise d’adapta-
teur soit complètement intégrée dans l’alimen-
tation électrique.
2 Insérez la petite prise de l’alimentation électri-
que dans le connecteur sur la partie arrière de
l’appareil. Introduire le bloc d’alimentation dans
la prise de courant.
3 Allumez l’appareil avec le commutateur mar-
che/arrêt situé à l’arrière. Attendez un moment, jusqu’à ce que l’ordinateur détecte le
nouveau matériel. Les fichiers photo, musique
et vidéo compatibles peuvent être copiés sur la
mémoire interne.
4 Si la liaison avec l’ordinateur est retirée, le ca-
dre photo numérique redémarre.
Mise en place d’une carte mémoire
1 Insérez une carte mémoire dans la fiche cor-
respondante à l’arrière de l’appareil. Votre appareil supporte les cartes mémoires suivantes :
SD/MMC/MS/SDHC/XD.
Installer la carte mémoire !
Utilisez uniquement les supports
d'enregistrement compatibles avec
l’appareil.
Ne retirer en aucun cas la carte mémoire installée pendant que l'appareil
y accède. Ceci pourrait endommager
ou effacer des données.
2 Allumez l’appareil avec le commutateur mar-
che/arrêt situé à l’arrière. Le diaporama commence après l’affichage de l’écran de démarrage.
Plusieurs photos sont disponibles sur
la carte mémoire
Si plusieurs photos sont enregistrées
sur la carte mémoire, il peut se passer
un certain temps avant que le diaporama ne commence.
3 Pendant le diaporama, appuyez à l’arrière sur
la touche OK pour arrêter le diaporama.
Connecter à l’ordinateur
Le câble USB vous permet de relier le cadre photo
à l'ordinateur pour transférer des fichiers entre la
mémoire interne et l'ordinateur.
1 Allumez l’appareil avec le commutateur mar-
che/arrêt situé à l’arrière.
2 Reliez l’extrémité étroite du câble avec le cadre
photo numérique éteint et l’extrémité épaisse
à l’ordinateur.x
Utiliser le support USB et la carte mémoire en même temps
Si un appareil USB est utilisé en
même temps qu’une carte mémoire,
les photos de la carte mémoire seront
affichées en premier.
4
Page 20
DANGER !
Remarque
af-5077_5087_5107psms_manual_02_fr_253243477-a.book Seite 5 Donnerstag, 2. Juli 2009 11:39 11
FR
Introduire les batteries de la télécommande ou les changer.
Il y a un risque d’explosion si un type de
batterie non approprié est utilisé
AVERTISSEMENT ! L'UTILISATION D'UN
MAUVAIS TYPE DE BATTERIE ENTRAINE
UN RISQUE D'EXPLOSION.
1 Retirez le boîtier à piles de la télécommande
pour déverrouiller (1) puis remettre le boîtier à
piles (2).
2 Introduisez la nouvelle batterie avec les pôles
positif et négatif placés dans le boîtier à piles
comme décrit sur le dessin à l'arrière de la té-
lécommande. Faîtes bien attention à la polarité
!
3 Introduisez le boîtier à piles dans la télécom-
mande jusqu'à ce que le verrouillage s'enclenche.
En général, les batteries ont une durée
de vie d’environ un an. Si la télécommande ne fonctionne pas, remplacez les batteries. Si vous n’utilisez pas le cadre sur
une longue période, retirez la batterie.
Ainsi, vous ne l’épuisez pas et vous ne
pouvez causer aucun dommage à la télécommande.
Les batteries utilisées doivent être éliminées conformément aux dispositions y
afférentes en vigueur dans votre pays.
Utiliser la télécommande
Orientez la télécommande vers le capteur situé à
l’avant de l’appareil. La télécommande fonctionne
uniquement si l’angle est inférieur à 30 degrés et
si la distance est supérieure à 2 mètres. Lorsque
vous utilisez la télécommande, aucun objet ne doit
se trouver entre vous et le capteur.
5
Page 21
Remarque
Remarque
Remarque
af-5077_5087_5107psms_manual_02_fr_253243477-a.book Seite 6 Donnerstag, 2. Juli 2009 11:39 11
Lecture
FR
Aperçu des fonctions du menu
Le menu principal comporte trois symboles.
1 Menu photo
2 Menu vidéo
(AF¦5077/¦5087/5107MS)
3 Menu musique
(AF¦5077/¦5087/5107MS)
Photomenü AF 5077
Naviguer dans le menu
1 Appuyez sur la commande à distance MENU
ou sur l’appareil MENU.
2 Sélectionnez le menu souhaité avec Ý/Þ.
3 Confirmez par .
Lecture Photo
1 Sélectionnez le menu photo dans le menu prin-
cipal, et confirmez avec OK.
2 Sur l’écran, 16 photos miniatures par page sont
affichées.
6Appuyez sur J/H, pour passer à la photo
précédente ou suivante.
7 Terminez le diaporama avec la touche MENU.
Accéder au menu
Pendant le diaporama, vous pouvez
appeler le menu principal à tous moments avec MENU.
Régler la musique de fond du diaporama
(AF¦5077/¦5087/5107MS)
Comme musique de fond, vous pouvez
uniquement utiliser des fichiers qui sont
enregistrés sur la carte mémoire avec
les photos de la mémoire interne ou sur
la connexion USB.
1 Pendant le diaporama, appuyez sur la touche
Û de la commande à distance ou sur G sur
l’appareil, pour lancer la musique de fond.
Û/Ü vous permet de régler le volume.
Lecture musique
(AF¦5077/¦5087/5107MS)
1 Choisissez le menu musique dans le menu prin-
cipal, et confirmez avec .
2 Sélectionnez le titre que vous souhaitez écou-
ter avec Ý/Þ ouÛ/Ü.
3Appuyez sur OK pour démarrer la lecture.
Pendant la lecture, des informations supplémentaires concernant le titre s’affichent.
4 Pour arrêter, appuyez sur OK.
3 Sélectionnez l’image à partir de laquelle vous
souhaitez démarrer le diaporama avec la tou-
che G/I ou J/H.
4Appuyez sur OK pour démarrer le diaporama.
5Appuyez sur OK pour interrompre le diapora-
ma. Un ‘symbole pause’ apparaît à l’écran
6
Page 22

Remarque
af-5077_5087_5107psms_manual_02_fr_253243477-a.book Seite 7 Donnerstag, 2. Juli 2009 11:39 11
FR
Lecture vidéo
(AF¦5077/¦5087/5107MS)
1 Choisissez le menu vidéo dans le menu princi-
pal, et confirmez avec .
2 Sélectionnez avec Ý/Þ ou Û/Ü le fichier vidéo
que vous souhaitez lire.
3Appuyez sur OK pour démarrer la lecture. Pour
arrêter, appuyez sur OK.
Fonctions de lecture additionnelles
Pendant de la lecture, vous pouvez
repasser au titre précédent ou au suivant avec les touches Ý/Þ ouÛ/Ü.
Appuyez sur la touche OK de la télécommande pour arrêter ou continuer
la lecture.
Régler le volume
(AF¦5077/¦5087/5107MS)
Pendant la lecture, vous pouvez régler le volume
avec la toucher Ü/Û de la télécommande. Appuyez plusieurs fois sur Ü pour éteindre complètement le volume.
7
Page 23
Remarque
af-5077_5087_5107psms_manual_02_fr_253243477-a.book Seite 8 Donnerstag, 2. Juli 2009 11:39 11
Paramètres
FR
Le menu de réglage comporte quatre symboles et
peut être appelé à l’aide de la touche ù sur l’appareil ou de la touche ù sur la commande à distance.
1 Réglages ECO (Marche/arrêt automatique,
adaptation automatique de la clarté de l’affichage
(AF¦5077/¦5087/5107MS))
2 Réglages de l’image (Réglages pour le diapora-
ma, tourner l’image)
3 Gestion de fichiers (Copier les fichiers, suppri-
mer, Listes de lectures)
4 Réglages fondamentales (Clarté, contraste,
date, heure)
Settingsmenü AF 5077
Réglages ECO
Vous pouvez allumer/éteindre le cadre photo numérique à des heures précises ou ajuster la clarté
de l’affichage en fonction de l’éclairage de l’environnement AF¦5077/¦5087/5107MS).
Choisissez donc parmi les réglages suivants :
Allumage/extinction automatique
Vous pouvez allumer/éteindre le cadre photo numérique automatiquement à des heures précises.
1Appuyez sur ù.
2 Sélectionnez le symbole avec J/H et con-
firmez avec OK.
3 Le symbole est déjà marqué.
4 Sélectionnez le symbole de couleur avec J/
H et confirmez avec OK.
5 Sélectionnez avec la touche J/H à quel mo-
ment le cadre photo doit s’allumer.
6 Confirmez par OK. Le cadre du curseur passe
du blanc au rouge.
7 Sélectionnez avec la touche J/H à quel mo-
ment le cadre photo numérique doit s’allumer.
8 Confirmez par OK. Le cadre du curseur passe
du rouge blanc. La période durant laquelle le
cadre photo numérique reste allumé est mar-
qué en vert.
9 Pour effacer une durée, marquez le domaine à
nouveau. Le marquage vert est ensuite supprimé.
10 Appuyez sur I et sélectionnez avec J/H le
symbole .
11 Confirmez par OK.
12 Terminez avec ù.
Allumer/éteindre automatiquement
Vous pouvez désactiver l’allumage/
extinction automatique. Les réglages
restent tout de même maintenus.
1Appuyez sur ù.
2 Sélectionnez le symbole avec J/
H et confirmez avec OK.
3 Le symbole est déjà marqué.
4 Sélectionnez avec J/H le symbole
noir/blanc (éteint automatiquement) ou le symbole de couleurs
(allumé automatiquement).
5Confirmez par OK.
6 Terminez avec ù.
Ajuster automatiquement a clarté de l’affichage
(AF¦5077/¦5087/5107MS)
Avec cette fonction, la clarté de l’affichage s’ajus-
te automatiquement en fonction de la clarté de
l’environnement.
1Appuyez sur ù.
2 Sélectionnez le symbole avec J/H et con-
firmez avec OK.
3 Sélectionnez le symbole avec I et confir-
mez avec OK.
4 Sélectionnez avec J/H le symbole noir/blanc
(éteint automatiquement) ou le symbole de
couleurs (allumé automatiquement).
5Confirmez par OK.
6 Terminez avec ù.
8
Page 24
Remarque
Remarque
Remarque
af-5077_5087_5107psms_manual_02_fr_253243477-a.book Seite 9 Donnerstag, 2. Juli 2009 11:39 11
FR
Changer les paramètres de l’image
Ici, vous pouvez tourner les photos, régler le grandissement de la page, définir les effets de transition du diaporama ou régler le temps de passage
du diaporama.
1Appuyez sur ù.
2 Sélectionnez avec J/H (paramètres ima-
ges) et confirmez avec OK.
3 Sélectionnez avec G/I le symbole corres-
pondant.
Tourner l’image – Changer la position de
l’image
Grandissement de la page – L’écran du cadre photo numérique a un grandissement de
pages en format 4:3. Sélectionnez si l’image
doit être mise au format original (16:9), au format large ou en grand écran.
Effets de transition – Régler différents effets de transition pour le mode diaporama
Diaporama – Temps de passage – Choisir
parmi les temps affichés.
Cadre personnel – Choisissez parmi des
cadres différents pour la présentation des
photos.
4 Sélectionnez le réglage correspondant avec
J/H.
5 Confirmez par OK.
6Terminez avec ù.
Gestion de fichier
Vous pouvez copier les fichiers photo d’une carte
mémoire ou d’une clé USB. Vous pouvez supprimer des fichiers photo de la mémoire interne.
Copier et supprimer les fichiers
1Appuyez sur ù.
2 Sélectionnez avec J/H (Gestion de fi-
chier) et confirmez avec OK.
3 Sélectionnez avec G (Copier) ou (Sup-
primer) et confirmez avecOK.
4 Sélectionnez avec G/I, J/H le fichier que
vous souhaitez copier ou supprimer.
5 Marquez le fichier avec OK.
7 Sélectionnez avec J/H le symbole , et
appuyez sur OK pour lancer le processus de
copie ou de suppression.
Copier tous les fichiers de la carte
mémoire
Sélectionnez et confirmez avec
OK pour copier tous les fichiers de la
mémoire interne.
Annuler opération
Sélectionnez et confirmez avec
OK pour interrompre le processus.
8 Une barre de traitement apparaît sur l'afficha-
ge. Une fois la copie terminée, le fichier se trouvera dans la mémoire interne.
Mode d’allumage
Choisissez si des photos, des films, ou des photos
et des filmes doivent être joués automatiquement
après l’allumage.
1Appuyez sur ù.
2 Sélectionnez avec J/H (Gestion de fi-
chier) et confirmez avec OK.
3 Sélectionnez avec G et confirmez par OK.
4 Sélectionnez J/H pour faire un choix parmi
les possibilités indiquées et confirmez avec
OK..
5 Terminez avec ù.
Listes de lecture
Composez votre liste personnelle de lecture pour
les photos, les films et la musique.
Seuls les films, les photos et la musique qui se
trouve dans votre liste seront lus. Vous pouvez
créer jusqu’à cinq listes.
Retirer le marquage
Appuyez à nouveau sur OK pour retirer le marquage.
6 Sélectionnez avec I la ligne de symbole sur le
bord inférieur de l’écran.
9
Page 25
Remarque
af-5077_5087_5107psms_manual_02_fr_253243477-a.book Seite 10 Donnerstag, 2. Juli 2009 11:39 11
Créer la liste de lecture
1Appuyez sur ù.
2 Sélectionnez avec J/H (Gestion de fi-
chier) et confirmez avec OK.
3 Sélectionnez avec G/I (Listes de lecture)
et appuyez sur H.
4 Sélectionnez avec J/H si vous souhaitez
créer une liste de musique, d’images ou de
films..
5 Confirmez par OK.
6 Confirmez ‚OFF’ avec OK pour créer une liste
de lecture.
7 Sélectionnez avec J/H par exemple la play-
list 1 et confirmez avec OK.
8 Sélectionnez avec G/I ouJ/H chaque fi-
chier que vous souhaitez introduire dans la lis-
te de lecture, die Sie der Wiedergabeliste. Mar-
quez le fichier avec OK.
9 Marquez les autres fichiers avec OK.
10 Sélectionnez avec I la ligne de symbole sur le
bord inférieur de l’écran.
11 Sélectionnez avec J/H le symbole , et
appuyez sur OK pour enregistrer la liste de
lecture.
12 Terminez avec ù.
Allumer/éteindre la liste de lecture
1Appuyez sur ù.
2 Sélectionnez avec J/H (Gestion de fi-
chier) et confirmez avec OK.
3 Sélectionnez avec G/I (Listes de lecture)
et appuyez sur H.
4 Sélectionnez avec J/H si vous souhaitez
créer une liste de musique, d’images ou de
films.
5 Confirmez par OK.
6 Confirmez par exemple la playlist 1 avec OK.
7 Sélectionnez avec J/H la liste de lecture
souhaitée.
Modifier les paramètres de base
1Appuyez sur ù.
2 Sélectionnez le symbole avec J/H et
confirmez avec OK.
3 Sélectionnez le paramètre que vous souhaitez
appliquer avec la touche Û/Ü.
4Confirmez par .
Vous pouvez appliquer les paramètres suivants :
, , (Clarté, contraste, saturation de
couleurs) – Réglage de clarté, contraste et saturation de couleurs de l’affichage LCD
(Heure) – Régler l’heure et la date.
(Alarme) (AF¦5077/¦5087/5107MS) – Réglage
de l’alarme, allumage/extinction de l’alarme et
sélection du son de l’alarme.
(Calendrier) – Réglage de l’année, du mois
et du jour.
(Paramètre usine) – Remettre les réglages
au paramètre usine.
5 Sélectionnez avec G/I les paramètres sou-
haités.
6Confirmez par .
7 Changez le paramètre avec J/H.
8 Confirmez chaque paramètre changé avec .
9 Terminez avec ù.
FR
Eteindre les listes de lecture
Sélectionnez avec J/H ’OFF’, pour
éteindre la liste de lecture. Lors de la
lecture, toutes les images, les films
ou les fichiers de musique sont disponibles.
10
Page 26

af-5077_5087_5107psms_manual_02_fr_253243477-a.book Seite 11 Donnerstag, 2. Juli 2009 11:39 11
FR
Service
Changer de cadre
Vous pouvez remplacer le cadre de l’appareil avec
le cadre de rechange fourni. Les cadres sont fixés
avec des aimants.
Problèmes Solution.
Le cadre photo ne s’allume pas. Assurez-vous que le câble d’alimentation est cor-
Aucun fichier ne peut être enregistrer Assurez-vous que l’espace d’enregistrement est
Aucun son Assurez-vous que le format du fichier est compati-
La carte mémoire n'est pas détectée Lorsque vous avez branché le cadre à un ordina-
Pour le diaporama, les films et la lecture de musique, tous les fichiers du support d’enregistrement
ne sont pas affichés
1 Pour effectuer le changement de cadre, ap-
puyez sur le bouton situé à l’arrière de l’appareil. Retirez le cadre.
2 Placez le cadre de rechange sur l'appareil jus-
qu'à ce qu'au contact avec les aimants.
rectement relié au cadre.
suffisant dans la mémoire interne. Redémarrer le
cadre photo et supprimez certains fichiers pour libérer de l'espace d'enregistrement.
ble, que le cadre photo et l’ordinateur sont bien reliés et que la carte mémoire n’est pas endommagée.
teur, la carte mémoire introduite n'est pas détectée.
Vérifiez si une liste de lecture est activée.
11
Page 27
af-5077_5087_5107psms_manual_02_fr_253243477-a.book Seite 12 Donnerstag, 2. Juli 2009 11:39 11
Annexes
FR
Caractéristiques techniques AF 5077PS
Dimensions (Type 1)
Dimensions (L¦×¦H¦×¦P) ....................... 190¦×¦153¦×¦80¦mm
Poids (Type 1)
Poids ................................................................................... 0,4¦kg
Entrée
Prises secteur....Entrée : 100¦–¦240¦V¦~ / 50¦–¦60¦Hz
Sortie
............................................................ Sortie : 5¦V¦† / 2¦A
Température ambiante recommandée :
Température ambiante recommandée :.... 5¦–¦45¦ºC
Humidité de l’air relative
Humidité de l’air relative ...................................20¦–¦80¦%
Taille du papier
Taille du papier
L’appareil est allumé
L’appareil est allumé (Diaporama)................. 5,0¦W
Diagonale Photo...................................................................7¦“
Rapport des dimensions .............................................. 4:3
Résolution.....................................................800¦×¦600 Pixel
Mémoire interne
Mémoire interne128¦MB¦MB ou jusqu’à 500¦photos
Connexion USB (Type 1)
raccordement USB / port USB ....................USB-Host
Cartes mémoire photo compatibles
Cartes mémoire photo compatibles..SD/MMC/MS/
SDHC/XD
Format Photo
Format Photo ....................................................................JPEG
Caractéristiques techniques AF 5077MS
Dimensions (Type 2)
Dimensions (L¦×¦H¦×¦P) ....................... 190¦×¦153¦×¦80¦mm
Poids (Type 2)
Poids ................................................................................... 0,4¦kg
Entrée
Prises secteur....Entrée : 100¦–¦240¦V¦~ / 50¦–¦60¦Hz
Sortie
............................................................ Sortie : 5¦V¦† / 2¦A
Température ambiante recommandée :
Température ambiante recommandée :.... 5¦–¦45¦ºC
Humidité de l’air relative
Humidité de l’air relative ...................................20¦–¦80¦%
Taille du papier
Taille du papier
L’appareil est allumé
L’appareil est allumé (Diaporama)................. 4,3¦W
Diagonale Photo...................................................................7¦“
Rapport des dimensions .............................................. 4:3
Résolution.....................................................800¦×¦600 Pixel
Mémoire interne
Mémoire interne..256¦MB¦MB ou jusqu’à 1000¦photos
Connexion USB (Type 2)
raccordement USB / port USBUSB-Host, USB Device
Cartes mémoire photo compatibles
Cartes mémoire photo compatibles..SD/MMC/MS/
SDHC/XD
Format Photo
Format Photo ....................................................................JPEG
Formats musique
Formats musique ............................................................ MP3
Formats vidéo
Formats vidéo................................ Motion Jpeg, Mpeg-4
Spaltenumbruch
Caractéristiques techniques AF 5087PS
Dimensions (Type 3)
Dimensions (L¦×¦H¦×¦P)........................ 203¦×¦163¦×¦90¦mm
Poids (Type 3)
Poids ................................................................................... 0,5¦kg
Entrée
Prises secteur....Entrée : 100¦–¦240¦V¦~ / 50¦–¦60¦Hz
Sortie
............................................................. Sortie : 5¦V¦† / 2¦A
Température ambiante recommandée :
Température ambiante recommandée : ....5¦–¦45¦ºC
Humidité de l’air relative
Humidité de l’air relative ...................................20¦–¦80¦%
Taille du papier
Taille du papier
L’appareil est allumé
L’appareil est allumé (Diaporama)................. 5,4¦W
Diagonale Photo...................................................................8¦“
Rapport des dimensions ............................................... 4:3
Résolution.....................................................800¦×¦600 Pixel
Mémoire interne
Mémoire interne128¦MB¦MB ou jusqu’à 500¦photos
Connexion USB (Type 3)
raccordement USB / port USB ....................USB-Host
Cartes mémoire photo compatibles
Cartes mémoire photo compatibles .SD/MMC/MS/
SDHC/XD
Format Photo
Format Photo ................................................................... JPEG
Caractéristiques techniques AF 5087MS
Dimensions (Type 4)
Dimensions (L¦×¦H¦×¦P)........................ 203¦×¦163¦×¦90¦mm
Poids (Type 4)
Poids ................................................................................... 0,5¦kg
Entrée
Prises secteur....Entrée : 100¦–¦240¦V¦~ / 50¦–¦60¦Hz
Sortie
............................................................. Sortie : 5¦V¦† / 2¦A
Température ambiante recommandée :
Température ambiante recommandée : ....5¦–¦45¦ºC
Humidité de l’air relative
Humidité de l’air relative ...................................20¦–¦80¦%
Taille du papier
Taille du papier
L’appareil est allumé
L’appareil est allumé (Diaporama)................. 6,3¦W
Diagonale Photo...................................................................8¦“
Rapport des dimensions ............................................... 4:3
Résolution.....................................................800¦×¦600 Pixel
Mémoire interne
Mémoire interne...1¦GB¦MB ou jusqu’à 4000¦photos
Connexion USB (Type 4)
raccordement USB / port USBUSB-Host, USB Device
Cartes mémoire photo compatibles
Cartes mémoire photo compatibles .SD/MMC/MS/
SDHC/XD
Format Photo
Format Photo ................................................................... JPEG
Formats musique
Formats musique ............................................................ MP3
Formats vidéo
Formats vidéo................................Motion Jpeg, Mpeg-4
Spaltenumbruch
12
Page 28
af-5077_5087_5107psms_manual_02_fr_253243477-a.book Seite 13 Donnerstag, 2. Juli 2009 11:39 11
FR
Caractéristiques techniques AF 5107PS
Dimensions (Type 5)
Dimensions (L¦×¦H¦×¦P) ....................... 255¦×¦203¦×¦90¦mm
Poids (Type 5)
Poids ................................................................................... 0,8¦kg
Entrée
Prises secteur....Entrée : 100¦–¦240¦V¦~ / 50¦–¦60¦Hz
Sortie
............................................................ Sortie : 5¦V¦† / 2¦A
Température ambiante recommandée :
Température ambiante recommandée :.... 5¦–¦45¦ºC
Humidité de l’air relative
Humidité de l’air relative ...................................20¦–¦80¦%
Taille du papier
Taille du papier
L’appareil est allumé
L’appareil est allumé (Diaporama)................. 6,1¦W
Diagonale Photo............................................................ 10,4¦“
Rapport des dimensions .............................................. 4:3
Résolution.....................................................800¦×¦600 Pixel
Mémoire interne
Mémoire interne128¦MB¦MB ou jusqu’à 500¦photos
Connexion USB (Type 5)
raccordement USB / port USB ....................USB-Host
Cartes mémoire photo compatibles
Cartes mémoire photo compatibles..SD/MMC/MS/
SDHC/XD
Format Photo
Format Photo ....................................................................JPEG
Caractéristiques techniques AF 5107MS
Dimensions (Type 6)
Dimensions (L¦×¦H¦×¦P) ....................... 255¦×¦203¦×¦90¦mm
Poids (Type 6)
Poids ................................................................................... 0,8¦kg
Entrée
Prises secteur....Entrée : 100¦–¦240¦V¦~ / 50¦–¦60¦Hz
Sortie
............................................................ Sortie : 5¦V¦† / 2¦A
Température ambiante recommandée :
Température ambiante recommandée :.... 5¦–¦45¦ºC
Humidité de l’air relative
Humidité de l’air relative ...................................20¦–¦80¦%
Taille du papier
Taille du papier
L’appareil est allumé
L’appareil est allumé (Diaporama)................. 6,6¦W
Diagonale Photo...................................................................8¦“
Rapport des dimensions .............................................. 4:3
Résolution.....................................................800¦×¦600 Pixel
Mémoire interne
Mémoire interne...1¦GB¦MB ou jusqu’à 4000¦photos
Connexion USB (Type 6)
raccordement USB / port USBUSB-Host, USB Device
Cartes mémoire photo compatibles
Cartes mémoire photo compatibles..SD/MMC/MS/
SDHC/XD
Format Photo
Format Photo ....................................................................JPEG
Formats musique
Formats musique ............................................................ MP3
Formats vidéo
Formats vidéo................................ Motion Jpeg, Mpeg-4
Toutes les données ne sont que des indications.
AgfaPhoto se réserve le droit d’effectuer des
changements sans notification préalable.
Spaltenumbruch
AgfaPhoto est utilisé sous la licence de AgfaGevaert NV & Co. KG ou Agfa-Gevaert NV. Ni
Agfa-Gevaert NV & Co. KG, ni Agfa-Gevaert NV
ne fabriquent ces produits ou offrent une garantie ou un service technique.
Pour de plus amples informations sur le service,
le service technique ou les garanties, veuillez
vous adresser à votre revendeur ou au fabricant.
Contact : AgfaPhoto Holding GmbH,
www.agfaphoto.com
Fabricant : Sagem Communications,
www.sagem-communications.com
Le symbole CE garantie que ce produit ne présente aucun risque pour la sécurité et la santé de son
utilisateur et qu’il est conforme à la directive CE
1999/5 relative au interférences électromagnétiques du Parlement Européen et du Conseil de la
radiodiffusion et de la télécommunication.
Vous pouvez consulter la déclaration de conformité sur le site internet www.agfaphoto.com.
La protection de l’environnement dans le cadre
d'un concept de développement durable est très
importante pour AgfaPhoto. AgfaPhoto s’efforce
d’utiliser des systèmes écologiques. C’est pourquoi AgfaPhoto a décidé d’accorder une grande
valeur à la performance écologique à toutes les
phases du produit, de la fabrication à la mise en
service, et de l'utilisation à l’élimination.
Emballage : Le logo (Point vert) signifie qu’une organisation nationale reconnue paie une cotisation
pour améliorer le mode d'emballage et les infrastructures de recyclage. Veuillez respecter les procédures de tri de déchets en vigueur dans votre
pays l’élimination de cet emballage.
Batteries : Si votre produit contient des batteries,
ces dernières doivent être éliminées au dépôt prévu à cet effet.
13
Page 29

af-5077_5087_5107psms_manual_02_fr_253243477-a.book Seite 14 Donnerstag, 2. Juli 2009 11:39 11
Produit : Le symbole poubelle barrée sur le produit
signifie que ce produit est un appareil électrique
ou électronique. La législation européenne prescrit donc une élimination séparée :
• Sur les lieux de vente, si vous achetez un appareil similaire.
• Aux dépôts locaux (Déchetterie, service déchets
spécial etc.)
Ainsi, vous pouvez également contribuer à la réutilisation et au recyclage de vieux appareils électroniques et électriques et avoir un impact sur
l'environnement et la santé des gens.
Les emballages utilisés en papier et carton peuvent être dépollués comme du papier usagé. Les
feuilles en plastique et le polystyrène peuvent
être recyclées ou déposées en déchets résiduels,
selon les spécifications de votre pays.
Marques déposées : Les références citées dans le
présent manuel sont des marques déposées des
entreprises respectives. L’absence des symboles
É et Ë ne signifie pas que les termes utilisés
sont des marques libres. Les autres noms de produit utilisés dans le présent document servent
uniquement à des fins de désignation et peuvent
être des marques des propriétaires respectifs.
AgfaPhoto rejette tous droits sur ces marques.
Ni AgfaPhoto ni les sociétés affiliées ne sont responsables vis-à-vis de l’acheteur de ce produit ou
de tiers en rapport aux demandes de dommages
et intérêts, pertes, frais ou dépenses qui incombent à l’acheteur ou à des tiers à la suite d’un accident, d’un usage erroné ou abusif de ce produit
ou à des modifications et réparations du produit
non autorisées ou au non respect des instructions
de service et de maintenance de AgfaPhoto.
AgfaPhoto n’endosse aucune responsabilité pour
les demandes de dommages et intérêts ou les
problèmes à la suite de l’utilisation d’options ou de
consommables qui ne sont pas des produits d’origine de AgfaPhoto ou de produits agréés par AgfaPhoto.
AgfaPhoto n’endosse aucune responsabilité pour
les demandes de dommages et intérêts à la suite
d’interférences électromagnétiques dues à l’emploi de câbles de connexion qui ne sont pas des
produits de AgfaPhoto.
Tous droits réservés. Aucune partie de la présente publication n’est autorisée à être reproduite,
enregistrée dans un système d’archive ou sous
quelque forme que ce soit ou bien transmise par
n’importe quel moyen – électronique, mécanique,
par photocopie, enregistrement ou autre. Les informations contenues dans le présent document
sont destinées exclusivement à l’utilisation du
produit décrit. AgfaPhoto n’endosse aucune responsabilité si ces informations sont appliquées à
d’autres appareils.
Le manuel d’utilisation est un document n’ayant
pas un caractère contractuel.
Sous réserve d’erreurs, de fautes d’impression et
de modifications.
Copyright © 2009 Sagem Communications
FR
14
Page 30
DANGER!
Notice
af-5077_5087_5107psms_manual_03_en_253243477-a.book Seite 1 Donnerstag, 2. Juli 2009 11:41 11
Introduction
EN
Dear Customer
Thank you for purchasing our photo frame. Get
ready to experience photography like never before! The photo frame allows you to view photos,
audio and video files—all without a computer.
High definition LCD screen
Memory
Your digital photo frame includes a built-in memory, a memory card slot and a USB port. Files on the
built-in memory can be deleted and files on memory card and USB-disc can be copied.
Supports browse mode (thumbnails of 20 images
per page at a time). Your digital photo frame supports photo rotate and stretch function.
An automatic, continuous slide show with background music lets you enjoy all of your photos
with ease.
The included remote control makes it simple to select photo-, music- and movies files, change settings and more.
Additional functions like time and date display,
alarm clock and an automatic on and off switch
are also available.
We hope you enjoy your device and its many functions!
About this User Manual
With the installation guide on the following pages,
you can start using your device quickly and easily.
Detailed descriptions can be found in the following sections of this user manual.
Read the entire user manual carefully. Follow all
safety instructions in order to ensure proper operation of your device. The manufacturer accepts no
liability if these instructions are not followed.
Multiple models of this device series are described
in this user manual. Please note that some functions are only available with specific models.
Symbols Used
Dangers
DANGER!
Warns about dangers for people, damage to the device or other objects as
well as possible loss of data. Injuries or
damage can result from improper handling.
Troubleshooting
Troubleshooting
This symbol designates tips that will
help you to use your device more effectively and easily.
1
Page 31

af-5077_5087_5107psms_manual_03_en_253243477-a.book Seite 2 Donnerstag, 2. Juli 2009 11:41 11
Safety Instructions and Recommendations
Introduction 2
Do not make any changes or settings that are not
described in this user manual. Physical injury or
damage to the device or loss of data can result
from improper handling. Take note of all warning
and safety notes indicated.
Setting Up the Device
The device is exclusively for indoor use only.
The device is exclusively for indoor use only. The
device should rest securely on a stabile, flat surface. Position all cables in such a way that no one
will stumble on them, thus avoiding possible injuries to persons or damage to the device itself.
LCD screen
Always handle the unit with care. Avoid touching
the LCD screen. Never place heavy or sharp objects on the LCD panel, frame or power cord.
Protect the device against direct sunlight
Protect the device against direct sunlight, heat,
large temperature fluctuations and moisture. Do
not place the device in the vicinity of heaters or air
conditioners. Observe the information on temperature and humidity in the technical data.
Do not switch the device on immediately a fter transporting it.
The device should not be switched on immediately
after being moved from a cold to a warm room or
vice versa or into a cold room which has been
heated up quickly. In such cases, wait at least
three hours until the device has adapted to the
changed conditions (temperature, humidity…) .
In the event that the device becomes too hot, or if you see smoke coming from the d evice
In the event that the device becomes too hot, or if
you see smoke coming from the device, you must
immediately pull the power cable out of the power
socket. Have your device examined by trained professionals at a technical service location. To prevent the spread of fire, open flames should be
kept away from the device.
Do not plug in the de vice in moist r ooms.
Do not plug in the device in moist rooms. Never
touch the mains cable or the mains connection
with wet hands.
Do not allow liquids to enter into the device.
Do not allow liquids to enter into the device. Disconnect the device from the power socket if liquids or foreign objects have entered the device
and have your device examined by trained professionals at a technical service location.
Do not allow children to handle the devi ce without supervision.
Do not allow children to handle the device without
supervision. The packing materials should be kept
out of the hands of children.
Power Supply
Use only the enclosed power adapter
Use only the enclosed power adapter (see chapter
Appendix / Technical Data). Check whether the
mains voltage of your device (indicated on the
type label) matches the mains voltage available at
the setup location. This equipment complies with
the voltage type specified on the unit.
Never touch the power cable if the insulation is damaged.
Never touch the power cable if the insulation is
damaged. Replace damaged wires immediately.
Use suitable cables only; if necessary please contact our technical customer service or your retailer.
Before cleaning the surface of your device, disconnect it from the power network.
Before cleaning the surface of your device, disconnect it from the power network. Use a soft,
lint-free cloth. Never use liquid, gaseous or easily
flammable cleansers (sprays, abrasives, polishes,
alcohol). Do not allow any moisture to reach the interior of the device.
Only clean the display with a dry, soft cloth.
Only clean the display with a dry, soft cloth. If the
display breaks, a mildly corrosive liquid may escape. Avoid all contact with your skin and eyes.
Repairs
Repairs
Do not make any repairs to the device yourself.
Improper maintenance can result in injuries or
damage to the device. Only have your device repaired by an authorised service centre.
Do not remove the type label from your device;
this would void the warranty.
Photo Memory Media
Photo Memory Media
Only use storage media that are compatible with
the device. In order to prevent damage to the card
or the unit, please turn off the power before removing or inserting the card.
Never pull out the memory card while the device is
accessing it. This could cause data to be damaged
or lost.
EN
2
Page 32

af-5077_5087_5107psms_manual_03_en_253243477-a.book Seite 3 Donnerstag, 2. Juli 2009 11:41 11
Overview
EN
Device Overview
On/Off Switch
1B—On/Off switch
Slot for Memory card
2—Slot for Memory card
Arrow keys left
3 J—Navigating in the Menu / Decrease the
brightness, contrast and colour saturation / Skips
to the previous image, previous row or page
OK
4 OK—Confirms the selection / Starting, interrupting the slide show
Arrow keys up
5 G—Navigating in the Menu / Increase the volume / Switch on the background music during
slide show
Arrow keys down
6 I—Navigating in the Menu / Decrease the
volume
Arrow keys right
7 H—Navigating in the Menu / Increase the
brightness, contrast and colour saturation / Skips
to the next image, next row or page
Menu Key
8 MENU—Calling the main menu / press and
hold: Switch on the analog clock
Adjustment Menu
9 ù—Calling up the settings menu
Mini USB
‹ ý—Mini USB connection – for connecting a
computer
USB Socket
Œ ý- Socket—USB port for a storage medium
USB connection for storage medium
÷ Í - Socket – Port for power supply
Rückseite AF5077
Spaltenumbruch
Remote Control
(AF¦5077/¦5087/5107MS)
Fernbedienung AF5077
1—Calling up the settings menu
2—Calling the main menu / press and hold:
Switch on the analog clock
3—Switching On and Off
4—Navigating in the Menu / Increase the volume
/ Switch on the background music during slide
show
5—Confirms the selection / Starting, interrupting
the slide show
6—Navigating in the Menu / Increase the brightness, contrast and colour saturation / Skips to the
next image, next row or page
7—Navigating in the Menu / Decrease the volume
8—Navigating in the Menu / Decrease the brightness, contrast and colour saturation / Skips to the
previous image, previous row or page
3
Page 33

Notice
CAUTION!
DANGER!
Notice
Notice
af-5077_5087_5107psms_manual_03_en_253243477-a.book Seite 4 Donnerstag, 2. Juli 2009 11:41 11
Initial Operation
Packing Contents
Digital photo frame
‚ Digital photo frame with bracket
Power supply with exchangeable plugs
ƒ Power supply with exchangeable plugs
Remote control (with battery) Variable
„ A remote control (with battery)
(AF¦5077/¦5087/5107MS)
User Guide (not depicted)
User Guide (not depicted)
Verpackungsinhalt AF 5077
Missing Package Contents
Missing Package Contents
If one of the parts is missing or damaged, please contact your retailer or our
customer service.
Connecting power supply
Mains Voltage at the Site of Installation
Mains Voltage at the Site of Installation!
Check whether the mains voltage of
your device (indicated on the type label)
matches the mains voltage available at
the setup location.
1 Choose the right plug for your country and
slide it onto the power adapter. Ensure that the
plug snaps in completely.
2 Insert the small plug of the power supply into
the socket on the rear side of your device. In-
sert the power supply unit into the socket.
Connecting to the PC
Using the USB cable, you can connect your photo
frame to a computer to transfer files between the
internal memory and computer.
1 Switch the device off using the on/off switch
on the rear.
2 With the frame turned off, connect the small
end of the cable to the digital picture frame
and the large end to your computer.
3 Switch the device on using the on/off switch
on the rear. Allow the computer a few mo-
ments to recognize the new hardware. Com-
patible photo, music and video files can be cop-
ied onto the internal memory.
4 If the connection with the computer is discon-
nected, the digital photoframe will restart automatically.
Inserting a Memory Card
1 Insert a memory card into the appropriate card
slot at the rear of the device. Your photo frame
supports the following memory cards: SD/
MMC/MS/SDHC/XD.
Inserting a Memory Card!
Only use storage media that are compatible with the device.
Never pull out the memory card while
the device is accessing it. This could
cause data to be damaged or lost.
2 Switch the device on using the on/off switch
on the rear. The player will start slide show after the start screen be displayed.
Many Photos on the Memory Card
If the memory card contains many
photos, it can take some time until
the slide show starts.
3 Press OK at the rear during a slide show to
stop the slide show.
Using USB device and memory card at
the same time
If a USB storage device is used at the
same time as a storage card, the images from the memory card are displayed first.
EN
4
Page 34

DANGER!
Notice
af-5077_5087_5107psms_manual_03_en_253243477-a.book Seite 5 Donnerstag, 2. Juli 2009 11:41 11
EN
Installing or Changing the Batteries of the Remote Control
Risk of explosion with incorrect type of
batteries
CAUTION! RISK OF EXPLOSION IF BATTERY IS REPLACED BY ONE OF AN INCORRECT TYPE.
1 Take the battery compartment from the re-
mote control by opening the locking mecha-
nism (1) and pulling out the battery compart-
ment (2).
2 Insert the new batteries into the battery com-
partment with the positive and negative poles
as shown on the back of the remote control.
Make sure the polarities(+ and -) are aligned
correctly.
3 Push the battery compartment back into the
remote control until the locking mechanism engages.
Normally the batteries will last for
around one year. If the remote control
does not work, please replace the batteries. If the player is not used for a long
time, take out the batteries. So you can
prevent leakage and possible damage to
the remote control.
The batteries used should be disposed
of according to the recycling regulations
of your country.
Using the Remote Control
Point the remote control to the remote sensor on
the front panel of the device. Its working limits is
within an angle of 30 degrees and a distance of 2
meter. When using the remote control, no obstacle
should be placed between the remote control and
remote sensor.
5
Page 35

Notice
Notice
Notice
af-5077_5087_5107psms_manual_03_en_253243477-a.book Seite 6 Donnerstag, 2. Juli 2009 11:41 11
Playback
Overview of the Menu Functions
There are three items on the main menu.
1 Photo Menu
2 Video Menu
(AF¦5077/¦5087/5107MS)
3 Music Menu
(AF¦5077/¦5087/5107MS)
Photomenü AF 5077
Navigating in the Menu
1 Press MENU on the remote control or MENU
on the device.
2 Select the desired menu using Ý/Þ.
3Confirm with .
Photo Playback
1 Select the photo menu in the main menu and
confirm using OK.
2 Then the frame will display 16 thumbnail imag-
es per page.
6 Press J/H to skip top the previous or next
EN
image.
7 End the slide show using MENU.
Calling up Menu
During the slideshow you can return
to the main menu by pressing MENU
at any time.
Setting the Background Music of the Slide Show
(AF¦5077/¦5087/5107MS)
As background music, you can only use
files that are stored together with the
photos in the internal memory on the
memory card or the USB connection.
1 During the slide show press Û on the remote
control or G on the device, to start the background music.
Using Û/Ü, set the volume.
Music Playback
(AF¦5077/¦5087/5107MS)
1 Select the music menu in the main menu and
confirm using .
2Using Ý/Þ or Û/Ü select the music title you
want to play.
3 Press OK to start playback.
Additional informations will be displayed during
playback.
4 To stop, press OK.
3Use G/I or J/H to select the image from
which to start the slide show
4 Press OK to start the slide show.
5 Press OK to pause the slide show. A ‘pause
symbol’ appears on the screen.
6
Page 36

Notice
af-5077_5087_5107psms_manual_03_en_253243477-a.book Seite 7 Donnerstag, 2. Juli 2009 11:41 11
Movie Playback
(AF¦5077/¦5087/5107MS)
EN
1 Select the video menu in the main menu and
confirm using .
2Using Ý/Þ or Û/Ü select the video title you
want to play.
3 Press OK to start playback. To stop, press OK.
Additional Playback Functions
During playback , you can skip to the
previous or next song by using Ý/Þ or
Û/Ü.
During playback, press the OK on the
remote control to pause and to
resume playback.
Adjusting Volume Level
(AF¦5077/¦5087/5107MS)
During playback you can adjust the volume using
Ü/Û on the remote control. Press repeatedly Ü
to switch off the volume (mute function).
7
Page 37

Notice
af-5077_5087_5107psms_manual_03_en_253243477-a.book Seite 8 Donnerstag, 2. Juli 2009 11:41 11
Settings
The settings menu contains four items and can be
called up using ù on the device or ù on the remote control.
1 ECO Settings (Automatically switch on/off,
Adaption of the LCD brightness automatically
(AF¦5077/¦5087/5107MS))
2 Picture-Settings (Slide show settings, rotating
image)
3 File Management (Copy files, delete files, play-
lists)
4 Basic-Settings (Brighness, contrast, date,
clock)
Settingsmenü AF 5077
ECO Settings
The digital picture frame can be switched on or off
automatically or the brightness of the LCD screen
can be adapted according the ambient light
(AF¦5077/¦5087/5107MS).
Select from the following settings:
Switching On and Off Automatically
The digital photo frame can be switched on or off
at a particular time of the day.
1 Press ù.
2Using J/H select the symbol and confirm
with OK.
3 The symbol is selected.
4Use J/H to select the coloured symbol and
confirm using OK.
5 Select the time at which the digital photo
frame should be switched on using J/H.
6Confirm with OK. The colour of the cursor will
change from white to red.
7 Select the time at which the digital photo
frame should be switched off using J/H.
8Confirm with OK. The colour of the cursor will
change from red to white. The time period
when the digital picture frame is switched on,
is marked green.
9 To delete a time period, mark the time period
again. The green marking will be removed.
10 Press I and select the symbol using J/
H.
11 Confirm with OK.
12 You can exit with ù.
Switching Automatic On/Off
You can deactivate the automatic on/
off. The actual setting is retained.
1 Press ù.
2Using J/H select the symbol
and confirm with OK.
3 The symbol is selected.
4 Select using J/H the black/white
symbol (automatic switched off) or
the coloured symbol (automatic
switched on).
5Confirm with OK.
6You can exit with ù.
Automatic adaption of the LCD brightness
(AF¦5077/¦5087/5107MS)
With this function the brightness of the LCD
screen can be adapted according the ambient
light.
1 Press ù.
2Using J/H select the symbol and confirm
with OK.
3Using I select the symbol and confirm with
OK.
4 Select using J/H the black/white symbol
(automatic switched off) or the coloured sym-
bol (automatic switched on).
5Confirm with OK.
6You can exit with ù.
EN
8
Page 38

Notice
Notice
Notice
af-5077_5087_5107psms_manual_03_en_253243477-a.book Seite 9 Donnerstag, 2. Juli 2009 11:41 11
EN
Modifying the Picture Settings
Here you can rotating the images, changing aspect ratio, determine the transition efects or adjusting the slide show speed.
1 Press ù.
2Using J/H select (Picture Setting) and
confirm with OK.
3Use G/I to select the required symbol.
Rotating Image—Change the orientation of
the image
Aspect Ratio—The digital photo frame has
a wide screen with 4:3 aspect ratio. Select
whether you would like to view the image in the
original format, in the wide screen format (16:9)
or if the image should be stretched to match
the shape of the screen.
Transition Effects—Allows you to choose
different styles of slide show effects.
Slide Show Speed—Select from the dis-
played times.
Personal Frame – Select from different
frames for displaying the pictures.
4 Select the required setting using J/H.
5Confirm with OK.
6You can exit with ù.
File Management
Files on the memory card or USB disk can be copied. Files in the internal memory can be deleted.
Copy / Delete Files
1 Press ù.
2Using J/H select (File Management) and
confirm with OK.
3Using G to select (copy) or (delete) and
confirm with OK.
4Using G/I, J/H select the file you want to
copy or delete.
5Mark the file using OK.
7Using J/H to select icon and press OK
to start copying or deleting.
Copy all Files from the Memory Card
Select and confirm using OK to
copy all files from the memory card to
the internal memory.
Cancel Process
Select and confirm using OK to
cancel the process.
8 The screen will display the processing bar. Af-
ter finish copying, you can find the image in the
internal memory.
Starting Mode
Select whether you would like images, movies or
images and movies to be played automatically after Power on.
1 Press ù.
2Using J/H select (File Management) and
confirm with OK.
3Using G select and confirm with OK.
4 Select from the options displayed using J/H
and confirm using OK.
5You can exit with ù.
Cancelling the Selection
Press again OK to cancel the selection.
6Using I to select the symbol line at the bot-
tom of the screen.
9
Page 39

Notice
af-5077_5087_5107psms_manual_03_en_253243477-a.book Seite 10 Donnerstag, 2. Juli 2009 11:41 11
Playlists
Create your own playlist for images, movies and
music.
Only images, movies and music in this playlists wil
be played back. You can create up to five playlists.
Creating Playlist
1 Press ù.
2Using J/H select (File Management) and
confirm with OK.
3 Select (Playlists) using G/I and confirm
with H.
4 Select using J/H wether you would like to
create a playlist for music, images or movies.
5Confirm with OK.
6 Confirm 'OFF' using OK to create a new playl-
ist.
7Using J/H select e.g. playlist 1 and confirm
with OK.
8 Select using G/I or J/H the file you want
to add to the playlist. Mark the file using OK.
9Mark further files using OK.
10 Using I to select the symbol line at the bot-
tom of the screen.
11 Using J/H to select icon and press OK
to save the playlist.
12 You can exit with ù.
Switching Playlist On/Off
1 Press ù.
2Using J/H select (File Management) and
confirm with OK.
3 Select (Playlists) using G/I and confirm
with H.
4 Select using J/H wether you would like to
switch on a playlist for music, images or mov-
ies.
5Confirm with OK.
6 Confirm e.g. playlist1 using OK.
7 Select the desired playlist using J/H.
Modifying the Basic Settings
1 Press ù.
2Using J/H select the symbol and confirm
with OK.
3Use Û/Ü to select the setting you would like
to allocate.
4Confirm with .
You can allocate the following settings:
, , (Brightness, Contrast, Colour saturation)—Adjustment of brightness, contrast,
and colour saturation of the LCD screen.
(Clock)—Setting the time and date.
(Alarm) (AF¦5077/¦5087/5107MS)—Setting
of the alarmtime, on/off of the alarm and the
selection of the alarmtone.
(Calendar) – Setting of year, month, day.
(Default)—Restore the settings to the fac-
tory default.
5 Select the desired setting using G/I.
6Confirm with
7 Modify the setting using J/H.
8 Confirm the modified setting using .
9You can exit with ù.
EN
Switching Playlist Off
With the selection of ’OFF’ uising J/
H the playlist will be switched off. All
images, movies or music files are
available again.
10
Page 40

af-5077_5087_5107psms_manual_03_en_253243477-a.book Seite 11 Donnerstag, 2. Juli 2009 11:41 11
Service
EN
Changing the frame
You can change the frame of the device using the
picture frames supplied. The frames are held with
magnets.
Problems Solutions
Photo Frame does not power on. Check that you connect the AC adapter to the
Cannot save files Make sure that enough internal memory is availa-
No sound Make sure the file format is supported, the compu-
Memory card can not be recognized If you connected the frame to a computer, the in-
Not all files of the memory card will be shown for
the slide show, movie and music play back.
1 Press on the change frames key on the back of
the device. Remove the frame.
2 Place the picture frame onto the device until it
engages on the magnets.
frame properly.
ble. Re-start the picture frame and delete some
files in order to free up memory space.
ter and the frame are correct connected or the
memory card is not damaged.
serted memory card can not be recognized.
Check whether a playlist is switched on.
11
Page 41

af-5077_5087_5107psms_manual_03_en_253243477-a.book Seite 12 Donnerstag, 2. Juli 2009 11:41 11
Appendix
Technical Data AF 5077PS
Dimensions (Type 1)
Dimensions (L¦×¦H¦×¦W)...................... 190¦×¦153¦×¦80¦mm
Weight (Type 1)
Weight................................................................................ 0,4¦kg
Input
Mains Connection Input: 100¦–¦240¦V¦~ / 50¦–¦60¦Hz
Output
............................................................Output: 5¦V¦† / 2¦A
Recommended Ambient Temperature
Recommended Ambient..................................... 5¦–¦45¦ºC
Relative humidity
Relative humidity...................................................20¦–¦80¦%
Power Consumption
Power Consumption
Device Switched On
Device is switched on (slide show) ..............5,0¦W
Screen size..............................................................................7¦“
Aspect ratio .......................................................................... 4:3
Resolution.....................................................800¦×¦600 Pixel
Internal memory
Internal memory.....128¦MB¦MB or up to 500¦photos
USB Connection (Type 1)
USB Port.................................................................. USB-Host
Compatible Memory Cards
Compatible Memory Cards.SD/MMC/MS/SDHC/XD
Photo formats
Photo formats...................................................................JPEG
Technical Data AF 5077MS
Dimensions (Type 2)
Dimensions (L¦×¦H¦×¦W)...................... 190¦×¦153¦×¦80¦mm
Weight (Type 2)
Weight................................................................................ 0,4¦kg
Input
Mains Connection Input: 100¦–¦240¦V¦~ / 50¦–¦60¦Hz
Output
............................................................Output: 5¦V¦† / 2¦A
Recommended Ambient Temperature
Recommended Ambient..................................... 5¦–¦45¦ºC
Relative humidity
Relative humidity...................................................20¦–¦80¦%
Power Consumption
Power Consumption
Device Switched On
Device is switched on (slide show) ..............4,3¦W
Screen size..............................................................................7¦“
Aspect ratio .......................................................................... 4:3
Resolution.....................................................800¦×¦600 Pixel
Internal memory
Internal memory..256¦MB¦MB or up to 1000¦photos
USB Connection (Type 2)
USB Port...................................... USB-Host, USB Device
Compatible Memory Cards
Compatible Memory Cards.SD/MMC/MS/SDHC/XD
Photo formats
Photo formats...................................................................JPEG
Music formats
Music formats ................................................................... MP3
Video formats
Video formats ................................Motion Jpeg, Mpeg-4
Spaltenumbruch
Technical Data AF 5087PS
Dimensions (Type 3)
Dimensions (L¦×¦H¦×¦W)...................... 203¦×¦163¦×¦90¦mm
Weight (Type 3)
Weight................................................................................ 0,5¦kg
Input
Mains Connection Input: 100¦–¦240¦V¦~ / 50¦–¦60¦Hz
Output
............................................................ Output: 5¦V¦† / 2¦A
Recommended Ambient Temperature
Recommended Ambient..................................... 5¦–¦45¦ºC
Relative humidity
Relative humidity...................................................20¦–¦80¦%
Power Consumption
Power Consumption
Device Switched On
Device is switched on (slide show) ..............5,4¦W
Screen size..............................................................................8¦“
Aspect ratio .......................................................................... 4:3
Resolution.....................................................800¦×¦600 Pixel
Internal memory
Internal memory.....128¦MB¦MB or up to 500¦photos
USB Connection (Type 3)
USB Port .................................................................. USB-Host
Compatible Memory Cards
Compatible Memory Cards SD/MMC/MS/SDHC/XD
Photo formats
Photo formats.................................................................. JPEG
Technical Data AF 5087MS
Dimensions (Type 4)
Dimensions (L¦×¦H¦×¦W)...................... 203¦×¦163¦×¦90¦mm
Weight (Type 4)
Weight................................................................................ 0,5¦kg
Input
Mains Connection Input: 100¦–¦240¦V¦~ / 50¦–¦60¦Hz
Output
............................................................ Output: 5¦V¦† / 2¦A
Recommended Ambient Temperature
Recommended Ambient..................................... 5¦–¦45¦ºC
Relative humidity
Relative humidity...................................................20¦–¦80¦%
Power Consumption
Power Consumption
Device Switched On
Device is switched on (slide show) ..............6,3¦W
Screen size..............................................................................8¦“
Aspect ratio .......................................................................... 4:3
Resolution.....................................................800¦×¦600 Pixel
Internal memory
Internal memory........1¦GB¦MB or up to 4000¦photos
USB Connection (Type 4)
USB Port ......................................USB-Host, USB Device
Compatible Memory Cards
Compatible Memory Cards SD/MMC/MS/SDHC/XD
Photo formats
Photo formats.................................................................. JPEG
Music formats
Music formats ................................................................... MP3
Video formats
Video formats ................................Motion Jpeg, Mpeg-4
Spaltenumbruch
EN
12
Page 42

af-5077_5087_5107psms_manual_03_en_253243477-a.book Seite 13 Donnerstag, 2. Juli 2009 11:41 11
EN
Technical Data AF 5107PS
Dimensions (Type 5)
Dimensions (L¦×¦H¦×¦W)...................... 255¦×¦203¦×¦90¦mm
Weight (Type 5)
Weight................................................................................ 0,8¦kg
Input
Mains Connection Input: 100¦–¦240¦V¦~ / 50¦–¦60¦Hz
Output
............................................................Output: 5¦V¦† / 2¦A
Recommended Ambient Temperature
Recommended Ambient..................................... 5¦–¦45¦ºC
Relative humidity
Relative humidity...................................................20¦–¦80¦%
Power Consumption
Power Consumption
Device Switched On
Device is switched on (slide show) ..............6,1¦W
Screen size.......................................................................10,4¦“
Aspect ratio .......................................................................... 4:3
Resolution.....................................................800¦×¦600 Pixel
Internal memory
Internal memory.....128¦MB¦MB or up to 500¦photos
USB Connection (Type 5)
USB Port.................................................................. USB-Host
Compatible Memory Cards
Compatible Memory Cards.SD/MMC/MS/SDHC/XD
Photo formats
Photo formats...................................................................JPEG
Technical Data AF 5107MS
Dimensions (Type 6)
Dimensions (L¦×¦H¦×¦W)...................... 255¦×¦203¦×¦90¦mm
Weight (Type 6)
Weight................................................................................ 0,8¦kg
Input
Mains Connection Input: 100¦–¦240¦V¦~ / 50¦–¦60¦Hz
Output
............................................................Output: 5¦V¦† / 2¦A
Recommended Ambient Temperature
Recommended Ambient..................................... 5¦–¦45¦ºC
Relative humidity
Relative humidity...................................................20¦–¦80¦%
Power Consumption
Power Consumption
Device Switched On
Device is switched on (slide show) ..............6,6¦W
Screen size..............................................................................8¦“
Aspect ratio .......................................................................... 4:3
Resolution.....................................................800¦×¦600 Pixel
Internal memory
Internal memory........ 1¦GB¦MB or up to 4000¦photos
USB Connection (Type 6)
USB Port...................................... USB-Host, USB Device
Compatible Memory Cards
Compatible Memory Cards.SD/MMC/MS/SDHC/XD
Photo formats
Photo formats...................................................................JPEG
Music formats
Music formats ................................................................... MP3
Video formats
Video formats ................................Motion Jpeg, Mpeg-4
All data are provided for reference purposes only.
AgfaPhotoreserves the right to make any changes without prior notice.
Spaltenumbruch
AgfaPhoto is used under license of Agfa-Gevaert NV & Co. KG or Agfa-Gevaert NV. Neither
Agfa-Gevaert NV & Co KG nor Agfa-Gevaert NV
manufacture this product or provide any product
warranty or support.
For service, support and warranty information,
contact the distributor or manufacturer.
Contact:AgfaPhoto Holding GmbH,
www.agfaphoto.com
Manufacturer: Sagem Communications,
www.sagem-communications.com
The CE marking certifies that the product meets
the main requirements of the European Parliament and Council directive 1999/5/CE on telecommunications terminal equipment, regarding safety
and health of users and regarding electromagnetic interference.
The declaration of compliance can be consulted
on the site www.agfaphoto.com
Preservation of the environment as part of a sustainable development logic is an essential concern
of AgfaPhoto. The desire of AgfaPhoto is to operate systems observing the environment and consequently it has decided to integrate environmental performances in the life cycle of this products,
from manufacturing to commissioning use and
elimination.
Packaging: The presence of the logo (green dot)
means that a contribution is paid to an approved
national organisation to improve package recovery and recycling infrastructures to facilitate.
Please respect the sorting rules set up locally for
this kind of waste.
Batteries:If your product contains batteries, they
must be disposed of at appropriate collection
points.
13
Page 43

af-5077_5087_5107psms_manual_03_en_253243477-a.book Seite 14 Donnerstag, 2. Juli 2009 11:41 11
All rights reserved. No part of this publication may
be reproduced, stored in a retrieval system or
transmitted in any form or by any means, electronic, mechanical, photocopying, recording, or otherwise, without the prior written permission of AgfaPhoto. The information contained herein is designed only for use with this product. AgfaPhoto
Product: The crossed-out waste bin stuck on the
product means that the product belongs to the
family of electrical and electronic equipment. In
this respect, the European regulations ask you to
dispose of it selectively;
• At sales points in the event of the purchase of
similar equipment.
• At the collection points made available to you locally(drop-off centre, selective collection, etc.).
In this way you can participate in the re-use and
upgrading of Electrical and Electronic Equipment
Waste, which can have an effect on the environment and human health.
The paper and cardboard packaging used can be
disposed of as recyclable paper. Have the plastic
wrapping and Styrofoam packaging recycled or
dispose of it in the non-recyclable waste, depending on the requirements in your country.
Trademarks: The references mentioned in this
manual are trademarks of the respective companies. The lack of the trademarks É and Ë does
not justify the assumption that these dedicated
terminologies are free trademarks. Other product
names used herein are for identification purposes
only and may be trademarks of their respective
owners. AgfaPhoto disclaims any and all rights in
those marks.
Neither AgfaPhoto nor its affiliates shall be liable
to the purchaser of this product or third parties for
damages, losses, costs, or expenses incurred by
the purchaser or third parties as a result of accident, misuse, or abuse of this product or unauthorized modifications, repairs, or alterations to
this product, or failure to strictly comply with AgfaPhoto operating and maintenance instructions.
AgfaPhoto shall not be liable for any damages or
problems arising from the use of any options or
any consumable materials other than those designated as original AgfaPhoto products or AgfaPhoto approved products.
AgfaPhoto shall not be held liable for any damage
resulting from electromagnetic interference that
occurs from the use of any interface cables other
than those designated as AgfaPhoto products.
is not responsible, if this information is applied to
other devices.
This user manual is a document that does not represent a contract.
Errors, printing errors and changes are reserved.
Copyright © 2009 Sagem Communications
EN
14
Page 44

PERICOLO!
Nota
af-5077_5087_5107psms_manual_04_it_253243477-a.book Seite 1 Donnerstag, 2. Juli 2009 11:44 11
Introduzione
IT
Stimato cliente,
Grazie per aver scelto la nostra cornice digitale.
Preparatevi ad una esperienza visiva del tutto
nuova! La vostra nuova cornice digitale vi permette di guardare foto e filmati e di ascoltare musica
– senza bisogno di un computer.
Schermo TFT LCD ad alta definizione
Memoria
La vostra cornice digitale include una memoria interna, uno slot per schede di memoria e una porta
USB. I file nella memoria interna della cornice possono essere cancellati, i file nella scheda di memoria o nel disco USB possono essere copiati
Supporta modalità browse (fino a 20 immagini per
pagina). La cornice digitale supporta la modalità di
rotazione e di allungamento dell’immagine.
Lo slide show automatico e continuo vi consente
di godervi comodamente tutte le vostre foto con
un sottofondo musicale.
Il telecomando incluso consente di selezionare
con facilità i file immagine, musicali e video, modificare le impostazioni ed eseguire molte altre funzioni.
Inoltre sono disponibili ulteriori funzioni come l’indicazione di data e ora, la sveglia e la funzione di
attivazione e disattivazione automatica.
Buon divertimento con il vostro nuovo apparecchio e le sue numerose funzioni!
A proposito del manuale d’uso
La guida all’installazione riportata nelle pagine seguenti permette di mettere in funzione l’apparecchio in modo rapido e semplice. Le descrizioni dettagliate sono riportate nei capitoli seguenti di questo manuale d’uso.
Leggere con attenzione il manuale d’uso. Seguire
soprattutto le avvertenze per la sicurezza, in
modo da garantire il miglior funzionamento
dell’apparecchio. Il costruttore non si assume alcuna responsabilità se queste istruzioni non vengono seguite.
In queste istruzioni per l’uso sono descritti diversi
modelli della serie. Si fa presente che alcune funzioni sono disponibili solo in determinati modelli.
Simboli utilizzati
Avvertenza sui pericoli
PERICOLO!
Fornisce avvertenze sui pericoli per persone, sui danni per l’apparecchio o altri
oggetti, nonché sulla prevenzione per
evitare la perdita dei dati. Un utilizzo non
corretto può provocare pericoli per le
persone o danni alle cose.
Consigli e aiuti
Consigli e aiuti
Questi simboli indicano suggerimenti per
un utilizzo più efficace e semplice
dell’apparecchio.
1
Page 45

af-5077_5087_5107psms_manual_04_it_253243477-a.book Seite 2 Donnerstag, 2. Juli 2009 11:44 11
Istruzioni di sicurezza e raccomandazioni
Introduzione 2
Non apportare alcuna impostazione o modifica che
non sia descritta in queste istruzioni per l’uso. In
caso di utilizzo scorretto dell'apparecchio si possono
riportare lesioni o danni fisici, provocare danni all'apparecchio o perdere dati. Osservare tutte le avvertenze e le informazioni per la sicurezza fornite.
Posizionamento dell’apparecchio
Il prodotto è solo per uso interno.
Il prodotto è solo per uso interno. L’apparecchio
deve appoggiare in modo sicuro e stabile su una
superficie piana. Provvedere ad una posa sicura
dei cavi in modo di evitare il rischio di inciampare,
o di danneggiare l’apparecchio.
Schermo TFT LCD
Maneggiare il prodotto sempre con cautela. Evitare di toccare lo schermo LCD. Non poggiare oggetti pesanti o appuntiti sullo schermo LCD, sulla cornice o sul cavo di alimentazione.
Proteggere l’apparecchio dall’esposizione diretta ai raggi solari
Proteggere l’apparecchio dall’esposizione diretta
ai raggi solari, dal calore, da forti sbalzi termici e
dall’umidità. Non posizionare l’apparecchio nelle
vicinanze di impianti di riscaldamento o di climatizzazione. Osservare i dati riportati nel foglio delle
caratteristiche tecniche relativi a temperatura e
umidità dell’aria.
Non attivare l'apparecchio immediatamente d opo il trasporto
L’apparecchio non deve essere acceso immediatamente dopo il trasporto da un ambiente freddo
ad uno caldo e viceversa oppure in un ambiente
freddo che è stato riscaldato in fretta. In tali casi
attendere almeno tre ore finché l’apparecchio non
si sarà adattato alle mutate condizioni ambientali
(temperatura, umidità atmosferica, ecc.) .
Qualora si riscontrasse un surriscaldamento dell’apparecchio o fuoriuscita di fumo
Qualora si riscontrasse un surriscaldamento
dell’apparecchio, fuoriuscita di fumo o odore di
bruciato, scollegare immediatamente la spina dalla
presa di corrente. Far controllare l’apparecchio da
un centro di assistenza tecnica. Tenere l’apparecchio lontano da fiamme libere per evitare la formazione di incendi.
Non collegare mai l’apparecchio alla corrente in a mbienti particolarmente umidi.
Non collegare mai l’apparecchio alla corrente in
ambienti particolarmente umidi. Non toccare mai la
spina elettrica o la presa di corrente con le mani
bagnate.
Impedire l’ingresso di liquidi di qualsiasi genere all’interno dell’apparecchio.
Impedire l’ingresso di liquidi di qualsiasi genere
all’interno dell’apparecchio. Qualora liquidi o corpi
estranei penetrassero nell’apparecchio, scollegare
quest’ultimo dalla presa di corrente e farlo esaminare da un centro di assistenza tecnica.
Evitare che l’apparecchio venga manipolato da ba mbini non sorvegliati.
Evitare che l’apparecchio venga manipolato da
bambini non sorvegliati. Tenere le pellicole utilizzate per l’imballo lontano dalla portata dei bambini.
Alimentazione
Utilizzare solo l’al imentatore incl uso
Utilizzare solo l’alimentatore incluso (vedi Allegato
/ Caratteristiche tecniche). Verificare sulla targhetta che la tensione di rete dell’apparecchio
coincida con la tensione di rete disponibile nel luogo di installazione. Il presente prodotto è compatibile con il tipo di voltaggio indicato.
Non toccare il cavo di rete se l’isolamento risulta danneggiato.
Non toccare il cavo di rete se l’isolamento risulta
danneggiato. Sostituire immediatamente eventuali cavi danneggiati. Utilizzare esclusivamente
cavi adatti; se necessario, rivolgersi al nostro Servizio di assistenza tecnica clienti o al proprio rivenditore specializzato.
Prima di pulire la superficie, scollegare l’apparecchio dalla rete di alime ntazione elettrica.
Prima di pulire la superficie, scollegare l’apparecchio dalla rete di alimentazione elettrica. Utilizzare
un panno morbido, non sfilacciato. Non utilizzare
detergenti liquidi, gassosi o facilmente infiammabili, quali spray, abrasivi, lucidanti, alcool, eccetera.
Non consentire che l’umidità penetri all’interno
dell’apparecchio.
Pulire il display con un panno morbido ed asciutto.
Pulire il display con un panno morbido ed asciutto.
In caso di rottura del display, potrebbe verificarsi
la fuoriuscita di un liquido leggermente corrosivo.
Evitare che tale liquido venga a contatto con la
pelle e con gli occhi.
Riparazioni
Riparazioni
Non eseguire personalmente lavori di riparazione
sull’apparecchio. Una manutenzione inappropriata
può provocare ferite alle persone o danni all’apparecchio. Far riparare l’apparecchio esclusivamente
dai centri di assistenza tecnica autorizzati.
Non rimuovere la targhetta di identificazione
dall’apparecchio; in caso contrario decade la garanzia.
Dispositivi di memoria per fotografie
Dispositivi di memori a per fotografi e
Utilizzare esclusivamente dispositivi di memoria
che siano compatibili con l’apparecchio. Per evitare danni alla scheda di memoria interna o al prodotto si raccomanda di spegnere sempre quest’ultimo prima di rimuovere od inserire la scheda.
Non sfilare mai la scheda di memoria inserita mentre l’apparecchio sta accedendo ai dati in essa
contenuti. In questo modo si potrebbero corrompere o perdere i dati.
IT
2
Page 46

af-5077_5087_5107psms_manual_04_it_253243477-a.book Seite 3 Donnerstag, 2. Juli 2009 11:44 11
Panoramica
IT
Descrizione dell’apparecchio
Attivazione/Disattivazione
1 B – Interruttore ON/OFF
Slot per la scheda di memoria
2 – Slot per la scheda di memoria
Tasti freccia sinistra
3 J – Navigazione nel menu / Riduzione di luminosità, contrasto, saturazione colore / Ritorno
all'immagine, colonna o pagina precedente
OK
4 OK – Conferma della selezione / Avvio, interruzione dello slide show
Tasti freccia verso l'alto
5 G – Navigazione nel menu / Aumento del volume / Attivazione del sottofondo musicale durante lo slide show
Tasti freccia verso il basso
6 I – Navigazione nel menu / Riduzione del volume
Tasti freccia destra
7 H – Navigazione nel menu / Aumento di luminosità, contrasto, saturazione colore / Passaggio
all'immagine, colonna o pagina successiva
Tasto Menu
8 MENU – Richiamo del menu principale / Attivazione dell'orologio analogico (tenere premuto il tasto)
Menu di regolazione
9 ù – Richiamo del menu impostazioni
Mini USB
‹ ý – Collegamento mini USB – per il collegamento di un computer
Presa USB
Œ ý Presa – Porta USB per un dispositivo di memoria
Porta USB disposit ivo di memoria
÷ Í-Presa – Collegamento alimentatore
Rückseite AF5077
Telecomando
(AF¦5077/¦5087/5107MS)
Fernbedienung AF5077
1 – Richiamo del menu impostazioni
2 – Richiamo del menu principale / Attivazione
dell'orologio analogico (tenere premuto il tasto)
3 - Attivazione/Disattivazione
4 – Navigazione nel menu / Aumento del volume
/ Attivazione del sottofondo musicale durante lo
slide show
5 – Conferma della selezione / Avvio, interruzione dello slide show
6 – Navigazione nel menu / Aumento di luminosità, contrasto, saturazione colore / Passaggio
all'immagine, colonna o pagina successiva
7 – Navigazione nel menu / Riduzione del volume
8 – Navigazione nel menu / Riduzione di lumino-
sità, contrasto, saturazione colore / Ritorno all'immagine, colonna o pagina precedente
Spaltenumbruch
3
Page 47

Nota
ATTENZIONE!
PERICOLO!
Nota
Nota
af-5077_5087_5107psms_manual_04_it_253243477-a.book Seite 4 Donnerstag, 2. Juli 2009 11:44 11
Prima messa in funzione
Contenuto dell’imballaggio
Cornice
‚ Cornice digitale con supporto
Alimentatore con spine intercambiabili
ƒ Alimentatore con spine intercambiabili
Telecomando (batteria inclusa) variable
„ Telecomando (batteria inclusa)
(AF¦5077/¦5087/5107MS)
Manuale d’istruzioni (senza figura)
Manuale d’istruzioni (senza figura)
Verpackungsinhalt AF 5077
Parti mancanti nell’imballo
Parti mancanti nell’imballo
Qualora una delle parti mancasse o presentasse dei difetti, rivolgersi al rivenditore o al nostro servizio clienti.
Collegamento dell’alimentatore alla corrente
Tensione di rete sul luogo di installazione
Tensione di rete sul luogo di installazione!
Verificare sulla targhetta che la tensione
di rete dell’apparecchio coincida con la
tensione di rete disponibile nel luogo di
installazione.
1 Scegliere la spina di alimentazione corretta per
il proprio Paese e inserirla nell'alimentatore.
Assicurarsi che la spina sia completamente in-
serita nell'alimentatore.
2 Infilare la spina piccola dell'alimentatore
nell’apposita presa sul retro dell’apparecchio.
Inserire l’alimentatore nella presa di corrente.
Collegamento al computer
Utilizzando il cavo USB, potete collegare la vostra
cornice ad un computer per trasferire file tra il
computer e la memoria interna.
1 Disattivare l’apparecchio con l’apposito inter-
ruttore ON/OFF sul retro.
2 Collegare l'estremità sottile del cavo alla corni-
ce digitale spenta e l'estremità spessa al com-
puter.
3 Attivare l’apparecchio con l’apposito interrut-
tore ON/OFF sul retro. Attendere alcuni istanti,
finché il computer non avrà riconosciuto il nuovo dispositivo. I file immagine, audio e video
compatibili possono essere copiati nella memoria interna della cornice.
4 Se il collegamento con il computer viene inter-
rotto, la cornice digitale si riavvia.
Inserire la scheda di memoria
1 Inserire una scheda di memoria nell'apposito
slot sul retro dell'apparecchio. La cornice digitale supporta le seguenti schede di memoria:
SD/MMC/MS/SDHC/XD.
Inserire la scheda di memoria
Utilizzare esclusivamente dispositivi
di memoria che siano compatibili con
l’apparecchio.
Non sfilare mai la scheda di memoria
inserita mentre l’apparecchio sta accedendo ai dati in essa contenuti. In
questo modo si potrebbero corrompere o perdere i dati.
2 Attivare l’apparecchio con l’apposito interrut-
tore ON/OFF sul retro. Il lettore inizierà lo slide
show dopo aver mostrato la schermata di avvio.
Numerose foto disponibili sulla scheda di memoria
Se sulla scheda di memoria sono memorizzate molte foto, è possibile che
l'avvio dello slide show richieda un
certo tempo.
3 Per terminare lo slide show, premere il tasto
OK sul retro durante lo slide show.
Dispositivo di memoria USB e scheda
di memoria utilizzati contemporaneamente
Se si utilizzano contemporaneamente un dispositivo di memoria USB e
una scheda di memoria, vengono visualizzate per prime le immagini della
scheda di memoria.
IT
4
Page 48

PERICOLO!
Nota
af-5077_5087_5107psms_manual_04_it_253243477-a.book Seite 5 Donnerstag, 2. Juli 2009 11:44 11
IT
Inserimento o sostituzione della batteria del telecomando
Rischio di esplosione in caso di utilizzo
di un tipo di batteria non idoneo
Avvertenza! RISCHIO DI ESPLOSIONE SE
LE BATTERIE VENGONO SOSTITUITE
CON ALTRE DI TIPO NON ADATTO.
1 Per rimuovere le batterie dal vano del teleco-
mando, aprire il dispositivo di bloccaggio (1)
ed estrarre il vano batteria (2).
2 Inserire la batteria nuova nello scomparto,
avendo cura di rispettare la polarità, come indi-
cato nel disegno riportato sul retro del teleco-
mando. Verificare che i poli (+ e -) siano allineati
correttamente.
3 Reinserire il vano batteria nel telecomando fin-
ché il dispositivo di bloccaggio non scatterà in
posizione.
Normalmente le batterie durano circa un
anno. Se il telecomando non funziona
sostituire le batterie. Se la cornice non
viene utilizzata per un lungo periodo, rimuovere le batterie. In tal modo possono
evitarsi eventuali perdite e danni al telecomando.
Smaltire le batterie usate in conformità
alle prescrizioni sul riciclaggio in vigore
nel paese d’uso.
Utilizzo del telecomando
Puntare il telecomando verso il sensore sul lato
anteriore della cornice. Il telecomando deve essere posto ad una angolazione di 30° e ad una distanza di 2 m. dal sensore. Inoltre non devono essere presenti ostacoli tra il telecomando e il sensore.
5
Page 49

Nota
Nota
Nota
af-5077_5087_5107psms_manual_04_it_253243477-a.book Seite 6 Donnerstag, 2. Juli 2009 11:44 11
Riproduzione
Descrizione delle funzioni di menu
Il menu principale include tre simboli.
1 Menu fotografico
2 Menu video
(AF¦5077/¦5087/5107MS)
3 Menu musicale
(AF¦5077/¦5087/5107MS)
Photomenü AF 5077
Navigare nel menu
1 Premere MENU sul telecomando o MENU
sull'apparecchio.
2 Selezionare il menu desiderato con Ý/Þ.
3Confermare con .
Riproduzione di fotografie
1 Selezionare il menu fotografico nel menu prin-
cipale e confermare con OK.
2 Sullo schermo vengono visualizzate 16 minia-
ture di foto per pagina.
6Premere J/H per tornare all'immagine prece-
dente o andare a quella successiva.
7 Terminare lo slide show con MENU.
Richiamo menu
Durante lo slide show, è possibile richiamare in ogni momento il menu
principale con il tasto MENU.
Impostazione del sottofondo musicale durante lo slide show
(AF¦5077/¦5087/5107MS)
Come sottofondo musicale si possono
usare esclusivamente file memorizzati
insieme alle foto nella memoria interna,
sulla scheda di memoria o in collegamento USB.
1 Durante uno slide show, premere il tasto Û del
telecomando oppure G sull'apparecchio per
attivare il sottofondo musicale.
Regolare il volume con Û/Ü.
Riproduzione di musica
(AF¦5077/¦5087/5107MS)
1 Selezionare il menu musicale nel menu princi-
pale e confermare con .
2 Selezionare il brano musicale che si desidera ri-
produrre con Ý/Þ o Û/Ü.
3Premere OK per avviare la riproduzione.
Durante la riproduzione vengono visualizzate
informazioni aggiuntive sul brano.
4 Per terminare la riproduzione, premere OK.
IT
3Con G/I oppure J/H selezionare la foto a
partire dalla quale si desidera avviare lo slide
show.
4 Premere OK per avviare lo slide show.
5 Premere OK per interrompere lo slide show.
Sullo schermo apparirà il simbolo di pausa.
6
Page 50

Nota
af-5077_5087_5107psms_manual_04_it_253243477-a.book Seite 7 Donnerstag, 2. Juli 2009 11:44 11
Riproduzione di filmati
(AF¦5077/¦5087/5107MS)
1 Selezionare il menu video nel menu principale e
confermare con .
2 Selezionare il file video che si desidera ripro-
IT
durre con Ý/Þ o Û/Ü.
3 Premere OK per avviare la riproduzione. Per
terminare la riproduzione, premere OK.
Funzioni di riproduzione aggiuntive
Durante la riproduzione è possibile ritornare al brano precedente o andare
a quello successivo con Ý/Þ oppure
con Û/Ü.
Sul telecomando premere OK per interrompere la riproduzione e proseguirla.
Regolazione del volume
(AF¦5077/¦5087/5107MS)
Durante la riproduzione è possibile regolare il vo-
lume con Ü/Û sul telecomando. Premere ripetutamente Ü per disattivare completamente il volume.
7
Page 51

Nota
af-5077_5087_5107psms_manual_04_it_253243477-a.book Seite 8 Donnerstag, 2. Juli 2009 11:44 11
Impostazioni
Il menu impostazioni include quattro simboli e viene richiamato con il tasto ù sull'apparecchio o ù
sul telecomando.
1 Impostazioni ECO (accensione/spegnimento
automatici, adattamento automatico della luminosità del display (AF¦5077/¦5087/5107MS))
2 Impostazioni immagine (impostazioni per lo sli-
de show, rotazione dell'immagine)
3 Gestione file (copiare, cancellare i file, liste di
riproduzione)
4 Impostazioni di base (luminosità, contrasto,
data, ora)
Settingsmenü AF 5077
Impostazioni ECO
È possibile accendere/spegnere automaticamente la cornice digitale ad ore prestabilite oppure
adattare automaticamente la luminosità del display all'illuminazione dell'ambiente (AF¦5077/
¦5087/5107MS).
Selezionare in proposito le seguenti impostazioni:
Accensione/spegnimento automatici
La cornice digitale può essere accesa o spenta
automaticamente ad ore prestabilite.
1 Premere ù.
2 Selezionare con J/H il simbolo e confer-
mare con OK.
3 Il simbolo è già contrassegnato.
4 Selezionare con J/H il simbolo colorato e
confermare con OK.
5 Selezionare con J/H l'ora di accensione della
cornice digitale.
6Confermare con OK. La cornice del cursore
cambia colore, da bianco a rosso.
7 Selezionare con J/H l'ora di spegnimento
della cornice digitale.
8Confermare con OK. La cornice del cursore
cambia colore, da rosso a bianco. L'intervallo di
tempo nel quale la cornice digitale resta accesa
è contrassegnato in verde.
9 Per cancellare un intervallo di tempo, contras-
segnare nuovamente il campo. La marcatura
verde viene così cancellata.
10 Premere I e selezionare con il tasto J/H il
simbolo .
11 Confermare con OK.
12 Terminare premendo ù.
Accensione/spegnimento automatici
L'accensione e lo spegnimento automatici possono essere disattivati. Le
impostazioni, tuttavia, vengono mantenute.
1Premere ù.
2 Selezionare con J/H il simbolo
e confermare con OK.
3 Il simbolo è già contrassegnato.
4 Selezionare con J/H il simbolo
bianco-nero (adattamento automatico disattivato) o il simbolo colorato (adattamento automatico attiva-
to).
5Confermare con OK.
6 Terminare premendo ù.
Adattamento automatico della luminosità del display
(AF¦5077/¦5087/5107MS)
Con questa funzione, la luminosità del display si
adatta automaticamente alla luminosità dell'ambiente.
1Premere ù.
2 Selezionare con J/H il simbolo e confer-
mare con OK.
3 Selezionare con I il simbolo e confermare
con OK.
4 Selezionare con J/H il simbolo bianco-nero
(adattamento automatico disattivato) o il simbolo colorato (adattamento automatico attiva-
to).
5Confermare con OK.
6 Terminare premendo ù.
IT
8
Page 52

Nota
Nota
Nota
af-5077_5087_5107psms_manual_04_it_253243477-a.book Seite 9 Donnerstag, 2. Juli 2009 11:44 11
IT
Modifica delle impostazioni immagine
Qui è possibile ruotare le immagini, impostare il
rapporto di aspetto, gli effetti di transizione dello
slide show o la velocità slide show.
1 Premere ù.
2 Con il tasto J/H selezionare (Impostazio-
ni immagine) e confermare con OK.
3 Selezionare con il tasto G/I il simbolo corri-
spondente.
Ruota immagine – Modificare la posizione
dell'immagine.
Rapporto di aspetto – Lo schermo della
cornice digitale ha un rapporto di aspetto nel
formato 4:3. Scegliere se visualizzare l'immagine nel formato originale, nel formato largo
(16:9) oppure se adattare l'immagine alle dimensioni dello schermo.
Effetti di transizione – Impostare diversi
effetti di transizione per la modalità slide show.
Velocità slide show – Scegliere tra i tempi
visualizzati.
Cornice personalizzata – Selezionare tra le
diverse cornici disponibili quella desiderata per
la visualizzazione delle fotografie.
4 Selezionare con J/H l'impostazione corri-
spondente.
5Confermare con OK.
6 Terminare premendo ù.
Gestione file
Da una scheda di memoria o uno stick USB è possibile copiare file. Dalla memoria interna è possibile cancellare file.
7 Selezionare con J/H il simbolo , quindi
premere OK per iniziare a copiare o a cancellare.
Copiare tutti i file della scheda di memoria
Selezionare e confermare con OK
per copiare tutti i file della scheda di
memoria nella memoria interna.
Interrompere la procedura
Selezionare e confermare con OK
per interrompere il processo.
8 Sullo schermo apparirà la barra di stato. Una
volta terminata la copia, il file si troverà nella
memoria interna.
Modo di accensione
Selezionare se, una volta accesa la cornice, devono essere visualizzati automaticamente fotografie, filmati oppure entrambi.
1Premere ù.
2 Con il tasto J/H selezionare (Gestione fi-
le) e confermare con OK.
3Con G selezionare e confermare con OK.
4Con J/H selezionare una delle possibilità vi-
sualizzate e confermare con OK.
5 Terminare premendo ù.
Copia, cancellazione di file
1 Premere ù.
2 Con il tasto J/H selezionare (Gestione fi-
le) e confermare con OK.
3 Con il tasto G selezionare (Copia) oppure
(Cancella) e confermare con OK.
4 Selezionare con G/I, J/H il file da copiare
o da cancellare.
5 Evidenziare il file con OK.
Rimuovere l'evidenziatura
Premere nuovamente OK per rimuovere l'evidenziatura.
6 Selezionare con I la riga dei simboli al fondo
dello schermo.
9
Page 53

Nota
af-5077_5087_5107psms_manual_04_it_253243477-a.book Seite 10 Donnerstag, 2. Juli 2009 11:44 11
Liste di riproduzione
È possibile creare liste di riproduzione personalizzate per fotografie, filmati e file audio.
In tal caso soltanto le fotografie, i filmati o i file audio contenuti in tali liste vengono riprodotti. Si
possono creare fino a cinque liste di riproduzione.
Creare una lista di riproduzione
1 Premere ù.
2 Con il tasto J/H selezionare (Gestione fi-
le) e confermare con OK.
3 Con il tasto G/I selezionare (Liste di ri-
produzione), quindi premere H.
4 Con il tasto J/H, scegliere se creare una lista
di riproduzione per file audio, immagini o filmati.
5Confermare con OK.
6 Confermare "OFF" con OK per creare una nuo-
va lista di riproduzione.
7 Con il tasto J/H selezionare ad es.: playlist 1
e confermare con OK.
8 Selezionare con G/I o J/H il file da ag-
giungere alla lista di riproduzione. Evidenziare
il file con OK.
9 Evidenziare altri file con OK.
10 Selezionare con I la riga dei simboli al fondo
dello schermo.
11 Selezionare con J/H il simbolo , quindi
premere OK per memorizzare la lista di ripro-
duzione.
12 Terminare premendo ù.
Attivazione/disattivazione della lista di riproduzione
1 Premere ù.
2 Con il tasto J/H selezionare (Gestione fi-
le) e confermare con OK.
3 Con il tasto G/I selezionare (Liste di ri-
produzione), quindi premere H.
4 Con il tasto J/H, scegliere se attivare una li-
sta di riproduzione per file audio, immagini o fil-
mati.
5Confermare con OK.
6 Confermare ad es. playlist1 con OK.
7 Selezionare con J/H la lista di riproduzione
desiderata.
Disattivazione delle liste di riproduzione
Con il tasto J/H selezionare "OFF":
la lista di riproduzione viene disattivata. Tutte le immagini, i filmati o i file
audio sono nuovamente disponibili
per la riproduzione.
Modifica delle impostazioni di base
1Premere ù.
2 Selezionare con J/H il simbolo e confer-
mare con OK.
3 Selezionare con Û/Ü le impostazioni da ese-
guire.
4Confermare con .
Si possono eseguire le seguenti impostazioni:
, , (luminosità, contrasto, saturazione
colore) – Impostazione della luminosità, del
contrasto e della saturazione del colore del display LCD.
(Orologio) – Permette di impostare la data e
l’ora.
(sveglia) (AF¦5077/¦5087/5107MS) – Impostazione della sveglia, attivazione/disattivazione della sveglia e selezione dei toni della sveglia.
(calendario) – Impostazione di anno, mese,
giorno.
(Impostazioni di fabbrica) – Ripristino delle
impostazioni ai valori di fabbrica.
5 Selezionare con G/I l’impostazione deside-
rata.
6Confermare con .
7 Modificare l'impostazione con J/H.
8 Confermare l'impostazione modificata con .
9 Terminare premendo ù.
IT
10
Page 54

af-5077_5087_5107psms_manual_04_it_253243477-a.book Seite 11 Donnerstag, 2. Juli 2009 11:44 11
Assistenza
IT
Cambio della cornice
È possibile sostituire la cornice dell’apparecchio
con la cornice intercambiabile inclusa. La cornice è
fissata mediante magneti.
Problemi Soluzioni
La Photo Frame non si accende. Verificare che la cornice sia stata correttamente
Impossibile salvare i file Verificare che la capacità della memoria interna sia
Non c’è audio Verificare che il formato del file sia tra quelli sup-
La scheda di memoria non viene riconosciuta Se la cornice è stata collegata ad un computer, la
Durante lo slide show o la riproduzione di filmati o
file audio non vengono visualizzati tutti i file del dispositivo di memoria.
1 Premere il pulsante per il cambio di cornice sul
retro dell’apparecchio. Rimuovere la cornice.
2 Applicare la cornice nuova sull’apparecchio fa-
cendo sì che i magneti trovino la loro sede.
collegata all’adattatore AC.
sufficiente. Avviare nuovamente la cornice e cancellare alcuni file in modo tale da liberare la memoria
portati, che la cornice e il computer siano correttamente collegati e che la scheda di memoria non sia
danneggiata.
scheda di memoria inserita non viene riconosciuta.
Verificare che non vi siano liste di riproduzione attivate.
11
Page 55

af-5077_5087_5107psms_manual_04_it_253243477-a.book Seite 12 Donnerstag, 2. Juli 2009 11:44 11
Allegato
Caratteristiche tecniche AF 5077PS
Dimensioni (Tipo 1)
Dimensioni (L¦×¦A¦×¦P)......................... 190¦×¦153¦×¦80¦mm
Peso (Tipo 1)
Peso .................................................................................... 0,4¦kg
Entrata
Alimentazione elettrica ........Entrata: 100¦–¦240¦V¦~ /
50¦–¦60¦Hz
Uscita
.............................................................Uscita: 5¦V¦† / 2¦A
Condizioni ambiente consigliate
Condizioni ambiente consigliate.................... 5¦–¦45¦ºC
Umidità relativa
Umidità relativa......................................................20¦–¦80¦%
Potenza assorbita
Potenza assorbita
L’apparecchio è acceso
L’apparecchio è acceso (slide show)........... 5,0¦W
Diagonale immagine ...........................................................7¦“
Rapporto di aspetto ......................................................... 4:3
Risoluzione...................................................800¦×¦600 Pixel
Memoria interna
Memoria interna 128¦MB¦MB oppure fino a 500¦fotografie
Collegamento USB (Tipo 1)
Porta USB Computer ....................................... USB-Host
Schede di memoria per fotografie compatibili
Schede di memoria per fotografie compatibili..SD/
MMC/MS/SDHC/XD
Formati fotografici
Formati fotografici..........................................................JPEG
Caratteristiche tecniche AF 5077MS
Dimensioni (Tipo 2)
Dimensioni (L¦×¦A¦×¦P)......................... 190¦×¦153¦×¦80¦mm
Peso (Tipo 2)
Peso .................................................................................... 0,4¦kg
Entrata
Alimentazione elettrica ........Entrata: 100¦–¦240¦V¦~ /
50¦–¦60¦Hz
Uscita
.............................................................Uscita: 5¦V¦† / 2¦A
Condizioni ambiente consigliate
Condizioni ambiente consigliate.................... 5¦–¦45¦ºC
Umidità relativa
Umidità relativa......................................................20¦–¦80¦%
Potenza assorbita
Potenza assorbita
L’apparecchio è acceso
L’apparecchio è acceso (slide show)........... 4,3¦W
Diagonale immagine ...........................................................7¦“
Rapporto di aspetto ......................................................... 4:3
Risoluzione...................................................800¦×¦600 Pixel
Memoria interna
Memoria interna .................256¦MB¦MB oppure fino a
1000¦fotografie
Collegamento USB (Tipo 2)
Porta USB Computer ...........USB-Host, USB Device
Schede di memoria per fotografie compatibili
Schede di memoria per fotografie compatibili..SD/
MMC/MS/SDHC/XD
Formati fotografici
Formati fotografici..........................................................JPEG
Formati musicali
Formati musicali............................................................... MP3
Formati video
Formati video .................................Motion Jpeg, Mpeg-4
Spaltenumbruch
Caratteristiche tecniche AF 5087PS
Dimensioni (Tipo 3)
Dimensioni (L¦×¦A¦×¦P)......................... 203¦×¦163¦×¦90¦mm
Peso (Tipo 3)
Peso .................................................................................... 0,5¦kg
Entrata
Alimentazione elettrica........Entrata: 100¦–¦240¦V¦~ /
50¦–¦60¦Hz
Uscita
..............................................................Uscita: 5¦V¦† / 2¦A
Condizioni ambiente consig liate
Condizioni ambiente consigliate.................... 5¦–¦45¦ºC
Umidità relativa
Umidità relativa......................................................20¦–¦80¦%
Potenza assorbita
Potenza assorbita
L’apparecchio è acceso
L’apparecchio è acceso (slide show)...........5,4¦W
Diagonale immagine ...........................................................8¦“
Rapporto di aspetto ......................................................... 4:3
Risoluzione ...................................................800¦×¦600 Pixel
Memoria interna
Memoria interna 128¦MB¦MB oppure fino a 500¦fotografie
Collegamento USB (Tipo 3)
Porta USB Computer .......................................USB-Host
Schede di memoria per fotografie compatibili
Schede di memoria per fotografie compatibili..SD/
MMC/MS/SDHC/XD
Formati fotografici
Formati fotografici......................................................... JPEG
Caratteristiche tecniche AF 5087MS
Dimensioni (Tipo 4)
Dimensioni (L¦×¦A¦×¦P)......................... 203¦×¦163¦×¦90¦mm
Peso (Tipo 4)
Peso .................................................................................... 0,5¦kg
Entrata
Alimentazione elettrica........Entrata: 100¦–¦240¦V¦~ /
50¦–¦60¦Hz
Uscita
..............................................................Uscita: 5¦V¦† / 2¦A
Condizioni ambiente consig liate
Condizioni ambiente consigliate.................... 5¦–¦45¦ºC
Umidità relativa
Umidità relativa......................................................20¦–¦80¦%
Potenza assorbita
Potenza assorbita
L’apparecchio è acceso
L’apparecchio è acceso (slide show)...........6,3¦W
Diagonale immagine ...........................................................8¦“
Rapporto di aspetto ......................................................... 4:3
Risoluzione ...................................................800¦×¦600 Pixel
Memoria interna
Memoria interna 1¦GB¦MB oppure fino a 4000¦fotografie
Collegamento USB (Tipo 4)
Porta USB Computer ...........USB-Host, USB Device
Schede di memoria per fotografie compatibili
Schede di memoria per fotografie compatibili..SD/
MMC/MS/SDHC/XD
Formati fotografici
Formati fotografici......................................................... JPEG
Formati musicali
Formati musicali............................................................... MP3
Formati video
Formati video .................................Motion Jpeg, Mpeg-4
Spaltenumbruch
IT
12
Page 56

af-5077_5087_5107psms_manual_04_it_253243477-a.book Seite 13 Donnerstag, 2. Juli 2009 11:44 11
IT
Caratteristiche tecniche AF 5107PS
Dimensioni (Tipo 5)
Dimensioni (L¦×¦A¦×¦P)......................... 255¦×¦203¦×¦90¦mm
Peso (Tipo 5)
Peso .................................................................................... 0,8¦kg
Entrata
Alimentazione elettrica ........Entrata: 100¦–¦240¦V¦~ /
50¦–¦60¦Hz
Uscita
.............................................................Uscita: 5¦V¦† / 2¦A
Condizioni ambiente consigliate
Condizioni ambiente consigliate.................... 5¦–¦45¦ºC
Umidità relativa
Umidità relativa......................................................20¦–¦80¦%
Potenza assorbita
Potenza assorbita
L’apparecchio è acceso
L’apparecchio è acceso (slide show)........... 6,1¦W
Diagonale immagine .................................................... 10,4¦“
Rapporto di aspetto ......................................................... 4:3
Risoluzione...................................................800¦×¦600 Pixel
Memoria interna
Memoria interna 128¦MB¦MB oppure fino a 500¦fotografie
Collegamento USB (Tipo 5)
Porta USB Computer ....................................... USB-Host
Schede di memoria per fotografie compatibili
Schede di memoria per fotografie compatibili..SD/
MMC/MS/SDHC/XD
Formati fotografici
Formati fotografici..........................................................JPEG
Caratteristiche tecniche AF 5107MS
Dimensioni (Tipo 6)
Dimensioni (L¦×¦A¦×¦P)......................... 255¦×¦203¦×¦90¦mm
Peso (Tipo 6)
Peso .................................................................................... 0,8¦kg
Entrata
Alimentazione elettrica ........Entrata: 100¦–¦240¦V¦~ /
50¦–¦60¦Hz
Uscita
.............................................................Uscita: 5¦V¦† / 2¦A
Condizioni ambiente consigliate
Condizioni ambiente consigliate.................... 5¦–¦45¦ºC
Umidità relativa
Umidità relativa......................................................20¦–¦80¦%
Potenza assorbita
Potenza assorbita
L’apparecchio è acceso
L’apparecchio è acceso (slide show)........... 6,6¦W
Diagonale immagine ...........................................................8¦“
Rapporto di aspetto ......................................................... 4:3
Risoluzione...................................................800¦×¦600 Pixel
Memoria interna
Memoria interna 1¦GB¦MB oppure fino a 4000¦fotografie
Collegamento USB (Tipo 6)
Porta USB Computer ...........USB-Host, USB Device
Schede di memoria per fotografie compatibili
Schede di memoria per fotografie compatibili..SD/
MMC/MS/SDHC/XD
Formati fotografici
Formati fotografici..........................................................JPEG
Formati musicali
Formati musicali............................................................... MP3
Formati video
Formati video .................................Motion Jpeg, Mpeg-4
I dati sono forniti esclusivamente a scopo informativo. AgfaPhoto si riserva il diritto di apportare
qualsiasi modifica senza preavviso.
Spaltenumbruch
Il marchio AgfaPhoto è una licenza della AgfaGevaert NV & Co. KG o della Agfa-Gevaert NV.
Agfa-Gevaert NV & Co. KG e Agfa-Gevaert NV
non realizzano questi prodotti né offrono servizi
di garanzia o assistenza tecnica.
Per informazioni su servizi, supporto e garanzia,contattare il distributore o il produttore.
Contatti: AgfaPhoto Holding GmbH,
www.agfaphoto.com
Produttore: Sagem Communications,
www.sagem-communications.com
Il marchio CE certifica che il prodotto è conforme
alla direttiva 1999/5/CE emanata dal Consiglio
della Comunità Europea in materia di apparecchiature terminali di telecomunicazione, sulla sicurezza, sulla salute degli utenti e sulle interferenze
elettromagnetiche.
La dichiarazione di conformità può essere consultata sul sito www.agfaphoto.com.
La difesa dell’ambiente come parte di un processo
di sviluppo sostenibile è di importanza fondamentale per AgfaPhoto. AgfaPhoto si impegna a utilizzare sistemi che rispettino l’ambiente. Pertanto
AgfaPhoto ha deciso di integrare i processi a tutela dell’ambiente all’interno del ciclo di vita dei
propri prodotti, dalla produzione alla messa in funzione, all’utilizzo e allo smaltimento.
Imballagio: La presenza del logo (punto verde) indica che viene versato un contributo ad una organizzazione nazionale riconosciuta per il riciclo e il
recupero degli imballaggi. Si prega di rispettare le
norme locali sullo smaltimento differenziato per
questo tipo di rifiuti.
Batterie: Se il vostro prodotto contiene batterie,
queste devono essere smaltite presso un apposito punto di raccolta.
Prodotto: Il simbolo del bidone barrato da una croce indica che questo prodotto appartiene alla categoria delle apparecchiature elettriche ed elet-
13
Page 57

af-5077_5087_5107psms_manual_04_it_253243477-a.book Seite 14 Donnerstag, 2. Juli 2009 11:44 11
troniche. A tale proposito le normative europee vi
chiedono di smaltirlo alternativamente;
• Presso i punti vendita dove vi rechiate per acquistare apparecchiature analoghe.
• Presso i punti di raccolta a voi più vicini(centri di
smaltimento rifiuti, raccolta differenziata, ecc.)
In questo modo si contribuisce al riutilizzo e alla
valorizzazione dei vecchi apparecchi elettrici ed
elettronici che, altrimenti, avrebbero conseguenze
negative sull’ambiente e sulla nostra salute.
Gli imballaggi di carta e cartone possono essere
smaltiti come carta usata. Le pellicole di plastica e
gli imballaggi di polistirolo possono essere destinati al riciclaggio o smaltiti con i rifiuti, secondo le
indicazioni del rispettivo paese.
Marchi di fabbrica: I riferimenti contenuti in questo manuale di istruzioni si riferiscono a marchi di
fabbrica delle rispettive ditte. L’assenza dei simboli É e Ë non giustifica il presupposto che i concetti interessati non siano marchi di fabbrica di diritto. Altri nomi di prodotti utilizzati in questo documento sono da intendersi a solo scopo di
designazione e possono essere marchi di fabbrica
dei rispettivi proprietari. AgfaPhoto declina ogni
diritto su tali marchi.
AgfaPhoto e società correlate non sono responsabili nei confronti degli acquirenti di questo prodotto o di terzi in relazione a reclami di sostituzione, perdite, costi o spese a cui l’acquirente o terzi
dovessero essere soggetti in conseguenza di un
incidente, di utilizzo non conforme o abuso di questo prodotto, oppure di modifiche, riparazioni, variazioni non autorizzate apportate al prodotto, oppure del mancato rispetto delle istruzioni d’uso e
manutenzione di AgfaPhoto.
AgfaPhoto declina ogni responsabilità per reclami
di sostituzione o problemi derivanti dall’utilizzo di
qualunque opzione o materiale di consumo che
non sia designato come prodotto originale di
AgfaPhoto o prodotto approvato da AgfaPhoto.
AgfaPhoto declina ogni responsabilità per reclami
di sostituzione derivanti da interferenze elettromagnetiche connesse all’uso di cavi di collegamento non originali AgfaPhoto.
Tutti i diritti riservati. La duplicazione di qualunque
parte di questa pubblicazione senza il consenso
scritto di AgfaPhoto, la memorizzazione in un archivio o in qualunque forma o altro mezzo di trasmissione, sia esso elettronico, meccanico, ottenuto per fotocopiatura, registrazione o altro. Le informazioni contenute nel presente documento si
riferiscono esclusivamente all’utilizzo con questo
prodotto. AgfaPhoto ünon si assume alcuna responsabilità nel caso in cui queste informazioni
vengano applicate ad altri apparecchi.
Questo manuale di istruzioni è un documento che
non ha carattere contrattuale.
Salvo errori ed omissioni, con riserva di modifiche.
Copyright © 2009 Sagem Communications
IT
14
Page 58

GEVAAR!
Opmerking
af-5077_5087_5107psms_manual_05_nl_253243477-a.book Seite 1 Donnerstag, 2. Juli 2009 11:45 11
Inleiding
NL
Geachte klant
Hartelijk gefeliciteerd met uw aanschaf van deze
digitale fotolijst. Maak kennis met een totaal nieuwe fotobelevenis! Met uw nieuwe digitale fotolijst
kunt u foto's en video's bekijken en muziek beluisteren zonder dat er een computer aan te pas
komt.
High-Definition TFT LCD-scherm
Geheugen
De digitale fotolijst heeft een intern geheugen,
een sleuf voor geheugenkaarten en een USBpoort. Bestanden in het interne geheugen kunnen
worden verwijderd en bestanden op een geheugenkaart of USB-schijfeenheid kunnen naar het
interne geheugen worden gekopieerd.
Ondersteunt speciale bladermodus (20 miniaturen
per pagina). Uw digitale fotovenster ondersteunt
het draaien en wijzigen van het paginaformaat.
Via een automatische, doorlopende diavoorstelling kunt u heel gemakkelijk al uw foto's bekijken
met achtergrondmuziek erbij.
Met de meegeleverde afstandsbediening kunt u
foto-, muziek- en videobestanden gemakkelijk uitkiezen, instellingen wijzigen, en nog veel meer.
Bovendien staan u nog aanvullende functies zoals
de weergave van tijd en datum, alarmklok en een
automatische aan- en uitschakelfunctie ter beschikking.
Veel plezier met uw toestel en zijn veelvoudige
functies!
Over deze handleiding
Met de installatiehulp op de volgende bladzijden
kunt u uw toestel snel en gemakkelijk in gebruik
nemen. Gedetailleerde beschrijvingen vindt u in de
volgende hoofdstukken van deze handleiding.
Lees de handleiding nauwkeurig. Let op de veiligheidsinstructies om een correcte werking van uw
toestel te garanderen. De fabrikant kan niet aansprakelijk worden gesteld voor enig gebruik dat
afwijkt van het in de instructies beschreven gebruik.
In deze handleiding worden verschillende modellen van de toestelreeks beschreven. Let op: sommige functies zijn slechts bij bepaalde modellen
beschikbaar.
Gebruikte symbolen
Waarschuwing
GEVAAR!
Waarschuwt voor gevaar voor personen,
voor beschadigingen aan het toestel of
andere voorwerpen en voor mogelijk verlies van gegevens. Ondeskundig gebruik
kan tot verwondingen en beschadigingen leiden.
Tips en Trucs
Tips en Trucs
Met dit symbool zijn tips gekenmerkt die
de bediening van uw apparaat efficiënter en eenvoudiger maken.
1
Page 59

af-5077_5087_5107psms_manual_05_nl_253243477-a.book Seite 2 Donnerstag, 2. Juli 2009 11:45 11
Veiligheidsinstructies en aanbevelingen
Inleiding 2
Breng geen instellingen en veranderingen aan die
niet in deze handleiding zijn beschreven. Door onoordeelkundig gebruik kan lichamelijk letsel of
schade, apparaatschade of gegevensverlies optreden. Let op alle aangegeven waarschuwingsen veiligheidsinstructies.
Toestel opstellen
Het apparaat is uitsluitend bedoeld voor gebruik binnenshuis.
Het apparaat is uitsluitend bedoeld voor gebruik
binnenshuis. Het toestel moet veilig en stabiel op
een effen oppervlak staan. Leg alle kabels zo dat
er niemand over kan vallen, dat er zich niemand
kan verwonden of dat het toestel wordt beschadigd.
LCD-scherm
Behandel het apparaat met zorg. Zorg ervoor dat
u het LCD-scherm niet aanraakt. Plaats nooit zware, harde of scherpe voorwerpen op het LCD-paneel, de lijst of het netsnoer.
Bescherm het toestel tegen direct zonlich t
Bescherm het toestel tegen direct zonlicht, hitte,
grote temperatuurverschillen en vochtigheid. Zet
het toestel niet in de buurt van de verwarming of
de airconditioning. Let op de informatie in de technische specificaties met betrekking tot temperatuur en luchtvochtigheid.
Apparaat niet direct na transport aanschakelen
Het apparaat dient niet direct na het transport van
een koude naar een warme ruimte resp. omgekeerd, of in een koude ruimte die snel wordt verwarmd te worden aangeschakeld. Wacht in die gevallen tenminste drie uur totdat het apparaat zich
aan de gewijzigde omstandigheden (temperatuur,
luchtvochtigheid, …) heeft aangepast.
Wanneer het toestel te warm wordt of wanneer er rook uit het toestel komt
Wanneer het toestel te warm wordt of wanneer er
rook uit het toestel komt – meteen de netstekker
uit het stopcontact trekken. Laat uw toestel door
een technische servicedienst onderzoeken. Om te
vermijden dat een brand uitbreidt, moeten open
vlammen uit de buurt van het toestel worden gehouden.
Sluit het toestel niet in vochtige ruimtes aan.
Sluit het toestel niet in vochtige ruimtes aan. Raak
de netstekker of de netaansluiting nooit met natte handen aan.
Er mogen geen vloeistof fen in het toestel geraken.
Er mogen geen vloeistoffen in het toestel geraken. Haal het toestel van het stroomnet wanneer
vloeistoffen of vreemde deeltjes in het toestel zijn
geraakt en laat uw toestel door een technische
servicedienst onderzoeken.
Laat uw kinderen niet zonder toezicht met het toes tel omgaan.
Laat uw kinderen niet zonder toezicht met het
toestel omgaan. De verpakkingsfolie mag niet in
de handen van kinderen geraken.
Stroomverzorging
Gebruik uitsluitend de meegeleverde voedingsadapter
Gebruik uitsluitend de meegeleverde voedingsadapter (zie Bijlage / Technische gegevens). Controleer of de netspanning van uw toestel (typeplaatje) overeenkomt met de netspanning die op
de opstelplaats beschikbaar is. Het juiste voltage
is op het apparaat vermeld.
Raak het stroomsnoer nooit aan als de isolatie beschadigd is.
Raak het stroomsnoer nooit aan als de isolatie beschadigd is. Wissel onmiddellijk de beschadigde
kabel om. Gebruik uitsluitend geschikte kabels;
neem indien nodig contact op met onze technische klantenservice of met uw vakhandel.
Sluit uw apparaat af van de stroomvoorziening voordat u de oppervl akte schoonmaakt.
Sluit uw apparaat af van de stroomvoorziening
voordat u de oppervlakte schoonmaakt. Gebruik
een zacht, pluisvrij doekje. Gebruik nooit vloeibare,
gasvormige of licht ontvlambare reinigingsmiddelen (sprays, schurende middelen, politoeren, alcohol). Er mag geen vocht in het toestel geraken.
Reinig het display met een droge, zachte doek.
Reinig het display met een droge, zachte doek.
Wanneer het display breekt, kan een zwarte bijtende vloeistof vrijkomen. Vermijd huid- en oogcontact.
Reparaties
Reparaties
Repareer uw toestel niet zelf. Ondeskundig onderhoud kan tot lichamelijke en materiële schade leiden. Laat uw toestel uitsluitend door een geautoriseerde servicedienst repareren.
Verwijder het typeplaatje van uw toestel niet, anders komt de garantie te vervallen.
Foto-opslagmedia
Foto-opslagmedia
Gebruik uitsluitend opslagmedia die compatibel
met het apparaat zijn. Om schade aan het apparaat of aan geheugenkaarten te voorkomen, schakelt u het apparaat uit voordat u een kaart uit het
apparaat verwijdert of in het apparaat plaatst.
Trek de ingestoken geheugenkaart er nooit uit als
het apparaat gegevens aan het opslaan is. Hierdoor kunnen gegevens beschadigd worden of verloren gaan.
NL
2
Page 60

af-5077_5087_5107psms_manual_05_nl_253243477-a.book Seite 3 Donnerstag, 2. Juli 2009 11:45 11
Overzicht
NL
Toesteloverzicht
Aan/uit schakelaar
1 B – Aan/uit schakelaar
Insteekgleuf voor geheugenkaart
2 – Sleuf voor geheugenkaart
Pijltjestoets links
3 J – In het menu navigeren / verminderen van
de helderheid, het contrast, de kleurverzadiging /
verspringen naar de vorige foto, de vorige kolom
of pagina
OK
4 OK – Keuze bevestigen / diashow beginnen of
onderbreken
Pijltjestoets omhoog
5 G – In het menu navigeren / verhogen van de
geluidsterkte / achtergrondmuziek tijdens de diashow aanzetten
Pijltjestoets omlaag
6 I – In het menu navigeren / verlagen van de
geluidsterkte
Pijltjestoets rechts
7 H – In het menu navigeren / vergroten van de
helderheid, het contrast, de kleurverzadiging /
verspringen naar de volgende foto, de volgende
kolom of pagina
Menutoets
8 MENU – Hoofdmenu oproepen / analoge klok
aanzetten (toets ingedrukt houden)
Instellingenmenu
9 ù – Instellingenmenu oproepen
Mini-USB
‹ ý – Mini-USB aansluiting – voor aansluiting
op een computer
USB-bus
Œ ý Bus – USB-aansluiting voor een opslagmedium
USB-aansluiting ops lagmedium
÷ Í-bus – aansluiting netverbinding
Rückseite AF5077
Spaltenumbruch
Afstandsbediening
(AF¦5077/¦5087/5107MS)
Fernbedienung AF5077
1 – Instellingenmenu oproepen
2 – Hoofdmenu oproepen / analoge klok aanzet-
ten (toets ingedrukt houden)
3 – Aan-/uitschakelen
4 – In het menu navigeren / verhogen van de ge-
luidsterkte / achtergrondmuziek tijdens de diashow aanzetten
5 – Keuze bevestigen / diashow beginnen of onderbreken
6 – In het menu navigeren / vergroten van de helderheid, het contrast, de kleurverzadiging / verspringen naar de volgende foto, de volgende kolom of pagina
7 – In het menu navigeren / verlagen van de geluidsterkte
8 – In het menu navigeren / verminderen van de
helderheid, het contrast, de kleurverzadiging /
verspringen naar de vorige foto, de vorige kolom
of pagina
3
Page 61

Opmerking
VOORZICHTIG!
GEVAAR!
Opmerking
Opmerking
af-5077_5087_5107psms_manual_05_nl_253243477-a.book Seite 4 Donnerstag, 2. Juli 2009 11:45 11
Eerste ingebruikneming
Inhoud verpakking
Fotoframe
‚ Digitaal fotovenster met statief
Stroomsnoer met verwisselbare stroomstekkers
ƒ Stroomsnoer met verwisselbare stroomstekkers
Afstandsbediening (met batterij) variable
„ Afstandsbediening (met batterij)
(AF¦5077/¦5087/5107MS)
Gebruiksaanwijzing (zonder afbeelding)
Gebruiksaanwijzing (zonder afbeelding)
Verpackungsinhalt AF 5077
Ontbrekende delen
Ontbrekende delen
Mocht een van de delen ontbreken of
beschadigd zijn, neem dan contact op
met uw vakhandelaar of met onze klantendienst.
Netverbinding aansluiten
Netspanning en plaats van o pstelling
Netspanning en plaats van opstelling!
Controleer of de netspanning van uw
toestel (typeplaatje) overeenkomt met
de netspanning die op de opstelplaats
beschikbaar is.
1 Kies de juiste stroomstekker voor uw land en
schuif deze op het stroomsnoer. Let erop dat
de stroomstekker volledig vast klikt op het
stroomsnoer.
2 Steek de kleine stekker van het stroomsnoer in
de aansluiting aan de achterzijde van het ap-
paraat. Steek de netverbinding in de wandcon-
tactdoos.
Op de computer aansluiten
Met de meegeleverde USB kabel kunt u het fotovenster aansluiten op een computer, zodat u bestanden kunt uitwisselen tussen de computer en
het interne geheugen.
1 Schakel het apparaat uit met de aan/uit scha-
kelaar aan de achterkant.
2 Sluit de kleine stekker van de USB-kabel aan
op de uitgeschakelde digitale fotolijst en de
grote stekker op de computer.
3 Schakel het apparaat aan met de aan/uit scha-
kelaar aan de achterkant. Wacht een ogenblik
totdat de computer de nieuwe hardware heeft
herkend. Compatibele foto-, muziek- en videobestanden kunnen naar het interne geheugen
worden gekopieerd.
4 Als de verbinding met de computer wordt ver-
broken, start de digitale fotolijst opnieuw op.
Geheugenkaart plaatsen
1 Plaats een geheugenkaart in de desbetreffen-
de sleuf aan de achterkant van het apparaat.
Uw apparaat ondersteunt de volgende geheugenkaarten: SD/MMC/MS/SDHC/XD.
Geheugenkaart plaatsen!
Gebruik uitsluitend opslagmedia die
compatibel met het apparaat zijn.
Trek de ingestoken geheugenkaart
er nooit uit als het apparaat gegevens aan het opslaan is. Hierdoor
kunnen gegevens beschadigd worden of verloren gaan.
2 Schakel het apparaat aan met de aan/uit scha-
kelaar aan de achterkant. Nadat het startscherm is weergegeven, wordt automatisch
een diavoorstelling gestart.
Er zijn veel foto’s op de geheugenkaart aanwezig
Als op de geheugenkaart veel foto’s
zijn opgeslagen, kan het enige tijd
duren voordat de diashow begint.
3 Druk tijdens de diashow op de achterkant op
de knop OK om de diashow te beëindigen.
USB-geheugen en geheugenkaart tegelijkertijd gebruiken
Als een USB-geheugenapparaat tegelijkertijd met een geheugenkaart
wordt gebruikt, worden eerst de foto’s op de geheugenkaart getoond.
NL
4
Page 62

GEVAAR!
Opmerking
af-5077_5087_5107psms_manual_05_nl_253243477-a.book Seite 5 Donnerstag, 2. Juli 2009 11:45 11
NL
Batterij van de afstandsbediening plaatsen of verwisselen
Ontploffingsgevaar indien onjuist batterijtype wordt gebruikt
GEVAAR! EXPLOSIEGEVAAR BIJ GEBRUIK VAN EEN VERKEERD TYPE BATTERIJ.
1 Haal het batterijvak uit de afstandsbediening
door de vergrendeling te openen (1) en het
batterijvak eruit te trekken (2).
2 Plaats de nieuwe batterij met de plus- en min-
pool in het batterijvak zoals op de tekening op
de achterkant van de afstandsbediening staat
aangegeven. Let daarbij op de polariteit (+ en -
)!
3 Schuif het batterijvak in de afstandsbediening
totdat de vergrendeling vast klikt.
Normaal gesproken gaan batterijen een
jaar mee. Als de afstandsbediening niet
meer werkt, vervangt u de batterij. Verwijder de batterijen als u het fotovenster
langere tijd niet gebruikt. Op die manier
lopen ze niet leeg en kunnen ze geen
schade aan de afstandsbediening veroorzaken.
Lever de gebruikte batterijen in overeenstemming met de in uw land geldende
voorschriften met betrekking tot afvalverwerking in.
Afstandsbediening gebruiken
Richt de afstandsbediening op de sensor aan de
voorkant van het apparaat. De afstandsbediening
werkt uitsluitend onder een hoek van maximaal
30° en op een afstand van maximaal 2 meter. Zorg
dat zich geen obstakels bevinden tussen de afstandsbediening en de sensor.
5
Page 63

Opmerking
Opmerking
Opmerking
af-5077_5087_5107psms_manual_05_nl_253243477-a.book Seite 6 Donnerstag, 2. Juli 2009 11:45 11
Weergave
Overzicht menufuncties
Het hoofdmenu bevat drie symbolen.
1 Fotomenu
2 Videomenu
(AF¦5077/¦5087/5107MS)
3 Muziekmenu
(AF¦5077/¦5087/5107MS)
Photomenü AF 5077
Door het menu navigeren
1 Druk op de afstandsbediening op MENU of op
het apparaat MENU.
2Kies met Ý/Þ het gewenste menu.
3 Bevestig met .
Fotoweergave
1 Kies het fotomenu in het hoofdmenu en beves-
tig dit met OK.
2 Op het scherm worden telkens 16 miniatuuraf-
beeldingen per pagina getoond.
6Druk op J/H om naar de vorige of volgende
foto te springen.
7 Beëindig de diashow met MENU.
Menu oproepen
Tijdens de diashow kunt u op ieder
gewenst moment het hoofdmenu oproepen met MENU.
Achtergrondmuziek van de diavoorstelling instellen
(AF¦5077/¦5087/5107MS)
Als achtergrondmuziek kunt u uitsluitend bestanden gebruiken die samen
met de foto's in het interne geheugen,
op de geheugenkaart, of op de USB verbinding zijn opgeslagen.
1 Druk tijdens een diashow op de toets Û van de
afstandsbediening of op G op het apparaat
om de achtergrondmuziek te starten.
Met Û/Ü stelt u het volume in.
Muziekweergave
(AF¦5077/¦5087/5107MS)
1 Kies het muziekmenu in het hoofdmenu en be-
vestig dit met .
2Kies met Ý/Þ of Û/Ü de muziektitel die u wilt
laten afspelen.
3Druk op OK, om de weergave te beginnen.
Tijdens het afspelen wordt aanvullende informatie over de titel getoond.
4 Om dit te stoppen drukt u op OK.
NL
3Kies met G/I of J/H de foto vanaf waar u
de diashow wilt starten.
4Druk op OK, om de diavoorstelling te beginnen.
5Druk op OK om de diashow te onderbreken. Op
het scherm verschijnt een 'pauzesymbool'.
6
Page 64

Opmerking
af-5077_5087_5107psms_manual_05_nl_253243477-a.book Seite 7 Donnerstag, 2. Juli 2009 11:45 11
Videoweergave
(AF¦5077/¦5087/5107MS)
1 Kies het videomenu in het hoofdmenu en be-
vestig dit met .
2Kies met Ý/Þ of Û/Ü het videobestand dat u
wilt laten afspelen.
3Druk op OK, om de weergave te beginnen. Om
dit te stoppen drukt u op OK.
NL
Aanvullende weergavefuncties
Tijdens de weergave kunt u met Ý/Þ
of Û/Ü naar de vori ge of d e volgend e
titel springen.
Druk op de afstandsbediening op OK
om de weergave te pauzeren of om
verder te gaan.
Volume instellen
(AF¦5077/¦5087/5107MS)
Tijdens de weergave kunt u op de afstandsbedie-
ning het volume met Ü/Û instellen. Druk meerdere malen op Ü om het volume volledig uit te zetten.
7
Page 65

Opmerking
af-5077_5087_5107psms_manual_05_nl_253243477-a.book Seite 8 Donnerstag, 2. Juli 2009 11:45 11
Instellingen
Het instellingenmenu heeft vier symbolen en
wordt met behulp van de toets ù op het apparaat
of met ù op de afstandsbediening opgeroepen.
1 ECO-instellingen (automatisch aan- en uit-
schakelen, automatische aanpassing van de helderheid van de display (AF¦5077/¦5087/5107MS))
2 Foto-instellingen (instellingen voor de dia-
show, foto draaien)
3 Bestandsbeheer (bestanden kopiëren, wissen,
weergavelijsten)
4 Basisinstellingen (helderheid, contrast, datum,
tijd)
Settingsmenü AF 5077
ECO-instellingen
U kunt de digitale fotolijst op vooraf ingestelde
tijdstippen automatisch aan- en uitschakelen of
de helderheid van de display aan de omgevingsverlichting aanpassen (AF¦5077/¦5087/5107MS).
Kies daarvoor uit de volgende instellingen:
Automatisch aan-/uitschakelen
U kunt de digitale fotolijst op vooraf ingestelde
tijdstippen automatisch aan-/uitschakelen.
1Druk op ù.
2Kies met J/H het symbool en bevestig
met OK.
3 Het symbool is al gemarkeerd.
4Kies met J/H het gekleurde symbool en be-
vestig dit met OK.
5Kies met J/H het tijdstip waarop de digitale
fotolijst zichzelf dient aan te schakelen.
6 Bevestig met OK. Het kader van de cursor ver-
andert van wit naar rood.
7Kies met J/H het tijdstip waarop de digitale
fotolijst zichzelf dient uit te schakelen.
8 Bevestig met OK. Het kader van de cursor ver-
andert van rood naar wit. De tijdsduur dat de
digitale fotolijst blijft aangeschakeld wordt
groen gemarkeerd.
9 Om een tijdsduur te wissen markeert u het be-
reik nogmaals. De groene markering wordt
daarbij gewist.
10 Druk op I en kies met J/H het symbool .
11 Bevestig met OK.
12 Beëindig met ù.
Functie automatisch aan-/uitschakelen
U kunt het automatisch aan-/uitschakelen deactiveren. De instellingen blijven echter bewaard.
1Druk op ù.
2Kies met J/H het symbool en
bevestig met OK.
3 Het symbool is al gemarkeerd.
4Kies met J/H het zwart/wit sym-
bool (functie automatisch uitgeschakeld) of het gekleurde symbool
(functie automatisch aangescha-
keld).
5 Bevestig met OK.
6 Beëindig met ù.
Helderheid van de display automatisch aanpassen
(AF¦5077/¦5087/5107MS)
Met deze functie wordt de helderheid van de dis-
play automatisch aan de omgevingsverlichting
aangepast.
1Druk op ù.
2Kies met J/H het symbool en bevestig
met OK.
3Kies met I het symbool en bevestig met
OK.
4Kies met J/H het zwart/wit symbool (functie
automatisch uitgeschakeld) of het gekleurde
symbool (functie automatisch aangeschakeld).
5 Bevestig met OK.
6 Beëindig met ù.
NL
8
Page 66

Opmerking
Opmerking
Opmerking
af-5077_5087_5107psms_manual_05_nl_253243477-a.book Seite 9 Donnerstag, 2. Juli 2009 11:45 11
NL
Foto-instellingen wijzigen
Hier kunt u de foto’s afspelen, de paginaverhouding instellen, de overgangseffecten van de diashow vastleggen of de oproeptijd van de diashow
instellen.
1Druk op ù.
2Kies met J/H (foto-instellingen) en be-
vestig met OK.
3Kies met G/I het desbetreffende symbool.
Foto afspelen – plaats van de foto wijzigen
Paginaverhouding – Het scherm van de digitale fotolijst heeft een paginaverhouding in
het format 4:3. Kies of de foto in het originele
format of in breedbeeld (16:9) dient te worden
getoond, of dat de foto aan de beeldschermgrootte dient te worden aangepast.
Overgangseffecten – Verschillende overgangseffecten voor de modus diashow instellen
Diashow - weergavetijd – Kiezen uit de op-
gegeven tijden.
Persoonlijke lijst – Kies uit verschillende
frames voor de weergave van de foto’s.
4 Kies de gewenste instelling met J/H.
5 Bevestig met OK.
6 Beëindig met ù.
Bestandsbeheer
U kunt vanaf een geheugenkaart of een USB-stick
bestanden kopiëren. Uit het interne geheugen
kunt u bestanden wissen.
Bestanden kopiëren/wissen
1Druk op ù.
2Kies met J/H (bestandsbeheer) en be-
vestig met OK.
3Kies met G (kopiëren) of (wissen) en be-
vestig met OK.
4Kies met G/I, J/H het bestand dat u wilt
kopiëren of wissen.
5 Markeer het bestand met OK.
7Kies met J/H het symbool en druk op
OK om te beginnen met kopiëren of wissen.
Alle bestanden op de geheugenkaart
kopiëren
Kies en bevestig met OK om alle
bestanden op de geheugenkaart
naar het interne geheugen te kopiëren.
Procedure afbreken
Kies en bevestig met OK om de
procedure af te breken.
8 Op de display verschijnt een voortgangsbalk.
Na afloop van het kopiëren is het bestand te
vinden in het interne geheugen.
Inschakelmodus
Kies of na het inschakelen automatisch foto’s,
films, of foto’s en films dienen te worden afgespeeld.
1Druk op ù.
2Kies met J/H (bestandsbeheer) en be-
vestig met OK.
3Kies met G en bevestig met OK.
4Kies met J/H uit de getoonde mogelijkhe-
den en bevestig met OK.
5 Beëindig met ù.
Weergavelijsten
Stel uw persoonlijke weergavelijsten voor foto’s,
films, en muziek samen.
Alleen die foto’s, films of muziek die zich in deze
weergavelijsten bevinden, worden afgespeeld. U
kunt maximaal vijf weergavelijsten samenstellen.
Markering opheffen
Druk nogmaals op OK om de marke-
ring op te heffen.
6Kies met I de symboolregel aan de onderste
schermrand.
9
Page 67

Opmerking
af-5077_5087_5107psms_manual_05_nl_253243477-a.book Seite 10 Donnerstag, 2. Juli 2009 11:45 11
Weergavelijst samenstellen
1Druk op ù.
2Kies met J/H (bestandsbeheer) en be-
vestig met OK.
3Kies met G/I (weergavelijsten) en druk op
H.
4Kies met J/H of u een weergavelijst voor
muziek, foto’s, of films wilt samenstellen.
5 Bevestig met OK.
6 Bevestig ’OFF’ met OK om een nieuwe weerga-
velijst samen te stellen.
7Kies met J/H bv.: playlist 1 en bevestig met
OK.
8Kies met G/I of J/H het bestand dat u
aan de weergavelijst wilt toevoegen. Markeer
het bestand met OK.
9 Markeer de daaropvolgende bestanden met
OK.
10 Kies met I de symboolregel aan de onderste
schermrand.
11 Kies met J/H het symbool en druk op
OK om de weergavelijst op te slaan.
12 Beëindig met ù.
Weergavelijst aan-/uitschakelen
1Druk op ù.
2Kies met J/H (bestandsbeheer) en be-
vestig met OK.
3Kies met G/I (weergavelijsten) en druk op
H.
4Kies met J/H of u een weergavelijst voor
muziek, foto’s, of films wilt aanschakelen.
5 Bevestig met OK.
6 Bevestig bv. playlist1 met OK.
7Kies met J/H de gewenste weergavelijst.
Basisinstellingen wijzigen
1Druk op ù.
2Kies met J/H het symbool en bevestig
met OK.
3Kies met Û/Ü welke instelling u wilt wijzigen.
4 Bevestig met .
U kunt de volgende instellingen maken:
, , (helderheid, contrast, kleurverzadiging) – Instellen van de helderheid, het contrast en de kleurverzadiging van het LCD
scherm.
(klok): Hiermee kunt u de datum en de tijd
instellen.
(Alarm) (AF¦5077/¦5087/5107MS) – Instellen
van de alarmtijd, aan-/uitschakelen van het
alarm, en keuze van de alarmtoon.
(Kalender) – Instellen van jaar, maand, dag.
(Fabrieksinstellingen) – Instellingen terug-
zetten naar de fabrieksinstellingen.
5 Kies de gewenste instelling met G/I.
6 Bevestig met
7 Wijzig de instelling met J/H.
8 Bevestig de gewijzigde instelling met .
9 Beëindig met ù.
NL
Weergavelijsten uitschakelen
Kies met J/H ’OFF’; de weergavelijst wordt uitgeschakeld. Tijdens de
weergave zijn weer alle foto’s, films
en muziekbestanden beschikbaar.
10
Page 68

af-5077_5087_5107psms_manual_05_nl_253243477-a.book Seite 11 Donnerstag, 2. Juli 2009 11:45 11
Service
NL
Venster wisselen
U kunt het venster van het apparaat vervangen
voor het meegeleverde wisselvenster. Het venster
wordt met magneetjes vastgehouden.
Problemen Oplossingen
Fotolijst start niet. Controleer of u de netvoedingsadapter correct
Kan geen bestanden opslaan. Controleer of er voldoende geheugenruimte op het
Geen geluid Controleer of de bestandsindeling wel wordt on-
Geheugenkaart wordt niet herkend Wanneer de fotolijst op een computer is aangeslo-
Voor de diashow, film- en muziekweergave worden
niet alle bestanden van het opslagmedium getoond.
1 Druk op de knop voor vensterwisseling aan de
achterkant van het apparaat. Verwijder het
venster.
2 Plaats het wisselvenster op het apparaat tot-
dat het vast klikt aan de magneetjes.
hebt aangesloten.
interne geheugen aanwezig is. Start het fotovenster nogmaals op en wis een aantal bestanden om
geheugenruimte vrij te maken.
dersteund, of de computer correct op het fotovenster is aangesloten en of de geheugenkaart niet
beschadigd is.
ten, wordt de in de fotolijst aanwezige geheugenkaart niet herkend.
Controleer of er een weergavelijst is aangeschakeld.
11
Page 69

af-5077_5087_5107psms_manual_05_nl_253243477-a.book Seite 12 Donnerstag, 2. Juli 2009 11:45 11
Bijlage
Technische specificaties AF 5077PS
Afmetingen (Type 1)
Afmetingen (B¦×¦H¦×¦D)....................... 190¦×¦153¦×¦80¦mm
Gewicht (Type 1)
Gewicht.............................................................................. 0,4¦kg
Ingang
Netaansluiting ....Ingang: 100¦–¦240¦V¦~ / 50¦–¦60¦Hz
Uitgang
..........................................................Uitgang: 5¦V¦† / 2¦A
Aanbevolen toestelomgeving
Aanbevolen toestelomgeving .........................5¦–¦45¦ºC
Relatieve luchtvochtigheid
Relatieve luchtvochtigheid ..............................20¦–¦80¦%
Verbruik
Verbruik
Apparaat is ingeschakeld
Apparaat is ingeschakeld (diashow ).......... 5,0¦W
Fotodiagonaal........................................................................7¦“
Hoogte/breedte verhouding ........................................ 4:3
Resolutie........................................................800¦×¦600 Pixel
Intern geheugen
Intern geheugen....128¦MB¦MB of maximaal 500¦fo-
to’s
USB-aansluiting (T ype 1)
USB-aansluiting...................................................USB-Host
Compatibele geheugenkaarten
Compatibele geheugenkaarten............SD/MMC/MS/
SDHC/XD
Fotoformaat
Fotoformaat.......................................................................JPEG
Technische specificaties AF 5077MS
Afmetingen (Type 2)
Afmetingen (B¦×¦H¦×¦D)....................... 190¦×¦153¦×¦80¦mm
Gewicht (Type 2)
Gewicht.............................................................................. 0,4¦kg
Ingang
Netaansluiting ....Ingang: 100¦–¦240¦V¦~ / 50¦–¦60¦Hz
Uitgang
..........................................................Uitgang: 5¦V¦† / 2¦A
Aanbevolen toestelomgeving
Aanbevolen toestelomgeving .........................5¦–¦45¦ºC
Relatieve luchtvochtigheid
Relatieve luchtvochtigheid ..............................20¦–¦80¦%
Verbruik
Verbruik
Apparaat is ingeschakeld
Apparaat is ingeschakeld (diashow ).......... 4,3¦W
Fotodiagonaal........................................................................7¦“
Hoogte/breedte verhouding ........................................ 4:3
Resolutie........................................................800¦×¦600 Pixel
Intern geheugen
Intern geheugen.256¦MB¦MB of maximaal 1000¦foto’s
USB-aansluiting (T ype 2)
USB-aansluiting....................... USB-Host, USB Device
Compatibele geheugenkaarten
Compatibele geheugenkaarten............SD/MMC/MS/
SDHC/XD
Fotoformaat
Fotoformaat.......................................................................JPEG
Muziekformaat
Muziekformaat ................................................................. MP3
Videoformaat
Videoformaat .................................Motion Jpeg, Mpeg-4
Spaltenumbruch
Technische specificaties AF 5087PS
Afmetingen (Type 3)
Afmetingen (B¦×¦H¦×¦D)....................... 203¦×¦163¦×¦90¦mm
Gewicht (Type 3)
Gewicht..............................................................................0,5¦kg
Ingang
Netaansluiting.....Ingang: 100¦–¦240¦V¦~ / 50¦–¦60¦Hz
Uitgang
.......................................................... Uitgang: 5¦V¦† / 2¦A
Aanbevolen toestelomgeving
Aanbevolen toestelomgeving .........................5¦–¦45¦ºC
Relatieve luchtvochtigheid
Relatieve luchtvochtigheid...............................20¦–¦80¦%
Verbruik
Verbruik
Apparaat is ingeschakeld
Apparaat is ingeschakeld (diashow ) .......... 5,4¦W
Fotodiagonaal........................................................................8¦“
Hoogte/breedte verhouding ........................................ 4:3
Resolutie........................................................800¦×¦600 Pixel
Intern geheugen
Intern geheugen....128¦MB¦MB of maximaal 500¦fo-
to’s
USB-aansluiting (Type 3)
USB-aansluiting...................................................USB-Host
Compatibele geheugenkaarten
Compatibele geheugenkaarten........... SD/MMC/MS/
SDHC/XD
Fotoformaat
Fotoformaat...................................................................... JPEG
Technische specificaties AF 5087MS
Afmetingen (Type 4)
Afmetingen (B¦×¦H¦×¦D)....................... 203¦×¦163¦×¦90¦mm
Gewicht (Type 4)
Gewicht..............................................................................0,5¦kg
Ingang
Netaansluiting.....Ingang: 100¦–¦240¦V¦~ / 50¦–¦60¦Hz
Uitgang
.......................................................... Uitgang: 5¦V¦† / 2¦A
Aanbevolen toestelomgeving
Aanbevolen toestelomgeving .........................5¦–¦45¦ºC
Relatieve luchtvochtigheid
Relatieve luchtvochtigheid...............................20¦–¦80¦%
Verbruik
Verbruik
Apparaat is ingeschakeld
Apparaat is ingeschakeld (diashow ) .......... 6,3¦W
Fotodiagonaal........................................................................8¦“
Hoogte/breedte verhouding ........................................ 4:3
Resolutie........................................................800¦×¦600 Pixel
Intern geheugen
Intern geheugen.1¦GB¦MB of maximaal 4000¦foto’s
USB-aansluiting (Type 4)
USB-aansluiting....................... USB-Host, USB Device
Compatibele geheugenkaarten
Compatibele geheugenkaarten........... SD/MMC/MS/
SDHC/XD
Fotoformaat
Fotoformaat...................................................................... JPEG
Muziekformaat
Muziekformaat ................................................................. MP3
Videoformaat
Videoformaat.................................. Motion Jpeg, Mpeg-4
Spaltenumbruch
NL
12
Page 70

af-5077_5087_5107psms_manual_05_nl_253243477-a.book Seite 13 Donnerstag, 2. Juli 2009 11:45 11
NL
Technische specificaties AF 5107PS
Afmetingen (Type 5)
Afmetingen (B¦×¦H¦×¦D)....................... 255¦×¦203¦×¦90¦mm
Gewicht (Type 5)
Gewicht.............................................................................. 0,8¦kg
Ingang
Netaansluiting ....Ingang: 100¦–¦240¦V¦~ / 50¦–¦60¦Hz
Uitgang
..........................................................Uitgang: 5¦V¦† / 2¦A
Aanbevolen toestelomgeving
Aanbevolen toestelomgeving .........................5¦–¦45¦ºC
Relatieve luchtvochtigheid
Relatieve luchtvochtigheid ..............................20¦–¦80¦%
Verbruik
Verbruik
Apparaat is ingeschakeld
Apparaat is ingeschakeld (diashow ).......... 6,1¦W
Fotodiagonaal.................................................................10,4¦“
Hoogte/breedte verhouding ........................................ 4:3
Resolutie........................................................800¦×¦600 Pixel
Intern geheugen
Intern geheugen....128¦MB¦MB of maximaal 500¦fo-
to’s
USB-aansluiting (T ype 5)
USB-aansluiting...................................................USB-Host
Compatibele geheugenkaarten
Compatibele geheugenkaarten............SD/MMC/MS/
SDHC/XD
Fotoformaat
Fotoformaat.......................................................................JPEG
Technische specificaties AF 5107MS
Afmetingen (Type 6)
Afmetingen (B¦×¦H¦×¦D)....................... 255¦×¦203¦×¦90¦mm
Gewicht (Type 6)
Gewicht.............................................................................. 0,8¦kg
Ingang
Netaansluiting ....Ingang: 100¦–¦240¦V¦~ / 50¦–¦60¦Hz
Uitgang
..........................................................Uitgang: 5¦V¦† / 2¦A
Aanbevolen toestelomgeving
Aanbevolen toestelomgeving .........................5¦–¦45¦ºC
Relatieve luchtvochtigheid
Relatieve luchtvochtigheid ..............................20¦–¦80¦%
Verbruik
Verbruik
Apparaat is ingeschakeld
Apparaat is ingeschakeld (diashow ).......... 6,6¦W
Fotodiagonaal........................................................................8¦“
Hoogte/breedte verhouding ........................................ 4:3
Resolutie........................................................800¦×¦600 Pixel
Intern geheugen
Intern geheugen.1¦GB¦MB of maximaal 4000¦foto’s
USB-aansluiting (T ype 6)
USB-aansluiting....................... USB-Host, USB Device
Compatibele geheugenkaarten
Compatibele geheugenkaarten............SD/MMC/MS/
SDHC/XD
Fotoformaat
Fotoformaat.......................................................................JPEG
Muziekformaat
Muziekformaat ................................................................. MP3
Videoformaat
Videoformaat .................................Motion Jpeg, Mpeg-4
Alle gegevens worden uitsluitend ter informatie
verstrekt. AgfaPhoto behoudt zich het recht voor
om zonder voorafgaande kennisgeving wijzigingen aan te brengen.
Spaltenumbruch
AgfaPhoto wordt gebruikt onder licentie van
Agfa-Gevaert NV & Co. KG of Agfa-Gevaert NV.
Noch Agfa-Gevaert NV & Co. KG noch Agfa-Gevaert NV fabriceren deze producten zelf of bieden garantie of ondersteuning.
Neem voor informatie over servicereparaties,
ondersteuning of garantieaanspraken contact
op met de distributeur of de fabrikant.
Contact: AgfaPhoto Holding GmbH,
www.agfaphoto.com
Fabrikant: Sagem Communications,
www.sagem-communications.com
De CE-markering geeft aan dat het product voldoet aan de hoofdvereisten op het gebied van
consumentenveiligheid en elektromagnetische interferentie uit richtlijn 1999/5/EC van de Europese Raad betreffende eindapparatuur voor telecommunicatie.
De compatibiliteitsverklaring kan worden geraadpleegd op de website www.agfaphoto.com.
AgfaPhoto hecht grote waarde aan milieubescherming in het kader van duurzame ontwikkeling. AgfaPhoto streeft ernaar om milieuvriendelijke systemen op de markt te brengen. Daarom
heeft AgfaPhoto besloten de ecologische prestaties in alle levensfasen van het product, van fabricage via ingebruikneming tot het gebruik en de afvalverwerking een hoge prioriteit te geven.
Verpakking: Het logo met de groene stip geeft
aan dat er een bijdrage aan een erkende landelijke
organisatie is betaald om infrastructuren voor
hergebruik en recycling van verpakkingen te verbeteren. Bied verpakkingsmateriaal altijd aan volgens de ter plaatse geldende voorschriften voor
gescheiden afvalinzameling.
Batterijen: Als het product batterijen bevat, levert
u deze aan het einde van de levensduur in bij een
erkend inzamelingspunt.
13
Page 71

af-5077_5087_5107psms_manual_05_nl_253243477-a.book Seite 14 Donnerstag, 2. Juli 2009 11:45 11
Alle rechten voorbehouden. Niets uit deze uitgave
mag zonder voorafgaande schriftelijke toestemming van AgfaPhoto worden vermenigvuldigd, in
een archiefsysteem worden opgeslagen of in welke vorm dan ook - elektronisch, mechanisch, door
middel van fotokopie, opname of op een andere
manier – worden gereproduceerd. De in dit docu-
Produkt: Wanneer een product is voorzien van
een logo van een afvalcontainer met een kruis, betekent dit dat het product behoort tot de categorie elektrische en elektronische apparatuur. De
Europese regelgeving schrijft voor dat dergelijke
apparatuur gescheiden moet worden ingezameld:
• via verkooppunten wanneer tegelijkertijd soortgelijke nieuwe apparatuur wordt aangeschaft
• via de plaatselijke systemen voor (gescheiden)
afvalinzameling.
Op deze manier levert u een bijdrage aan hergebruik en recycling van Afgedankte Elektrische en
Elektronische Apparatuur, en daarmee tevens aan
een beter milieu en een betere volksgezondheid.
De gebruikte papieren en kartonnen verpakkingen
kunnen als oud papier worden aangeboden. De
plastic en Styropor verpakkingen biedt u als overig afval ter verwerking aan, afhankelijk van de in
uw land geldende richtlijnen.
Handelsmerken: De in deze handleiding genoemde referenties zijn handelsmerken van de betreffende firma’s. Het ontbreken van de symbolen É
en Ë betekent niet dat de betreffende begrippen
vrije handelsmerken zijn. Andere in dit document
gebruikte productnamen dienen alleen maar ter
kenmerking en kunnen handelsmerken van de betreffende houder zijn. AgfaPhoto weigert om het
even welk recht op deze merken.
AgfaPhoto en aanverwante bedrijven kunnen
door de koper van dit product of door derden niet
aansprakelijk worden gesteld voor eisen tot schadevergoeding, verlies of kosten en uitgaven tengevolge van een ongeval, het verkeerde gebruik of
misbruik van dit product of niet toegelaten modificaties, reparaties, wijzingen van het product of
het niet in acht nemen van de gebruiks- en onderhoudsinstructies van AgfaPhoto.
AgfaPhoto kan niet aansprakelijk worden gesteld
voor eisen tot schadevergoeding of problemen
tengevolge van het gebruik van om het even welke opties of verbruiksmaterialen die niet als originele producten van AgfaPhoto of niet als door AgfaPhoto goedgekeurde producten zijn gekenmerkt.
AgfaPhoto kan niet aansprakelijk worden gesteld
voor eisen tot schadevergoeding tengevolge van
elektromagnetische interferenties veroorzaakt
door het gebruik van verbindingskabels die niet
als producten van AgfaPhoto zijn gekenmerkt.
ment opgenomen informatie is uitsluitend bedoeld
als ondersteuning bij het gebruik van dit product.
AgfaPhoto kan niet aansprakelijk worden gesteld
wanneer deze informatie op andere toestellen
wordt toegepast.
Deze gebruiksaanwijzing kan niet als contract
worden beschouwd.
Vergissingen, drukfouten en wijzingen voorbehouden.
Copyright © 2009 Sagem Communications
NL
14
Page 72

PELIGRO!
Nota
af-5077_5087_5107psms_manual_06_es_253243477-a.book Seite 1 Donnerstag, 2. Juli 2009 11:47 11
Introducción
ES
Distinguido cliente:
Gracias por adquirir nuestro marco digital. Prepárese para experimentar la fotografía como jamás
hubiera pensado. Su nuevo marco digital le permite visualizar fotos, vídeos y escuchar música –
todo ello sin un ordenador.
Pantalla LCD de TFT alta definición
Memoria
Su marco digital incluye una memoria incorporada,
una ranura de tarjeta de memoria y un puerto
USB. Pueden eliminarse los archivos de la memoria incorporada y pueden copiarse los archivos de
la tarjeta de memoria y de discos USB.
Soporta modo de navegación (miniaturas de 20
imágenes por página a la vez). Con su marco de
fotos digital puede Vd. girar y modificar el formato
de las páginas.
Una presentación de diapositivas continua y automática le permite disfrutar fácilmente de todas
sus fotos.
El mando a distancia incluido hace que seleccionar
las fotos, músicas, películas, cambiar los parámetros, etc., sea más sencillo.
Además tiene a su disposición otras funciones
adicionales, como reloj, calendario, despertador o
el apagado y encendido automático.
¡Disfrute de su aparato y de su gran variedad de
funciones!
Acerca de este manual de usuario
Gracias a la guía de instalación que aparece en las
páginas siguientes podrá poner en marcha su
aparato de forma rápida y sencilla. En los capítulos
siguientes de este manual de usuario encontrará
descripciones detalladas.
Lea detenidamente este manual de usuario. Para
garantizar un funcionamiento del aparato libre de
fallos, preste especial atención a las instrucciones
de seguridad. El fabricante no se responsabiliza
de los problemas que puedan surgir del incumplimiento de estas instrucciones.
En este manual de usuario se describen varios
modelos de una serie de aparatos. Tenga en cuenta que algunas funciones sólo están disponibles
para determinados modelos.
Símbolos utilizados
Advertencias de pe ligro
PELIGRO!
Cuidado con los peligros para personas
y daños para los aparatos u otros objetos, así como con posibles pérdidas de
datos. El manejo indebido puede ocasionar lesiones o daños.
Trucos & Consejos
Trucos & Consejos
Con este símbolo se han marcado los
consejos con ayuda de los cuales podrá
Vd. utilizar el aparato de forma más
efectiva y simple.
1
Page 73

af-5077_5087_5107psms_manual_06_es_253243477-a.book Seite 2 Donnerstag, 2. Juli 2009 11:47 11
Instrucciones de seguridad y recomendaciones
Introducción 2
No realice ajustes ni modificaciones que no vengan descritos en este manual de usuario. Si no se
maneja correctamente el aparato pueden provocarse daños corporales o desperfectos, daños en
el aparato o pérdida de datos. Tenga en cuenta
todos los avisos de precaución y seguridad.
Instalar el aparato
El aparato ha sido construido para su uso exclusivo en interiores.
El aparato ha sido construido para su uso exclusivo en interiores. El aparato debe estar colocado
correctamente y de forma estable sobre una superficie plana. Coloque todos los cables de forma
que el aparato no resulte dañado y que nadie pueda tropezar con ellos y resultar herido.
Pantalla LCD
Manipule la unidad con cuidado. Evite tocar la pantalla LCD. No coloque nunca objetos pesados o
afilados sobre el panel LCD, marco, o cable.
Proteja el aparato contra la exposición solar direc ta
Proteja el aparato contra la exposición solar directa, e l calo r, la s osci laciones gr aves d e temperatu ra
y la humedad. No instale el aparato en las proximidades de radiadores o aparatos de aire acondicionado. Preste atención a la información acerca de
la temperatura y la humedad del aire que aparece
en los datos técnicos.
No encender el aparato inmediatamente después de haberlo transportado
No debería encenderse en aparato inmediatamente después de haber sido transportado de una habitación fría a una caliente ni viceversa, ni tampoco en una habitación fría que se haya calentado
rápidamente. En esos casos espere un mínimo de
tres horas a que el aparato se haya adoptado al
cambio de condiciones (temperatura, humedad
ambiental,...)
En caso de que el aparato s e caliente demasiado o eche humo
En caso de que el aparato se caliente demasiado
o eche humo, desconecte el aparato de la red
eléctrica. Deje que el servicio técnico revise su
aparato. Para evitar que se pueda extender un
fuego, no exponga el aparato a un fuego abierto.
No conecte el aparato en habitaciones húmedas.
No conecte el aparato en habitaciones húmedas.
Nunca toque el enchufe ni el conector de alimentación con las manos húmedas.
El aparato no puede entrar en co ntacto con líquidos.
El aparato no puede entrar en contacto con líquidos. En caso de que el aparato entre en contacto
con líquidos u otros cuerpos extraños, desconecte
el aparato de la red eléctrica y deje que el servicio
técnico lo revise.
No permita que haya niños que manejen el aparato sin ser vigilados.
No permita que haya niños que manejen el aparato sin ser vigilados. No permita que los plásticos
de embalaje lleguen a manos de niños.
Alimentación eléctrica
Utilice solamente la f uente de alime ntación suminis trada
Utilice solamente la fuente de alimentación suministrada (véase Anexo / Características técnicas).
Compruebe que la tensión de red de su aparato
(placa de características) coincide con la tensión
de la red disponible en el lugar de instalación. Este
equipo cumple el tipo de tensión especificado en
la unidad.
No toque jamás el cable si el aislamiento está deteriorado.
No toque jamás el cable si el aislamiento está deteriorado. Sustituya inmediatamente los cables
defectuosos. Utilice exclusivamente cables apropiados; dado el caso, póngase en contacto con
nuestro servicio técnico de asistencia el cliente o
con su comerciante especializado.
Desenchufe el aparato de l a red eléctrica an tes de limpiar s u superficie.
Desenchufe el aparato de la red eléctrica antes de
limpiar su superficie. Utilice un paño suave y sin
pelusas. No utilice en ningún caso productos de
limpieza líquidos, gaseosos o fácilmente inflamables (sprays, productos abrasivos, productos para
pulir, alcohol, etc.). El interior del aparato no puede
entrar en contacto con humedad.
Limpie la pantalla con un paño s uave y seco.
Limpie la pantalla con un paño suave y seco. Si la
pantalla se rompe, puede salir un líquido ligeramente corrosivo. Evite el contacto con la piel y con
los ojos.
Reparaciones
Reparaciones
No realice reparaciones de ningún tipo en el aparato. Un mantenimiento indebido puede provocar
daños a personas o en el aparato. Deje que únicamente el servicio técnico autorizado repare su
aparato.
No retire la placa de características de su aparato,
de lo contrario se extinguirá la garantía.
Dispositivos de almacenamiento de imágenes
Dispositivos de almac enamiento de im ágenes
Use solamente medios de almacenamiento compatibles con el aparato. Para evitar dañar la tarjeta
o la unidad, apague el marco antes de introducir o
extraer la tarjeta.
En ningún caso saque la tarjeta de memoria utilizada mientras que el aparato esté accediendo a
ella. Los datos se podrían dañar o perder.
ES
2
Page 74

af-5077_5087_5107psms_manual_06_es_253243477-a.book Seite 3 Donnerstag, 2. Juli 2009 11:47 11
Esquema
ES
Esquema del aparato
Interruptor de encendido y apagado
1 B – Interruptor de encendido/apagado
Ranura para la tarjeta de memoria
2 – Toma para la tarjeta de memoria
Tecla con flecha hacia la izquierda
3 J – Navegar por el menú / Disminuir la claridad, contraste, saturación de color / Volver a la
imagen anterior, columna anterior o página
OK
4 OK – Confirmar la elección / Iniciar, interrumpir
el pase de diapositivas
Tecla de flecha hacia arriba
5 G – Navegar por el menú / Subir el volumen /
Encender la música de fondo durante el pase de
diapositivas
Tecla de flecha hacia abajo
6 I – Navegar por el menú / Bajar el volumen
Tecla con flecha a la derecha
7 H – Navegar por el menú / Disminuir la claridad, contraste, saturación de color / Volver a la
imagen anterior, columna anterior o página
Tecla del menú
8 MENU – Activar el menú principal / Encender
el reloj análogo (Mantener pulsada la tecla)
Menú de configuración
9 ù – Activa el menú de ajuste
Mini USB
‹ ý – Conexión mini USB – Para conectar un ordenador
Hembrilla USB
Œ ý Clavija – Conexión de USB para un medio de
almacenamiento
Sistema de memoria de la conexión USB
÷ Í-Hembrilla – Conexión a la fuente de alimentación
Rückseite AF5077
Control remoto
(AF¦5077/¦5087/5107MS)
Fernbedienung AF5077
1 – Activa el menú de ajuste
2 – Activar el menú principal / Encender el reloj
análogo (Mantener pulsada la tecla)
3 - Interruptor de encendido y apagado
4 – Navegar por el menú / Subir el volumen / En-
cender la música de fondo durante el pase de diapositivas
5 – Confirmar la elección / Iniciar, interrumpir el
pase de diapositivas
6 – Navegar por el menú / Disminuir la claridad,
contraste, saturación de color / Volver a la imagen
anterior, columna anterior o página
7 – Navegar por el menú / Bajar el volumen
8 – Navegar por el menú / Disminuir la claridad,
contraste, saturación de color / Volver a la imagen
anterior, columna anterior o página
Spaltenumbruch
3
Page 75

Nota
ATENCIÒN!
PELIGRO!
Nota
Nota
af-5077_5087_5107psms_manual_06_es_253243477-a.book Seite 4 Donnerstag, 2. Juli 2009 11:47 11
Puesto en marcha por primera vez
Contenido del embalaje
Marcos de fotos
‚ Marco digital para imágenes con pie
Fuente de alimentación con clavija intercambiable de alimentación
ƒ Fuente de alimentación con clavija intercambiable de alimentación
Mando a distancia (con pilas) variable
„ Mando a distancia (con pilas)
(AF¦5077/¦5087/5107MS)
Manual de usuario (sin imagen)
Manual de usuario (sin imagen)
Verpackungsinhalt AF 5077
Contenido del embalaje incompleto
Contenido del embalaje incompleto
En caso de que alguna pieza falte o esté
dañada, diríjase a su distribuidor especializado o a nuestro servicio de asistencia al cliente.
Enchufar la fuente de alimentación
Tensión de red en el lugar donde se va a colocar
Tensión de red en el lugar donde se va a
colocar
Compruebe que la tensión de red de su
aparato (placa de características) coincide con la tensión de la red disponible en
el lugar de instalación.
1 Elija la clavija de alimentación apropiada a su
país y encájela en la fuente de alimentación.
Asegúrese de que la clavija quede bin engati-
llada con la fuente de alimentación.
2 Conecte el enchufe pequeño de la fuente de
alimentación en el empalme situado en la parte
posterior del aparato. Enchufe la fuente de ali-
mentación en la toma de corriente.
3 Encienda el aparato con el interruptor de en-
cendido y apagado que hallará en la parte posterior. Espere un momento hasta el que el ordenador haya reconocido el nuevo disco duro.
En la memoria interna se pueden copiar archivos compatibles de fotos, música y video.
4 Si se desconecta del ordenador, el marco digi-
tal de fotos se reinicia.
Instalar tarjeta de memoria
1 Introduzca una tarjeta de memoria en la toma
correspondiente de la parte trasera del aparato. El aparato acepta las siguientes tarjetas de
memoria: SD/MMC/MS/SDHC/XD.
¡Introducir la tarjeta de memoria!
Use solamente medios de almacenamiento compatibles con el aparato.
En ningún caso saque la tarjeta de
memoria utilizada mientras que el
aparato esté accediendo a ella. Los
datos se podrían dañar o perder.
2 Encienda el aparato con el interruptor de en-
cendido y apagado que hallará en la parte posterior. El reproductor comienza la presentación
de imágenes tras mostrarse la pantalla de inicio.
Hay muchas fotos en la tarjeta de memoria
Si hay muchas fotos almacenadas en
la tarjeta de memoria, es posible que
transcurra algún tiempo hasta que se
inicie la presentación de diapositivas.
3 Para detener la presentación de diapositivas,
presione la tecla OK en la parte trasera mientras está activa la presentación.
ES
Enchufar al ordenador
Mediante el cable USB puede Vd. conectar el marco a un ordenador para transferir los archivos entre la memoria interna y el ordenador.
1 Apague el aparato con el interruptor de encen-
dido y apagado que hallará en la parte poste-
rior.
2 Enchufe el final estrecho del cable con el marco
de fotos digital apagado y con el ordenador.
Utilizar al mismo tiempo el dispositivo
de almacenamiento USB y la tarjeta
de memoria
Si se utiliza al mismo tiempo un dispositivo de almacenamiento USB junto con una tarjeta de memoria, se
muestran en primer lugar las imágenes que hay en esta última.
4
Page 76

PELIGRO!
Nota
af-5077_5087_5107psms_manual_06_es_253243477-a.book Seite 5 Donnerstag, 2. Juli 2009 11:47 11
ES
Colocar las pilas en el mando a distancia o cambiarlas
Peligro de explosión en caso de que se
instale un tipo erróneo de pila
!ADVERTENCIA! RIESGO DE EXPLOSIÓN
SI SE CAMBIA LA PILA POR UN TIPO INCORRECTO.
1 Saque el compartimento de pilas del mando a
distancia, abriendo para ello el cierre (1) y ex-
tráigalo (2).
2 Coloque la nueva pila en el compartimento de
la batería, con los polos positivo y negativo tal
y como aparece descrito en la parte posterior
de dicho mando. ¡Tenga en cuenta la polaridad!
3 Empuje el compartimento en el mando a dis-
tancia hasta que el cierre quede engatillado.
Normalmente las pilas duran alrededor
de un año. Si e l contro l remo to no funciona, cambie las pilas. Si no va a utilizar el
marco de fotos durante un período prolongado de tiempo, por favor, saque las
pilas. De esta forma no se derraman y no
pueden provocar daños en el mando a
distancia.
Deseche las pilas utilizadas según las
normas de reciclaje de su país.
Utilizar el mando a distancia
Apunte con el mando a distancia hacia el sensor
situado en el panel frontal del aparato. El mando
sólo funciona si el ángulo no es mayor de 30°, ni
la distancia supera los 2 metros. Al usar el control
remoto, no debe haber ningún obstáculo entre el
control remoto y el sensor remoto.
5
Page 77

Nota
Nota
Nota
af-5077_5087_5107psms_manual_06_es_253243477-a.book Seite 6 Donnerstag, 2. Juli 2009 11:47 11
Reproducción
Esquema de las funciones de menú
El menú principal contiene tres símbolos.
1 Menú de fotos
2 Menú de video
(AF¦5077/¦5087/5107MS)
3 Menú de música
(AF¦5077/¦5087/5107MS)
Photomenü AF 5077
Navegar por el menú
1 En el mando a distancia pulse MENU o en el
aparato MENU.
2 Seleccione con Ý/Þ el menú deseado.
3Pulse para confirmar.
Reproducción de las fotos
1 En el menú principal, elija el de fotos y confír-
melo con OK.
2 En la pantalla se muestran 16 fotos en minia-
tura por cada página.
5Pulse OK, para interrumpir el pase de diaposi-
tivas. En la pantalla aparecerá el „símbolo de
interrupción“
6Pulse J/H, para saltar a la imagen anterior o
a la posterior.
7 Finalice dicho pase con MENU.
Activar el menú
Durante la proyección de imagenes
puede Vd. activar el menú principal
con MENU.
Ajustar la música de fondo de la presentación de imagenes
(AF¦5077/¦5087/5107MS)
Como música de fondo sólo puede utilizar archivos que estén almacenados
juntamente con las fotos en la memoria
interna, en la tarjeta de memoria o en la
conexión USB.
1 Para iniciar la música de fondo, pulse durante
la proyección de diapositivas Û del mando a
distancia o G en el aparato.
Con Û/Ü puede ajustar el volumen.
Reproducción de la música
(AF¦5077/¦5087/5107MS)
1 Elija el menú de música en el menú principal y
confírmelo con .
2Elija con Ý/Þ o Û/Ü la música que desea repro-
ducir.
3Pulse OK para iniciar la reproducción.
Mientras se escucha aparecerá más información sobre el título.
4 Para pararlo, pulse OK.
ES
3Con la tecla G/I o J/H elija la imágen con
la que desea iniciar el pase de diapositivas.
4Pulse OK para iniciar la presentación de imá-
genes.
6
Page 78

Nota
af-5077_5087_5107psms_manual_06_es_253243477-a.book Seite 7 Donnerstag, 2. Juli 2009 11:47 11
Reproducción de video
(AF¦5077/¦5087/5107MS)
1 Elija el menú de vídeo en el menú principal y
confírmelo con .
2Elija con Ý/Þ o Û/Ü el vídeo que desea repro-
ducir.
3Pulse OK para iniciar la reproducción. Para pa-
rarlo, pulse OK.
Funciones adicionales de reproduc-
ES
ción
Durante la reproducción puede Vd.
saltar de un título al siguiente con Ý/
Þ o Û/Ü
Pulse en el mando a distancia OK
para así interrumpir la reproducción o
continuarla.
Ajustar el volumen
(AF¦5077/¦5087/5107MS)
Durante la reproducción y con la tecla Ü/Û del
mando a distancia puede Vd. ajustar el volumen.
Pulse varias veces Ü, para apagar completamente
el volumen.
7
Page 79

Nota
af-5077_5087_5107psms_manual_06_es_253243477-a.book Seite 8 Donnerstag, 2. Juli 2009 11:47 11
Ajustes
El menú de ajuste contiene cuatro símbolos y se
activa con la tecla ù del aparato o ù en el mando
a distancia.
1 Ajustes - ECO (Encendido / Apagado automá-
tico, Adaptación automática de la claridad de la
pantalla (AF¦5077/¦5087/5107MS))
2 Ajustes de la imagen (Ajustes para el pase de
diapositivas. Girar la imagen)
3 Gestionar los archivos (copiar los archivos, bo-
rrarlos, listas de reproducción)
4 Ajustes básicos (Claridad, contraste, fecha,
hora)
Settingsmenü AF 5077
Ajustes ECO
Puede encender / apagar el marco digital automático a horas prefijadas con antelación o adaptar
automáticamente la claridad de la pantalla a la luz
de alrededor (AF¦5077/¦5087/5107MS).
Elija uno de los siguientes ajustes:
Encendido y apagado automático
Puede encender / apagar el marco digital automático a horas prefijadas con antelación
1Pulse ù.
2 Elija con la tecla J/H el símbolo y confír-
melo con OK.
3 El símbolo está ya marcado.
4Elija con J/H el símbolo coloreado y confír-
melo con OK.
5Elija con J/H el momento en el que el marco
digital de fotos vaya a encenderse.
6Pulse OK para confirmar. El marco del cursor
se modifica de blanco a rojo.
7Elija con J/H el momento en el que el marco
digital de fotos vaya a apagarse.
8Pulse OK para confirmar. El marco del cursor
se modifica de rojo a blanco. Queda marcdo en
verde el plazo de tiempo durante el cual el mar-
co de fotos digital está encendido.
9 Para borrar un plazo de tiempo, vuelva a mar-
car esa zona. La marca verde se borrará.
10 Pulse I y elija con J/H el símbolo .
11 Pulse OK para confirmar.
12 Finalice con ù.
Encendido y apagado automático
Puede desactivar el encendido y apagado automático. Los ajustes se
mantienen.
1Pulse ù.
2 Elija con la tecla J/H el símbolo
y confírmelo con OK.
3 El símbolo está ya marcado.
4Elija con J/H el símbolo negro/
blanco (se apaga el mecanismo automático) o el símbolo coloreado
((se enciende el símbolo coloreado).
5Pulse OK para confirmar.
6 Finalice con ù.
La claridad de la pantalla se adapta automáticamente.
(AF¦5077/¦5087/5107MS)
Con esta función, la claridad de la pantalla se
adapta automáticamente a la del alrededor.
1Pulse ù.
2 Elija con la tecla J/H el símbolo y confír-
melo con OK.
3 Elija con la tecla I el símbolo y confírmelo
con OK.
4Elija con J/H el símbolo negro/blanco (se
apaga el mecanismo automático) o el símbolo
coloreado ((se enciende el símbolo coloreado).
5Pulse OK para confirmar.
6 Finalice con ù.
ES
8
Page 80

Nota
Nota
Nota
af-5077_5087_5107psms_manual_06_es_253243477-a.book Seite 9 Donnerstag, 2. Juli 2009 11:47 11
ES
Modificar los ajustes de imagen
Aquí puede rotar las imágenes, ajustar las proporciones de la página, determinar los efectos de
transición de la presentación de diapositivas o fijar el lapso de cambio de imagen dentro l a presentación.
1Pulse ù.
2Elija con J/H (Ajustes de imagen) y con-
fírmelo con OK.
3 Seleccione con G/I el símbolo correspon-
diente.
Rotar imagen – Modificar la posición de la
imagen
Proporciones de las páginas - La pantalla
del marco de fotos digital tiene una proporción
de páginas en formato 4:3. Elija a qué formato
tiene que adaptarse la imagen: original, de pantalla ancha (16:9) o a la medida de la pantalla.
Efectos de transición – Ajustar diferentes
efectos de transición para el modo de presentación de diapositivas
Lapso de cambio de imagen en la presentación de diapositivas – Elegir entre los tiempos mostrados.
Marco personal:- Elija entre uno de los diferentes marcos para la exposición de las fotos.
4 Seleccione la configuración correspondiente
con J/H.
5Pulse OK para confirmar.
6 Finalice con ù.
7Elija con J/H el símbolo , y pulse OK,
para iniciar el proceso de copiado o borrado.
Copiar todos los archivos de la tarjeta
de memoria
Elija con y confírmelo OK para copiar todos los archivos de la tarjeta
de memoria en la memoria interna.
Interrumpir la operación
Elija con y confírmelo con OK para
detener el proceso.
8 En la pantalla aparece una barra horizontal
para modificaciones. Tras el proceso de copia,
encontrará el archivo en la memoria interna.
Modo de encendido
Elija qué es lo que debe mostrarse automáticamente en cuanto se encienda el aparato: fotos,
películas o fotos y películas.
1Pulse ù.
2Elija con J/H (Gestión de archivos) y con-
fírmelo con OK.
3 Seleccione con G y confirme con OK.
4 Elija la tecla J/H de las posibilidades que se
le indican y confírmelo con la tecla OK.
5 Finalice con ù.
Gestionar los archivos
Puede copiar los archivos desde una tarjeta de
memoria o desde una memoria portátil USB. Puede borrar los archivos de la memoria interna.
Copiar archivo, borrar
1Pulse ù.
2Elija con J/H (Gestión de archivos) y con-
fírmelo con OK.
3Elija con G (Copiar) o (Borrar) y confír-
melo con OK.
4Elija con G/I, J/H el archivo que desee
copiar o borrar.
5 Marque el archivo con OK.
Eliminar la marca
Presione de nuevo OK para eliminar
la marca.
6 Seleccione con I la línea de símbolos que hay
en el borde inferior de la pantalla.
9
Page 81

Nota
af-5077_5087_5107psms_manual_06_es_253243477-a.book Seite 10 Donnerstag, 2. Juli 2009 11:47 11
Listas de reproducción
Compile sus propias listas de reproducción para
las fotos, películas y música.
Sólo se reproducirán fotos, películas o música que
se hallen en estas listas. Puede compilar hasta
cinco listas de reproducción.
Elaborar lista de reproducción
1Pulse ù.
2Elija con J/H (Gestión de archivos) y con-
fírmelo con OK.
3Elija con G/I (Listas de reproducción) y
pulse H.
4Pulse con J/H si desea elaborar una lista de
reproducción de música, imagenes o películas.
5Pulse OK para confirmar.
6 Confirme „OFF“ con OK para elaborar una nue-
va lista de reproducción.
7Elija con J/H por ejemplo: playlist 1 y confír-
melo con OK.
8Elija con G/I o J/H el archivo que desee
añadir a la lista de reproducción. Marque el ar-
chivo con OK.
9 Marque otros archivos con OK.
10 Seleccione con I la línea de símbolos que hay
en el borde inferior de la pantalla.
11 Elija con J/H el símbolo , y pulse OK,
para grabar la lista de reproducciones.
12 Finalice con ù.
Encender y apagar la lista de reproducciones.
1Pulse ù.
2Elija con J/H (Gestión de archivos) y con-
fírmelo con OK.
3Elija con G/I (Listas de reproducción) y
pulse H.
4Elija con J/H qué tipo de lista desea encen-
der: De música, fotos o películas.
5Pulse OK para confirmar.
6 Confirme p.e. playlist1 con OK.
7 Elija con la tecla J/H la lista de rproducción
deseada.
Modificar los ajustes básicos
1Pulse ù.
2 Elija con la tecla J/H el símbolo y confír-
melo con OK.
3 Seleccione con Û/Ü qué ajuste desea realizar.
4 Pulse para confirmar.
Puede realizar las siguientes configuraciones:
, , (Claridad, contraste, saturación de
color) – Ajuste de claridad, contraste, saturación de color de la pantalla LCD
(Reloj) – Permite seleccionar la hora y la fecha.
(Alarma) (AF¦5077/¦5087/5107MS) – Ajuste
de la hora en que va a sonar la alarma, Encendido / Apagado de la alarma y elección del tono
de ésta.
(Calendario) – Ajuste del año, mes y día..
(ajustes de fábrica) – Borrar los ajustes de
fábrica.
5Elija con G/I el ajuste deseado.
6 Pulse para confirmar.
7 Modifique la configuración con J/H.
8 Confirme la modificación del ajuste con .
9 Finalice con ù.
ES
Apagar las listas de reproducción
Elija con J/H ’OFF’, y la lista de reproducción se apaga. Durante la reproducción están de nuevo disponibles todos los archivos de fotos, películas o música.
10
Page 82

af-5077_5087_5107psms_manual_06_es_253243477-a.book Seite 11 Donnerstag, 2. Juli 2009 11:47 11
Servicio
ES
Cambiar el marco
Puede sustituir el marco del aparato por los marcos intercambiables suministrados. Los marcos se
sostienen con imanes.
Problemas Soluciones
El marco no se enciende Compruebe que ha conectado correctamente el
No puede guardar ningún archivo Asegúrese de que en la memoria interna hay dis-
No hay sonido Compruebe que se acepta el formato del archivo,
No reconoce la tarjeta de memoria Si conecta el marco a un ordenador, puede que la
Tanto en el pase de diapositivas, como para la reproducción de películas y vídeos no se muestran
todos los archivos de la memoria
1 Para cambiar el marco, pulse en el botón situa-
do en el lado posterior del aparato. Saque el
marco.
2 Coloque el marco intercambiable en el aparato,
hasta que se encaje en los imanes.
adaptador AC al marco
ponible suficiente espacio libre. Vuelva a poner en
marcha el marco y borre algunos archivos para obtener espacio libre para la memoria
que el ordenador y el marco estén correctamente
conectados y que la tarjeta de memoria no esté dañada.
tarjeta de memoria interna no sea reconocida.
Compruebe si alguna de las listas de reproducción
está encendida.
11
Page 83

af-5077_5087_5107psms_manual_06_es_253243477-a.book Seite 12 Donnerstag, 2. Juli 2009 11:47 11
Anexo
Datos técnicos AF 5077PS
Dimensiones (Tipo 1)
Dimensiones (A¦×¦A¦×¦P).................... 190¦×¦153¦×¦80¦mm
Peso (Tipo 1)
Peso .................................................................................... 0,4¦kg
Entrada
Alimentación eléctricaEntrada: 100¦–¦240¦V¦~ / 50¦–
¦60¦Hz
Salida
..............................................................Salida: 5¦V¦† / 2¦A
Entorno recomendado
Entorno recomendado ........................................ 5¦–¦45¦ºC
Humedad relativa
Humedad relativa..................................................20¦–¦80¦%
Consumo de potencia
Consumo de potencia
El aparato está conectado
El aparato está conectado (Pase de
diapositivas)............................................................. 5,0¦W
Diagonal de pantalla ..........................................................7¦“
Relación de las páginas ................................................. 4:3
Resolución ....................................................800¦×¦600 Pixel
Memoria interna
Memoria interna128¦MB¦MB o hasta un máximo de
500¦Fotos
Conexión USB (Tipo 1)
Puerto USB Ordenador....................................USB-Host
Tarjetas de memoria compatibles
Tarjetas de memoria compatibles ......SD/MMC/MS/
SDHC/XD
Formatos de foto
Formatos de foto............................................................JPEG
Spaltenumbruch
Datos técnicos AF 5087PS
Dimensiones (Tipo 3)
Dimensiones (A¦×¦A¦×¦P).................... 203¦×¦163¦×¦90¦mm
Peso (Tipo 3)
Peso .................................................................................... 0,5¦kg
Entrada
Alimentación eléctricaEntrada: 100¦–¦240¦V¦~ / 50¦–
¦60¦Hz
Salida
.............................................................. Salida: 5¦V¦† / 2¦A
Entorno recomendado
Entorno recomendado......................................... 5¦–¦45¦ºC
Humedad relativa
Humedad relativa..................................................20¦–¦80¦%
Consumo de potencia
Consumo de potencia
El aparato está conectado
El aparato está conectado (Pase de
diapositivas).............................................................. 5,4¦W
Diagonal de pantalla ..........................................................8¦“
Relación de las páginas.................................................. 4:3
Resolución ....................................................800¦×¦600 Pixel
Memoria interna
Memoria interna128¦MB¦MB o hasta un máximo de
500¦Fotos
Conexión USB (Tipo 3)
Puerto USB Ordenador ....................................USB-Host
Tarjetas de memoria compatibles
Tarjetas de memoria compatibles ..... SD/MMC/MS/
SDHC/XD
Formatos de foto
Formatos de foto........................................................... JPEG
ES
Datos técnicos AF 5077MS
Dimensiones (Tipo 2)
Dimensiones (A¦×¦A¦×¦P).................... 190¦×¦153¦×¦80¦mm
Peso (Tipo 2)
Peso .................................................................................... 0,4¦kg
Entrada
Alimentación eléctricaEntrada: 100¦–¦240¦V¦~ / 50¦–
¦60¦Hz
Salida
..............................................................Salida: 5¦V¦† / 2¦A
Entorno recomendado
Entorno recomendado ........................................ 5¦–¦45¦ºC
Humedad relativa
Humedad relativa..................................................20¦–¦80¦%
Consumo de potencia
Consumo de potencia
El aparato está conectado
El aparato está conectado (Pase de
diapositivas)............................................................. 4,3¦W
Diagonal de pantalla ..........................................................7¦“
Relación de las páginas ................................................. 4:3
Resolución ....................................................800¦×¦600 Pixel
Memoria interna
Memoria interna256¦MB¦MB o hasta un máximo de
1000¦Fotos
Conexión USB (Tipo 2)
Puerto USB Ordenador........ USB-Host, USB Device
Tarjetas de memoria compatibles
Tarjetas de memoria compatibles ......SD/MMC/MS/
SDHC/XD
Formatos de foto
Formatos de foto............................................................JPEG
Formatos de música
Formatos de música...................................................... MP3
Formatos de vídeo
Formatos de vídeo ......................Motion Jpeg, Mpeg-4
Datos técnicos AF 5087MS
Dimensiones (Tipo 4)
Dimensiones (A¦×¦A¦×¦P).................... 203¦×¦163¦×¦90¦mm
Peso (Tipo 4)
Peso .................................................................................... 0,5¦kg
Entrada
Alimentación eléctricaEntrada: 100¦–¦240¦V¦~ / 50¦–
¦60¦Hz
Salida
.............................................................. Salida: 5¦V¦† / 2¦A
Entorno recomendado
Entorno recomendado......................................... 5¦–¦45¦ºC
Humedad relativa
Humedad relativa..................................................20¦–¦80¦%
Consumo de potencia
Consumo de potencia
El aparato está conectado
El aparato está conectado (Pase de
diapositivas).............................................................. 6,3¦W
Diagonal de pantalla ..........................................................8¦“
Relación de las páginas.................................................. 4:3
Resolución ....................................................800¦×¦600 Pixel
Memoria interna
Memoria interna..... 1¦GB¦MB o hasta un máximo de
4000¦Fotos
Conexión USB (Tipo 4)
Puerto USB Ordenador........ USB-Host, USB Device
Tarjetas de memoria compatibles
Tarjetas de memoria compatibles ..... SD/MMC/MS/
SDHC/XD
Formatos de foto
Formatos de foto........................................................... JPEG
Formatos de música
Formatos de música...................................................... MP3
Formatos de vídeo
Formatos de vídeo ......................Motion Jpeg, Mpeg-4
12
Page 84

af-5077_5087_5107psms_manual_06_es_253243477-a.book Seite 13 Donnerstag, 2. Juli 2009 11:47 11
Spaltenumbruch
AgfaPhoto se usa bajo licencia de Agfa-Gevaert
NV & Co. KG o de Agfa-Gevaert NV. Ni Agfa-Gevaert NV & Co. KG, ni Agfa-Gevaert NV fabrican
este producto y tampoco ofrecen ni garantía, ni
servicio post-venta.
Si necesita información respecto al servicio
postventa o garantía, por favor diríjase a su proveedor o al fabricante.
Contacto: AgfaPhoto Holding GmbH,
www.agfaphoto.com
Fabricante: Sagem Communications,
www.sagem-communications.com
ES
Spaltenumbruch
Datos técnicos AF 5107PS
Dimensiones (Tipo 5)
Dimensiones (A¦×¦A¦×¦P).................... 255¦×¦203¦×¦90¦mm
Peso (Tipo 5)
Peso .................................................................................... 0,8¦kg
Entrada
Alimentación eléctricaEntrada: 100¦–¦240¦V¦~ / 50¦–
¦60¦Hz
Salida
..............................................................Salida: 5¦V¦† / 2¦A
Entorno recomendado
Entorno recomendado ........................................ 5¦–¦45¦ºC
Humedad relativa
Humedad relativa..................................................20¦–¦80¦%
Consumo de potencia
Consumo de potencia
El aparato está conectado
El aparato está conectado (Pase de
diapositivas).............................................................. 6,1¦W
Diagonal de pantalla ...................................................10,4¦“
Relación de las páginas ................................................. 4:3
Resolución ....................................................800¦×¦600 Pixel
Memoria interna
Memoria interna128¦MB¦MB o hasta un máximo de
500¦Fotos
Conexión USB (Tipo 5)
Puerto USB Ordenador....................................USB-Host
Tarjetas de memoria compatibles
Tarjetas de memoria compatibles ......SD/MMC/MS/
SDHC/XD
Formatos de foto
Formatos de foto............................................................JPEG
El marcado CE certifica que el producto cumple los
principales requisitos de la directiva del Consejo y
del Parlamento Europeo 1999/5/CE sobre equipos
terminales de telecomunicaciones, en relación con
la seguridad y salud de los usuarios, y en relación
con las interferencias electromagnéticas.
La declaración de cumplimiento puede consultarse en la página web www.agfaphoto.com.
Datos técnicos AF 5107MS
Dimensiones (Tipo 6)
Dimensiones (A¦×¦A¦×¦P).................... 255¦×¦203¦×¦90¦mm
Peso (Tipo 6)
Peso .................................................................................... 0,8¦kg
Entrada
Alimentación eléctricaEntrada: 100¦–¦240¦V¦~ / 50¦–
¦60¦Hz
Salida
..............................................................Salida: 5¦V¦† / 2¦A
Entorno recomendado
Entorno recomendado ........................................ 5¦–¦45¦ºC
Humedad relativa
Humedad relativa..................................................20¦–¦80¦%
Consumo de potencia
Consumo de potencia
El aparato está conectado
El aparato está conectado (Pase de
La conservación del medio ambiente como parte
de una lógica de desarrollo sostenible es una preocupación esencial de AgfaPhoto. AgfaPhoto se
esfuerza en utilizar sistemas no contaminantes.
Por ello, AgfaPhoto ha decidido dar mucha importancia a los parámetros ecológicos en todas las
fases del producto, desde la fabricación hasta el
uso y la eliminación, pasando por la puesta en funcionamiento.
diapositivas).............................................................. 6,6¦W
Diagonal de pantalla ..........................................................8¦“
Relación de las páginas ................................................. 4:3
Resolución ....................................................800¦×¦600 Pixel
Memoria interna
Memoria interna..... 1¦GB¦MB o hasta un máximo de
4000¦Fotos
Conexión USB (Tipo 6)
Puerto USB Ordenador........ USB-Host, USB Device
Tarjetas de memoria compatibles
Tarjetas de memoria compatibles ......SD/MMC/MS/
SDHC/XD
Formatos de foto
Formatos de foto............................................................JPEG
Formatos de música
Formatos de música...................................................... MP3
Formatos de vídeo
Formatos de vídeo ......................Motion Jpeg, Mpeg-4
Embalaje: La presencia del logotipo (punto verde)
significa que se paga una contribución a una organización nacional aprobada para mejorar las infraestructuras para la recuperación y el reciclado de
los embalajes. Le rogamos respete las normas de
clasificación establecidas localmente para este
tipo de residuo.
Pilas: Si su producto contiene pilas, debe desecharlas en un punto de recogida adecuado.
Todos datos se proporcionan exclusivamente a
modo de referencia. AgfaPhoto se reserva el derecho de realizar modificaciones sin previo aviso.
13
Page 85

af-5077_5087_5107psms_manual_06_es_253243477-a.book Seite 14 Donnerstag, 2. Juli 2009 11:47 11
Todos los derechos reservados. Está prohibida la
reproducción total o parcial de esta publicación
sin previo consentimiento escrito de AgfaPhoto,
así como su almacenamiento en cualquier sistema
de archivo y la transmisión por cualquier medio, ya
sea electrónico, mecánico, mediante fotocopia,
grabación u otro. La información que contiene
Producto: La papelera tachada que aparece en la
mercancía significa que el producto es un aparato
eléctrico o electrónico. En relación con esto, las
normativas europeas le ruegan lo deseche selectivamente:
• En los puntos de venta, en el caso de compra de
un aparato similar.
• En el punto de recogida municipal establecido.
De esta forma, puede participar en la reutilización
y mejora de la calidad de los Residuos de Equipos
Eléctricos y Electrónicos, que tienen un grave
efecto en el entorno y en la salud humana.
El embalaje utilizado es de papel y cartón y desecharse en los contendores de papel. Por favor
entregue los plásticos y embalajes de estiropor
para que sean reclicados o elimínelos en el contenedor de basuras sobrantes, según las disposicions de su país.
Marca registrada: Las referencias mencionadas
en el presente manual son marcas comerciales de
las respectivas compañías. La ausencia de los
símbolos É y Ë no ha de dar pie a suponer que
los símbolos correspondientes sean marcas libres
de fábrica. Otros nombres de productos utilizados
en el presente documento sirven sólo para identificar los productos y pueden ser marcas del propietario correspondiente. AgfaPhoto niega tener
ningún derecho sobre estas marcas.
Ni AgfaPhoto ni sus empresas colaboradoras son
responsables, frente al comprador de este producto o frente a terceros, de reclamaciones por
daños, pérdidas, costes o gastos ocasionados al
comprador o a un tercero como consecuencia de
accidente, uso inadecuado o mal uso del producto;
o modificaciones, reparaciones o cambios no autorizados en el aparato, o por la inobservancia de
las instrucciones de funcionamiento y mantenimiento de AgfaPhoto.
AgfaPhoto no se hace responsable de las reclamaciones por daños o los problemas derivados de
la utilización de cualquier opción o material de
consumo que no esté identificado como producto
original AgfaPhoto o producto autorizado por
AgfaPhoto.
AgfaPhoto no se hace responsable de las reclamaciones por daños debidas a interferencias electromagnéticas ocasionadas por la utilización de
cables de conexión no identificados como producto de AgfaPhoto.
este documento está exclusivamente pensada
para la utilización de este producto. AgfaPhoto no
se responsabiliza de la utilización de esta información en otros aparatos.
Este manual de usuario no tiene carácter contractual.
Nos reservamos el derecho a modificaciones y no
nos responsabilizamos de errores de imprenta u
otros errores en este documento.
Copyright © 2009 Sagem Communications
ES
14
Page 86

PERIGO!
Indicação
af-5077_5087_5107psms_manual_07_pt_253243477-a.book Seite 1 Donnerstag, 2. Juli 2009 11:49 11
Introdução
PT
Estimado cliente
Muito obrigado por adquirir a nossa moldura digital. Prepare-se para ver a fotografia de uma forma
como nunca viu antes! A sua nova moldura digital
permite-lhe visualizar fotografias, vídeos e ouvir
música – tudo isto sem um computador.
Ecrã LCD de alta definição
Memória
A sua moldura digital tem uma memória integrada,
uma ranhura para cartões de memória e uma porta USB. Os ficheiros na memória interna poderão
ser apagados e os ficheiros nos cartões de memória e na memória USB poderão ser copiados para
a memória interna.
Inclui o modo de visualização prévia (20 imagens
miniatura por página de cada vez). A sua moldura
digital permite a rotação e a alteração do formato
de visualização.
Um modo de apresentação automático permitelhe visualizar facilmente todas as suas fotografias
com uma música de fundo.
O comando à distância incluído permite-lhe seleccionar facilmente ficheiros de imagem, música e
vídeo, alterar configurações e muito mais.
Além disso, encontram-se à sua disposição funções adicionais, como a indicação da hora e da data, o despertador e uma função de ligação e desconexão automática.
Esperamos que o seu novo aparelho de fax com
as suas múltiplas funções satisfaça plenamente
as suas expectativas!
Acerca deste manual de instruções
Com o guia de instalação fácil incluído nas páginas
que se seguem, poderá colocar o aparelho em funcionamento com toda a simplicidade e rapidez.
Nos capítulos seguintes deste manual de instruções encontrará descrições mais detalhadas.
Leia atentamente este manual de instruções. Tenha principalmente em atenção as informações de
segurança, a fim de assegurar um funcionamento
sem problemas do seu aparelho. O fabricante declina toda e qualquer responsabilidade no caso do
não cumprimento destas instruções.
Neste manual de instruções encontram-se descritos vários modelos da série de aparelhos. Tenha
em atenção que algumas funções só estão disponíveis para determinados modelos.
Símbolos utilizados
Aviso contra riscos
PERIGO!
Este símbolo chama a atenção para os
riscos que as pessoas podem incorrer,
os danos que o aparelho ou outros objectos podem sofrer, bem como para a
eventual perda de dados. O manuseamento incorrecto pode causar lesões ou
danos.
Conselhos e truques
Conselhos e truques
As sugestões identificadas com este
símbolo ajudam-no a utilizar o aparelho
de uma forma mais simples e eficaz.
1
Page 87

af-5077_5087_5107psms_manual_07_pt_253243477-a.book Seite 2 Donnerstag, 2. Juli 2009 11:49 11
Instruções e recomendações de segurança
Introdução 2
Nunca ajuste quaisquer definições nem introduza
quaisquer alterações que não sejam indicadas
neste manual de instruções. O manuseamento incorrecto pode provocar ferimentos corporais ou
danos, danos no aparelho ou a perda de dados.
Respeite todas as advertências e notas de segurança indicadas.
Instalação do aparelho
Este aparelho é indicado unica mente para um uso interi or.
Este aparelho é indicado unicamente para um uso
interior. Coloque o aparelho de forma a ficar seguro e estável, sobre uma superfície plana. Assente
os cabos de modo a impedir que alguém possa
tropeçar neles e se possa magoar e também de
modo a impedir que o aparelho possa sofrer
quaisquer danos.
Ecrã LCD
Manipule sempre o aparelho com cuidado. Evite
tocar no ecrã LCD. Nu nca coloque objectos pesados ou pontiagudos em cima do ecrã LCD, da moldura ou do cabo de alimentação.
Proteja o aparelho contra a exposição directa aos raios solares
Proteja o aparelho contra a exposição directa aos
raios solares, calor, grandes variações de temperatura e humidade. Nunca instale o aparelho próximo de aparelhos de elementos de aquecimento
ou de instalações de ar condicionado. Tenha em
atenção as indicações relativas à temperatura e à
humidade do ar incluídas nas especificações técnicas.
Não ligue o aparelho imediatamente após o transporte
O aparelho não deve ser ligado logo após o transporte de um local frio para um local quente ou
vice-versa ou para um local frio, que seja aquecido
rapidamente. Nestes casos, aguarde, no mínimo,
três horas até o aparelho se adaptar às novas
condições (temperatura, humidade do ar,...) .
Se o aparelho registar um aquecimento excessivo ou se sair fumo deste
Se o aparelho registar um aquecimento excessivo
ou se sair fumo deste, puxe imediatamente a ficha
eléctrica da tomada de alimentação. Mande verificar o aparelho por um centro de assistência técnica. Manter o aparelho afastado de chamas abertas a fim de evitar a propagação de incêndios.
Nunca instale o aparelho em espaços húmidos.
Nunca instale o aparelho em espaços húmidos.
Nunca toque na ficha de rede ou na ligação de
rede com as mãos húmidas.
Nunca deixe entrar líquidos no aparelho.
Nunca deixe entrar líquidos no aparelho. Se tiverem entrado líquidos ou corpos estranhos no aparelho, desligue-o da corrente de alimentação e
mande verificar o aparelho por um centro de assistência técnica.
Nunca permita que as crianças mexam no aparelho sem a supervisão de um adulto.
Nunca permita que as crianças mexam no aparelho sem a supervisão de um adulto. Manter as películas da embalagem afastadas das crianças.
Alimentação eléctrica
Utilize apenas o adaptador fornecido
Utilize apenas o adaptador fornecido (vide o capítulo Anexo / Especificações técnicas). Certifiquese de que a tensão de rede do aparelho (indicada
na placa de características) coincide com a tensão
da rede eléctrica disponível no local onde o aparelho vai ser instalado. Este aparelho é compatível
com a voltagem indicada no mesmo.
Nunca toque no cabo de rede se o isolamento estiver danificado.
Nunca toque no cabo de rede se o isolamento estiver danificado. Substitua imediatamente os cabos danificados. Utilize apenas o cabo adequado;
se necessário, contacte os nossos serviços de assistência técnica ou o seu revendedor.
Desligue o aparelho da rede eléctrica antes d e limpar a respect iva superfície.
Desligue o aparelho da rede eléctrica antes de limpar a respectiva superfície. Utilize um pano macio
e que não largue pêlo. Nunca utilize produtos de
limpeza líquidos, gasosos ou facilmente inflamáveis (sprays, produtos abrasivos, polimentos, álcool). Não deve entrar qualquer humidade no interior
do aparelho.
Limpe o visor com um pano seco e maci o.
Limpe o visor com um pano seco e macio. Se o visor se partir, pode sair um líquido ligeiramente
corrosivo. Evite qualquer contacto com a pele e os
olhos.
Reparações
Reparações
Nunca proceda a trabalhos de reparação no aparelho. Uma manutenção incorrecta pode causar lesões nas pessoas ou danos no aparelho. Mande
sempre reparar o aparelho por um centro de assistência técnica autorizado.
Não remova a placa de características do aparelho, caso contrário a garantia perde a validade.
Meios de armazenamento de dados fotográficos
Meios de armazenamento de dados fotográficos
Utilize apenas dispositivos de memória compatíveis com o aparelho. A fim de evitar danos no cartão ou no próprio aparelho, desligue o aparelho
antes de retirar ou introduzir o cartão.
Nunca retire o cartão de armazenamento de dados colocado, enquanto o aparelho estiver a acedê-lo. Se o fizer, os dados podem ficar corrompidos ou mesmo ser eliminados.
PT
2
Page 88

af-5077_5087_5107psms_manual_07_pt_253243477-a.book Seite 3 Donnerstag, 2. Juli 2009 11:49 11
Descrição geral
PT
Descrição geral do aparelho
Interruptor para ligar/desligar
1 B – Interruptor para ligar/desligar
Ranhura para cartão de armazenamento de dados
2 – Ranhura para cartão de armazenamento de
dado
Teclas de seta para a esquerda
3 J – Navegar no menu / diminui a luminosidade, contraste, saturação da cor / passa à imagem
ou página anterior, imagem ou página seguinte
OK
4 OK – Confirma a selecção / inicia, interrompe a
apresentação de imagens
Teclas de seta para cima
5 G – Navegar no menu / aumento do volume /
liga a música de fundo durante a apresentação de
imagens
Teclas de seta para baixo
6 I – Navegar no menu / diminui o volume
Teclas de seta para a direita
7 H – Navegar no menu / aumenta a luminosidade, contraste, saturação da cor / passa à imagem seguinte, coluna ou página seguinte
Tecla do menu
8 MENU – Chama o menu principal / activa o relógio analógico (manter a tecla premida)
Menu de ajuste
9 ù – Chama o menu de ajuste
Mini USB
‹ ý – Ligação mini-USB – para a ligação de um
computador
Tomada USB
Œ Porta ý – Porta USB para o meio de armazenamento
Porta USB meio de armazenamento
÷ Porta Í – Porta da fonte de alimentação
Rückseite AF5077
Comando à distância
(AF¦5077/¦5087/5107MS)
Fernbedienung AF5077
1 – Chama o menu de ajuste
2 – Chama o menu principal / activa o relógio
analógico (manter a tecla premida)
3 – activar/desactivar
4 – Navegar no menu / aumento do volume / liga
a música de fundo durante a apresentação de
imagens
5 – Confirma a selecção / inicia, interrompe a
apresentação de imagens
6 – Navegar no menu / aumenta a luminosidade,
contraste, saturação da cor / passa à imagem seguinte, coluna ou página seguinte
7 – Navegar no menu / diminui o volume
8 – Navegar no menu / diminui a luminosidade,
contraste, saturação da cor / passa à imagem ou
página anterior, imagem ou página seguinte
Spaltenumbruch
3
Page 89

Indicação
CUIDADO!
PERIGO!
Indicação
Indicação
af-5077_5087_5107psms_manual_07_pt_253243477-a.book Seite 4 Donnerstag, 2. Juli 2009 11:49 11
Primeira utilização
Conteúdo da embalagem
Moldura
‚ Moldura digital com suporte
Fonte de alimentação com fichas intercambiáveis
ƒ Fonte de alimentação com fichas intercambiáveis
Comando à distância (com p ilha) variable
„ Comando à distância (com pilha)
(AF¦5077/¦5087/5107MS)
Manual de instruções (sem figuras)
Manual de instruções (sem figuras)
Verpackungsinhalt AF 5077
Conteúdo da embalagem em falta
Conteúdo da embalagem em falta
No caso de faltar qualquer componente
ou no caso de algum componente apresentar danos, agradecemos que entre
em contacto com o seu revendedor ou
com o nossos serviço de assistência
técnica.
Ligar a fonte de alimentação
Tensão de rede no local de instalação
Tensão de rede no local de instalação!
Certifique-se de que a tensão de rede do
aparelho (indicada na placa de características) coincide com a tensão da rede
eléctrica disponível no local onde o aparelho vai ser instalado.
1 Seleccione a ficha de rede correcta para o seu
país e ligue-a na fonte de alimentação. Preste
atenção para que a ficha de rede encaixe total-
mente na fonte de alimentação.
2 Ligue a ficha pequena da fonte de alimentação
à ligação existente na parte de trás do apare-
lho. Insira a fonte de alimentação na porta.
Conectar ao computador
Usando o cabo USB, poderá ligar a moldura a um
computador, podendo assim transferir ficheiros
entre a memória interna e o computador.
1 Ligue o aparelho com o interruptor para ligar/
desligar na parte traseira.
2 Ligue a ponta pequena do cabo à moldura digi-
tal desligada e a ponta maior ao computador.
3 Desligue o aparelho com o interruptor para li-
gar/desligar na parte traseira. Aguarde um momento, até o computador ter reconhecido o
novo hardware. Os ficheiros compatíveis de fotografia, música e vídeo podem ser copiados
para a memória interna.
4 Se a ligação com o computador for interrompi-
da, a moldura digital reinicia-se.
Introduzir um cartão de armazenamento de dados no aparelho
1 Coloque um cartão de armazenamento de da-
dos na respectiva ranhura, na parte traseira do
aparelho. O seu aparelho suporta os seguintes
cartões de armazenamento de dados: SD/
MMC/MS/SDHC/XD.
Introduzir um cartão de armazenamento de dados!
Utilize apenas dispositivos de memória compatíveis com o aparelho.
Nunca retire o cartão de armazenamento de dados colocado, enquanto
o aparelho estiver a acedê-lo. Se o fizer, os dados podem ficar corrompidos ou mesmo ser eliminados.
2 Desligue o aparelho com o interruptor para li-
gar/desligar na parte traseira. Terá início a
apresentação de imagens depois de visualizar
o ecrã inicial.
Existem muitas fotos no cartão de
memória
Se no cartão de memória estiverem
guardadas muitas fotos, a apresentação de imagens poderá demorar
um pouco a iniciar-se.
3 Para parar a apresentação de imagens prima a
tecla OK na parte de trás do aparelho.
Utilizar simultaneamente uma memória USB e um cartão de memória
Se um dispositivo de armazenamento
USB for utilizado simultaneamente
com um cartão de memória, são indicadas as imagens do cartão de memória em primeiro lugar.
PT
4
Page 90

PERIGO!
Indicação
af-5077_5087_5107psms_manual_07_pt_253243477-a.book Seite 5 Donnerstag, 2. Juli 2009 11:49 11
PT
Colocar ou trocar a pilha no comando à distância
Risco de explosão se a pilha for substituída por outra de tipo incorrecto
AVISO! RISCO DE EXPLOSÃO SE A PILHA FOR SUBSTITUÍDA POR OUTRA DE
UM TIPO INCORRECTO.
1 Retire o compartimento das pilhas do comando
à distância, abrindo o dispositivo de bloqueio
(1) e retirando o compartimento das pilhas
(2).
2 Coloque a pilha nova no respectivo comparti-
mento, de modo que os pólos positivos e nega-
tivos fiquem nas posições indicadas no dese-
nho inscrito na parte traseira do comando à
distância. Certifique-se de que as polaridades
estão correctamente alinhadas!
3 Empurre o compartimento das pilhas para o co-
mando à distância até o dispositivo de bloqueio encaixar.
Normalmente, as pilhas terão uma duração de um ano. Se o comando à distância não funcionar, substitua as pilhas. Se
não utilizar a moldura durante um longo
período de tempo, retire as pilhas. Desta
forma, elas não derramam, evitando danos no comando à distância.
As pilhas utilizadas devem ser eliminadas de acordo com as disposições de reciclagem locais.
Utilizar o comando à distância
Aponte o comando à distância para o sensor existente no painel frontal do aparelho. Os limites de
funcionamento são um ângulo de 30 graus e uma
distância de 2 metros. Ao usar o comando à distância não deverá haver nenhum obstáculo entre
este e o sensor.
5
Page 91

Indicação
Indicação
Indicação
af-5077_5087_5107psms_manual_07_pt_253243477-a.book Seite 6 Donnerstag, 2. Juli 2009 11:49 11
Reprodução
Descrição geral das funções do menu
Existem três símbolos no menu principal.
1 Menu de fotografias
2 Menu de vídeo
(AF¦5077/¦5087/5107MS)
3 Menu de música
(AF¦5077/¦5087/5107MS)
Photomenü AF 5077
Navegar no menu
1 No comando à distância, prima a tecla MENU
ou no aparelho a tecla MENU.
2Prima Ý/Þ, para seleccionar o menu pretendi-
do.
3 Prima para confirmar.
Reprodução de fotografias
1 Seleccione o menu de fotografias no menu
principal e confirme com OK.
2 Em seguida, a moldura irá exibir 16 imagens mi-
niatura por página, tal como é ilustrado.
4 Prima a tecla OK para iniciar a apresentação
de imagens.
5Prima OK para interromper a apresentação de
imagens. No ecrã surge um ’símbolo de pausa’.
6Prima J/H, para saltar para a imagem ante-
rior ou seguinte.
7Prima MENU para terminar a apresentação de
imagens.
Chamar o menu
Durante a apresentação de imagens
pode chamar a qualquer momento o
menu principal com a tecla MENU.
Definir a música de fundo da apresentação de imagens
(AF¦5077/¦5087/5107MS)
Como música de fundo só pode utilizar
ficheiros, que estejam guardados juntamente com as fotografias na memória
interna, no cartão de armazenamento de
dados ou na ligação USB.
1 Durante uma apresentação de imagens prima
a tecla Û do comando à distância ou a tecla G
no aparelho, para iniciar a música de fundo.
Com a tecla Û/Ü regula o volume do
som.
Reprodução de música
(AF¦5077/¦5087/5107MS)
1 Seleccione o menu de música no menu princi-
pal e confirme com .
2 Com a tecla Ý/Þ ou Û/Ü seleccione a faixa de
música que deseja reproduzir.
3Prima OK para iniciar a reprodução.
Durante a reprodução são indicadas informações adicionais sobre a faixa.
4 Para parar, prima a tecla OK.
PT
3Com G/I ou J/H seleccione a imagem,
com a qual pretende iniciar a apresentação de
imagens.
6
Page 92

Indicação
af-5077_5087_5107psms_manual_07_pt_253243477-a.book Seite 7 Donnerstag, 2. Juli 2009 11:49 11
Reprodução de vídeo
(AF¦5077/¦5087/5107MS)
1 Seleccione o menu de vídeo no menu principal
e confirme com a tecla .
2Com a tecla Ý/Þ ou Û/Ü seleccione o ficheiro
de vídeo que deseja reproduzir.
3Prima OK para iniciar a reprodução. Para parar,
prima a tecla OK.
Funções de reprodução adicionais
Durante a reprodução, pode saltar
para a faixa anterior ou para a seguinte com Ý/Þ ou Û/Ü.
PT
No comando à distância, prima OK,
para parar ou continuar a reprodução.
Regular o volume do som
(AF¦5077/¦5087/5107MS)
Durante a reprodução, pode definir o volume com
Ü/Û no comando à distância. Prima repetidamente a tecla Ü, para desligar completamente o volume.
7
Page 93

Indicação
af-5077_5087_5107psms_manual_07_pt_253243477-a.book Seite 8 Donnerstag, 2. Juli 2009 11:49 11
Definições
O menu de ajuste de brilho contém quatro símbolos e é chamado com a tecla ù no aparelho ou a
tecla ù no comando à distância.
1 Definições ECO (ligação e desconexão auto-
mática, adaptação automática da luminosidade do
visor (AF¦5077/¦5087/5107MS))
2 Definições da imagem (definições da apresen-
tação de imagens, rodar imagem)
3 Gestão de ficheiros (copiar, apagar ficheiros,
listas de reprodução)
4 Definições básicas (luminosidade, contraste,
data, hora)
Settingsmenü AF 5077
Definições ECO
Pode ligar ou desligar automaticamente a moldura
digital em alturas predefinidas ou adaptar automaticamente a luminosidade do visor à iluminação
ambiente (AF¦5077/¦5087/5107MS).
Seleccione uma das seguintes opções:
Ligação/desconexão automática
Pode ligar ou desligar automaticamente a moldura
digital em alturas predefinidas.
1Prima ù.
2 Com a tecla J/H seleccione o símbolo e
confirme com OK.
3 O símbolo já está seleccionado.
4 Com a tecla J/H seleccione o símbolo colori-
do e confirme com a tecla OK.
5 Com a tecla J/H seleccione a altura em que
a moldura digital se deve ligar.
6Prima OK para confirmar. A forma do cor alte-
ra-se de branco para vermelho.
7 Com a tecla J/H seleccione a altura em que
a moldura digital se deve desligar.
8Prima OK para confirmar. A forma do cor alte-
ra-se de vermelho para branco. A altura em que
a moldura digital permanece ligada é assinala-
da a verde.
9 Para apagar uma moldura, seleccione nova-
mente a área. A marcação a verde é apagada.
10 Prima a tecla I e com a tecla J/H seleccio-
ne o símbolo .
11 Prima OK para confirmar.
12 Prima ù para terminar.
Ligar/desligar o modo automático
Pode desactivar a ligação/desconexão automática. No entanto, as definições permanecem inalteradas.
1Prima ù.
2Com a tecla J/H seleccione o sím-
bolo e confirme com OK.
3 O símbolo já está seleccionado.
4Com a tecla J/H seleccione o sím-
bolo preto/branco (modo automático desligado) ou o símbolo colorido
(modo automático desligado).
5Prima OK para confirmar.
6Prima ù para terminar.
Adaptar automaticamente a luminosidade do visor
(AF¦5077/¦5087/5107MS)
Com esta função a luminosidade do visor é adap-
tada automaticamente à luminosidade ambiente.
1Prima ù.
2Com a tecla J/H seleccione o símbolo e
confirme com OK.
3 Com a tecla I seleccione o símbolo e con-
firme com OK.
4 Com a tecla J/H seleccione o símbolo preto/
branco (modo automático desligado) ou o sím-
bolo colorido (modo automático desligado).
5Prima OK para confirmar.
6Prima ù para terminar.
PT
8
Page 94

Indicação
Indicação
Indicação
af-5077_5087_5107psms_manual_07_pt_253243477-a.book Seite 9 Donnerstag, 2. Juli 2009 11:49 11
PT
Alterar definições da imagem
Aqui pode rodar imagens, definir a dimensão da
imagem, determinar os efeitos de transição da
apresentação de imagens ou definir a velocidade
da apresentação de imagens.
1Prima ù.
2 Seleccione com a tecla J/H (definições
da imagem) e confirme com a tecla OK.
3 Com a tecla G/I seleccione o respectivo
símbolo.
Rodar imagem – Alterar a posição da ima-
gem
Dimensão da imagem – O ecrã da moldura
digital possui uma dimensão de imagem no formato 4:3. Seleccione se a imagem deve ser
adaptada ao formato original, ao formato widescreen (16:9) ou se deve ser adaptada ao tamanho do ecrã.
Efeitos de transição – Definir diferentes
efeitos de transição para o modo de apresentação de imagens
Apresentação de imagens - Velocidade –
Seleccionar uma das velocidades indicadas.
Moldura pessoal – Seleccione uma das diferentes molduras para a apresentação das fotografias.
4 Seleccione a respectiva definição com a tecla
J/H.
5Prima OK para confirmar.
6Prima ù para terminar.
Gestão de ficheiros
Pode copiar ficheiros de um cartão de memória ou
de um dispositivo USB. Pode apagar ficheiros da
memória interna.
7Com a tecla J/H seleccione o símbolo e
prima a tecla OK, para iniciar o processo de cópia ou de eliminação.
Copiar todos os ficheiros do cartão
de memória
Seleccione e confirme com a tecla
OK para copiar todos os ficheiros
para a memória interna.
Interromper o processo
Seleccione e confirme com a tecla
OK para interromper o processo.
8 No visor é apresentada uma barra de edição.
Uma vez terminada a cópia, poderá encontrar
o ficheiro na memória interna.
Modo de ligação
Seleccione se, após a ligação, devem ser reproduzidas automaticamente fotos, filmes ou fotografias e filmes.
1Prima ù.
2 Seleccione com a tecla J/H (gestão de fi-
cheiros) e confirme com a tecla OK.
3Prima G para seleccionar a opção e prima
OK para confirmar.
4 Com a tecla J/H seleccione uma das opções
indicadas e confirme com a tecla OK.
5Prima ù para terminar.
Copiar, apagar ficheiros
1Prima ù.
2 Seleccione com a tecla J/H (gestão de fi-
cheiros) e confirme com a tecla OK.
3 Seleccione com a tecla G (copiar) ou
(apagar) e confirme com a tecla OK.
4 Com a tecla G/I, J/H seleccione o ficheiro
que deseja copiar ou apagar.
5 Seleccione o ficheiro com a tecla OK.
Anular a marcação
Prima novamente a tecla OK para
anular a marcação.
6 Seleccione com a tecla I a barra de símbolos
na parte inferior do ecrã.
9
Page 95

Indicação
af-5077_5087_5107psms_manual_07_pt_253243477-a.book Seite 10 Donnerstag, 2. Juli 2009 11:49 11
Listas de reprodução
Organize as suas listas de reprodução pessoais
para fotografias, filmes e música.
Só serão reproduzidas aquelas fotos, filmes ou
músicas que se encontrem nestas listas de reprodução. Pode criar um máximo de cinco listas de reprodução.
Criar lista de reprodução
1Prima ù.
2 Seleccione com a tecla J/H (gestão de fi-
cheiros) e confirme com a tecla OK.
3 Seleccione com a tecla G/I (listas de re-
produção) e prima a tecla H.
4 Com a tecla J/H seleccione se deseja criar
uma lista de reprodução para música, imagens
ou filmes.
5Prima OK para confirmar.
6 Confirme ’OFF’ com a tecla OK para criar uma
nova lista de reprodução.
7 Seleccione com a tecla J/H p. ex.: playlist 1
e confirme com a tecla OK.
8Com a tecla G/I ou J/H seleccione o fi-
cheiro que deseja adicionar à lista de reprodução. Seleccione o ficheiro com a tecla OK.
9 Seleccione outros ficheiros com OK.
10 Seleccione com a tecla I a barra de símbolos
na parte inferior do ecrã.
11 Com a tecla J/H seleccione o símbolo e
prima a tecla OK, para guardar a lista de reprodução.
12 Prima ù para terminar.
Activar/desactivar a lista de reprodução
1Prima ù.
2 Seleccione com a tecla J/H (gestão de fi-
cheiros) e confirme com a tecla OK.
3 Seleccione com a tecla G/I (listas de re-
produção) e prima a tecla H.
4 Com a tecla J/H seleccione se deseja activar
uma lista de reprodução para música, imagens
ou filmes.
5Prima OK para confirmar.
6 Confirme p. ex. playlist1 com OK.
7 Com a tecla J/H seleccione a lista de repro-
dução desejada.
Desactivar listas de reprodução
Se com a tecla J/H seleccionar
’OFF’, a lista de reprodução é desactivada. Durante a reprodução estão
novamente disponíveis todas a imagens, filmes ou ficheiros de música.
Alterar definições básicas
1Prima ù.
2 Com a tecla J/H seleccione o símbolo e
confirme com OK.
3Com Û/Ü, seleccione a definição que pretende
efectuar.
4 Prima para confirmar.
Pode proceder às seguintes definições:
, , (brilho, contraste, saturação da cor)
- Permite-lhe ajustar o brilho, o contraste e a
saturação da cor do ecrã LCD
(Relógio) - Permite ajustar as horas e a da-
ta.
(alarme) (AF¦5077/¦5087/5107MS) – Permite
o ajuste da hora de alarme, a activação/desactivação do alarme e a selecção do som do alarme.
(calendário) – Permite o ajuste do ano, mês,
dia.
(definição de fábrica) – Permite recuperar o
ajuste das definições de fábrica.
5Com G/I, seleccione a definição pretendida.
6 Prima para confirmar.
7 Altere a definição com J/H.
8 Sempre que alterar uma definição confirme
com .
9Prima ù para terminar.
PT
10
Page 96

af-5077_5087_5107psms_manual_07_pt_253243477-a.book Seite 11 Donnerstag, 2. Juli 2009 11:49 11
Assistência técnica
PT
Mudar a moldura
Pode trocar a moldura do aparelho com a moldura
intercambiável fornecida. As molduras são fixadas
com ímanes.
Problemas Soluções
O reprodutor não se liga. Verifique que o adaptador de corrente CC está de-
Não é possível gravar ficheiros Certifique-se de que existe espaço suficiente na
Não há som Verifique se o formato do ficheiro é suportado pela
O cartão de memória não é reconhecido Quando ligar a moldura ao computador, o cartão de
Para a apresentação de imagens, filme e reprodução de música não são exibidos todos os ficheiros
do meio de armazenamento de dados
1 Prima no botão para a troca de moldura na par-
te de trás do aparelho. Retire a moldura.
2 Coloque a moldura intercambiável no aparelho
até ela encaixar nos ímanes.
vidamente ligado à moldura.
memória interna. Inicie novamente a moldura e elimine alguns ficheiros, para libertar espaço na memória
moldura, se a ligação entre a moldura e o computador está correctamente efectuada e se o cartão
de memória não se encontra danificado.
memória introduzido na moldura não será reconhecido.
Verifique se está activada uma lista de reprodução.
11
Page 97

af-5077_5087_5107psms_manual_07_pt_253243477-a.book Seite 12 Donnerstag, 2. Juli 2009 11:49 11
Anexo
Especificações técnicas AF 5077PS
Dimensões (Tipo 1)
Dimensões (L¦×¦A¦×¦P)......................... 190¦×¦153¦×¦80¦mm
Peso (Tipo 1)
Gramagem........................................................................ 0,4¦kg
Entrada
Ligação à rede. Entrada: 100¦–¦240¦V¦~ / 50¦–¦60¦Hz
Saída
...............................................................Saída: 5¦V¦† / 2¦A
Condições ambientais recomendadas
Condições ambientais recomendadas ....... 5¦–¦45¦ºC
Humidade relativa
Humidade relativa.................................................20¦–¦80¦%
Consumo de energia
Consumo de energia
Aparelho está ligado
Aparelho está ligado (apresentação de
imagens)...................................................................... 5,0¦W
Diagonais da imagem ........................................................7¦“
Razão da dimensão.......................................................... 4:3
Resolução......................................................800¦×¦600 Pixel
Memória interna
Memória interna128¦MB¦MB ou até 500¦fotografias
Ligação USB (Tipo 1)
Porta USB computador....................................USB-Host
Cartões de armazenamento de dados compatíveis
Cartões de armazenamento de dados
compatíveis................................SD/MMC/MS/SDHC/XD
Formatos de fotografia
Formatos de fotografia ...............................................JPEG
Especificações técnicas AF 5077MS
Dimensões (Tipo 2)
Dimensões (L¦×¦A¦×¦P)......................... 190¦×¦153¦×¦80¦mm
Peso (Tipo 2)
Gramagem........................................................................ 0,4¦kg
Entrada
Ligação à rede. Entrada: 100¦–¦240¦V¦~ / 50¦–¦60¦Hz
Saída
...............................................................Saída: 5¦V¦† / 2¦A
Condições ambientais recomendadas
Condições ambientais recomendadas ....... 5¦–¦45¦ºC
Humidade relativa
Humidade relativa.................................................20¦–¦80¦%
Consumo de energia
Consumo de energia
Aparelho está ligado
Aparelho está ligado (apresentação de
imagens)...................................................................... 4,3¦W
Diagonais da imagem ........................................................7¦“
Razão da dimensão.......................................................... 4:3
Resolução......................................................800¦×¦600 Pixel
Memória interna
Memória interna256¦MB¦MB ou até 1000¦fotografias
Ligação USB (Tipo 2)
Porta USB computador........ USB-Host, USB Device
Cartões de armazenamento de dados compatíveis
Cartões de armazenamento de dados
compatíveis................................SD/MMC/MS/SDHC/XD
Formatos de fotografia
Formatos de fotografia ...............................................JPEG
Formatos de música
Formatos de música...................................................... MP3
Formatos de vídeo
Formatos de vídeo ......................Motion Jpeg, Mpeg-4
Spaltenumbruch
Especificações técnicas AF 5087PS
Dimensões (Tipo 3)
Dimensões (L¦×¦A¦×¦P)......................... 203¦×¦163¦×¦90¦mm
Peso (Tipo 3)
Gramagem........................................................................ 0,5¦kg
Entrada
Ligação à rede. Entrada: 100¦–¦240¦V¦~ / 50¦–¦60¦Hz
Saída
................................................................Saída: 5¦V¦† / 2¦A
Condições ambientais recom endadas
Condições ambientais recomendadas .......5¦–¦45¦ºC
Humidade relativa
Humidade relativa.................................................20¦–¦80¦%
Consumo de energia
Consumo de energia
Aparelho está ligado
Aparelho está ligado (apresentação de
imagens)......................................................................5,4¦W
Diagonais da imagem ........................................................8¦“
Razão da dimensão.......................................................... 4:3
Resolução......................................................800¦×¦600 Pixel
Memória interna
Memória interna128¦MB¦MB ou até 500¦fotografias
Ligação USB (Tipo 3)
Porta USB computador....................................USB-Host
Cartões de armazenamento de dados compatíveis
Cartões de armazenamento de dados
compatíveis............................... SD/MMC/MS/SDHC/XD
Formatos de fotografia
Formatos de fotografia .............................................. JPEG
Especificações técnicas AF 5087MS
Dimensões (Tipo 4)
Dimensões (L¦×¦A¦×¦P)......................... 203¦×¦163¦×¦90¦mm
Peso (Tipo 4)
Gramagem........................................................................ 0,5¦kg
Entrada
Ligação à rede. Entrada: 100¦–¦240¦V¦~ / 50¦–¦60¦Hz
Saída
................................................................Saída: 5¦V¦† / 2¦A
Condições ambientais recom endadas
Condições ambientais recomendadas .......5¦–¦45¦ºC
Humidade relativa
Humidade relativa.................................................20¦–¦80¦%
Consumo de energia
Consumo de energia
Aparelho está ligado
Aparelho está ligado (apresentação de
imagens)......................................................................6,3¦W
Diagonais da imagem ........................................................8¦“
Razão da dimensão.......................................................... 4:3
Resolução......................................................800¦×¦600 Pixel
Memória interna
Memória interna.. 1¦GB¦MB ou até 4000¦fotografias
Ligação USB (Tipo 4)
Porta USB computador........ USB-Host, USB Device
Cartões de armazenamento de dados compatíveis
Cartões de armazenamento de dados
compatíveis............................... SD/MMC/MS/SDHC/XD
Formatos de fotografia
Formatos de fotografia .............................................. JPEG
Formatos de música
Formatos de música...................................................... MP3
Formatos de vídeo
Formatos de vídeo ......................Motion Jpeg, Mpeg-4
Spaltenumbruch
PT
12
Page 98

af-5077_5087_5107psms_manual_07_pt_253243477-a.book Seite 13 Donnerstag, 2. Juli 2009 11:49 11
PT
Especificações técnicas AF 5107PS
Dimensões (Tipo 5)
Dimensões (L¦×¦A¦×¦P)......................... 255¦×¦203¦×¦90¦mm
Peso (Tipo 5)
Gramagem........................................................................ 0,8¦kg
Entrada
Ligação à rede. Entrada: 100¦–¦240¦V¦~ / 50¦–¦60¦Hz
Saída
...............................................................Saída: 5¦V¦† / 2¦A
Condições ambientais recomendadas
Condições ambientais recomendadas ....... 5¦–¦45¦ºC
Humidade relativa
Humidade relativa.................................................20¦–¦80¦%
Consumo de energia
Consumo de energia
Aparelho está ligado
Aparelho está ligado (apresentação de
imagens)...................................................................... 6,1¦W
Diagonais da imagem ................................................. 10,4¦“
Razão da dimensão.......................................................... 4:3
Resolução......................................................800¦×¦600 Pixel
Memória interna
Memória interna128¦MB¦MB ou até 500¦fotografias
Ligação USB (Tipo 5)
Porta USB computador....................................USB-Host
Cartões de armazenamento de dados compatíveis
Cartões de armazenamento de dados
compatíveis................................SD/MMC/MS/SDHC/XD
Formatos de fotografia
Formatos de fotografia ...............................................JPEG
Especificações técnicas AF 5107MS
Dimensões (Tipo 6)
Dimensões (L¦×¦A¦×¦P)......................... 255¦×¦203¦×¦90¦mm
Peso (Tipo 6)
Gramagem........................................................................ 0,8¦kg
Entrada
Ligação à rede. Entrada: 100¦–¦240¦V¦~ / 50¦–¦60¦Hz
Saída
...............................................................Saída: 5¦V¦† / 2¦A
Condições ambientais recomendadas
Condições ambientais recomendadas ....... 5¦–¦45¦ºC
Humidade relativa
Humidade relativa.................................................20¦–¦80¦%
Consumo de energia
Consumo de energia
Aparelho está ligado
Aparelho está ligado (apresentação de
imagens)...................................................................... 6,6¦W
Diagonais da imagem ........................................................8¦“
Razão da dimensão.......................................................... 4:3
Resolução......................................................800¦×¦600 Pixel
Memória interna
Memória interna.. 1¦GB¦MB ou até 4000¦fotografias
Ligação USB (Tipo 6)
Porta USB computador........ USB-Host, USB Device
Cartões de armazenamento de dados compatíveis
Cartões de armazenamento de dados
compatíveis................................SD/MMC/MS/SDHC/XD
Formatos de fotografia
Formatos de fotografia ...............................................JPEG
Formatos de música
Formatos de música...................................................... MP3
Formatos de vídeo
Formatos de vídeo ......................Motion Jpeg, Mpeg-4
Estas indicações servem unicamente como referência. AgfaPhotoreserva-se o direito de alterar
as especificações sem aviso prévio.
Spaltenumbruch
A AgfaPhoto é usada sob concessão da AgfaGevaert NV & Co. KG ou Agfa-Gevaert NV. Nem
a Agfa-Gevaert NV & Co. KG nem a Agfa-Gevaert
NV fabricam estes produtos nem concedem garantia ou prestam assistência.
Para informações sobre serviço, assistência ou
garantia dirija-se ao seu revendedor ou ao fabricante.
Contacto: AgfaPhoto Holding GmbH,
www.agfaphoto.com
Fabricante: Sagem Communications,
www.sagem-communications.com
O símbolo CE certifica que este produto satisfaz
os requisitos da Directiva 1999/5/CE do Parlamento e Conselho Europeu referente a terminais
de telecomunicações, no que concerne à segurança e saúde dos utilizadores, e no que diz respeito
a interferências electromagnéticas.
A declaração de conformidade pode ser consultada na página da Internet www.agfaphoto.com.
A conservação do ambiente enquanto parte integrante de um plano de desenvolvimento sustentável é uma preocupação essencial da AgfaPhoto. O
desejo da AgfaPhoto é utilizar sistemas, tendo em
conta o meio ambiente. Consequentemente, a
AgfaPhoto decidiu integrar medidas ambientais
dentro do período de duração dos nossos produtos, desde o fabrico ao comissionamento, utilização e eliminação.
Embalagem: A presença do logótipo (ponto verde)
significa que é feita uma contribuição para uma
organização nacional devidamente aprovada, com
o fim de melhorar a recuperação de embalagens e
as infra-estruturas de reciclagem. Respeite as leis
locais relativamente à eliminação deste tipo de resíduos.
Pilhas: Se o seu produto contiver pilhas, estas deverão ser eliminadas através do ponto de recolha
adequado.
13
Page 99

af-5077_5087_5107psms_manual_07_pt_253243477-a.book Seite 14 Donnerstag, 2. Juli 2009 11:49 11
Produto: A presença do símbolo de um caixote do
lixo com uma cruz em cima significa que o produto
pertence à família do equipamento eléctrico e
electrónico. A este respeito, a legislação europeia
estabelece que deverá eliminar este tipo de equipamento:
• Nos pontos de venda, em caso de compra de
produtos semelhantes.
• Em pontos de recolha disponibilizados a nível local (centros de recolha, contentores de recolha
selectiva, etc.).
Deste modo poderá contribuir para a reutilização
e melhoria dos resíduos de equipamento eléctrico
e electrónico, que podem ter efeitos sobre o meio
ambiente e a saúde humana.
As embalagens utilizadas em papel e cartão podem ser eliminadas como papéis velhos. As películas de plástico e as embalagens em Styropor
devem ser enviadas para reciclagem ou colocadas
no lixo residual, em conformidade com as regulamentações do seu país.
Marcas comerciais: As marcas mencionadas no
presente manual de instruções são marcas comerciais detidas pelas respectivas empresas. A
omissão dos símbolos É e Ë não justifica o pressuposto de que essas marcas sejam marcas comerciais não sujeitas a licença. Outros nomes de
produtos mencionados neste documento têm por
único objectivo uma identificação, podendo ser
marcas comerciais detidas pelos respectivos proprietários. A AgfaPhoto declina todos e quaisquer
direitos sobre essas marcas.
Nem a AgfaPhoto, nem as empresas a ela associadas podem ser responsabilizadas, seja perante o
comprador deste produto, seja perante terceiros,
relativamente a reivindicações de indemnizações
por danos, a prejuízos, a custos ou a despesas em
que quer o comprador, quer terceiros tenham incorrido em resultado de um acidente, de uma utilização errada ou incorrecta do produto, de modificações não autorizadas, de reparações, de alterações introduzidas no produto ou do
incumprimentos das instruções de utilização e de
manutenção dadas pela AgfaPhoto.
A AgfaPhoto declina toda e qualquer responsabilidade por reivindicações de indemnizações por
danos e por problemas decorrentes da utilização
de todos e quaisquer consumíveis ou opções que
não estejam identificados como sendo produtos
originais da AgfaPhoto ou produtos por ela autorizados.
Da mesma forma, a AgfaPhoto também declina
toda e qualquer responsabilidade por reivindicações de indemnizações por danos resultantes de
interferências electromagnéticas decorrentes da
utilização de cabos de ligação que não estejam
identificados como produtos da AgfaPhoto.
Todos os direitos reservados. Nenhuma parte
desta publicação pode ser duplicada, guardada
num sistema de arquivo ou transmitida de qualquer outra forma ou por qualquer outra via, electrónica, mecânica, por meio de fotocópia, de gravação ou outra, sem a autorização prévia expressa e por escrito da AgfaPhoto. As informações
constantes no presente documento foram elaboradas tendo exclusivamente em vista este produto. A AgfaPhoto declina toda e qualquer responsabilidade pela aplicação destas informações a
outros aparelhos.
Este manual de instruções é um documento sem
carácter contratual.
Salvaguardam-se erros, erros de impressão e alterações.
Copyright © 2009 Sagem Communications
PT
14
Page 100

FARA!
Anvisningar
af-5077_5087_5107psms_manual_08_se_253243477-a.book Seite 1 Donnerstag, 2. Juli 2009 11:52 11
Introduktion
SE
Bäste kund
Tack för du bestämde dig för våra digitala fotoramar. Gör dig redo för en helt ny fotoupplevelse!
Med din nya digitala bildram kan du se dina foto
och videos samt spela din musik – utan dator.
Högkvalitets TFT – LCD bildskärm
Minne
Dina digitala fotoramar har ett internt minne, en
digital kortläsare och en USB anslutning. Data kan
raderas från det interna minnet och kopieras från
minneskort eller USB minnen.
Överskådlig småbildsförhandsvisning (miniatyrvisning av 20 bilder samtidigt). Din digitala fotoram
understöder vridning och ändring av sidoformatet.
Titta helt enkelt på dina bilder med den automatiska diapresentationen med bakgrundsmusik.
Med den medlevererade fjärrkontrollen kan du lätt
välja ut foto-, musik- och videofiler, ändra inställningar och mycket mer.
Dessutom står ytterligare funktioner som indikering av klockslag och datum, väckningsfunktion
och till- och frånkopplingsfunktion till förfogande.
Mycket nöje med din apparat och dess mångfaldiga funktioner!
Om den här bruksanvisningen
Med installationshjälpen på följande sidor kan du
snabbt och enkelt ta din apparat i bruk. Detaljerade beskrivningar finner du i följande kapitel i denna bruksanvisning.
Läs noggrant igenom bruksanvisningen. Beakta
framförallt säkerhetsanvisningar för att garantera
en problemfri användning av din apparat. Tillverkaren övertar inget ansvar om du inte skulle iaktta
anvisningarna.
I denna bruksanvisning beskrivs flera modeller av
apparater. Observera att somliga funktioner endast är tillgängliga för bestämda modeller.
Använda symboler
Varning för fara
FARA!
Varnar för personfara, produktskada eller andra föremål såväl som för potentiell
förlust av information. Skador kan uppstå genom icke fackmässig hantering.
Råd och tips
Råd och tips
Med denna symbol markeras tips som
hjälper dig att använda din apparat på
ett effektivare och enklare sätt.
1
 Loading...