

Page 1

ma crom edia
COURSEBUILDER
for DREAMWEAVER
Using CourseBuilder
®
™
macromedia
™
Page 2

Trademarks
Afterburner, AppletAce, Attain, Attain Enterprise Learning System, Attain Essentials, Attain Objects for Dreamweaver, Authorware,
Authorware Attain, Authorware Interactive Studio, Authorware Star, Authorware Synergy, Backstage, Backstage Designer, Backstage
Desktop Studio, Backstage Enterprise Studio, Backstage Internet Studio, Design in Motion, Director, Director Multimedia Studio,
Doc Around the Clock, Dreamweaver, Dreamweaver Attain, Drumbeat, Drumbeat 2000, Extreme 3D, Fireworks, Flash, Fontographer,
FreeHand, FreeHand Graphics Studio, Generator, Generator Developer's Studio, Generator Dynamic Graphics Server, Knowledge
Objects, Knowledge Stream, Knowledge Track, Lingo, Live Effects, Macromedia, Macromedia M Logo & Design, Macromedia Flash,
Macromedia Xres, Macromind, Macromind Action, MAGIC, Mediamaker, Object Authoring, Power Applets, Priority Access, Roundtrip
HTML, Scriptlets, SoundEdit, ShockRave, Shockmachine, Shockwave, Shockwave Remote, Shockwave Internet Studio, Showcase, Tools
to Power Your Ideas, Universal Media, Virtuoso, Web Design 101, Whirlwind and Xtra are trademarks of Macromedia, Inc. and may be
registered in the United States or in other jurisdictions including internationally. Other product names, logos, designs, titles, words or
phrases mentioned within this publication may be trademarks, servicemarks, or tradenames of Macromedia, Inc. or other entities and
may be registered in certain jurisdictions including internationally.
This guide contains links to third-party Web sites that are not under the control of Macromedia, and Macromedia is not
responsible for the content on any linked site. If you access a third-party Web site mentioned in this guide, then you do so at
your own risk. Macromedia provides these links only as a convenience, and the inclusion of the link does not imply that
Macromedia endorses or accepts any responsibility for the content on those third-party sites.
Apple Disclaimer
APPLE COMPUTER, INC. MAKES NO WARRANTIES, EITHER EXPRESS OR IMPLIED, REGARDING THE ENCLOSED
COMPUTER SOFTWARE PACKAGE, ITS MERCHANTABILITY OR ITS FITNESS FOR ANY PARTICULAR PURPOSE.
THE EXCLUSION OF IMPLIED WARRANTIES IS NOT PERMITTED BY SOME STATES. THE ABOVE EXCLUSION MAY
NOT APPLY TO YOU. THIS WARRANTY PROVIDES YOU WITH SPECIFIC LEGAL RIGHTS. THERE MAY BE OTHER
RIGHTS THAT YOU MAY HAVE WHICH VARY FROM STATE TO STATE.
Copyright © 1999 Macromedia, Inc. All rights reserved. This manual may not be copied, photocopied, reproduced, translated, or
converted to any electronic or machine-readable form in whole or in part without prior written approval of Macromedia, Inc.
Part Number ZCB30M100
Acknowledgments
Project Management: Sheila McGinn
Writing: Kim Diezel
Production: Chris Basmajian
First Edition: December1999
Macromedia, Inc.
600 Townsend St.
San Francisco, CA 94103
2
Page 3

CONTENTS
INTRODUCTION
Getting Started . . . . . . . . . . . . . . . . . . . . . . . . . . . . . . . . . 11
What you can do with CourseBuilder for Dreamweaver . . . . . . . . . . . .12
System requirements . . . . . . . . . . . . . . . . . . . . . . . . . . . . . . . . . . . . . . .13
Installing CourseBuilder for Dreamweaver . . . . . . . . . . . . . . . . . . . . . .13
Learning CourseBuilder for Dreamweaver. . . . . . . . . . . . . . . . . . . . . . .14
New user’s checklist . . . . . . . . . . . . . . . . . . . . . . . . . . . . . . . . . . . . . . . .16
What’s new in CourseBuilder for Dreamweaver. . . . . . . . . . . . . . . . . . .18
CHAPTER 1
CourseBuilder for Dreamweaver Tutorial . . . . . . . . 21
Tutorial overview. . . . . . . . . . . . . . . . . . . . . . . . . . . . . . . . . . . . . . . . . .21
Set up site structure for the tutorial . . . . . . . . . . . . . . . . . . . . . . . . . . . .22
Define a local site . . . . . . . . . . . . . . . . . . . . . . . . . . . . . . . . . . . . . . . . .23
Create an explore CourseBuilder Interaction . . . . . . . . . . . . . . . . . . . . .24
Define the hot areas. . . . . . . . . . . . . . . . . . . . . . . . . . . . . . . . . . . . . . . .26
Create user feedback . . . . . . . . . . . . . . . . . . . . . . . . . . . . . . . . . . . . . . .31
Create a drag-and-drop interaction . . . . . . . . . . . . . . . . . . . . . . . . . . . .36
Create drag-and-drop pairs . . . . . . . . . . . . . . . . . . . . . . . . . . . . . . . . . .40
Create user feedback . . . . . . . . . . . . . . . . . . . . . . . . . . . . . . . . . . . . . . .45
Create a multiple-choice quiz . . . . . . . . . . . . . . . . . . . . . . . . . . . . . . . .48
Create user feedback . . . . . . . . . . . . . . . . . . . . . . . . . . . . . . . . . . . . . . .53
Create a Multiple-choice interaction . . . . . . . . . . . . . . . . . . . . . . . . . . .55
Define the multiple-choice interaction . . . . . . . . . . . . . . . . . . . . . . . . .57
Define the choices . . . . . . . . . . . . . . . . . . . . . . . . . . . . . . . . . . . . . . . . .59
Define the action. . . . . . . . . . . . . . . . . . . . . . . . . . . . . . . . . . . . . . . . . .61
Test the interaction . . . . . . . . . . . . . . . . . . . . . . . . . . . . . . . . . . . . . . . .66
3
Page 4

CHAPTER 2
CourseBuilder for Dreamweaver basics. . . . . . . . . . 67
CourseBuilder Interaction compatibility with browsers. . . . . . . . . . . . .73
What’s new—step-by-step procedures . . . . . . . . . . . . . . . . . . . . . . . . . .74
Converting from previous versions . . . . . . . . . . . . . . . . . . . . . . . . . . . .75
What to put on the web server . . . . . . . . . . . . . . . . . . . . . . . . . . . . . . .76
Troubleshooting . . . . . . . . . . . . . . . . . . . . . . . . . . . . . . . . . . . . . . . . . .76
CHAPTER 3
Multiple-Choice CourseBuilder Interactions. . . . . . 79
Multiple-choice interaction overview. . . . . . . . . . . . . . . . . . . . . . . . . . .79
The multiple-choice templates . . . . . . . . . . . . . . . . . . . . . . . . . . . . . . .80
The multiple-choice CourseBuilder Interaction tabs . . . . . . . . . . . . . . .81
Multiple-choice CourseBuilder Interactions—
step-by-step procedures . . . . . . . . . . . . . . . . . . . . . . . . . . . . . . . . .83
True/false questions . . . . . . . . . . . . . . . . . . . . . . . . . . . . . . . . . . . . . . . .85
Creating a true/false question . . . . . . . . . . . . . . . . . . . . . . . . . . . . . . . .86
Replacing “True” and “False” with different words . . . . . . . . . . . . . . . .88
Multiple-choice questions . . . . . . . . . . . . . . . . . . . . . . . . . . . . . . . . . . .88
Creating a multiple-choice question . . . . . . . . . . . . . . . . . . . . . . . . . . .89
Graphic multiple-choice questions . . . . . . . . . . . . . . . . . . . . . . . . . . . .91
Using images instead of text as choices . . . . . . . . . . . . . . . . . . . . . . . . .92
All-that-apply questions . . . . . . . . . . . . . . . . . . . . . . . . . . . . . . . . . . . .94
Creating an all-that-apply question . . . . . . . . . . . . . . . . . . . . . . . . . . . .95
Changing the order of the choices. . . . . . . . . . . . . . . . . . . . . . . . . . . . .96
Adding or deleting a choice. . . . . . . . . . . . . . . . . . . . . . . . . . . . . . . . . .97
Naming a choice . . . . . . . . . . . . . . . . . . . . . . . . . . . . . . . . . . . . . . . . . .98
Adding an image to a text choice. . . . . . . . . . . . . . . . . . . . . . . . . . . . . .98
4
Contents
Page 5

CHAPTER 4
Drag-and-Drop CourseBuilder Interactions . . . . . . 99
Drag-and-drop interaction overview . . . . . . . . . . . . . . . . . . . . . . . . . . .99
The drag-and-drop templates . . . . . . . . . . . . . . . . . . . . . . . . . . . . . . .100
The drag-and-drop CourseBuilder Interaction tabs . . . . . . . . . . . . . . .102
Drag-and-drop CourseBuilder Interactions—
step-by-step procedures . . . . . . . . . . . . . . . . . . . . . . . . . . . . . . . .104
One-to-one matching . . . . . . . . . . . . . . . . . . . . . . . . . . . . . . . . . . . . .106
One-to-one matching, either way . . . . . . . . . . . . . . . . . . . . . . . . . . . .107
One-to-many matching. . . . . . . . . . . . . . . . . . . . . . . . . . . . . . . . . . . .108
One-to-many matching, either way. . . . . . . . . . . . . . . . . . . . . . . . . . .109
Creating a matching exercise . . . . . . . . . . . . . . . . . . . . . . . . . . . . . . . .110
The “Build your own” template. . . . . . . . . . . . . . . . . . . . . . . . . . . . . .112
Building your own matching exercise . . . . . . . . . . . . . . . . . . . . . . . . .113
Two-step procedure. . . . . . . . . . . . . . . . . . . . . . . . . . . . . . . . . . . . . . .116
Two-step procedure with a distractor. . . . . . . . . . . . . . . . . . . . . . . . . .117
Creating a procedure. . . . . . . . . . . . . . . . . . . . . . . . . . . . . . . . . . . . . .118
Building your own procedure . . . . . . . . . . . . . . . . . . . . . . . . . . . . . . .120
Replacing placeholder graphics . . . . . . . . . . . . . . . . . . . . . . . . . . . . . .122
Naming a drag-and-drop element . . . . . . . . . . . . . . . . . . . . . . . . . . . .123
Adding and deleting drag-and-drop elements . . . . . . . . . . . . . . . . . . .124
Adding and deleting drag-and-drop pairs . . . . . . . . . . . . . . . . . . . . . .125
A target’s active area . . . . . . . . . . . . . . . . . . . . . . . . . . . . . . . . . . . . . .126
Setting how an element behaves when dropped. . . . . . . . . . . . . . . . . .127
Making an element a drag element or a target . . . . . . . . . . . . . . . . . . .128
CHAPTER 5
Explore CourseBuilder Interactions. . . . . . . . . . . . . 129
Explore interactions overview . . . . . . . . . . . . . . . . . . . . . . . . . . . . . . .129
The explore templates . . . . . . . . . . . . . . . . . . . . . . . . . . . . . . . . . . . . .130
The explore CourseBuilder Interaction tabs . . . . . . . . . . . . . . . . . . . .131
Explore CourseBuilder Interactions—step-by-step procedures. . . . . . .133
Random exploration . . . . . . . . . . . . . . . . . . . . . . . . . . . . . . . . . . . . . .135
Creating a random exploration . . . . . . . . . . . . . . . . . . . . . . . . . . . . . .136
Structured exploration. . . . . . . . . . . . . . . . . . . . . . . . . . . . . . . . . . . . .138
Creating a structured exploration . . . . . . . . . . . . . . . . . . . . . . . . . . . .139
Replacing placeholder graphics . . . . . . . . . . . . . . . . . . . . . . . . . . . . . .141
Naming a hot area. . . . . . . . . . . . . . . . . . . . . . . . . . . . . . . . . . . . . . . .141
Adding text to a hot area. . . . . . . . . . . . . . . . . . . . . . . . . . . . . . . . . . .142
Adding and deleting hot areas . . . . . . . . . . . . . . . . . . . . . . . . . . . . . . .142
Contents
5
Page 6

CHAPTER 6
Text Entry CourseBuilder Interactions . . . . . . . . . . 143
Text entry interaction overview . . . . . . . . . . . . . . . . . . . . . . . . . . . . . .143
The text entry templates . . . . . . . . . . . . . . . . . . . . . . . . . . . . . . . . . . .144
The text entry CourseBuilder Interaction tabs. . . . . . . . . . . . . . . . . . .145
Text entry CourseBuilder Interactions—step-by-step procedures. . . . .147
Single-line text entries . . . . . . . . . . . . . . . . . . . . . . . . . . . . . . . . . . . . .149
Multiple-line text entries. . . . . . . . . . . . . . . . . . . . . . . . . . . . . . . . . . .150
Creating a text entry field . . . . . . . . . . . . . . . . . . . . . . . . . . . . . . . . . .151
Adding default text to a field . . . . . . . . . . . . . . . . . . . . . . . . . . . . . . . .153
Naming a response . . . . . . . . . . . . . . . . . . . . . . . . . . . . . . . . . . . . . . .153
Adding and deleting responses . . . . . . . . . . . . . . . . . . . . . . . . . . . . . .154
Checking for correct capitalization . . . . . . . . . . . . . . . . . . . . . . . . . . .154
Checking for an exact match. . . . . . . . . . . . . . . . . . . . . . . . . . . . . . . .155
Checking for key words or phrases . . . . . . . . . . . . . . . . . . . . . . . . . . .155
Checking for unanticipated responses . . . . . . . . . . . . . . . . . . . . . . . . .156
CHAPTER 7
Enhancements and Customization . . . . . . . . . . . . . 157
Enhancing and customizing CourseBuilder Interactions . . . . . . . . . . .157
Editing CourseBuilder Interactions . . . . . . . . . . . . . . . . . . . . . . . . . . .158
Cutting, copying, pasting, and clearing interactions . . . . . . . . . . . . . .158
Customizing feedback . . . . . . . . . . . . . . . . . . . . . . . . . . . . . . . . . . . . .159
Displaying feedback in a frame, layer, status bar, or text field . . . . . . .160
Limiting the number of tries . . . . . . . . . . . . . . . . . . . . . . . . . . . . . . . .162
Putting a time limit on an interaction . . . . . . . . . . . . . . . . . . . . . . . . .163
Setting when a CourseBuilder Interaction is judged . . . . . . . . . . . . . .163
Changing the name of the Submit button. . . . . . . . . . . . . . . . . . . . . .164
Resetting a CourseBuilder Interaction. . . . . . . . . . . . . . . . . . . . . . . . .165
Inserting a CourseBuilder Interaction into a layer . . . . . . . . . . . . . . . .166
Setting preferences . . . . . . . . . . . . . . . . . . . . . . . . . . . . . . . . . . . . . . .167
Authorware integration . . . . . . . . . . . . . . . . . . . . . . . . . . . . . . . . . . . .167
Using the Insert Authorware object. . . . . . . . . . . . . . . . . . . . . . . . . . .168
Managing CourseBuilder Interaction templates. . . . . . . . . . . . . . . . . .169
Working with Gallery files. . . . . . . . . . . . . . . . . . . . . . . . . . . . . . . . . .170
6
Contents
Page 7

CHAPTER 8
CourseBuilder Interaction Controls . . . . . . . . . . . . . 173
Button CourseBuilder Interactions . . . . . . . . . . . . . . . . . . . . . . . . . . .173
The button templates . . . . . . . . . . . . . . . . . . . . . . . . . . . . . . . . . . . . .174
The button CourseBuilder Interaction tabs. . . . . . . . . . . . . . . . . . . . .175
Button CourseBuilder Interactions—step-by-step procedures . . . . . . .176
Toggle switches . . . . . . . . . . . . . . . . . . . . . . . . . . . . . . . . . . . . . . . . . .177
Push buttons. . . . . . . . . . . . . . . . . . . . . . . . . . . . . . . . . . . . . . . . . . . .178
Creating a button . . . . . . . . . . . . . . . . . . . . . . . . . . . . . . . . . . . . . . . .179
Choosing a look for a button . . . . . . . . . . . . . . . . . . . . . . . . . . . . . . .182
Highlighting a button . . . . . . . . . . . . . . . . . . . . . . . . . . . . . . . . . . . . .182
Changing the initial state of a button . . . . . . . . . . . . . . . . . . . . . . . . .183
Changing the type of button . . . . . . . . . . . . . . . . . . . . . . . . . . . . . . . .183
Adding custom button graphics . . . . . . . . . . . . . . . . . . . . . . . . . . . . .184
Timer CourseBuilder Interaction . . . . . . . . . . . . . . . . . . . . . . . . . . . .185
The timer templates . . . . . . . . . . . . . . . . . . . . . . . . . . . . . . . . . . . . . .185
The timer CourseBuilder Interaction tabs . . . . . . . . . . . . . . . . . . . . . .186
Timer CourseBuilder Interactions—step-by-step procedures. . . . . . . .187
Timers. . . . . . . . . . . . . . . . . . . . . . . . . . . . . . . . . . . . . . . . . . . . . . . . .189
Creating a timer . . . . . . . . . . . . . . . . . . . . . . . . . . . . . . . . . . . . . . . . .190
Timers with a warning . . . . . . . . . . . . . . . . . . . . . . . . . . . . . . . . . . . .192
Creating a timer with a warning . . . . . . . . . . . . . . . . . . . . . . . . . . . . .193
Setting a timer. . . . . . . . . . . . . . . . . . . . . . . . . . . . . . . . . . . . . . . . . . .195
Setting a trigger. . . . . . . . . . . . . . . . . . . . . . . . . . . . . . . . . . . . . . . . . .195
Choosing a look for a timer. . . . . . . . . . . . . . . . . . . . . . . . . . . . . . . . .196
Naming a trigger. . . . . . . . . . . . . . . . . . . . . . . . . . . . . . . . . . . . . . . . .196
Adding and deleting triggers . . . . . . . . . . . . . . . . . . . . . . . . . . . . . . . .197
Judging a response before the first trigger is reached . . . . . . . . . . . . . .198
Adding custom timer graphics. . . . . . . . . . . . . . . . . . . . . . . . . . . . . . .198
Slider CourseBuilder Interaction. . . . . . . . . . . . . . . . . . . . . . . . . . . . .200
The slider templates . . . . . . . . . . . . . . . . . . . . . . . . . . . . . . . . . . . . . .200
The slider CourseBuilder Interaction tabs . . . . . . . . . . . . . . . . . . . . .201
Slider CourseBuilder Interactions—step-by-step procedures . . . . . . . .202
Range sliders . . . . . . . . . . . . . . . . . . . . . . . . . . . . . . . . . . . . . . . . . . . .204
Creating a range slider. . . . . . . . . . . . . . . . . . . . . . . . . . . . . . . . . . . . .205
Point sliders. . . . . . . . . . . . . . . . . . . . . . . . . . . . . . . . . . . . . . . . . . . . .207
Creating a point slider. . . . . . . . . . . . . . . . . . . . . . . . . . . . . . . . . . . . .208
Choosing a look for a slider. . . . . . . . . . . . . . . . . . . . . . . . . . . . . . . . .210
Setting a slider’s start and end values . . . . . . . . . . . . . . . . . . . . . . . . . .210
Setting a range. . . . . . . . . . . . . . . . . . . . . . . . . . . . . . . . . . . . . . . . . . .211
Contents
7
Page 8

Naming a range. . . . . . . . . . . . . . . . . . . . . . . . . . . . . . . . . . . . . . . . . .211
Adding and deleting ranges . . . . . . . . . . . . . . . . . . . . . . . . . . . . . . . . .212
Adding custom slider graphics. . . . . . . . . . . . . . . . . . . . . . . . . . . . . . .213
CHAPTER 9
Action Manager . . . . . . . . . . . . . . . . . . . . . . . . . . . . . . . 215
Action Manager CourseBuilder Interactions . . . . . . . . . . . . . . . . . . . .215
Action Manager CourseBuilder Interactions—
step-by-step procedures . . . . . . . . . . . . . . . . . . . . . . . . . . . . . . . .215
Action Manager pop-up menu . . . . . . . . . . . . . . . . . . . . . . . . . . . . . .217
Adding a segment . . . . . . . . . . . . . . . . . . . . . . . . . . . . . . . . . . . . . . . .218
Adding a condition . . . . . . . . . . . . . . . . . . . . . . . . . . . . . . . . . . . . . . .219
Creating expressions for a condition . . . . . . . . . . . . . . . . . . . . . . . . . .221
Adding an action. . . . . . . . . . . . . . . . . . . . . . . . . . . . . . . . . . . . . . . . .224
Renaming a segment, condition, or action . . . . . . . . . . . . . . . . . . . . .224
Expanding and collapsing a segment or condition. . . . . . . . . . . . . . . .225
Promoting and demoting a condition . . . . . . . . . . . . . . . . . . . . . . . . .225
Editing a segment, condition, or action. . . . . . . . . . . . . . . . . . . . . . . .225
Cutting, copying, and pasting a segment, condition, or action . . . . . .226
Where to create actions . . . . . . . . . . . . . . . . . . . . . . . . . . . . . . . . . . . .226
Learning-specific actions . . . . . . . . . . . . . . . . . . . . . . . . . . . . . . . . . . .227
Setting interaction properties . . . . . . . . . . . . . . . . . . . . . . . . . . . . . . .238
CourseBuilder Interaction properties. . . . . . . . . . . . . . . . . . . . . . . . . .240
Setting Action Manager properties . . . . . . . . . . . . . . . . . . . . . . . . . . .247
Setting the JavaScript property . . . . . . . . . . . . . . . . . . . . . . . . . . . . . .248
Adding a custom behavior. . . . . . . . . . . . . . . . . . . . . . . . . . . . . . . . . .249
Action Manager CourseBuilder Interactions . . . . . . . . . . . . . . . . . . . .249
The Action Manager template. . . . . . . . . . . . . . . . . . . . . . . . . . . . . . .250
The Action Manager CourseBuilder Interaction tabs. . . . . . . . . . . . . .250
8
Contents
Page 9

CHAPTER 10
Scoring and Data Tracking . . . . . . . . . . . . . . . . . . . . 251
Tracking user performance . . . . . . . . . . . . . . . . . . . . . . . . . . . . . . . . .251
Scoring and data tracking—step-by-step procedures . . . . . . . . . . . . . .252
Marking a response right or wrong . . . . . . . . . . . . . . . . . . . . . . . . . . .254
Scoring a response. . . . . . . . . . . . . . . . . . . . . . . . . . . . . . . . . . . . . . . .255
Displaying feedback . . . . . . . . . . . . . . . . . . . . . . . . . . . . . . . . . . . . . .256
Locating the CourseBuilder Interaction identifier in
HTML Source code. . . . . . . . . . . . . . . . . . . . . . . . . . . . . . . . . . .257
Scoring multiple interactions on the same HTML page . . . . . . . . . . .257
Scoring multiple interactions on different HTML pages . . . . . . . . . . .259
Tracking the time remaining . . . . . . . . . . . . . . . . . . . . . . . . . . . . . . . .264
Tracking the number of tries . . . . . . . . . . . . . . . . . . . . . . . . . . . . . . . .265
JavaScript variables for tracking performance . . . . . . . . . . . . . . . . . . .265
Recording performance . . . . . . . . . . . . . . . . . . . . . . . . . . . . . . . . . . . .266
Using Knowledge Track. . . . . . . . . . . . . . . . . . . . . . . . . . . . . . . . . . . .267
Using CourseBuilder for Dreamweaver with Lotus Pathware. . . . . . . .269
Connecting with databases . . . . . . . . . . . . . . . . . . . . . . . . . . . . . . . . .272
Creating the data source . . . . . . . . . . . . . . . . . . . . . . . . . . . . . . . . . . .273
Collecting data . . . . . . . . . . . . . . . . . . . . . . . . . . . . . . . . . . . . . . . . . .274
Transferring data . . . . . . . . . . . . . . . . . . . . . . . . . . . . . . . . . . . . . . . . .276
Recording data using Cold Fusion. . . . . . . . . . . . . . . . . . . . . . . . . . . .278
Recording data using ASP . . . . . . . . . . . . . . . . . . . . . . . . . . . . . . . . . .279
Recording data with other transport methods . . . . . . . . . . . . . . . . . . .280
Contents
9
Page 10

CHAPTER 11
CourseBuilder Interaction Options . . . . . . . . . . . . . 281
General options. . . . . . . . . . . . . . . . . . . . . . . . . . . . . . . . . . . . . . . . . .281
Tracking tab . . . . . . . . . . . . . . . . . . . . . . . . . . . . . . . . . . . . . . . . . . . .287
Choices options. . . . . . . . . . . . . . . . . . . . . . . . . . . . . . . . . . . . . . . . . .287
Drag-and-drop element options . . . . . . . . . . . . . . . . . . . . . . . . . . . . .289
Pairs options . . . . . . . . . . . . . . . . . . . . . . . . . . . . . . . . . . . . . . . . . . . .289
Hot areas options . . . . . . . . . . . . . . . . . . . . . . . . . . . . . . . . . . . . . . . .291
Responses options . . . . . . . . . . . . . . . . . . . . . . . . . . . . . . . . . . . . . . . .292
Triggers options. . . . . . . . . . . . . . . . . . . . . . . . . . . . . . . . . . . . . . . . . .293
Ranges options . . . . . . . . . . . . . . . . . . . . . . . . . . . . . . . . . . . . . . . . . .294
Action Manager segments . . . . . . . . . . . . . . . . . . . . . . . . . . . . . . . . . .295
Check Time segment. . . . . . . . . . . . . . . . . . . . . . . . . . . . . . . . . . . . . .296
Correctness segment . . . . . . . . . . . . . . . . . . . . . . . . . . . . . . . . . . . . . .296
Check Tries segment . . . . . . . . . . . . . . . . . . . . . . . . . . . . . . . . . . . . . .296
Multiple-choice segments . . . . . . . . . . . . . . . . . . . . . . . . . . . . . . . . . .297
One-to-one matching segments. . . . . . . . . . . . . . . . . . . . . . . . . . . . . .297
One-to-one matching (either way) segments . . . . . . . . . . . . . . . . . . . .297
One-to-many matching segments . . . . . . . . . . . . . . . . . . . . . . . . . . . .298
“Build your own” template segments. . . . . . . . . . . . . . . . . . . . . . . . . .298
Two-step procedure segments . . . . . . . . . . . . . . . . . . . . . . . . . . . . . . .299
Explore segments. . . . . . . . . . . . . . . . . . . . . . . . . . . . . . . . . . . . . . . . .300
Toggle-switch segment . . . . . . . . . . . . . . . . . . . . . . . . . . . . . . . . . . . .300
Pushbutton segment . . . . . . . . . . . . . . . . . . . . . . . . . . . . . . . . . . . . . .301
Text entry segments. . . . . . . . . . . . . . . . . . . . . . . . . . . . . . . . . . . . . . .301
Timer segment . . . . . . . . . . . . . . . . . . . . . . . . . . . . . . . . . . . . . . . . . .301
Timer with warning segment. . . . . . . . . . . . . . . . . . . . . . . . . . . . . . . .302
Range slider segment. . . . . . . . . . . . . . . . . . . . . . . . . . . . . . . . . . . . . .302
Point slider segment . . . . . . . . . . . . . . . . . . . . . . . . . . . . . . . . . . . . . .303
10
Contents
INDEX
. . . . . . . . . . . . . . . . . . . . . . . . . . . . . . . . . . . . . . . . 305
Page 11

INTRODUCTION
Getting Started
.............................................................................................................
Macromedia CourseBuilder is an extension application to Dreamweaver for
creating Web-based learning content and interactive Web pages. CourseBuilder
extends Dreamweaver with a set of easy to use templates and tools that simplify
and accelerate the development of online learning content. CourseBuilder for
Dreamweaver is the first visual authoring tool developed specifically for creating
Web-based learning. Learning interactions created with CourseBuilder are
100% Web-native, enabling cross-platform and cross-browser delivery without
plug-ins or applets.
All CourseBuilder Interactions require at least a version 3 browser. Because of the
capabilities of the browsers, some interactions—drag-and-drop, explore, timer,
and slider—work only with version 4 browsers. (See “CourseBuilder Interaction
compatibility with browsers” on page 73.)
11
Page 12

What you can do with CourseBuilder
for Dreamweaver
CourseBuilder for Dreamweaver helps you quickly design compelling learning
interactions with step-by-step assistance. In minutes, you can:
Create true/false, multiple-choice, and all-that-apply quizzes
See “Multiple-choice CourseBuilder Interactions—step-by-step procedures” on
page 83
Create drag-and-drop matching exercises
See “Drag-and-drop CourseBuilder Interactions—step-by-step procedures” on
page 104
Create explore interactions
See “Explore CourseBuilder Interactions—step-by-step procedures” on
page 133
Create text-entry interactions
See “Text entry CourseBuilder Interactions—step-by-step procedures” on
page 147
Create buttons, timers, and sliders
See “Button CourseBuilder Interactions— step-by-step procedures” on
page 176
See “Timer CourseBuilder Interactions—step-by-step procedures” on page 187
See “Slider CourseBuilder Interactions— step-by-step procedures” on page 202
CourseBuilder for Dreamweaver lets you define a complete Web-based learning
interaction. Choose which type of interaction you want to create from the
CourseBuilder Interactions Gallery (see “CourseBuilder Interaction Gallery” on
page 71). You can edit the content of a CourseBuilder Interaction, so you don’t
have to start from scratch if you want to make changes. You can extend the
CourseBuilder Interaction’s built-in functionality by creating your own
interaction templates.
CourseBuilder includes both traditional learning interactions (multiple choice,
drag and drop, explore, text entry) and learning interactions that function
much like desktop controls (buttons, timers, and sliders). You can combine
CourseBuilder Interactions—for example, you can include a timer object with a
drag-and-drop object that records how long the user takes to complete the dragand-drop interaction. You can use an Action Manager CourseBuilder Interaction
to control conditions and actions for any or all other CourseBuilder Interactions
on the page.
12
Introduction
Page 13

System requirements
The following hardware and software is required to run CourseBuilder for
Dreamweaver.
For Microsoft Windows™:
An Intel Pentium® 133-MHz or equivalent processor running Windows 95,
Windows 98, or Windows NT version 4.0 or later.
32 MB of random-access memory (RAM) plus 30 MB of available disk space.
A color monitor capable of 800 x 600 pixel resolution.
A CD-ROM drive.
For the Macintosh®:
A Power Macintosh, running Mac OS 8.1 or later.
32 MB of RAM with virtual memory set to 64 MB, plus 30 MB of available
disk space.
A color monitor capable of 800 x 600 pixel resolution.
A CD-ROM drive.
Installing CourseBuilder for Dreamweaver
Follow these steps to install CourseBuilder for Dreamweaver on either a Windows
or a Macintosh computer.
To install CourseBuilder for Dreamweaver:
1
Insert the CourseBuilder for Dreamweaver CD into the computer’s
CD-ROM drive.
Choose from the following options:
2
In Windows, choose Start > Run. Click Browse and choose the Setup.exe
file on the CourseBuilder for Dreamweaver CD. Click OK in the Run dialog
box to begin the installation.
On the Macintosh, double-click the CourseBuilder for Dreamweaver
Installer icon.
Follow the on-screen instructions.
3
If prompted, restart your computer.
4
Getting Started
13
Page 14
Learning CourseBuilder for Dreamweaver
The CourseBuilder for Dreamweaver package contains a variety of resources to
help you learn the program quickly and become proficient in creating your own
Web page interactions. These resources include online HTML help pages that
appear in your browser, a tutorial, and a printed book. In addition, the
CourseBuilder for Dreamweaver Web site is updated regularly.
CourseBuilder for Dreamweaver Help
The CourseBuilder for Dreamweaver HTML help pages provide comprehensive
information about all CourseBuilder Interaction features. These browsers are
strongly recommended for viewing CourseBuilder for Dreamweaver Help:
In Windows: Netscape Navigator 4 and later or Microsoft Internet Explorer 4
and later
On the Macintosh: Netscape Navigator 4 and later
If you use a 3 browser, all the content is still accessible, but some features (such as
Search) will not work.
CourseBuilder for Dreamweaver Help makes extensive use of JavaScript. Make
sure that JavaScript is enabled in your browser. If you plan to use the search
feature, make sure that Java is enabled as well.
CourseBuilder for Dreamweaver Help includes the following components:
The table of contents
Click top-level entries to view subtopics.
The index,
like a traditional printed index, can be used to find important terms
and go to related topics.
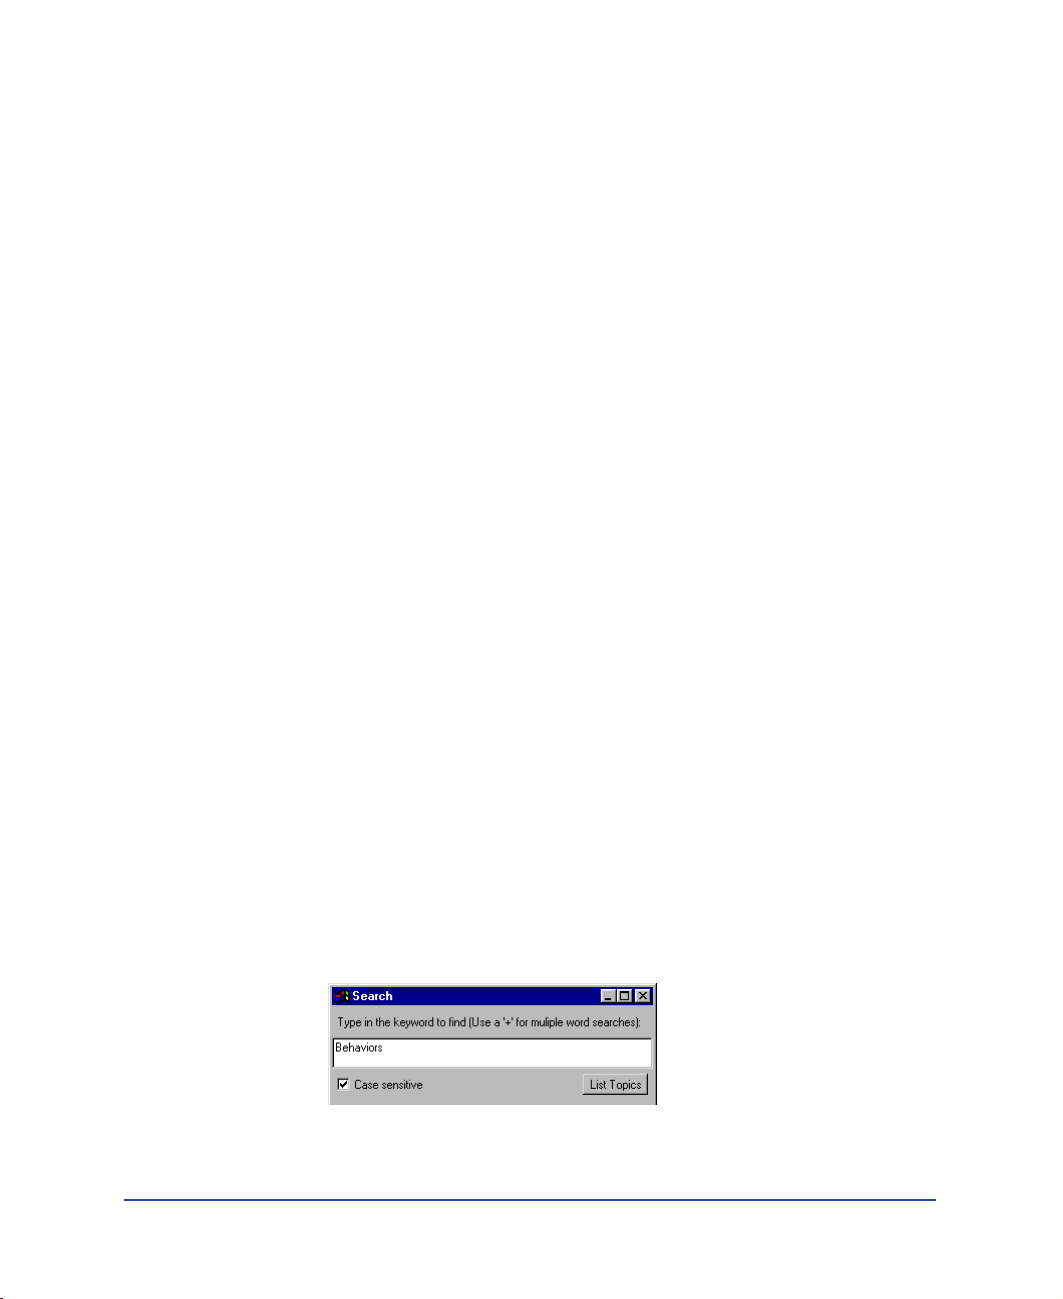
Search
allows you to find any character string in all topic text. The search feature
requires a version 4 browser with Java enabled.
enables you to see all information organized by subject.
14
Introduction
Note:
After clicking Search, a Java security window may appear, asking for permission to
read files on your hard disk. You must grant this permission for the search to work. The
applet does not write anything to your hard disk, nor does it read any files outside the
HTML help pages.
To search for a phrase, simply type the phrase in the text field.
To search for files that contain two keywords (for example,
text
and
entry
),
separate the search terms with a plus (+) sign.
Page 15

Context-sensitive help
provides a Help button in each dialog box, or a question
mark icon in inspectors, windows, and palettes, that opens a relevant help topic.
The Help navigation bar
provides buttons you can click to move through topics.
The Previous and Next buttons move to the previous or next topic in a section
(following the topic order listed in the table of contents).
CourseBuilder for Dreamweaver tutorial
The CourseBuilder for Dreamweaver tutorial is the best place to start if you don’t
have very much experience in developing Web-based learning interactions. By
working through the tutorial, you’ll learn how to create learning interactions with
some of CourseBuilder’s most useful and powerful features. The tutorial is in both
CourseBuilder for Dreamweaver Help and the
Dreamweaver
book.
Using CourseBuilder for
CourseBuilder for Dreamweaver user’s guide (printed book)
The
Using CourseBuilder for Dreamweaver
book provides a printed alternative to
CourseBuilder for Dreamweaver Help.
CourseBuilder for Dreamweaver Support Center
The CourseBuilder for Dreamweaver Support Center Web site is updated
regularly with the latest information on CourseBuilder for Dreamweaver, plus
advice from expert users, information on advanced topics, examples, tips, and
updates. Check the Web site often for the latest news on CourseBuilder for
Dreamweaver and how to get the most out of the program at
http://www.macromedia.com/support/coursebuilder.
Getting Started
15
Page 16

New user’s checklist
CourseBuilder for Dreamweaver is a sophisticated tool that’s both powerful and
easy to use. You’ll learn the basics quickly. Other things will take you more time to
master. This checklist will help you find the resources you need to learn everything
you need to know about using CourseBuilder for Dreamweaver.
Work through the tutorial.
Read this book.
Using CourseBuilder for Dreamweaver
behind using CourseBuilder Interactions. Don’t overlook the lists of step-bystep procedures. They give you an overview of all the things you can do and tell
you where to find detailed instructions.
The material in this book is available online throughout CourseBuilder for
Dreamweaver Help. Choose Help > Using CourseBuilder for Dreamweaver.
The CourseBuilder for Dreamweaver Help Pages are always the quickest way to
find the answers to your questions. Use the index to search for the topic you’re
interested in.
Visit the CourseBuilder for Dreamweaver Support Center.
It’s a rich source of information about CourseBuilder for Dreamweaver that
includes articles by expert users on new features and common problems,
regular installments of new Show Me examples, and information about books
and Web sites, user groups and events, and tools and services you may need.
Click the What’s New button at the top of the Help Pages browser or visit
www.macromedia.com/support/courseBuilder.
Join the DWARE list.
The DWARE discussion list is an online forum for discussing CourseBuilder
for Dreamweaver. This list is maintained, not by Macromedia, but by
CourseBuilder for Dreamweaver developers worldwide. It’s a great way to share
your problems with and learn from expert users from around the globe.
To subscribe to the DWARE discussion list, send the following message to
LISTSERV@LS.KULEUVEN.AC.BE:
SUBSCRIBE DWA Your_First_Name Your_Last_Name
For example,
SUBSCRIBE DWA Chris Chen
You can remove your name from the list any time by sending a SIGNOFF
DWA command to LISTSERV@LISTSERV.CC.KULEUVEN.AC.BE.
Check the CourseBuilder for Dreamweaver TechNotes when you have
a problem.
is the ideal place to find the concepts
16
Introduction
Page 17

If you’re having a problem, chances are that Technical Support has already
solved the problem for someone else.Check the CourseBuilder for
Dreamweaver Discussion Group.
If you’re having a problem, and you can’t find the answer in the TechNotes,
check the CourseBuilder Discussion Group. The discussion group is part of the
CourseBuilder for Dreamweaver Support Center. Visit www.macromedia.com/
support/coursebuilder.
Join a user group.
Other developers can help you over a lot of hurdles. The best place to meet
them is at a user group. For a list of user groups, visit www.macromedia.com/
support/coursebuilder.
Getting Started
17
Page 18

What’s new in CourseBuilder for Dreamweaver
CourseBuilder for Dreamweaver is the new name for the product originally called
Dreamweaver Attain or Attain Objects for Dreamweaver.
CourseBuilder for Dreamweaver is fully compatible with Dreamweaver 3 allowing
you to expand on the flexibility and power of Dreamweaver as you create
interactive learning content.
If you’ve worked with Attain Objects for Dreamweaver, most of the changes you
see will be interface changes related to the new product name and enhanced
integration with Dreamweaver 3.
If you’ve worked with Dreamweaver Attain, you’ll see more significant changes
and new features: saving custom CourseBuilder Interactions to the Gallery,
creating Pathware framesets, and copying support files have all been streamlined.
Behind the scenes, CourseBuilder for Dreamweaver creates and manages code
differently, resulting in more compact HTML and eliminating code duplication.
Interface enhancements
CourseBuilder Interaction icons
allow you to easily select an interaction to make
edits to, copy, or cut. See CourseBuilder for Dreamweaver basics.
The new <interaction> tag
Interactions. When you select a CourseBuilder Interaction,
has been added to identify CourseBuilder
<interaction>
appears
in the tag selector. See CourseBuilder for Dreamweaver basics.
A custom Property inspector for CourseBuilder Interactions
contains a list of all
the CourseBuilder Interactions on the page and an Edit button, which you can
use to reopen the CourseBuilder Interaction dialog box to make changes to a
selected interaction. See “Editing CourseBuilder Interactions” on page 158.
Improved functionality
Live updates
let you make changes in the CourseBuilder Interaction dialog box
appear immediately in the Document window. Live updating allows you to see
information as you enter it and changes as you make them.
The Undo Command
now undoes each single change rather than all of the changes
you make to one CourseBuilder Interaction. Often, the change you’re undoing
may not be apparent. For example, if you change the answer of a multiple-choice
question from true to false, and then undo it, you won’t see any change in the
Document window.
Copying support files
is now prompted. When you add a CourseBuilder
Interaction from the Object palette, you’ll be prompted to copy the support files
to the folder that contains your document.
Support files
refers to the scripts and
images CourseBuilder for Dreamweaver adds to a page as it builds the
CourseBuilder Interaction. See “Copying support files” on page 68.
18
Introduction
Page 19

Customizing CourseBuilder Interactions
The Insert in Layer option
places a CourseBuilder Interaction in its own layer,
thereby simplifying Netscape layer issues and allowing absolute placement of the
interaction on the page. Inserting the interaction into its own layer also
facilitates the use of various actions, such as Show-Hide layers. This feature is
available only in version 4 browser interactions. See “Inserting a CourseBuilder
Interaction into a layer” on page 166.
Customizing the Actions pop-up menu
is now possible. You can edit the order of
the items listed on the Actions pop-up menu to fit the way you work. See “Action
Manager pop-up menu” on page 217.
Adding custom behaviors is now easier because the list of behaviors in the Action
Manager is now dynamically generated. Copy custom behaviors to the folder
Dreamweaver\Configuration\Behaviors\Actions, and they will be visible both at
the bottom of the Action Manager pop-up menu and in the Behavior window the
next time you launch CourseBuilder for Dreamweaver. For information about
custom behaviors, see “Adding a custom behavior” on page 249.
Action Manager changes
Segment, Condition, and Action Editors are now dialog boxes instead of tabs. The
Segment, Condition, or Action Editor appears when you add a segment,
condition, or action or when you click the Edit button to edit one, thereby
eliminating the confusion caused by switching between tabs to edit information.
Edit and Rename buttons are now available in the Action Manager tab:
The Edit button reopens the dialog box for a selected segment, condition, or
action, making it easier for you to make edits. See “Editing a segment,
condition, or action” on page 225.
The Rename button allows you to rename elements in the Action Manager. See
“Renaming a segment, condition, or action” on page 224.
Help buttons now appear on every tab in the CourseBuilder Interaction
dialog box.
Getting Started
19
Page 20

Menu changes
CourseBuilder Interaction commands can now be found on one of two menus—
the Insert menu and the Modify menu.
The Insert CourseBuilder Interaction command in the Insert menu displays the
CourseBuilder Interaction dialog box, from which you can insert a CourseBuilder
Interaction into your document.
New Modify commands The CourseBuilder Interaction commands in the Modify
menu display a submenu of commands to specifically use with CourseBuilder for
Dreamweaver:
The Edit Interaction command brings up the CourseBuilder Interaction dialog
box from which you can edit a CourseBuilder Interaction.
The Add CourseBuilder Interaction to Gallery command saves custom
CourseBuilder Interactions for easy, reusable access in the CourseBuilder
Interaction Gallery. See “Adding a CourseBuilder Interaction template to the
Gallery” on page 169.
The Create Tracking Frameset and Create Pathware Frameset commands allow
you to create the frameset and results files needed for tracking student
performance either in Lotus Pathware or in another computer-managed
instruction (CMI) tracking system. See “Using Knowledge Track” on page 267.
The Copy Support Files command copies the support files (scripts and images)
to the same folder in which CourseBuilder for Dreamweaver document has
been saved. Without the support files, a CourseBuilder Interaction may not
work or may not be able to find the images it needs.
The Convert From Previous Version command converts pages made with the
previous version of Dreamweaver Attain so that they can be edited in
CourseBuilder for Dreamweaver. See “Converting from previous versions” on
page 75.
Improved integration
The Insert Authorware button lets you place a Web-packaged Authorware piece on
a Web page. See “Using the Insert Authorware object” on page 168.
Introduction20
Page 21

CHAPTER 1
CourseBuilder for Dreamweaver Tutorial
.............................................................................................................
Tutorial overview
This tutorial shows you how to use CourseBuilder for Dreamweaver to create
three types of learning interactions.
As you develop a web-based sales training module for sales representatives of
Discovertoys.com, a fictitious company, you’ll create an explore interaction (where
a user clicks areas on a page to gain more information about an object), a
multiple-choice interaction (where a user selects a correct response from a set of
choices), and a drag-and-drop interaction (where a user demonstrates knowledge
by dragging one object on the screen to another object on the screen).
You need Netscape Navigator 4 or Microsoft Internet Explorer 4—or a later
version of either browser—to view the pages you create in this tutorial.
Along the way you’ll learn how to perform the following tasks:
Copy support files to a local site folder
Insert CourseBuilder Interactions in a document
Use the CourseBuilder Interaction dialog box to select an interaction template
Customize CourseBuilder Interaction templates
Use the Action Manager to attach actions to an interaction
Edit CourseBuilder Interactions
Test an interaction
1
21
Page 22

Preview the completed Discover Toys interaction
Take a look at the completed CourseBuilder for Dreamweaver files to get an idea
of what you’re working toward. In the folder in which you installed CourseBuilder
for Dreamweaver, open the folder named cb_tutorial. Then locate the folder
named discover_comp, and double-click the file named discover_nav.htm.
The discover_nav page opens in your browser, click the buttons on this page to
navigate to other pages of the site.
Try all of the possible combinations of correct and incorrect responses on the quiz
pages to see how the interactions work. Click Refresh or Reload in the browser to
restart an interaction.
Close the browser when you’re finished looking at the files.
How the tutorial files are arranged
The cb_tutorial folder contains both the completed and partially completed
HTML files used in this tutorial.
The completed files are in the discover_comp folder. Images and other associated
files for the completed files are in folders within the discover_comp folder. The
partially completed files—which you’ll be working on—are in the cb_discover
folder. (The complete path to the discover_comp folder will vary, depending on
where you have CourseBuilder for Dreamweaver installed.)
Each file has a meaningful name—for example, the HTML file for the completed
module’s navigation page is named discover_nav.htm.The partially completed files
have names similar to their counterparts in the complete site, except they begin
with cb_; the partially completed version of discover_nav.htm, for example, is
called cb_nav.htm.
Set up site structure for the tutorial
Before you start the tutorial, create a new folder into which you’ll transfer the
CourseBuilder for Dreamweaver tutorial files.
If you completed the Dreamweaver tutorial and already created a Sites folder,
skip step 1.
1 At the root level of your local disk, create a new folder and name it Sites—for
example, C:\Sites (Windows) or Hard Drive:Sites (Macintosh).
2 From the Dreamweaver\CourseBuilder\Tutorial folder, copy the entire
cb_tutorial folder to the Sites folder.
Chapter 122
Page 23
Define a local site
Set up a local site to develop a file structure for your site. A local site contains all
the files used within a specified site, such as HTML files, images, scripts, and
other asset files. For this tutorial, you’ll specify the cb_tutorial folder as the local
site folder.
1 Launch CourseBuilder for Dreamweaver.
A blank document opens.
2 Choose Site > New Site.
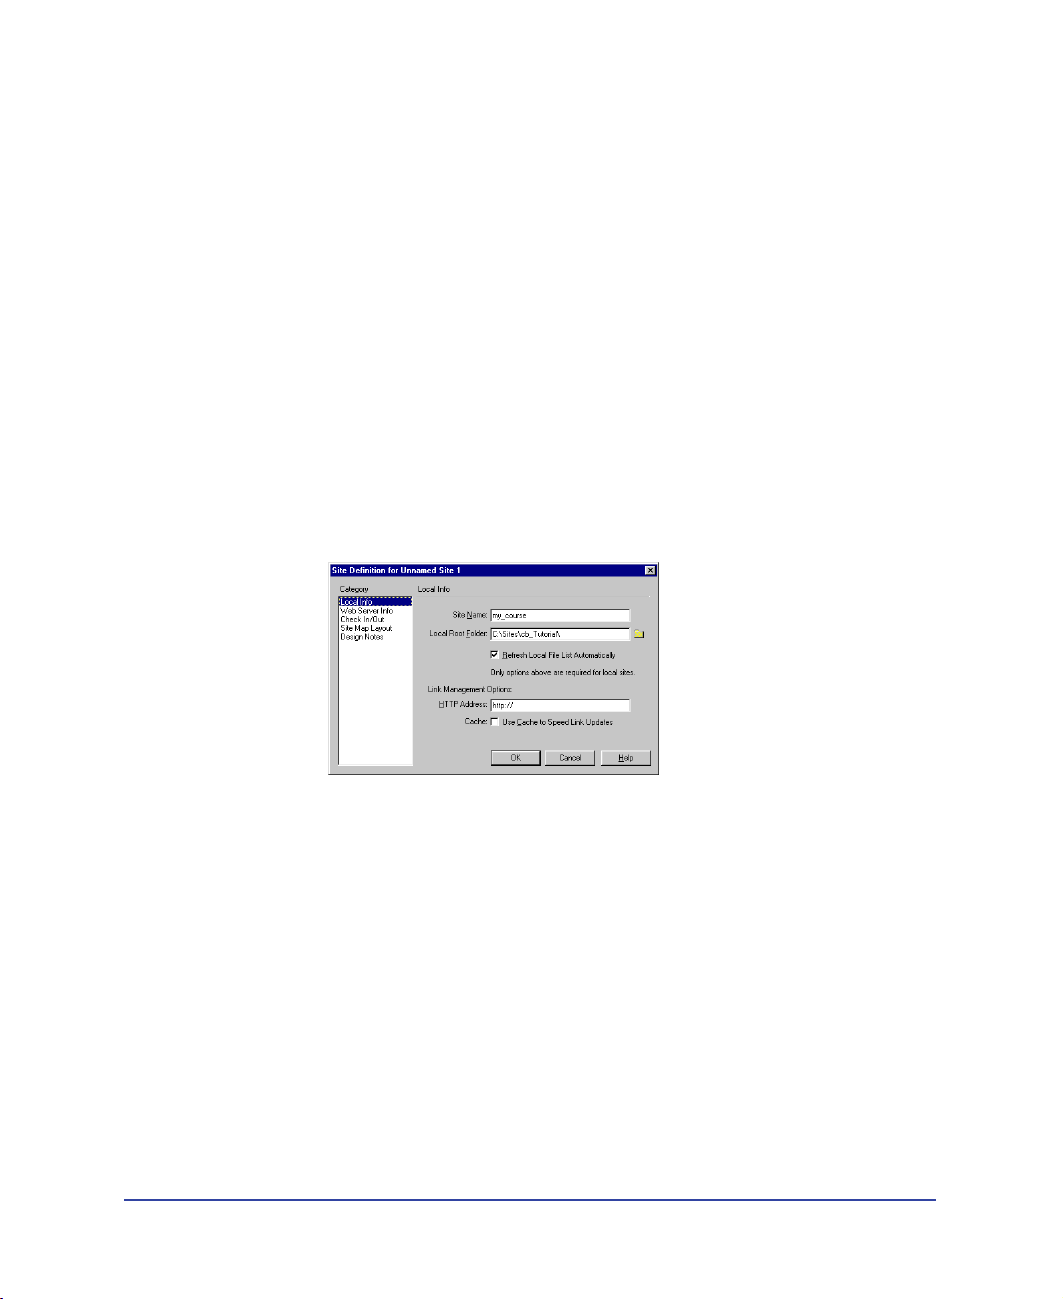
3 In the Site Definition dialog box, make sure Local Info is selected in the
Category list.
4 In the Site Name field, type my_course.
5 Click the folder icon to the right of the Local Root Folder field, navigate to
the Sites\cb_tutorial folder, and then click Select (Windows) or Choose
(Macintosh).
The Local Root Folder field updates to display the path to the local site.
Note: The complete path to the cb_tutorial folder may vary, depending on where you
have created your Sites folder.
6
Click OK.
CourseBuilder for Dreamweaver Tutorial 23
Page 24

7
Click Create when asked if you’d like to create a cache file for the site.
Caching the files in the cb_tutorial folder creates a record of existing files
so Dreamweaver can quickly update links when you move, rename, or
delete a file.
The Site window now displays a list of the folders and files in the local site
my_course. The list also acts as a file manager, allowing you to copy, paste,
delete, move, and open files just as you would in the file finder or explorer on
your own computer.
8 Leave the Site window open.
9 Click the Document window to make it active.
Create an explore CourseBuilder Interaction
CourseBuilder Interactions cannot be added to an unsaved document. You
can either start with a new document, then save it, or you can open an existing
document.
In this tutorial, you’ll add CourseBuilder Interactions to existing partially
completed pages which contain the same elements—a background image and a
training department banner.
Now, you’ll create an explore interaction. In this interaction users click pictures of
the toy products to learn about them.
Open the file to which you’ll add an explore CourseBuilder Interaction.
1 Choose File > Open.
2 In the dialog box that appears, navigate to Sites/cb_tutorial/cb_discover, then
select cb_explore.htm, and click Select (Windows) or Open (Macintosh) to
open the file.
Chapter 124
Page 25
Copy support files
CourseBuilder for Dreamweaver requires support files that contain images and
scripts; the support files enable CourseBuilder Interactions to function.
You’ll copy support files to the cb_discover folder.
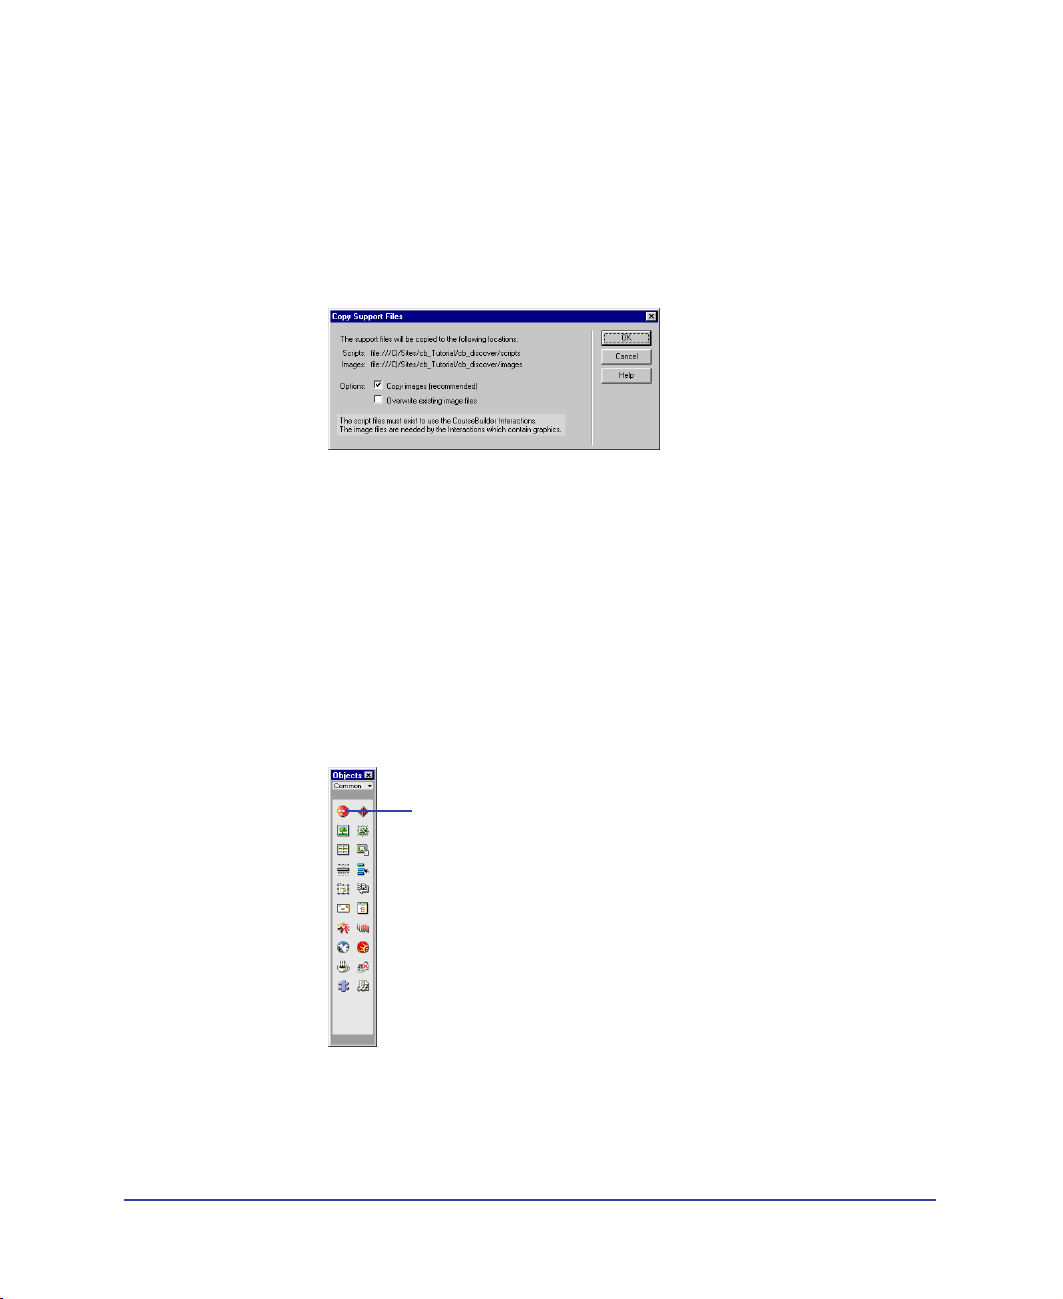
1 Choose Modify > CourseBuilder > Copy Support Files.
A message appears advising where the support files will be copied.
2 Click OK to create the necessary folders and to copy the files.
The files are copied to the cb_discover folder.
Insert a CourseBuilder Interaction
1 If the Object palette isn’t already open, choose Window > Objects to open it.
2 In the Document window, click in the middle of the document to place the
insertion point after existing page elements.
3 In the Object palette’s Common panel, click the CourseBuilder Interaction
icon to open the CourseBuilder Interaction dialog box.
CourseBuilder Interaction icon
CourseBuilder for Dreamweaver Tutorial 25
Page 26
Select the type of interaction
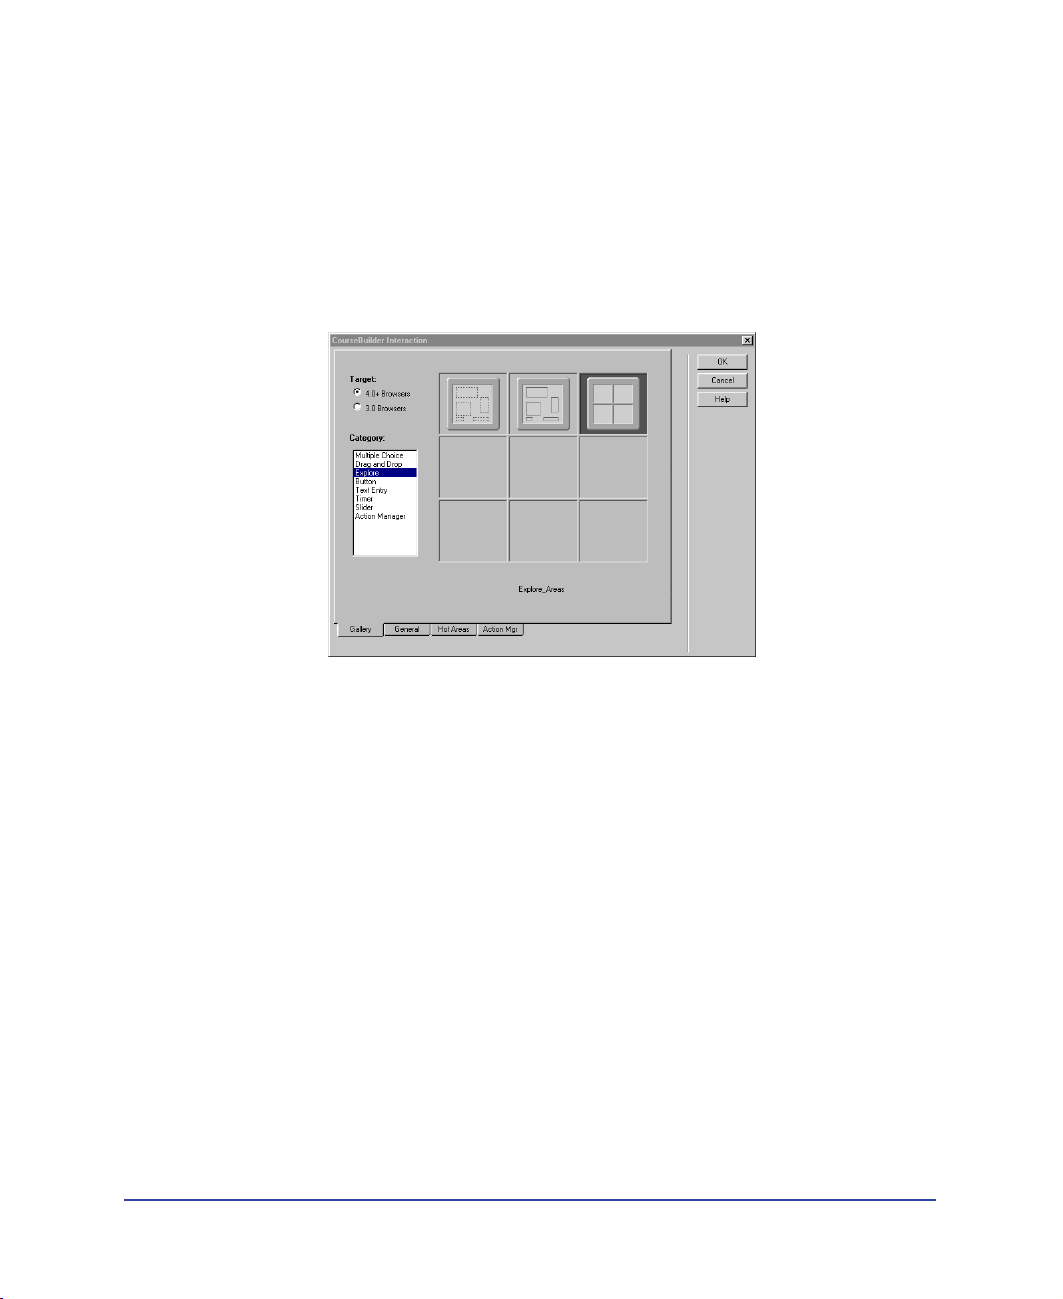
1 In the CourseBuilder Interaction dialog box, under Target, 4.0+ Browsers
should already be selected. If it is not, select it.
2 Select Explore in the Category list.
The icons in the Gallery represent the explore CourseBuilder Interactions that
function in version 4 and later browsers.
3 Click the icon for the Explore_Areas template.
Define the hot areas
You don’t need to change the default settings that are in the General tab, so you’ll
begin by specifying the hot area elements of the explore interaction—graphic
images of the toys the users will click.
Chapter 126
Page 27
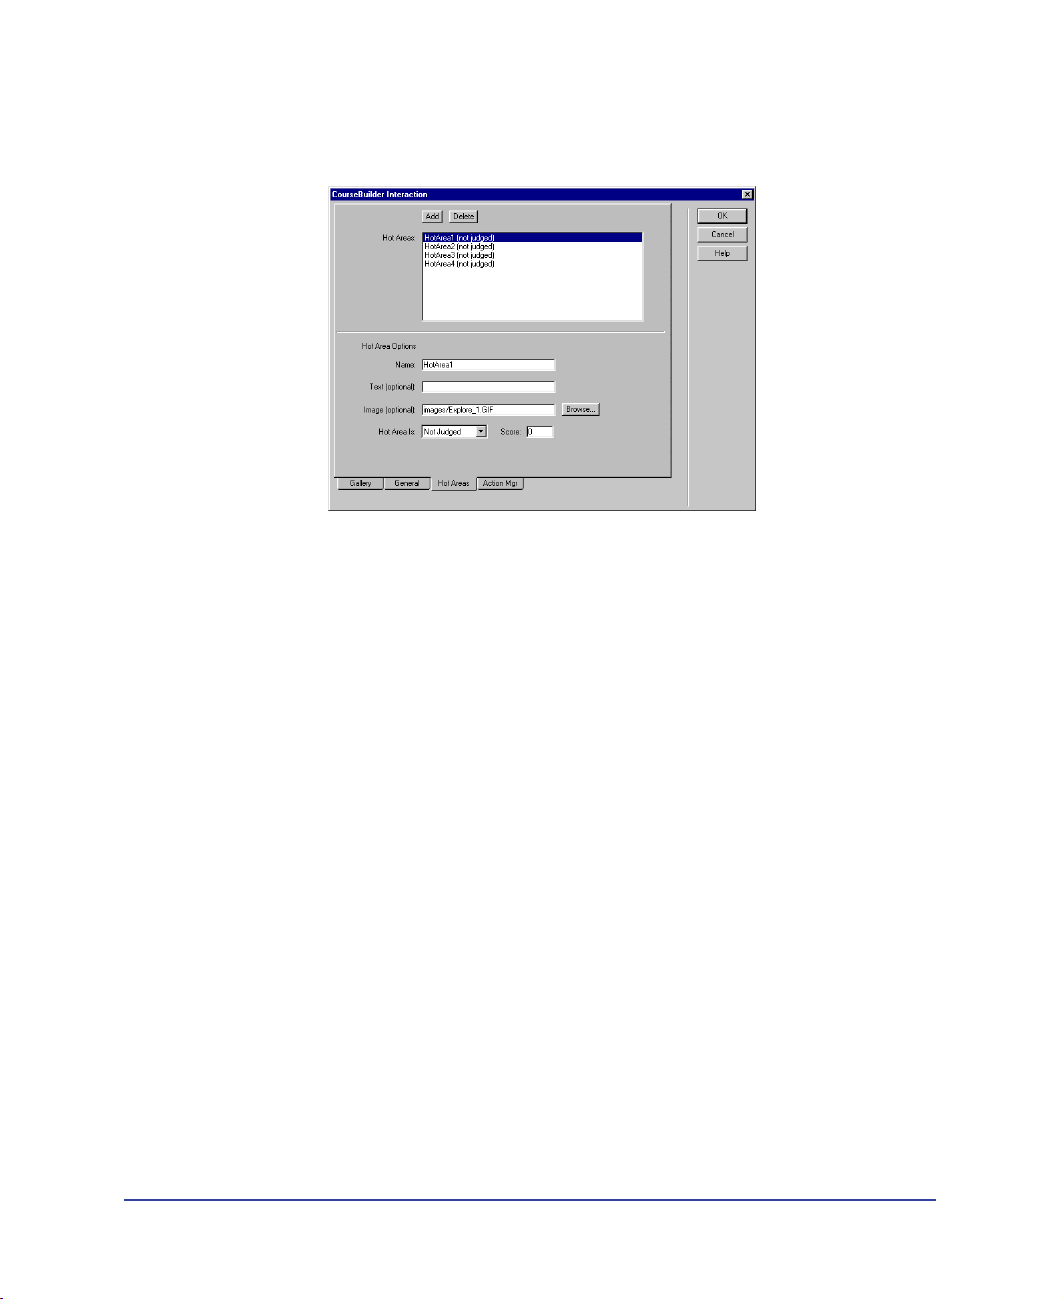
Add graphics for the hot areas
1 Start by clicking the Hot Areas tab.
In the Hot Areas list, Hot Area1 is already selected.
2 In the Image field, click Browse. Then, in the Select Appearance dialog box,
navigate to the cb_graphics folder and select toy_racer.gif. Then click Select
(Windows) or Choose (Macintosh) to display the image.
Add three more hot area graphics
1 In the Hot Areas list, select HotArea2.
2 In the Image field, click Browse. Then, in the Select Appearance dialog box,
navigate to the cb_graphics folder and select toy_coldfusion.gif. Then click
Select (Windows) or Choose (Macintosh) to display the image.
3 In the Hot Areas list, select HotArea3.
4 In the Image field, click Browse. Then, in the Select Appearance dialog box,
navigate to the cb_graphics folder and select toy_satellite.gif. Then click Select
(Windows) or Choose (Macintosh) to display the image.
5 In the Hot Areas list, select HotArea4.
6 In the Image field, click Browse. Then in the Select Appearance dialog box,
navigate to the cb_graphics folder and select toy_waverider.gif. Then click
Select (Windows) or Choose (Macintosh) to display the image.
7 Click OK to close the CourseBuilder Interaction dialog box.
8 Save your file.
CourseBuilder for Dreamweaver Tutorial 27
Page 28
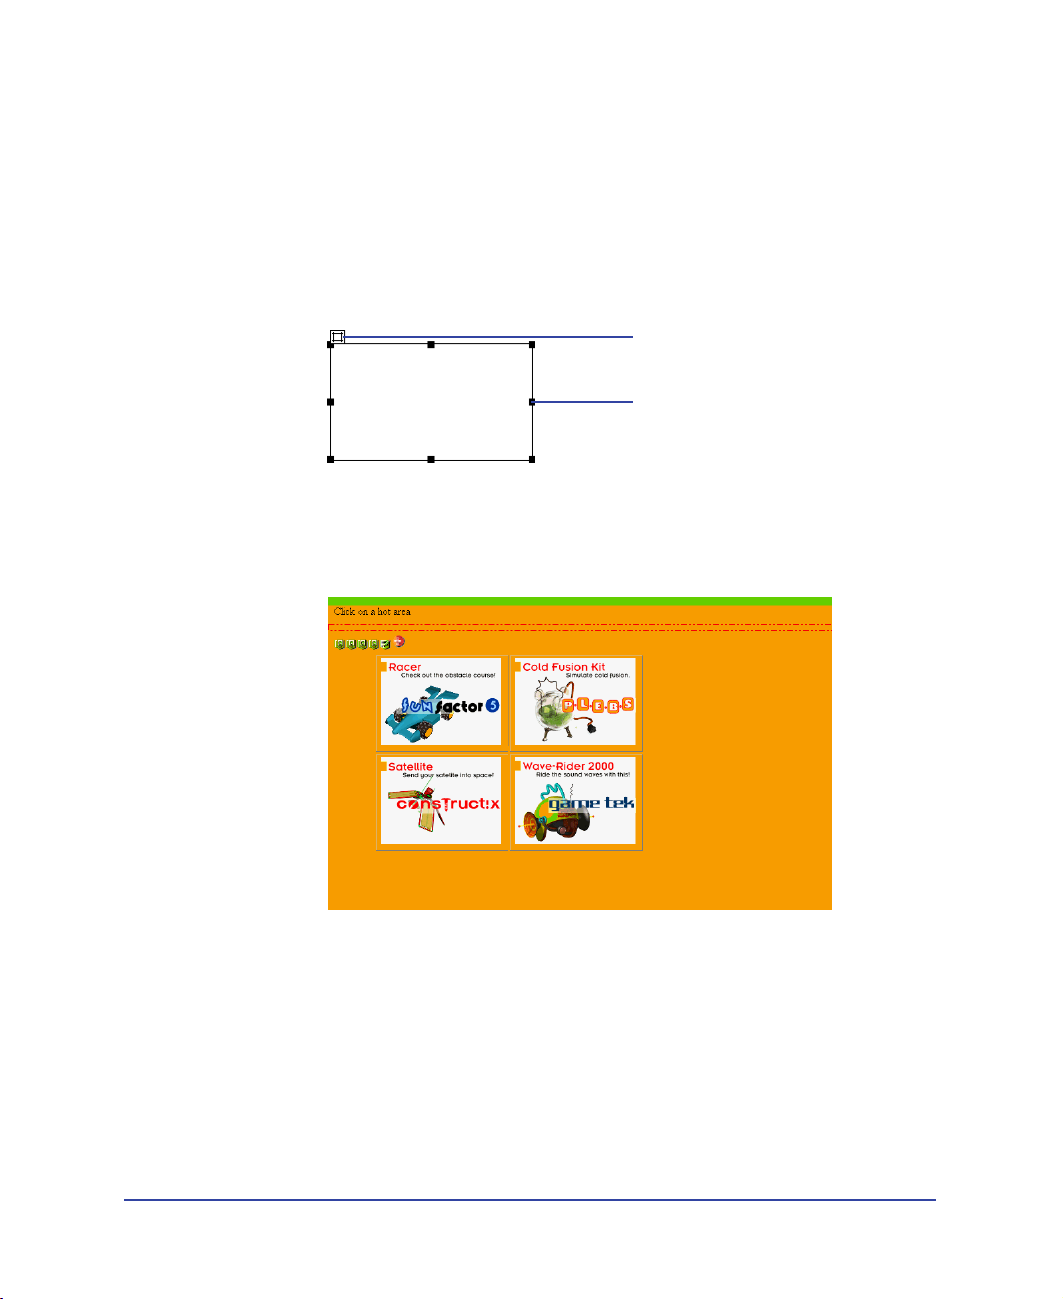
Arrange the hot areas in the document
Next, you’ll remove the text instructions on the page, and move the hot area layers
to make room for a new layer that you’ll use to provide feedback to users.
1 In the Document window, select the text “Click on a hot area” at the top of the
screen, then press Backspace (Windows) or Delete (Macintosh) to delete it.
2 In the Document window, click the border of a hot area layer to select the layer.
Handles appear around a selected layer:
Layer tab
Layer handle
3 Click the layer tab, on the upper left corner, then drag the layer where you want
to position it.
Move each hot area, as necessary, to position the layers like this:
4 Save your changes.
Chapter 128
Page 29
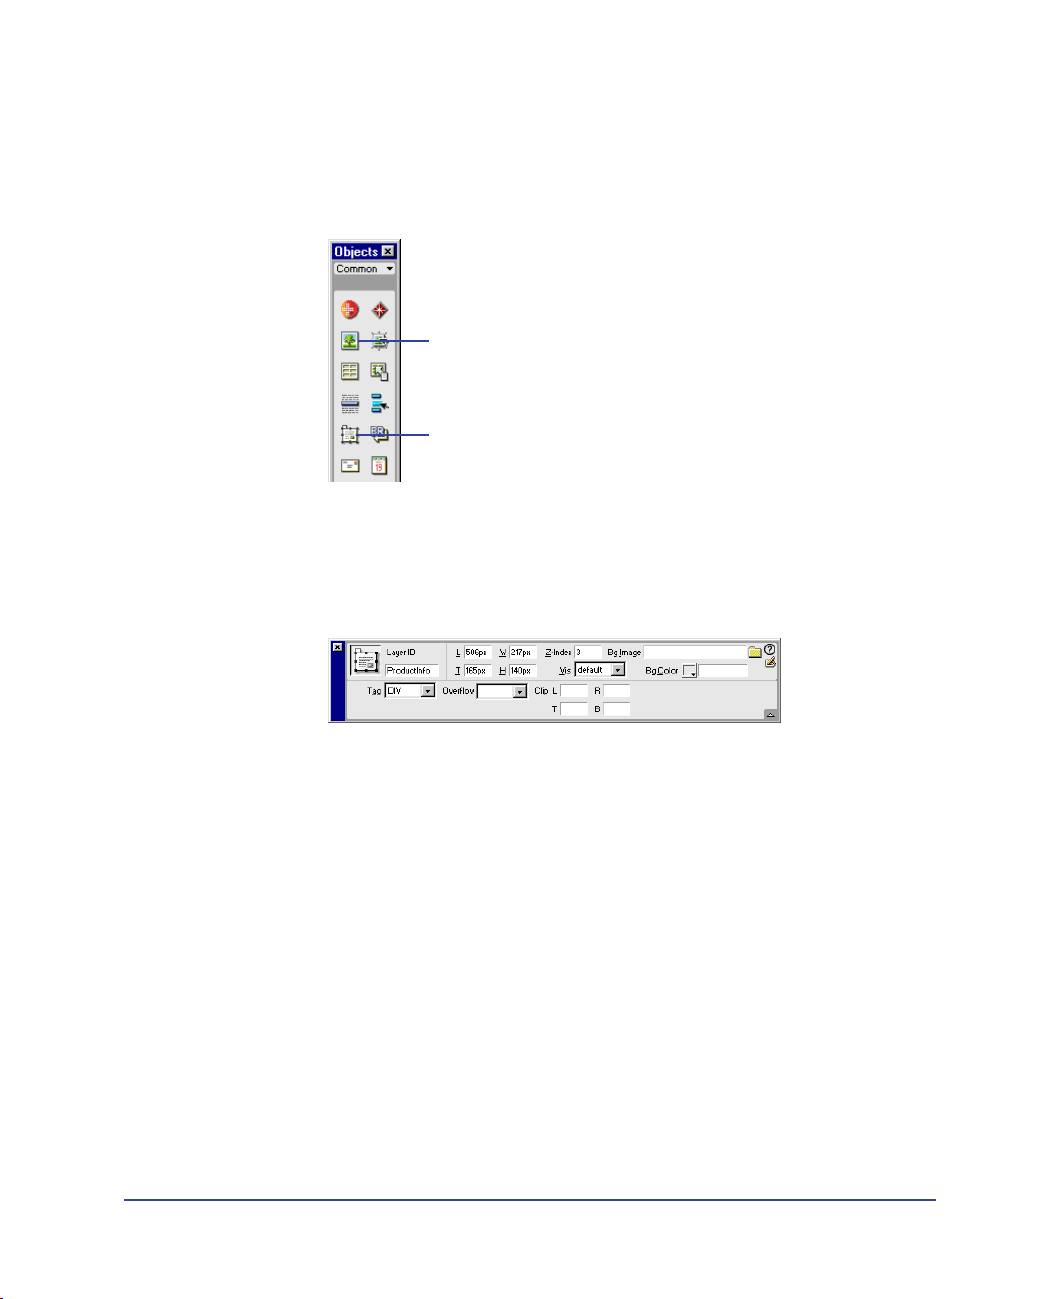
Add a layer for user feedback
Next, you’ll create a layer where both instructions to the user and the product
information will appear in the page.
1 Click the Layer icon on the Object palette.
Image icon
Layer icon
2 Move the pointer to the Document window, then drag to draw a layer in the
right side of the document.
3 Click the border of the layer to select it. Then, in the Property inspector’s
LayerID field, replace the default text “Layer1” by typing ProductInfo.
4 In the Document window, click in the middle of the ProductInfo layer to set
the insertion point in the layer.
5 In the Object palette, click the Image icon to insert an image in the layer.
The Select Image Source dialog box appears.
CourseBuilder for Dreamweaver Tutorial 29
Page 30
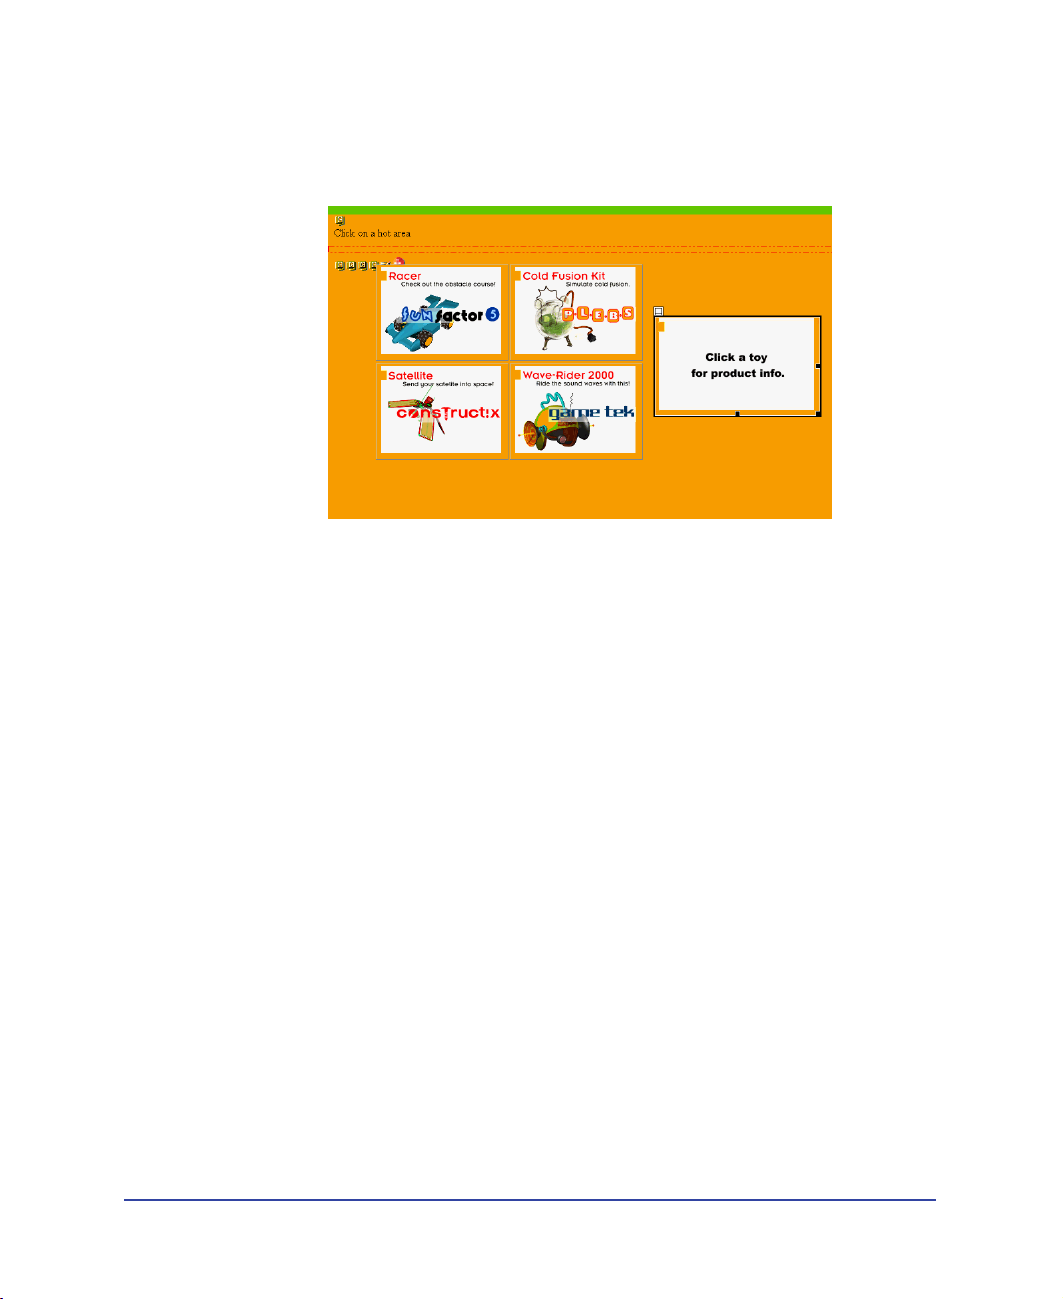
6
In the dialog box, navigate to the cb_graphics folder, select text_any.jpg, and
click Select (Windows) or Choose (Macintosh) to insert the image in the layer.
The user instructions appear in the layer in the Document window.
Editing a CourseBuilder Interaction
The elements are set up; however, you still need to define what happens when a
user clicks one of the hot areas. To ensure that your interactions function correctly,
always make changes to the elements of a CourseBuilder Interaction in the
CourseBuilder Interaction dialog box. Reopen the CourseBuilder Interaction
dialog box.
1 In the Document window, do one of the following to select the CourseBuilder
Interaction:
Click the CourseBuilder Interaction icon in the Document window.
Click any of the hot area layers, then click <interaction> in the tag selector.
2 In the Property inspector, click Edit to open the CourseBuilder Interaction
dialog box.
Chapter 130
Page 31

Create user feedback
When users clicks a hot area, they should learn about the product they selected.
You’ll set up a swap image to switch the image displayed in the ProductInfo layer
with an image that contains information about the product that was clicked.
Use the Action Manager to define what happens when a specific hot area is
clicked. You’ll remove the default Popup Message action feedback and add a Swap
Image action for each hot area.
View the Action Manager tab
Start by clicking the Action Manager tab.
The Action Manager tab displays default segments and conditions based on the
type of interaction selected. Segments preceded by a plus sign (+) are collapsed. To
view the conditions and actions of a selected collapsed segment, click Expand in
the Action Manager tab.
Action flows from the top of the list down until a defined condition is met—for
example, if a user clicks Hot Area 1. When a defined condition is met, action
flows to the next item within that segment—for example, if Hot Area 1 is clicked,
a Popup Message would be displayed.
Although segments are automatically added in the Action Manager to check the
time limit and tries limit, the actions for these segments aren’t triggered unless you
select these options in the General tab.
CourseBuilder for Dreamweaver Tutorial 31
Page 32

Add a swap image action for racer product information
1 In the Action Manager list under “if Hot Area1 Selected,” select Popup
Message, then click Cut.
2 Select “if Hot Area1 Selected,” then in the Actions pop-up menu choose Swap
Image, and click Add.
The Swap Image dialog box appears:
In the Swap Image dialog box, “unnamed <img>” is selected. This is the image
you inserted in the ProductInfo layer. You’ll swap this image for an image that
describes the image in Hot Area 1, the racer.
3 In the “Set Source to” field, click Browse.
4 In the Select Image Source dialog box that appears, select text_racer.jpg, then
click Select (Windows) or Choose (Macintosh) to display the image.
5 Click OK to close the dialog box.
Chapter 132
Page 33

Add a swap image action for Cold Fusion product information
Replace the user instruction text with text describing the Cold Fusion Kit.
1 In the Action Manager list under “if Hot Area2 Selected,” select Popup
Message, then click Cut.
2 Select “if Hot Area2 Selected,” then in the Actions pop-up menu choose Swap
Image, and click Add.
The Swap Image dialog box appears.
In the Swap Image dialog box’s Images list, “image ‘Image1’ in layer
‘ProductInfo’” is already selected, and the image is set to display text_racer.jpg.
You’ll set the image to display the correct text for Hot Area 2, the Cold Fusion
product.
3 In the “Set Source to” field, click Browse.
4 In the Select Image Source dialog box, select text_coldfusion.jpg, then click
Select (Windows) or Choose (Macintosh) to display the image.
5 Click OK to close the dialog box.
CourseBuilder for Dreamweaver Tutorial 33
Page 34

Add a swap image action for satellite product information
Replace the user instruction text with text describing the satellite.
1 In the Action Manager list under “if Hot Area3 Selected,” select Popup
Message, then click Cut.
2 Select “if Hot Area3 Selected,” then in the Actions pop-up menu choose Swap
Image, and click Add.
3 In the Swap Image dialog box’s Images list, “image ‘Image1’ in layer
‘ProductInfo’” is already selected. Click Browse next to the “Set Source to” field
to select the replacement image.
4 In the Select Image Source dialog box, select text_satellite.jpg, then click Select
(Windows) or Choose (Macintosh) to display the image.
5 Click OK to close the dialog box.
Add a swap image action for wave-rider product information
Now, you’ll replace the user instruction text with text describing the
wave-rider helmet.
1 In the Action Manager list under “if Hot Area4 Selected,” select Popup
Message, then click Cut.
2 Select “if Hot Area4 Selected,” then in the Actions pop-up menu choose Swap
Image, and click Add.
3 In the Swap Image dialog box’s Images list, “image ‘Image1’ in layer
‘ProductInfo’” is already selected. Click Browse next to the “Set Source to” field
to select the replacement image.
4 In the Select Image Source dialog box, select text_waverider.jpg, then click
Select (Windows) or Choose (Macintosh) to display the image.
5 Click OK to close the dialog box.
6 Click OK to close the CourseBuilder Interaction dialog box.
Chapter 134
Page 35

Create a link to the next page
Link this page to the next interaction page, the drag-and-drop quiz.
1 In the Object palette’s Common panel, click the Layer icon, then move the
pointer to the page, and drag to draw a layer in the space beneath the
ProductInfo layer.
2 Click the layer to select it, then move the layer if you need to position it.
Use the layer tab on the upper left corner of the layer to position the layer:
3 Click in the layer to place the insertion point in the layer. In the Object
palette, click the Image icon to insert an image in the layer.
4 In the Select Image Source dialog box, open the cb_graphics folder (if it’s not
already open), select Arrow_Sharp_Right.gif, and click Select (Windows) or
Choose (Macintosh).
An arrow appears in the layer.
5 In the Property inspector, click the folder icon next to the Link field. Then, in
the Select File dialog box, navigate to the cb_discover folder, select
cb_drag_drop.htm, and click Select (Windows) or Choose (Macintosh) to
select the file to open when the arrow is clicked.
6 Click the border of the layer to select it, then use one of the handles to resize
the layer to the size of the graphic.
7 Save your document.
CourseBuilder for Dreamweaver Tutorial 35
Page 36

Test the explore interaction
Test the page to see how the interaction works.
1 Choose File > Preview in Browser, and choose the browser you want to use.
The browser launches and displays the page.
2 Click each of the products and make sure the correct information appears.
3 Click the arrow to see if it goes to the “Know your target audience” page.
Create a drag-and-drop interaction
Now you’ll create a drag-and-drop matching quiz. Users will test their
knowledge of the products by dragging a toy to the target audience for which
the toy is designed.
Insert a CourseBuilder Interaction
1 Choose File > Open. In the dialog box that appears, navigate to
cb_drag_drop.htm, and click Select (Windows) or Open (Macintosh) to
open the file.
2 If the Object palette isn’t already open, choose Window > Objects to open it.
3 In the Document window, click in the middle of the document to place the
insertion point after existing page elements.
4 In the Object palette’s Common panel, click the CourseBuilder
Interaction icon.
The CourseBuilder Interaction dialog box appears.
Chapter 136
Page 37

Select the type of interaction
1 In the CourseBuilder Interaction dialog box, under Target, select 4.0+ Browsers
if it isn’t already selected.
2 Select Drag and Drop in the Category list.
3 Click the icon for the many-to-many matching template.
CourseBuilder for Dreamweaver Tutorial 37
Page 38

Define the General tab options
Use the tabs in the CourseBuilder Interaction dialog box to define this interaction.
As you select options in the tabs, you specify how the CourseBuilder Interaction
will perform.
The default settings of the CourseBuilder Interactions are designed for ease of
use. You’ll find that most of the options you’d select for your interactions are
the options that are set as the current defaults. You’ll only need to change a
few settings to customize the information for courses, surveys, or quizzes
you’re creating.
Use the options of the General tab to define how the interaction responds when a
user interacts with it.
1 Click the General tab.
2 Under Judge Interaction, select “when the user drops a drag element.”
This option causes feedback to display every time the user moves a toy image to
a target audience image—rather than waiting until the user has tried to match
every toy with a target audience.
3 Under Reset, accept the default setting “Create a Reset button for this
Interaction.”
4 Under Reaction, select “Snap back if incorrect.”
This returns the toy to its original position if the user drags it to the wrong
target audience.
Chapter 138
Page 39

5
Under Reaction, accept the default setting “Snap back if not dropped
on target.”
This returns the toy to its original position if the user drags it somewhere other
than a target area.
6 Under Layer, select “Insert this Interaction in a layer” to place the question text
in a layer, making it easy for you to position the text in the document. (Each of
the drag-and-drop images is already in an individual layer.)
Your General tab should be set as the shown here:
CourseBuilder for Dreamweaver Tutorial 39
Page 40

Create drag-and-drop pairs
Now you’ll add the drag and drop elements to the interaction. You’ll add three
drag images and three target images.
Drag-and-drop matching exercises are made up of pairs of drag and target objects.
For example, the satellite is a drag object. Its target object is an image of its target
audience: kids with big imaginations. In this step, you replace the drag-and-drop
template’s placeholder graphics with the images you want to use for the drag and
target objects.
Add drag images
1 Click the Elements tab.
Drag1 is already selected in the Elements list.
2 In the Name field, type satellite.
3 Click the Browse button next to the Image File box. In the cb_graphics folder,
select toy_satellite_mini.gif, then click Select (Windows) or Choose
(Macintosh) to display the image for this drag object.
4 In the Elements list, select Drag2; then in the Name field, type waverider.
5 Click the Browse button. In the cb_graphics folder, select
toy_waverider_mini.gif, then click Select (Windows) or Choose (Macintosh) to
display the image for this drag object.
6 In the Elements list, select Drag3; then in the Name field, type racer.
7 Click the Browse button. In the cb_graphics folder, select toy_racer_mini.gif,
then click Select (Windows) or Choose (Macintosh) to display the image for
this drag object.
Chapter 140
Page 41
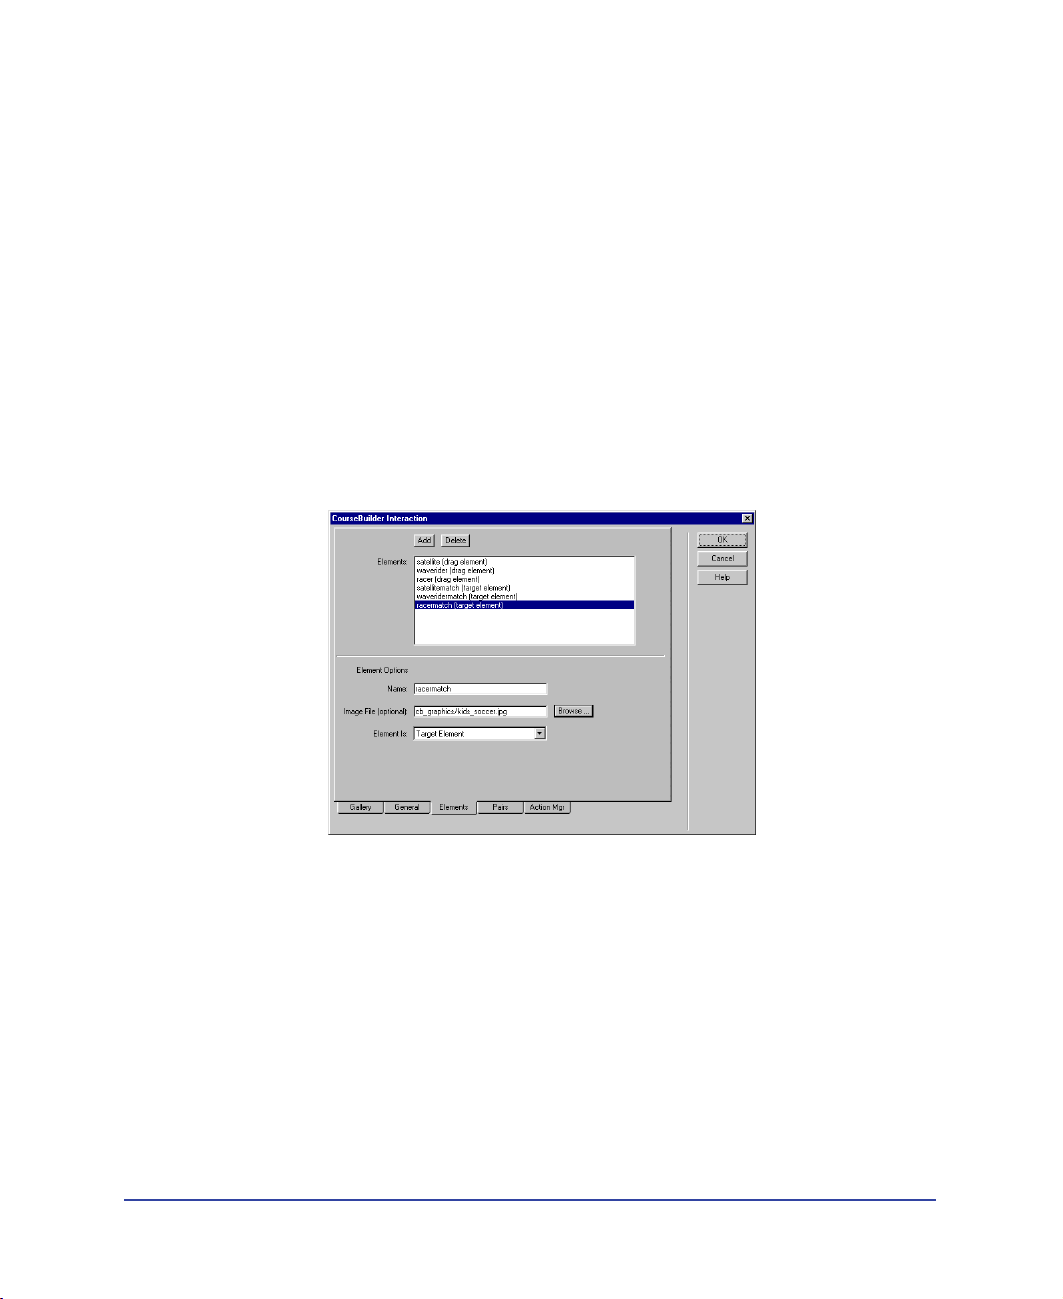
Add target images
Next, add the target images that match the drag objects:
1 In the Elements list, select Target1; then in the Name field, type satellitematch.
2 Click the Browse button. In the cb_graphics folder, select kids_climbing.jpg,
then click Select (Windows) or Choose (Macintosh).
3 In the Elements list, select Target2; then in the Name field, type
waveridermatch.
4 Click the Browse button. In the cb_graphics folder, select kids_bike.jpg, then
click Select (Windows) or Choose (Macintosh).
5 In the Elements list, select Target3; then in the Name field, type racermatch.
6 Click the Browse button. In the cb_graphics folder, select kids_soccer.jpg, then
click Select (Windows) or Choose (Macintosh).
Your screen should look like this.
7 Click OK to close the CourseBuilder Interaction dialog box.
CourseBuilder for Dreamweaver Tutorial 41
Page 42

Position the images in the document
Now you’ll arrange the layers in the Document window to set up the interaction.
1 In the Document window, select a layer by clicking its border.
2 Use the layer tab to drag the layers in your document to match this
screen layout.
3 In the Document window, use the pointer to select the default text “Drag the
objects on the left to the correct targets on the right, then press the ‘Submit’
button to check the answer.” Replace the text by typing
Ready to sell? Drag each toy to its target customer.
Chapter 142
Page 43

Set snap to settings
You’ve already set what happens when a match is incorrect: the toy snaps back to
its original position. But what happens when the match is correct? Where does the
toy land? In this step, you’ll precisely set the position of the toy when the toy is
dragged to the correct target audience.
You need to set up the snap behavior of the correct pairs only; the incorrect pairs
are already set.
1 Click one of the images in the drag-and-drop interaction, then click
<interaction> in the tag selector, and click Edit in the Property inspector.
2 Click the Pairs tab.
Notice that because you set matches for the Drag1 and Target1 elements, the
matching pairs are already set up: satellite and satellitematch are a correct
match, but satellite and waveridermatch are an incorrect match.
3 Select the “satellite:satellitematch” pair if it isn’t already selected.
CourseBuilder for Dreamweaver Tutorial 43
Page 44

4
Under Snap To, select “pixels down,” and in the pixel down field type 70. Then
“select pixels to right of the target element’s upper left corner,” and in this
field type 30.
Your screen should look like this.
When a match occurs, the drag element will move to these precise positions in
the target element.
5 Select the “waverider:waveridermatch” pair.
6 Under Snap To, select “pixels down,” and in the “pixels down” field type 70.
Then select “pixels to the right of the target element’s upper left corner,” and in
this field type 30.
7 Select the “racer:racermatch” pair.
8 Under Snap To, select “pixels down,” and in the “pixels down” field type 70.
Then select “pixels to the right of the target element’s upper left corner,” and in
this field type 30.
Chapter 144
Page 45

Create user feedback
Users get feedback only if they make a match that’s correct. If a match is wrong,
the toy snaps back to its original position so the user can try again. The entire
interaction is correct only when the user gets all three matches correct. For this
interaction there are two different types of feedback: one when a match is correct,
one when the entire interaction is correct.
Set feedback for a correct response
The “if Correct” condition controls what happens when the entire interaction
is correct.
1 Click the Action Manager tab.
2 Select the Popup Message action under “if Correct,” and click Edit.
The Popup Message dialog box appears.
3 In the dialog box’s Message field, change the default text, “Correct,” by typing
You’re ready to sell!
4 Click OK to close the dialog box.
Delete default feedback for an incorrect or unknown response
You won’t set the next condition, “else if Incorrect,” because you aren’t providing
feedback to users when they make an incorrect match. Additionally, you won’t set
a response for “else if Unknown Response,” because it’s impossible for users to
respond in a way that you can’t identify.
1 Select “else if Incorrect,” and click Cut.
2 Select “else if Unknown Response,” and click Cut.
The conditions and their associated Popup Message actions are
automatically cut.
CourseBuilder for Dreamweaver Tutorial 45
Page 46

Add correct match feedback
Now you’ll add another condition to provide users with feedback when they make
a correct match while in the process of completing the interaction. Until the entire
interaction is complete with the “all correct and none incorrect” condition met,
correct matches receive this feedback.
1 In the Action Manager list, select the Popup Message action below “if Correct,”
choose Else from the Actions pop-up menu, and click Add.
Else is added to the Action Manager list.
2 With “-- else” selected, choose Popup Message in the Actions pop-up menu,
and click Add.
The Popup Message dialog box appears.
3 In the Message field, type That’s right!.
4 Click OK to close the dialog box.
5 Click OK to close the CourseBuilder Interaction dialog box.
6 Choose File > Save to save your document.
Chapter 146
Page 47

Create a link to the next interaction
Link this page to the final page of your course, the multiple-choice quiz.
1 In the Object palette, click the Layer icon, then move the pointer to the
Document window, and drag the pointer to draw a layer in the lower right area
of the document.
2 Select the layer, then position it using the layer tab to position the layer.
3 Click in the layer. In the Object palette, click the Image icon to insert an image
in the layer.
4 In the Select Image Source dialog box, navigate to the cb_graphics folder, select
Arrow_Sharp_Right.gif, and click Select (Windows) or Choose (Macintosh).
An arrow appears in the layer.
5 In the Property inspector, click the folder icon next to the Link field to select
the file to open when the arrow is clicked.
6 In the Select File dialog box, in the cb_discover folder, select cb_mc.htm, and
click Select (Windows) or Choose (Macintosh).
7 Click the border of the layer to select it, then use one of the layer handles to
resize it to fit the graphic.
Test the drag-and-drop interaction
Test the page to see how it works:
1 Choose File > Save, then choose File > Preview in Browser.
The browser launches and displays the page.
2 Drag the toys to the descriptions.
These are the correct matches:
Satellite and “Kids 12 to 14 with big imaginations”
Wave-rider helmet and “Kids 8 to 14 who bike to school”
Racer and “Preteen boys looking for a testosterone rush”
When you drag a toy to the wrong target, it should snap back to its
original position.
When you drag a toy to the right target, a message should appear saying,
“That’s right!”
When you match all the toys with their correct targets, a message should appear
saying, “You’re ready to sell!”
CourseBuilder for Dreamweaver Tutorial 47
Page 48

Create a multiple-choice quiz
In this part of the tutorial you’ll create a multiple-choice quiz. When the user
selects from a list of choices, feedback is provided based on the user’s correct or
incorrect response.
Insert a CourseBuilder Interaction
1 Choose File > Open. In the dialog box that appears, navigate to the cb_discover
folder and then to cb_mc.htm, and click Select (Windows) or Open
(Macintosh) to open the document.
2 If the Object palette isn’t already open, choose Window > Objects to open it.
3 In the Document window, click in the middle of the document to place the
insertion point after existing page elements.
4 In the Object palette’s Common panel, click the CourseBuilder Interaction
icon to open the CourseBuilder Interaction dialog box.
Select the type of interaction
1 In the CourseBuilder Interaction dialog box, under Target, select 4.0+ Browsers
if it isn’t already selected.
2 Select Multiple Choice in the Category list.
3 Click the icon for the graphic multiple-choice template.
Chapter 148
Page 49

Define the multiple-choice interaction
1 Click the General tab.
2 In the Question Text field, delete the default text.
3 Under Judge Interaction, select “when the user clicks a choice,” if it isn’t
already selected.
4 In Correct When, accept the default setting Any Correct and None Incorrect.
5 In Tries Are and Time Is, accept the default settings, Unlimited.
6 Verify that the Reset option is not selected.
7 Select “Insert this Interaction in a layer,” to place the CourseBuilder Interaction
in a layer so you can easily position it in the document.
CourseBuilder for Dreamweaver Tutorial 49
Page 50
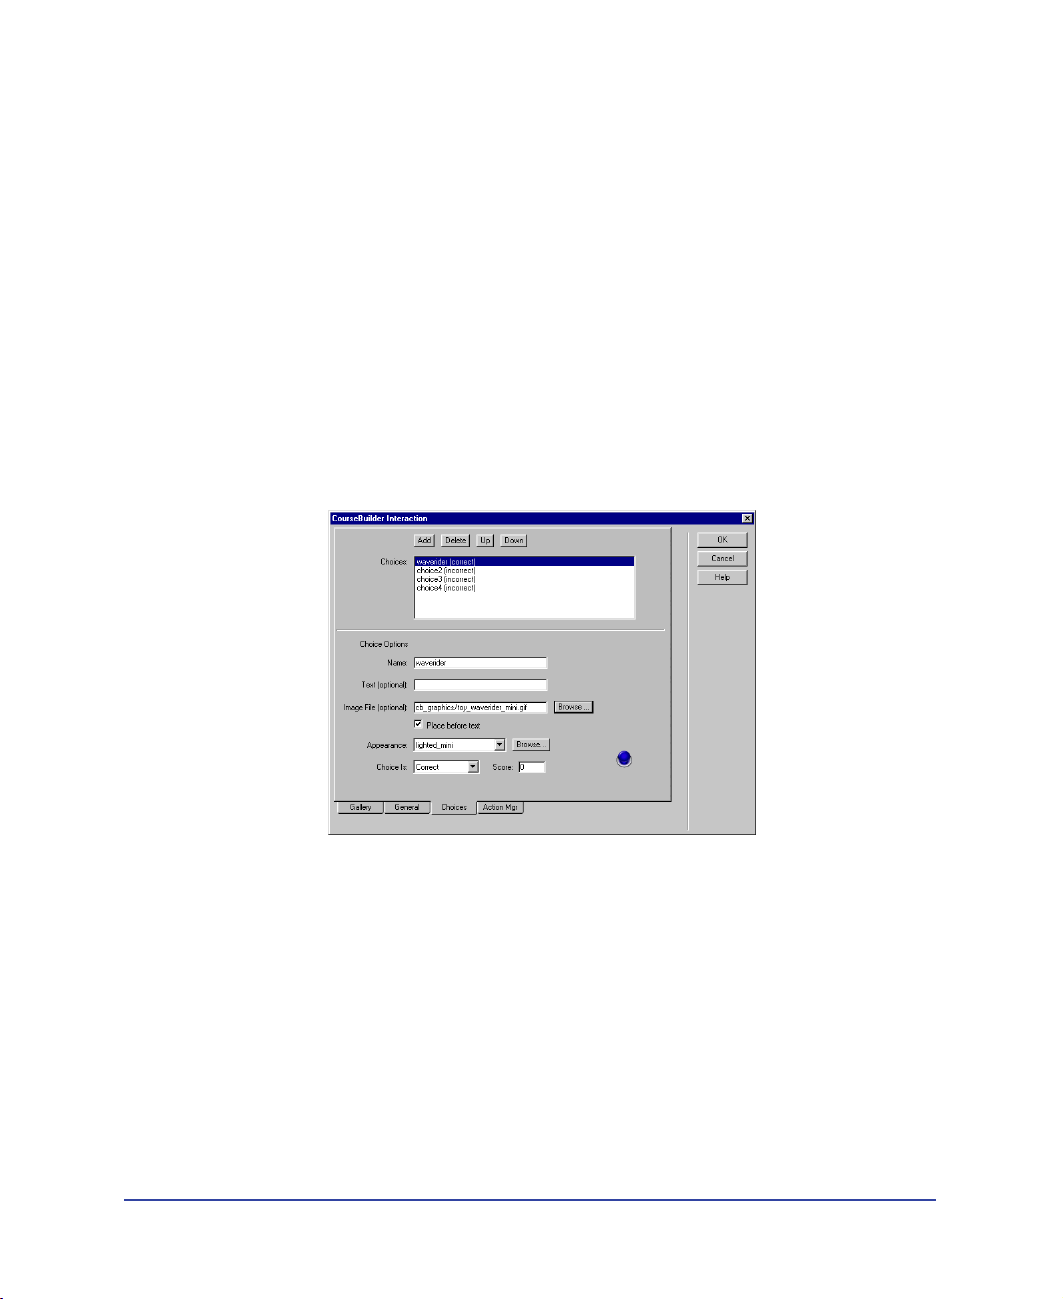
Define the correct choice
Use the Choices tab to define the interaction choices and to define whether a
choice is correct or incorrect.
1 Click the Choices tab.
In the Choices list, choice1 is already selected and marked as correct.
2 Under Choice Options, in the Name field, change the default text “choice1” by
typing waverider.
3 Delete the text in the Text field.
4 In the Image File field, click Browse.
5 In the Select Appearance dialog box, navigate to the cb_graphics folder,
then select toy_waverider_mini.gif, and click Select (Windows) or
Choose (Macintosh).
The Choices tab updates.
Chapter 150
Page 51

Define incorrect choices
Now you’ll set images for the other incorrect interaction choices.
1 In the Choices list, select choice2.
Notice that “Choice Is” is marked incorrect.
2 Under Choice Options, in the Name field, change the default text “choice2” by
typing coldfusion.
3 Delete the text in the Text field.
4 In the Image File field, click Browse. Then, in the Select Appearance dialog
box, navigate to the cb_graphics folder, select toy_coldfusion_mini.gif, and
click Select (Windows) or Choose (Macintosh).
5 In the Choices list, select choice3.
6 Under Choice Options, in the Name field, change the default text “choice3” by
typing racer.
7 Delete the text in the Text field.
8 In the Image File field, click Browse. Then, in the Select Appearance dialog
box, navigate to the cb_graphics folder, select toy_racer_mini.gif, and click
Select (Windows) or Choose (Macintosh).
9 In the Choices list, select choice4.
10 Under Choice Options, in the Name field, change the default text “choice4” by
typing satellite.
11 Delete the text in the Text field.
12 In the Image File field, click Browse. Then, in the Select Appearance dialog
box, navigate to the cb_graphics folder, select toy_satellite_mini.gif, and click
Select (Windows) or Choose (Macintosh).
13 Click OK to close the CourseBuilder Interaction dialog box.
CourseBuilder for Dreamweaver Tutorial 51
Page 52

Create a layer for user feedback
In the document, you’ll position the layer containing the interaction choices, then
create a layer in the document where both the quiz question and the user feedback
will appear.
1 In the Document window, click the border of the interaction layer to
select the layer.
2 Click the layer tab then drag the layer until your document looks similar to the
screen below.
3 In the Object palette, click the Layer icon. Then move the pointer to the
Document window, and in the area to the left of the choices, drag the pointer
to draw a layer.
4 With the layer selected, in the Property inspector’s LayerID field, replace the
default text “Layer1” by typing Feedback.
5 In the Document window, click in the Feedback layer to position the insertion
point in the layer, then in the Object palette, click the Image icon to insert an
image in the layer.
6 In the Select Image Source dialog box, navigate to the cb_graphics folder,
and select text_mc_question.jpg, and click Select (Windows) or Choose
(Macintosh).
7 With the image selected, in the Property inspector’s Image field, name the
image feedback
8 Move the layer if you need to so it doesn’t overlap the layer containing
the choices.
Chapter 152
Page 53

Create user feedback
When users make a choice, you’ll give them feedback using the same technique
you used to display product information earlier: you’ll have the Action Manager
swap the image of the question with an image containing the feedback.
Set up feedback for a correct response
1 Click anywhere in the layer containing the choices. Then, in the tag selector
click <interaction>, and in the Property inspector click Edit to open the
CourseBuilder Interaction dialog box.
2 Click the Action Manager tab.
3 In the Action Manager list under “if Correct,” select Popup Message,
and click Cut.
4 In the Action Manager list reselect “if Correct,” then choose Swap Image from
the Actions pop-up menu, and click Add.
The Swap Image dialog box appears.
5 In the Images list, select “image in the Feedback layer,” then click Browse.
6 In the Select Image Source dialog box, navigate to the cb_graphics folder, select
text_feedback_correct.jpg, and click Select (Windows) or Choose (Macintosh).
7 Click OK to close the Swap Image dialog box.
Set up feedback for wrong response
Next, you’ll set the feedback for an incorrect choice.
1 In the Action Manager list under “else if Incorrect,” select Popup Message,
then click Cut.
2 In the Action Manager list re-select “else if Incorrect,” then choose Swap Image
from the Actions pop-up menu, and click Add.
The Swap Image dialog box appears.
3 In the Images list, select “image in the Feedback layer,” then click Browse.
4 In the Select Image Source dialog box, navigate to the cb_graphics folder,
and select text_feedback_incorrect.jpg, and click Select (Windows) or
Choose (Macintosh).
5 Click OK to close the Swap Image dialog box.
6 Click OK to close the CourseBuilder Interaction dialog box.
CourseBuilder for Dreamweaver Tutorial 53
Page 54

Test the interaction
Now test the page to see how it works.
1 Choose File > Save, then press F12 to preview the page in a browser.
2 When the document opens try the interaction:
Click the first button, and you receive feedback that your choice is right.
Click the other three buttons, and you receive feedback that your choice
is wrong.
Chapter 154
Page 55

Create a Multiple-choice interaction
You’re now ready to create a navigation page from which users can select how they
want to navigate your site. They can choose to learn about the products, test their
knowledge of the products, or take a sales incentives quiz.
Now you’ll see another way to use a multiple-choice interaction.
Open the file to which you’ll add a multiple-choice CourseBuilder Interaction.
1 Choose File > Open.
2 In the Open dialog box, navigate to the cb_discover folder, then select the file
named cb_nav.htm, and click Open.
Insert a CourseBuilder Interaction
1 If the Object palette isn’t already open, choose Window > Objects to open it.
2 In the Document window, click in the middle of the document to place the
insertion point after existing page elements.
You can’t see the invisible markers in the document because they are obscured
by the banner image.
3 In the Object palette’s Common panel, click the CourseBuilder
Interaction icon.
The CourseBuilder Interaction dialog box appears displaying the Gallery tab.
CourseBuilder for Dreamweaver Tutorial 55
Page 56

Select the type of interaction
Use the options in the Gallery tab to select an interaction template. You can
choose a target browser to see a list of interactions that will work on the specified
browser version and you can use the Category list to select an interaction type.
The icons in the Gallery show which templates are available for a selected
interaction type.
1 In the CourseBuilder Interaction dialog box, under Target, select 4.0+ Browsers
if it isn’t already selected.
2 In the Category list, select Multiple Choice.
The icons in the Gallery represent the multiple-choice CourseBuilder
Interactions that will function in version 4 and later browsers.
3 Click the icon for the graphic multiple-choice with radio buttons template.
Notice that as you place the pointer over the template icons, the template’s
name appears in the blank space below the Gallery.
The CourseBuilder Interaction dialog box displays additional tabs next to the
Gallery tab. Use these tabs to define the properties, elements, and actions of
the interaction.
The framework of the multiple-choice template is visible in the Document
window. To see the CourseBuilder Interaction in the Document window, drag the
CourseBuilder Interaction dialog box down or to the right, if necessary.
Chapter 156
Page 57
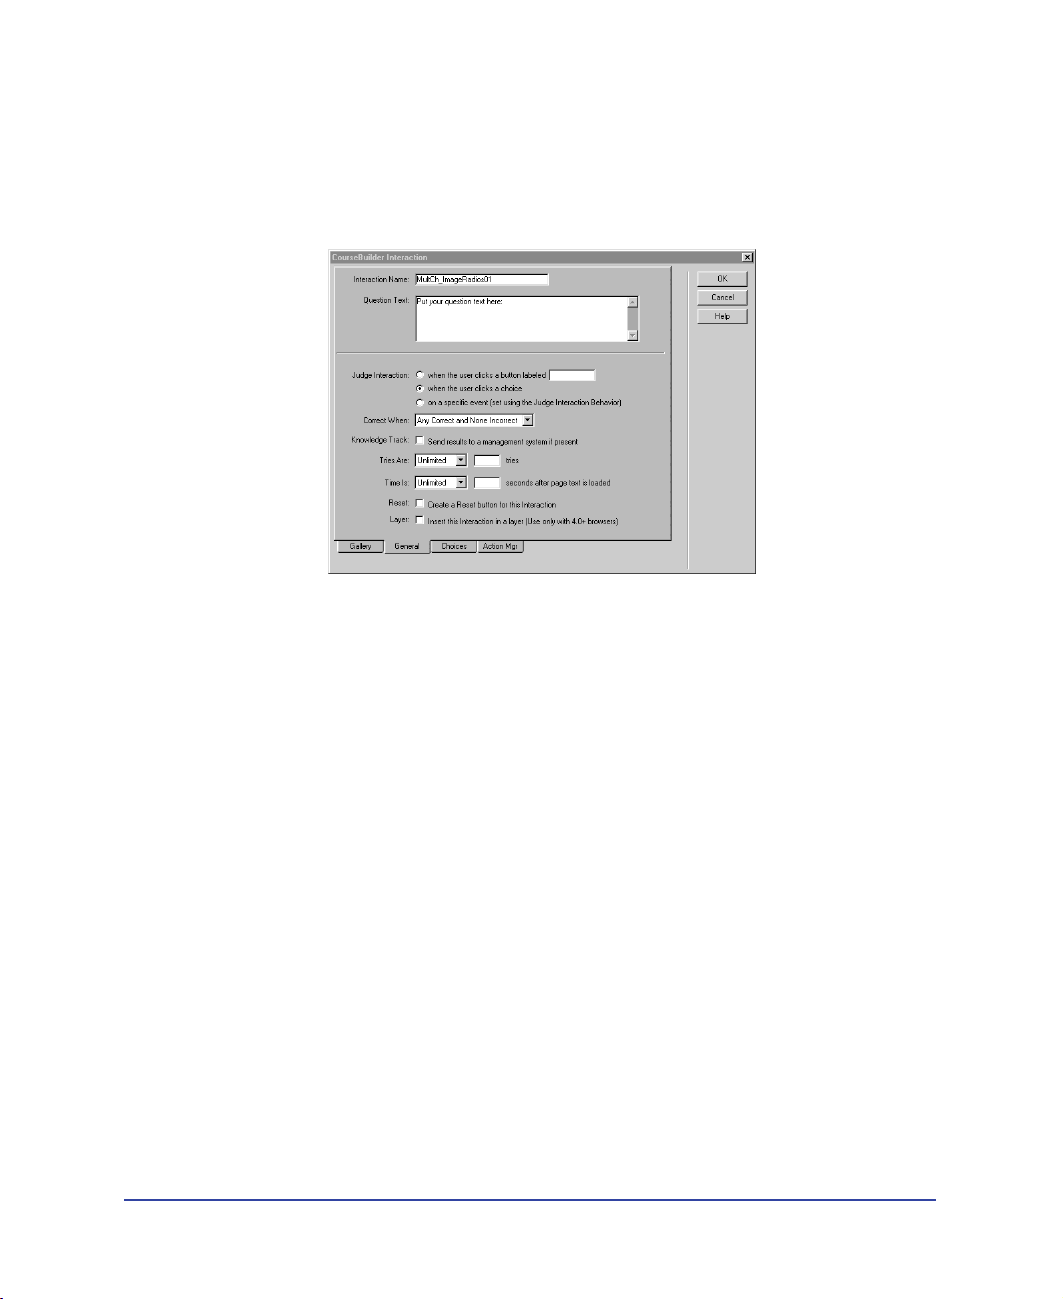
Define the multiple-choice interaction
Select options on the General tab to define general properties that apply to the
overall multiple-choice interaction.
1 Click the General tab.
2 In the Question Text field, replace the text “Put your question text here”
by typing:
Here’s the latest on our new line of toys - specs, prices, and this quarter’s sales
incentives. Explore first, then test your knowledge with a couple of quizzes.
Click a button to choose:
The text instantly updates in the Document window when you click another
field on this tab.
3 Under Judge Interaction, accept the default setting, “when the user clicks
a choice.”
This option dictates that the interaction is instantly judged when a user makes
a selection.
4 In Correct When, accept the default setting, Any Correct and None Incorrect.
5 In Tries Are and Time Is, accept the default settings, Unlimited.
You aren’t limiting the number of tries, nor the amount of time the user has to
respond correctly to the question in this interaction.
6 Verify that the Reset option is not selected.
CourseBuilder for Dreamweaver Tutorial 57
Page 58
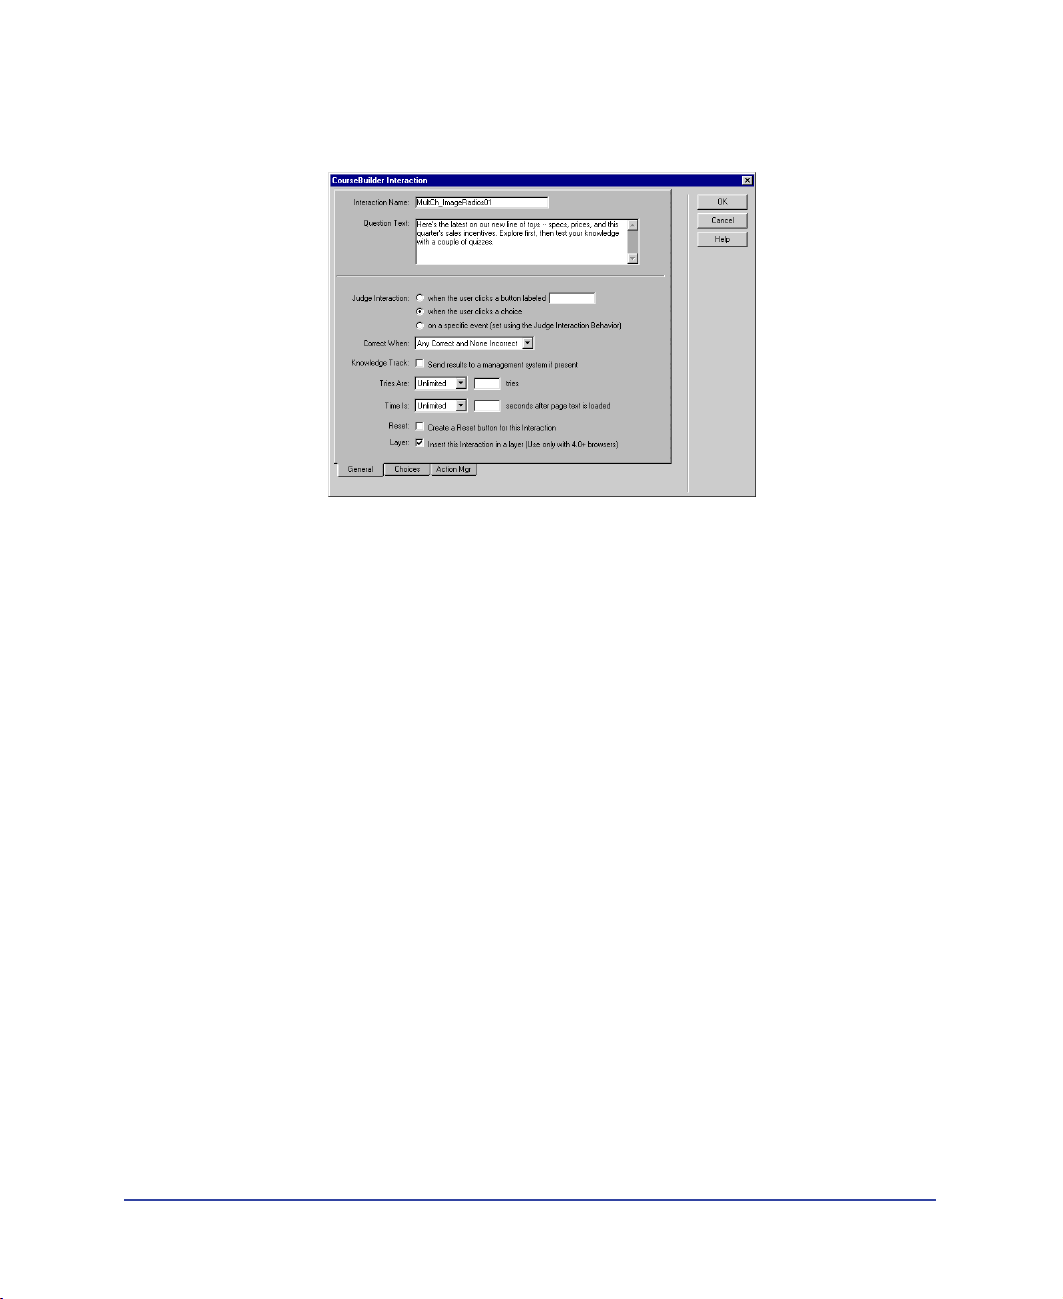
7
Select “Insert this Interaction in a layer” to place the CourseBuilder Interaction
in a layer so you can easily position it in the document.
Chapter 158
Page 59

Define the choices
Use the Choices tab to define the user’s choices in the interaction. You’ll name
each choice so you can easily identify them in other tabs, add text to create the
user’s choices, and define how each choice is judged.
1 Start by clicking the Choices tab.
In the Choices list, “choice1(correct)” is already selected.
2 In the Name field, replace the default text “choice1” by typing Explore.
3 In the Text field, replace the default text “Text for choice1” by typing Explore
the new products.
This is the text the user sees on the screen.
CourseBuilder for Dreamweaver Tutorial 59
Page 60

4
In the Choice Is pop-up menu, select Not Judged.
This interaction guides navigation, so a user’s choice isn’t correct or incorrect.
5 In the Choices list, click “choice2” to select it.
Notice that the Name field changes; it now matches the selected choice in
the Choices list.
6 In the Name field, replace the default text “choice2” by typing DD.
7 In the Text field, replace the default text “Text for choice2” by typing Know
your target customer.
8 In the Choice Is pop-up menu, select Not Judged.
9 In the Choices list, click “choice3” to select it.
10 In the Name field, replace the default text “choice3” by typing MC.
11 In the Text field, replace the default text “Text for choice3” by typing What’s in
it for you.
12 In the Choice Is pop-up menu, select Not Judged.
13 In the Choices list, select “choice4” then click Delete to remove this choice
from the interaction.
Chapter 160
Page 61
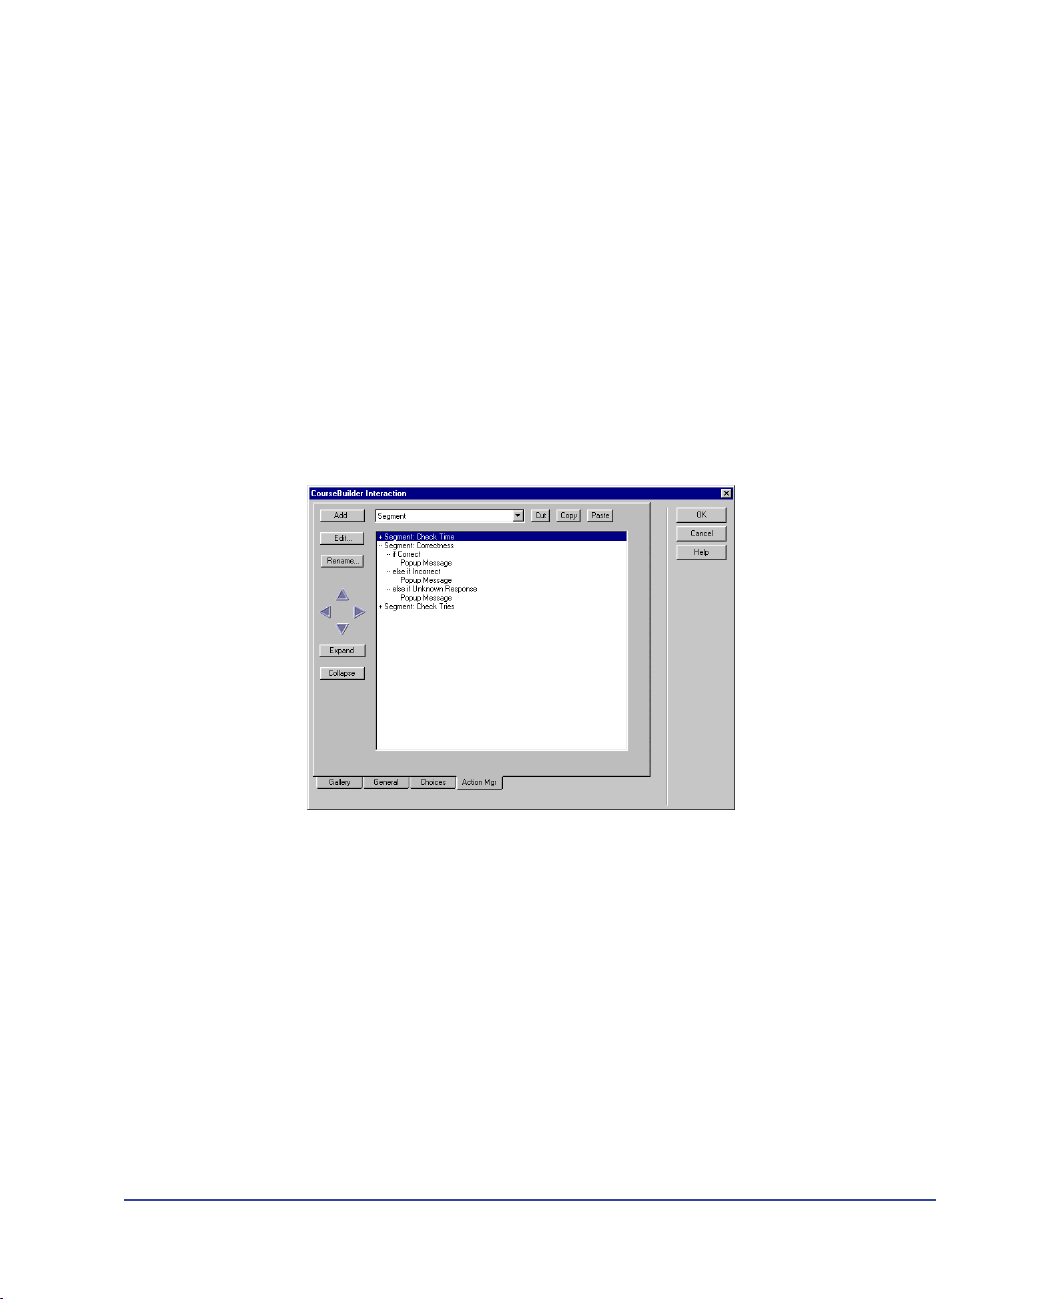
Define the action
Complete the interaction by defining the action that CourseBuilder executes in
response to the user’s choices. You’ll link each choice with a file to open when
clicked. Use the Action Manager to set up a Go To URL action for each choice.
If a user selects choice 1, the explore activity page is displayed
If a user selects choice 2, the drag-and-drop quiz page is displayed
If a user selects choice 3, the multiple-choice quiz page is displayed
While defining this interaction, you’ll change the default settings of the segments,
conditions, and actions to customize the feedback.
Select the Action Manager tab
Start by clicking the Action Manager tab.
The Action Manager tab displays three segments:
Segment: Check Time
Segment: Correctness
Segment: Check Tries
Although segments are automatically set up for a time limit and tries limit, they
aren’t triggered unless you select the time or tries limit options in the General tab.
Actions to provide users with feedback are already set for each default Action
Manager segment. You’ll change the default settings of the segments, conditions,
and actions to customize the feedback for your interaction.
Segments preceded by a plus sign (+) are collapsed. To view the conditions and
actions of collapsed segments, click Expand on the Action Manager tab.
CourseBuilder for Dreamweaver Tutorial 61
Page 62

Edit the segments
You’ll change the default segment name to a name that identifies what the
segment does.
1 In the Action Manager list, select Segment:Correctness to select this segment.
2 Click Edit.
The Segment Editor appears.
3 In the Segment Name field, replace the default text, by typing Navigation.
4 Click OK to close the dialog box.
Chapter 162
Page 63

Define the explore condition
1 In the Action Manager list, select the “if Correct” condition.
2 Click Edit.
The Condition Editor appears.
3 In the Condition Name field, type Explore selected to indicate which
condition is represented.
4 In the rightmost Interaction pop-up menu, which currently shows <none>,
select Button “Explore.”
5 In the bottommost Type pop-up menu, make sure True is selected.
6 Click OK to close the dialog box.
CourseBuilder for Dreamweaver Tutorial 63
Page 64

Add a Go To URL action
Now add the action that takes the user to the correct URL when this choice is
selected. First you’ll delete the existing Popup Message action, then you’ll add a
Go To URL action.
1 In the Action Manager list, under “if Explore selected,” select Popup Message.
2 Click Cut to delete this action from the Action Manager list.
3 In the Action Manager, select “if Explore selected.”
4 In the Action Manager pop-up menu, choose Go To URL, then click Add.
The Go To URL dialog box appears.
5 In the URL field, click Browse.
6 In the dialog box that appears, navigate to the cb_discover folder, then to
cb_explore.htm, and click Select (Windows) or Choose (Macintosh) to select
the file to open when the choice is clicked.
The URL field updates.
7 Click OK to close the dialog box.
Define the drag-and-drop condition
1 In the Action Manager list, select the “else if Incorrect” condition.
2 Click Edit to open the Condition Editor.
3 In the Condition Name field, type Drag and Drop selected to indicate which
condition is represented.
4 In the rightmost Interaction pop-up menu, select Button “DD.”
5 In the bottommost Type pop-up menu, make sure True is selected.
6 Click OK to close the dialog box.
Chapter 164
Page 65

Add a Go To URL action
Add the action which takes the user to the drag-and-drop quiz when this choice is
selected. Delete the existing Popup Message action, then add a Go To URL action.
1 In the Action Manager list, under “else if Drag and Drop selected,” select
Popup Message.
2 Click Cut to delete this action from the Action Manager list.
3 In the Action Manager, select “else if Drag and Drop selected.”
4 In the Action Manager pop-up menu, choose Go To URL, then click Add.
5 In the Go To URL dialog box, in the URL field, click Browse. Then, in the
dialog box that appears, navigate to cb_drag_drop.htm in the tutorial folder,
and click Select (Windows) or Choose (Macintosh) to select the file to open
when the choice is clicked.
6 Click OK to close the dialog box.
Define the multiple-choice condition
1 In the Action Manager list select the “else if Unknown Response” condition.
2 Click Edit to open the Condition Editor.
3 In the Condition Name field, type Multiple Choice selected to indicate which
condition is represented.
4 In the rightmost Interaction pop-up menu, select Button “MC.”
5 In the bottommost Type pop-up menu, make sure True is selected.
6 Click OK to close the dialog box.
CourseBuilder for Dreamweaver Tutorial 65
Page 66

Add a Go To URL action
Add the action that takes the user to the multiple-choice quiz page when
Choice 3 is selected. Delete the existing Popup Message action, then add a
Go To URL action.
1 In the Action Manager list, under “else if Multiple Choice selected,” select
Popup Message.
2 Click Cut to delete this action from the Action Manager list.
3 In the Action Manager, select “else if Multiple Choice selected.”
4 In the Action Manager pop-up menu, choose Go To URL, then click Add.
5 In the Go To URL dialog box, in the URL field click Browse. Then in the
dialog box that appears, navigate to cb_mc.htm in the cb_discover folder, and
click Select (Windows) or Choose (Macintosh) to select the file to open when
the choice is clicked.
6 Click OK to close the dialog box, then click OK to close the CourseBuilder
Interaction dialog box.
7 Choose File > Save to save your document.
Position the interaction in the document
You may need to change the size and position of the layer that contains the
multiple-choice interaction object.
1 Click the border of the layer to select it.
2 Then do the following to resize or move the layer:
Use the layer tab (on the upper left corner) to drag the layer to the desired
location.
Drag any of the layer handles to resize the layer.
3 Save your changes.
Test the interaction
1 Choose File > Preview in Browser.
Your browser opens and displays the interaction.
2 Click each of the buttons to test your site.
The other interaction pages you created appear.
3 Close your browser when you are done testing your site.
Chapter 166
Page 67

CHAPTER 2
CourseBuilder for Dreamweaver basics
.............................................................................................................
Overview of CourseBuilderBasics
Whether you are familiar with using Dreamweaver or new to Dreamweaver, you
can easily get started using CourseBuilder for Dreamweaver. CourseBuilder for
Dreamweaver includes an easy to use interface which helps you to create webbased learning interactions.
About the CourseBuilder for Dreamweaver work area
After installing CourseBuilder for Dreamweaver you may not notice much
difference between Dreamweaver and CourseBuilder for Dreamweaver.
As with Dreamweaver, begin by creating a local site for your CourseBuilder for
Dreamweaver documents. For information about creating a local site, see the
“Sites and Documents” chapter in the Using Dreamweaver book.
CourseBuilder for Dreamweaver’s functionality is initiated when you insert a
CourseBuilder Interaction in a document. As you get started with CourseBuilder
for Dreamweaver you’ll notice the following work area components and
commands.
2
67
Page 68

Copying support files
Use the Copy Support Files command to copy CourseBuilder for Dreamweaver
support files to the local site folder you’ve established for your site. Using this
command adds two folders to your site structure; the Scripts folder, a folder that
contains JavaScript files, and the Images folder, a folder which contains graphics
elements such as placeholder images, button images, slider images, and timer
images. CourseBuilder Interactions require these script and image support files in
order to function correctly.
Note: If your current file structure contains a folder named Images, CourseBuilder for
Dreamweaver will copy the image support files into that folder. If you want to keep
CourseBuilder support files separate from your graphic files, you may want to rename your
graphics file prior to copying the support files.
To copy support files, do one of the following:
1
You must have a saved document open. Do one of the following:
Open a new document, then save it to your local site folder.
Open an existing document from within your local site folder.
2 Choose Modify > CourseBuilder > Copy Support Files.
3 Select the options you want, then click OK.
The Copy Support Files command always copies the script files.
There are two options for copying the image files:
Copy images copies the image files from the Dreamweaver\CourseBuilder folder
to the folder where the document is located.
Overwrite existing image files overwrites the image files in the folder where the
document is located with the image files in the Dreamweaver\CourseBuilder
folder. Only files with names matching those in the Dreamweaver\CourseBuilder
folder are replaced. New files you’ve added to the folder are left untouched.
Files from the Dreamweaver\CourseBuilder folder that you’ve renamed are also
left untouched.
Note: It is important that you also transfer CourseBuilder for Dreamweaver support files to
your web server when publishing your web site. You can use the Dreamweaver Site
window to copy HTML pages and dependent files. CourseBuilder support files, however,
aren’t seen as dependent files and are not automatically copied to a remote server. (See also
“What to put on the web server” on page 76.)
Chapter 268
Page 69

The CourseBuilder Interaction icon on the palette
The CourseBuilder Interaction icon appears on the Object palette’s
Common panel.
CourseBuilder Interaction icon
The CourseBuilder Interaction icon in the document
After inserting a CourseBuilder Interaction in a document, the CourseBuilder
Interaction icon appears in the document.
Use the CourseBuilder Interaction icon to select a CourseBuilder Interaction
when you want to cut, copy, clear, or edit a CourseBuilder Interaction.
The CourseBuilder Interaction icon remains visible even when View > Invisible
Elements is turned off.
The interaction tag
When a CourseBuilder Interaction is selected, the interaction tag, <interaction>,
appears in the tag selector.
If you can’t locate the CourseBuilder Interaction icon in a document (it may be
obscured by other elements in a document, such as a layer), use the interaction tag
to select the CourseBuilder Interaction.
CourseBuilder for Dreamweaver basics 69
Page 70

The CourseBuilder Interaction Property inspector
When an interaction is selected, the CourseBuilder Interaction Property inspector
is displayed. Use the CourseBuilder Interaction Property inspector to make edits
to a selected CourseBuilder Interaction.
Name lists each CourseBuilder Interaction in the document. Use the pop-up
menu to select an interaction to edit.
Layer places a CourseBuilder Interaction into its own layer. See “Inserting a
CourseBuilder Interaction into a layer” on page 166.
Edit displays the CourseBuilder Interaction dialog box. Click Edit to make
changes to the settings for the selected Interaction. See “Editing CourseBuilder
Interactions” on page 158.
Inserting a CourseBuilder Interaction
You must save the document before inserting a CourseBuilder Interaction. If you
attempt to insert a CourseBuilder Interaction prior to saving the document, you
are prompted to save your document.
To insert a CourseBuilder Interaction:
In the Document window, position the insertion point where you want the
Interaction to appear, then use one of the following methods to open the
CourseBuilder Interaction dialog box:
Click the CourseBuilder Interaction icon in the Object palette.
Drag the CourseBuilder Interaction icon from the Object palette to
the document.
Choose Insert > CourseBuilder Interaction.
The CourseBuilder Interaction Gallery appears.
Chapter 270
Page 71

CourseBuilder Interaction Gallery
The CourseBuilder Interaction Gallery lists the categories of Interactions and
displays an icon representing each of the Interaction templates.
Use the Target option in the upper left corner to display only the templates that
work in the browser version you’re targeting. See “CourseBuilder Interaction
compatibility with browsers” on page 73 for an overview of compatibility issues.
Create custom templates and add them to the Gallery (see “Adding a
CourseBuilder Interaction template to the Gallery” on page 169). Add
new categories to the Interactions list to accommodate new classes of
custom templates.
For information about the templates and what you can do with them, see:
Multiple-choice Interactions
“The multiple-choice templates” on page 80
“Multiple-choice CourseBuilder Interactions—step-by-step procedures” on
page 83
Drag-and-drop Interactions
“The drag-and-drop templates” on page 100
“Drag-and-drop CourseBuilder Interactions—step-by-step procedures” on
page 104
Explore Interactions
“The explore templates” on page 130
“Explore CourseBuilder Interactions—step-by-step procedures” on page 133
CourseBuilder for Dreamweaver basics 71
Page 72

Button Interactions
“The button templates” on page 174
“Button CourseBuilder Interactions— step-by-step procedures” on page 176
Text entry Interactions
“The text entry templates” on page 144
“Text entry CourseBuilder Interactions—step-by-step procedures” on page 147
Timer Interactions
“The timer templates” on page 185
“Timer CourseBuilder Interactions—step-by-step procedures” on page 187
Slider Interactions
“The slider templates” on page 200
“Slider CourseBuilder Interactions— step-by-step procedures” on page 202
Action Manager Interactions
“Action Manager CourseBuilder Interactions—step-by-step procedures” on
page 215
Chapter 272
Page 73

CourseBuilder Interaction compatibility
with browsers
Different browsers—and different versions of the same browser—have different
capabilities. Browser limitations can limit what you can do with a CourseBuilder
Interaction. The following table provides an overview of what you can expect
of the Interaction templates when they run in Netscape Navigator and
Internet Explorer.
Template Netscape 3 Netscape 4
Multiple choice
with form
elements
Multiple choice
with graphic
elements
Drag and drop Fails without error OK*; cannot insert in
Explore Fails without error OK*; cannot insert in
Button OK; transparency in
Text entry OK*; accepts text
Timer May have only one
Slider Fails without error* Only one per page*;
; radio buttons
OK
*
aren’t cleared by
Reset; both radio
buttons and check
boxes can be selected
even when disabled
OK; transparency in
images may cause
redraw problems
images may cause
redraw problems
entry even when
disabled
running on each
page
OK*; radio buttons
aren’t cleared by
Reset; both radio
buttons and check
boxes can be selected
even when disabled
OK Fails without error OK
a layer
a layer
OK Fails without error OK
OK* OK*; accepts text
May have only one
running on each
page
layers after the slider
won’t function
correctly; setting
background color on
the slider layer causes
a failure without
error
Internet
Explorer 3 (Win)
OK*; radio buttons
aren’t cleared by
Reset; both radio
buttons and check
boxes can be selected
even when disabled
Fails without error OK*
Fails without error OK*
entry even when
disabled
Fails without error OK
Fails without error* OK*
Internet
Explorer 4
OK
OK
Action Manager OK OK OK OK
* Not grayed when disabled
CourseBuilder for Dreamweaver basics 73
Page 74

What’s new—step-by-step procedures
What you can do
Convert Knowledge Objects created in
an earlier version of Dreamweaver
Attain to Attain Objects
Select the CourseBuilder Interaction
icon to edit an interaction
Copy the script and image files an
Interaction needs to the folder where
it’s located
Insert a CourseBuilder Interaction in
a layer
Edit a segment, condition, or action “Editing a segment, condition, or action” on
Rename a segment, condition,
or action
Cut, copy, paste, or clear an entire
CourseBuilder Interaction
Change the order of the items on the
Action Manager pop-up menu
Add custom behavior to the Action
Manager pop-up menu
Add a custom object to the Gallery “Adding a CourseBuilder Interaction template
Set up a page to track student
performance
“Converting from previous versions” on
page 75
“Editing CourseBuilder Interactions” on
page 158
“Copying support files” on page 68
“Inserting a CourseBuilder Interaction
into a layer” on page 166
page 225
“Renaming a segment, condition, or action”
on page 224
“Cutting, copying, pasting, and clearing
interactions” on page 158
“Action Manager pop-up menu” on page 217
“Adding a custom behavior” on page 249
to the Gallery” on page 169
“Creating the CMI activity” on page 269
Add a web-packaged Authorware
piece to a page
Chapter 274
“Authorware integration” on page 167
Page 75

Converting from previous versions
Knowledge Objects you’ve created in Dreamweaver 1.2 Attain or in Attain
Objects for Dreamweaver need to be converted before you can use them with
CourseBuilder for Dreamweaver.
The Convert From Previous Versions command both converts a Knowledge
Object to a CourseBuilder Interaction and creates a backup of the original HTML
page it’s part of. The backup has the same file name as the original followed by the
extension BAK (for example, the backup created for Myfile.htm is named
Myfile.htm.bak).
You can also convert a Knowledge Object on a page by selecting it, opening the
Property inspector, and clicking the Convert button.
To convert previous version files:
1
Copy all of the original Dreamweaver Attain files to a new folder and delete the
Scripts folder.
2 Launch CourseBuilder for Dreamweaver.
3 Open a document which was created in a previous version. Choose
File > Open.
4 Choose Modify > CourseBuilder > Copy Support Files to copy CourseBuilder
for Dreamweaver support files to the same folder as the document.
5 Choose Modify > CourseBuilder > Convert From Previous Versions to convert
the document to CourseBuilder for Dreamweaver.
A message appears saying that the file has been converted.
6 Do one of the following:
Click OK to close the message window.
Click View Log to see the conversion log, which opens in a separate browser
window; then close the browser window to return to your document.
7 Save the document.
Note: You must open and convert each document in the folder which contains a previous
version Knowledge Object in order to edit it using CourseBuilder for Dreamweaver.
CourseBuilder for Dreamweaver basics 75
Page 76

What to put on the web server
When you’re transferring your completed CourseBuilder for Dreamweaver
documents to the web server, be sure to copy the following files:
Images for buttons and timers (in the Images folder)
Images called by the Swap Image action
The Scripts folder
Any custom scripts (JavaScript files) a page uses
Other external media, such as sounds, web-packaged Authorware pieces,
and so on
Troubleshooting
Here are some tips for avoiding problems when you’re working with
CourseBuilder Interactions.
Creating forms and form elements
Form elements can’t be added to CourseBuilder Interactions. To build multiplechoice or text entry interactions, insert a CourseBuilder Interaction on the page,
then add and name elements using the CourseBuilder Interaction dialog box.
Creating layers
Layers can’t be used as elements in a CourseBuilder Interaction. To build a dragand-drop or explore interaction, insert an interaction on the page, then add and
name elements using the CourseBuilder Interaction interface.
Naming elements
Directly changing the names of CourseBuilder Interaction page elements causes
problems. Page elements created using CourseBuilder are given unique names,
such as “G01Question.” Rename page elements only in the CourseBuilder
Interaction dialog box.
Cutting, copying, pasting, and clearing
Use the Cut, Copy, Paste, and Clear commands on the Edit menu to edit
CourseBuilder Interactions. Use the special Edit > Clear command to completely
remove all HTML code related to a selected CourseBuilder Interaction.
Chapter 276
Page 77

Placing CourseBuilder Interactions in layers
Don’t drag or paste CourseBuilder Interactions into layers. To place an Interaction
in a layer, select the Insert in Layer option, either in the Property inspector or on
the General tab.
Nesting and coloring layers
Don’t nest layers or set the background color of a layer that contains an
Interaction if you’re targeting Netscape browsers.
Resizing hot area layers containing images
In Netscape browsers, layers shrink to fit their content. To resize a hot area layer,
resize the image first, then shrink the layer to the same size. When moving these
layers, take care not to drag the images out of the layers.
Inserting multiple CourseBuilder Interactions on a page
Don’t nest CourseBuilder Interactions. Before inserting a new Interaction, make
sure the insertion point isn’t inside an existing <interaction> tag.
Behaviors and custom scripts
Many page elements created by using CourseBuilder for Dreamweaver contain
custom scripts, which may show up in the Behavior inspector. Don’t delete or alter
these scripts, and avoid adding other actions to these elements. To add actions, use
the Action Manager.
CourseBuilder for Dreamweaver basics 77
Page 78

Chapter 278
Page 79

CHAPTER 3
Multiple-Choice CourseBuilder Interactions
.............................................................................................................
Multiple-choice interaction overview
Use multiple-choice CourseBuilder Interactions to create surveys, drill and
practice learning activities, tests, and assessments. You can track quizzes to
determine if further instruction might be necessary, and you can collate
survey results.
You can combine several multiple-choice CourseBuilder Interactions with an
Action Manager CourseBuilder Interaction to track scores that a user receives for
each of the multiple-choice interactions, and then total the scores for an entire
test. You can also introduce feedback when a user chooses an incorrect answer.
A multiple-choice CourseBuilder Interaction presents users with a group of
images, text items, or both from which to choose; then it exhibits actions based on
which items the user selects.
3
79
Page 80

The multiple-choice templates
You can choose from six multiple-choice CourseBuilder Interaction templates,
and then use the CourseBuilder Interaction dialog box to customize the
interaction (including the number and source files of the graphics, radio buttons,
and check boxes that the CourseBuilder Interaction contains):
MultCh_TrueFalse true/false question. Contains a block of text followed by
two radio buttons labeled True and False.
For details about how the template works, see “True/false questions” on
page 85.
For information about using the template, see “Creating a true/false
question” on page 86.
MultCh_Radios multiple-choice question (radio buttons). Contains a block of
text followed by four choices labeled with placeholder text. The choices are
preceded by standard form radio buttons.
For details about how the template works, see “Multiple-choice questions”
on page 88.
For information about using the template, see “Creating a multiple-choice
question” on page 89.
MultCh_ImageRadios multiple-choice question (graphic buttons), version 4
or later browsers only. Contains a block of text followed by four choices
labeled with placeholder text. The choices are preceded by graphic buttons.
For details about how the template works, see “Multiple-choice questions”
on page 88.
For information about using the template, see “Creating a multiple-choice
question” on page 89.
MultCh_ImageButton all-that-apply question (form check boxes). Contains
a block of text followed by four choices labeled with placeholder text. The
choices are preceded by standard form check boxes.
For details about how the template works, see “All-that-apply questions” on
page 94.
For information about using the template, see “Creating an all-that-apply
question” on page 95.
MultCh_Checkboxes all-that-apply question (graphic check boxes), version 4
or later browsers only. Contains a block of text followed by four choices
labeled with placeholder text. The choices are preceded by graphic check
boxes.
For details about how the template works, see “All-that-apply questions” on
page 94.
For information about using the template, see “Creating an all-that-apply
question” on page 95.
MultCh_ImageChkboxes graphic multiple-choice question (images), version
4 or later browsers only. Contains a block of text followed by four choices
represented by placeholder graphics.
For details about how the template works, see “Graphic multiple-choice
questions” on page 91.
For information about using the template, see “Using images instead of text
as choices” on page 92.
Chapter 380
Page 81

The multiple-choice CourseBuilder
Interaction tabs
General tab
See “Multiple-choice General tab options” on page 283 for detailed information
about the options on this tab.
Here’s a brief overview of the options:
Interaction Name is the unique name of the interaction. This name is used to
identify a CourseBuilder Interaction in the Condition Editor and other
dialog boxes.
Question Text is the text of the question, statement, or instruction that precedes
the choices.
Judge Interaction determines when CourseBuilder for Dreamweaver evaluates a
user’s response. See “Setting when a CourseBuilder Interaction is judged” on
page 163.
Correct When defines what qualifies as a correct response to the CourseBuilder
Interaction. See “Marking a response right or wrong” on page 254.
Knowledge Track sends information about a user’s performance to a computer-
managed instruction system. See “Using Knowledge Track” on page 267.
Tries Are limits the number of tries a user has to respond to the CourseBuilder
Interaction. See “Limiting the number of tries” on page 162.
Time Is limits the amount of time a user has to respond to the interaction. See
“Putting a time limit on an interaction” on page 163.
Reset creates a button that lets a user start over. See “Resetting a CourseBuilder
Interaction” on page 165.
Layer places the CourseBuilder Interaction in a layer. See “Inserting a
CourseBuilder Interaction into a layer” on page 166.
Tracking tab
The Tracking tab appears only if you’ve selected the Knowledge Track option on
the General tab. See “Tracking tab” on page 287.
Multiple-Choice CourseBuilder Interactions 81
Page 82

Choices tab
See “Choices options” on page 287 for detailed information about the options
on this tab.
Here’s a brief overview of the options:
Choices lists all the choices in the CourseBuilder Interaction. Use the buttons to
add, delete, and rearrange choices. See “Adding or deleting a choice” on page 97.
Name is the name of the selected choice. It appears only in the CourseBuilder
Interaction dialog box. See “Naming a choice” on page 98.
Text is the text of the selected choice—the text that appears on the page. See
“Replacing “True” and “False” with different words” on page 88, “Creating a
multiple-choice question” on page 89, and “Creating an all-that-apply question”
on page 95.
Image File is the name of an image file associated with the text of a choice. See
“Adding an image to a text choice” on page 98. Don’t use this option for graphic
buttons or check boxes or for graphics-only questions; use the Appearance
option instead.
Appearance is the name of the image file for a graphic button or check box (see
“Multiple-choice questions” on page 88 and “All-that-apply questions” on
page 94) and in a graphics-only question (see “Using images instead of text as
choices” on page 92). The template supplies a placeholder.
Choice Is determines whether a choice is right or wrong. See “Marking a response
right or wrong” on page 254.
Score is the value assigned to the choice. See “Scoring a response” on page 255.
Action Manager tab
The Action Manager tab contains code segments set up as if...then conditions that
define how a CourseBuilder Interaction behaves if any of the following occurs:
A user reaches a time limit that you’ve set on the General tab (see “Check Time
segment” on page 296).
A user’s response is correct, incorrect, or unknown (see “Correctness segment”
on page 296).
A user reaches the tries limit that you’ve set on the General tab (see “Check
Tries segment” on page 296).
Chapter 382
Page 83

Multiple-choice CourseBuilder Interactions— step-by-step procedures
What you can do For instructions, see
Create a true/false question “Creating a true/false question” on page 86
Replace “True” and “False” with “Yes”
and “No” or with words from another
language
Create multiple-choice questions “Creating a multiple-choice question” on
Create multiple-choice questions that
use images rather than words
Create all-that-apply questions “Creating an all-that-apply question” on
Rearrange the order of the choices in
a question
Use more or fewer choices than a
template provides
Give a choice a descriptive name “Naming a choice” on page 98
Use images to enhance the text of the
choices in a question
Learn about the segments in the
Action Manager that control how a
CourseBuilder Interaction acts on a
user’s response
Make changes to a CourseBuilder
Interaction
Cut, copy, and paste an entire
CourseBuilder Interaction
“Replacing “True” and “False” with
different words” on page 88
page 89
“Using images instead of text as choices” on
page 92
page 95
“Changing the order of the choices” on
page 96
“Adding or deleting a choice” on page 97
“Adding an image to a text choice” on
page 98
“Multiple-choice segments” on page 297
“Editing CourseBuilder Interactions” on
page 158
“Editing CourseBuilder Interactions” on
page 158
Set which responses are right and
which are wrong
Customize the feedback that the
CourseBuilder Interaction gives
the user
Display feedback in a frame, layer,
status bar, or text field rather than in
a pop-up message
Limit the number of times a user can
try to respond correctly to an
interaction
Multiple-Choice CourseBuilder Interactions 83
“Marking a response right or wrong” on
page 254
“Customizing feedback” on page 159
“Displaying feedback in a frame, layer, status
bar, or text field” on page 160
“Limiting the number of tries” on page 162
Page 84

What you can do For instructions, see
Limit the amount of time a user has to
respond correctly
Set whether a CourseBuilder
Interaction evaluates a user’s response
as soon as the user responds, when
the user clicks a Submit button, or
when an event occurs
Assign a CourseBuilder Interaction a
value as part of a test
Send information about users’
performance to a computer-managed
instruction system such as Lotus
Pathware
Give the Submit button a
different name
Let users start an exercise over “Resetting a CourseBuilder Interaction” on
Add a custom CourseBuilder
Interaction as a template
Place a CourseBuilder Interaction in a
layer so you can hide it, position it, or
manipulate it in some other way
“Putting a time limit on an interaction” on
page 163
“Setting when a CourseBuilder Interaction
is judged” on page 163
“Scoring a response” on page 255
“Tracking user performance” on page 251
“Changing the name of the Submit button”
on page 164
page 165
“Adding a CourseBuilder Interaction template
to the Gallery” on page 169
“Inserting a CourseBuilder Interaction
into a layer” on page 166
Chapter 384
Page 85

True/false questions
The true/false template contains a block of text (see Question Text on the General
tab) followed by two radio buttons labeled True and False (see the Text option on
the Choices tab).
True is correct (see the Choice Is option on the Choices tab).
The CourseBuilder Interaction judges a user’s response as soon as the user clicks a
choice (see the Judge Interaction option on the General tab).
The CourseBuilder Interaction displays feedback if the user answers correctly or
incorrectly. It also displays feedback if the user doesn’t select either radio button.
(See the Correctness segment in the Action Manager tab.)
For a step-by-step guide to using this template, see “Creating a true/false question”
on page 86.
For detailed information about the options on the tabs, see:
“General options” on page 281
“Choices options” on page 287
“Multiple-choice segments” on page 297
Multiple-Choice CourseBuilder Interactions 85
Page 86

Creating a true/false question
See “The multiple-choice CourseBuilder Interaction tabs” on page 81 for an
overview of the tabs.
To create a true/false question:
1
Insert a CourseBuilder Interaction in the document by doing one of
the following:
Click the Insert CourseBuilder Interaction icon in the Object palette.
Click the Insert CourseBuilder Interaction icon, then drag it to the
document window.
Choose Insert > CourseBuilder Interaction.
2 In the CourseBuilder Interaction dialog box, select Multiple Choice from the
Category list.
3 Select the true/false question icon.
4 Click the General tab. In the Question Text box, replace the default text with
the text of your question.
If the correct answer is True:
Click OK.
If the correct answer is False:
1
Click the Choices tab.
2 In the Choices list at the top of the tab, select choice1 (which corresponds to
true). Change the Choice Is setting at the bottom of the tab to Incorrect.
3 In the Choices list, select choice2 (which corresponds to false). Change the
Choice Is setting at the bottom of the tab to Correct.
4 Click OK.
Chapter 386
Page 87

Other things you can do
What you can do For instructions, see
Replace “True” and “False” with “Yes”
and “No” or with words from another
language
Give a choice a descriptive name “Naming a choice” on page 98
Add an image to each choice “Adding an image to a text choice” on
Evaluate the answer when the user
clicks a Submit button
Give the Submit button a
different name
Assign an interaction a value as part
of a test
Track a user’s performance in a
computer-managed instruction
system, such as Lotus Pathware
Limit the number of tries a user has to
complete the interaction correctly
Limit the amount of time a user has to
complete the interaction
Change the feedback preprogrammed
in the template
Allow users to click a button to answer
the question again
“Replacing “True” and “False” with
different words” on page 88
page 98
“Inserting a CourseBuilder Interaction
into a layer” on page 166
“Changing the name of the Submit button”
on page 164
“Scoring a response” on page 255
“Tracking user performance” on page 251
“Limiting the number of tries” on page 162
“Putting a time limit on an interaction” on
page 163
“Customizing feedback” on page 159
“Resetting a CourseBuilder Interaction” on
page 165
Place the question in a layer so you
can hide it, position it, or manipulate
it in some other way as a layer
Save a custom true/false CourseBuilder
Interaction as a template
Multiple-Choice CourseBuilder Interactions 87
“Inserting a CourseBuilder Interaction
into a layer” on page 166
“Adding a CourseBuilder Interaction template
to the Gallery” on page 169
Page 88

Replacing “True” and “False” with
different words
1 In the CourseBuilder Interaction dialog box, click the Choices tab.
See “Editing CourseBuilder Interactions” on page 158 if you need help.
2 In the Choices list at the top of the tab, select choice1.
3 In Choice Options, in the Text (optional) field, replace True with the text you
want to use.
4 In the Choices list, select choice2.
5 In Choice Options, in the Text (optional) field, replace False with the text you
want to use.
6 Click OK to close the CourseBuilder Interaction dialog box.
Multiple-choice questions
Multiple-choice (radio
buttons)
Multiple-choice (graphic buttons)
For version 4 and later browsers
The multiple-choice templates contain a block of text (see Question Text on the
General tab) followed by four choices labeled with placeholder text (see the Text
option on the Choices tab). In one multiple-choice template, the choices are
preceded by standard form radio buttons. In the other template, they’re preceded
by graphic buttons (see the Appearance option on the Choices tab).
The first choice is correct (see the Choice Is option on the Choices tab).
The CourseBuilder Interaction judges a user’s response as soon as the user clicks a
choice (see the Judge Interaction option on the General tab).
The CourseBuilder Interaction displays feedback if the user answers correctly or
incorrectly. It also displays feedback if the user doesn’t select a radio button. (See
the Correctness segment in the Action Manager tab.)
For a step-by-step guide to using this template, see “Creating a multiple-choice
question” on page 89.
For detailed information about the options on the tabs, see:
“General options” on page 281
“Choices options” on page 287
“Multiple-choice segments” on page 297
Chapter 388
Page 89

Creating a multiple-choice question
Multiple-choice questions with graphic buttons work only in version 4 or later
browsers. (You can also use them in Netscape Navigator 3 if the images contain no
transparent pixels.)
See “The multiple-choice CourseBuilder Interaction tabs” on page 81 for an
overview of the tabs.
To create a multiple-choice question:
1
Insert a CourseBuilder Interaction in the document by doing one of
the following:
Click the Insert CourseBuilder Interaction icon in the Object palette.
Click the Insert CourseBuilder Interaction icon, then drag it to the
document window.
Choose Insert > CourseBuilder Interaction.
2 In the CourseBuilder Interaction dialog box, select Multiple Choice from
the Category list, then select the icon for the multiple-choice template you
want to use.
Multiple-choice (radio
buttons)
3 Click the General tab. In the Question Text box, replace the default text with
Multiple-choice (graphic buttons)
For version 4 and later browsers
the text of your question.
4 Click the Choices tab. In the Choices list at the top of the tab, select the first
choice, and type the text of the correct answer in the Text field (you can change
the order of the answers later). Repeat for each of the wrong answers.
If the answers are neither right nor wrong, see “Marking a response right or
wrong” on page 254.
If you want to delete default choices or add additional choices, see “Adding or
deleting a choice” on page 97.
5 Arrange the order of the answers.
See “Changing the order of the choices” on page 96.
6 Click OK to close the dialog box.
Multiple-Choice CourseBuilder Interactions 89
Page 90

Other things you can do
What you can do For instructions, see
Give a choice a descriptive name “Naming a choice” on page 98
Add an image to each choice “Adding an image to a text choice” on
Evaluate the answer when the user
clicks a Submit button
Give the Submit button a different
name
Change which choice is correct “Marking a response right or wrong” on
Assign an interaction a value as part
of a test
Track a user’s performance in a
computer-managed instruction
system, such as Lotus Pathware
Limit the number of tries a user has to
complete the interaction correctly
Limit the amount of time a user has to
complete the interaction
Change the feedback preprogrammed
in the template
Allow users to click a button to answer
the question again
Place the question in a layer so you
can hide it, position it, or manipulate
it in some other way as a layer
page 98
“Setting when a CourseBuilder Interaction
is judged” on page 163
“Changing the name of the Submit button”
on page 164
page 254
“Scoring a response” on page 255
“Tracking user performance” on page 251
“Limiting the number of tries” on page 162
“Putting a time limit on an interaction” on
page 163
“Customizing feedback” on page 159
“Resetting a CourseBuilder Interaction” on
page 165
“Inserting a CourseBuilder Interaction
into a layer” on page 166
Save a custom multiple-choice
CourseBuilder Interaction as a
template
Chapter 390
“Adding a CourseBuilder Interaction template
to the Gallery” on page 169
Page 91

Graphic multiple-choice questions
For version 4 and later browsers
The graphic multiple-choice template contains a block of text (see Question Text
on the General tab) followed by four choices represented by placeholder graphics
(see the Appearance option on the Choices tab).
The first choice is correct (see the Choice Is option on the Choices tab).
The CourseBuilder Interaction judges a user’s response as soon as the user clicks a
choice (see the Judge Interaction option on the General tab).
The CourseBuilder Interaction displays feedback if the user answers correctly or
incorrectly. It also displays feedback if the user doesn’t select anything. (See the
Correctness segment in the Action Manager tab.)
For a step-by-step guide to using this template, see “Using images instead of text
as choices” on page 92.
For detailed information about the options on the tabs, see:
“General options” on page 281
“Choices options” on page 287
“Multiple-choice segments” on page 297
Multiple-Choice CourseBuilder Interactions 91
Page 92

Using images instead of text as choices
Graphic multiple-choice questions work only in version 4 or later browsers.
(You can also use them in Netscape Navigator 3 if the images contain no
transparent pixels.)
See “The multiple-choice CourseBuilder Interaction tabs” on page 81 for an
overview of the tabs.
To create a graphic multiple-choice question:
1
Insert a CourseBuilder Interaction in the document by doing one of
the following:
Click the Insert CourseBuilder Interaction icon in the Object palette.
Click the Insert CourseBuilder Interaction icon, then drag it to the
document window.
Choose Insert > CourseBuilder Interaction.
2 In the CourseBuilder Interaction dialog box, under Target, select 4.0 Browsers;
then in the Category list select Multiple Choice to see the multiple-choice
templates.
3 Select the graphic multiple-choice icon.
4 Click the General tab. In the Question Text box, replace the default text with
the text of your question.
5 Click the Choices tab. In the Choices list at the top of the tab, select a choice to
set an image for.
6 In the Appearance field click Browse and navigate to the image you want to
display for the selected choice. Repeat for each of the other choices in the
interaction.
If the answers are neither right nor wrong, see “Marking a response right or
wrong” on page 254.
If you want to delete default choices or add additional ones, see “Adding or
deleting a choice” on page 97.
7 Arrange the order of the answers.
See “Changing the order of the choices” on page 96.
8 Click OK to close the dialog box.
Chapter 392
Page 93

Other things you can do
What you can do For instructions, see
Give a choice a descriptive name “Naming a choice” on page 98
Evaluate the answer when the user
clicks a Submit button
Give the Submit button a
different name
Change which choice is correct “Marking a response right or wrong” on
Assign an interaction a value as part
of a test
Track a user’s performance in a
computer-managed instruction
system, such as Lotus Pathware
Limit the number of tries a user has to
complete the interaction correctly
Limit the amount of time a user has to
complete the interaction
Change the feedback preprogrammed
in the template
Allow users to click a button to answer
the question again
Place the question in a layer so you
can hide it, position it, or manipulate
it in some other way as a layer
Save a custom question CourseBuilder
Interaction as a template
“Setting when a CourseBuilder Interaction
is judged” on page 163
“Changing the name of the Submit button”
on page 164
page 254
“Scoring a response” on page 255
“Tracking user performance” on page 251
“Limiting the number of tries” on page 162
“Putting a time limit on an interaction” on
page 163
“Customizing feedback” on page 159
“Resetting a CourseBuilder Interaction” on
page 165
“Inserting a CourseBuilder Interaction
into a layer” on page 166
“Adding a CourseBuilder Interaction template
to the Gallery” on page 169
Multiple-Choice CourseBuilder Interactions 93
Page 94

All-that-apply questions
All-that-apply (check boxes) All-that-apply (graphic check boxes)
For version 4 and later browsers
The all-that-apply templates contain a block of text (see Question Text on the
General tab) followed by four choices labeled with placeholder text (see the Text
option on the Choices tab). In one all-that-apply template, the choices are
preceded by standard form check boxes. In the other template, they’re preceded by
graphic check boxes (see the Appearance option on the Choices tab).
The first two choices are correct (see the Choice Is option on the Choices tab).
The CourseBuilder Interaction judges a user’s response when the user clicks a
Submit button (see the Judge Interaction option on the General tab).
The CourseBuilder Interaction has a Reset button that lets the user start over
either before or after clicking the Submit button (see the Reset option on the
General tab).
The CourseBuilder Interaction displays feedback if the user answers correctly or
incorrectly. It also displays feedback if the user responds in a way that can’t be
evaluated (for example, if the user clicks the Submit button before selecting any
choices). (See the Correctness segment in the Action Manager tab.)
For a step-by-step guide to using this template, see “Creating an all-that-apply
question” on page 95.
For detailed information about the options on the tabs, see:
“General options” on page 281
“Choices options” on page 287
“Multiple-choice segments” on page 297
Chapter 394
Page 95

Creating an all-that-apply question
All-that-apply questions with graphic check boxes work only in version 4 or later
browsers. (You can also use them in Netscape Navigator 3 if the images contain no
transparent pixels.)
See “The multiple-choice CourseBuilder Interaction tabs” on page 81 for an
overview of the tabs.
To create an all-that-apply question:
1
Insert a CourseBuilder Interaction in the document by doing one of
the following:
Click the Insert CourseBuilder Interaction icon in the Object palette.
Click the Insert CourseBuilder Interaction icon, then drag it to the
document window.
Choose Insert > CourseBuilder Interaction.
2 In the CourseBuilder Interaction dialog box, in the Category list select
Multiple Choice, then select the icon for the all-that-apply template you
want to use.
All-that-apply (check boxes) All-that-apply (graphic check boxes)
3 Click the General tab. In the Question Text box, replace the default text with
For version 4 and later browsers
the text of your question.
4 Click the Choices tab. In the Choices list at the top of the tab, select the first
choice, and type the text of the first correct answer in the Text field. Repeat for
the second correct answer and for each of the wrong answers.
If you want to change which choices are correct or incorrect, see “Marking a
response right or wrong” on page 254.
If the answers are neither right nor wrong, see “Marking a response right or
wrong” on page 254.
If you want to delete default choices or add additional ones, see “Adding or
deleting a choice” on page 97.
5 Arrange the order of the answers.
See “Changing the order of the choices” on page 96.
6 Click OK to close the dialog box.
Multiple-Choice CourseBuilder Interactions 95
Page 96

Other things you can do
What you can do For instructions, see
Give a choice a descriptive name “Naming a choice” on page 98
Add an image to each choice “Adding an image to a text choice” on
Evaluate the answer when the user
clicks a Submit button
Give the Submit button a
different name
Assign an interaction a value as part
of a test
Track a user’s performance in a
computer-managed instruction
system, such as Lotus Pathware
Limit the number of tries a user has to
complete the interaction correctly
Limit the amount of time a user has to
complete the interaction
Change the feedback preprogrammed
in the template
Allow users to click a button to answer
the question again
Place the question in a layer so you
can hide it, position it, or manipulate
it in some other way as a layer
Save a custom all-that-apply
CourseBuilder Interaction as a
template
page 98
“Setting when a CourseBuilder Interaction
is judged” on page 163
“Changing the name of the Submit button”
on page 164
“Scoring a response” on page 255
“Tracking user performance” on page 251
“Limiting the number of tries” on page 162
“Putting a time limit on an interaction” on
page 163
“Customizing feedback” on page 159
“Resetting a CourseBuilder Interaction” on
page 165
“Inserting a CourseBuilder Interaction
into a layer” on page 166
“Adding a CourseBuilder Interaction template
to the Gallery” on page 169
Changing the order of the choices
1 In the CourseBuilder Interaction dialog box, click the Choices tab.
See “Editing CourseBuilder Interactions” on page 158 if you need help.
2 In the Choices list at the top of the tab, select the name of the choice you
want to move.
3 Click Up or Down to change the order in which the choice displays in the
interaction.
Chapter 396
Page 97

Adding or deleting a choice
Go to the Choices tab:
In the CourseBuilder Interaction dialog box, click the Choices tab.
See “Editing CourseBuilder Interactions” on page 158 if you need help.
To delete a choice:
In the Choices list at the top of the tab, select the name of the choice you want to
delete, then click Delete.
To add a choice:
1
In the Choices list at the top of the tab, select the name of the choice whose
properties are most like the one you want to add.
2 Click Add.
The choice is duplicated.
3 Name the choice.
See “Naming a choice” on page 98.
4 Change the properties that need changing.
See “Multiple-choice CourseBuilder Interactions—step-by-step procedures” on
page 83.
5 Arrange the choice’s position in the Choices list.
See “Changing the order of the choices” on page 96.
Multiple-Choice CourseBuilder Interactions 97
Page 98

Naming a choice
The name of a choice is different from the text of the choice. The text of the choice
is what appears on the page; it’s what the user sees. The name of the choice
appears only in the CourseBuilder Interaction dialog box.
The templates assign default names (choice1, choice2, and so on) to each choice.
Change the default names to something more descriptive to make the choices
easier to work with. However, you should avoid naming choices in ways that
describe whether a choice is correct or incorrect. Because clever users can look at
the HTML, you don’t want them to be able to determine the answer based on the
names of the choices.
To change the name of a choice:
1
In the CourseBuilder Interaction dialog box, click the Choices tab.
See “Editing CourseBuilder Interactions” on page 158 if you need help.
2 In the Choices list at the top of the tab, select the name of the choice you
want to change.
3 In the Name field, replace the default name with the name you want. The
name can consist only of letters and numbers. Invalid characters, including
spaces, are automatically deleted.
Adding an image to a text choice
Don’t confuse an image you add to a text choice with a graphic multiplechoice question. Adding an image to a text choice merely enhances it. If you
want to create a multiple-choice question that’s essentially graphic and that
needs no text, use the graphic multiple-choice question template (see “Graphic
multiple-choice questions” on page 91).
To add an image to a choice:
1
In the CourseBuilder Interaction dialog box, click the Choices tab.
See “Editing CourseBuilder Interactions” on page 158 if you need help.
2 In the Choices list at the top of the tab, select the name of the choice you want
to add an image to.
3 In the Image File, click Browse, then navigate to the image you want to display
for the choice.
The “Place before text” option is selected by default. The image appears to the
left of the text of the choice.
To have the image appear to the right of the text of the choice:
Deselect the “Place before text” option.
Chapter 398
Page 99

CHAPTER 4
Drag-and-Drop CourseBuilder Interactions
.............................................................................................................
Drag-and-drop interaction overview
Drag-and-drop CourseBuilder Interactions offer users hands-on learning in which
they interact directly with a lesson by manipulating elements on-screen. Use the
drag-and-drop CourseBuilder Interaction to have students demonstrate that
they’ve mastered complex relationships between objects. For example, have users
assemble a piece of machinery from its parts or relate concepts spatially.
You can include guidance to demonstrate the consequences of using a complex
system incorrectly. Consider using feedback on incorrect or undesirable responses
to guide students and explain flaws in logic. To give a drag-and-drop interaction
depth and make it less predictable and more challenging, make sure that dragand-drop interactions are real enough to handle and give feedback on a wide
variety of gestures.
4
99
Page 100

The drag-and-drop templates
You can choose from seven drag-and-drop CourseBuilder Interaction templates,
and then use the CourseBuilder Interaction dialog box to customize the drag-anddrop interaction.
Drag_ManyToMany one-to-one matching. Places three drag elements and
three target elements on the page. Each target element is the correct match
for only one drag element.
For details about how the template works, see “One-to-one matching” on
page 106.
For information about using the template, see “Creating a matching
exercise” on page 110.
Drag_2wayManyToMany one-to-one matching (either way). Places six drag
& target elements on the page. A drag & target element can be both a drag
element and a target element. Each drag & target element is the correct
match for only one other drag & target element.
For details about how the template works, see “One-to-one matching, either
way” on page 107.
For information about using the template, see “Creating a matching
exercise” on page 110.
Drag_1ToMany one-to-many matching. Places one drag element and three
target elements on the page. Only one of the target elements is the correct
match for the drag element.
For details about how the template works, see “One-to-many matching” on
page 108.
For information about using the template, see “Creating a matching
exercise” on page 110.
Drag_2way1ToMany one-to-many matching (either way). Places four drag &
target elements on the page. Only one pair of drag & target elements
constitute the correct match.
For details about how the template works, see “One-to-many matching,
either way” on page 109.
For information about using the template, see “Creating a matching
exercise” on page 110.
Drag_2way1To1 the “Build your own” template. Places two drag & target
elements on the page, each of which can be dragged and dropped onto
the other. Use this template as the starting point for your own custom
CourseBuilder Interaction.
For details about how the template works, see “The “Build your own”
template” on page 112.
For information about using the template, see “Building your own matching
exercise” on page 113.
For information about using the template, see “Creating a matching
exercise” on page 110.
Chapter 4100
 Loading...