

Page 1

3Com® Network Administrator
for HP OpenView | Windows
User Guide
3C15400
http://www.3com.com/
Part No. DUA1540-0AAA01
Published November 2003
Page 2

3Com Corporation
350 Campus Drive
Marlborough
MA USA 01752-3064
Copyright © 2003, 3Com Technologies. All rights reserved. No part of this documentation may be reproduced
in any form or by any means or used to make any derivative work (such as translation, transformation, or
adaptation) without written permission from 3Com Technologies.
3Com Technologies reserves the right to revise this documentation and to make changes in content from time
to time without obligation on the part of 3Com Technologies to provide notification of such revision or
change.
3Com Technologies provides this documentation without warranty, term, or condition of any kind, either
implied or expressed, including, but not limited to, the implied warranties, terms or conditions of
merchantability, satisfactory quality, and fitness for a particular purpose. 3Com may make improvements or
changes in the product(s) and/or the program(s) described in this documentation at any time.
If there is any software on removable media described in this documentation, it is furnished under a license
agreement included with the product as a separate document, in the hard copy documentation, or on the
removable media in a directory file named LICENSE.TXT or !LICENSE.TXT. If you are unable to locate a copy,
please contact 3Com and a copy will be provided to you.
UNITED STATES GOVERNMENT LEGEND
If you are a United States government agency, then this documentation and the software described herein are
provided to you subject to the following:
All technical data and computer software are commercial in nature and developed solely at private expense.
Software is delivered as “Commercial Computer Software” as defined in DFARS 252.227-7014 (June 1995) or
as a “commercial item” as defined in FAR 2.101(a) and as such is provided with only such rights as are
provided in 3Com’s standard commercial license for the Software. Technical data is provided with limited rights
only as provided in DFAR 252.227-7015 (Nov 1995) or FAR 52.227-14 (June 1987), whichever is applicable.
You agree not to remove or deface any portion of any legend provided on any licensed program or
documentation contained in, or delivered to you in conjunction with, this User Guide.
Unless otherwise indicated, 3Com registered trademarks are registered in the United States and may or may not
be registered in other countries.
3Com and the 3Com logo are registered trademarks of 3Com Corporation. XRN is a trademark of
3Com Corporation
IEEE and 802 are registered trademarks of the Institute of Electrical and Electronics Engineers, Inc.
Intel and Pentium are registered trademarks of Intel Corporation. Microsoft, MS-DOS, Windows, and Windows
NT are registered trademarks of Microsoft Corporation. Novell and NetWare are registered trademarks of
Novell, Inc. UNIX is a registered trademark in the United States and other countries, licensed exclusively
through X/Open Company, Ltd.
Netscape Navigator is a registered trademark of Netscape Communications.
HP OpenView is a registered trademark of Hewlett Packard.
JavaScript is a trademark of Sun Microsystems.
All other company and product names may be trademarks of the respective companies with which they are
associated.
ENVIRONMENTAL STATEMENT
It is the policy of 3Com Corporation to be environmentally-friendly in all operations. To uphold our policy, we
are committed to:
Establishing environmental performance standards that comply with national legislation and regulations.
Conserving energy, materials and natural resources in all operations.
Reducing the waste generated by all operations. Ensuring that all waste conforms to recognized environmental
standards. Maximizing the recyclable and reusable content of all products.
Ensuring that all products can be recycled, reused and disposed of safely.
Ensuring that all products are labelled according to recognized environmental standards.
Improving our environmental record on a continual basis.
End of Life Statement
3Com processes allow for the recovery, reclamation and safe disposal of all end-of-life electronic components.
Regulated Materials Statement
3Com products do not contain any hazardous or ozone-depleting material.
Environmental Statement about the Documentation
The documentation for this product is printed on paper that comes from sustainable, managed forests; it is
fully biodegradable and recyclable, and is completely chlorine-free. The varnish is environmentally-friendly, and
the inks are vegetable-based with a low heavy-metal content.
Page 3

CONTENTS
ABOUT THIS GUIDE
Conventions 14
Feedback about this User Guide 15
Related Documentation 15
1 GETTING STARTED
Introduction 17
What is 3Com Network Administrator 17
On the CD 18
Installation 18
Activation 20
Getting Started 21
Creating a New Inventory File 21
Import Device Information 21
Main Features 23
Device Window 23
Device Administration 24
Importing and Refreshing 24
Backup, Restore and Setup 25
Agent Update 25
Traffic Prioritization 25
Reporting 25
HP OpenView Integration 26
Live Update 26
2 PRODUCT ACTIVATION
Introduction 27
Key Concepts 28
Components 28
About Dialog 28
Page 4

Activation Wizard 29
Examples 31
Activating 3Com Network Administrator 31
Useful Information and References 32
Key Considerations 32
3 DEVICE WINDOW
Overview 35
Key Concepts 36
Inventory Files 36
Device Groups 36
Components 40
The Device Group Tree 40
The Device List 41
Device List Columns 41
Toolbar 43
Status Bar 43
Menus 44
File > Open 48
File > Save and Save As 48
Most Recently Used Files 49
File > Exit 49
Edit > Add Device 49
Edit > Delete 50
Edit > Find 51
Edit > Select All 52
View > Show Toolbar 52
View > Show Columns 52
View > Update Window 53
Tools > Scheduled Tasks 53
Too ls > O pt io ns 55
Help > Contents and Index 58
Help > About 58
Examples 59
Finding the IP address of a Device 59
Backing up Devices in a certain VLAN 59
Adding a New Device 59
Page 5

Key Considerations 60
Deleting Devices 60
Active Selection 60
Scheduled Tasks 60
4 DEVICE ADMINISTRATION
Overview 61
Key Concepts 62
Web Management 62
Telnet Management 62
Administration Menu 62
IP Ping 63
Trace Route 64
Properties Dialog 65
Registering Devices for Warranty 71
Components 71
Device Warranty Dialog 71
Device Warranty Wizard 72
Connection to the 3Com Server 78
What Data is Sent to the 3Com server 78
Reports 79
Examples 81
Renaming a Switch 4007 using Telnet 81
Disabling a Port on a Switch 4400 using the Web Interface 81
Viewing Connected Ports using Device View 82
Registering 3Com Devices for Warranty 82
Key Considerations 84
Troubleshooting 84
Frequently Asked Questions 85
5 IMPORTING AND REFRESHING DEVICES
Overview 87
Key Concepts 88
Importing 88
Refreshing 90
Components 92
Import Dialog 92
Page 6

Import Progress Dialog 92
Refresh Progress Dialog 93
Refresh Summary Dialog 95
Import and Refresh Reports 96
Examples 97
Importing Newly Discovered Devices from HP OpenView 97
Importing Devices from a Spreadsheet 98
Refreshing Existing Devices 99
Delaying Refreshing Existing Devices 100
Key Considerations 102
Import Problems 102
Refresh Problems 103
Updating the Inventory 105
Subnet Creation 105
Frequently Asked Questions 106
6 BACKUP, RESTORE AND SETUP
Overview 107
Key Concepts 108
Physical Identification of Devices 108
Physical Configuration of Devices 108
Backup Components 109
Device Backup Wizard 109
Device Backup Events 112
Device Backup Reports 112
Backup Files 114
Restore Components 114
Device Restore Wizard 114
Device Restore Event 118
Restore Summary Report 118
Setup Components 119
Device Setup Wizard 119
Device Setup Event 123
Setup Summary Report 123
Examples 124
Scheduling a Device Backup Operation 124
Restoring to a Replacement Device 125
Page 7

Deploying a Group of Devices 128
Useful Information and References 130
Supported 3Com Devices 130
Supported Device Parameters 131
Understanding Backup Files 132
Managing Backup Files 132
Key Considerations 133
How Backup Files are Discarded 133
Potential Hazards when using Restore and Setup 134
Why Errors can Occur during Restore and Setup 134
7 AGENT UPDATE
Overview 135
Key Concepts 136
Agent Image Files 136
The Internal TFTP Server 136
Scheduling 136
Components 137
Agent Update Wizard 137
Agent Update Events 145
Agent Update Reports 145
Examples 146
Update all Switch 4400’s with a New Agent 146
Detecting and Downgrading a Problem Device 147
Useful Information and References 148
Supported Devices 148
Agent Image Filenames 148
Key Considerations 149
Co-existence With Other TFTP Servers 149
Considerations When Downgrading Devices 149
Troubleshooting Device Problems Following Agent Update 149
Repeated Timeouts 150
8 PRIORITIZING NETWORK TRAFFIC
Overview 153
Key Concepts 154
Classification 154
Page 8

Marking 155
Queuing 157
Dropping 159
Service Levels 159
Configuring the Network for End-to-end Traffic Prioritization 160
Components 161
Prioritize Network Traffic Wizard 161
Prioritization Reports 167
Examples 169
Applying an Existing Configuration to New Devices 169
Prioritizing NBX Voice Traffic 170
Prioritizing Traffic To and From a SAP Server 171
Blocking Access to a Streaming Audio Server 173
Prioritizing a Video Conferencing Application 174
Restricting Access to SNMP 177
Useful Information and References 180
User Priority Field 180
DiffServ Codepoint Field 181
Determining Field Values for Applications 182
3Com Network Administrator Service Levels 182
Configuration Levels for Supported 3Com Devices 183
Key Considerations 184
Resource Warnings 184
Why Errors Can Occur When Adding a Server 186
Potential Hazards When Blocking Traffic To and From Servers 186
Servers That Cannot be Selected for Blocking 187
Potential Hazards of Blocking Application Traffic 188
Potential Hazards of Blocking SNMP, HTTP and Telnet 189
9 REPORTING
Overview 191
Key Concepts 192
Selection-sensitive 192
Feature Reports 192
Custom Reports 193
Reports History 193
Export to CSV 193
Page 9

Components 193
Inventory Report 193
Capacity Report 194
Changes Report 194
Reports Dialog 197
Custom Report Types Dialog 200
Add/Edit Report Wizard 201
Examples 204
Assessing Network Expansion Capability 204
Ensuring Stacks are Running the Same Agent Version 206
Useful Information and References 207
VLAN-unaware Devices 207
VLANS and the Switch 4007 207
Key Considerations 207
Report Information Out-of-Date 207
Disk Usage 207
‘Generate Report’ not Working 208
10 HP OPENVIEW INTEGRATION
Overview 209
Key Concepts 211
Alarms 211
Getting Information from HP OpenView into 3Com Network
Administrator 211
Icons 211
MIBs 212
Components 213
Menu Components 213
Application Index Dialog 215
Alarm Categories 217
Examples 217
Launching 3Com Network Administrator from HP OpenView 217
Importing Device Information from HP OpenView 217
Using the HP OpenView MIB browser 218
Key Considerations 219
Alarms Sent 219
Page 10

11 LIVE UPDATE
Overview 221
Key Concepts 222
Connection Type 222
Service Packs 222
Live Update Engine 222
Components 223
Live Update Setup Wizard 223
Live Update Select File Groups Dialog 227
Select File Group - Group Name 229
Download Progress 230
Changing the Download Settings 231
Live Update Activity Report 234
Examples 235
Ensuring 3Com Devices are Supported 235
Updating the Connection Information 236
Useful Information and References 239
Proxy Server 239
Key Considerations 239
The Proxy Settings are not Retrieved 239
Not Enough Space on the Disk 240
A SUPPORTED DEVICES
Device View 241
Switch Manager 243
Router Manager 243
Device Warranty 243
Backup, Restore and Setup 245
Agent Update 248
B 3COM DEVICE VIEW
About Device View 252
Management Support Matrix 252
C OBTAINING SUPPORT FOR YOUR PRODUCT
Register Your Product to Gain Service Benefits 255
Page 11

Purchase Value-Added Services 255
Troubleshoot Online 255
Access Software Downloads 256
Contact Us 256
Telephone Technical Support and Repair 256
D SYSTEM REQUIREMENTS
Operating System 259
Web Browser 259
HP OpenView Supported Versions 259
Additional Software Required 259
Hardware 260
INDEX
3COM END USER SOFTWARE LICENSE AGREEMENT
Page 12

Page 13

ABOUT THIS GUIDE
This guide is intended for use by those responsible for installing, setting
up and managing a network; consequently, it assumes a working
knowledge of networks and network management systems.
®
If the Release Notes provided with this 3Com
User Guide contain details that differ from the information in this guide,
follow the information in the release notes.
Most 3Com user guides are available in Adobe Acrobat Reader Portable
Document Format (PDF) or HTML on the 3Com World Wide Web site:
http://www.3com.com/
Network Administrator
Page 14
14 ABOUT THIS GUIDE
Conventions Ta bl e 1 and Tab l e 2 list conventions that are used throughout this guide.
Tab le 1 Notice Icons
Icon Notice Type Description
Information note Information that describes important features or
instructions.
Caution Information that alerts you to potential loss of data or
potential damage to an application, system, or device.
Warning Information that alerts you to potential personal
injury.
Tab le 2 Text Conventions
Convention Description
Screen displays This typeface represents information as it appears on the
screen.
Syntax The word “syntax” means that you must evaluate the syntax
provided and then supply the appropriate values for the
placeholders that appear in angle brackets. Example:
To change your password, use the following syntax:
system password <password>
In this example, you must supply a password for <password>.
Commands The word “command” means that you must enter the
command exactly as shown and then press Return or Enter.
Commands appear in bold. Example:
To display port information, enter the following command:
bridge port detail
The words “enter”
and “type”
When you see the word “enter” in this guide, you must type
something, and then press Return or Enter. Do not press
Return or Enter when an instruction simply says “type.”
Keyboard key names If you must press two or more keys simultaneously, the key
names are linked with a plus sign (+). Example:
Press Ctrl+Alt+Del
Words in italics Italics are used to:
■ Emphasize a point.
■ Denote a new term at the place where it is defined in the
text.
■ Identify menu names, menu commands, and software
button names. Examples:
From the Help menu, select Contents.
Click OK.
Page 15

Feedback about this User Guide 15
Feedback about this User Guide
Related Documentation
Your suggestions are very important to us. They will help make our
documentation more useful to you. Please e-mail comments about this
document to 3Com at:
pddtechpubs_comments@3com.com
Please include the following information when commenting:
■ Document title
■ Part number
■ Page number (if appropriate)
Example:
3Com Network Administrator for HP OpenView User Guide
DUA1540-0AAA01
Page 21
Do not use this email address for technical support questions. For
information about contacting Technical Support, please refer to
Appendix B
on page 251.
In addition to this guide, 3Com Network Administrator provides on-line
help which can be accessed through the application.
Page 16

16 ABOUT THIS GUIDE
Page 17

1
GETTING STARTED
Introduction This chapter contains introductory information about 3Com
Administrator for HP OpenView, how to install and activate the
application and a brief summary of all its major features.
What is 3Com
Network
Administrator
3Com Network Administrator for HP OpenView is an application that lets
you perform administration tasks on a number of your 3Com devices at
once. By using 3Com Network Administrator you can:
■ Directly import device information from HP OpenView or text files.
■ Access the Telnet or Web Management consoles of your 3Com
devices
■ Launch device-specific 3Com configuration applications such as
Device View
■ Backup and Restore device configurations over the network and even
deploy setup configurations to a number of 3Com devices at once.
■ Perform upgrades of your 3Com devices using a single update wizard
tool
■ Generate reports of detailed information about your 3Com devices
■ Configure your network to use the quality of service (QoS) capabilities
of your 3Com devices
®
Network
Page 18
18 CHAPTER 1: GETTING STARTED
On the CD The CD contains the following resources:
■ A readme file for 3Com Network Administrator
■ The 3Com Network Administrator installation program
■ This 3Com Network Administrator user guide in PDF format
■ Adobe Acrobat Reader
■ 3Com Switch Manager
■ 3Com Router Manager
Use Windows Explorer to browse the CD and access the files.
Installation 3Com recommends that you install the Router Manager and Switch
Manager applications before you install 3Com Network Administrator.
These applications must be installed first so that the 3Com Network
Administrator installation can create the correct shortcuts to these
applications.
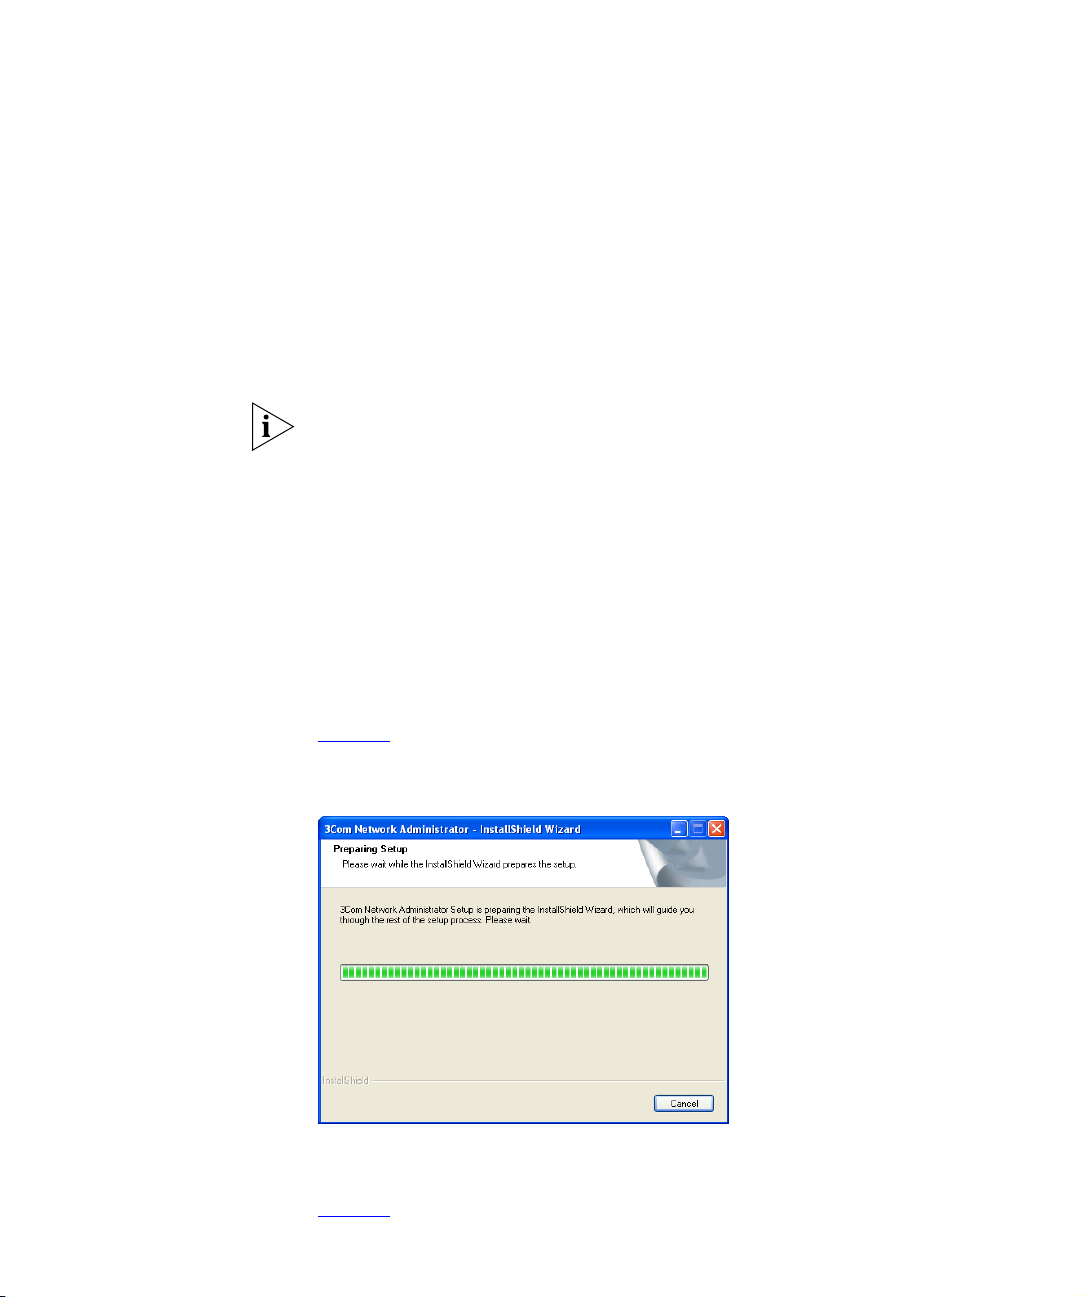
To install 3Com Network Administrator, insert the product CD in your
computer’s CDROM drive and browse the CD. Double-click the
3Com Network Administrator v1.0.exe file to begin the
installation process. Once the installation has started (as shown in
Figure 1
), please follow the steps in the installation wizard.
Figure 1 InstallShield Wizard
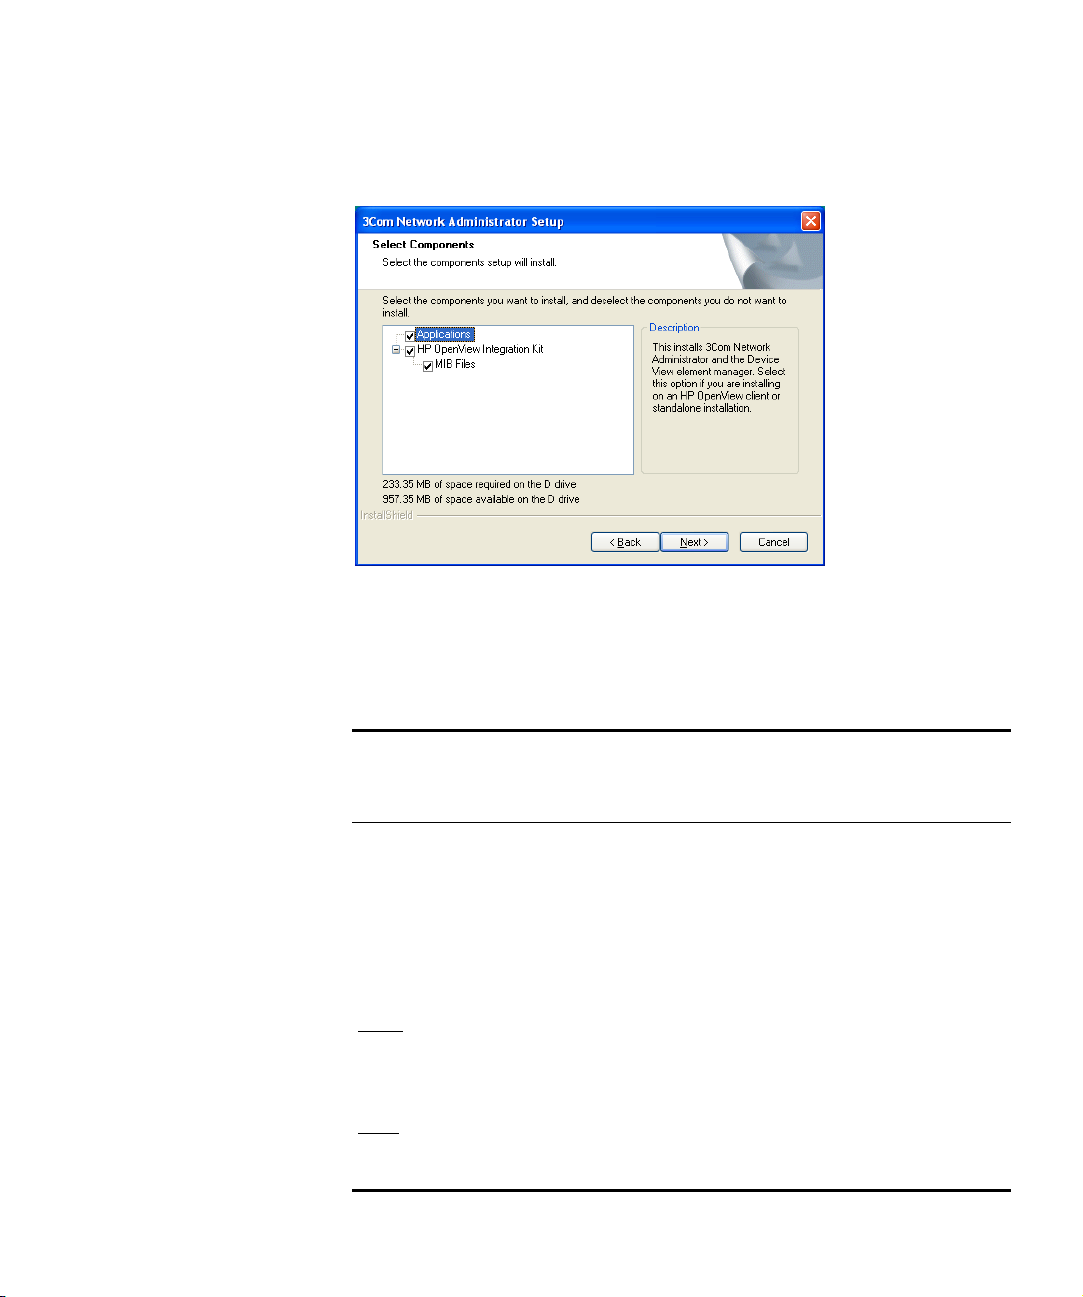
The Select Components step in the installation wizard gives you the
option of installing parts of 3Com Network Administrator as shown in
Figure 2
:
Page 19
Introduction 19
Figure 2 Select Components
The following table provides guidelines on the scenarios you may be
installing 3Com Network Administrator under, and which checkboxes you
should select:
Tab le 3 Installation Checkboxes
Checkboxes:
Scenario Applications Integration MIBs
Installing 3Com Network Administrator on a
system with a standalone version of HP
OpenView
Installing 3Com Network Administrator on a
system that does not contain HP OpenView
Installing 3Com Network Administrator on a
system that is acting as an HP OpenView
.
server
Note: You must install on the server before
installing any clients.
Installing on a system that is an HP OpenView
client
. Please install the integration kit on the
server before installing 3Com Network
Administrator on any clients.
✕ ✕ ✕
✕
✕ ✕
✕
Page 20

20 CHAPTER 1: GETTING STARTED
Installing the MIBs into HP OpenView is optional. The MIBs give you
access to low-level statistics and control of your 3Com devices. However,
you may decide not to install the MIB collection to save time during the
install, since the MIBs can take up to an hour to install.
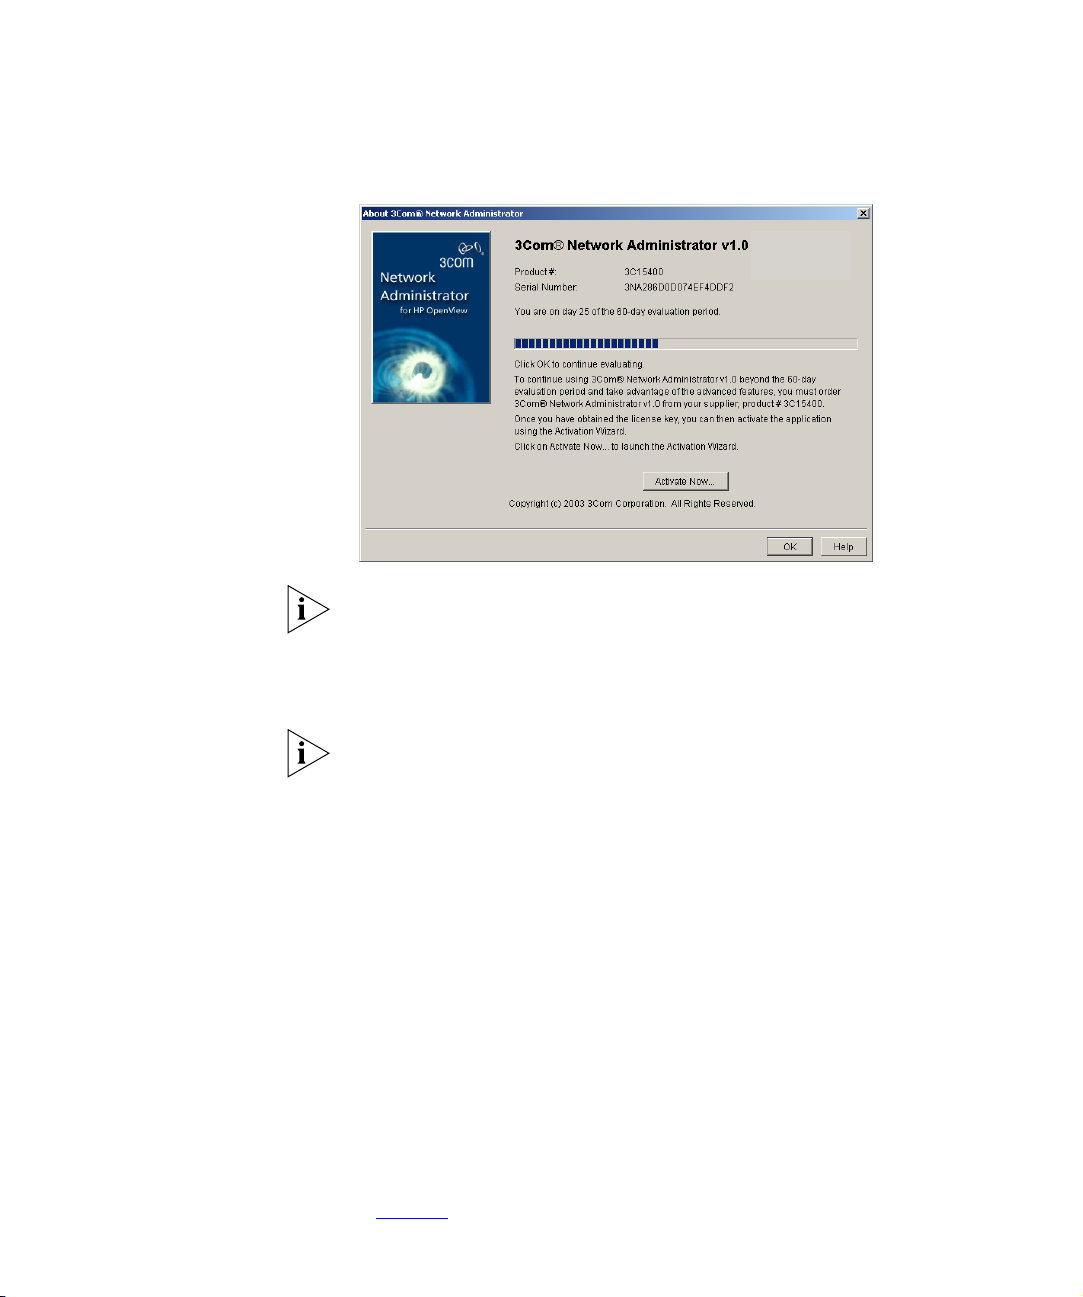
Activation Once you have installed 3Com Network Administrator, you will have a
60-day grace period within which to activate your software. When you
launch 3Com Network Administrator for the first time the About dialog
will be displayed as shown in Figure 3
Figure 3 About Dialog
:
To activate your software:
1 Click Activate Now to launch the Activation Wizard.
2 The wizard will ask you for your license key. Enter the key and click Next.
3Com Network Administrator will then direct you to a 3Com activation
website to retrieve your activation key.
3 Once you have your activation key, enter it into the Activation Key text
box and click Finish to complete the activation process.
For more information, please refer to “
Product Activation” on page 27.
Page 21
Getting Started 21
Getting Started This section details the two operations you need to perform before you
can start using 3Com Network Administrator with your 3Com devices.
Creating a New
Inventory File
Import Device
Information
3Com Network Administrator stores detailed information about your
3Com devices in inventory files. When you first run 3Com Network
Administrator, a Welcome dialog is displayed which lets you:
■ Create a new inventory file
■ Open an existing inventory file
■ Open the last inventory file you were using
To create a new inventory file from the Welcome dialog, select Create a
new inventory file and click OK.
Once you have an inventory file loaded into 3Com Network
Administrator, you must bring device information into the import facility
as follows:
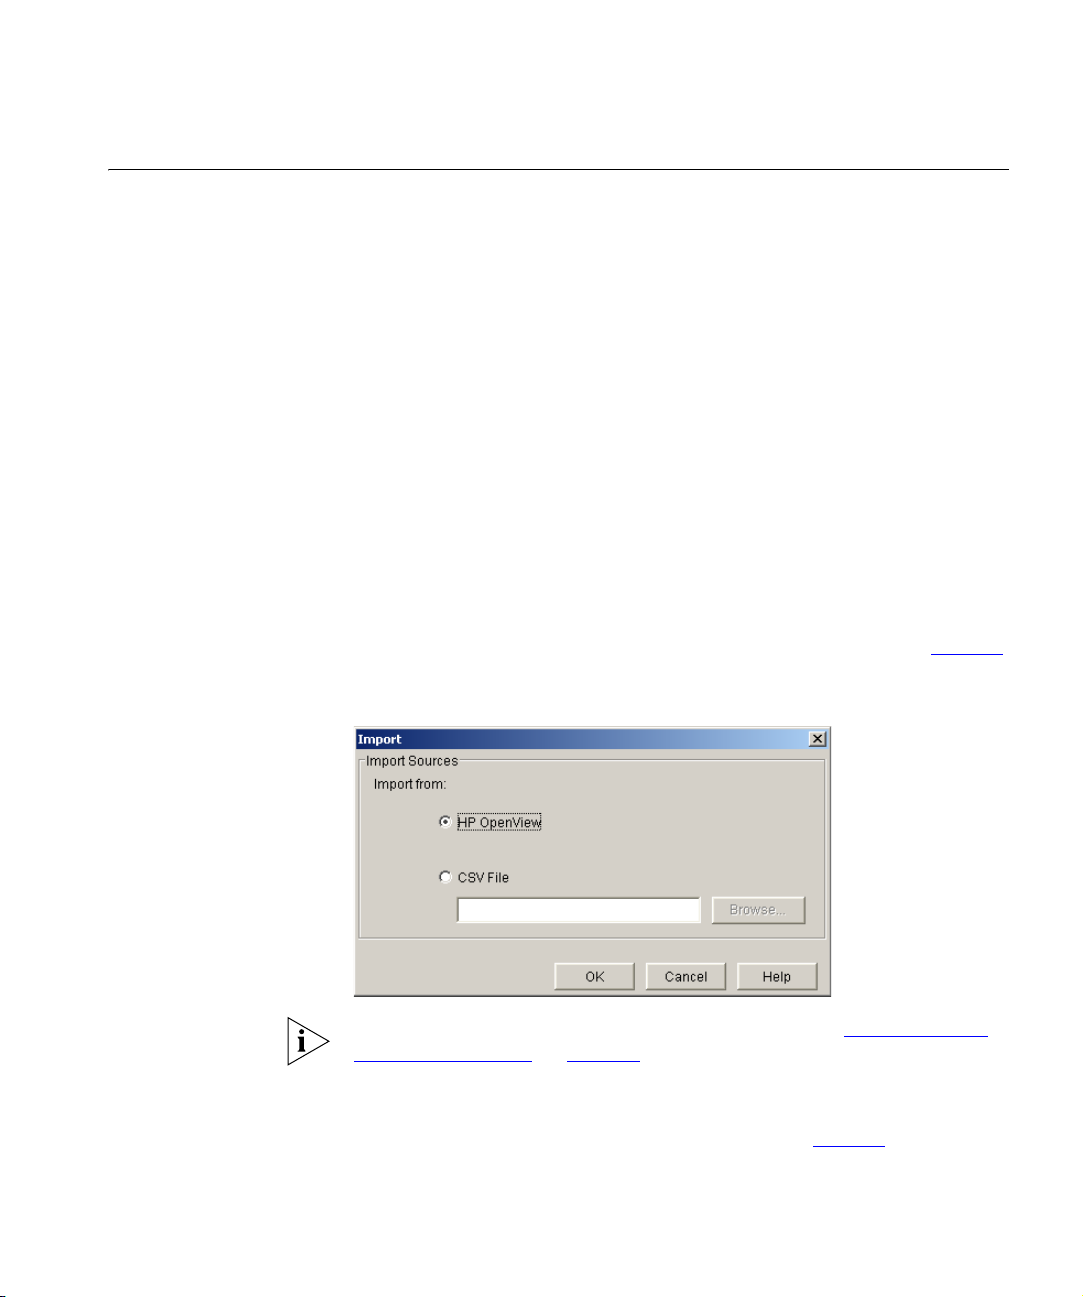
1 From the File menu, select Import to display the dialog shown in Figure 4
Figure 4 Import Dialog
:
For information on how to import from a CSV file, see “Importing and
Refreshing Devices” on page 87.
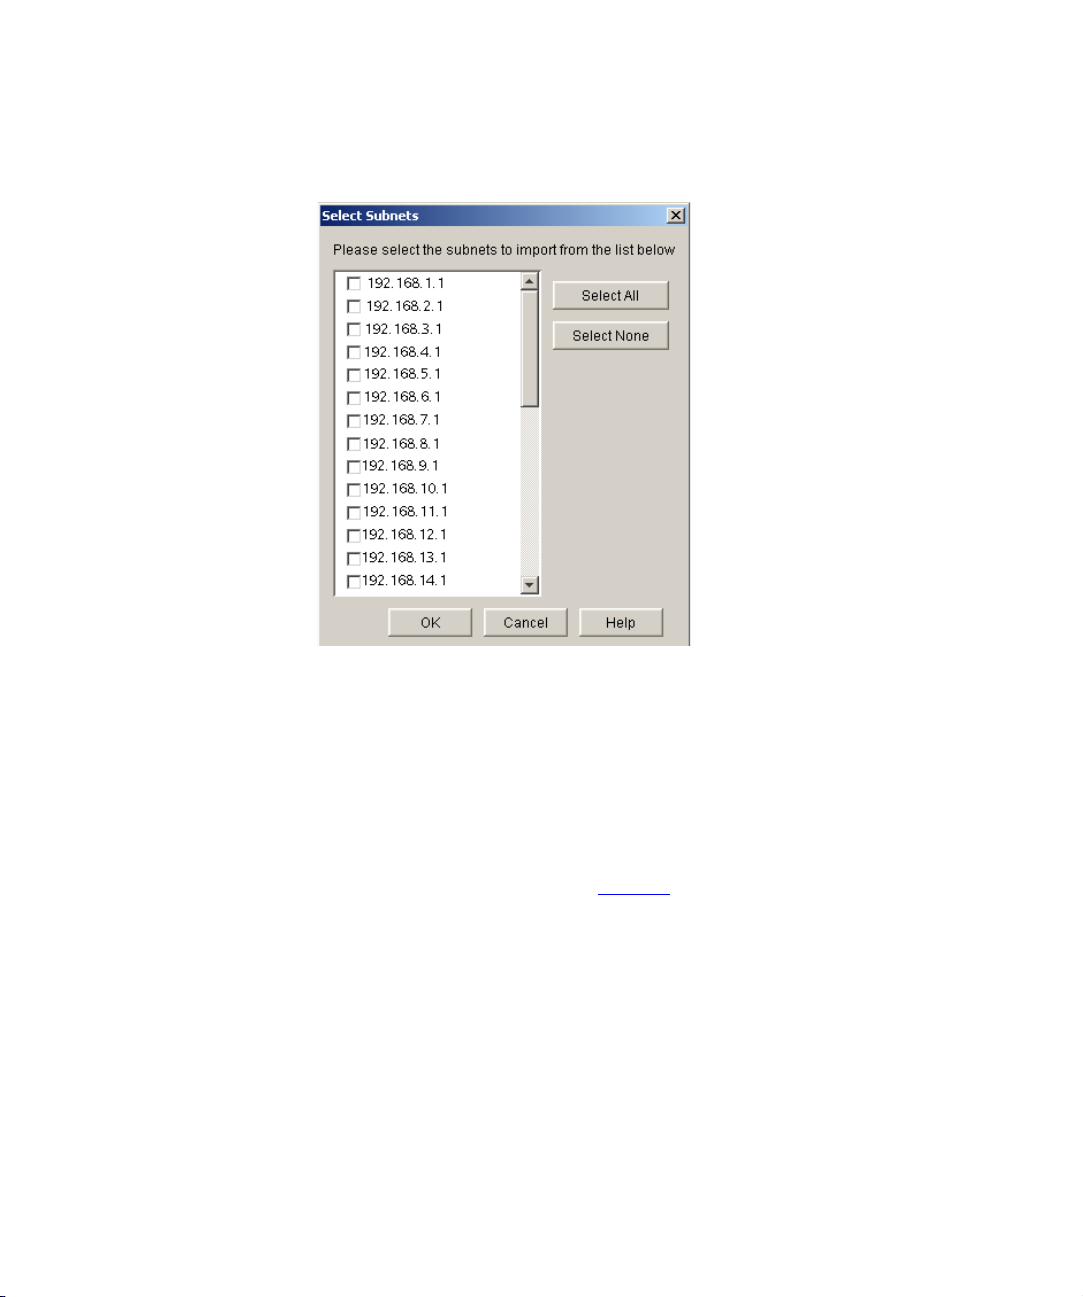
2 The Import from HP OpenView option is selected by default so click OK to
display the Select Subnets dialog, which contains a list of subnets that HP
OpenView has discovered. An example is shown in Figure 5
:
Page 22
22 CHAPTER 1: GETTING STARTED
Figure 5 Select Subnets Dialog
3 Select the subnets you want to import 3Com devices from and click OK.
An Import Progress dialog is displayed while 3Com Network
Administrator contacts the HP OpenView database and retrieves device
information for the 3Com devices in the subnets you have specified.
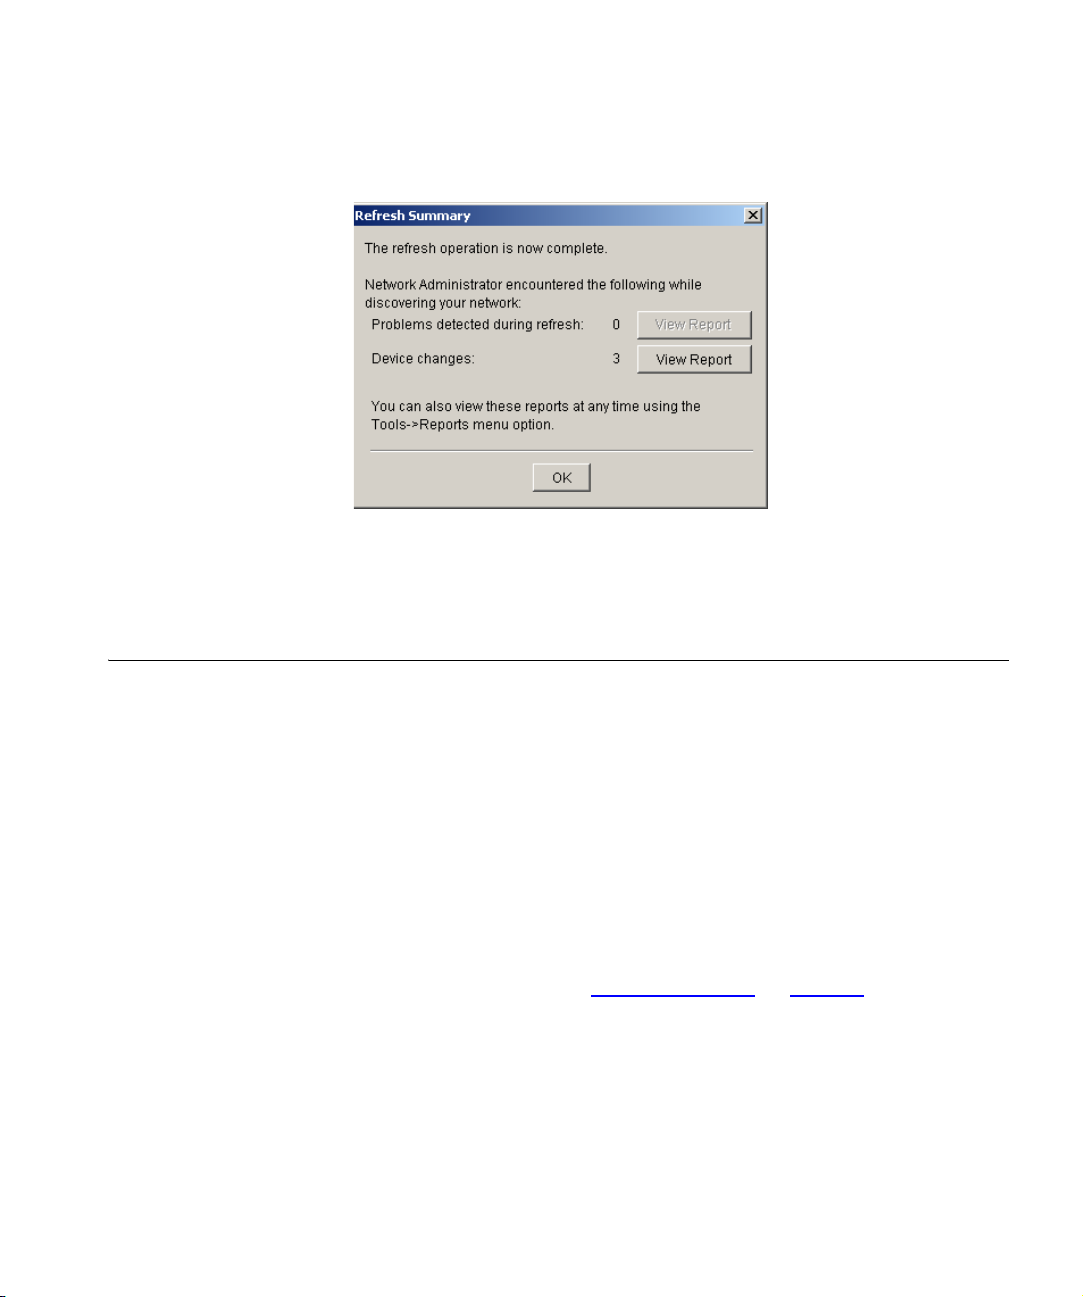
Once the import has taken place, the Refresh Progress dialog is displayed.
During importing, 3Com Network Administrator (using SNMP) retrieves
even more detailed information about your 3Com devices than is held in
HP OpenView. When the refresh operation is complete, a Summary
dialog is displayed as shown in Figure 6
. From the Summary dialog you
can view reports on the import and refresh operations.
Page 23
Main Features 23
Figure 6 Summary Dialog
4 Click OK to close the Summary dialog and return to the Device Window.
You are now ready to start using the administration functions of 3Com
Network Administrator.
Main Features This section outlines the main features in 3Com Network Administrator,
with references to the relevant chapters where each feature is described
in more detail.
Device Window The 3Com Network Administrator Device Window is your console for
viewing your 3Com devices. The window contains a tree view of device
groups (called the Device Group tree) and a list of the devices in the
selected groups (called the Device List). By using the Device Window, you
are able to perform administration functions on specific devices, a
selection of devices or entire device groups. A toolbar is included to
provide access to the most commonly used administration tasks.
For more information, see “
Device Window” on page 35.
Page 24

24 CHAPTER 1: GETTING STARTED
Device
Administration
Whilst 3Com Network Administrator provides administration functions
that apply to a range of your 3Com devices, you may want specific
control of the details on a single device. For this reason, 3Com Network
Administrator provides access to the following specific applications in
order to obtain detailed control:
■ Telnet Management
■ Web Management
■ 3Com Device View
■ 3Com Switch Manager
■ 3Com Router Manager
■ Network Jack Configuration
3Com Network Administrator also includes a feature called Device
Warranty. This feature enables you to register your 3Com devices for any
applicable warranty.
For more information on the administration functions see “
Device
Administration” on page 61.
For more information on 3Com Device View, see Appendix B on
page 251
.
Importing and
Refreshing
Importing is a convenient way of retrieving just the 3Com devices from
your HP OpenView database. You can also import information from a
CSV file.
Refreshing is the term 3Com Network Administrator uses for retrieving
detailed information from your 3Com devices. This information is then
presented in the Device Window and in the reports that 3Com Network
Administrator provides.
For more information, see “
page 87
.
Importing and Refreshing Devices” on
Page 25

Main Features 25
Backup, Restore and
Setup
The Backup facility allows you to store the configuration of your devices.
You can back up large numbers of devices and 3Com Network
Administrator will store them on your computer.
The Restore facility allows you to select which configuration to restore to
the device. You must have previously saved this configuration for the
device.
If you have a number of devices with similar settings, you can use the
Setup Wizard to deploy selected setup configurations to those 3Com
devices.
For more information, see “
Backup, Restore and Setup” on page 107.
Agent Update Agent Update allows you to update software on your 3Com devices if
you have a valid support contract. Agent Update also works in
conjunction with 3Com Network Administrator’s scheduling facility so
that you can schedule the updates to take place overnight and minimize
the impact on the network and, therefore, your users.
For more information, see “
Agent Update” on page 135.
Traffic Prioritization Many 3Com devices have traffic prioritization (or quality of service)
features. 3Com Network Administrator provides the Prioritize Network
Traffic Wizard to simplify the configuration of these devices. Using the
wizard, you can choose to prioritize or block specific servers or traffic
types. To provide end-to-end quality of service, your configuration can be
applied to all supported 3Com devices.
For more information, see “
Prioritizing Network Traffic” on page 153.
Reporting The Reporting facility enables you to retrieve stored information about
your 3Com devices. Many of the features in 3Com Network
Administrator have their own reports but there are other, general purpose
reports which give you different views of your 3Com devices. You can
also create your own reports using the Custom Report facility.
For more information, see “
Reporting” on page 191.
Page 26

26 CHAPTER 1: GETTING STARTED
HP OpenView
Integration
3Com Network Administrator customizes your copy of HP OpenView
with map icons and MIBs to enhance the management of your 3Com
devices. It also integrates with the HP OpenView Event Browser to send
you alarms for backup, restore, setup and agent update operations.
Menu options are provided for you to be able to launch 3Com Network
Administrator from within HP OpenView.
For more information, see “
HP OpenView Integration” on page 209.
Live Update The Live Update feature keeps your copy of 3Com Network Administrator
up-to-date with the latest device support and fixes. You can view and
download updates specifically for your copy of 3Com Network
Administrator. In addition, 3Com Product News is also available from Live
Update to keep you informed with what is happening at 3Com.
For more information, see “
Live Update” on page 221.
Page 27

PRODUCT ACTIVATION
2
Introduction 3Com Network Administrator uses an activation system which allows you
to use your copy of the software beyond the grace period. This chapter
describes how to activate 3Com Network Administrator.
Once you have installed 3Com Network Administrator, you can use it for
a grace period of up to 60 days without activating it. During this time,
you have the opportunity to activate the product each time you launch it.
It is important that you activate 3Com Network Administrator, this ends
the grace period and allows you unrestricted access to the product.
Activation also starts the product’s warranty period, entitling you to
customer support for 3Com Network Administrator for the duration of
the warranty. You can also decide to receive important update
information relating to both this and other associated products.
This chapter covers the following topics:
■ Key Concepts
■ Components
■ Examples
■ Useful Information and References
■ Key Considerations
Page 28

28 CHAPTER 2: PRODUCT ACTIVATION
Key Concepts 3Com Network Administrator uses the following information in the
activation process:
■ The Serial Number — 3Com Network Administrator automatically
generates this number when it is first installed.
■ The License Key — identifies the physical copy of the software you
have. Each 3Com Network Administrator CD has a unique license key.
■ The Product Number — the part number of your software, which
starts with ‘3C’.
The part number for 3Com Network Administrator is 3C15400.
■ The Activation Key — the key returned from the 3Com registration
site. Type this key into the Activation Wizard to complete the
activation process.
3Com Network Administrator provides an Activation Wizard which
guides you through the activation process.
Components The following section describes how to activate 3Com Network
Administrator.
About Dialog 3Com Network Administrator’s About dialog is used to display general
information relating to the product, such as the name, product number
and serial number.
You can launch the About dialog by selecting the menu option Help >
About > 3Com Network Administrator. If 3Com Network Administrator is
still running within its grace period, the About dialog automatically
displays each time the application is launched.
During the grace period, the About dialog displays the number of days
remaining in the grace period. Click the Activate Now... button to launch
the Activation Wizard as shown in Figure 7
:
Page 29
Components 29
Figure 7 About Dialog Before Registration
When the grace period has expired, most menu options are disabled.
However, you can still activate the product using the Activate Now menu
option or by clicking Activate Now in the About dialog.
You can close the dialog without activating the product by clicking OK.
Once the product has been activated, the additional information and the
Activate Now button will not be displayed.
Activation Wizard The Activation Wizard guides you through the activation process. The
Wizard can be launched either by clicking Activate Now on the About
dialog, or by clicking Help > Activate Now from the top level menu.
Once 3Com Network Administrator is activated, the Activation Wizard is
no longer needed and the Activate Now menu option displays a message
box that confirms the product is activated instead.
The wizard consists of two steps as follows:
1 Entering the license key — the key can be found on the CD sleeve of your
3Com Network Administrator software. The license key is five groups of
hexadecimal characters separated by dashes. For example:
3NA - 1BF9 - 093B - AC5F - 8343
Type the license key into the License Key text box and click Next as shown
in Figure 8
:
Page 30
30 CHAPTER 2: PRODUCT ACTIVATION
Figure 8 Activation Wizard - License Key
3Com Network Administrator checks that you have a valid license key
before allowing you to continue.
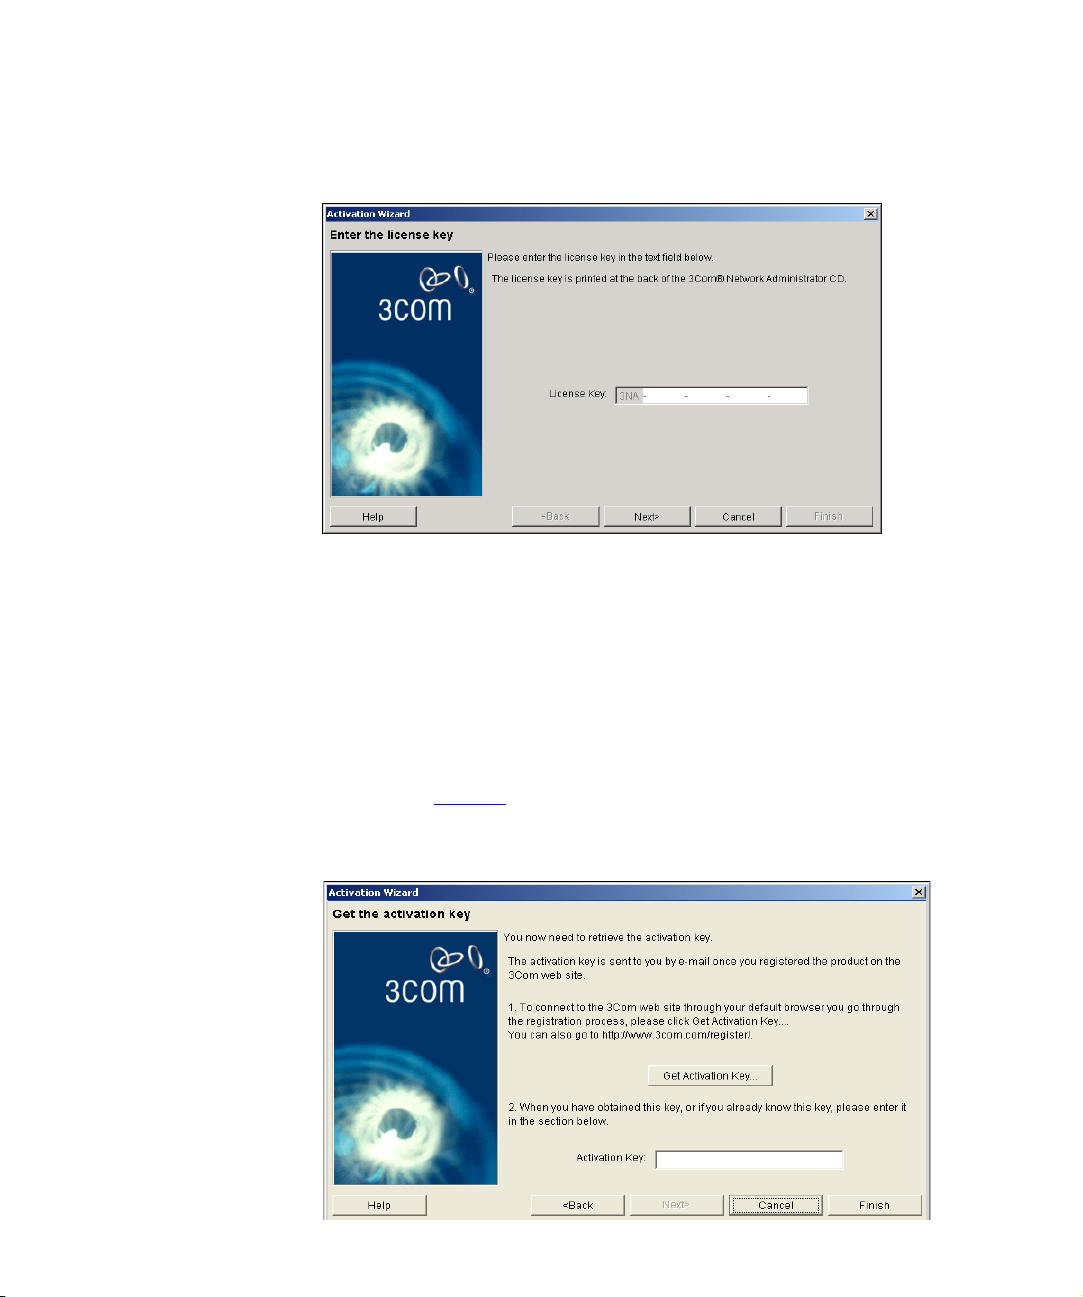
2 Obtaining the activation key — the activation key step allows you to do
two things:
■ Connect to the 3Com registration web site by clicking Get Activation
Key.
■ Enter the activation key you receive from the 3Com web site by typing
it in to the Activation Key text box and clicking Finish in the wizard as
shown in Figure 9
Figure 9 Activation Wizard - Activation Key
:
Page 31

Examples 31
The wizard already knows the product number and serial number so you
do not have to type them in.
To obtain the activation key for this copy of 3Com Network
Administrator, click Get Activation Key. This launches your default web
browser, which displays the 3Com registration web site. 3Com Network
Administrator sends the serial number, product number and license key
for you. Follow the instructions on the web site to complete the product
registration process. Once registration is complete, the web site displays
your activation key. You will also be sent a copy of this key via e-mail.
If you prefer, you can register your product manually at:
http://www.3com.com/register
However, 3Com recommends that you use the Activation Wizard.
Examples The following section provides an example of using the Activation
process.
Activating 3Com
Network
Administrator
You have installed 3Com Network Administrator on your computer and
you want to activate it.
1 Start 3Com Network Administrator. The About dialog will appear,
showing the number of days remaining in the grace period.
2 In the About dialog, click Activate Now to display the Activation Wizard.
3 Enter the license key (as printed on the product’s packaging) in the
License Key text box and click Next.
If the license key is valid, the wizard moves to the Activation Key step.
4 From the Activation Key step, click Get Activation Key. Your default web
browser is launched which automatically directs you to the 3Com
registration site.
If the wizard fails to launch your web browser, you can go directly to
3Com’s registration system by opening your preferred web browser and
entering the following URL into the browser’s address bar:
http://www.3com.com/register
5 Follow the instructions on the registration site to complete the
registration of the product and obtain the activation key. 3Com will also
send you a copy of your activation key via e-mail.
Page 32

32 CHAPTER 2: PRODUCT ACTIVATION
6 Enter the activation key in the Activation Key text box to activate the
product.
Useful Information and References
The following section provides useful information and references when
activating 3Com Network Administrator.
Where can I find the product number for 3Com Network
Administrator?
The product number for 3Com Network Administrator is found on the
the product’s packaging and is also displayed in the About dialog. To
launch the About dialog, select Help > About > 3Com Network
Administrator from the menu on the main window.
Where can I find the serial number for 3Com Network
Administrator?
The serial number for your copy of 3Com Network Administrator is
displayed in the About dialog.
Where can I find the license key for 3Com Network Administrator?
The license key is printed on a card inside the 3Com Network
Administrator packaging. If you are using an evaluation copy
downloaded from the 3Com web-site, you cannot activate the product.
Please contact your preferred 3Com reseller to buy a copy of the product
as a physical shipment.
Key Considerations The following section provides useful information when activating 3Com
Network Administrator.
What if I lose my Activation Key after registration?
You can re-register your copy of 3Com Network Administrator to obtain
your activation key again. You will also receive an e-mail confirmation of
your activation key.
When you are re-registering the product, it is very important to enter
exactly the same user and product information during the original
registration. This includes the username, product number, serial number,
and license key. Entering different information may result in the
registration begin rejected.
Page 33

Key Considerations 33
How do I move my copy of 3Com Network Administrator to
another workstation?
If you need to move 3Com Network Administrator to another computer,
you must contact 3Com Customer Support to revoke the existing
activation key. The activation key will only work with the correct
combination of license key (to identify the software) and serial number
(to identify the machine the software is installed on). To comply with the
software license agreement you must remove the original installation.
If I re-install the product after it has been activated, do I need to
activate it again?
No - the product activation information is stored on your computer and
will remain intact following de-installation and re-installation.
My copy of 3Com Network Administrator no longer runs, even
though it has been activated.
If you upgraded a major component on your computer, such as the
processor, or hard disk driver or if you upgrade your computer’s operating
system, the serial number will then be invalid. In this case, you need to
contact 3Com Customer Support to have your activation key revoked.
Refer to “
How do I move my copy of 3Com Network Administrator to
another workstation?” above for more information.
Why can’t I log in to the 3Com support web site?
If you experience difficulties logging in to the 3Com support web site,
please check your web browser settings to ensure that cookies are
enabled. You may also want to check with your system administrator that
your site’s firewall settings permit web site cookies.
Page 34

34 CHAPTER 2: PRODUCT ACTIVATION
Page 35

DEVICE WINDOW
3
Overview This chapter describes the 3Com Network Administrator device window.
The device window provides a view of the 3Com devices on your
network, and arranges them into groups. These groups are displayed in a
tree on the left side of the window. Devices in the selected group are
displayed in a list on the right side of the window. All of the features in
3Com Network Administrator are accessed from the device window.
This chapter covers the following topics:
■ Key Concepts
■ Components
■ Examples
■ Key Considerations
Page 36

36 CHAPTER 3: DEVICE WINDOW
Key Concepts This section describes the 3Com Network Administrator key concepts
relating to the device window.
Inventory Files 3Com Network Administrator stores device information in inventory files.
Inventory files have the file extension ‘
Network Administrator and are not related to HP OpenView.
Only one inventory file may be open at any one time. Opening a new
inventory file will close the current inventory file.
All operations invoked from 3Com Network Administrator are applied to
the current inventory file. For example, importing data from either HP
OpenView or a CSV file results in the current inventory file being updated
with the newly gathered information. 3Com Network Administrator does
not alter the CSV files or HP OpenView maps it imports device
information from.
Two other types of files are saved alongside inventory files. These files use
the same name as the inventory file but have
extensions. These files are used internally by 3Com Network
Administrator. Whilst the presence of these files is not required to
successfully load an inventory file, some user-defined options may not be
set if they are not present.
.inv'. They are exclusive to 3Com
.mdb and .properties file
Device Groups Device Groups are displayed on the left side of the device window.
There are two main groups in the Device Group Tree:
■ All 3Com Devices
■ Standard Groups
Page 37

Key Concepts 37
The purpose of these groups is explained as follows:
All 3Com Devices Group
This group displays all 3Com devices present within the currently open
inventory file. You should use this when you want to perform operations
on all the devices in the current inventory file.
Standard Groups
This group contains sub-groups based on the type of devices present in
your inventory file. The sub-groups are:
■ Device Types — if your inventory contained 3Com SuperStack
®
3
Switch 4400s and SuperStack 3 Switch 4900s for example, there
would be two sub-groups present within the 'Device Types' group. An
example is shown in Figure 10
Figure 10 Device Types Group
.
The device type name is shortened to make navigating the tree more
convenient. For example, '3Com SuperStack 3 Switch 4900' is shortened
to 'Switch 4900'. All sub-groups listed under the 'Device Types' group are
sorted alphabetically, then numerically.
Page 38

38 CHAPTER 3: DEVICE WINDOW
■ Subnets Group — this group contains sub-groups based on the IP
Figure 11 Subnets Group
address and subnet mask of the devices present in your inventory file.
Each Subnets group is named using the network address of the
subnet, followed by the subnet mask.
For example, if the devices in your inventory file are on the following
networks: 192.168.1.0 (255.255.255.0) and 192.168.2.0
(255.255.255.0), there will be two sub-groups present under the
'Subnets' group. An example is shown in Figure 11
.
All sub-groups listed under the 'Subnets' group are sorted according
to network address.
■ VLANs Group — this group contains sub-groups based on the VLAN
membership of the devices in your inventory file. Each VLAN
sub-group is named using the VLAN ID followed by the VLAN name.
For example, if some devices present in your inventory are members of
VLAN 1, named 'Marketing' and other devices present are members
of VLAN 2, named 'Accounting', the sub-groups ‘1 - Marketing’ and
‘2 - Accounting’ would be present in the VLANs Group.
Page 39

Key Concepts 39
A VLAN sub-group is considered unique if it has a unique VLAN ID and
a unique name. The name is case sensitive, so a VLAN named
'marketing', with a lowercase 'm', is considered different to a VLAN
named 'Marketing', with an uppercase 'M'. VLANs with the same ID
and name on either side of a router are considered to be the same
VLAN for the purposes of the VLANs group.
Devices with no available VLAN information are added to a specific
'Undetermined' VLAN sub-group as shown in Figure 12
Figure 12 VLAN Groups
.
All sub-groups listed under the 'VLANs' group are sorted first by VLAN
ID, then by VLAN name. If the 'Undetermined' sub-group is present, it
is added as the first group in the VLANs group.
Page 40

40 CHAPTER 3: DEVICE WINDOW
Components The following section describes the features of the Device Window and
describes the operations you can perform from this window.
The Device Group
Tree
The device group tree is located on the left side of the 3Com Network
Administrator device window.
Device Group Tree Right-click Menus
A right-click menu is available for a device group by right-clicking on the
required group. Only one device group may be selected at a time.
Right-click menus can only be applied to sub-groups or to groups that
contain no sub-groups. Such groups include the 'All 3Com Devices'
group and any of the sub-groups under ‘Standard Groups' (that is,
‘Device Types', 'Subnets' and 'VLANs' groups). Right-clicking on ‘Standard
Groups’ or any of its sub-groups will not produce a right-click menu.
The options available in the right-click menu are shown in Figure 13
Figure 13 Group Tree Right-click Menu
.
Selecting an item in the right-click menu performs the corresponding
operation for all of the devices within the selected group or sub-group.
The operations available in the right-click menu are equivalent to
corresponding menu items in the main menu. Please refer to “
page 44
for more information.
Menus” on
Page 41

The Device List The device list shows the devices contained within a device group.
Selecting a device group in the device group tree displays the devices
within the group in the device list.
Multiple selection is allowed in the device list and is achieved through
either of the following:
■ Holding down a mouse button and dragging over a selection of
devices in the list.
■ Clicking on different devices while holding down the CTRL or SHIFT
keyboard buttons.
Device List Columns The following columns are available in the device list:
■ Name — the name of the device, as specified in HP OpenView or the
CSV file.
■ IP Address — the IP Address of the device.
■ Device Type — the type of device, for example, Switch 4400, Switch
4900, Switch 4060.
Components 41
■ Unit Count — the number of units in the device's stack or chassis.
Devices that are not stacked display '1' in this column. If there is no
unit information the column is left blank.
■ SNMP Read Community — the read community string that 3Com
Network Administrator is using to communicate with the device.
■ SNMP Write Community — the write community string that 3Com
Network Administrator is using to communicate with the device.
■ Subnet — the subnet mask of the device.
■ Contact — the contact name for the device, taken from the
sysContact MIB variable.
■ Location — the location name for the device, taken from the
sysLocation MIB variable.
When the application is run for the first time, only the default columns
(Name, IP Address, Device Type and Unit Count) are displayed.
Columns can be resized by dragging either edge of a column header to a
new position. Columns can be reordered by dragging a column header to
a new location. Any changes made are applied to all device groups.
Page 42

42 CHAPTER 3: DEVICE WINDOW
You can sort the entire list using the information in a given column by
clicking on its column header. Initially the list is sorted by the left-most
column.
You can add or remove columns from the device list using the Show
Columns dialog. Please refer to “
more information.
Device List Right-click Menus
Selecting a device in the device list and right clicking on it launches a
right-click menu. This is shown in Figure 14
Figure 14 Device List Right-click Menu
View > Show Columns” on page 52 for
.
Multiple selection is possible within the device list. However, not all items
in the right-click menu can be applied to multiple selections. In this case,
any such items in the menu are omitted.
The operations provided by the right-click menu are equivalent to
corresponding menu items in the main menu. Please refer to “
page 44
for more information.
Menus” on
Page 43

Components 43
Toolbar The toolbar provides access to the most commonly used administration
tools.
Some items in the toolbar are not applicable to multiple or group
selection. When this is the case, the toolbar button is grayed out.
Hovering the mouse cursor over a button in the toolbar causes a 'tooltip'
for that button to be displayed. The tooltip describes the operation
associated with the button.
The operations provided by the toolbar buttons are equivalent to their
corresponding menu items. Please refer to the “
Menus” on page 44 for
more information.
Status Bar The status bar provides detailed information about items within the
device window, as well as providing a location for minimized progress
dialogs such as the Refresh Progress dialog.
The status bar provides information on the current selection as follows:
■ For a selected group in the Device Group Tree the text displayed is:
Selected Group <Group Name>. Contains <number selected>
items.
■ For a single selected device in the device list the text displayed is:
Selected device <Device Display Name>
■ For multiple device selection in the device list the text displayed is:
Selected <number selected> items.
This information is useful if you need to count the number of devices with
a given property. For example, if you need to know how many devices are
in VLAN 1 — 'Marketing', simply select the appropriate VLANs sub-group
in the device group tree. The status bar text displays how many devices
are in that group.
The status bar also provides detailed information about a menu item
when it is highlighted.
Page 44

44 CHAPTER 3: DEVICE WINDOW
Menus Ta bl e 4 lists each menu item for a given main menu and the associated
operation invoked by selecting it.
Tab le 4 File Menu
Menu Item Hot Key Operation
New Ctrl+N Creates a new empty inventory file.
Open Ctrl+O Opens an existing inventory file.
Save Ctrl+S Saves the current inventory file.
Save As… Saves the current inventory file using a
Import… Launches the Import dialog used to
Most Recently Used File List See “Most Recently Used Files” on
Exit Exits 3Com Network Administrator.
Prompts for a save if the current
inventory has changed. See “
Open” on page 48 for more
information.
Prompts for a save if the current
inventory has changed. See “File >
Open” on page 48 for more
information.
Prompts for a filename if the inventory
has not been saved previously. See
“
File > Save and Save As” on page 48
for more information.
specified name. See “
Save As” on page 48 for more
information.
import CSV and HP OpenView device
information. See “
Refreshing Devices” chapter on
page 87
page 49
Prompts for a save if the current
inventory has changed. See “File >
Exit” on page 49 for more
information.
for more information.
for more information.
Importing and
File >
File > Save and
Page 45

Components 45
Tab le 5 Edit Menu
Menu Item Hot Key Operation
Add Device… Launches the Add Device dialog. This
dialog allows you to add a new device to
the inventory file. See “
on page 49
Delete Ctrl+Delete Deletes the selected device. See “Edit >
Delete” on page 50 for more information.
Find… Ctrl+F Launches the Find dialog. This dialog
allows you to find devices by Name, User
Name, IP or MAC address, Device Type or
VLAN. See “
more information.
Select All Ctrl+A Selects all devices in the Device Window.
See “
more information.
for more information.
Edit > Find” on page 51 for
Edit > Select All” on page 52 for
Edit > Add Device”
Tab le 6 View Menu
Menu Item Hot Key Operation
Show Toolbar Toggles whether the toolbar is displayed or
not. See “
page 52
Show Columns… Launches the Show Columns dialog. This
dialog allows you to add or remove
columns from the device list. See “
Show Columns” on page 52 for more
information.
Update Window Updates the inventory with data received
after a scheduled refresh. See “
Update Window” on page 53 for more
information.
View > Show Toolbar” on
for more information.
View >
View >
Page 46

46 CHAPTER 3: DEVICE WINDOW
Tab le 7 Device Menu
Menu Item Hot Key Operation
Web Management… Launches the web interface for the selected
Telnet Management… Launches the Telnet management interface
Backup… Launches the Backup wizard for the selected
Restore… Launches the Restore wizard for the selected
Setup… Launches the Setup wizard. See “Device
Agent Update… Launches the Agent Update wizard for the
Agent Import… Launches the Agent Import dialog. See
Refresh Information Updates the information for the selected
Properties… Launches the Properties dialog for the
device.
for the selected device.
devices. See “
page 109
device. See “
page 114
Setup Wizard” on page 119 for more
information.
selected devices. See “
Wizard” on page 137 for more information.
“
Import Dialog” on page 92 for more
information.
devices. See “
more information.
selected devices. See “
Refreshing Devices” on page 87 for more
information.
Device Backup Wizard” on
for more information.
Device Restore Wizard” on
for more information.
Agent Update
Refreshing” on page 90 for
Importing and
Page 47

Components 47
Tab le 8 Tools Menu
Menu Item Hot Key Operation
Reports… Launches the Reports dialog. See “Reports
Dialog” on page 197 for more information.
Prioritize Network
Traffic…
Device Warranty… Ctrl+W Launches the Device Warranty wizard. See
Scheduled Tasks… Launches the Scheduled Tasks dialog, where
Live Update… Launches the Live Update wizard. See “Live
Options… Launches the Options dialog. See “Tools >
Launches the Prioritize Network Traffic
wizard. See “
Wizard” on page 161 for more information.
“
Device Warranty Wizard” on page 72 for
more information.
all currently scheduled tasks are listed. See
“Tools > Scheduled Tasks” on page 53 for
more information.
Update Setup Wizard” on page 223 for
more information.
Options” on page 55 for more information.
Prioritize Network Traffic
Tab le 9 Help Menu
Menu Item Hot Key Operation
Contents and
Index…
Register Now… Launches the Registration dialog. See
About… Launches the About dialog. See “Help >
Launches the online help. See “Help >
Contents and Index” on page 58 for more
information.
Getting Started” on page 17 for more
“
information.
About” on page 58 for more information.
Page 48

48 CHAPTER 3: DEVICE WINDOW
File > Open The File > Open option is used to open an inventory (.inv) file for use
within 3Com Network Administrator.
The default directory for opening inventory files is:
<3Com Network Administrator install dir>\inventory_files
The default directory may be changed using the Options dialog, for more
information see “
Once the inventory file has been located, select it and click OK. This loads
the inventory file into 3Com Network Administrator. To abort the open
operation click Cancel to return to the Device Window.
Opening a new inventory file when another inventory file is currently
open causes the new file to be loaded in place of the currently open file.
If the current inventory file contains any unsaved changes, you are
prompted to save the file. Cancelling this operation returns you to the
current inventory file without any changes being made.
If you re-open the current inventory file, the open operation will not take
place if there are no saved changes in the current file. If, however, the
current inventory file has changed, you are prompted on whether you
wish to revert to the saved inventory file.
Tools > Options” on page 55.
File > Save and SaveAsThe File > Save and Save As operations are used to save the current
inventory file. The Save operation saves the currently loaded inventory file
using the current file name. If the inventory file is untitled, the Save
operation will launch the Save As dialog.
The Save As operation is used to save an inventory using a specified
filename, typed into the File name text field.
The default directory for saving inventory files is:
<3Com Network Administrator install dir>\inventory_files
The default location may be changed using Tools > Options, for more
information see “
Tools > Options” on page 55.
To save an inventory file in a different directory to the default location,
use the Save As dialog's browser to select the directory where the
inventory file is to be saved. Click Save to save the file.
Page 49

Components 49
Click Cancel if you wish to abort the Save operation. This returns you to
the Device Window.
Most Recently Used
Files
File > Exit This operation closes 3Com Network Administrator. The following
In the File menu, between the Import and Exit menu items, is a list of the
last four inventory files that you have been using. This list is called the
Most Recently Used (MRU) file list, and is updated every time you open or
save an inventory file.
To open one of the inventory files in the MRU file list, select the
appropriate item in the File menu or use the Hot Keys Ctrl+1 to Ctrl+4.
message will display if there are outstanding changes to the inventory
that need to be saved:
Figure 15 Closing 3Com Network Administrator
Any scheduled tasks present in the Scheduled Tasks list are cancelled
when the application closes.
Edit > Add Device This dialog is used to add a device to the current inventory file by
manually entering information about the device into the dialog.
■ Name — the name of the device that is displayed in the inventory file.
■ IP Address — the IP Address of the device to be added to the
inventory.
■ Read — the SNMP read community string used to communicate with
this device.
■ Write — the SNMP write community string used to write to this
device.
Page 50

50 CHAPTER 3: DEVICE WINDOW
Compulsory fields are the IP Address and the Read Community String. If
you do not enter information into these fields, a warning message is
displayed when OK is clicked. You are returned to the Add Device dialog
to enter the required information.
If a device is added successfully to the current inventory, a message dialog
informs you that the operation was successful.
The Add Device dialog is not available while a refresh operation is in
progress.
Edit > Delete Deleting a device from any group within 3Com Network Administrator
removes it from the entire inventory file. The device is removed from all
device groups when you click Yes on the confirmation dialog as shown in
Figure 16
Figure 16 Deleting a Device
.
Multiple devices may be deleted at the same time by highlighting them in
the device list and selecting Edit > Delete.
If as a result of a delete operation a group is then empty, that group is
removed from the device group tree unless the group is one of the
'Standard Groups' or the 'All 3Com Devices' group.
Page 51

Components 51
Edit > Find The Find dialog is used to search for devices within your inventory
according to the criteria listed in Ta bl e 1 0
. To change the search criteria
simply select the appropriate item in the 'Search By' list.
Table 10 Search criteria for finding devices within an inventory
Search Criteria Description
Name Enter the name of the device to search for in the supplied
'Name' text field.
IP Address Enter the IP Address of the device to search for in the
supplied 'IP Address' field.
MAC Address Enter the MAC address of the device to search for in the
supplied 'MAC Address' field.
Device Type Select the type of device, e.g. SuperStack 3 Switch 4400, to
search for in the supplied 'Device Type' combo box.
VLAN Select the VLAN name and ID to search for in the supplied
'VLAN' combo box.
Wildcards (* and ?) are allowed within search strings:
* - Matches 0 or more characters.
? - Matches a single character.
Devices that match the search criteria are added to the results list. The
number of matches is displayed in the Find dialog's status bar. Items in
the results list may be selected and the following pull right options are
available for them:
■ Web Management
■ Telnet Management
■ IP Ping...
■ Trace Route...
■ Backup…
■ Restore…
■ Agent Update…
■ Prioritize Network Traffic…
■ Refresh Information…
■ Properties…
Page 52

52 CHAPTER 3: DEVICE WINDOW
For more information on these menu items refer to “Menus” on page 44.
Edit > Select All This option selects all of the devices in the currently selected group. For a
device list containing no devices, the Select All option is grayed out.
View > Show Toolbar This menu item toggles between a visible or hidden toolbar. If you find
you do not use the toolbar, hiding it provides more space for the device
group tree and device list.
View > Show
Columns
This menu item launches the Show Columns dialog. This dialog is used to
add and remove columns from the device list as shown in Figure 17
Figure 17 Show Columns Dialog
:
To add a column, simply check the appropriate check box. To remove a
column, uncheck the appropriate check box. Click OK to update the
device list and display the selected columns.
You can have no columns selected, but the application warns you that no
information will be displayed in the device list.
Page 53

Components 53
View > Update
Window
Tools > Scheduled
Ta sk s
This menu item is enabled when there is some pending information to be
added to the inventory. This occurs after a scheduled refresh has
completed. Selecting this option adds the newly refreshed information to
the inventory file.
This menu item launches the Scheduled Tasks dialog as shown in
Figure 18
Figure 18 Scheduled Tasks
:
The Scheduled Tasks dialog displays a list of all currently scheduled tasks.
Operations that may be scheduled include Device Backup, Agent Update
and Refresh. Each task has a name, a start time and how often the task
repeats (if applicable). For tasks that are not repeatable, for example, the
backup operation, the Repeat column displays N/A.
Only one scheduled task can run at a given time. If two or more tasks are
set to run at the same time, the first task is executed and all others enter
a 'pending' state (the Start Time column displays Pending). The pending
task is executed immediately after the currently scheduled task finishes.
A scheduled task also enters the pending state if it is scheduled to start
but cannot for some reason. For example, if a manual refresh is currently
in progress which prevents a scheduled refresh from executing. Once the
blocking task has finished the pending scheduled task is executed.
Page 54

54 CHAPTER 3: DEVICE WINDOW
If the following scheduled tasks are running:
■ Agent Update
■ Backup
■ Restore
■ Setup
■ Prioritize Network Traffic
■ Refresh
Then:
■ The following operations are prohibited from running:
■ File > New
■ File > Open
■ Edit > Add Device
■ Edit > Delete
■ Device > Refresh Information
■ Tools > Prioritize Network Traffic
■ The following tasks are not blocked if they are currently running:
■ Agent Update
■ Backup
■ Restore
■ Setup
Instead you are given the choice of:
■ Queuing the new task to run after the current task finishes.
■ Cancelling the current task, allowing the new task to run
immediately.
■ Cancelling the new task, allowing the current task to finish.
For scheduled tasks to execute, 3Com Network Administrator must be
running. On exiting the application all currently scheduled tasks are
cancelled.
Page 55

Components 55
Tools > Options This menu item launches the Options dialog, which is used to configure
the default behavior of 3Com Network Administrator. The Options dialog
consists of four tabs:
■ General — default file locations and how the application should
behave.
■ Device Management — options for managing devices in your
inventory.
■ Internet — how 3Com Network Administrator should connect to the
internet.
■ Refresh — refresh options available to 3Com Network Administrator.
General
This tab (as shown in Figure 19
■ Default File Location — change the default inventory files location
) displays the following:
to a different location. Click Browse to choose the directory you want.
If the path you enter does not exist, you are warned of this when you
click OK.
The default directory is:
dir>\inventory_files
Figure 19 General Tab
<3Com Network Administrator install
.
Page 56

56 CHAPTER 3: DEVICE WINDOW
■ MAC Addresses — for any MAC address displayed, you can append
■ Show the Live Update Setup Wizard next time — this option is
■ Show the Device Warranty dialog after a refresh operation —
Device Management
This tab allows you to change the management application that is
launched when a device is double clicked in the list as shown in
Figure 20
Figure 20 Device Management Tab
the manufacturers name to the start. For example, 00-c0-00-xx-xx-xx
becomes 3Com-xx-xx-xx. This option is disabled by default.
enabled by default (see “
Live Update Setup Wizard” on page 223 for
more information).
this is enabled by default.
:
Choose from the Web Management (default), Telnet Management or
Administration Application. If a device does not support the preferred
Web Management application, Telnet is launched instead.
For further information on the Device Management options see “
Device
Administration” on page 61.
Page 57

Internet
Components 57
This tab (as shown in Figure 21
) allows you to select one of the following
options:
■ Use Web browser settings — this is the default option. If your web
browser uses a proxy server to access the internet, 3Com Network
Administrator will use the same system.
Figure 21 Internet Tab
■ Direct connection to the Internet — use this option if your
management station connects to the Internet directly through a Local
Area Network, without using a proxy server.
■ Custom proxy settings — specify the URL to the proxy server
followed by the proxy port number. If your proxy server requires
authentication click the My proxy server requires authentication check
box and enter the username and password.
Page 58

58 CHAPTER 3: DEVICE WINDOW
Refresh
This tab (as shown in Figure 22
) allows you to schedule refresh operations
to repeat at specified times. Select from repeating every x hours or at a
specific time every day, weekday, or week. For further information on the
Refresh tab see “
Figure 22 Refresh Tab
Delaying Refreshing Existing Devices” on page 100.
Help > Contents and
Index
Help > About When you launch 3Com Network Administrator for the first time, the
This launches the Contents and Index pages of the online help.
About dialog is displayed.
The dialog shows the product name, product number, serial number and
the major version number. Any service packs installed are also listed.
Page 59

Examples 59
Examples The following section contains useful examples on using the Device
Window.
Finding the IP address
of a Device
Backing up Devices in
a certain VLAN
You have discovered that a particular MAC address is causing problems
on your network. You want to know the name and IP address of the
device causing the problem, given its MAC address:
1 Launch the Find dialog, using Edit > Find or CTRL+F.
2 Change the Search By combo box option to MAC Address.
3 Type the known MAC address into the MAC Address field provided.
4 Click Find. The device with the corresponding MAC address is displayed
in the results list.
The IP address of the device is listed in the results list.
You are about to upgrade the agent software on the switches in VLAN 5
(your Accounts department VLAN). Before you do, you want to back up
their software configurations. To do this:
1 Launch the Find dialog, using Edit > Find or CTRL+F.
2 Change the Search By combo box option to VLAN.
3 Set the VLAN to search for (ID=5) Accounting Department VLAN.
4 Click Find. The devices matching the selected VLAN appear in the results
list. Select all of the devices in the list and right-click on them.
5 Select Backup from the right-click menu.
6 Complete all the wizard steps to upgrade the appropriate devices.
You could also perform this operation by selecting ‘VLAN 5’ in the device
group tree and selecting Device Backup.
Adding a New Device A new 3Com device has been added to your network with the IP address
192.168.1.1. The location of the device is in Building 1, Rack 4. The name
of the device is b1r4-192.168.1.1. The SNMP read community string has
been set to be netman2003r, the write SNMP community string has been
set to be netman2003w.
Page 60

60 CHAPTER 3: DEVICE WINDOW
To add this device to the current inventory file, use the Add Device dialog
as follows:
1 Launch the Add Device dialog using the Edit > Add Device menu option.
2 Enter the name of the device into the Name field as
3 Enter the IP address of the device into IP Address field as
b1r2-192.168.1.1.
192.168.1.1
4 Enter the read community string into the Read text field as netman2003r.
5 Enter the write community string into the Write text field as
netman2003w.
6 Click OK.
If all information has been entered correctly an information dialog
appears, stating that the new device has been added successfully.
7 Click OK to close the dialog.
The new device is now listed in the inventory, and is added to all
appropriate device groups.
Key Considerations The following section provides useful information and advice on the
Device Window.
Deleting Devices A device deleted from one device group removes it from all device
groups. The only way to re-add the device is to either re-import it or use
the Add Device dialog.
Active Selection The active selection within 3Com Network Administrator is always
highlighted in blue (this color may differ according to the windows
scheme currently being used). A non-active selection is always shown in
gray. The active selection may be contained within the device groups tree
or the device list, but never both at the same time.
Scheduled Tasks When 3Com Network Administrator is closed all currently scheduled
tasks are cancelled. When the application runs again the tasks will have
to be re-scheduled.
Page 61

DEVICE ADMINISTRATION
4
Overview This chapter describes the following device administration functions:
■ Web Management — launches your default web browser against a
device selected in the device list.
■ Telnet Management — launches your computer’s Telnet application
against a device selected in the device list.
■ Administration Menu — contains integrated add-on 3Com device
management applications.
■ Registering Devices for Warranty — enables you to register the 3Com
devices on your network for any applicable warranty.
The following topics are covered in this chapter:
■ Key Concepts
■ Components
■ Examples
■ Key Considerations
Page 62

62 CHAPTER 4: DEVICE ADMINISTRATION
Key Concepts The following section describes the key concepts for administering
devices using 3Com Network Administrator.
Web Management Many 3Com devices provide a web interface that enables you to manage
a single device or stack of devices at one time. Your default web browser
is used to display the web interface. Access to the interface is protected
by username and password authentication. A graphical representation of
the device is usually displayed, along with various device configuration
options and low-level statistics. For more information on the features
provided by the web interface, please refer to the user documentation for
your device.
Telnet Management Most 3Com devices provide a Telnet management interface, enabling you
to manage a single device or stack of devices at one time. Access to the
interface is protected by username and password authentication. It
typically provides the most complete range of configuration options. For
more information on the features provided by the Telnet interface, please
refer to the user documentation for your device.
Administration Menu The administration menu of 3Com Network Administrator contains
entries for add-on 3Com device management applications. These
applications provide management operations specific to a particular
device type. For more information please refer to the appropriate
management application’s manual and or online help pages.
Devices that support the features described in the Administration Menu
are listed in Appendix A
on page 241.
Page 63

Key Concepts 63
3Com Device View
Using Device View, along with the Device Configuration Tool, you can
view and modify the configuration of a single device or multiple devices
at the same time.
For further information see Appendix B
on page 251.
For information on devices supported by Device View, see Appendix A
page 241
.
3Com Switch Manager
Switch Manager is the element manager of the Switch 7700.
3Com Router Manager
Router Manager is the element manger of the 3Com router family.
Network Jack Configuration Manager
3Com Network Jack Configuration Manager provides management for
the 3Com Network Jack NJ200. Although the NJ200 is bundled with a
Local Configuration Manager and a Central Configuration Manager, only
the Central Configuration Manager is integrated with 3Com Network
Administrator. The Central Configuration Manager enables remote
discovery, advanced configuration and management of multiple NJ200s.
IP Ping IP Ping enables you to run the Windows system ping command from
within a command window. If you select a device that has more than one
IP address, the IP ping menu will contain submenus for each IP address.
on
When you select a device and click on IP Ping... from the right-click menu,
a console dialog is launched as shown in Figure 23
:
Page 64

64 CHAPTER 4: DEVICE ADMINISTRATION
Figure 23 IP Ping Console Dialog
The dialog pre-fills the command line text box with the command ‘ping’
followed by the IP address of the device you have selected. The command
line is provided so that you can specify additional command line options
to the ping command. When you click Start, the ping command is run
and its output is displayed in the Output window.
Trace Route The Trace Router feature enables you to run the Windows system ‘tracert’
utility. This utility lets you trace the router path from the management
station to the device you’re interested in. If the device has more than one
IP interface, the Trace Route menu will contain submenus for each IP
address the device has.
When you select a device and click on Trace Route... from the right-click
menu, a console dialog is launched as shown in Figure 24
:
Page 65

Figure 24 Trace Route Console Dialog
Key Concepts 65
The dialog pre-fills the command line text box with the command
‘tracert’ and the IP address of the device you have selected. The
command line is provided so that you can specify additional command
line options to the trace route command. When you click Start, the trace
route command is run and it’s output is displayed in the Output window.
Properties Dialog The Device Properties dialog gives you additional details on a a selected
device. The details are split in to four tabs as follows:
General
The General tab provides name and address information for your device
as shown in Figure 25
. The name of the device and all MAC and IP
addresses associated with it are displayed in this tab. You can change the
name by editing the Name text field and clicking OK.
Page 66

66 CHAPTER 4: DEVICE ADMINISTRATION
Figure 25 Properties - General Tab
Security
The Security tab displays community string information as shown in
Figure 26
:
Page 67

Figure 26 Properties - Security Tab
Key Concepts 67
The following two radio buttons are provided:
■ Defaults — select this option to use the community strings 3Com
Network Administrator is using by default on all other devices. If this
community string does not work, 3Com Network Administrator will
resort to using the factory defaults for devices of that device type.
■ Specify — select this option to specify the exact community strings to
use for the selected device. You might use this option if you imported
your devices using ‘read-only’ community strings but you now want to
use the additional permissions that read-write access gives you.
Page 68

68 CHAPTER 4: DEVICE ADMINISTRATION
Unit Information
The Unit Information tab lists the various units in a stack. The individual
device types, with hardware and software revision are shown in the table
in Figure 27
Figure 27 Properties - Unit Information Tab
:
You can resize the columns in the unit information table by dragging the
edges of the table headings. You can also change the order of the
columns by dragging the column headings.
Page 69

Key Concepts 69
VLANs
The VLANs tab contains detailed VLAN information for the selected
device as shown in Figure 28
Figure 28 Properties - VLANs Tab
:
Clicking on the drop-down list will list all VLANs associated with the
device. Each time you select a VLAN, the table under the drop-down list
changes to show the ports that are members of that VLAN.
Page 70

70 CHAPTER 4: DEVICE ADMINISTRATION
If a VLAN is being used for routing, click VLAN Routing to launch a
separate dialog listing the subnets and routers that use that VLAN for
routing as shown in Figure 29
Figure 29 Properties - VLANs Tab - VLAN Routing
If a VLAN is being used to constrain certain protocols the Protocol Details
button is available. Click Protocol Details to launch a dialog that lists the
network protocols that are associated with the VLAN as shown in
Figure 30
:
:
Figure 30 Properties - VLANs Tab - VLAN Protocol Details
Page 71

Components 71
Registering Devices
for Warranty
You can register the 3Com devices on your network for any applicable
warranty. 3Com Network Administrator checks for devices on your
network that have not yet been registered and sends this information to
3Com. See “
What Data is Sent to the 3Com server” on page 78 for more
details.
Registering devices enables the device warranty for all the supported
3Com equipment and enables 3Com services such as technical assistance,
hardware repair and hardware replacement.
Components The following sections describe how to administer devices using 3Com
Network Administrator.
Device Warranty
Dialog
When a refresh operation completes and 3Com Network Administrator
finds that there are unregistered devices, you are given the option to
register devices as shown in Figure 31
Figure 31 Device Warranty Dialog
:
If you do not want to see this dialog after each refresh, de-select the
Show the Device Warranty dialog after a network discovery check box.
You can also de-select the Show the Device Warranty dialog after a
refresh operations check box in the General panel of the Options dialog
as shown in Figure 32
.
Page 72

72 CHAPTER 4: DEVICE ADMINISTRATION
Figure 32 Options - General
Device Warranty
Wizard
The Device Warranty wizard allows you to enter registration information
and to select the devices you want to register for any applicable warranty.
To l a u n ch th e wi za rd :
■ Click Yes from the Device Warranty dialog, as shown in Figure 31. Or,
■ Select the Tools > Device Warranty menu option
Introduction Step
The Introduction step describes the various stages of the wizard and
provides a hyperlink to the 3Com Privacy Statement as shown in
Figure 33
.
Page 73

Components 73
Figure 33 Introduction Step
Click on the hyperlink to view the 3Com Privacy Statement in your
default web browser.
By clicking Next, you consent to the collection, processing and use of the
data submitted in the Device Warranty Wizard, in accordance with the
3Com Privacy Statement.
Contact Details Step
The Contact Details step allows you to enter your contact information as
shown in Figure 34
.
Page 74

74 CHAPTER 4: DEVICE ADMINISTRATION
Figure 34 Contact Details Step
All fields are compulsory (marked with a ‘*’), except the second line of
the Address and the Phone Extension number
3Com Network Administrator retains these details for the next time you
run the Device Warranty Wizard. This way, you only have to enter your
contact details once.
Partner/Reseller Details Step
The Partner/Reseller Details step enables you to enter contact details for
your preferred 3Com Partner/Reseller as shown in Figure 35
.
Page 75

Components 75
Figure 35 Partner/Reseller Details Step
The Partner/Reseller Details step displays the following fields:
■ I have no preferred 3Com Partner/Reseller — select this option if
you do not order 3Com equipment from an approved 3Com
Partner/Reseller.
■ My preferred 3Com Partner/Reseller is — select this option if you
order 3Com equipment from an approved 3Com Partner/Reseller.
These fields are only displayed if you select the My preferred 3Com
Partner/Reseller is option:
■ Name — the company name of your preferred 3Com Partner/Reseller.
■ E-Mail — the contact e-mail for your preferred 3Com Partner/Reseller.
■ Phone — the contact phone number for your preferred 3Com
Partner/Reseller.
If you select the My preferred 3Com Partner/Reseller is option, the Name
field cannot be left blank.
Just like your contact details, 3Com Network Administrator retains the
reseller details for the next time you run the Device Warranty Wizard. This
way, you only have to enter your reseller’s contact details once.
Page 76

76 CHAPTER 4: DEVICE ADMINISTRATION
Device Selection Step
The Device Selection step lists the 3Com devices on your network that
have not yet been registered as shown in Figure 36
Figure 36 Device Selection Step
.
Each row in the list corresponds to a 3Com product. If the device in the
inventory file is a stack, the list will contain one row per unit. If the
network node in the inventory is a chassis device, the list will contain one
row for each chassis blade.
The Device Selection step contains the following columns:
■ Register Now — when the check box in this column is selected, the
corresponding device will be registered for warranty. De-select the
check box if you do not want this device to be registered
■ Device Name — the name of the device as it appears in the inventory
file. If the row corresponds to a unit (for a stack) or a blade (for a
chassis), the index of the unit or blade will also be specified. For
instance, MySwitch (Unit 2).
■ Device Type — the type of the product.
By default, all supported 3Com devices are listed and selected.
Page 77

Components 77
If you de-select some devices and complete the wizard, the next time you
run the Device Warranty wizard, these devices will be listed and
de-selected by default.
Summary Step
At the Summary step you can review the contact details you specified in
the previous steps of the wizard as shown in Figure 37
Figure 37 Summary Step
.
The Summary step provides a summary of the warranty registration
information prior to sending it to 3Com. If you consent to 3Com keeping
you updated on its products you will receive 3Com product news.
If you selected I am registering on behalf of the individual named above
in the Contact Details step of the wizard, then the first I consent to:
option will be greyed out.
Click Finish to connect to the 3Com server and register the devices for
warranty.
Page 78

78 CHAPTER 4: DEVICE ADMINISTRATION
Connection to the
3Com Server
While 3Com Network Administrator is connecting to the 3Com server, a
message, as shown in Figure 38
Figure 38 Connecting to the 3Com Server
, is displayed:
Click Cancel if you wish to interrupt the connection and abort the
registration of your 3Com devices.
Once 3Com Network Administrator is connected to the 3Com server, the
data will be transmitted and the message will update.
Once the transmission is complete, a confirmation message is displayed
as shown in Figure 39
Figure 39 Confirmation Message
.
What Data is Sent to
the 3Com server
3Com will send you an email within 24 hours to confirm that your 3Com
devices are now registered for any applicable warranty.
To register your 3Com devices, 3Com Network Administrator will
transmit some data to the 3Com server. That data consists of:
■ The contact details (name, company, address etc) that you specified in
the Device Warranty wizard.
■ The contact details of your preferred 3Com Partner/Reseller (name,
email etc) that you specified in the Device Warranty wizard (if any).
■ The details of the device you want to register (product number, serial
number, MAC address).
Page 79

Components 79
For security reasons, 3Com Network Administrator does not send the IP
address of your devices.
This information is then processed so that the devices are registered for
their applicable warranty.
Reports The following reports are produced when administering devices.
Web Management
Devices that support the web interface can be listed by generating a
custom report as follows:
1 From 3Com Network Administrator, launch the Reports dialog from
Tools > Reports.
2 Click Custom Report Types.
3 Click Add from the Custom Report Types dialog to launch the Add Report
Typ e w i za rd .
4 In the first step of the wizard, include the Web management column in
the report to be generated. Click Next.
5 In the second step of the wizard, give the report a name and (optionally)
a description. Click Finish.
6 Click OK to close the Custom Report Types dialog.
7 Run the custom report by clicking on its name in the Report Types column
of the Reports dialog and clicking Generate Reports.
Device Warranty
You can generate a report on the devices on your network that 3Com
Network Administrator registered for any applicable warranty as follows:
1 From 3Com Network Administrator, launch the Reports dialog from Tools
> Reports.
2 Click Custom Report Types.
3 Click Add from the Custom Report Types dialog to launch the Add Report
Typ e w i za rd .
4 In the first step of the wizard, include the Registered column in the
report, as well as columns that help you identify the device (for instance,
Device Name, Product Number, Serial Number). Click Next.
5 In the second step of the wizard, give the report a name and (optionally)
a description. Click Next to show the Summary dialog and click Finish.
Page 80

80 CHAPTER 4: DEVICE ADMINISTRATION
6 Click OK to close the Custom Report Types dialog.
7 In the Report Types table, click the name of the report you created and
click on Generate Report to launch the report as shown in Figure 40
Figure 40 Device Warranty
.
When you view the report you have generated the Registered column
shows:
■ Yes — if 3Com Network Administrator registered the product.
■ No — if 3Com Network Administrator did not register the product.
■ N/A — if the product is not supported by the Device Warranty
feature.
Page 81

Examples 81
Examples The following section provides some examples of how to administer the
devices on your network.
Renaming a Switch
4007 using Telnet
Disabling a Port on a
Switch 4400 using the
Web Interface
You have a Switch 4007 on your network and you wish to rename it
using the Telnet Management Interface. To do this:
1 Find the Switch 4007 device in the 3Com Network Administrator device
list. This can be done using Edit > Find if needed.
2 Select the device and right-click on it to launch the right-click menu.
3 Select the Telnet Management menu item. The Telnet console will be
launched.
4 Enter your username and password for the device.
5 Ty pe set name < new name >.
6 Ty pe logout. The Telnet console will close.
7 Use Refresh to update the current inventory file with the new name.
You have a Switch 4400 on your network and you wish to disable a port
on it using the web interface:
1 Find the appropriate Switch 4400 device in the 3Com Network
Administrator device list. This can be done using the Find dialog if
needed.
2 Select the device and right-click on it to launch the right-click menu.
3 Select the Web Management menu item. The default web browser will
be launched.
4 Enter your username and password for the device.
5 Select the Device View tab in the web browser.
6 Right-click on the port and select Setup.
7 Change the Port State to Disabled and click OK.
8 Close the web browser.
Page 82

82 CHAPTER 4: DEVICE ADMINISTRATION
Viewing Connected
Ports using Device
View
Registering 3Com
Devices for Warranty
You have a Switch 3300 on your network and you wish to view
connected ports on it using Device View:
1 Find the appropriate Switch 3300 device in the 3Com Network
Administrator device list. This can be done using the Find dialog if
needed.
2 Select the device and right-click on it to launch the menu.
3 Select Device > Administration > Device View.
Device View will be launched and a graphical representation of the device
will be displayed. Connected ports have a connected link annotation over
them. If the port is ‘up’ it will be green in color.
You have just bought several 3Com devices and installed them on your
network. You now want to register all these devices for warranty using
3Com Network Administrator.
1 Launch the Options dialog using Tools > Options and make sure that in
the General tab, the Show the Device Warranty dialog after a refresh
operation option is selected. If it is de-selected, click on the check box to
select it.
2 Re-import the network on which the new 3Com devices are installed.
This can be done by launching the right-click menu and selecting Refresh
Information.
3 When the refresh is complete, you will get a message as shown in
Figure 41
Figure 41 Registering Devices for Warranty - Example
.
Page 83

Examples 83
4 Click OK to launch the Device Warranty wizard.
5 In the Introduction step, make sure you have read the 3Com Privacy
Statement and click Next.
6 In the Contact Details step ensure:
■ If this is the first time you have used the wizard, that you enter your
contact details and click Next. Alternatively,
■ If you have previously completed the wizard, you review the contact
details as they will be pre-set and click Next.
7 In the Reseller Details step ensure:
■ If this is the first time you have used the wizard, enter the contact
details of your preferred 3Com Partner/Reseller (if any). Alternatively,
■ If you have previously completed the wizard, the contact details of
your preferred 3Com Partner/Reseller (if any) will be pre-set so review
the details and click Next.
8 In the Device Selection step, make sure that your new devices are
included and that the Register Now check box is selected for those
devices. Click Next.
9 In the Summary step, make sure that the contact details are correct and
click Finish.
The registration details will be communicated to the 3Com server and a
message box will be displayed to confirm the completion of the
operation.
You will also get a confirmation by email that the devices you selected
have been registered by 3Com for any applicable warranty.
Page 84

84 CHAPTER 4: DEVICE ADMINISTRATION
Key Considerations The following section provides assistance when administering devices.
Troubleshooting Some advice on errors are outlined as follows:
The Device Warranty dialog is not displayed after a refresh
One possible explanations for this is that the Device Warranty dialog is
disabled. To check this:
1 Launch the Options dialog by selecting the Tools > Options menu.
2 Select the General tab.
3 Check that the Show the Device Warranty dialog after a refresh operation
check box is selected. If it is not selected, click on the check box to select
this option.
The other explanation for this is that there are no devices to register. To
check this:
1 Select the Tools > Device Warranty menu option.
2 If all the devices on your network have already been registered, a
message, as shown in Figure 42
, is displayed.
Figure 42 Warning Message
3Com Network Administrator lists some devices as unregistered,
although you have already registered them on the 3Com website
The reason for this is that 3Com Network Administrator only knows
about devices that were registered using 3Com Network Administrator. If
the devices were registered on the 3Com website, 3Com Network
Administrator will think these devices are as yet unregistered.
If you do register these devices again, this will not affect the original
registration.
Page 85

Key Considerations 85
Frequently Asked
Questions
Below are some frequently asked questions about the device warranty
confirmation email.
Why are some registered devices missing from the email?
If the device selection includes devices that have already been registered
(for instance, if you registered them on the 3Com website), these devices
will not be listed in the confirmation email.
Why is there no warranty associated with some of the devices in
the email?
There are two explanations for this:
■ The product is not supported by 3Com anymore — if the product has
been discontinued, there will be no warranty for that product.
■ The warranty date has expired — if the warranty period for a device
has expired, there will be no warranty for that device.
Page 86

86 CHAPTER 4: DEVICE ADMINISTRATION
Page 87

IMPORTING AND REFRESHING
5
DEVICES
Overview This chapter describes how to populate the inventory with a list of devices
so that they appear in the device list. You must do this before you can
perform administrative operations on your devices, such as agent update
and device backup.
The process of populating the inventory is done in two stages as follows:
■ Importing — enables you to supply 3Com Network Administrator
with an initial list of devices from an external source. 3Com Network
Administrator supports two data sources for importing:
■ A text file of devices in Comma Separated Value (CSV) format.
■ A populated HP OpenView database
■ Refreshing — begins once you have imported a list of devices. 3Com
Network Administrator attempts to ‘interrogate’ each imported device
in order to obtain live information about its detailed configuration. A
device will only be added to the inventory if the information obtained
meets certain criteria (for example, only 3Com devices are supported).
You can also use the refresh operation independently to keep your
inventory up-to-date.
The following topics are covered in this chapter:
■ Key Concepts
■ Components
■ Examples
■ Key Considerations
Page 88

88 CHAPTER 5: IMPORTING AND REFRESHING DEVICES
Key Concepts This section outlines the key concepts of importing and refreshing.
Importing 3Com Network Administrator provides two methods for importing
devices from an external source into its inventory. It enables you to import
a list of devices from a text file or, alternatively, from HP OpenView. After
importing a list of devices, 3Com Network Administrator performs a
refresh operation to obtain live information from the devices.
Importing from HP OpenView
Device data retrieved by HP OpenView is stored in a database. You can
import some or all 3Com devices from the HP OpenView database into
3Com Network Administrator’s own inventory. This allows you to use the
administrative tools provided by 3Com Network Administrator to manage
3Com devices.
Typically, if you have a large network or if your network is spread across
multiple sites then it is likely that it will be divided into subnets. When HP
OpenView retrieves information about your network, it detects which
subnet(s) a device belongs to. 3Com Network Administrator makes use of
this information when importing from HP OpenView and allows you to
choose which subnets you wish to import device information from. This
can speed up the import process as it eliminates unnecessary processing
of devices from subnets that you are not interested in.
If you find that this importing process does not provide the level of
control you require for customizing your inventory, you can delete
unwanted devices from the inventory once the import process is
complete. Alternatively, you can use the CSV file import mechanism or
simply add single devices one at a time using the ‘Add Device’ feature.
Since the management tools that 3Com Network Administrator provides
are specific to 3Com devices, it only imports 3Com devices from HP
OpenView. If a device does not appear as a 3Com device in the HP
OpenView database, it will not be imported.
Page 89

Key Concepts 89
Importing from CSV Files
CSV files are simple text files used to specify a set of data. The data is
made up of a number of records, with each record corresponding to a
line in the file. Each record is made up of a number of fields, where each
field is separated by a comma.
You can create a CSV file to specify the list of devices that you wish to
import into the 3Com Network Administrator inventory. Each record (or
line) corresponds to the device that you wish to import. The fields within
a record correspond to parameters associated with the device, such as a
name or IP address. The format of a device record expected by 3Com
Network Administrator is:
IP address,[subnet mask],[name],[read community],[write
community]
The purpose of each field is as follows:
■ IP Address — the address used by the refresh operation to
communicate with the device. Only the IP address is mandatory.
■ Subnet Mask — used for grouping devices during the refresh
operation. The subnets created in the inventory file may be different
to those provided by the CSV file if a different subnet mask is read
from the device.
■ Name — defines the name of the device that will ultimately appear in
the device list. If you do not provide a name here then 3Com Network
Administrator will choose a name based on the information read from
the device during the refresh operation.
■ Read Community — the SNMP read community string that the
refresh operation uses when reading detailed configuration
information from the device, such as unit and port configuration. If
you do not supply a read community, 3Com Network Administrator
will default to using ‘public’.
■ Write Community — required by 3Com Network Administrator for
certain administration functions, such as traffic prioritization. The
refresh operation attempts to verify that the write community you
have provided is correct. If you do not supply write community then
3Com Network Administrator will attempt to use the factory default
for that device.
Page 90

90 CHAPTER 5: IMPORTING AND REFRESHING DEVICES
CSV File Format
3Com Network Administrator expects the content of the CSV file to obey
certain rules as follows:
■ Each record (device) should be on a separate line.
■ White space at the start and end of a field is ignored.
■ If an optional field is omitted within the middle of a line, the commas
surrounding it must be present. For example, omitting the name field:
192.168.1.2, 255.255.255.0,, public, private
■ If an optional field is omitted at the end of a line, its preceding comma
need not be present. For example, omitting the write community:
192.168.1.2, 255.255.255.0., My Device, public
■ Fields containing commas must be surrounded by double quotes. For
example:
192.168.1.2, 255.255.255.0., “Device, A”, public, private
■ Blank lines are ignored and are not considered to be errors.
■ Comment lines can be included and must be preceded by a “#”
symbol. As with blank lines, they are ignored. For example:
# This is the main router
192.168.1.1, 255.255.255.0., Router A
You can specify IP address ranges.
Refreshing 3Com Network Administrator ‘refreshes’ the device information by
reading the live data from the devices on the network. 3Com Network
Administrator refreshes the devices it intends to add to the inventory file
and ultimately display in the device list.
3Com Network Administrator refreshes the devices it intends to add to
the inventory file and ultimately display in the device list. 3Com Network
Administrator ‘refreshes’ the device information by reading the live data
from the devices on the network.
Many of the tools provided by 3Com Network Administrator require
detailed knowledge of the configuration of the devices they are
operating on. For example, Device Setup enables you to copy the
software configuration of one 3Com device to another device of the
same type. To be able to establish which devices are compatible for such
an operation, 3Com Network Administrator needs to know their detailed
Page 91

Key Concepts 91
hardware configuration. This is the information that the refresh operation
retrieves for each device in the inventory file.
Information Retrieved by Refresh
The refresh operation retrieves detailed information about a device, some
of which is required by other tools within 3Com Network Administrator.
This includes:
■ Pinging the device to verify that the device still exists on the network.
■ Reading the basic SNMP information of the device, such as its MAC
address, name and location.
■ Determining any services it supports, such as Telnet and Web
management.
■ Establishing the detailed hardware and software configuration of the
device, such as unit and port information and the agent software
version it is running, by using SNMP.
Performing Refresh
3Com Network Administrator performs a refresh at the following times:
■ After an Import — a refresh operation is always initiated
automatically on a list of devices that were successfully imported from
a CSV file or HP OpenView.
■ As a Manual Operation — you can request a refresh on some or all
devices in the current inventory. This is done by selecting the relevant
devices and then selecting Device > Refresh Information. You may
wish to do this if you have re-configured some of your devices. For
example, if you have added a new unit to a stack.
■ As a Scheduled Operation — you can run an automated refresh
operation at periodic intervals by setting the frequency from the
Refresh tab of the Options dialog.
Page 92

92 CHAPTER 5: IMPORTING AND REFRESHING DEVICES
Components The following section describes how to import and refresh device
information using 3Com Network Administrator.
Import Dialog The Import dialog can be launched from the File > Import menu as shown
in Figure 43
Figure 43 Import Dialog
:
Import Progress
Dialog
The Import dialog enables you to choose one of two data sources to
import a list of devices from, as follows:
■ Import from HP OpenView — to import devices using this option,
HP OpenView must be installed.
■ Import from CSV File — to import devices using this option you can
manually enter a full path and filename into the Edit field or use
Browse to search for the file on your computer.
The Import Progress dialog displays when you select OK in the Import
dialog and indicates how much of the import process is complete. When
you are importing from HP OpenView a count is given of the number of
devices processed. When you are importing from a CSV file a count is
given of the number of lines processed. Click Cancel to stop the import
operation at any time during this period.
When the import process is complete an Import report is generated
containing a list of successfully imported devices and any problems
encountered during the import process. The Cancel button is grayed out
while the report is being generated.
Page 93

Components 93
The report cannot be viewed at this point. It can only be viewed when the
Summary dialog is displayed after the refresh operation has completed.
The Import Progress dialog will eventually close automatically and the
process continues one of two ways, as follows:
■ If at least one device was successfully imported 3Com Network
Administrator proceeds to the refresh operation in order to obtain live
data for those devices.
■ If no devices were successfully imported, the refresh operation is not
performed. Instead, the Summary dialog is displayed allowing you to
view the report in order to establish errors that may have occurred.
Refresh Progress
Dialog
The Refresh Progress dialog displays when a refresh operation starts and
is shown for the duration of the refresh operation. It exists in two forms:
■ Restored — this is the normal form as shown in Figure 44. It appears
as a dialog showing a progress bar for the current subnet being
processed and a progress bar for the current stage being processed
within the subnet. As devices are processed successfully, they are
added to the list box in the center of the dialog. The dialog can be
cancelled or minimized at any time.
Figure 44 Refresh Progress Dialog
Page 94

94 CHAPTER 5: IMPORTING AND REFRESHING DEVICES
■ Minimized — the dialog itself is not visible but the progress bar is
shown on the right hand part of the status bar. There are buttons to
the right to cancel the refresh operation or restore the dialog to its
visible state. You can minimize the Refresh Progress dialog by clicking
Minimize in the bottom left hand corner of the dialog.
If Minimize is selected, then the Minimize buttons are shown in the
bottom right hand corner of the Device Window dialog as shown in
Figure 45
Figure 45 Minimized Buttons
:
The refresh operation itself may be started by one of several actions as
follows:
■ Immediately after an import operation — after a successful
import, a refresh is performed automatically on the imported devices
before they are added to the inventory. In this case the Progress dialog
is shown in ‘restored’ form.
■ By manually invoking the refresh operation — if you select one or
more devices in the device list and choose Device > Refresh, the
refresh operation will be started on the selected devices. The Progress
dialog is shown in ‘restored’ form.
■ When a scheduled refresh is run — you can schedule an
automated refresh to occur at some point in the future or at regular
intervals. You can control the schedule from the Options > Refresh
menu. This option also uses the minimized version of the Refresh
Progress dialog.
Page 95

Components 95
Refresh Summary
Dialog
The Refresh Summary dialog displays either after the Refresh Progress
dialog completes or if you select Update after an automated refresh
completes as shown in Figure 46
Figure 46 Refresh Summary Dialog
.
The Refresh Summary dialog provides you with the following
information:
■ Problems detected during importing — displays if the refresh was
run as a result of performing an import operation. It also allows you to
view the Import report. For more information on problems that can
occur see “
Import Problems” on page 102.
■ Problems detected during refresh — shows the number of refresh
problems and you can also view the Refresh report. This line is absent
if an import was performed but no devices were successfully imported
(in order to be able to run the refresh operation). In this case the
dialog is still shown so that you can view the Import report.
■ Device changes — displays if a refresh successfully completed on a
previously non-empty inventory. You can view the Changes report to
see the details of the changes.
Page 96

96 CHAPTER 5: IMPORTING AND REFRESHING DEVICES
Import and Refresh
Reports
The following reports are produced through the Importing and
Refreshing feature:
Import Report
The Import Report lists all devices that were successfully imported and
passed onto the refresh operation. It also includes any problems
encountered, such as invalid CSV record entries or problems connecting
to the HP OpenView database. For more information on the type of
problems encountered see “
Import Problems” on page 102.
If you cancel a refresh operation after the import operation has
completed you can still view the import report from the History tab of the
Main Reports dialog.
Refresh Report
The Refresh Report lists all the problems encountered during the refresh
operation, such as the device not responding. For more information on
the types of problem encountered see “
Refresh Problems” on page 103.
Changes Report
The Changes Report lists any changes that were detected for devices that
existed in the inventory file prior to performing the refresh.
From the Refresh Summary dialog you can view each of these reports
(where applicable). Additionally, once a report has been generated it can
also be viewed from the History tab of the Main Reports dialog. The
reports are automatically generated in the background as part of the
import/refresh process. You do not need to view the reports from the
Summary dialog for them to be added to the Report history.
Page 97

Examples 97
Examples The following section provides examples of how you might use the
import and refresh operations.
Importing Newly Discovered Devices from HP OpenView
One of your sites has expanded and requires some new users to be
connected to the network. As a result, you have added some new 3Com
switches to the appropriate subnet in order to handle the extra
connections. You are running HP OpenView and it has detected the new
devices on your network.
To use the configuration tools provided by 3Com Network Administrator
on new devices, you must import them into a 3Com Network
Administrator inventory file:
1 Launch the Import dialog by selecting the File > Import menu.
2 Ensure that the Import From HP OpenView radio button is selected (it is
selected by default) and click OK.
3 A list of subnets displays. Select the subnet to which you have added the
new device and click OK.
4 The Import Progress dialog displays indicating that it is importing the
devices on your selected subnet. After a while the Import Progress dialog
will close and be replaced by the Refresh Progress dialog listing the
existing devices in the subnet. The new devices will appear as each one is
successfully refreshed.
5 When the refresh completes, the Summary dialog displays and should
indicate that there were no import or refresh problems. If there are any,
try to resolve them. For further information on how to do this see “
Key
Considerations” on page 102.
6 Close the Summary dialog and the new devices are added to the
inventory. Confirm this by selecting the relevant subnet in the tree. The
devices appear in the device list shown in the device window.
7 You can now use the configuration tools that 3Com Network
Administrator provides to manage the new devices.
Page 98

98 CHAPTER 5: IMPORTING AND REFRESHING DEVICES
Importing Devices
from a Spreadsheet
You maintain the list of devices on your network in a Microsoft Excel
spreadsheet. You wish to configure the devices using the tools provided
by 3Com Network Administrator.
To enable access to the configuration tools that 3Com Network
Administrator provides you must export the devices from your
spreadsheet to a CSV file and then import them into your 3Com Network
Administrator inventory file. One of the columns in the spreadsheet must
specify the IP address of the device:
1 Open your spreadsheet in Microsoft Excel.
2 Keep the main spreadsheet open and create a second spreadsheet by
selecting File > New.
3 Use the Window menu to return to the main spreadsheet and select the
entire IP Address column by clicking on the column header to highlight it.
4 Select Edit > Copy to copy the highlighted column.
5 Using the Window menu, return to the second spreadsheet.
6 Click the column header A to select the entire column and select Edit >
Paste to paste the IP addresses into column.
7 Repeat this process for the Subnet Mask column, pasting it into column B
of the second spreadsheet. If you have no subnet mask column in your
main spreadsheet then leave column B blank in your second spreadsheet.
8 Repeat this process for the Name column, pasting it into column C of the
second spreadsheet. If you have no name column in your main
spreadsheet then leave column C blank in your second spreadsheet.
9 Repeat this process for the Read Community column, pasting it into
column D of the second spreadsheet. If you have no read community
column in your main spreadsheet then leave column D blank in your
second spreadsheet.
10 Repeat this process for the Write Community column, pasting it into
column E of the second spreadsheet. If you have no write community
column in your main spreadsheet then leave column E blank in your
second spreadsheet.
11 Select File > Save As to save the second spreadsheet and select CSV as the
file type. Save the spreadsheet as
C:\MyDevices.csv.
Page 99

Examples 99
You are now ready to import the devices into 3Com Network
Administrator:
12 Launch 3Com Network Administrator if it is not already running.
13 Select File > Import.
14 Select the Import From CSV File radio button and enter
C:\MyDevices.csv into the edit field.
15 Select OK.
The Import Progress step is displayed indicating that 3Com Network
Administrator is importing the devices from your CSV file. After a while
the Import Progress dialog will close and be replaced by the Refresh
Progress dialog. You will see the devices appearing in the list box.
16 When the refresh completes the Summary step is displayed and should
indicate that there were no import or refresh problems. Problems that
have been detected should be resolved. For more information on how to
do this see “
Key Considerations” on page 102.
17 Click OK in the Summary step and the new devices will be added to the
inventory. Confirm this by selecting All 3Com devices in the tree. The
devices will be present in the device list shown in the right hand side of
the device window.
Refreshing Existing
Devices
You can now use the configuration tools that 3Com Network
Administrator provides to manage the imported devices.
You are using Switch 4400s at the edge of the network and you need to
increase the number of ports to connect some new users. To achieve this
you have added extra units to a selection of your devices, creating
stacked devices.
Certain configuration tools within 3Com Network Administrator can
adapt to the fact that the configuration held in the inventory does not
match that of the real devices. However, other configuration tools will
either continue to function (warning you that the configuration is out of
date) or will simply not function. 3Com recommends that you keep the
configuration of devices held in the inventory file up-to-date with the real
configuration on the network. Therefore, if you know certain devices are
out-of-date you can refresh them as follows:
Page 100

100 CHAPTER 5: IMPORTING AND REFRESHING DEVICES
1 Select the All 3Com devices folder in the tree.
2 In the device list, select the devices that you have changed.
3 From the right-click menu, select Refresh Information to display the
Refresh Progress step. The devices you have selected will appear in the list
box each time one is successfully refreshed.
4 When the refresh completes the Summary step displays and should
indicate that there were no refresh problems. Problems that have been
detected should be resolved. For more information on how to do this see
Refresh Problems” on page 103.
“
5 Close the Summary step and the refreshed devices will now reflect their
true configuration. You can confirm this by selecting one of the devices in
the device list and select the Device > Properties menu to launch the
Properties dialog.
You can now use the configuration tools that 3Com Network
Administrator provides to manage the refreshed devices.
Delaying Refreshing
Existing Devices
You have an engineer working in a remote site who is making changes to
the device configurations and these changes are likely to continue after
you have left the office. You wish to be able to view the changes when
you return to the office the following day. To do this:
1 Launch the Options step from Tools > Options and select the refresh
pane.
2 From the Refresh tab in the step, schedule the refresh to run at 11.30pm
and from the drop-down list select day as shown in Figure 47
:
 Loading...