

ZyXEL AMG1302-11C User Manual
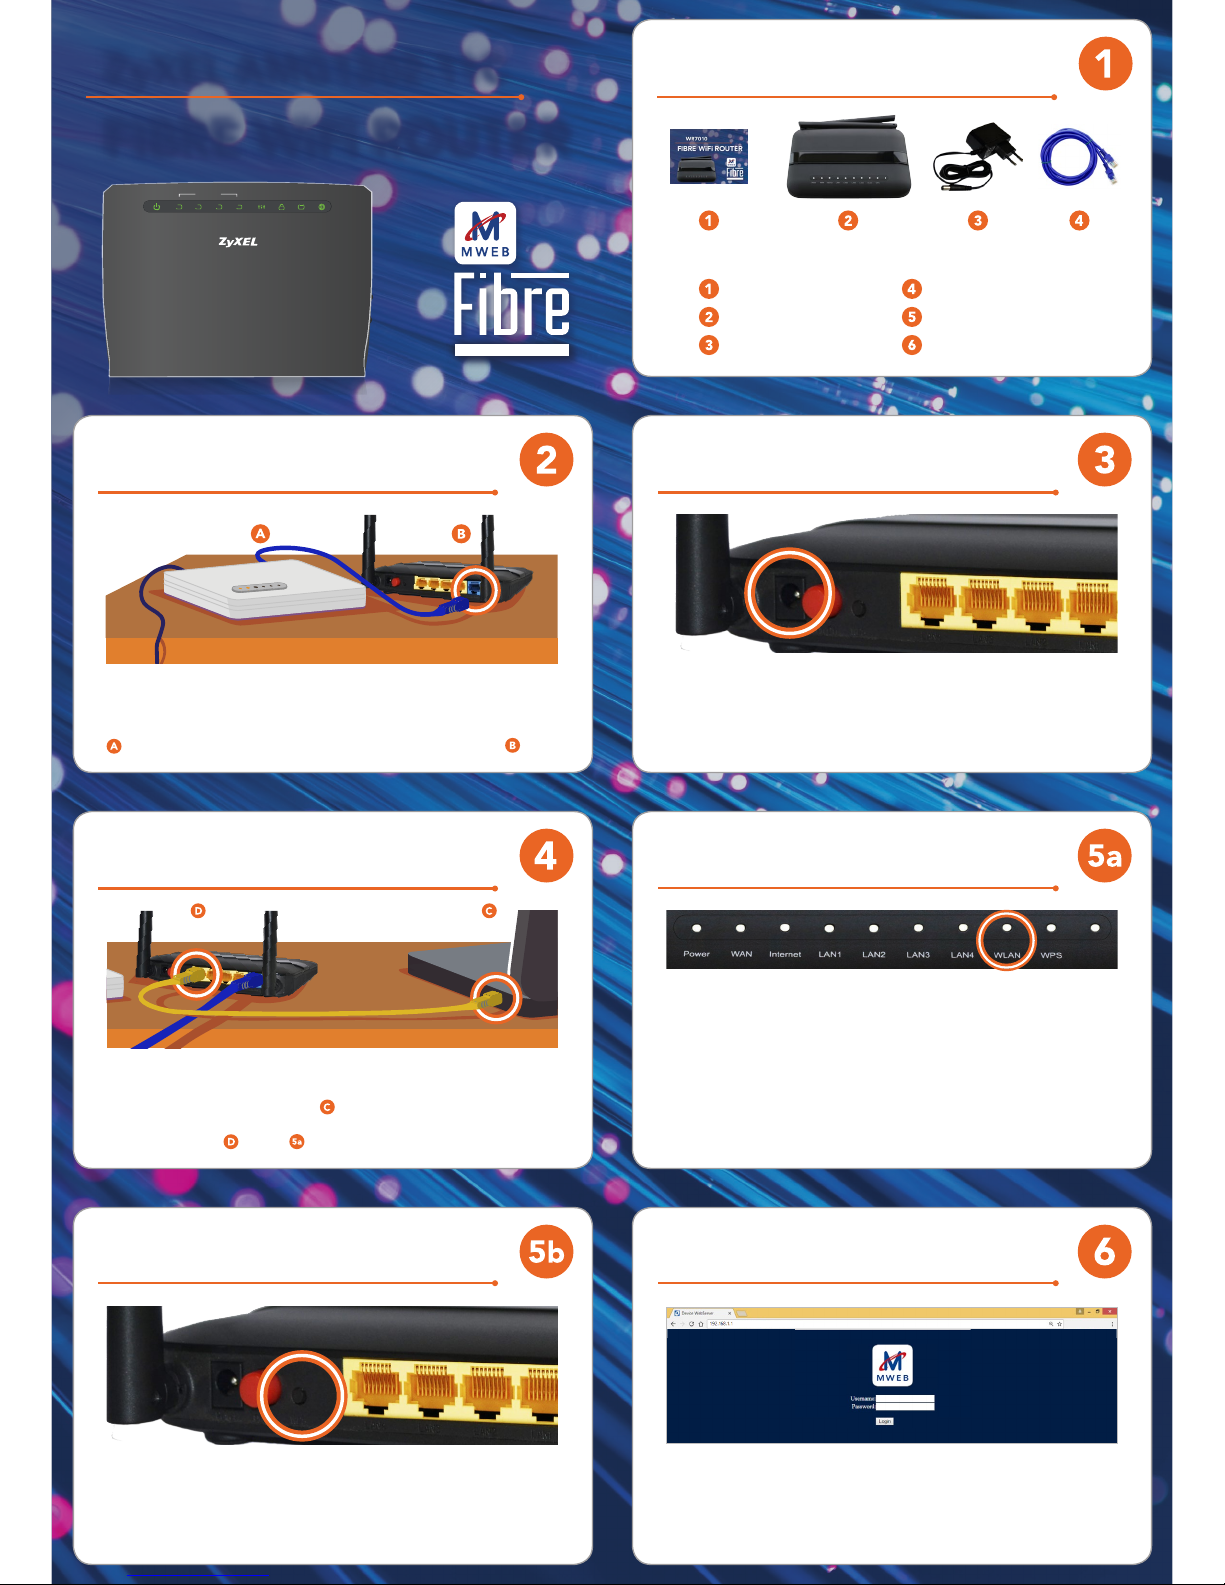
Using the Blue Ethernet cable, connect the LAN port of the Fibre Unit (ONT)
to the blue port labelled “WAN” on the back of the router
Plug the power supply unit into the wall socket and connect the small
round plug from the power supply unit into the power socket on the
back of the router. Switch the power on at the wall socket and press the
red power button on the back of the router. The power LED on top of
the router will light up.
You will need a second LAN cable for this step. Plug one end of the LAN
cable into the LAN port of your PC Plug the other end of the LAN cable
into the yellow LAN port labelled LAN1, LAN2, LAN3, or LAN4 on the
back of the router Follow to connect without a second LANcable.
The default SSID (WiFi Network Name) and WiFi key (WiFi Password)
are displayed on the bottom of your router. Ensure that the WLAN LED
on top of your router is lit up. If the LED is not lit, open a web browser
on your device and type 192.168.1.1 into the address bar at the top.
Enter the username and password (admin/admin). Click on WLAN in the
menu on the left. Click on Basic Settings and uncheck the box named
“Disable WLAN Interface”. On your WiFi-enabled device, browse for
and select the router’s SSID (WiFi Network Name). Use the WiFi key
when prompted to connect your device to the WiFi network.
If your WiFi-enabled device is equipped with a WPS button, press the
WPS button on the back of the router until the WPS LED blinks. Press
the WPS button on the WiFi-enabled device and allow 2 minutes for a
secure WiFi connection to be established.
Open an Internet browser (e.g. Google Chrome) on your device. Enter
192.168.1.1 into the address bar and enter the default username (admin)
and password (admin). Follow the Quick Setup instructions to complete
the Fibre configuration on your device. If you are having trouble, contact
MWEB Tech Support for Help.
ZyXEL AMG1302-11C
CONNECTING THE
POWER SUPPLY UNIT
CONNECTING A DEVICE TO
THE ROUTER WITH WiFi
CONNECTING A DEVICE TO
THE ROUTER WITH WiFi
IN THE BOX
Quick Start Guide
Fibre WiFi Router
Router Stand
Power Supply Unit
Grey Telephone Cable
Yellow Ethernet Cable
CONNECTING A DEVICE TO THE
ROUTER VIA A LAN CABLE
CONNECTING TO FIBRE
FIBRE WiFi ROUTER
CONFIGURE YOUR ROUTER
POWER
2 3
41
WLAN WPS DSL INTERNETETHERNET
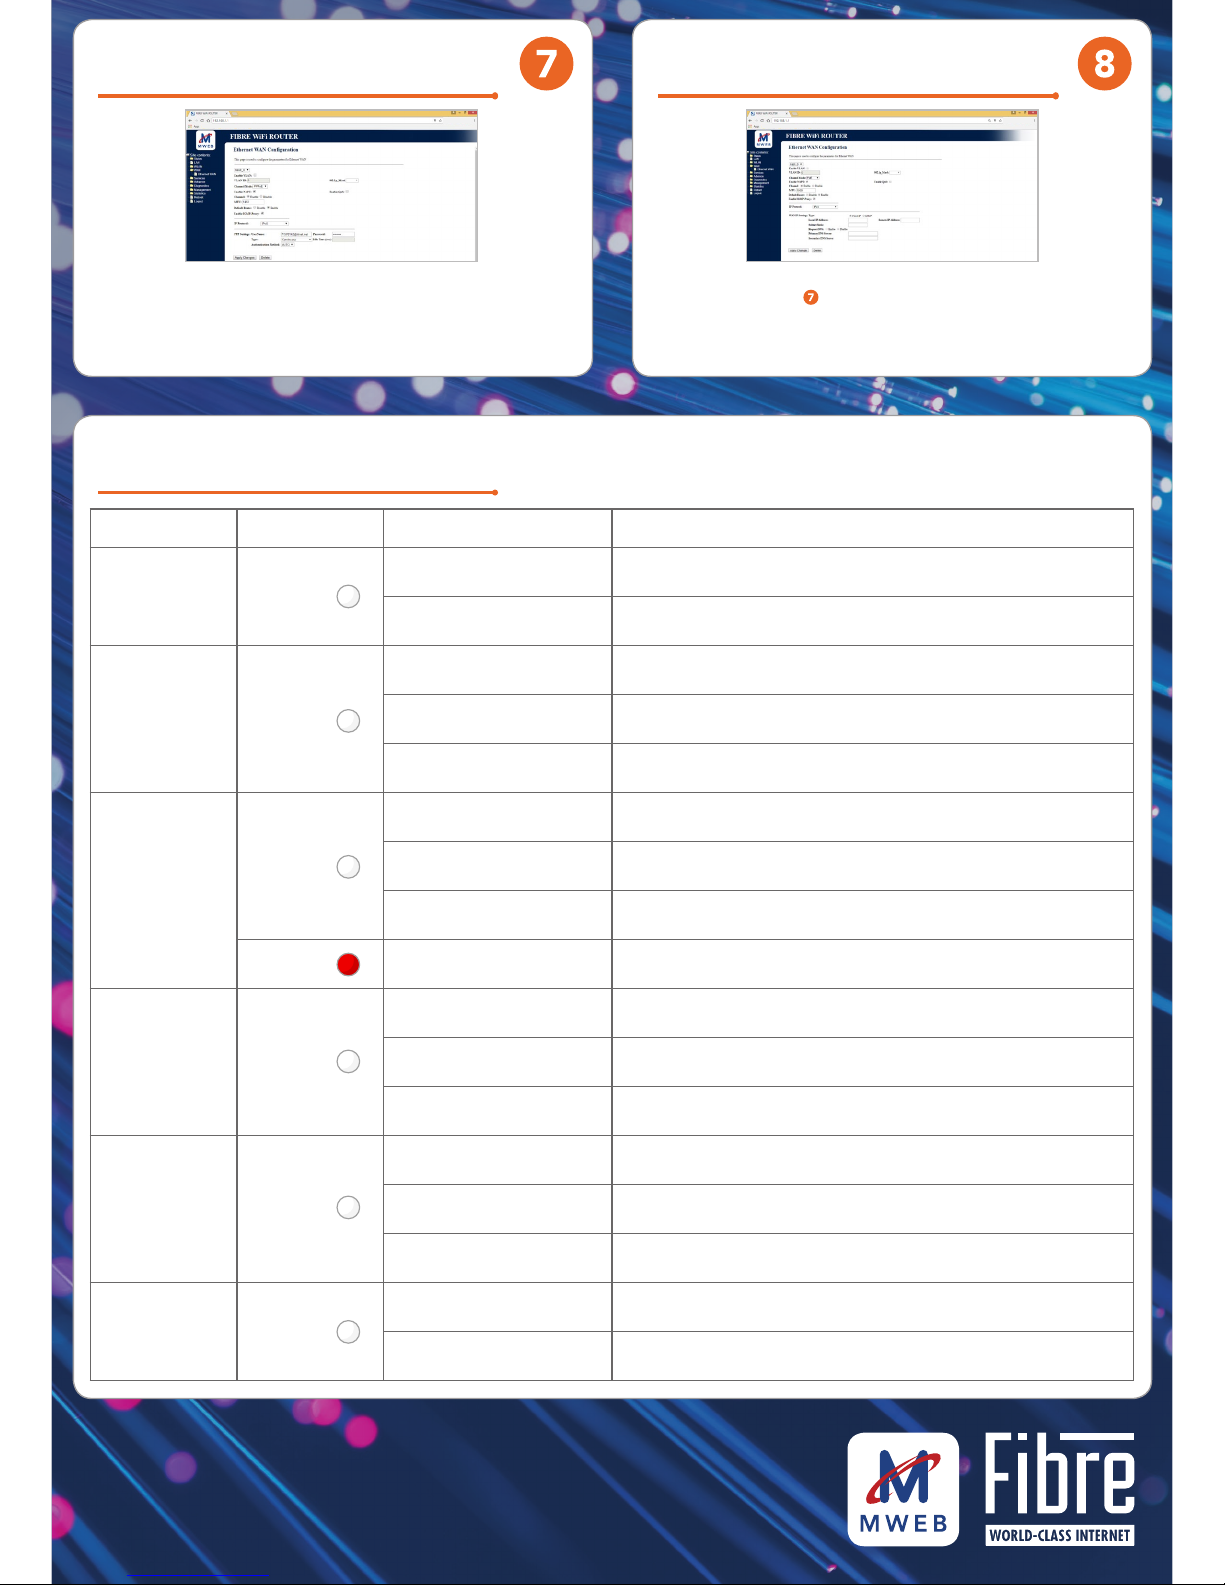
Open an Internet browser on your device. Enter 192.168.1.1 in the
address bar and enter the default username (admin) and password
(admin). Click on WAN in the menu on the left and then Ethernet WAN.
In the section at the bottom labled PPP Settings input your MWEBsupplied username and password and click Apply Changes.
Follow the steps in to get to the WAN settings. In the settings
near the top find the Channel Mode drop down and change it to IPoE.
Leave all the other settings at default and click Apply Changes. If you
are having trouble, contact MWEB Tech Support for Help.
MANUAL SET UP
READING THE LEDs
SET UP FOR IP-BASED
FIBRE USERS
www.mweb.co.za/help/home
LED COLOUR STATUS DESCRIPTION
POWER WHITE
ON
The router is receiving power and ready for use.
OFF
The router is not receiving power.
WAN WHITE
ON
The router detects an Ethernet connection on the Ethernet WAN port.
BLINKING
The router is sending or receiving data to/from the Ethernet WAN port.
OFF
The router does not detect an Ethernet link on the Ethernet WAN port.
INTERNET
WHITE
ON
The router has an Internet connection but no traffic.
BLINKING
The router is sending or receiving Internet traffic.
OFF
There is no Internet connection.
RED ON
The router failed to make an Internet connection.
LAN 1-4 WHITE
ON
The router detects an Ethernet connection on one or more of the LAN ports.
BLINKING
The router is sending or receiving data to/from one or more of the LAN ports.
OFF
The router does not detect Ethernet links on the LAN ports.
WLAN WHITE
ON
WiFi is enabled and ready.
BLINKING
Wireless devices are connected.
OFF
WiFi is disabled.
WPS WHITE
BLINKING
The router is setting up a WPS connection.
OFF
WPS is disabled.
 Loading...