

ZTE ZXHNH560N User Manual

H560N
Quick Start Guide
Wireless Router
Package Contents: ZXHN H560N Wireless Router, Power Adapter, Quick Start Guide, Warranty
Card
This product is a low Low-power product mainly used to extend the Wi-Fi signal, This product
is targeted to provide 24 hours continuous service.
- 1 -
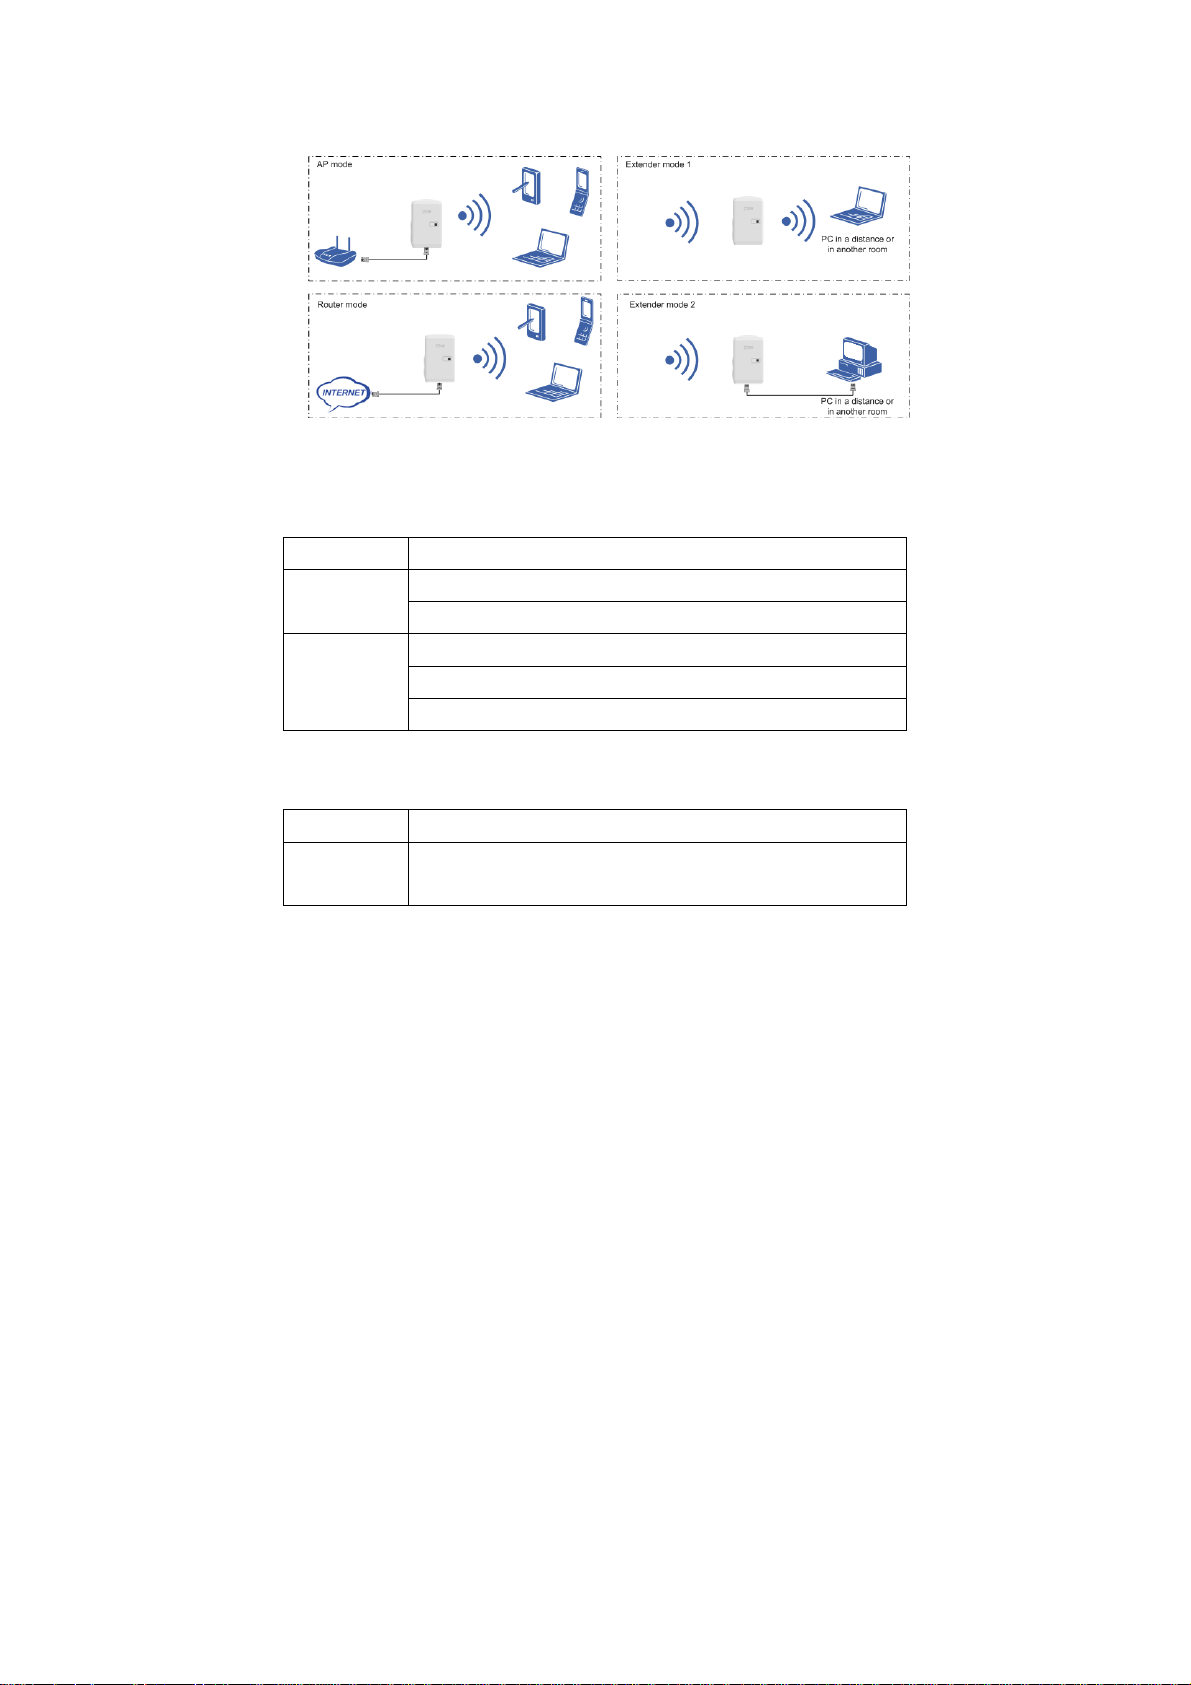
1 Connecting the Equipment
Figure 1-1 Connecting the Equipment
After the connections, check the LED indicators of your H560N.
2 LED indicator
ZXHN H560N uses a 2-color LED, red and green, to indicate the status as follow.
Color Direction
RED ON: The device is booting or hardware error.
Flashing: In Extender mode, H560N doesn’t associate any wireless router.
Green ON: Device runs normally no wireless data transmitted
Random Flashing: Data is being transmitted.
5Hz Flashing: In WPS mode
3 Buttons
ZXHN H560N buttons show as follow.
Button Direction
WPS Users can easily push the WPS button for quick and safe WLAN configuration
with other WLAN devices.
- 2 -

Reset Reset to factory default setting.
4 Safety Precautions
Keep away from heat and keep good ventilation.
Power off your H560N and remove all cable connections on thundery or rainy days.
Only use the power adapter that is provided with the H560N.
Keep your H560N dry during the storage, transportation, and operation.
5 Configuring the Computer
For a computer connecting to your H560N with cables, perform the following steps to set the IP
address:
Windows 7/Vista
1. Select Start → Control Panel. The Control Panel window is displayed.
2. Click Network and Internet. The Network and Internet window is displa yed.
3. Click Network and Sharing Center. The Network and Sharing Center window is displayed.
4. Click Change adapter settings. The Network Connections window is displayed.
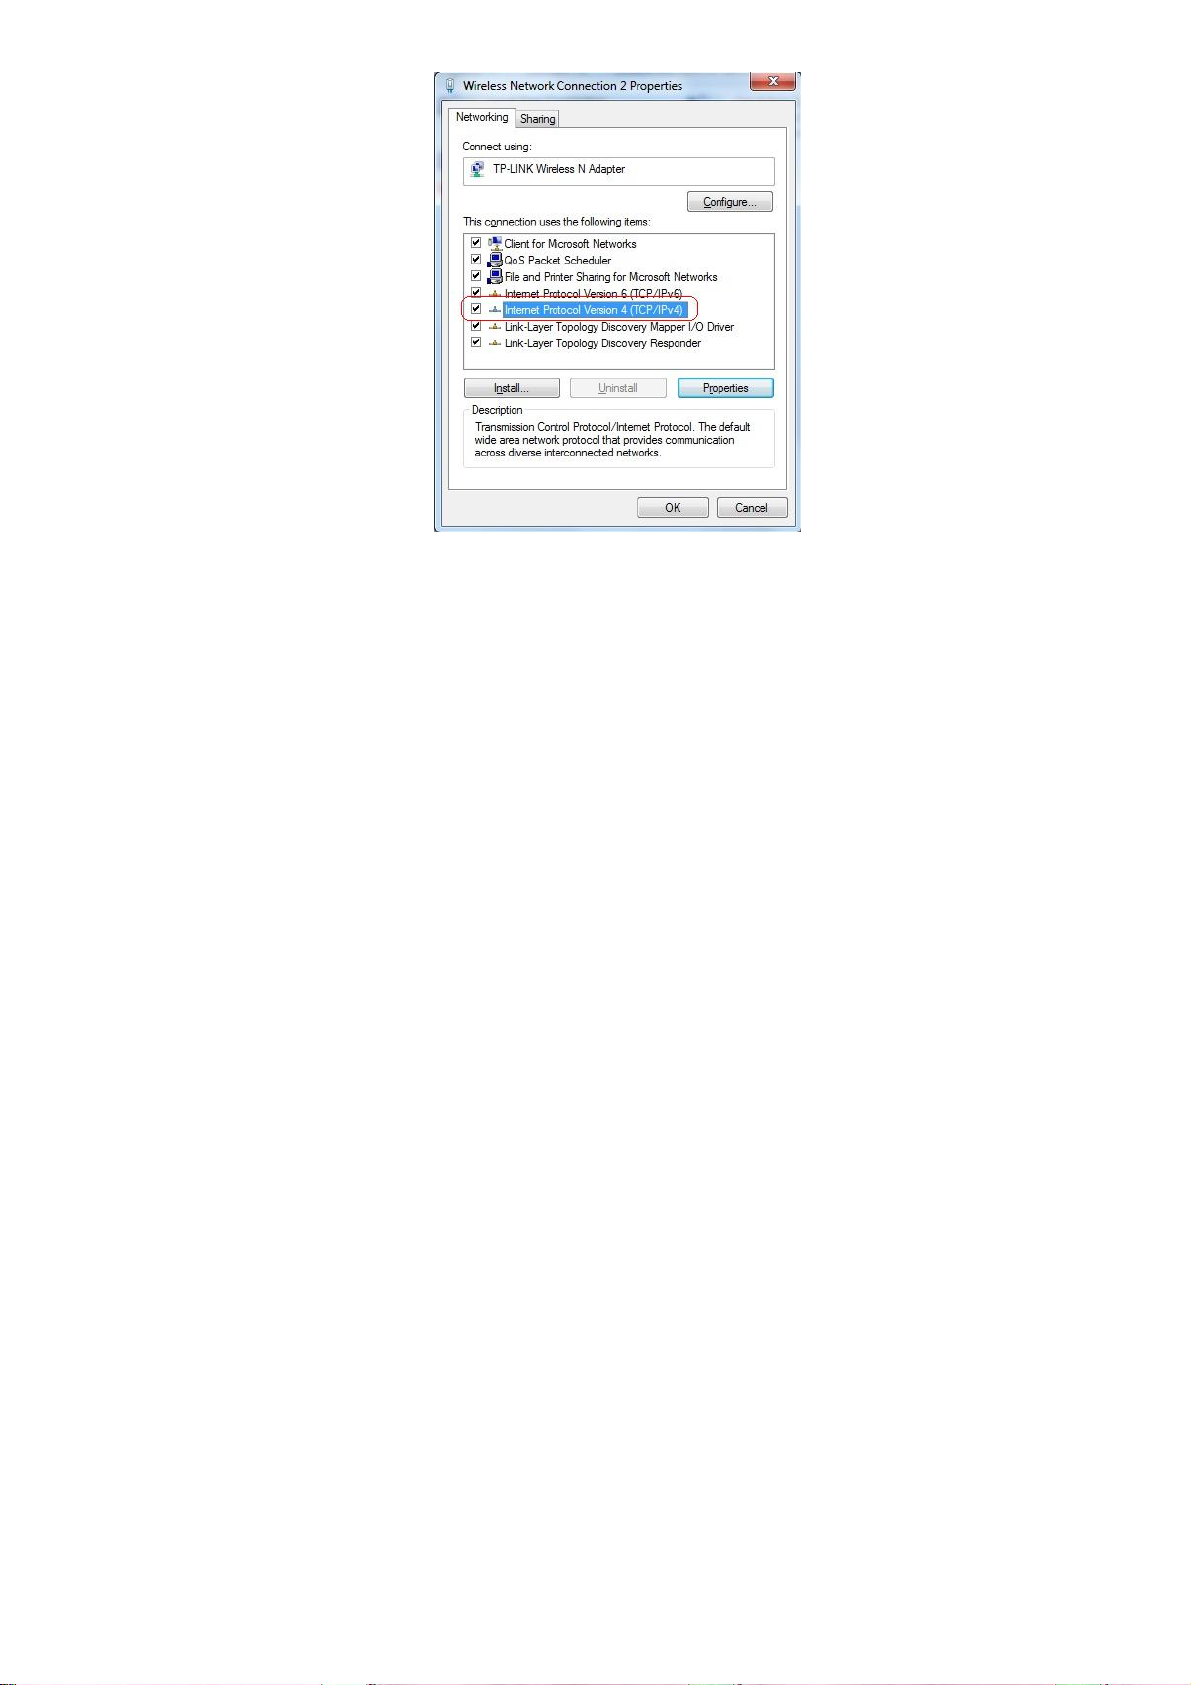
5. Right-click Loca l Area Connection and then select Properties from the shortcut menu. The Local Area
Connection Properties dialog box is displayed, Double-click Internet Protocol Version 4 (TCP/IPv4). .
- 3 -
6. Click the Obtain an IP address automatically and Obtain DNS server address automatically option
buttons, and then click OK.
- 4 -

7. On the Local Area Connection Properties dialog box, click OK.
Windows XP/2000
1. Right-click My Network and then select Properties from the shortcut menu. The Network Connections
window is displayed.
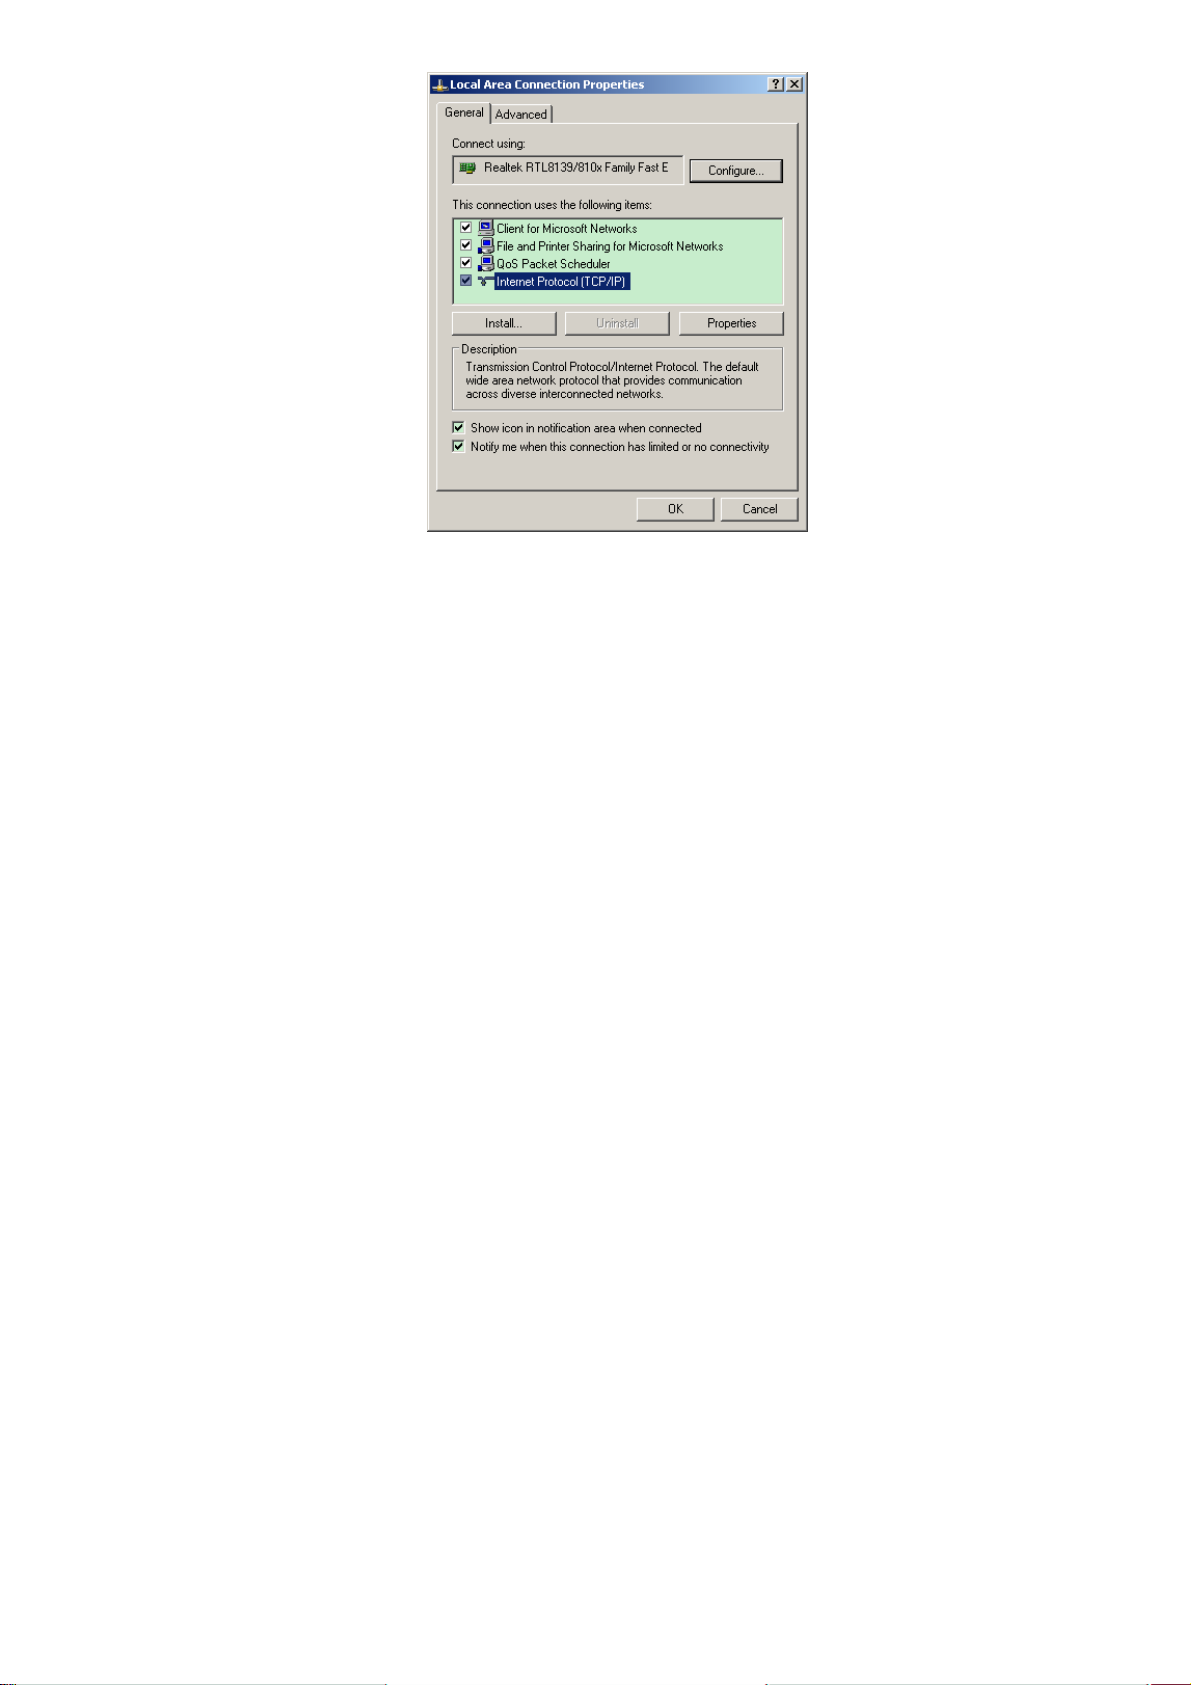
2. Right-click Loca l Area Connection and then select Properties from the shortcut menu. The Local Area
Connection Properties dialog box is displayed, Double-click Internet Protocol (TCP/IP):
- 5 -
3. Click the Obtain an IP address automatically and Obtain DNS server address automatically option
buttons, and then click OK:
- 6 -
 Loading...