

Page 1

ZTE BLADE V Ultra
User Manual
Page 2

About This Manual
Thank you for choosing this ZTE mobile device. In order to keep
your device in its best condition, please read this manual and
keep it for future reference.
Copyright © 2018 ZTE CORPORATION.
All rights reserved.
No part of this publication may be quoted, reproduced, translated
or used in any form or by any means, electronic or mechanical,
including photocopying and microfilm, without the prior written
permission of ZTE Corporation.
Notice
ZTE Corporation reserves the right to make modifications on print
errors or update specifications in this guide without prior notice.
We offer self-service for our smart terminal device users. Please
visit the ZTE official website (atwww.ztedevices.com) for more
information on self-service and supported product models.
Information on the website takes precedence.
Visit http://www.ztedevices.com to download the user manual.
Just click Support from the home page and then select your
location, product type, and name to search for related support
information.
Disclaimer
ZTE Corporation expressly disclaims any liability for faults and
damages caused by unauthorized modifications of the software.
Images and screenshots used in this guide may differ from the
actual product. Content in this guide may differ from the actual
product or software.
1
Page 3
Trademarks
ZTE and the ZTE logos are trademarks of ZTE Corporation.
Android is a trademark of Google LLC; Oreo is a trademark of
Mondelez International, Inc. group.
The Bluetooth®word mark and logos are registeredtrademarks
owned by the Bluetooth SIG, Inc. and any use of such marks by
ZTE Corporation is under license.
microSDXC Logo is a trademark of SD-3C, LLC.
Qualcomm® Snapdragon™processorsare products of Qualcomm
Technologies, Inc.
Qualcomm and Snapdragon are trademarks of Qualcomm
Incorporated, registered in the United States and other countries.
Used with permission.
Other trademarks and trade names are those of their respective
owners.
2
Page 4

Contents
Getting Started ......................................................... 6
Getting to Know Your Phone .............................................. 6
Key Functions .................................................................... 8
Installing the nano-SIM Card and microSDXCTM Card
(Optional) ........................................................................... 8
Charging the Battery ........................................................ 10
Powering You Phone On/Off ............................................. 11
Setting Up for the First Time ............................................. 11
Locking/Unlocking the Screen and Keys ............................ 11
Using the Touch Screen ................................................... 12
Extending Home Screen Panels ....................................... 13
Choosing Your Wallpaper ................................................. 14
Personalizing ......................................................... 15
Changing the System Language ...................................... 15
Setting the Date and Time ................................................ 15
Turning System Sounds On/Off ........................................ 16
Using Do not Disturb Mode .............................................. 16
Protecting Your Phone With Screen Locks ........................ 17
Protecting Your Phone With Screen Pinning ..................... 18
Knowing the Basics ............................................... 20
Status and Notification Icons ............................................ 20
Entering Text .................................................................... 23
3
Page 5

Connecting to Networks and Devices .................. 25
Connecting to Mobile Networks ........................................ 25
Connecting to Wi-Fi ......................................................... 26
Connecting to Bluetooth Devices ..................................... 27
Sharing Your Mobile Data Connection .............................. 28
Connecting to Virtual Private Networks ............................ 30
Phone Calls ............................................................ 32
Placing Calls .................................................................... 32
Answering or Rejecting Calls ........................................... 33
Checking Voicemail ......................................................... 34
Using Options During a Call ............................................. 34
Managing Multi-party Calls ............................................... 35
Adjusting Your Call Settings ............................................. 36
Contacts ................................................................. 38
Adding a New Contact ..................................................... 38
Searching f or a Contact .................................................. 38
Editing Contacts .............................................................. 39
Messages ................................................................ 40
Opening the Messages Screen ........................................ 40
Sending a Message ......................................................... 40
Changing Message Settings ............................................ 41
Browser .................................................................. 42
Opening the Browser ....................................................... 42
Using Multiple Browser Tabs ............................................ 42
4
Page 6

Downloading Files ............................................................ 43
Changing Browser Settings .............................................. 43
Camera ................................................................... 44
Capturing a Photo ............................................................ 44
Recording a Video ............................................................ 46
More Apps and Features ....................................... 48
Music ............................................................................... 48
Clock ............................................................................... 48
File Manager .................................................................... 49
Voice Recorder ................................................................ 50
Google Apps .................................................................... 50
For Your Safety ...................................................... 52
General Safety ................................................................. 52
FCC RF Exposure Information (SAR) ............................... 53
FCC Regulations .............................................................. 53
Distraction ........................................................................ 55
Product Handling ............................................................. 55
Electrical Safety ............................................................... 59
Radio Frequency Interference .......................................... 60
Explosive Environments ................................................... 62
5
Page 7
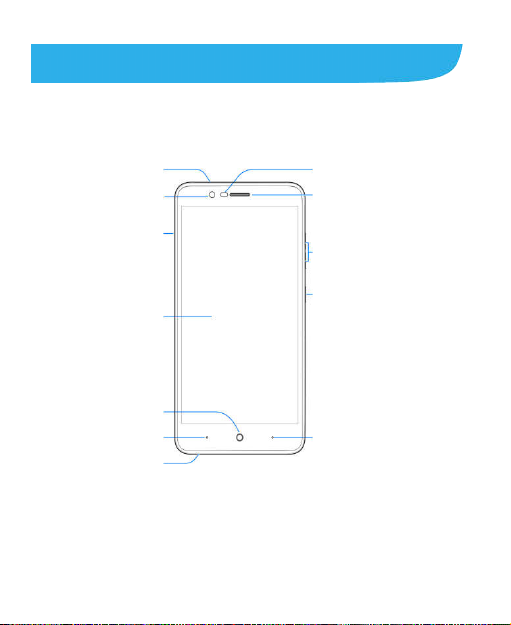
Frontcamera
SIM/
microSDXC
Auxiliary
Headset jack
Getting Started
Getting to Know Your Phone
microphone
nano-
card tray
Touch screen
Home key
Back key
6
Proximity&
light sensor
Earpiece
Volume keys
Power key
Recent apps
key
Page 8

type-C jack
Dual-lens
camera
Flash
Fingerprint
sensor
Speaker
Charging/USB
Main
microphone
7
Page 9
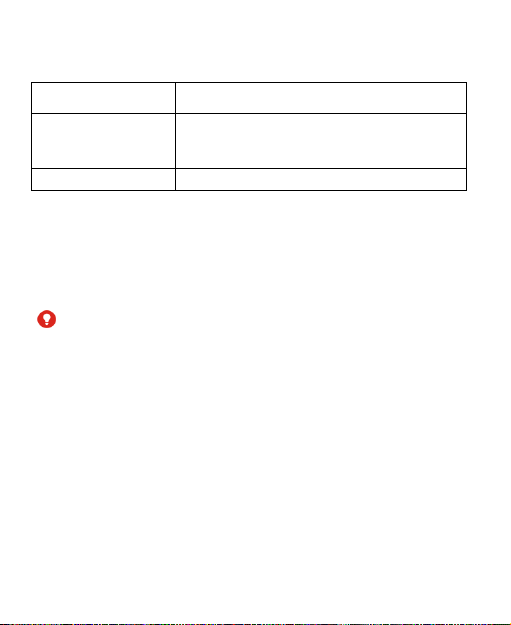
KeyFunctions
Key Function
Power key
Volume keys Press or hold to turn the volume up or down.
Press and hold to restart, turn airplane mode
onor power off.
Press to turn off or on the screen display.
Installing the nano-SIM Card and
microSDXCTM Card(Optional)
The nano-SIM card can be installed or removed while the phone
is turned on.
WARNING!
To avoid damage to the phone, do not use any other kind of SIM
cards, or any non-standard nano-SIM card cut from a SIM card.
You can get a standard nano-SIM card from your service
provider.
8
Page 10
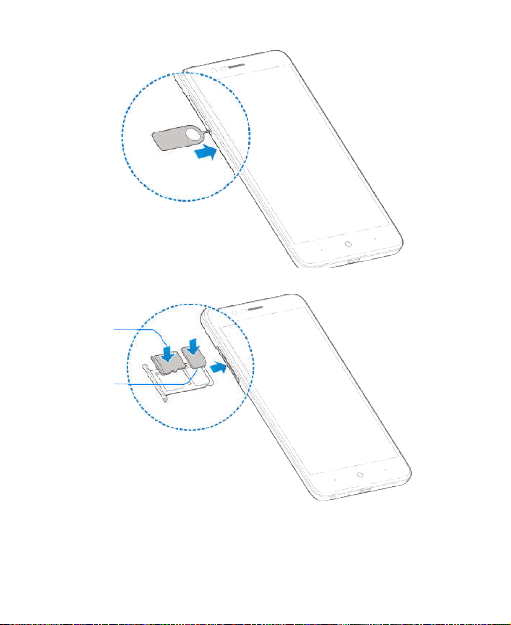
SIM
card
microSDXC
card
nano-
9
Page 11
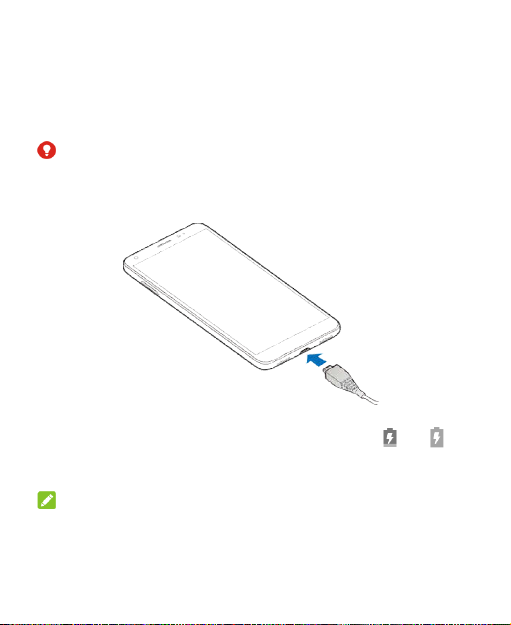
Charging the Battery
Your phone’s battery should have enough power for the phone to
turn on, find a signal, and make a few calls. You should fully
charge the battery as soon as possible.
WARNING!
Use only ZTE-approved chargers and USB Type-C cables. The
use of unapproved accessories could damage your phone or
cause the battery to explode.
1. Connect the charger to a standard AC power outlet. If the
phone is on, you’ll see a charging icon, such as or ,
appear on the Status Bar.
2. Disconnect the charger when the battery is fully charged.
NOTE:
If the battery is extremely low, you may be unable to power on
the phone even when it is being charged. In this case, try again
after charging the phone for at least 20 minutes. Contact the
10
Page 12

customer service if you still cannot power on the phone after
prolonged charging.
Powering You Phone On/Off
Press and hold the Power key to power on your phone.
To power off, press and hold the Power keyand touch Power
off.
Setting Up for the First Time
When you first power on your phone after you purchase it or
reset it to factory settings, you need to do some settings before
using it.
Touch the language field to select a language. Then touch LET'S
GO and follow the prompts to set up your Wi-Ficonnection, date
& time, name, fingerprint, Google services and other options.
Locking/Unlocking the Screen and Keys
Your phone allows you to quickly lock the screen and keys (put
the phone to sleep mode) when not in use and to turn the screen
back on and unlock it when you need it.
Locking the Screen and Keys
To quickly turn the screen off and lock the keys, press the Power
key.
NOTE:
To save battery power, the phone automatically turns off the
11
Page 13
screen after some time of inactivity. You will still be able to
receive messages and calls while the phone screen is off.
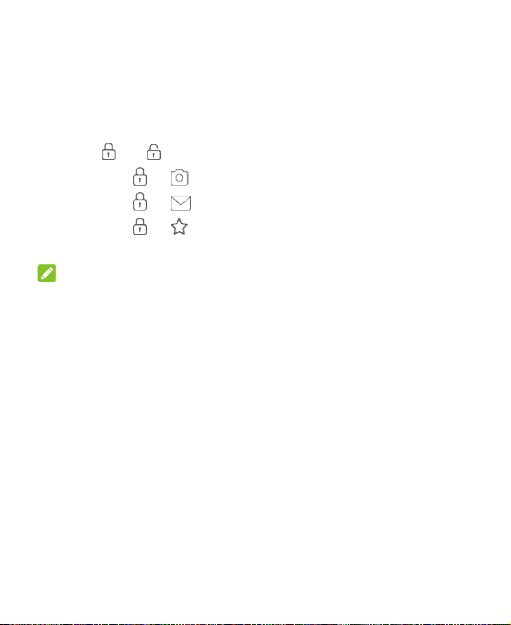
Unlocking the Screen and Keys
1. Press the Power key to turn the screen on.
2. Swipe to to unlock the phone, or
Swipe to to select multimedia apps.
Swipe to to select messaging apps.
Swipe to to select favorite apps.
Double-tap a notification to open the related app.
NOTE:
If you have set apattern, PIN or password for your phone, you’ll
need to draw the pattern, or enter the PIN/password to unlock your
screen.
Using the Touch Screen
Your phone’s touch screen enables you to control actions
through a variety of touch gestures.
Touch
When you want to type using the onscreen keyboard, select
items on the screen such as the application and settings
icons, or press the onscreen buttons, simply touch them with
your finger.
Touch and Hold
To open the available options for an item (for example, a
12
Page 14

message or link in a web page), touch and hold the item.
Swipe or Slide
To swipe or slide means to quickly drag your finger vertically
or horizontally across the screen.
Drag
To drag, press and hold your finger with some pressure
before you start to move your finger. While dragging, do not
release your finger until you have reached the target position.
Pinch
In some apps (such as Maps orweb browser), you can zoom
in and out by placing two fingers on the screen at once and
pinching them together (to zoom out) or spreading them apart
(to zoom in).
Rotate the screen
For most screens, you can automatically change the screen
orientation from portrait to landscape by turning the phone
sideways.
Extending Home Screen Panels
Your home screen is extendable, providing more space
forshortcuts, widgets, and more. Simply swipe left or right on the
home screen to see the extended panels. You can add or remove
home screen panels, or adjust their order.To add a new home
screen panel:
1. Touch and hold an empty area of the home screen.
13
Page 15

2. Slide the home screen thumbnails right and touch .
Choosing Your Wallpaper
You can set the wallpaper for the home screen and lock screen.
1.
From the home screen, touchthe Arrow
>Settings
2. Touch My photosor select a built-in wallpaper and use it as
the wallpaper.
NOTE:
Other way to set the home screen wallpaper and the lock screen
wallpaper:
Touch and hold an empty area of the home screen and select the
WALLPAPERS tab. Then select a built-in image, or an image
from your gallery.
>Display >Advanced >Wallpaper.
14
Page 16

Personalizing
Changing the System Language
1. From the home screen,touch the Arrow
>Settings>System>Languages & input> Languages.
2. To add a system language, touch Add a language, and
thenselect the language you need.
3. Touch and hold next to the language you want to use,
anddrag it to the top of the list.
Setting the Date and Time
1. From the home screen,touchthe Arrow >Settings>
System > Date & time.
2. Set the date, time, time zone, and time format.
To adjust the date and time automatically, touch to turn
onAutomatic date & time.
To adjust the date and time manually, touch to turn
offAutomatic date & time and touchSet date / Set time
tochange the date and time.
To adjust the time zone automatically, touch to turn
onAutomatic time zone.
To adjust the time zone manually, touch to turn off
Automatictime zone and touchSelect time zone to set the
correcttime zone.
To adjust the time format, touchUse 24-hour format.
15
Page 17

Turning System Sounds On/Off
1. From the home screen, touch
>Settings
2. Inthe Other sounds and vibrations section, touch the switch
beside each option to turn it on or off.
>Sound >Advanced.
the Arrow
Using Do not Disturb Mode
You can limit interruptions with Do not disturb mode. This mode
silences your phone so that it doesn’t make sounds or vibrate
when you don’t want it to.
1. From the home screen, touchthe Arrow
>Settings>Sound > Advanced>Do Not Disturb
preferences.
2. Set the following options:
TouchPriority only allows to select which types of
notifications will be permitted when Do not disturb is enable.
TouchBlock visual disturbances to prevent notifications
silenced by Do not disturb from peeking/popping up on the
screen and/or from turning on the screen when it is off.
Under Automatic rules, manage rules for automatically
turning on Do not disturb. You can touch an existing rule to
enable, disable, modify, or delete it, or touchAdd more to
create a new rule.
There are two types of rules:
Time rule: Do not disturb mode will be activated
automatically according to the days, start time, and end
16
Page 18

time you set.
Event rule: Do not disturb mode will be activated
automatically during calendar events. You can choose to
apply the rule to events from a specific calendar or any,
and according to your reply to the event invitation.
TouchEvent to enable and configure the preset event
rule.
3. When modifying or creating a rule, you can touchDo Not
Disturb preferences to set the mode: Priority only, Alarms
only, or Total silence.
NOTES:
To set a Do not disturb exception for a specific app, from the
home screen, touch the Settings > Apps & notifications >
Notifications, and then touchNotifications. Select the app
you want, and then touchthe slider to allow or block its
notifications.
You can activate Do not disturb mode from the Quick Settings
menu. Slide the Status Bar down twiceto open Quick Settings,
and then touchDo not disturb.To quickly turn off Do not
disturb mode, press eitherof the Volume keys and
touchTURN OFF NOW.
Protecting Your Phone With Screen
Locks
You can protect your phone by creating a screen lock.
Whenenabled, you need to swipe up from screen, and then
drawa pattern or enter a numeric PIN or a password to unlock
thephone’s screen and keys.
17
Page 19

1. From the home screen, touchthe Arrow
>Settings>Security &Location>Screen lock.
2. TouchNone, Swipe, Pattern, PIN, or Password.
TouchNone to disable screen lock protection.
TouchSwipe to enable unlocking by swiping up on the
lock screen.
TouchPattern to create a pattern that you must draw
tounlock the screen.
TouchPIN or Password to set a numeric PIN or a
passwordthat you must enter to unlock the screen.
3. For Pattern, PIN, or Password lock, select how you would
likenotifications and their contents to show when the phone
islocked, and then touchDONE.
NOTE:
Remember the pattern, PIN, or password you set. Otherwise,you
will need to upgrade the phone software to use the phone.
Protecting Your Phone With Screen
Pinning
You can use the screen pinning feature to keep an app in view,
so others cannot switch to other apps or access your personal
information.
Turning On Screen Pinning
1. From the home screen, touch the Arrow
>Settings>Security &Location> Screenpinning.
18
Page 20

2. Touch the On/Off switch.
3. If you want to be asked for the unlock pattern, PIN,
orpassword before unpinning the screen, switch onAsk for
unlock pattern before unpinning when thescreen lock has
been set.
Pinning a Screen
1. Ensure that screen pinning is turned on.
2. Open the app you want to keep in view.
3. Touch the Recent apps key.
4. If there are many app tabs, swipe up to find on the
front-mosttab.
5. Touch >GOT IT.
Unpinning the Screen
To unpin the screen and return to normal use, touch and hold
theBack key.
If you have turned on Ask for unlock pattern before unpinning,
swipe up from the screen and drawthe pattern.
19
Page 21

Knowing the Basics
Status and Notification Icons
Your phone will tell you exactly what’s going on by showing you
simple icons. Here’s what they mean.
USB tethering on
Flight mode
Missed call
Bluetooth on
New Wi-Fi network
detected
/
Battery charging
Song playing
Alarm set
Do not disturb mode
on
Signal strength
New message(s)
Connected to a Wi-Fi network
Mobile hotspot on
Vibration on
Speakerphone on
No signal
Opening/Closing the Notification Panel
Notifications report the arrival of new messages, calendar
events, and alarms, as well as ongoing events, such as when
you are playing music. You can open the notification panel to
view the details of notifications.
20
Page 22

To open the notification panel, swipe your finger downfrom
the top of the screen.
To close the notification panel, swipe your finger up on the
screen or touch the Back key.
Responding to or Removing a Notification
In the notification panel, you can respond to a notification or
remove the notifications. The notification panel also supports
expandable notifications that let you perform additional actions
right from the notification itself.
To respond to a notification, just touch it.
Touch / to expand or collapse certain notifications.
To remove a notification, swipe it left or right.
To remove all notifications, touch CLEAR ALL below all the
notifications.
To manage notifications you have received, touch and hold a
notification to identify the application that created it. And then
touchMORE SETTINGS to customize notification settings.
NOTE:
If you block notifications for an app, you may miss its important
alerts and updates. The notifications of some apps cannot be
blocked.
21
Page 23

Using Quick Settings
The QuickSettings make it convenient to view or change the
most common Settings for your phone.
Open the notification panel anddrag the panel downwards to find
the following Quick Settingson the screen.
Wi-Fi: Touch to turn on or off Wi-Fi. Touch and hold to open
the Wi-Fi menu in Settings.
Bluetooth: Touch to turn on or off Bluetooth. Touch and hold
to open the Bluetooth menu in Settings.
Sound/Vibrate/Silent: Touch to select sound mode.
Flashlight: Turn the flashlight function on or off. When on,
the flash on the back of the device lights up.
(For your safety, do not look directly into the light)
Location: Touch to turn on or off Location. Touch and hold to
open the Location menu in Settings.
Airplane mode: Touch to turn on or off airplane mode.
Data: Touch and hold to open the Data usage menu
Auto-rotate/Portrait: Touch to turn on or off the auto-rotate
screen feature.
Ultra Power-saver: Touch to enable Ultra Power-saver.
Hotspot: Touch to turn on or off the Mobile Hotspot.
Do not disturb / Alarms only:
mode and select an option. Touch again to turn off Do not disturb
mode.
Sync: Touch to turn on or off auto-sync of accounts data.
Touch to turn on Do not disturb
Touch and hold to add a new account on the phone.
22
Page 24

Data Saver: Touch to turn the data saver function on or off.
Touch and hold to open the data usage menu in Settings.
Invert colors:Touch to turn on or off the color inversion
feature.
Screen shot: Touch to capture the screen.
NOTE:
In the Quick Settings screen, touch to get to the settings
menu; touch to add or remove control switch.
Entering Text
You can enter text using the on-screen keyboard. Some
appsopen it automatically. In others, you open it by touching
where youwant to type. You can touch the Back keyto hide the
on-screenkeyboard. You can also enter text by speaking with the
Googlevoice typing feature.
Enabling or Disabling Input Methods
1.
From the home screen, touchthe Arrow >Settings
System >Languages & input >Virtualkeyboard >Manage
keyboards.
2. Slide the switches beside the input methods to enable
ordisable them.
NOTE:
Some default input methods may not be disabled.
Managing Input Method Settings
1. From the home screen, touchthe Arrow
23
>
Page 25

>Settings>System >Languages & input>Virtual
keyboard.
2. Touch an input method to adjust itsSettings.
24
Page 26

Connecting to Networks and
Devices
Connecting to Mobile Networks
ControllingMobile Data Use
To enable or disable data access:
1. From the home screen, touchthe Arrow
>Settings>Network & Internet >Data usage> Mobile
data.
2. Slidethe Mobile data switch to enable or disable mobile data
use.
To get data services when roaming:
1.
From the home screen, touchthe Arrow
>Settings>Network & Internet > Mobile network > Data
roaming
.
2.
Slide theData roamingswitch to enable or disable roaming
NOTE:
Data roaming may incur significant roaming charges.
SettingAccess Point Names
To connect to the Internet you can use the default Access Point
Names (APN). And if you want to add a new APN, please contact
the service provider to get the necessary information.
25
.
Page 27

1. From the home screen, touchthe Arrow
>Settings>Network & Internet > Mobile
network >Access Point Names.
2. Touch+.
Touch each item to enter the required information.
3.
Touch >Save to complete.
4.
NOTE:
To set the APN to default settings, touch >Reset to default.
Connecting to Wi-Fi
Wi-Fi is a wireless networking technology that can provide
Internet access at distances of up to300 feet, depending on the
Wi-Fi router and your surroundings.
Turning Wi-Fi On and Connecting to a Wi-Fi Network
1. From the home screen, touchthe Arrow
>Settings>Network & Internet >Wi-Fi.
2. Slide the Wi-Fi switch to turn it on.
3. Touch a network name to connect to it.
4. If the network is secured, enter the password and touch
CONNECT.
NOTE:
Your phone automatically connects to previously used Wi-Fi
networks when they are in range.
26
Page 28

Adding a Wi-Fi Network
You can add a Wi-Fi network if the network does not broadcast its
name (SSID), or add a Wi-Fi network when you are out of range.
To connect to a secured network, you first need to get the
security details from the network's administrator.
1. From the home screen, touchthe Arrow
>Settings>Network & Internet >Wi-Fi.
2. If Wi-Fi is off, touch the switch to turn it on.
3. At the bottom of the list of available networks, touch Add
network.
4. Enter the network SSID (name). If necessary, enter security
or other network configuration details.
5. Touch SAVE.
Connecting to Bluetooth Devices
Bluetooth is a short-range wireless communication technology.
Phones or other devices with Bluetooth capabilities can
exchange information wirelessly within a distance of about 30
feet. The Bluetooth devices must be paired before the
communication is performed.
1. From the home screen, touchthe Arrow
>Settings>Connected devices > Bluetooth.
2. Touch the switch to turn Bluetooth on or off and then touch
Pair new device.
When Bluetooth is on, the icon appears in the Status Bar.
27
Page 29

Your phone automatically scans for and displays the IDs of all
available Bluetooth devices in range.
3. Touch the device you want to pair with.
4. If necessary, confirm that the Bluetooth passwords are the
same between the two devices and touchPAIR. Alternatively,
enter a Bluetooth password and touch PAIR.
5. Pairing is successfully completed when the other device
accepts the connection or the same password is entered.
Sharing Your Mobile Data Connection
You can share your phone’s data capabilities through tetheringor
by activating the mobile hotspot feature to create a Wi-Fi hotspot.
Sharing Your Mobile Data Connection via USB
You can access the Internet on your computer via the USB
tethering feature of your phone. The feature needs data
connection on a mobile network and may result in data charges.
NOTE:
You cannot transfer files between your phone and your computer
via USB while the phone is USB tethered.
1. Connect your phone to your computer with a USB cable.
2. From the home screen, touchthe Arrow
>Settings>Network & Internet>Tethering.
3. Switch on USB tethering. A new network connection will be
created on your computer.
NOTE:
28
Page 30

To stop sharing your data connection, switch offUSB tethering
or disconnect the USB cable.
Sharing Your Mobile Data Connection via Bluetooth
If your computer can obtain an Internet connection via Bluetooth,
you can configure your phone to share its mobile data connection
with your computer.
1. Pair your phone with your computer via Bluetooth.
2. Configure your computer to obtain its network connection via
Bluetooth. For more information, please see your computer's
documents.
4. From the home screen,touchthe Arrow
>Settings>Network & Internet >Tethering.
3. Switch onBluetooth tethering. Your computer is now
sharing your phone's data connection.
NOTE:
To stop sharing your data connection, switch offBluetooth
tethering.
Sharing your mobile data connection as a Mobile
Hotspot
You can share your phone’s data connection with other devices
by turning your phone into a portable Wi-Fi hotspot. The feature
requires a data connection on a mobile network and may result in
data charges.
NOTE:
29
Page 31

When the Mobile Hotspot feature is enabled, you cannot use
your phone’s Wi-Fi capability to access the Internet. You still
remain connected to the Internet via your mobile data network.
1. From the home screen,touchthe Arrow >Settings >
Network & Internet>Wi-Fi Hotspot.
2. Slide the switch to the On position.
3. After a moment, the phone starts broadcasting its Wi-Fi
network name (SSID).
4. On another device, locate your phone via Wi-Fi and connect
with it to start using the phone’s mobile data.
NOTE:
To stop sharing your data connection, slide the switch to the Off
position.
Connecting to Virtual Private Networks
Virtual private networks (VPNs) allow you to connect to the
resources inside a secured local network. VPNs are commonly
deployed by corporations, schools, and other institutions to let
people access local network resources when not on campus, or
when connected to a wireless network.
Depending on the type of VPN you are using, you may be
required to enter your login credentials or install security
certificates before you can connect to your VPN. You can get this
information from your network administrator.
To add a VPN:
1. From the home screen, touchthe Arrow
30
Page 32

>Settings>Network & Internet> VPN.
2. Touch +to add a new VPN.
3. Enter the VPN name, server address, and other information
provided by your network administrator. Check Show
advanced options to fill out additional details.
4. TouchSAVE.The VPN is added to the list on the VPN screen.
NOTE:
You must set a lock PIN, password or pattern before using VPN.
31
Page 33

Phone Calls
You can place calls from the Phone app, the Contacts app, or
other apps or widgets that display contact information. Wherever
you see a phone number, you can usually touch it to dial.
Placing Calls
Placing a Call From the Phone
1. From the home screen, touch .
2. Touch to open the dialpad.
3. Enter the phone numberwith the dialpad. Touch to
delete incorrect digits.
4. Touch below the keypad to dial.
NOTE:
To make an international call, touch and hold the 0 key to enter
the plus (+) symbol. Next, enter the country code, followed by the
city/area code and then the phone number.
Placing a Call From the Call History
1. From the home screen, touch > >Call history.(If the
dialpad is visible, touch the Back key to close it.)
2. Touch beside a listing to call back.
32
Page 34

Placing a CallFromYour Contacts
1. From the home screen, touch .
2. Touch . Your favorite and frequently called contacts are
displayed in the tab. Touch one to place a call.
- or -
Touch . Your full contact list is displayed. Select the
contact you want to call and then touch beside a contact
to place a call.
Answering or Rejecting Calls
When you receive a phone call, the incoming call screen opens,
displaying the caller ID or the information about the caller that
you've entered in theContacts app. You can answer or reject the
call, or reject it with a text message.
Answering a Call
When you receive a phone call, slide up to answer.
NOTE:
To silence the ringer before answering the call, you can press the
Volume key or the Power key.
Rejecting a Call
When you receive a phone call, slide down to reject.
33
Page 35

You can also touchand hold and drag toward the center of the
screen to reject the call and select a preset text message or write
one to send to the caller.
Checking Voicemail
If you have set the phone to divert calls to voicemail, callers can
leave voicemail messages when they cannot reach you. Here’s
how to check the messages they left.
1. From the home screen, touch .
2. Touch to open the dialpad.
3. Touch and hold the 1 keyin the dialer. If prompted, enter your
voicemail password.
4. Follow the voice prompts to listen to and manage your
voicemail messages.
Using Options During a Call
During a call, you will see a number of onscreen options. Touch
an option to select it.
Touch to mute or unmute your microphone.
Touch to open contacts app.
Touch to turn speakerphone on or off.
Touch to make another call separately from the first call,
which is put on hold.
34
Page 36

Touch to open the dialpad when you need to enter a code
(for example, the PIN for your voicemail or bank account)
during the call.
Touch to put the call on hold.
Touch to end the current call.
Managing Multi-party Calls
When the call waiting and three-way call features are available,
you can switch between two calls or set up a conference call.
NOTE:
Options and interface will vary. The call waiting and three-way
call features need network support and may result in additional
charges. Please contact your service provider for more
information.
Switching Between Current Calls
When you’re on a call and another call comes in, your phone
screen informs you and displays the caller ID.
Swipe up to answer the incoming call and place the first
call on hold.
Swipe down to reject the second call.
Touch to place the current call on hold and switch to the
other call.
35
Page 37

Setting Up a Conference Call
With this feature, you can talk to two people at the same time.
1. Place the first call.
2. Once you have established the connection, touch and dial
the second number. (This puts the first caller on hold.)
3. When you’re connected to the second party, touch to
merge the two calls.
If one of the people you called hangs up during your call, you and
the remaining caller stay connected. If you initiated the call and
are the first to hang up, all callers are disconnected.
4. To end the conference call, touch .
Adjusting Your Call Settings
From the home screen, touch > > Settings.
Display options:Touch Sort by or Name format to set the
order of the contacts and the format of the contact names.
Sounds and vibration:Touch Phone ringtone to select the
ringtone for incoming calls to that card.Touch Also vibrate
for calls to enable the vibration when you receive
calls.TouchDialpad tones to enable the sound which will play
when you touch the keypad keys.
Answer and end calls:Touch the Power button ends call
slider to enable or disable ending calls by pressing the Power
key; touch the Vibrating after connected slider to enable or
disable vibration when a call is answered.
36
Page 38

Speed dial:You can touch and hold the 1 ~ 9 keys from the
dialer to call the corresponding speed dial number.
Call settings:Configure call settings.
Touch Fixed Dialing Numbers for the following options:
Enable FDN: Input the PIN2 code to enable the FDN
–
feature.
–
Change PIN2: Change the PIN2 code for FDN
access.
–
FDN list: Manage the FDN list.
Call forwarding:Call forwarding feature allows you to
forward your incoming calls to another phone number.
Call waiting: Touch to get notified of incoming calls
during a call.
Additional settings: Touch Caller ID to choose whether
your number is displayed when someone receives your
outgoing call.
Call blocking: Allows you to block calls and messages from
certain numbers.
Voicemail: Touch Voicemail for the following options:
Touch Notifications to configure the settings you want,
and then touch the Back keywhen you're finished.
Touch Advanced Settings and select an option:
–
TouchSetup to view the voicemail number.
37
Page 39

Contacts
You can add contacts on your phone and synchronize them with
the contacts in your Google account or other accounts that
support contact syncing.
Adding a New Contact
1. From the home screen, touch the Arrow > .
2. Touch to add a new contact.
3. Enter the c ontact name, phone numbers, and email
addresses.TouchMore fields to enter other information.
4. TouchSAVE.
Searching for a Contact
1. From the home screen, touch , and then touch to
search.
2. Inputthe contact name or other information (such as phone
number) you want to search for. The contacts matched will be
listed.
38
Page 40

Editing Contacts
1. From the home screen, touch the Arrow > .
2. Touch a contact you need to edit it and then touch .
3. Edit the contact and touch SAVE.
39
Page 41

Messages
You can use Messages toexchange text messages (SMS) and
multimedia messages (MMS).
Opening the Messages Screen
From the home screen, touch .
The Messagesscreen opens, where you can create a new
message, search for messages, or open an ongoing message
thread.
Touch to write a new text or multimedia message.
Touch to search for a message using keywords.
Touch an existing message thread to open the conversation.
Touch for more options.
Sending a Message
1. On the Messages screen, touch .
2. Touch the To field and manually enter the recipient’s
number or the contact name.
3. Touch the Text message field and enter the message text.
4. If you want to send a multimedia message, touch to
attach a file to the message.
40
Page 42

5. Touch .
NOTE:
Do not add an attachment if you want to send a text message.
Otherwise you may be charged for a multimedia message.
Changing Message Settings
Touch > Settings in the Messages screen to change the
messagessettings.
41
Page 43

Browser
UseBrowserto view web pages and search for information.
Opening the Browser
1. From the home screen, touch to launch the web browser.
NOTE:
The browser also opens when you touch a web link (for
example, in an email or a text message).
2. Touch the address box at the top.
3. Enter the address (URL) of a webpage or enter terms you
want to search for.
4. Touch a URL or search suggestion or touch on the
keyboard to open the web page or search results.
Using Multiple Browser Tabs
You can open several web pages at the same time (one page in
each tab) and switch between them freely.
Opening a New Browser Tab
Touch >+at the top of the screen to add a new browser
window.
42
Page 44

SwitchingBetween Tabs:
1. Touch at the topof the screen to see thumbnails of
currently opened web pages.
2. Touch the thumbnail of the page you want to open.
NOTE:
Touch× or swipe left or right to close a browser window. Touch
>Close all tabs to close all windows.
Downloading Files
1. Touch and hold an image or a link to a file or to another
webpage.
2. In the menu that opens, touch Download image or
Download link.
The downloaded files are saved to your phone or the memory
card. You can view or open them in the Downloads app.
Changing Browser Settings
You can configure a number of settings to customize the way
you browse the web, including several that you can use to
control your privacy.
In the main Browser screen, touch > Settings. Make changes
as needed, and touch the Back key when done.
43
Page 45

Camera
You can take photos and record videos. Photos and videos are
stored on the microSDXC card, if you have installed one, or to
the phone’s internal storage. You can copy them to your
computer or access them in the Gallery app.
Capturing a Photo
1. From the home screen, touch the Arrow > .
2. Aim the camera at the subject and make any necessary
adjustments. PHOTO (automatic camera) mode is used by
default.
3. Touch the area on the screen where you want the camera to
focus, or let the camera autofocus on the center of the
image.
4. Touch to take a photo.
WARNING!
Keep a safe distance when using the flash. Do not point the
flash towards the eyes of people or animals.
44
Page 46

Number
Function
1 Change the camera settings.
Change the High-Dynamic Range (HDR) setting
2
(back camera only).
3 View photos and videos you have taken.
45
Page 47

Number
Function
4 Capture a photo.
Switch between the front camera and the back
5
camera.
Switch among camera modes: VIDEO, PHOTO,
6
PORTRAIT (back camera), BOKEH(back camera).
7 Adjust the focus point and exposure.
8 Turn live photo mode on.
9
10 Change the flash setting.
NOTES:
•
You can spread or pinch with two fingers on the screen to
zoom in or out before taking pictures.
•
In PHOTO mode, when you touch the screen to focus, the
exposure bar appears beside the focus point. You can drag
up or down to adjust the exposure.
Select
image effects.
Recording a Video
1. From the home screen, touch > VIDEO.
2. Aim the camera at the subject and make any necessary
adjustments. You can touch any area on the screen that you
want the camcorder to focus on before and during
recording.
46
Page 48

3. Touch to start recording. You can touch / to
pause or resume recording, or touch to save the frame
as a photo.
4. Touch to stop recording.
NOTES:
You can pinch or spread two fingers on the screen to zoom
•
in or out before and during recording.
•
When you touch the screen to focus during normal-speed
recording, the exposure bar appears beside the focus point.
You can drag up or down to adjust the exposure.
47
Page 49

More Apps and Features
Music
From the home screen, touch the Arrow >Play Musicto
play audio files stored on your phone, and your audio files are
cataloged according to the information stored in the files.
NOTE:
If an audio file is being played, its name and player controls are
displayed at the bottom of the screen. Touch the area to open the
playback screen.
Clock
From the home screen,touch the Arrow > Clock. The Clock
app allows you to check local time in places around the world,
set alarms, and use timers.
Setting a New Alarm
1. Open the Clock app and touch .
2. Touch a default alarm to configure it, or touch at the
bottom of the screen to create a new alarm.
3. Touch the clock to set the alarm time, and then touch OK.
NOTES:
To enable or disable existing alarms directly, slide the
48
Page 50

switches on the right sideof each alarm.
Touch >Setting to configure alarm settings.
UsingWorld Time
1. Open the Clock app and touch .
2. Touch at the bottom to add a new city.
Using the Stopwatch and Countdown
1. Open the Clock app and touch or .
2. Stopwatch allows you to record lap times (100 laps at most),
while countdown allows you to set a time and count down to
zero.
File Manager
Quickly access all of your images, videos, audio clips, and
other types of files on your phone and on the memory card.
From the home screen, touch the Arrow >FileManagerto
check the record.
Touch folders and files to access stored items.
Touch and hold an item for more options, such as share or
delete.
49
Page 51

Voice Recorder
Voice Recorder enables you to record voice memos and listen
to them whenever you like.
1. From the home screen, touch the Arrow >Voice
Recorder.
2. Touch to start recording.Touch / to pause or
continue the recording.
3. Touch Done to stop recording.
4. Enter the titleand touch SAVEto save the recording.
Google Apps
Open the Google apps to use Google services. Some apps are
put in the Google folder on the home screen.
NOTE:
Some contents or Google services may not be available in
certain regions. Some apps will require you to sign in to your
Google account.
Gmail: Send and receive emails via your Gmail account or
other personal email accounts.
Google: Use Google search or get information when you
need it.
Maps: Find your place and find your way in the world.
YouTube: Watch video clips from YouTube.com, or upload
50
Page 52

your own and share with the world.
51
Page 53

Your phone may produce a
listen at high volume levels
For Your Safety
General Safety
Don’t make or receive
handheld calls while
driving. Never text while
driving.
Keep your phone away
from your ear or body
while making calls.
Don’t use at gas stations.
bright or flashing light.
Small parts may cause
choking.
Your phone can produce
a loud sound.
Avoid contact with
anything magnetic.
Don’t dispose of your
phone in fire.
To prevent possible
hearing damage, do not
for long periods.
Avoid extreme
temperatures.
52
Page 54

Keep away from
pacemakers and other
electronic medical
devices.
Avoid contact with liquids.
Keep your phone dry.
Turn off when asked to in
hospitals and medical
facilities.
Turn off when told to in
aircrafts and airports.
Turn off when near
explosive materials or
liquids.
FCC RF Exposure Information (SAR)
Do not attempt to
disassemble your phone.
Only use approved
accessories.
Don’t rely on your phone
as a primary device for
emergency
communications.
Please visit https://certification.ztedevices.com and select your
product type for more information on FCC RF Exposure
Information and SAR value for this device.
FCC Regulations
This mobile phone complies with part 15 of the FCC Rules.
Operation is subject to the following two conditions: (1) This
53
Page 55

device may not cause harmful interference, and (2) this device
must accept any interference received, including interference
that may cause undesired operation.
This mobile phone has been tested and found to comply with
the limits for a Class B digital device, pursuant to Part 15 of the
FCC Rules.
These limits are designed to provide reasonable protection
against harmful interference in a residential installation. This
equipment generates, uses and can radiate radio frequency
energy and, if not installed and used in accordance with the
instructions, may cause harmful interference to radio
communications.
However, there is no guarantee that interference will not occur
in a particular installation. If this equipment does cause harmful
interference to radio or television reception, which can be
determined by turning the equipment off and on, the user is
encouraged to try to correct the interference by one or more of
the following measures:
Reorient or relocate the receiving antenna.
Increase the separation between the equipment and receiver.
Connect the equipment into an outlet on a circuit different from
that to which the receiver is connected.
Consult the dealer or an experienced radio/TV technician for
help.
CAUTION: Changes or modifications not expressly
approved by the party responsible for compliance could void
54
Page 56

the user’s authority to operate the equipment.
The antenna(s) used for this transmitter must not be co-located
or operating in conjunction with any other antenna or transmitter.
Distraction
Driving
Full attention must be given to driving at all times in order to
reduce the risk of an accident. Using a phone while driving
(even with a hands-free kit) can cause distraction and lead to
an accident. You must comply with local laws and regulations
restricting the use of wireless devices while driving.
Operating Machinery
Full attention must be given to operating the machinery in order
to reduce the risk of an accident.
Product Handling
General Statement on Handling and Use
You alone are responsible for how you use your phone and any
consequences of the use.
You must always switch off your phone wherever the use of a
phone is prohibited. Use of your phone is subject to safety
measures designed to protect users and their environment.
55
Page 57

Always treat your phone and its accessories with care and
keep them in a clean place.
Keep the screen and camera lens clean. Unclean screen or
camera lens may slow down the phone's reaction to your
operations or lower image quality.
Clean your phone and its accessories with a soft material
such as cleaning cloth for eyeglass lenses. Do not use
alcohol or other corrosive substances for cleaning or allow
them to get inside.
Do not expose your phone or its accessories to open flames
or lit tobacco products.
Do not expose your phone accessories to liquid, moisture or
high humidity.
Do not drop, throw or try to bend your phone or its
accessories.
Do not paint your phone or its accessories.
Do not attempt to disassemble your phone or its accessories,
only authorized personnel can do so.
Do not expose or use your phone or its accessories in an
environment with or that can reach extreme temperatures,
minimum - [10] and maximum + [55] degrees Celsius.
Do not place your phone inside or near heating equipment or
high pressure containers, such as water heaters, microwave
ovens, or hot cooking utensils. Otherwise, your phone may be
damaged.
56
Page 58

Please check local regulations for disposal of electronic
products.
Do not carry your phone in your back pocket as it could break
when you sit down.
Small Children
Do not leave your phone and its accessories within the reach of
small children or allow them to play with it.
They could hurt themselves or others, or could accidentally
damage the phone.
Your phone contains small parts with sharp edges that may
cause an injury or may become detached and create a choking
hazard.
Demagnetization
To avoid the risk of demagnetization, do not allow electronic
devices or magnetic media close to your phone for a long time.
Electrostatic Discharge (ESD)
Do not touch the metallic connectors of the nano-SIM
microSDXC
card/
Antenna
Do not touch the antenna unnecessarily.
card.
57
Page 59

Normal Use Position
When placing or receiving a phone call, hold your phone to your
ear, with the bottom toward your mouth.
Air Bags
Do not place your phone in the area over an air bag or in the air
bag deployment area as an airbag inflates with great force and
serious injury could occur.
Place your phone safely before driving your vehicle.
Seizures/Blackouts
Your phone can produce a bright or flashing light. A small
percentage of people may be susceptible to blackouts or
seizures (even if they have never had one before) when exposed
to flashing lights or light patterns such as when playing games or
watching videos. If you have experienced seizures or blackouts
or have a family history of such occurrences, please consult a
physician. To reduce the risk of blackouts or seizures, you can
use your phone in a well-lit room and take frequent breaks.
Repetitive Strain Injuries
To minimize the risk of Repetitive Strain Injury (RSI) when texting
or playing games with your phone:
Do not grip the phone too tightly.
Press the buttons lightly.
58
Page 60

Use the special features which are designed to minimize the
times of pressing buttons, such as Message Templates and
Predictive Text.
Take frequent breaks to stretch and relax.
Emergency Calls
This phone, like any other wireless phone, operates using radio
signals, which cannot guarantee connection in all conditions.
Therefore, you should not rely solely on any wireless phone for
emergency communications.
Loud Noise
This phone is capable of producing loud noises, which may
damage your hearing. Turn down the volume before using
headphones, Bluetooth headsets or other audio devices.
Phone Heat
Your phone may become warm during charging and normal use.
Electrical Safety
Accessories
Use only approved accessories.
Do not connect with incompatible products or accessories.
Take care not to touch metallic objects, such as coins or key
59
Page 61

rings, or allow them to contact or short-circuit the charging jack.
Never puncture the surface of the battery with sharp objects.
Connection to a Car
Seek professional advice when connecting a phone interface to
the vehicle electrical system.
Faulty and Damaged Products
Do not attempt to disassemble the phone or its accessories.
Only qualified personnel can service or repair the phone or its
accessories.
If your phone (or its accessories) has been submerged in water,
punctured, or subjected to a severe fall, do not use it until you
have taken it to be checked at an authorized service center.
Radio Frequency Interference
General Statement on Interference
Care must be taken when using your phone in close proximity to
personal medical devices, such as pacemakers and hearing aids.
Please consult your doctor and the device manufacturers to
determine if the operation of your phone may interfere with the
operation of your medical devices.
60
Page 62

Pacemakers
Pacemaker manufacturers recommend that a minimum
separation of 15 cm be maintained between a mobile phone and
a pacemaker to avoid potential interference with the pacemaker.
To achieve this, use the phone on the opposite ear to your
pacemaker and do not carry it in a breast pocket.
Hearing Aids
People with hearing aids or other cochlear implants may
experience interfering noises when using wireless devices or
when one is nearby.
The level of interference depends on the type of the hearing
device and the distance from the interference source. Increasing
the separation between them may reduce the interference. You
may also consult your hearing aid manufacturer to discuss
alternatives.
Medical Equipment
Switch off your wireless device when you are requested to do
so in hospitals, clinics or health care facilities. These requests
are designed to prevent possible interference with sensitive
medical equipment.
Aircraft
Switch off your wireless device whenever you are instructed to do
so by airport or airline staff.
61
Page 63

Consult the airline staff about the use of wireless devices on
board the aircraft and enable aeroplane mode of your phone
when boarding an aircraft.
Interference in Vehicles
Please note that because of possible interference to electronic
equipment, some vehicle manufacturers forbid the use of mobile
phones in their vehicles unless a hands-free kit with an external
antenna is included in the installation.
Explosive Environments
Petrol Stations and Explosive Atmosphere
In locations with potentially explosive atmosphere, obey all
posted signs to turn off wireless devices such as your phone or
other radio equipment.
Areas with potentially explosive atmosphere include fueling areas,
below decks on boats, fuel or chemical transfer or storage
facilities, and areas where the air contains chemicals or particles,
such as grain, dust, or metal powders.
Blasting Caps and Areas
Power off your mobile phone or wireless device when in a
blasting area or in areas where signs are posted to power off
“two-way radios” or “electronic devices” to avoid interfering with
blasting operations.
62
 Loading...