


April 2019 | Version 2.0.16

2
© 2018 ZIH Corp. and/or its affiliates. All rights reserved. ZEBRA and the stylized Zebra head are trademarks of ZIH Corp.,
registered in many jurisdictions worldwide. All other trademarks are the property of their respective owners.
COPYRIGHTS & TRADEMARKS: For complete copyright and trademark information, go to www.zebra.com/copyright
WARRANTY: For complete warranty information, go to www.zebra.com/warranty
END USER LICENSE AGREEMENT: For complete EULA information, go to www.zebra.com/eula
This document contains information proprietary to Zebra Technologies Corporation. This document and the information
contained within is Copyrighted by Zebra Technologies Corporation and may not be duplicated in full or in part by any
person without written approval from Zebra Technologies Corporation. While every effort has been made to keep the
information contained within current and accurate as of the date of publication, no guarantee is given that the document is
error-free or that it is accurate with regard to any specification. Zebra Technologies Corporation reserves the right to make
changes, for product improvement, at any time.
Proprietary Statement This manual contains proprietary information of Zebra Technologies Corporation and its subsidiaries
ed solely for the information and use of parties operating and maintaining the equipment
described herein. Such proprietary information may not be used, reproduced, or disclosed to any other parties for any other
purpose without the express, written permission of Zebra Technologies.
Product Improvements Continuous improvement of products is a policy of Zebra Technologies. All specifications and
designs are subject to change without notice.
Liability Disclaimer Zebra Technologies takes steps to ensure that its published Engineering specifications and manuals are
correct; however, errors do occur. Zebra Technologies reserves the right to correct any such errors and disclaims liability
resulting therefrom.
Limitation of Liability In no event shall Zebra Technologies or anyone else involved in the creation, production, or delivery of
the accompanying product (including hardware and software) be liable for any damages whatsoever (including, without
limitation, consequential damages including loss of business profits, business interruption, or loss of business information)
arising out of the use of, the results of use of, or inability to use such product, even if Zebra Technologies has been advised
of the possibility of such damages. Some jurisdictions do not allow the exclusion or limitation of incidental or consequential
damages, so the above limitation or exclusion may not apply to you.

3
10
Specifications 10
Minimum Hardware specifications 10
Software 10
Supported Printers 11
Download and Install 13
13
14
Registration of the Software Edition 18
Registration of the Software 18
Online Registration 18
Successful Registration 18
io 19
DesignStudio Interface 19
DesignStudio Navigation 21
Main Menu 21
File 21
Store 22
Edit 22
View 22
Options 22
Help 23
Quick Menu 24
DesignStudio Start a Card Design 27
New Card Design 27
Open existing Card Design 28
DesignStudio Card Design from the Store 29
Browse the Store 29
My items 30
DesignStudio Card Design Menu 32
Preview 32
Card settings 32
Dynamic Fields 33

4
DesignStudio Elements 35
Element Properties 40
Text element properties 40
Image element properties 40
Passport Photo element properties 41
Signature element properties 41
Barcode element properties 42
Dynamic logo element properties 42
Element Position 43
Resize and rotate elements on the canvas 43
Element Style 44
Border & Background 44
Color & Transparency 44
DesignStudio Print a Card Design 46
47
PrintStudio Interface 48
PrintStudio Navigation 49
Main menu 49
File 49
Edit 49
Record 49
Options 50
Views 50
Help 50
Quick menu 51
A. New 51
B. Open existing Project 51
C. Undo 51
D. Redo 51
E. Add a new record 51
F. Delete a selected record 51
G. Filter records 52
K. Refresh Data 52
L. Print all selected records 53
PrintStudio Create a Project 55
New Project 55
Create a New Project 56
1. Project structure 56
2. Biometric settings 57
3. View configuration 58
4. Card designs 59
5. Triggers 60
6. Create project 61

5
Create a New CardStudio Project with database connection 62
1. Data sources 62
2. Image sources 63
3. View configuration 64
4. Card designs 65
5. Triggers 66
6. Create project 67
Create copy of an existing Project 68
1. Select project 68
2. Copy project 69
Import Project from Excel 70
1. Data source 70
2. Project structure 71
3. Biometric settings 72
4. View configuration 73
5. Card designs 74
6. Triggers 75
7. Import Project 76
New Project from BadgeMaker 7 Project 77
1. Select BadgeMaker 7 Project 77
2. Project structure 78
3. Biometric settings 79
4. View configuration 80
5. Triggers 81
6. Import Project 82
New Project from IDPro 7 Project 83
1. Select IDPro 7 Project 83
2. Project structure 84
3. Biometric settings 85
4. View configuration 86
5. Triggers 87
6. Import Project 88
PrintStudio Open Project 90
PrintStudio Import Data 92
Import an Excel file or CSV data file 93
1. Data source 93
2. Configuration 94
3. Import data 95
Import BadgeMaker 7 project data 96
1. Data source 96
2. Configuration 97
3. Import data 98

6
Import IDPro 7 data 99
1. Data source 99
2. Configuration 100
3. Import data 101
PrintStudio Import Photos 102
PrintStudio Export Data 104
PrintStudio Export Photos 105
PrintStudio Project Settings 107
Detail View 107
Gallery view 108
Biometric settings 109
Card Designs 110
Card designs assignment 111
Project structure 112
Triggers 113
Manage Project 114
PrintStudio Link Card Design to record 116
PrintStudio Records 118
Add Records 118
1. Add a new record 118
2. Photo 119
3. Signature 120
Print records 121
PrintStudio Database Connection 123
Setting up a PrintStudio Database connection 124
How to set up a PrintStudio Project with Database connection 124
Connect with database 125
Changes when working with PrintStudio with external database connection 128
PrintStudio Encode 130
Contactless Encoding 130
SmartCard Editor 130
Creating a MIFARE Classic Template using the CCI Editor 130
Information about Sector Data 132
Creating a MIFARE DESfire template using the CCI Editor 133
Encoding with PrintStudio 135
Supported standards 136

7
User Guide
Introduction

8
-feature card design and printing software application with complete capabilities for card design, data
management and card production. CardStudio is provided in four editions: Classic, Standard, Enterprise and Professional.
All four editions integrate the required features for ID card design and production.
Classic:
CardStudio 2.0 Classic edition allows you to design and print professional photo IDs and other type of card designs with
a new easy-to-use interface with design and print features.
Standard:
CardStudio 2.0 Standard edition allows you to create, manage and print high grade card designs with a new easy-touse interface with design, data management and print features. Including internal database, Excel and .csv file
integration for ID records, 2D bar codes and advanced print functionality.
Enterprise:
Designed for enterprise applications, the CardStudio 2.0 Enterprise edition allows you to create and print professional
photo IDs and other type of card designs with a new easy-to-use interface with design, data management and print
features. Including internal database, Excel and .csv file integration for ID records, 2D bar codes and advanced print
functionality. Enterprise edition includes advanced features to connect to multiple databases, ODBC data sources and
multiple projects, for advanced card design, issuance and data management capabilities.
Professional:
Created for advanced enterprise applications that require smart card encoding support, CardStudio 2.0 Professional
edition allows you to create, print and encode professional card designs with a new easy-to-use interface and design
and print features. Including internal database, Excel and .csv file integration for ID records, 2D bar codes and advanced
print functionality. Professional also offers the advanced features to connect to multiple databases and ODBC data
sources, and multitple projects for advanced card design, issuance and data management capabilities.
CardStudio is desktop-based card production software developed to design card layouts, manage, add or import card
data, capture photo's and signatures as well as one-click printing, making the card production process quick and easy.
CardStudio 0 is a combination of two specific modules that each have their own area of expertise. DesignStudio focuses
on creating perfect card layouts and PrintStudio can handle your data with the ease of well-known spreadsheet software.
DesignStudio gives you the all the needed tools to create a front and back design with images, , shapes and dynamic
data. You will be able to create a template with placeholders that help determine the layout of dynamic data.
For example: where a passport photo should be placed, a signature or the first and last name of a person.
As a user, you can manage data and layouts for different types of ID cards using different types of printers. PrintStudio gives
you the basic tools to import, add and manage data like card holder information, passport photos and signatures. This data
can then be connected to a card design or multiple card layouts and selected for printing. CardStudio imports and prints
large amounts of data and cards and makes your card production process faster and more efficient.
Any Windows PC with a network connection can be used to install CardStudio . This PC needs to have an internet
connection to download the installation file, register the software and keep the software up to date with automatic updates.
This manual does not describe the installation of printers or other peripherals like a camera or signature pad.
Please refer to the manuals for further information on these devices. Before working with the software, first install the
Zebra Windows printer driver so the Zebra Printer is ready to print cards.

9
General Information

10
It is essential, when you or your organization choose CardStudio for your card design, data management and card
production, to make sure to have the correct hardware to install the software on. We strongly advise a Windows PC for
installation, that creates an optimal work environment for the software and supports the correct peripheral
devices like card printers.
Specifications
Minimum Hardware specifications
Processor Intel Pentium Dual core
G640 2,8 Ghz or equal
Memory 2GB
Free Disk space 4GB
Graphics 1024 x 768
Monitor/Mouse/keyboard
3 available USB ports
(printer/webcam/signature pad)
Software
Supported Operating Systems:
Windows 7 (32 bit & 64 bit)
Windows 8.1 (32 bit & 64 bit)
Windows 10 (32 bit & 64 bit)
.NET Framework version:
4.7.0

11
Supported Printers
Updates for support of new printers are added regularly by means of automatic software updates.
Manufacturer
Type
Single
sided
Double
sided
Batch
Printing
True
Black
Print job
Preferences
Contactless
Encoding
MAGstripe
Encoding
Remark
Zebra
ZXP Series
1
- -
Zebra
ZXP Series
3
Zebra
ZXP Series
7
Zebra
ZXP Series
8
Zebra
ZXP Series
9
Zebra
ZCL10
-
-
Zebra
ZC100 -
-
-
Zebra
ZC300/
350

12
Installation

13
Download the
Download the latest version of the at:
https://cardstudio.zebra.com
USB Card-Drive
The link will download the installer file that will look like this:
Double-click the icon to open a pop-up verifying you are sure you would like to run the installer. Click 'Run' to start the
installation wizard.
14
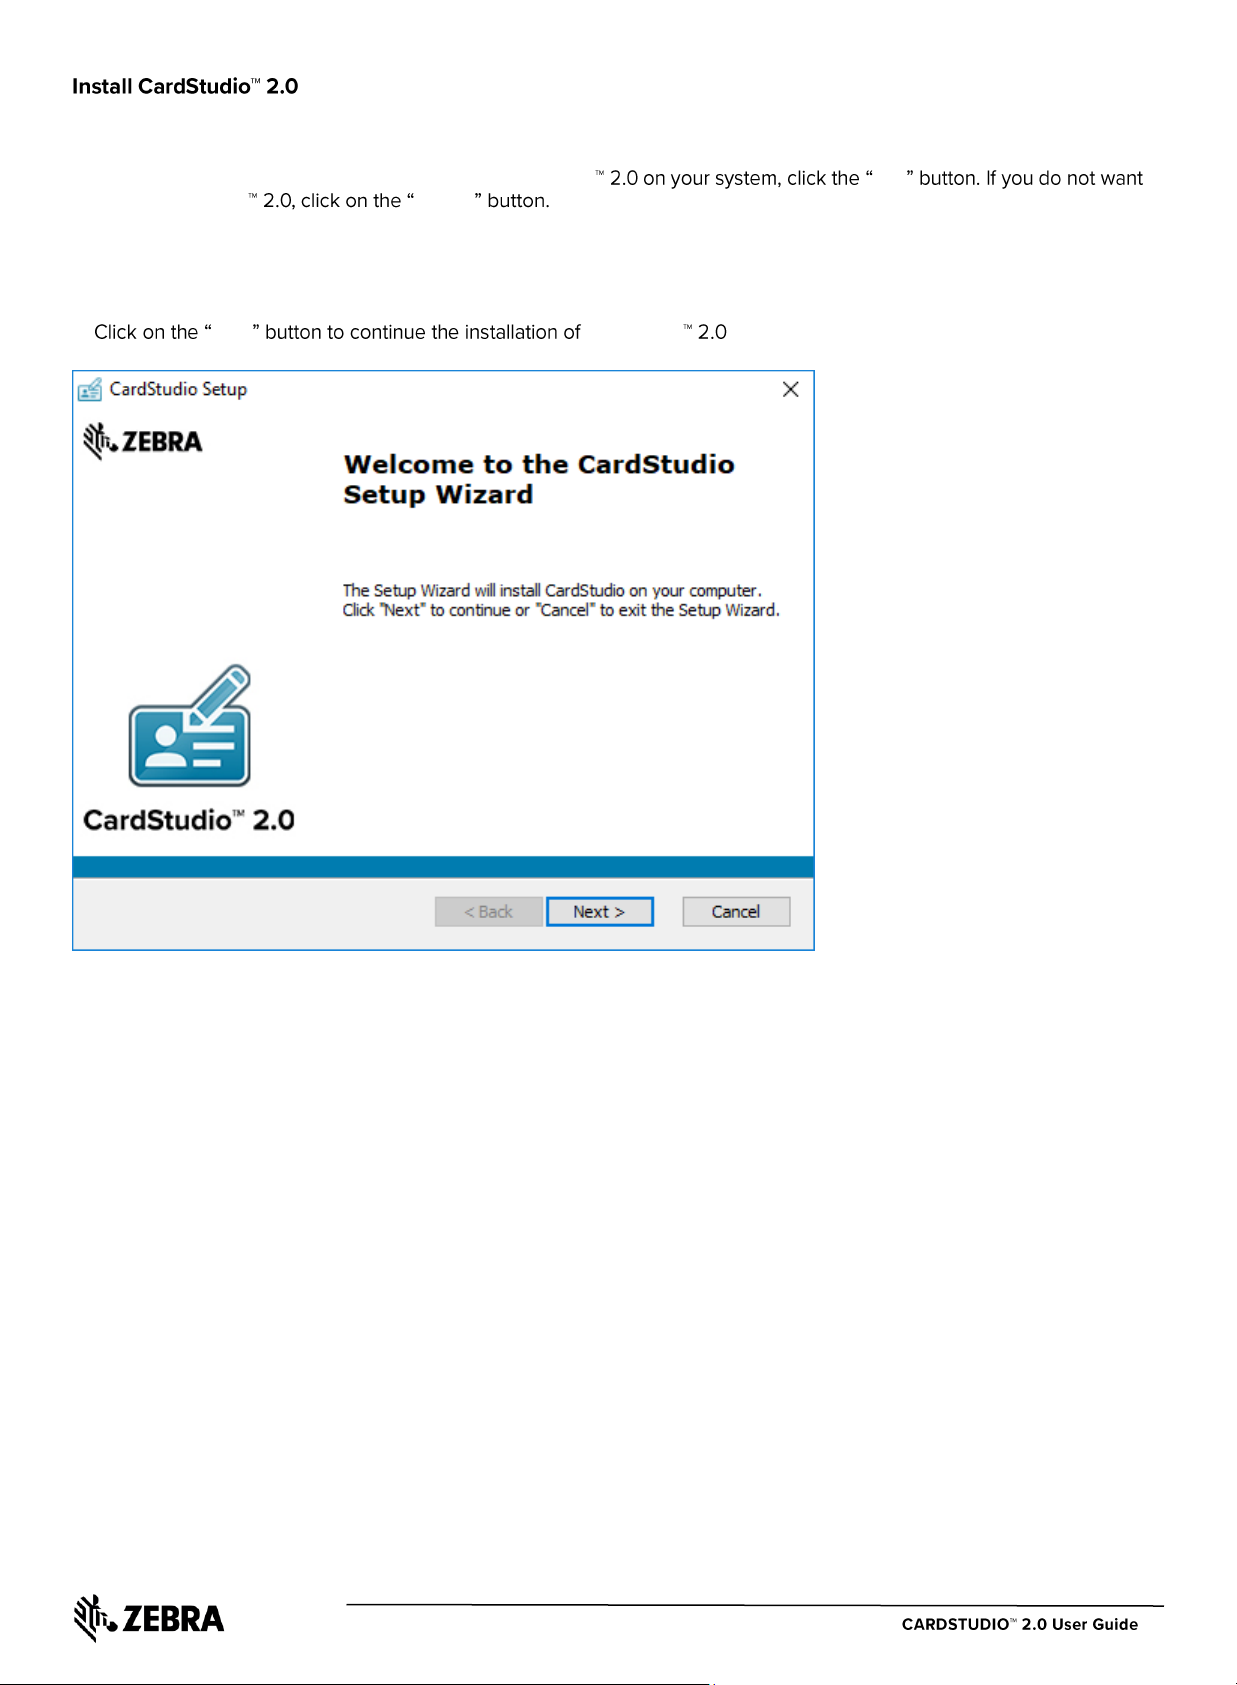
A. If you would like to run the installer and setup CardStudio Run
to install CardStudio Cancel
B. Next CardStudio .

15
C.1 Features tab: The third step in the installation process is to select how you would like to install CardStudio. You can
select the features you would like to install. DesignStudio, PrintStudio, Demo projects and the SmartCard Editor are selected
by default. If you would like to only install PrintStudio or DesignStudio, just un-check the boxes of the features you do not
want to install.
C.2 Installation Folder tab: The second tab of the third step is to select the location where you would like to install
CardStudio . You can select this by clicking on the browse button and browse to the desired location. If you do not have
a specific location for CardStudio leave the default location.

16
D. The installer is now ready to begin the CardStudio installation. Install
Back Cancel .
E. The installation is now in process. This may take a couple of minutes.
A pop-up window will appear to make sure that you want to run the installation. Yes

17
F. Finish exit the installer.
G. After completing the installation, 3 shortcuts will appear on your desktop.
For CardStudio , only DesignStudio and PrintStudio are needed. When installing CardStudio Classic only one desktop
icon will appear, only DesignStudio is needed. If you have CardStudio Standard or above, you will have 2 or 3 desktop Icons.
If you would like to start creating a new card layout, double- DesignStudio
If you would like to start a project and add card data, double-c PrintStudio
If you would like to start the SmartCard Editor to create an encoding file, double- SmartCard Editor
Before you start .

18
Registration of the Software Edition
When DesignStudio or PrintStudio starts for the first time, a registration window will pop-up, this is where the license key can
be entered, and the CardStudio Software activated.
Example of the CardStudio registration window.
Registration of the Software
The first question will be about online or offline registration.
Select online registration .
The license keys are for online registration. No access to the
internet to activate your license keys?
Contact your local reseller for more information on offline
license keys.
Example of the CardStudio online registration license key
window with License Key entered.
Online Registration
You will be requested to enter a license key. The license key
will be provided by our License Manager. The license key
must be entered (copy-paste), when the key is valid, the
software will start. The next time the software will not require
the license key to be entered.
Test keys can have a time restriction and may expire on a
given date. (View the License Manager User Guide for more
information on license keys).
A. Use Proxy
needed to connect through a Proxy server in your network.
Example of a successful online registration of a CardStudio
demo key.
Successful Registration
When you copy-paste the correct key you will see that the
registration is successful. In this case it is a demo key that
shows the evaluation time. Ok button to start
working with CardStudio.
A

19

20
A. Main menu
B. Window menu
C. Quick menu
D. Toolbar
E. Workspace/Canvas Front
F. Workspace/Canvas Back
G. Card Design:
Preview / Card Settings / Dynamic Data Fields
H. Element Properties
C D E F G H A
B

21
DesignStudio makes the card design process as easy, fast and intuitive as possible. Accommodating the users in your
organization, set with the task of designing the ID-cards. Using a user-friendly overview that shows all the tools needed and
is easy to navigate.
Window navigation
The window navigation gives the option to A. minimize, B. maximize or C. close.
Main Menu
File Store , Edit View , Options Help
The main menu offers 4 sub-menus.
File
The first button offers the main functions needed to start, use, save and end CardStudio Design:
- New Card design:
Create a blank new layout for your ID card or use CTRL+N
- Open Card design:
Open an existing card design to adjust or use CTRL+O
- Import BadgeCreator design:
Import designs created in BadgeCreator.
- Import CardStudio 1.0 design:
Import designs created in CardStudio 1.0.
- Import IDPro7 design:
Import old designs created in IDPro7.
- Save Card design: To save a Card Design click here or use CTRL+S.
- Save Card design as: To save a Card Design using another name click here or use CTRL+Shift+S. It is also a simple
way to create a duplicate of your design.
- Export Card design: Card designs can be exported from Design Studio as a zip file, ready to send or upload.
- Print card: The Classic Edition allows you to print your design from DesignStudio. Click to select a printer, set
preferences and print.
- Print card with: When a default printer is setup, you can skip the printer preferences and print directly with the
default printer. Click here, use the printer button in the quick menu or use CTRL+P.
- Exit: This button will let you exit DesignStudio.
A
B
C

22
Store
The second button offers the DesignStudio Store, you can find different types of example card designs ready to place in
My items . Use the example card designs to get inspired or adjust for own use.
- Browse store: Open the store with a selection of card designs for you to choose from.
- My items: Overview of your selected card designs from the store, ready to download and use.
Edit
The third button will offer all the edit functions that you use during the design process:
- Undo: Undo previous design steps. You can use the short cut CTRL+Z.
- Redo: Redo design steps you undid CTRL+Y.
- Cut: To relocate an object (image, text, placeholder) on the canvas use the cut
button. You can use the short cut CTRL+X.
- Copy: To copy an object (image, text, placeholder) on the canvas use the copy
button. You can use the short cut CTRL+C.
- Paste: To paste a copied or cut object (image, text, placeholder) on the canvas use
the cut button. You can use the short cut CTRL+V.
- Bring To Front: To bring an element to the front of the design.
- Bring Forward: To bring an element one step forward in the design.
- Send Backward: To send an element one step backward in the design.
- Send To Back: To send an element to the back of the design.
View
The fourth button controls the CardStudio dashboard view, make specific views visible or invisible:
- Card Design: See the design preview, card settings and the dynamic fields.
- Element Properties: Adjust the different type of elements by clicking on an element
and use the Element Properties to make changes.
Options
The fifth button controls the CardStudio dashboard view, make specific views visible or invisible:
- Settings: Change Design Studio settings like enabling the grid,
changing the language or the path to save card designs to.
- Improvement Program: Help optimize the quality of DesignStudio, by
participating anonymously in the DesignStudio Improvement Program.

23
Help
The Help button offers information about DesignStudio and an online user guide:
- View Help: Opens the online user guide or use the shortcut F1.
- View changelog: Shows the changes and updates made in the
software.
- License Information: Shows the specific license information, the
edition, the reference, versions and activation date.
- About DesignStudio: Pop-up with version and developer information.

24
Quick Menu
The Quick Menu offers a selection of large visual buttons often used in the card design process, allowing for quick and easy
navigation.
A. Create new Card design
Starts a new Card design.
B. Open existing Card design
Open an existing Card design.
C. Save
It is important to save your layout while designing. Quickly saves the card design.
D. Save as
Saves your design under another name.
E. Undo
Undo design steps you made.
F. Redo
Redo design steps you made.
G. Cut
To place an element somewhere else, use this button to cut and replace the image. Just select the element you want to
replace, click on the cut button and then click on the paste button to place it somewhere else.
H. Copy
To copy elements, select the element, then click on the copy button. The element is ready to be pasted anywhere on the
front or back of the design canvas.
I. Paste
If you cut or copy an element, click on the paste button to place the element on the front or the back of the canvas.
J. Show/hide grid
Make a grid visible or invisible. A grid can help you be more
precise with your design. Having the grid to align elements.
When the grid option is selected it will auto-snap elements in
place whilst using your mouse. Once placed, the arrow keys
allow free movement of elements.
K. Settings
Settings gives a couple of options:
A
B
C
D
EFGHI JKL MNOP Q
S
R

25
- Check or uncheck the enable grid checkbox to enable or disable the grid.
- Determine the scale of the grid.
- Set the language used in the designer. Languages supported: English, French, Spanish, German, Polish and Dutch.
Other languages will be supported soon.
- Determine your own project path, where you would like to open and save your designs.
- To confirm settings, OK , to cancel settings, Cancel .
- To exit settings, X .
L. Show front and back designers
View the canvas for the front and back side of the layout.
M. Show front designer only
View the canvas for the front side of the layout.
N. Show back designer only
View the canvas for back side of the layout.
O. Design layer
This is the base layer to work in to design your (YMCK or monochrome) card layout.
P. Specialty panel
This is a specialty panel to work in if you want your specialty panel (like an pearl panel) to a have a certain design or pattern.
(Be aware that a specific printer and ribbon are needed to add specific layers with a design or pattern.)
Q. Scale slider
Use this slider to zoom the canvas view in or out.
R. Print Card Design
This Quick menu button is only available in the CardStudio CLASSIC edition and allows you to add one record of data and
print your card design from Design Studio. You can only use Zebra printers to print you card designs.
S. PrintStudio
This Quick button lets you open PrintStudio and continue with your card production process.

26
DesignStudio
Start a Card Design

27
To start and work on a card design, start a new design or open an existing design.
New Card Design
A. File New Card design
Or click on the icon below in the quick menu:
When clicking on the new card design link or button a setup window will pop-up.
Fig. Example of new card design setup window.
A. Enter the name for the layout. The exclamation mark at the end appears when the field is not filled, or the name
OK
B. The size of the card can be chosen from a drop down.
C. Define a custom size for your layout.
D. Check this box if the design is single sided.
E. Check this box if the design is for a card with MAGstripe.
F. Check the ribbon type (color or mono), the orientation of the design for the front and the type of layers.
G. Check the ribbon type (color or mono), the orientation of the design for the front and the type of layers.
A A A B C D E
F
G

28
Open existing Card Design
B. To open an existing Card Design go File
Open Card design
Or click on the icon below in the quick menu:
When clicking on the new card design link or button, a selection window will pop-up.
All available existing designs are displayed, select a layout for editing.
You can open multiple layouts at the same time.
Example of the Open Card design pop-up window.
A. Select one of the existing designs.
B. View the layout of the design selected.
C. Open the selected design.
D. Cancel opening a design.
E. Delete a selected design.
B B A B C D E

29
Browse the Store to select and download one of the example card design to start with. Get inspired and adjust the example
designs to your own liking.
Browse the Store
To browse the store, go Store Browse store
A. Store: Overview of all the card design bundles available to select and available My items
B. Filter the overview of card designs by specific tags. Use the drop-down button to select a tag.
C. Search card design bundles by name.
D. Click on the bundle image to learn more about the bundle and its card designs.
E. Add to My items to add the collection of card design and make them available for download.
A
B C D E E

30
My items
All the selected card designs added from the Store My items card designs will always be
available for you as specific customer ready for download.
A. My items: overview of all the selected card designs from the Store ready to select and download.
B. Preview images of the selected card design.
C. Click Download to download the selected card design to your Design Studio.
Give the downloaded card design a name.
After saving the design is opened automatically in DesignStudio. The card design is now ready be used in your
CardStudio 2.0.
D. Close -up.
A B C
D
 Loading...