

Page 1
SE655 (WA9018) & SE965 (WA9016) End-Cap
INSTALLATION INSTRUCTIONS
WARNING! Installation of any components must be performed using appropriate anti-static devices. If unavailable,
Along with the end-cap (either SE655 or SE965), these kits include the following:
•
M2.6x8L Torx T6 screws (x4)
WARNING! Always disconnect the unit from all power sources (battery & A/C power) before servicing components.
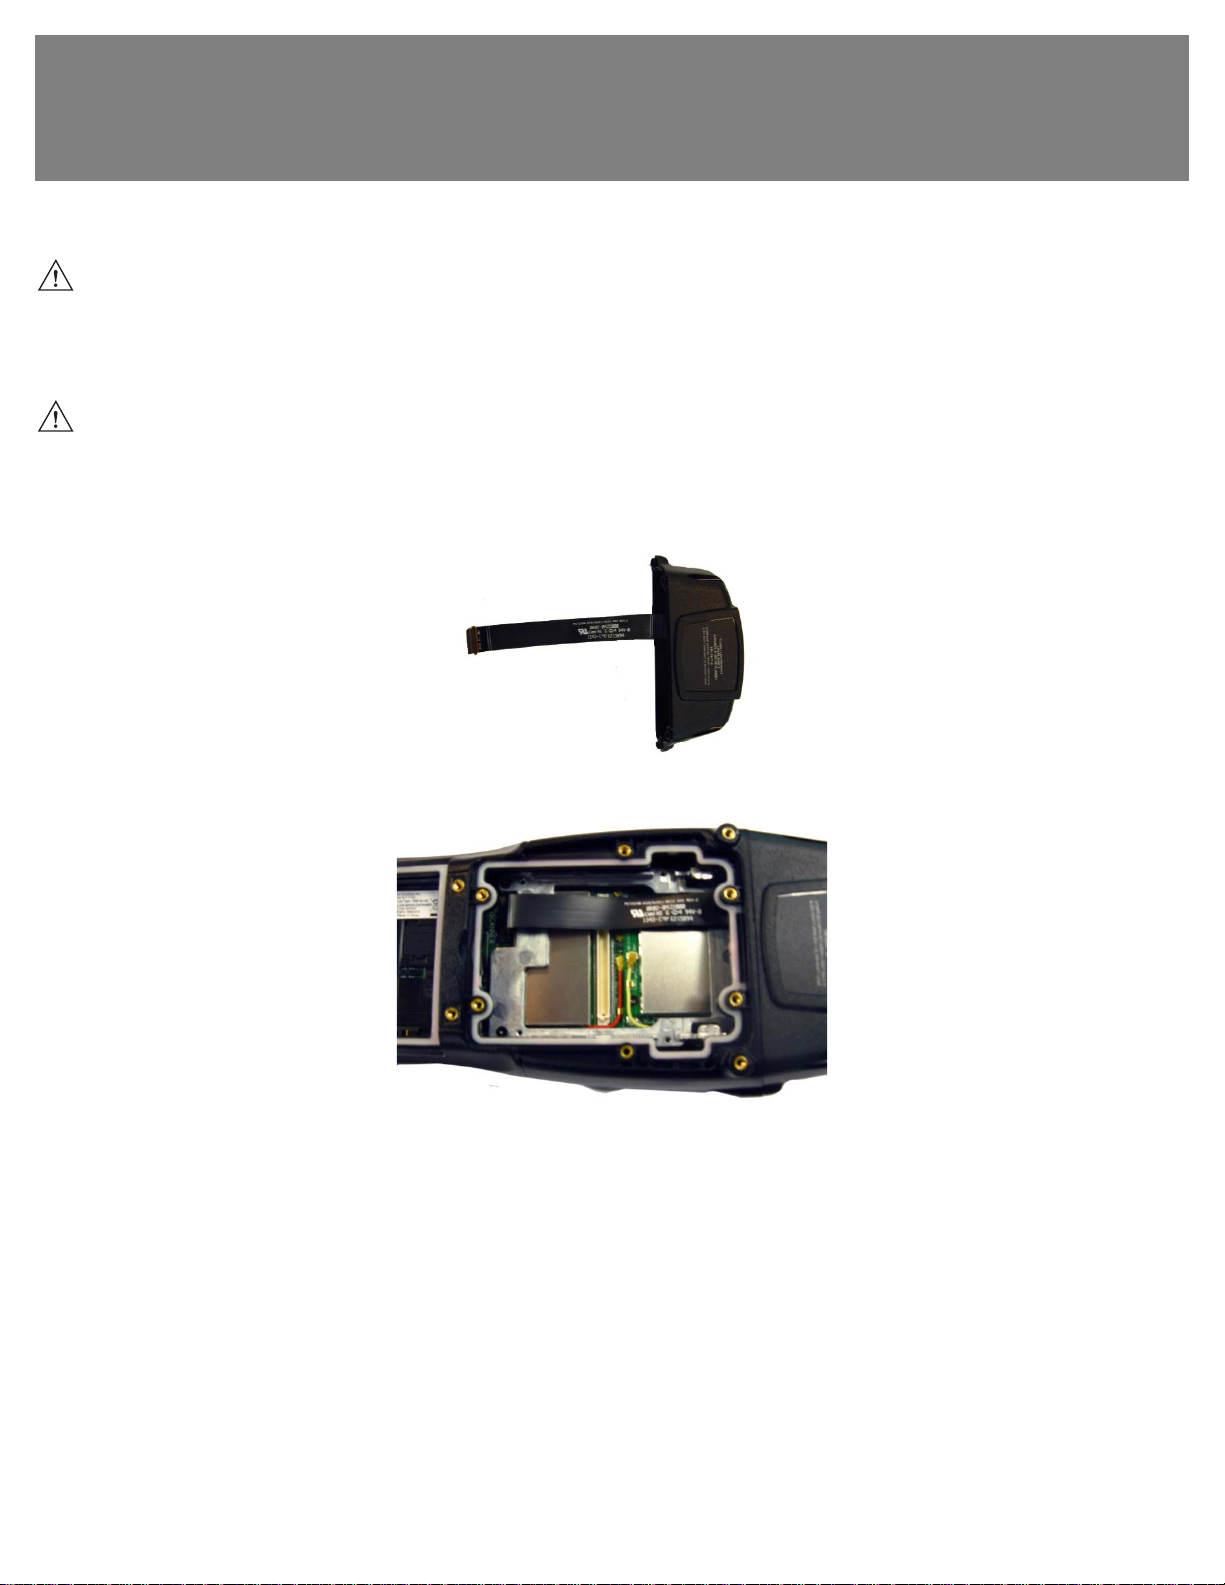
1. Remove the existing end-cap (x4 screws), back cover (x6 screws), and battery.
2. Slide the flex cable attached to the end-cap through the opening at the top of the unit, and secure the end-cap in place using the 4
screws included to a torque of 2.6 in-lbs.
3. Insert the flex cable into the 1D scanner connector, pushing the latch down to secure the flex cable in place.
discharge body static by touching a grounded metallic object before opening any covers on the hand-held.
4. Install the back cover (x6 screws) torqued to 2.6 in-lbs.
5. Insert the battery, and replace the battery cover.
Once the end-cap is installed:
1. Press and hold down the [Power] [FN/BLUE] and the top-middle [SCANNER] button simultaneously to display the Boot menu.
2. Press the [s] key to display the Scanner menu. (For numeric keyboard users, press the [FN/ORANGE] key, press the [7] key four
times, and then press the [FN/ORANGE] key again.)
3. Type the number corresponding with the end-cap you have installed – 67 to configure the SE655, or 63 to configure the SE965.
Press [ENTER].
4. Choose option 1 to run the main OS.
Page 2

5. Press and hold down the [Power] [FN/BLUE] and the top-middle [SCANNER] button simultaneously to display the Boot menu again.
NOTE It is cri tica l that you execute the previous step to display the Boot menu again; if this step is omitted, the DataWedge
Status Icon indicates that DataWedge is in idle mode making the capture device unavailable.
6. Next, perform a clean boot – at the Command> prompt, type .clean (for numeric keyboard users, type .25326). Press [ENTER].
NOTE Fo r Windows Embedded Hand-Held 6.5, clean booting the device removes the add-on CAB file. It must be re-installed.
To re-install the add-on CAB file:
1. Download the add-on CAB file from Ingenuity Working to your Workabout Pro4.
2. Double-click the add-on CAB filename to install the CAB file.
Service Information
If you have a problem using the equipment, contact your facility’s Technical or Systems Support. If there is a problem with the equipment, they will contact the Global Support Center at: http://www.zebra.com/support.
Zebra Technologies Corporation
Lincolnshire, IL U.S.A.
http://www.zebra.com
Zebra and the Zebra head graphic are registered trademarks of ZIH Corp. The Symbol logo is a registered trademark of Symbol Technologies, Inc., a Zebra Technologies Company.
© 2015 Symbol Technologies, Inc.
8000303-001 Revision A — February 2015
 Loading...