

Zebra SB1 User Manual
SB1
SALES DEMO
USER GUIDE

2
Zebra reserves the right to make changes to any product to improve reliability, function,
or design.
Zebra does not assume any product liability arising out of, or in connection with, the
application or use of any product, circuit, or application described herein.
No license is granted, either expressly or by implication, estoppel, or otherwise under
any patent right or patent, covering or relating to any combination, system, apparatus,
machine, material, method, or process in which Zebra products might be used. An
implied license exists only for equipment, circuits, and subsystems contained in Zebra
products.
Service Information
If you have a problem using the equipment, contact your facility’s Technical or Systems
Support. If there is a problem with the equipment, they will contact the Zebra Global
Customer Support at: http://www.zebra.com/support.

Introduction
Retailers are faced with shoppers who have higher expectations and more knowledge
at their fingertips than ever before. Meeting their needs and turning shoppers into
buyers requires every worker in the store to respond quickly to any customer request.
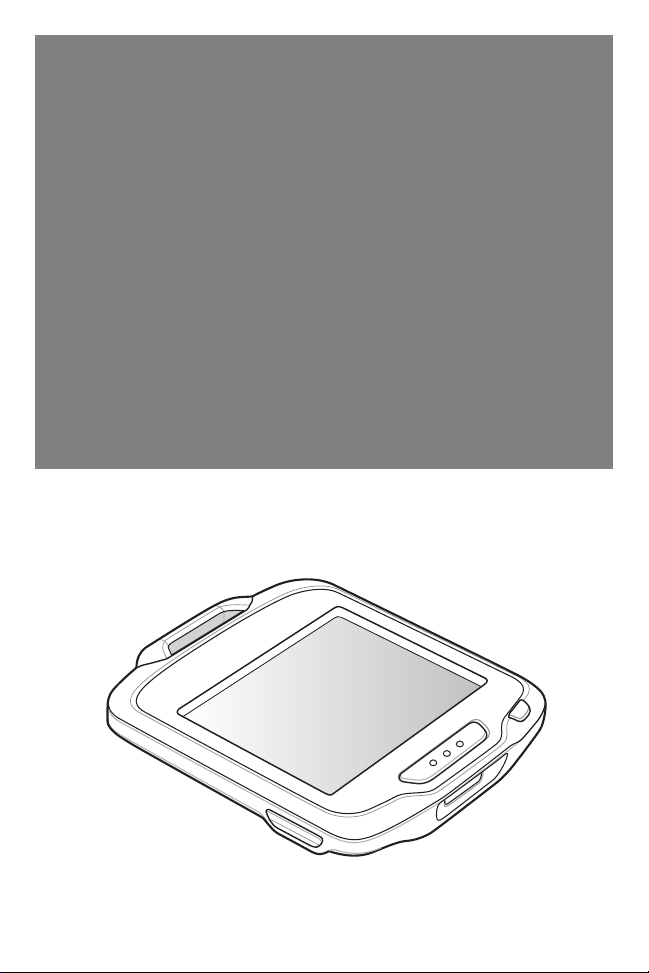
And with the SB1 smart badge, they can. This compact wearable mobile device can
serve as an electronic identity badge, a 1D/2D bar code scanner, a push-to-talk voice
communicator, a task manager and more, in a single affordable and lightweight mobile
device that is priced so retailers can purchase one for every worker. Today, over 90
percent of the retail workforce has no wireless connection to retail data, to co-workers
or to managers. With the SB1, every worker in your operation is connected to the
people and information required to exceed shopper expectations, complete tasks and
maximize productivity.
This guide provides information for demonstrating the functionality of the SB1.
Start Up
Place the SB1 in a powered cradle to turn it on. Allow the SB1 to fully charge.
Remove the SB1 from the cradle. The Home screen displays. Refer to the SB1 User
Guide for information on using the Home screen.
Notifications Lock
3
User Profile
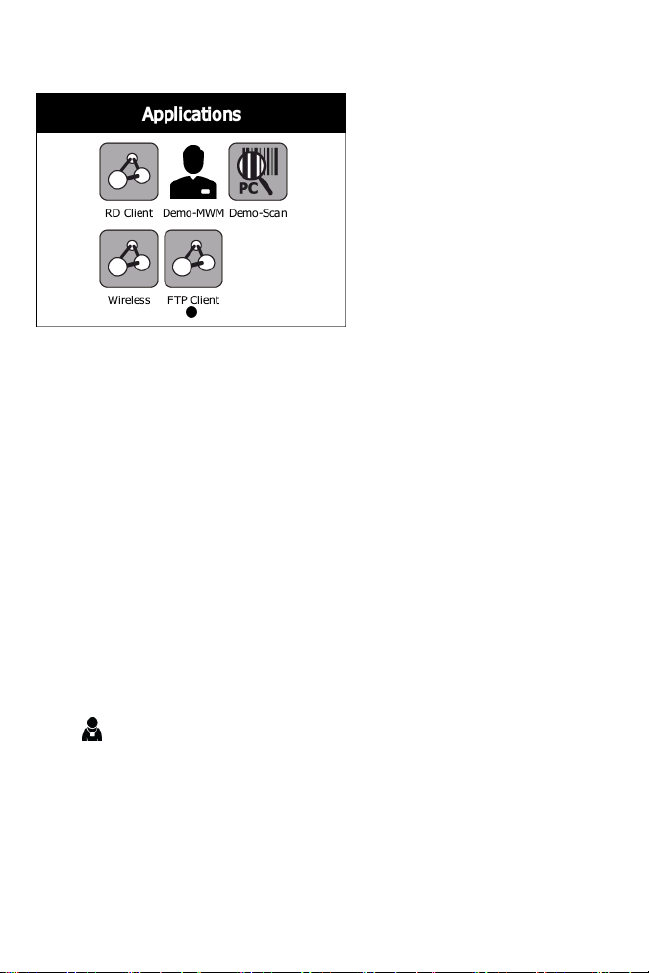
The SB1 is pre-loaded with a number of applications. Touch to open the
Applications screen.
Applications Settings
4
The Applications screen has the following applications:
• RD Client - Use to stage the SB1 for initial use by initiating the deployment of
settings, firmware and software. Refer to the SB1 Integrator Guide for detailed
information.
• Demo-MWM - use to demonstrate the functionality of the SB1. See MWM DEMO on
page 8 for more information.
• Demo-Scan - use to demonstrate the SB1 scanning functionality. See SCAN DEMO
on page 7 for more information.
• Wireless - use to setup the SB1 to connect to a WLAN. Refer to the SB1 Integrator
Guide for detailed information.
• FTP Client - use to copy files to the SB1 using a local ftp connection.Refer to the
SB1 Integrator Guide for detailed information.
Setting Name and Title
Use the Profile screen to set the user name and user title, sign out of the SB1 and
switch devices.
Press the Home button to display the Home screen on the side of the device.
Touch . The Profile screen appears.
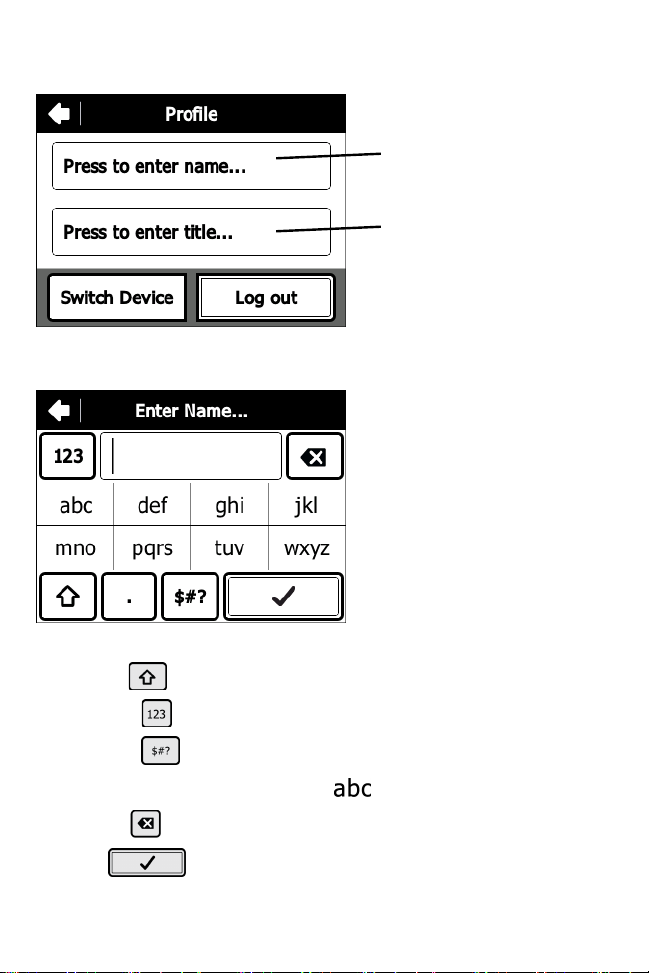
Name Text Box
Title Text Box
To enter user name:
1. In the Profile screen, touch the top text box. The Enter Name screen appears.
5
2. Press the keypad keys to enter the user name.
• Use to create capital letter.
• Touch to display the numeric keypad.
• Touch to display special character keypad.
• To create the letter c, quickly touch three times.
• Use to delete the last character in the text box.
3. Touch to save the name.
To enter user title:
1. In the Profile screen, touch the lower text box. The Enter Title screen appears.
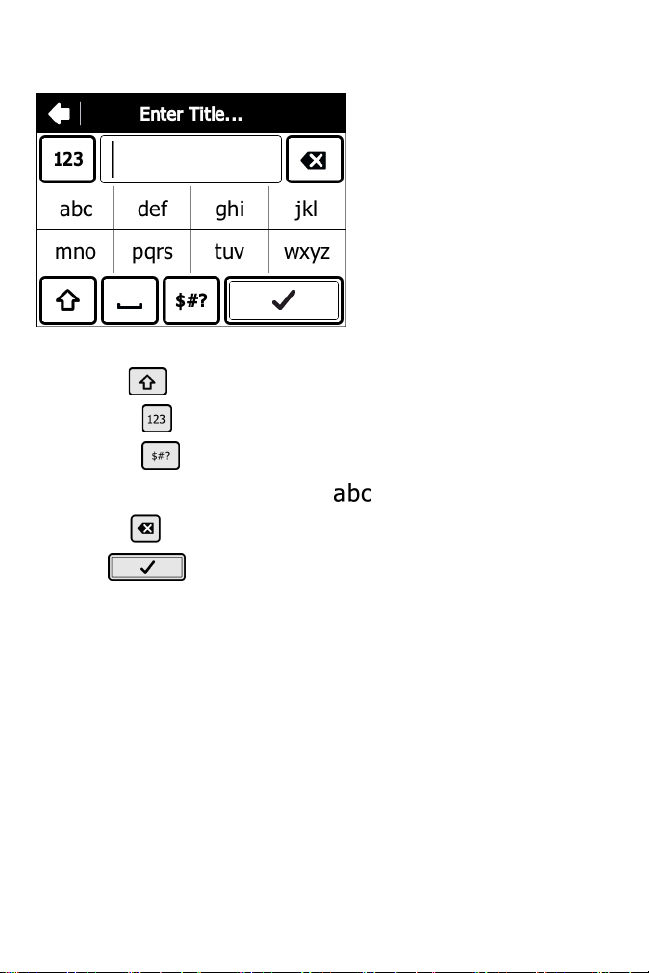
6
2. Press keypad keys to enter the user title.
• Use to create capital letter.
• Touch to display the numeric keypad.
• Touch to display special character keypad.
• To create the letter c, quickly touch three times.
• Use to delete the last character in the text box.
3. Touch to save the user title.
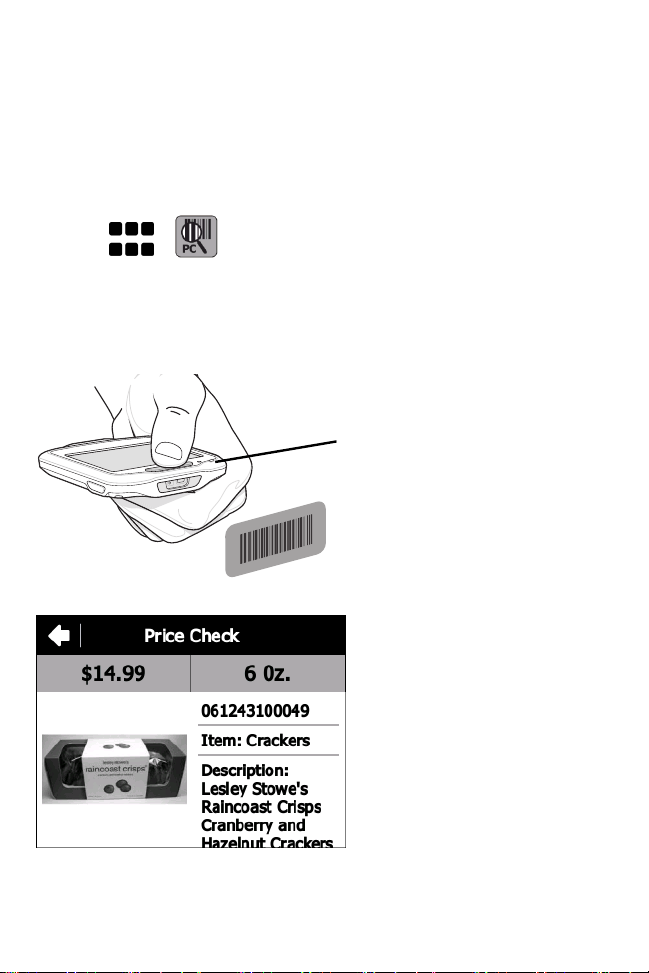
SCAN DEMO
The Scan Demo is a Price Check demo that uses predefined bar codes and provides a
picture of the item, price and other info. This is a good way to showcase how well the
bar code reading function works while demonstrating how a retail associate can use it
to assist shoppers with a price check or inventory lookup task.
1. Touch > . The Price Check screen appears.
2. Aim the exit window at the bar code.
3. Press the Scan button and scan one of the bar code on page 31. Ensure the red
illumination covers the entire bar code. The LED Indicator illuminates red to
indicate that the illumination is on. The LED Indicator turns green and a beep
sounds to indicate a successful decode.
LED
4. Upon successful decode the corresponding product information screen displays.
7
5. Press the Back button to return to the main Price Check screen.
8
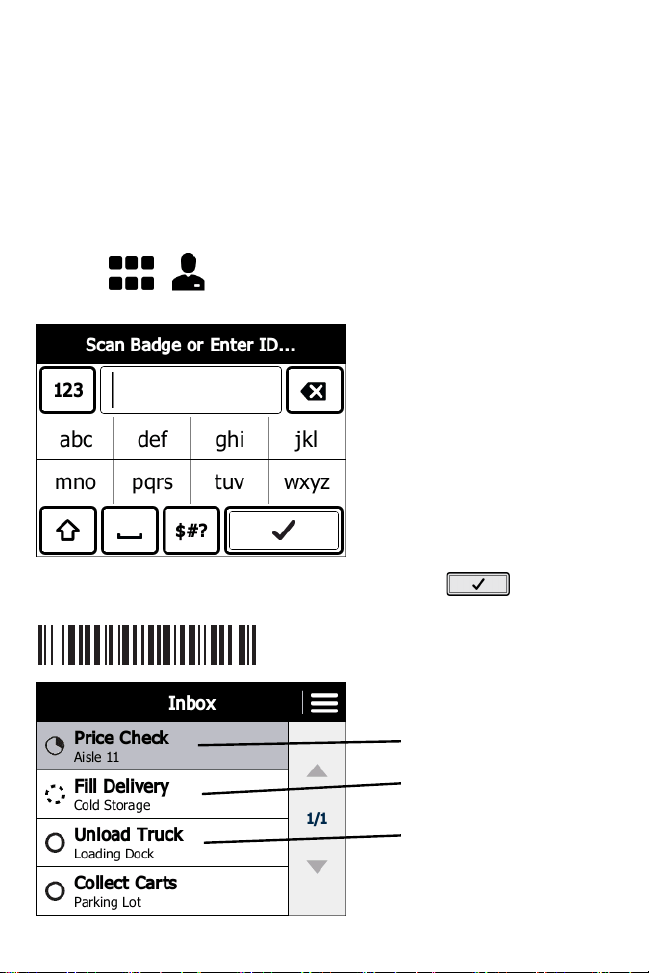
MWM DEMO
The MWM Demo starts with a user logging on (any scan or numeric works), followed by
the display of an inbox that includes four tasks. As you go through each task, you
accept and complete the task. Once its completed, the task is removed from the inbox.
This is a great way to show how the E Ink and touch display works while demonstrating
task management capabilities that improve worker productivity and management
oversight.
1. Touch > .
2. The splash screen appears followed by the Enter Password screen.
3. Enter 123456 or scan the bar code below and then touch . The Inbox
appears.
Task In-progress
Task Not Assigned
Task Assigned - Not Started
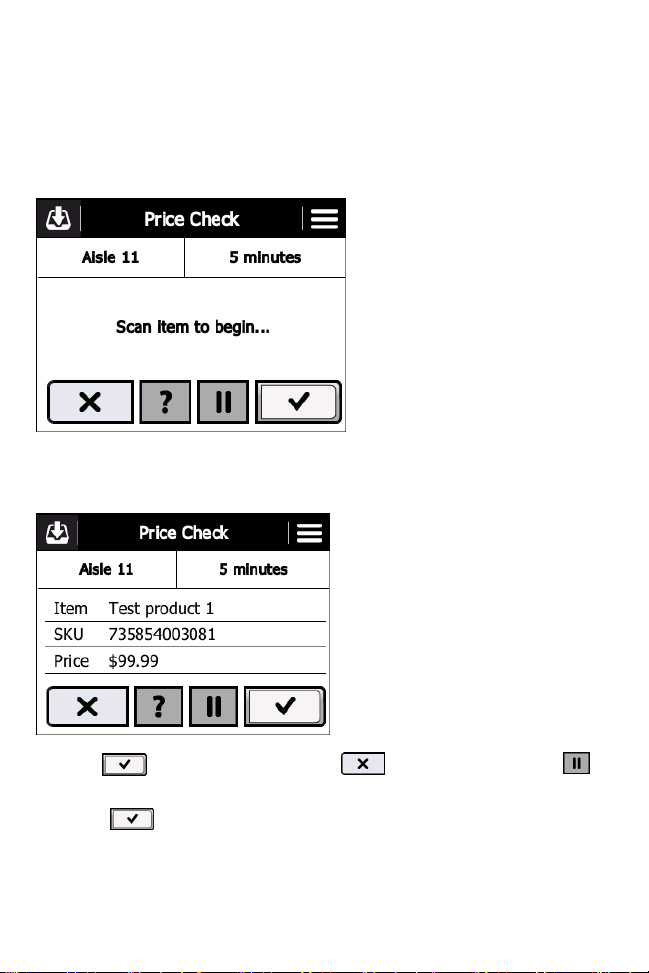
Price Check Scenario
The Price Check scenario illustrates a task that has already been accepted by the user,
the user has already started the task and the user completes the task.
1. Touch Price Check. The Price Check screen appears.
2. Point the SB1 at a bar code on a product.
3. Press the Scan button. The SB1 reads the bar code and displays information about
the product.
9
Touch when the task is completed, to go back to the Inbox or to
pause the task and complete at a later time.
4. Touch to indicate that the task is complete.
5. Touch OK to confirm task completion.
6. Touch OK.
7. The Inbox re-displays.
 Loading...