

Page 1
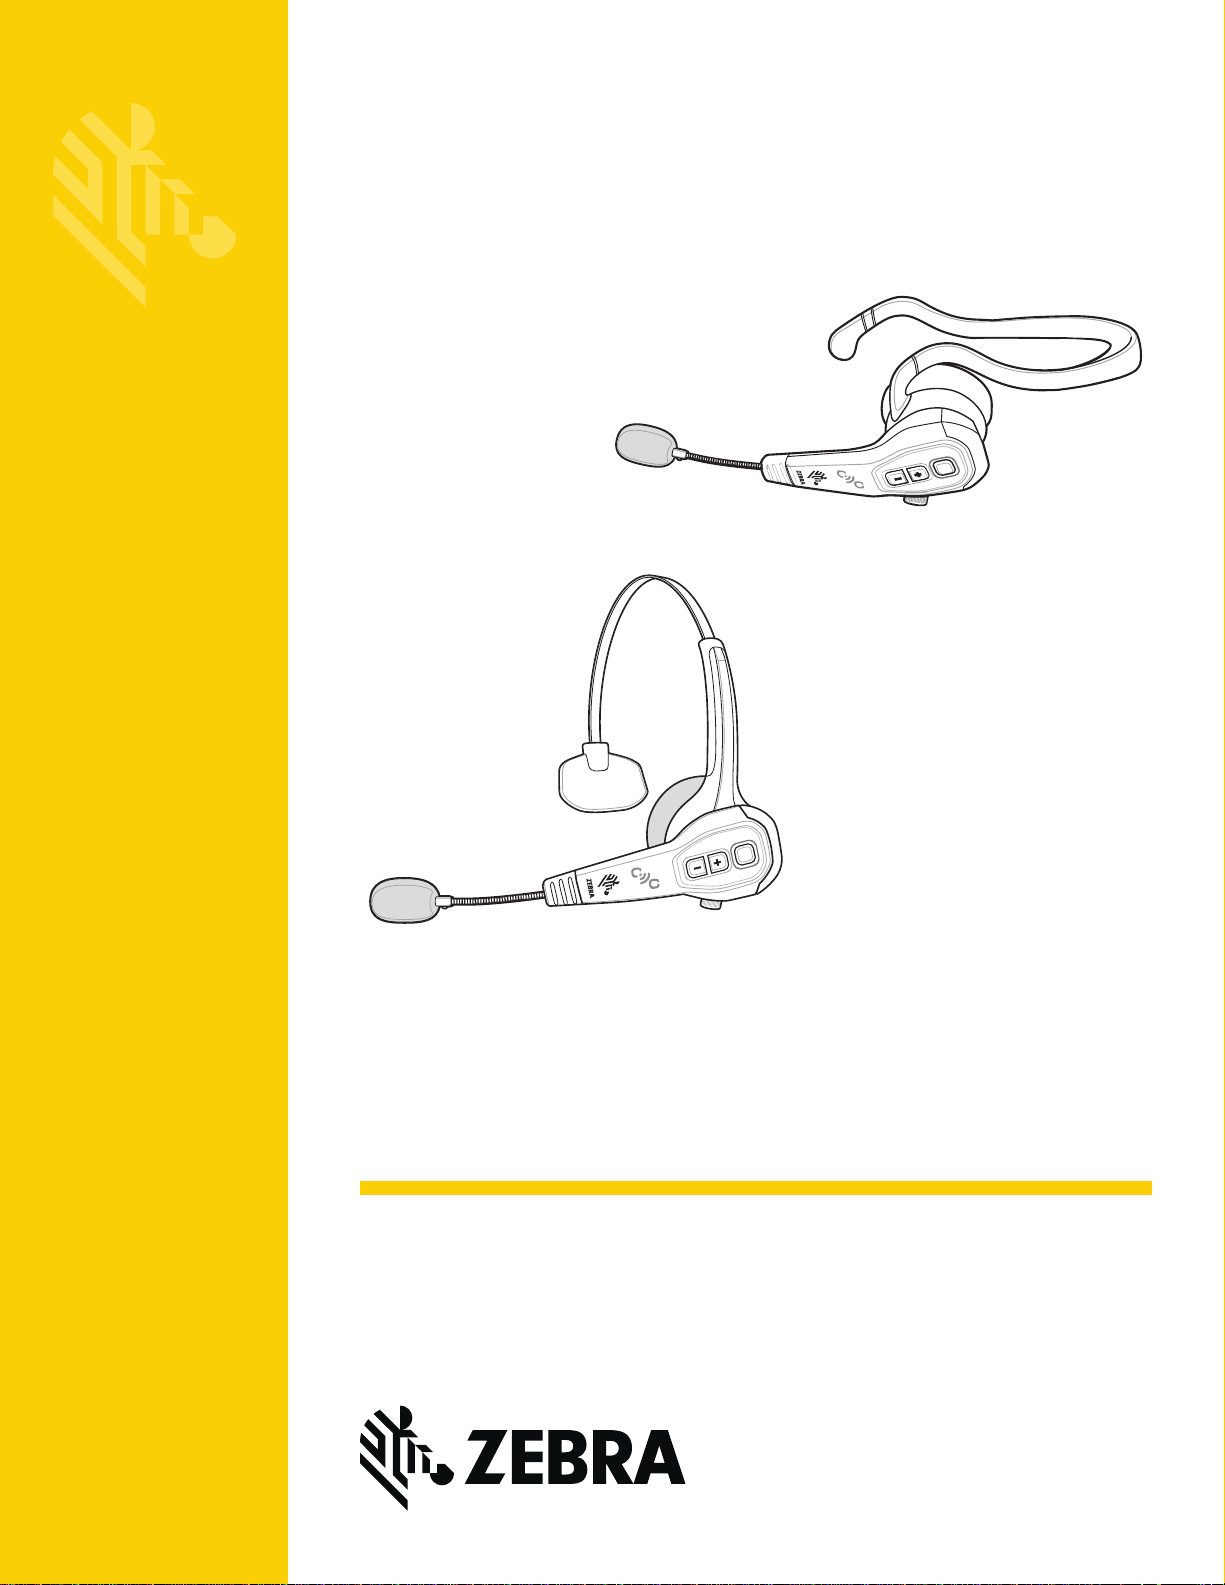
HS3100
MN-002774-02
Rugged Bluetooth Headset
User Guide
Page 2

Page 3

HS3100 RUGGED BLUETOOTH HEADSET
USER GUIDE
MN-002774-02
Rev. A
November 2016
Page 4

ii HS3100 Rugged Bluetooth Headset User Guide
Revision History
Changes to the original guide are listed below:
Change Date Description
Rev A - 01 09/2016 Initial Release
Rev A - 02 11/2016 Update to remove Mute Microphone
Page 5

TABLE OF CONTENTS
Revision History ................................................................................................................................. ii
About This Guide
Introduction ........................................................................................................................................ v
Chapter Descriptions ......................................................................................................................... v
Notational Conventions...................................................................................................................... v
Related Documents .......................................................................................................................... vi
Service Information ........................................................................................................................... vi
Chapter 1: Getting Started
Headset Overview .......................................................................................................................... 1-1
Headset Configurations ............................................................................................................ 1-2
Over-the-Head (OTH) Features ............................................................................................... 1-3
Behind-the-Neck (BTN) Features ............................................................................................. 1-3
Unpacking ...................................................................................................................................... 1-4
Charging ........................................................................................................................................ 1-5
Charging Configurations .......................................................................................................... 1-5
Connect the Charger ................................................................................................................ 1-5
Charge the Battery in the Battery Charger ............................................................................... 1-6
Battery Charge LED Status ...................................................................................................... 1-6
Insert the Battery in the Headset ................................................................................................... 1-7
Power On the Headset ................................................................................................................... 1-8
MFB Actions and Headset States ............................................................................................ 1-8
LED Indicator and Headset Status ........................................................................................... 1-9
Chapter 2: Pairing the Headset
Methods of Pairing the Headset ..................................................................................................... 2-1
Chapter 3: Adjusting the Headset
Introduction .................................................................................................................................... 3-1
Page 6

iv HS3100 Rugged Bluetooth Headset User Guide
Position the Boom .......................................................................................................................... 3-1
Adjust the OTH Headband ............................................................................................................. 3-2
Adjust the Microphone ................................................................................................................... 3-3
Adjust the Microphone Boom ......................................................................................................... 3-3
Chapter 4: Using the Headset
Introduction .................................................................................................................................... 4-1
Adjust the Volume .......................................................................................................................... 4-1
Audio Tones ............................................................................................................................. 4-1
Chapter 5: Maintenance and Troubleshooting
Introduction .................................................................................................................................... 5-1
Maintaining the HS3100 Headset .................................................................................................. 5-1
Replace T-Bar .......................................................................................................................... 5-1
Replace Headband .................................................................................................................. 5-2
Replace Ear Pad ...................................................................................................................... 5-3
Replace Windscreen ................................................................................................................ 5-4
Remove the Battery ................................................................................................................. 5-5
Safety Guidelines ........................................................................................................................... 5-5
General Safety Guidelines ....................................................................................................... 5-5
Battery Safety Guidelines ......................................................................................................... 5-5
Cleaning the HS3100 Headset ...................................................................................................... 5-6
Troubleshooting ............................................................................................................................. 5-7
Appendix A: Accessories
Parts and Accessories .................................................................................................................. A-1
Appendix B: Technical Specifications
HS3100 Technical Specifications ................................................................................................. B-1
8-Slot Battery Charger Technical Specifications ........................................................................... B-3
8-Slot-Battery Charger & 8-Slot-WT6000 Charger Technical Specifications ................................ B-4
Index
Page 7

ABOUT THIS GUIDE
Introduction
This guide provides information about using the HS3100 Rugged Bluetooth Over-the Head (OTH) and
Behind-the-Neck (BTN) Headsets.
NOTE Pictures in this guide are samples and can differ from the actual headset.
Chapter Descriptions
Topics covered in this guide are as follows:
•
Chapter 1, Getting Started, provides an overview, features, and getting started.
•
Chapter 2, Pairing the Headset, explains the various ways to pair the headset.
•
Chapter 3, Adjusting the Headset, explains how to adjust the headset for proper fit and maximum comfort
during use.
•
Chapter 4, Using the Headset, provides basic instructions for using the headset.
•
Chapter 5, Maintenance and Troubleshooting, includes instructions on replacing parts, safety and battery
guidelines, cleaning the headset and troubleshooting solutions for potential problems.
•
Appendix A, Accessories, describes the accessories available for the headset.
•
Appendix B, Technical Specifications, provides the technical specifications for the headset.
Notational Conventions
The following conventions are used in this document:
•
“tablet” refers to the Zebra tablet.
Page 8

vi HS3100 Rugged Bluetooth Headset User Guide
•
Italics are used to highlight the following:
• Chapters and sections in this guide
• Related documents
•
Bold text is used to highlight the following:
• Dialog box, window and screen names
• Drop-down list and list box names
• Check box and radio button names
• Icons on a screen
• Key names on a keypad
• Button names on a screen.
•
Bullets (•) indicate:
• Action items
• Lists of alternatives
• Lists of required steps that are not necessarily sequential.
•
Sequential lists (e.g., those that describe step-by-step procedures) appear as numbered lists.
Related Documents
The following document provides more information about the HS3100 Rugged Bluetooth Headset.
•
HS3100 Rugged Bluetooth Headset Quick St art Guide , p/n MN-002762-xx - describes how to adjust, use,
and maintain the headset and also includes required regulatory information.
For the latest version of this guide and all guides, go to: http://www.zebra.com/support
Service Information
If you have a problem with your equipment, contact Zebra Global Customer Support for your region. Contact
information is available at: http://www.zebra.com/support
When contacting support, please have the following information available:
•
Serial number of the unit
•
Model number or product name
•
Software type and version number.
Zebra responds to calls by email, telephone or fax within the time limits set forth in support agreements.
If your problem cannot be solved by Zebra Customer Support, you may need to return your equipment for servicing
and will be given specific directions. Zebra is not responsible for any damages incurred during shipment if the
approved shipping container is not used. Shipping the units improperly can possibly void the warranty.
.
.
If you purchased your Zebra business product from a Zebra business partner, contact that business partner for
support.
Page 9

CHAPTER 1 GETTING STARTED
Headset Overview
The HS3100 Rugged Bluetooth Headset comes in two configurations; Over-the-Head (OTH) and Behind-the-Neck
(BTN) headbands.
NOTE This guide applies to both the OTH and BTN headband models, unless otherwise noted.
The HS3100 headset is ideal for the following applications:
Industries
•
Warehousing
•
Distribution
•
Transportation and Logistics
•
Manufacturing
Environments
•
Freezers
•
Outdoor Yards
•
Airports
•
Seaports
•
Railway Yards
Page 10

1 - 2 HS3100 Rugged Bluetooth Headset User Guide
Headset Configurations
Table 1-1 Headset Configurations
Model Configuration Includes
HS3100-OTH Over-the-Head Headband
Left or Right Side Boom Placement
HS3100-BTN-L Behind-the-Neck Headband
Left Side Boom Placement
HS3100 Boom Module
OTH Headband
Windscreen
Battery
HS3100 Boom Module
BTN Headband
Windscreen
Battery
Page 11
Over-the-Head (OTH) Features
Adjustable OTH Headband
Microphone with Windscreen
Flexible Microphone Boom
T-Bar
Ear Pad
Battery
Disassembly Knob
Multi-
Function
Button
with LED
Indicator
NFC Tag
Volume Buttons
Microphone with Windscreen
Flexible Microphone Boom
Disassembly Knob
BTN Headband
Multi- Function
Button with
LED Indicator
Battery
Left Placement
Ear Pad
NFC Tag
Volume Bu ttons
Getting Started 1 - 3
Figure 1-1 HS3100-OTH Bluetooth Headset
Behind-the-Neck (BTN) Features
Figure 1-2 HS3100-BTN-L Bluetooth Headset
Page 12

1 - 4 HS3100 Rugged Bluetooth Headset User Guide
Unpacking
Carefully remove all protective material from the headset and save the shipping container for later storage and
shipping.
Verify the following items are in the box:
•
Headset:
• Headband Module
• Boom Module
•
Battery
•
Quick Start Guide
Inspect the equipment for damage. if any equipment is missing or damaged, contact the Zebra Support Center
immediately. See Service Information on page ii-vi for contact information.
Page 13
Charging
The headset batteries are charged in a toaster which uses either a one slot cradle or a five slot cradle.
Charging Configurations
Table 1-2 Charging Configurations
Battery Toaster 1 Slot-SE Cradle 1-Slot Base Cradle
Battery Toaster 5 Slot-SE Cradle 5-Slot Base Cradle
Getting Started 1 - 5
Model Includes
Toaster Cup
PS000084A01 adapter plus CBL-DC-388A1-01 DC
cable
Toaster Cup
4 WT/WT Charging Cups
PS000086A01 adapter plus CBL-DC-381A1-01 DC
cable
Connect the Charger
NOTE Ensure that you follow the guidelines for battery safety described in Battery Safety Guidelines on page
7-1.
The 8-Slot Battery Charger charges up to eight spare batteries.
To connect the charger:
Connect one end of the power supply to the charging base and the other end into the outlet.
Figure 1-3
Battery Toaster 1 Slot - SE Cradle and Battery Toaster 5 Slot - SE Cradle
Page 14
1 - 6 HS3100 Rugged Bluetooth Headset User Guide
Charge the Battery in the Battery Charger
Although the batteries come partially charged, it is recommended to fully charge them before first use. Allow up to
three and a half hours for a full charge.
To charge the battery:
Insert the battery into the charger with the contacts facing forward.
Figure 1-4 Charging the Battery in 8-Slot Battery Charger or 8-Slot Battery Charger with
Each battery slot has a battery status indicator displaying the charging status.
Battery Charge LED Status
Table 1-3 Battery Charge LED Status
Mode Description
Charge Fault Fast blinking red
Charging (Healthy) Solid Amber
Charge Complete
(Healthy)
Solid Green
8-Slot-WT6000 Charger
Page 15

Insert the Battery in the Headset
To insert the battery:
1. Insert the battery with the contacts facing outward into the battery slot.
2. Push the battery into the slot until it is firmly secure.
Getting Started 1 - 7
Figure 1-5 Insert the Battery
Page 16

1 - 8 HS3100 Rugged Bluetooth Headset User Guide
MultiFunction
Button
Power On the Headset
To turn the power on:
1. Press the Multi-Function button (MFB).
2. Wait for the headset LED to illuminate blue and flash three times.
The headset is ready to use.
Figure 1-6 Power On Headset
MFB Actions and Headset States
Table 1-4 MFB Actions and Headset States
Condition Action Headset State
Headset in Low Power Mode Press Multi-Function Button for two
seconds
Headset in Low Power Mode Press Multi-Function Button for three
seconds
Headset is ON or Connected Press Multi-Function Button for two
seconds
Headset goes into Pairing Mode or in
Connected state
Headset goes into Pairing Mode
Headset goes into Low Power Mode
Page 17

LED Indicator and Headset Status
Table 1-5 LED Indicator and Headset Status
LED Indicator Headset Status
Three Blue Flashes Power On
Three Red Flashes Power Off
Blue and Red Alternate Flashes Pairing Mode
Slow Blue Flash Connected
Steady Blue Not Connected
Slow Two Red Flashes Low Battery
Getting Started 1 - 9
Page 18

1 - 10 HS3100 Rugged Bluetooth Headset User Guide
Page 19

CHAPTER 2 PAIRING THE HEADSET
NFC Tag
Methods of Pairing the Headset
The headset can be paired with other Bluetooth devices in the following ways:
Figure 2-1 NFC Pairing
•
Standard Bluetooth pairing where the headset is discovered by the host.
•
Bypassing device discovery using a multi-modal interface:
• Scan-to-pair - the host gets the headset MAC address through a scan and connects with it.
• Tap-to-pair - with hosts having an NFC reader, the host gets the MAC address through NFC and connects
with it.
Page 20

2 - 2 HS3100 Rugged Bluetooth Headset User Guide
Page 21

CHAPTER 3 ADJUSTING THE
Right Side Boom Placement
Left Side Boom Placement
HEADSET
Introduction
This chapter explains how to adjust the headset for the proper fit and maximum comfort during use.
Position the Boom
To position the boom:
Rotate the boom for left side or right side placement.
CAUTION Do not rotate the boom beyond the stop point.
Figure 3-1 Position the Boom
NOTE Applies to OTH model. The BTN model has only left side boom placement.
Page 22

3 - 2 HS3100 Rugged Bluetooth Headset User Guide
Adjust the OTH Headband
To adjust the OTH headband:
1. Squeeze the headband for a tighter fit to the head.
Notice that the headband clicks as it is positioned into place.
2. Position the ear pad in the center of the ear.
3. Position the T-Bar above the ear, half way between the top of the ear and the top of the head.
Figure 3-2 Adjust the OTH Headband
Page 23

Adjust the Microphone
Microphone Icon
To adjust the microphone:
Position the microphone icon so that it is facing your mouth.
Figure 3-3 Adjust the Microphone
Adjust the Microphone Boom
To adjust the microphone boom:
Place the microphone two finger’s width away from the corner of your mouth, so it is slightly to one side.
Adjusting the Headset 3 - 3
Figure 3-4 Adjust the Microphone Boom
Page 24

3 - 4 HS3100 Rugged Bluetooth Headset User Guide
Page 25

CHAPTER 4 USING THE HEADSET
Volume UP/DOWN
Buttons
Introduction
This chapter provides basic instructions for using the headset.
Adjust the Volume
To adjust the volume:
Press the Volume Up (+) or Volume Down (-) buttons as desired.
Figure 4-1 Adjust the Volume
Audio Tones
The following transitions and states are associated with the audio tones listed.
Page 26

4 - 2 HS3100 Rugged Bluetooth Headset User Guide
Table 4-1 Audio Tones
Transition or
State
Start Pairing Two short low tones
Successful
Pairing
Headset
Connected
Link Lost Two low tones followed by a high tone
Low Battery Two short tones every two minutes until shutdown
Mute Two descending tones
Un-mute Two rising tones
Power Up Four tones
Power Down Four descending tones
Three rising tones
One tone
Audio Tones
Page 27

CHAPTER 5 MAINTENANCE AND
TROUBLESHOOTING
Introduction
This chapter includes instructions on replacing parts and accessories, safety and battery guidelines, cleaning and
storing the headset and provides troubleshooting solutions for potential problems during operation.
Maintaining the HS3100 Headset
For proper maintenance and maximum operating use and comfort, various parts and accessories can be replaced.
Replace T-Bar
To replace the T-Bar:
1. Pull and remove the T-Bar off the headband.
Figure 5-1 Remove T-Bar
Page 28

5 - 2 HS3100 Rugged Bluetooth Headset User Guide
2. Align the T-Bar slot with the end of the headband and push the replacement T-Bar on the headband until firmly
secured.
Figure 5-2 Replace T-Bar
NOTE Applies to OTH model.
Replace Headband
To replace the headband:
1. Loosen the screw.
Figure 5-3 Loosen Screw
Page 29

2. Disassemble the headset to replace the headband.
Figure 5-4 Disassemble headset
Replace Ear Pad
Maintenance and Troubleshooting 5 - 3
To replace the ear pad:
1. Firmly grip and pull the ear pad and inner casing.
Figure 5-5 Remove Ear Pad
Page 30

5 - 4 HS3100 Rugged Bluetooth Headset User Guide
2. Align and snap the new ear pad into position.
Figure 5-6 Replace Ear Pad
Replace Windscreen
To replace the windscreen:
1. Pull and remove the windscreen off the microphone.
Figure 5-7 Remove Windscreen
2. Align and slide the replacement windscreen over the microphone.
Figure 5-8 Replace Windscreen
Page 31

Remove the Battery
To remove the battery:
Firmly grip the outer battery casing, and pull tightly.
Maintenance and Troubleshooting 5 - 5
Figure 5-9 Remove the battery
Safety Guidelines
General Safety Guidelines
•
Please read the User Guide carefully and completely before using the product.
•
Always keep the product dry and do not expose it to extreme temperatures.
•
Use the product with care and store it in a clean, just-free environment.
•
Only use the power supply units intended for use with the product.
Battery Safety Guidelines
CAUTION Risk of explosion if battery is replaced by an incorrect type.
Dispose of batteries according to instructions.
•
The area in which the HS3100 headsets are charged should be clear of debris and combustible materials or
chemicals. Particular care should be taken where the headset is charged in a non-commercial environment.
•
Do not use incompatible batteries and chargers. If you have any questions about the compatibility of a
battery or a charger, contact Zebra Support. See Service Information on page ii-vi for contact information.
•
Do not crush, puncture, or place a high degree of pressure on the battery.
•
Follow battery usage, storage, and charging guidelines.
•
Improper battery use may result in a fire, explosion, or other hazard.
Page 32

5 - 6 HS3100 Rugged Bluetooth Headset User Guide
•
To charge the headset battery, the battery and charger temperatures must be between 32ºF and +113ºF (0ºC
and +45ºC).
•
Do not disassemble or open, crush, bend or deform, puncture, or shred.
•
Severe impact from dropping any battery-operated device on a hard surface could cause the battery to
overheat.
•
Do not short circuit a battery or allow metallic or conductive objects to contact the battery terminals.
•
Do not modify or remanufacture, attempt to insert foreign objects into the battery, immerse or expose to water
or other liquids, or expose to fire, explosion, or other hazard.
•
Do not leave or store the equipment in or near areas that might get very hot, such as in a parked vehicle or
near a radiator or other heat source. Do not place battery into a microwave oven or dryer.
•
Battery usage by children should be supervised.
•
Please follow local regulations to promptly dispose of used re-chargeable batteries.
•
Do not dispose of batteries in fire.
•
Seek medical advice immediately if a battery has been swallowed.
•
In the event of a battery leak, do not allow the liquid to come in contact with the skin or eyes. If contact has
been made, wash the affected area with large amounts of water and seek medical advice.
•
If you suspect damage to your equipment or battery, call Customer Support to arrange for inspection. See
Service Information on page ii-vi for contact information.
Cleaning the HS3100 Headset
The headset does not require any user preventative maintenance other than cleaning of the keys, microphone and
speaker area.
To maintain the headset, it is suggested to adhere to the following guidelines:
•
Do not expose the headset to harsh chemicals or cleaning agents.
•
Do not immerse the headset in water.
•
If the headset becomes dirty, wipe it with a soft damp cloth. Do not use soap, cleaning fluids or chemicals.
•
Keep dust, dirt and debris out of the headset battery slot and the battery charger slots.
•
When handling the headset battery, keep the battery contacts free of dirt, grease, oil and other substances
that can affect the battery from making proper contact with the headset or charger.
All the surfaces that touch a worker’s skin or hair, or that a worker breathes into, are easily replaced in the field.
Page 33

Troubleshooting
This section provides troubleshooting solutions for potential problems during HS3100 operations.
Table 5-1 Troubleshooting
Operating
Headset does not turn on - Verify the battery is fully inserted in the headset.
Pairing
Headset does not pair - Verify headset is off when beginning the pairing
Maintenance and Troubleshooting 5 - 7
Problem Solution
- Verify the battery is charged.
process.
- Verify intended Bluetooth device is on.
- Verify headset is within twelve inches of intended
Bluetooth device.
- Select
HS3100
on the Bluetooth device search menu.
Headset appears to be paired but cannot communicate
with the intended Bluetooth device
Charging Battery
Battery does not sit properly in the charging slot - Rotate battery and re-insert into the charging slot. The
No LED’s light on charger when battery is inserted - Check the power cable connection to the charger.
The headset may be connected with an incompatible
Bluetooth device.
1. Verify the intended Bluetooth device is within twelve
inches of the headset.
2. Verify all other non-intended Bluetooth devices are six
feet away from the headset.
3. Turn off the headset and start the pairing process
again.
battery cannot be inserted into the cup in the wrong
direction.
- The battery may be faulty. Replace the battery.
Page 34

5 - 8 HS3100 Rugged Bluetooth Headset User Guide
Page 35

APPENDIX A ACCESSORIES
This appendix provides information about the HS3100-OTH and HS3100-BTN-L accessories.
Parts and Accessories
The following table lists the part numbers for the headsets and available accessories.
Table A-1 Parts and Accessories
Part/Accessory Part Number Description
Headset and Modules
HS3100 Bluetooth Headset - OTH HS3100-OTH
HS3100 Bluetooth Headset - BTN - Left HS3100-BTN-L
HS3100 Boom Module HS3100-BOOM-01 HS3100 Boom Module
HSX100 BTN Headband Left Module HSX100-BTN-L-HB-01 HSX100 BTN Headband Left Module
HSX100 OTH Headband Module HSX100-OTH-HB-01 HSX100 OTH Headband Module
Chargers
8-Slot-Battery Charger SAC-HS3100-B8-01 Charges up to eight HS3100 batteries
HS3100 Rugged Bluetooth Headset
(Over-the-Head Headband)
(Includes HS3100 Boom Module and
HSX100 OTH Headband Module)
HS3100 Rugged Bluetooth Headset
(Behind-the-Neck Headband Left)
(Includes HS3100 Boom Module and
HSX100 BTN Headband Module Left)
(Includes Microphone Boom, Battery,
and Windscreen)
(Includes BTN Headband and Ear Pad)
(Includes OTH Headband, Ear Pad,
and T-Bar with Pad)
Page 36

A - 2 HS3100 Rugged Bluetooth Headset User Guide
Table A-1 Parts and Accessories (Continued)
Part/Accessory Part Number Description
8-Slot-Battery Charger &
8-Slot-WT6000 Charger
Cables
USB Cable CBL-HS3100-CUC1-01 USB Type-A 36" (0.9M) Charging and
Replacement Parts
8-Slot-Battery Charger Spare Cup A9310272-003 Mounts on the 8-Slot Battery Charger
Single Battery BTRY-HS3100-HS1-01 Replacement HS3100 battery
Battery Pack of 8 BTRY-HS3100-HS1-08 Replacement HS3100 battery (8-pack)
Over-the-Head Headband Pack of 10
Behind-the-Neck Headband Left Pack
of 10
SAC-HS3100-B8W8-01 Charges up to eight HS3100 batteries
and up to eight WT6000 devices
communication cable
or the 8-slot Battery Charger & 8-Slot
WT6000 Charger
KT-HSX100-OTH1-10
KT-HSX100-BTNL1-10
Replacement HS3100-OTH headbands
(10-pack)
(Includes Headband, T-Bar and Ear
Pad)
Replacement HS3100-BTN-L
headbands (10-pack)
(Includes Headband and Ear Pad)
HSX100 Headset Foam Ear Pad Pack
of 20
HSX100 Headset Leatherette Ear Pad
Pack of 20
HSX100 Headset Series Microphone
Windscreen Pack of 50
T-Bar with Pad Pack of 20 KT-HSX100-TBP1-20
KT-HSX100-EPF1-20
KT-HSX100-EPL1-20
KT-HSX100-MWS1-50
Replacement foam ear pad (20-pack)
Replacement leatherette ear pad
(20-pack)
Replacement microphone windscreen
(50-pack)
Replacement T-Bar with pad (20-pack)
Page 37

APPENDIX B TECHNICAL
SPECIFICATIONS
This section provides technical specifications for the HS3100 Bluetooth Headset and charging cradles
HS3100 Technical Specifications
Table B-1 HS3100 Bluetooth Headset Technical Specifications
Item Description
Physical Characteristi cs
Weight 4 oz./115 g (with battery)
Wearing Styles Over-the-head headband
Behind-the-neck headband
Field
Replaceable
Parts
Power Li-ion 220 mAh, 3.7V with up to 15 hours of continuous speech use on a single charge using a
Performance Characteristics
Speech-Directed
Applications
Audio High performance sealed noise canceling microphone with noise immunity greater than 10 dB
Send Frequency
Response
Microphone
Sensitivity
Headband, battery, ear pad, windscreen, T-bar
battery with ≤ 100 charge/discharge cycles
Can work with all Zebra devices running speech recognition and text-to-speech engines for
speech-directed applications
for high noise environments
50 Hz to 8 kHz
-53 dB @ 1 kHz, 1 Pa
Page 38

B - 2 HS3100 Rugged Bluetooth Headset User Guide
Table B-1 HS3100 Bluetooth Headset Technical Specifications (Continued)
Item Description
Receive
Frequency
Response
Speaker
Sensitivity
Bluetooth Bluetooth Class II, v 3.0; Bluetooth Hands-free Profile (HFP 1.6)
NFC NFC tag used for Tap-to-Pair
User Environment
Zebra Mobile
Computers
Compatibility
User Interfaces LED: Bi-color LED for headset status
Operating
Temperature
Storage
Temperature
Sealing Rating IEC 60529: IP67
300 Hz to 6 kHz
89 dB SPL with 1.0 Vrms @ 1 kHz
Visit www.zebra.com/hsheadsets for the most current list of compatible mobile computers.
Buttons: Three functional buttons
-30°C (-22°F) to +50°C (+122°F)
-40°C (-40°F) to +60°C (+140°F) incl. battery
-40°C (-40°F) to +70°C (+158°F) excl. battery
Humidity 5% to 95% non-condensing
Drop Rating 6 ft./1.8 m drop to concrete (36 drops, over operating temperature range)
Tumble Rating 1,000 tumbles @ 0.5 m (room temperature)
Vibration Since 5-2000Hz, 4g peak, 1 hour per axis; Random 20-2000Hz, 6g RMS or 0.04g2/Hz, 1 hour
per axis
Electrostatic
Discharge (ESD)
Software Compatibility
Software TekSpeech Pro 4, Android EMDK
The HS3100 is optimized for real-time two-way speech applications and uses the BT Hands Free Profile. A host
connected to HS3100 can remotely control audio volume and microphone gain of the headset.
The HS3100 sends the host its battery information (Serial Number, State of Charge and State of Health), the power
state (main or backup battery) and headset information (Serial Number, HW and FW version, and its capabilities).
+/-20kV air discharge, +/-10kV contact discharge, +/-10kVdc indirect discharge
Page 39

8-Slot Battery Charger Technical Specifications
Table B-2 8-Slot Battery Charger Technical Specifications
Item Description
Dimensions Height: 74.1 mm
Width: 97.8 mm
Depth: 134.7 mm
Weight 439.8 g
Input Voltage 12 V
Technical Specifications B - 3
Power
Consumption
Operating
Temperature
Storage
Temperature
Charging
Temperature
Humidity 10% to 95% RH
Drop 30 inches
Electrostatic
Discharge (ESD)
5.82 Watt (Full load), 0.18 Watt (No load)
0° C (32° F) to 45° C (113° F)
-40° C (-40° F) to 70° C (158° F)
0° C (32° F) to 40° C (104° F)
+/- 15 k V air (Certificate)
+/- 8 k V Contact and Indirect (Certificate)
Page 40

B - 4 HS3100 Rugged Bluetooth Headset User Guide
8-Slot-Battery Charger & 8-Slot-WT6000 Charger Technical Specifications
Table B-3 8-Slot Battery Charger & 8-Slot-WT6000 Charger Technical Specifications
Item Description
Dimensions Height: 87.1 mm
Width: 134.7 mm
Depth: 488.4 mm
Weight 2.2 kg
Input Voltage 12 V
Power
Consumption
Operating
Temperature
Storage
Temperature
Charging
Temperature
Humidity 10% to 95% RH
Drop 30 inches
Electrostatic
Discharge (ESD)
60 Watt (Full load), 0.18 Watt (No load)
0° C (32° F) to 45° C (113° F)
-40° C (-40° F) to 70° C (158° F)
0° C (32° F) to 40° C (104° F)
+/- 15 k V air (Certificate)
+/- 8 k V Contact and Indirect (Certificate)
Page 41

INDEX
A
adjust the microphone . . . . . . . . . . . . . . . . . . . . . . . . 3-3
adjust the microphone boom . . . . . . . . . . . . . . . . . . . 3-3
adjust the OTH headband . . . . . . . . . . . . . . . . . . . . . 3-2
audio tones . . . . . . . . . . . . . . . . . . . . . . . . . . . . . . . . 4-1
B
behind-the-neck features . . . . . . . . . . . . . . . . . . . . . . 1-3
bullets . . . . . . . . . . . . . . . . . . . . . . . . . . . . . . . . . . . . . .vi
buttons/LED . . . . . . . . . . . . . . . . . . . . . . . . . . . . . . . . 1-4
C
charge the battery . . . . . . . . . . . . . . . . . . . . . . . . . . . 1-6
charger configurations . . . . . . . . . . . . . . . . . . . . . . . . 1-5
clean the headset . . . . . . . . . . . . . . . . . . . . . . . . . . . 5-6
connect the charger . . . . . . . . . . . . . . . . . . . . . . . . . . 1-5
conventions
notational . . . . . . . . . . . . . . . . . . . . . . . . . . . . . . .ii-v
H
headset configurations . . . . . . . . . . . . . . . . . . . . . . . 1-2
HS3100 technical specifications . . . . . . . . . . . . . . . . B-1
I
P
pairing methods . . . . . . . . . . . . . . . . . . . . . . . . . . . . . 2-1
parts and accessories . . . . . . . . . . . . . . . . . . . . . . . . A-1
position the boom . . . . . . . . . . . . . . . . . . . . . . . . . . . 3-1
power on headset . . . . . . . . . . . . . . . . . . . . . . . . . . . 1-8
R
related documents . . . . . . . . . . . . . . . . . . . . . . . . . . . . . vi
remove battery . . . . . . . . . . . . . . . . . . . . . . . . . . . . . 5-5
replace ear pad . . . . . . . . . . . . . . . . . . . . . . . . . . . . . 5-3
replace headband . . . . . . . . . . . . . . . . . . . . . . . . . . . 5-2
replace t-bar . . . . . . . . . . . . . . . . . . . . . . . . . . . . . . . 5-1
replace windscreen . . . . . . . . . . . . . . . . . . . . . . . . . . 5-4
S
safety information . . . . . . . . . . . . . . . . . . . . . . . . . . . 5-5
T
troubleshooting . . . . . . . . . . . . . . . . . . . . . . . . . . . . . 5-7
V
volume . . . . . . . . . . . . . . . . . . . . . . . . . . . . . . . . . . . . 4-1
information, service . . . . . . . . . . . . . . . . . . . . . . . . . . . .vi
insert the battery . . . . . . . . . . . . . . . . . . . . . . . . . . . . 1-7
O
over-the-head features . . . . . . . . . . . . . . . . . . . . . . . 1-3
overview . . . . . . . . . . . . . . . . . . . . . . . . . . . . . . . . . . 1-1
Page 42

Index - 2 HS3100 Rugged Bluetooth Headset User Guide
Page 43

Page 44

Zebra Technologies Corporation, Inc.
3 Overlook Point
Lincolnshire, IL 60069, U.S.A.
http://www.zebra.com
Zebra and the stylized Zebra head are trademarks of ZIH Corp., registered in many
jurisdictions worldwide. All other trademarks are the property of their respective owners.
© 2016 Symbol Technologies LLC, a subsidiary of Zebra Technologies Corporation. All rights
reserved.
MN-002774-02 Revision A - November 2016
 Loading...