


ZebraNet® 10/100 Internal Print Server
for
ZM400™, ZM600™, G-Series™, ZP Series™,
HC100™, Xi4™, LP 2824 Plus™, and TLP 2824 Plus™
14197L-005
User Guide

© 2009 ZIH Corp. The copyrights in th is manual and the software and/or firmware in the label printer
described therein are owned by ZIH Corp. Unauthorized reproduction of this manual or the software and/or
firmware in the label printer may result in imprisonment of up to one year and fines of up to $10,000
(17 U.S.C.506). Copyright violators may be subject to civil li ab il ity.
®
This product may contain ZPL
3®
; and Monotype Imaging fonts. Software © ZIH Corp. All rights reserved worldwide.
E
, ZPL II®, and ZebraLink™ programs; Element Energy Equalizer® Circuit;
ZebraLink and all product names and numbers are trademarks, and Zebra, the Zebra logo, ZPL, ZPL II, Element
3
Energy Equalizer Circuit, and E
Circuit are registered trademarks of ZIH Corp. All rights reserved worldwide.
All other brand names, product names, or trademarks belong to their respective holders. For additional
trademark information, please see “Trademarks” on the product CD.
Proprietary Statement This manual contains proprietary information of Zebra Technologies Corporation
and its subsidiaries (“Zebra Technolog ies”). It is inten ded solely for t he information and use of parties ope rating
and maintaining the equipment describ ed he rein . Such proprie tary in formati on may n ot b e used , reprod uced, or
disclosed to any other parties for any other purpose withou t the express, written permission of Zebra
Technologies Corporation.
Product Improvements Continuous improvement of products is a policy of Zebra Technologies
Corporation. All specifications and designs are subject to change without notice.
Liability Disclaimer Zebra Technologies Corporation takes steps to ensure that its published Engineering
specifications and manuals are correct; however, errors do occur. Zebra Technologies Corporation reserves the
right to correct any such errors and disclaims liability resulting therefrom.
Limitation of Liability In no event shall Zebra Technologies Corporation or anyone else involved in the
creation, production, or delivery of the accompanying product (including hardware and software) be liable for
any damages whatsoever (including, without limitation, consequential damages including loss of business
profits, business interruption, or loss of business information) arising out of the use of, the results of use of, or
inability to use such product, even if Zebra Technologies Corporation has been advised of the possibility of such
damages. Some jurisdictions do not allow the exclusion o r limitation of inc idental or consequ ential damage s, so
the above limitation or exclusion may not apply to you.
Part Number: 14197L-005

Contents
About This Document . . . . . . . . . . . . . . . . . . . . . . . . . . . . . . . . . . . . . . . 7
Who Should Use This Document. . . . . . . . . . . . . . . . . . . . . . . . . . . . . . . . . . . .8
How This Document Is Organized . . . . . . . . . . . . . . . . . . . . . . . . . . . . . . . . . . .8
Contacts. . . . . . . . . . . . . . . . . . . . . . . . . . . . . . . . . . . . . . . . . . . . . . . . . . . . . . .9
Document Conventions . . . . . . . . . . . . . . . . . . . . . . . . . . . . . . . . . . . . . . . . . .10
Related Documents . . . . . . . . . . . . . . . . . . . . . . . . . . . . . . . . . . . . . . . . . . . . .12
1 • Introduction . . . . . . . . . . . . . . . . . . . . . . . . . . . . . . . . . . . . . . . . . . . 13
Overview . . . . . . . . . . . . . . . . . . . . . . . . . . . . . . . . . . . . . . . . . . . . . . . . . . . . .14
Components. . . . . . . . . . . . . . . . . . . . . . . . . . . . . . . . . . . . . . . . . . . . . . . .14
Requirements. . . . . . . . . . . . . . . . . . . . . . . . . . . . . . . . . . . . . . . . . . . . . . . . . .16
Firmware . . . . . . . . . . . . . . . . . . . . . . . . . . . . . . . . . . . . . . . . . . . . . . . . . .16
Software. . . . . . . . . . . . . . . . . . . . . . . . . . . . . . . . . . . . . . . . . . . . . . . . . . .16
Browser Support . . . . . . . . . . . . . . . . . . . . . . . . . . . . . . . . . . . . . . . . . . . .17
Protocols . . . . . . . . . . . . . . . . . . . . . . . . . . . . . . . . . . . . . . . . . . . . . . . . . .17
Hardware . . . . . . . . . . . . . . . . . . . . . . . . . . . . . . . . . . . . . . . . . . . . . . . . . .17
Compatibility. . . . . . . . . . . . . . . . . . . . . . . . . . . . . . . . . . . . . . . . . . . . . . . . . . .18
Technical Specifications for the 10/100 Internal PS. . . . . . . . . . . . . . . . . . . . .19
2 • Getting Started . . . . . . . . . . . . . . . . . . . . . . . . . . . . . . . . . . . . . . . . . 21
Before You Begin . . . . . . . . . . . . . . . . . . . . . . . . . . . . . . . . . . . . . . . . . . . . . . .22
Print a Configuration Label. . . . . . . . . . . . . . . . . . . . . . . . . . . . . . . . . . . . .23
Setting the Primary Network Print Server. . . . . . . . . . . . . . . . . . . . . . . . . . . . .27
Using the Control Panel to View and Modify Print Server Parameters . . . . . .28
11/12/2009 10/100 Internal Print Server User Guide 14197L-005

4
Contents
Defaulting the 10/100 Internal PS . . . . . . . . . . . . . . . . . . . . . . . . . . . . . . . . . .29
Defaulting the 10/100 PS on the ZM400 and ZM600 Printers . . . . . . . . .29
Defaulting the 10/100 PS on the G-Series, ZP Series, and 2824 Plus
Printers . . . . . . . . . . . . . . . . . . . . . . . . . . . . . . . . . . . . . . . . . . . . . . . . . . . .29
Defaulting the 10/100 PS on the HC100 Printers . . . . . . . . . . . . . . . . . . .30
Defaulting the 10/100 PS on the Xi4 Printers . . . . . . . . . . . . . . . . . . . . . .30
Defaulting the 10/100 Internal PS Using WebView . . . . . . . . . . . . . . . . .31
Defaulting the 10/100 Internal PS Using ZebraNet View . . . . . . . . . . . . .32
Assigning an IP Address . . . . . . . . . . . . . . . . . . . . . . . . . . . . . . . . . . . . . . . . .33
With Dynamic Host Configuration Protocol (DHCP) . . . . . . . . . . . . . . . . .33
Without DHCP . . . . . . . . . . . . . . . . . . . . . . . . . . . . . . . . . . . . . . . . . . . . . .33
In a Non-Windows Environment. . . . . . . . . . . . . . . . . . . . . . . . . . . . . . . . .36
3 • Installation . . . . . . . . . . . . . . . . . . . . . . . . . . . . . . . . . . . . . . . . . . . . 41
10/100 Internal PS . . . . . . . . . . . . . . . . . . . . . . . . . . . . . . . . . . . . . . . . . . . . . .42
ZebraNet Utilities . . . . . . . . . . . . . . . . . . . . . . . . . . . . . . . . . . . . . . . . . . . . . . .42
ZebraNet View Java Applet . . . . . . . . . . . . . . . . . . . . . . . . . . . . . . . . . . . . . . .46
4 • ZebraLink WebView - Printer . . . . . . . . . . . . . . . . . . . . . . . . . . . . . 49
WebView - Printer . . . . . . . . . . . . . . . . . . . . . . . . . . . . . . . . . . . . . . . . . . . . . .50
Printer Home Page. . . . . . . . . . . . . . . . . . . . . . . . . . . . . . . . . . . . . . . . . . .50
View Printer Configuration . . . . . . . . . . . . . . . . . . . . . . . . . . . . . . . . . . . .51
View and Modify Printer Settings. . . . . . . . . . . . . . . . . . . . . . . . . . . . . . . .55
Directory Listing . . . . . . . . . . . . . . . . . . . . . . . . . . . . . . . . . . . . . . . . . . . .55
Alert Setup . . . . . . . . . . . . . . . . . . . . . . . . . . . . . . . . . . . . . . . . . . . . . . . . .56
Establishing Email Alert Messaging . . . . . . . . . . . . . . . . . . . . . . . . . . . . .60
Printer Controls . . . . . . . . . . . . . . . . . . . . . . . . . . . . . . . . . . . . . . . . . . . . .62
Print Server Settings . . . . . . . . . . . . . . . . . . . . . . . . . . . . . . . . . . . . . . . . .64
View and Modify Printer Settings . . . . . . . . . . . . . . . . . . . . . . . . . . . . . . . . . . .65
Network Configuration . . . . . . . . . . . . . . . . . . . . . . . . . . . . . . . . . . . . . . . .71
5 • ZebraLink WebView - Print Server . . . . . . . . . . . . . . . . . . . . . . . . . 77
WebView - Print Server . . . . . . . . . . . . . . . . . . . . . . . . . . . . . . . . . . . . . . . . . .78
Print Server Home Page . . . . . . . . . . . . . . . . . . . . . . . . . . . . . . . . . . . . . .78
Status and Configuration . . . . . . . . . . . . . . . . . . . . . . . . . . . . . . . . . . . . . .80
Print Jobs. . . . . . . . . . . . . . . . . . . . . . . . . . . . . . . . . . . . . . . . . . . . . . . . . .80
Print Server Status. . . . . . . . . . . . . . . . . . . . . . . . . . . . . . . . . . . . . . . . . . .81
Support. . . . . . . . . . . . . . . . . . . . . . . . . . . . . . . . . . . . . . . . . . . . . . . . . . . .82
Reset . . . . . . . . . . . . . . . . . . . . . . . . . . . . . . . . . . . . . . . . . . . . . . . . . . . . .83
Restore. . . . . . . . . . . . . . . . . . . . . . . . . . . . . . . . . . . . . . . . . . . . . . . . . . . .85
Configuring the Print Server. . . . . . . . . . . . . . . . . . . . . . . . . . . . . . . . . . . . . . .87
14197L-005 10/100 Internal Print Server User Guide 11/12/2009

Contents
A • ZebraNet Utilities . . . . . . . . . . . . . . . . . . . . . . . . . . . . . . . . . . . . . . 93
ZebraNet View . . . . . . . . . . . . . . . . . . . . . . . . . . . . . . . . . . . . . . . . . . . . . . . . .94
Print Server Configuration . . . . . . . . . . . . . . . . . . . . . . . . . . . . . . . . . . . . . . . .95
ZebraNet Alert . . . . . . . . . . . . . . . . . . . . . . . . . . . . . . . . . . . . . . . . . . . . . . . . .96
ZebraNet Alert Using SNMP . . . . . . . . . . . . . . . . . . . . . . . . . . . . . . . . . . .97
Open ZebraNet Alert . . . . . . . . . . . . . . . . . . . . . . . . . . . . . . . . . . . . . . . . .98
Setting Alerts . . . . . . . . . . . . . . . . . . . . . . . . . . . . . . . . . . . . . . . . . . . . . . . . . .99
Establishing Email Alert Messaging . . . . . . . . . . . . . . . . . . . . . . . . . . . .101
ZebraNet View Java Applet . . . . . . . . . . . . . . . . . . . . . . . . . . . . . . . . . . . . . .102
ZebraNet Connect IP . . . . . . . . . . . . . . . . . . . . . . . . . . . . . . . . . . . . . . . . . . .104
Setting up a ZebraNet Connect IP. . . . . . . . . . . . . . . . . . . . . . . . . . . . . .104
B • Hardware Troubleshooting . . . . . . . . . . . . . . . . . . . . . . . . . . . . . . 107
Troubleshooting the 10/100 PS . . . . . . . . . . . . . . . . . . . . . . . . . . . . . . . . . . .108
Defaulting the 10/100 PS. . . . . . . . . . . . . . . . . . . . . . . . . . . . . . . . . . . . .108
10/100 Internal PS Network Status/Activity Indicator. . . . . . . . . . . . . . . .108
ZebraNet View Utility Discovery or Configuration Problems . . . . . . . . . .109
Unable to Print . . . . . . . . . . . . . . . . . . . . . . . . . . . . . . . . . . . . . . . . . . . .109
Unable to Configure Device . . . . . . . . . . . . . . . . . . . . . . . . . . . . . . . . . .111
5
C • Print Protocols . . . . . . . . . . . . . . . . . . . . . . . . . . . . . . . . . . . . . . . . 113
FTP . . . . . . . . . . . . . . . . . . . . . . . . . . . . . . . . . . . . . . . . . . . . . . . . . . . . . . . .114
D • Print Queues . . . . . . . . . . . . . . . . . . . . . . . . . . . . . . . . . . . . . . . . . 115
Berkeley Software Distribution (BSD)-Style Print Queue. . . . . . . . . . . . . . . .116
Configuring the Print Queue. . . . . . . . . . . . . . . . . . . . . . . . . . . . . . . . . . .116
System V Queue Installation . . . . . . . . . . . . . . . . . . . . . . . . . . . . . . . . . . . . .117
Configuring Operating System V Queue for ZebraNet Printing . . . . . . . .117
Prerequisites . . . . . . . . . . . . . . . . . . . . . . . . . . . . . . . . . . . . . . . . . . . . .117
Spool Print Job Configuration. . . . . . . . . . . . . . . . . . . . . . . . . . . . . . . . . .117
E • Frequently Asked Questions . . . . . . . . . . . . . . . . . . . . . . . . . . . . 119
Glossary . . . . . . . . . . . . . . . . . . . . . . . . . . . . . . . . . . . . . . . . . . . . . . . . 123
Index . . . . . . . . . . . . . . . . . . . . . . . . . . . . . . . . . . . . . . . . . . . . . . . . . . . 127
11/12/2009 10/100 Internal Print Server User Guide 14197L-005

Contents
Notes • ___________________________________________________________________
__________________________________________________________________________
__________________________________________________________________________
__________________________________________________________________________
__________________________________________________________________________
__________________________________________________________________________
__________________________________________________________________________
__________________________________________________________________________
__________________________________________________________________________
__________________________________________________________________________
6
14197L-005 10/100 Internal Print Server User Guide 11/12/2009

About This Document
This section provides you with contact information, documen t struc ture and organization, and
additional reference documents.
Contents
Who Should Use This Document. . . . . . . . . . . . . . . . . . . . . . . . . . . . . . . . . . . . . . . . . . . . 8
How This Document Is Organized . . . . . . . . . . . . . . . . . . . . . . . . . . . . . . . . . . . . . . . . . . . 8
Contacts. . . . . . . . . . . . . . . . . . . . . . . . . . . . . . . . . . . . . . . . . . . . . . . . . . . . . . . . . . . . . . . 9
Document Conventions . . . . . . . . . . . . . . . . . . . . . . . . . . . . . . . . . . . . . . . . . . . . . . . . . . 10
Related Documents . . . . . . . . . . . . . . . . . . . . . . . . . . . . . . . . . . . . . . . . . . . . . . . . . . . . . 12
11/12/2009 10/100 Internal Print Server User Guide 14197L-005

About This Document
8
Who Should Use This Document
Who Should Use This Document
This user guide is intended to be used by any person who will install and work with the
10/100 Internal PS for the ZM400, ZM600, GK420™, GX420/430™, ZP Series, HC100, Xi4,
and 2824 Plus printers.
How This Document Is Organized
This user guide is set up as follows:
Section Description
Introduction This chapter provides a high-level overview of the
Getting Started This chapter provides you with information and
10/100 Internal PS device, installation types,
standard network configurations, and how to work
with 10/100 Internal PS.
procedures for working with the most frequently
used 10/100 Internal PS features.
Installation This chapter provides information on the
10/100 Internal PS, and how to install ZebraNet
Utilities and the ZebraNet View Java Applet.
ZebraLink WebView - Printer This chapter provides you with detailed
information about how to set, modify, and view the
Printer Settings using WebView.
ZebraLink WebView - Print Server This chapter provides you with detailed
information about how to set, modify, and view the
Print Server Settings using WebView.
ZebraNet Utilities The appendix provides you with details on
ZebraNet Utilities, the software suite of printer
administration tools that complements a nd
enhances both ZebraLink and the ZebraNet family
of connectivity products.
Hardware Troubleshooting This appendix provides you with solutions to
known issues.
Print Protocols In this appendix, an exercise is provided to
experiment with File Transfer Protocol (FTP)
support.
Print Queues This appendix provides information and
instructions on configuring your print queue.
Frequently Asked Questions This appendix provides a group of frequently
asked questions (FAQs) about 10/100 Internal PS.
Glossary This appendix is a list of terms and associated
definitions.
14197L-005 10/100 Internal Print Server User Guide 11/12/2009

Contacts
About This Document
Technical Support via the Internet is available 24 hours per day, 365 days per year.
Web Site: www.zebra.com
E-mail Back Technical Library:
E-mail address: emb@zebra.com
Subject line: Emaillist
Self Service Knowledge Base: www.zebra.com/knowledgebase
Online Case Registration: www.zebra.com/techrequest
Contacts
9
Which Department
Do You Need?
Regional Headquarters
Technical Support
For questions on the
operation of Zebra
equipment and software,
please call your distributor.
For additional assistance,
contact us.
Please have your model and
serial numbers available.
Repair Service
Department
For back-to-base service and
repair.
Technical Tr aining
Department
For Zebra product training
courses.
Inquiry Department
For product literature and
distributor and dealer
information.
Customer Service
Department (US)
Internal Sales
Department (UK)
For printers, parts, media,
and ribbon, please call your
distributor or contact us.
Key:
T: Telephone
F: Facsimile
E: E-mail
The Americas
Zebra Technologies In ternational, LLC
333 Corporate W oods Parkway
Vernon Hills, IL 60061-3109
U.S.A.
T: +1 847 793 2600
Toll-free +1 800 423 0422
F: +1 847 913 8766
T: +1 877 ASK ZEBRA (275 9327)
F: +1 847 913 2578
Hardware: ts1@zebra.com
Software: ts3@zebra.com
Kiosk printers:
T: +1 866 322 5202
E: kiosksupport@zebra.com
T: +1 877 ASK ZEBRA (275 9327)
F: +1 847 821 1797
E: repair@zebra.com
To request a repair in the U.S.,
go to www.zebra.com/repair
T: +1 847 793 6868
T: +1 847 793 6864
F: +1 847 913 2578
E: ttamerica@zebra.com
T: +1 877 ASK ZEBRA (275 9327)
E: inquiry4@zebra.com
T: +1 877 ASK ZEBRA (275 9327)
E: clientcare@zebra.com
.
Europe, Africa,
Middle East, India
Zebra Technologies Europe Limited
Dukes Meadow
Millboard Road
Bourne End
Buckinghamshire, SL8 5XF
United Kingdom
T: +44 (0) 1628 556000
F: +44 (0) 1628 556001
T: +44 (0) 1628 556039
F: +44 (0) 1628 556003
E: Tseurope@zebra.com
T: +44 (0) 1772 693069
F: +44 (0) 1772 693046
New requests: ukrma@zebra.com
Status updates:
repairupdate@zebra.com
T: +44 (0) 1628 556000
F: +44 (0) 1628 556001
E: Eurtraining@zebra.com
T: +44 (0) 1628 556037
F: +44 (0) 1628 556005
E: mseurope@zebra.com
T: +44 (0) 1628 556032
F: +44 (0) 1628 556001
E: cseurope@zebra.com
Asia Pacific
Zebra Technologies Asia
Pacific Pte. Ltd.
120 Robinson Road
#06-01 Parakou Building
Singapore 068913
T: + 65 6858 0722
F: +65 6885 0838
T: +65 6858 0722
F: +65 6885 0838
E: China: tschina@zebra.com
All other areas:
tsasiapacific@zebra.com
T: +65 6858 0722
F: +65 6885 0838
E: China: tschina@zebra.com
All other areas:
tsasiapacific@zebra.com
T: + 65 6858 0722
F: +65 6885 0838
E: China: tschina@zebra.com
All other areas:
tsasiapacific@zebra.com
E: China: GCmarketing@zebra.com
All other areas:
AP ACChannelmarketing@zebra.com
T: +65 6858 0722
F: +65 6885 0836
E: China: order-csr@zebra.com
All other areas:
csasiapacific@zebra.com
11/12/2009 10/100 Internal Print Server User Guide 14197L-005

About This Document
10
Document Conventions
Document Conventions
The following conventions are used throughout this document to convey certain information:
Alternate Color (online only) Cross-references c
ontain links to other sections in this guide.
If you are viewing this guide online, click the blue text to jump to its location.
Command Line Examples All command line examples appear in Cou
For example, type the following to get to the Post-Install scripts in the
rier New font.
bin directory:
Ztools
Files and Directories All file names and directories appear in Courier New font. For
example, the
Cautions, Important, Note
Caution • Warns you of the potential for electrostatic discharge.
Caution • Warns you of a potential electric shock situation.
Caution • Warns you of a situation where excessive heat could cause a burn.
Zebra<version number>.tar file and the /root directory.
, and Example
Caution • Advises you that failure to take or avoid a specific action could result in physical
harm to you.
Caution • Advises you that failure to take or avoid a specific action could result in physical
harm to the hardware.
Caution • Advises you need to wear protective eye wear.
Important • Advises you of informatio n that is essential to complete a task.
Note • Indicates neutral or positive information that emphasizes or supplements important
points of the main text.
Example • Provides an example, often a scenario, to better clarify a section of text.
14197L-005 10/100 Internal Print Server User Guide 11/12/2009

About This Document
1
2
Document Conventions
Illustration Instructions Used when an illustration contains either information about a
dialog box or step(s) to accomplish in a dialog box.
One illustration instruction identifies a section of the dialog box and the other shows steps to
follow .
11
Set Permanent text-box.
1
a. In the Set Permanent text-box, type in the print
2
server’s IP address.
b. When you are finished, click OK.
11/12/2009 10/100 Internal Print Server User Guide 14197L-005

About This Document
12
Related Documents
Related Documents
The following documents might be helpful references:
• ZebraNet Wireless User Guide
• Programming Guide for ZPL II®, ZBI 2, Set-Get-Do, Mirror and WML
(formerly the ZPL II® Programming Guide)
•EPL™ Programming Guide
• Connectivity Solutions CD
14197L-005 10/100 Internal Print Server User Guide 11/12/2009

1
Introduction
This chapter provides a high-level overview of the 10/100 Internal PS device, installation
types, standard network configurations, and how to work with 10/100 Internal PS.
Contents
Overview . . . . . . . . . . . . . . . . . . . . . . . . . . . . . . . . . . . . . . . . . . . . . . . . . . . . . . . . . . . . . 14
Components. . . . . . . . . . . . . . . . . . . . . . . . . . . . . . . . . . . . . . . . . . . . . . . . . . . . . . . . . 14
Requirements. . . . . . . . . . . . . . . . . . . . . . . . . . . . . . . . . . . . . . . . . . . . . . . . . . . . . . . . . . 16
Firmware . . . . . . . . . . . . . . . . . . . . . . . . . . . . . . . . . . . . . . . . . . . . . . . . . . . . . . . . . . . 16
Software. . . . . . . . . . . . . . . . . . . . . . . . . . . . . . . . . . . . . . . . . . . . . . . . . . . . . . . . . . . . 16
Browser Support . . . . . . . . . . . . . . . . . . . . . . . . . . . . . . . . . . . . . . . . . . . . . . . . . . . . . 17
Protocols . . . . . . . . . . . . . . . . . . . . . . . . . . . . . . . . . . . . . . . . . . . . . . . . . . . . . . . . . . . 17
Hardware . . . . . . . . . . . . . . . . . . . . . . . . . . . . . . . . . . . . . . . . . . . . . . . . . . . . . . . . . . . 17
Compatibility. . . . . . . . . . . . . . . . . . . . . . . . . . . . . . . . . . . . . . . . . . . . . . . . . . . . . . . . . . . 18
Technical Specifications for the 10/100 Internal PS. . . . . . . . . . . . . . . . . . . . . . . . . . . . . 19
11/12/2009 10/100 Internal Print Server User Guide 14197L-005

Introduction
2
1
14
Overview
Overview
The 10/100 Internal Print Server (PS) i
connects the network and your ZebraLink-enabled printer. 10/100 Internal PS provides you
with a browser interface for printer and print serv er set tin gs. If yo u use the ZebraNet Utilities,
you can easily access the specialized features of a ZebraLink enabled printer. For details, see
ZebraNet Utilities on page 93.
Important • You can download the most recent version of ZebraNet Utilities from
http://www.zebra.com/print
Components
Figure 1 shows the components of a printer equipped with a 10/100 Internal PS. Table 1
identifies the various components and the functions each performs.
s an optional factory- or field-installed device that
er_management.html.
Figure 1 • Components
14197L-005 10/100 Internal Print Server User Guide 11/12/2009

Table 1 • Components and Functions
Introduction
Overview
15
1
Printer with 10/100 Internal PS—10/100 Internal PS gives your printer
these features:
• Print server and printer setup using a browser
• Remote monitoring and configuration capability of the
10/100 Internal PS using a browser
• Alerts
• The ability for you to send unsolicited printer status messages via
email-enabled devices
2
ZebraNet Utilities—ZebraNet Utilities is a suite of software programs
that work with 10/100 Internal PS and enhance the features of ZebraLink
resident within ZPL-based printers. The features include the following:
• ZebraNet View allows you to locate printers automatically.
ZebraNet View searches on parameters such as IP address, subnet,
printer model, printer status, and many other user-defined
characteristics. It also offers powerful device management
capabilities.
• ZebraNet Alert lets you configure multiple event alerts per device
with different alerts directed to different people. You are notified
of alerts from either visual or audio cues. You can also generate
advanced alert reports.
• ZebraNet View Java Applet is a Java-based version of the popular
ZebraNet View. It gives you ZebraNet View capabilities in a
non-Windows en viro nmen t.
• ZebraNet Connect IP allows you to discover a print server on a
network and define a port for printing.
11/12/2009 10/100 Internal Print Server User Guide 14197L-005

Introduction
16
Requirements
Requirements
Firmware
This section lists the minimum requirements for 10/100 Internal PS, which include firmware,
software, browser support, protocols, and hardware.
Software
Ta ble 2 sh
ows the appropriate firmware version for each printer.
Table 2 • Firmware Ve rsion by Printer
Printer Firmware Version
ZM400 V53.15.x or later
ZM600 V53.15.x or later
GK420 V61.15.x or later
GX420/430 V56.15.x or later
ZP Series V61.15.x or later
HC100 V54.16.x or later
Xi4 V53.17.x or later
2824 Plus V61.17.x or later
Important • You can upgrade your firmware by visiting our web site:
www.zebra.com/firmware
These are the platforms supported by ZebraNet Utilities:
®
Microsoft
• Client mode for peer-to-peer printing via TCP/IP
• Print Protocols & Methods (all simultaneously active):
• TCP/IP
• LPR/LPD
• Telnet
• FTP
• Raw printer port (port 9100)
14197L-005 10/100 Internal Print Server User Guide 11/12/2009
Windows® 95/98/Me/NT/2000/XP:

The ZebraNet View Java Applet is supported by most Java-enabled browsers:
®
UNIX
• Print Protocols & Methods (all simultaneously active):
Linux, and other systems supporting TCP/IP:
• TCP/IP
• LPR/LPD
• Telnet
• FTP
• Raw printer port (port 9100)
Browser Support
• HTML v3.2 or higher
• Internet Explorer or Netscape Navigator
Protocols
• TCP/IP: ARP, RARP
Introduction
Requirements
17
Hardware
The following are the 10/100 Internal Print Server options available for different printer
models:
• TCP/IP & UDP: DHCP, BOOTP, SNMP v1.0
• HTTP v1.0
Printers
Internal
Field Upgrade
Internal
Factory
ZM400 • •
ZM600 • •
GK420 •
GX420/430 •
ZP Series •
HC100 •
Xi4 • •
2824 Plus •
11/12/2009 10/100 Internal Print Server User Guide 14197L-005

Introduction
18
Compatibility
Compatibility
This section identifies the various components that are compatible with 10/100 Internal PS.
ZebraNet Wireless Print Server 10/100 Internal PS is fully compatible with the Wire less
Print Server.
ZebraNet Wireless Plus Print Server 10/100 Internal PS is also fully compatible with
the Wireless Plus Print Server.
Software IBM®: Tivoli® v7.1.3, HP®: Web JetAdmin™ v7.0, OpenView™ V6.4, and any
SNMP management application via Zebra Management Information Base (MIB) all work with
10/100 Internal PS.
14197L-005 10/100 Internal Print Server User Guide 11/12/2009

Technical Specifications for the 10/100 Internal PS
Technical Specifications for the 10/100 Internal PS
General Specifications
Network Connection Ethernet 10BaseT and 100BaseT UTP RJ-45
connection Half and Full Duplex Communications
User Interface A single (two element) LED activity indicator:
• bi-color display of operational status (solid
green or solid amber)
• bi-color display of speed and network activity
(flashing green or flashing amber)
Height (external dimensions) 0.5 in. 13.4 mm
Width (external dimensions) 2.2 in. 55.9 mm
Length (external dimensions) 3.7 in. 92.9 mm
Wei ght 0.9 oz 26 g
Temperature Operating 32° to 140°F 0° to 60°C
Storage –40° to 140°F –40° to 60°C
Introduction
19
Relative Humidity Operating 20% to 80%, non-condensing
Storage 5% to 85%, non-condensing
11/12/2009 10/100 Internal Print Server User Guide 14197L-005

Introduction
Notes • ___________________________________________________________________
__________________________________________________________________________
__________________________________________________________________________
__________________________________________________________________________
__________________________________________________________________________
__________________________________________________________________________
__________________________________________________________________________
__________________________________________________________________________
__________________________________________________________________________
__________________________________________________________________________
20
Technical Specifications for the 10/100 Internal PS
14197L-005 10/100 Internal Print Server User Guide 11/12/2009

2
Getting Started
This chapter provides you with information and procedures for working with the most
frequently used 10/100 Internal PS features.
Contents
Before You Begin . . . . . . . . . . . . . . . . . . . . . . . . . . . . . . . . . . . . . . . . . . . . . . . . . . . . . . . 22
Print a Configuration Label . . . . . . . . . . . . . . . . . . . . . . . . . . . . . . . . . . . . . . . . . . . . . 23
Setting the Primary Network Print Server . . . . . . . . . . . . . . . . . . . . . . . . . . . . . . . . . . . . 27
Using the Control Panel to View and Modify Print Server Parameters . . . . . . . . . . . . . . 28
Defaulting the 10/100 Internal PS . . . . . . . . . . . . . . . . . . . . . . . . . . . . . . . . . . . . . . . . . . 29
Defaulting the 10/100 PS on the ZM400 and ZM600 Printers. . . . . . . . . . . . . . . . . . . 29
Defaulting the 10/100 PS on the G-Series, ZP Series, and 2824 Plus Printers. . . . . . 29
Defaulting the 10/100 PS on the HC100 Printers . . . . . . . . . . . . . . . . . . . . . . . . . . . . 30
Defaulting the 10/100 PS on the Xi4 Printers . . . . . . . . . . . . . . . . . . . . . . . . . . . . . . . 30
Defaulting the 10/100 Internal PS Using WebView . . . . . . . . . . . . . . . . . . . . . . . . . . . 31
Defaulting the 10/100 Internal PS Using ZebraNet View. . . . . . . . . . . . . . . . . . . . . . . 32
Assigning an IP Address . . . . . . . . . . . . . . . . . . . . . . . . . . . . . . . . . . . . . . . . . . . . . . . . . 33
With Dynamic Host Configuration Protocol (DHCP) . . . . . . . . . . . . . . . . . . . . . . . . . . 33
Without DHCP . . . . . . . . . . . . . . . . . . . . . . . . . . . . . . . . . . . . . . . . . . . . . . . . . . . . . . . 33
In a Non-Windows Environment . . . . . . . . . . . . . . . . . . . . . . . . . . . . . . . . . . . . . . . . . 36
11/12/2009 10/100 Internal Print Server User Guide 14197L-005

Getting Started
22
Before You Begin
Before You Begin
10/100 Internal PS offers many features, but how you access and work with them is dependent
on your environment. Before you begin, you need to get information from the 10/100 Internal
PS configuration label.
Important • Make sure the printer is turned off (O).
Ta ble 3 sho
label with different DPI printheads.
ws the minimum label widths needed to print a 10/100 Internal PS configuration
DPI Inches MM
600 1.25 31.75
300 2.50 63.50
200 3.69 93.73
Table 3 • Label Width
14197L-005 10/100 Internal Print Server User Guide 11/12/2009

Print a Configuration Label
1. Which printer do you have?
If you have a… Then…
ZM400 and ZM600 a. Turn on (I) the printer and let it complete its power-up
G-Series, ZP Series,
and 2824 Plus
HC100
Xi4
Getting Started
Before You Begin
cycle.
b. When the POST cycle is complete, press Setup/Exit to
enter the Setup Mode.
c. Scroll through the parameters by pressing Plus (+) until
you reach List Network.
d. Press Select.
e. Press Plus (+) to print a network configuration label
(Figure 2).
f. Press Setup/Exit twice to exit the Setup Mode.
g. Cont in ue to step 2.
a. Turn on (I) the printer and let it complete its power-up
cycle.
b. Press and hold Feed until you see one flash of the LED.
c. After the LED flashes, release the button. A network and
printer configuration label (See Figure 3) prints.
d. Cont in ue to step 2.
Note • The HC100 does not have a network
configuration label. However, the IP Address, MAC
Address, and other useful information appear on the
printer configuration wristband.
a. Turn on (I) the printer and let it complete its power-up
cycle.
b. Press and hold Pause/Feed until the green lights turn off
on the printer status indicator and the orange lights blink
once.
c. Release Pause/Feed to print a printer configuration
wristband (Figure 4).
d. Cont in ue to step 2.
a. Turn on (I) the printer and let it complete its power-up
cycle.
b. When the POST cycle is complete, press Setup/Exit to
enter the Setup Mode.
c. Scroll through the parameters by pressing Next/Save
(
) until you reach List Network.
d. Press Plus (+) to print a network configuration label
(Figure 5).
e. Press Setup/Exit to exit the Setup Mode.
f. Press Next/Save to permanently save your changes.
23
11/12/2009 10/100 Internal Print Server User Guide 14197L-005

Getting Started
24
Before You Begin
2. From the configuration label, you need to look for these numbers:
• IP PROTOCOL *
• IP ADDRESS
•SUBNET MASK *
• DEFAULT GATEWAY *
• MAC ADDRESS
* Not available on HC100
3. On the configuration label that prints out for your 10/100 Internal PS device, circle the
aforementioned settings. You can now proceed to Assigning an IP Address on page 33.
Figure 2 • Network Configuration Label for ZM400/ZM600
14197L-005 10/100 Internal Print Server User Guide 11/12/2009

Getting Started
Before You Begin
Figure 3 • Network Configuration Label for G-Series, ZP Series, and
2824 Plus Printers
Figure 4 • Printer Configuration Wristband for HC100
25
11/12/2009 10/100 Internal Print Server User Guide 14197L-005

Getting Started
26
Before You Begin
Figure 5 • Network Configuration for Xi4
14197L-005 10/100 Internal Print Server User Guide 11/12/2009

Setting the Primary Network Print Server
The ZM400, ZM600, and Xi4 printers support the simultaneous installation of an internal
wired, external wired, and a wireless print server. Even though all three print servers may be
installed, only one is connected to the network and is the active print server. Table 4 outlines
priorities and identifies which device becomes the active print server when multiple print
servers are installed.
Table 4 • Primary Print Server
Getting Started
Setting the Primary Network Print Server
27
If the
Primary
Network
is set
to:
Installed and Connected to a Live
Ethernet Network Then, the
Internal External Wireless*
Active Print
Server will be:
XX X Internal
Wired
XXExternal
XWireless
XX X Wireless
Wireless
XX
Internal
X External
*NOTE: A Wireless Option board must have an active radio that can properly associate to an
access point.
The primary network setting can be configured using any of the following methods:
1. Printer’s control panel:
•ZM400: P
RIMARY NETWORK
• Xi4: PRIMARY NETWORK
• G-Series, ZP Series, HC100, 2824 Plus: Not available
2. ZPL command: ^NC
3. Set-Get-Do command: ip.primary_network
4. Printer’s web page: Network Configuration > Primary/Secondary Settings
11/12/2009 10/100 Internal Print Server User Guide 14197L-005

Getting Started
28
Using the Control Panel to View and Modify Print Server Parameters
Using the Control Panel to View and Modify Print
Server Parameters
You may change several print server parameters using the control pa nel o n the print er. Table 5
shows the parameters that may be viewed or modified through the printer’s control panel for
ZM400, ZM600, and Xi4 printers with firmware version V53.15 .x or late r.
Table 5 • Print Server Parameters
Parameter
Function
LIST NETWORK Print a Network Configuration Label
Use this parameter to print a network configuration label (see Figure 2
on page 24).
IP PROTOCOL
IP ADDRESS
SUBNET MASK
DEFAULT GATEWAY
RESET NETWORK
1
View the Method to Obtain an IP Address
This parameter tells if the user (permanent) or the server (dynamic) selects
the IP address. If a dynamic option is chosen, this parameter tells the
method(s) by which the print server (wired or wireless) receives the IP
address from the server.
Selections: ALL, GLEANING ONLY, RARP , BOOTP, DHCP , DHCP AND
BOOTP, PERMANENT
Default Value: All
1
View the Print Server’s IP Address
Default Value: 0.0.0.0
1
View the Subnet
Default Value: 255.255.255.0
1
View the Gateway
Default Value: 0.0.0.0
1
Reset the Wired or Wireless Network
Use this parameter to reinitialize the wire less radio card and the print server
(wired or wireless) when the wireless print server is running. This
parameter also causes any wireless radio card in the printer to reassociate to
the wireless network.
ACTIVE PRINTSRVR
View the Active Print Server
Selections: Internal Wired, External Wired, or Wireless
PRIMARY NETWORK
View the Primary Network
Selections: Wired, Wireless
Default Value: Wired
1 These parameters appear after the system recognizes the existence of a ZebraNet print server (wired or wireless). After the
print server is recognized, all zeroes (000.000.000.000) will display until the printer obtains an IP address or defaults to
address 192.168.254.254.
14197L-005 10/100 Internal Print Server User Guide 11/12/2009

Defaulting the 10/100 Internal PS
Defaulting the 10/100 Internal PS
This section provides you with instructions for defaulting the 10/100 Internal PS to factory
settings using the control panel, WebView, and ZebraNet View.
Defaulting the 10/100 PS on the ZM400 and ZM600 Printers
To default the 10/100 Internal PS to factory settings using the control panel on
the ZM400 or ZM600 printers, complete these steps:
1. From the control panel, press Setup/Exit two times.
2. Press Plus (+ button) five times.
The control panel will read DEFAULT NET.
3. Press Setup/Exit to save the change.
After the printer defaults all settings, the control panel will show PRINTER READY.
Getting Started
29
Defaulting the 10/100 PS on the G-Series, ZP Series, and 2824 Plus Printers
For the G-Series, ZP Series, and 2824 Plus printers, select one of the following methods to
default the print server for these printers:
• Use the web page in WebView — see Defaulting the 10/100 Internal PS Using WebView
on page 31 for further details.
• Use the ZebraNet View utility — see Defaulting the 10/100 Internal PS Using ZebraNet
View on page 32 for further details.
• Issue the ZPL command shown immediately below or refer to the ZPL II Programming
Guide for further details.
^XA^JUN^XZ
• Use ZebraNet Bridge to manage the print server — see the ZebraNet™ Bridge Enterprise
User Guide for further details.
Note • T o downl oad a copy of either of the guides men tione d abov e, visit the Zeb ra we b site
at: www.zebra.com/manuals.
11/12/2009 10/100 Internal Print Server User Guide 14197L-005

Getting Started
30
Defaulting the 10/100 Internal PS
Defaulting the 10/100 PS on the HC100 Printers
To default the 10/100 Internal PS to factory settings, complete these steps:
Defaulting the 10/100 PS on the Xi4 Printers
To default the 10/100 Internal PS to factory settings, complete these steps:
1. Press and hold Feed for two seconds.
Note • Be sure to count the number of LED blinks. The three blink sequence defaults only
the print server parameters while the four blink sequence defaults all of the printer
parameters.
2. Wait for the three blink sequence of the Error/Status LED.
3. Release Feed.
1. From the control panel, press Setup/Exit two times.
2. Press Plus (+) five times.
The control panel will read DEFAULT NET.
3. Press Next/Save to save the change.
The control panel will read PRINTER READY.
14197L-005 10/100 Internal Print Server User Guide 11/12/2009

Defaulting the 10/100 Internal PS
Defaulting the 10/100 Internal PS Using WebView
To default the 10/100 Internal PS to factory settings using WebView, complete
these steps:
1. From the ZebraNet Print Server view, click Factory Print Server Settings.
The Restore to Factory Defaults page opens:
Figure 6 • Restore to Factory Defaults
Getting Started
31
2. Enable the check box for the settings you want to reset, and click Submit Changes.
Important • During the reset cycle, the web pages are unavailable. Upon completion,
check the IP address of the 10/100 Internal PS as it may have changed during the reset
e.
cycl
11/12/2009 10/100 Internal Print Server User Guide 14197L-005

Getting Started
32
Defaulting the 10/100 Internal PS
Defaulting the 10/100 Internal PS Using ZebraNet View
To default 10/100 Internal PS to factory settings using ZebraNet View, complete
these steps:
1. From the task bar, select Start > Programs > ZebraNet Utilities > ZebraNet View.
The ZebraNet View dialog opens:
Figure 7 • ZebraNet View
2. From the menu bar, select Print Server > Reset.
The Reset Print Server dialog opens:
Figure 8 • Reset Print Server
3. Select the settings you want to reset, and then click Restore.
14197L-005 10/100 Internal Print Server User Guide 11/12/2009

Assigning an IP Address
Before you can begin working with 10/100 Internal PS, you must get or assig n an IP address
for the 10/100 Internal PS device.
There are four different ways to assign an IP address. Here is a list and a brief description of
each method:
Getting Started
Assigning an IP Address
33
• Web View — Browser-enabled method to assi
gn an IP address.
• ZebraNet View — Utility that remotely manages ZebraLink-enabled printers.
• DHCP — See your LAN administrator for mor
e information.
• Telnet — DOS command to assign an IP address.
Important • Throughout the procedures in this cha pter , there are some feat ures that require the
default User ID and/or default password. If you are prompted, these are the defaults:
• User ID: admin
• Password: 1234
With Dynamic Host Configuration Protocol (DHCP)
If your network uses DHCP, your 10/100 In ternal PS device is assigned a temporary IP
address.
Note • Check with your Network Administrator to see whether your network uses DHCP.
Without DHCP
If your network does not use a dynamic IP addressi
ng system (such as DHCP), you need to set
a permanent IP address for the 10/100 Internal PS device. ZebraNet View is the
Windows-based print server management and configuration utilit y that comes with your
10/100 Internal PS.
Important • The remaining sections are dependent on the successful installation of ZebraNet
Utilities. To install, see ZebraNet Utilities on page 42.
11/12/2009 10/100 Internal Print Server User Guide 14197L-005

Getting Started
34
Assigning an IP Address
Assigning an IP Address, Subnet Mask, and Default Gateway
To assign an IP address, Subnet, and Default Gateway using ZebraNet View,
complete these steps:
1. From the task bar, select Start > Programs > ZebraNet Utilities > ZebraNet View.
Important • On the illustrati on that follows, take no te of the H/W address column and
Serial # column. Compare what you see in ZebraNet View with the network
configuration label you printed out.
The ZebraNet View dialog opens:
Figure 9 • ZebraNet View
2. Compare the MAC Address on the 10/100 Internal PS network configuration label with
the H/W Address column on the screen to find the 10/100 Internal PS you are working
with.
3. When you locate your 10/100 Internal PS, select it.
14197L-005 10/100 Internal Print Server User Guide 11/12/2009

Getting Started
Assigning an IP Address
4. From the menu bar, select PrintServer > Configuration.
Important • If the 10/100 Internal PS does not have an IP address, it shows in the main
screen with an IP of 0.0.0.0. If, after 2 minutes, you do not assi gn an IP Address, the
10/100 Internal PS defaults to
IP Address 192.168.254.254.
The Print Server Configuration dialog opens.
Figure 10 • Printer Server Configuration
35
5. If your 10/100 Internal PS does not have an IP address, complete these steps:
•Enter an IP
•Click
6. From the ZebraNet View menu bar, select PrintServer > Configuration.
7. Click the TCP/IP tab.
8. From the Print Server Configuration dialog > TCP/IP tab, in the Subnet Mask text-box,
Address.
OK.
type in your subnet mask.
9. Confirm it is accurate, and cl ick OK.
10. To set a permanent IP address, enable the Set Permanent option button.
11. In the Set Permanent text box, type a new IP address, and then click OK.
11/12/2009 10/100 Internal Print Server User Guide 14197L-005

Getting Started
36
Assigning an IP Address
In a Non-Windows Environment
Assigning an IP address from the printer LCD
12. From the Print Server Configuration dialog > TCP/IP tab, in the Default Gateway
text-box, type in your default gateway.
13. Confirm it is accurate, and click OK.
If your environment is not Windows-based, this section is for you. However, this method can
be used in a Windows environment, too.
These steps can be used to assign an IP address using the control panel (LCD).
Note • This method is not available for the G-Series, ZP Series, 2824 Plus, and HC100
printers because they do not have a control panel (or printer LCD).
To assign an IP address from the printer LCD, complete these steps:
1. Connect the AC power cord and data cables.
2. Turn on (I) the printer.
3. Wait until the printer completes the POST and the LCD says PRINTER READY.
4. Which model printer do you have?
If you have a(n)… Then…
ZM400 or ZM600 a. When the POST cycle is complete, press Setup/Exit to
enter the Setup Mode.
b. Scroll through the parameters by pressing Plus (+) until
you reach ACTIVE PRINTSRVR.
c. Verify that th e active print server is INTERNAL
WIRED.
d. Scroll through the parameters by pressing Plus (+) until
you reach PRIMARY NETWORK.
e. Continue to step 5.
Xi4
a. When the POST cycle is complete, press Setup/Exit to
enter the Setup Mode.
b. Scroll through the parameters by pressing Next/Save
) until you reach ACTIVE PRINTSRVR.
(
c. Verify that th e active print server is INTERNAL
WIRED.
d. Scroll through the parameters by pressing Next/Save
(
) until you reach PRIMARY NETWORK.
e. Continue to step 5.
14197L-005 10/100 Internal Print Server User Guide 11/12/2009

Getting Started
Assigning an IP Address
5. You can edit any of the following network settings in order to communicate with any
10/100 Internal PS in your network environment. The settings shown below will
sequentially appear after the PRIMARY NETWORK parameter on the control panel.
Important • To change any of these settings, you need to enter the printer password. The
default password is
1234.
• ip protocol (GLEANING ONLY, RARP, BOOTP, DHCP, DHCP and BOOTP, ALL,
PERMANENT): The printer menu item
IP PROTOCOL must be set to
PERMANENT if attempting to assign the IP address from the control panel.
• ip address (if initial default setting is 0.0.0.0, after 2 minutes this defaults to
192.168.254.254)
37
• subnet mask (d
• default gatew
6. Which model printer do you have?
If you have a(n)… Then…
efault setting 255.255.255.0)
ay (default setting of 000.000.000.000)
ZM400 or ZM600 a. Press Select.
b. Press Setup/Exit twice to save your changes and exit the
Setup Mode.
c. The control panel will read PRINTER READY.
Xi4
a. Press Setup/Exit to exit the Setup Mode.
b. Press Next/Save to permanently save your changes.
c. The control panel will read PRINTER READY.
11/12/2009 10/100 Internal Print Server User Guide 14197L-005

Getting Started
38
Assigning an IP Address
Assigning an IP Address via a Telnet Session
The methods used for assigning an IP address with a Telnet session are Static Route and
Gleaning.
Important • This applies to any TCP/IP-capable workstation/host networked with the Zebra
printer. Both, the workstation/host and the 10/100 Internal PS, must be on the same network
segment.
Before you can Telnet to the 10/100 Internal PS and configure it, you must first assign the
/100 Internal PS a temporary IP address.
10
Static Route
To use this method, complete these steps:
1. Turn on (I) the printer and wait for 2 minutes to allow for the device to complete the
self-test.
During this time, the 10/100 Internal PS performs an address broadcast. If no address is
assigned to the unit (via
for 10/100 Internal PS is 192.168.254.254. Prin
DHCP or BOOTP), it uses a default address. The default address
t the 10/100 Internal PS
configuration label to confirm the address. For details, see Before You Begin on page 22.
2. You can use the route add command to place the default IP address into the
workstation's network routing table.
Example • In the next step, **** is the IP address on the 10/100 Internal PS
configuration label.
3. At the workstation/host command prompt (in Windows, at the DOS prompt), type:
route add **** "IP address of the workstation" 0
Note • The zero (0) placed at the end of the “route add” command is optional on some
systems.
4. Telnet to the 10/100 Internal PS by typing:
"Telnet xxx.xxx.xxx.xxx"
The password is 1234.
5. At this point, you can alter the settings as desired. When complete, do a reset and allow
the 10/100 Internal PS self-test to complete before proceeding with any communications
activity.
14197L-005 10/100 Internal Print Server User Guide 11/12/2009

Getting Started
Assigning an IP Address
Gleaning
A method by which the 10/100 Internal PS uses the IP address of the first ping packet that is
sent to its hardware address.
Note • Gleaning works only on local subnets at routers. It does not pass Address Resolution
Protocol (ARP) broadcasts.
To use this method, complete these steps:
1. Add an entry to the ARP table that assigns an IP address to an Ethernet (hardware)
address.
The syntax for this command is:
arp -s "temporary ipaddress of print server" "MAC Address
(print server hardware address)" arp -s <temporary ip
address> <MAC Address>
Example • You would type:
arp -s 10.3.50.59 00-07-4d-68-1D-B9-86
39
2. Power cycle the printer.
3. As the printer reboots, begin a continuous ping to the address assigned p reviously.
Note • Most UNIX systems use a continuous ping.
To use a continuous ping from a Windows host, you must issue the command:
ping -t "ipaddress".
4. When the 10/100 Internal PS begins to respond, stop the ping activity.
In Windows, Ctrl + C halts the pinging.
5. Telnet to the 10/100 Internal PS and assign the appropriate IP address, subnet mask, and
gateway, if applicable.
6. Once this is complete, reset the 10/100 Internal PS.
11/12/2009 10/100 Internal Print Server User Guide 14197L-005

Getting Started
Notes • ___________________________________________________________________
__________________________________________________________________________
__________________________________________________________________________
__________________________________________________________________________
__________________________________________________________________________
__________________________________________________________________________
__________________________________________________________________________
__________________________________________________________________________
__________________________________________________________________________
__________________________________________________________________________
40
Assigning an IP Address
14197L-005 10/100 Internal Print Server User Guide 11/12/2009

3
Installation
This chapter provides information on the 10/100 Internal PS, and how to install ZebraNet
Utilities and the ZebraNet View Java Applet.
Contents
10/100 Internal PS . . . . . . . . . . . . . . . . . . . . . . . . . . . . . . . . . . . . . . . . . . . . . . . . . . . . . . 42
ZebraNet Utilities . . . . . . . . . . . . . . . . . . . . . . . . . . . . . . . . . . . . . . . . . . . . . . . . . . . . . . . 42
ZebraNet View Java Applet . . . . . . . . . . . . . . . . . . . . . . . . . . . . . . . . . . . . . . . . . . . . . . . 46
11/12/2009 10/100 Internal Print Server User Guide 14197L-005

Installation
42
10/100 Internal PS
10/100 Internal PS
T o i nstall an 1 0/100 Internal PS, see th e inst allation instruction s on the Con nectivity Solutio ns
CD.
ZebraNet Utilities
The ZebraNet Utilities is a software suite consisting of tools to assist you with the
configuration of the 10/100 Internal PS device, which gives you the flexibility to make
changes to settings, track errors, and more.
If you want to be certain you have the most recent version of the ZebraNet Utilities, you can
visit our Web site and download the most recent version at:
www.zebra.com/utilities
For more details, see Ov
Note • Contact your System Administrator before installing this software. You must have
Administrator rights on your network to install most of these utilities.
erview on page 14 or ZebraNet Utilities on page 93.
To install the ZebraNet Utilities, complete these steps:
The steps that follow reflect the steps and dialogs fo
conduct a custom installation, the dialogs you encounter or see will differ from those in these
steps.
1. Insert the CD-ROM into the drive.
Important • Is AutoPlay enabled on your computer?
• Yes. Your computer automatically launches the installation.
• No. You need to navi gate to:
Software > ZebraNet Util > setup.exe
on the CD-ROM and manually launch the installation.
r a typical installation. If you plan to
14197L-005 10/100 Internal Print Server User Guide 11/12/2009

ZebraNet Utilities
Each of these
icons has a
drop-down
menu from
which to
choose.
2. Click Next.
Figure 11 shows the dialog box where you select the utilities that you want to install.
Figure 11 • ZebraNet Install Utilities
Installation
43
11/12/2009 10/100 Internal Print Server User Guide 14197L-005
Installation
44
ZebraNet Utilities
Important • If you choose to install the ZebraNet View Java Applet in step 3, you must
complete the installation steps for ZebraNet View Java Applet on page 46.
3. In the ZebraNet Utilities dialog, select the features you want to install and click Next.
The ZebraNet Setup Dialog gives you the chanc
e to reset your installation settings.
Figure 12 • ZebraNet Setup Dialog
14197L-005 10/100 Internal Print Server User Guide 11/12/2009

Installation
ZebraNet Utilities
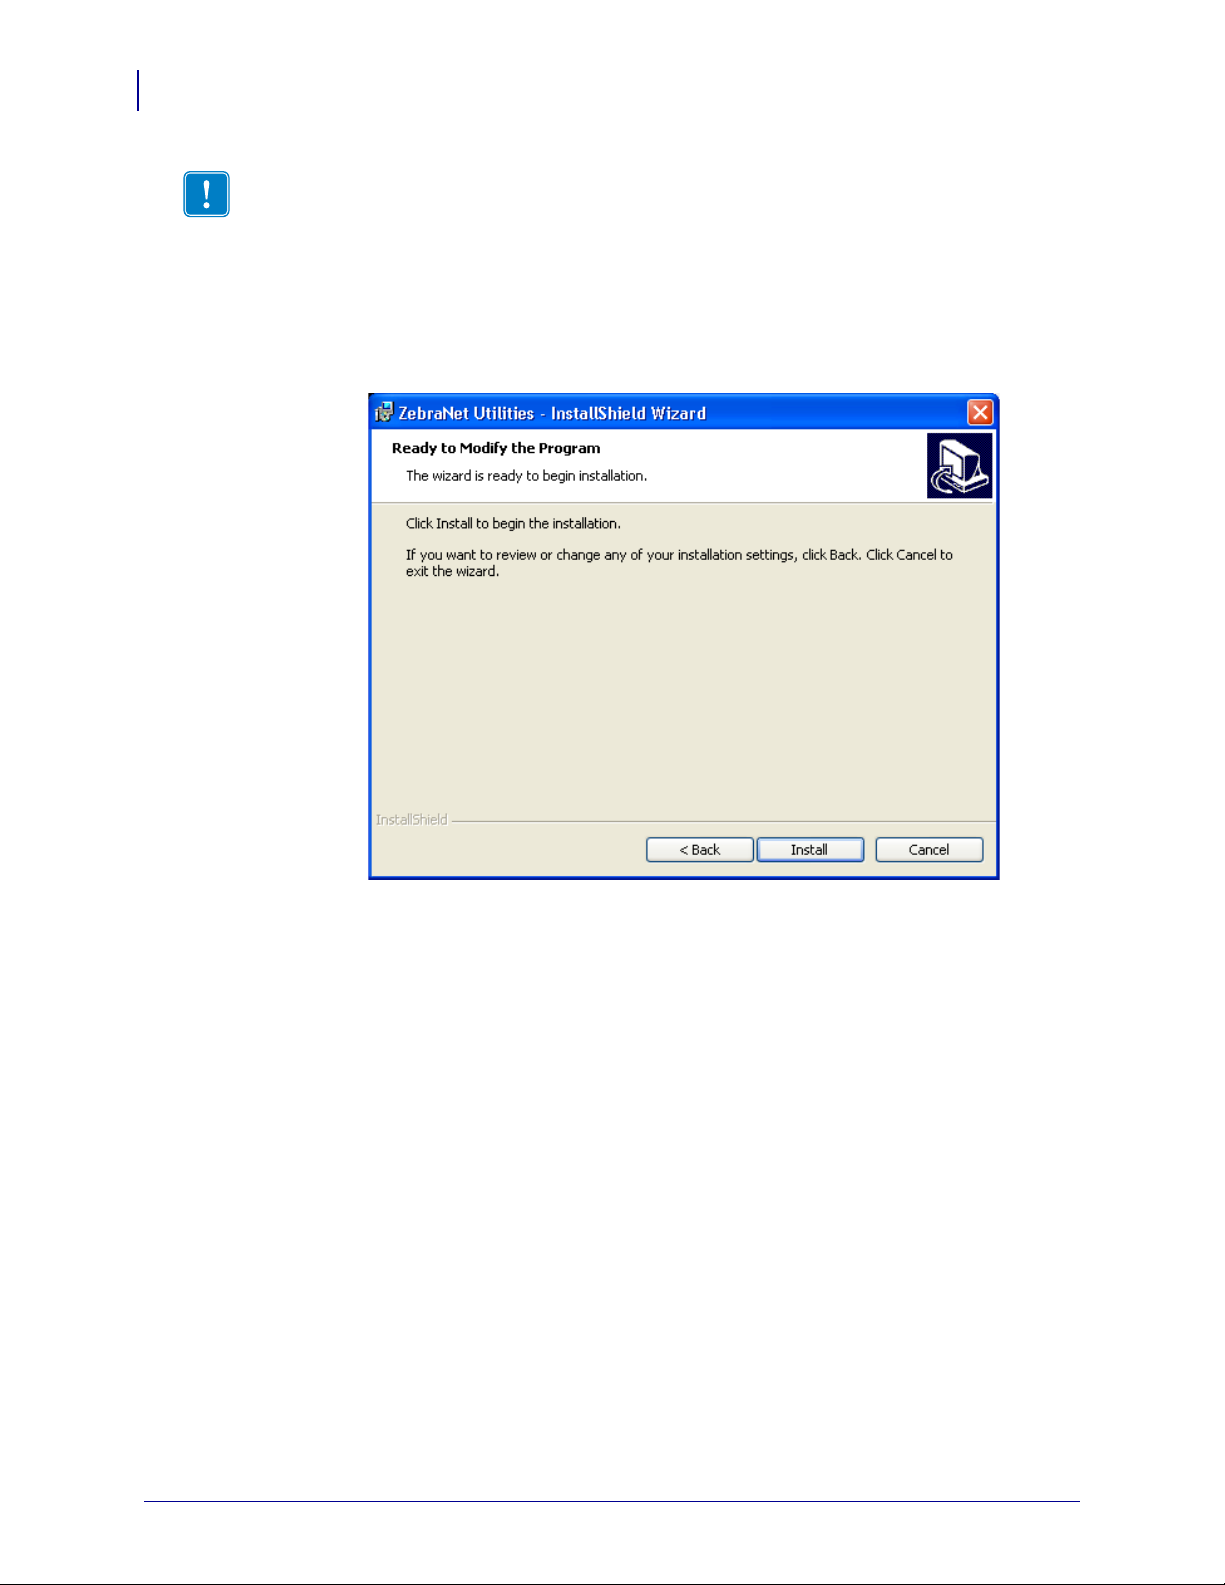
4. In the ZebraNet Utilities dialog, you have the option to review an d make any changes to
your installation settings. When you are satisfied with your installation settings, click
Install.
When the installation is complete, this dialog opens.
Figure 13 • ZebraNet Setup Dialog
45
5. Click Finish.
Important • When the installa tion is complete, you need to restart you r system for the changes
to take effect.
11/12/2009 10/100 Internal Print Server User Guide 14197L-005

Installation
46
ZebraNet View Java Applet
ZebraNet View Java Applet
If you selected ZebraNet View Java Applet when you were installing the ZebraNet Utilities,
you need to complete a few installation steps to work with this utility.
To install ZebraNet View Java Applet, complete these steps:
1. From the task bar, select Programs > ZebraNet Utilities > ZebraNet View Java Applet 1.0.
This Security Warning dialog opens.
Figure 14 • ZebraNet Security Warning
14197L-005 10/100 Internal Print Server User Guide 11/12/2009

2. To begin the installation, click Yes.
The Select Java Plugin Installation dialog opens.
Figure 15 • Select Java Plugin Installation
Installation
ZebraNet View Java Applet
47
3. Make the selections that apply to your environment, and click Install.
The Software License Agreement opens.
Figure 16 • Software License Agreement
11/12/2009 10/100 Internal Print Server User Guide 14197L-005

Installation
48
ZebraNet View Java Applet
4. Read the License Agreement.
5. To continue with the installation, click Yes.
6. When the installation is complete, click OK.
The Java page opens.
Figure 17 • Java Page
7. You have these options:
• To work with this utility, see ZebraNet View Java Applet on page 102.
• To close the utility, click the X.
14197L-005 10/100 Internal Print Server User Guide 11/12/2009

4
ZebraLink
WebView - Printer
This chapter provides you with detailed information about how to set, modify, and view the
Printer Settings using WebView.
Contents
WebView - Printer . . . . . . . . . . . . . . . . . . . . . . . . . . . . . . . . . . . . . . . . . . . . . . . . . . . . . . 50
Printer Home Page . . . . . . . . . . . . . . . . . . . . . . . . . . . . . . . . . . . . . . . . . . . . . . . . . . . 50
View Printer Configuration. . . . . . . . . . . . . . . . . . . . . . . . . . . . . . . . . . . . . . . . . . . . . . 51
View and Modify Printer Settings. . . . . . . . . . . . . . . . . . . . . . . . . . . . . . . . . . . . . . . . . 55
Directory Listing. . . . . . . . . . . . . . . . . . . . . . . . . . . . . . . . . . . . . . . . . . . . . . . . . . . . . . 55
Alert Setup. . . . . . . . . . . . . . . . . . . . . . . . . . . . . . . . . . . . . . . . . . . . . . . . . . . . . . . . . . 56
Establishing Email Alert Messaging. . . . . . . . . . . . . . . . . . . . . . . . . . . . . . . . . . . . . . . 60
Printer Controls . . . . . . . . . . . . . . . . . . . . . . . . . . . . . . . . . . . . . . . . . . . . . . . . . . . . . . 62
Print Server Settings . . . . . . . . . . . . . . . . . . . . . . . . . . . . . . . . . . . . . . . . . . . . . . . . . . 64
View and Modify Printer Settings. . . . . . . . . . . . . . . . . . . . . . . . . . . . . . . . . . . . . . . . . . . 65
Network Configuration . . . . . . . . . . . . . . . . . . . . . . . . . . . . . . . . . . . . . . . . . . . . . . . . . 71
11/12/2009 10/100 Internal Print Server User Guide 14197L-005

ZebraLink WebView - Printer
50
WebView - Printer
WebView - Printer
W ebView provides the System Administrator or user complete, easy, one-step control over the
printing environment. It provides real-time configuratio n, cont rol, and moni toring capabi lities
with the convenient graphic interface of a Web browser.
The Web pages returned by Zebra printers are not static. They contain real-time information
about the printer’s present state of operatio n, inc luding o n-line sta tus, erro r conditio ns, and al l
printing parameters.
Printer Home Page
Note • To access the printer’s Web page, you need the IP address. For instructions on getting
the IP address, see Assigning an IP Address on page 33.
The Home Page is the first web page that opens. It is a page with a menu of hyperlinks. Each
hyperlink allows you to make modifications to the printer, 10/100 Internal PS, and network
settings. The other changeable settings on the Home Page include:
• Network Status, Error, and Warning reports
• ZebraNet 10/100 Internal PS configuration
• Printer settings
• Directories of objects stored in Flash memory and RAM devices
• Objects, stored fonts, images, programs, and ZPL II formats
• Zebra Technologies support and home pages
14197L-005 10/100 Internal Print Server User Guide 11/12/2009

To open WebView for your printer, complete these steps:
1. Open a Web browser.
2. In the Address text-box, type your printer’s IP address, and press Enter.
The Printer Home Page opens.
Figure 18 • Printer Home Page
ZebraLink WebView - Printer
WebView - Printer
51
View Printer Configuration
The V iew Pri nter Co nfigurat ion menu optio n prov ides accurat e, up-to-the-min ute informa tion
on the printer’s current state. An administrator can conveniently find any information on the
virtual configuration label and also check on the status of printer ports.
To see the View Printer Configuration menu option, complete these steps:
1. From the Printer Home Page, click View Printer Configuration.
11/12/2009 10/100 Internal Print Server User Guide 14197L-005

ZebraLink WebView - Printer
52
WebView - Printer
WebView displays the configuration settings.
Table 6 • Configuration Settings
ZM400, ZM600
a3
14197L-005 10/100 Internal Print Server User Guide 11/12/2009
HC100
Table 6 • Configuration Settings
ZebraLink WebView - Printer
WebView - Printer
53
11/12/2009 10/100 Internal Print Server User Guide 14197L-005

ZebraLink WebView - Printer
54
WebView - Printer
Table 6 • Configuration Settings
Xi4
14197L-005 10/100 Internal Print Server User Guide 11/12/2009

2. To update the printer information from this view, click Refresh and the printer sends
current information to the Web browser.
3. When you are finished reviewing:
If... Then...
You want to return to the Home page Click the Home link.
You want to print a label Scroll to the bottom of this page and click
View and Modify Printer Settings
This section provides you with steps for accessing and modifying printer settings with a
ZebraLink-enabled printer. It also provides illustrations of the various pages you can access.
For more specific information about these settings, please refer to View and Modify Printer
Settings on page 65.
Important • To apply changes made in this section, you need to use the default password for
your printer:
Label
ZebraLink WebView - Printer
WebView - Printer
Print
55
.
Password: 1234
Directory Listing
The directory page provides a listing of all file system devices (B:, E:, R:, Z:). The size, name,
and location of each stored object appears.
Buttons are available to perform file management operations on the objects. The file
management operations include:
• Delete object — Not available for objects in read-only memory (Z:).
• Copy object to a new name and/or device — Not available for objects in read-only
memory (Z:).
11/12/2009 10/100 Internal Print Server User Guide 14197L-005
ZebraLink WebView - Printer
56
WebView - Printer
To view the Directory Listing, complete these steps:
1. From the Printer Home Page, click Directory Listing.
The Directory Listing page opens. There are several fields to select in this view.
Figure 19 • Directory Listing
2. To create a script, click Create New Script.
Alert Setup
To configure the printer’ s in teraction with ZebraNet Alert to be completely fun ct ion al , SNMP
settings must be established in these areas:
• T he printer, via the WebView interface.
• The Alert Printer Management Utility for logging SNMP traps.
14197L-005 10/100 Internal Print Server User Guide 11/12/2009

The ZebraLink messaging system provides for more than SNMP notification. Alerts can be
routed to various destinations:
•TCP
•UDP
•email
• serial port
• parallel port destinations
•SNMP
•USB
Setting Alerts
Your 10/100 Internal Print Server allows you to configure your printer to send unsolicited
Alerts.
ble 7 shows the conditions that can trigger alerts.
Ta
ZebraLink WebView - Printer
WebView - Printer
57
Table 7 • Alerts
Alert Type Error Condition
ZebraLink Alerts
• Paper out
• Ribbon out *
• Head too hot
• Head too cold
• Head open
• Supply too hot*
• Ribbon in *
• Rewind *
• Cutter jammed *
• Printer paused
• PQ job completed
• Label ready *
• Head element bad *
• BASIC runtime
• BASIC forced
• Power on
• Clean printhead
• Media low
• Ribbon low
• Replace head
• Battery low *
• RFID error *
• All messages
* NOTE: Alerts for these conditions cannot be set on the HC100.
11/12/2009 10/100 Internal Print Server User Guide 14197L-005
ZebraLink WebView - Printer
58
WebView - Printer
This section has step-by-step instructions for setting up an alert using ZebraLink™. For
information on setting up alerts using ZebraNet View, see ZebraNet Utilities on page 93.
Important • If you do not have a ZebraLink-enabled printer, these steps will not work.
To view Alert Setup using ZebraLink, complete these steps:
1. Open a Web browser.
2. In the Address text-box, type your printer’s IP address, and press Enter.
The Printer Home Page opens.
Figure 20 • Printer Home Page
14197L-005 10/100 Internal Print Server User Guide 11/12/2009

3. From the Printer Home Page, click Alert Setup.
The Alert Messaging System page opens.
Figure 21 • Alert Messaging System
ZebraLink WebView - Printer
WebView - Printer
59
To add an alert, you need the default password.
4. To add an alert, click Add Alert Message.
5. Select accordingly.
6. You can use ZebraNet Alert to monitor alert s set throug h a Zebr aLin k -e nab le d pr int er.
From this Web page, you can add alert messages notifying you when a printer is out of
paper, needs a ribbon, and so on.
11/12/2009 10/100 Internal Print Server User Guide 14197L-005

ZebraLink WebView - Printer
60
WebView - Printer
Establishing Email Alert Messaging
You can have multiple email addresses set up for routing different error messages, or split
notifications between email and other network management tools.
To begin receiving email notification of errors, complete these steps:
1. Open a Web browser.
2. In the Address text-box, type in the printer’s IP address.
The Printer Home Page opens.
Figure 22 • Printer Home Page
3. From the Printer Home Page, click Alert Setup.
The Alert Setup page shows a list of message notifications and their respective
destinations (if no notifications are listed).
14197L-005 10/100 Internal Print Server User Guide 11/12/2009

ZebraLink WebView - Printer
WebView - Printer
4. To set up email notification, go to the Alert Setup page and click Add Alert Message.
The Add Alert Message page opens.
Figure 23 • Add Alert Message
61
5. Specify the condition to send over email, such as HEAD ELEMENT BAD or PAPER OUT.
6. Set Destination to Email.
7. In the SET drop-down box, select YES.
You will be notified via email whenever your specific condition is detected.
8. In the CLR drop-down box, select YES if you wish to be notified when the specific
condition is cleared.
11/12/2009 10/100 Internal Print Server User Guide 14197L-005
ZebraLink WebView - Printer
62
WebView - Printer
10. Click Add Alert Message.
11. To save current settings, click Save Printer Setting.
9. Enter a valid email address to send the alert messages to.
Example • admin@yourcompany.net (The Port field can be ignored for
email setup.)
Important • A password is required. If you forget to enter the password, the alerts you just
set are deleted.
T o receive email alert, yo u must give 10/100 Internal PS the IP address of your mail server
th
at is running SMTP.
12. Enter the password and click Save Current Configuration.
Important • The printer accepts only the last configuration made.
13. You can continue to add more Alerts, if finished:
• From the Printer Home Page, select
Setup
•Click SMTP Email Alerts.
• Specify your SMTP server address.
Note • The SMTP Server address might be referred to as Mail Server address.
When these steps are done, you can begin receiving email notification messages.
Printer Controls
This page offers control over basic printer functions.
Other functions are also accessible from this page. These include:
• Pause — pauses the print job.
.
PrintServer Settings > Network Communications
.
•
Feed — causes printer to feed one label.
Cancel One Format — cancels the currently printing format.
•
•
Cancel All Formats — cancels all formats.
Reset Printer — causes printer to perform its standard reset without cycling power.
•
14197L-005 10/100 Internal Print Server User Guide 11/12/2009

To view Printer Controls, complete these steps:
1. From the Printer Home Page, click Printer Controls.
This Printer Controls page opens.
Figure 24 • Printer Controls
ZebraLink WebView - Printer
WebView - Printer
63
Important • In this view, you must have administrative rights to make changes to the printer
controls.
11/12/2009 10/100 Internal Print Server User Guide 14197L-005

ZebraLink WebView - Printer
64
WebView - Printer
Print Server Settings
This section provides you with instructions for viewing the current printer server settings.
To view the print server menu, complete this step:
1. From the Printer Home Page, click Print Server Settings.
The Print Server Settings Page opens.
Figure 25 • Print Server Settings Page
14197L-005 10/100 Internal Print Server User Guide 11/12/2009

View and Modify Printer Settings
Not available
on HC100
To view and modify printer settings, complete these steps:
1. From the Printer Home Page, click View and Modify Printer Settings.
The View and Modify Printer Settings page opens.
Figure 26 • View and Modify Printer Settings
ZebraLink WebView - Printer
View and Modify Printer Settings
65
11/12/2009 10/100 Internal Print Server User Guide 14197L-005

ZebraLink WebView - Printer
66
View and Modify Printer Settings
2. For details on the View and Modify Printer Settings page, see Table 8.
Table 8 • View and Modify Printer Settings Menu Options
General Setup
For the HC100 printers,
the following changes
occur:
• Darkness Mode added
• Print Mode removed
• Print Speed removed
Serial Communicat
ions Setup
14197L-005 10/100 Internal Print Server User Guide 11/12/2009

ZebraLink WebView - Printer
View and Modify Printer Settings
67
Table 8 • View and Modify Printer Settings Menu
Network Configuration
For the G-Series, ZP
es, 2824 Plus, and
Seri
HC100 printers, only
the following links
appear:
• SNMP
• SMTP
• TCP/IP Settings
For more information about
configuring the network, see
Network Configuration
on page 71.
Print Listings on Label
For the HC100 printers,
List Network has been
removed.
Options (Continued)
11/12/2009 10/100 Internal Print Server User Guide 14197L-005
ZebraLink WebView - Printer
68
View and Modify Printer Settings
Table 8 • View and Modify Printer Settings Menu
Media Setup
For the HC100 printers,
Media Type and Print
Method
have been
removed. No changes
can be made to the
Maximum Length settings.
and
Print Width
Options (Continued)
14197L-005 10/100 Internal Print Server User Guide 11/12/2009

ZebraLink WebView - Printer
View and Modify Printer Settings
Table 8 • View and Modify Printer Settings Menu Options (Continued)
Calibration
For the HC100 printers,
this page is not
available.
69
11/12/2009 10/100 Internal Print Server User Guide 14197L-005

ZebraLink WebView - Printer
70
View and Modify Printer Settings
Table 8 • View and Modify Printer Settings Menu
ZPL Control
Advanced Setup
For the HC100 printers,
Backfeed has been
removed.
Options (Continued)
14197L-005 10/100 Internal Print Server User Guide 11/12/2009

Network Configuration
Not available
on HC100
To view and modify network configuration, complete these steps:
1. From the Printer Home Page, click View and Modify Printer Settings.
2. Click Network Configuration.
The Network Configuration page opens.
Note • For the G-Series, ZP Series, 2824 Plus, and HC100 printers, only the following
links appear:
• SNMP
• SMTP
• TCP/IP Settings
ZebraLink WebView - Printer
View and Modify Printer Settings
Figure 27 • Network Configuration Page
(ZM400/ZM600
Web Page Shown)
71
11/12/2009 10/100 Internal Print Server User Guide 14197L-005

ZebraLink WebView - Printer
72
View and Modify Printer Settings
3. For details on the Network Configuration Settings page, see Table 9.
Table 9 • Network Configuration Settings Menu Options
Primary/Secondary Settings
For the HC100 printers,
this page is not
av
ailable.
SNMP
14197L-005 10/100 Internal Print Server User Guide 11/12/2009

ZebraLink WebView - Printer
View and Modify Printer Settings
Table 9 • Network Configuration Settings Menu Options (Continued)
SMTP
TCP/IP Settings
73
11/12/2009 10/100 Internal Print Server User Guide 14197L-005

ZebraLink WebView - Printer
74
View and Modify Printer Settings
Table 9 • Network Configuration Settings Menu Options (Continued)
Wireless Setup
14197L-005 10/100 Internal Print Server User Guide 11/12/2009

ZebraLink WebView - Printer
View and Modify Printer Settings
Table 9 • Network Configuration Settings Menu Options (Continued)
Wireless Encryption Setup
75
11/12/2009 10/100 Internal Print Server User Guide 14197L-005

ZebraLink WebView - Printer
Notes • ___________________________________________________________________
__________________________________________________________________________
__________________________________________________________________________
__________________________________________________________________________
__________________________________________________________________________
__________________________________________________________________________
__________________________________________________________________________
__________________________________________________________________________
__________________________________________________________________________
__________________________________________________________________________
76
View and Modify Printer Settings
14197L-005 10/100 Internal Print Server User Guide 11/12/2009

5
ZebraLink
WebView - Print Server
This chapter provides you with detailed information about how to set, modify, and view the
Print Server Settings using WebView.
Contents
WebView - Print Server . . . . . . . . . . . . . . . . . . . . . . . . . . . . . . . . . . . . . . . . . . . . . . . . . . 78
Print Server Home Page . . . . . . . . . . . . . . . . . . . . . . . . . . . . . . . . . . . . . . . . . . . . . . . 78
Status and Configuration . . . . . . . . . . . . . . . . . . . . . . . . . . . . . . . . . . . . . . . . . . . . . . . 80
Print Jobs. . . . . . . . . . . . . . . . . . . . . . . . . . . . . . . . . . . . . . . . . . . . . . . . . . . . . . . . . . . 80
Print Server Status. . . . . . . . . . . . . . . . . . . . . . . . . . . . . . . . . . . . . . . . . . . . . . . . . . . . 81
Support . . . . . . . . . . . . . . . . . . . . . . . . . . . . . . . . . . . . . . . . . . . . . . . . . . . . . . . . . . . . 82
Reset . . . . . . . . . . . . . . . . . . . . . . . . . . . . . . . . . . . . . . . . . . . . . . . . . . . . . . . . . . . . . . 83
Restore . . . . . . . . . . . . . . . . . . . . . . . . . . . . . . . . . . . . . . . . . . . . . . . . . . . . . . . . . . . . 85
Configuring the Print Server. . . . . . . . . . . . . . . . . . . . . . . . . . . . . . . . . . . . . . . . . . . . . . . 87
11/12/2009 10/100 Internal Print Server User Guide 14197L-005
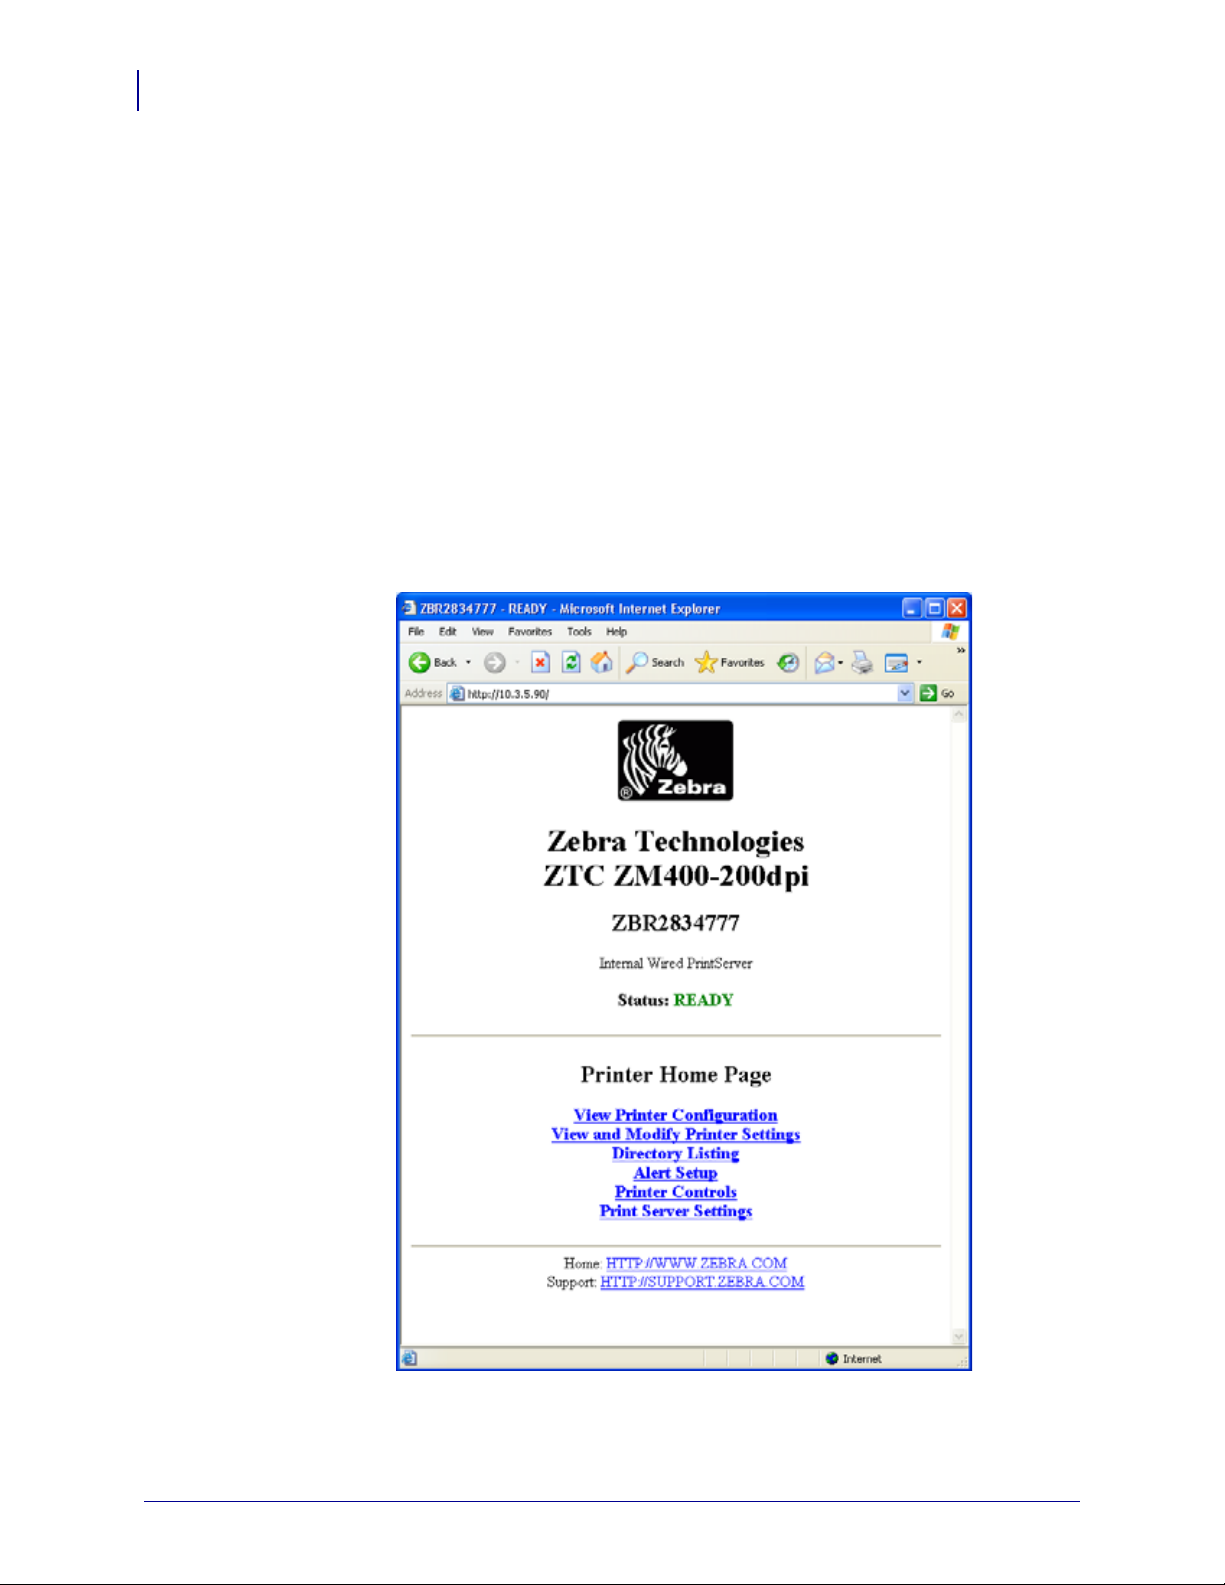
ZebraLink WebView - Print Server
78
WebView - Print Server
WebView - Print Server
This section provides steps on how to check the 10/100 Internal PS configuration settings
using a browser.
Print Server Home Page
To open WebView for your print server, complete these steps:
1. Open a Web browser.
2. In the Address text-box, type your printer’s IP address, and then press Enter.
Your browser page looks similar to Figure 28.
Figure 28 • Printer Home Page
14197L-005 10/100 Internal Print Server User Guide 11/12/2009

ZebraLink WebView - Print Server
WebView - Print Server
3. From the Printer Home Page, click Print Server Settings.
The default User ID and password are required.
Important • To apply changes made in this section, you need to use the default User ID
and password for your printer:
User ID: admin
Password: 1234
The Print Server Settings Page opens.
Figure 29 • Print Server Settings Page
79
11/12/2009 10/100 Internal Print Server User Guide 14197L-005

ZebraLink WebView - Print Server
80
WebView - Print Server
Status and Configuration
Within this section of the Print Server Settings, you will either navigate to the printer home
page or change the configuration of the 10/100 Internal PS.
Printer
With this feature, you may return to the Printer Home Page.
Print Server
This feature allows the configuration of certain options for the print server including:
• TCP/IP Configuration
• TCP/IP Logical Printing Ports
• System (SNMP)
• SMTP Email Alerts
• Web Admin
• POP3 E-Mail Printing
For more detailed information, please refer to Configuring the Print Server on page 87.
Print Jobs
Within this section o f the Print Server Settings, you may either view the prin t job log or cance l
the job.
Job Log
You may use this feature to display the system up time, total jobs printed, and job in fo rmati on .
Cancel Job
You may use this feature to cancel the current print job.
14197L-005 10/100 Internal Print Server User Guide 11/12/2009

Print Server Status
Within this section of th e Print Serve r Settings, you may either assess the Configuration Sheet
or the port status.
View Configuration Sheet
You may use this feature to view the configuration sheet with general, TCP/IP, and port
configuration sections.
ZebraLink WebView - Print Server
Figure 30 • Configuration Sheet Page
WebView - Print Server
81
11/12/2009 10/100 Internal Print Server User Guide 14197L-005

ZebraLink WebView - Print Server
82
WebView - Print Server
View Port Status
You may use this feature to check the printer’s status and model.
Figure 31 • Port Status Page
Support
Within this section of the Print Server Settings, you may either contact Zebra or review
Frequently Asked Questions (FAQ’s).
Contact
Use this feature to contact Zebra via web site, telephone, or fax.
FAQ
Use this feature to connect to the Zebra Service and Support on the web site.
14197L-005 10/100 Internal Print Server User Guide 11/12/2009

Reset
Reset Printer
ZebraLink WebView - Print Server
WebView - Print Server
Within this section of the Print Server Settings, you may either reset the printer or the print
server.
This feature permits you to reset the controls used to print formats, and to reset the printer.
Figure 32 • Reset Printer Page
83
11/12/2009 10/100 Internal Print Server User Guide 14197L-005

ZebraLink WebView - Print Server
84
WebView - Print Server
Reset Print Server
With this feature, you may reset the print server.
Figure 33 • Reset Print Server Page
14197L-005 10/100 Internal Print Server User Guide 11/12/2009

ZebraLink WebView - Print Server
WebView - Print Server
Restore
Within this section of the Print Server Settings, you may either restore factory default settings to the
printer or the print server.
Factory Default Printer Settings
You may use this feature to restore the printer settings to factory defaults.
Figure 34 • Factory Default Printer Settings Page
85
11/12/2009 10/100 Internal Print Server User Guide 14197L-005

ZebraLink WebView - Print Server
86
WebView - Print Server
Factory Print Server Settings
You may use this feature to restore the print server to factory defaults.
Figure 35 • Factory Print Server Settings Page
14197L-005 10/100 Internal Print Server User Guide 11/12/2009

Configuring the Print Server
To configure the print server settings, complete these steps:
1. From the Print Server Home page, click Print Server.
The Print Server Configuration page opens.
Figure 36 • Print Server Configuration Page
ZebraLink WebView - Print Server
Configuring the Print Server
87
2. For details on the Print Server Configuration page choices, see Table 10, Print Server
Configuration Menu Options on page 88.
3. Select the appropriate link to make your change(s).
11/12/2009 10/100 Internal Print Server User Guide 14197L-005

ZebraLink WebView - Print Server
88
Configuring the Print Server
TCP/IP Configuration
You can change the TCP/IP configuration of the
10/100 Internal PS.
• IP Address: Use this feature to set the IP
address if using the Permanent addressing
method.
• IP Protocol: Use this feature to select the
Dynamic Addressing method to use at
startup. Choices include: ALL, GLEANING
ONLY, RARP, BOOTP, DHCP, BOOTP and
DHCP, or PERMANENT.
• Default Address Enabled: This setting
determines if the printer will use its default
address, if no address is provided through
DHCP or BOOTP. If no address is assigned
after two minutes, the print server defaults to
IP address 192.168.254.254.
• Subnet Mask: Use this feature to set the
subnet mask. The subnet mask must follow
the format XXX.XXX.XXX.XXX, where
each XXX is a number between 0 and 255.
• Default Gateway: Use this feature to set the
default gateway. This gateway will be used
whenever messages need to be sent to
another network. This gateway address must
follow the format XXX.XXX.XXX.XXX,
where each XXX is a number between 0 and
255.
• WINS Server IP Address: Use this feature
to set or view the IP address of the WINS
Server.
• Connection Timeout Checking: Use this
feature to enable or disable the Connection
Timeout feature. The timeout is used to close
network TCP/IP connections that are idle for
more than the number of seconds entered in
the Timeout Value.
• Timeout Value (secs): Use this feature to set
the Connection Timeout Value. The Valid
range is 10 to 3600 seconds. The default is
300 seconds.
• ARP Broadcast Interval (mins): Use this
feature to set interval for sending an ARP
Broadcast. The valid range is 1 to 30 minutes.
Address Resolution Protocol (ARP)
broadcast packets allow other network
devices to associate the print server's IP
Address with its hardware address.
• Base Raw Port Number: Use this feature to
set the raw TCP port that the print server will
use for printing tasks. The default is port
9100.
Table 10 • Print Server Configuration Menu Options
14197L-005 10/100 Internal Print Server User Guide 11/12/2009

Table 10 • Print Server Configuration Menu Options (Continued)
TCP/IP Logical Printing Ports
Logical printers allow you to set up multiple preand post-processing configurations for each
output port. Each logical port configuration can
perform the following:
• Add user-configured strings before and after
the print data.
• Remove unwanted characters from the
beginning of the print data.
• Four logical printer configurations are
supported for each output port on the printer.
The configurations can be assigned to any
port, and all of these configurations can be
assigned to a single output port.
ZebraLink WebView - Print Server
Configuring the Print Server
89
11/12/2009 10/100 Internal Print Server User Guide 14197L-005

ZebraLink WebView - Print Server
90
Configuring the Print Server
System (SNMP)
This feature gives you the ability to manage
multiple devices on a network, be it printers,
computers, or other network-attached devices.
On this page, you can define the SNMP system
name, system location (10/100 Internal PS
description), and other SNMP settings for your
10/100 Internal PS.
Table 10 • Print Server Configuration Menu Options (Continued)
SMTP Email Alert Configuration
This feature allows you to set up the print server
to send email messages about the printer’s status
to an Network Administrator. The SMTP settings
must be set to send emails to the email server.
14197L-005 10/100 Internal Print Server User Guide 11/12/2009

Table 10 • Print Server Configuration Menu Options (Continued)
Web Admin
This page allows you to configure the Admin
name and password. Links to upgrades and
support information can also be altered.
Note • The printer and print server password can
be changed on ZPL printers with firmware
Vx.15.x or higher.
ZebraLink WebView - Print Server
Configuring the Print Server
91
POP3 Email Printing
This feature helps you set up the print server to
receive email messages containing formats that
can be printed. The POP3 settings must be set to
retrieve emails from the email server.
Important • Zebra recommends setting the
POP3 polling interval no lower than 30. Some
email servers will lock accounts after repeated
login attempts.
11/12/2009 10/100 Internal Print Server User Guide 14197L-005

ZebraLink WebView - Print Server
Notes • ___________________________________________________________________
__________________________________________________________________________
__________________________________________________________________________
__________________________________________________________________________
__________________________________________________________________________
__________________________________________________________________________
__________________________________________________________________________
__________________________________________________________________________
__________________________________________________________________________
__________________________________________________________________________
92
Configuring the Print Server
14197L-005 10/100 Internal Print Server User Guide 11/12/2009

A
ZebraNet Utilities
The appendix provides you with details on ZebraNet Utilities, the software suite of printer
administration tools that complements and enhances both ZebraLi nk and th e ZebraNet family
of connectivity products.
Contents
ZebraNet View . . . . . . . . . . . . . . . . . . . . . . . . . . . . . . . . . . . . . . . . . . . . . . . . . . . . . . . . . 94
Print Server Configuration . . . . . . . . . . . . . . . . . . . . . . . . . . . . . . . . . . . . . . . . . . . . . . . . 95
ZebraNet Alert . . . . . . . . . . . . . . . . . . . . . . . . . . . . . . . . . . . . . . . . . . . . . . . . . . . . . . . . . 96
ZebraNet Alert Using SNMP . . . . . . . . . . . . . . . . . . . . . . . . . . . . . . . . . . . . . . . . . . . . 97
Open ZebraNet Alert . . . . . . . . . . . . . . . . . . . . . . . . . . . . . . . . . . . . . . . . . . . . . . . . . . 98
Setting Alerts . . . . . . . . . . . . . . . . . . . . . . . . . . . . . . . . . . . . . . . . . . . . . . . . . . . . . . . . . . 99
Establishing Email Alert Messaging. . . . . . . . . . . . . . . . . . . . . . . . . . . . . . . . . . . . . . 101
ZebraNet View Java Applet . . . . . . . . . . . . . . . . . . . . . . . . . . . . . . . . . . . . . . . . . . . . . . 102
ZebraNet Connect IP . . . . . . . . . . . . . . . . . . . . . . . . . . . . . . . . . . . . . . . . . . . . . . . . . . . 104
Setting up a ZebraNet Connect IP. . . . . . . . . . . . . . . . . . . . . . . . . . . . . . . . . . . . . . . 104
11/12/2009 10/100 Internal Print Server User Guide 14197L-005
ZebraNet Utilities
94
ZebraNet View
ZebraNet View
To open ZebraNet View Utilities, complete these steps:
ZebraNet View offers powerful device management capabilities and allows you to locate
printers automatically. It can search on parameters such as IP address, subnet, printer model,
printer status, and many other user-defined characteristics.
1. From the task bar, select Start > Programs > ZebraNet Utilities > ZebraNet View.
The ZebraNet View dialog opens.
Figure 37 • ZebraNet View
2. Select your printer.
14197L-005 10/100 Internal Print Server User Guide 11/12/2009

Print Server Configuration
To configure your print server, complete these steps:
1. From the menu bar, select PrintServer > Configuration.
The Print Server Configuration dialog opens.
Figure 38 • Print Server Configuration
ZebraNet Utilities
Print Server Configuration
95
There are multiple tabs that you can access to make changes to current setti ng s.
11/12/2009 10/100 Internal Print Server User Guide 14197L-005

ZebraNet Utilities
96
ZebraNet Alert
ZebraNet Alert
ZebraNet Alert gives you the ability to manage your Zebra printers by immediately notifying
Syst
em Administrators of printer error or warning co nditions, which red uces printer downtime
and increases application efficiency. Using Web-based configuration tools, selected errors or
warning conditions can be routed to a variety of services such as email messages, wireless
pagers, or the ZebraNet Alert.
Ta ble 11 shows the conditions that can trigger alerts and the possible destinations.
Table 11 • ZebraNet Alert and Destinations
Alert Type Error Condition
ZebraLink Alerts
• Paper out
• Ribbon out *
• Head too hot
• Head too cold
• Head open
• Supply too hot*
• Ribbon in *
• Rewind *
• Cutter jammed *
• Printer paused
• PQ job completed
• Label ready *
• Head element bad *
• BASIC runtime
• BASIC forced
• Power on
• Clean printhead
• Media low
• Ribbon low
• Replace head
• Battery low *
• RFID error *
• All messages
ZebraNet Alert
Destinat
* NOTE: Alerts for these conditions cannot be set on the HC100.
14197L-005 10/100 Internal Print Server User Guide 11/12/2009
ions
Unsolicited Alert messages can be direct
destinations:
• Email (10/100 Internal PS-specific)
• TCP (10/100 Internal PS-specific)
• UDP (10/100 Internal PS-specific)
• SNMP (10/100 Internal PS-specific)
• Serial
• Parallel
• USB
ed to the following

ZebraNet Alert Using SNMP
You can send notifications over SNMP only, for use with ZebraNet Alert or a similar network
management utility.
To configure the 10/100 Internal PS to send alerts across a TCP/IP Network
using ZebraNet Alert, complete these steps:
Important • If you did not install Zebr aNet Alert during the ZebraNet Ut ilities installation, see
ZebraNet Utilities on page 42.
1. From the task bar, select Start > Programs > ZebraNet Utilities > ZebraNet View.
2. Select the printer you want.
If... Then...
ZebraNet Utilities
ZebraNet Alert
97
A DHCP server is
The 10/100 Internal PS will already have an IP address.
present
No DHCP server is
You may need to assign the printer an IP address.
present
3. To assign your printer an IP address, from the menu bar, select Print Server >
Configuration
4. For PrintServer SNMP Traps, select the SNMP Traps tab.
5. Enter the trap destination and options.
.
This tells the 10/100 Internal PS what TCP/IP address to send the alerts to, and under what
circumstances to send error and
log reports. Entering 255.255.255.255 broadcasts the
message to every host on the network with an SNMP program running.
6. For ZebraNet Alert to get and display the messages, you need to open ZebraNet Alert. To
do this, follow these steps:
a. From the task bar, select Start > Programs > ZebraNet Utilities > ZebraNet Alert.
Important • The SNMP trap settings must be established to communicate with
10/100 Internal PS if messages are se
b. In the ZebraNet Alert dialog, from the menu bar, select View > Filter Settings.
c. From the View Filter - Devices tab, choose your settings accordingly.
nt to the ZebraNet Alert.
Note • If you select No device filtering, messages from every printer are caught;
Device Address allows you to specify from which IP address data will come.
d. The View Filter - Events tab allows you to select individual events you want the
program to be aware of.
.
Important • Now SNMP Alert messages for the 10/100 In tern al PS can be set up in
W ebView. From the pri nter’ s home page, activa te the link to Alert Setu p. You can add
messages that are sent to the ZebraNet Alert for Windows by choosing SNMP as a
destination.
11/12/2009 10/100 Internal Print Server User Guide 14197L-005

ZebraNet Utilities
98
ZebraNet Alert
Open ZebraNet Alert
To open ZebraNet Alert, complete these steps:
1. From the task bar, select Start > ZebraNet Utilities > ZebraNet Alert.
2. In the ZebraNet Alert dialog, from the menu bar, select Report.
The report menu option has multiple report selections.
3. Select the type of report you want to generate.
Figure 39 is an example of the Event Summary report. Notice it generates a .log file.
Figure 39 • Event Summary Report
14197L-005 10/100 Internal Print Server User Guide 11/12/2009

Setting Alerts
This section includes step-by-step instructions for sett ing up an alert using ZebraNe t V ie w. For
information on setting up alerts using ZebraLink, see Alert Setup on page 56.
To set alerts (traps) using ZebraNet View, complete these steps:
1. In the ZebraNet View dialog, from the menu bar select Print Server > Configuration.
2. Click the SNMP Traps tab.
The Printer Traps check boxes are the alerts you can set from ZebraNet Vi ew.
Figure 40 • SNMP Traps
ZebraNet Utilities
Setting Alerts
99
11/12/2009 10/100 Internal Print Server User Guide 14197L-005

100
ZebraNet Utilities
Setting Alerts
3. Enable the alerts (printer traps) you want to set here and click OK.
4. To monitor the alerts you established, from the task bar select Start > ZebraNet Utilities >
ZebraNet Alert
.
The ZebraNet Alert dialog opens.
Figure 41 • ZebraNet Alert
In this dialog, you can view the log of errors and monitor the activity of your printer(s).
14197L-005 10/100 Internal Print Server User Guide 11/12/2009
 Loading...