

Page 1

User manual
XOMAX
Multimedia car radio
with Android OS
XM-DA755
ENGLISH
Page 2
IMPORTANT NOTICE & PRECAUTIONS
Notes:
-
-
-
-
Installation varies on type of cars and supplied
parts
Store small articles in places not accessible to
children
Install only with the supplied screws
Installation of unit by professional technician
is strongly recommended
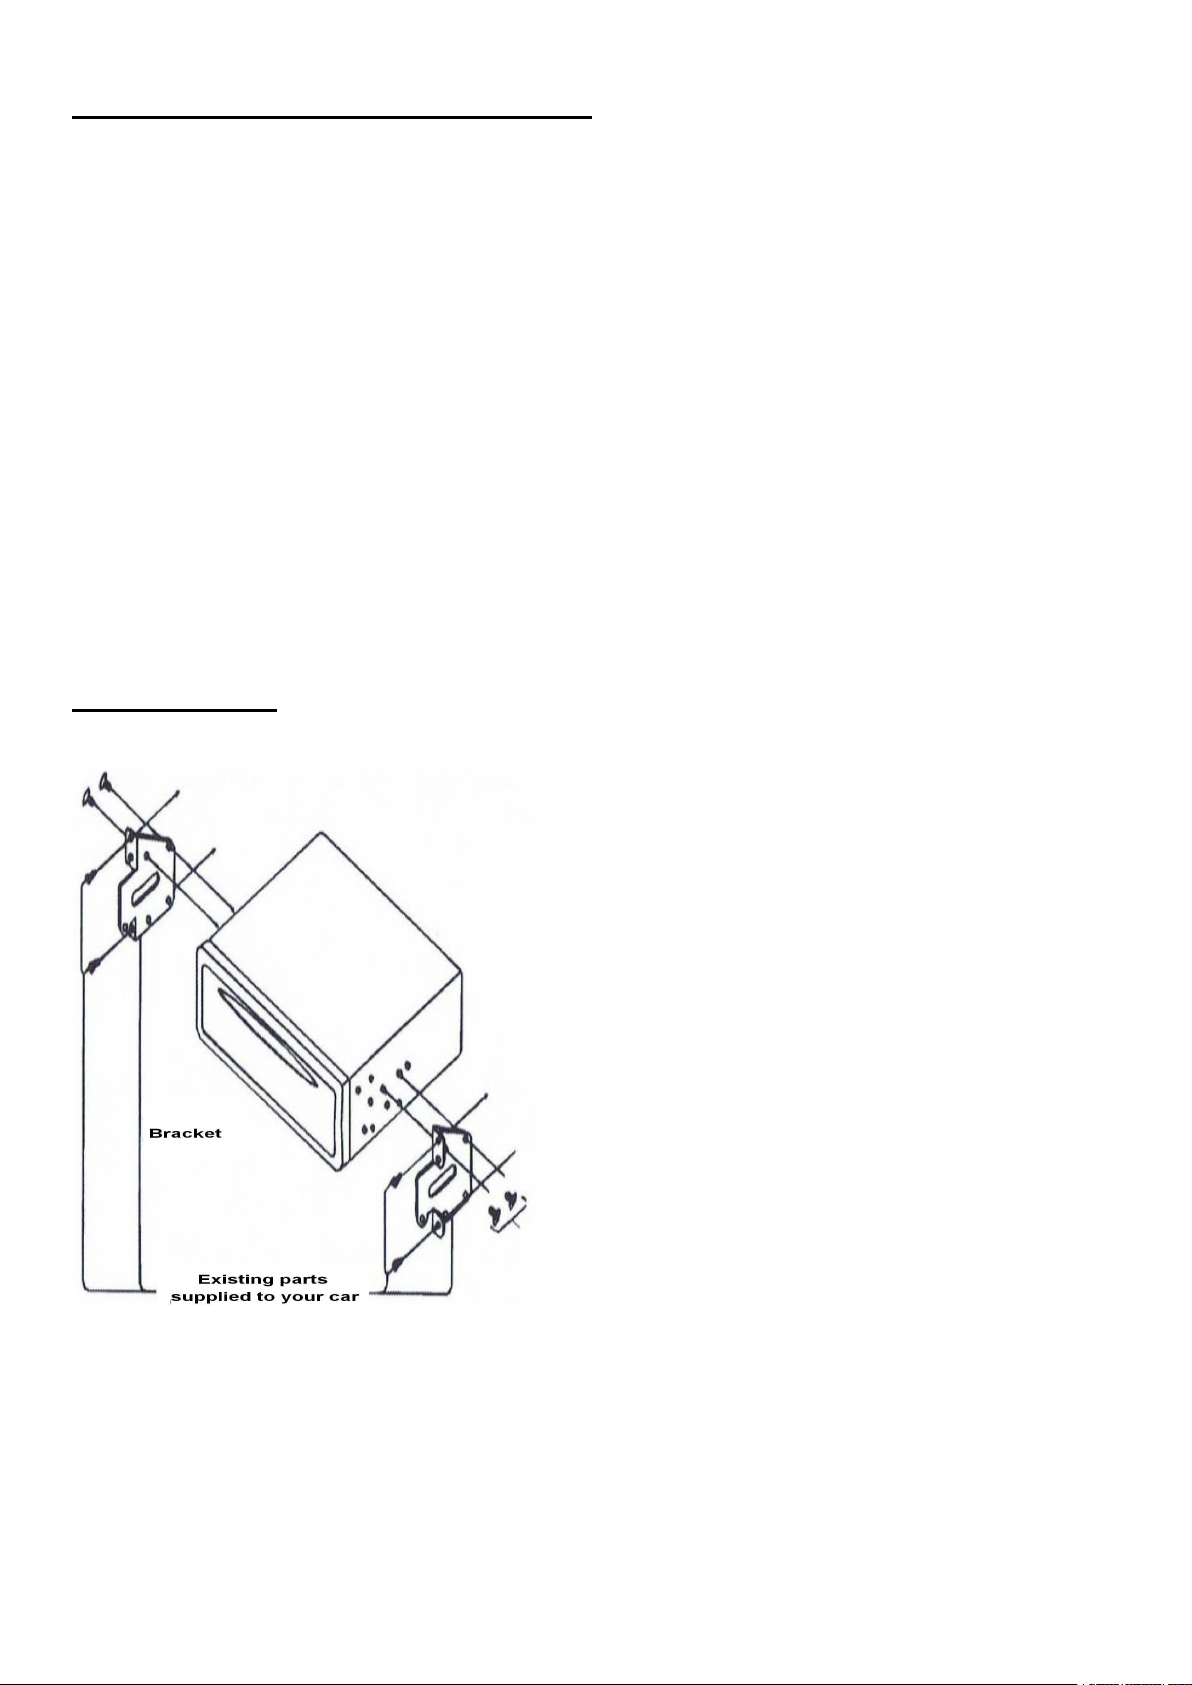
Remarks:
Mounting brackets and screws are the parts
that supplied in your car and not provided in
this unit.
Thank you for using our company multi-media player! To operate the unit correctly, please read the
operation manual carefully before using. Keep this operation manual for future reference.
The unit is designed only for DC 12V negative ground operation system. Make sure your vehicle
is connected to DC 12V negative ground operation system. Be sure to connect the speaker(-) leads
to the speaker(-) terminal. Never connect the left and right channel speaker wires together or to the
vehicle body.
The normal temperature for operation is between0 and +0 degree Celsius.Do not work in
extreme high or low temperature and lock vents or radiator panels of the unit, blocking them will
cause heat to build up inside the unit and may cause damage or fire.
This unit can play the following discs (12 cm) and media files:
1080P / RMVB / DVD±R/RW / MPEG4 / AVI / SVCD / VCD / MP3 / WMA / CD-R/RW / JPEG.
INSTALLATION
Page 3
MAIN UNIT OPERATION
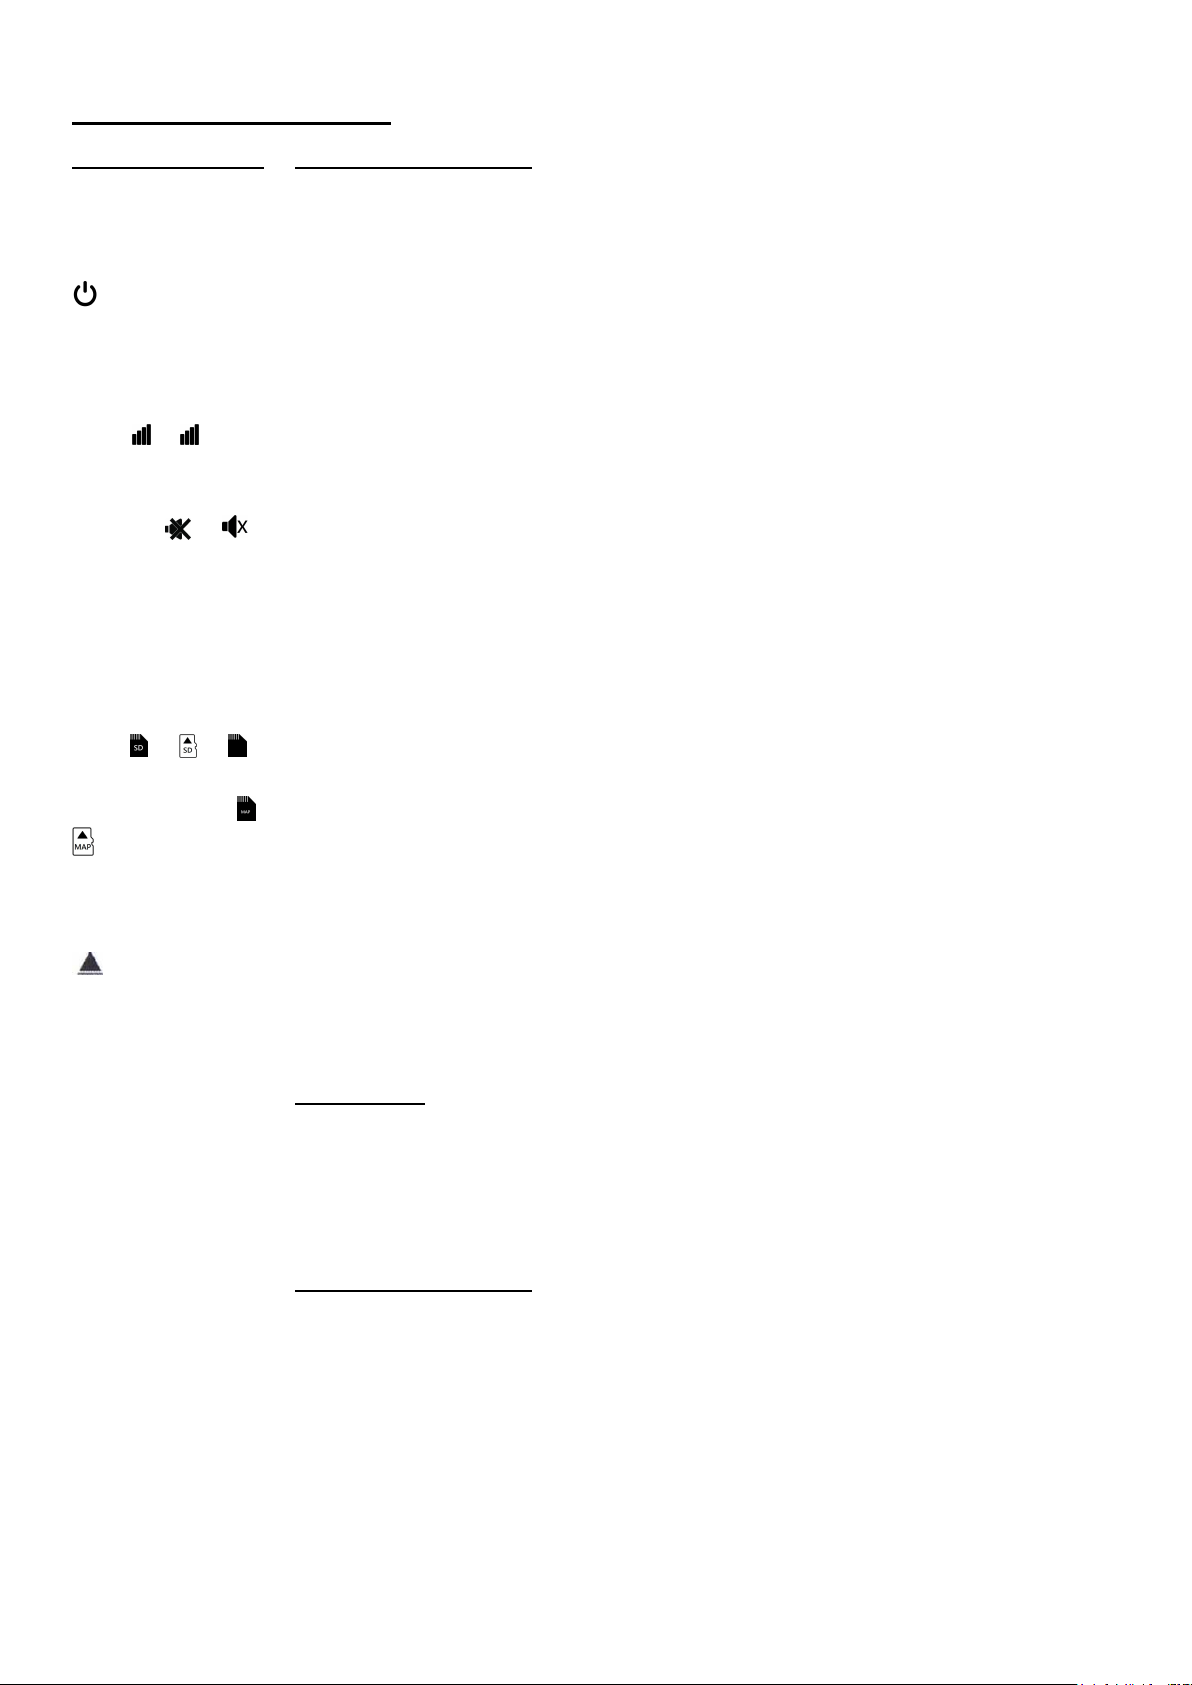
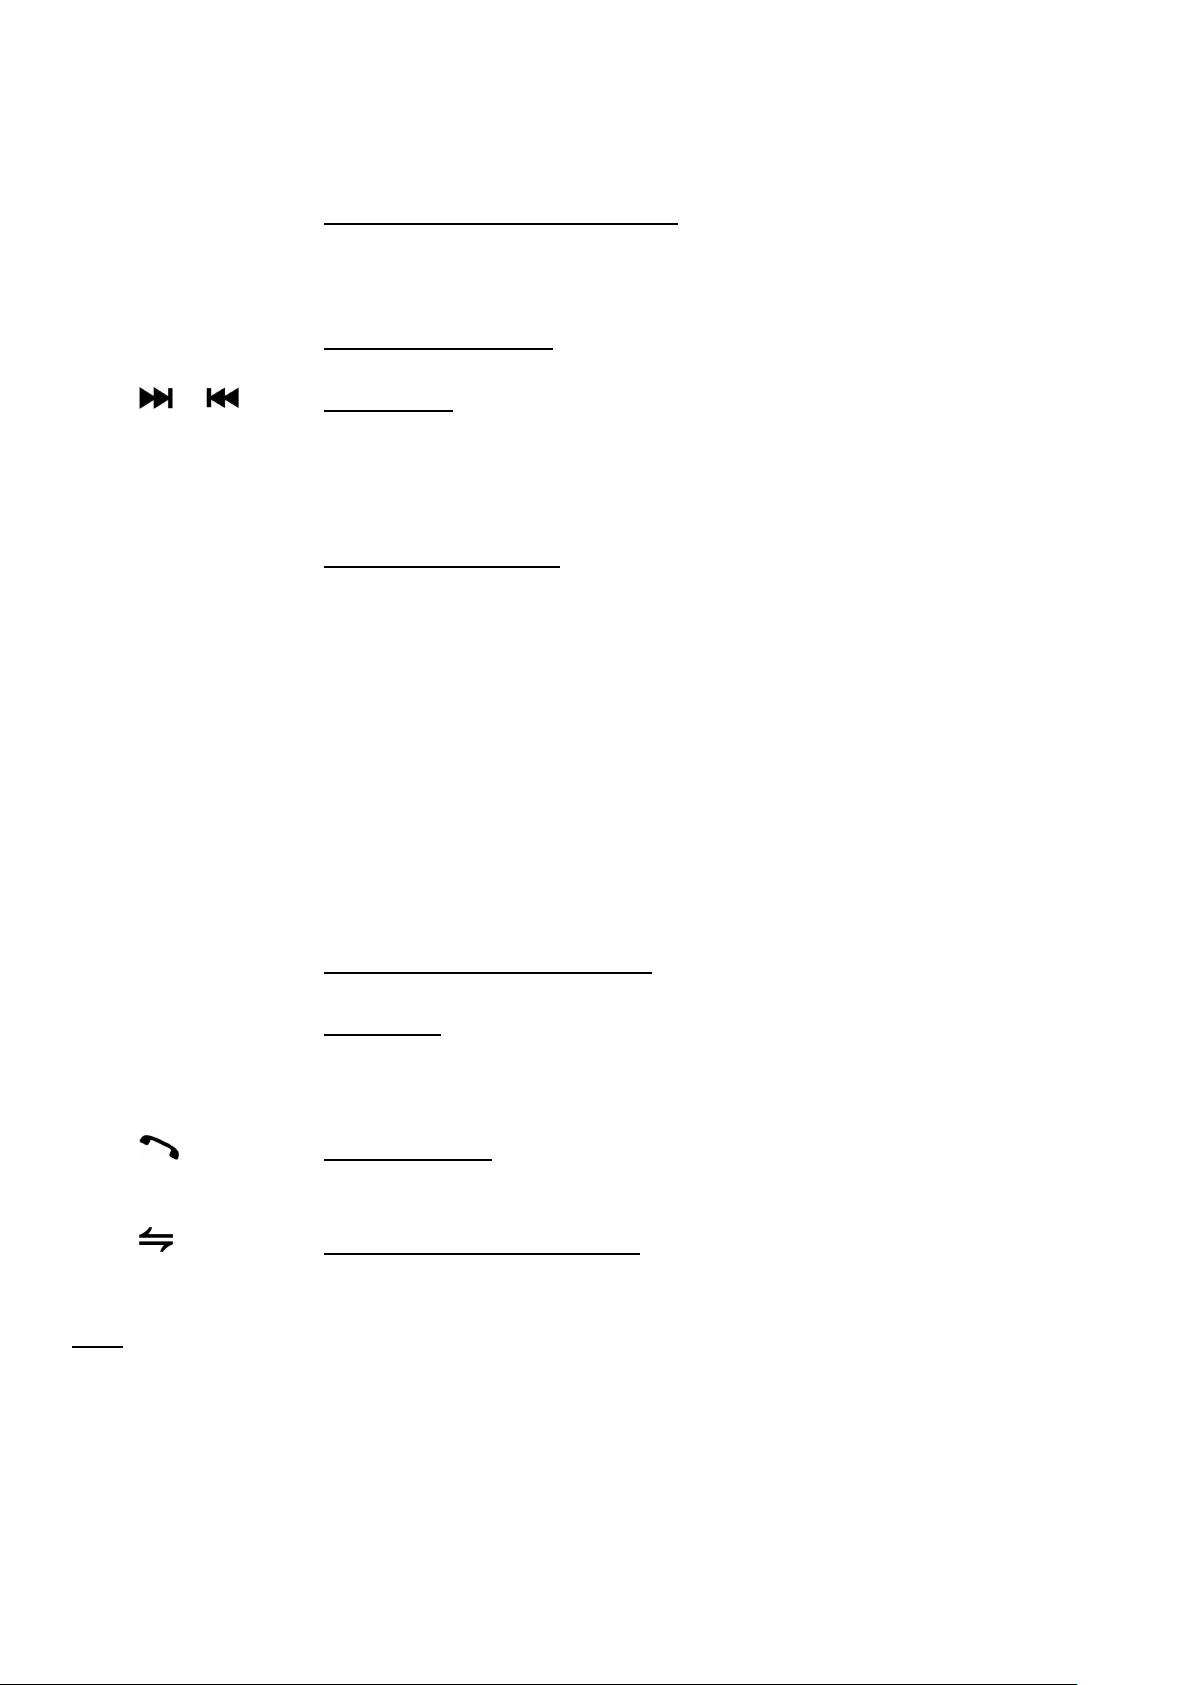
Symbol / Function
Operations & Controls
RES / RST Press with a pointed object (such as a ball point) to reset the unit to its initial
/ POWER
M/N / MENU Press to shift screen between navigation mode & current operation mode.
VOL / VOL /
VOL+ / VOL- /
VOLUME / VOL
MUTE / /
IR Remote control sensor for signal reception from remote handset.
AUX Insert an external device to this jack in order to have sound output of that
USB Insert USB device to this slot for digital files playback.
MICRO SD / SD /
SD CARD / MINI
SD /
MAP CARD / GPS
CARD / GPS /
DVD Press to shift the current operation mode to disc operation mode (when a disc
DISC SLOT Insert or remove disc from this disc slot (when a disc has been inserted).
BND / BAND At radio mode, press to select radio band (AM/FM) for broadcasting.
+►►▌/▐◄◄- /
►►▌/▐◄◄ /
SEEK
/ /
/ EJECT
setting by the factory (default stage).
When the unit is turned off, press to turn on the unit.
When the unit is turned on, press & hold shortly to turn off the unit.
(Note: In case navigation mode has not been setup, press to shift screen
between setting menu & current operation mode)
For rotary control version, rotate to adjust sound output level.
For key control version, press repeatedly to adjust sound output level.
During unit operation, press to turn on or off of sound mute control.
external device through the unit.
Insert micro SD card to this port for digital files playback.
(Note: support only microSD card with FAT32)
Insert micro SD card installed with navigation software to this port for operation
under GPS mode.
/
(Note: only for micro SD card with Navi maps)
has been inserted).
Press to eject disc from the disc slot (when a disc has been inserted).
(Note: When the unit is under other operation mode, press to shift current
operation mode to radio mode)
Radio Mode
For rotary control unit, rotate to tune the radio to the upward or downward
preset station for broadcasting.
For key control unit, press to tune the radio frequency upward or downward
and stop for broadcasting when a station received.
For key control unit, press to pause or resume playback.
Media Playback Mode
For rotary control unit, rotate to shift track upward or downward for playback.
For rotary control unit, press to pause or resume playback.
For key control unit, press to shift track upward or downward for playback.
Page 4
BT
Press to shift the current operation mode to Bluetooth mode.
MIC
For voice reception under Bluetooth operation.
TFT SCREEN
It shows the status of operation on the unit. This screen is also a touch
display – soft touch the screen for different operations of unit
Note
BATTERY REPLACEMENT
Refer to the back of remote handset for details on
how to replace the battery.
Remove this tab before using the remote handset
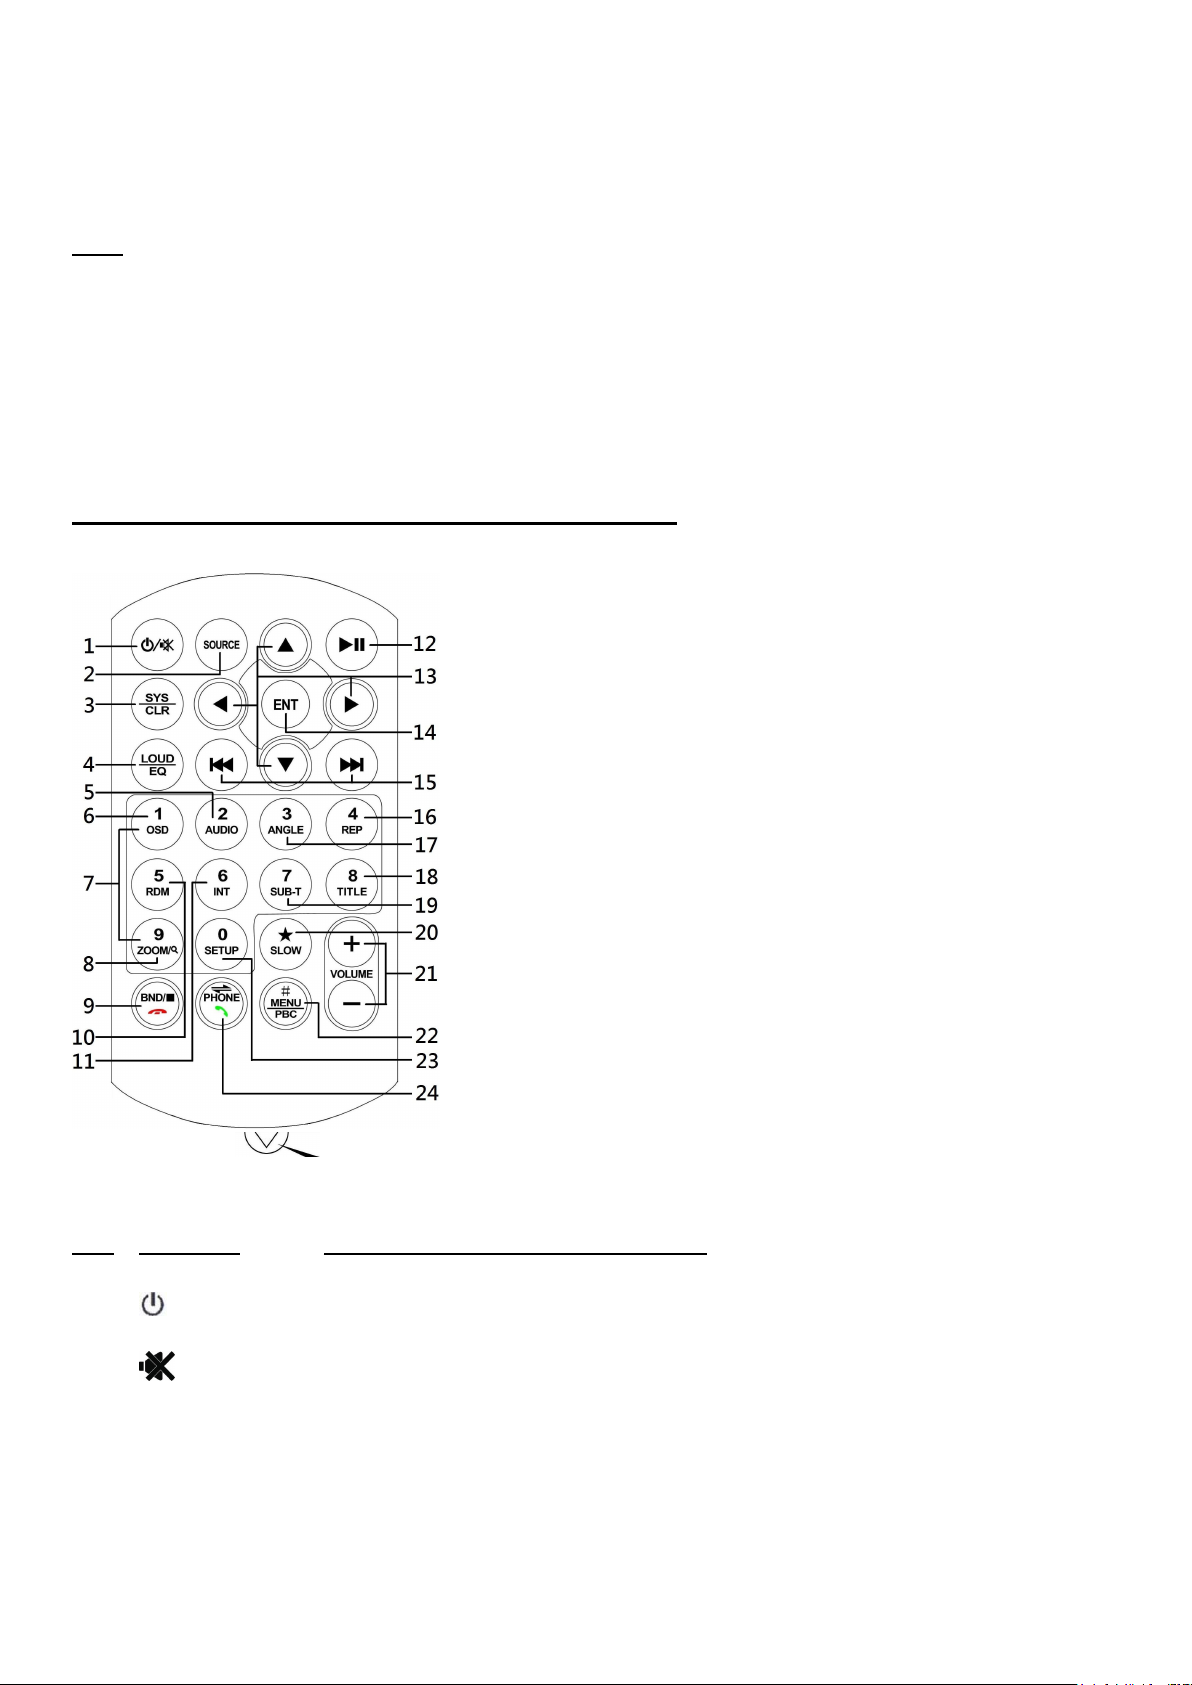
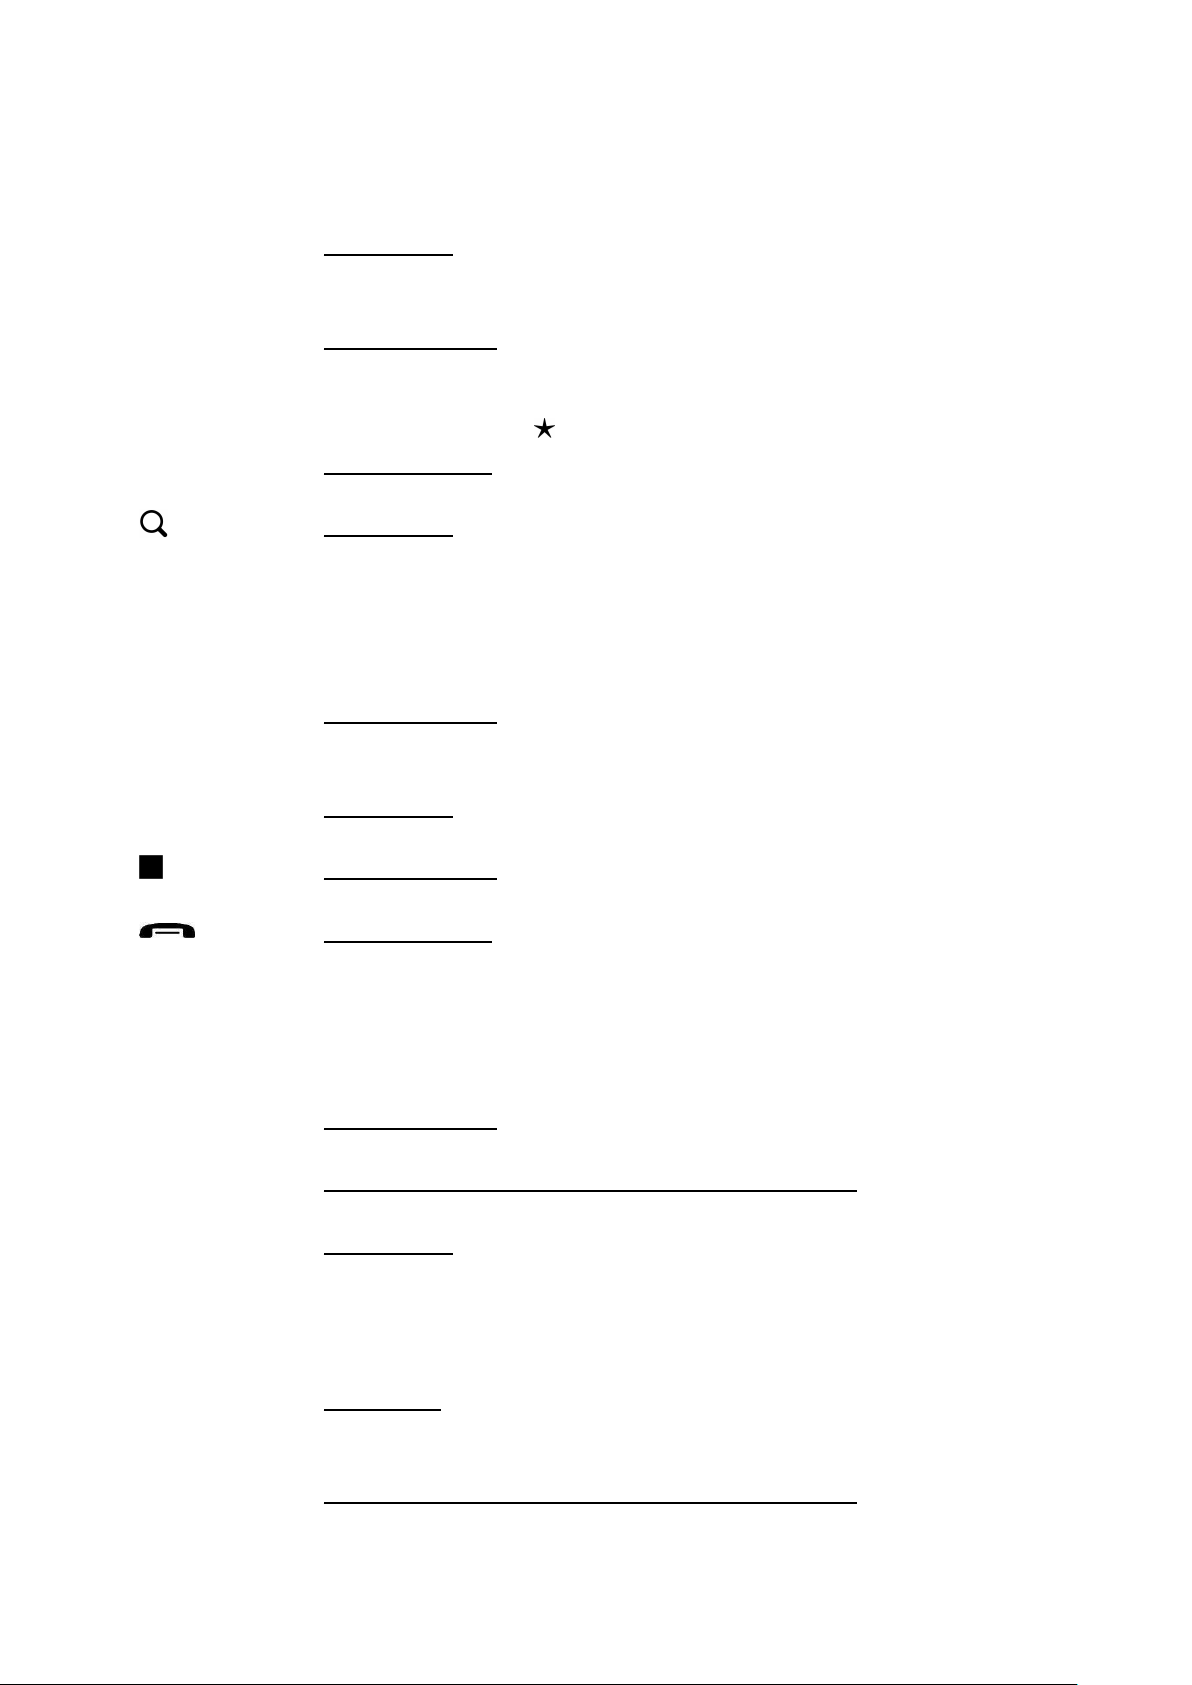
NO.
SYMBOL
OPERATION & CONTROL MODES
1.
When the unit is turn off, press to turn on the unit.
When the unit is turn on, press & hold shortly to turn off the unit.
During unit operation, press to turn on or off of sound mute control
2.
SOURCE
Press repeatedly to select the desired mode for operation
3.
SYS / CLR
No function & not available for operation.
4.
EQ / LOUD
Press repeatedly to select the desired preset equalization mode.
5.
AUDIO
At video playback mode, each time press & hold shortly to select different
audio output channels. (Note: Available on input device or media files
The above mentioned symbols / functions / operations & controls show the operations for various
version of the unit and may not be equipped or available for control in this unit. Printings and
symbols on the above may be varied from the exact main unit. Referred to the main unit for exact
functions and features that applied. User is highly recommended to use the touch screen control to
operate. Most of the operations of this unit cannot be controlled by the main unit.
REMOTE HANDSET – GENERAL OPERATION
Page 5
recorded with different output channels)
At music playback mode, each time press & hold shortly to select desired
preset equalization mode.
6.
OSD
At video playback mode under disc input, press & hold shortly to turn on or
off of time display on screen.
7.
1 – 6
Radio Mode
Press any one of the number key 1-6 to select a station that had been
stored in the preset memory for broadcasting.
0 – 9
Disc Input Mode
Press directly to input the number of track for playback.
(Remarks: Repeatedly press & hold shortly「6」for 10+ track selection.
Repeatedly press
「 」
also for 10+ track selection)
Bluetooth Mode
Press to input the number for dial out.
8.
Radio Mode
Press & hold shortly to start searching the frequency and storing the
strongest signal stations into the preset memory stations (total 6 preset
stations on each radio band).
Press to start scanning all the preset stations on memory and stop for a few
seconds for broadcasting.
ZOOM
Disc Input Mode
At video & photo playback mode, each time press & hold shortly to select
various zoom in and zoom out of screen for viewing.
9.
BND
Radio Mode
Press repeatedly to select the desired radio band (AM/FM) for broadcasting.
Disc Input Mode
Press to stop playback.
Bluetooth Mode
Press to hang up or refuse an incoming call.
10.
RDM
At disc input mode, press & hold shortly to turn on or off of random
playback.
11.
INT
At radio mode, press & hold shortly to start intro broadcasting of the preset
memory stations for a few seconds on the selected radio band.
12.
►▌▌
Disc Input Mode
Press to pause, resume or start playback.
USB / SD Input & Bluetooth Music Playback Mode
Press to pause or resume playback.
13.
▲/▼/▶/◀
Radio Mode
Press「▶」/「◀」to tune the radio to the upward or downward preset station
for broadcasting.
Press「▲」/「▼」to adjust sound output level.
DVD Mode
At DVD menu/title display mode, press to select the desired setting/setup
and press ENT to confirm/enter.
USB / SD Input & Bluetooth Music Playback Mode
Page 6
Press「▶」/「◀」to shift track upward or downward for playback.
(Remarks: Not available at photo playback mode)
Press「▲」/「▼」to adjust sound output level.
14.
ENT
DVD Mode / Folder/Playlist Mode
At DVD menu/title display mode, press ▲/▼/▶/◀ to select the desired
setting/setup and press ENT to confirm/enter.
USB / SD Input Mode
At video & music playback mode, press to pause or resume playback.
15./Radio Mode
Press to tune the radio to the upward or downward preset station for
broadcasting.
Press & hold shortly to tune radio frequency to the upward or downward
station for broadcasting.
Media Playback Mode
Press repeatedly to shift track upward or downward for playback.
16.
REP
At disc playback mode, press repeatedly to select various repeat playback
mode.
17.
ANGLE
At DVD playback mode, each time press & hold shortly to view angle
changes in sequential order (available on media files recorded with this
features).
18.
TITLE
At DVD mode, press & hold shortly to display on screen the menu of the
entire disc for setting/setup.
19.
SUB-T
At DVD mode, press & hold shortly to select different sub-titles that
recorded in the media files.
20.
SLOW
No function and not available for operation.
21.
VOL + / VOL -
Press repeatedly or press & hold to adjust sound output level.
22.
MENU / PBC
Radio & Media Playback Mode
Press to shift screen to main menu of the unit.
VCD Mode
Press & hold shortly to turn on or off of PBC playback.
23.
SETUP
During unit operation, press & hold shortly to shift between system menu of
the unit and the current operation mode.
24.
/ PHONE
Bluetooth Mode
Press to pick up an incoming call; dial out after input a phone number; redial
last dial out number.
Bluetooth Conversation Mode
Press to shift conversation between main unit and mobile phone.
Note
The above mentioned symbols / functions / operations & controls show the operations for various
version of the unit and may not be equipped or available for control in this unit. Printings and
symbols on the above may be varied from the exact remote handset. Referred to the remote
handset for exact functions and features that applied. User is highly recommended to use the touch
screen control to operate. Most of the operations of this unit cannot be controlled by the remote
handset.
Page 7
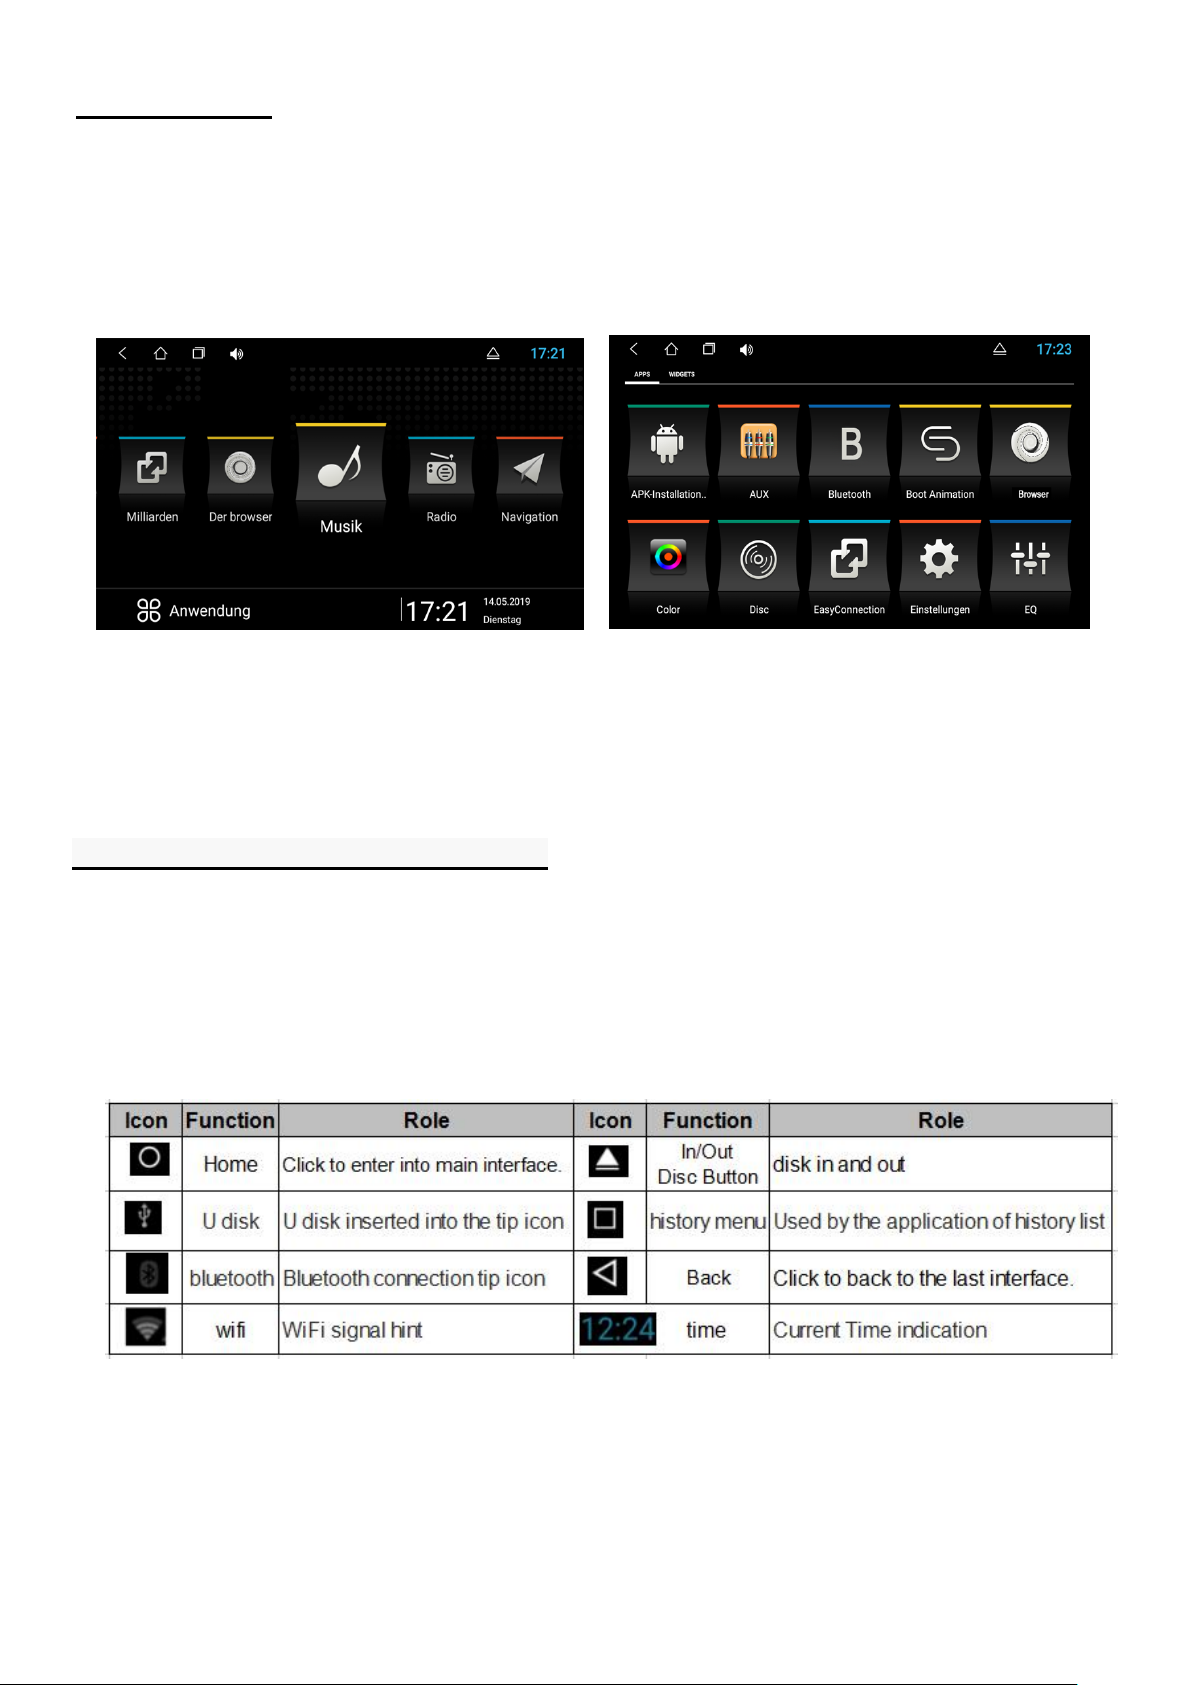
MAIN SCREEN
Note: The device software is under upgrading, the status indicator may be different with
your device; please refer to the actual device software.
You can use the touch screen operation to use the various functions of the device. This equipment
has a total of five main screen, left or right sliding can be switched with each other. Any interface
press the HOME physical buttons on the panel to return to the main screen
interface, and display the application icon in the main screen interface, click any application icon to
open the program.
Note: You can add the freedom of the space of the main screen or Remove Programs icon to see
equipment Basic Settings section.
Click the application icon; you can view all of the programs of the equipment.
THE STATUS BAR AND INDICATOR
Icons on the left top of the screen are notifications for messages and events; Icons on the right top
of the screen are device status indicator.
If there is new message, it will be displayed on the status bar, slide your finger gently from the
status bar, all prompts would be displayed. Then you could click the message and view the
content.
Page 8

TIME AND DATE SETTING
This device has the function to automatically calibrate the current time on the condition that the
GPS is active. You could also manually set the date, time zone and format.
Applications > Settings
> Date and Time
> Setting Date or Setting Time
Tip: You can set the time zone and time format according to request.
Page 9

SWITCH ON THE ENTERING METHOD
Applications > Settings
> Language & input
> Check the input method according to user's requirements, such as xunfei input
method
The user can install other third-party input method on its ow
Page 10

BASIC SETTINGS
User Defined Home Screen
There are 3 main screens of this device, sliding left or right to switch. In any interface you just need
to click the HOME to back to main screen.
Note: You could add shortcut, widget and file in the blank area of the main screen on the condition
that there is enough room for placing.
Setting Wallpaper
Click the blank area of main screen> Wallpaper
> Wallpaper or Pictures Bank , etc.
For example,into the wallpaper,Click on the wallpaper to set
Widget
Applications > The left sliding
According to long drag widgets can be added
Page 11

Steering Wheel
> Steering wheel Settings
e.Click “END” to ensure that the steering wheel setting is completed.
Users could set the steering wheel according to hint.
Note: Steering wheel interface is special for cars with buttons, but some cars’ steering button are
not able for study but by “can”, such as Ford MONDEO
Application>Setting
>&DU Settings
Steering Wheel Interface
a.First to click “Start”
b.Click the buttons as you want.
c . Click the corresponding button on the wheel, if the study displays successful, there will
be a change on the corresponding color on the main screen.
d. Repeat step 1 and 2 till you complete all the buttons’ setting on the steering wheel.
If you want the steering wheel button to re-learn, press the [CLEAR] Repeat a, b, c, three steps
Page 12

NAVIGATION APPLICATION
Select appropriate map application, then it can be associated with the navigation button on the
physical and navigation icon on the main screen.
Applications> Settings
> Car settings
> Navigation options
> For example: GO
Page 13

Radio
Press the RADIO button on panel or click the icon on the main menu to enter the radio interface,
the specific functions and operations are as follows:
The functions of Icons in the radio interface are described below:
RDS
Radio interface with RDS
Page 14

BLUETOOTH WIRELESS CONNECTION
Under the default status, the bluetooth would be turned on when the power is connected.
You could create a wireless connection between a mobile phone and this device for
Data exchange.
Note:
There may be prohibition or restriction for Bluetooth devices, please abide by local laws.
In order to ensure bluetooth security by the greatest degree, you should in safe and
non-public place when connecting a bluetooth device.
startup bluetooth application
Bluetooth pairing
The whole information of the Bluetooth interface, the mobile search auto-complete matching
(the default passkey:0000)
Matching refers to the mutual recognition process of two Bluetooth devices for the first
communication. After the first connection, the subsequent communication connection will
automatically pair and not have to pair every time. ( depending on mobile phones).
Press in Bluetooth pairing interface, it will get into the status of the Bluetooth search mode
and this machine is searching for Bluetooth devices around, press again will automatically
terminate the search state.
Page 15

Choose the Bluetooth device name on the search results to match connection. It will
automatically after the connection is successful jump to the matching list, and there will be a
Bluetooth icon besides the successful connected Bluetooth devices
Note: The following operations are performed in the Blu etooth pairing success and connect
under the conditions of operation:
Bluetooth Phone Book
the Bluetooth interface, click “
follow the
download the phone book
” to enter the Bluetooth Address book interface. And
Bluetooth Phone Book Interface
A list of dial-up operation when long names and numbers are used to scroll the display
Page 16

Phone
To achieve the dialing function via Bluetooth
In the Bluetooth interface, click “
Click numbers on t he interface, if the input is wrong, click to delete
”to enter into the Bluetooth Dial interface.
entering phone number; Click
Are onacall, press the
Function keys on the panel are unavailable when in the call; the function keys return to normal
after hang up.
Call Record
In the Bluetooth interface, click “
switch to the phone call, press Mute for MIC.
to end up the call.
” to enter into bluetooth call history interface.
Page 17

Bluetooth Music
In the Bluetooth interface, click “
When connected with bluetooth mobile phone, it can operate play/pause/down music function.
Note: Some kind of mobile phones need to start playing music player for bluetooth music
” into Bluetooth Music Interface.
when using bluetooth music function.
MULTIMEDIA
Click equalizer application icon into the equalizer interface. Or click to enter into EQ Setup
operation in all audio or video playing interface. Equalizer settings interface is divided into two
functions: namely, equalizer and sound field settings function.
In the equalizer settings interface provides 8 kinds of audio playback mode choose:
Inafield setting interface t he user can freely adjust the bass and loudness of the contrast, the
user can also on the front left, front right, left, right after the four angularly audio settings, as
shown below:
Page 18

Note: the subwoofer adjustment is only effective when it is linked to external 5.1 amp.
AUDIO PLAY
Audio player supports the following formats:
mp3/aac/flac/wav/amr/m4a/ogg Application>Music
Click music application icon to enter into the music player interface, as shown below:
Function details as below:
Page 19

VIDEO PLAYING
Supporting form of the video player:
mp4/avi/wmv/3gp/flv/saf/mov/mkv/mpg Application >Video
Press Video application icon to enter into video playing interface, take a photo for
example.
The detail of the button function of video playing interface
Page 20

AUX IN
Before running this function, please confirm back the normal output of the video source
Click > enter the Aux In mode, points On the return key to return to the interface, click the HOME
button to return to the system main interface
CAMERA
Auto start the reverse gear, such as with a rear view mirror, the system automatically switch to the
rearview mirror image output.
If not equipped with a rear view mirror, shows "No Video Signal"
Page 21

SIMPLE TROUBLE SHOOTING
PROBLEMS, CAUSES & SOLUTIONS
No power
- Check and make sure the connecting wires are connected correctly
- Check whether the fuse is blown. Replace with the proper value fuse if necessary.
No sound
- Check and make sure the speaker wires are connected correctly.
No picture
- Check whether the video wire is connected to the video device.
Unit hang-up
- Press the RESET button to reset the unit to its default stage.
No function when pressing the buttons or TFT screen
- Press the RESET button to reset the unit to its default stage.
Poor effect or unable to receive radio
- Check whether the radio antenna is inserted or properly connected.
- Antenna may not be the proper length. Make sure the antenna is fully extended.
- Antenna may be poorly grounded. Check and make sure the antenna is properly grounded.
Stereo cannot be received under radio mode
- Tune the radio frequency accurately.
- The broadcasting signal is too weak, set the mode to MONO.
Disc inserted but cannot play
- Check whether the disc inserted upside down.
- Check whether the disc is dirty or badly cracked.
- Lens is dirty. Clean lens by using the lens clean disc.
Abnormal moving, skipping or sound during playback
- The disc is dirty or damaged. Wipe the disc with a dry soft cloth or replace a new disc.
Remote handset does not work
- Replace new battery of the remote handset.
- Point the remote handset directly at the remote sensor of the main unit.
- Clean the surface of the remote sensor.
Bluetooth not operated
- Check if the devices are linked up correctly.
Page 22

GPS not operated
- Check if the appropriate navigation map software has been installed and selected.
- Check if the GPS antenna connected properly.
Cannot connected to Wi Fi
- Check if the Wi Fi antenna connected properly.
Note
After the above efforts, if the unit still cannot be worked normally, consult your service dealer.
Never attempt to disassemble the unit by yourself. No service part inside the unit.
 Loading...