

Xerox Phaser 3320DN, Phaser 3320DNI User Guide

Version 1.0
January 2012
Xerox® Phaser 3320DN/3320DNI
User Guide

©2012 Xerox Corporation. XEROX® and XEROX and Design® are trademarks of Xerox Corporation in the United States and/or other
countries.
Document version 1.0:January 2012

Table of Contents
1 Getting Started
Machine Overview. . . . . . . . . . . . . . . . . . . . . . . . . . . . . . . . . . . . . . . . . . . . . . . . . . . . . . . . . . . . . . . . . . . . . . . . .6
Powering on the Machine . . . . . . . . . . . . . . . . . . . . . . . . . . . . . . . . . . . . . . . . . . . . . . . . . . . . . . . . . . . . . . . . . . 8
Control Panel Overview . . . . . . . . . . . . . . . . . . . . . . . . . . . . . . . . . . . . . . . . . . . . . . . . . . . . . . . . . . . . . . . . . . . .9
Menu Overview . . . . . . . . . . . . . . . . . . . . . . . . . . . . . . . . . . . . . . . . . . . . . . . . . . . . . . . . . . . . . . . . . . . . . . . . . 10
Reports . . . . . . . . . . . . . . . . . . . . . . . . . . . . . . . . . . . . . . . . . . . . . . . . . . . . . . . . . . . . . . . . . . . . . . . . . . . . . . . . . 12
Software. . . . . . . . . . . . . . . . . . . . . . . . . . . . . . . . . . . . . . . . . . . . . . . . . . . . . . . . . . . . . . . . . . . . . . . . . . . . . . . . 13
Loading Paper . . . . . . . . . . . . . . . . . . . . . . . . . . . . . . . . . . . . . . . . . . . . . . . . . . . . . . . . . . . . . . . . . . . . . . . . . . 14
Media Output Locations . . . . . . . . . . . . . . . . . . . . . . . . . . . . . . . . . . . . . . . . . . . . . . . . . . . . . . . . . . . . . . . . . 18
General Care and Consumables . . . . . . . . . . . . . . . . . . . . . . . . . . . . . . . . . . . . . . . . . . . . . . . . . . . . . . . . . . 20
Further Assistance. . . . . . . . . . . . . . . . . . . . . . . . . . . . . . . . . . . . . . . . . . . . . . . . . . . . . . . . . . . . . . . . . . . . . . . 21
2Print
Printing using Windows . . . . . . . . . . . . . . . . . . . . . . . . . . . . . . . . . . . . . . . . . . . . . . . . . . . . . . . . . . . . . . . . . . 24
Xerox Easy Printer Manager (EPM) . . . . . . . . . . . . . . . . . . . . . . . . . . . . . . . . . . . . . . . . . . . . . . . . . . . . . . . 45
Wireless Setting Program (Phaser 3320DNI) . . . . . . . . . . . . . . . . . . . . . . . . . . . . . . . . . . . . . . . . . . . . . . 46
SetIP . . . . . . . . . . . . . . . . . . . . . . . . . . . . . . . . . . . . . . . . . . . . . . . . . . . . . . . . . . . . . . . . . . . . . . . . . . . . . . . . . . . 48
Printing using Macintosh . . . . . . . . . . . . . . . . . . . . . . . . . . . . . . . . . . . . . . . . . . . . . . . . . . . . . . . . . . . . . . . . 49
Printing using Linux . . . . . . . . . . . . . . . . . . . . . . . . . . . . . . . . . . . . . . . . . . . . . . . . . . . . . . . . . . . . . . . . . . . . . 52
Printing using Unix . . . . . . . . . . . . . . . . . . . . . . . . . . . . . . . . . . . . . . . . . . . . . . . . . . . . . . . . . . . . . . . . . . . . . . 54
3 CentreWare Internet Services
Using CentreWare Internet Services . . . . . . . . . . . . . . . . . . . . . . . . . . . . . . . . . . . . . . . . . . . . . . . . . . . . . . 58
Status . . . . . . . . . . . . . . . . . . . . . . . . . . . . . . . . . . . . . . . . . . . . . . . . . . . . . . . . . . . . . . . . . . . . . . . . . . . . . . . . . . 59
Jobs . . . . . . . . . . . . . . . . . . . . . . . . . . . . . . . . . . . . . . . . . . . . . . . . . . . . . . . . . . . . . . . . . . . . . . . . . . . . . . . . . . . . 60
Print . . . . . . . . . . . . . . . . . . . . . . . . . . . . . . . . . . . . . . . . . . . . . . . . . . . . . . . . . . . . . . . . . . . . . . . . . . . . . . . . . . . . 62
Properties. . . . . . . . . . . . . . . . . . . . . . . . . . . . . . . . . . . . . . . . . . . . . . . . . . . . . . . . . . . . . . . . . . . . . . . . . . . . . . . 63
Support. . . . . . . . . . . . . . . . . . . . . . . . . . . . . . . . . . . . . . . . . . . . . . . . . . . . . . . . . . . . . . . . . . . . . . . . . . . . . . . . . 64
4 Paper and Media
Loading Paper . . . . . . . . . . . . . . . . . . . . . . . . . . . . . . . . . . . . . . . . . . . . . . . . . . . . . . . . . . . . . . . . . . . . . . . . . . 66
Setting Paper Size and Type . . . . . . . . . . . . . . . . . . . . . . . . . . . . . . . . . . . . . . . . . . . . . . . . . . . . . . . . . . . . . 70
Media Guidelines and Specifications. . . . . . . . . . . . . . . . . . . . . . . . . . . . . . . . . . . . . . . . . . . . . . . . . . . . . . 71
5 Machine Features and Setups
Accessing the Feature and Setup Options . . . . . . . . . . . . . . . . . . . . . . . . . . . . . . . . . . . . . . . . . . . . . . . . . 76
Feature Options . . . . . . . . . . . . . . . . . . . . . . . . . . . . . . . . . . . . . . . . . . . . . . . . . . . . . . . . . . . . . . . . . . . . . . . . . 77
Setup Options. . . . . . . . . . . . . . . . . . . . . . . . . . . . . . . . . . . . . . . . . . . . . . . . . . . . . . . . . . . . . . . . . . . . . . . . . . . 81
Xerox Phaser 3320DN/3320DNI
User Guide
3

6 General Care and Troubleshooting
General Care . . . . . . . . . . . . . . . . . . . . . . . . . . . . . . . . . . . . . . . . . . . . . . . . . . . . . . . . . . . . . . . . . . . . . . . . . . . . 88
Troubleshooting. . . . . . . . . . . . . . . . . . . . . . . . . . . . . . . . . . . . . . . . . . . . . . . . . . . . . . . . . . . . . . . . . . . . . . . . . 93
Further Assistance . . . . . . . . . . . . . . . . . . . . . . . . . . . . . . . . . . . . . . . . . . . . . . . . . . . . . . . . . . . . . . . . . . . . . . 116
7 Specifications
Machine Specifications . . . . . . . . . . . . . . . . . . . . . . . . . . . . . . . . . . . . . . . . . . . . . . . . . . . . . . . . . . . . . . . . . 118
Electrical Specifications . . . . . . . . . . . . . . . . . . . . . . . . . . . . . . . . . . . . . . . . . . . . . . . . . . . . . . . . . . . . . . . . . 121
Print Specifications . . . . . . . . . . . . . . . . . . . . . . . . . . . . . . . . . . . . . . . . . . . . . . . . . . . . . . . . . . . . . . . . . . . . . 122
System Requirements. . . . . . . . . . . . . . . . . . . . . . . . . . . . . . . . . . . . . . . . . . . . . . . . . . . . . . . . . . . . . . . . . . . 123
Network Environment. . . . . . . . . . . . . . . . . . . . . . . . . . . . . . . . . . . . . . . . . . . . . . . . . . . . . . . . . . . . . . . . . . . 125
8Safety
Notices and Safety . . . . . . . . . . . . . . . . . . . . . . . . . . . . . . . . . . . . . . . . . . . . . . . . . . . . . . . . . . . . . . . . . . . . . 128
Safety Labels and Symbols . . . . . . . . . . . . . . . . . . . . . . . . . . . . . . . . . . . . . . . . . . . . . . . . . . . . . . . . . . . . . . 129
Operational Safety Information . . . . . . . . . . . . . . . . . . . . . . . . . . . . . . . . . . . . . . . . . . . . . . . . . . . . . . . . . 130
Basic Regulations. . . . . . . . . . . . . . . . . . . . . . . . . . . . . . . . . . . . . . . . . . . . . . . . . . . . . . . . . . . . . . . . . . . . . . . 134
Material Safety Data . . . . . . . . . . . . . . . . . . . . . . . . . . . . . . . . . . . . . . . . . . . . . . . . . . . . . . . . . . . . . . . . . . . 138
Product Recycling and Disposal. . . . . . . . . . . . . . . . . . . . . . . . . . . . . . . . . . . . . . . . . . . . . . . . . . . . . . . . . . 139
Energy Program Compliance . . . . . . . . . . . . . . . . . . . . . . . . . . . . . . . . . . . . . . . . . . . . . . . . . . . . . . . . . . . . 141
Environment, Health and Safety (EH&S) Contact Information . . . . . . . . . . . . . . . . . . . . . . . . . . . . . 142
Index
4
Xerox Phaser 3320DN/3320DNI
User Guide

Getting Started
This chapter includes:
• Machine Overview on page 6
• Powering on the Machine on page 8
• Control Panel Overview on page 9
• Menu Overview on page 10
• Reports on page 12
• Software on page 13
• Loading Paper on page 14
• Media Output Locations on page 18
• General Care and Consumables on page 20
• Further Assistance on page 21
1
Xerox Phaser 3320DN/3320DNI
User Guide
5
Machine Overview
8
1
2
3
4
5
6
7
9
10
11
1728394105116
Machine Overview
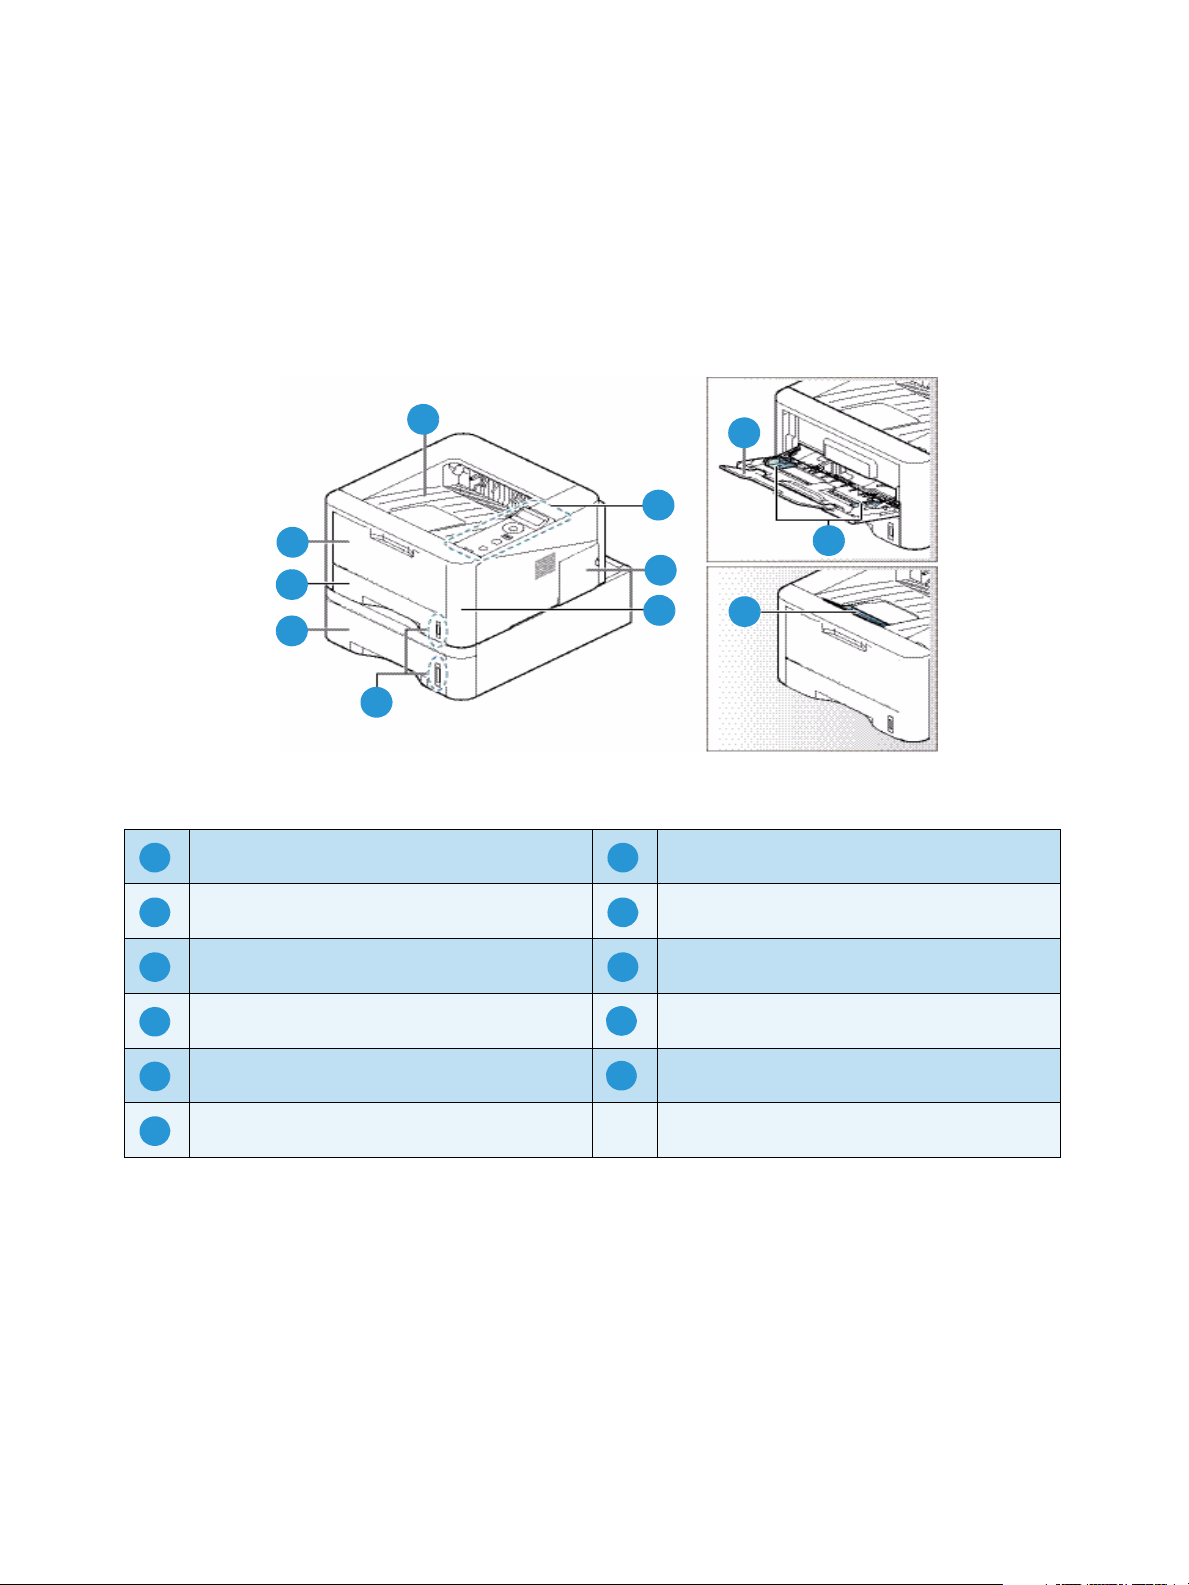
Before you use your machine, take some time to familiarize yourself with the various features and
options.
Front View
Output Tray Paper Tray 1
Control Panel Bypass Tray
Control Board Cover Bypass Tray Extension
Front Cover Bypass Tray Width Guides
Paper Level Indicator Output Tray Support
Paper Tray 2 (Optional)
6
Xerox Phaser 3320DN/3320DNI
User Guide
Rear View
1
2
3
4
5 6
7
1526374
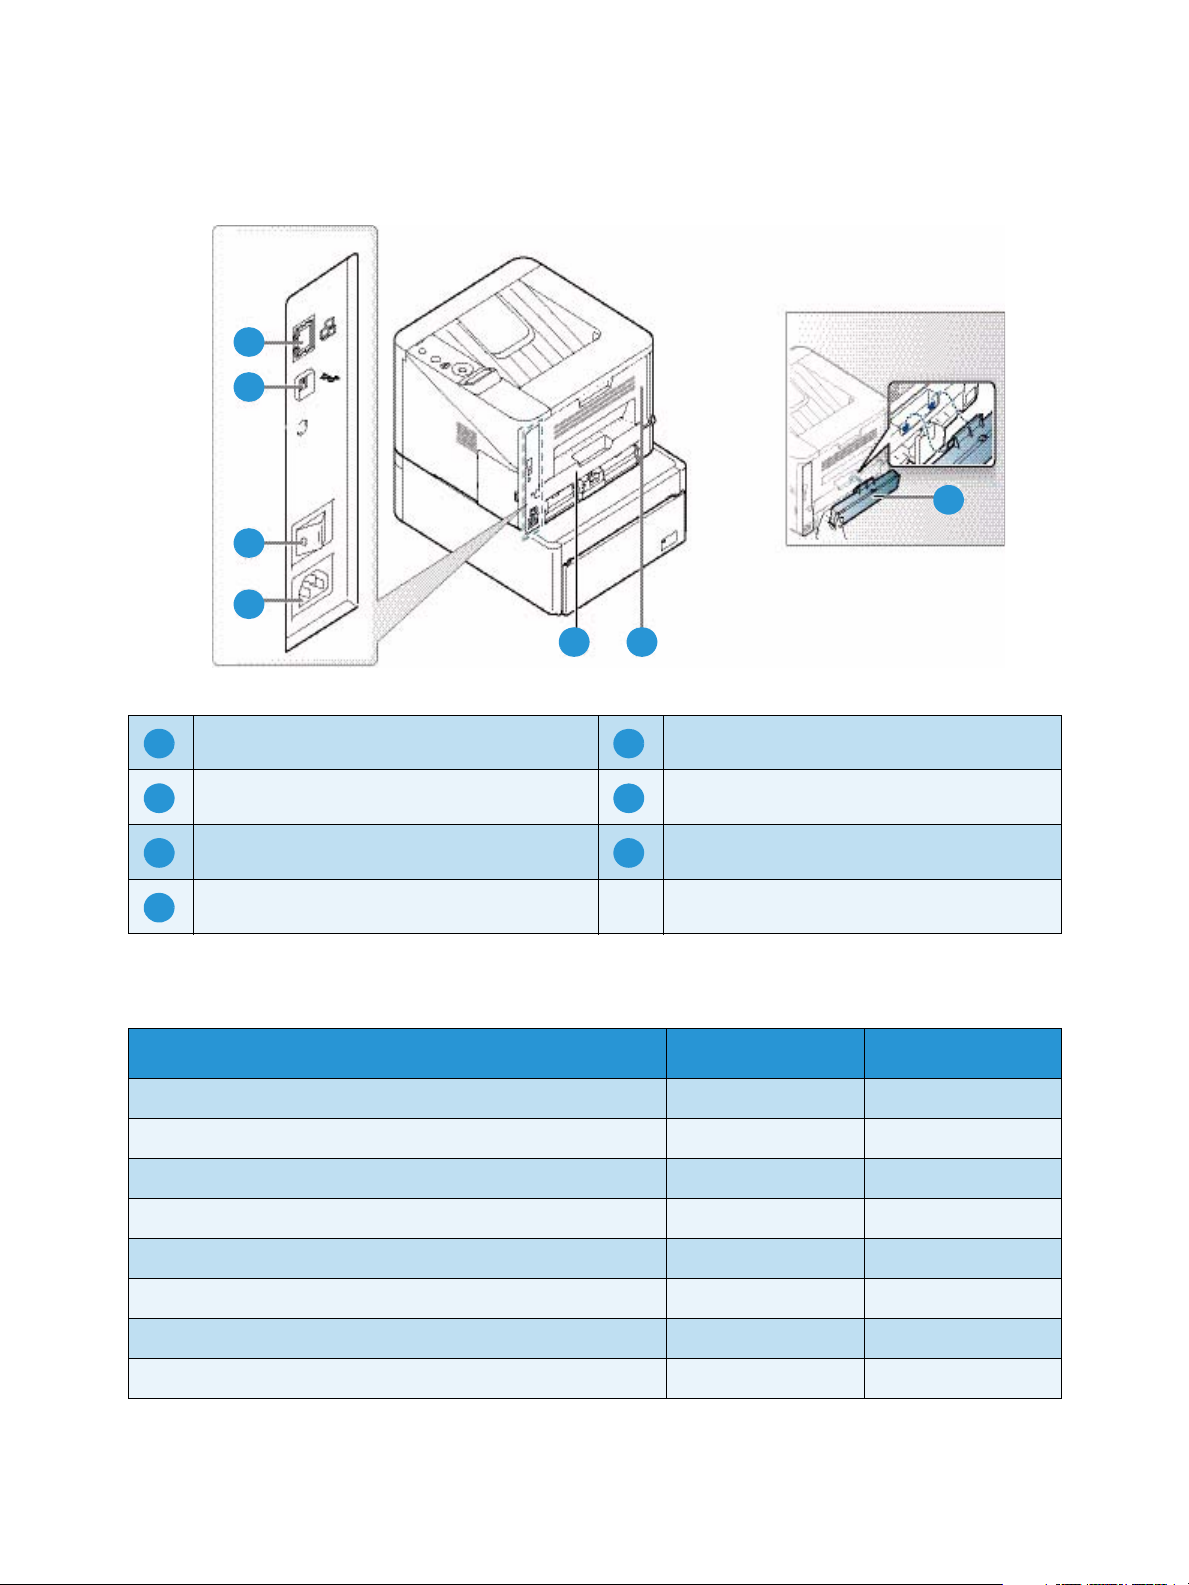
Machine Overview
Network Port Duplex Unit
USB Port Rear Door
Power Switch Paper Tray Rear Cover
Power Receptacle
Product Configurations
Component Phaser 3320DNI Phaser 3320DN
Paper Tray 1 (250 sheets) Standard Standard
Bypass Tray (50 sheets) Standard Standard
Paper Tray 2 (520 sheets) Optional Optional
Network Printing Standard Standard
USB Port Standard Standard
128MB Memory Standard Standard
256MB Additional Memory Expansion Optional Optional
Wireless Enabled Standard Not Applicable
Xerox Phaser 3320DN/3320DNI
7
User Guide
Powering on the Machine
1
2
1
2
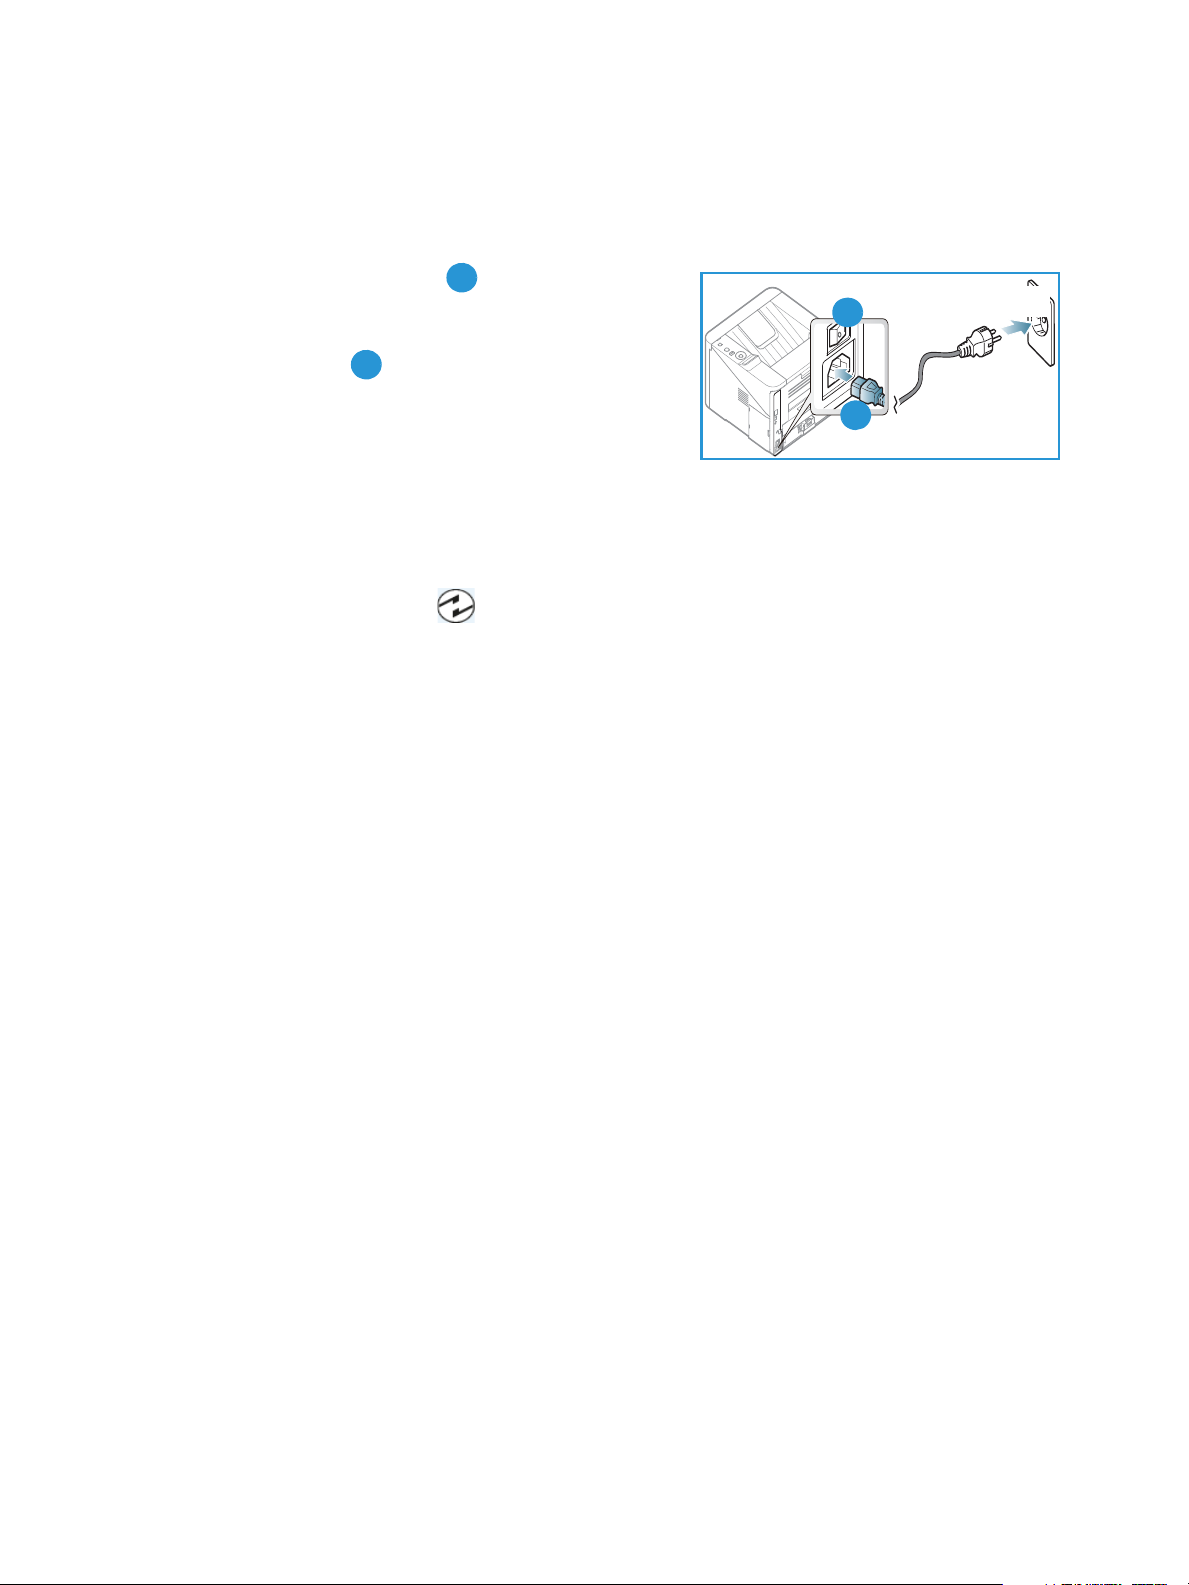
Powering on the Machine
The On/Off switch and the power cable socket are at the rear of the machine.
1. Connect the
power outlet. The power cord must be plugged into a
grounded power socket.
2. Press the
Power Save
This machine contains advanced energy conservation
technology that reduces power consumption when it is not in active use.
• When the printer does not receive data for an extended period of time, the Power Save mode
becomes active and power consumption is automatically lowered.
•Press the Power Save button to select the Power Save mode immediately.
To restore the machine to a normal state, press the Power Save button.
AC Power Cord to the machine and a
ON/OFF switch to the ON (I) position.
Powering off the Machine
There are two ways to switch the machine off:
•Press the ON/OFF switch to the (O) position.
•Press the Power Save button and use the arrow buttons on the control panel to select Power
Down and then press OK.
8
Xerox Phaser 3320DN/3320DNI
User Guide
Control Panel Overview
1
2
3
4 5
6 7
8
1234567
8
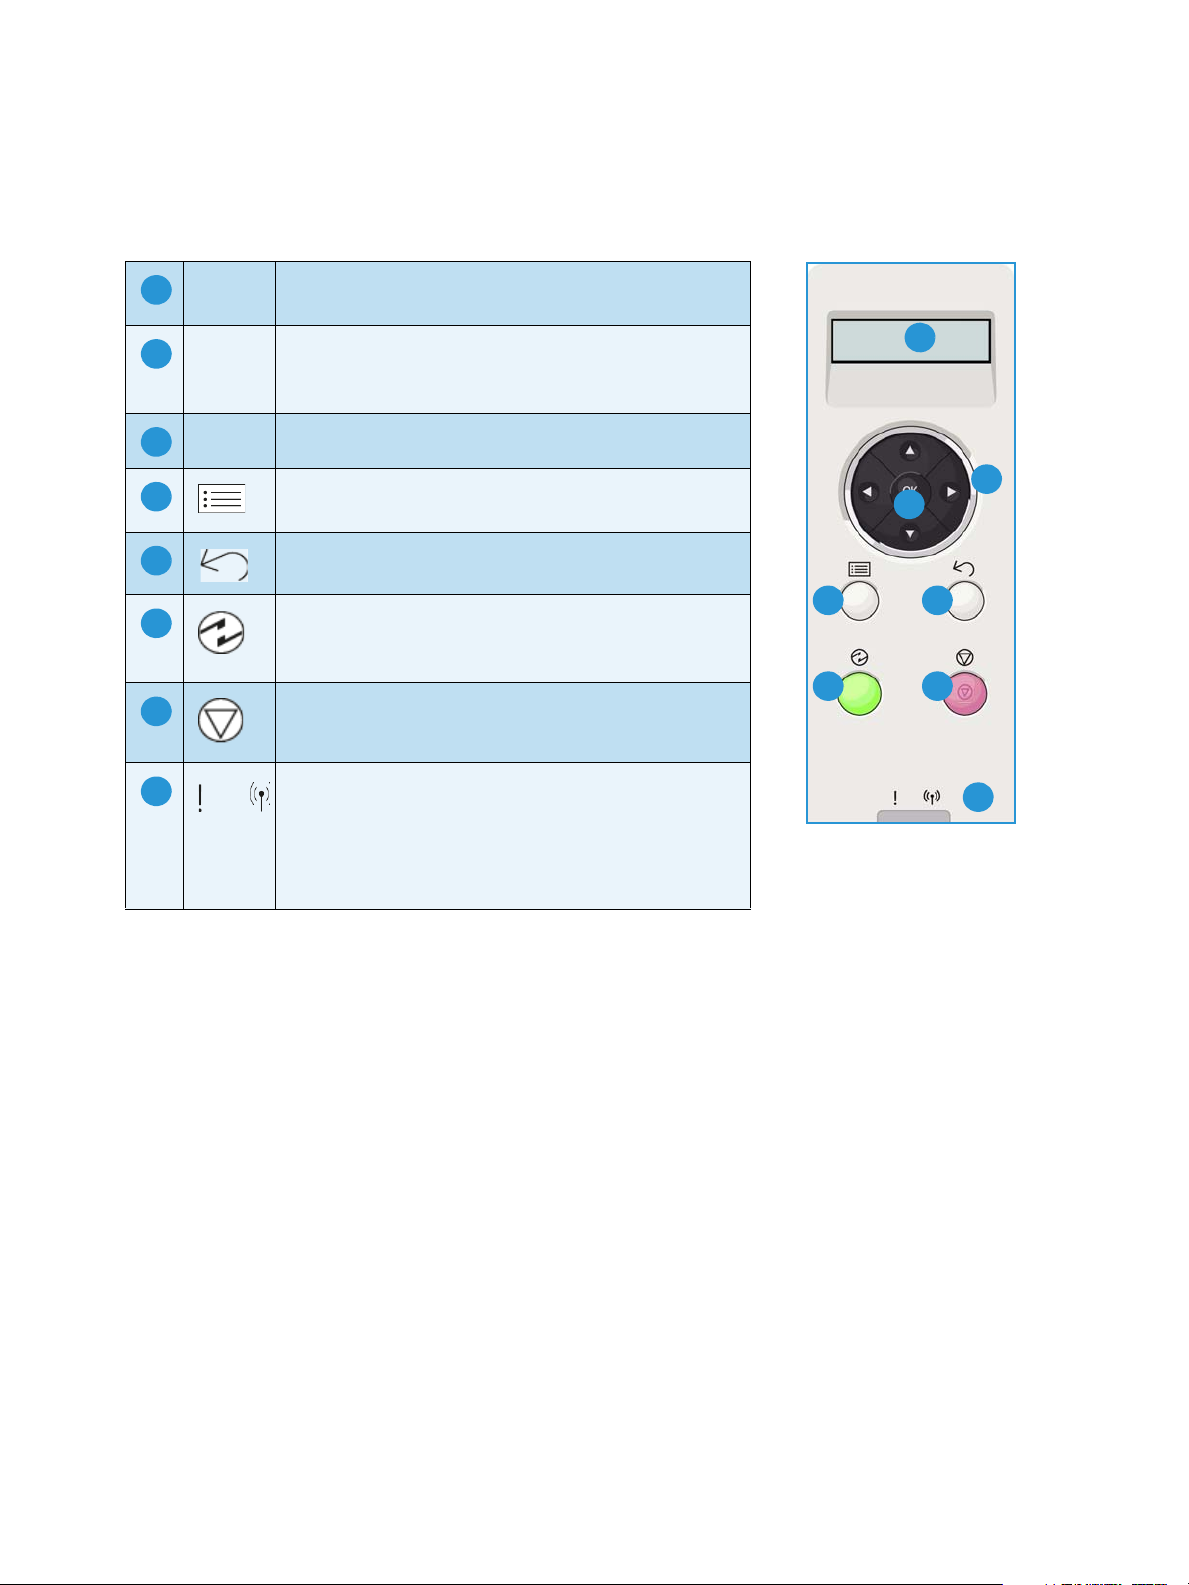
Display Screen: Displays the current machine status
and prompts during an operation.
Arrows: The up/down and left/right arrows are used to
scroll through the options available in the selected
menu, and to increase or decrease values.
OK: Confirms the selection on the screen.
Menu: Enters Menu Mode and enables you to access
options and settings.
Back: Used to go back one level in the menu.
Power Save: Sends the machine into Power Save
mode or Power Down. Press the button again to restart
the machine.
Control Panel Overview
Stop: Pressing the Stop button stops an operation at
any time.
Status / Wireless LED: The color of the LEDs indicates
the machine’s current status. For more information
refer to Status / Wireless LED on page 93.
Note: The Wireless LED applies to the Phaser
3320DNI only.
Xerox Phaser 3320DN/3320DNI
User Guide
9
Menu Overview
Menu Overview
The control panel provides access to various menus. These menus can be accessed by pressing the
Menu button and using the arrow buttons to navigate to the menu item you require and pressing OK.
Selecting Menu Items
•Press the Menu Button on the control panel.
•Press the Up/Down arrow buttons to scroll through the menu items. Press OK to select the menu
item.
•Press the Right/Left arrow buttons to scroll to a menu option in the selected menu item. Press OK
to select the menu option.
Entering Alphanumeric Characters
As you perform various tasks, you may need to enter alphanumeric characters. For example, when
entering a margin measurement. When this is required, the arrow keys are used as follows:
• UP Key: Increases the character code (A -> B -> C …)
• Down Key: Decreases the character code (C -> B -> A…)
• Right Key: Moves to the next input field
• Left Key: Deletes the last character
• OK Key: Enters the current input
Feature Menu
You can change the settings for various feature options within the print environment to meet your
preferences and needs. A password may be required to access and change these settings.
The following table shows the available options for each menu item. For more detailed information
refer to Machine Features and Setups on page 75.
Information Layout Paper Graphic Job Manage
•Menu Map
• Configuration
• Supplies info.
•Demo Page
•PCL Font
•PS Font
•EPSON Font
•Stored Job
•Usage Counters
Note: Some menu options may be unavailable depending on your machine configuration and
whether the machine is in the Ready state.
•Orientation
•Common Margin:
- Simplex Margin
- Duplex Margin
- Binding Margin
• Bypass Tray
•Tray X
•Emulation Margin
•Duplex
•Quantity
•Bypass Tray/Tray
1 & 2: Paper Size
and Type
•Paper Source
•Bypass Mode
•Resolution
•Darken Text
•Active Job
•Stored Job
•File Policy
10
Xerox Phaser 3320DN/3320DNI
User Guide
Menu Overview
Setup Menu
The Setup menu enables you to customize options which are specific to the machine, such as
Language and Power Save and Emulation settings. A password may be required to access and change
these Setup settings.
You may also set up the network using the machine's display screen. Before doing that, you must have
the relevant information concerning the type of network protocols and computer system you use. If
you are not sure which setting to use, contact your System Administrator to configure this machine on
the network. A password may be required to access and change the Network Setups.
The following table shows the available options for each menu item. For more detailed information
refer to Machine Features and Setups on page 75.
System Setup Emulation Network Setup
• Language
•Power Save
• Wakeup Event
•Auto Continue
•Paper Subst.
•Paper Mismatch
• Tray Chaining
•Default Paper
•Metric Default
•Altitude Adj.
•Line Term.
• Job Timeout
• Config. Page
• Maintenance
- Supplies Info
- Toner Low Alert
•Toner Save
•Earth Smart
• Clear Setting
•Emulation Type
•Setup:
•Setup-PCL
- Typeface
- Symbol
- Courier
- Pitch
- Lines
- Wide A4
•Setup-Postscript
•Setup-EPSON/IBM
- Font
- Character Set
- Character Tab
- Pitch
- LPI
- Autowrap
•TCP/IP(IPv4)
•TCP/IP(IPv6)
• Ethernet Speed
• 802.1x
- Off
- On
• Wireless (Phaser 3320DNI only)
• Clear Setting
•Network Conf.
•Net. Activate
• HTTP Activate
Note: Some menu options may be unavailable depending on your machine configuration. You
may be required to enter a password before making setup changes.
Xerox Phaser 3320DN/3320DNI
User Guide
11
Reports
Reports
Various reports can be printed to provide information about your machine.
1. Select the Menu button on the control panel.
2. Use the up/down arrows to scroll to the Information menu and select OK.
3. Use the up/down arrows until the report you require displays and select OK.
4. Select OK to print the report.
The following reports can be printed:
Report Description
Menu Map Prints the menu map which shows the layout and current settings of this
machine.
Configuration This report provides information about your machine setup, including
the serial number, IP Address, installed options and the software
version.
Supplies Info Prints the supplies information page.
Demo Page The demo page is printed to check the quality of the print.
PCL Font Prints the PCL font list.
PS Font Prints the PS font list.
EPSON Font Prints the EPSON font list.
Stored Job Prints the stored job list.
Usage Counters This list shows the number of impressions made on the machine. The list
includes:
• Total Impressions
• Black Impressions
• Black Printed Impressions
• Sheets
• 2 Sided Sheets
• Printed Sheets
• Printed 2 Sided Sheets
• Black Printed Sheets
• Black Printed 2 Sided Sheets
• Maintenance Impressions
• Black Maintenance Impressions
Note: Some options may be unavailable depending on your machine configuration.
12
Xerox Phaser 3320DN/3320DNI
User Guide
Software
Software
After you have set up your machine and connected it to your computer, you must install the printer
software. The software is supplied on the CD delivered with your machine, or can be downloaded from
www.xerox.com. The following software is provided:
CD OS Contents
Printer
Software
CD
Printer
Software
Printer
Software
Printer
Software
CD
Windows • Printer Driver: Use the printer driver to take full advantage of your
printer’s features. PCL6, Postscript and XPS drivers are provided.
• Xerox Easy Printer Manager (EPM): Conveniently combines access to
device settings, printing environments and the launch of applications
such as Xerox CentreWare Internet Services into one location.
Note: Login is required to change Printer Settings.
• Wireless Setting Program: When installing the Phaser 3320DNI you can
use the Wireless Setting program that was automatically installed with
the printer driver to configure the wireless settings.
• SetIP program: A utility program allowing you to select a network
interface and manually configure the addresses for use with the TCP/IP
protocol.
Linux • Printer Driver: Use this driver to take full advantage of your printer’s
fea tures.
Note: Linux software is available on xerox.com only.
Unix • Printer Driver: Use this driver to take full advantage of your printer’s
fea tures.
Note: Unix software is available on xerox.com only.
Macintosh • Printer Driver: Use this driver to take full advantage of your printer’s
fea tures.
• SetIP program: A utility program allowing you to select a network
interface and manually configure the addresses for use with the TCP/IP
protocol.
• Smart Panel: This utility enables remote management, displaying toner
levels, printer status and problem alerts.
Xerox Phaser 3320DN/3320DNI
User Guide
13
Loading Paper
1
2
1
2
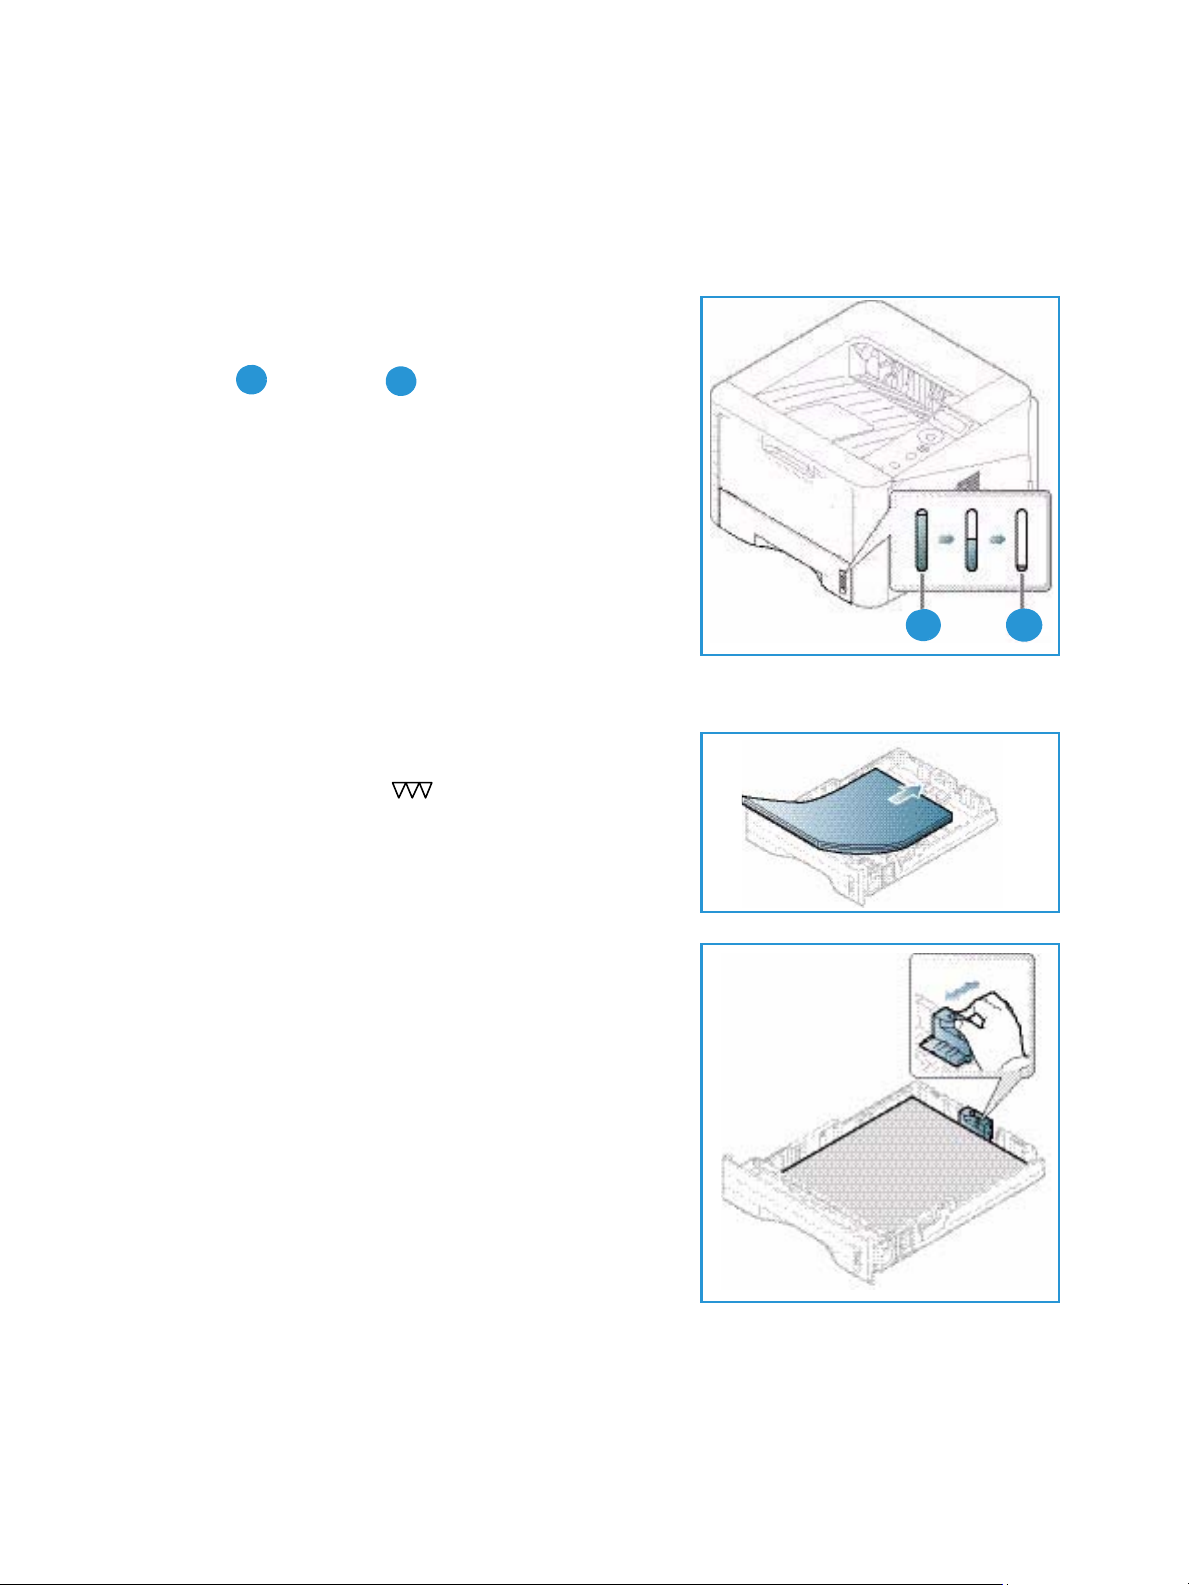
Loading Paper
Paper Tray 1 and Paper Tray 2 (optional)
The paper level indicator on the front of trays 1 and 2 shows
the amount of paper currently left in the tray. When the tray
is empty, the indicator is completely lowered as shown in the
illustration: shows full, shows empty. Paper tray 1
can hold up to 250 sheets and paper tray 2 (optional) can
hold up to 520 sheets of 20 lb (80 g/m
media specifications, refer to Media Specifications on
page 119.
2
) paper. For more
To load the paper:
1. Pull out the paper tray and load paper into the tray, print
side down. Do not fill above the Maximum Fill line
indicated by the symbol .
2. Slide the paper length guide until it lightly touches the
end of the paper stack.
14
Xerox Phaser 3320DN/3320DNI
User Guide
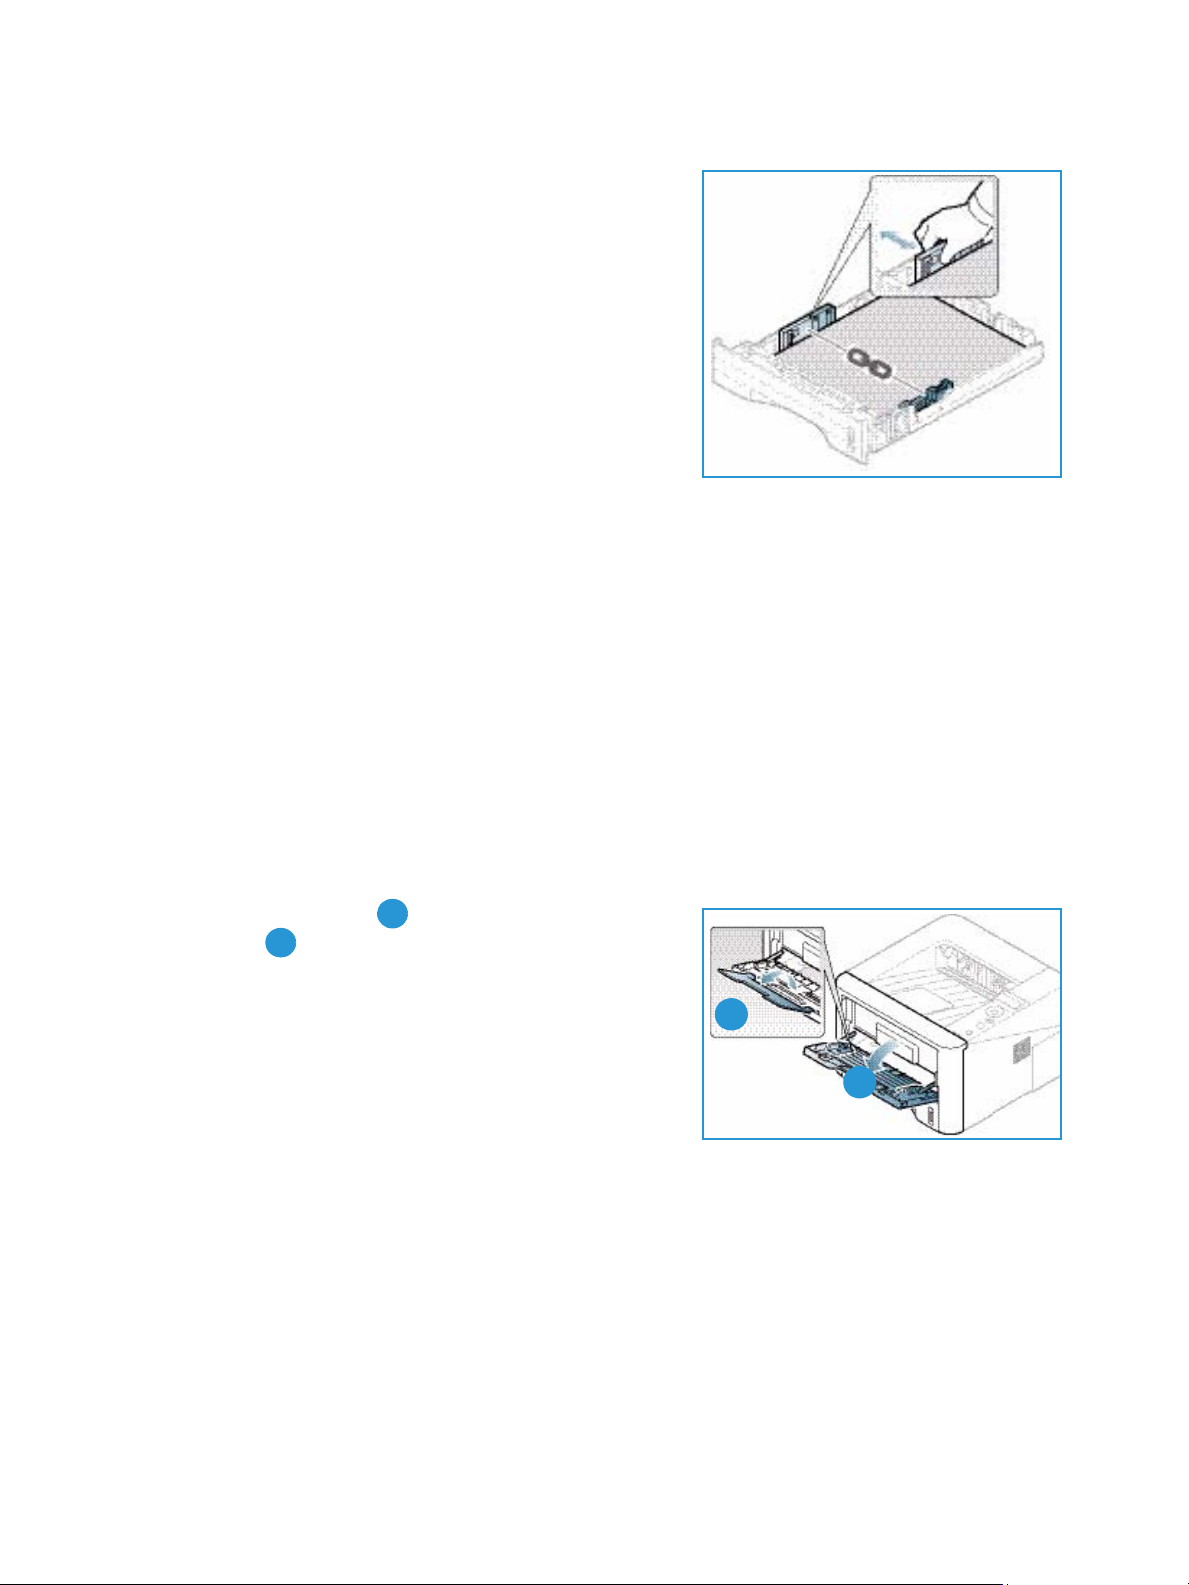
3. Position the side guide by squeezing the lever and sliding
2
1
1
2
it towards the stack of paper, until it gently touches the
side of the stack.
4. Insert the paper tray into the machine.
5. After loading paper in the paper tray, set the paper size
and type using the control panel. For information about
setting the paper size and type on the control panel, refer
to Setting Paper Size and Type on page 70.
6. When printing from your computer, ensure you select
Size on the driver Paper tab to specify the correct paper
size and type. Not confirming the paper details may
result in printing delays. For information about setting
the paper size and type in the printer driver, refer to Paper Tab on page 38.
Note: The settings made from the printer driver on your computer override the settings on the
control panel.
For more information on loading paper, refer to Paper and Media on page 65.
Loading Paper
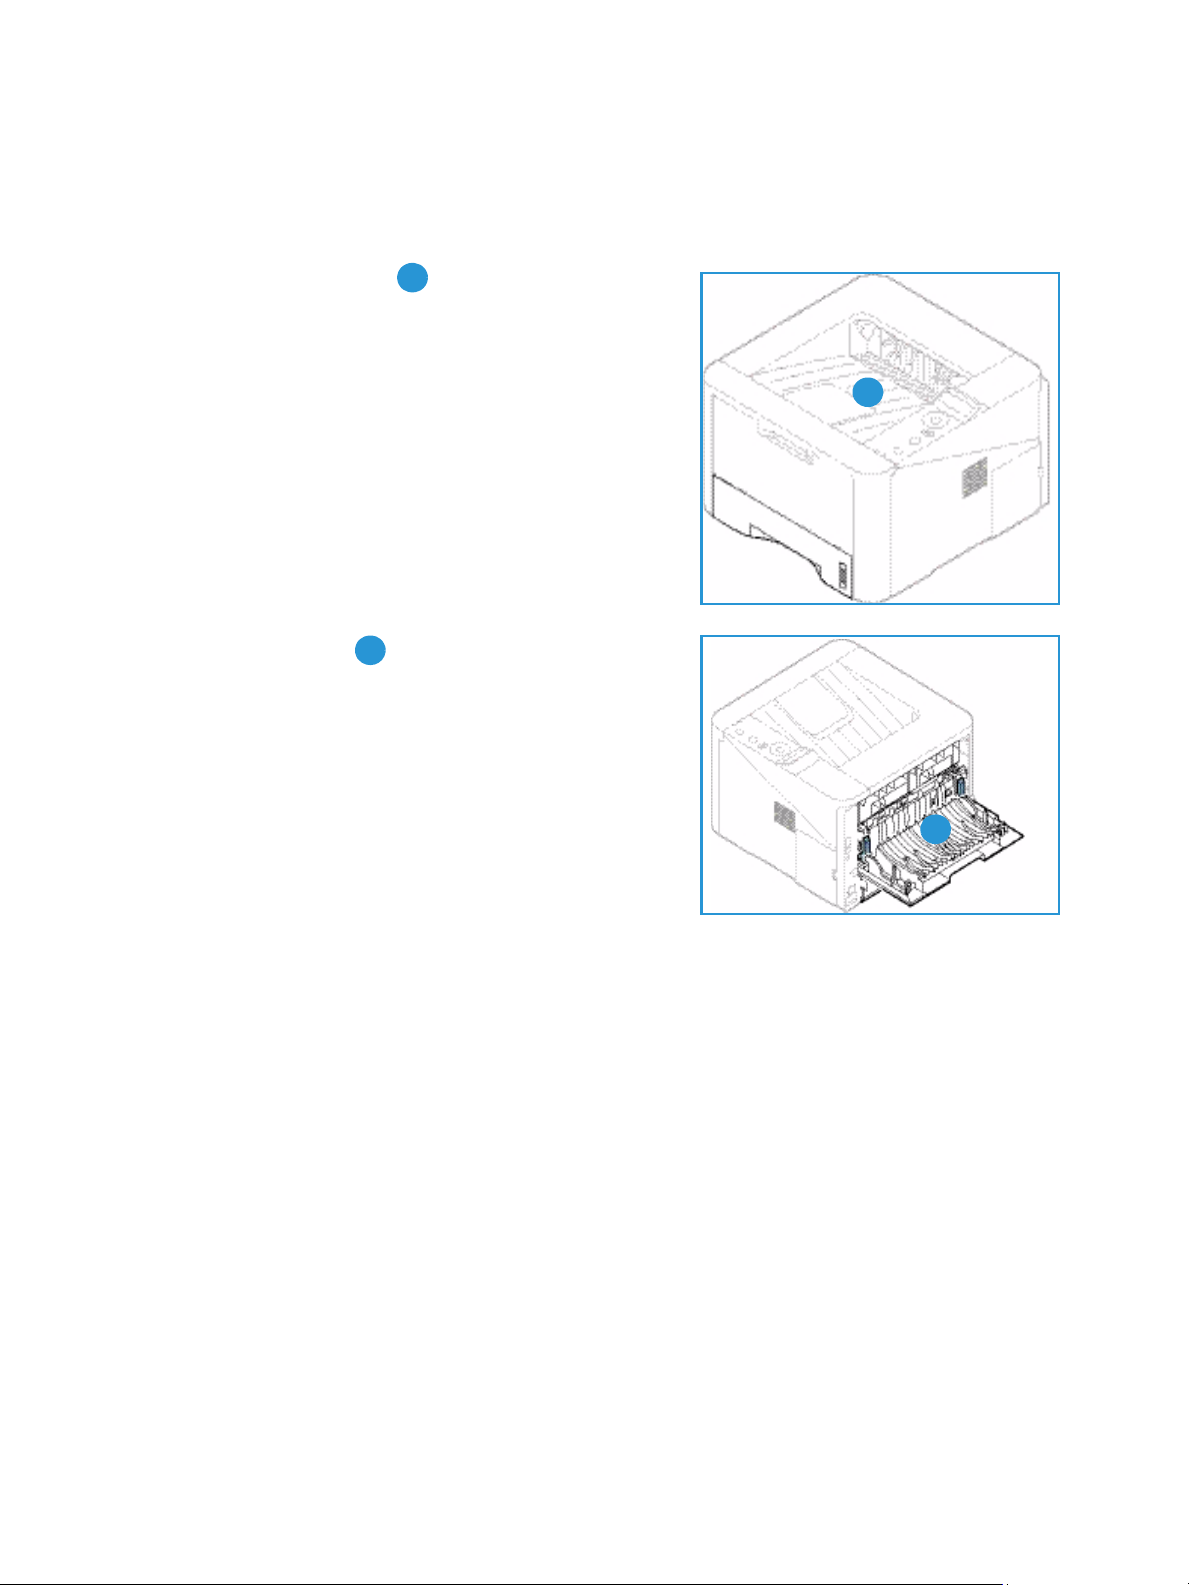
Bypass Tray
The bypass tray is located on the front of your machine. It can be closed when not in use, making the
product more compact. Use the bypass tray to print transparencies, labels, envelopes or postcards in
addition to making quick runs of paper types or sizes that are not currently loaded in the main paper
tray.
The bypass tray can hold a maximum of 50 sheets of 20 lb (80 g/m²) bond paper, 5 transparency
sheets or 5 envelopes.
1. Lower the bypass tray and unfold the paper support
extension .
2. Prepare a stack of paper for loading by flexing or fanning
it back and forth. Straighten the edges on a level surface.
Remove any curl on postcards, envelopes and labels
before loading them into the bypass tray.
When using the bypass tray for special media it may be
necessary to use the rear door for the output. For further
information refer to Media Output Locations on page 18.
Note: The rear door output can only be used for simplex jobs. Duplex printing with the rear door
open will cause paper jams.
Xerox Phaser 3320DN/3320DNI
User Guide
15
Loading Paper
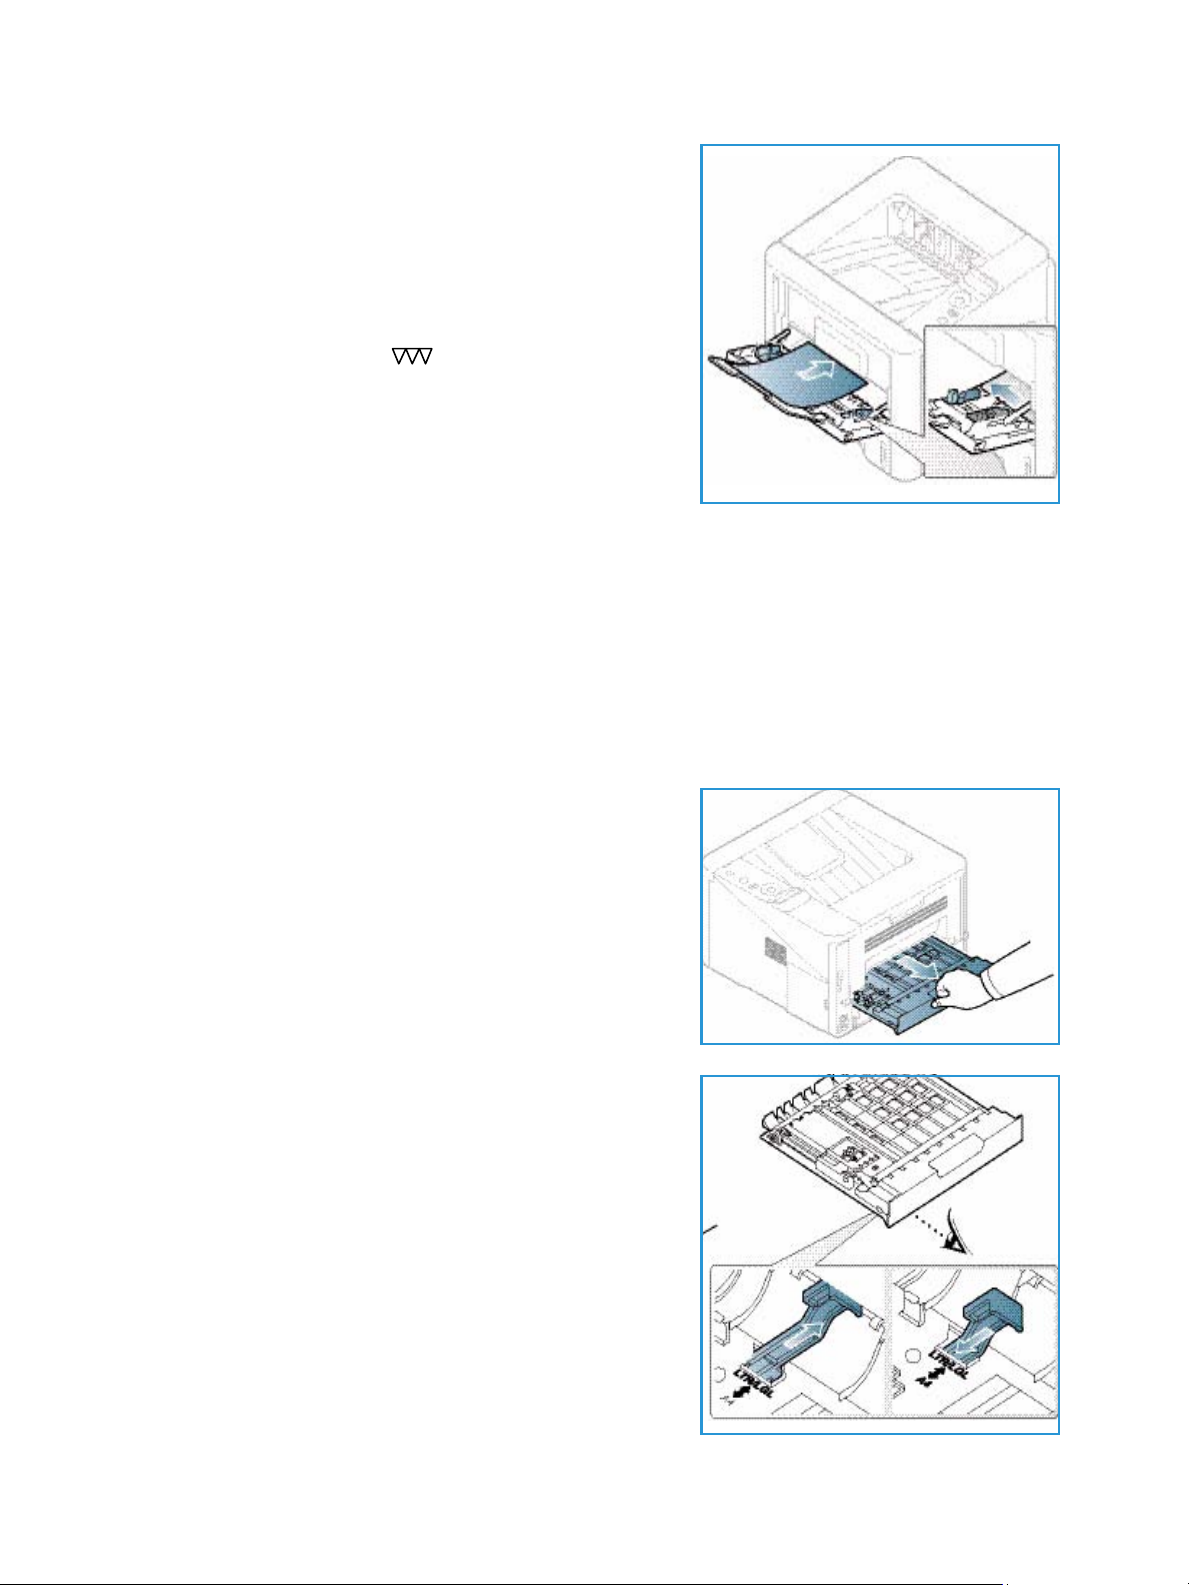
3. Load the print material between the width guides with
the print side facing up.
Note: Hold transparencies by the edges and avoid
touching the print side.
4. Adjust the paper guide to the width of the stack of print
material. Ensure you have not loaded too much print
media. The stack should be below the Maximum Fill line
indicated by the symbol .
5. When printing from your computer, ensure you select
Size on the driver Paper tab to specify the correct paper
size and type. Not confirming the paper details may
result in printing delays. For information about setting
the paper size and type in the printer driver, refer to
Paper Tab on page 38.
Note: The settings made from the printer driver on your computer override the settings on the
control panel.
6. After printing, remove any unfed paper and close the bypass tray.
Duplex Unit
The duplex unit is preset to either Letter size or A4 depending on your country. To change the size of
the duplex unit, follow the instructions below.
1. Pull the duplex unit out of the machine.
2. Adjust the guides to match the size of paper you will be
using.
16
Xerox Phaser 3320DN/3320DNI
User Guide
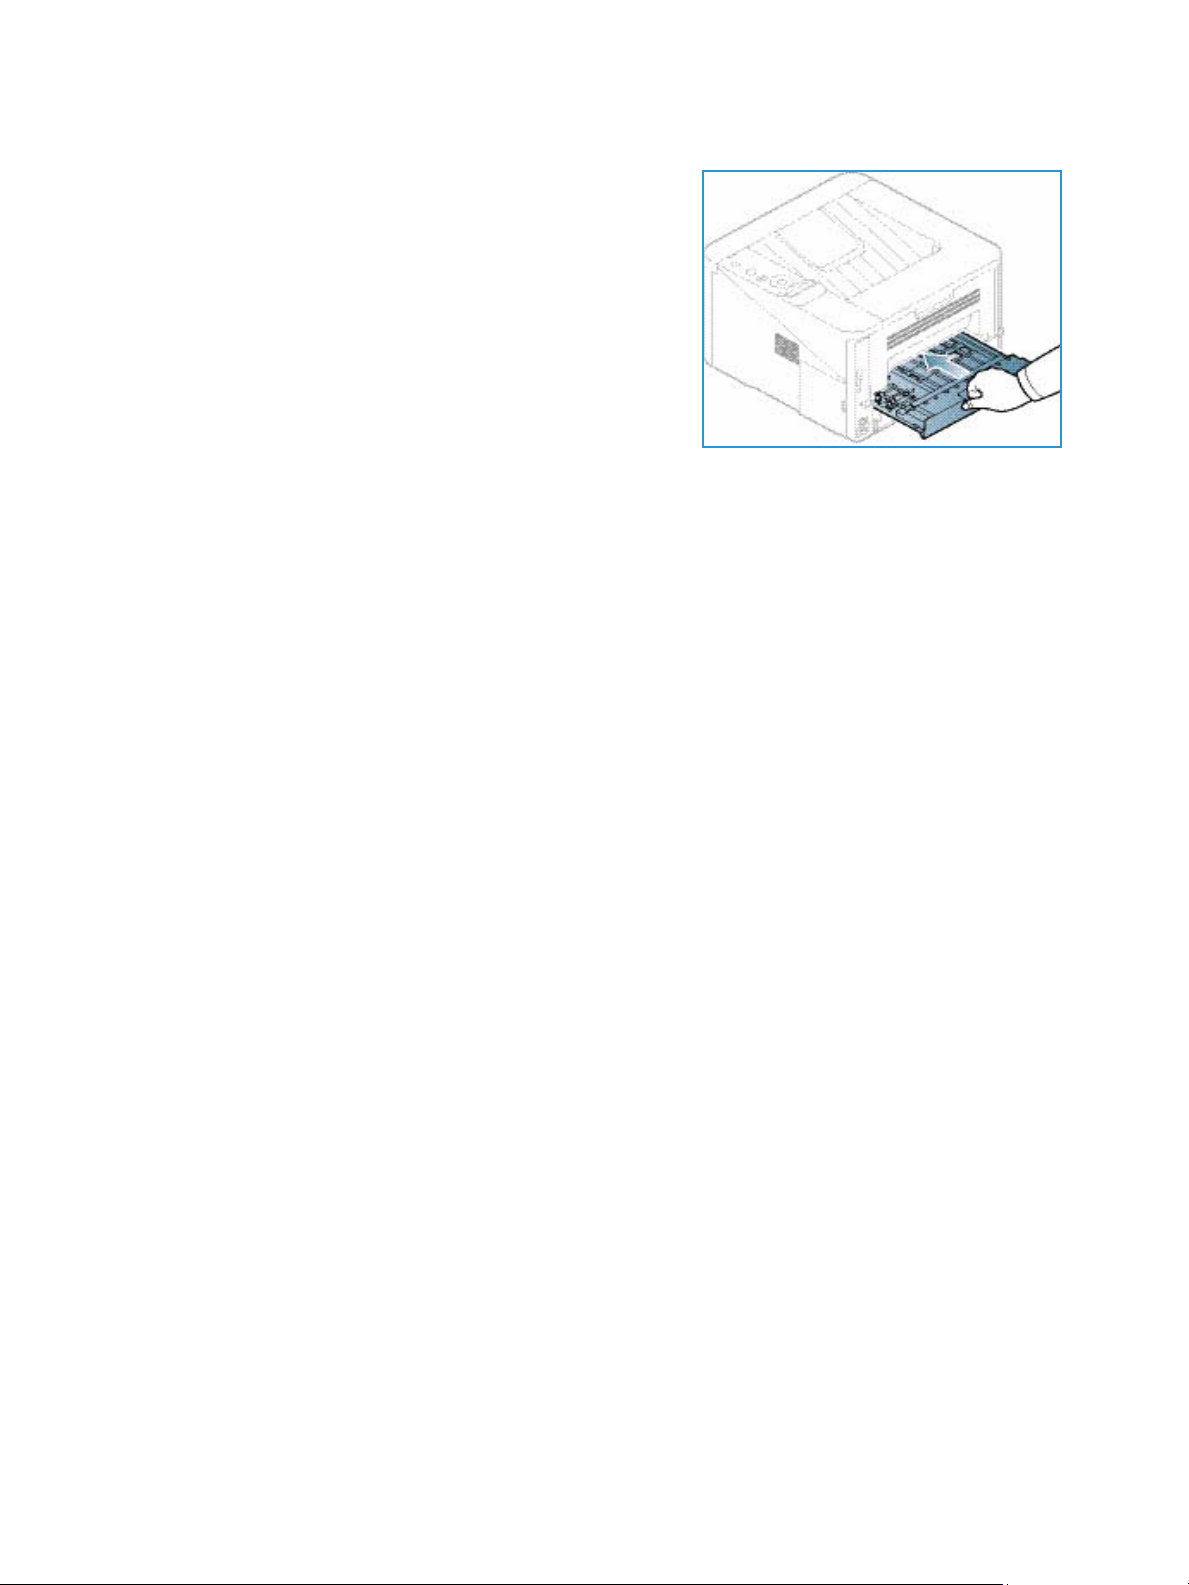
3. Insert the duplex unit back into the machine, aligning
the edges of the unit with the feed grooves on the inside
of the machine. Make sure the duplex unit is fully pushed
in.
Loading Paper
Xerox Phaser 3320DN/3320DNI
User Guide
17
Media Output Locations
1
1
2
2
Media Output Locations
The machine has two output locations:
• Output tray (face down) up to a maximum of 150
sheets of 20 lb (80 g/m²) paper.
• Rear door (face up) one sheet at a time for 1-sided
output only.
The machine sends output to the output tray by default. If special media such as envelopes print out
with wrinkles, curl, creases or black bold lines, the rear door should be used for the output. Open the rear
door and keep it open while printing one sheet at a time.
Note: The rear door output can only be used for simplex jobs. Duplex printing with the rear door
open will cause paper jams.
Using the Output Tray
The output tray collects printed paper face down, in the order in which the sheets were printed. The
output tray should be used for most jobs. When the output tray is full, a message displays on the
control panel.
18
Xerox Phaser 3320DN/3320DNI
User Guide
To u s e th e output tray, make sure that the rear door is closed.
Notes:
• To reduce paper jams, do not open or close the rear door while the printer is printing.
• If paper coming out of the output tray has problems, such as excessive curl, try printing
to the rear door.
• The rear door output can only be used for simplex jobs. Duplex printing with the rear
door open will cause paper jams.
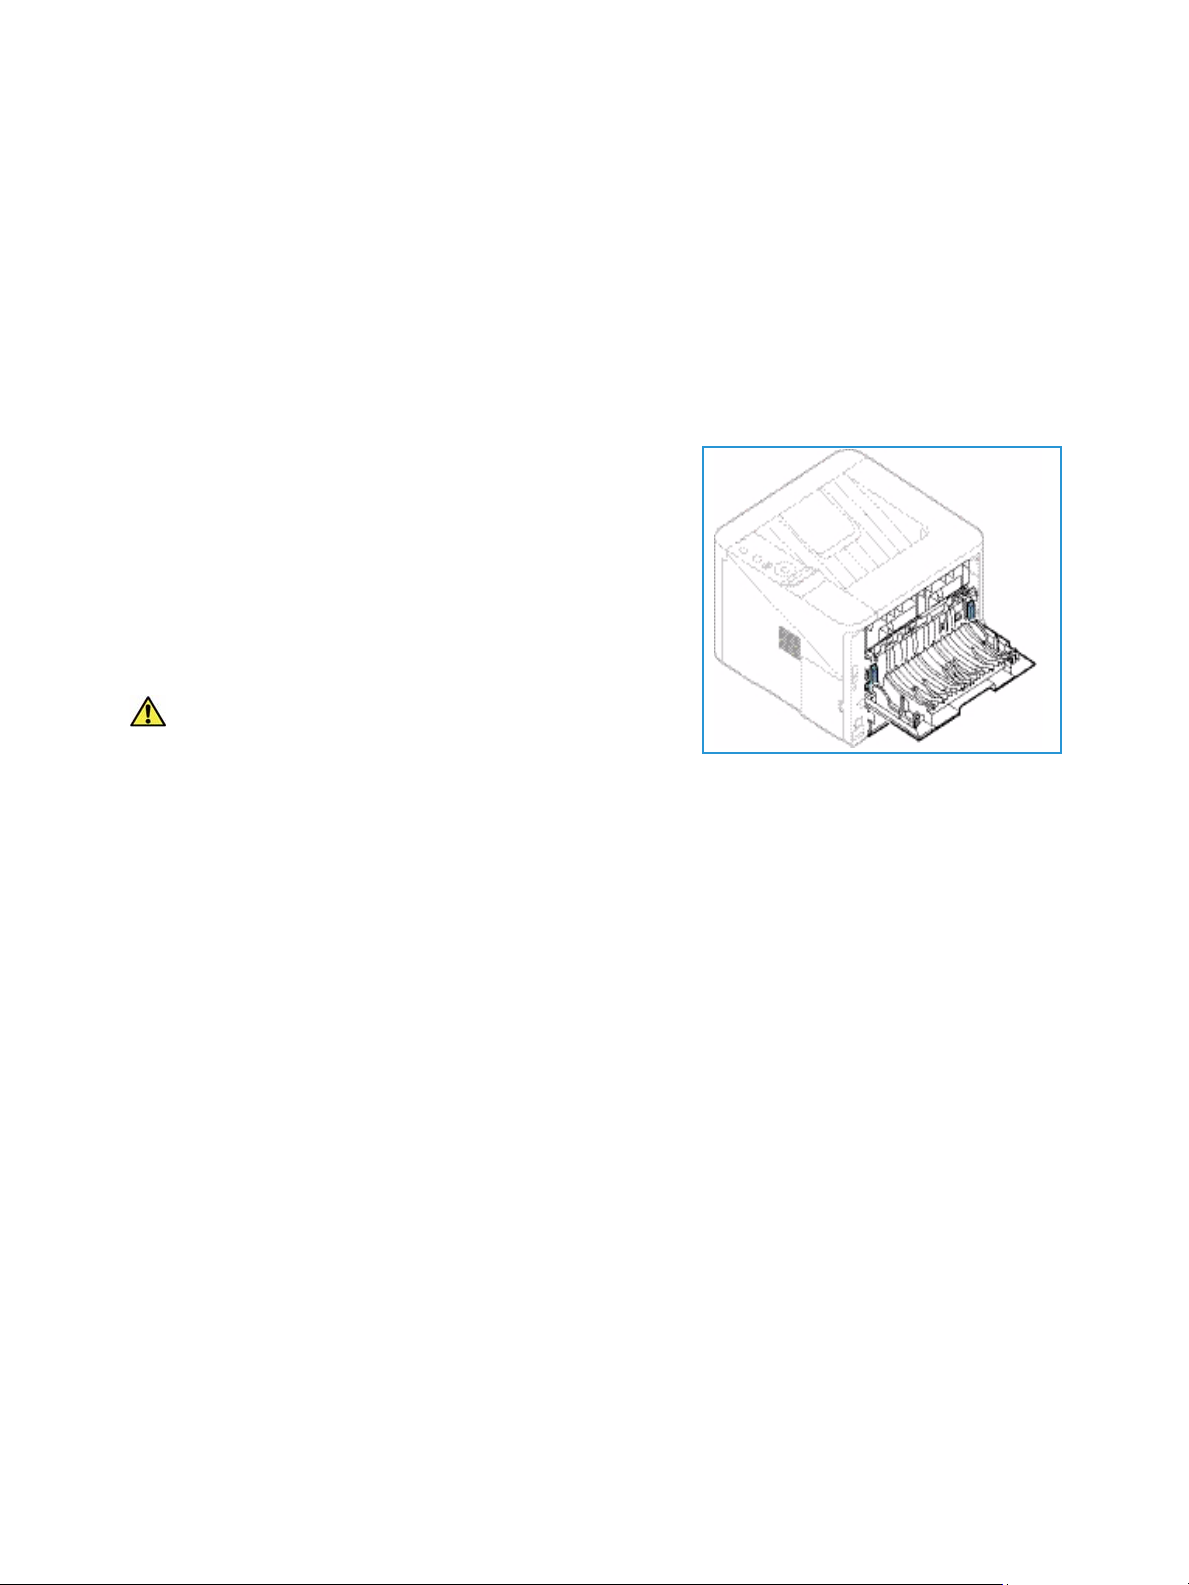
Using the Rear Door
When using the rear door, paper comes out of the machine
face up. Printing from the bypass tray to the rear door
provides a straight paper path and might improve the output
quality when printing on special media. Whenever the rear
door is open, the output is delivered there.
Note: The rear door output can only be used for simplex
jobs. Duplex printing with the rear door open will cause
paper jams.
Media Output Locations
CAUTION: The fuser area inside the rear door of your
machine becomes very hot when in use. Take care when
you access this area.
Xerox Phaser 3320DN/3320DNI
User Guide
19
General Care and Consumables
General Care and Consumables
There is only one customer replaceable consumable in the machine, the print cartridge. To place an
order for Xerox consumables, please contact your local Xerox Representative giving your Company
Name, product number and the machine serial number. Supplies can also be ordered from
www.xerox.com, refer to Support on page 64 for further information.
The machine’s serial number is located on the inside of the front door on the machine and is printed on
the configuration report. For further information about locating the serial number, please refer to
Locating the Serial Number on page 116.
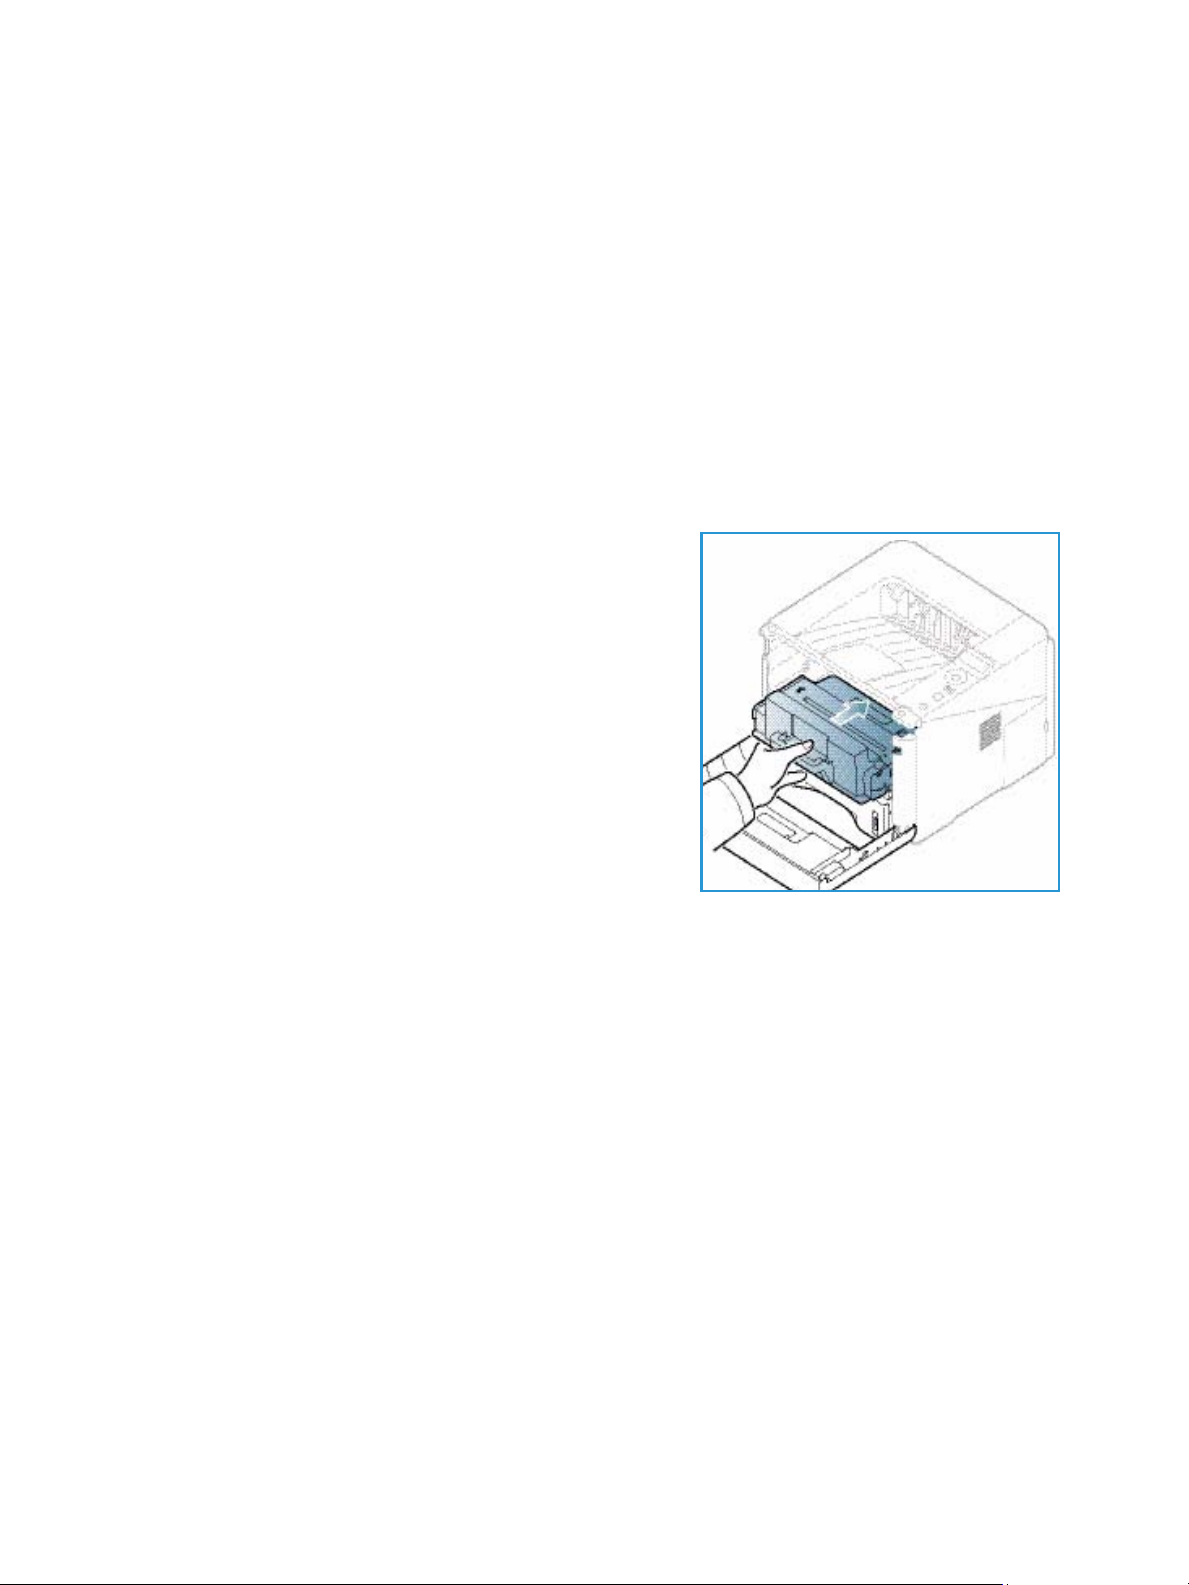
Print Cartridge
To avoid print quality problems resulting from worn parts and
to maintain your machine in top working condition, the print
cartridge will need to be replaced after printing the specified
number of pages or when the life span of the cartridge has
expired.
The machine will display a message when the print cartridge
needs to be replaced. Only replace the cartridge when a
message instructs you to do so or when instructed by a Xerox
representative. To replace the print cartridge, follow the
instructions provided within this guide or with the
consumable.
To re pla c e t h e print cartridge, refer to General Care and
Troubleshooting on page 87. To purchase a new print
cartridge, contact your local Xerox representative or authorized dealer. Supplies can also be ordered
from www.xerox.com, refer to Support on page 64 for further information.
Cleaning Tasks
Performing regular cleaning activities ensures the machine is kept free of dust and debris. The machine
covers and control panel should all be cleaned using a soft lint-free cloth, lightly dampened with water.
Remove any residue with a clean cloth or paper towel.
For further information on maintenance tasks, refer to General Care and Troubleshooting on page 87.
20
Xerox Phaser 3320DN/3320DNI
User Guide

Further Assistance
Further Assistance
For any additional help visit our customer web site at www.xerox.com or contact the Xerox Support
Center quoting the machine serial number.
The machine’s serial number is located on the inside of the front door on the machine and is printed on
the configuration report. For further information about locating the serial number, please refer to
Locating the Serial Number on page 116.
Xerox Support Center
If a fault cannot be resolved by following the display instructions, check Error Messages on page 101. If
the difficulty persists, contact the Xerox Support Center. The Xerox Support Center will want to know
the nature of the problem, the machine serial number, the fault code (if any) plus the name and
location of your company.
Documentation
Most answers to your questions will be provided by the documentation that is supplied with your
machine or on the Software and Documentation CD supplied with your machine. Alternatively you can
access the documents from www.xerox.com/support.
•Installation Guide - contains information about installing the machine.
• User Guide (this document) - contains instructions and information about all the features on the
machine.
• System Administration Guide - provides detailed instructions and information about connecting
your machine to the network and installing optional features.
Xerox Phaser 3320DN/3320DNI
User Guide
21

Further Assistance
22
Xerox Phaser 3320DN/3320DNI
User Guide

The Xerox Phaser 3320DN/DNI produces high quality prints from electronic documents. You can access
the printer from your computer by installing the appropriate printer driver. To access the many printer
drivers which can be used with your machine, refer to the Drivers CD or download the latest versions
from the Xerox website at www.xerox.com.
This chapter includes:
• Printing using Windows on page 24
• Xerox Easy Printer Manager (EPM) on page 45
• Wireless Setting Program (Phaser 3320DNI) on page 46
• SetIP on page 48
• Printing using Macintosh on page 49
• Printing using Linux on page 52
• Printing using Unix on page 54
2
Xerox Phaser 3320DN/DNI
User Guide
23
Printing using Windows
Printing using Windows
The following provides an overview of the print procedure and features available when printing using
Windows.
Install Printer Software
You can install the printer software for local printing and network printing. To install the printer
software on the computer, perform the appropriate installation procedure depending on the printer in
use.
A printer driver is software that lets your computer communicate with your printer. The procedure to
install drivers may differ depending on the operating system you are using. All applications should be
closed on your PC before beginning installation.
You can install the printer software for a local, networked or wireless printer using the typical or custom
method. For further information refer to the System Administrator Guide.
Local Printer
A local printer is a printer directly attached to your computer using a printer cable, such as a USB cable.
If your printer is attached to a network, refer to Networked Printer on page 26.
Note: If the “New Hardware Wizard” window appears during the installation procedure, select
Close or Cancel.
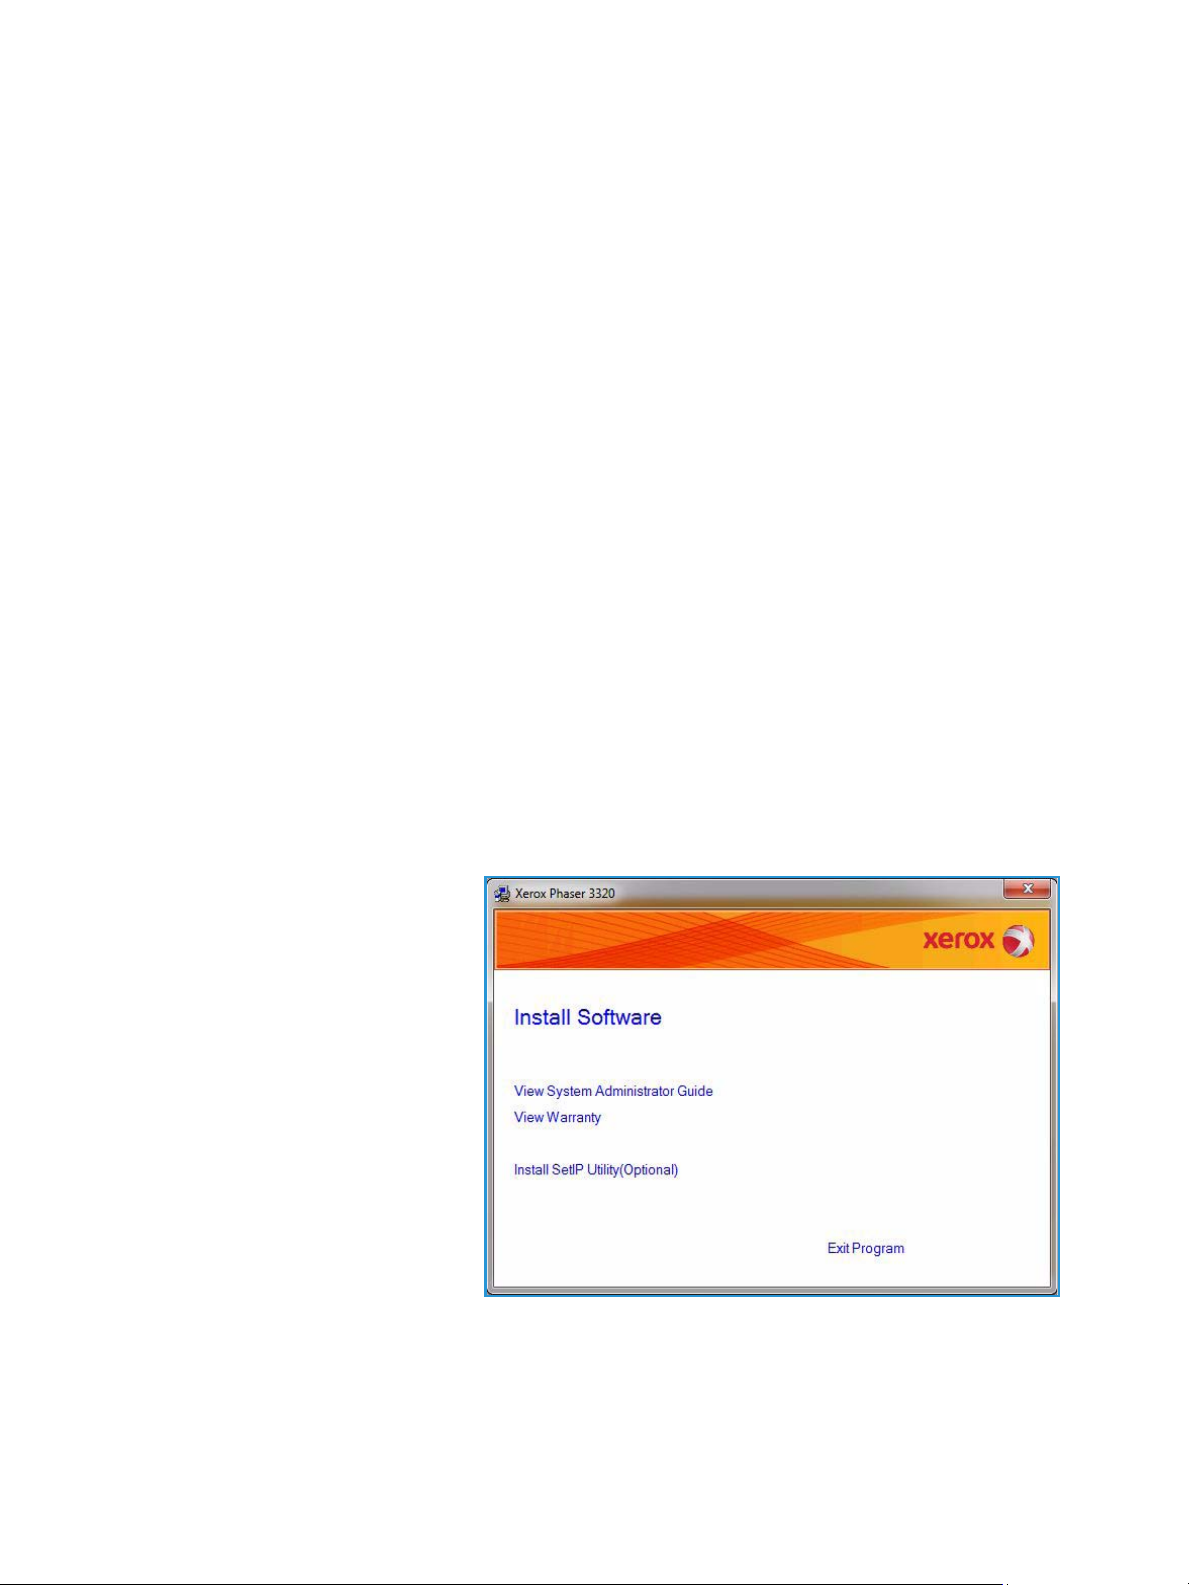
1. Make sure that the printer is connected to your computer and powered on.
2. Insert the supplied CD-ROM into
your CD-ROM drive. The CD-ROM
should automatically run, and an
installation window appear.
• If the installation window
does not appear, select the
Start button and then Run.
Ty pe X:\Setup.exe,
replacing “X” with the letter
which represents your drive
and select OK.
• If you use Windows Vista,
select Start > All programs
> Accessories > Run, and
type X:\Setup.exe. If the
AutoPlay window appears in
Windows Vista, select Run
Setup.exe in the Install or run program field, and select Continue in the User Account
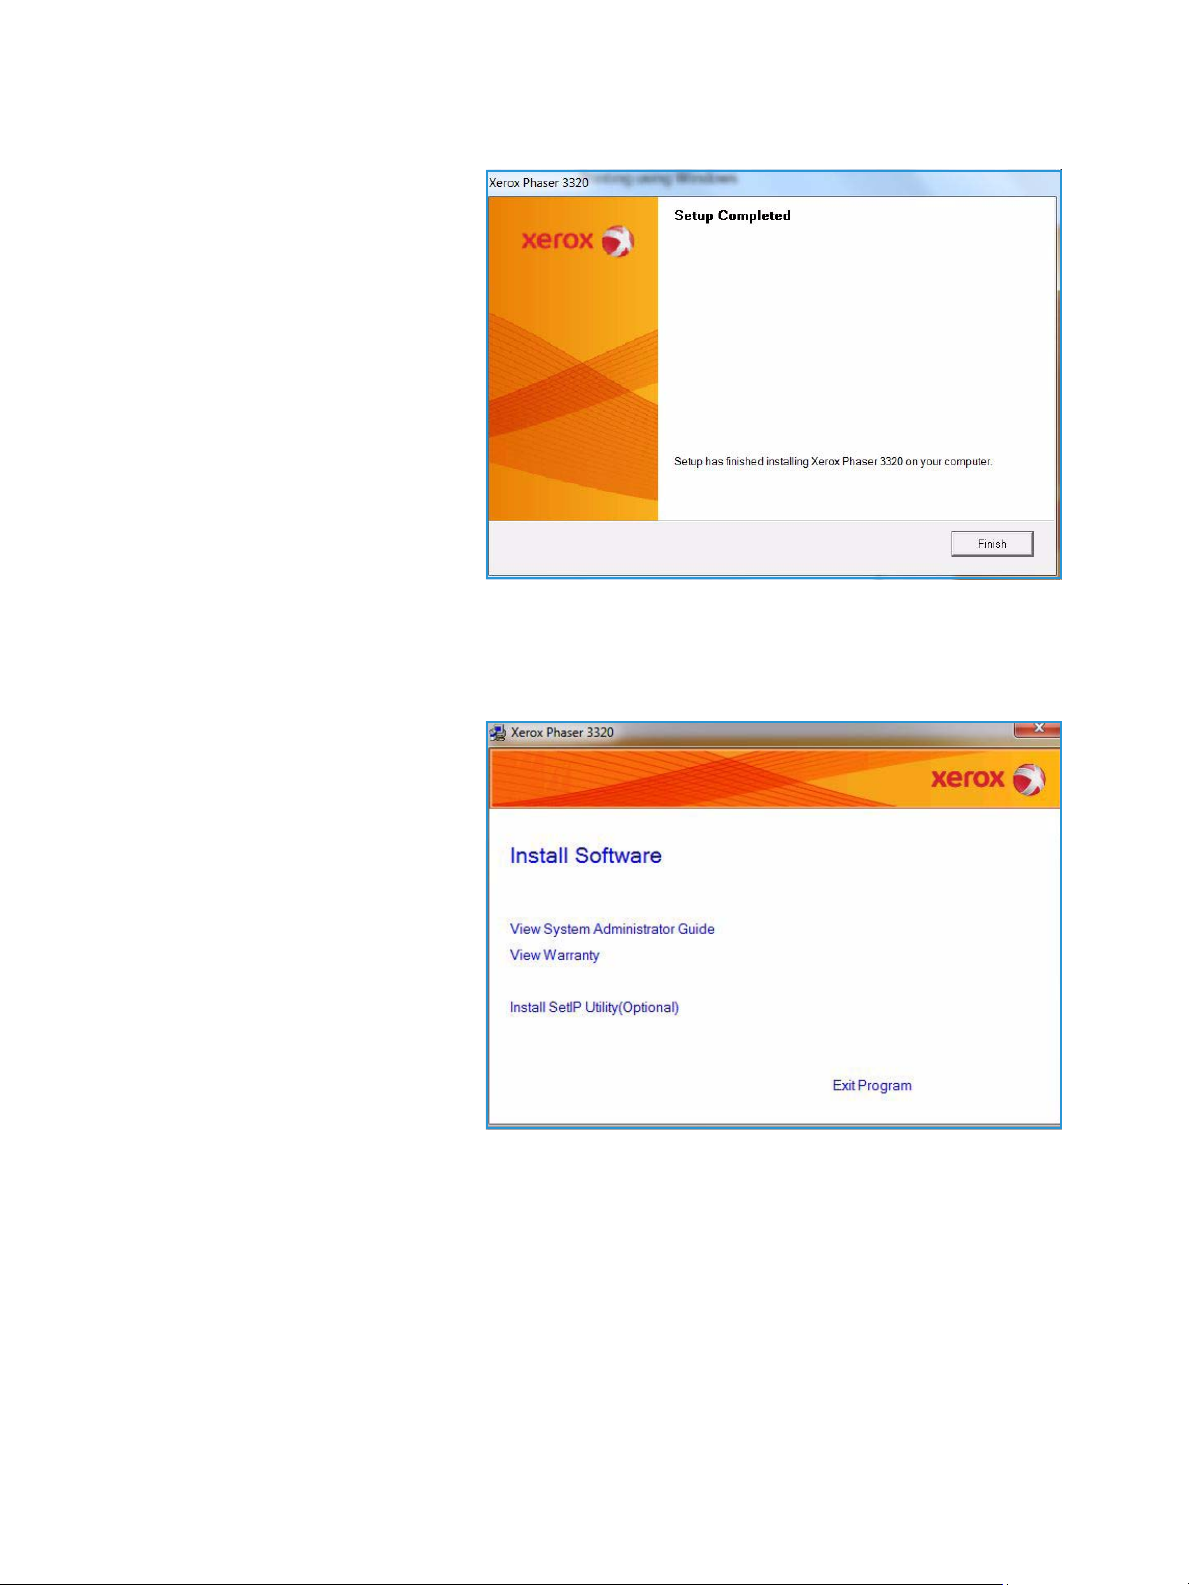
Control window.
3. Select Install Software.
24
Xerox Phaser 3320DN/DNI
User Guide
Printing using Windows
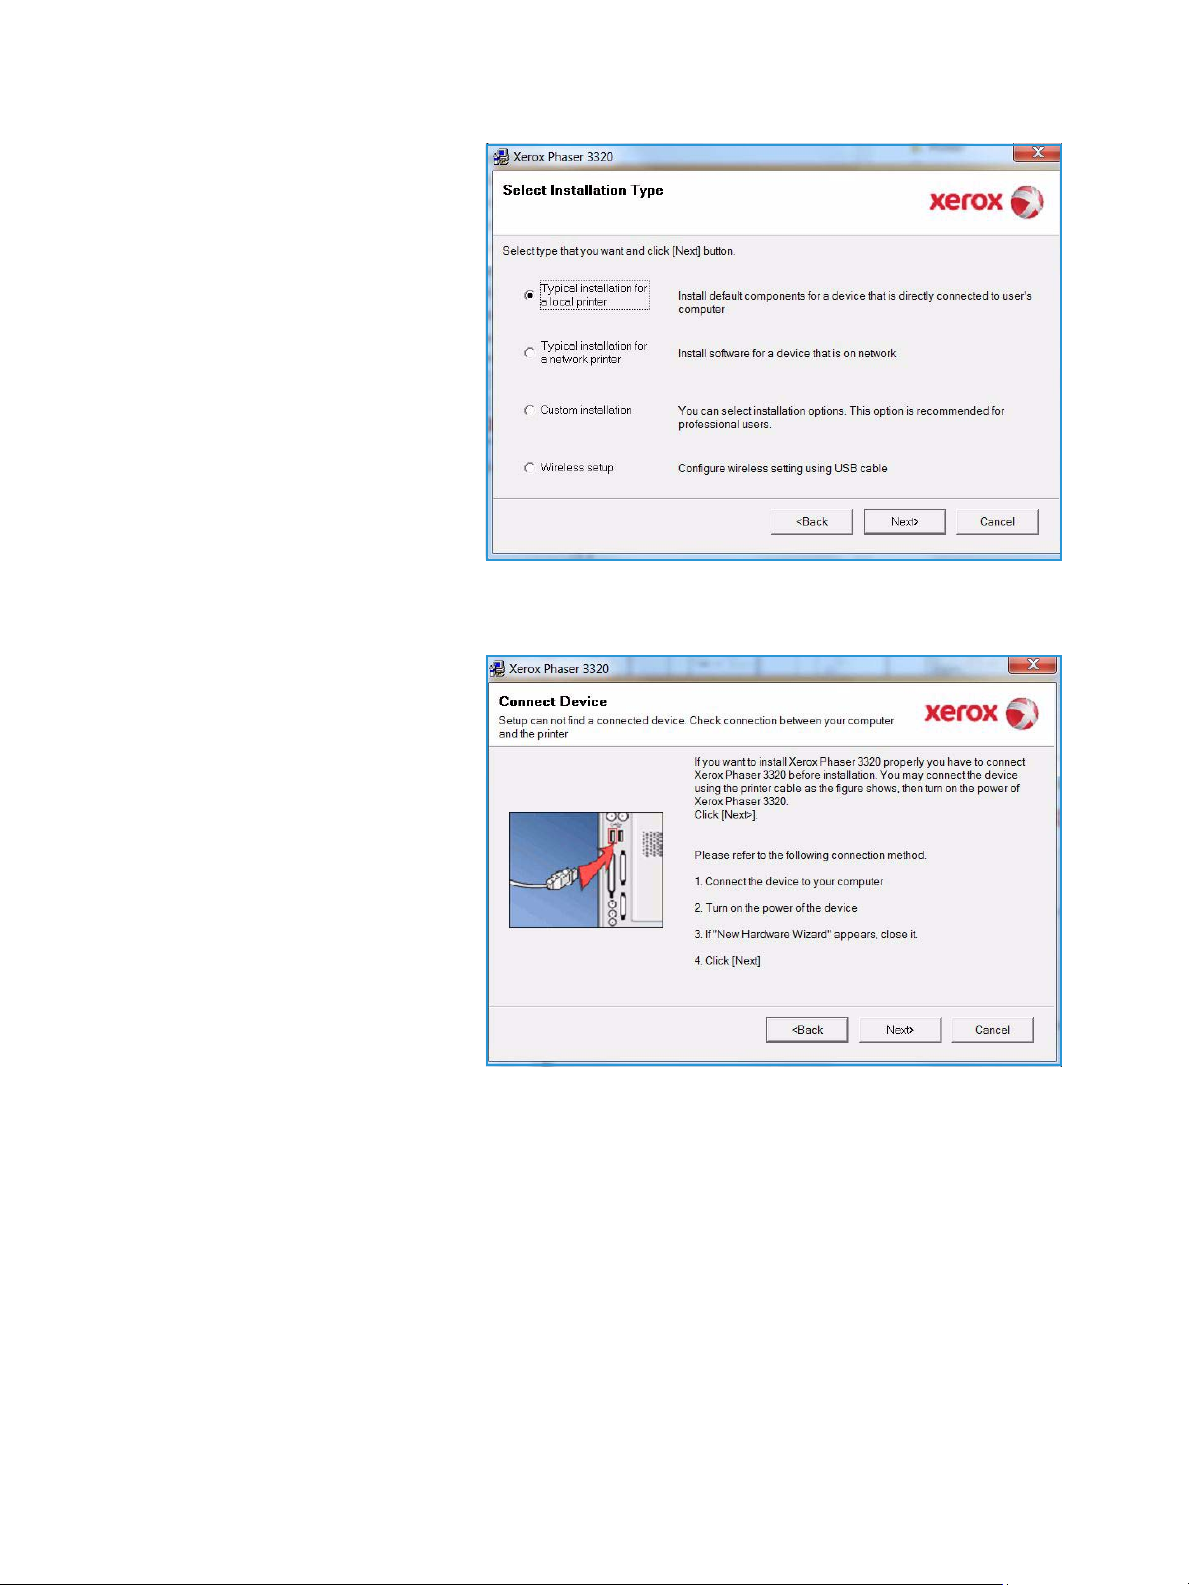
4. Select Typical installation for a
local printer and follow the
wizard instructions to install the
local printer.
If your printer is not already connected to the computer, the Connect Device screen will appear.
After connecting the printer, select Next.
Note: If you don’t want to
connect the printer at this time,
select Next and then No on the
following screen. Then the
installation will start and a test
page will not be printed at the
end of the installation.
Xerox Phaser 3320DN/DNI
User Guide
25
Printing using Windows
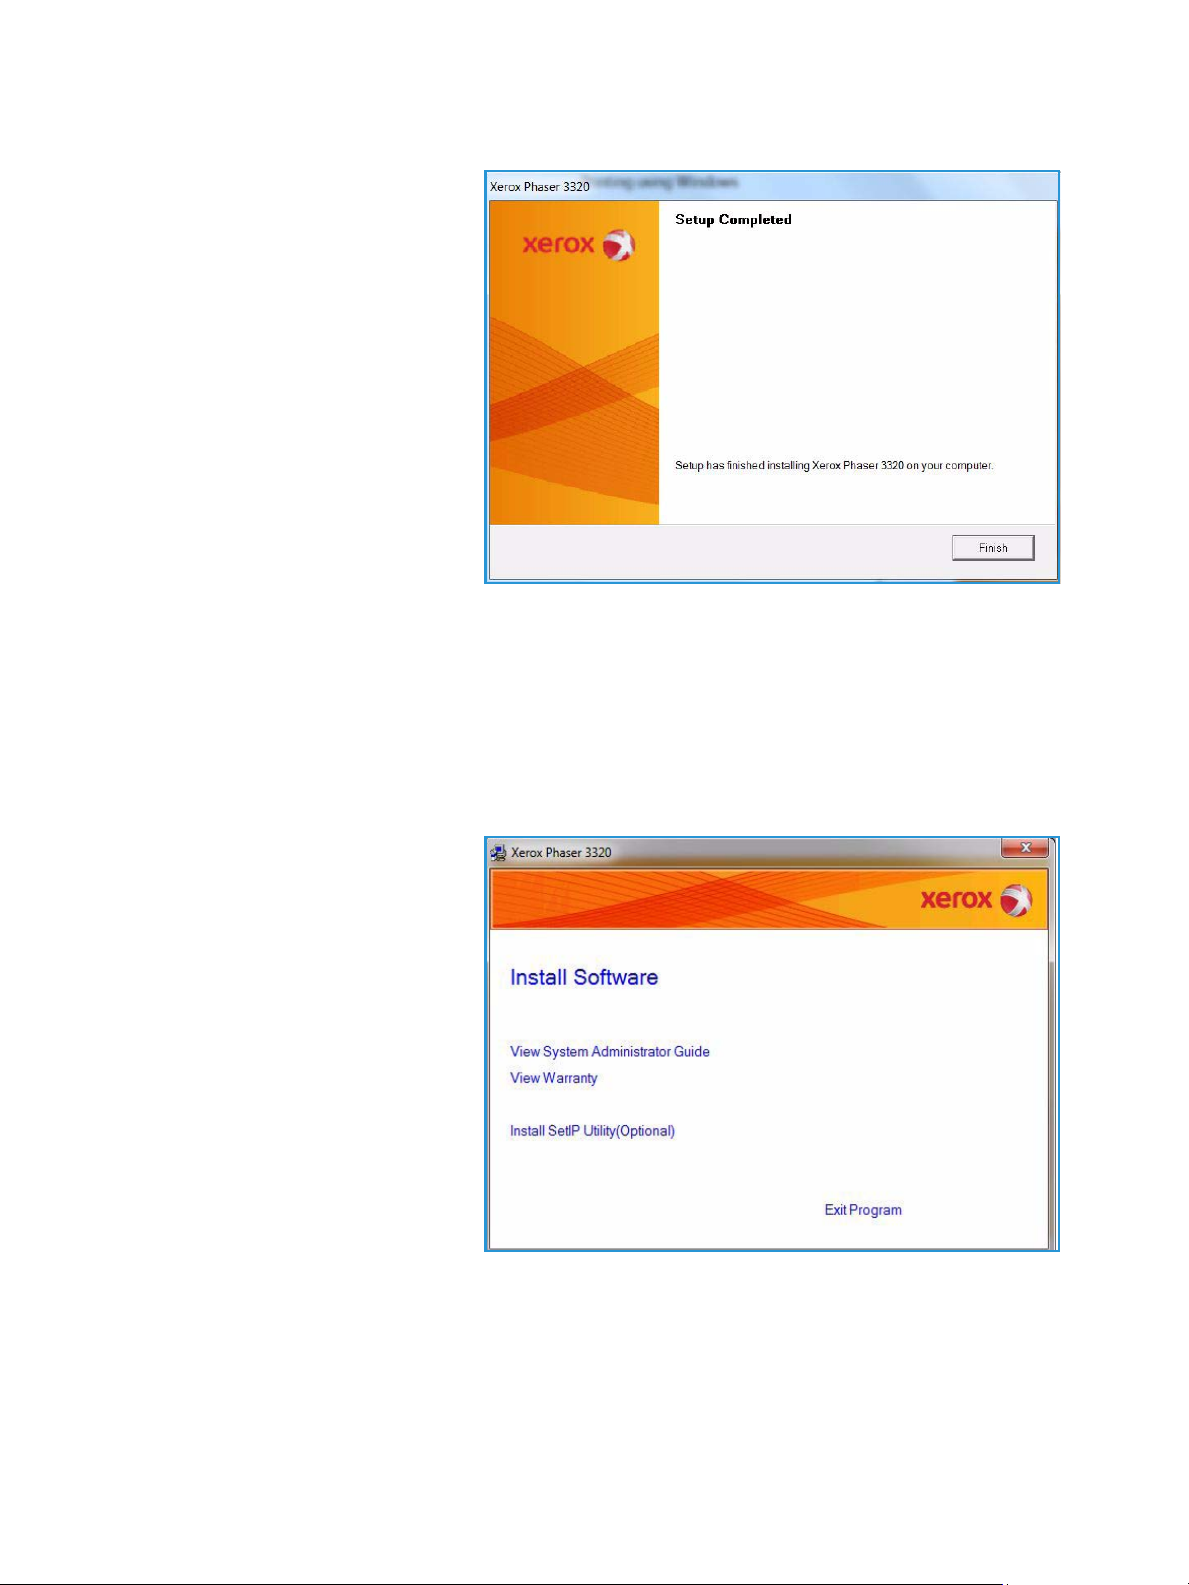
5. After the installation is finished,
select Finish.
If your printer is connected to the
computer, a Tes t Pr i nt page will be
printed. If the Te s t Pr i nt operation is
successful, continue on to Print
Procedure on page 34 in this
document. If the print operation
failed, refer to Troubleshooting on
page 93.
Networked Printer
When you connect your printer to a network, you must first configure the TCP/IP settings for the
printer. After you have assigned and verified the TCP/IP settings, you are ready to install the software
on each computer on the network.
1. Make sure that the printer is connected to your network and powered on. For details about
connecting to the network, refer to the System Administrator Guide.
2. Insert the supplied CD-ROM into
your CD-ROM drive.
The CD-ROM should
automatically run, and an
installation window appears.
• If the installation window
does not appear, select the
Start button and then Run.
Ty pe X:\Setup.exe,
replacing “X” with the letter
which represents your drive
and select OK.
• If you use Windows Vista,
select Start > All programs
> Accessories > Run, and
type X:\Setup.exe. If the
AutoPlay window appears in Windows Vista, select Run Setup.exe in the Install or run
program field, and select Continue in the User Account Control window.
3. Select Install Software.
26
Xerox Phaser 3320DN/DNI
User Guide
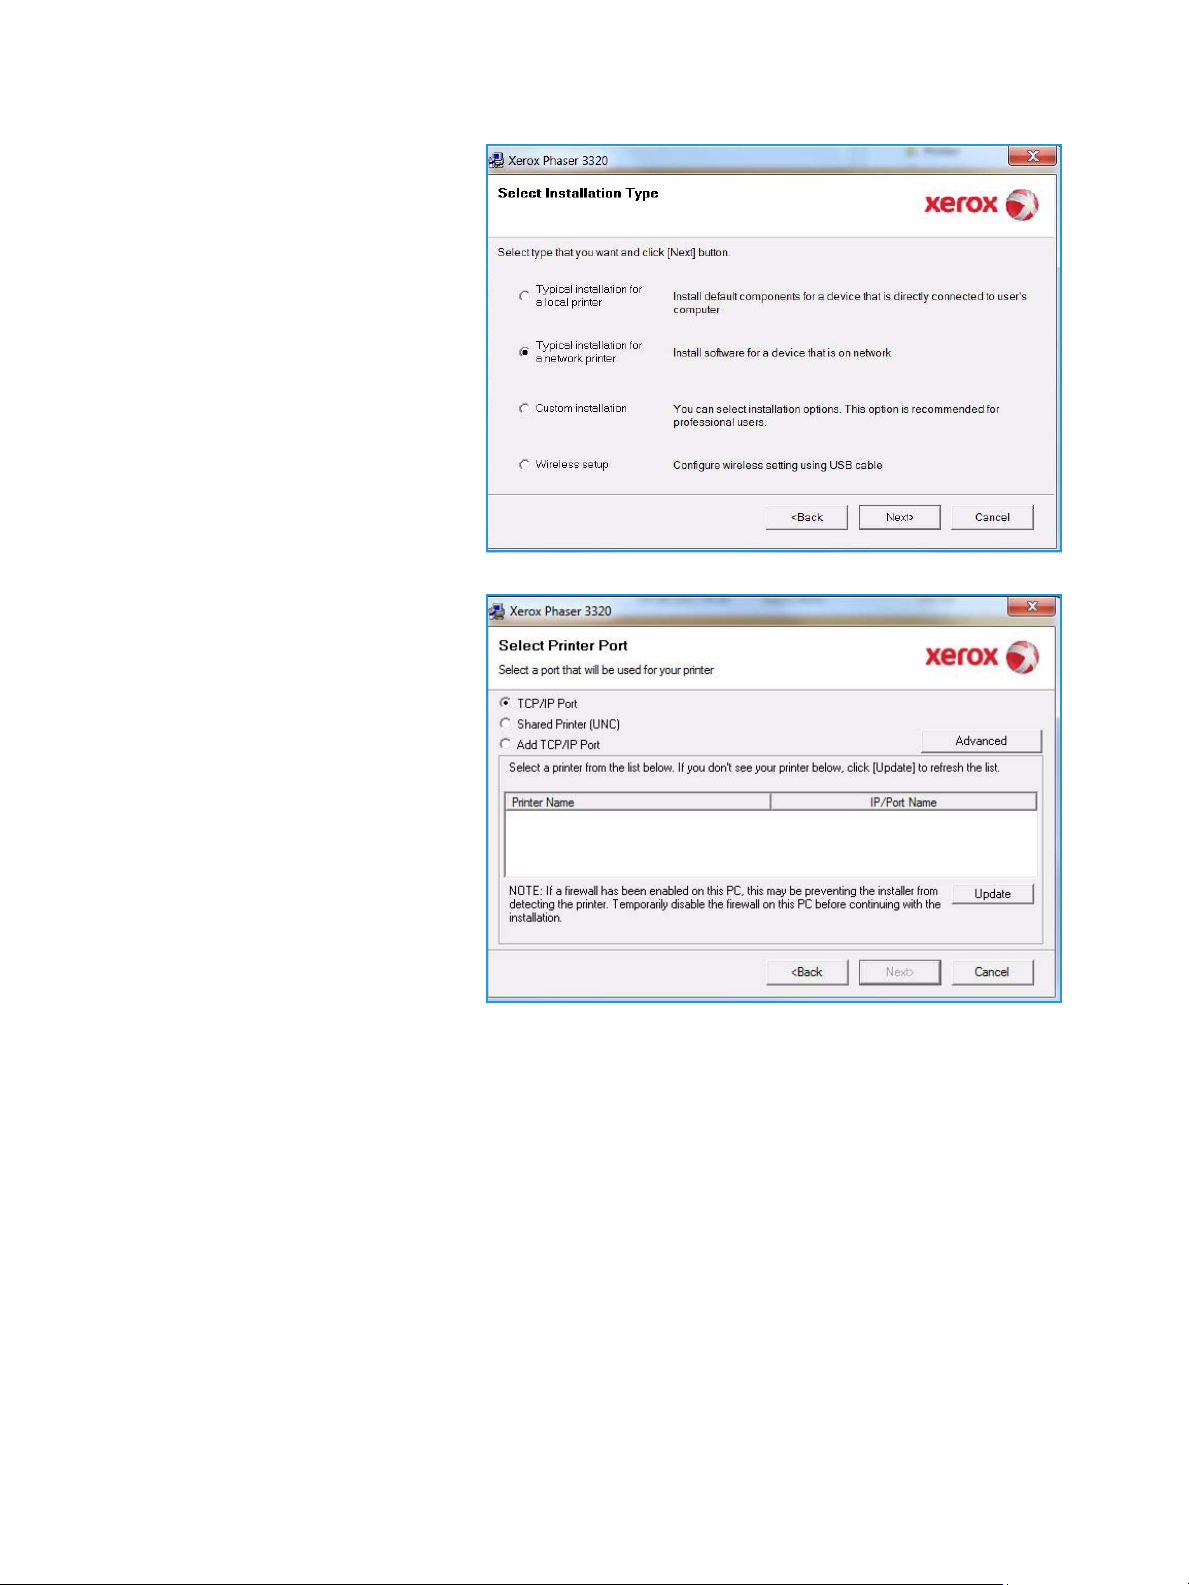
4. Select Typical installation for a
network printer and click Next.
Note: For custom install
instructions, see Custom
Installation on page 29.
5. Select the required Printer Port. If
TCP/IP Port is selected, select
your printer from the list and click
Next. Click Update to refresh the
list.To select a different port go
to the next step, otherwise follow
the wizard instructions to install
the printer.
Printing using Windows
Xerox Phaser 3320DN/DNI
User Guide
27
Printing using Windows
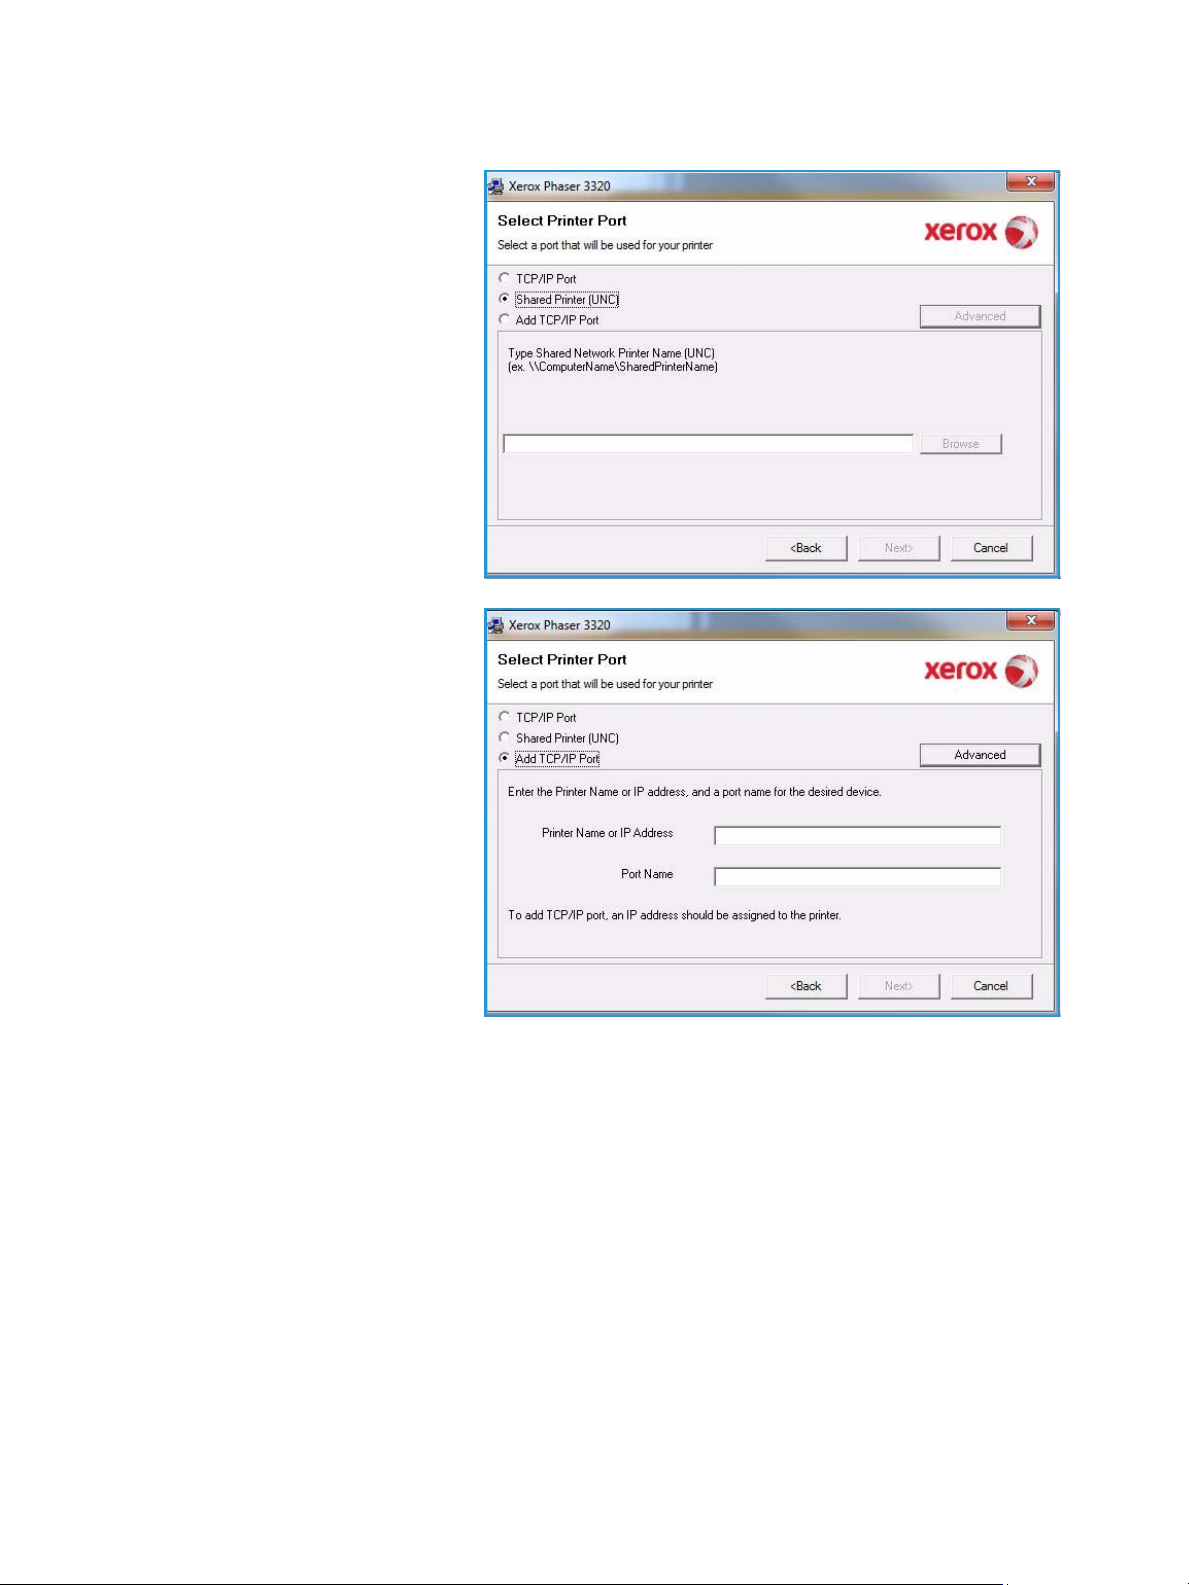
6. Select the required Printer Port. If
Shared Printer (UNC) is selected,
type in the name of the shared
network printer and select
Next.To select a different port go
to the next step, otherwise follow
the wizard instructions to install
the printer.
7. If Add TCP/IP Port is selected,
enter the Printer Name or the
assigned IP address and a port
name for the desired device. Click
Next and follow the wizard
instructions to install the printer.
28
Xerox Phaser 3320DN/DNI
User Guide
8. After the installation is finished,
select Finish.
If your printer is connected to the
network, a Te s t Pri n t page will be
printed. If the Te s t Pr i nt operation is
successful, continue on to Print
Procedure on page 34 in this
document. If the print operation
failed, refer to Troubleshooting on
page 93.
Custom Installation
Printing using Windows
With the custom installation, you can choose individual components to install.
1. Make sure that the printer is
connected to your computer and
powered on.
2. Insert the supplied CD-ROM into
your CD-ROM drive.The CD-ROM
should automatically run, and an
installation window appears.
• If the installation window
does not appear, select the
Start button and then Run.
Ty pe X:\Setup.exe,
replacing “X” with the letter
which represents your drive
and select OK.
• If you use Windows Vista,
select Start > All programs
> Accessories > Run, and type X:\Setup.exe. If the AutoPlay window appears in Windows
Vista, select Run Setup.exe in the Install or run program field, and select Continue in the
User Account Control window.
3. Select Install Software.
Xerox Phaser 3320DN/DNI
User Guide
29
Printing using Windows
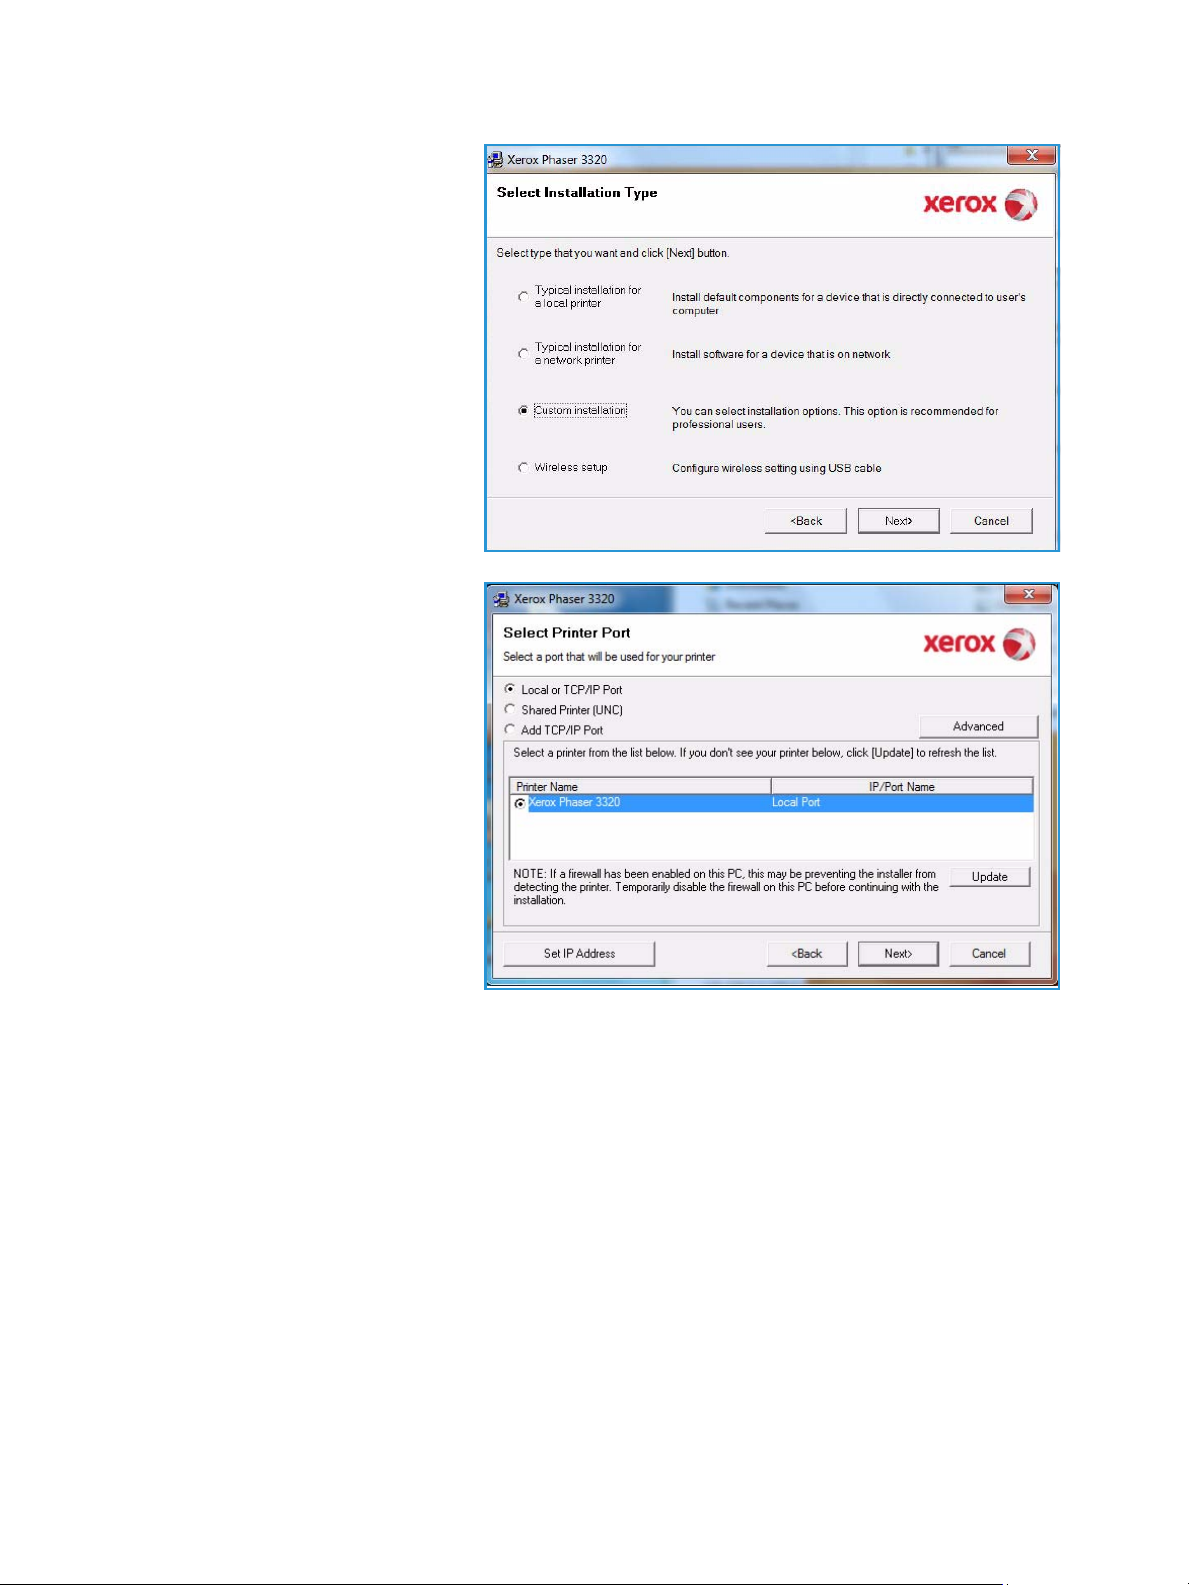
4. Select Custom installation.
5. Select Next.
6. Select the desired Printer Port
and follow the instructions to
select your printer or enter your
printer details. Click Next.
Note: If your printer is not
already connected to the
computer, the Connect Device
window will display, refer to the
next step.
30
Xerox Phaser 3320DN/DNI
User Guide
 Loading...