


Basic Operation Guide

2
Preface
Thank you for using DocuWorks.
DocuWorks™ document handling software provides you with a uniform way to handle data in a
wide variety of office situations.
With DocuWorks, you can handle both documents created by PC (personal computer)
applications and data acquired by scanning as DocuWorks format data. This data can also be
sent as e-mail or printed on a printer.
This manual provides overview of DocuWorks and its basic operations. Be sure to read this
manual before using DocuWorks.
The description of the contents are assumed that the user has acquired the basic operations of
Microsoft
Windows
Windows 98SE, Windows Me, Windows 2000, Windows XP, Windows Vista).
®
Window
®
2000, Microsoft® Windows® XP, Microsoft® Windows Vista® (here after called
®
98 (Second Edition), Microsoft® Windows® Millennium Edition, Microsoft
Xerox Corporation
®
Permission has been obtained from Microsoft Corporation for use of software screen shots.
Microsoft, Windows, Windows Vista, Excel, and Internet Explorer are registered trademarks of Microsoft Corporation in the
United States and/or other countries.
Adobe, Acrobat and Elements are either registered trademarks or trademarks of Adobe Systems Incorporated in the United
States and/or other countries.
Pentium is a registered trademark of Intel Corporation, and its subsidiaries in the United States and/or in other countries.
WinReader is registered tradmark of Media Drive Corporation.
All product/brand names are trademarks or registered trademarks of the respective holders.
Fuji Xerox is not responsible for any breakdown of machines due to infection of computer virus or com-
puter hacking.
Important
1. This manual is copyrighted with all rights reserved. Under the copyright laws, this manual may not be
copied or modified in whole or part, without the written consent of the publisher.
2. Parts of this manual are subject to change without prior notice.
3. We welcome any comments on ambiguities, errors, or omissions, or missing pages.
Xerox, The Document Company, the stylized X, TrustMarking Basic, and CentreWare are registered trademarks of
Xerox Corporation.
DocuWorks is a trademark of Fuji Xerox Co.,Ltd.
3
About DocuWorks Manuals
The following Manuals are available for DocuWorks.
Type of Manuals
The following manuals provide information on functions and operations of DocuWorks.
Manual Name Description
Installation Guide It explains operating environments and installation
procedure of DocuWorks. This manual is shown by
clicking the [Installation Guide] on the screen when you
insert the CD-ROM of DocuWorks into the drive on your
computer.
Basic Operation Guide
(this guide)
Help Help explain overall features of DocuWorks and details of
This guide describes basic operations such as viewing,
creating, and editing documents.
If you check [Basic Operation Guide] in the [Select Option
Files] dialog box when you install DocuWorks, this guide
will also be installed.
You can view it by selecting [All Programs] > [Xerox] >
[DocuWorks] > [DocuWorks Basic Operation Guide].
each function.
You can use Help as a reference to understand the
general description, as well as each operation and
functionality of DocuWorks. You can also refer to Help to
find out about setting procedures in dialog boxes while
using DocuWorks.
It mainly describes the following main points.
z
Overview and New Functions
z
Setting up and usage of operating environment with
windows
z
All operations
z
Menus and functions of dialog boxes
z
Specifications, compatibilities, cautions and constraints
Manual File
Format
DocuWorks file
DocuWorks file
CHM file
Release Notes It describes information you should read before working
Using This Guide
This manual includes following contents.
1 DocuWorks Overview
DocuWorks document handling software provides you with a uniform way to handle data of
various kinds. This section describes what you can do with DocuWorks and an overview of its
features.
HTML file
with DocuWorks. Cautions and Constraints concerning
DocuWorks are explained.

4
2 Using DocuWorks
DocuWorks has two interface windows: Desk and Viewer. Desk provides the environment as if
you were working while sitting at a desk. You can work with Viewer as if you were writing on
paper-based documents. This section describes how to use DocuWorks.
3 Creating a DocuWorks Document
DocuWorks documents can be created from scanned paper documents, data of other
applications, and image files. There are several ways to create DocuWorks documents. This
section describes how to create DocuWorks documents.
4 Editing
You can attach notepads, write comments, or edit with annotations in DocuWorks documents just
like on paper-based documents. You can also utilize text or images in documents. This section
describes editing work you can perform with DocuWorks.
5 Combining Documents
You can stack DocuWorks documents into a single document, and you can also unstack them.
You can stack PDF documents into a single document, and you can also unstack them. As for
DocuWorks documents, you can assemble the stacked documents into a binder. This section
describes how to stack and unstack documents and how to work with binders.
6 Organizing Documents Using Folders
Documents and binders can be organized using folders. You can create a new folder in the user
folder in Desk or link to a Windows folder to which documents or binders can be moved or copied.
This section describes how to manage files in the folders.
7 Printing
You can print DocuWorks documents in the same way as with other Windows applications. This
section describes how to use plug-ins, as well as the various ways of printing such as by enlarging
or reducing the document according to paper size.
8 Searching
In Desk, you can search documents or binders using a specified file name, date, text, or
document properties as a keyword. Documents in other formats can also be searched. Multiple
conditions can be set for search. This section describes how to search a document.
9 Securities and Digital Signature
You can set security levels to protect documents so that only the specified user is allowed to
open, edit and print the document. You can sign a DocuWorks document in the same manner as
you puttting a seal or a signature on a paper document. When documents are signed, it is
possible to confirm the signer and the contents of the documents at the point when they were
signed, thus preventing tampering or forgery. This section describes how to set securities and the
features of the DocuWorks Electronic Signature, as well as the digital certificate.
10 Converting a Document to Another Format
You can convert DocuWorks files to PDF or image files. Or, you can convert PDF or image files
to DocuWorks files. Furthermore, you can search PDF files on Desk or display thumbnails of PDF
files. This section describes how to convert files to or from DocuWorks files.
5
11 Useful Features for Operations
This section introduces useful features of DocuWorks other than basic operations.
Conventions
The following symbols are used in the manual.
Symbol Use of the symbol
Important
Note
Refer to
“ ” Represents names of other manuals, and titles of sections within this manual for
[ ] Represents dialog box names, and item names and button names in the dialog
> Represents hierarchy of the menus, e.g. Select the [Start] menu of Windows, and
< > key Represents keys on the keyboard of a PC.
Refer to Help
?
z
This manual describes the DocuWorks screens and operations taking Windows XP as an
Indicates important information that you should read.
Indicates additional information on operations or features.
Indicates cross-reference within this guide.
references. Also represents folder names, file names, and directory path names.
box, e.g. Click the [OK] button.
[All Programs] > [Xerox] > [DocuWorks].
Represents a reference title of the topics in Help.
example. For those who use operating systems other than Windows XP, please read
information according to the respective environment.
z
The term, "select" used in this manual refers to an operation to choose the menu items or items
in the dialog box. The term, "click" refers to an operation to place a cursor over a button in the
dialog box and press the left button of the mouse.
z
The following terms may be abbreviated in some cases:
- "DocuWorks Desk" may be abbreviated as "Desk".
- "DocuWorks Viewer" may be abbreviated as "Viewer".
- "DocuWorks Viewer Light" may be abbreviated as "Viewer Light".
- "DocuWorks Viewer Light for Web" may be abbreviated as "Viewer Light for Web".
- "DocuWorks Viewer Control" may be abbreviated as "Viewer Control".
- "[DocuWorks Desk] window" may be abbreviated as "Desk window".
- "[DocuWorks Viewer] window" may be abbreviated as "Viewer window".
z
Unless otherwise noted, a "document" may be used instead of a "DocuWorks document". A
"binder" may be used instead of a "DocuWorks binder". A "DocuWorks document" and a
"DocuWorks binder" together may be called "DocuWorks file" collectively.

6
How to Use Help and Release Note
Displaying Help
Starting from the Windows [Start] menu
Click [Start] on the Windows taskbar, then select [All Programs] > [Xerox] > [DocuWorks] >
[DocuWorks Help].
You can also display Help without starting DocuWorks.
Starting Help from the DocuWorks [Help] menu
Select [DocuWorks Help] from the [Help] menu in the Desk or Viewer window.
How To Use Help
You can use Help by clicking the buttons at the top of the Help window or right-clicking within the
window to show the pop-up menu.
Refer to Help
?
How To Use Help and the Manuals > How to Use Help
Displaying Release Notes
Before installing DocuWorks
The Release Notes for the entire CD-ROM is shown by clicking the [Release Note] on the screen
when you insert the CD-ROM of the DocuWorks into the drive on your computer. Track back the
links to display the desired information.
After installing DocuWorks
Click [Start] on the Windows taskbar, then select [All Programs] > [Xerox] > [DocuWorks] >
[Readme].

7
Table of Contents
Preface .........................................................................................................2
About DocuWorks Manuals..........................................................................3
How to Use Help and Release Note............................................................. 6
Table of Contents ......................................................................................... 7
1 DocuWorks Overview.............................................................................................. 9
1.1 Introduction to DocuWorks ........................................................................... 9
1.2 DocuWorks Components............................................................................ 12
1.3 Types of Document Handled in DocuWorks............................................... 15
2 Using DocuWorks.................................................................................................. 17
2.1 Starting and Exiting DocuWorks................................................................. 17
2.2 Components of Desk..................................................................................18
2.3 Components of Viewer ............................................................................... 24
3 Creating a DocuWorks Document ....................................................................... 33
3.1 Creating Documents by Dragging-and-dropping Files of Another
Application to Desk.....................................................................................33
3.2 Creating Document by Dragging-and-dropping Image Files to Desk......... 35
3.3 Creating Documents by Outputting Files of Another Application to
the DocuWorks Printer .............................................................................. 37
3.4 Creating DocuWorks Documents by Scanning Paper Documents............. 38
3.5 Creating Documents Using the [Convert to DocuWorks document] Button
in the Office Application..............................................................................39
4 Editing .................................................................................................................... 40
4.1 Adding Annotations .................................................................................... 40
4.2 Utilizing Document Contents ...................................................................... 48
4.3 Converting Characters in an Image to Text Data (OCR) ........................... 50
4.4 Sorting Pages.............................................................................................52
4.5 Setting Up Headers and Footers................................................................ 54
4.6 Creating a Table of Contents......................................................................57
5 Combining Documents ......................................................................................... 59
5.1 Stacking or Unstacking Documents............................................................ 59
5.2 Combining Documents into a Binder.......................................................... 61
6 Organizing Documents Using Folders ................................................................ 68
6.1 Organizing Documents Using a User Folder.............................................. 68
6.2 Organizing Documents Using a Link Folder............................................... 70

8
6.3 Cleaning Up the Recycle Bin......................................................................71
7 Printing ...................................................................................................................72
7.1 Printing a Document ...................................................................................72
7.2 Useful Features for Printing........................................................................75
8 Searching ............................................................................................................... 77
8.1 Searching for a Document in Desk.............................................................77
8.2 Searching for a Text String in Viewer......................................................... 82
8.3 Adding a Mark to the Search Result........................................................... 84
8.4 Search PDF Files ....................................................................................... 86
9 Securities and Digital Signature .......................................................................... 88
9.1 Overview of Securities................................................................................ 88
9.2 Configuring the Security Using a Password ............................................... 90
9.3 Security Using DocuWorks Electronic Signature........................................ 92
9.4 Security Using a Digital Certificate ............................................................. 93
9.5 Overview of Signatures .............................................................................. 94
9.6 Security Using DocuWorks Electronic Signature........................................ 95
9.7 Security Using a Digital Certificate ............................................................. 97
10Converting a Document to Another Format ....................................................... 98
10.1 Converting to a PDF File ............................................................................ 98
10.2 Converting Documents to Image Files .....................................................100
11Useful Features for Operations..........................................................................102
11.1 Useful Plug-in Features ............................................................................ 102
Index.........................................................................................................106
1 DocuWorks Overview 9
1 DocuWorks Overview
DocuWorks document handling software provides you with a uniform way to handle data of
various kinds. With DocuWorks, you can work with digital documents as if you were working with
paper documents. This section describes what you can do with DocuWorks.
1.1 Introduction to DocuWorks
DocuWorks is software that converts paper documents and files that were created using other
applications into DocuWorks format to enable uniform handling of data. DocuWorks does away
with the need to be conscious of differences in computer file formats, making it possible to handle
document files in much the same manner as paper documents.
A document in DocuWorks format is called a DocuWorks file.
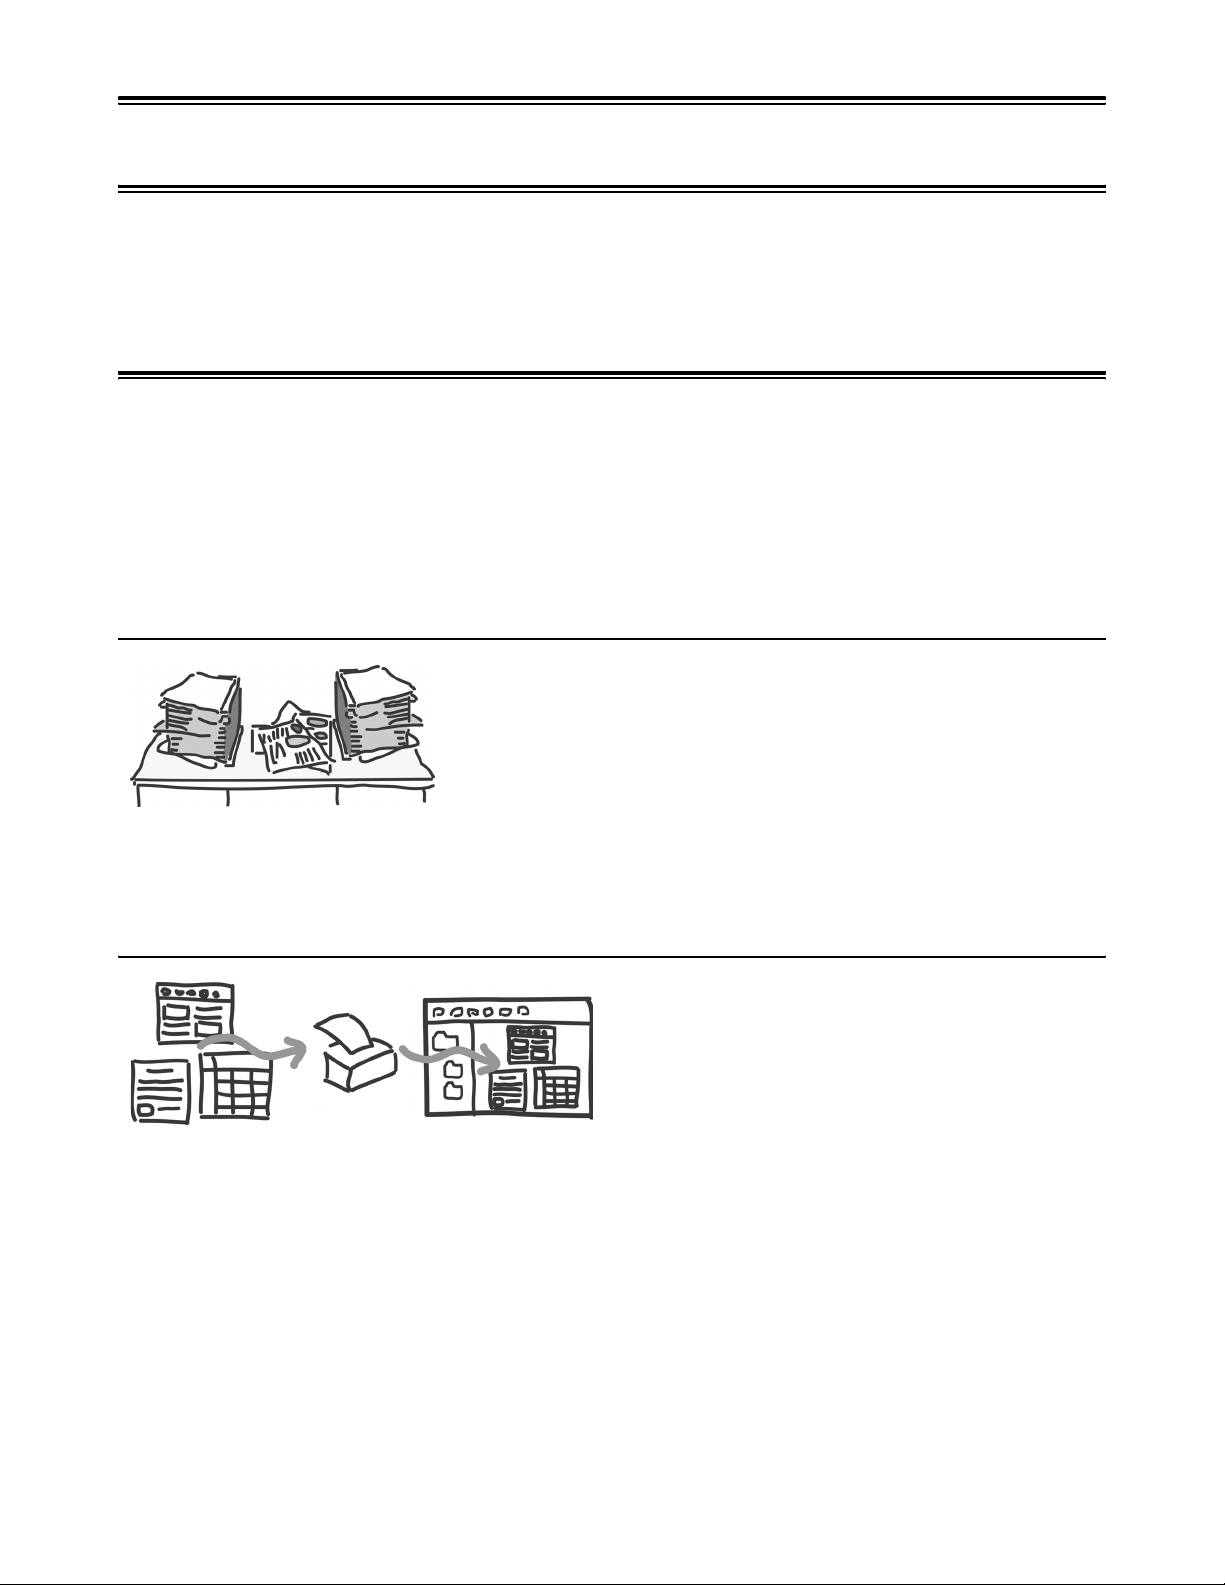
That growing mountain of paper... You can immediately find the desired documents if they have been digitized and saved in digital format.
That mountain of paper just continues to grow. You can't remember where
you put those files, even though they were neatly filed away.
DocuWorks allows paper-based documents to be scanned and then
managed as electronic data. Once in electronic form, documents are easy
to find using the search function. Also, you can rotate electronic documents
to change the orientation or straighten the slant of electronic documents
after scanning.
It also saves storage space, increases efficiency, and reduces cost.
You can save Web-based information just like printing it on a paper.
When you save Web pages, pages that are different
from what you have viewed on the screen may be saved
due to the split frames within a window.
With DocuWorks, you can save the information on Web
pages in the same image as you see on the PC screen
by following the similar procedure used for printing. In
the same way, you can convert other information such
as e-mails to DocuWorks documents.
1 DocuWorks Overview 10
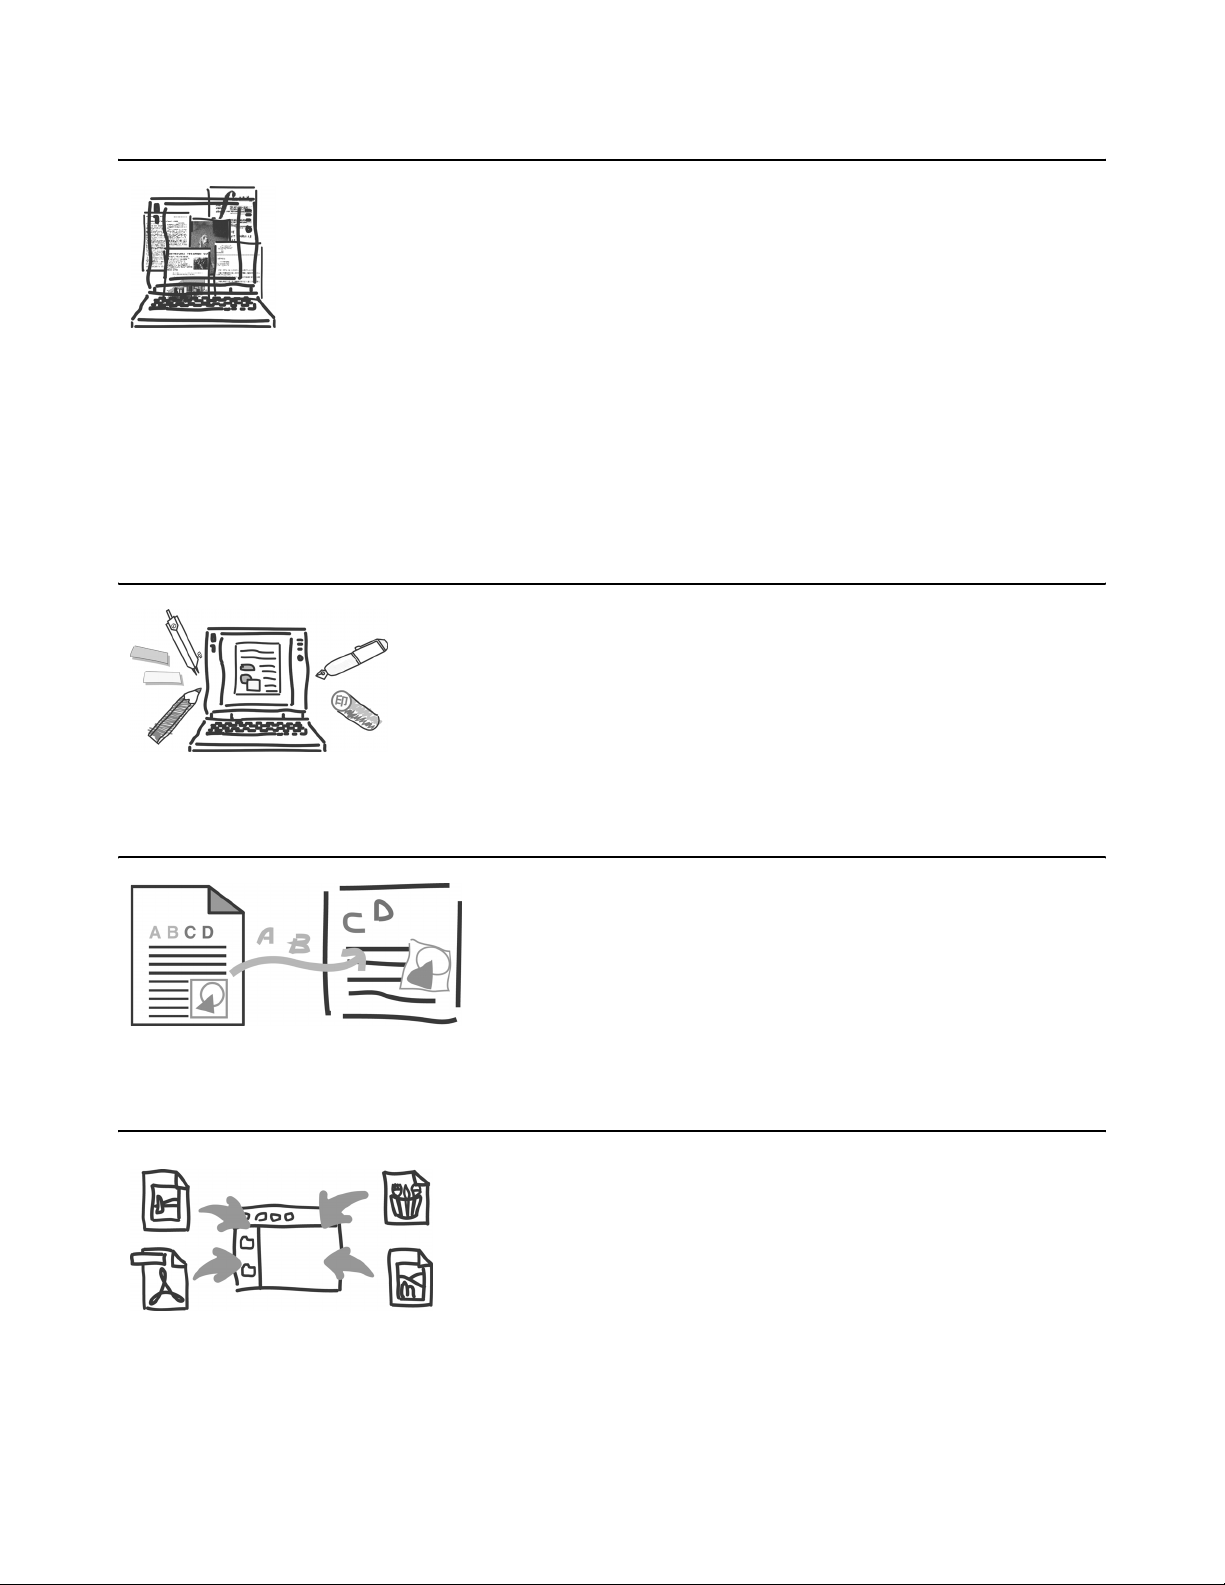
You can file or bind electronic data created by various applications into a single document.
Suppose you want to insert Microsoft Excel tables, scanned materials, and digital camera
photo data into a report in Microsoft Word format and add titles or page numbers to distribute
as handouts for a meeting. You might even want to print those handouts or staple them.
DocuWorks manages files created using different application software as one document.
You can even replace the specified pages later or add sequential page numbers or headers.
A created document can have its original application file attached. DocuWorks also enables
enlarged or reduced printing of a variety of paper sizes such as A4 or Letter, on a specified
page sizes.
You can even process pages of various sizes or orientations to create a DocuWorks
document containing pages of unified size and aligned orientation and check it on the screen
before printing.
Writing memos or pasting notepads on electronic documents is also possible
One of the good points of paper-based documents is that you can use
highlighter pens to mark important points, write comments, or paste notepads.
With DocuWorks, you can use highlight pens, add comments, paste notepads,
or put stamps onto the documents even though they are electronic. In addition,
you can use the signature function to clarify the person in charge of document
creation and in charge of approval, or use the security function to protect the
document.
You can also utilize or search texts in image data
You can create documents in electronic form by scanning, but that
doesn't allow you to re-use the text in the documents.
With DocuWorks, you can process scanned image data by OCR to
obtain the document's text. Characters and images of the application
data can also be extracted and re-used. You can perform search in the
extracted character data using a specified file name or the text in the
document as a keyword.
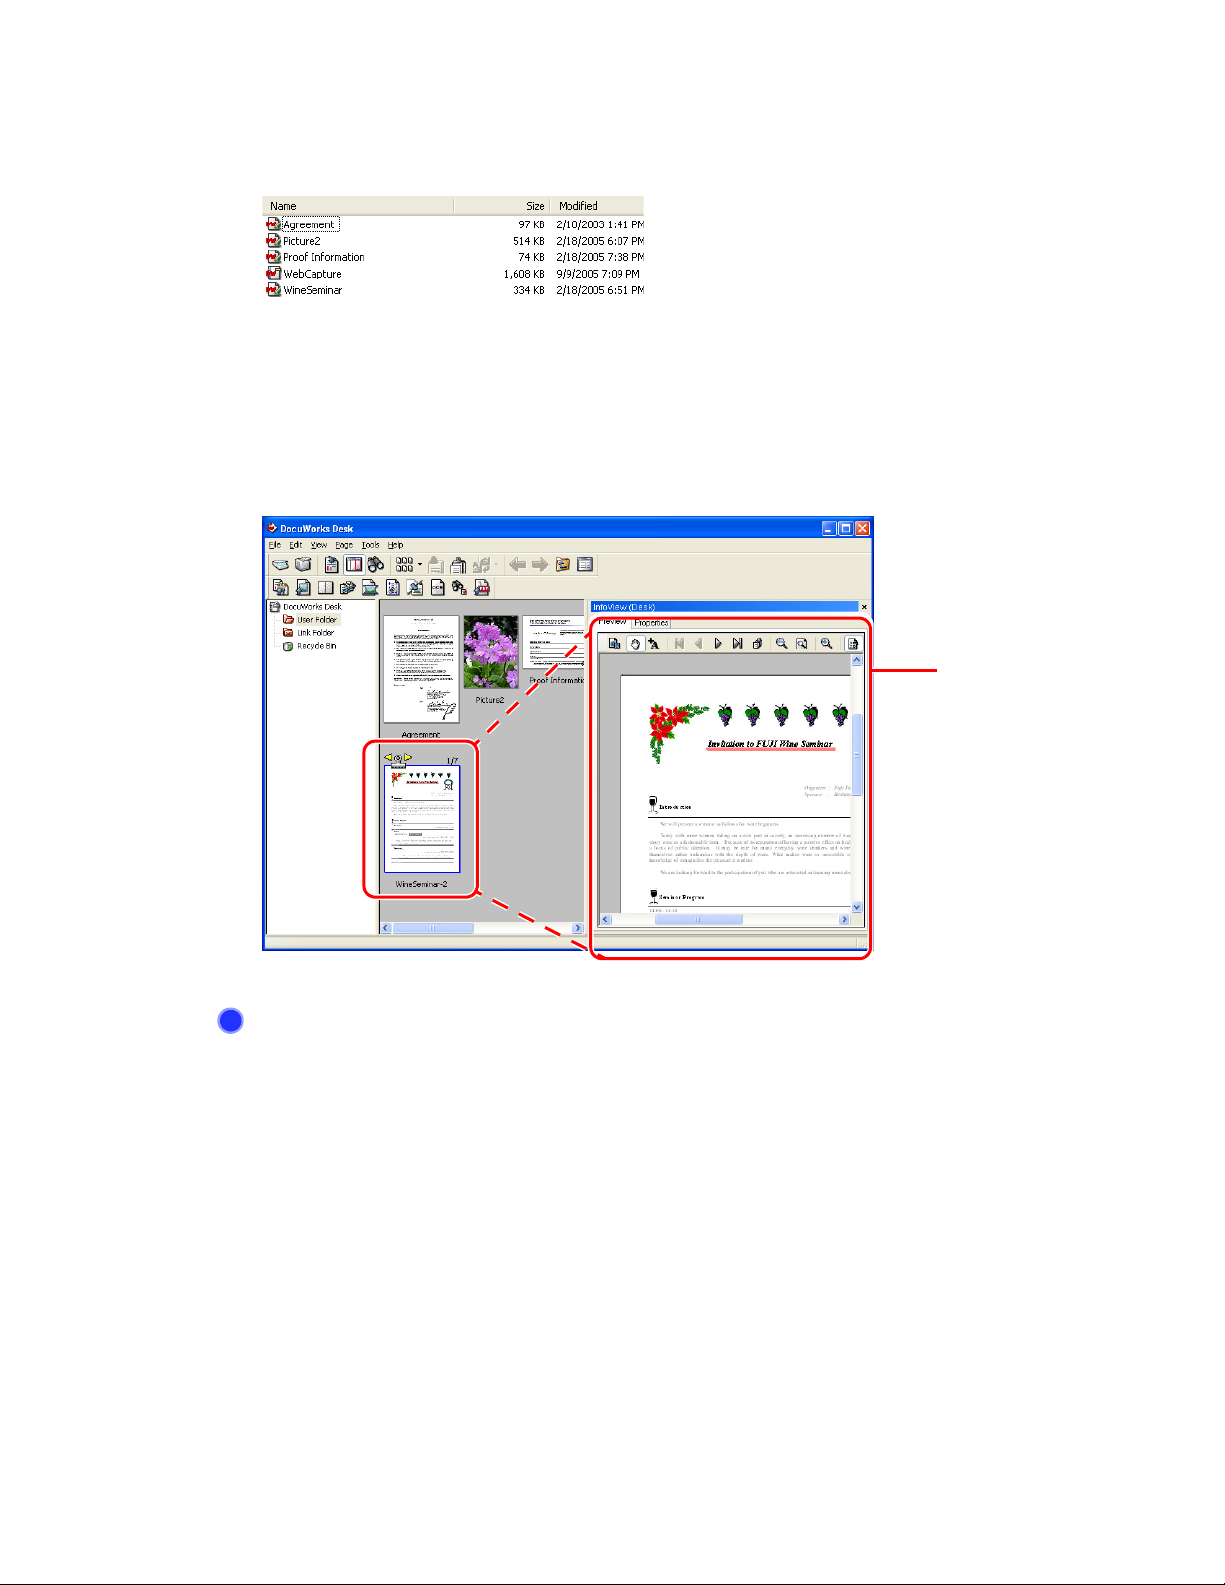
Various files can be consolidated and be managed in the Desk window
You might have found it difficult to manage files of different applications
and formats, because they were stored in different locations.
DocuWorks allows you to unify management of files including image files
(TIFF, JPEG, Bitmap), PDF, and files of other applications, in Desk with
easy operations, where they can be displayed as thumbnails. Or, you can
convert DocuWorks files to PDF or image files.
1 DocuWorks Overview 11
Operations such as printing, e-mail transmission, and saving files in folders can be carried out in the Desk window.
Normally, you have to start your e-mail program to transmit documents by email, or start Windows Explorer to save documents.
DocuWorks can transmit multiple files at a time including DocuWorks files
and other application files. In addition, files can be saved in the shared folder
on the network.
Security levels can be set to protect documents
When transferring important documents via the Internet, you may be anxious about
the information being leaked or the contents being overwritten during transmission.
It is important for us to be able to handle documents with peace of mind regardless
of the user, environment, or tool, by implementing fail-safe operation.
You can set security levels to protect documents. The protected document can be
opened only by those that have the designated password or digital certificate, thus
preventing leakage of contents.
1 DocuWorks Overview 12
1.2 DocuWorks Components
The DocuWorks CD-ROM contains DocuWorks, DocuWorks Viewer Light, and Adobe® PDF
Creation Add-On.
DocuWorks
By installing DocuWorks, you can use DocuWorks Desk, DocuWorks Viewer, DocuWorks Viewer
Control, and DocuWorks Printer.
z
DocuWorks Desk
The DocuWorks Desk (hereafter referred to as "Desk") window shows a folder structure and
files in a folder. You can perform file-by-file operation such as copying, managing, or storing
DocuWorks documents.
z
DocuWorks Viewer
The DocuWorks Viewer (hereafter referred to as "Viewer") window displays the contents of
DocuWorks documents a page at a time. You can change the page sequence, add headers
and page numbers, and annotating individual pages with comments.
1 DocuWorks Overview 13
z
DocuWorks Viewer Control
DocuWorks Viewer Control allows you to display DocuWorks files on Microsoft Internet
Explorer on page-by-page basis. You can print the displayed DocuWorks file, search and copy
a certain text string, jump to the linked location by clicking a link annotation, and extract original
data. It also allows you to edit DocuWorks files, such as pasting annotations and changing
attributes, and then save files displayed on Microsoft Internet Explorer.
z
DocuWorks Printer
When you install DocuWorks, ÅgDocuWorks PrinterÅh is added in [Printers and Faxes] of
Windows. This print driver can be used to create DocuWorks documents from data created on
other applications.
DocuWorks Viewer Light
Simplified version of the DocuWorks Viewer. This enables you to view and print DocuWorks
documents in an environment that does not have DocuWorks installed.
You can search and copy a character string, jump with the use of link annotation, and extract
original data. You cannot edit using Viewer Light.
Note You can download its latest upgrades from the DocuWorks website for free.
1 DocuWorks Overview 14
z
DocuWorks Viewer Light for Web
DocuWorks Viewer Light for Web allows you to display the DocuWorks file on Netscape 7.x or
Firefox 2.0x, on page-by-page basis. You can print the displayed DocuWorks file, search and
copy a certain text string, jump to the linked location by clicking a link annotation, and extract
original data. DocuWorks Viewer Light for Web does not allow you to edit DocuWorks files.
Note You can download its latest upgrades from the DocuWorks website for free.
DocuWorks Image Capture
By using DocuWorks Image Capture, you can convert an image file in your PC into a file in
DocuWorks format and manipulate it as a DocuWorks document.
DocuWorks Image Capture periodically monitors a specified directory, converts a detected image
file (JPEG and TIFF file) to a DocuWorks document.
Adobe PDF Creation Add-On
This allows you to create a PDF file only by opening the document that have been created using
DocuWorks or other application, and printing it to "Adobe PDF" as a destination.

1 DocuWorks Overview 15
1.3 Types of Document Handled in DocuWorks
The types of document handled in DocuWorks are as follows:
z
DocuWorks document
Document data created by DocuWorks. Application data and image files can be converted to
create DocuWorks documents.
You can attach or add annotations such as notepad annotations, text, drawings, freehand,
dates, and stamps to DocuWorks documents. The extension is "xdw".
z
DocuWorks binder
A "container" used for holding a batch of DocuWorks documents together. The extension is
"xbd".
z
DocuWorks file
A term used to refer collectively to DocuWorks documents and DocuWorks binders.
z
Original data
Application data that is attached to a DocuWorks file.
z
Pageless document
A DocuWorks document that does not have any pages. Original data can be attached.
z
Signed documents
A DocuWorks file that has a signature in the form of a DocuWorks Electronic Signature or a
Digital Certificate.
z
Protected documents
A DocuWorks file for which security settings have been made.
Protection is made using a password, a DocuWorks Electronic Signature, or a Digital
Certificate.
z
Shortcut to a DocuWorks file
A shortcut to a DocuWorks file. If you make the setting to display a file other than DocuWorks
documents, the shortcut appears in thumbnail view.
z
Other format file
Files other than DocuWorks document and DocuWorks binders, such as files and image files
created by other applications. You can display such files in the workspace on Desk, and move
the files among folders, or copy or delete the files, as well as start application that have been
associated using Windows Explorer. You can also convert files to DocuWorks documents.
1 DocuWorks Overview 16
z
Folder
Used to organize and store files. Folders appear in the folders area on Desk.
Single-page
DocuWorks
document
Multi-page
DocuWorks document
Binder
Original Data
Attached documents
Pageless
document
Signed
documents
Protected
documents
Protected documents
of which thumbnail is
displayed.
Shortcut
PDF files
Other format File
Folder

2 Using DocuWorks 17
2 Using DocuWorks
DocuWorks consists of the Desk and Viewer.
When starting DocuWorks, the Desk window appears. Desk provides an environment as if you
were sitting at a desk. You can handle documents with DocuWorks as if you were opening them
on your desk.
Double-clicking on the DocuWorks files displays the Viewer window. With Viewer, you can attach
notepads, write comments, or edit with annotations in DocuWorks documents just like on paperbased documents.
This section describes how to start, operate, and exit DocuWorks as well as the way it is
organized such as the names and functions of each part of Desk and Viewer.
2.1 Starting and Exiting DocuWorks
This section describes how to start and exit DocuWorks.
Starting DocuWorks
The procedure for starting DocuWorks is as follows:
Opening Desk using the [Start] menu
1 Click [Start] on the Windows taskbar, then select [All Programs] > [Xerox] > [DocuWorks] >
[DocuWorks Desk].
DocuWorks starts and the Desk window appears.
Opening Desk using the shortcut
1 Double-click the Desk shortcut icon on the Windows desktop.
DocuWorks starts and the Desk window appears.
Note The Desk shortcut icon appears on the desktop only if you created it during the
Exiting DocuWorks
The procedure for exiting DocuWorks is as follows:
1 Select [Exit] from the [File] menu in Desk.
This exits DocuWorks and closes the Desk window.
Note You can also close Desk using the following method:
• Clicking the [X] button at the top right corner of the Desk window.
installation of DocuWorks.
2 Using DocuWorks 18
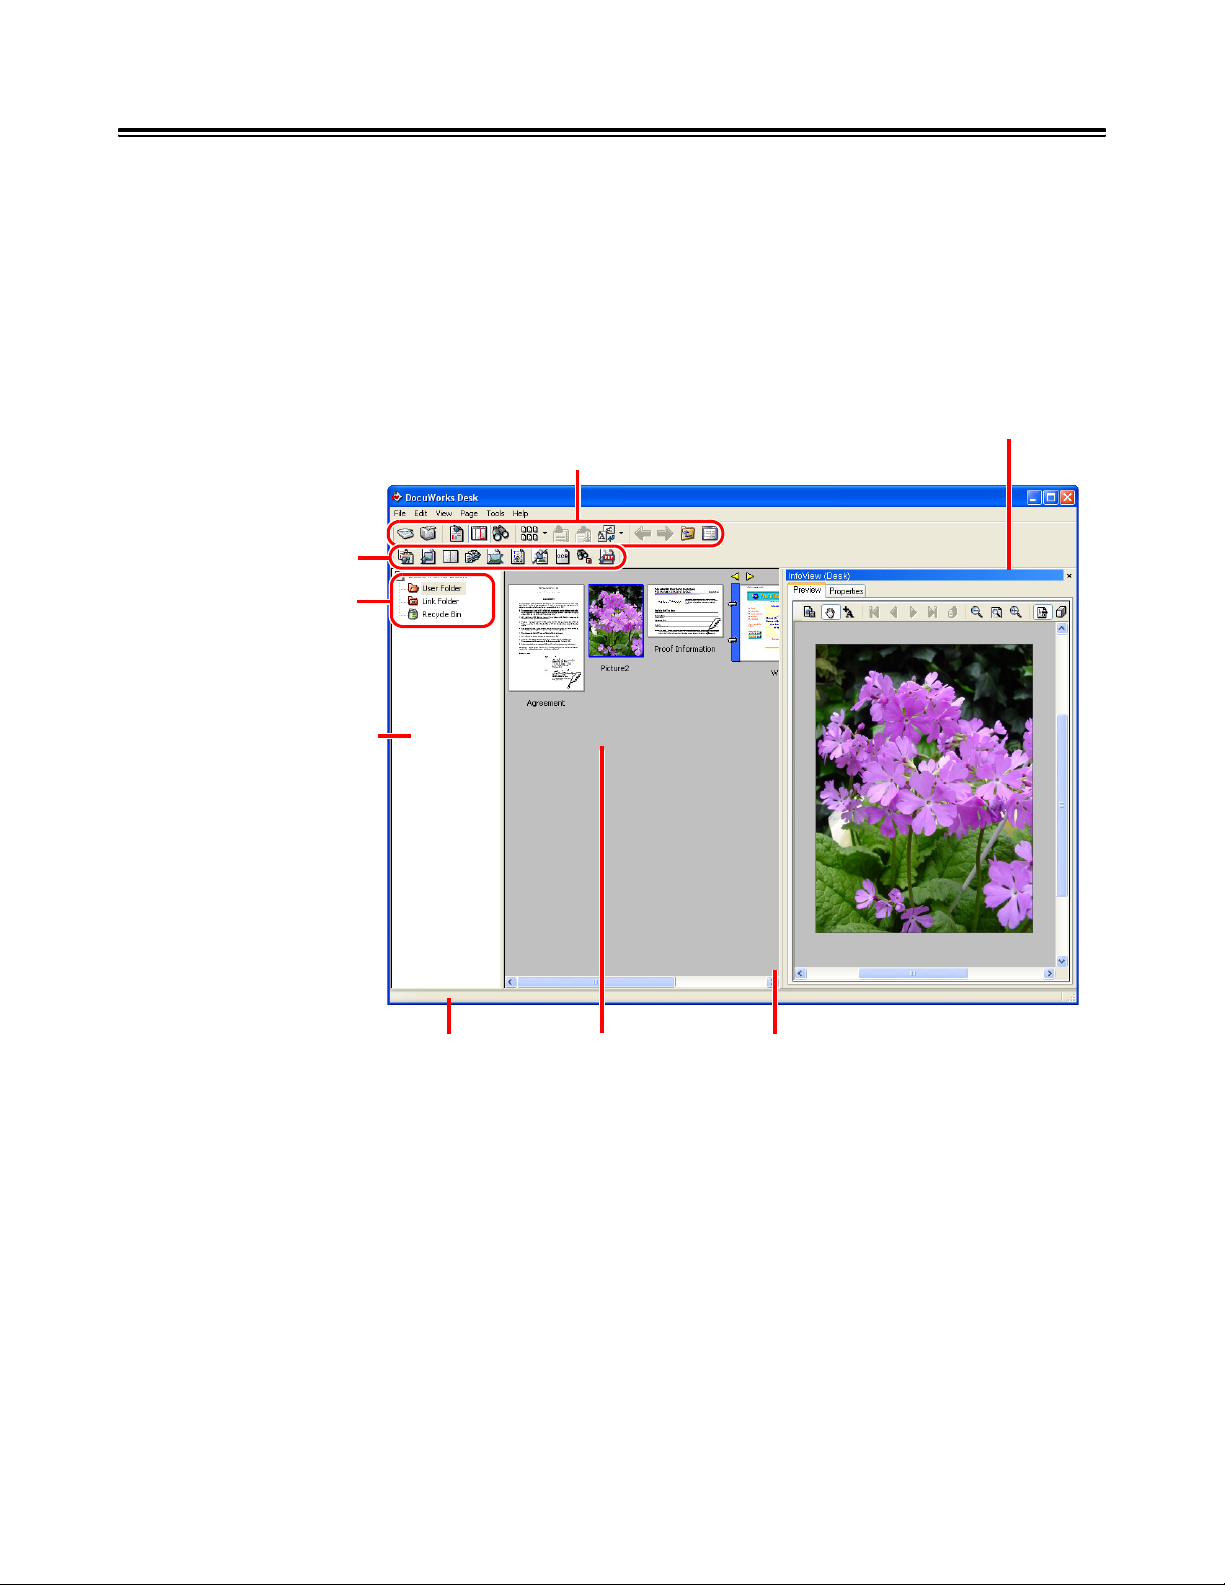
2.2 Components of Desk
The Desk window, which is opened by starting DocuWorks, provides an environment as if you
were sitting at a desk.
Desk consists of the following three windows:
z
Folder area
z
Toolbar
- Standard Toolbar
- Plug-in Toolbar
z
Workspace
Infoview
Standard Toolbar
Plug-in
Toolbar
Folders
Folder area
Status Bar
Thumbnail
Workspace
Workspace
Displays the files in the folder which is being selected in the folder area.
Files in the folder are displayed in thumbnail when starting DocuWorks. You can also display files
in list view.
Thumbnail
A reduced image of a DocuWorks file. The zoom ratio cannot be changed.
Folder area
Shows a folder structure. You can create folders and store files.
Standard Toolbar
A collection of buttons for performing frequently used functions.
2 Using DocuWorks 19
Plug-in Toolbar
A collection of buttons for using plug-ins.
Status Bar
A message or information on the selected file is displayed.
Infoview
Displays an enlarged image of the display page of the selected DocuWorks file, as well as
information on the file.
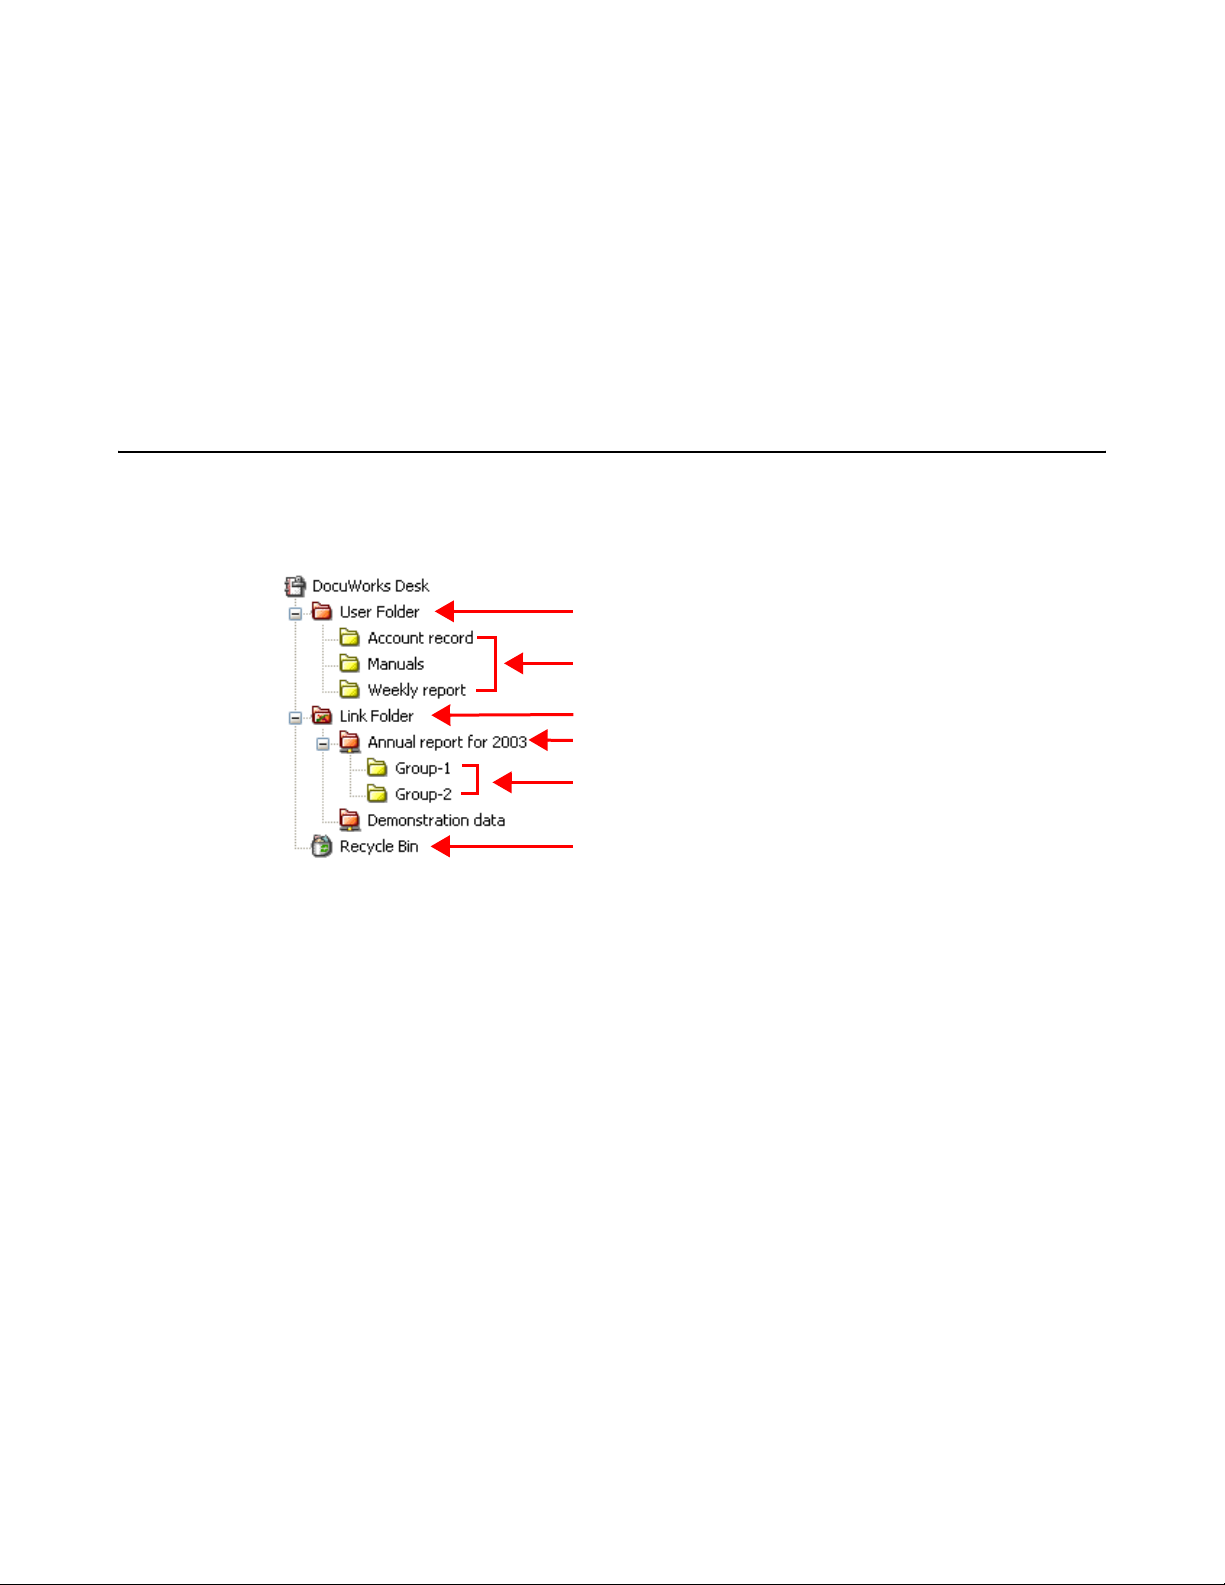
Folder area
In DocuWorks, you can use Desk folders to organize files.
It is like a desk drawer or a common cabinet. The contents of the folder which is open in the folder
area are displayed in the workspace on the right.
System definition folder
System definition folder
Desk folders that are created upon installation of DocuWorks are called system definition folders.
You cannot delete, move, copy, rename, or change attributes of the system definition folders.
There are 3 types of system definition folders:
z
User folder
You can store files or create folders in the user folder.
Folders that are created by the user below the user folder are called user definition folders.
z
Link folder
In the link folder, a link root folder that is link-connected to a Windows folder or a network folder
is created.
z
Recycle Bin
A folder for temporarily storing those files deleted on Desk until they are actually removed from
the system.
User definition folders
System definition folder
Link root folder
Link definition folders
System definition folder
2 Using DocuWorks 20
Link folder
To use a folder other than the user folder, such as a network folder, on Desk, create a link
connection in the link folder. When a link connection has been established, you can display
files existing in the link destination folder in the workspace and manipulate the files in the same
manner as the files in the user folder. Note that such a file does not go into the recycle bin when
it is deleted.
There are 3 types of link-related folders:
z
Link folder
A system definition folder. You can create a link connection immediately below this link folder.
z
Link root folder
A folder that is link-connected to a Windows folder or a network folder.
A link root folder is created immediately below the link folder.
z
Link definition folder
This is a folder in link destination, that is displayed in a link root folder.
Refer to Help
?
Operating environment of DocuWorks > Desk > Make-up of the Folder Area
Workspace
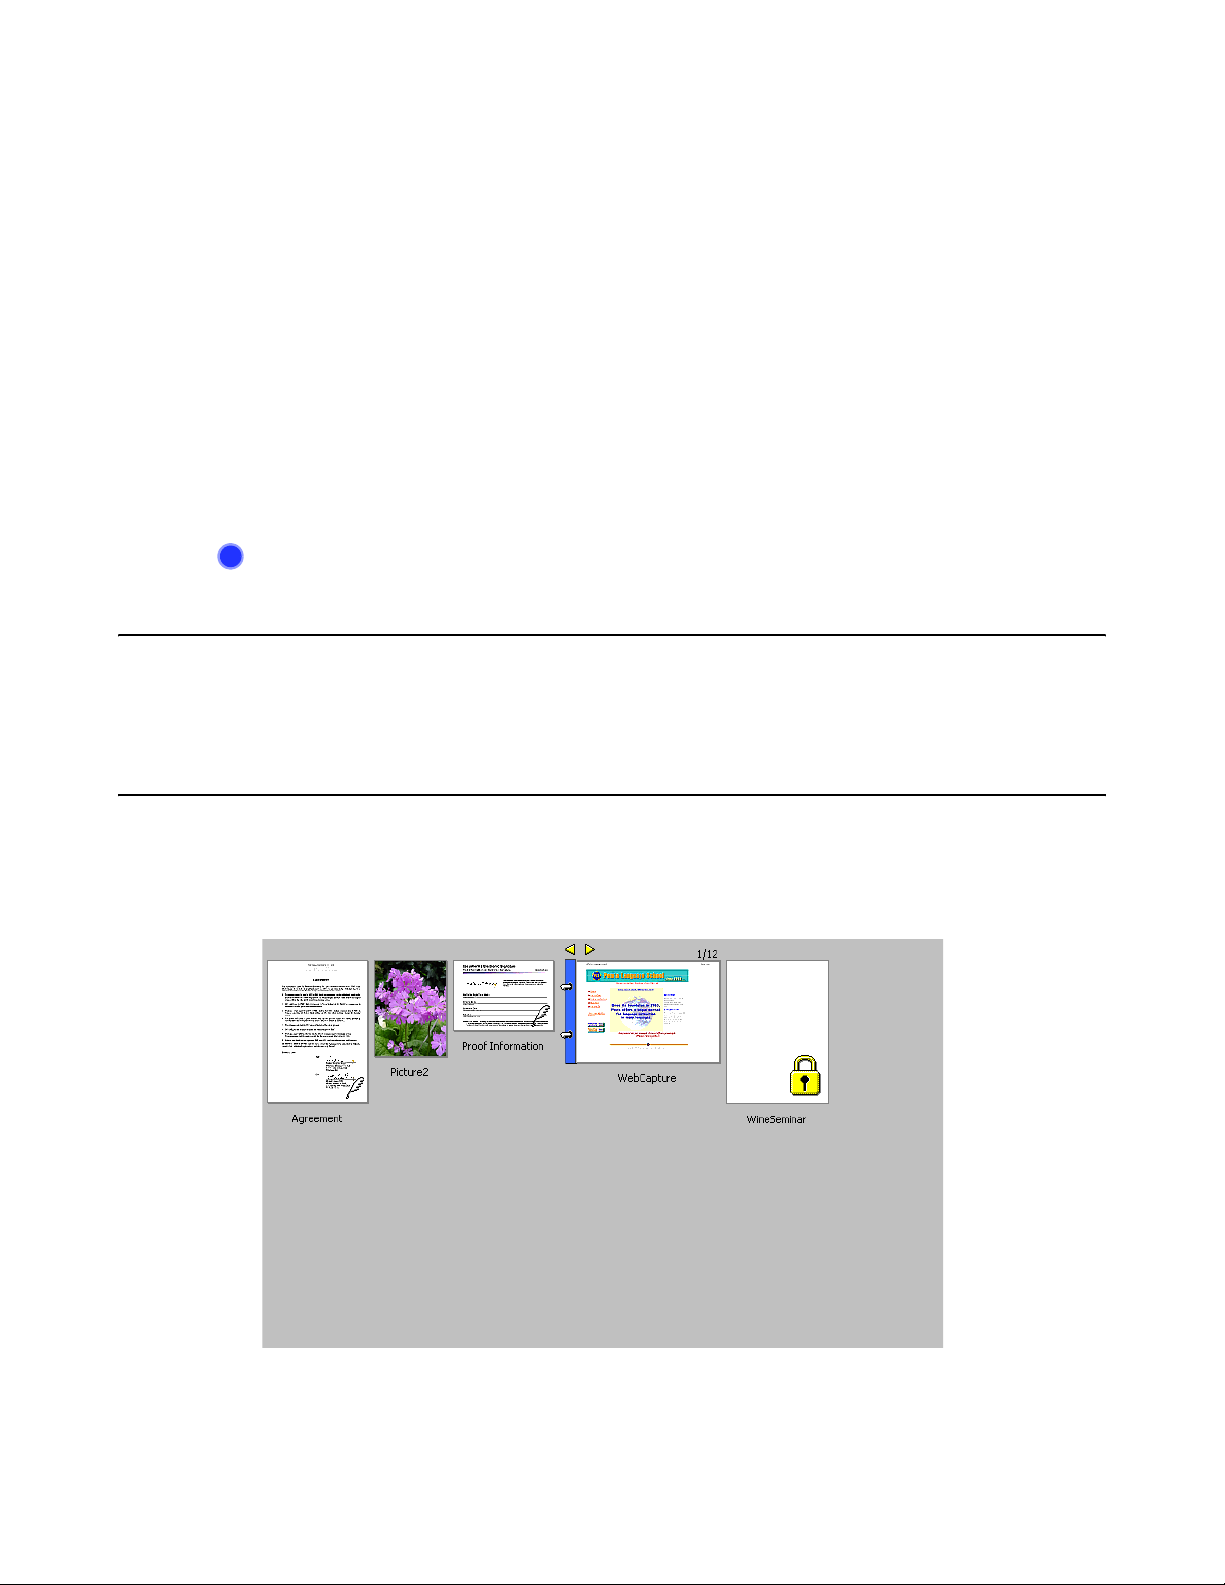
Workspace is used as a working area on the desktop. Files stored in the selected folder are
displayed on Workspace.
Files are displayed either in thumbnail view (reduced image) or in list view.
Workspace View Modes
View as Thumbnails (reduced image)
The default view mode when opening Desk.
[List View] of the [View] menu is unchecked.
2 Using DocuWorks 21
List View (list of file names)
Check [List View] of the [View] menu. Lists information on the files such as names, sizes, and the
modified dates. Thumbnails are not displayed.
Note You can add items to be displayed in list view or change the order of display in Desk
settings.
Displaying the Infoview (enlarged images and the detailed information)
To show infoview, select [InfoView] from the [View] menu. InfoView displays the preview and
properties of the selected document, including the name, size, and modified date.
Refer to Help
?
Infoview
• Operating Environment of DocuWorks > Desk > Make-up of Infoview
• Operating Environment of DocuWorks > Desk > Make-up of Workspace
2 Using DocuWorks 22
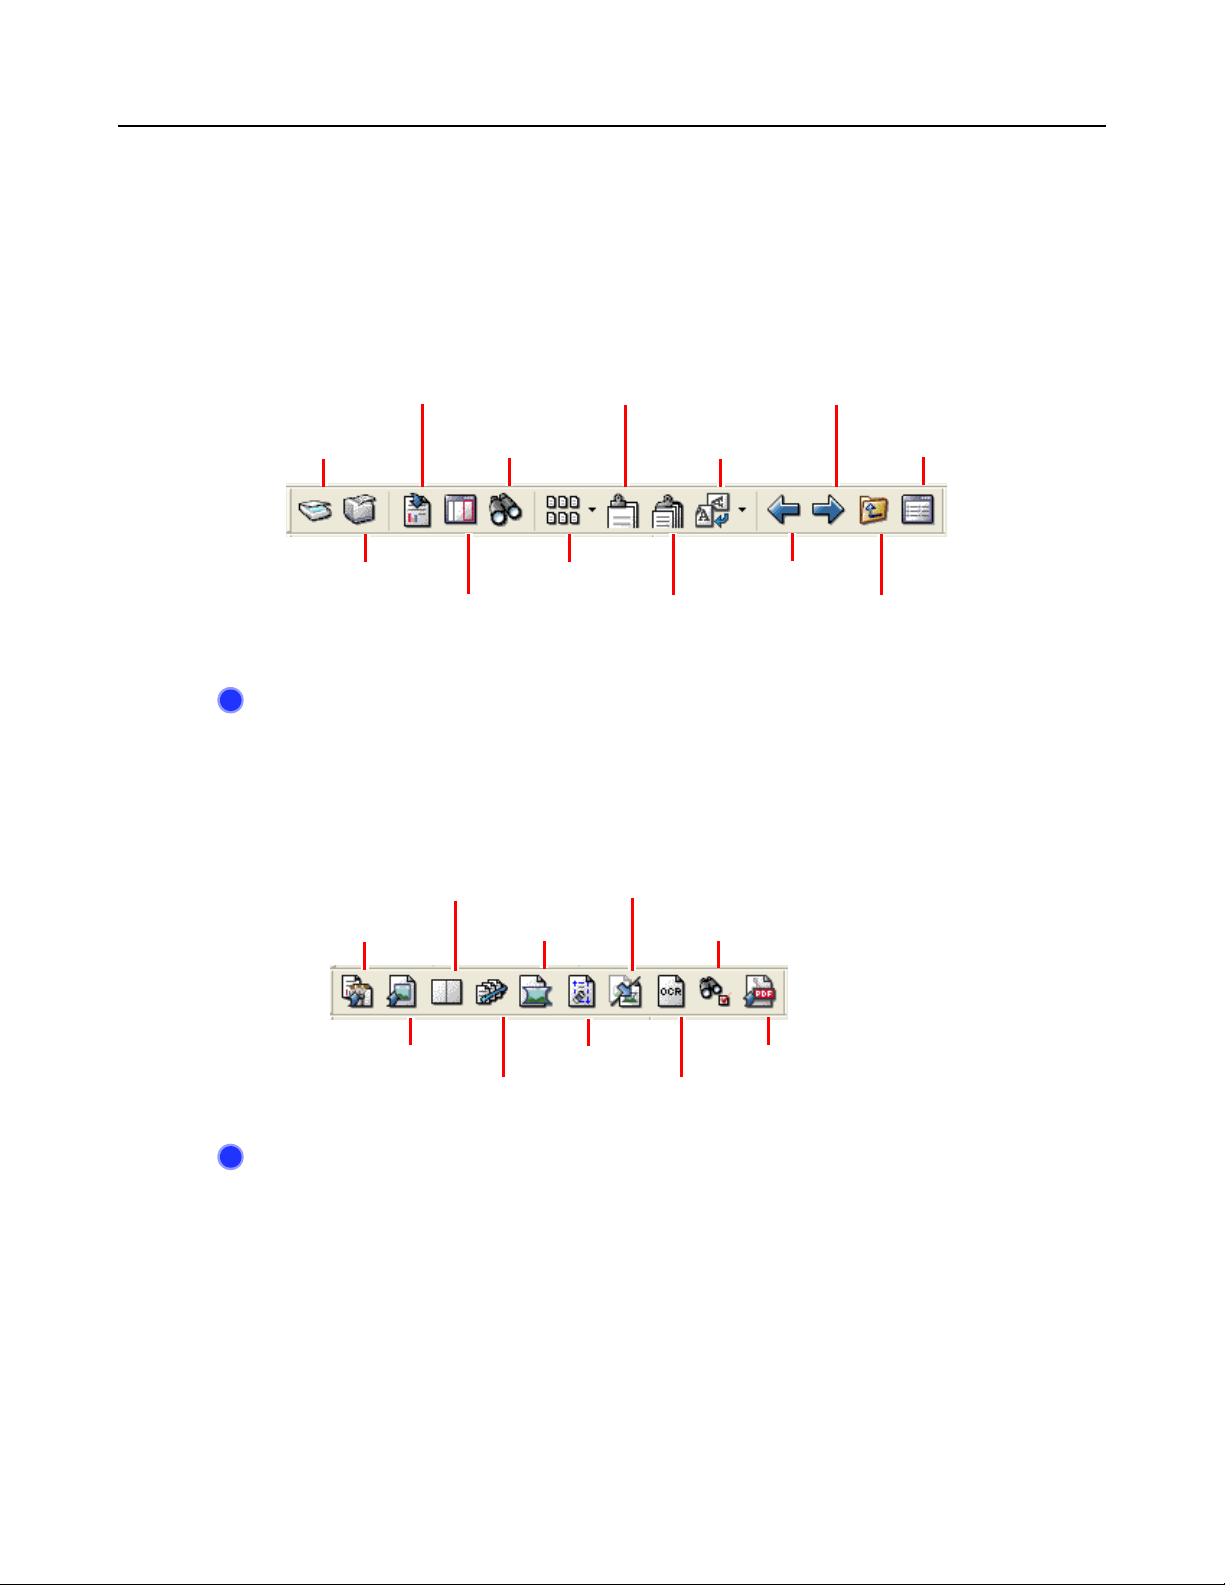
Toolbar
The toolbar contains buttons for frequently used functions in Desk.
There are 2 types of toolbars; a standard toolbar and the plug-in toolbar. This section describes
a standard toolbar. You can change the settings of the toolbar in Desk.
Standard Toolbar
The standard toolbar contains buttons for frequently used functions in the Desk menu.
You can add buttons of the toolbar or change their display order using [Customize Standard
Toolbar] in Desk.
Refer to Help
?
Plug-in Toolbar
The plug-in toolbar contains buttons for the plug-in tools available in Desk.
You can add buttons of other plug-ins using [Plug-in Setting] in Desk.
Import File
TWAIN Acquire
Print
Image Converter
Stack documents
Rotate document to
Find
Sort documents
Toggle
InfoView
Operating Environment of DocuWorks > Desk > Description of Bars > Standard
Toolbar
Page Layout Process Pages
File Optimization
documents
the right
Unstack
Find and Mark
Forward
List / Thumbnail
Back
Up
Extract Images
Sort Pages OCR
Refer to Help
?
Note • Removing the check mark in the [Toolbar] submenu of the [View] menu hides the
Operating Environment of DocuWorks > Desk > Description of Bars > Plug-in
Toolbar
toolbar.
• You can change buttons displayed on the toolbar. Buttons can be changed in the
[Customize Toolbar] dialog box displayed by selecting [Customize Standard Toolbar] of
the [View] menu.
Edge Erase
Conversion to PDF

2 Using DocuWorks 23
Status Bar
The status bar displays description on the current command, a message of the task in progress,
or the information on the current file.
Refer to Help
?
Operating Environment of DocuWorks > Desk > Description of Bars > Status Bar
2 Using DocuWorks 24
2.3 Components of Viewer
Viewer, opened by double-clicking the DocuWorks file, displays the document in a manner that
you open that document on the desktop. With Viewer, you can edit DocuWorks files.
Find Toolbar
Zoom ToolbarStandard Toolbar
Annotation
Toolbar
Page
Toolbar
Infoview
Refer to Help
?
Cursor Types
The shapes of cursors displayed in Viewer are as follows:
Scrolling Mode
Pointing Mode
Property Toolbar
Operating Environment of DocuWorks > Viewer > Make-up of the Viewer Window
A cursor mode for scrolling a page. When the left mouse button is pressed with the cursor
over a document page, the cursor shape changes into a closed hand. As you drag the cursor
in this state, the page moves along with the cursor.
In this mode, you can select an annotation pasted in a document, or select a page in page
sorter view. When you move the cursor over an annotation, the shape of the cursor changes.
Status Bar
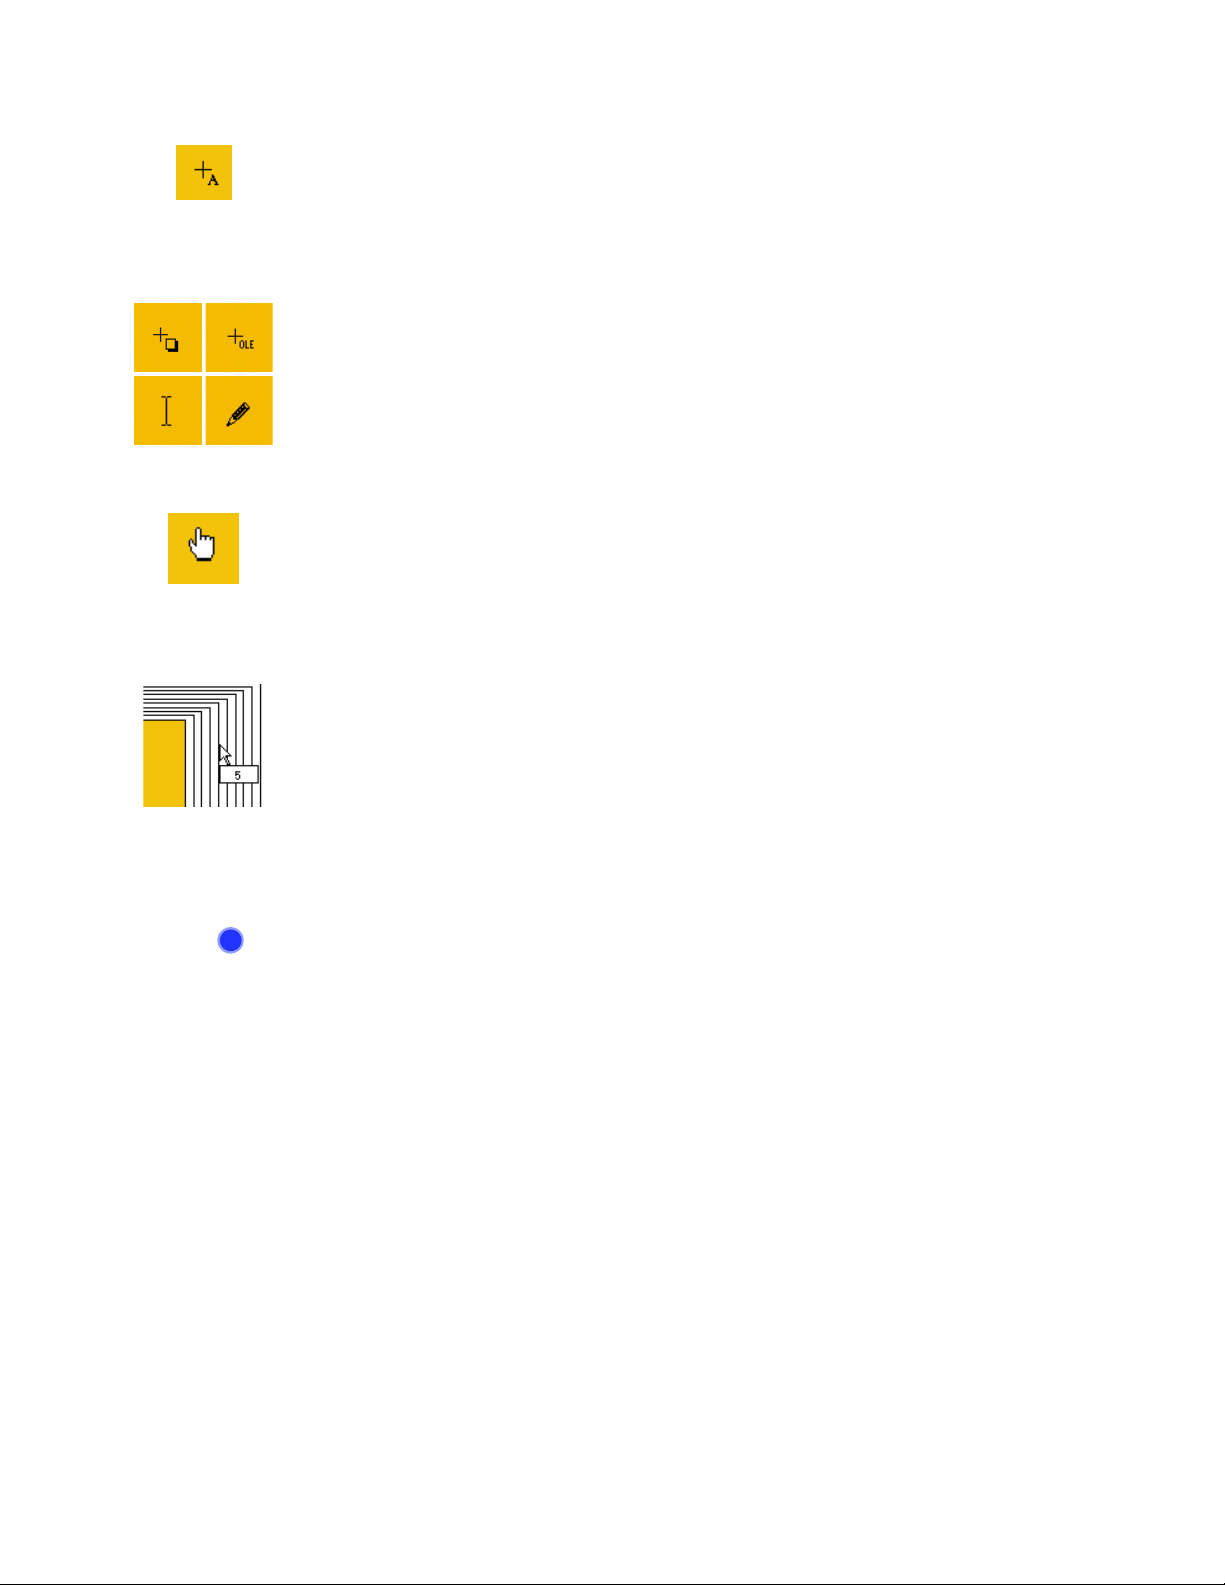
2 Using DocuWorks 25
Text Mode
A cursor mode for selecting a text string from a page.
Tool Mode
The shape of a cursor changes when pasting an annotation. (There are several shapes of
cursor in Tool mode according to the type of annotation. Some of the examples are shown
here.
Cursor to Jump to the Link Destination
A cursor that jumps from the link annotation to the link destination.
Cursor of the Page Number
A cursor representing a page number.
If a document has multiple pages, placing the cursor over the piling portion of pages displays
the page number of the page to which the cursor is currently pointing.
Note For DocuWorks files, pressing the <Shift> key while the cursor of the page number is
displayed shows thumbnails of the pages.
Refer to Help
?
Operating Environment of DocuWorks > Viewer > Cursor Types

2 Using DocuWorks 26
Toolbar
A Toolbar is like a tool box placed on the desk. Tools that are frequently used to edit DocuWorks
files are displayed on the toolbar.
Standard Toolbar
Contains buttons for frequently used functions in the Viewer menu.
You can add buttons of the toolbar or change their display order using [Customize Standard
Toolbar] in Viewer.
Save
New
Open Copy
Print Rotate Right
Forward
Scrolling Mode
Back
Pointing Mode
Text Mode
Paste
Cut
Document View
Original Data View
Page Sorter View
Toggle Starch/
Remove Starch
Copy Image
Full Screen
Page Sorter/
Document View
Toggle Annotations
Toggle
InfoView
Binder View in
Sequential Page
Display Binder
Index
User Option
Help
Refer to Help
?
Zoom Toolbar
Refer to Help
?
Operating Environment of DocuWorks > Viewer > Description of Bars > Standard
Toolbar
Use this bar to change the zoom ratio of the document currently open in Viewer.
Fit to Whole Page
Zoom
Zoom Out
Fit to Page Width
Zoom In
Operating Environment of DocuWorks > Viewer > Description of Bars > Zoom
Toolbar
2 Using DocuWorks 27
Find Toolbar
Use this bar to search any text string by specifying it in the document currently open in Viewer.
?
Page Toolbar
?
Find Search string
Refer to Help
Operating Environment of DocuWorks > Viewer > Description of Bars > Find
Toolbar
Find Previous
Find Next
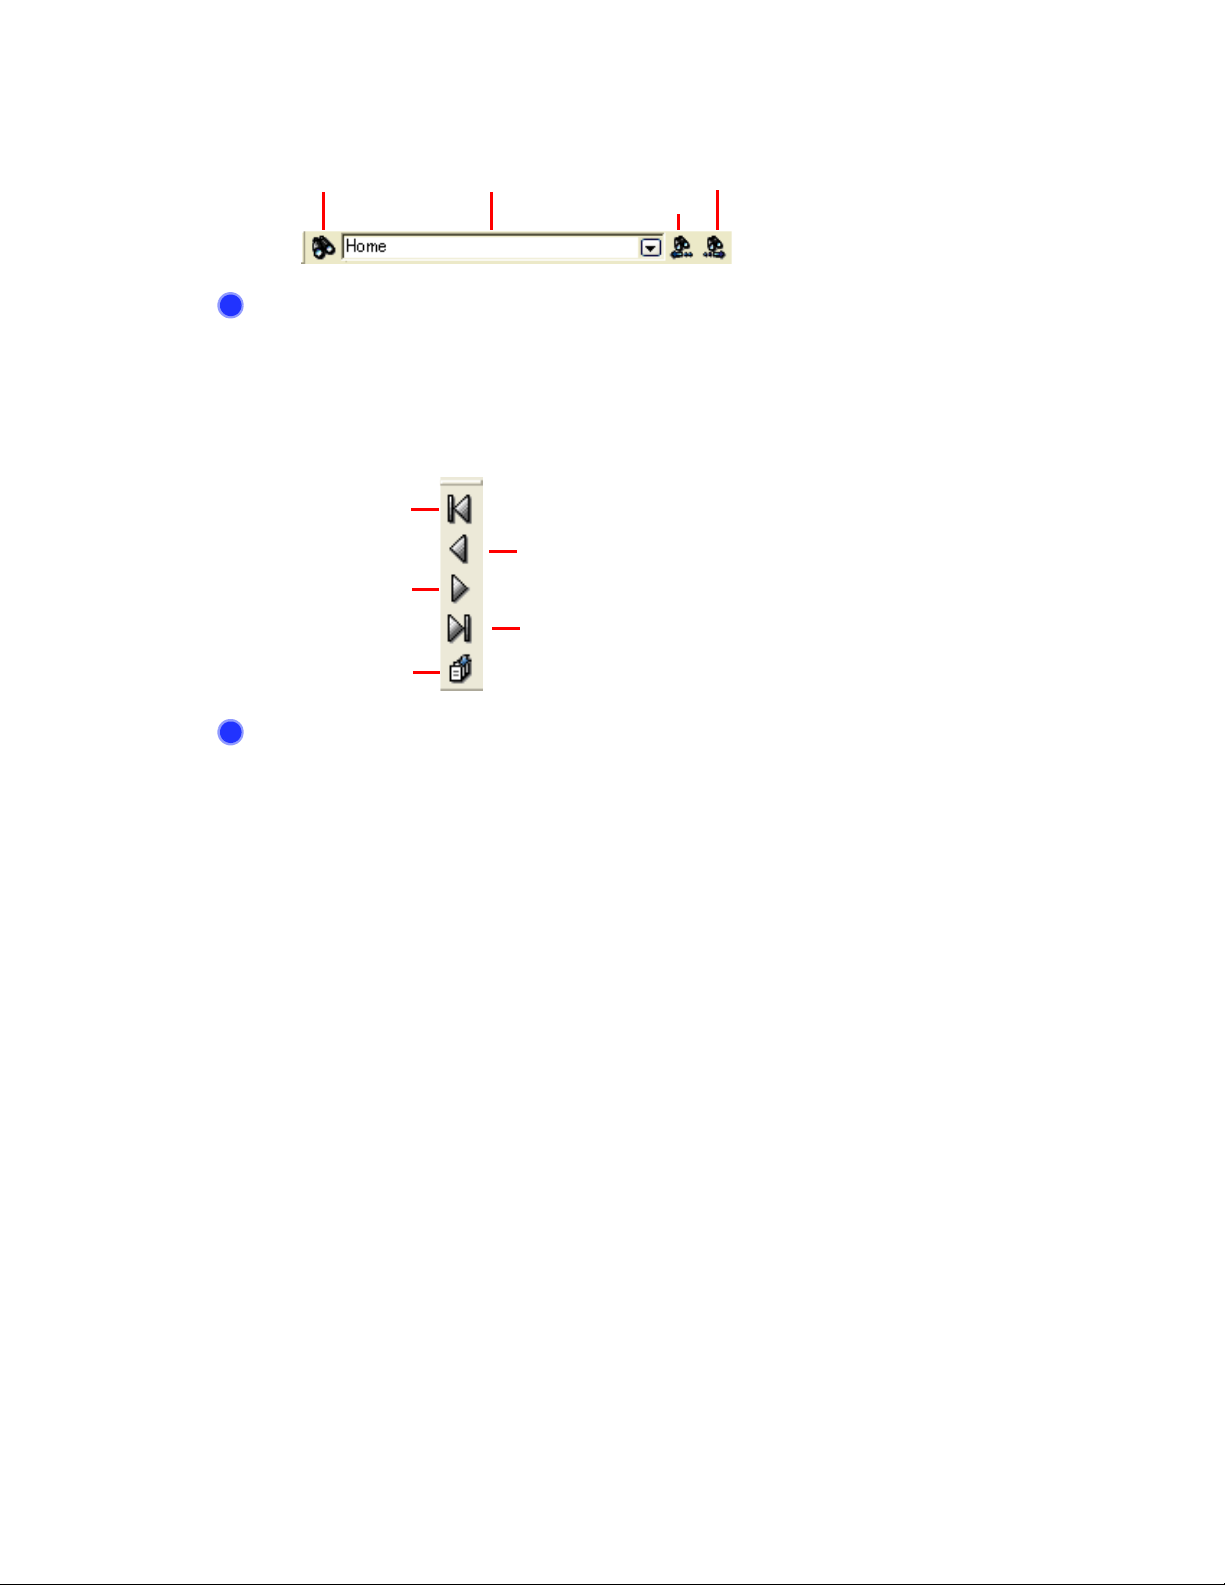
Use this toolbar to turn pages of the document currently selected in Viewer or specify the page
of the document to view.
First Page
Previous Page
Next Page
Last Page
Go To
Refer to Help
Operating Environment of DocuWorks > Viewer > Description of Bars > Page
Toolbar

2 Using DocuWorks 28
Annotation toolbar
Contains the buttons of the annotation tools defined in Viewer.
You can add buttons of the toolbar or change their display order using [Annotation Toolbar
Options] in Viewer.
NotePad/Yellow
Text/Times New
Roman/Black/
12pt
Text/Times New
Roman/Red/
12pt
CONFIDENTIAL
URGENT
COPY
PRIVATE_CONFIDENTIAL
FreeHand/
Black/1 pt
Marker/Yellow/
NotePad/Blue/
with Text
DRAFT
Line/Black/1pt
Ellipse/
Frame: Red 3pt/
Fill: None
7pt
Rectangle/Frame:
Red 3pt/Fill: None
OLE
Polygon/Frame:
Red/Fill: Aqua
(Transparent)
Paper
Title/Level1
Letter Portrait
Link
Refer to Help
?
Property Toolbar
Displays buttons for changing properties of annotations.
Refer to Help
?
Operating Environment of DocuWorks > Viewer > Description of Bars > Annotation
Toolbar
Fill Color
Pen Color
Pen Thickness
Rotate Text
Annotation
Font
Font Size
Bold
Underline
Text Color
Italic
Operating Environment of DocuWorks > Viewer > Description of Bars > Property
Toolbar
2 Using DocuWorks 29
Status Bar
Displays information on documents, description of functions of buttons on the toolbar, and
messages currently being processed.
Refer to Help
?
Operating Environment of DocuWorks > Viewer > Description of Bars > Status Bar
Viewing Documents
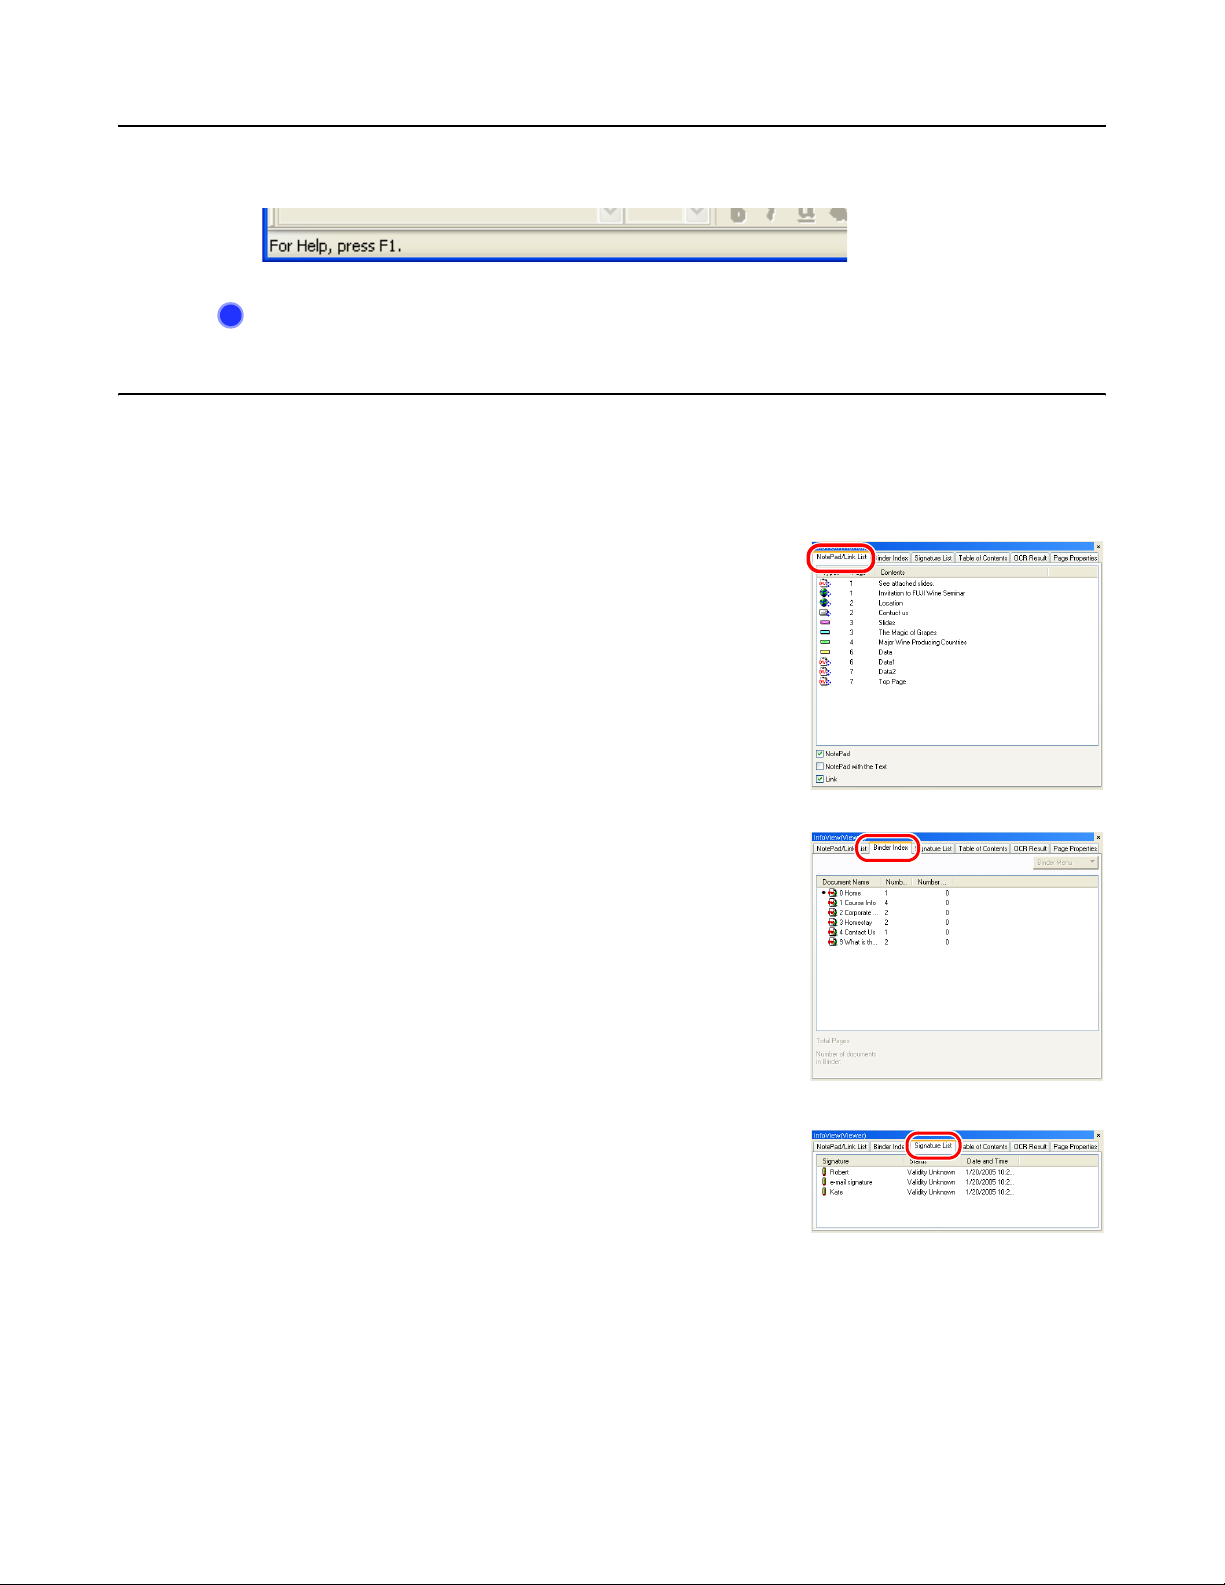
Infoview
Infoview displays information on the document being opened in the Viewer window. There are 5
tabs:
z
NotePad / Link List
Displays a list of notepad annotations and link
annotations for the document. You can view information
on annotations.
From the list, you can display a page that has an
annotation, or jump to a link destination by doubleclicking the respective icon.
z
Binder Index
Displays a list of documents contained in the binder is
displayed when the binder is open.
You can use menu to display the number of pages of
each document in the binder. You can also import
document into the binder, or rename the file in the binder.
z
Signature List
Displays a list of signatures affixed in the document. You
can check the signature information, or display the page
that has the signature.
You can also verify the signature or restore the document
using the pop-up menu.
2 Using DocuWorks 30
z
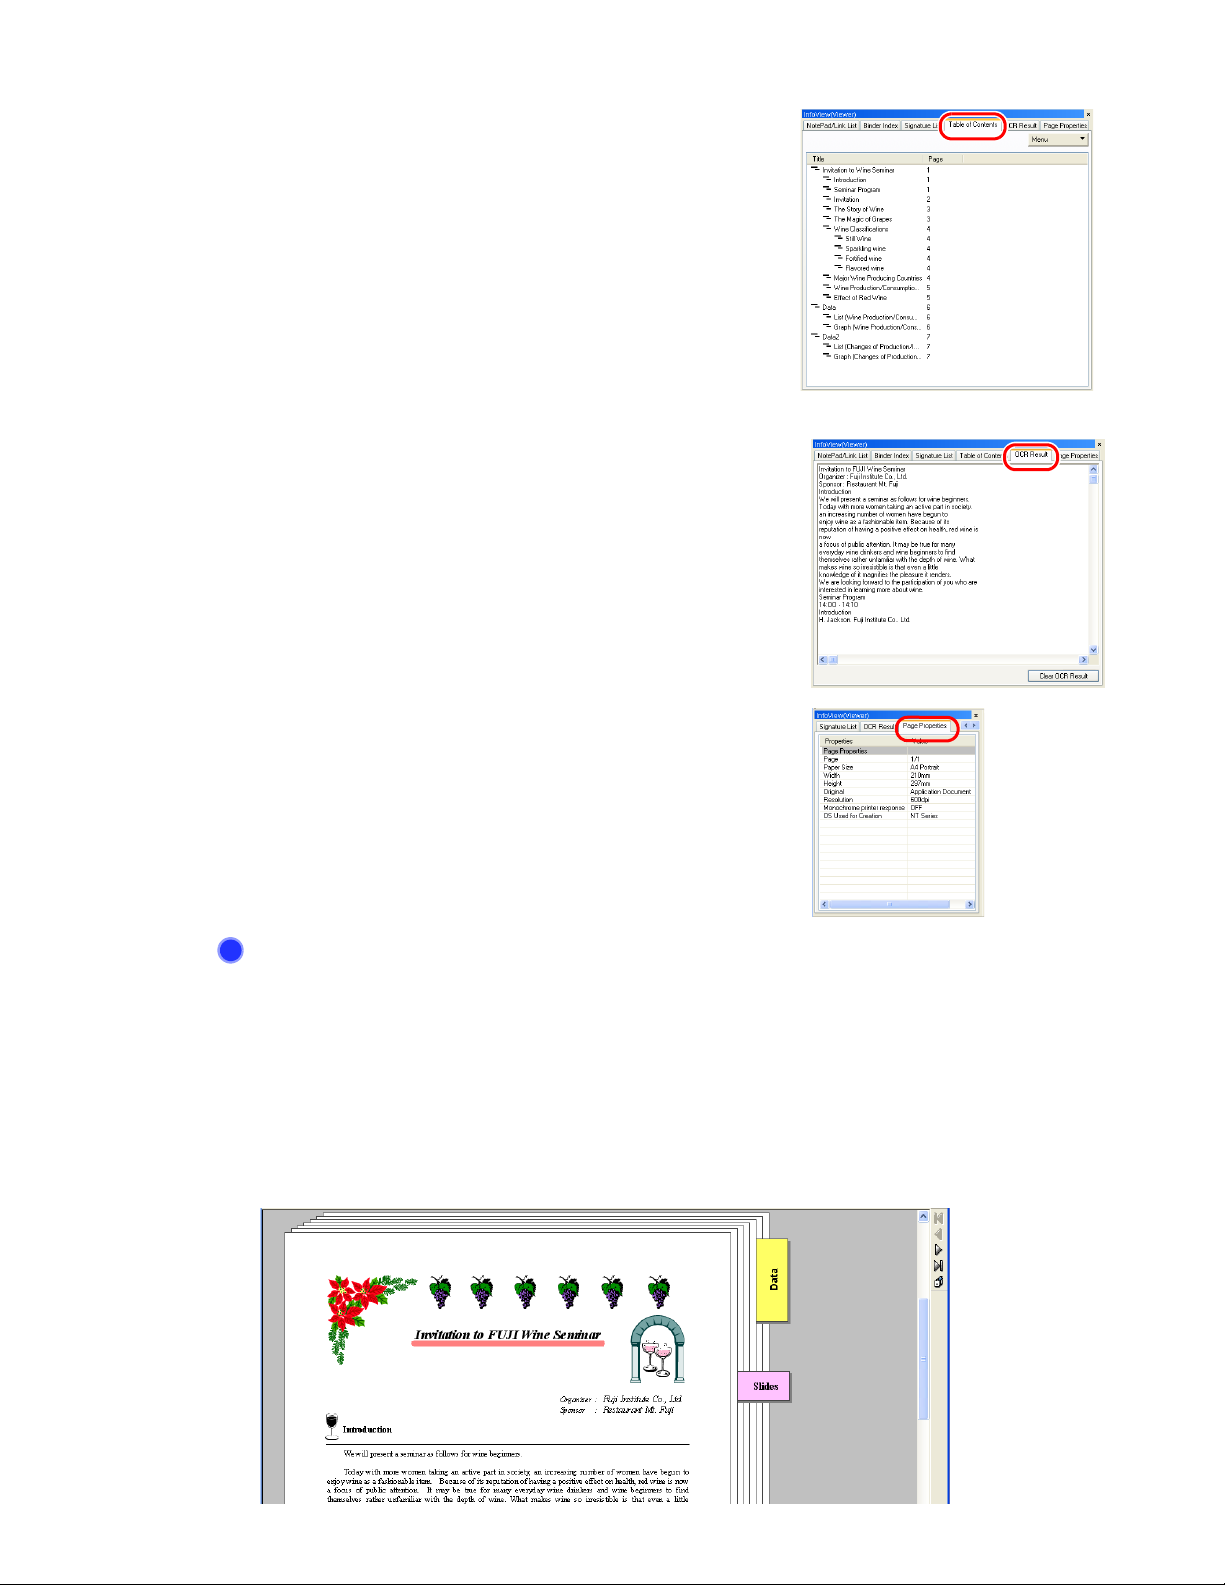
Table of Contents
Displays a list of title annotations pasted in the
document.
You can check the title information, or change the level
of the character string.
If you double-click a title icon on the list, the page on
which annotations are pasted will be displayed.
z
OCR Result
Displays recognition result of the OCR-processed
documents.
You can search a text string in the result and edit the text.
z
Refer to Help
?
Document View
Pages are displayed in layers. You can change the zoom ratio. This is the default view of Viewer
window.
Use this view to read the contents of the page, search text strings, or attach a notepad to the
page.
Page Properties
Displays the properties of the page currently displayed.
You can check information such as the paper size, type
of the original data, or the resolution.
Operating Environment of DocuWorks > Viewer > Make-up of Infoview

2 Using DocuWorks 31
Page Sorter View
In this view, the contents of pages in the binder are displayed as thumbnails in sequential order
of the pages. This is useful when working with pages including sorting pages or copying multiple
pages. For binders, you can select either to display each document contained in the binder or to
display all the documents serially.
Original Data View
In this mode, original data attached to DocuWorks files is displayed as icons.
You can retrieve the original file and save it in the specified folder.
Page Sorter and Document View
Use this view when sorting pages in Page Sorter view while checking the contents of each page
in Document view.
Note You can change the appearance of the window to be split vertically in the [User
Options] dialog box.

2 Using DocuWorks 32
Full Screen
In this view, the document is displayed in full screen. Any screen area outside of the page image
is filled with a black background. This view can be used for presentations.
Since no menu bar or tool bar appears in the full screen view, use the control panel or the popup menu for any operation. You can display the control panel by selecting [Control Panel] from
the pop-up menu.
You can also display the control panel by clicking the button which appears as you move the
cursor to the lower left of the screen.
Forward
Refer to Help
?
Turn Pages
Zoom Ratio
Close the Full ScreenBack/
Operation Guide > Basic Operations of Viewer > Operation on DocuWorks
Documents > Manipulating a Document in Full Screen

3 Creating a DocuWorks Document 33
3 Creating a DocuWorks
Document
A DocuWorks document can be created from a paper document such as a FAX sheet or
manuscript, data of other applications including Word and Excel, and image files.
There are several ways to create DocuWorks documents. This section describes the procedures
for the respective methods.
3.1 Creating Documents by Dragging-and-dropping Files of Another Application to Desk
You can create DocuWorks documents by dragging-and-dropping files created by another
application such as Word and Excel into Desk.
If [Attaching original data] is selected when importing files, the original data is attached, which you
can edit by starting the application from DocuWorks.
1 Select the file on the desktop or folder and drag it into the Desk workspace.
2 Click [Yes] in the [Import File] dialog box.
3 Select one of the options for original data attachment and page creation, and then click
[Execute].

3 Creating a DocuWorks Document 34
Note You can attach a copy of the original data when creating a DocuWorks document from
application data. The attached data is called the original data. The original data can be
edited using the original application even after converting it into a DocuWorks
document.
Refer to Help
?
Operation Guide > Basic Operations of Desk > Creating DocuWorks Documents >
Creating Documents from Application Data > Creating Documents by Copying
Application Data to the Workspace

3 Creating a DocuWorks Document 35
3.2 Creating Document by Dragging-and-dropping Image Files to Desk
You can create DocuWorks documents by dragging-and-dropping or copying-and-pasting image
files (BMP, JPEG, or TIFF files) into the Desk workspace.
Multiple files or folders can be imported simultaneously.
If you copy a folder, files stored in that folder are converted to DocuWorks documents all at once.
1 Select the file to be converted to DocuWorks documents on the desktop screen or folder, and
drag it into the Desk workspace.
2 Click [Yes] in the [Import File] dialog box.
Image file

3 Creating a DocuWorks Document 36
3 Specify the respective items in the [Import Image File(s)] dialog box.
Specify the paper size of the document or where to lay
out the image while monitoring the preview screen.
Specifying [Automatic] sets the
minimum standard size that can
contain the entire image.
This option specifies creation of the document by
placing priority on either the image quality or
compression rate.
4 Click [OK] to close the [Import Image File(s)] dialog box.
A DocuWorks document having the same name as the imported image file has been created in Desk.
Refer to Help
?
Operation Guide > Creating DocuWorks Documents > Creating Documents from
Image Files > Creating Documents by Copying Image Files to the Workspace

3 Creating a DocuWorks Document 37
3.3 Creating Documents by Outputting Files of Another Application to the DocuWorks Printer
You can convert application data such as Word or Excel files to DocuWorks documents in the
same manner as if you were printing them. DocuWorks Printer is a virtual printer. Printing a
document to the DocuWorks Printer converts the document to a DocuWorks document instead
of printing on paper.
You can also convert Web page or mail contents to DocuWorks documents in the same manner.
1 Select [Print] from the [File] menu in the file of other applications such as Word or Excel to
display the [Print] dialog box.
2 For the printer name, select [DocuWorks Printer].
3 Click [Properties] when you want to specify the paper size or orientation of the document.
4 Click [OK] to close the [Print] dialog box.
The corresponding DocuWorks documents are created in the Desk workspace.
Refer to Help
?
Operation Guide > Creating DocuWorks Documents > Creating Documents from
Application Data > Creating Documents by Printing to a DocuWorks Printer

3 Creating a DocuWorks Document 38
3.4 Creating DocuWorks Documents by Scanning Paper Documents
You can also convert data scanned using a TWAIN32 compatible scanner to DocuWorks
documents.
Verify that the appropriate scanner driver is installed and the scanner is operational.
1 Scan the paper document using the TWAIN32 compatible scanner.
2 In Desk, select [Select source] from the [File] menu.
3 Select the scanner to be used in the [Select Source] dialog box.
Important If your scanner does not appear in the source list, there is a possibility that the
appropriate scanner driver has not been correctly installed or the scanner is not
properly connected. For more information, refer to the manual for your scanner.
4 Select [Acquire] from the [File] menu. Or, click the [TWAIN Acquire] button on the toolbar.
5 Select [Select Scanner].
The dialog box corresponding to the selected scanner appears. The dialog box displayed varies according
to the type of the scanner.
6 Specify the desired settings, and then start scanning by clicking the appropriate button (such as
[Start]).
Scanning begins and the corresponding DocuWorks document is created.
Note • Refer to the appropriate manuals supplied with the respective scanner for instructions
on performing the scan.
• You can specify the paper size, quality, or save destination for scanning data in the
[DocuWorks Desk Options] dialog box.
Refer to Help
?
Operation Guide > Basic Operations of Desk > Creating DocuWorks Documents >
Creating Documents from Scanned Data > Creating Documents from Scanned Data

3 Creating a DocuWorks Document 39
3.5 Creating Documents Using the [Convert to DocuWorks document] Button in the Office Application
You can convert files to DocuWorks documents using the [Convert to DocuWorks document]
button in the Microsoft Office application if you have installed DocuWorks Creator for Microsoft
Office.
This feature can be added only to 2007 Microsoft Office, Microsoft Office 2003, and Microsoft
Office XP. In addition, you must select the application to be used (Word/Excel/PowerPoint) for
the [DocuWorks Creator for Microsoft Office Settings] in the Personal Settings.
1 Click the [Convert to DocuWorks document] button on the Standard toolbar when the Word,
Excel, or PowerPoint file is open.
The corresponding DocuWorks documents are created and displayed in the Desk workspace.
Refer to Help
?
• Operation Guide > Customize DocuWorks > Personal Setting > Setup Personal
Setting
• About DocuWorks > New Features of DocuWorks 6

4 Editing 40
4 Editing
Drawings, lines, and illustrations pasted to document pages are called annotations.
You can attach notepads, write comments, or edit with annotations in DocuWorks documents just
like on paper-based documents. In addition, you can add page headers and serial page numbers.
You can also extract text or images from documents and utilize them in DocuWorks documents
or in other applications. This section describes basic editing operations.
You can use various editing functions other than those described here. For details of other
functions, refer to Help.
4.1 Adding Annotations
You can attach notepads, write comments, or edit with annotations in DocuWorks documents just
like on paper-based documents. Drawings, lines, and notepads pasted to document pages are
called annotations. Annotations are pasted using annotation tools found on the annotation
toolbar, which is like a pencil case containing various types of stationery supplies.
Types of Annotations
The following table shows the main types of annotations.
You can change the color or thickness of lines, the font or size of text, or the color of notepads by
changing the properties of annotations. In addition, annotations with modified properties can be
added to the toolbar.
Title
Link
Toolbar
OLE
NotePad
Marker
Staight
Line
EllipseRectangle
FreeHand
(Marker)
NotePad (with text)
Polygon

4 Editing 41
Displaying Annotations
You can select whether to display or hide annotations when displaying or printing documents. For
each document or binder, you can specify whether to show or hide annotations.
1 Double-click the document or binder to display Viewer.
2 Check [Show Annotations] in the [Document] menu.
The annotations are displayed in the document or a binder.
If you uncheck the box, the annotations are hidden.
Flow for Operating Annotations
The basic operation of adding annotations is as follows:
1 Double-click on the DocuWorks file to display the Viewer window.
2 Select a desired annotation from the [Annotations] menu and paste it.
Or, click the button on the annotation toolbar and paste the desired annotation.
3 Change the properties of the annotation such as color or widths of lines as needed.
4 Add the modified annotation to the toolbar (if it is used often).
Or, create and register a new annotation toolbar.
Pasting Annotations
This section describes how to paste annotations, taking a case of pasting a notepad with text as
an example.
1 Double-click the document or binder to display Viewer.
2 From the Annotation Toolbar, click the [NotePad / Blue / with Text] button .
Or, select [NotePad / Blue / with Text] in [Basic] from the [Annotations] menu.
The shape of the cursor changes to .
3 Click on a position in a page on which you want to paste the annotation.
The annotation is pasted to the position and DocuWorks will be in pointing mode.
4 Double-click on the notepad to enter the text within the notepad.
Note For annotations other than notepads, the portion of the annotation that does not fit in a
Refer to Help
?
page or a notepad annotation is not displayed.
Operation Guide > Use of Annotations > Work with Annotations (Common
operation) > Pasting or Deleting Annotations

4 Editing 42
Modifying Annotation Properties
This topic describes how to change the properties of annotations, taking a case of changing the
color of the notepad to green as an example.
1 Right-click the text on the notepad to display the pop-up menu, and select [Properties] from the
menu.
2 Change the font, font style, or size of the text of the notepad.
3 Click [OK] to close the [Text Properties] dialog box.
4 Right-click on the notepad to display the pop-up menu, and select [Properties] from the menu.

4 Editing 43
5 Select green in the [NotePad Properties] dialog box.
6 Click [OK] to close the [NotePad Properties] dialog box.
Refer to Help
?
• Operation Guide > Use of Annotations > Work with Annotations (Common
operation) > Displaying or Modifying Annotation Properties
• Operation Guide > Use of Annotations > Use of Annotations > Using NotePad
Annotations
Creating a New Annotation Toolbar
Annotation tools are configured for each user, so if you open multiple Viewers on your PC, the
same set of annotation tools are used for all of them. You can create annotation toolbars for each
task and use them according to the application.
1 Select [Annotation Toolbar Settings...] from the [Tools] menu of Viewer.
2 Select [Create New Toolbar] from the [Tab] menu.

4 Editing 44
3 Enter the [Name of toolbar], then click [OK].
A tab for the new toolbar is created in the [Annotation Toolbar Options] window.
4 Select [Exit] from the [File] menu.
A confirmation message appears asking whether you want to save the changes.
5 Click [Yes] to close the [Toolbar Options] dialog box.
The display of toolbars and the menu items are also updated.
Refer to Help
?
Operation Guide > Use of Annotations > Customize Annotation Tools > Creating or
Deleting an Annotation Toolbar
Adding an Annotation to the Annotation Toolbar
This section describes how to add a notepad for which the font size or color has been changed,
to the existing Toolbar.
1 Right-click on the notepad for which the properties have been changed, and select [Add to
Annotation Toolbar] from the pop-up menu.
Or, select [Add to Annotation Toolbar] from the [Annotations] menu.

4 Editing 45
2 Enter the name of the changed annotation describing the modified properties in the [Name] field
in the [Add to Annotation Toolbar] dialog box. (Example: NotePad / Checked / Green)
3 Click [OK] to close the [Add to Annotation Toolbar] dialog box.
A button is added to the annotation toolbar.
Refer to Help
?
Operation Guide > Use of Annotations > Customize Annotation Tools > Creating
Annotation Tools > Creating an Annotation Tool from a Pasted Annotation
Changing Settings of the Annotation Toolbar
You can change the types of buttons or the order in which they are displayed on the annotation
toolbar, including hiding annotations that are not used or changing the button order according to
usage frequency.
Adding a new annotation
Copy the existing annotation and change its properties.
1 Select [Annotation Toolbar Settings] from the [Tools] menu of Viewer.
2 Select [Line / Black / 1pt] in the [Annotation Toolbar Options] window.
3 Right-click on the selected annotation to display the pop-up menu, select [Copy], then select
[Paste] at the desired position.
Or, select [Copy] and then select [Paste] from the [Edit] menu.

4 Editing 46
4 Right-click on the copied [Straight Line / Black / 1pt] and select [Properties] from the pop-up
menu.
5 In the [Line Properties] dialog box, select [Red] for color, [3pt] for thickness, [Beginning] for
arrow type, and [PolyLine] for style.
6 Enter the name of the changed annotation describing the modified properties in the [Name] field.
7 Click [OK] to close the [Line Properties] dialog box.
8 Check next to the added annotation.
9 Click [x] at the top right corner of the [Annotation Toolbar Options] window.
10 The message "Do you want to save changes to the Toolbar options?" appears. Click [Yes].
The added annotation button appears on the toolbar of Viewer.
Changing the display order of the annotation tools
1 Select [Annotation Toolbar Options] from the [Annotations] menu of Viewer.
2 Select the annotation tool for which you want to change the position, then select [Move Up] or
[Move Down].
3 Click [x] at the top right corner of the [Annotation Toolbar Options] window.
4 A message "Do you want to save changes to the Toolbar options?" appears. Click [Yes].
The toolbar of Viewer is updated.

4 Editing 47
Deleting an unused annotation button
1 Select [Annotation Toolbar Options] from the [Annotations] menu of Viewer.
2 Select the unused annotation tool in the [Annotation Toolbar Options] window.
3 Select [Delete] from the [Edit] menu.
4 Click [x] at the top right corner of the [Annotation Toolbar Options] window.
5 The message "Do you want to save changes to the Toolbar options?" appears. Click [Yes].
The toolbar of Viewer is updated.

4 Editing 48
4.2 Utilizing Document Contents
You can copy text from DocuWorks documents to other DocuWorks documents and application
data and utilize them.
Copying Part of a Text String
Text that can be copied includes text on application pages and image pages on which OCR has
been performed.
1 Double-click on the DocuWorks file to display the Viewer window.
2 Click the [Text Selecting Mode] button on the standard toolbar.
The shape of the cursor changes from to , which is the text selecting mode.
3 Drag the cursor to select a text string from the body text.
4 Click the [Copy] button on the standard toolbar.
Or, right-click to display the pop-up menu, and select [Copy] from the menu.
5 Paste the selected text to a document of another application or a DocuWorks document.
The selected text string is copied. The text pasted to a DocuWorks document will be a text annotation.
Refer to Help
?
Operation Guide > Basic Operations of Viewer > Use of Data on Pages > Selecting
and Copying Text

4 Editing 49
Copying Part of an Image
1 Double-click on the DocuWorks file to display the Viewer window.
2 Click the [Copy Image] button on the standard toolbar.
3 In the [Capture Image] dialog box, specify [Resolution] and [Color/Monochrome], and click [OK].
The shape of the cursor changes to .
Note While placing the cross-shaped cursor over the image on the page, if you press the
<Shift> key, the both lines forming the cross extend to the edges of the page. Those
extended cross lines of the cursor are displayed as long as the <Shift> key is being
pressed. If you release the <Shift> key, the extended lines are no longer displayed.
4 Drag the cursor to select the area to be copied.
The data is copied to the Windows clipboard.
5 Display the document of the copy destination and paste it.
When pasting to a DocuWorks document, select the pasting method in the [Paste] dialog box.
Refer to Help
?
Operation Guide > Basic Operations of Viewer > Use of Data on Pages > Copying or
Moving a Portion of an Image

4 Editing 50
4.3 Converting Characters in an Image to Text Data (OCR)
The text contained in images cannot be selected or copied as is. You can use OCR to convert
the image page into text data, and perform a search or copy the resulting text.
Performing OCR (Character Recognition)
1
Select a document or a binder in Desk.
2 Click the [OCR] button on the standard plug-in toolbar.
3 Click [Setting] in the [OCR] dialog box.
4 Specify each item in the [OCR Setting] dialog box.

4 Editing 51
5 If required, specify detailed settings by clicking [OCR Detailed Settings] in the [OCR Setting] to
display the [OCR Advanced Settings] dialog box.
6 Click [OK] to close the [OCR Setting] dialog box.
7 Click [Start] in the [OCR] dialog box.
Processing starts and its progress is displayed in the [OCR] dialog box.
8 Click [Close] to close the [OCR] dialog box. The result is displayed in [OCR Result] of infoview
(view).
Processing starts and its progress is displayed in the [OCR] dialog box.
Note To perform OCR, the original document type for the page properties should be "Image
Document".
Refer to Help
?
Operation Guide > Basic Operations of Viewer > Use of Data on Pages> Perform
OCR on Image Data

4 Editing 52
4.4 Sorting Pages
Use the Page Sorter view in Viewer when you want to replace, delete, or add pages.
In [Page Sorter and Document] view, all the pages are displayed as thumbnails and the selected
page is zoomed in, enabling you to check the contents of pages during operation.
Changing the Order of Pages
1
Double-click on the file to display the Viewer window.
2 Select [Page Sorter] from the [View] menu.
3 Select the page and drag-and-drop it into the desired position.
The page order is changed.
Refer to Help
?
Deleting Pages
1
Double-click on the file to display the Viewer window.
2 Select the page and press the <Delete> key. Or, select [Delete] from the [Edit] menu.
Refer to Help
?
Operation Guide > Basic Operations of Viewer > Operations on Pages > Copying,
Moving, and Deleting Pages
Operation Guide > Basic Operations of Viewer > Operations on Pages > Copying,
Moving, and Deleting Pages

4 Editing 53
Moving a Page to Another Document
1 Open the two documents in Viewer and change to the Page Sorter view.
2 Select a page from the source document.
3 Drag-and-drop it into the desired position in the destination document.
The page is moved to the specified position.
When copying a page, drag-and-drop it while holding down the <Ctrl> key.
Refer to Help
?
Operation Guide > Basic Operations of Viewer > Operations on Pages > Copying,
Moving, and Deleting Pages

4 Editing 54
4.5 Setting Up Headers and Footers
You can add a header (text strings or images) or footer to a document or binder.
Margin
Header
Top image
Page number
Bottom image
Footer

4 Editing 55
Setting Up Headers
For binders, you can set up page headers throughout the binder while remaining the headers of
each document.
1 Double-click the document or binder to display Viewer.
2 Select [Header/Footer] from the [Tools] menu, then select [Setup Header/Footer].
3 Select the [Header] or [Footer] tab to specify the text items including text string, alignment, or
margin.

4 Editing 56
4 Click [OK] to close the [Setup Header / Footer] dialog box.
Refer to Help
?
Operation Guide > Basic Operations of Viewer > Operation on DocuWorks
Documents > Setting Up Headers and Footers
Setting Up the Footer
For binders, you can set up the footer throughout the binder while retaining the footer of each
document.
1 Double-click the document or binder to display Viewer.
2 Select [Header/Footer] from the [Tools] menu, then select [Setup Header/Footer].
3 Select the [Page Number] tab in the [Setup Header /Footer] dialog box.
4 Enter the text string representing the page number for [Format]. You can specify more than one
line including a carriage return.
The symbol "#" can be used as a character string substitute for the actual page number.
Example: "P. #" → "P. 25", "-#-" → "-25-", "#/25" → "12/25"
5 Use this tab to specify the settings for the format, position, font, alignment, and the starting
number for the page numbers.
Adding an image to the header
Besides text, images can also be attached to the header.
Refer to Help
?
Operation Guide > Basic Operations of Viewer > Operation on DocuWorks
Documents > Setting Up Headers and Footers

4 Editing 57
4.6 Creating a Table of Contents
A table of contents gives titles to each section of information and displays the overall layout of the
document's pages in a single list. Therefore, the table of contents allows a user to quickly find the
desired page and to easily grasp the contents of a document, even when it contains many pages.
This section describes the steps used to create a table of contents from the affixed title
annotations.
1 Double-click on a DocuWorks document or binder to open the Viewer.
2 On Viewer, select [Edit All Links/Titles] from [Link/Title] in the [Tools] menu to display title
annotations.
3 Paste title annotations where you want to set titles.
4 Select [Create Table of Contents] from [Table of Contents] in the [Tools] menu.

4 Editing 58
5 Set the paper size, insertion point, and other options for the created table of contents from the
[Create Table of Contents] dialog box.
A table of contents will be inserted into the specified page of the document or binder.
Note For a Docuworks binder, the table of contents will be inserted into the page number that
is determined from the overall number of pages in all of the internal documents.
Refer to Help
?
• Basic Operations of Viewer > Use of Data on Pages > Creating or Deleting a Table
of Contents
• Working with Annotations > Using Annotations > Using Title Annotations

5 Combining Documents 59
5 Combining Documents
You can combine DocuWorks documents created by scanning paper documents and DocuWorks
documents created from other application data such as Word or Excel, into one document.
DocuWorks allows you to stack multiple DocuWorks documents into a single document, or into a
binder with each document remaining independent. DocuWorks alos allows you to stack multiple
PDF documents into a single document.
5.1 Stacking or Unstacking Documents
You can stack multiple DocuWorks documents into a single document. You can also stack
multiple PDF documents into a single document. Unstacking the multi-page documents breaks
the documents into pages, and each of these pages becomes a single-page document.
Stacking Documents
When stacking, the documents are added in the order in which they were selected. You can even
stack pages or documents that have different paper sizes or orientations.
1 In Desk, change to Thumbnail view.
2 Drag-and-drop a document on another document.
The dropped document is inserted before the front page of the destination document.
Important The stacking function cannot be used for the following types of documents:
• Binder documents
• DocuWorks protected documents
• DocuWorks signed documents
• Secured PDF documents
• Signed PDF documents
• Combination of PDF documents and non
• PDF documents
• Files other than DocuWorks files and PDF files
Note • Other methods:
• Select the first document and then select another one while holding down the
<Ctrl> key. Click the [Stack] button on the standard toolbar.
• Select the first document and then select another one while holding down the
<Ctrl> key. Select [Stack] from the [Edit] menu.

5 Combining Documents 60
• Select the first document and then select another one while holding down the
<Ctrl> key. Right-click on the selected document to display the pop-up menu, and
select [Stack].
• Document pages are stacked in the order in which they were selected into a single
document with the name of the document that was selected first.
Refer to Help
?
Operation Guide > Basic Operations of Desk > Manipulate DocuWorks Documents
> Stacking Documents
Unstacking Documents
You can unstack a stacked document into single-page documents.
1 In Desk, change to Thumbnail view.
2 Double-click on the paper clip of the stacked document.
Double-
click
The selected document will be multiple single-page documents.
Important The unstacking function cannot be used for the following types of documents:
• DocuWorks protected documents
• DocuWorks signed documents
• Secured PDF files
• Signed PDF files
• Files other than DocuWorks files and PDF files
Note • Other methods
• Select the stacked document, then click the [Unstack] button on the standard
toolbar.
• Select the document that you want to unstack, then select [Unstack] from the
[Edit] menu.
• Right-click on the document to display the pop-up menu, and select [Unstack]
from the menu.
• The names of the unstacked documents are the same as the original name with the
addition of a serial-number suffix.
Refer to Help
?
Operation Guide > Basic Operations of Desk > Manipulate DocuWorks Documents
> Unstacking a Document

5 Combining Documents 61
5.2 Combining Documents into a Binder
A binder is a container that can store multiple DocuWorks documents as individual documents.
If you stack multiple documents without using a binder, the stacked multiple documents will
become one single document. When stacking multiple documents into a binder, they are stored
as independent documents so that you can manage them while retaining the original data, the
header and footer information, and the properties of the document.
This section describes how to create a binder, and add, retrieve, replace, rename, or delete
documents. We recommend that you copy documents or binders before starting document
manipulation if you are not accustomed to these operations.
Viewing a Binder
Viewing a binder in thumbnail in Desk
In thumbnail view, a binder is displayed as follows:
When the size of the binder
and those of included
documents are same.
Binding
margin
When the size of the
binder is larger than
those of included
documents.
When the sizes of included documents
are larger than that of a binder.
The protruding edge is displayed in
dotted line.
When original data
are attached to the
documents.
When the binder
contains no
document.
Size and color
You can set these properties when newly creating a binder. If you want to change these
properties later, use the [General] tab in the [Document Properties] dialog box.
Original data
If the binder contains one or more documents with the original data attached, an icon is shown
on the binder.
Binding margin
Double-clicking the binding margin will open the [Binder Index] dialog box.
Display of the pages
A cover page is displayed when the binder is empty.
Number of pages
The current page number and the total number of pages in the binder are displayed. Nothing is
displayed if the binder is empty.
When a pageless document is displayed, a hyphen appears in place of the current page number.

5 Combining Documents 62
Viewing a listed binder in Desk
In List view, the binder icon is displayed to the left of the binder name.
Creating a Binder
1 In Desk, select [New] from the [File] menu, then select [DocuWorks Binder].
2 Change [Binder size] and [Binder color] as needed and click [OK].
A new binder is created on Desk.
3 Enter the new binder name (file name) and press the <Enter> key.
The binder name is changed.
Refer to Help
?
Operation Guide > Basic Operations of Desk > Operations Unique to Binders >
Creating a Binder

5 Combining Documents 63
Importing Documents to a Binder
1 Drag-and-drop one or more DocuWorks documents to a binder on Desk.
When importing a document by copying, drag-and-drop it while pressing the <Ctrl> key.
Drag-and-drop
The imported document is added to the front or back of the documents in the binder.
Note You can specify to add the imported document either to the front or back of documents
in the [Document Operation] tab of the [DocuWorks Desk Options] dialog box.
Refer to Help
?
• Operation Guide > Basic Operations of Desk > Operations Unique to Binders >
Importing Documents to a Binder
• Menus and Dialog Boxes > Desk > Dialog Boxes > [DocuWorks Desk Options] >
[DocuWorks Desk Options] - [Document Operation] tab
Other methods
1 Double-click the binding margin to display the [Binder Index] dialog box.
Binding
margin

5 Combining Documents 64
2 Drag-and-drop one or more documents into the [Binder Index] dialog box.
3 Click [Save and Close] to close the [Binder Index] dialog box.
Note You can specify to add the imported document either to the front or back of documents
in the [DocuWorks Desk Options] dialog box.
Refer to Help
?
• Operation Guide > Basic Operations of Desk > Operations Unique to Binders >
Importing Documents to a Binder
• Menus and Dialog Boxes > Desk > Dialog Boxes > [DocuWorks Desk Options] >
[DocuWorks Desk Options] - [Document Operation] tab
Exporting Documents from a Binder
1 Double-click the binding margin to display the [Binder Index] dialog box.
Binding
margin
2 Select one or more documents from the list in the [Binder Index] dialog box and drag-and-drop
them onto Desk or on the desktop.
3 Click [Save and Close] to close the [Binder Index] dialog box.
Note Other methods
• Right-click on the document name and select [Copy] or [Cut] in the pop-up menu to
export.
Refer to Help
?
Operation Guide > Basic Operations of Desk > Operations Unique to Binders >
Exporting Documents from a Binder

5 Combining Documents 65
Changing the Order of Documents within a Binder
1 Double-click the binding margin to display the [Binder Index] dialog box.
Binding
margin
2 To move one or more documents, drag them within the list in the [Binder Index] dialog box.
To copy one or more documents, drag them while pressing the <Ctrl> key.
When dragging a file, a guide line appears.
3 Click [Save and Close] to close the [Binder Index] dialog box.
Refer to Help
?
Operation Guide > Basic Operations of Desk > Operations Unique to Binders >
Modifying the Document Organization in a Binder

5 Combining Documents 66
Renaming the Document Organization in a Binder
1 Double-click the binding margin to display the [Binder Index] dialog box.
Binding
margin
2 Right-click on the document name to display the pop-up menu, and select [Rename Document].
3 Enter a new name, then press the <Enter> key.
4 Rename the document and click [Save and Close] to close the [Binder Index] dialog box.
Refer to Help
?
Operation Guide > Basic Operations of Desk > Operations Unique to Binders >
Modifying the Document Organization in a Binder
Deleting Documents in a Binder
1 Double-click the binding margin to display the [Binder Index] dialog box.
Binding
margin
2 Select one or more documents from the list in the [Binder Index] dialog box, then press the
<Delete> key.
3 Click [Save and Close] to close the [Binder Index] dialog box.
Note Other methods
• Right-click on the document name in the [Binder Index] dialog box, then select
[Delete] from the pop-up menu.
• Select the document you want to delete and select [Delete] from the [Edit] menu in
the [Binder Index] dialog box.
Refer to Help
?
Operation Guide > Basic Operations of Desk > Operations Unique to Binders >
Modifying the Document Organization in a Binder

5 Combining Documents 67
Deleting the Document in the Binder while Checking the Contents
By previewing a document in infoview in Viewer, you can delete it while checking its contents.
1 Double-click the binder in Desk to display Viewer.
2 Select [InfoView] from the [View] menu.
3 Select the [Binder Index] tab at the top of the infoview.
The document names in the binder are listed and a display mark appears next to the name of the document
currently displayed.
4 Select the document to delete and press the <Delete> key.
Or, right-click on the document to delete, to display the pop-up menu, and select [Delete] from
the menu.
5 Select [Exit] from the [File] menu in Viewer.
6 On the confirmation window, select [Yes] to save the changes.
Note You can also delete documents in a binder from Desk.
In Desk, double-click the binding margin to display the [Binder Index] dialog box. Rightclick on the document you want to delete, and select [Delete] from the pop-up menu.
Refer to Help
?
• Operation Guide > Basic Operations of Viewer > Operations Unique to Binders >
Displaying the Binder Index
• Operation Guide > Basic Operations of Viewer > Operations Unique to Binders
>Modifying the Document Organization in a Binder

6 Organizing Documents Using Folders 68
6 Organizing Documents
Using Folders
Documents and binders can be organized using folders.
You can create a new folder in the user folder in Desk or link to a Windows folder to which
documents or binders can be moved or copied.
The contents of the folder selected in the folder area are displayed in the workspace.
6.1 Organizing Documents Using a User Folder
Create a folder and organize documents or binders by moving or copying.
You can also move or copy a folder to a user folder in Desk, Windows Explorer, or the desktop.
Creating a Folder
When you install DocuWorks, a user folder is automatically created. You can create a new folder
under the user folder and organize files.
1 In Desk, select [New] from the [File] menu, then select [Folder].
A new folder is created in the folder that is currently open.
2 Enter a folder name, then press the <Enter> key.
3 Right-click the newly created folder, and select [Properties] from the pop-up menu.

6 Organizing Documents Using Folders 69
4 Change the [Color] and [Workspace Colors] as necessary.
If you want to change the background color and frame color in the selection state that have been specified
for the workspace, uncheck the [Same colors as the DocuWorks Desk settings] check box and select the
desired colors from the combo-box.
Note If you specify a different folder color or workspace background color for each folder in
the [Folder Property] dialog box, the selected folder can be easily identified.
Refer to Help
?
Operation Guide > Basic Operations of Desk > Operating on Folder > Creating or
Deleting a Folder
Importing Documents to a Folder
You can move or copy DocuWorks documents or binders to a folder.
1 Select one or more documents and drag-and-drop them into a folder.
When importing a document by copying, drag-and-drop it while pressing the <Ctrl> key.
2 When you select the folder, its icon changes to the open state and the files in that folder are
displayed in the workspace.

6 Organizing Documents Using Folders 70
6.2 Organizing Documents Using a Link Folder
You can manipulate Windows folders that are not displayed in Desk as Desk folders. These files
are stored in a link folder that is linked to a Windows folder or to a shared folder on the network.
Creating a Link Root Folder
A folder that is link-connected to a Windows folder or to a network shared folder is called "a link
root folder".
It can also be linked to a network shared folder located on another PC.
1 In Desk, select [Link] from the [Tools] menu, then select [New Link].
2 Change [Workspace Colors] as necessary.
3 Specify the path for the link connection in [Location], then click [OK].
The link root folder that is link-connected appears in the folder area.
Note Other methods
• 1. Drag-and-drop the link target folder from Windows Explorer or the desktop to the
folder area of Desk.
• 2. Specify items in the [Folder Property] dialog box and click [OK].
Refer to Help
?
Operation Guide > Basic Operations of Desk > Operating on Folder > Operating on
Link Folder > Creating a Link

6 Organizing Documents Using Folders 71
Disconnecting a Link
1 In Desk, select [Link] from the [Tools] menu, then select [Disconnect Link].
2 Select the folder from which you want to disconnect a link, then click [OK].
6.3 Cleaning Up the Recycle Bin
The recycle bin is a folder for temporarily storing those files deleted from Desk until they are
actually removed from the system.
Deleting Files from the Recycle Bin
1
Select [Empty Recycle Bin] from the [File] menu.
2 When the confirmation message appears, click [Yes].
The recycle bin will be emptied.
Appearance of the
empty recycle bin
Important • Documents and folders deleted from the recycle bin are not stored in the recycle bin of
the Windows system.
• It is possible to delete DocuWorks files and folders without using the recycle bin even it
has been set to be used, by pressing the <Shift> + <Delete> keys.
• You can set whether or not to use the recycle bin in the [DocuWorks Desk Options]
dialog box.
Appearance of the
recycle bin with trash

7 Printing 72
7Printing
You can print a document by enlarging or reducing it in order to fit to the paper size, or by reducing
it so that a pasted notepad protruding from the page can also be printed.
You can print DocuWorks documents in the same way as with other Windows applications.
7.1 Printing a Document
DocuWorks documents can be printed both from Desk and Viewer. You can print a document by
enlarging or reducing it in order to fit to the paper size, or by reducing it so that the notepad pasted
protruding the page can also be printed.
Printing
1 In Desk, select a document. Or, double-click the document or binder to display Viewer.
2 Click the [Print] button on the toolbar.
Or, select [Print] from the [File] menu.
3 Specify the print range or the number of copies to be printed in the [Print] dialog box, and click
[OK].
Refer to Help
?
• Operation Guide > Basic Operations of Desk (Viewer) >Print DocuWorks
Documents
• Menus and Dialog Boxes > Desk (Viewer) > Dialog Boxes > [Print]

7 Printing 73
Print by Enlarging or Reducing to Fit to the Paper Size
If you check [Fit to Paper Size], each page is enlarged or reduced to fit the paper size for printing
or outputting.
For example, a document containing different sizes of pages such as A3, B4, A4, and A5 can be
printed on A4 size paper by automatically enlarging or reducing each page.
Refer to Help
?
• Operation Guide > Basic Operations of Desk > Print DocuWorks Documents >
Setting Up a Printer
• Operation Guide > Use of Plug-ins > Arrange Page Layouts > Setting Up the Page
Layout Plug-in
Printing by Resizing a Document to Fit Print Area
If [Resize document to fit print area] is checked, the entire area including the protruding notepad
is automatically reduced to the printable area.
For example, the FAX header at the marginal portion of the page can be printed.
Refer to Help
?
Operation Guide > Basic Operations of Desk > Print DocuWorks Documents >
Setting Up a Printer
Printing by Including Notepad Annotation
If [Include NotePad Annotation] in addition to [Resize document to fit print area] is checked, the
entire area including the protruding notepad is reduced to the printable area.
Refer to Help
?
Operation Guide > Basic Operations of Desk > Print DocuWorks Documents >
Setting Up a Printer

7 Printing 74
Force to Print Slash Pattern for Transparent Color
If you check [Force to print slash pattern for transparent color], the document is printed with a
slash pattern for the transparent color of annotations, and so forth.
This option is useful for printers that cannot correctly print the transparent area of annotations.
Refer to Help
?
Operation Guide > Basic Operations of Desk > Print DocuWorks Documents >
Setting Up a Printer
Choose Output Destination by DocuWorks Paper Size
If you check [Choose output destination by DocuWorks paper size], the paper that fits the
respective page size is automatically selected for printing mixed-size documents.
Refer to Help
?
Operation Guide > Basic Operations of Desk > Print DocuWorks Documents >
Setting Up a Printer

7 Printing 75
7.2 Useful Features for Printing
You can print according to the application by using plug-in features in Desk.
Printing by Using the Same Settings: [Easy Printer] Plug-in
The [Easy Printer] plug-in allows you to print using the same settings just by clicking the plug-in
button in which print settings have been registered.
We recommend that you register frequently-used printer settings to speed up the printing
process. You can also divide print jobs, and on some printers you can print specific pages in
monochrome, color, or grayscale to speed up printing.
Select multiple documents
A button on
which 2-sided
printing is set
A button on
which 2 Up is
set
1 Select [Setting] from the [Plug-in] in the [Tools] menu in Desk.
2 Select [Easy Printer] from [Available Plug-ins] in the [Plug-in Setting] dialog box and click [Add].
3 Select either [Save the printer name and the printing settings] or [Save only the printer name] in
the [Selecting the Save mode] dialog box.
4 Select a printer in the [Printer Setup] dialog box, specify the paper or printing orientation, and
click [OK].
5 Enter the desired name for the [Easy Printer] plug-in that has been added to [Current Plug-in
Menu].
6 Click [Close].
A button for the newly set up Easy Printer is added to the toolbar.
7 Clicking the [Easy Printer] plug-in button allows you to print documents in the same manner as
when you select the [Print] button or [Print] from the [File] menu.
Important The settings that can be saved depend on the printer driver or its versions. Check the
available setting items in your operating environment.
Note Using the same procedure, you can register multiple Easy Printers and use them
according to the application. Registering multiple Easy Printers with different names
and icons makes it easy to identify the setting contents, even speeding up the printing
operation.
Refer to Help
?
Operation Guide > Use of Plug-ins > Use of Easy Printer > Setting Up the Easy
Printer Plug-in

7 Printing 76
Printing 2 Pages or 4 Pages on 1 Sheet: [Page Layout] Plug-in
You can print 2 pages or 4 pages on 1 sheet by using the [Page Layout] plug-in. A new document
consisting of laid-out pages is created, which you can print using a printer that has no page layout
function.
Page Layout
Combines 2 pages and lays them out on a page
Combines 4 pages and lays them out on a page
Refer to Help
?
Operation Guide > Use of Plug-ins > Arrange Page Layouts > Setting Up the Page
Layout Plug-in
Making a Booklet: [Page Layout] Plug-in
You can lay out pages to create a booklet by using the [Page Layout] plug-in. A new document
consisting of sorted and laid-out pages is created, which you can print using a printer that has no
page layout function.
Print pages as a booklet using a printer that has no function for booklet printing
Page layout
4
3
2
1
Important To make a booklet, a printer is required that is able to print on both sides of the paper. If
you are using a printer without double-side printing capability to print pages to make a
booklet, you must create 2 documents containing odd-numbered pages and evennumbered pages respectively, and print the odd-numbered-page document first, turn
over the sheet of paper, then print the even-numbered-page document.
41
2-sided
printing
23
Refer to Help
?
Operation Guide > Use of Plug-ins > Arrange Page Layouts > Setting Up the Page
Layout Plug-in

8 Searching 77
8 Searching
In Desk, you can search documents or binders using a specified file name, date, text, or
document properties as a keyword. Documents in other formats can also be searched.
In Viewer, you can search body text, and text annotation in the displayed document.
8.1 Searching for a Document in Desk
In Desk, you can search documents or binders using a specified file name, date text, or document
properties as a keyword. Documents in other formats such as PDF can also be searched.
Specify the search conditions and location, and execute a search.
Search Conditions
Click the [Find] button on the standard toolbar in Desk to display the [Find] dialog box. Before
starting a search, select each tab in the dialog box and specify the search conditions. You can
specify the following conditions:
Note The properties information of documents contained in the binder are excluded from the
search.
[Name & Location] tab
Use this tab to specify the document name, type of files, or locations to be searched.
Documents other than DocuWorks files can also be the target.
Check [Documents other than DocuWorks files will also be the target] in [File Type] if you want
to search files in other formats such as PDF.
[Date & Size] tab
Use this tab to search for documents by the size, or date they were updated, created, or
accessed.
You can specify a particular date or a range of dates.
[Text] tab
Use this tab to search for documents by a certain text string within the document.
You can also search in text annotations, text of OCR-processed pages, headers and footers.
[Document properties] tab
Use this tab to search for documents by document properties such as title or creator.

8 Searching 78
[Frequently used conditions] tab
If you frequently search using the same conditions, it is convenient to register a set of those
conditions.
You can register search conditions, and set the registered conditions to the respective tabs.
Refer to Help
?
Menus and Dialog Boxes > Desk > Dialog Boxes > [Find]
Searching for a Document
1
In Desk, click the [Find] button on the toolbar.
Or, select [Find] from the [Edit] menu.
2 Select the [Name & Location] tab and specify the document name or locations to be searched as
necessary.
Note If you want to search PDF files, select the [Names & Locations] tab and check
[Documents other than DocuWorks files will also be the target].

8 Searching 79
3 Select the [Date & Size] tab and specify the dates or size as necessary.
4 Select the [Text] tab and specify the text string to be searched as necessary. Also specify the
text type searched in DocuWorks documents or in PDF files.

8 Searching 80
5 Select the [Document Properties] tab and specify the text string or other settings as necessary.
6 Select the [Frequently used conditions] tab and specify the frequently used conditions as
necessary.

8 Searching 81
7 Click [Find Now].
The search result is displayed in the [Search result].
Note [Search result] can also be displayed as thumbnails. Select [View As Thumbnails] from
the [View] menu in the [Find] dialog box.
Refer to Help
?
• Operation Guide > Basic Operations of Desk > Search DocuWorks Documents >
Specify Search Conditions
• Operation Guide > Basic Operations of Desk > Search DocuWorks Documents >
Performing a Search
Saving the Search Result
Specify the [Search result] using one of the following 3 saving methods selected from the [File]
menu in the [Find] dialog box.
Save the result in CSV format
Use this option to export the search result information to a file and save it in CSV format.
Save documents
Saves the document selected from [Search result] to the specified folder.
Create shortcut
Creates a shortcut to the document selected from [Search result] in the specified folder.
Refer to Help
?
Operation Guide > Basic Operations of Desk > Search DocuWorks Documents >
Saving the Search Result
Opening a Document from the Search Result
Double-click on the document listed in [Search result] to open it.
Being a DocuWorks document, the text string that has been specified for [Character string] in the
[Text] tab is displayed in a selected state when opening the document in [Search Result].
Or, click the document displayed in [Search result] and click [Display Icon]. The corresponding
DocuWorks document in the Desk workspace is selected.
Refer to Help
?
Operation Guide > Basic Operations of Desk > Search DocuWorks Documents >
Saving the Search Result

8 Searching 82
8.2 Searching for a Text String in Viewer
In Viewer, you can search for body text, and text annotations in the displayed document.
Search Conditions
Click the [Find] button on the find toolbar in Viewer to display the [Find] dialog box. Specify
the search conditions of the target text. You can specify the following conditions:
Text
Enter a text string to search. You can specify multiple character strings by delimiting them with
spaces.
If multiple character strings are specified, you can search for documents containing any of the
specified character strings.
Target
Check to specify the text type to be searched. You can select multiple text types.
The types of that can be targets of a search are the text of application pages, text of image pages,
and text annotations.
Note Character strings that spread over 2 pages, and headers and footers specified in
Ignore Case
You can specify whether the system ignores the difference of uppercase and lowercase.
- Since DocuWorks documents are created using various methods, character strings may not
be included in the search even if they appear as text because they have been processed as
images instead of text, the orientation is different, or optical recognition has failed. These
characteristics apply not only to Viewer or Desk, but also to plug-ins such as the "Find and
Mark" plug-in.
Viewer cannot be searched.
Refer to Help
?
Operation Guide > Basic Operations of Viewer > Use of Data on Pages > Search for
Text > About Text Search

8 Searching 83
Searching for a Text String in Documents
1 In Desk, double-click on the search-target document to display the Viewer window.
2 Click the [Find] button on the find toolbar.
Or, select [Find] from the [Edit] menu.
Note Other methods
Enter a text string in [Search string]
this case, you cannot specify the type of target text string.
on the find toolbar. In
3 Enter a text string to search for in the [Find] dialog box.
4 Check the text type to include in the search.
5 Click [Find Next].
This closes the [Find] dialog box and starts the search for text strings. If the text string is found, that part is
selected.
6 To search for the next hit, select [Find Next] from the [Edit] menu.
Or click [Find Next] in the [Find] dialog box.
To search for the previous text string, select [Find Previous] from the [Edit] menu.
Or click [Find Previous] in the [Find] dialog box.
If another text string is found, that part is selected.
Note Other methods
Click the [Find Next] button or the [Find Previous]button form the find toolbar.
Refer to Help
?
Operation Guide > Basic Operations of Viewer > Use of Data on Pages > Search for
Text > Searching for Text String

8 Searching 84
8.3 Adding a Mark to the Search Result
You can use the [Find and Mark] plug-in to search for text strings in a document and attach
annotations to the hit.
A new document of the search result with the file name [original document name - mark] is
created in Desk.
Setting up the [Find and Mark] Plug-in
In Desk, select the document to search in, and click the [Find and Mark] button .
1
Or, select [Standard Plug-in] from the [Plug-in] in the [Tools] menu, then select [Find and Mark].
2 Enter the text string to be searched for, and specify the type of text included in the search as
necessary.
3 Click [Details].
4 Check the annotation type that you want to add to the find result and click [Details] to set colors
and sizes of annotations as necessary.

8 Searching 85
5 Click [OK] to close the [Find and Mark Plug-in Settings] dialog box.
6 Click [Start] in the [Find and Mark] dialog box.
A new document of the search result with the file name [original document name - mark] is created in the
Desk workspace. Annotations are automatically attached to those pages on which the search text strings
are found.
Rectangle annotation
(Text string found)
(Pages on which text strings have been found)
Text annotation
(Search string)
Notepad annotation
Refer to Help
?
Operation Guide > Use of Plug-ins > Mark the Search Result

8 Searching 86
8.4 Search PDF Files
PDF files can also be searched as DocuWorks documents. You can search not only for text in a
document but also for text annotations or bookmarks.
1 In Desk, click the [Find] button on the toolbar.
Or, select [Find] from the [Edit] menu.
2 Select the [Names & Locations] tab and check [Documents other than DocuWorks files will also
be the target].

8 Searching 87
3 Select the [Text] tab.
4 Enter the text string in [Character string] and check the desired type of text in [PDF document].
5 Click [Find Now].
PDF files containing the search text are displayed in [Search result].

9 Securities and Digital Signature 88
9 Securities and Digital
Signature
With the security settings, you can restrict users who can open DocuWorks files to those who
know the password or possess a specific electronic signature. You can also protect DocuWorks
files by restricting operations such as printing and editing.
There are 3 types of security settings available: password, DocuWorks Electronic Signature, and
digital certificate, for which you can specify the users who are allowed to open or manipulate
documents in respective ways.
You can sign a DocuWorks document in the same manner as you putting a seal or a signature
on a paper document. When documents are signed, it is possible to confirm the signer and the
contents of the documents at the point when they were signed, thus to prevent tampering or
forgery.
This section describes how to set these 3 types of securities and the features of the DocuWorks
Electronic Signature, as well as the digital certificate.
9.1 Overview of Securities
You can protect confidential information by setting the security for documents. Documents and
binders that have their security configured are called protected documents.
Types of Securities
Password, DocuWorks Electronic Signature, and digital certificate are the 3 types of security
settings available, for which you can specify the users who are allowed to open or manipulate
documents in respective ways.
Password-protected security
Use this method to configure the security so that only those users who know the password can
open and manipulate a document. Select [Password (V4 compatible)] or [Password (128-bit V4
non-compatible)]. If the document is Ver. 4 or earlier, and protected with [Password (V4
compatible)], it can be opened with DocuWorks Ver. 4.x. If the document is protected with
[Password (128 bit V4 non-compatible)], it cannot be opened with DocuWorks Ver. 4.x, although
it offers more secure encryption.
Security using DocuWorks Electronic Signature
Electronic Signature is a unique function to DocuWorks. You can use this function if all of the
users create their own electronic signature and exchanges their credential information with one
another. It is useful for protecting documents within a relatively small group of users.
Security using a digital certificate
Use this to configure the security so that only those users who have a certificate issued by a
Certificate Authority (CA) can open and manipulate a document. You can use this function if all
of the users obtain public key certificates from a Certification Authority and exchange their
certificates with one another. It is useful for protecting documents within a large group or among
an unspecified number of users.

9 Securities and Digital Signature 89
Refer to Help
?
Operation Guide > Use of Securities > About Securities > About Protecting
Documents
Operations that can be Restricted
Prohibit editing of a document
Operations such as moving, adding, or deleting pages, stacking or unstacking, rotating, reducing
noise, changing the organization of documents in a binder, and adding or deleting original data
are not possible. Annotations can be manipulated.
Prohibit editing of an annotation
Operations such as hiding or showing, adding, editing, or deleting annotations, and adding
Electronic Signatures to annotations are prohibited.
Prohibit printing
Printing, preview operation for printing in Viewer, Easy Printer, [Conversion to PDF] plug-in, and
[Page Layout] plug-in are prohibited.
Prohibit copying
Operations that copy a part of texts or images in a document such as copying a page, an
annotation, or a document in a binder are not allowed. In addition, [Export Original Data] and
[Image Converter] commands are not allowed to use.
Refer to Help
?
Operation Guide > Use of Securities > About Securities > About Restricting
Operations
Confirming the Prohibited Operations
1 In Desk, select a protected document and select [Properties] from the [File] menu.
2 Select the [Security] tab in the [Document Properties] dialog box.
The restricted operation settings are displayed with checkmarks.
Refer to Help
?
Operation Guide > Use of Securities > Set Up Securities > Confirming the Security
Settings

9 Securities and Digital Signature 90
9.2 Configuring the Security Using a Password
You can configure the security so that only those users who know the password can open and
manipulate a document.
Setting a Password
To protect a document using a password, the user should specify the password for configuring
the security.
Important If you forget the open password or full access password, you cannot open the
document or change its settings. Make sure to remember the password.
1 In Desk, select a document to be password-protected.
You can select more than one document, or binder.
2 Select [Security] from the [Tools] menu, then select [Security Settings].
3 Select [Password (V4 compatible)] or [Password (128-bit V4 non-compatible)], then click [OK].
4 Check the items for [Restricted operations] as necessary.

9 Securities and Digital Signature 91
5 Enter the [Open password].
6 If necessary, enter the [Full access password] and [Comment].
7 Click [Set] to close the [Security Settings] dialog box.
8 Enter the [Open password] again in the [Passwords Confirmation] dialog box.
If you set the [Full access password], enter the [Full access password].
9 Click [OK] to close the [Password Confirmation] dialog box.
A padlock mark representing security with password appears on the thumbnail of that document.
Note You can also configure securities in Viewer. For details, refer to Help.
Refer to Help
?
Operation Guide > Use of Securities > Set Up Securities > Changing or Removing
the Security Settings
Opening a Password-protected Document
Before opening the protected document, confirm the password to open.
1 Double-click the password-protected document.
2 Enter the appropriate password, then click [OK].
The restricted operations are displayed in the [DocuWorks Viewer] dialog box.
3 Click [OK] to close the [DocuWorks Viewer] dialog box.
The password-protected document opens.
Refer to Help
?
Operation Guide > Use of Securities > Set Up Securities > Opening a Protected
Document

9 Securities and Digital Signature 92
9.3 Security Using DocuWorks Electronic Signature
You can configure the security so that only those users who have a specific electronic signature
can open and manipulate a document. Electronic Signature is a unique function to DocuWorks.
You can use this function if all of the users create their own electronic signatures and exchange
their credential information with one another. It is useful for protecting documents within a
relatively small group of users.
Flow of Operations
Creating a DocuWorks Electronic Signature
1) Creating an Electronic Signature case
Create a case for storing electronic signatures to be used with DocuWorks Electronic
Signature.
2) Creating [My Signature]
Use a bitmap file of the signature to create an Electronic Signature.
Bitmap [My signature] in the Electronic Signature Case
3) Registering electronic signatures of other users
Use the credential information on electric signatures sent from other users to register them in
the [Trusted Electronic Signatures]. Register the signature only when you can confirm that
the credential information was created by that user.
Configuring the security using DocuWorks Electronic Signature
1) Select a document or binder to be protected. Then select [Security] from the [Tools] menu,
then select [Security Settings].
2) Select [DocuWorks Electronic Signature].
3) Open the Electronic Signature Case in which the electronic signature for security setting is
stored.
4) Set the restrictions on operations.
5) Add the Electronic Signature to [Signature capable of opening the document] or to [Signature
capable of entering full access mode] by clicking [Add].
6) Click [Set] in the [Security Settings (DocuWorks Electronic Signature)] dialog box.

9 Securities and Digital Signature 93
Opening an electronic signature-protected document
1) Open the Electronic Signature Case. If there are multiple cases, you must open the one
containing the electronic signature used for security setting as My Electronic Signature.
2) Open the electronic signature-protected document.
Refer to Help
?
• Operation Guide > Use of Securities > About Securities > Flow of Security
Operations
• Operation Guide > Use of Securities > Set Up Securities > Set Up New Security >
Configuring Electronic Signature-protected Security
9.4 Security Using a Digital Certificate
Use this to configure the security so that only those users who have a certificate issued by a
Certificate Authority (CA) can open and manipulate a document.
You can use this function if all of the users obtain the public key certificates from a Certification
Authority and exchange their certificates with one another. It is useful for protecting documents
within a large group or among an unspecified number of users.
Flow of Operations
Preparing a digital certificate
1) Install the certificate on the [Personal] tab or [Other People] tab in the [Contents] tab of the
Windows Internet Explorer [Internet Options] dialog box.
Configuring a security using a digital certificate
1) Select a document or binder to be protected and select [Tools] > [Security] > [Security
Settings].
2) Select [Digital Certificate (V4 non-compatible)].
3) Set the restrictions on operations in the [Security Settings (Digital Certificate)] dialog box.
4) Click [Add] next to [Signature capable of opening the document] or [Signature capable of
entering full access mode] to display the [Add Certificate] dialog box and select the
certificate.
5) In the [Security Settings (Digital Certificate)] dialog box, click [Set].
Opening a digital certificate-protected document
Open the digital certificate-protected document.
Refer to Help
?
Operation Guide > Use of Securities > Set Up Securities > Set Up New Security >
Configuring Digital Certificate-protected Security

9 Securities and Digital Signature 94
9.5 Overview of Signatures
You can sign a DocuWorks document as if you were putting a seal or signature on a paper
document. When documents are signed, it is possible to confirm the signer and the contents of
the documents at the point when they were signed, thus preventing tampering and forgery.
For a signature on a paper document, you can confirm the signer and the date that it was signed
by looking at it. For a digital signature, you can confirm that the signer himself/herself has created
the digital signature and that the document has not been modified since its signing by obtaining
its credential information to verify the digital signature. If there are multiple digital signatures for
a document, you can confirm the order in which they were signed. You can also restore the
document to the state immediately before or after each signature was appended.
Signed Documents
A signed DocuWorks file is shown with a signature mark in Thumbnail view of Desk.
Important DocuWorks Electronic Signature does not use digital certificates issued by a
Certification Authority. When you print DocuWorks documents marked with the
DocuWorks Electronic Signature imprint or the signature image of a Digital Certificate
onto paper documents, the paper documents can not be used as legal deeds or signed
documents.
Refer to Help
?
Operation Guide > Use of Signatures > About Signatures

9 Securities and Digital Signature 95
9.6 Security Using DocuWorks Electronic Signature
You can sign a document using a signature from the Electronic Signature Case. You can also
verify the trustworthiness of an electronic signature by comparing the signature in the Electronic
Signature Case with the impression on the document.
Configuration of DocuWorks Electronic Signature
Electronic Signature
An electronic signature is used to affix an imprint on a DocuWorks document page as you would
put a seal on a paper document. You must prepare the images you want to use for the imprint.
You can use bitmap files smaller than 9.5 MB as electronic signature images.
Electronic Signature Case
Store My Electronic Signature and Trusted Electronic Signatures. Set the password when
creating an Electronic Signature Case. This password is required when you open the Electronic
Signature Case.
My Signature
Use this signature when signing a document or opening an electronic signature-protected
document.
Trusted Signature
A Trusted Signature is an electronic signature to be collated when verifying the electronic
signature affixed on a document. It is also used when you configure the security based on
electronic signature.
Credential information of an electronic signature
Credential information is a DocuWorks document that contains information such as the
impression image, owner's name and expiration date of an electronic signature. It is used to have
others add your My Signature to their Electronic Signature Cases as their Trusted Signatures.
Refer to Help
?
Flow of Operations
Creating a DocuWorks Electronic Signature
Operation Guide > Use of Signatures > Use of Signatures with Electronic Signature
> About Signatures with Electronic Signature
1) Creating an Electronic Signature case
2) Creating a My Signature
3) Creating and distributing credential information
4) Adding a trusted electronic signature
Signing a Document with a DocuWorks Electronic Signature
1) Signing a Document with a My Signature
2) Confirming signature information

9 Securities and Digital Signature 96
Verifying a DocuWorks Electronic Signature
1) Verifying verification statuses of electronic signatures
Refer to Help
?
Operation Guide > Use of Signatures > Use of Signatures with Electronic Signature
> About Signatures with Electronic Signature > Operational Flow of Electronic
Signature

9 Securities and Digital Signature 97
9.7 Security Using a Digital Certificate
A digital signature generally means a signature made electronically, but in this manual it refers to
signing with the use of a private key possessed only by a specific user on DocuWorks documents,
based on the public key cryptographic technology. A person who receives a signed DocuWorks
document can obtain the signer's public key from the certificate to verify the signature. You can
confirm that the DocuWorks document has not been changed since it was signed and that the
signer himself/herself owns the private key.
Difference from DocuWorks Electronic Signature
DocuWorks Electronic Signature is designed to be used within a small group of people who know
one another. Using it on an external server or under a service contract with a third-party
organization is not assumed.
On the other hand, a digital certificate is a module based on standard specifications that
DocuWorks and other PKI applications can use in common, and is largely intended for use on the
Internet among a large number of people.
Refer to Help
?
• Operation Guide > Use of Signatures > Use of Signatures with Digital Certificate >
About Digital Certificate
• Operation Guide > Use of Signatures > Use of Signatures with Digital Certificate >
About Digital Certificate > About Certificate, Public Key, and Secret Key
Flow of Operations
Security using a digital certificate
1) Setting up a signature
2) Setting up a certificate
3) Setting display options
Signing with digital certificate
1) Signing a document
2) Confirming signature information
3) Displaying signature list
Verifying a signature with digital certificate
1) Verifying signatures
Refer to Help
?
• Operation Guide > Use of Signatures > Use of Signatures with Digital Certificate >
Create a Signature with Digital Certificate
• Operation Guide > Use of Signatures > Use of Signatures with Digital Certificate >
Sign with Digital Certificate
• Operation Guide > Use of Signatures > Use of Signatures with Digital Certificate >
Verify with Digital Certificate

10 Converting a Document to Another Format 98
10Converting a Document to
Another Format
This feature allows you to create a PDF file just by opening a document that has been created
using DocuWorks or another application, and printing it to [Adobe PDF] as the destination.
You can also convert DocuWorks files to image files. When converting to a PDF file, you can unify
the mixed-sized pages of a DocuWorks document or binder by enlarging or reducing, or change
the orientation of the document or binder. Moreover, you can manage the converted PDF file on
DocuWorks Desk such as displaying thumbnails or performing a search.
10.1 Converting to a PDF File
You can convert DocuWorks documents to PDF files, display thumbnails of PDF files, or execute
a search on them.
To do this, Adobe PDF Creation Add-On, Adobe
Elements 7.0, Adobe® Acrobat® 6.0, Adobe® Acrobat® 7.0, or Adobe® Acrobat® 8, must be
installed on your PC. In addition, you must set the [Adobe PDF] printer in order to convert a
document to a PDF file.
®
Acrobat® Elements 6.0, Adobe® Acrobat
®
Setting Up the [Conversion to PDF] Plug-in
You can specify the orientation and size of paper, and the setting for enlarging or reducing the
size for converting a DocuWorks file to a PDF file in the [Conversion to PDF] plug-in in Desk.
Setup these conversion settings when executing the plug-in for the first time after installation. You
can also change the settings later.
1 Select [Setting] from the [Plug-in] in the [Tools] menu in Desk.
2 Select [Conversion to PDF] from [Current Plug-in Menu] in the [Plug-in Setting] dialog box, then
click [Settings].
The following message appears when you set up this setting for the first time after installing DocuWorks on
a PC running under Windows 2000, Windows XP, or Windows Vista.

10 Converting a Document to Another Format 99
3 If you are using Windows 2000, Windows XP, or Windows Vista the [Adobe PDF Document
Properties] dialog box appears. Uncheck [Do not send fonts to Adobe PDF] in the [Adobe PDF
Settings] tab and click [OK].
Note Uncheck the [Do not send fonts to "Adobe PDF"] checkbox and click [OK] for Adobe
Acrobat 7.0 Elements, Adobe Acrobat Elements 6.0, Adobe Acrobat 7.0, and Adobe
Acrobat 6.0.
4 Specify each item in the [Conversion to PDF Settings] dialog box.
5 Click [OK] to close the [Conversion to PDF Settings] dialog box.
Note If you have not set up these conversion settings, when you click the [Conversion to
PDF] button on the plug-in toolbar, the message in Step 2 appears, from which you can
specify the settings as described above. In this case, clicking [OK] in Step 5 executes
conversion to a PDF file.

10 Converting a Document to Another Format 100
Converting to a PDF File
1
In Desk, select a document and click the [Conversion to PDF] button on the standard plug-in
toolbar.
The [Conversion to PDF] dialog box appears. When the conversion is completed, a PDF file is created in
the Desk workspace.
Refer to Help
?
Operation Guide > Use of Plug-ins > Conversion to PDF
10.2 Converting Documents to Image Files
You can convert documents to image files (TIFF, JPEG, BMP, or PDF files).
1 In Desk, select a document or binder that you want to convert to an image file and click the
[Image Converter] button on the plug-in toolbar.
Or, double-click on the document to be converted to an image file, and select
[Image Converter] from the [File] menu.
2 Select either [Bitmap File], [TIFF File], [JPEG File], or [PDF File] from the [Format] pull-down
menu.
3 Use this dialog box to specify other settings including [Save To], [Page Range], and
[Resolution].
 Loading...