

Page 1

Splash RPX-i Color Server
Printing Guide
Page 2

© 2006 Electronics for Imaging, Inc. The information in this publication is covered
under Legal Notices for this product.
45054810
05 May 2006
Page 3

7
7
9
ONTENTS
C
CONTENTS
NTRODUCTION
I
Terminology and conventions
About this document
RINTING
P
FROM
Installing the Mac OS X printer files
Installing from the Splash RPX-i User Software and Documentation CD 10
Downloading from the Splash RPX-i 11
M
AC
OS X
3
8
10
Setting up the Splash RPX-i for printing
Setting up with Mac OS X v10.4 or later 12
Setting up with Mac OS X v10.3.x or earlier 18
Selecting the PPD file 23
Using the Virtual Printers 23
Printing from Mac OS X computers
Selecting the Splash RPX-i in the Printer List 25
Setting print options from Mac OS X 26
Enabling Two Way Communication 37
Defining custom page sizes from Mac OS X 38
12
25
Page 4
40
43
53
CONTENTS
RINTING
P
RINTING
P
FROM
Installing the Mac OS 9 printer files
Installing from the Splash RPX-i User Software and Documentation CD 41
Downloading from the Splash RPX-i 42
Setting up the Splash RPX-i for printing
Printing from Mac OS 9 computers
Selecting the Splash RPX-i in the Chooser 45
Setting print options from Mac OS 9 46
Defining custom page sizes from Mac OS 9 51
FROM
Adding a printer with the TCP/IP with LPR printing connection
M
W
AC
OS 9
INDOWS
4
41
45
54
Preparing the Windows printer files 54
Setting up the TCP/IP with LPR printing connection 56
Setting up the Splash RPX-i for printing 59
Adding a printer with the SMB printing connection
Setting up the Splash RPX-i with Point and Print 62
Uninstalling the printer files 63
Printing from Windows computers
Selecting the Splash RPX-i from the Printers list 64
Setting print options from Windows 65
Enabling Two Way Communication 73
Defining custom page sizes 75
62
64
Page 5

77
77
79
CONTENTS
P
RINT
PTIONS
O
About printer drivers and PPD files
About print options
Print option override hierarchy 78
Setting print options 78
Splash RPX-i print options
More about print options
File Handling 89
Job Handling 89
Media Quality 92
Output 93
Paper Source 94
5
78
89
NDEX
I
Secure Printing 94
Secure Access 96
99
Page 6

Page 7

NTRODUCTION
I
Terminology and conventions
INTRODUCTION
This document describes how to install the printer drivers and PostScript printer description
(PPD) files for the Splash RPX-i Color Server, how to set up the Splash RPX-i Color Server
for printing, and how to print from Apple Mac OS and Microsoft Windows computers.
It also provides information about the Splash RPX-i print options.
For information about setting up network servers and clients to use the Splash RPX-i
Color Server, see the Configuration Guide . For general information about using the copier,
computer, application software, or network, see the documentation that accompanies
those products.
7
This document uses the following terminology and conventions.
Term or convention Refers to
Copier DocuColor 240/250
Mac OS Mac OS 9, Mac OS X
Splash RPX-i Splash RPX-i Color Server
Titles in italics
Windows Windows 2000, Windows XP, Windows Server 2003
Other documents in this set
Page 8

INTRODUCTION
About this document
This document covers the following topics:
•Installing printer files on Mac OS computers
•Setting up the Splash RPX-i for printing from Mac OS computers
•Printing from Mac OS computers
•Installing printer files on Windows computers
•Setting up the printing connections from Windows computers
•Printing from Windows computers
•Splash RPX-i print options
8
Page 9

RINTING
P
FROM
PRINTING FROM MAC OS X
AC
M
OS X
To print a job from a Mac OS X computer to the Splash RPX-i, you must install the
PostScript printer files for the Splash RPX-i and set up the Splash RPX-i for printing.
The printer files are provided on the Splash RPX-i User Software and Documentation CD
or can be downloaded directly from the Splash RPX-i over the network. This chapter
describes the procedures for installing the printer files, setting up the Splash RPX-i for
printing, and printing from a Mac OS X computer.
See the following table for the location of each procedure.
Procedure See
Installing the Mac OS X printer files page 10
9
Setting up the Splash RPX-i for printing page 12
Printing from Mac OS X computers page 25
Page 10

:
:
PRINTING FROM MAC OS X
Installing the Mac OS X printer files
The following sections describe how to install the Mac OS X printer files for the
Splash RPX-i.
N
OTE
For system requirements, see Getting Started.
Installing from the Splash RPX-i User Software and Documentation CD
The Splash RPX-i User Software and Documentation CD provides the following printer files
for the Splash RPX-i.
OSX installer
•
computer.
•
Language folders
to open the folders or install them manually on your computer. The files are installed to
the appropriate folders by OSX installer.
•
PDE plug-in files
on your computer.
installs the printer files that are necessary to print from the Mac OS X
contain the PPD files that are installed by OSX installer. You do not need
are installed by OSX installer. You do not need to install them manually
10
T
O
INSTALL
1 Quit all open applications.
2 Make sure that the Printer Setup Utility (or Print Center) is not running on your computer.
THE
PRINTER
FILES
FOR
M
AC
OS X
Printer Setup Utility (or Print Center) updates the list of available printers when it restarts.
If a printer description file is added while it is running, you cannot select the associated
printer model until you restart.
3 Insert the Splash RPX-i User Software and Documentation CD into the CD-ROM drive.
4 Locate the OSX installer file in the following folder:
Splash RPX-i User Software and Documentation CD : Printer Drivers : RPX-i MacOS X
:Printer Driver
5 Double-click the OSX installer icon to start installing the printer files.
6Follow the on-screen instructions.
The OSX installer installs the printer files that correspond to the Splash RPX-i.
The printer files are installed to the following folders:
PPDs:
•
•
N
<Startup disk> : Library :Printers : PPDs:Contents : Resources : <language>.lproj
PDE plug-ins and filter:
OTE
On Mac OS X v10.2.x, the PDE plug-ins are installed to the following folder:
<Startup disk> : Library :Printers : Splash
<Startup disk> : Library :PPD Plugins: Printers : SplashPDE.plugin
7 Click Quit.
Page 11
PRINTING FROM MAC OS X
Downloading from the Splash RPX-i
You can download printer files to your computer directly from the Splash RPX-i over
the network and then install them following the procedures in the previous section.
For more information about downloading files from the Splash RPX-i, see
the Job Management Guide .
T
O
DOWNLOAD
M
AC
OS X
THE
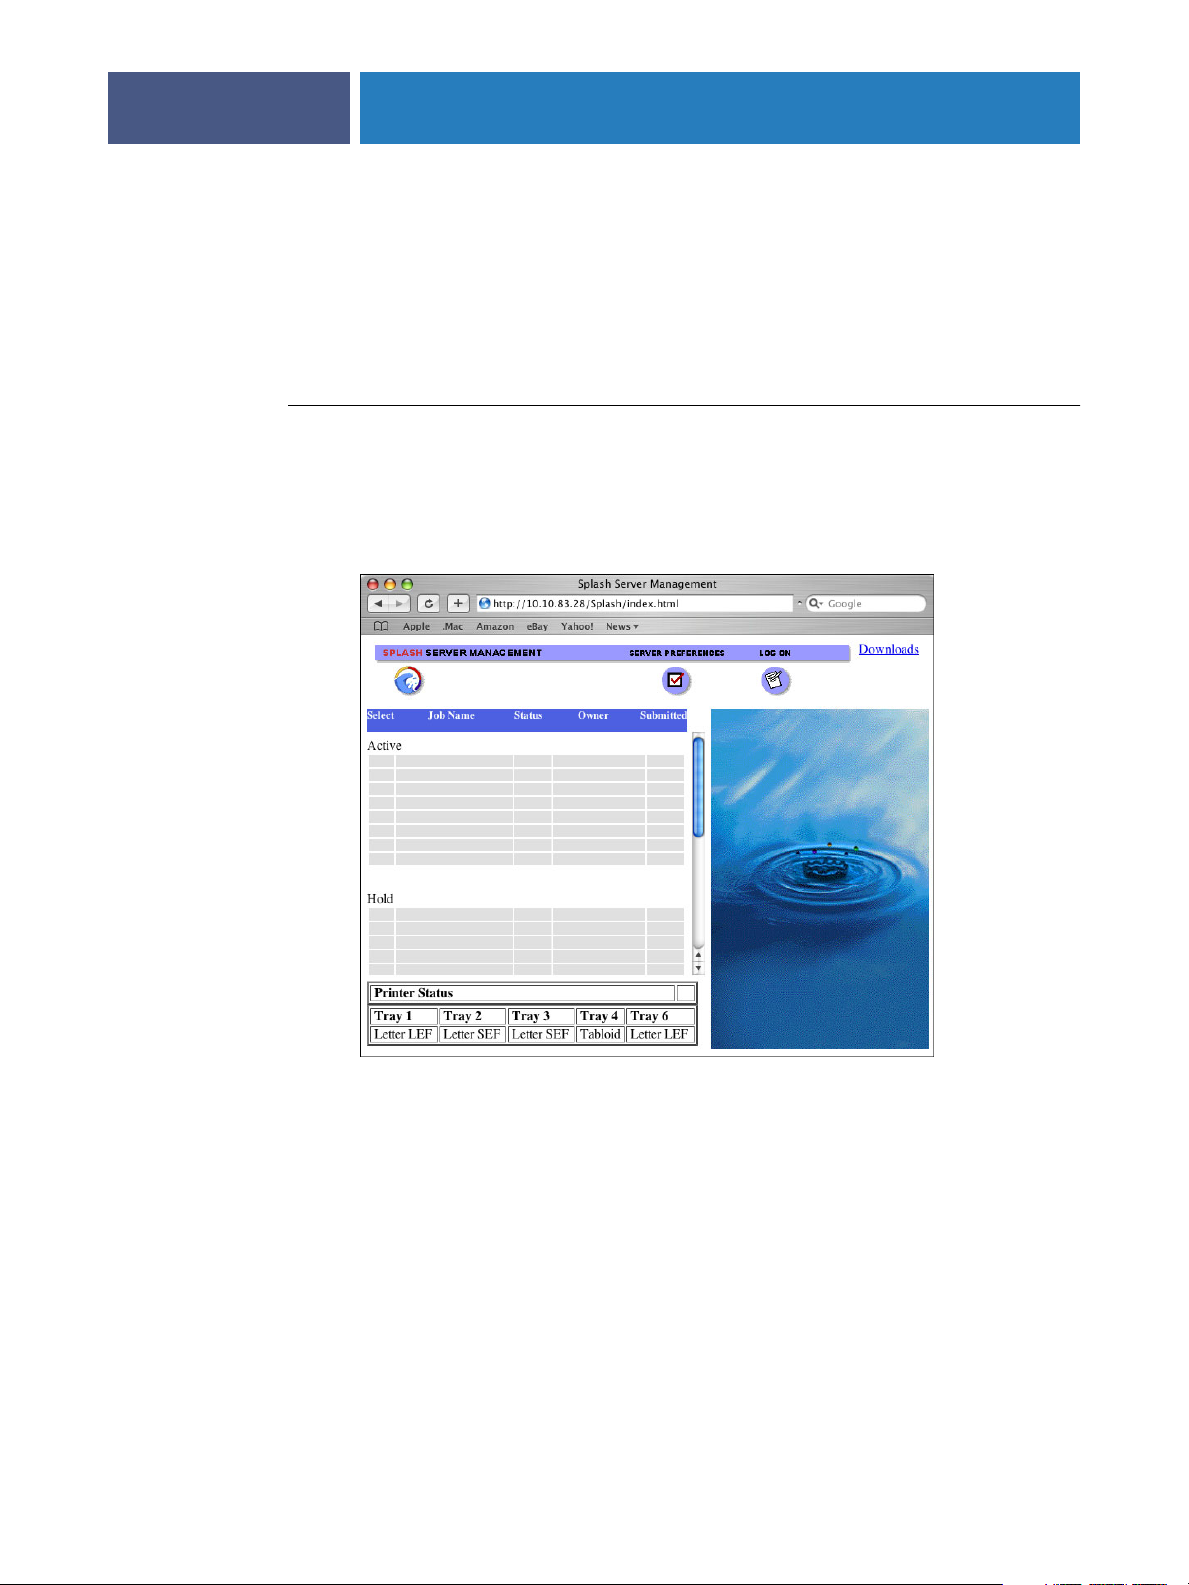
1 Start your Internet browser.
2Type the IP address of the Splash RPX-i and click Go.
PRINTER
FILES
The Splash Server Management dialog box appears.
11
3 Click Downloads.
4 Click Splash Installer Downloads.
5 Click RPX-i MacOS X Drivers.zip and save the file to the desktop.
6 Expand the archive.
7 Open the RPX-i MacOS X folder.
8 Open the Printer Driver folder.
9 Double-click the OSX installer.
To install the printer files, follow the procedure on page 10.
Page 12
PRINTING FROM MAC OS X
Setting up the Splash RPX-i for printing
The following section describes how to set up the Splash RPX-i on a Mac OS X computer.
NOTE: The steps for the computers with Mac OS X v10.4 or later and the computers with
Mac OS v10.3.x or earlier are different. Differences are noted in the following sections.
Setting up with Mac OS X v10.4 or later
Use the following steps for setting up the Splash RPX-i on a computer with Mac OS X v10.4
or later.
TO SET UP THE SPLASH RPX-I FOR PRINTING
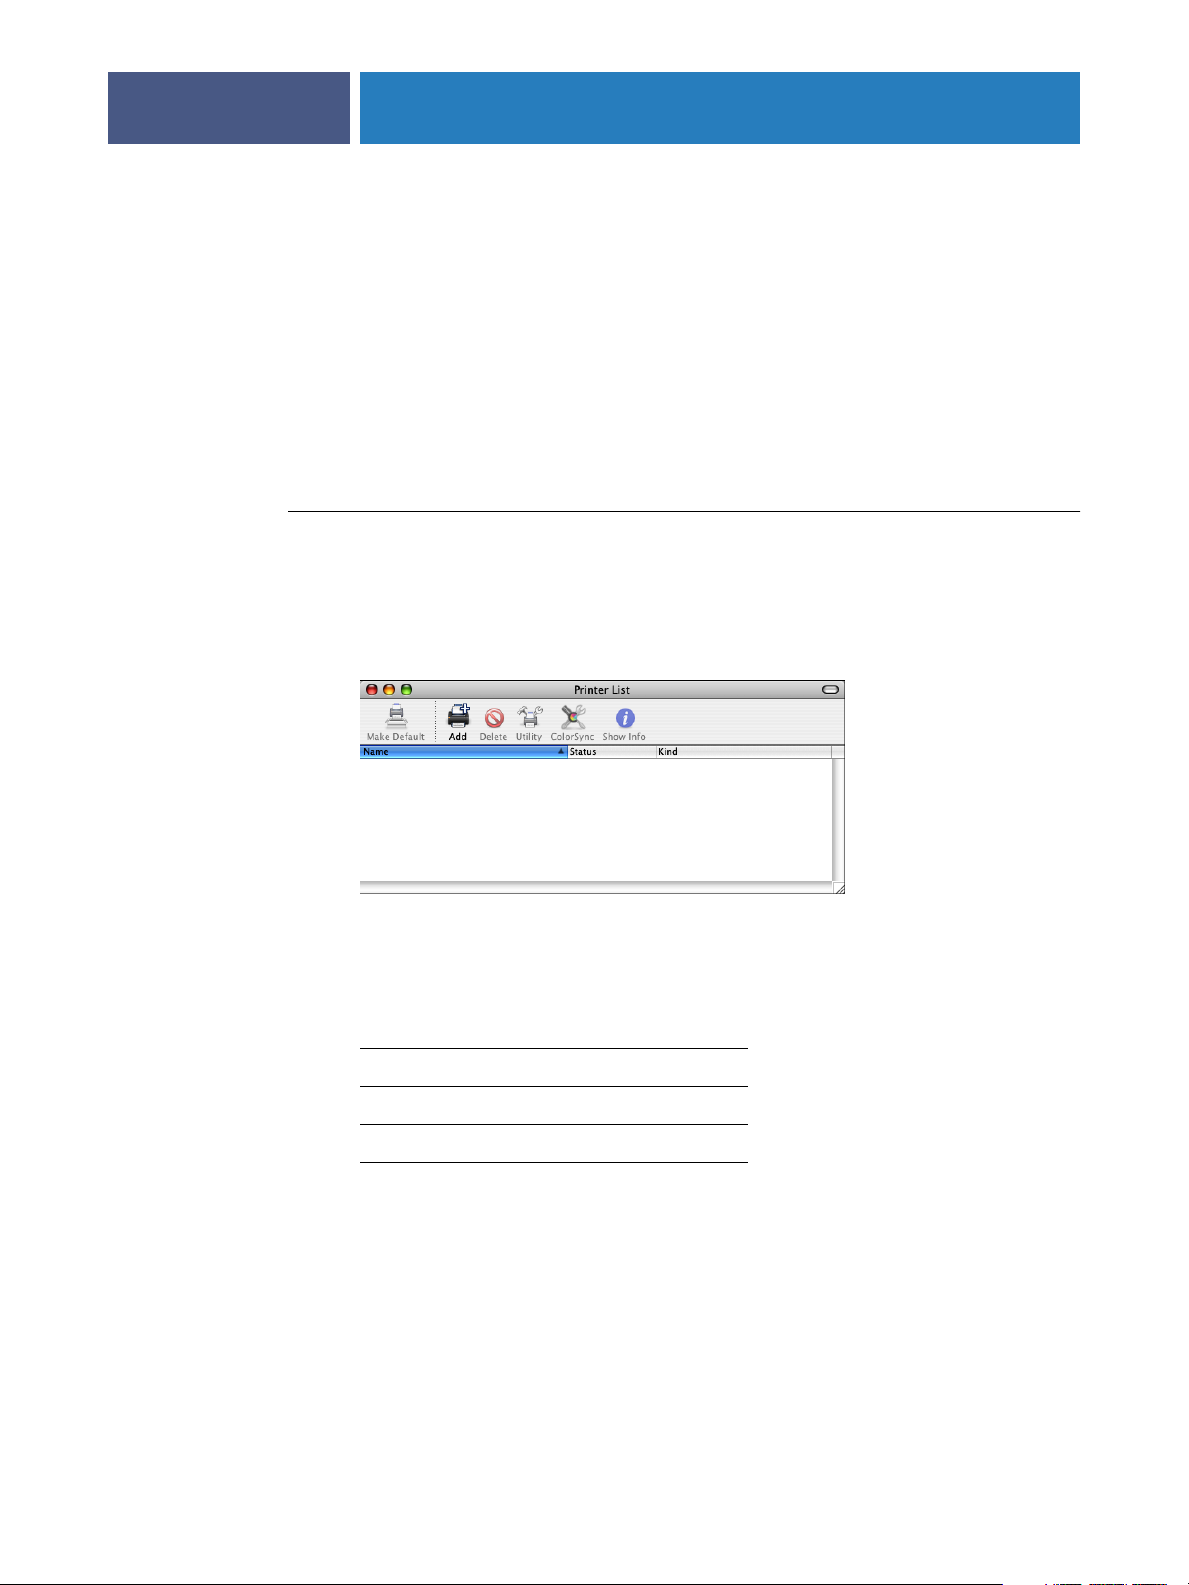
1 Choose Utilities from the Go menu.
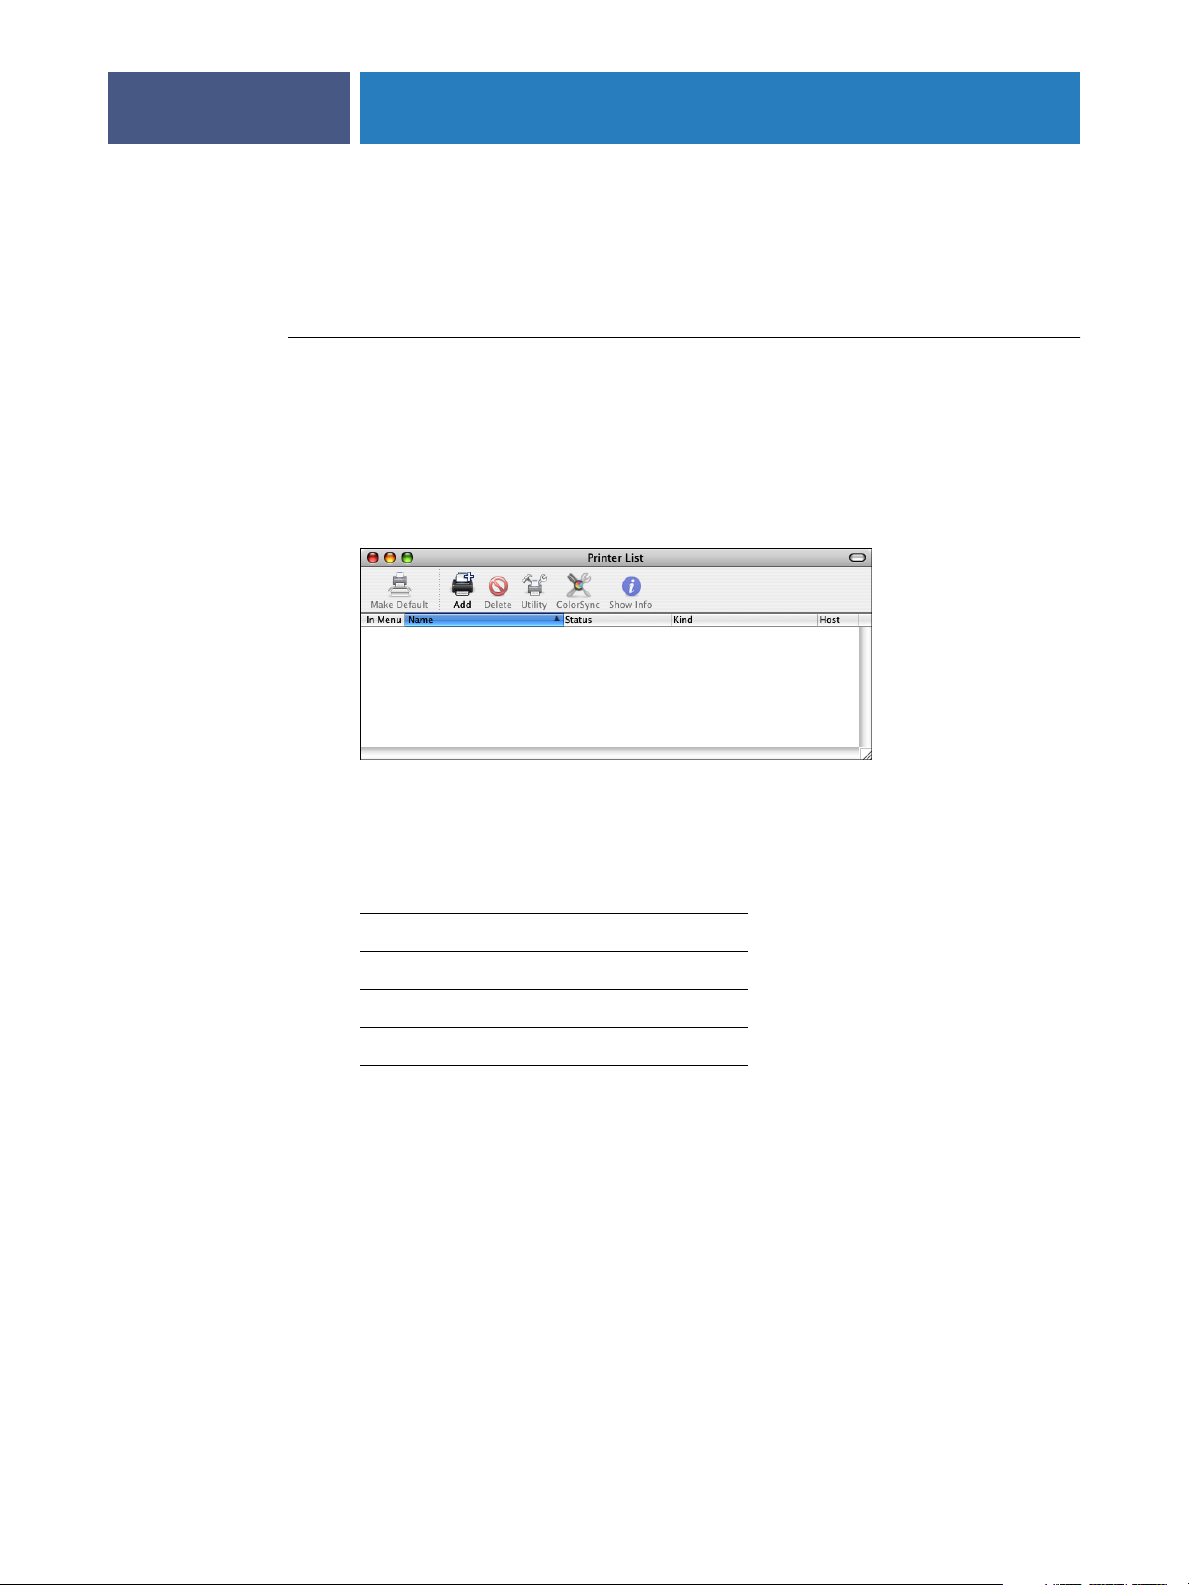
2 Start Printer Setup Utility.
The Printer List dialog box appears.
12
3 Click Add.
The Printer Browser dialog box appears. Use one of the following connections to add
a printer.
Printing connection See
Default Browser page 13
IP Printer page 14
AppleTalk page 16
Page 13
PRINTING FROM MAC OS X
TO ADD A PRINTER WITH THE DEFAULT BROWSER CONNECTION
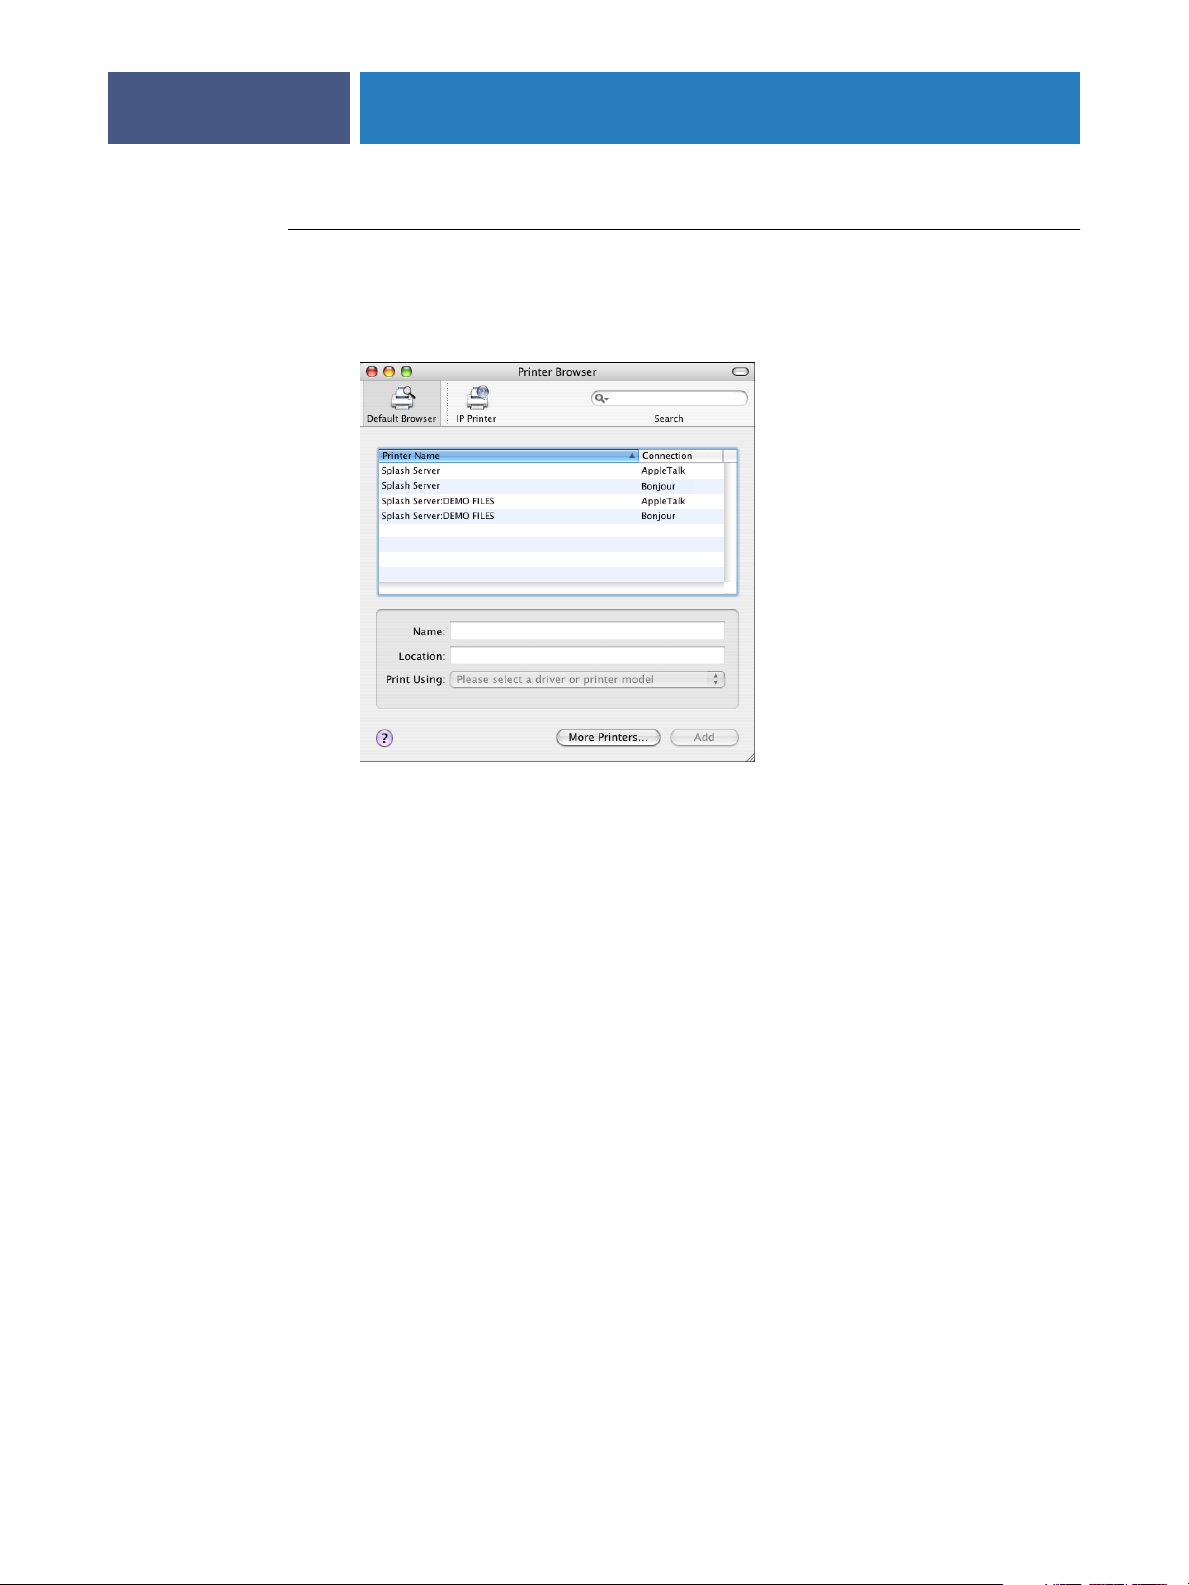
1 Click Default Browser in the Printer Browser dialog box.
The Default Browser pane appears.
13
The names of the printers with the default connections are listed. The Virtual Printers that are
configured at the Splash RPX-i are also listed.
NOTE: The Virtual Printers are linked to the Hot Folders. The names of the Virtual Printers
appear as <printer name:Hot Folder name> in the Name list. For more information, see
“Using the Virtual Printers” on page 23.
2 Select the Splash RPX-i from the list.
The information about the selected printer appears at the bottom of the Default Browser
pane.
The appropriate PPD file for the Splash RPX-i is automatically selected. If your server
administrator configured the Secure Access printing at the Splash RPX-i, the PPD file for
Secure Access printing is selected.
3 Click Add.
The Splash RPX-i name appears in the Printer List.
Page 14
PRINTING FROM MAC OS X
TO ADD A PRINTER WITH THE IP PRINTER CONNECTION
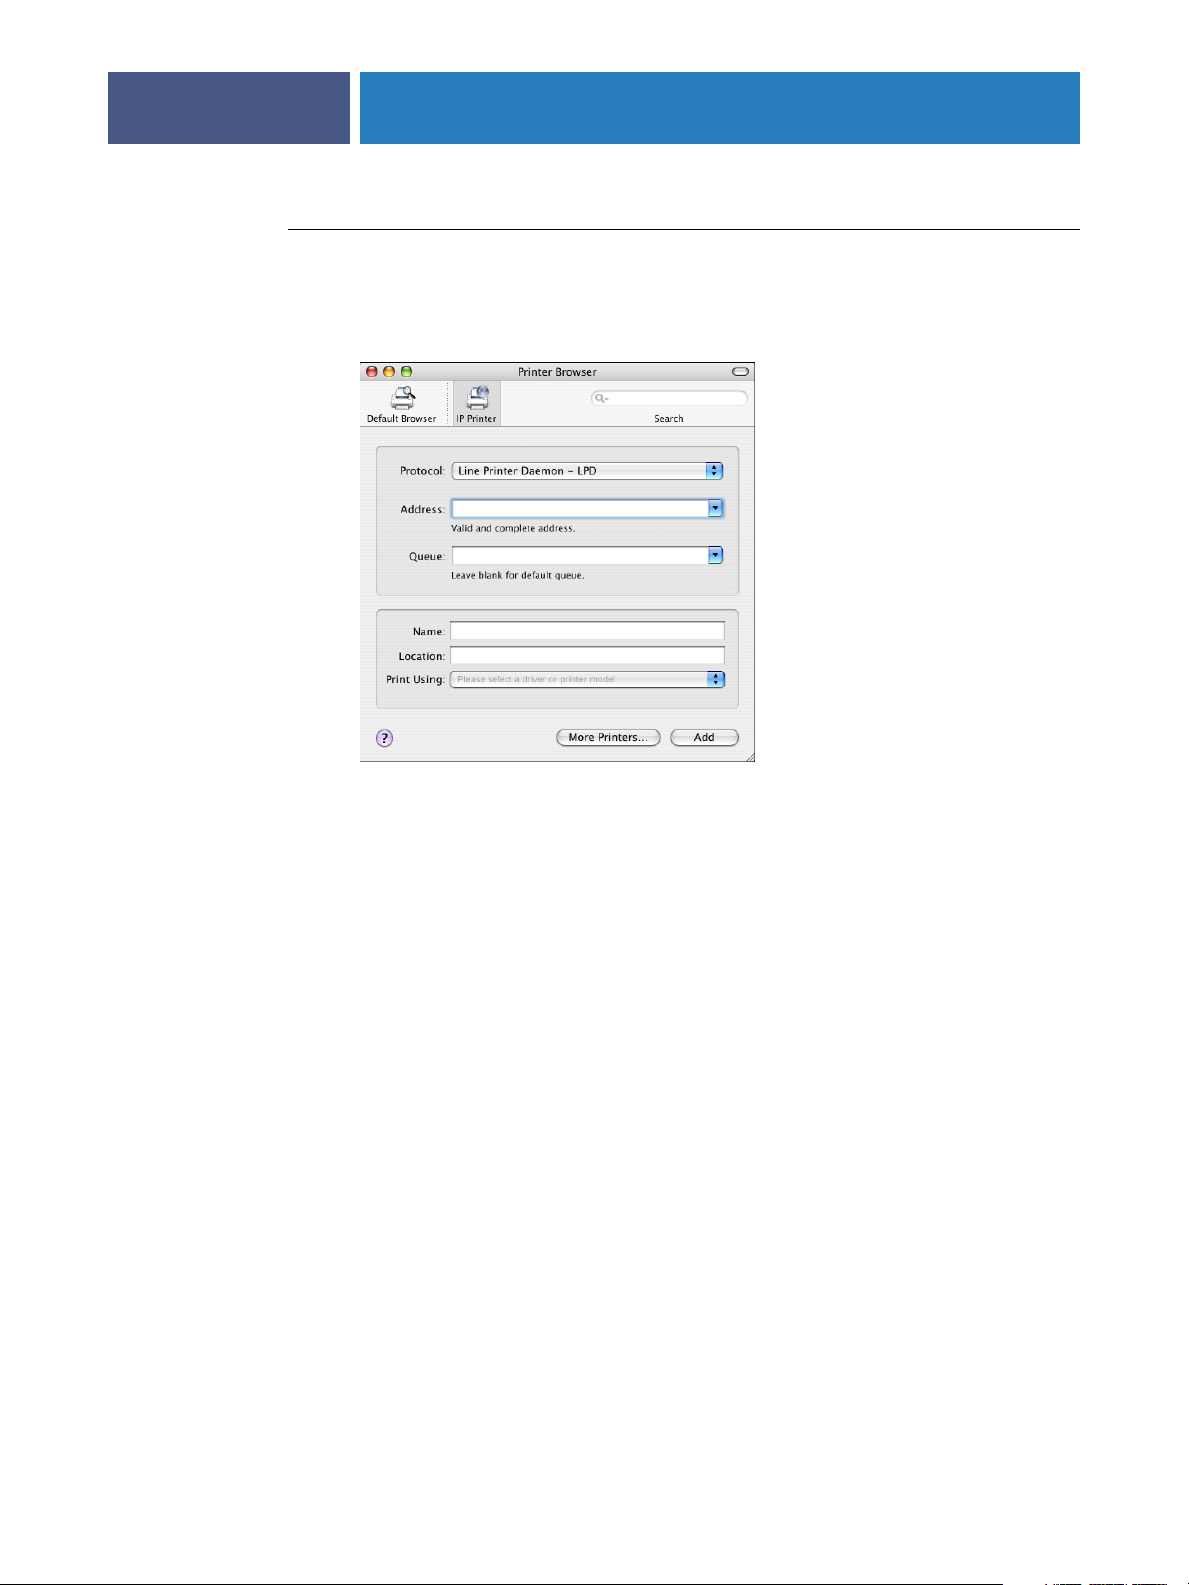
1 Click IP Printer in the Printer Browser dialog box.
The IP Printer pane appears.
14
2 Select Line Printer Daemon - LPD from the Protocol list and type the IP address of
the Splash RPX-i.
The IP address appears in the Name field.
3Type the Virtual Printer name in the Queue field or leave it blank for the default queue.
Page 15
PRINTING FROM MAC OS X
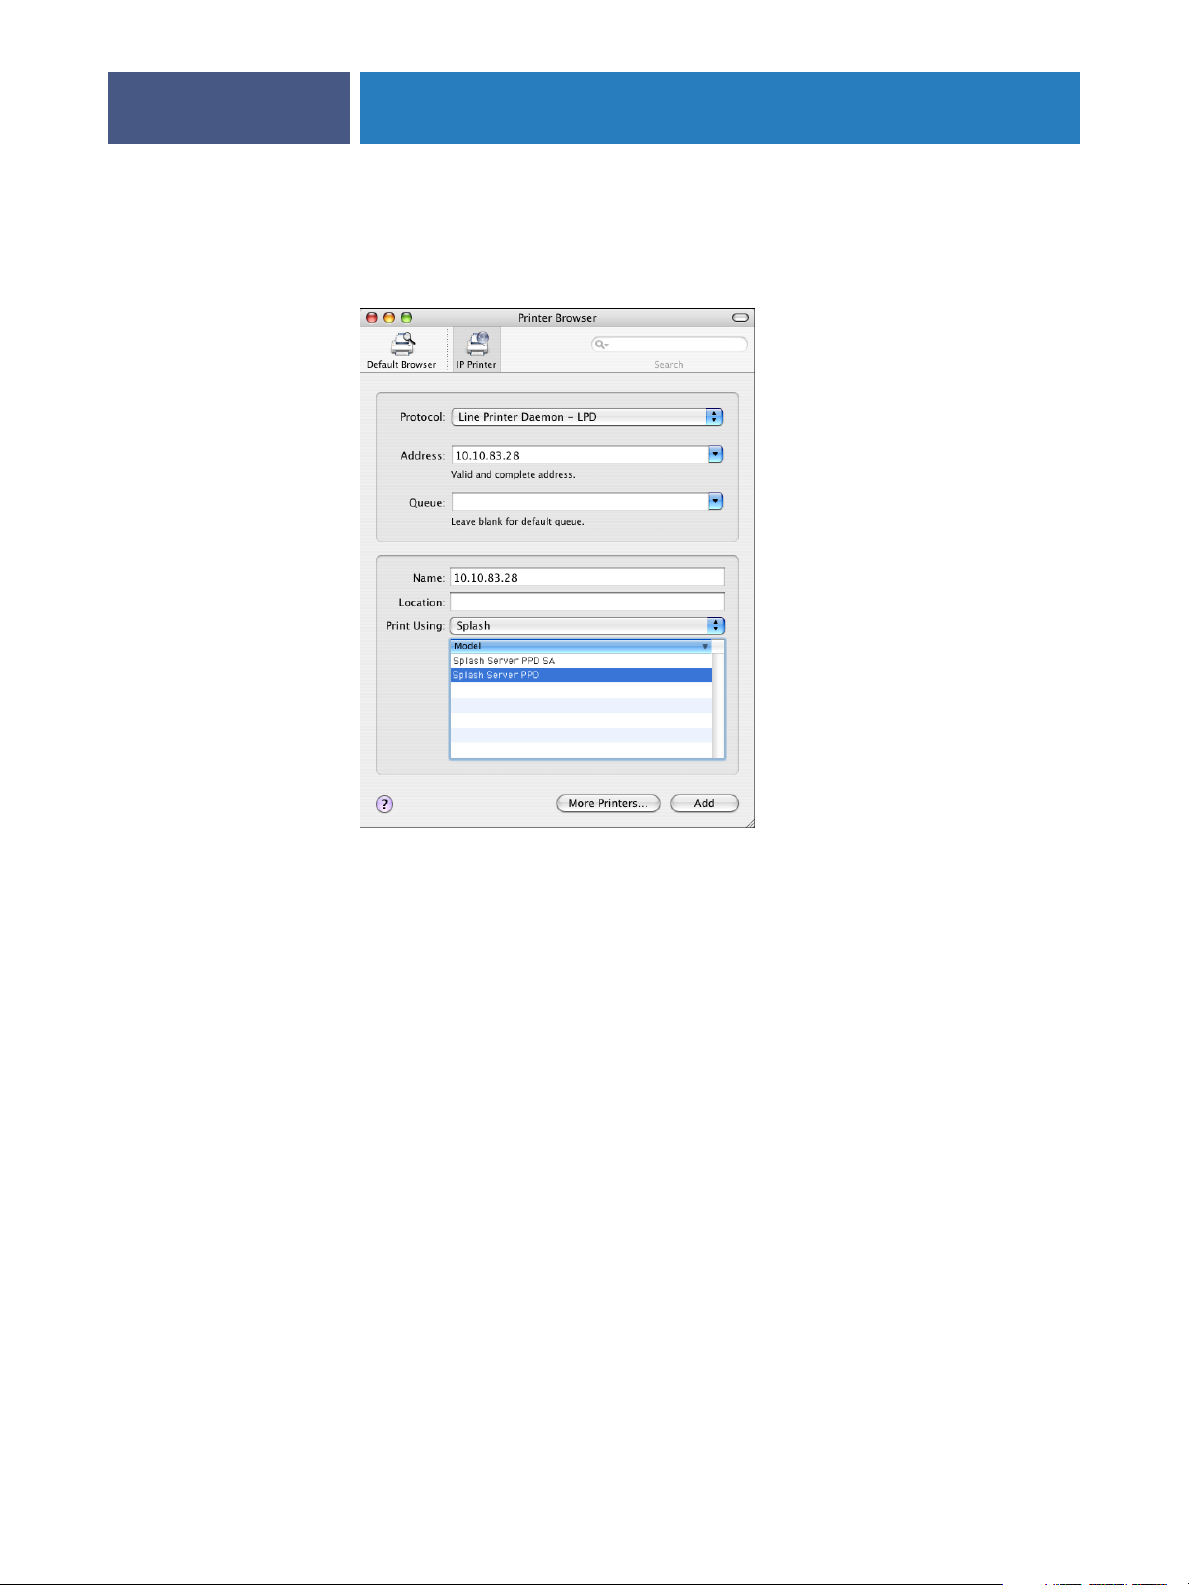
4 Select Splash from the Print Using list.
The Model pane appears in the dialog box.
15
5 Select the PPD file from the Model list.
For more information, see “Selecting the PPD file” on page 23.
6 Click Add.
The Splash RPX-i with its IP address appears in the Printer List.
Page 16

PRINTING FROM MAC OS X
TO ADD A PRINTER WITH THE APPLETALK CONNECTION
1 Click Default Browser or IP Printer in the Printer Browser dialog box.
NOTE: Use this procedure if the Splash RPX-i is in a different AppleTalk zone from your
computer. If the Splash RPX-i is in the same zone, it is displayed as a default browser.
Follow the procedure on page 13.
16
2 Click More Printers.
The dialog box with a pop-up list of other connections appears.
3 Select AppleTalk from the connection list.
The AppleTalk pane appears.
Page 17

PRINTING FROM MAC OS X
4 Select the AppleTalk zone for the Splash RPX-i from the pop-up list.
The AppleTalk printers in the specified zone are listed. The Virtual Printers that are
configured at the Splash RPX-i are also listed.
NOTE: The Virtual Printers are linked to the Hot Folders. The names of the Virtual Printers
appear as <printer name:Hot Folder name> in the Name list. For more information, see
“Using the Virtual Printers” on page 23.
5 Select the Splash RPX-i name in the Name list and click Add.
The appropriate PPD file for the Splash RPX-i is automatically selected. If your server
administrator configured the Secure Access printing at the Splash RPX-i, the PPD file for
Secure Access printing is selected.
For instructions on manually selecting the PPD file, see “Selecting the PPD file” on page 23.
The Splash RPX-i name appears in the Printer List.
17
Page 18
PRINTING FROM MAC OS X
Setting up with Mac OS X v10.3.x or earlier
Use the following steps for setting up the Splash RPX-i on a computer with Mac OS X
v10.3.x or earlier.
TO SET UP THE SPLASH RPX-I FOR PRINTING
1 Choose Utilities from the Go menu.
NOTE: If you are using Mac OS X v10.2.x, select Applications:Utilities to access Print Center.
2 Start Printer Setup Utility or Print Center.
The Printer List dialog box appears.
18
3 Click Add.
The dialog box with a pop-up list of printing connections appears. Use one of the following
connections to add a printer.
Printing connection See
AppleTalk page 19
LPD/LPR page 20
Rendezvous page 21
Rendezvous with IP Printing page 22
Page 19

PRINTING FROM MAC OS X
TO ADD A PRINTER WITH THE APPLETALK CONNECTION
1 Select AppleTalk from the list.
The AppleTalk pane appears.
2 Select the AppleTalk zone for the Splash RPX-i from the zone pop-up list.
19
The AppleTalk printers in the specified zone are listed. The Virtual Printers that are
configured at the Splash RPX-i are also listed.
NOTE: The Virtual Printers are linked to the Hot Folders. The names of the Virtual Printers
appear as <printer name:Hot Folder name> in the Name list. For more information, see
“Using the Virtual Printers” on page 23.
3 Select the Splash RPX-i name in the Name list.
4 Click Add.
The appropriate PPD file for the Splash RPX-i is automatically selected. If your server
administrator configured the Secure Access printing at the Splash RPX-i, the PPD file for
Secure Access printing is selected.
For instructions on manually selecting the PPD file, see “Selecting the PPD file” on page 23.
The Splash RPX-i name appears in the Printer List.
Page 20
PRINTING FROM MAC OS X
TO ADD A PRINTER WITH THE LPD/LPR CONNECTION
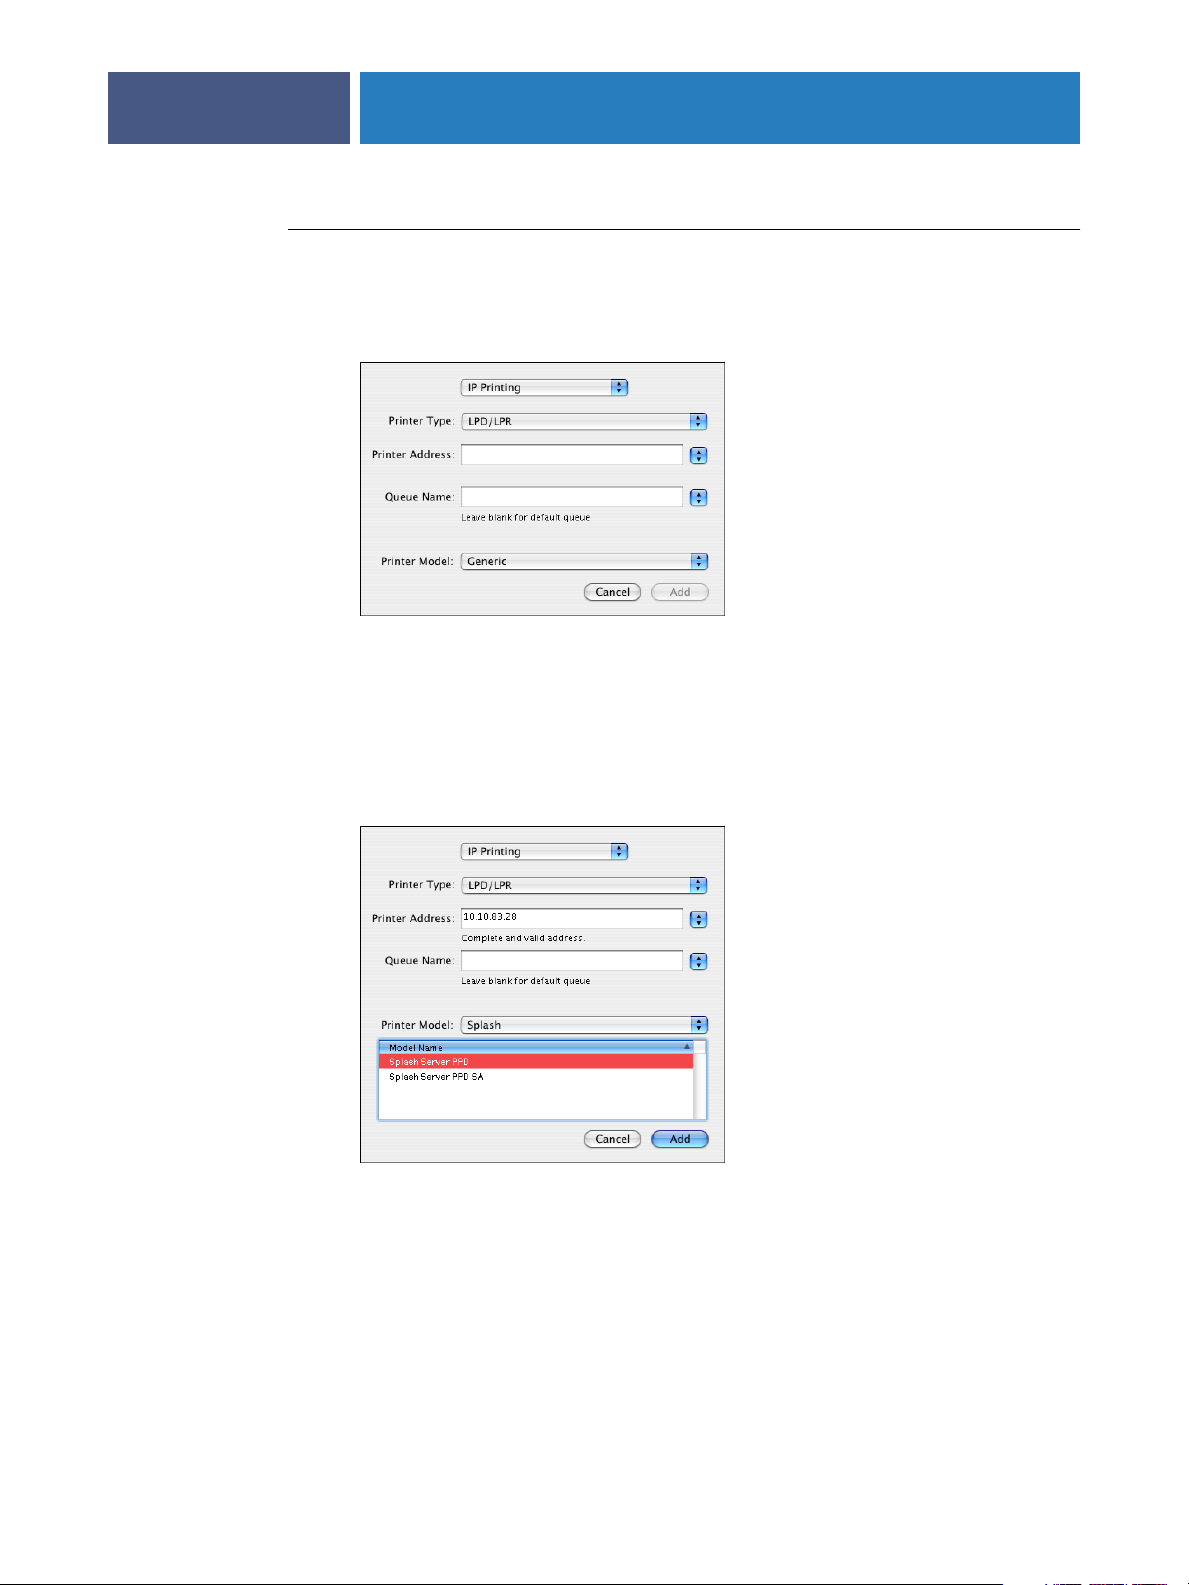
1 Select IP Printing from the list.
The IP Printing pane appears.
2 Select LPD/LPR from the Printer Type list.
20
3Type the IP address of the Splash RPX-i in the Printer Address field.
4Type the Virtual Printer name in the Queue Name field or leave it blank for the default queue.
5 Select Splash from the Printer Model list.
The Model Name pane appears in the dialog box.
6 Select the PPD file from the Model Name list.
For more information, see “Selecting the PPD file” on page 23.
7 Click Add.
The Splash RPX-i with its IP address appears in the Printer List.
Page 21
PRINTING FROM MAC OS X
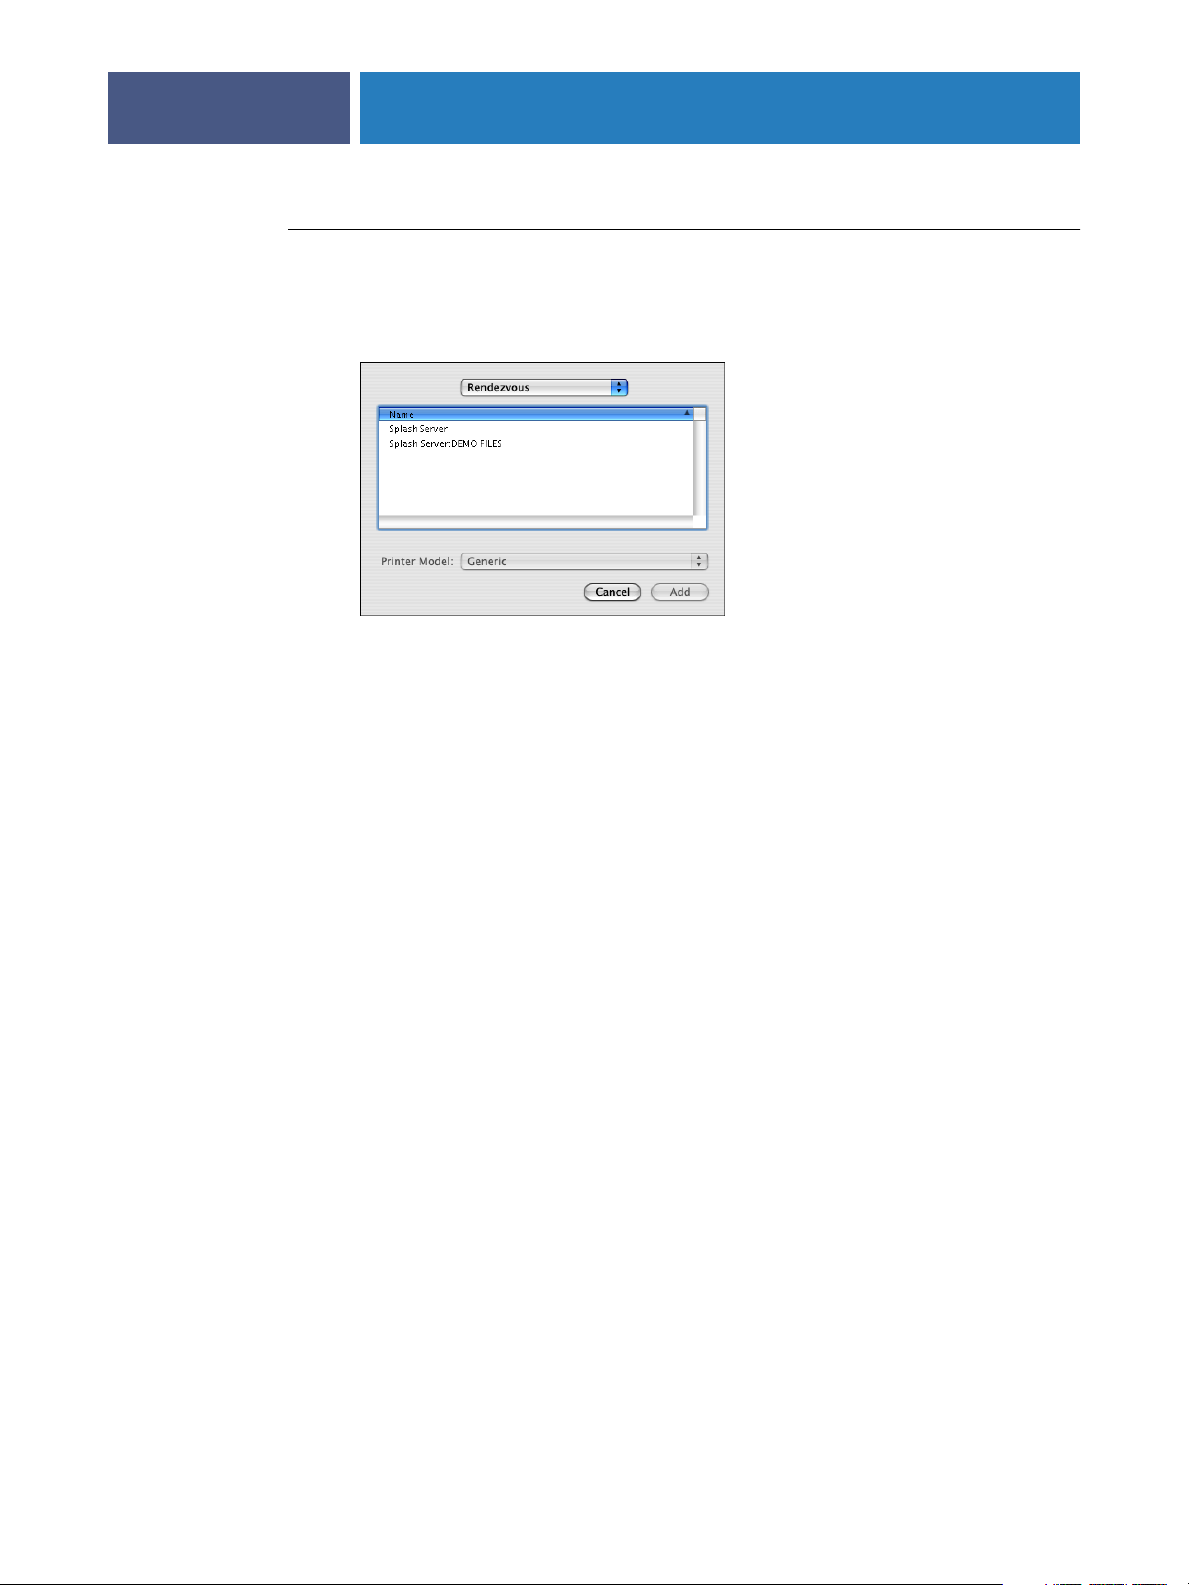
TO ADD A PRINTER WITH THE RENDEZVOUS CONNECTION
1 Select Rendezvous from the list.
The Rendezvous pane appears.
The Rendezvous printers are listed. The Virtual Printers that are configured at the
Splash RPX-i are also listed.
21
NOTE: With the Rendezvous connection in Mac OS X v10.3.x, the Splash RPX-i is displayed
if your computer is on the same subnet as the Splash RPX-i.
NOTE: The Virtual Printers are linked to the Hot Folders. The names of the Virtual Printers
appear as <printer name:Hot Folder name> in the Name list. For more information, see
“Using the Virtual Printers” on page 23.
2 Select the Splash RPX-i name in the Name list.
3 Select the PPD file.
For more information, see “Selecting the PPD file” on page 23.
4 Click Add.
The Splash RPX-i name appears in the Printer List.
Page 22
PRINTING FROM MAC OS X
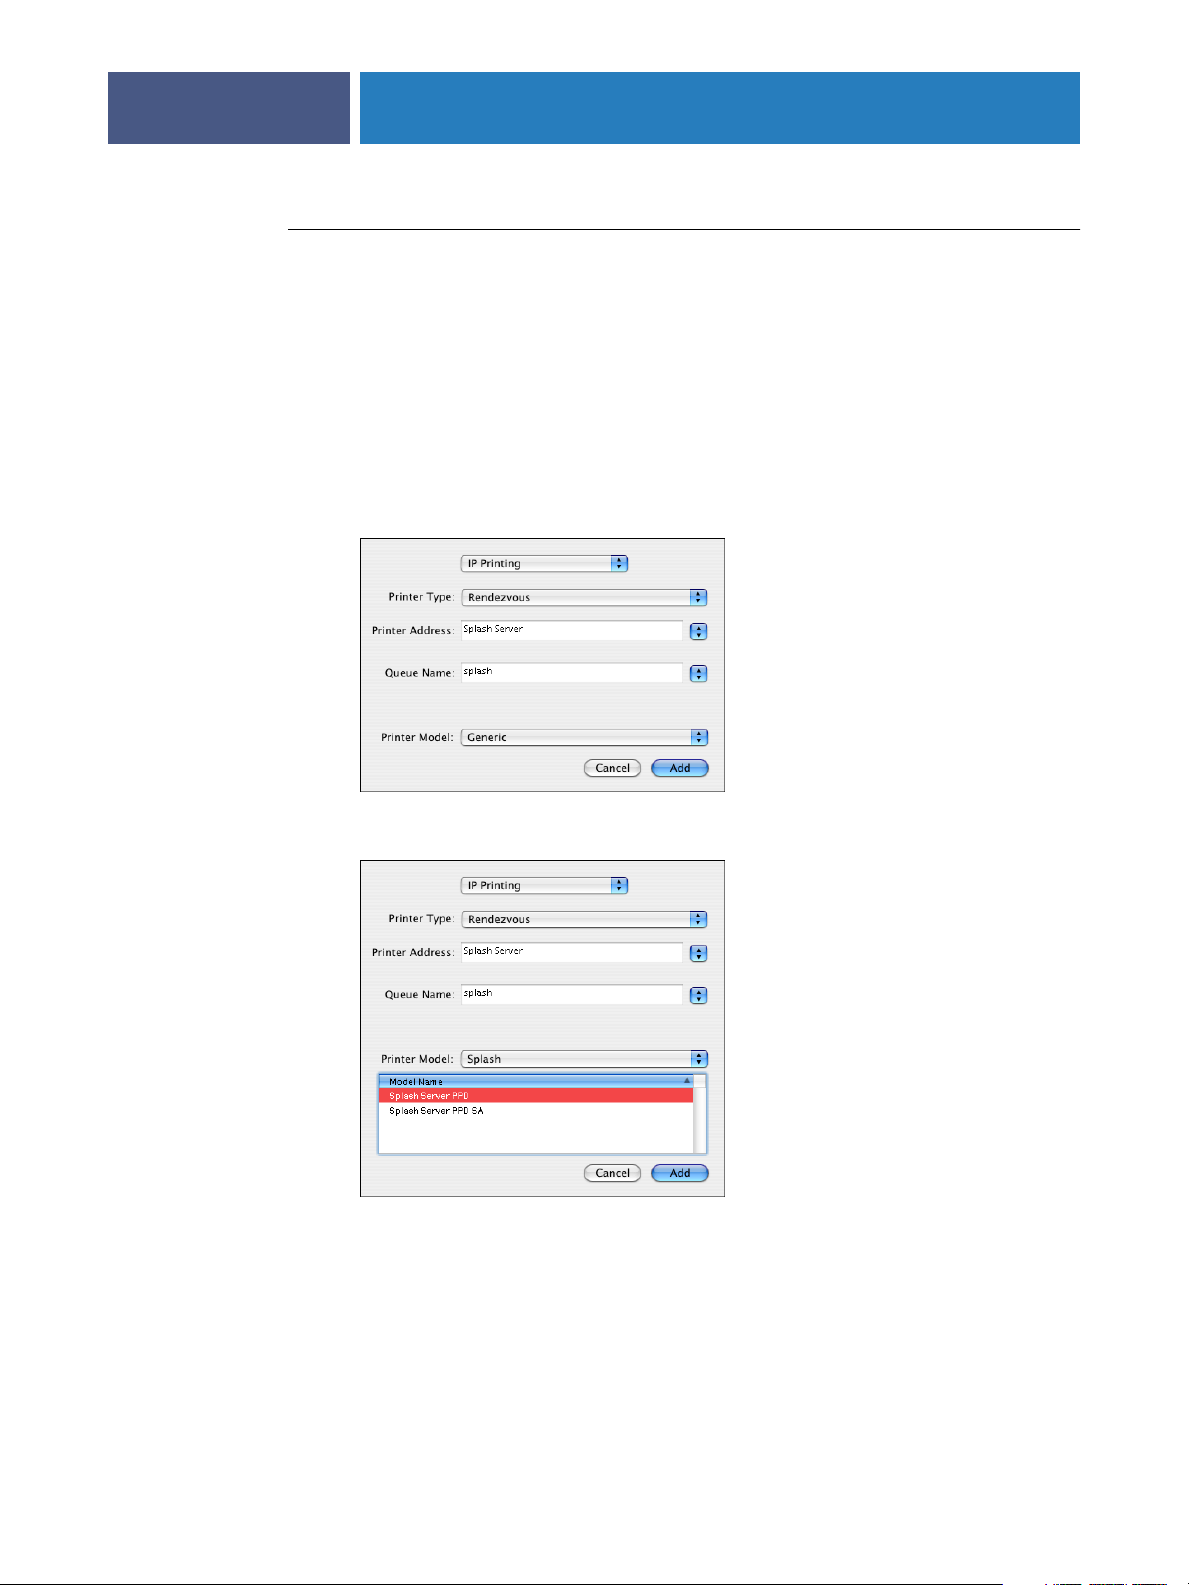
TO ADD A PRINTER WITH THE RENDEZVOUS CONNECTION WITH IP PRINTING
1 Select IP Printing from the list.
The IP Printing pane appears.
2 Select Rendezvous from the Printer Type list.
NOTE: With the Rendezvous connection, the Splash RPX-i is displayed only when your
computer is in the same subnet as the Splash RPX-i.
3 Select the Splash RPX-i from the Printer Address list.
4 Select the Virtual Printer name from the Queue Name list.
22
5 Select Splash from the Printer Model list.
6 Select the PPD file from the Model Name list.
For more information, see “Selecting the PPD file” on page 23.
7 Click Add.
The Splash RPX-i name appears in the Printer List.
Page 23

PRINTING FROM MAC OS X
23
Selecting the PPD file
The PPD files that are provided for the Splash RPX-i are as follows:
• Splash RPX-i 240-250 for standard printing
• Splash RPX-i 240-250 SA for Secure Access printing
NOTE: Select the PPD file for Secure Access printing if your server administrator has
configured Secure Access printing at the Splash RPX-i. For more information about Secure
Access, see page 96 and the Job Management Guide.
Using the Virtual Printers
The Virtual Printers feature allows you to send your jobs to the Hot Folders that are set up at
the Splash RPX-i.
A Virtual Printer can be added as your printer with various printing connections. The steps to
add a printer, including a Virtual Printer, are discussed in “Setting up with Mac OS X v10.4
or later” on page 12 and in “Setting up with Mac OS X v10.3.x or earlier” on page 18.
This section provides an overview of how to enable and use the Virtual Printers. The setup of
the Virtual Printers must be performed by your server administrator at the Splash RPX-i
before you use the Virtual Printers as your printers.
TO ENABLE AND USE A VIRTUAL PRINTER
1 Enable the Virtual Printers feature at the Splash RPX-i.
To use the Virtual Printers feature, the following option must be enabled at the Splash RPX-i
by your server administrator.
• Virtual Printers in the Splash Server Preferences> Network>Services pane
If AppleTalk Registration in the Services pane is enabled, you can access the Virtual
Printers as AppleTalk printers.
If Enterprise Networking in the Services pane is enabled, you can access the Virtual
Printers as LPR printers.
For more information about Preferences, see the Configuration Guide.
2Create a Hot Folder at the Splash RPX-i.
The Virtual Printers are linked to the Hot Folders. For more information, see
the Job Management Guide.
Page 24

PRINTING FROM MAC OS X
3At the client workstation, start the Printer Setup Utility and set up a Virtual Printer for
printing.
For more information, see “Setting up with Mac OS X v10.4 or later” on page 12 and
“Setting up with Mac OS X v10.3.x or earlier” on page 18.
4 Select the Virtual Printer in the Printer List dialog box.
For more information, see “Selecting the Splash RPX-i in the Printer List” on page 25.
5 Open a file in your application and print your job to the Virtual Printer.
When you send your job to a Virtual Printer, a set of print options that are configured for the
Hot Folder is applied. For more information, see the Job Management Guide.
24
Page 25
PRINTING FROM MAC OS X
Printing from Mac OS X computers
Print to the Splash RPX-i just as you would print to any other printer from a Mac OS X
application. Select the Splash RPX-i as the current printer in the Printer List and print the
file from within the application.
After you install the Splash RPX-i printer files and set up the Splash RPX-i for printing, you
can print from most Mac OS X applications. Using the appropriate PPD file, you can control
the Splash RPX-i printing features by specifying print options from the Print dialog boxes.
For more information about the Splash RPX-i print options, see page 77.
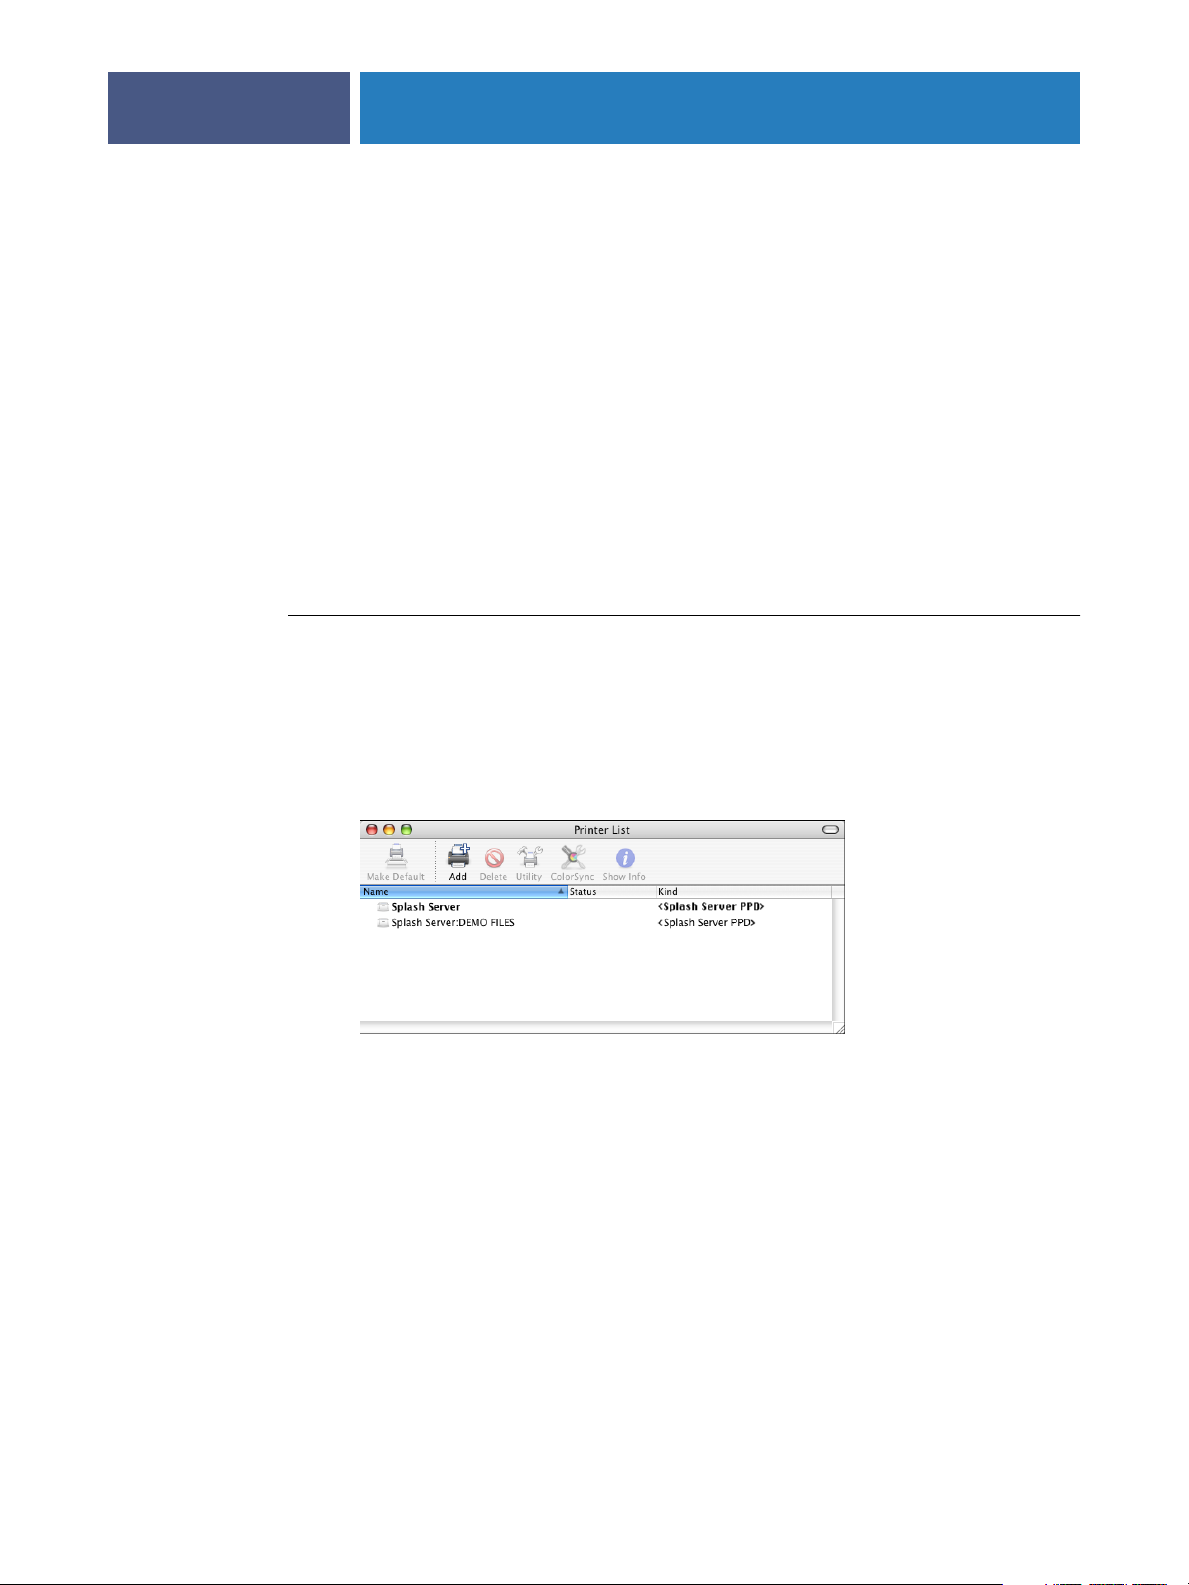
Selecting the Splash RPX-i in the Printer List
Before you print a job, you must select the Splash RPX-i from the Printer List. Use the
following procedure to select the Splash RPX-i as your default printer.
TO SELECT THE SPLASH RPX-I AS THE DEFAULT PRINTER
1 Make sure that the Splash RPX-i is connected to the network and turned on.
25
2 Choose Utilities from the Go menu.
3 Start Printer Setup Utility (or Print Center).
The Printer List dialog box appears.
The printers that are set up for printing are listed. The Virtual Printers that are configured at
the Splash RPX-i and set up for printing are also listed. For more information, see “Using the
Virtual Printers” on page 23.
4 Select the Splash RPX-i in the Printer List to specify it as your current printer.
5 Click the Make Default icon.
The Splash RPX-i is now your default printer.
Page 26
PRINTING FROM MAC OS X
26
Setting print options from Mac OS X
The Splash RPX-i print options are set from the Print dialog box within most Mac OS X
applications. For the table of all print options and the detailed information about some print
options, see “Print Options” on page 77.
NOTE: Some default settings are set by your server administrator during Splash RPX-i Setup.
For information about the current Splash RPX-i default settings, contact your server
administrator.
NOTE: A Virtual Printer is linked to a Hot Folder. When you send your job to a Virtual
Printer, a set of print options that are configured for the Hot Folder is applied, regardless of
your selection in the printer driver. For more information about Hot Folders, see the Job
Management Guide.
NOTE: Some print options that are selectable from the printer driver or an application are the
same as or similar to print options that are specific to the Splash RPX-i. In these cases, use the
print options specific to the Splash RPX-i. The printer driver or an application may not set up
the file properly for printing on the Splash RPX-i, resulting in unexpected printing errors and
longer processing time.
Use the following procedures to set print options from your Mac OS X computer.
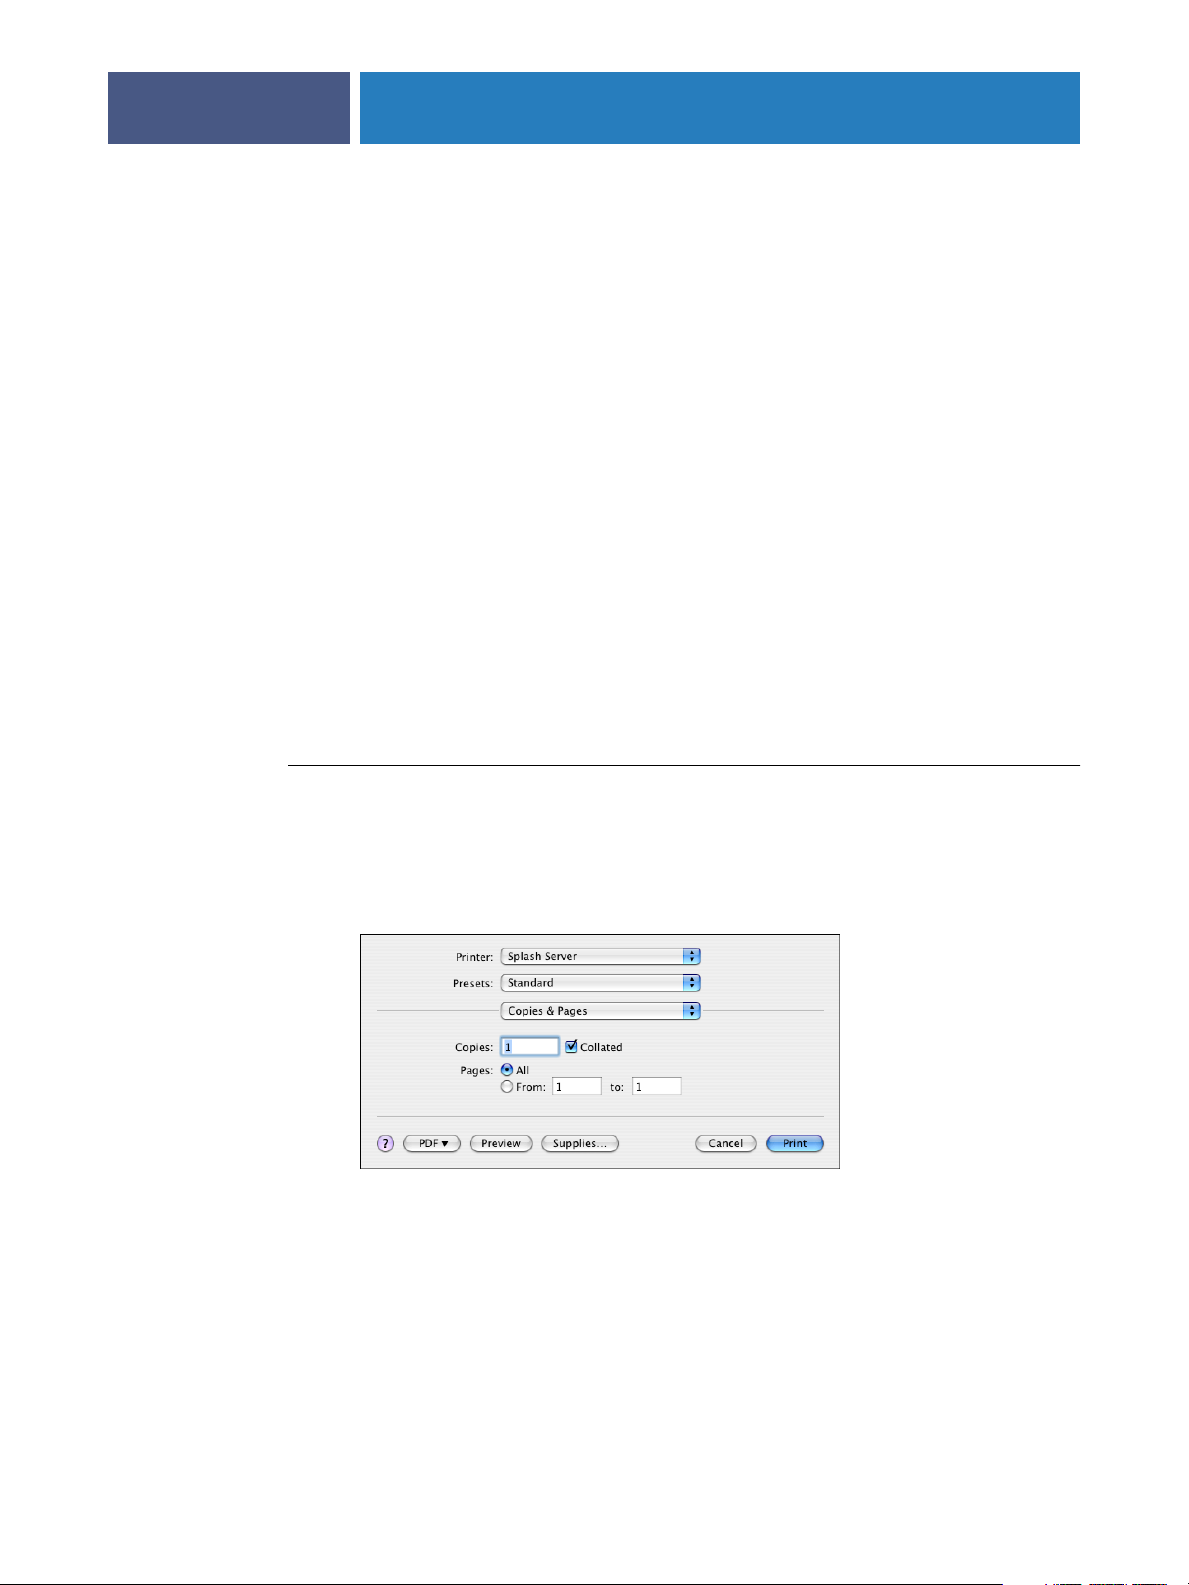
TO SET THE PRINT OPTIONS FROM MAC OS X
1 Open a file in your application.
2 Choose Print from the File menu.
The Print dialog box appears.
3 Select the Splash RPX-i from the Printer list.
Page 27
PRINTING FROM MAC OS X
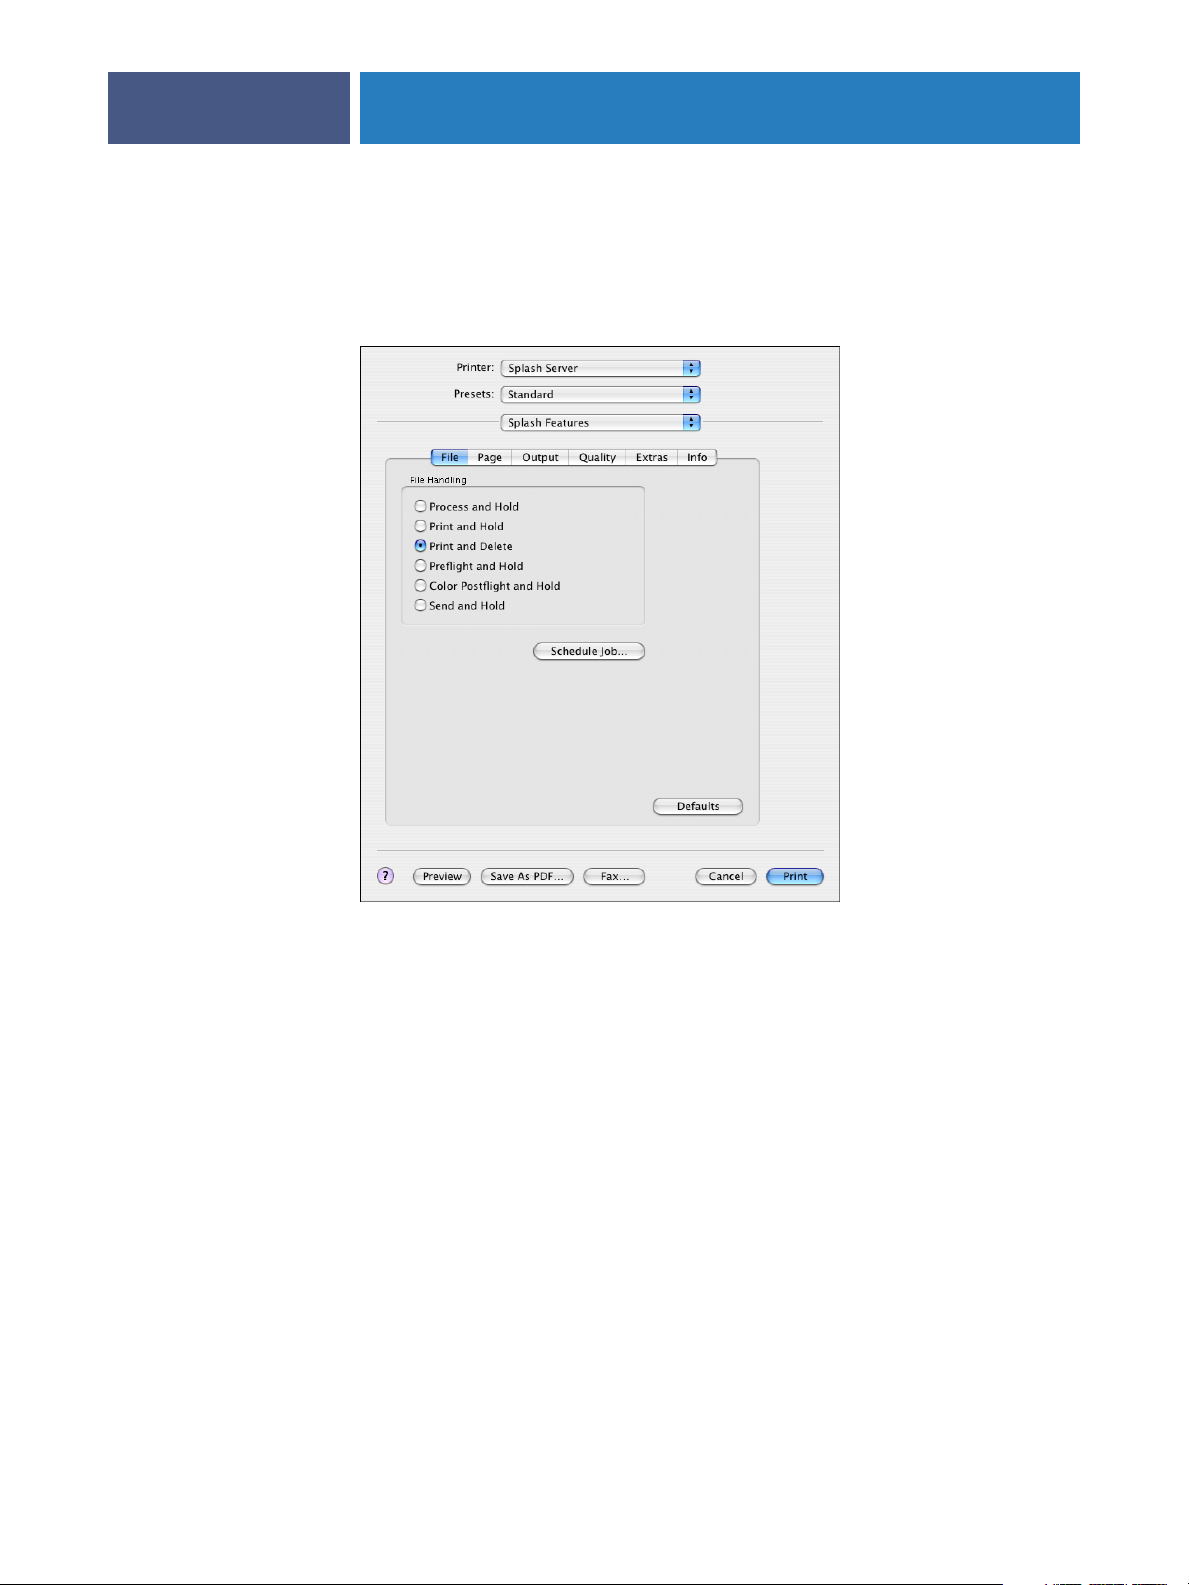
4 Select Splash Features from the Copies and Pages drop-down list.
The Splash Features pane appears listing the following print option groups:
• Click the File tab to specify file handling and scheduling options.
27
For more information, see the table on page 79 and “File Handling” on page 89.
Page 28
PRINTING FROM MAC OS X
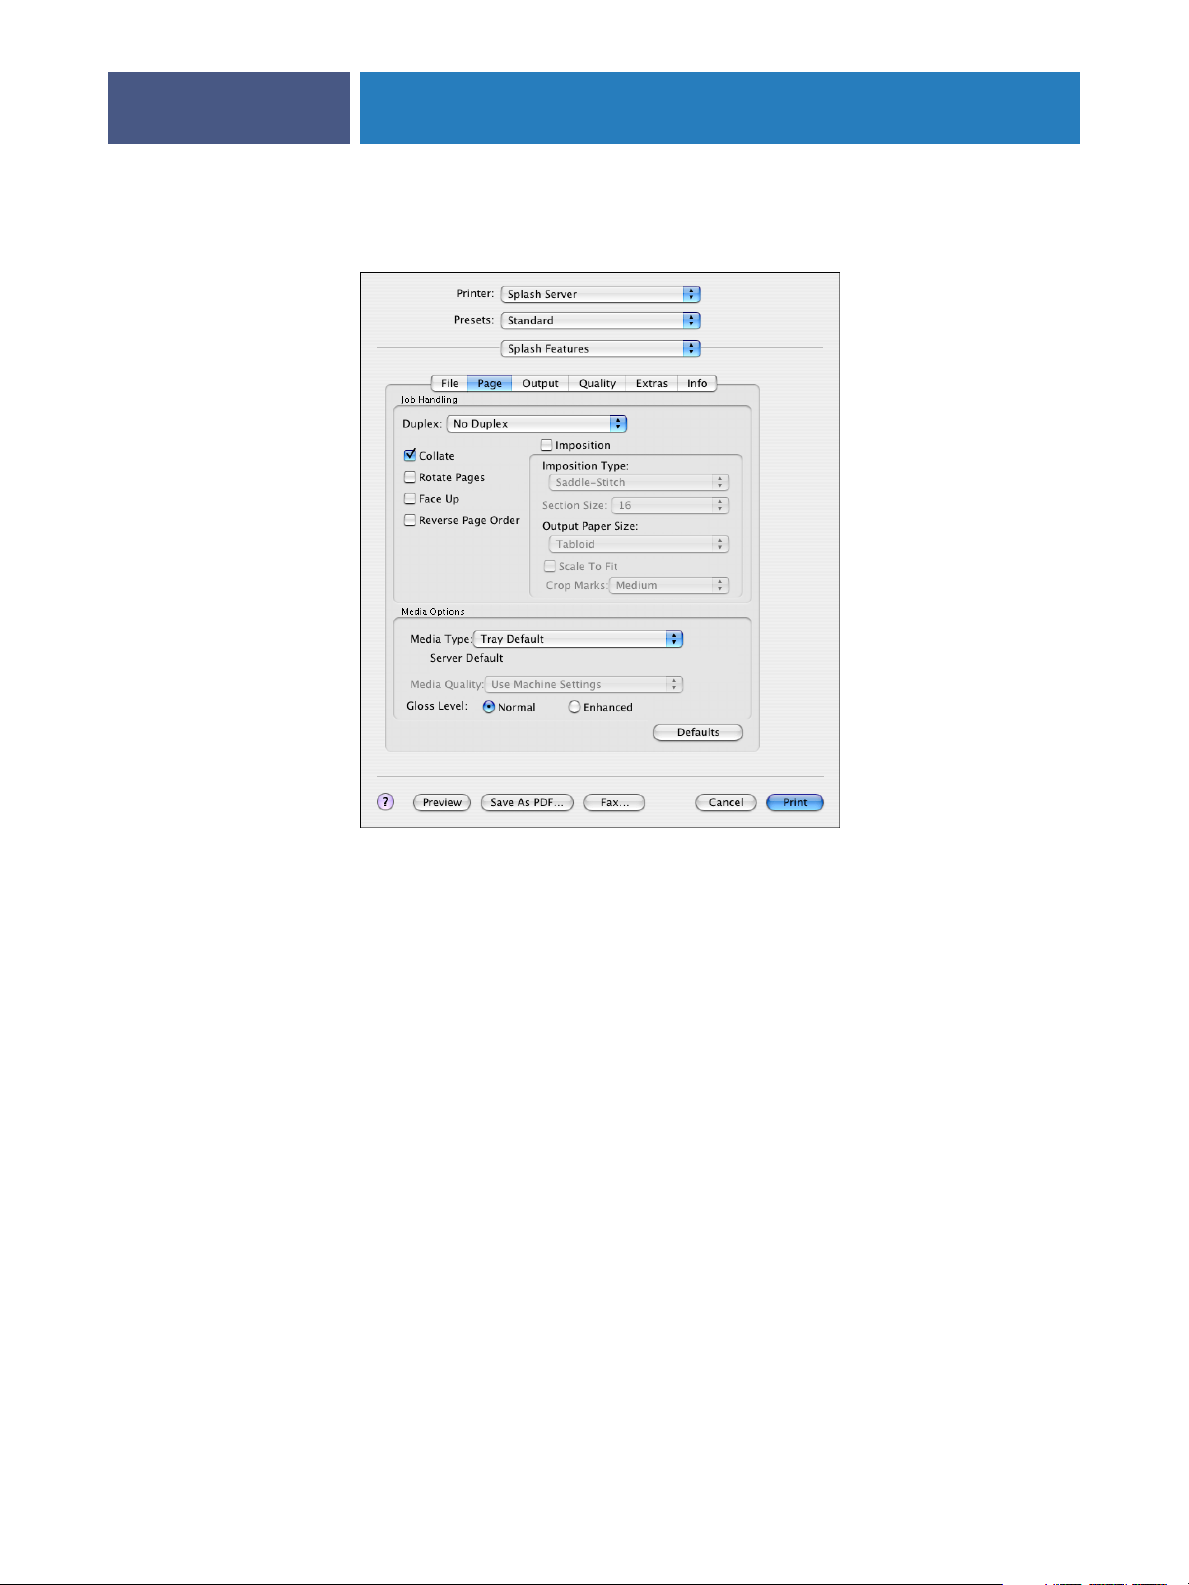
• Click Page to specify job handling and media options.
28
For more information, see the table on page 80, “Job Handling” on page 89, and “Media
Quality” on page 92. For more information about Imposition, see the Job Management Guide.
Page 29
PRINTING FROM MAC OS X
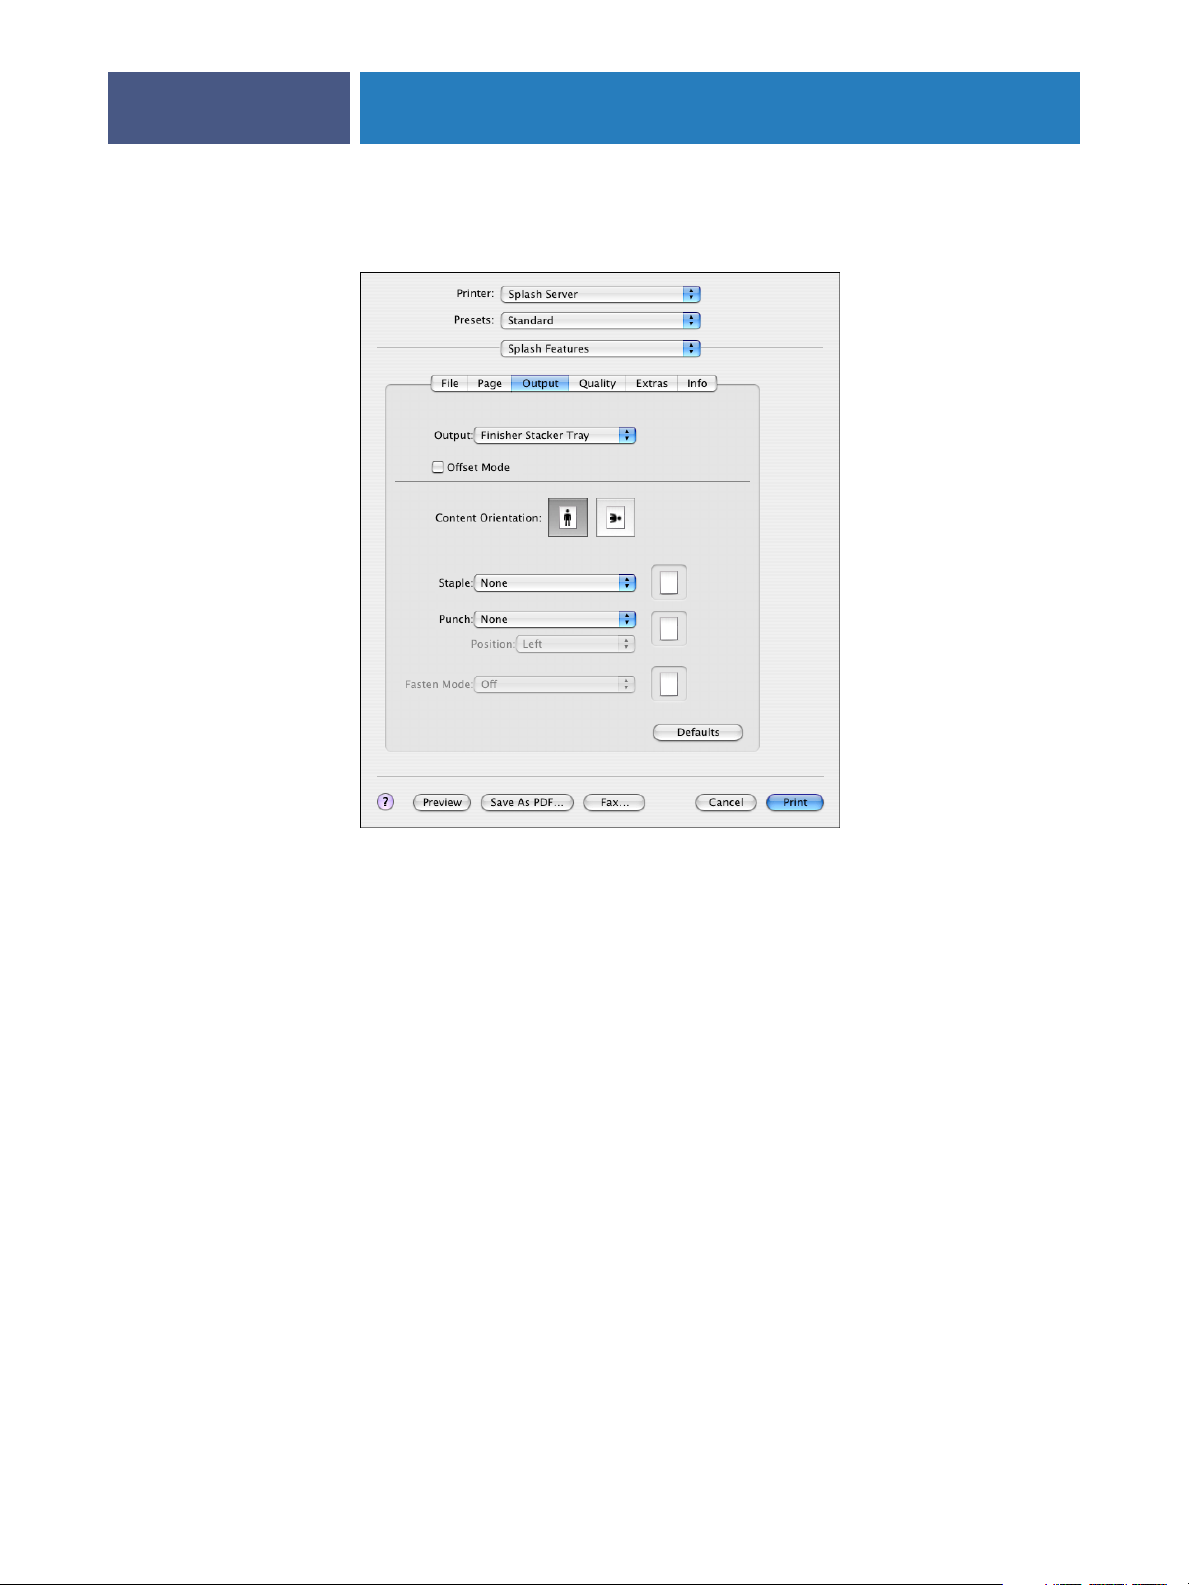
• Click the Output tab to specify output tray and finishing options.
29
. For more information, see the table on page 82 and “Output” on page 93.
Page 30
PRINTING FROM MAC OS X
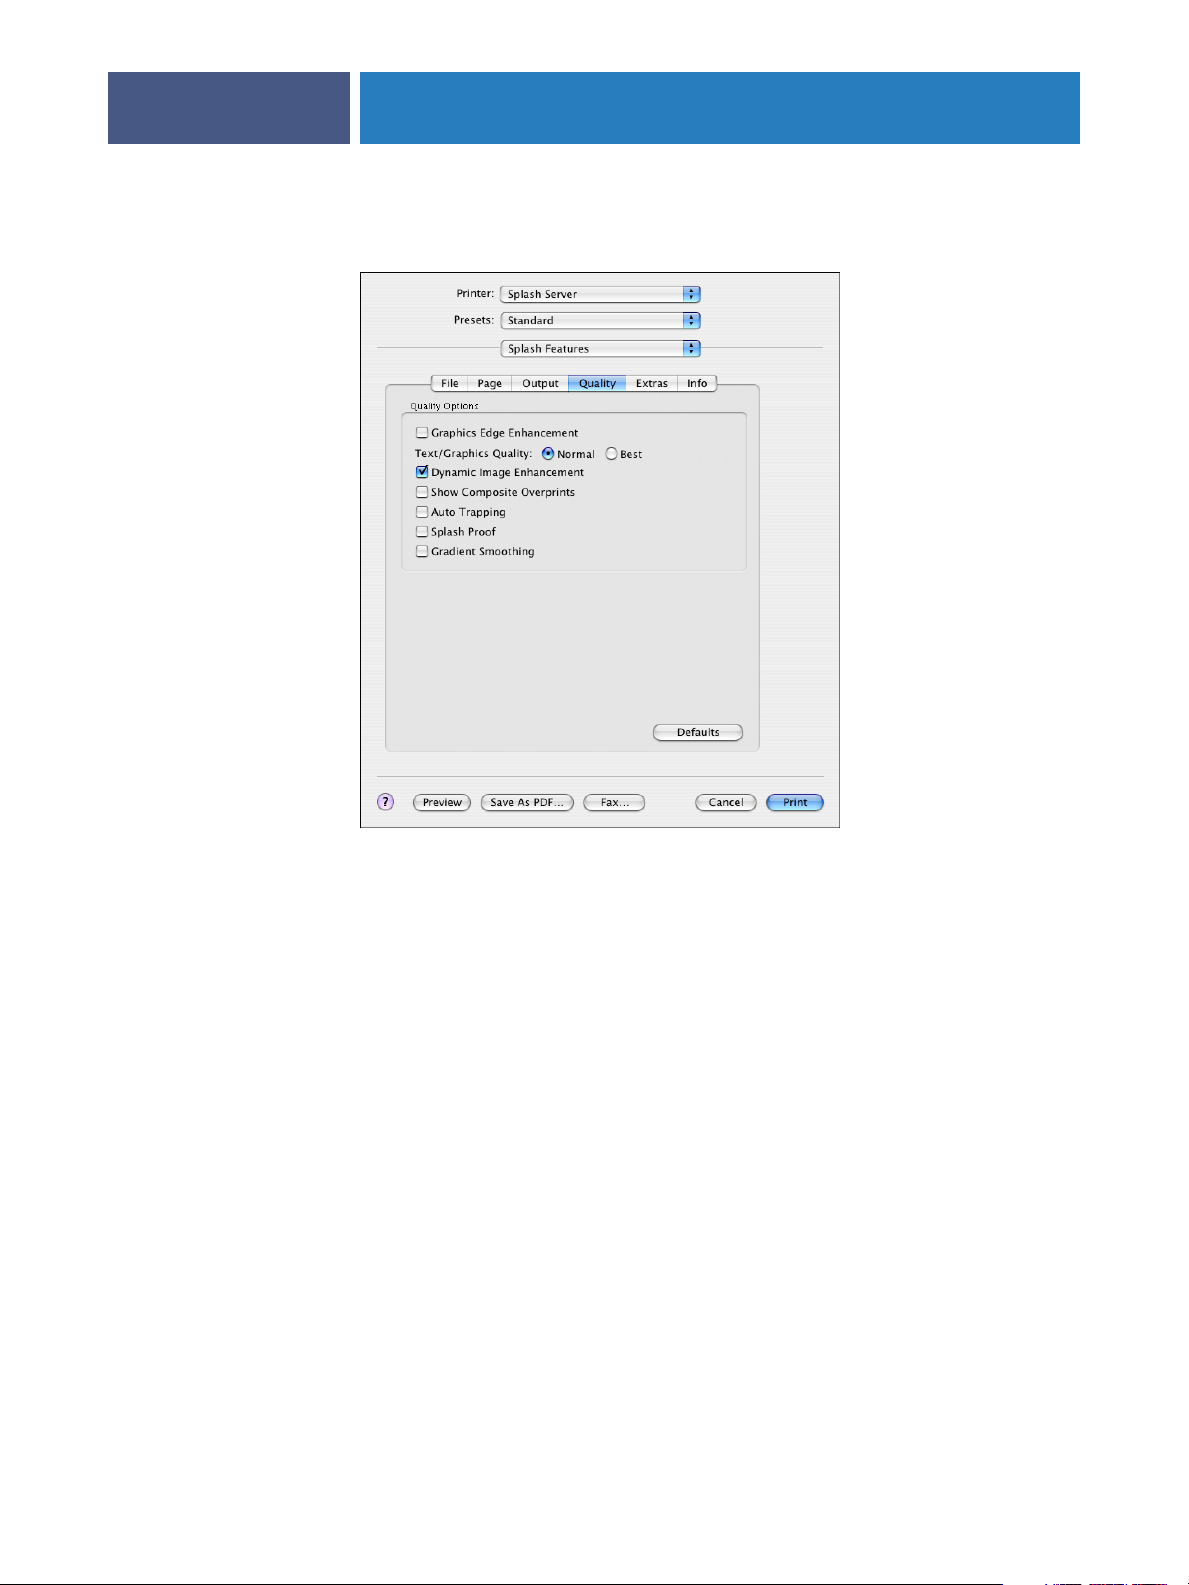
• Click the Quality tab to specify quality options.
30
For more information, see the table on page 83 and the Color Guide.
Page 31

PRINTING FROM MAC OS X
• Click the Extras tab to specify prepress options.
31
For more information, see the table on page 83 and the Color Guide.
Page 32

PRINTING FROM MAC OS X
• Click the Info tab.
32
Type the following information:
•User
•Password
•Account
For more information, see the table on page 84.
NOTE: The information in this pane can be entered for the Secure Access or standard printing.
If the Secure Access is configured at the Splash RPX-i, and if the required information is not
provided before you click Print, you are prompted to do so when you click Print.
Contact your server administrator for the required information. For more information,
see “Secure Access” on page 96 and the Job Management Guide.
5 Click Enable to use the Secure Printing feature.
The Secure Printing dialog box appears.
6Type your password to send your job as a Secure Printing job and click OK.
Page 33

PRINTING FROM MAC OS X
7 Select Splash Color from the drop-down list.
33
Specify the Print Mode and Printer Mode options.
Use Standard Color to print your job with the current default color settings at the
Splash RPX-i.
8 Click Expert Settings to change the current color settings.
The Expert Color Settings dialog box appears. This dialog box displays the color settings
differently depending on whether or not the Two Way Communication option is selected.
Page 34

Two Way Communication:
Off
PRINTING FROM MAC OS X
34
NOTE: To view the current color settings at the Splash RPX-i, you must enable the Two Way
Communication option. For more information, see “Enabling Two Way Communication” on
page 37.
Two Way Communication:
On
Page 35

PRINTING FROM MAC OS X
NOTE: The initial values reflect the current color settings that are set in Edit Defaults at the
Splash RPX-i.
Specify the following options in the Expert Color Settings dialog box:
•RGB Profile
•Press Simulation
• CMYK Color Management
•Preserve Original GCR
•Match Spot Colors
•Rendering Style
•Use Black Ink Only
•Overprint Black
•Output Profile
35
For more information about the color options, see the table on page 85 and the Color Guide.
Page 36

PRINTING FROM MAC OS X
9 Select Paper Source from the drop-down list.
In the Paper Source pane, specify the following option:
•Mixed Media
36
For more information about Mixed Media, see the Job Management Guide.
10 Select Printer Info from the drop-down list.
NOTE: To view the copier information, the Two Way Communication option must be
selected. For more information, see “Enabling Two Way Communication” on page 37.
In the Printer Info pane, you can view the following information about the copier:
•Status
•Paper Tray Info
•Toner Levels
11 Click Print.
Page 37

PRINTING FROM MAC OS X
Enabling Two Way Communication
The Two Way Communication feature allows you to retrieve information such as the current
color settings or the status of the copier from the Splash RPX-i.
The Two Way Communication option is enabled at the following panes:
•Splash Features:Info
•Splash Color
•Printer Info
Use the following procedure to enable the Two Way Communication option in the Print
dialog box.
TO ENABLE THE TWO WAY COMMUNICATION OPTION
1 Select Splash Features from the Copies & Pages menu, click Info, and then click
Bi-Di Communications.
Or choose Splash Color from the Copies & Pages menu and click Configure.
Or choose Printer Info from the Copies & Pages menu.
37
A dialog box prompts you for an IP address.
NOTE: If the dialog box does not appear automatically, click Configure in the Printer Info
pane.
2Type the IP address of the Splash RPX-i in the Printer Address field.
3 Click OK.
Page 38

1 Custom page names
PRINTING FROM MAC OS X
Defining custom page sizes from Mac OS X
You can define a new custom page size in the Custom Page Default pane of the Page Setup
dialog box. With custom page sizes, you define page dimensions and margins. After you
define a custom page size, you can use it from within an application without redefining it
each time you print.
NOTE: If you specify dimensions that match a particular regular page size, the Splash RPX-i
processes the job as a regular page size job.
TO DEFINE A CUSTOM PAGE SIZE FROM MAC OS X
1 Open a file in your application.
2 Choose Page Setup from the File menu.
3 Choose Manage Custom Sizes from the Page Size menu.
38
1
4 Click the “+” button.
5 Double-click the default custom page name and type a new name.
6 Specify the page dimensions and margins.
The Custom Page Size feature supports the following dimensions and margins:
•Widths: 3.93” to 13”
•Heights: 5.83” to 19.2”
•Margins: 0.17”
NOTE: If you define a custom paper size that is larger or smaller than the numbers previously
listed, the Mac OS X printer driver substitutes it with the default page size without warning.
7 Click OK.
The custom page size you defined is added to the list of Paper Size selections in the Page Setup
dialog box.
Page 39

PRINTING FROM MAC OS X
TO EDIT A SAVED CUSTOM PAGE SIZE
1 Open a file in your application.
2 Choose Page Setup from the File menu.
3 Choose Manage Custom Sizes from the Page Size menu.
4 Select the custom page size name.
5 Edit the page dimensions and margins.
6 Replace the existing custom page name by clicking it.
7 Click OK.
TO DELETE A CUSTOM PAGE SIZE
1 Open a file in your application.
2 Choose Page Setup from the File menu.
3 Choose Manage Custom Sizes from the Page Size menu.
39
4 Click the custom paper size name.
5 Click Delete and click OK.
TO MAKE A COPY OF THE CUSTOM PAGE SIZE
1 Open a file in your application.
2 Choose Page Setup from the File menu.
3 Choose Manage Custom Sizes from the Page Size menu.
4 Click the custom paper size name.
5 Click Duplicate and click OK.
Page 40

PRINTING FROM MAC OS 9
PRINTING FROM MAC OS 9
To print a job from your Mac OS 9 computer to the Splash RPX-i, you must install the
PostScript printer files for the Splash RPX-i and set up the Splash RPX-i for printing.
The printer files are provided on the Splash RPX-i User Software and Documentation CD or
can be downloaded directly from the Splash RPX-i over the network. This chapter describes
the procedures for installing the printer files, setting up the Splash RPX-i for printing, and
printing from your Mac OS 9 computer.
See the following table for the location of each procedure.
Procedure See
Installing the Mac OS 9 printer files page 41
40
Setting up the Splash RPX-i for printing page 43
Printing from Mac OS 9 computers page 45
Page 41

PRINTING FROM MAC OS 9
Installing the Mac OS 9 printer files
The following sections describe how to install the Mac OS 9 printer files for the
Splash RPX-i.
Installing from the Splash RPX-i User Software and Documentation CD
The Splash RPX-i User Software and Documentation CD provides the following installers for
the Splash RPX-i:
• RPX-i OS9 Client for standard printing
• RPX-i OS9 Client SA for Secure Access printing
NOTE: Select the installer for Secure Access printing if your server administrator has
configured the Secure Access printing at the Splash RPX-i. For more information, see “Secure
Access” on page 96 and the Job Management Guide.
NOTE: The following instructions are for Mac OS 9 and Mac OS X Classic. The term
“Mac OS 9” refers to Mac OS 9 and Mac OS X Classic. For the supported versions and
system requirements, see Getting Started.
41
TO INSTALL THE PRINTER FILES FOR MAC OS 9
1 Quit all open applications.
2 Insert the Splash RPX-i User Software and Documentation CD into the CD-ROM drive.
3 Locate the installer file in the following folder:
Splash RPX-i User Software and Documentation CD:Printer Drivers: RPX-i MacOS 9
4 Double-click the installer icon.
5Follow the on-screen instructions.
The installer installs the printer files for the Splash RPX-i.
Page 42

PRINTING FROM MAC OS 9
Downloading from the Splash RPX-i
You can download printer files to your computer directly from the Splash RPX-i over
the network and then install them following the procedures in the previous section.
For more information about downloading files from the Splash RPX-i, see
the Job Management Guide.
TO DOWNLOAD MAC OS 9 PRINTER FILES
1 Start your Internet browser.
2Type the IP address of the Splash RPX-i and click Go.
The Splash Server Management dialog box appears.
42
3 Click Downloads.
4 Click Splash Installer Downloads.
5 Click the following files:
• RPX-i OS9 Client.bin for standard printer files
• RPX-i OS9 Client SA.bin for Secure Access printer files
6 Expand the archive.
7 Double-click the installer.
To install the printer files, follow the procedure on page 41.
Page 43

PRINTING FROM MAC OS 9
Setting up the Splash RPX-i for printing
The following section describes how to set up the Splash RPX-i on your Mac OS 9 computer.
TO SET UP THE SPLASH RPX-I IN THE CHOOSER
1 Select Chooser from the Apple menu.
The Chooser dialog box appears.
43
2 Click AdobePS.
3 Select Active for AppleTalk.
4 Select the AppleTalk zone for the Splash RPX-i.
The names of the printers appear in the Select a PostScript Printer area. The Virtual Printers
that are configured at the Splash RPX-i are also listed.
NOTE: Virtual Printers are linked to Hot Folders. The names of Virtual Printers appear as
<printer name:Hot Folder name> in the Name list. For more information, see “Using the
Virtual Printers” on page 23.
5 Select the Splash RPX-i from the list.
6 Click Create.
Page 44

PRINTING FROM MAC OS 9
7 Select the PPD file in the Printer Descriptions list and click Select.
The printer name for the Splash RPX-i appears with the Setup icon. The Setup icon indicates
that the printer is set up with a PPD file and ready for printing.
8 Close the Chooser.
44
Page 45

PRINTING FROM MAC OS 9
Printing from Mac OS 9 computers
Print to the Splash RPX-i just as you would print to any other printer from any Mac OS 9
application. Select the Splash RPX-i as the current printer in the Chooser and print the file
from within the application.
Using the Adobe PostScript printer driver and the correct PPD file, you can control many
Splash RPX-i printing features by specifying the print options from Page Setup and Print
dialog boxes. For more information about the Splash RPX-i print options, see page 77.
Selecting the Splash RPX-i in the Chooser
Before you print a job, you must select the Splash RPX-i as your default printer in
the Chooser.
TO SELECT THE SPLASH RPX-I AS THE DEFAULT PRINTER
1 Make sure that the Splash RPX-i is connected to the network and turned on.
45
2 Select Chooser from the Apple menu.
The Chooser dialog box appears.
3 Click the AdobePS icon.
4 Select Active for AppleTalk.
5 Select the AppleTalk zone for the Splash RPX-i.
The names of the printers appear in the Select a PostScript Printer area.
The Virtual Printers that are configured at the Splash RPX-i and set up for printing are also
listed. For more information, see “Using the Virtual Printers” on page 23.
6 Select the Splash RPX-i from the list.
7 Close the Chooser dialog box.
The Splash RPX-i remains selected as your default printer until you select another printer in
the Chooser.
Page 46

PRINTING FROM MAC OS 9
Setting print options from Mac OS 9
You can set the Splash RPX-i print options from the Page Setup and Print dialog boxes within
most Mac OS 9 applications. For information about specific print options, see page 77.
Some default settings are set by your server administrator during Splash RPX-i Setup. For
information about the current Splash RPX-i settings, contact your server administrator.
Virtual Printers are linked to Hot Folders. When you send your job to a Virtual Printer, a set
of print options that are configured for the Hot Folder is applied. For more information about
Hot Folders, see the Job Management Guide.
NOTE: Some print options that are selectable from the printer driver or an application are the
same as or similar to print options that are specific to the Splash RPX-i. In these cases, use the
print options specific to the Splash RPX-i. The printer driver or an application may not set up
the file properly for printing to the Splash RPX-i, resulting in unexpected printing errors and
longer processing time.
TO SET THE PAGE SETUP OPTIONS FROM MAC OS 9
1 Open a file in your application.
46
2 Choose Page Setup from the File menu.
3 Choose Page Attributes.
NOTE: Page setup dialog boxes vary across applications.
4 Select the paper size for your job from the Paper list.
5 Click OK.
Page 47

PRINTING FROM MAC OS 9
TO SET THE PRINT OPTIONS FROM MAC OS 9
1 Choose Print from the File menu.
NOTE: Print dialog boxes vary across applications.
2 Select the Splash RPX-i from the Printer list.
47
NOTE: If the Splash RPX-i is set as the default printer in Chooser, the Splash RPX-i name
appears in the Printer list.
3 Select a tray for your job from the Paper Source list.
NOTE: The Paper Source selection is valid for the current job only.
4 Click General to view the categories of the print options.
5 Select Document Info from the drop-down menu.
Type the following information:
• Owner
•Password
• Comment
•Account Number
For more information, see the table on page 84.
NOTE: The information in this pane can be entered for Secure Access or standard printing.
If Secure Access is configured at the Splash RPX-i, and you have not entered the required
information, you are prompted to do so when you click Print.
Contact your server administrator for the required information. For more information about
Secure Access printing, see “Secure Access” on page 96 and the Job Management Guide.
6 Click Enable to use the Secure Printing feature.
The Secure Printing dialog box appears.
Page 48

PRINTING FROM MAC OS 9
7Type your password to send your job as a Secure Printing job and click OK.
8 Select File from the drop-down menu.
Specify the File Handling options. For more information, see the table on page 79 and
“File Handling” on page 89.
9 Select Page from the drop-down menu.
48
Specify the Page options. For more information, see the table on page 80.
For more information about Imposition, see the Job Management Guide.
Page 49

PRINTING FROM MAC OS 9
10 Select Output from the drop-down menu.
Specify the finishing options. For more information, see the table on page 82 and
“Output” on page 93.
11 Select Quality from the drop-down menu.
49
Specify the Quality options. For more information, see the table on page 83 and
the Color Guide.
Page 50

PRINTING FROM MAC OS 9
12 Select Extras from the drop-down menu.
Specify the prepress options. For more information, see the table on page 83 and the Color
Guide.
13 Select Color from the drop-down menu.
50
Specify the Color options. For more information, see the table on page 85 and
the Color Guide.
14 Click Save Settings to save your selections as the default settings.
15 Click Print.
Page 51

PRINTING FROM MAC OS 9
Defining custom page sizes from Mac OS 9
You can define a new custom page size in the Custom Page Default pane of the Page Setup
dialog box. After you define a custom page size, you can use it from within an application
without redefining it each time you print.
NOTE: If you specify dimensions that match a particular regular page size, the Splash RPX-i
processes the job as a regular page size job.
TO DEFINE A CUSTOM PAGE SIZE FROM MAC OS 9
1 Open a file in your application.
2 Choose Page Setup from the File menu.
3 Click Page Attributes and select Custom Page Default from the drop-down menu.
The Custom Page setup pane appears.
51
1Choose Custom
2 Check PPD limits
3Type a custom page name
1
2
3
4 Select Custom from the page size drop-down list.
5To view the minimum and maximum values, click the PPD Limits menu.
The custom page size supports the following dimensions and margins:
•Widths: 3.93” to 13”
•Heights: 5.83” to 19.2”
•Margins: 0.17”
6 Specify the page dimensions and margins.
NOTE: If you enter invalid sizes, an error message appears. Click Cancel and specify the sizes
within the PPD Limits.
7Type a name for the custom page size and click Add.
Saved custom page sizes appear in the menu of custom paper sizes in the upper-right corner of
the dialog box. To remove a saved custom page size, choose it from the menu and
click Remove.
8 Click OK.
Page 52

PRINTING FROM MAC OS 9
TO EDIT A SAVED CUSTOM PAGE SIZE
1 Open a file in your application.
2 Choose Page Setup from the File menu.
3 Click Page Attributes and select Custom Page Default from the drop-down menu.
4 Select the custom page size name from the page size drop-down list.
5 Edit the page dimensions and margins.
6 Click Add.
7 Click OK to replace the existing custom page name.
TO PRINT WITH A CUSTOM PAGE SIZE
1 Open a file in your application.
2 Choose Page Setup from the File menu.
3 Click Page Attributes and select Custom Page Default from the drop-down menu.
52
4 Select the custom page size name from the page size drop-down list.
5 Click OK.
6 Choose Print from the File menu.
7 Specify your print options and click Print.
Page 53

PRINTING FROM WINDOWS
PRINTING FROM WINDOWS
To print a job from your Windows computer to the Splash RPX-i, you must set up the
printing connections and add a printer to set up the Splash RPX-i for printing. The printer
files are provided on the Splash RPX-i User Software and Documentation CD or can be
downloaded directly from the Splash RPX-i over the network.
This chapter describes the procedures for setting up the printing connections, setting up the
Splash RPX-i for printing, and printing from your Windows computer.
See the following table for each procedure.
Procedure See
Adding a printer with the TCP/IP with LPR printing connection page 54
53
Adding a printer with the SMB printing connection page 62
Printing from Windows computers page 64
Page 54

PRINTING FROM WINDOWS
Adding a printer with the TCP/IP with LPR printing connection
Before you print a job to the Splash RPX-i, you must set up a printing connection and add a
printer. This section describes the procedures for setting up the TCP/IP with LPR printing
connection and setting up the Splash RPX-i for printing with the files on the Splash RPX-i
User Software and Documentation CD or the files that are downloaded from the
Splash RPX-i.
Refer to the following table for each procedure.
Procedure See
Preparing the Windows printer files page 54
Setting up the TCP/IP with LPR printing connection page 56
Setting up the Splash RPX-i for printing page 59
Preparing the Windows printer files
54
You must have the Windows printer files ready before setting up the TCP/IP with LPR
printing connection because you are prompted to point to the location of the printer files
after completing the setup procedure for the printing connection.
Preparing the printer files on the Splash RPX-i User Software and Documentation CD
The Splash RPX-i User Software and Documentation CD provides the following printer files
for the Splash RPX-i.
•Adobe PostScript Printer Driver: Provides a way of communication between your
Windows 2000/XP/Server 2003 computer, the Splash RPX-i, and the copier.
• PPD file: Provides information about the Splash RPX-i and copier to your application and
printer driver.
Before you start the procedure for setting up the TCP/IP with LPR printing connection, have
the Splash RPX-i User Software and Documentation CD ready for the Windows printer files
to be installed.
Downloading the printer files from the Splash RPX-i
Before you start the procedure for setting up the TCP/IP with LPR printing connection,
download the Windows printer files from the Splash RPX-i.
You can download printer files to your computer directly from the Splash RPX-i over the
network.
Page 55

PRINTING FROM WINDOWS
TO DOWNLOAD THE WINDOWS PRINTER FILES
1 Start your Internet browser.
2Type the IP address of the Splash RPX-i and click Go.
The Splash Server Management dialog box appears.
55
3 Click Downloads.
4 Click Splash Installer Downloads.
5Download RPX-i Windows Drivers.zip to your desktop and expand the archive.
You now have the printer files ready to be installed. Set up the printing connection and install
these printer files in the same way as you do with the files in the Splash RPX-i User Software
and Documentation CD.
For more information about setting up the printing connection, see page 56. For more
information about installing the printer files, see page 59.
Page 56

PRINTING FROM WINDOWS
Setting up the TCP/IP with LPR printing connection
To print a job to Splash RPX-i, you must configure your Windows computer for the printing
connections. This section describes how to set up TCP/IP with LPR printing connection.
NOTE: The Splash RPX-i must be configured to accept print jobs using TCP/IP with the LPR
protocol, and LPD must be enabled on the Splash RPX-i by your server administrator.
For more information, see the Configuration Guide.
The procedures for setting up TCP/IP with LPR printing connections for Windows 2000,
Windows XP, and Windows Server 2003 are similar. The following procedures use the
illustrations from the Windows 2000 computer. The differences are noted.
TO SET UP TCP/IP WITH LPR PRINTING CONNECTION FOR WINDOWS
1 Obtain the IP address of the Splash RPX-i from your server administrator.
2 Windows 2000: Click Start, choose Settings, and then choose Printers.
Windows XP: Click Start and choose Printers and Faxes.
Windows Server 2003: Click Start, choose Control Panel, and then choose Printers and Faxes.
56
3 Double-click Add Printer (or click Add a Printer).
The Add Printer Wizard dialog box appears.
4 Click Next.
The Local or Network Printer pane appears.
5 Select Local printer (or Local printer attached to this computer), clear the “Automatically
detect and install my Plug and Play printer” option, and then click Next.
The Select a Printer Port pane appears.
6 Select Create a new port.
7 Select Standard TCP/IP Port from the Type of port list and click Next.
The Add Standard TCP/IP Printer Port Wizard dialog box appears.
Page 57

PRINTING FROM WINDOWS
8 Click Next.
The Add Port pane appears.
9Type the IP address of the Splash RPX-i and click Next.
57
The Additional Port Information Required pane appears.
Page 58

PRINTING FROM WINDOWS
10 Select Custom in the Device Type area and click Settings.
The Configure Standard TCP/IP Port Monitor dialog box appears.
58
11 Select LPR in the Protocol area.
12 In the Queue Name field, type splash to connect to the default queue on the Splash RPX-i.
Type the name of a Hot Folder to connect to the Virtual Printer.
The Virtual Printers feature allows you to send your jobs to Hot Folders that are set up at the
Splash RPX-i. For more information about Hot Folders, see the Job Management Guide.
NOTE: The Hot Folder name is case sensitive, and must exactly match the Virtual Printer
name.
13 Select LPR Byte Counting Enabled (optional).
NOTE: LPR Byte Counting can cause slower printing.
14 Click OK.
15 Click Next.
16 Click Finish in the Add Standard TCP/IP Port Wizard dialog box.
The Add Standard TCP/IP Port Wizard dialog box closes and the Add Printer Wizard
dialog box appears. For instructions on installing the printer files, see the following section.
Page 59

PRINTING FROM WINDOWS
Setting up the Splash RPX-i for printing
The following sections describe how to add a printer with the printer files on the CD or the
files that are downloaded from the Splash RPX-i.
NOTE: For the system requirements, see Getting Started.
Setting up with the printer files on the Splash RPX-i User Software and
Documentation CD
Use the following procedure to install the printer files from the Splash RPX-i User Software
and Documentation CD.
NOTE: The procedures for installing the printer files for Windows 2000, Windows XP, and
Windows Server 2003 are similar. The following procedures use Windows 2000 illustrations.
The differences are noted.
TO INSTALL THE PRINTER FILES FROM THE SPLASH RPX-I USER SOFTWARE AND DOCUMENTATION CD
NOTE: This procedure assumes that you have completed the procedure to set up the TCP/IP
with LPR printing connection that is described in the previous section. For more information,
see “Setting up the TCP/IP with LPR printing connection” on page 56.
59
1 Click Have Disk in the Add Printer Wizard dialog box.
The Install From Disk dialog box appears and prompts you for the installation disk.
2 Insert the Splash RPX-i User Software and Documentation CD into the CD-ROM drive.
3Type the name of the CD-ROM drive (for example, D:\).
4 Click Browse.
The Locate File dialog box appears.
Page 60

PRINTING FROM WINDOWS
5Browse to the following folder that contains the printer files for the Splash RPX-i.
Splash RPX-i\ Printer Drivers\RPX-i Windows Client\ English \ Printdrvr \ Ps_drvr
\Win_2K_XP
6 Select oemsetup.inf and click Open.
The path is copied to the field in the Install From Disk dialog box.
7 Click OK.
8 Select the PPD file in the Printers pane and click Next.
60
The following Splash Server PPD files are provided:
• Splash RPX-i 240-250 for standard printing
• Splash RPX-i 240-250 SA for Secure Access printing
NOTE: Select the PPD file for Secure Access printing if your server administrator configured
Secure Access printing at the Splash RPX-i. For more information, see “Secure Access” on
page 96 and the Job Management Guide.
Page 61

PRINTING FROM WINDOWS
9 In the Printer name field, keep the default name or type a custom name.
This name is used in the Printers window.
10 Indicate whether to make it the default printer and click Next.
61
11 Follow the on-screen instructions.
The necessary files are installed on your hard disk. When installation is complete, the Printers
dialog box appears, with an icon for the newly installed printer.
Setting up with the downloaded printer files
You can install the downloaded printer files in the same way as the files on the Splash RPX-i
User Software and Documentation CD. Follow the procedure in “Setting up the
Splash RPX-i for printing” on page 59 to install the downloaded printer files.
Page 62

PRINTING FROM WINDOWS
Adding a printer with the SMB printing connection
If your network does not have a Windows server, Windows computers can still print to the
Splash RPX-i. This method of printing is SMB printing (also known as Windows or WINS
printing). When users send print jobs, computers running Windows operate in a peer-to-peer
environment and communicate directly with the Splash RPX-i.
Enabling SMB printing allows the Splash RPX-i to be listed on the network, so that Windows
clients can print to the Splash RPX-i without using other networking software. Windows
printing runs via TCP/IP. You must configure TCP/IP on the Splash RPX-i and on all
computers that use SMB printing. For information about configuring TCP/IP on the
Splash RPX-i, see the Configuration Guide.
Setting up the Splash RPX-i with Point and Print
SMB printing allows you to install printer files on your computer from the Splash RPX-i
using Point and Print, and print to the Splash RPX-i.
NOTE: To use the SMB printing feature, the Windows Sharing option must be enabled by
your server administrator at the Splash RPX-i. For more information, see the Configuration
Guide.
62
TO INSTALL THE PRINTER FILES BY POINT AND PRINT
1 Obtain the IP address of the Splash RPX-i from your server administrator.
2 Click Start and choose Run.
3Type “\\” followed by the IP address of the Splash RPX-i.
An example: \\10.10.83.28
4 If the login dialog box appears, type the user name and password for the server administrator
of the Splash RPX-i.
For this information, contact your server administrator.
Page 63

PRINTING FROM WINDOWS
5 Click OK.
63
The content of the Splash RPX-i hard disk appears.
6 Double-click the printer icon “splash” to connect to the default queue on the Splash RPX-i.
Double-click the name of a Hot Folder to connect to the Virtual Printer.
The Virtual Printers feature allows you to send your jobs to the Hot Folders that are set up at
the Splash RPX-i. For more information about Hot Folders, see the Job Management Guide.
7 If the Printers dialog box appears, click Yes.
The printer files for the Splash RPX-i are installed on your computer and the printer window
appears.
Uninstalling the printer files
When you must remove the printer files from your Windows computer, remove them
using the Splash Printer Delete Utility that is provided on the Splash RPX-i User Software
and Documentation CD.
For information about installing the Splash Printer Delete Utility, see Getting Started.
TO UNINSTALL THE PRINTER FILES
1 Click Start, choose All Programs (or Programs), and then choose EFI.
2 Click SplashPrinterDeleteUtility.
The Splash Driver Uninstall Tool dialog box appears. The Splash RPX-i printer files found on
your computer are listed.
3 Select the printer name and click Delete.
4 Click OK to delete the printer files.
5 Click OK to restart, or click Cancel to return to the Splash Driver Uninstall Tool dialog box to
delete another set of printer files.
6 When you finish deleting the printer files, click Exit.
7 Restart your computer.
Page 64

PRINTING FROM WINDOWS
Printing from Windows computers
Print to the Splash RPX-i just as you would print to any other printer from a Windows
application. Select the Splash RPX-i as the current printer in the Printers list and print the file
from within the application.
After you install the Splash RPX-i printer files and configure the printing connections, you
can print from most Windows applications. Using the appropriate PPD file, you can control
the Splash RPX-i printing features by specifying the print options from the Print dialog boxes.
For more information about the Splash RPX-i print options, see page 77.
Selecting the Splash RPX-i from the Printers list
Before you print a job, select the Splash RPX-i from the Printers list. Use the following
procedure to select Splash RPX-i as your default printer.
TO SELECT THE SPLASH RPX-I AS THE DEFAULT PRINTER
1 Make sure the Splash RPX-i is connected to the network and turned on.
64
2 Windows 2000: Click Start, choose Settings, and then choose Printers.
Windows XP: Click Start and choose Printers and Faxes.
Windows Server 2003: Click Start, choose Control Panel, and then choose Printers and Faxes.
The printers that are set up for printing are listed. The Virtual Printers that are configured at
the Splash RPX-i and set up for printing are also listed. For more information about Virtual
Printers, see the Job Management Guide.
3 Right-click the Splash RPX-i and select Set as Default Printer.
4 Close the window.
Page 65

PRINTING FROM WINDOWS
65
Setting print options from Windows
The print options are set from the Print tabs with most Windows applications.
For information about specific print options, see “Print Options” on page 77.
Some default settings are set by your server administrator during Splash RPX-i Setup.
For information about the current server default settings, contact your server administrator.
Some print options that are selectable from the printer driver or an application are the same as
or similar to print options that are specific to the Splash RPX-i. In these cases, use the print
options specific to the Splash RPX-i. The printer driver or an application may not set up the
file properly for printing on the Splash RPX-i, resulting in unexpected printing errors and
longer processing time.
NOTE: A Virtual Printer is linked to a Hot Folder. When you send your job to a Virtual
Printer, a set of print options that are configured for the Hot Folder is applied. For more
information about Hot Folders, see the Job Management Guide.
The procedures for printing a job from the Windows 2000, Windows XP, and Windows
Server 2003 computers are similar. The following procedures use the illustrations from
Windows 2000. The differences are noted.
TO SET PRINT OPTIONS FROM WINDOWS
1 Open a file in your application.
2 Choose Print from the File menu.
The Print dialog box appears. The name of the Splash RPX-i that is set up as the default
printer is listed in the Name field. The drop-down menu allows you to view the list of other
printers that are set up for printing.
NOTE: The Virtual Printers that are configured at the Splash RPX-i and set up for printing are
also listed. For more information about Virtual Printers, see the Job Management Guide.
Page 66

PRINTING FROM WINDOWS
3 Select the Splash RPX-i from the Name list and click Properties.
The Document Properties dialog box appears.
4 Click the Paper/Quality tab.
66
Specify Paper Source and Paper Size options from the following list.
• Paper Source from the Tray Selection > Paper Source list
• Paper Size from the Paper/Output>Paper Size list in the Advanced Options dialog box
For more information, see the table on page 86 and “Paper Source” on page 94.
Page 67

PRINTING FROM WINDOWS
5 Click the File tab to specify file handling and scheduling options.
67
For more information, see the table on page 79 and “File Handling” on page 89.
Page 68

PRINTING FROM WINDOWS
6 Click the Page tab to specify Job Handling, Imposition, and Media Type options.
68
For more information, see the table on page 80, “Job Handling” on page 89, and
“Media Quality” on page 92. For more information about Imposition and Mixed
Media, see the Job Management Guide.
Page 69

PRINTING FROM WINDOWS
7 Click the Output tab to specify Output and Finishing options.
69
For more information, see the table on page 82 and “Output” on page 93.
8 Click the Color tab to specify Color Model and Printer Mode options.
Page 70

Two Way Communication:
Off
PRINTING FROM WINDOWS
Click Expert Settings to specify the color settings.
70
The Expert Color Settings dialog box displays color settings differently, depending on
whether or not the Two Way Communication option is selected.
NOTE: To view the current color settings at the Splash RPX-i, you must enable the Two Way
Communication option. For more information, see “Enabling Two Way Communication” on
page 73.
Two Way Communication:
On
Page 71

PRINTING FROM WINDOWS
NOTE: The initial values reflect the current color settings that are set in Edit Defaults at the
Splash RPX-i.
Specify the following options in the Expert Color Settings dialog box:
•RGB Profile
•Press Simulation
• CMYK Color Management
•Preserve Original GCR
•Match Spot Colors
•Rendering Style
•Use Black Ink Only
•Overprint Black
•Output Profile
71
For more information about the color options, see the table on page 85 and the Color Guide.
9 Click the Extras tab to specify Prepress options.
For more information, see the table on page 83 and the Color Guide.
Page 72

PRINTING FROM WINDOWS
10 Click the Quality tab to specify Quality options.
72
For more information, see the table on page 83 and the Color Guide.
11 Click the Info tab.
If the Secure Access printing is configured at the Splash RPX-i, type the following
information:
•User
•Password
•Account
For more information, see the table on page 84.
NOTE: The information in this pane can be entered for Secure Access or standard printing.
If Secure Access is configured at the Splash RPX-i and the required information is not
provided, you are prompted to do so when you click Print.
Page 73

PRINTING FROM WINDOWS
Contact your server administrator for the required information. For more information about
Secure Access printing, see “Secure Access” on page 96 and the Job Management Guide.
Click Enable to use the Secure Printing feature.
The Secure Printing dialog box appears.
Type your password to send your job as a Secure Printing job and click OK.
12 Click the Consumables tab to view the following information about the copier:
• Paper: Levels, Sizes, and Dimensions
• Engine Status: Device Name, State, Jobs in Queue, Status Messages, and Error Messages
• Toner: Levels
NOTE: The content in the Consumable tab is displayed using the Two Way Communication
feature. For more information, see the following section.
13 Click Update to update the copier status.
14 Click Print.
73
Enabling Two Way Communication
The Two Way Communication feature allows you to retrieve information from the
Splash RPX-i, such as the current color settings at the Splash RPX-i and the status of the
copier.
The Two Way Communication option is enabled when you configure the printer port for the
Splash RPX-i. For more information, see “Setting up the TCP/IP with LPR printing
connection” on page 56.
If the Two Way Communication feature is not enabled automatically, use the following
procedure to enable the option in the Info tab of the Printing Properties or Document
Properties dialog box.
Page 74

PRINTING FROM WINDOWS
TO ENABLE THE TWO WAY COMMUNICATION OPTION
1 Click the Info tab.
74
2Type the IP address of the Splash RPX-i in the Server IP Address field.
3 Click OK.
Page 75

PRINTING FROM WINDOWS
P
Land
75
Defining custom page sizes
With custom page sizes, you define the dimensions of a printed page. After you define a
custom page size, you can use it from within an application without redefining it each time
you print. When you create custom page sizes, specify Width dimensions to correspond with
the shorter side of your job and specify Height dimensions to correspond with the longer side
of your job. Set custom page sizes in this way, regardless of the orientation settings in the
application.
ortrait
Height
Width
Width
Height
NOTE: Custom page sizes are not supported with Imposition jobs.
The procedures for defining a custom page size from the Windows 2000, Windows XP, and
Windows Server 2003 computers are similar. The following procedures use the illustrations
from Windows 2000. The differences are noted.
TO DEFINE A CUSTOM PAGE SIZE FROM WINDOWS
1 Windows 2000: Click Start, choose Settings, and then choose Printers.
Windows XP: Click Start and choose Printers and Faxes.
Windows Server 2003: Click Start, choose Control Panel, and then choose Printers and Faxes.
2 Right-click the Splash RPX-i and select Printing Preferences.
scape
3 Click the Paper/Quality tab.
4 Click Advanced.
Page 76

PRINTING FROM WINDOWS
5 Select PostScript Custom Page Size from the Paper Size list.
The PostScript Custom Page Size Definition dialog box appears.
6 Specify the following options.
• Custom Page Size Dimensions: Specify the width and height of the print job.
The custom page size supports the following dimensions and margins:
76
–Widths: 3.93” to 13”
–Heights: 5.83” to 19.2”
–Margins: 0.17”
• Unit: Select a unit of measurement for the print job.
• Paper Feed Direction: Choose the paper feed direction of the print job.
• Paper Type: Cut Sheet is the only option available.
• Offsets Relative to Paper Feed Direction: Specify the offsets (margins) of the print job
relative to the paper feed direction.
7 Click OK to close the PostScript Custom Page Size Definition dialog box.
8 Click OK to close the Advanced Options dialog box.
9 Click OK to close the Printing Preferences dialog box.
You can now specify the custom page size from an application.
Page 77

PRINT OPTIONS
About printer drivers and PPD files
PRINT OPTIONS
This chapter describes the Splash RPX-i print options. It covers the following topics:
•Information about printer drivers and PostScript printer description (PPD) files
•Brief explanations of each print option, default setting, and any constraints
or requirements
•Details about specific print options
The Splash RPX-i receives files from computers on the network, processes (RIPs) the files, and
then sends them to the copier. When printing from an application, the Mac OS or Windows
computer communicates with the Splash RPX-i by means of a PostScript printer driver and
PPD files.
77
A printer driver provides a way to communicate information about print jobs between your
application and the Splash RPX-i and copier. It interprets the instructions generated by the
application, merges those instructions with copier-specific options you specify, and then
translates all information into a language that the copier understands. In other words, the
printer driver writes a PostScript file based on your original file and the options you specify
from the Page Setup and Print dialog boxes.
A PPD file contains information about the features and capabilities of a particular device
(for example, what paper sizes and media types are supported). The printer driver reads the
information in the PPD file and presents the information to you in the form of print options
you select in the Page Setup and Print dialog box. The PPD file for the Splash RPX-i includes
information about the features of both the copier and the Splash RPX-i. For information
about the specific print options for the Splash RPX-i, see the table on page 79.
Page 78

PRINT OPTIONS
About print options
The Splash RPX-i print options give you access to the special features of your copier and
Splash RPX-i. They can be specified in multiple locations: at the Splash RPX-i and from
your applications. You can also specify some print options when printing using Hot Folders.
For more information about Hot Folders, see the Job Management Guide.
Print option override hierarchy
The override hierarchy is as follows:
• The Splash Server Preferences settings override the factory default settings.
• The Splash RPX-i Default Job Settings override the factory default settings.
• The settings from your applications override the Splash Server Preferences and
Default Job Settings.
• The Hot Folders settings override the settings from your applications.
78
• The Splash RPX-i override settings override the Hot Folders settings and settings from
your applications.
Setting print options
Refer to the following descriptions for the locations of setting print options:
Splash Server Preferences: Some settings are specified at Splash Server Preferences during
Splash RPX-i Setup by your server administrator. For more information about the Splash
Server Preferences, see the Configuration Guide. For information about the current
Splash RPX-i settings, print the Configuration page from the Splash RPX-i or contact your
server administrator.
Splash RPX-i Default Job Settings: You can set the default values for most of the print options
from the Default Job Settings dialog box at the Splash RPX-i. For more information about
Default Job Settings, see the Job Management Guide. For information about the current
Splash RPX-i settings, print the Configuration page from the Splash RPX-i or contact your
server administrator.
Application: When printing from your application, you can specify print options with the
PostScript printer drivers. For more information, see Printing from Mac OS X, Printing from
Mac OS 9, and Printing from Windows.
Hot Folders: You can assign a set of print options to a Hot Folder. When you specify a set
for a Hot Folder, those print options are applied to all jobs that are sent to the Hot Folder.
For more information, see the Job Management Guide.
Splash Server overrides: You can change the settings of a job from the Edit Job Settings
dialog box at the Splash RPX-i. For more information, see the Job Management Guide.
Page 79

PRINT OPTIONS
Splash RPX-i print options
See the following table for a list of print options that are available with Splash RPX-i.
The factory default settings are underlined. The constraints and information about the print
options are also provided in the table.
If you do not change any settings, the Splash RPX-i prints your job with the factory default
settings. If your server administrator changed the Printer’s default settings at the Splash RPX-i
and you do not change any settings, your job is printed with the settings your server
administrator specified.
The structure of the print options in the following table is based on the Mac OS X printer
driver. The items in the table are based on the Mac OS X and Windows 2000 printer drivers.
Any differences in the names and locations of the print options for Mac OS X and
Windows 2000 are noted.
79
Option Groups Options Settings
(underlined: default setting)
Splash Features:
File
(Mac OS)
File
(Windows)
File Handling Process and Hold
Print and Hold
Print and Delete
Preflight and Hold
Color Postflight and Hold
Send and Hold
Schedule Job Schedule Print Job dialog box:
- Date
- Time
(Mac OS)
Selected:
- Date
- Time
Unselected
(Windows)
Do this Constraints
and information
Specify the action at the
Splash RPX-i for the
spooled and processed files
after you send the job.
For Mac OS: Click
Schedule Job to display the
Schedule Print Job dialog
box. Select the date on the
calendar that appears. Type
or select the time using the
arrows.
For Windows: Select the
Schedule Job option. Type
or select the date on the
calendar that appears. Type
or select the time using the
arrows.
For more information,
see page 89.
Page 80

PRINT OPTIONS
80
Option Groups Options Settings
(underlined: default setting)
Splash Features:
Page
(Mac OS)
Page
(Windows)
Job
Handling
Duplex No Duple
Long Edge Binding
Short Edge Binding
Collate Selected
Unselected
Rotate Page Selected
Unselected
Face Up Selected
Unselected
Reverse Page
Order
Imposition Selected
Selected
Unselected
Unselected
Imposition Type:
- Saddle Stitch
- Nested Saddle Stitch
- Perfect Bound
- Nested Perfect Bound
- Signature
- 2-up Imposition
- Step and Repeat
Do this Constraints
and information
x
Specify whether to enable
the feature for your job.
Specify whether to use the
Imposition feature.
Select the imposition type
For more information,
see page 89.
For more information,
see the Job
Management Guide.
for your Imposition job.
Section Size:
- All
- 4
- 8
- 16
- 32
- 64
Output Paper Size:
- T
abloid
- A3
- Letter
- A4
- 8K
-12x18
-SRA3
-13x19
Scale To Fit:
- Selected
- Unselected
Crop Marks:
- Very Long
- Long
- Medium
- Short
- Very Short
- Off
Select the section size for
your Imposition job.
Select the output paper size
for your Imposition job.
Specify whether to scale
your Imposition job to fit
to the paper.
Specify whether to print the
crop marks, and the type of
the crop marks for your
Imposition job.
Page 81

PRINT OPTIONS
81
Option Groups Options Settings
(underlined: default setting)
Splash Features:
Page
(Mac OS)
Page
(Windows)
Media
Options
Media Type T
ray Default
Plain paper (64-105 gsm)
Plain paper (Side 2) (64-105
gsm)
Recycled paper (64-105 gsm)
Heavyweight 1 (105-176 gsm)
Heavyweight 1 (Side 2) (105176 gsm)
Coated 1 (105-176 gsm)
Coated 1 (Side 2) (105-176
gsm)
Tab Stock 1 (105-176gsm)
Labels 1 (105-176 gsm)
Heavyweight 2 (177-220 gsm)
Heavyweight 2 (Side 2) (177220 gsm)
Heavyweight 2 (221-300 gsm)
Heavyweight 2 (Side 2) (221300 gsm)
Coated 2 (177-220 gsm)
Coated 2 (Side 2) (177-220
gsm)
Coated 2 (221-280 gsm)
Coated 2 (Side 2) (221-280
gsm)
Tab Stock 2 (177-280 gsm)
Labels 2 (177-300 gsm)
Hole Punched
Transparency
Transparency Interleave
Custom 1 paper (64-105 gsm)
Custom 2 paper (64-105 gsm)
Custom 3 paper (64-105 gsm)
Custom 4 paper (64-105 gsm)
Custom 5 paper (64-105 gsm)
Do this Constraints
and information
Select the media type for
your job.
Select Tray Default to use
the media that is set in the
For more information,
see the documentation
that accompanies the
copier.
copier.
Media Quality
Gloss Level Normal
Enhanced
Mixed Media
(Windows)
Specify the Media Quality
settings for some media
types.
Specify whether to enhance
the gloss level of your job.
Click to define the Mixed
Media settings for your job.
For more information,
see page 92.
For more information,
see the Job
Management Guide
.
Page 82

PRINT OPTIONS
82
Option Groups Options Settings
(underlined: default setting)
Splash Features:
Output
(Mac OS)
Output:
Finishing
Options
(Windows)
Output Output Tray
Finisher Top Tray
Finisher Stack
Booklet Tray
Offset Mode Selected
Unselected
Content
Orientation
Staple None
Punch None
Portrait
Landscape
Left Bottom Single
Right Bottom Single
Left Top Single
Right Top Single
Left Double
Right Double
Bottom Double
Top Double
2 Hole Punch
3 Hole Punch
4 Hole Punch
er Tray
Do this Constraints
and information
Specify the output tray for
your job.
For more information,
see the documentation
that accompanies the
copier.
Specify whether to offset
sets of your job.
Define the orientation of
the content of the original
document so that the
Splash RPX-i places staple
and punch selections
correctly.
Specify whether to staple
your job, and the location
of the staple(s) if a job is
stapled.
Specify whether to punch
your job, and the number
of holes if a job is punched.
Position:
- Left
- Right
- Top
Fasten Mode Off
Fold and Staple
Fold
Specify the location of the
holes if a job is punched.
Specify whether to fold and
staple or fold your booklet
job.
Page 83

PRINT OPTIONS
83
Option Groups Options Settings
(underlined: default setting)
Splash Features:
Quality
(Mac OS)
Quality
(Windows)
Splash Features:
Extras
(Mac OS)
Extras
(Windows)
Quality
Options
Prepress
Features
Text/Graphics
Quality
Dynamic Image
Enhancement
Graphics Edge
Enhancement
Auto Trapping Selected
Splash Proof Selected
Show Composite
Overprints
Gradient
Smoothing
Separations A
Normal
Best
Selected
Unselected
Selected
Unselected
Unselected
Unselected
Selected
Unselected
Selected
Unselected
utomatic
Automatic Single Page
Disabled
QuarkXPress 4 Style
QuarkXPress 3 Style
PageMaker Style
FreeHand Style
Canvas Style
Do this Constraints
and information
Specify whether to enable
the feature for your job.
Specify the type of
separations for your job.
For more information,
see the Color Guide.
For more information,
see the Color Guide.
Print In Own Color:
- Selected
- Unselected
Print
Progressives
Print Info Strip Selected
Save As TIFF Selected
Mirror Image Selected
Invert Image Selected
Selected
Unselected
Unselected
Unselecte
-DPI (72/300/600)
Unselected
Unselected
Specify whether to print
each plate of a separations
file in its own color.
Specify whether to print
progressives for your job.
Specify whether to print the
Info Strip for your job.
Specify whether to save
d:
your job as a TIFF file, and
select the resolution from
the list for your job.
Specify whether to flip the
page on the vertical axis.
Specify whether to invert
your job.
Page 84

PRINT OPTIONS
84
Option Groups Options Settings
(underlined: default setting)
Splash Features:
Info
(Mac OS)
Info:
Document
Information
(Windows)
User
Password
Comment
Account
Server IP
Address
(Windows)
Do this Constraints
and information
Type the information in the
User, Password, and
Account fields, if required
for Secure Access printing.
Contact your server
administrator to obtain the
information.
The maximum
number of characters
is 24.
If no name is typed for
the User field, the job
includes the network
identification of your
computer.
The maximum
number of characters
is 8.
The maximum
number of characters
is 255.
The maximum
number of characters
is 32.
Type the IP address of the
Splash RPX-i to use the
Two Way Communication
feature.
Contact your server
administrator to
obtain the
information.
Secure Printing
Password
Printer Address:
(Mac OS)
Enable
Secure Printing dialog box:
- Password
- Verify password
Bi-Di Communication
Click Enable to display the
Secure Printing dialog box.
Enter the Secure Printing
password in both fields and
click OK.
Type the IP address of the
Splash RPX-i in the Printer
Address field to use the Two
Way Communication
feature.
Or click Bi-Di
Communication to open a
dialog box to enable the
feature.
The maximum
number of characters
for the password is 8.
Page 85

PRINT OPTIONS
85
Option Groups Options Settings
(underlined: default setting)
Splash Color
(Mac OS)
Color
(Windows)
Splash Color
(Mac OS)
Color
(Windows)
Expert Color
Settings
Print Mode
(Mac OS)
Color Model
(Windows)
Printer Mode Contone
Two Way
Communication
(Mac OS)
RGB:
RGB Profile
Standar
Expert Color
Grayscale
Color (4 Pass)
Grayscale (1 Pass)
Screened
Selected
Unselected
Printer Address
Configure
Printer’
Adobe RGB
Apple RGB
RGB 9300
RGB D50
RGB D65
sRGB
Color Management Off
Custom Setup:
- RGB Gamma: Lightest (1.0)/
/Light (1.4)/Normal (1.8)
/D
ark (2.2)/Darkest (2.6)
- RGB Whitepoint: More Yellow
(D50)/Normal (D65)/M
(9300)
d Color
s default (Apple RGB)
ore Blue
Do this Constraints
and information
Select the print mode or
color model for your job.
For more information,
see the Color Guide.
Specify whether to print
your job with the contone
or halftone screening mode.
Select Two Way
Communication or click
Configure to open a dialog
box to enable the feature.
Specify a RGB source color
space definition for printing
RGB images, objects, and
text.
Select Custom Setup to
specify the RGB Gamma
and RGB Whitepoint
settings.
For more information,
see the Color Guide.
You must enable the
Two Way
Communication
feature to view and
edit the printer’s
default settings of the
Splash RPX-i.
RGB:
Press Simulation
CMYK:
CMYK Color
Management
CMYK:
Preserve
Original GCR
Printer’s default (Disabled)
Disabled
Enabled
Printer’
s default (SWOP)
SWOP
Euroscale
Enhanced
Custom 1 - 10
Color Management Off
Printer’s default (Disabled)
Enabled
Disabled
Specify whether to process
your RGB job for press
simulation.
Specify a CMYK color
space definition for press
simulation.
Specify whether to preserve
the original GCR values.
Page 86

PRINT OPTIONS
86
Option Groups Options Settings
(underlined: default setting)
Splash Color
(Mac OS)
Color
(Windows)
Expert Color
Settings
Spot:
Match Spot
Colors
Black:
Use Black Ink
Only
Black:
Overprint Black
Rendering:
Rendering Style
Output:
Output Profile
Printer’
On
Off
Printer’
On
Off
Printer’
On
Off
Printer’
Graphics
Photographic
Presentation
Paper Simulation
Spot
Printer’s default (DC250-240
(Splash))
DC250-240 (Splash)
DC250-240 1bit (Splash)
DC250-240 1bit EHW (Splash)
DC250-240 1bit OHP (Splash)
DC250-240 EHW (Splash)
DC250-240 OHP (Splash)
s default (On)
s default (On)
s default (On)
s default (Photographic)
Do this Constraints
and information
Specify whether to enable
the feature for your job.
For more information,
see the Color Guide.
You must enable the
Two Way
Communication
feature to view and
edit the printer’s
default settings of the
Splash RPX-i.
Specify the rendering style.
Specify the output profile
to use for your job.
Paper Source
(Mac OS)
Paper/Quality:
Advanced
Options:
Paper/Output
(Windows)
Paper Size
Letter LEF
Letter SEF
Legal
Legal 13
Tabloid
Statement SEF
A4 LEF
A4 SEF
A3
A5 SEF
B4
B5 LEF
B5 SEF
8K
16K LEF
SRA3
12x18
13x19
Custom
Select the paper size for
your job.
For more information
about setting Custom
paper size, see Printing
from Mac OS X,
Printing from Mac OS
9, and Printing from
Windows.
Page 87

PRINT OPTIONS
87
Option Groups Options Settings
(underlined: default setting)
Paper Source
(Mac OS)
Paper/Quality:
Tray Selection
(Windows)
Paper Source
(Mac OS)
Paper Source Automatic
A
uto Select
Tray 1
Tray 2
Tray 3
Tray 4
Tray 5
Tray 6 (HCF)
Media Type
(Mac OS)
Tray Default
Plain paper (64-105 gsm)
Plain paper (Side 2) (64-105
gsm)
Recycled paper (64-105 gsm)
Heavyweight 1 (105-176 gsm)
Heavyweight 1 (Side 2) (105176 gsm)
Coated 1 (105-176 gsm)
Coated 1 (Side 2) (105-176
gsm)
Tab Stock 1 (105-176gsm)
Labels 1 (105-176 gsm)
Heavyweight 2 (177-220 gsm)
Heavyweight 2 (Side 2) (177220 gsm)
Heavyweight 2 (221-300 gsm)
Heavyweight 2 (Side 2) (221300 gsm)
Coated 2 (177-220 gsm)
Coated 2 (Side 2) (177-220
gsm)
Coated 2 (221-280 gsm)
Coated 2 (Side 2) (221-280
gsm)
Tab Stock 2 (177-280 gsm)
Labels 2 (177-300 gsm)
Hole Punched
Transparency
Transparency Interleave
Custom 1 paper (64-105 gsm)
Custom 2 paper (64-105 gsm)
Custom 3 paper (64-105 gsm)
Custom 4 paper (64-105 gsm)
Custom 5 paper (64-105 gsm)
Do this Constraints
and information
Specify the paper source for
your job.
For more information,
see page 94.
Auto Select automatically
selects the tray that contains
the paper size specified for
your job.
Select the media type for
your job.
For more information,
see the documentation
that accompanies the
copier.
Mixed Media
(Mac OS)
Define
Click to define the Mixed
Media settings for your job.
For more information,
see the Job
Management Guide
.
Page 88

PRINT OPTIONS
88
Option Groups Options Settings
(underlined: default setting)
Printer Info
(Mac OS)
Consumables
(Windows)
Paper Tray Info
Toner Levels
Refresh
Two Way Communication
- Printer Address
Configure
Paper
Engine Status
Toner
Update
Do this Constraints
and information
Display the status of the
copier. Click Refresh to
update the copier status.
If no IP address appears
next to Printer Address,
click Configure to open a
dialog box to enable the
Two Way Communication
feature.
Display the status of the
copier. Click Update to
update the status.
Page 89

PRINT OPTIONS
More about print options
The following sections provide additional information about specific print options. For more
information about the settings, requirements, and constraints in effect for these options, see
the table on page 79.
File Handling
The Splash RPX-i provides several options for handling the PostScript spool file and image
files created during printing.
• Process and Hold sends the spool file directly to the Hold queue after the Splash RPX-i
processes it.
• Print and Hold saves the spool and image files after printing the job. The job is transferred
to the Hold queue. Saving the image file saves time when the same file must be reprinted,
but does not have to be reRIPped.
• Print and Delete automatically deletes the image and spool files after printing the job.
89
• Preflight and Hold processes and screens the job for prepress errors and then sends the job
to the Hold queue.
• Color Postflight and Hold processes and prints the job to screen for color postflight errors
and then sends the job to the Hold queue.
• Send and Hold sends the job file directly to the Hold queue, without processing.
Job Handling
The following print options are provided for job handling.
• Duplex specifies that the job prints double-sided output. Use this option to set up
automatic duplex printing from Trays 1-4.
– No Duplex applies no duplexing.
– Duplex Short Edge Binding prints double-sided sheets that are bound on the short edge
of the document. The second side of the sheet is rotated for correct orientation.
– Duplex Long Edge Binding prints double-sided sheets that are bound on a long edge of
the document. The second side of the sheet is rotated for correct orientation.
• Collate prints copies of a complete job, one after another. Sending collated jobs displays
the “Set” message in the Splash Server status window. Sending uncollated copies displays
the “Copy” message in the Splash Server status window.
• Rotate Pages rotates all pages of a job by 180 degrees. Select this option when stapling
landscape jobs that are rotated incorrectly by the creating application, such as Microsoft
PowerPoint and QuarkXPress.
Page 90

PRINT OPTIONS
90
• Face Up prints the job with a face-up orientation.
NOTE: If the Duplex option is selected for the job, Face Up has no effect.
• Reverse Page Order prints the job starting with the last page of the document.
NOTE: If your application provides reverse order printing (sometimes called “back-to-
front” printing), select the application’s option instead of this option.
NOTE: You must set the reverse page order option to On, either with this option or with
your application’s option, for a booklet job to be properly folded or folded and stapled
with the Fasten Mode option.
Manual duplex printing:
Use the Duplex options to set up manual duplex printing from Tray 5 for manual-fed jobs.
This specifies that the job prints as two-sided output.
The following paper sizes and media types must be set up for manual duplex printing from
Tray 5.
•Paper Size
– SRA3
–12x 18
–13x 19
–Custom
•Media Type
–Heavyweight 2 (177-220 gsm)
–Heavyweight 2 (221-300 gsm)
– Coated 1 (105-176 gsm)
– Coated 2 (177-220 gsm)
– Coated 2 (221-280 gsm)
–Tab Stock 1 (105-176 gsm)
–Tab Stock 2 (177-280 gsm)
NOTE: The following media types cannot be used for automatic or manual duplex printing.
– Labels 1 (105-176 gsm)
– Labels 2 (177-300 gsm)
–Transparency
–Transparency Interleave
Page 91

PRINT OPTIONS
TO PRINT USING MANUAL DUPLEX
1 Send a job to the Splash RPX-i with the “Print and Hold” option selected.
The Print and Hold option is displayed in the File tab. For more information about the
location, see the table on page 79.
2From the Job Editor at the Splash RPX-i, specify to print only the odd-numbered pages.
3 Place the printed odd-numbered pages in Tray 5.
4Verify that the orientation is appropriate for your job.
5From the Job Editor, specify to print only the even-numbered pages.
The Duplex alignment offsets on the Splash RPX-i are applied to the even-numbered pages.
91
Page 92

PRINT OPTIONS
92
Media Quality
The Media Quality option classifies various media types into further media descriptions.
You can specify the Media Quality settings for the following media types. For best results,
we recommend that you set the Media Quality option to Use Machine Setting.
NOTE: You must select Tray 5 from the Paper Source option to use the Media Quality feature.
Media Type Media Quality Setting
Plain paper (64-105 gsm)
Plain paper (Side 2) (64-105 gsm)
Recycled paper (64-105 gsm)
Heavyweight 1 (105-176 gsm)
Heavyweight 1 (Side 2) (105-176 gsm)
Coated 1(105-176 gsm)
Coated 1 (Side 2) (105-176 gsm)
Heavyweight 2 (177-220 gsm)
Heavyweight 2 (Side 2) (177-220 gsm)
Heavyweight 2 (221-300 gsm)
Heavyweight 2 (Side 2) (221-300 gsm)
Use Machine Settings
Plain A (64-80 gsm)
Plain B (81-105 gsm)
Plain C
Plain - Special 1
Plain - Special 2
Recycled A (64-80 gsm)
Recycled B (81-105 gsm)
Use Machine Settings
Heavyweight 1A (105-128 gsm)
Heavyweight 1B (129-176 gsm)
Heavyweight 1 - Special 1
Heavyweight 1 - Special 2
Use Machine Settings
Coated 1A (105-128 gsm)
Coated 1B (129-176 gsm)
Use Machine Settings
Heavyweight 2A
Heavyweight 2B
Heavyweight 2C
Heavyweight 2D
Heavyweight 2E - Envelope
Heavyweight 2 - Special 1
Heavyweight 2 - Special 2
Custom 1 paper (64-105 gsm)
Custom 2 paper (64-105 gsm)
Custom 3 paper (64-105 gsm)
Custom 4 paper (64-105 gsm)
Custom 5 paper (64-105 gsm)
Use Machine Settings
Plain A (64-80 gsm)
Plain B (81-105 gsm)
Plain C
Plain - Special 1
Plain - Special 2
Recycled A (64-80 gsm)
Recycled B (81-105 gsm)
Page 93

PRINT OPTIONS
Output
The following constraints are set for some of the options offered under Output:
• Output: To select a tray in this option, the tray must be installed at the copier.
• Content Orientation: To use this option, Hole Punch Finisher must be installed at the
copier and the Output option must be set to Finisher Stacker Tray or Finisher Top Tray.
• Staple: To use this option, Finisher Stacker Tray must be installed at the copier and the
Output option must be set to Finisher Stacker Tray.
– Left Bottom Single is disabled when Punch Position option is set to Top or Right.
– Right Bottom Single is disabled when Punch Position option is set to Top or Left.
– Left Top Single is disabled when Punch Position option is set to Right.
– Right Top Single is disabled when Punch Position option is set to Left.
– Left Double is disabled when Punch Position option is set to Right.
– Right Double is disabled when Punch Position option is set to Left.
93
– Bottom Double is disabled when Punch Position option is set to None.
– Top Double is disabled when Punch Position option is set to Top.
• Punch: To use this option, Hole Punch Finisher must be installed at the copier and the
Output option must be set to Finisher Stacker Tray or Finisher Top Tray.
– Position: This option is disabled when the Punch option is set to None.
– Left is enabled when the Staple option is set to Left Bottom Single, Left Top Single, or
Left Double.
– Right is enabled when the Staple option is set to Right Bottom Single, Right Top
Single, or Right Double.
– Top is enabled when the Staple option is set to Left Top Single, Right Top Single, or Top
Double.
• Fasten Mode: To use this option, Booklet Tray must be installed at the copier and the
Output option must be set to Booklet Tray.
For more information, see the documentation that accompanies the copier.
Page 94

PRINT OPTIONS
94
Paper Source
The Paper Source option lists the following trays that are available for the Splash RPX-i.
• Auto Select: The copier searches for the tray that contains the paper size and media type
that are specified for a job.
For the automatic tray selection to work properly, the paper sizes and media types must be
correctly set in the copier.
When a job is sent with the Media Type option set to any media type other than Tray
Default, the correct paper size of the correct media type must be set in the copier. If the
correct paper size of the correct media type is not set in the copier, the job does not print.
• Tray 1, Tray 2, Tray 3, Tray 4, Tray 6 (HCF): You can specify a specific tray, for example, to
print on letterhead or colored paper installed in a single tray.
When a job is sent with the Media Type option set to Tray Default, the job prints using the
copier settings. The paper size specified for the job must match the paper size in the tray.
If the paper size does not match, the job does not print.
When a job is sent with the Media Type option set to any media type other than Tray
Default, the job prints if the paper size and media type of the job match those in the tray.
The job does not print if the paper size and media type do not match.
Secure Printing
The printer drivers for the Splash RPX-i allow you to use Secure Printing to password-protect
your jobs. This security feature can be implemented only from the printer driver, and printed
at the Splash RPX-i only when a password is entered.
In order for a job to be password-protected, you must provide a password for the job at the
time it is printed. If a job sent to the Splash RPX-i is password-protected, the job will not RIP
until you enter a password at the Splash RPX-i.
NOTE: If a Secure Printing spool file is saved and sent to the Hold queue, the password is not
saved and must be re-entered when you resend the job to the Active queue.
NOTE: A Secure Printing job cannot be previewed or be part of a document set.
Page 95

PRINT OPTIONS
TO SET SECURE PRINTING
1 Open a document from your application.
2 Choose Print from the File menu.
3 Select Splash Features from the Copies and Pages menu and click the Info tab.
The Info pane appears.
95
4 Click Enable.
The Secure Printing dialog box appears.
5 Enter a Secure Printing password, verify the password, and then click OK.
The document is now password-protected, and the job goes to the Error queue at the
Splash RPX-i.
Page 96

PRINT OPTIONS
TO ACTIVATE A PASSWORD-PROTECTED JOB AT THE SPLASH RPX-I
1 Double-click the password-protected job in the Error queue.
The dialog box with job information appears.
96
2Type the Secure Printing password, as it was assigned at your computer, and click OK.
If you entered the password correctly, you can select the job and drag it to the Active queue.
If an incorrect password is entered, the job stays in the Error queue.
Secure Access
Secure Access allows the server administrator to limit who can print to the Splash RPX-i by
defining a combination of User, Password, and Account which must be entered and verified
before jobs print. Secure Access can also be used without verification to improve job logging
by requiring User and Account information in order to print.
Secure Access accounts are established and managed at the Splash RPX-i by your server
administrator. You are prompted for the required information at your computer. Validation of
the information, if required, is performed by the Splash RPX-i and if the information is not
correct, you are prompted to correct the information before you can print the job.
For more information about Secure Access, see the Job Management Guide.
Page 97

PRINT OPTIONS
Using the Secure Access printing
When the Secure Access printing is configured at the Splash RPX-i by your server
administrator, you must use the Secure Access PPD file to print a job.
The following PPD files are provided for the Splash RPX-i:
• Splash RPX-i 240-250 for standard printing
• Splash RPX-i 240-250 SA for Secure Access printing
To use Secure Access printing, you must use the PPD file with “SA” appended to the name.
Depending on the platforms and the types of printing connections to the Splash RPX-i,
the Secure Access PPD files are installed and accessed differently. For more information
about installing the printer files and selecting the Secure Access PPD file, see Printing from
Mac OS X, Printing from Mac OS 9, and Printing from Windows.
Printing
When you print a job, you are prompted to provide the following information as configured
by your server administrator at the Splash RPX-i:
97
•User
•Password
•Account
NOTE: Contact your server administrator for the required information at your site.
If the information you entered is incorrect, the driver prompts you to re-enter the correct
information, specifying the first incorrect entry, along with the error message that is set up at
the Splash RPX-i. This continues until you enter the correct information or click Cancel.
Once the correct information is entered, the job prints as with the standard PPD file.
Page 98

Page 99

INDEX
INDEX
99
A
AppleTalk connection, Mac OS X 16, 19
AppleTalk zone, Mac OS 9 43
C
Chooser, Mac OS 9 45
Color options
Mac OS 9 50
Windows 69, 85
Consumables, Windows 73
custom page size
defining for Mac OS 9 51
defining for Mac OS X 38
defining for Windows 75
custom page size, see defining a custom
page size, printing a custom page size
D
Default Browser connection 13
deleting printer files 63
Document Info options, Mac OS 9 47
downloading printer files
Mac OS 9 42
Mac OS X 11
Windows 54, 61
F
File
Mac OS 9 48
option group 79
Windows 67
File Handling 89
I
Info
Mac OS X 32
option group 84
Windows 72
installing printer files
Mac OS 9 41
Mac OS X 10
Windows 59
IP Printer connection 14
J
Job Handling options 89
L
Line Printer Daemon - LPD 14
LPD/LPR connection,
Mac OS X 20
E
enabling Two Way Communication
Mac OS X 37
Windows 73
Expert Color Settings
Mac OS X 35
option group 85
Windows 71
Extras
Mac OS 9 50
Mac OS X 31
option group 83
Windows 71
M
Mac OS 9
defining custom page sizes 51
downloading printer files 42
installing printer files 41
Page Setup 46
printing from 45
selecting printers 45
setting print options 46
setting up printers 43
Page 100

INDEX
100
Mac OS X
AppleTalk connection 16, 19
Default Browser connection 13
downloading printer files 11
installing printer files 10
IP Printer connection 14
Line Printer Daemon - LPD 14
LPD/LPR connection 20
Rendezvous connection 21, 22
selecting printers 25
setting print options 26
Mac OS X Classic 41
Manual duplex printing 90
Media Quality option 92
Media Type option 87
O
Oemsetup.inf file, Windows 60
OSX Installer 10
Output
Mac OS 9 49
Mac OS X 29
option group 82
Windows 69
P
Page
Mac OS 9 48
Mac OS X 28
option group 80 to 81
Windows 68
Page Attributes, Mac OS 9 46
Page Setup, Mac OS 9 46
Paper Size option 86
Paper Source
Mac OS X 36
Mac OS 9 47
option group 87
settings 94
Paper/Output options 86
Paper/Quality options 66, 86
Point and Print, Windows 62
PPD
Mac OS X 10
Windows 60
Print Center 10
print options
about 78
override hierarchy 78
setting 78
printer default settings 78
Printer Delete Utility 63
printer drivers, about 77
printer files, installing using
Point and Print 62
Printer Setup Utility 10
printing
from Mac OS 9 45
from Mac OS X 25
from Windows 64
Q
Quality
Mac OS 9 49
Mac OS X 30
option group 83
Windows 72
R
Rendezvous connection
Mac OS X 21
with IP Printing 22
S
Save Settings, Mac OS 9 50
Secure Access printing
about 96
Mac OS 9 47
Mac OS X 32
Windows 72
Secure Printing 94
Mac OS 9 47
Mac OS X 32
Windows 73
 Loading...