


DesignPro Tools for Xerox
G e t t i n g S t a r t e d G u i d e
C
1998-2008 Elixir Technologies Corporation . All rights reserved.

Elixir Technologies Corporation
721 East Main Street
Ventura, CA 93001
Copyright ©2008 by Elixir Technologies Corporation.
All rights reserved.
DP200801V300
All product names and trade names used herein are trademarks of their respective owners.
To report any errors you might find, please send a note to errata@elixir.com. Please note: e-mails
are used to correct future versions of this guide and may not receive an individual reply. For
technical support, please see “Customer Support” on page 10.
2 DesignPro Tools® for Xerox Getting Started Guide

Contents
Chapter 1: Introduction 5
DesignPro Tools Overview....................................................................5
Associated DesignPro Tools Applications and Utilities........................6
About This User Guide..........................................................................7
Who Should Use this Guide?....................................................................... 7
Related Guides.............................................................................. .... ..... ...... 8
Conventions...........................................................................................8
Typographic Conventions............................................................................ 8
Symbolic Conventions................................................................................. 9
Getting the Answers You Need...........................................................10
Customer Support...................................................................................... 10
Elixir Web Site ..........................................................................................11
Elixir Training ........................................................................................... 11
Product Help.............................................................................................. 12
Release Notes ............................................................................................ 12
Chapter 2: Installation 13
System Requirements.......................................................... .... ..... ............. 13
Software Requirements ....................................................................................13
Hardware Requirements...................................................................................14
Installing DesignPro Tools ....................................................................... 14
Select Components.................................................................................... 20
Complete DesignPro Tools Installation, Continued.................................. 21
Registering DesignPro Tools ..................................... .... ..... ...................... 27
Preparing and Downloading Initial Product License from the Internet ...........30
Downloading Existing Product License from the Internet...............................32
Viewing the Product License Information........................................................32
Deactivating the Product License File...................................................... ........33
Continuing the Installation ........................................................................34
Upgrading DesignPro Tools ..................................................................... 36
Modifying DesignPro Tools...................................................................... 44
Repairing DesignPro Tools ...................................................................... 51
Uninstalling DesignPro Tools .................................................................. 58
Contents 3

Installing DesignPro Tools in Silent Mode............................................... 63
Upgrading DesignPro Tools in Silent Mode............................................. 68
Modifying DesignPro Tools in Silent Mode............................................. 71
Repairing DesignPro Tools in Silent Mode............................................... 74
Uninstalling DesignPro Tools in Silent Mode .......................................... 77
Chapter 3: Configuration 81
Understanding Virtual Folders.................................................................. 82
Adding Virtual Folders.............................................................................. 84
Removing Virtual Folders......................................................................... 86
Chapter 4: Quick Start 87
Understanding the Design ...................................................................87
Opening Form Editor................................................................................. 89
Setting Page Properties ....................................................................................90
Adding an Image..............................................................................................91
Adding Text......................................................................................................95
Saving as an Elixir Form..................................................................................98
Importing Text..................................................................................................99
Editing Text................................ ....................................................................103
Adding Images...............................................................................................105
Drawing a Box...............................................................................................107
Drawing a Line............................................................................................... 110
Saving as a Xerox Form................................................................................. 111
Previewing Your Work .................................................................................. 114
Using PrintDriver to Create Forms.......................................................... 115
Creating a Form from MS Word Document.................................................. 115
Using Content from a Windows Application................................................. 121
Making Modifications to a Printed Form.......................................................121
Removing an Existing Image.........................................................................123
Adding a New Image..................................................................................... 123
Print Preview..................................................................................................125
Saving the Form............................................................................................. 125
Index 127
4 DesignPro Tools® for Xerox Getting Started Guide

Chapter 1:
Introduction
Welcome to the DesignPro Tools for Xerox Getting Started Guide. This guide is designed
to get you up and running with DesignPro Tools. This guide provides the following:
Default installation, including installation of the system software and system
configuration.
DesignPro Tools Quick Start exercises, which will lead you through a few exercises
for hands-on experience with DesignPro Form Editor and Elixir PrintDriver Pro.
Once you are ready to start working, the Quick Start exercise leads you through a
few exercises for hands-on experience with the DesignPro Form Editor and Elixir
PrintDriver Pro.
In the Quick Start chapter, you will create and edit forms.
This chapter defines who should use this guide, describes the guides within the DesignPro
Tools documentation set, and provides Elixir Customer Supp ort and training information.
DesignPro Tools Overview
DesignPro Tools provides a Windows-based, visual design environment for the rapid and
cost-effective creation of resources for the Xerox print environment. DesignPro Tools
supports integrated resource editors that make it easy to create and edit the forms, fonts
and images needed for Xerox printing.
5

Associated DesignPro Tools Applications and Utilities
DesignPro Tools for Xerox employs integrated applications and utilities to provide
advanced functionality for creating resources such as documents, forms, fonts and images
for Xerox jobs. Each application helps you create or modify one or more of these
necessary resources in a simple environment.
Following are the DesignPro Tools for Xer ox applications:
DesignPro Manager: a Windows Explorer-based file management tool for
resources used in editing and creating forms, graphics and fonts. It is also a central
launching area for the DesignPro Editors, Converters and other utilities.
DesignPro Form Editor: a page layout tool for creating and editing forms using
native Xerox, Windows or Elixir resources. Forms can be saved to Xerox, Adobe and
Elixir formats.
DesignPro Graphics Editor: a bitmap editor that prepares scanned images for
printing. Images can be tiled into fonts to speed the printing process. Uses native
Xerox, Windows or Elixir resources for bitmap editing.
DesignPro Font Editor: a bitmap font editor used to create and edit all Xerox fonts.
Easy to use editing tools give you precise control over font design, including
resizing, pixel editing, filtering and special effects. Outline fonts can also be opened,
edited and saved as a bitmap Elixir or Xerox font.
Elixir PrintDriver Pro: a utility for “printing” Windows documents into forms.
Windows documents can be opened in their original format and printed into forms
using the Elixir PrintDriver Pro. All supported formats can be created using the
Elixir PrintDriver Pro.
Elixir Scout: a system service that watches directories for a file or an event to
perform a number of actions like launching an executable (EXE or COM), running a
batch file (BAT or CMD), or selecting a process (DLL).
Elixir Viewer: displays printstream and resource files.
6 DesignPro Tools® for Xerox Getting Started Guide

About This User Guide
This guide introduces you to DesignPro Tools. It provides assistance with system
installation and configuration and provides a few exercises to help you feel confident in
the use of DesignPro Tools.
This guide is divided into four chapters:
Chapter 1: Introduction
Provides a general introduction to DesignPro Tools and the DesignPro Tools Getting
Started Guide.
Chapter 2: Installation
Includes system requirements, registering, and installing your software.
Chapter 3: Configuration
Introduces the concept of virtual folders and leads you through an exercise in setting up
virtual folders in the DesignPro Manager.
Chapter 4: Quick Start
Leads you through the DesignPro Form Editor and Elixir PrintDriver Pro using a set of
sample forms.
Who Should Use this Guide?
This guide is for anyone who needs to create and edit resources for a Xerox printing
environment. This includes Xerox users and print bureaus hosting a Xerox printing
environment.
This guide assumes you are already familiar with Microsoft Windows operations, printer
and font management operations and PC peripherals. You should also have access to
reference manuals for PC software and hardware, including any printers you are using for
the design and print process.
Chapter 1: Introduction 7

Related Guides
If you require further information about a specific topic or wish to obtain product
background information, reference the following resources, all of which are part of the
DesignPro Tools for Xerox documentation package.
DesignPro Tools Manager for Xerox User Guide
DesignPro Tools Form Editor for Xerox User Guide
DesignPro Tools Font Editor for Xerox User Guide
DesignPro Tools Graphics Editor for Xerox User Guide
DesignPro Tools for Xerox Migration Guide
Conventions
Elixir products adhere to Microsoft Windows conventions for using menus, menu
commands, dialogs, command buttons, icons, and mouse. See your Windows manual for
more information.
This guide uses the following typographic and symbolic conventions to identify special
information.
Typographic Conventions
The typographic conventions used in this guide are given below:
Convention Information Type/Example
Bold type Text for you to enter.
Field names, windows, toolbars, buttons, and workspace areas within a
task step.
Example: select an item from the List of Used Fonts.
Example: click the Options tab.
Example: use rules set by the Start on option.
Example: select the Text tool.
Example: click OK to save settings.
Italic type References to other documents and books.
Example: refer to the DesignPro Tools Form Editor for Xerox User
Guide.
8 DesignPro Tools® for Xerox Getting Started Guide
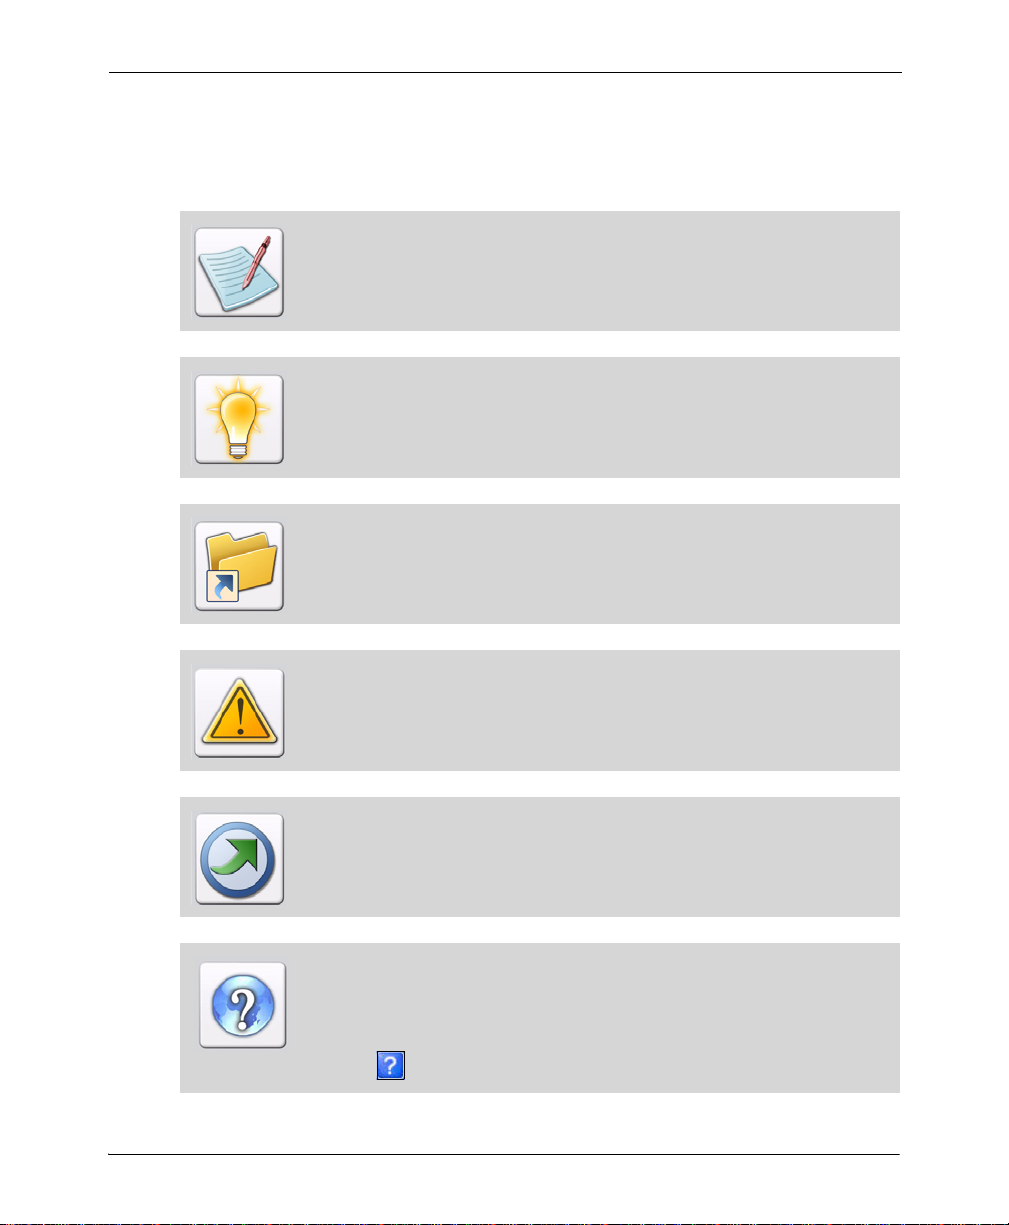
Symbolic Conventions
Look for the following symbols as you read through this guide to identify special
information.
The Note symbol calls your attention to additional information.
The Tip symbol highlights a helpful tip.
The Shortcut symbol calls your attention to an easier way of accomplishing a
task.
The Warning symbol warns you of problems you might encounter.
The Migrating Users symbol provides notes and tips for anyone migrating from
a previous version of Opus.
The Question symbol refers you to the online help for more information.
To open online help:
From the Help menu, select Help Topics, or
Click in an open dialog.
Chapter 1: Introduction 9

Getting the Answers You Need
Elixir Technologies provides you with multiple ways to learn and use DesignPro Tools:
Customer Support (page 10)
Elixir Web Site (page 11)
Elixir Training (page 11)
Product Help (page 12)
Release Notes (page 12)
Customer Support
If you purchased this product directly from Elixir Technologies, you can contact the
Customer Support Center for your region at the number listed below.
If you have purchased this product from some other source, please contact the
authorized support representative from that source. Elixir provides customer
support for products purchased directly from Elixir.
North and South America:
+1 805 641 5900 ext. 3
Monday - Friday, 7:00 am to 4:00 pm Pacific Standard Time; if closed, press 2 to
reach Elixir’s extended Support coverage.
ELX_support@elixir.com
Asia Pacific:
Asia_support@elixir.com
10 DesignPro Tools® for Xerox Getting Started Guide

Europe:
+44 (0) 207 993-4811
Monday - Friday, 6:00 am to 4:00 pm Central European Time
+1 805 641 5900 ext. 3
Monday - Friday, 4:00 pm to 2:00 am Central European Time
Europe_support@elixir.com
An Elixir Product Specialist will take your call and ask for the following information:
Your name, organization, telephone number and address.
Elixir product name and version number.
A complete description of the problem, including any error messages printed or
displayed on your monitor.
Elixir Web Site
You can obtain product support from the Elixir web page at www.elixir.com.
Select Support to:
Ask a question of Elixir Support.
Download the latest product releases and patches.
View the latest product Release Notes.
Sign up for Elixir Training.
Renew your product license.
Elixir Training
Elixir Technologies offers training for its full-range of W indows-based products. For more
information, contact Elixir Learning at +1 805 641 5900, ext. 4.
Chapter 1: Introduction 11

Product Help
Elixir software uses the Microsoft Windows Help program to provide online help for all
product functions.
This online tool includes step-by-step procedures that you can follow as you work.
Context-Sensitive Help can be activated from within the software for certain
dialogs by clicking in the top right corner of a dialog.
Online Help can be opened from any component from the Help menu by selecting
Contents.
Release Notes
Release Notes display at the start of product installation so you can review them before
beginning the installation process. Once installation completes, you can access Release
Notes from the product CD at drive:\Relnotes. There are two formats of the Release Notes
file: Relnotes.pdf and Relnotes.txt. The TXT file can be viewed using either Notepad or
WordPad. The PDF file can be viewed using Acrobat Reader.
12 DesignPro Tools® for Xerox Getting Started Guide

Chapter 2:
Installation
In this chapter...
System Requirements
Installing DesignPro Tools
Installing DesignPro Tools in Silent Mode
This chapter guides you through the installation and registration processes of DesignPro
Tools for Xerox. It describes the system requ irements necessary to install and run
DesignPro Tools on your computer.
This chapter also describes procedures for upgrading to, repairing and uninstalling
DesignPro Tools version 3.00.
System Requirements
The minimum system requirements for running DesignPro Tools are:
Software Requirements
To run DesignPro Tools, you need one of the following operating systems installed on
your computer:
Windows XP with Service Pack 1.0a or higher.
Windows 2000 Professional with Service Pack 3.0 or higher.
Windows NT 4.0 with Service Pack 6.0a or higher.
13

The application also requires Internet Explorer 5.5 or above.
Internet Explorer 5.5 is required whether or not you have an Internet
connection.
Hardware Requirements
You need the following minimum hardware specifications to run DesignPro Tools on your
computer:
Processor: 350 MHz Pentium required, Pentium III or higher recommended.
RAM: 128 MB required, 256 MB recommended.
Hard disk space: 10 GB (with 650 MB free space for Windows 2000 or Windows
NT, and 1.5 GB free space for Windows XP).
VGA or SVGA monitor that supports 1024 x 768 screen resolution or higher.
Installing DesignPro Tools
This section provides instructions for installing DesignPro Tools for Xerox.
It is highly recommended that you close all programs before you install or
uninstall any software.
14 DesignPro Tools® for Xerox Getting Started Guide
To install DesignPro Tools:
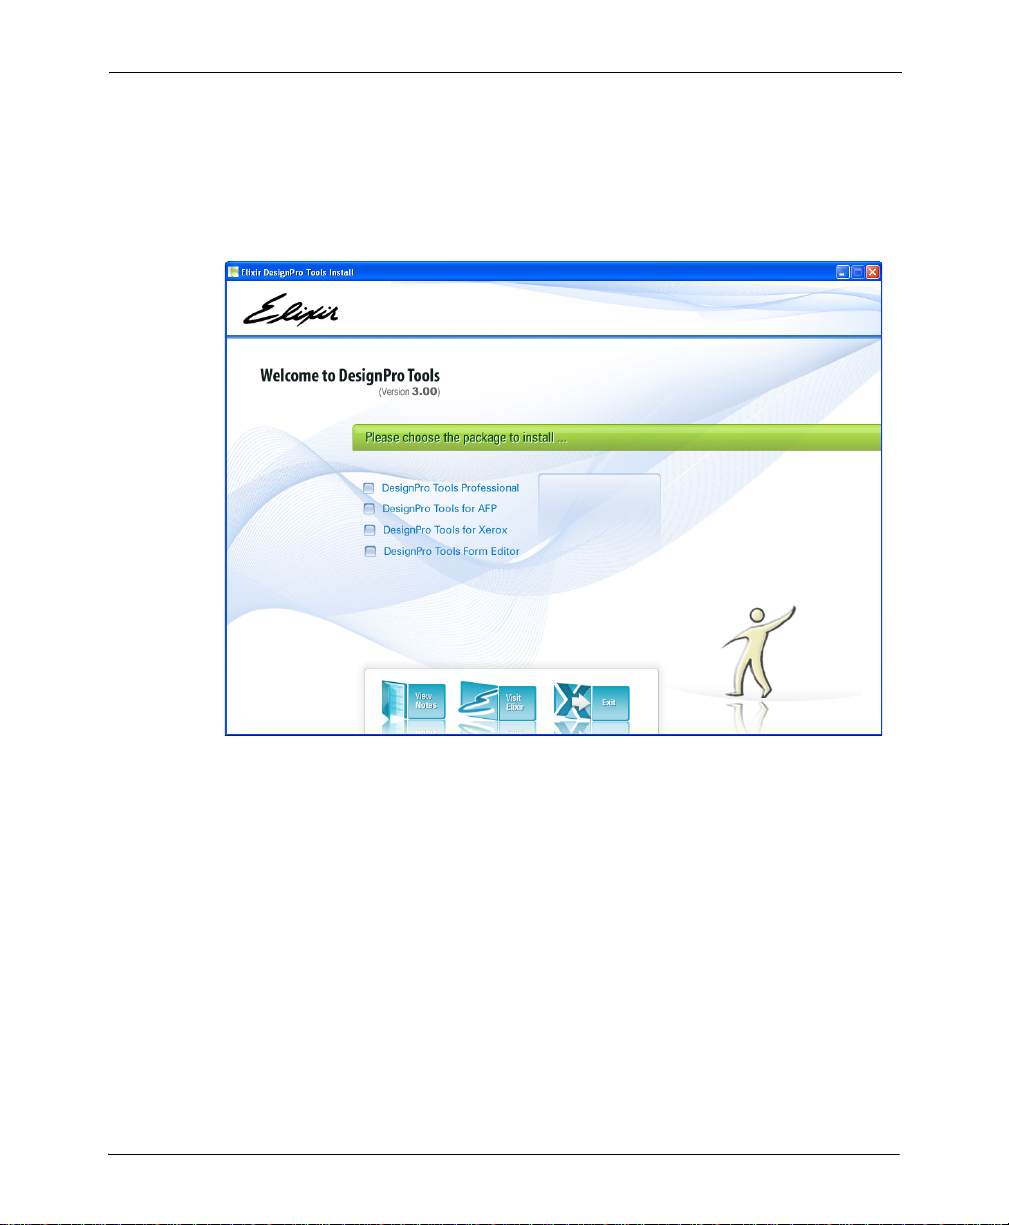
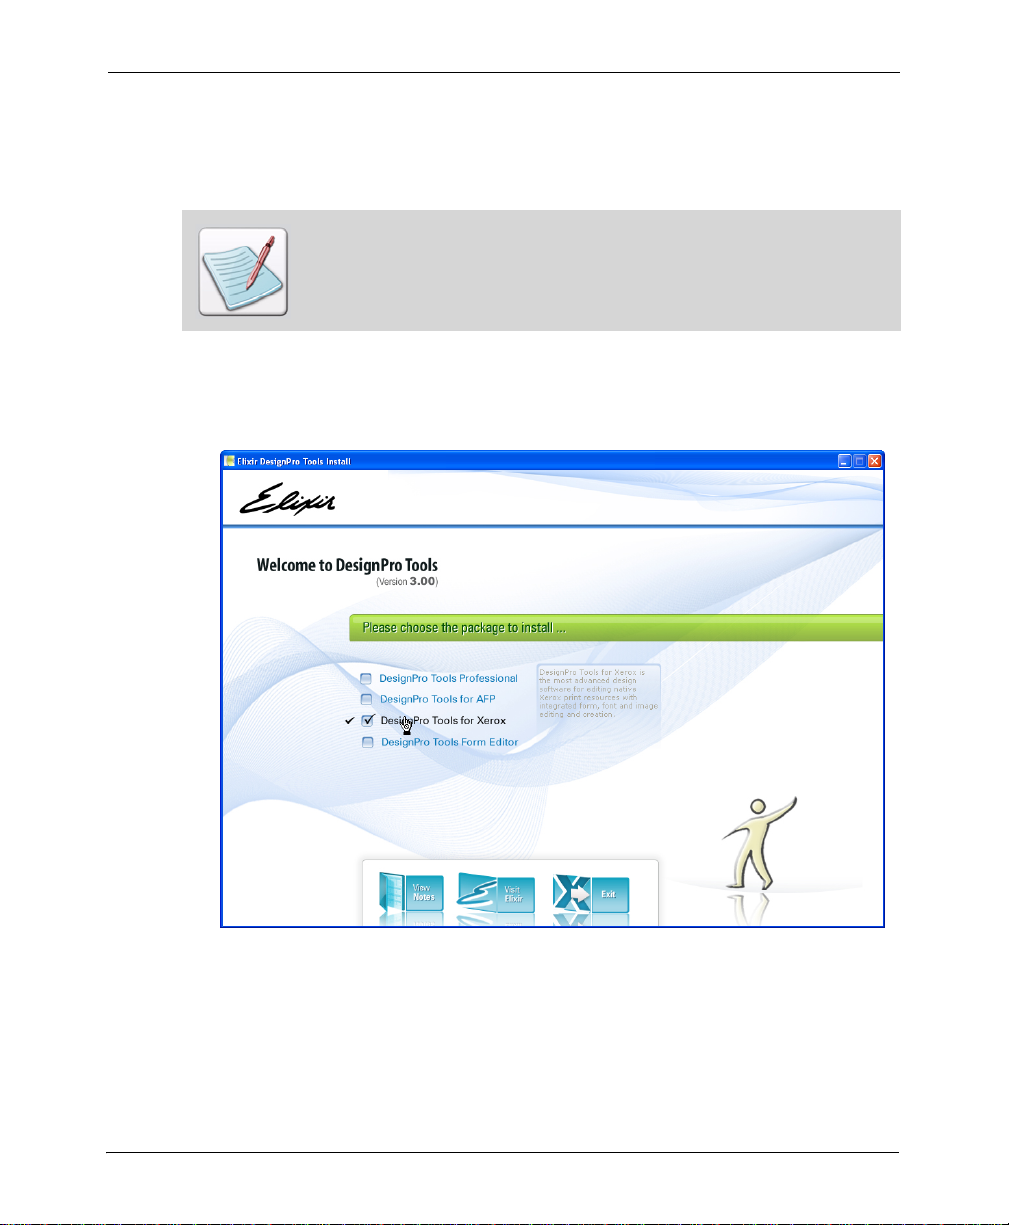
1 Insert the DesignPro Tools CD into your CD-ROM drive.
If your computer is set up to automatically run a CD, the Welcome to DesignPro
Tools screen displays.
The Welcome to DesignPro Tools screen.
If your computer is not set up to automatically run a CD, you will need to run the
installation manually:
2 From the Start menu, select Run.
3 Type drive:\Setup.exe (replace drive with the letter of your CD-ROM drive) and
click OK.
The Welcome to DesignPro Tools screen displays.
Chapter 2: Installation 15
4 Select DesignPro Tools for Xerox.
This selection installs the Xerox version of DesignPro Tools. If you want to install
both the AFP and Xerox versions, select DesignPro Tools Professional.
The DesignPro Tools setup prepares the InstallShield Wizard.
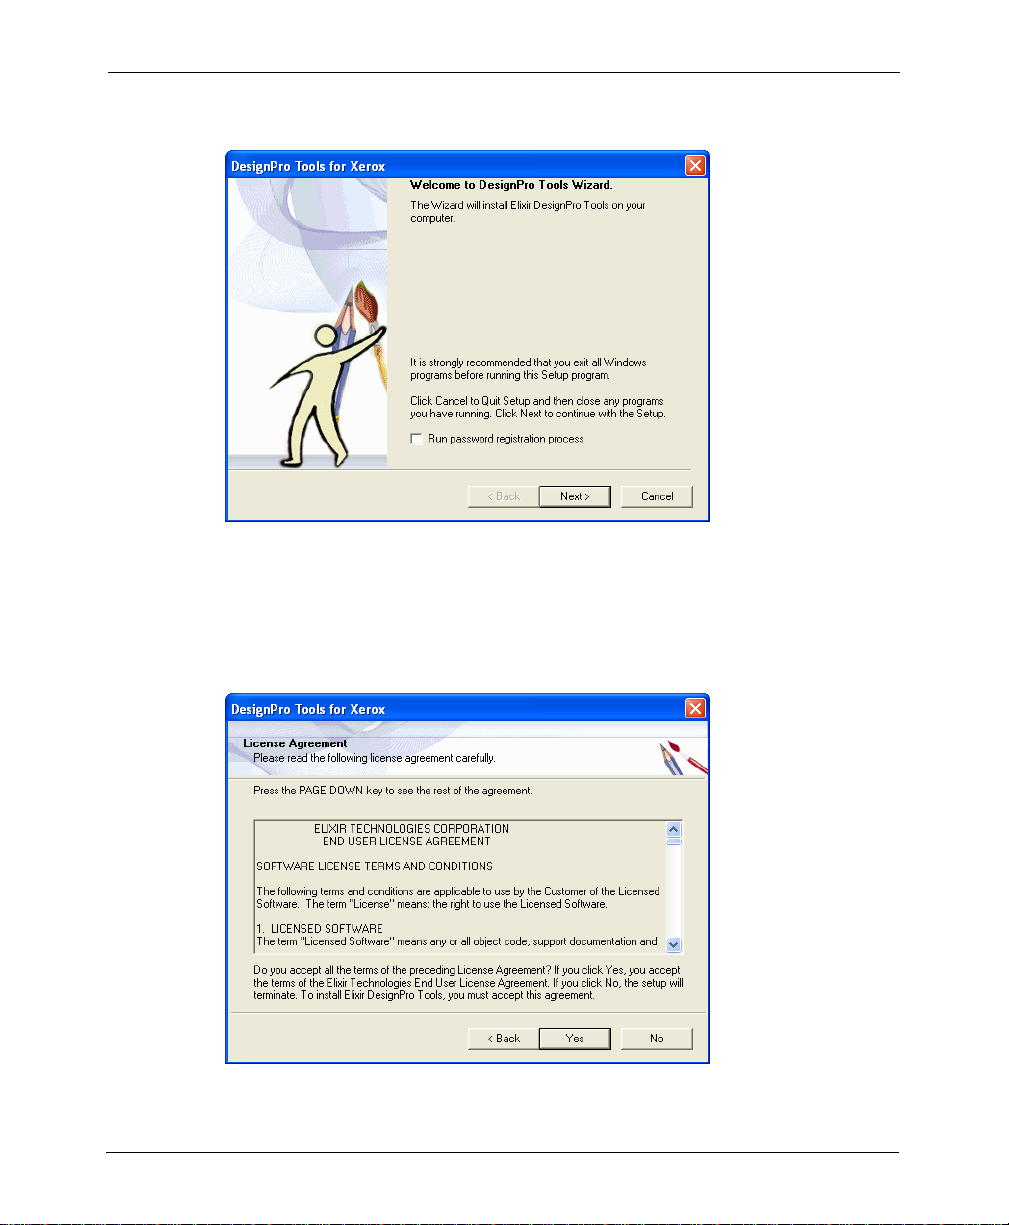
The Setup initializes.
The DesignPro Tools for Xerox Wizard displays.
The DesignPro Tools for Xerox Wizard.
5 Select Run Password Registration Process.
If selected, the password registration process runs automatically after the installa tion.
16 DesignPro Tools® for Xerox Getting Started Guide
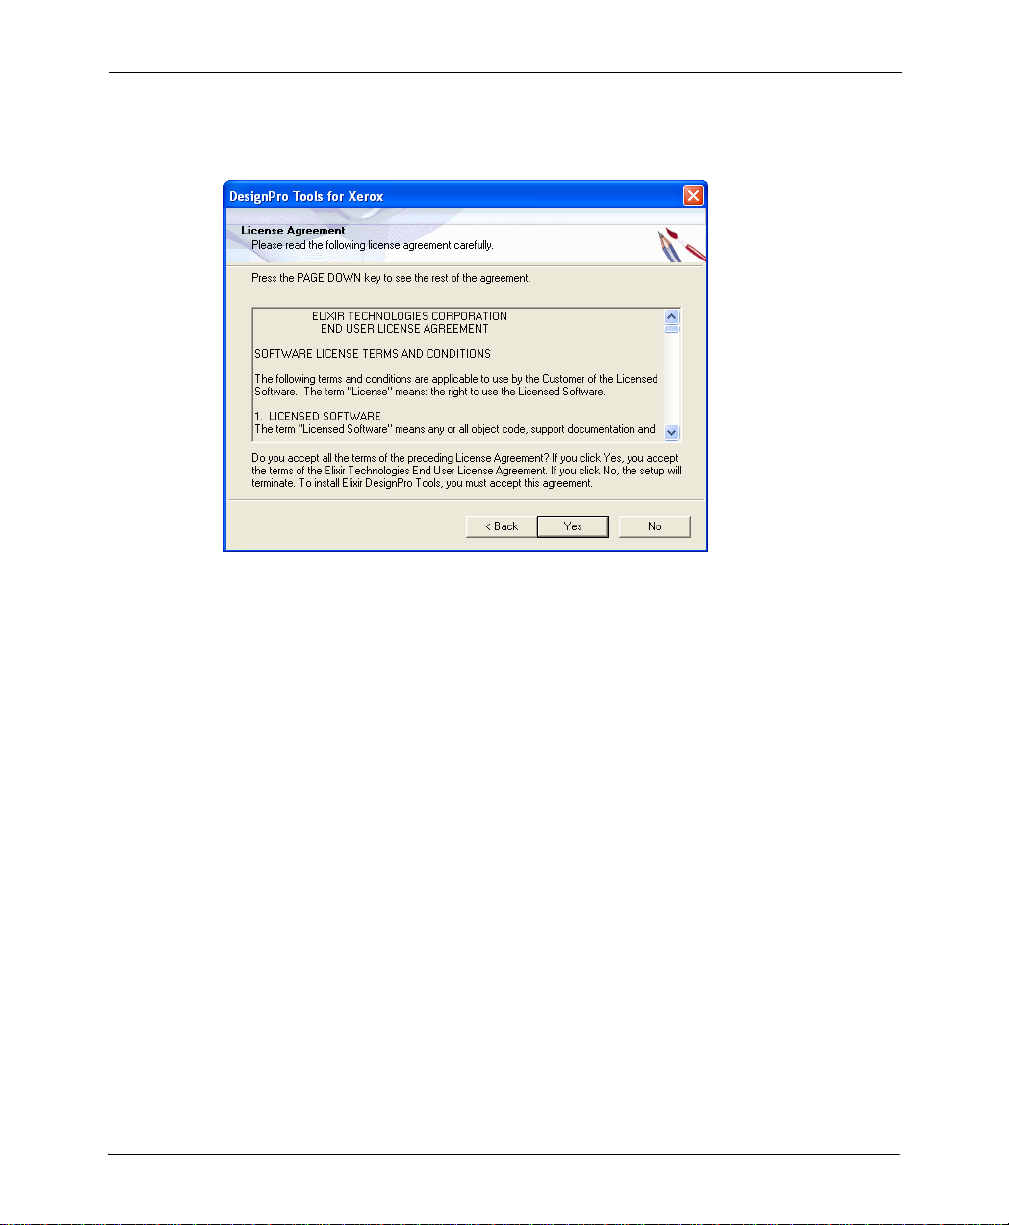
6 Click Next.
The License Agreement dialog displays.
Read the License Agreement carefully before proceeding.
7 Read the License Agreement carefully.
Chapter 2: Installation 17
8 If you agree, click Yes.
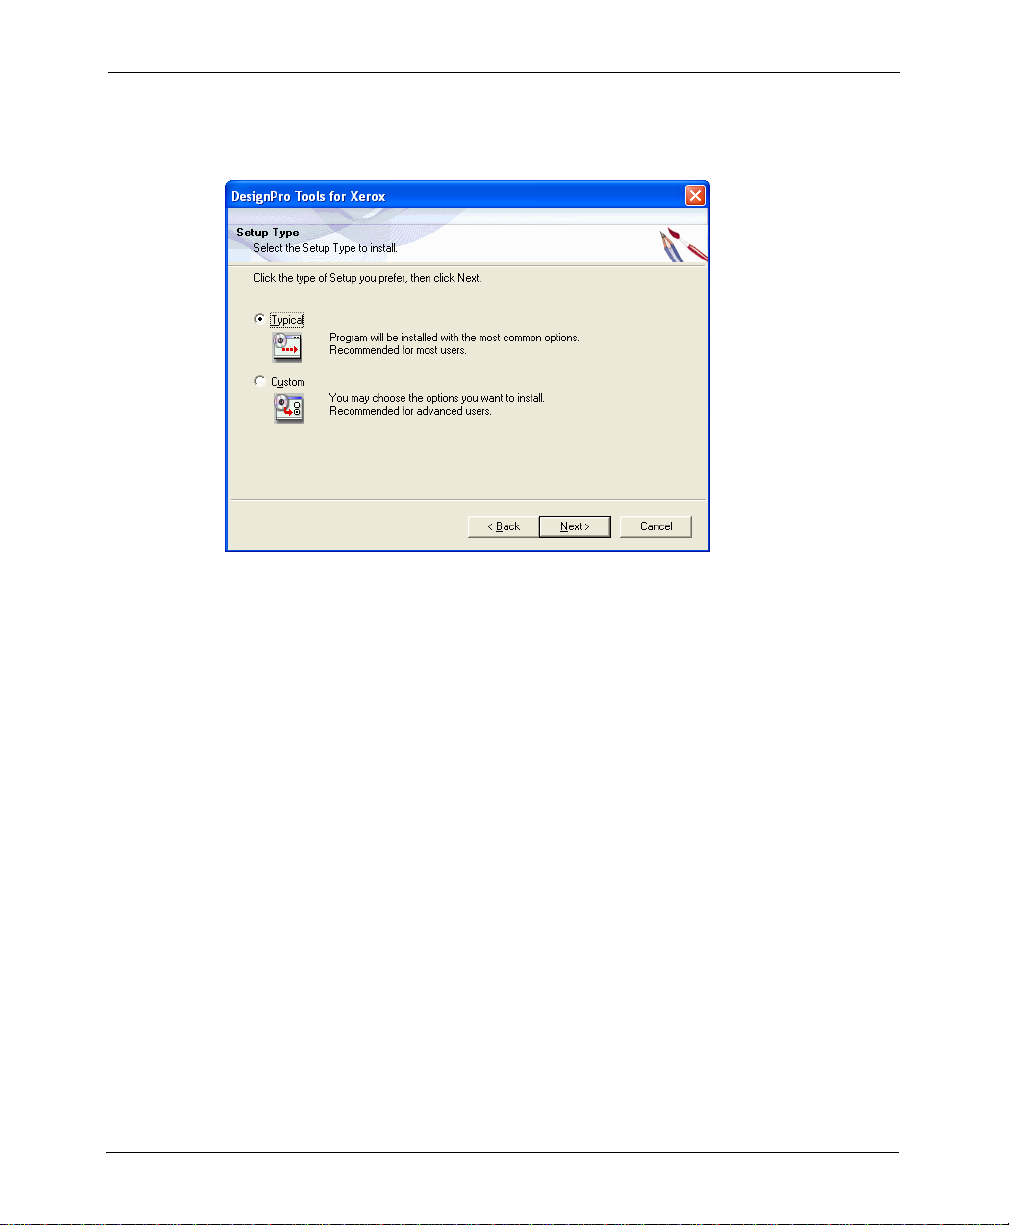
The Setup Type dialog displays.
Choose the type of setup you prefer in the Setup Type dialog.
9 As appropriate, select one of the following:
Typical
Installs all services and components; displays the Customer Information dialog.
Custom
Allows custom setup components selection; displays the Customer Information
dialog and then Select Components dialog.
10 Click Next.
For specific options on selecting Custom components, see “Select Components” on page
20.
18 DesignPro Tools® for Xerox Getting Started Guide
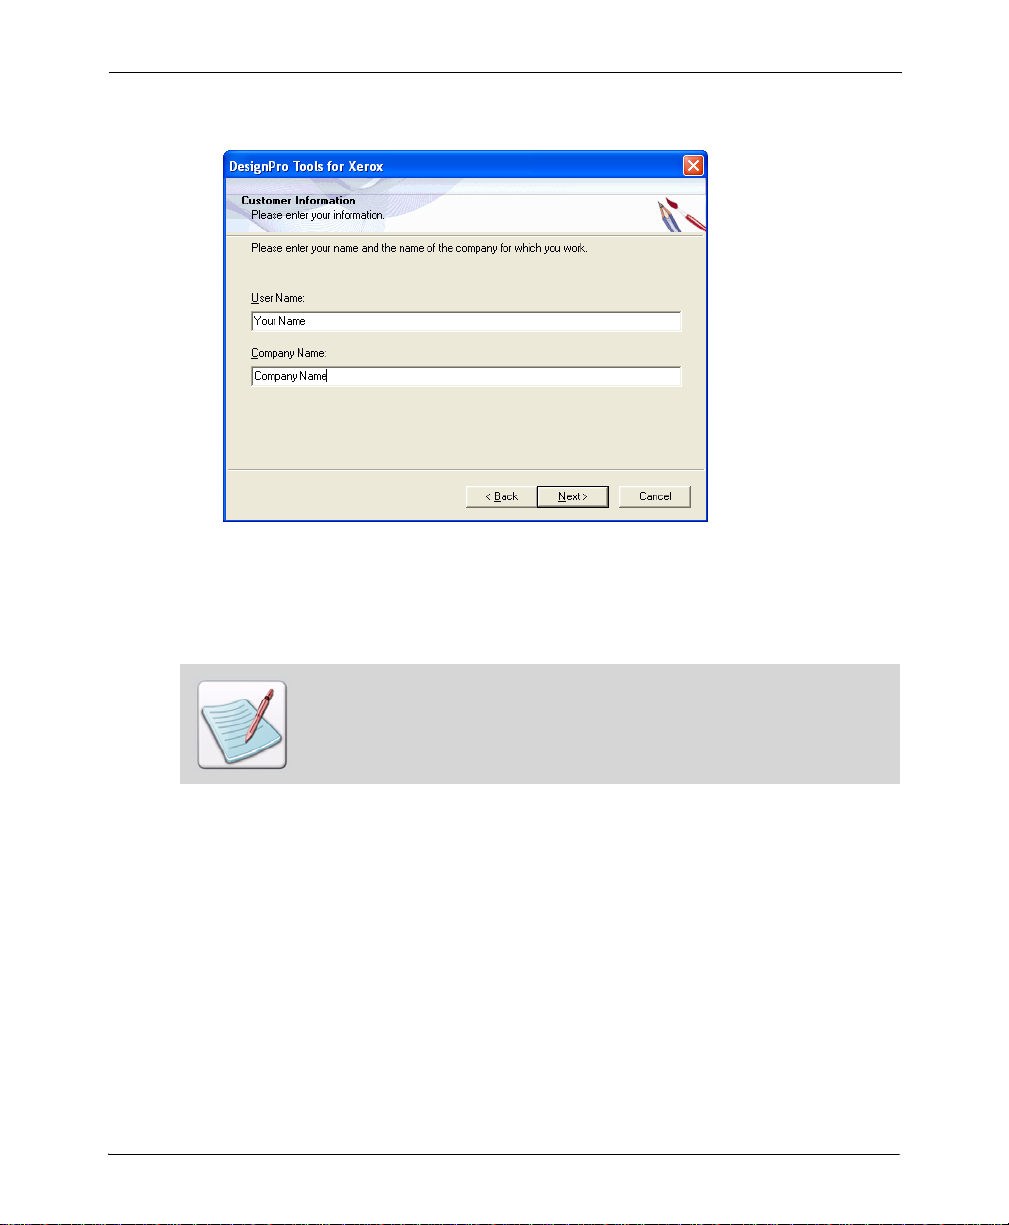
The Customer Information dialog displays.
Enter your information and continue.
11 In the User Name entry box, enter your name.
12 In the Company Name entry box, enter your company’s name.
These entries are pre-filled using the default information from your PC. You can
change this information if needed.
13 Click Next.
Chapter 2: Installation 19
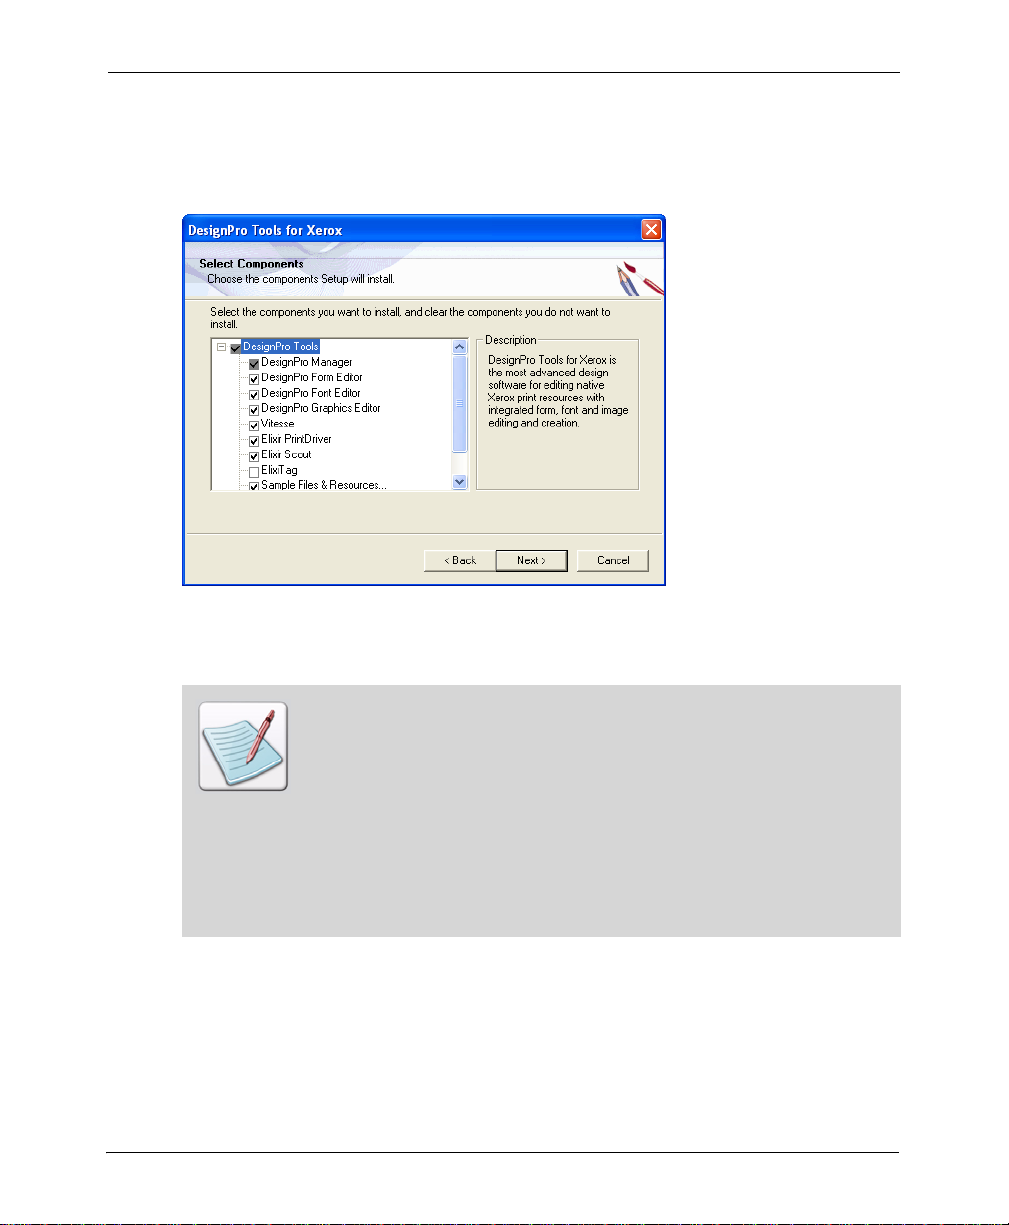
Select Components
The Select Components dialog displays if Custom was selected from the Setup Type
dialog in step 9. This dialog lists all available services and components.
Selecting DesignPro Tool components to install.
14 Select required services and components, then click Next.
You can also install Elixir PrintDriver Pro and Elixir Scout components
separately. To do so, insert the DesignPro Tools CD into your CD-ROM drive.
From the Start menu, select Run. Enter one of the following:
Drive:\PrintDrv\Setup.exe to install Elixir PrintDriver Pro (replace drive
with the letter of your CD-ROM drive).
or
Drive:\Scout\Setup.exe to install Elixir Scout Manager (replace drive with
the letter of your CD-ROM drive).
Click OK to install the specified component.
20 DesignPro Tools® for Xerox Getting Started Guide
Complete DesignPro Tools Installation, Continued
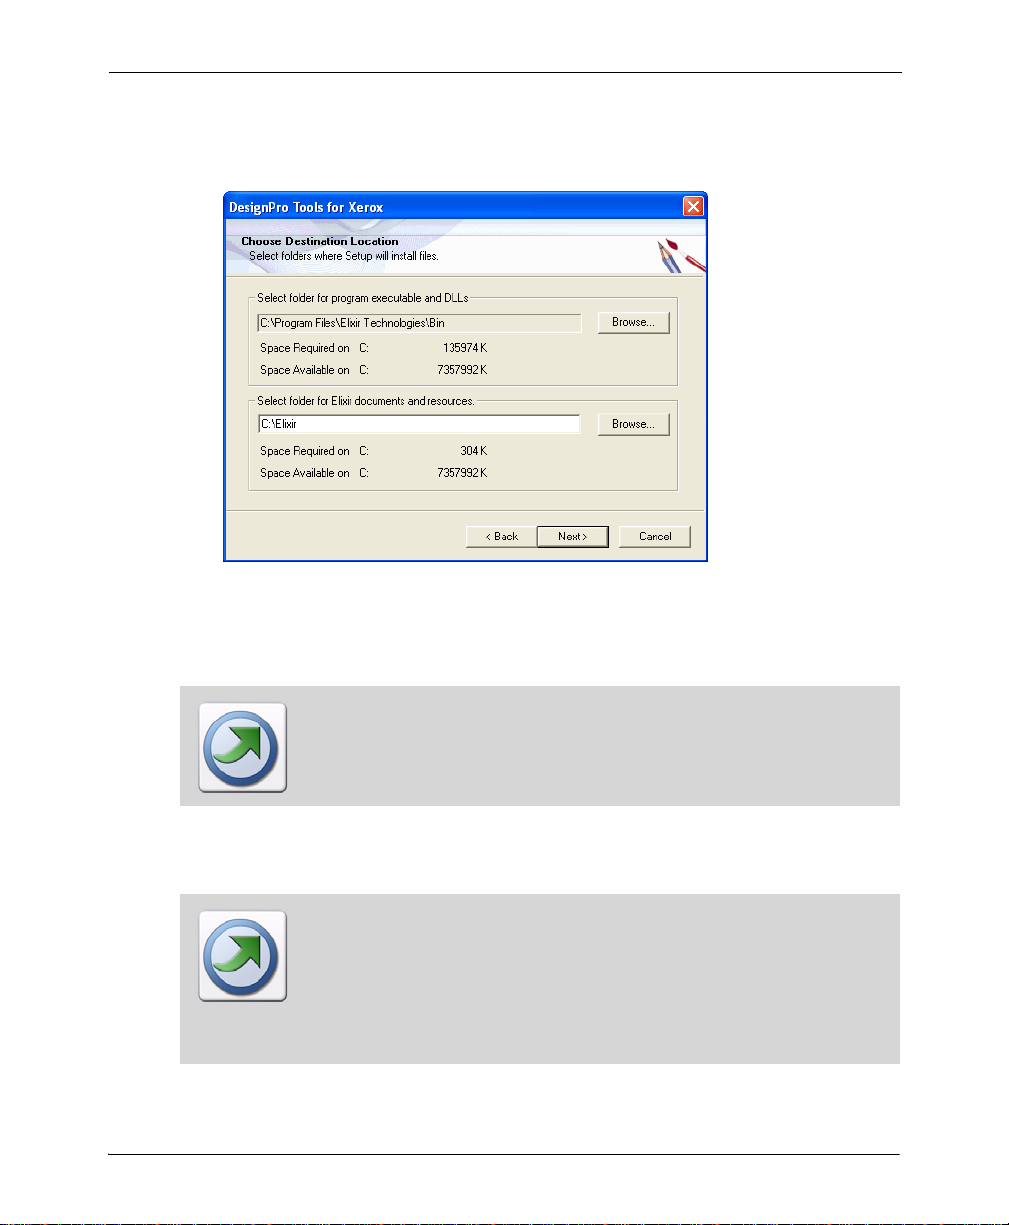
The Choose Destination Location dialog displays.
Setting the DesignPro Tools installation location.
15 Browse to select the folder for DesignPro Tools executables and DLLs if you want to
change the default directory.
The default path for DesignPro Tools application files is different than the Elixir
Application Suite directory path. This allows you to run both applications at the
same time. For more information on migrating from Elixir Application Suite,
refer to DesignPro Tools for Xerox Migration Guide.
16 Browse to select the folder for Elixir documents and resources, if you want to change
the default directory.
If you are currently using Elixir Application Suite, you can choose from one of
the two folder configurations:
You can use your existing directory structure; existing resource folders will
be kept intact.
You can create a new directory structure by browsing to a new directory
location other than drive:\Elixir.
Chapter 2: Installation 21
17 Click Next.
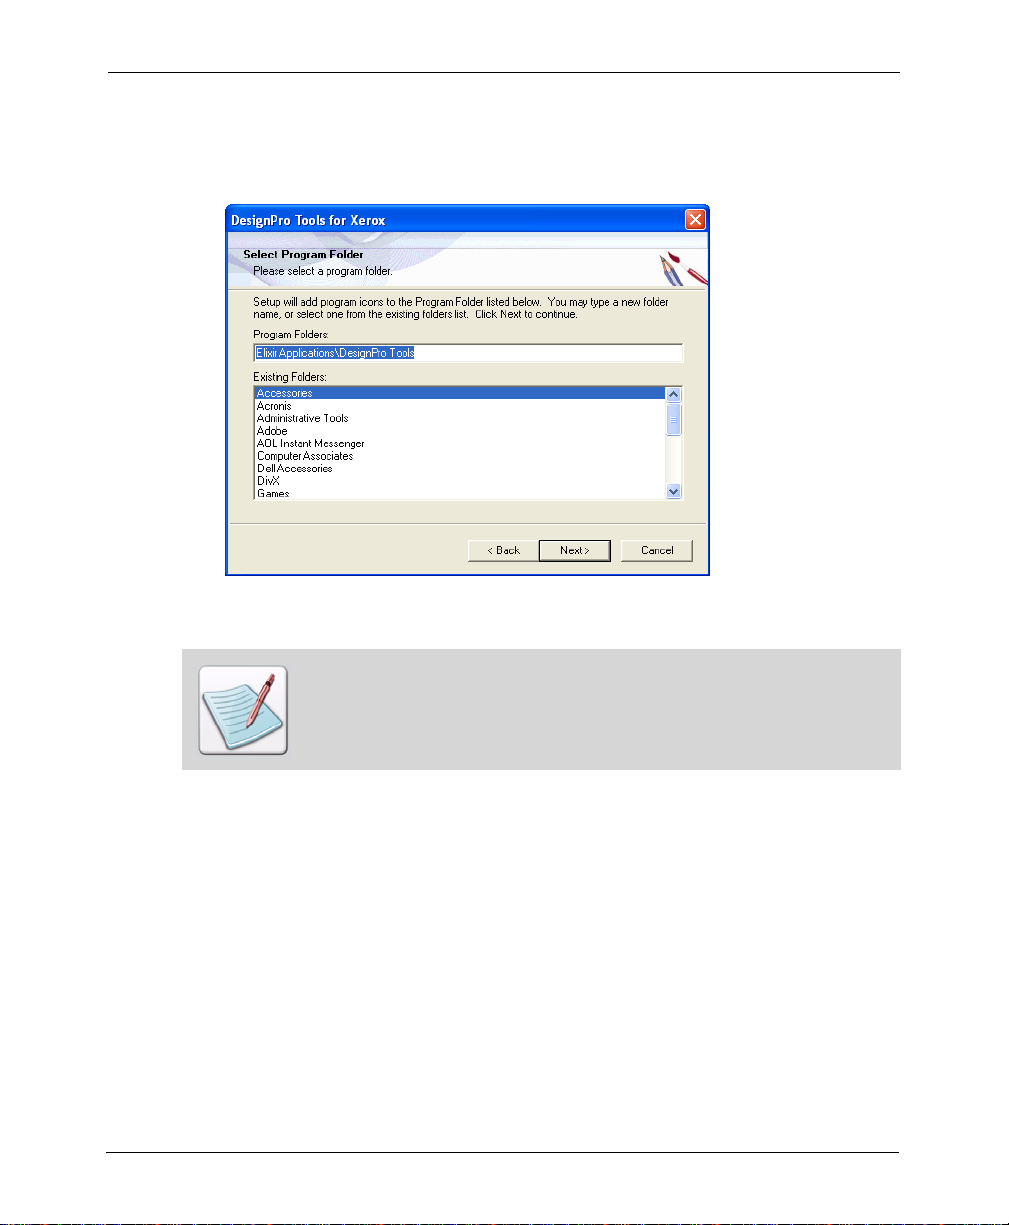
The Select Program Folder dialog displays with Elixir Applications\DesignPro Tools
set as the default folder for placing application shortcuts.
Selecting the Program Folder for DesignPro Tools
In this dialog, you can either create a new Program folder for DesignPro Tools
shortcuts or select from the existing folders listed.
22 DesignPro Tools® for Xerox Getting Started Guide
18 Click Next.
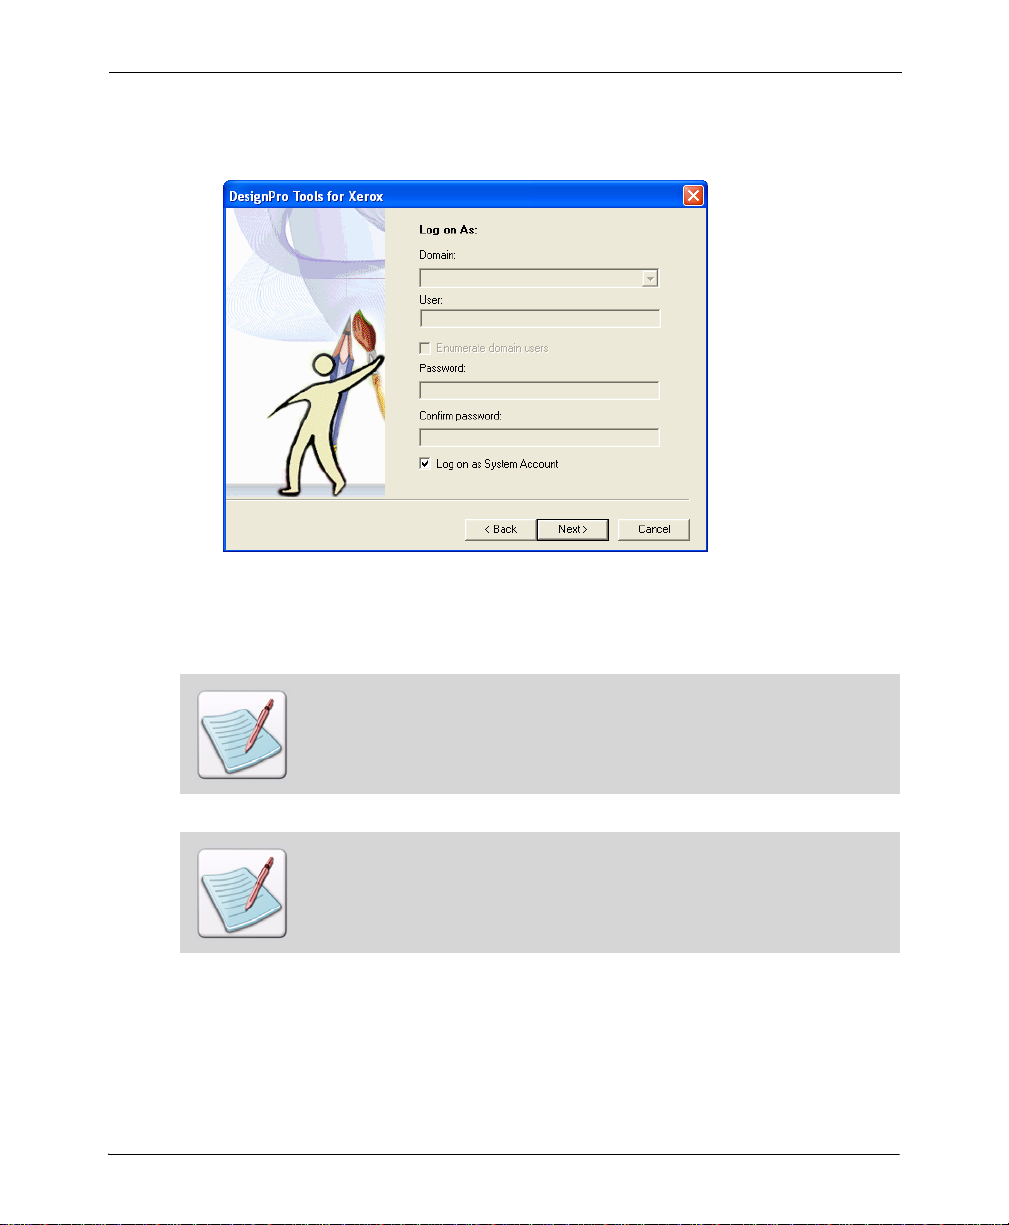
The Log on As dialog displays.
Using system logon information.
By default, the Log on as System Account option is selected and all fields are unavailable.
Proceeding with these settings will use your PC’s log on information.
The Log on As dialog does not display when installing Elixir PrintDriver Pro only.
However, in Window NT the Log on As dialog displays when installing Elixir
PrintDriver Pro.
You will need to change the default log on settings if you want to log on using a
different login ID (other than the one you are currently logged on with). Logging
on with a local machine/domain account will restrict DesignPro Tools use to
authorized users only.
T o customize the log on options, uncheck the Log on as System Account option and enter
your information in the available fields.
Chapter 2: Installation 23
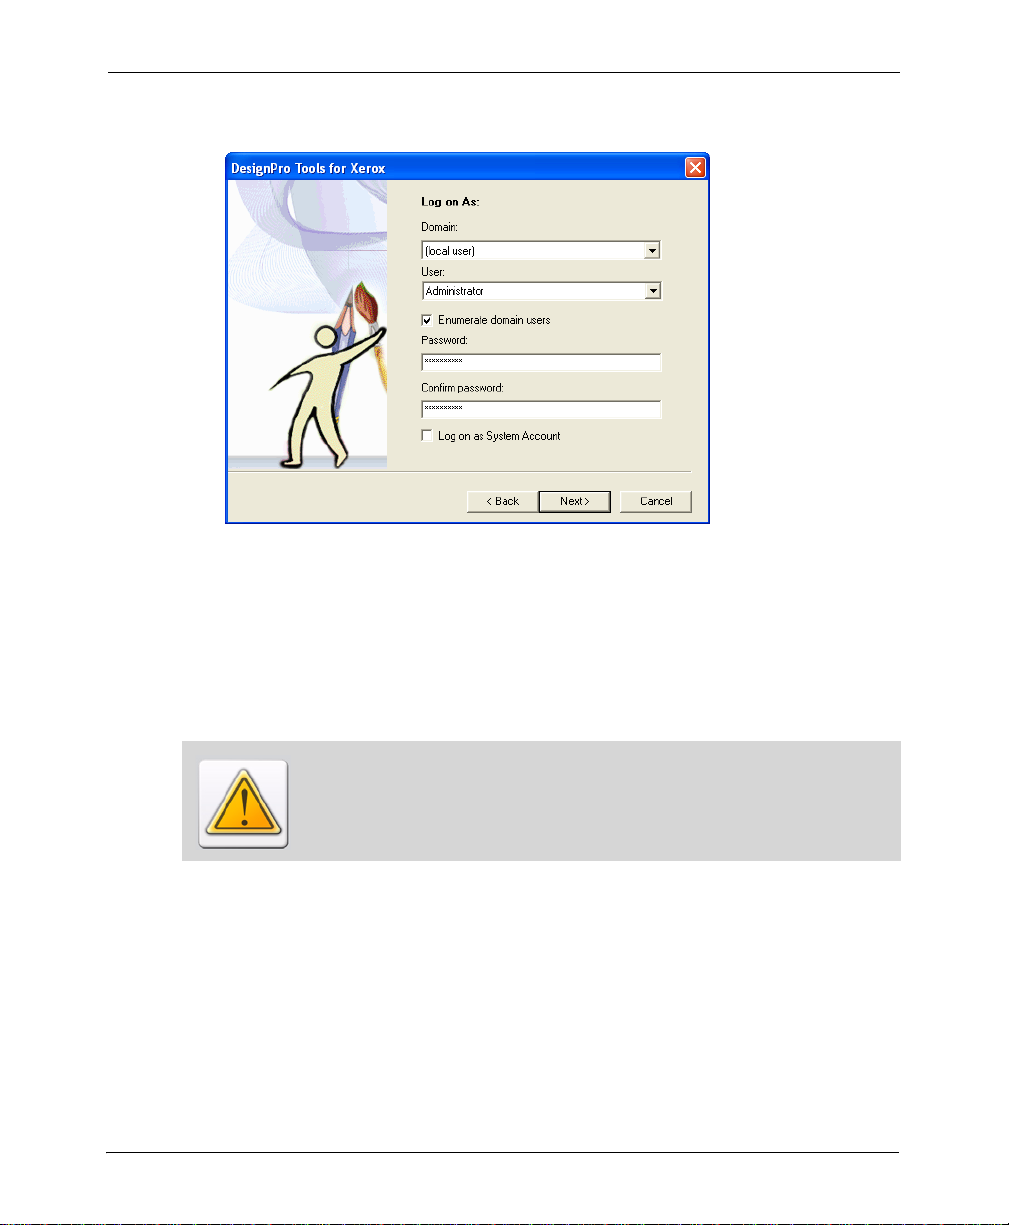
19 Uncheck Log on as System Account.
Adding logon information.
20 Specify your domain from the Domain drop-down list.
21 Enter your User ID in the User entry box.
If you would like a list of users within a chosen domain, select Enumerate Domain
Users. Then select a User ID from the drop-down list. This should be the User ID
that you would want to use when logging onto the PC to work with DesignPro Tools.
If DesignPro Tools is installed using one login ID, and then you log on with
another ID, you will need to create a new profile using the Profile Editor. A new
default profile is not automatically created for new users.
22 Enter your password in the Password entry box.
This should be the same password used to log on.
23 Enter your password again in the Confirm Password entry box.
24 DesignPro Tools® for Xerox Getting Started Guide
24 Click Next.
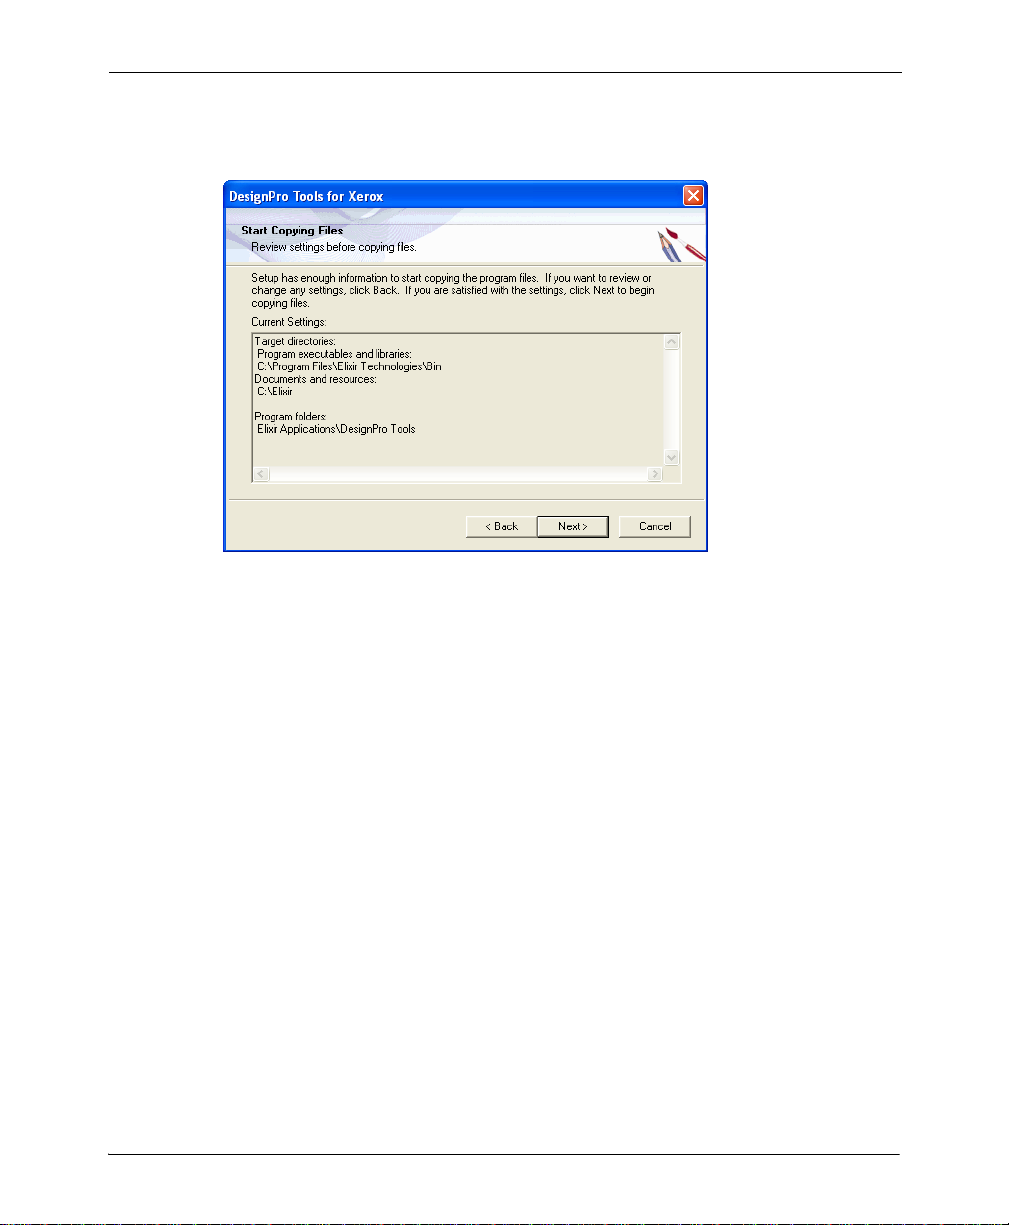
The Start Copying Files dialog displays with the current setting details.
Review the Current Settings details before starting the installation.
The wizard confirms your settings before it starts copying DesignPro Tools files. If you
need to make any changes to these settings, click Back.
Chapter 2: Installation 25
25 If you agree with the settings, click Next.
The Setup Status dialog displays with the installation’s progress.
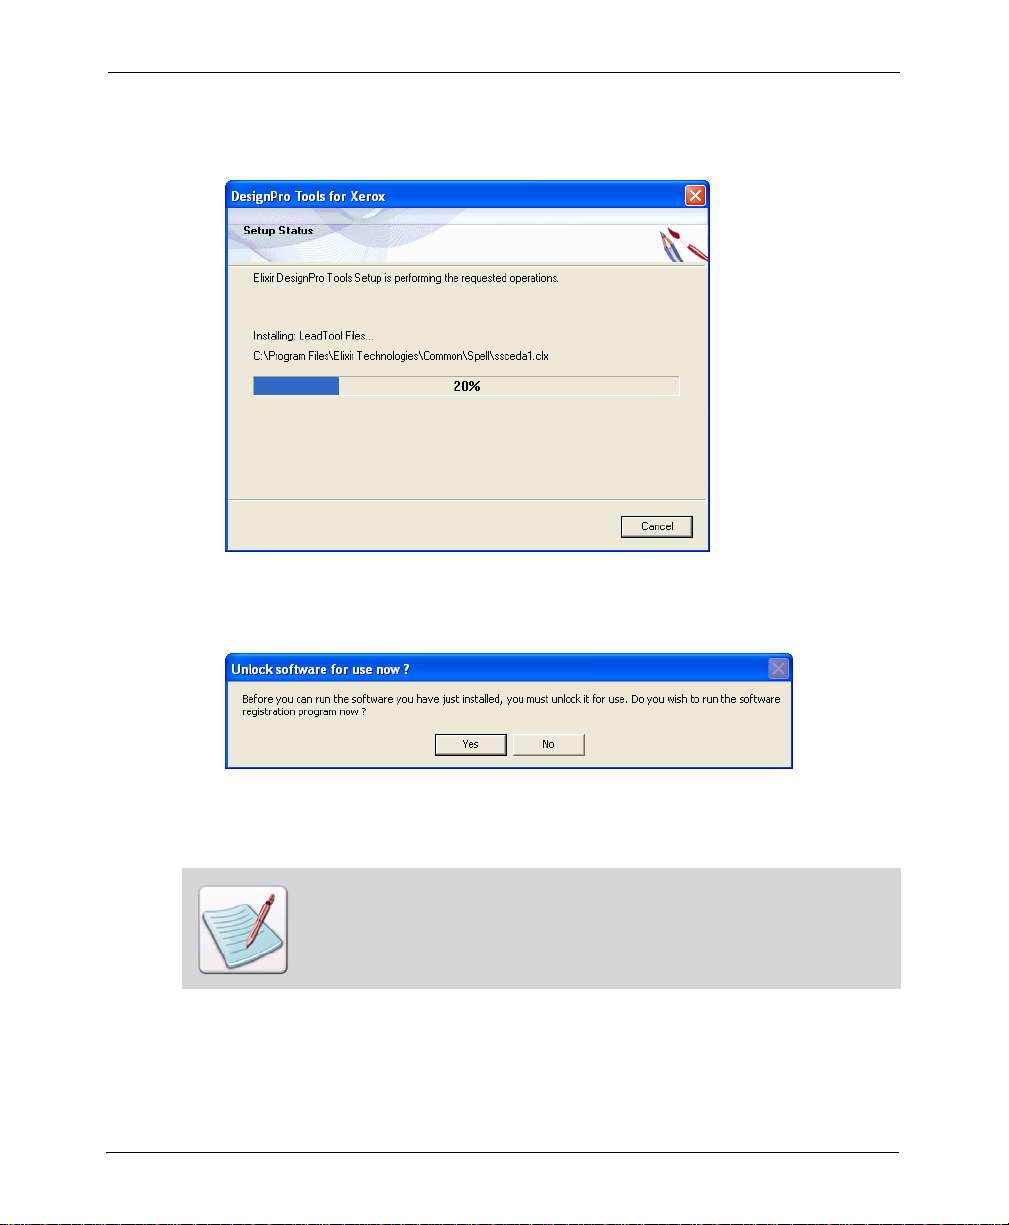
DesignPro Tools installs.
Once the installation completes, you will be prompted to unlock DesignPro Tools for use.
Starting the software registration process as part of the installation.
26 Click Yes.
This dialog only displays if Run Password Registration Process is selected at
the start of the installation process.
26 DesignPro Tools® for Xerox Getting Started Guide
If you want to run registration as a separate process, click No. When you are
ready to register, open the Start menu and select Programs, Elixir
Applications, DesignPro Tools, Product Registration.
Registering DesignPro Tools
Elixir Technologies Corporation provides li censes to use pu rchased copies of DesignPro
Tools. The easiest method for unlocking your software is using the Internet. Connect to
the Internet at this point to start the registration process.
You can continue with the registration process even if you are not connected to
the Internet. Other options for registering are given in the last dialog of
registration.
If you are not registering as part of the installation process, product registration
is available in the DesignPro Tools program folder. When you are ready to
register, open the Start menu and select Programs, Elixir Applications,
DesignPro Tools, Product Registration.
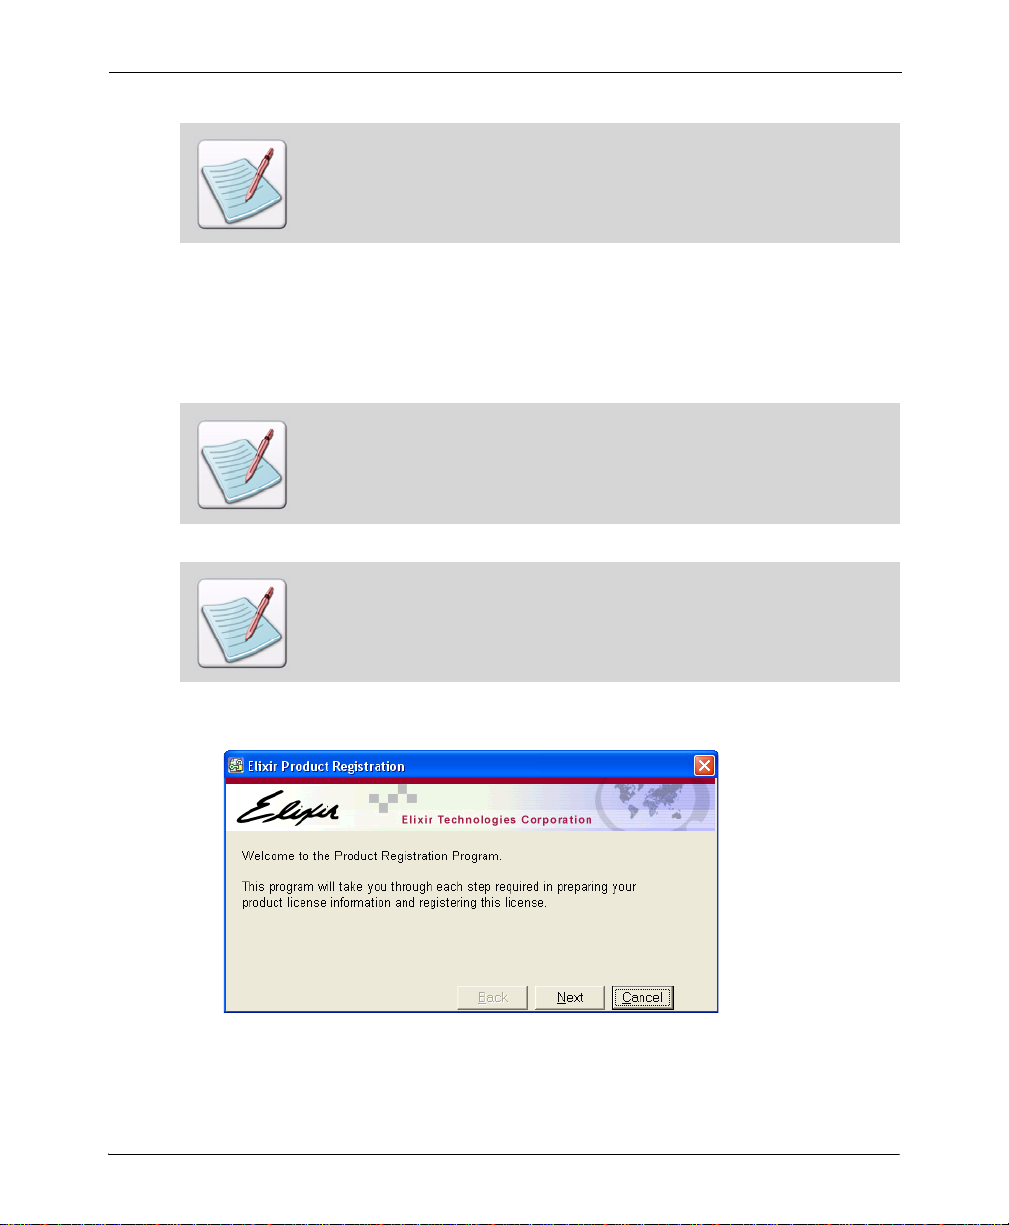
The Elixir Product Registration dialog displays.
The Product Registration process begins.
Chapter 2: Installation 27
27 Click Next.
The registration process continues.
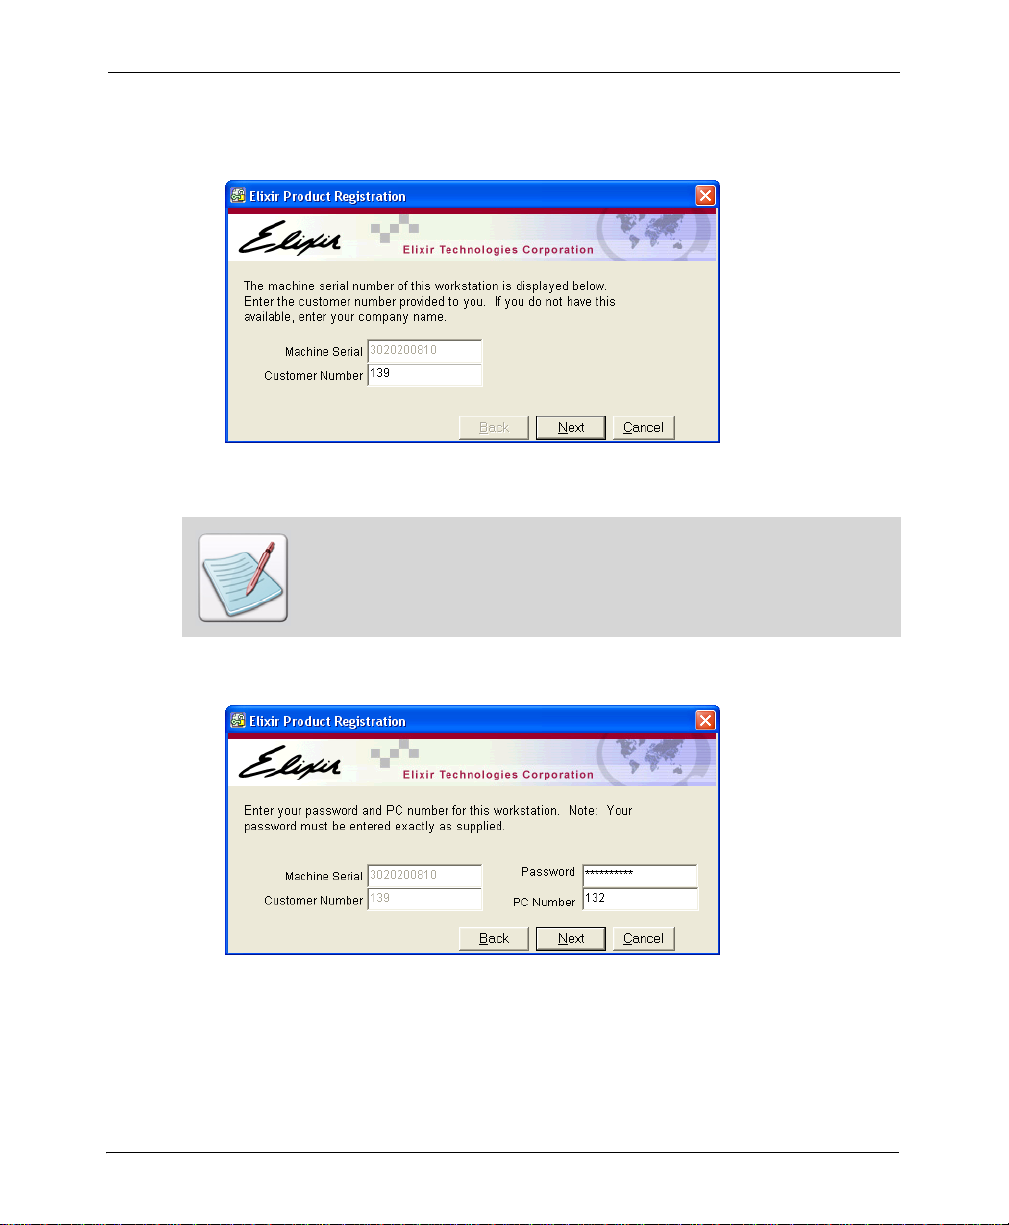
The Machine Serial number is automatically obtained from your PC.
Every computer has a unique, system-generated Machine Serial number. This
dialog only requires the Customer Number provided with your Customer
Activation Letter.
28 In the Customer Number entry box, enter your Customer Number and click Next.
Enter your password and PC Number from the Customer Activation Letter sent with
your software.
28 DesignPro Tools® for Xerox Getting Started Guide
29 Type in your Password and PC Number.
Elixir Technologies creates specific software registrations based on the unique
combination of Customer Number, PC Number, and Password. This information
is provided in the Customer Activation Letter.
30 Click Next.
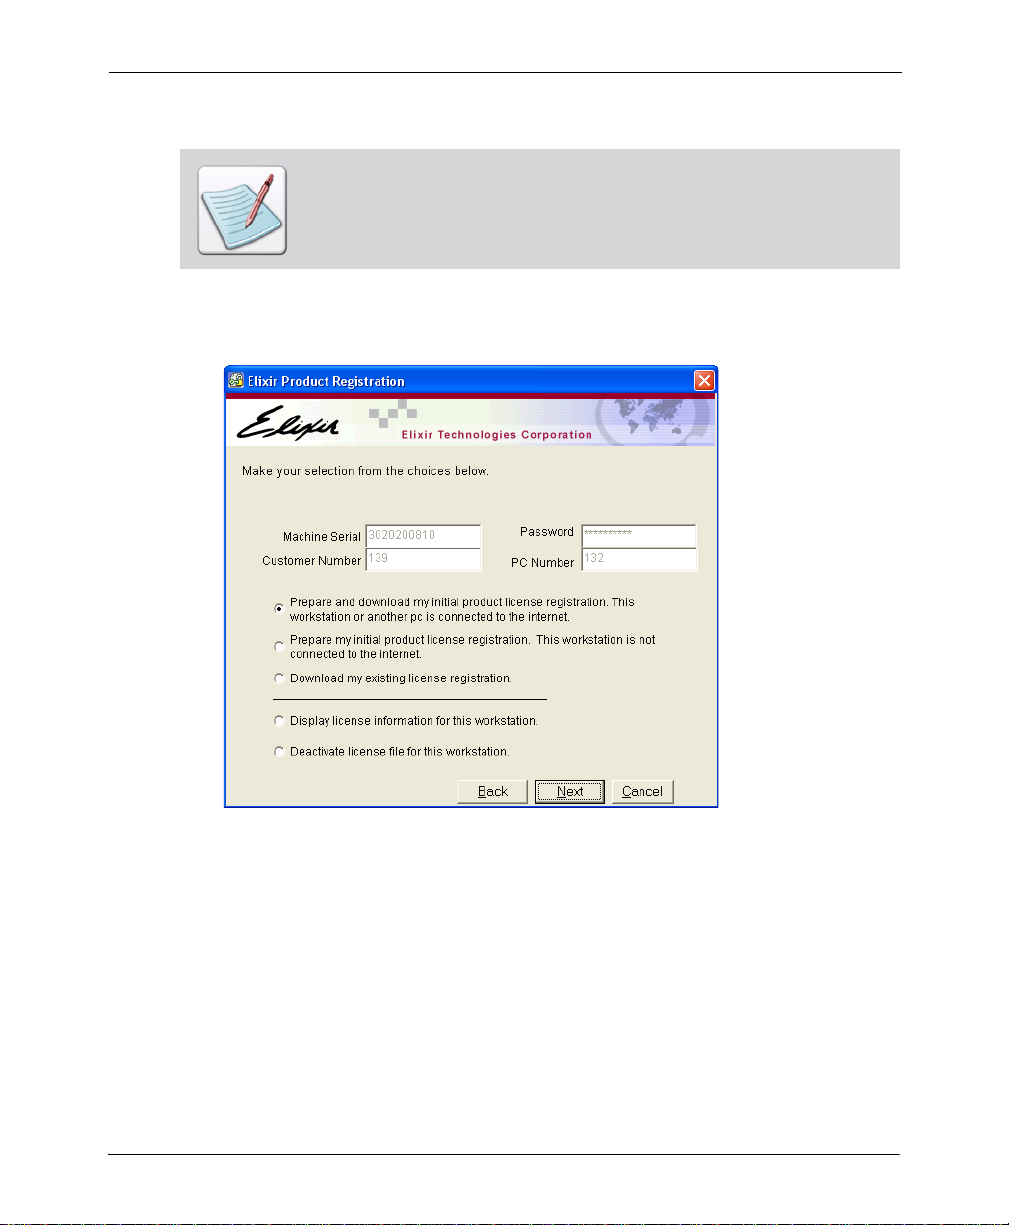
The dialog displays a selection of registration choices.
Select a method for initial product registration.
You can select one of the following from this dialog:
Download the Product License via Internet:
• See “Preparing and Downloading Initial Product License from the Internet” on
page 30.
• See “Downloading Existing Product License from the Internet” on page 32.
Prepare the Product License if Not Connected to the Internet:
Contact “Customer Support” on page 10 for assistance.
Chapter 2: Installation 29
View the Product License:
See “Viewing the Product License Information” on page 32.
Deactivate the Product License:
See “Deactivating the Product License File” on page 33.
Preparing and Downloading Initial Product License from the Internet
31 Select Prepare and download my initial product license registration. This
workstation or another pc is connected to the internet.
The Registration wizard communicates your licensing information with Elixir
Technologies using your Internet connection.
You will need to connect to the Internet before continuing with the registration
process.
32 Click Next.
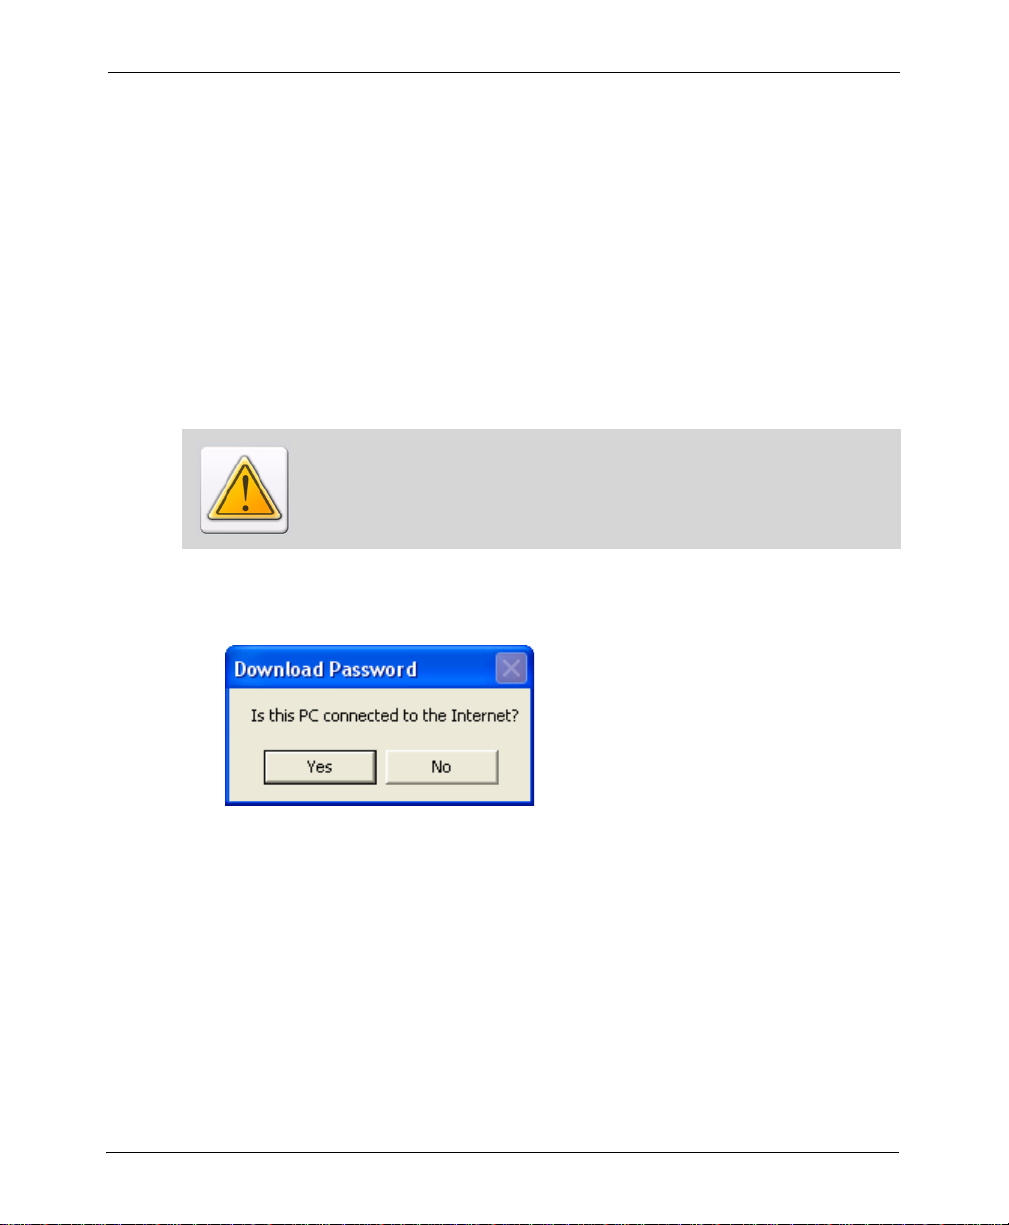
The Download Password dialog prompts if the PC is connected to the Internet.
30 DesignPro Tools® for Xerox Getting Started Guide

33 In the Download Password dialog, click one of the following options:
Option Result
Yes The license information downloads and displays in the dialog.
No If your PC or another PC available is not connected to the Internet, you
can contact “Customer Support” on page 10 for getting the product
license.
The Elixir Product Specialist will ask for the following information:
Your name, customer number, organization, telephone number
and address.
Elixir product name and version number.
Your machine serial and PC number.
Clicking Yes displays the following dialog:
The license information downloads and displays in the Elixir Product Registration
dialog on clicking Yes.
Make sure the product information listed is correct. If you have any questions or
concerns, contact “Customer Support” on page 10 for assistance.
Chapter 2: Installation 31

34 Click Save.
The Elixir Product Registration dialog displays.
Your product registration proces s is complete.
35 Click Finish to save the license file Password.epw at
drive:\Program Files\Elixir Technologies\Bin.
Downloading Existing Product License from the Internet
If you are already a licensed user and want to renew your product license, request
Customer Support for license renewal and select Download My Existing License
Registration from the dialog. If you are connected to the Internet, the updated license file
will download at drive:\Program Files\Elixir Technologies\Bin\.
Viewing the Product License Information
To view information regarding the exist ing prod uct license on your machine:
36 Select Display License Information for This Workspace, and then click Next.
The information provided by your selected license key or license server is displayed
in the Elixir Product Registration dialog. The information includes the Machine
Serial, Customer Number, Password, PC Number, Unlock Codes, Qty, Expire,
Product Name, Version, and PC Unlock Code.
37 Click Print to print the information for future reference.
The print command is sent to the default printer set on your machine.
32 DesignPro Tools® for Xerox Getting Started Guide

38 Perform any of the following steps in the dialog:
Click Back to modify the information in the Elixir Product Registration dialog.
Or
Click Save to save the product license file Password.epw at
drive:\Program Files\Elixir Technologies\Bin\.
Upon saving the file, the Product Registration Wizard confirms that the license is
saved on your machine.
Make sure that the product information listed is correct. If you have any
questions or concerns, contact “Customer Support” on page 10 for assistance.
39 Click Finish to exit the Product Registration Wizard.
Deactivating the Product License File
If you select Deactivate License File for This Workspace from the Elixir Product
Registration dialog, the license and your customer password is permanently disabled
from your machine.
It is recommended to contact “Customer Support” on page 10 if you want to
deactivate the license from your machine.
After the registration process completes, if an earlier version of Elixir
Application Suite is detected on your system, you are given an option to place
the resources at the location where Elixir Application Suite resources are
already located.
Chapter 2: Installation 33
Continuing the Installation
The installation process continues.
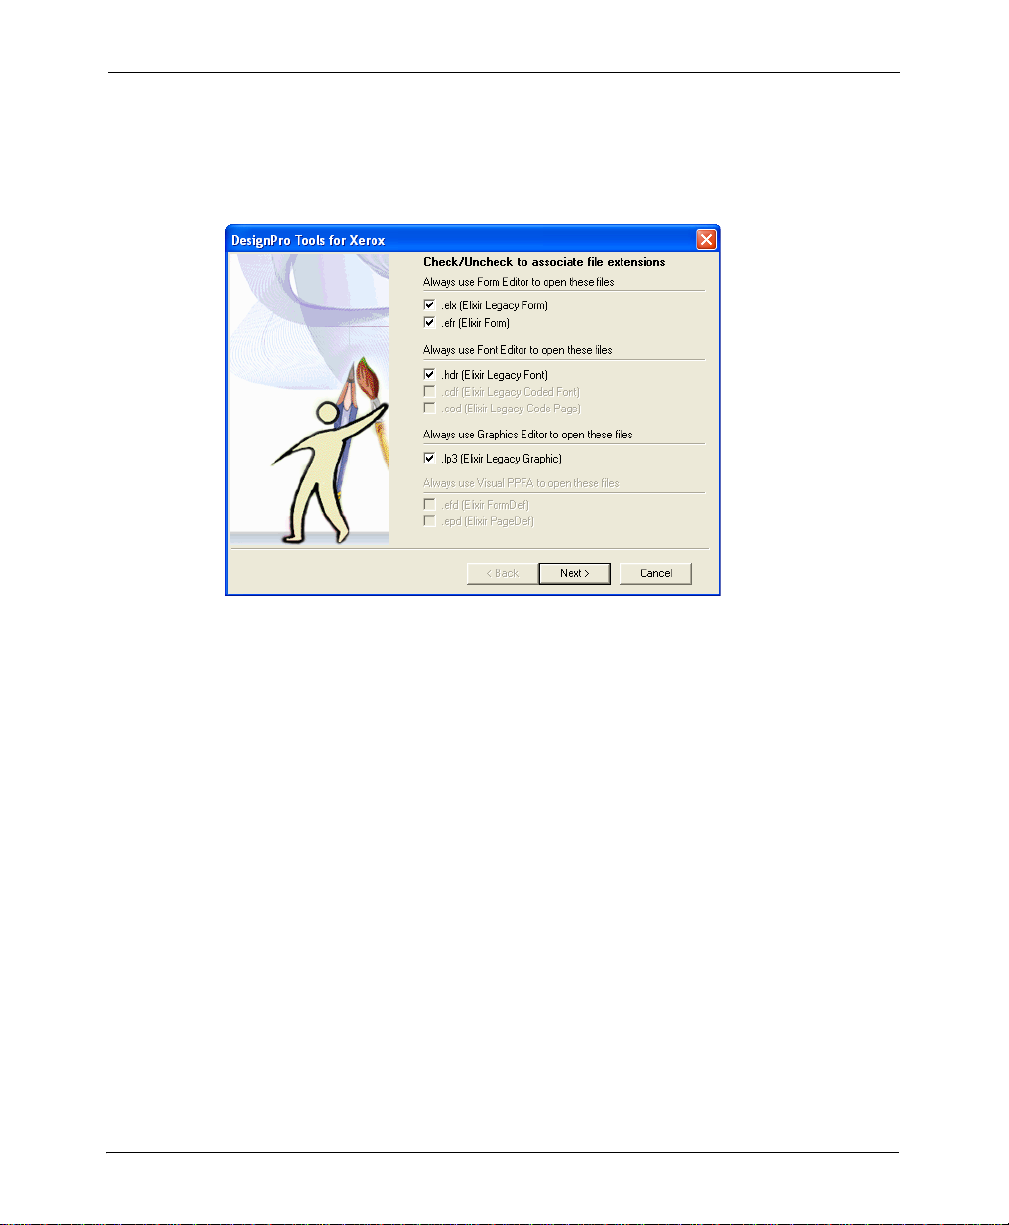
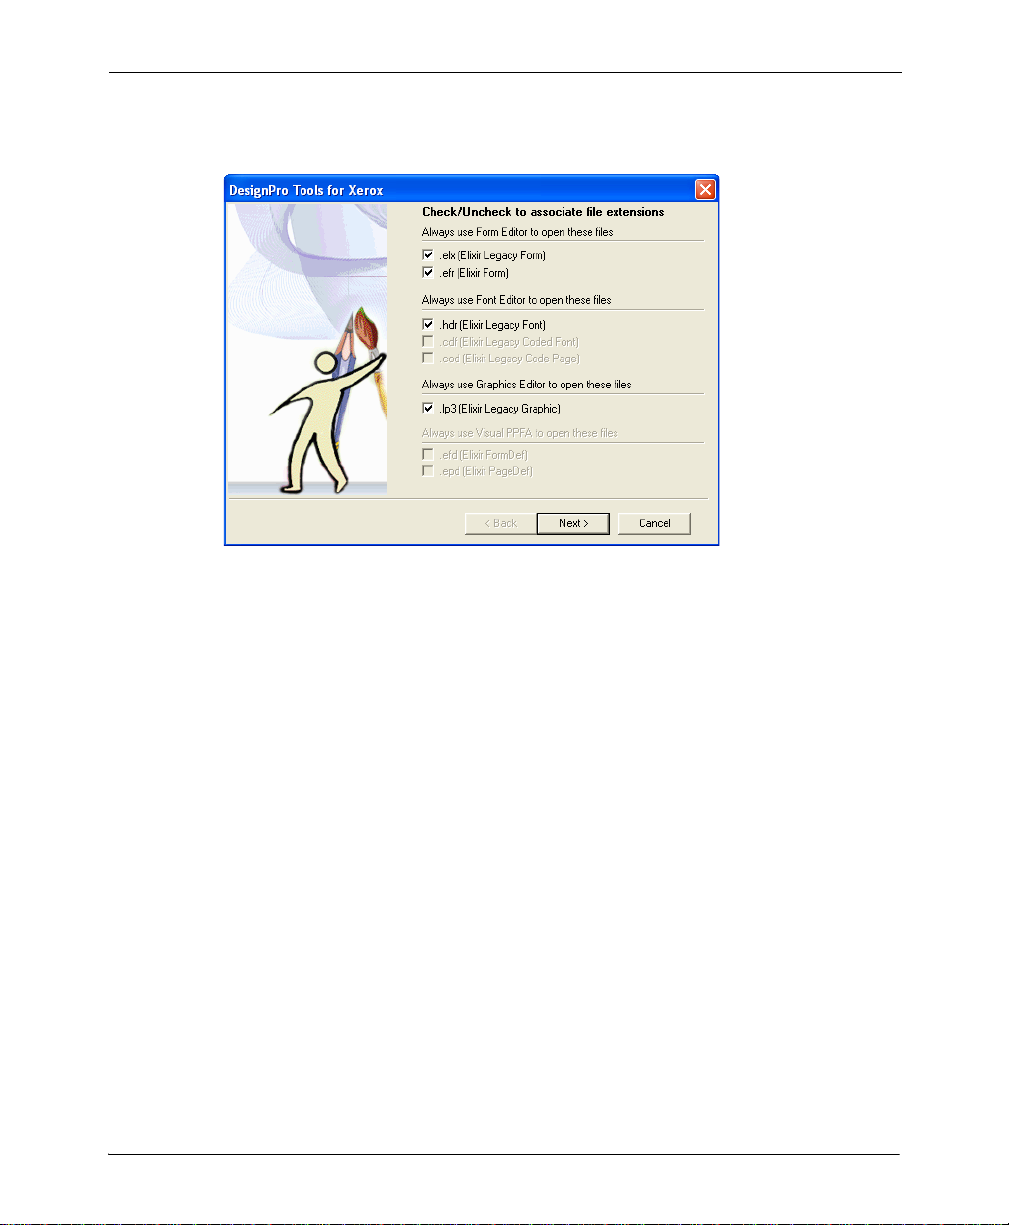
The Check/Uncheck to associate file extensions dialog displays.
Creating file extension associations.
40 Select any file extensions you wish to associate with a DesignPro Tools editor.
34 DesignPro Tools® for Xerox Getting Started Guide

41 Click Next.
The InstallShield Wizard Complete dialog displays.
The installation is complete.
42 Select Yes, I want to restart my computer now.
43 Click Finish.
The installation completes and the computer restarts.
If you do not receive a prompt to restart your PC, you may choose whether or
not to restart. The installation completes without restarting. However, it is
recommended that you restart your computer after any software installation or
upgrade.
44 Once the computer has restarted, you may remove the CD from the CD-ROM drive.
Chapter 2: Installation 35
Upgrading DesignPro Tools
To upgrade an earlier installation of DesignPro Tools to DesignPro Tools 3.00, you can
run the Update process.
Make sure you close all open programs before repairing or modifying a software
application.
1 Insert the DesignPro Tools CD into your CD-ROM drive.
If your computer is set up to automatically run a CD, the Welcome to DesignPro
Tools screen displays.
The Welcome to DesignPro Tools screen.
36 DesignPro Tools® for Xerox Getting Started Guide

If your PC is not set up to automatically run CDs, open the Start menu and
select Run. Type drive:\Setup.exe (replace drive with the letter of your CD-
ROM drive) and click OK.
2 Click DesignPro Tools for Xerox.
This selection will update the Xerox version of DesignPro Tools. If you want to
update both the AFP and Xerox versions, click Desig n Pro Tools Professional .
The DesignPro Tools setup prepares the InstallShield Wizard.
The Setup initializes.
To upgrade an earlier installation, the installation program searches for a
previously installed version of the software.
Chapter 2: Installation 37
The DesignPro Tools for Xerox Wizard displays.
The DesignPro Tools for Xerox dialog.
You do not need to check the Run Password Registration Process option.
3 Click Next.
The License Agreement dialog displays.
Read the License Agreement carefully before proceeding.
38 DesignPro Tools® for Xerox Getting Started Guide

4 Read the License Agreement carefully.
5 If you agree, click Yes.
The installation program searches for a previously installed version of the software.
If an earlier version of DesignPro Tools is found on your system, the install
automatically displays the Welcome dialog with the Modify, Update, and Remove
options.
The DesignPro Tools install detects an installed version of DesignPro Tools.
The Modify option:
Uninstalls components from the present application.
Installs components not previously installed.
The Update option:
Upgrades the installed version of DesignPro Tools to 3.00.
The Remove option:
Removes all installed components of DesignPro Tools.
Chapter 2: Installation 39

6 Select Update and click Next.
The Log on As dialog displays.
Using system log on information.
By default, the Log on as System Account option is selected and all fields are unavailable.
Proceeding with these settings will use your PC’s log on information.
You will need to change the default log on settings if you want to log on using a
different login ID (other than the one you are currently logged on with). Logging
on with a local machine/domain account will restrict DesignPro Tools use to
authorized users only.
T o customize the log on options, uncheck the Log on as System Account option and enter
your information in the available fields.
40 DesignPro Tools® for Xerox Getting Started Guide

7 Uncheck Log on as System Account.
Adding logon information.
8 Specify your domain from the Domain drop-down list.
9 Enter your User ID in the User entry box.
Selecting this option generates a list of users within the chosen domain. Then select a
User ID from the drop-down list. This should be the User ID that you want to use
when logging onto the PC to work with DesignPro Tools.
10 Enter your password in the Password entry box.
This should be the same password used to log on to your domain.
11 Enter your password again in the Confirm Password entry box.
Chapter 2: Installation 41

12 Click Next.
The wizard performs the requested operation and updates the software to version
3.00. The upgrade status displays in the Setup Status dialog.
The Install updates the application.
Once the update procedure is complete, the Check/Uncheck to associate file
extensions dialog displays.
Creating file extension associations.
42 DesignPro Tools® for Xerox Getting Started Guide

13 Select any file extensions you wish to associate with a DesignPro Tools editor.
14 Click Next.
The Maintenance Complete dialog displays.
Maintenance is complete.
15 Click Finish.
The DesignPro Tools update process completes. The Welcome to DesignPro Tools
screen displays.
16 Click Exit to close the Welcome to DesignPro Tools screen.
If you do not receive a prompt to restart your PC, you may choose whether or
not to restart. The maintenance completes without restarting. However, it is
recommended that you restart your computer after any software installation or
upgrade.
Chapter 2: Installation 43

Modifying DesignPro Tools
T o add or remove DesignPro Tools program components, you can run the Modify process.
Make sure you close all open programs before repairing or modifying a software
application.
1 Insert the DesignPro Tools CD into your CD-ROM drive.
If your computer is set up to automatically run a CD, the Welcome to DesignPro
Tools screen displays.
The Welcome to DesignPro Tools screen.
If your PC is not set up to automatically run CDs, open the Start menu and
select Run. Type drive:\Setup.exe (replace drive with the letter of your CDROM drive) and click OK
44 DesignPro Tools® for Xerox Getting Started Guide

2 Click DesignPro Tools for Xerox.
This selection will update the Xerox version of DesignPro Tools. If you want to
update both the AFP and Xerox versions, click Desig n Pro Tools Professional .
The DesignPro Tools setup prepares the InstallShield Wizard.
The Setup initializes.
To upgrade an earlier installation, the installation program searches for a
previously installed version of the software.
The DesignPro Tools for Xerox Wizard displays.
The DesignPro Tools for Xerox Wizard.
You do not need to check the Run Password Registration Process option.
Chapter 2: Installation 45

3 Click Next.
The installation program searches for a previously installed version of the software.
If DesignPro Tools 3.00 is found on your system, the install automatically displays
the Welcome dialog with the Modify, Repair, and Remove options.
The DesignPro Tools install detects an installed version of DesignPro Tools.
The Modify option:
Uninstalls components from the present application.
Installs components not previously installed.
The Repair option:
Repairs or refreshes damaged or missing files of the presently installed application.
The Remove option:
Removes all installed components of DesignPro Tools.
46 DesignPro Tools® for Xerox Getting Started Guide

4 Select Modify and click Next.
The Component Selection Dialog displays.
Selecting DesignPro Tool components to install.
Select all components you wish to install.
Chapter 2: Installation 47

5 Click Next.
The wizard performs the requested operation and modifies the software to include
only the selected components. The modification status displays in the Setup Status
dialog.
The Install modifies the application.
48 DesignPro Tools® for Xerox Getting Started Guide
Once the modification procedure completes, the Check/Uncheck to associate file
extensions dialog displays.
Creating file extension associations.
6 Select any file extensions you wish to associate with a DesignPro Tools editor.
Chapter 2: Installation 49

7 Click Next.
The Maintenance Complete dialog displays.
Maintenance is complete.
8 Click Finish.
The DesignPro Tools modifying process completes. The Welcome to DesignPro
Tools screen displays.
9 Click Exit to close the Welcome to DesignPro Tools screen.
If you do not receive a prompt to restart your PC, you may choose whether or
not to restart. The maintenance completes without restarting. However, it is
recommended that you restart your computer after any software installation.
50 DesignPro Tools® for Xerox Getting Started Guide

Repairing DesignPro Tools
T o repair DesignPro Tools or to reinstall missing or damaged files, you can run the Repair
process.
Make sure you close all open programs before repairing or modifying a software
application.
1 Insert the DesignPro Tools CD into your CD-ROM drive.
If your computer is set up to automatically run a CD, the Welcome to DesignPro
Tools screen displays.
The Welcome to DesignPro Tools screen.
Chapter 2: Installation 51

If your PC is not set up to automatically run CDs, open the Start menu and
select Run. Type drive:\Setup.exe (replace drive with the letter of your CDROM drive) and click OK.
2 Click DesignPro Tools for Xerox.
This selection repairs the Xerox version of DesignPro Tools. If you want to repair
both the AFP and Xerox versions, select DesignPro Tools Professional.
The DesignPro Tools setup prepares the repairing wizard.
The Setup initializes.
The DesignPro Tools for Xerox Wizard displays.
The DesignPro Tools for Xerox Wizard.
You do not need to check the Run Password Registration Process option.
52 DesignPro Tools® for Xerox Getting Started Guide
3 Click Next.
The installation program searches for a previously installed version of the software.
If DesignPro Tools 3.00 is found on your system, the install automatically displays
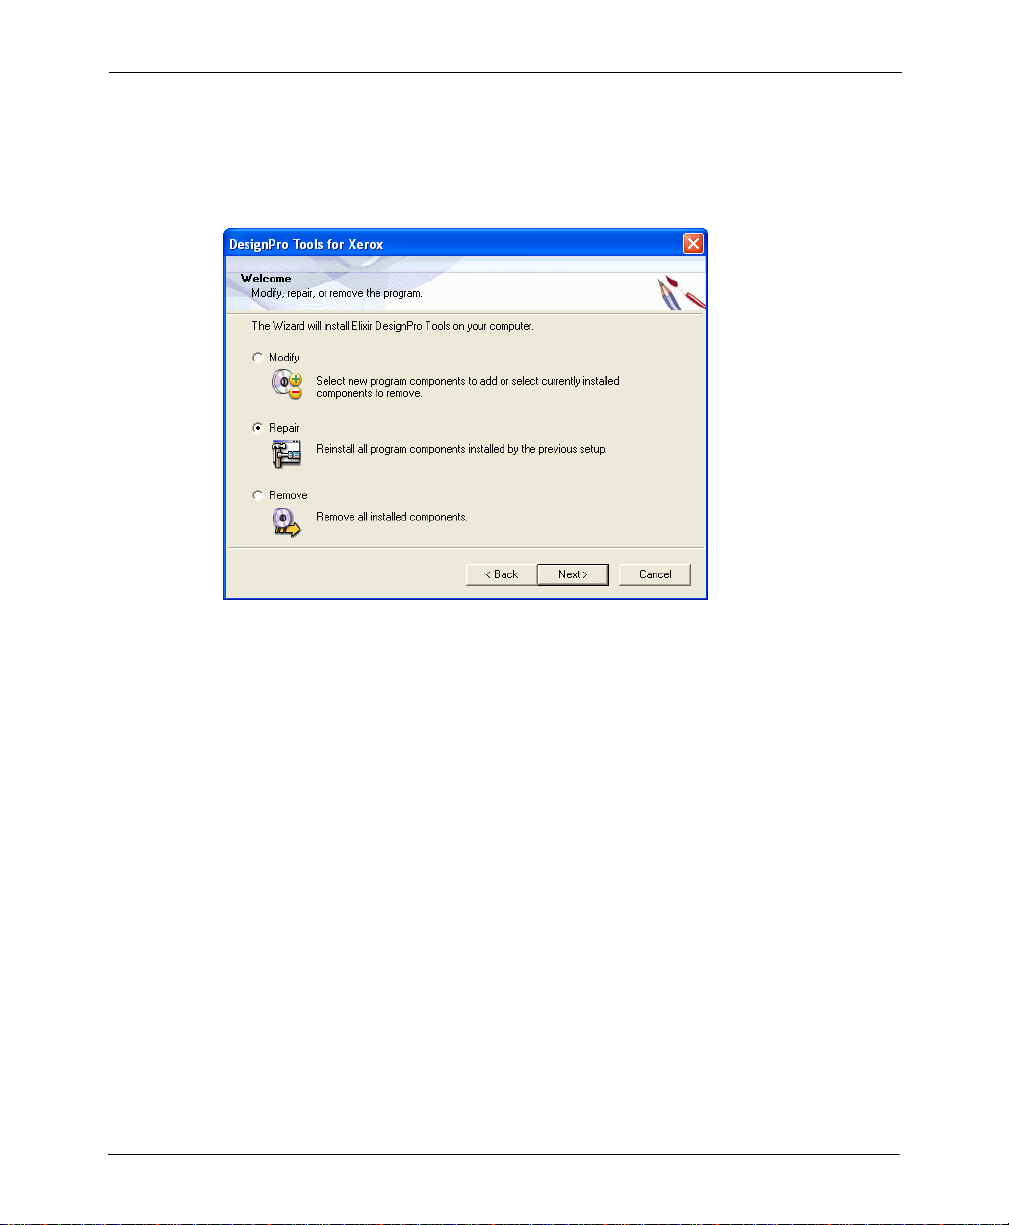
the Welcome dialog with the Modify, Repair, and Remove options.
The DesignPro Tools install detects an installed version of DesignPro Tools.
The Modify option:
Uninstalls components from the present application.
Installs components not previously installed.
The Repair option:
Repairs or refreshes damaged or missing files of the presently installed application.
The Remove option:
Removes all installed components of DesignPro Tools.
Chapter 2: Installation 53
4 Select Repair and click Next.
The Log on As dialog displays.
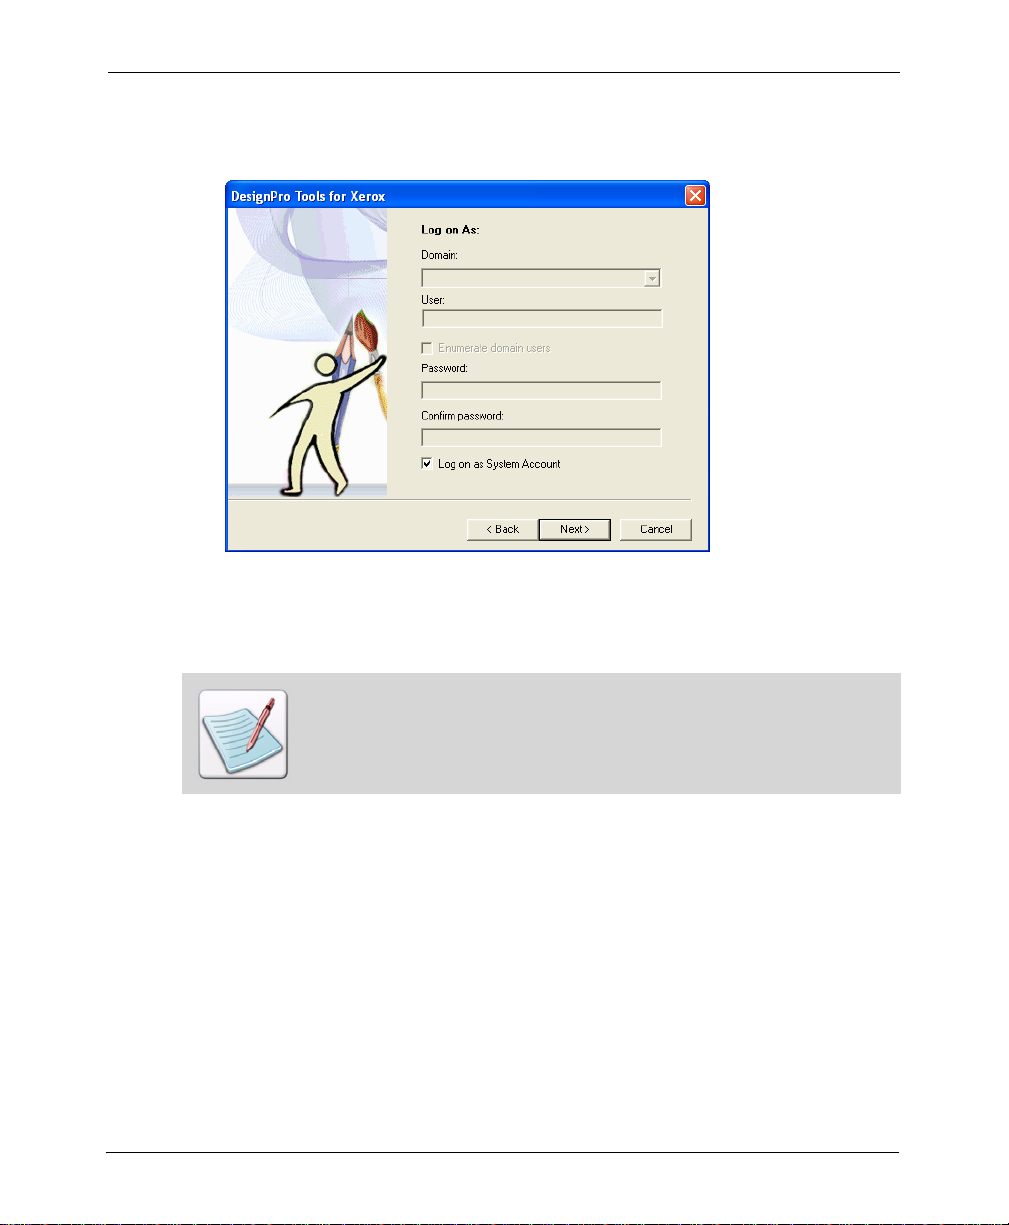
Using system log on information.
By default, the Log on as System Account option is selected and all fields are unavailable.
Proceeding with these settings will use your PC’s log on information.
You will need to change the default log on settings if you want to log on using a
different login ID (other than the one you are currently logged on with). Logging
on with a local machine/domain account will restrict DesignPro Tools use to
authorized users only.
T o customize the log on options, you will uncheck the Log on as System Account option
and enter your information in the available fields:
54 DesignPro Tools® for Xerox Getting Started Guide

5 Uncheck Log on as System Account.
Adding log on information.
6 Specify your domain from the Domain drop-down list.
7 Enter your User ID in the User entry box.
If you would like a list of users within a chosen domain, select Enumerate domain
users. Then select a User ID from the drop-down list. This should be the User ID
that you want to use when logging onto the PC to work with DesignPro Tools.
8 Enter your password in the Password entry box.
This should be the same password used to log on to your domain.
9 Enter your password again in the Confirm Password entry box.
Chapter 2: Installation 55

10 Click Next.
The wizard performs the requested operation and repairs the damaged files or
reinstalls the software. The maintenance status displays in the Setup Status dialog.
The Install repairs the application.
Once the repair procedure completes, the Check/Uncheck to associate file extensions
dialog displays.
Creating file extension associations.
56 DesignPro Tools® for Xerox Getting Started Guide
11 Select any file extensions you wish to associate with a DesignPro Tools editor.
12 Click Next.
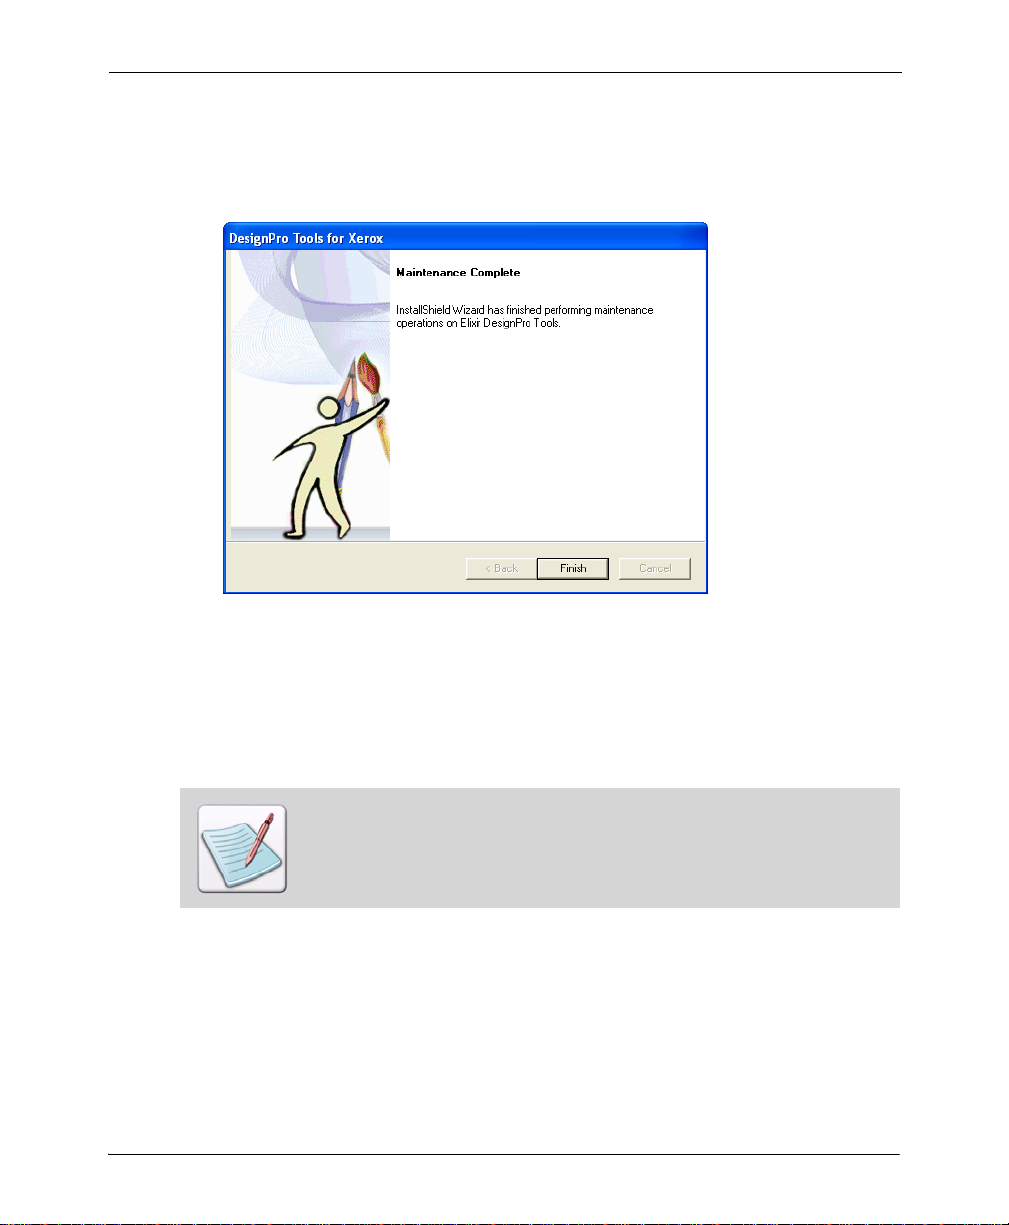
The Maintenance Complete dialog displays.
Maintenance is complete.
13 Click Finish.
The DesignPro Tools repair process completes. The Welcome to DesignPro Tools
screen displays.
14 Click Exit to close the Welcome to DesignPro Tools screen.
If you do not receive a prompt to restart your PC, you may choose whether or
not to restart. The maintenance completes without restarting. However, it is
recommended that you restart your computer after any software installation.
Chapter 2: Installation 57

Uninstalling DesignPro Tools
To uninstall DesignPro Tools, you will run the Remove process.
Prior to removing DesignPro Tools, close all open programs.
To uninstall DesignPro Tools:
1 Insert the DesignPro Tools CD into your CD-ROM drive.
If your computer is set up to automatically run a CD, the Welcome to DesignPro
Tools screen displays.
The Welcome to DesignPro Tools screen.
58 DesignPro Tools® for Xerox Getting Started Guide

If your PC is not set up to automatically run CDs, open the Start menu and
select Run. Type drive:\Setup.exe (replace drive with the letter of your CD-
ROM drive) and click OK.
2 Click DesignPro Tools for Xerox.
The DesignPro Tools setup prepares the InstallShield Wizard.
The Setup initializes.
The DesignPro Tools for Xerox Wizard displays.
The DesignPro Tools for Xerox Wizard.
You do not need to check the Run Password Registration Process option.
Chapter 2: Installation 59

3 Click Next.
The installation program searches for a previously installed version of the software. If a
previous version of DesignPro Tools is found on your system, the install automatically
displays the Welcome dialog with the Modify, Repair, and Remove options.
Select Remove to uninstall all DesignPro Tools software components.
4 Select Remove and click Next.
The Confirm Uninstall dialog displays.
Confirming the uninstall request.
Confirming this option will remove all installed components of DesignPro Tools.
60 DesignPro Tools® for Xerox Getting Started Guide

5 Click OK.
The Confirm Uninstall dialog displays.
Confirming the uninstall process for Elixir PrintDriver and Elixir Scout.
Confirming this option will also remove Elixir PrintDriver, Elixir Scout and utilities
of the DesignPro Tools software package.
6 Click Yes.
The Setup Status dialog displays and begins removing DesignPro Tools.
The Shared File Detected dialog displays.
The Shared *.dll files are detected.
Shared DLL files are detected that may no longer be needed in any application.
It is recommended to remove these shared files with the software.
7 Select Don’t display this message again.
Chapter 2: Installation 61

8 Click Yes.
The DesignPro Tools Setup removes all components. The Setup Status dialog
displays the progress.
The Setup Status displays the uninstall progress.
Once all DesignPro Tools application files are removed from your computer, the
wizard displays the Maintenance Complete dialog.
DesignPro Tools is removed from your computer.
62 DesignPro Tools® for Xerox Getting Started Guide

9 Click Finish.
DesignPro Tools is uninstalled from your PC. The Welcome to DesignPro Tools
screen displays.
10 Click Exit to close the Welcome to DesignPro Tools screen.
DesignPro Tools resource folders are not removed with the application files.
If you do not receive a prompt to restart your PC, you may choose whether or
not to restart. The uninstall process completes without restarting. However, it is
recommended that you restart your computer after any software is installed.
Installing DesignPro Tools in Silent Mode
DesignPro Tools now provides the silent installation feature. This is a two step process;
first the installation process is carried out in Record mode. The installation process is run
once to capture the necessary installation and configuration parameters that will be
provided in an ISS file.
An ISS file contains a set of parameters that represent installation and
configuration specifications.
Secondly the installer is run on a machine in Silent mode. The installer picks up the
installation and configuration specifications from the ISS file. Silent installation results in
the exact installation and configuration specifications being used on all machines.
Chapter 2: Installation 63

You can also use the silent installation feature to run such procedures as upgrading to,
repairing, modifying, and uninstalling using DesignPro Tools version 3.00.
Only user accounts with administrative rights can perform install related tasks.
Prior to installing DesignPro Tools, close all open programs.
To install DesignPro Tools for Xerox in Record mode:
1 Insert the DesignPro Tools CD into your CD-ROM drive.
2 Open the Command Prompt.
3 Change the directory to drive:\DPTools
Replace drive with the letter of your CD-ROM drive.
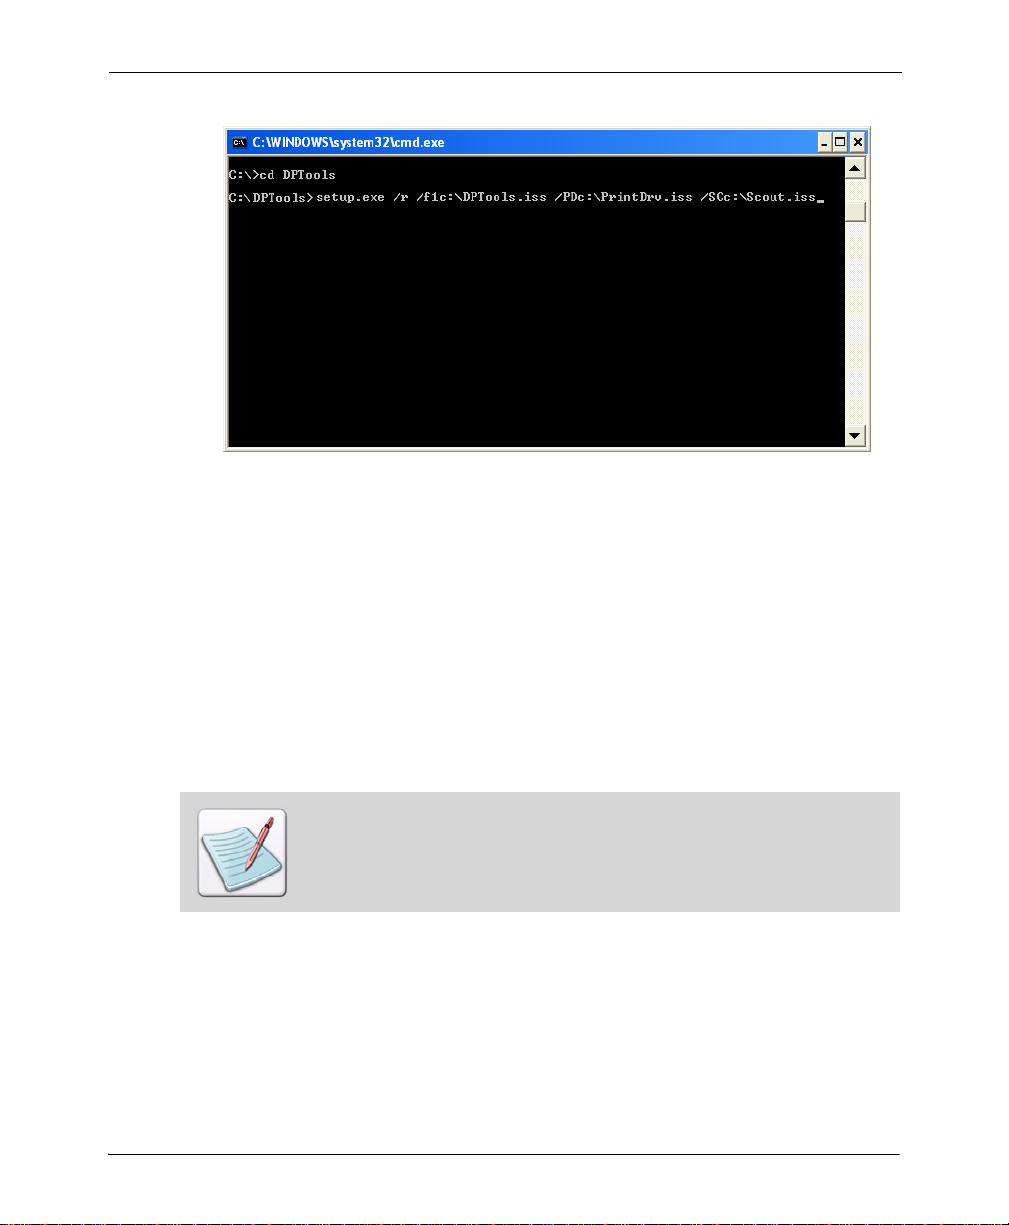
4 Enter Setup.exe /r /f1drive:\DPTools.iss /PDdrive:\PrintDrv.iss /
SCdrive:\Scout.iss
The /r or -r switch is used to run the install in Record mode and /f1 or -f1 switch
specifies the ISS file (DPTools.iss). Specify the directory where the ISS file created
is to be placed. If an ISS file is not specified, then Setup.iss file is created by default
and is placed in the drive:\Windows Directory.
For PrintDriver and Scout, separate ISS files are used. The /PD or -PD switch
specifies the PrintDriver ISS file (PrintDrv.iss) and /SC or -SC switch specifies the
Scout ISS file (Scout.iss). Specify the directory where the ISS files are to be placed.
If a directory is not provided, then these files are placed on the system’s root drive.
The ISS files used for installing can not be used for any other procedures such as
upgrading to, modifying, repairing and uninstalling of DesignPro Tools.
64 DesignPro Tools® for Xerox Getting Started Guide
Installing DesignPro Tools for Xerox in Record mode.
5 Press [Enter].
The DesignPro Tools setup prepares the InstallShield Wizard and the installation
process runs. For more information on the installation process, refer to “Installing
DesignPro Tools ” on page 14.
DesignPro Tools always prompts to restart the machine after the completion of
installation in Record mode. Once the installation is complete the next step is to
unlock DesignPro Tools for use. For more information, refer to“Registering
DesignPro Tools ” on page 27.
Once the installation process is complete, the DesignPro Tools is installed on the system
and the ISS files created are placed in the directory specified in step 4.
You can also run the installation process using the sample batch file
DPTRecordMode_Inst.bat provided with the install. Run the batch file to install
DesignPro Tools in Record mode; the ISS files created are placed by default in
the system’s root drive.
Chapter 2: Installation 65

Elixir Application Suite Detection dialog always appear during installation in Record
mode even in the absence of Elixir Application Suite. This ensures that the Elixir
Application Suite settings can be saved on machines where Elixir Application Suite is
detected during installation in Silent mode.
Elixir Application Suite Detection dialog always appear during installation in Record
mode even in the absence of Elixir Application Suite.
ElixiTag is supported by MS Word 2000 or higher. However, ElixiTag utility is
installed in Record mode in the absence of MS Word 2000 or higher. This
enables the ElixiTag utility to be installed on a machine where MS Word 2000 or
higher is detected during installation in Silent mode.
To install DesignPro Tools for Xerox in Silent mode:
1 Insert the DesignPro Tools CD into your CD-ROM drive.
2 Open the Command Prompt.
3 Change the directory to drive:\DPTools
Replace drive with the letter of your CD-ROM drive.
66 DesignPro Tools® for Xerox Getting Started Guide

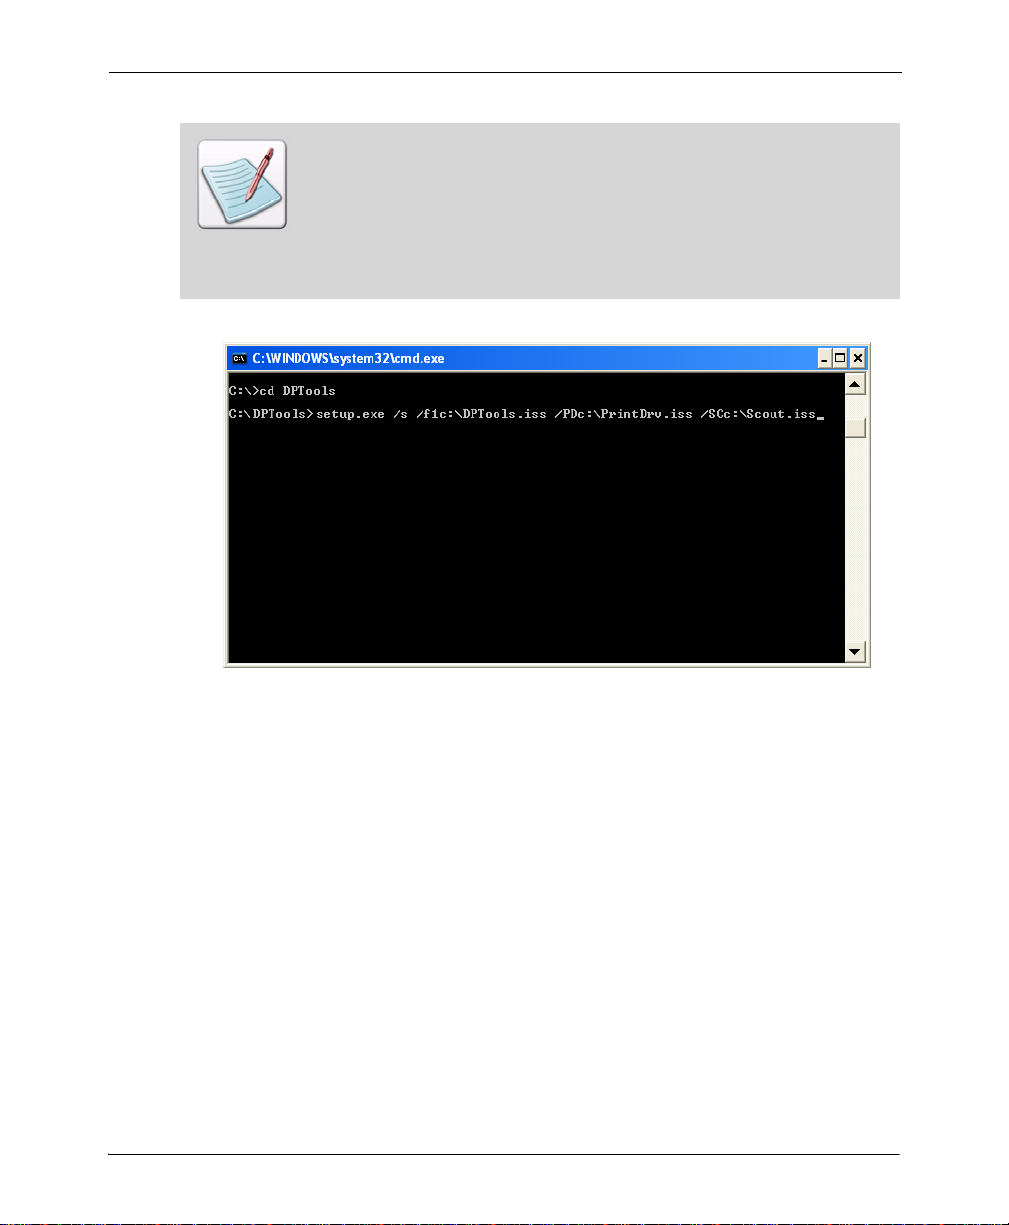
4 Enter Setup.exe /s /f1drive:\DPTo ols.iss /PDdrive:\PrintDrv.iss /
SCdrive:\Scout.iss
The /s or -s switch is used to run the install in Silent mode and /f1 or -f1 switch
specifies the ISS file (DPTools.iss). Specify the directory where you have placed the
ISS file.
For PrintDriver and Scout, separate ISS files are used. The /PD or -PD switch
specifies the PrintDriver ISS file (PrintDrv.iss) and /SC or -SC specifies Scout ISS
file (Scout.iss). Specify the directory where you have placed the PrintDriver and
Scout ISS files.
Sample ISS files (Setup.iss, PrintDrv.iss, and Scout.iss) for installating DesignPro
Tools in Silent mode are provided with the install. These files are placed in their
respective program folders (DPTools, PrintDrv, and Scout) in the CD-ROM.
When using these sample files, you do not need to carry out the installation in
Record mode.
To install DesignPro Tools in Silent mode using the sample ISS files, place the ISS
files on a local drive and carry out steps 2 to 4 mentioned above.
The sample files provided with the install only allow you to install DesignPro
Tools Professional using the Typical installation mode.
Installing DesignPro Tools for Xerox in Silent mode.
Chapter 2: Installation 67

The installation runs in Silent mode.
You can also run the installation process in Silent mode using the batch file
DPTSilentMode_Inst.bat provided with the install.
To install DesignPro Tools using the batch file, place the sample ISS files
(Setup.iss, PrintDrv.iss, and Scout.iss) provided with the install on the system’s
root drive and run the batch file. DesignPro Tools is installed on the system.
Messages generated during the Silent mode installation are logged in the
Install.log file. The log file is placed in the drive:\Program Files\Elixir
Technologies\Bin Directory.
Upgrading DesignPro Tools in Silent Mode
To upgrade DesignPro Tools for Xerox in Record mode:
1 Insert the DesignPro Tools CD into your CD-ROM drive.
2 Open the Command Prompt.
3 Change the directory to drive:\DPTools
Replace drive with the letter of your CD-ROM drive.
Only user accounts with administrative rights can perform install related tasks.
Prior to upgrading DesignPro Tools, close all open programs.
68 DesignPro Tools® for Xerox Getting Started Guide

4 Enter Setup.exe /r /f1drive:\DPTo ols.iss /PDdrive:\PrintDrv.iss /
SCdrive:\Scout.iss
The /r or -r switch is used to run the install in Record mode and /f1 or -f1 switch
specifies the ISS file (DPTools.iss). Specify the directory where the ISS file created
is to be placed. If an ISS file is not specified then Setup.iss file is created by default
and is placed in the drive:\Windows Directory.
For PrintDriver and Scout, separate ISS files are used. The /PD or -PD switch
specifies the PrintDriver ISS file (PrintDrv.iss) and /SC or -SC switch specifies the
Scout ISS file (Scout.iss). Specify the directory where the ISS files are to be placed.
If a directory is not provided, then these files are placed on the system’s root drive.
The ISS file used for upgrading can not be used for any other procedures such as
repairing, modifying, installing and uninstalling of DesignPro Tools.
Upgrading DesignPro Tools for Xerox in Record mode.
5 Press [Enter].
The DesignPro Tools setup prepares the InstallShield Wizard and the upgrading
process runs. For more information on the upgrading process, refer to “Upgrading
DesignPro Tools ” on page 36.
DesignPro Tools always prompts to restart the machine after the completion of
maintenance in Record mode.
Chapter 2: Installation 69

To upgrade DesignPro Tools for Xerox in Silent mode:
1 Open the Command Prompt.
2 Change the directory to drive:\DPTools
Replace drive with the letter of your CD-ROM drive.
3 Enter Setup.exe /s /f1drive:\DPTools.iss /PDdrive:\PrintDrv.iss /
SCdrive:\Scout.iss
The /s or -s switch is used to run the install in Silent mode and /f1 or -f1 switch
specifies the ISS file (DPTools.iss). You also need to specify the directory where
you have placed the ISS file.
For PrintDriver and Scout, separate ISS files are used. The /PD or -PD switch
specifies the PrintDriver ISS file (PrintDrv.iss) and /SC or -SC specifies Scout ISS
file (Scout.iss). Specify the directory where you have placed the PrintDriver and
Scout ISS files.
Upgrading DesignPro Tools for Xerox in Silent mode.
The upgrading process runs in Silent mode.
70 DesignPro Tools® for Xerox Getting Started Guide

Modifying DesignPro Tools in Silent Mode
T o modify DesignPro Tools for Xerox in Record mode:
1 Insert the DesignPro Tools CD into your CD-ROM drive.
2 Open the Command Prompt
3 Change the directory to drive:\DPTools
Replace drive with the letter of your CD-ROM drive.
Only user accounts with administrative rights can perform install related tasks.
Prior to modifying DesignPro Tools, close all open programs.
4 Enter Setup.exe /r /f1drive:\DPTools.iss /PDdrive:\PrintDrv.iss /
SCdrive:\Scout.iss
The /r or -r switch is used to run the install in Record mode and /f1 or -f1 switch
specifies the ISS file (DPTools.iss). Specify the directory where the ISS file created
is to be placed. If an ISS file is not specified then Setup.iss file is created by default
and is placed in the drive:\Windows Directory.
For PrintDriver and Scout, separate ISS files are used. The /PD or -PD switch
specifies the PrintDriver ISS file (PrintDrv.iss) and /SC or -SC switch specifies the
Scout ISS file (Scout.iss). These files are placed on the system’s root drive. Specify
the directory where the ISS files are to be placed. If a directory is not provided, then
these files are placed on the system’s root drive.
The ISS files used for modifying can not be used for any other procedures such
as repairing, upgrading, installing and uninstalling of DesignPro Tools.
Chapter 2: Installation 71
Modifying DesignPro Tools for Xerox in Record mode.
5 Press [Enter].
The DesignPro Tools setup prepares the InstallShield Wizard and the modification
process runs. For more information on the modification process, refer to “Modifying
DesignPro Tools” on page 44.
DesignPro Tools always prompts to restart the machine after the completion of
maintenance in record mode.
T o modify DesignPro Tools for Xerox in Silent mode:
1 Insert the DesignPro Tools CD into your CD-ROM drive.
2 Open the Command Prompt.
3 Change the directory to drive:\DPTools
Replace drive with the letter of your CD-ROM drive.
4 Enter Setup.exe /s /f1drive:\DPTools.iss /PDdrive:\PrintDrv.iss /
SCdrive:\Scout.iss
72 DesignPro Tools® for Xerox Getting Started Guide
The /s or -s switch is used to run the install in Silent mode and /f1 or -f1 switch
specifies the ISS file (DPTools.iss). you also need to specify the directory where
you have placed the ISS file.
For PrintDriver and Scout, separate ISS files are used. The /PD or -PD switch
specifies the PrintDriver ISS file (PrintDrv.iss) and /SC or -SC specifies Scout ISS
file (Scout.iss). Specify the directory where you have placed the PrintDriver and
Scout ISS files.
Modifying DesignPro Tools for Xerox in Silent mode.
The modification process runs in Silent mode.
Chapter 2: Installation 73

Repairing DesignPro Tools in Silent Mode
To repair DesignPro Tools for Xerox in Record mode:
1 Insert the DesignPro Tools CD into your CD-ROM drive.
2 Open the Command Prompt.
3 Change the directory to drive:\DPTools
Replace drive with the letter of your CD-ROM drive.
Only user accounts with administrative rights can perform install related tasks.
Prior to repairing DesignPro Tools, close all open programs.
4 Enter Setup.exe /r /f1drive:\DPTools.iss /PDdrive:\PrintDrv.iss /
SCdrive:\Scout.iss
The /r or -r switch is used to run the install in Record mode and /f1 or -f1 switch
specifies the ISS file (DPTools.iss). Specify the directory where the ISS file created
is to be placed. If an ISS file is not specified, then Setup.iss file is created by default
and is placed in the drive:\Windows Directory.
For PrintDriver and Scout, separate ISS files are used. The /PD or -PD switch
specifies the PrintDriver ISS file (PrintDrv.iss) and /SC or -SC switch specifies the
Scout ISS file (Scout.iss). Specify the directory where the ISS files will be placed. If
a directory is not provided, then these files are placed on the system’s root drive.
The ISS files used for repairing can not be used for any other procedures such as
upgrading to, modifying, installing and uninstalling of DesignPro Tools.
74 DesignPro Tools® for Xerox Getting Started Guide

Repairing DesignPro Tools for Xerox in Record mode.
5 Press [Enter].
The DesignPro Tools setup prepares the InstallShield Wizard and the repairing
process runs. For more information on the repairing process, refer to “Repairing
DesignPro Tools ” on page 51.
DesignPro Tools always prompts to restart the machine after the completion of
maintenance in Record mode.
T o repair DesignPro Tools for Xerox in Silent mode:
1 Insert the DesignPro Tools CD into your CD-ROM drive.
2 Open the Command Prompt.
3 Change the directory to drive:\DPTools
Replace drive with the letter of your CD-ROM drive.
Chapter 2: Installation 75

4 Enter Setup.exe /s /f1drive:\DPTools.iss /PDdrive:\PrintDrv.iss /
SCdrive:\Scout.iss
The /s or -s switch is used to run the install in Silent mode and /f1 or -f1 switch
specifies the ISS files (DPTools.iss). You also need to specify the directory where
you have placed the ISS file.
For PrintDriver and Scout, separate ISS files are used. The /PD or -PD switch
specifies the PrintDriver ISS file (PrintDrv.iss) and /SC or -SC specifies Scout ISS
file (Scout.iss). Specify the directory where you have placed the PrintDriver and
Scout ISS files.
Repairing DesignPro Tools for Xerox in Silent mode.
The repairing process runs in Silent mode.
76 DesignPro Tools® for Xerox Getting Started Guide

Uninstalling DesignPro Tools in Silent Mode
T o uninstall DesignPro Tools for Xerox in Record mode:
1 Insert the DesignPro Tools CD into your CD-ROM drive.
2 Open the Command Prompt.
3 Change the directory to drive:\DPTools
Replace drive with the letter of your CD-ROM drive.
Only user accounts with administrative rights can perform install related tasks.
Prior to removing DesignPro Tools, close all open programs.
4 Enter Setup.exe /r /f1drive:\DPTo ols.iss /PDdrive:\PrintDrv.iss /
SCdrive:\Scout.iss
The /r or -r switch is used to run the install in Record mode and /f1 or -f1 switch
specifies the ISS file (DPTools.iss). Specify the directory where the ISS file created
is to be placed. If an ISS file is not specified, then Setup.iss file is created by default
and is placed in the drive:\Windows Directory.
For PrintDriver and Scout, separate ISS files are used. The /PD or -PD switch
specifies the PrintDriver ISS file (PrintDrv.iss) and /SC or -SC switch specifies the
Scout ISS file (Scout.iss). Specify the directory where the ISS files will be placed. If
a directory is not provided, then these files are placed on the system’s root drive.
The ISS files used for uninstalling can not be used for any other procedures such
as upgrading to, modifying, installing and repairing of DesignPro Tools.
Chapter 2: Installation 77

Uninstalling DesignPro Tools for Xerox in Record mode.
5 Press [Enter].
The DesignPro Tools setup prepares the InstallShield Wizard and the uninstalling
process runs. For more information on the uninstalling process, refer to“Uninstalling
DesignPro Tools ” on page 58.
DesignPro Tools always prompts to restart the machine after the completion of
uninstall process in Record mode.
You can also run the uninstall process using the sample batch file
DPTRecordMode_Uninst.bat provided with install. Run the batch file to uninstall
DesignPro Tools in Record mode; the ISS files created are placed on the system’s
root drive.
To uninstall DesignPro Tools for Xerox in Silent mode:
1 Insert the DesignPro Tools CD into your CD-ROM drive.
2 Open the Command Prompt.
3 Change the directory to drive:\DPTools
Replace drive with the letter of your CD-ROM drive.
78 DesignPro Tools® for Xerox Getting Started Guide

4 Enter Setup.exe /s /f1drive:\DPTo ols.iss /PDdrive:\PrintDrv.iss /
SCdrive:\Scout.iss
The /s or -s switch is used to run the install in Silent mode and /f1 or -f1 switch the
specifies ISS file (DP Tools.iss). Specify the directory where you have placed the ISS
file. If a Log file is not specified then Setup.log is created and is placed at the
directory specified in the ISS file.
For PrintDriver and Scout, separate ISS files are used. The /PD or -PD switch
specifies the PrintDriver ISS file (PrintDrv.iss) and /SC or -SC specifies Scout ISS
file (Scout.iss). Specify the directory where you have placed the PrintDriver and
Scout ISS files.
Sample ISS files (DPTools_Uninst.iss, PrintDrv_Uninst.iss, and Scout_Uninst.iss)
for uninstallating DesignPro Tools in Silent mode are provided with the install.
These files are placed in their respective program folders (DPTools, PrintDrv,
and Scout) in the CD-ROM. When using these sample files, you do not need to
carry out the uninstallation process in Record mode.
To uninstall DesignPro Tools in Silent mode using the sample ISS files, place the
ISS files on a local drive and carry out steps 2 to 4 mentioned above.
The sample files provided with the install only allow you to uninstall DesignPro
Tools Professional.
Uninstalling DesignPro Tools for Xerox in Silent mode.
Chapter 2: Installation 79

The uninstall process runs in Silent mode.
You can also run the uninstallation process in Silent mode using the sample batch
file DPTSilentMode_Uninst.bat provided with the install.
To uninstall DesignPro Tools using the batch file, place the ISS files
(DPTools_Uninst.iss, PrintDrv_Uninst.iss, and Scout_Uninst.iss) provided with
the install on the system’s root drive and run the batch files.
80 DesignPro Tools® for Xerox Getting Started Guide

Chapter 3:
Configuration
In this chapter...
Understanding Virtual Folders
Adding Virtual Folders
Removing Virtual Folders
In this chapter, you will configure DesignPro Tools for your environment. Configuration
involves setting up virtual folders, which are used to organize, manage, and maintain
resources.
A resource is a file used for printing. A resource can be, but is not limited to, forms, fonts,
or images. Each resource can exist in several different formats. For example, an image
might be scanned and saved as a BMP, then later saved as an IMG. At some point, you
might want to convert the original image into another format for a different application.
DesignPro Tools offers an effective way of managing all of these resources in the form of
virtual folders.
In addition, system parsers, writers and editors use virtual folders for locating resources.
When a form is opened in the Form Editor, the system parsers search the virtual folder
paths for fonts and images used in the form. If the resources are not located in the defined
virtual folders, the form opens with errors.
A folder structure supporting all file types is created during the Elixir software
installation. You can designate additional folders for each file type to work within your
current workflow.
81
Understanding Virtual Folders
Virtual folders are an abstract representation of the physical file folder structure
underlying DesignPro Tools. Displayed as a tree structure in the Manager, virtual folders
are organized by resource type, then resource format. At the lowest level of each branch,
one or more folders are listed, each representing a physical location on a mapped drive.
You will start by reviewing the virtual folders that are available by default in the Manager.
From the Start menu, select All Programs, Elixir Applications, DesignPro Tools,
DesignPro Manager.
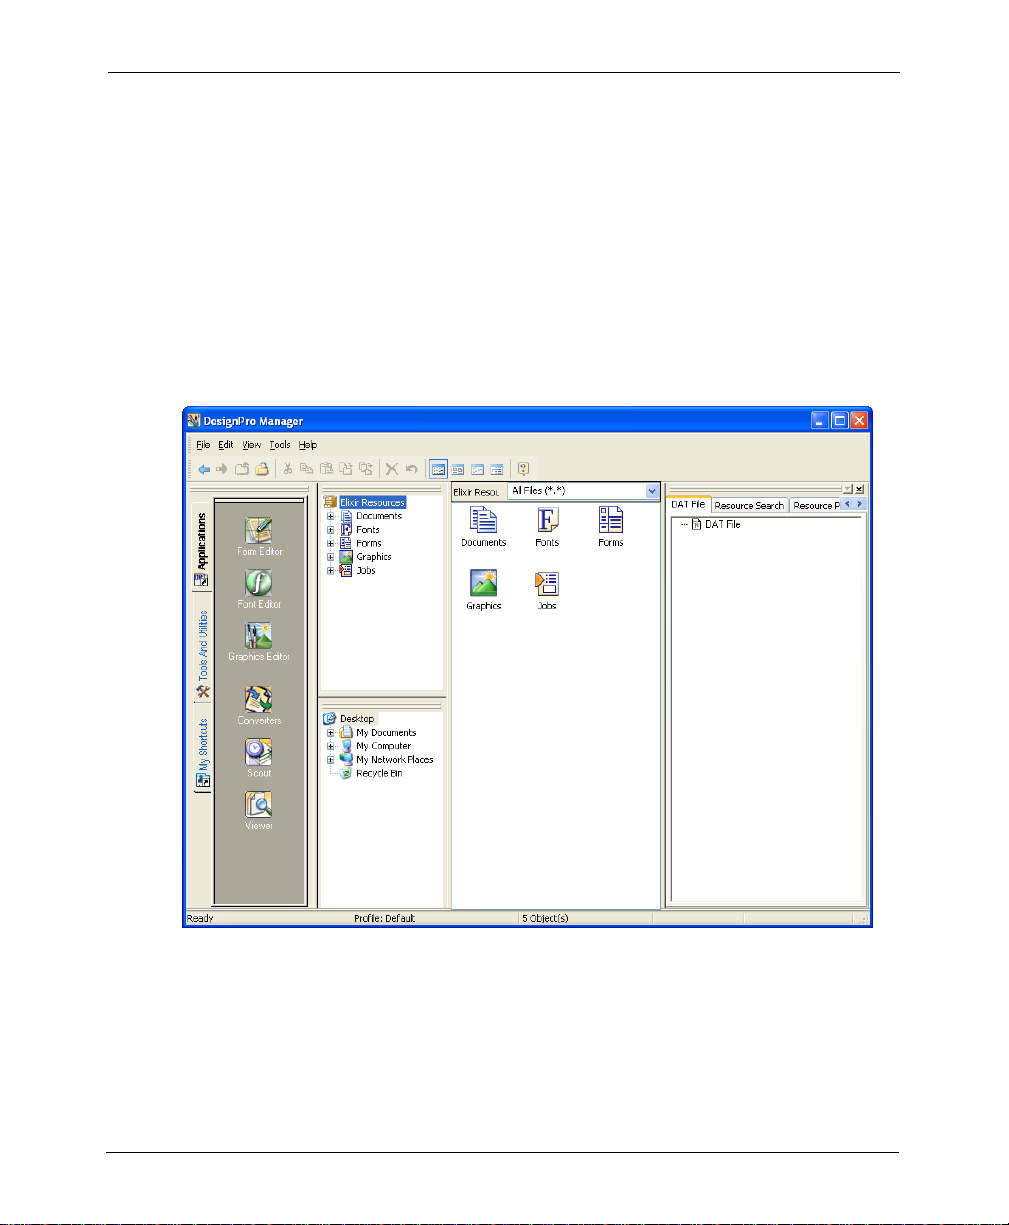
The Manager opens:
Notice the hierarchy underneath the Elixir Resources node. These are virtual folders, or
file locations for resources.
82 DesignPro Tools® for Xerox Getting Started Guide

Manager displays three panes similar to Windows Explorer: the top left pane is the
Resource Tree, displaying the virtual folder tree; the bottom left pane is the Explorer tree,
displaying the physical folders; and the right pane displays the contents of the folder
selected in either of the panes on the left side. The root of the virtual folder tree, named
Elixir Resources, is at the same level in the hierarchy as the Desktop root node of the
physical Explorer tree. The Manage window, that provides various options for packaging
and searching the Elixir resources, appears at the right most corner.
Notice that there are default locations for Documents, Fonts, Forms, Graphics, and Jobs.
Each of these resource type folders contains the supported resource format folders.
Underneath the resource format folders (FRM, FSL, etc.), there are additional named file
folders, representing a physical location on your drive or network. These names are
automatically generated; however, you can change these names according to your
environment specifications. Placing your cursor over the named folder displays the
absolute path of the virtual folder references.
The virtual folder structure.
Chapter 3: Configuration 83
Adding Virtual Folders
You may wish to add more folders for each resource type, depending on your
organization’s current workflow. You can map the same physical folder to several resource
formats. Folders are not restricted to just one resource format.
To add physical folders to the virtual folder structure:
1 Expand the folder structure and select a resource type.
For example, to map a new folder for Xerox FRM files, expand the Forms and Xerox
Forms folders by using the + (plus) sign next to the folder names.
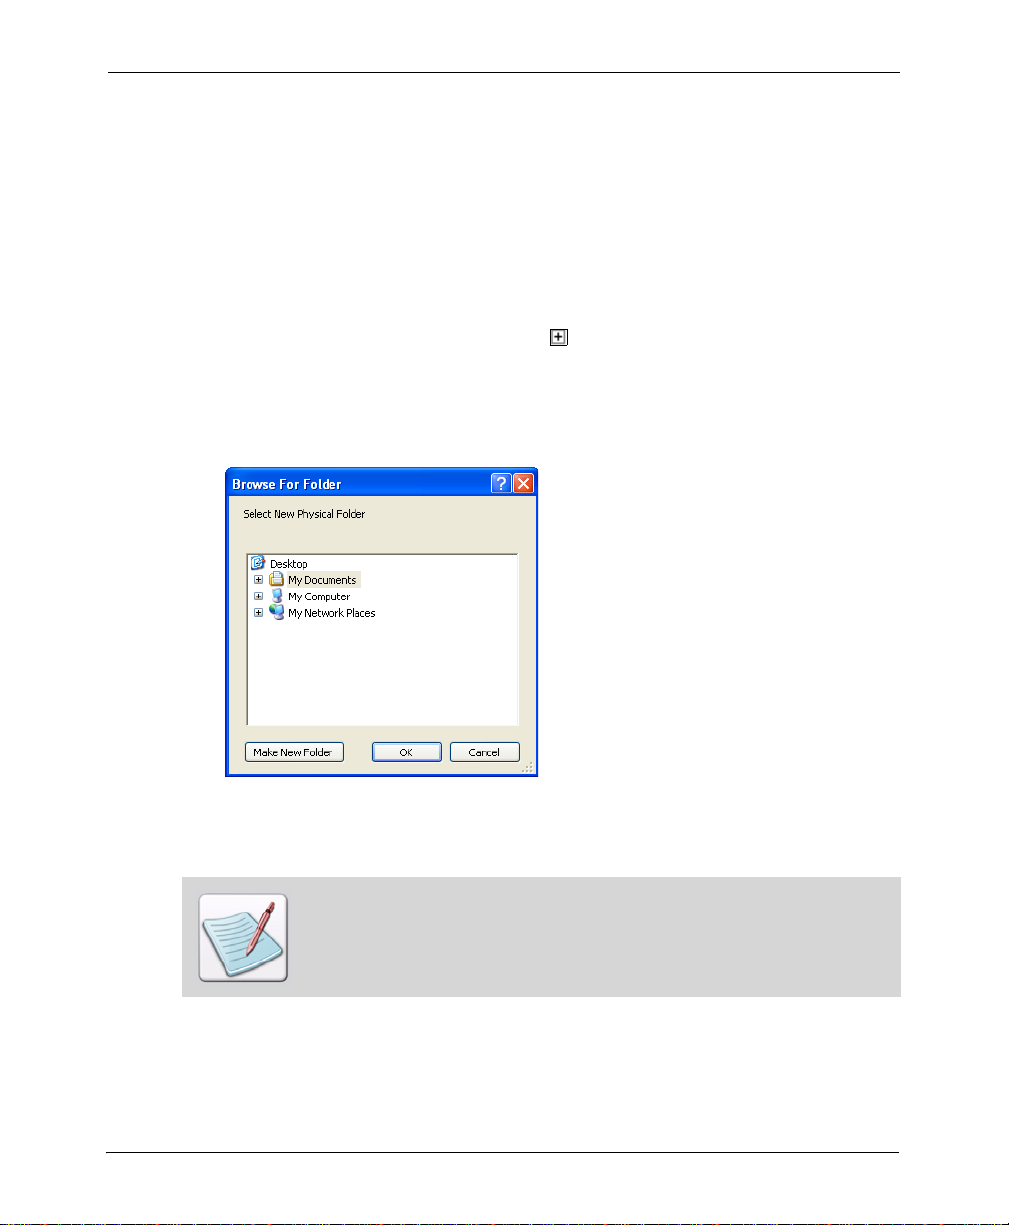
2 Right-click a resource format node where you would like to map a new folder, and
select Map New Folder from the pop-up menu.
The Browse for Folder dialog displays.
Browse to a new physical location.
3 Browse to select a folder and click OK.
You are selecting an existing physical folder location. This physical location will
be mapped to a virtual folder.
84 DesignPro Tools® for Xerox Getting Started Guide
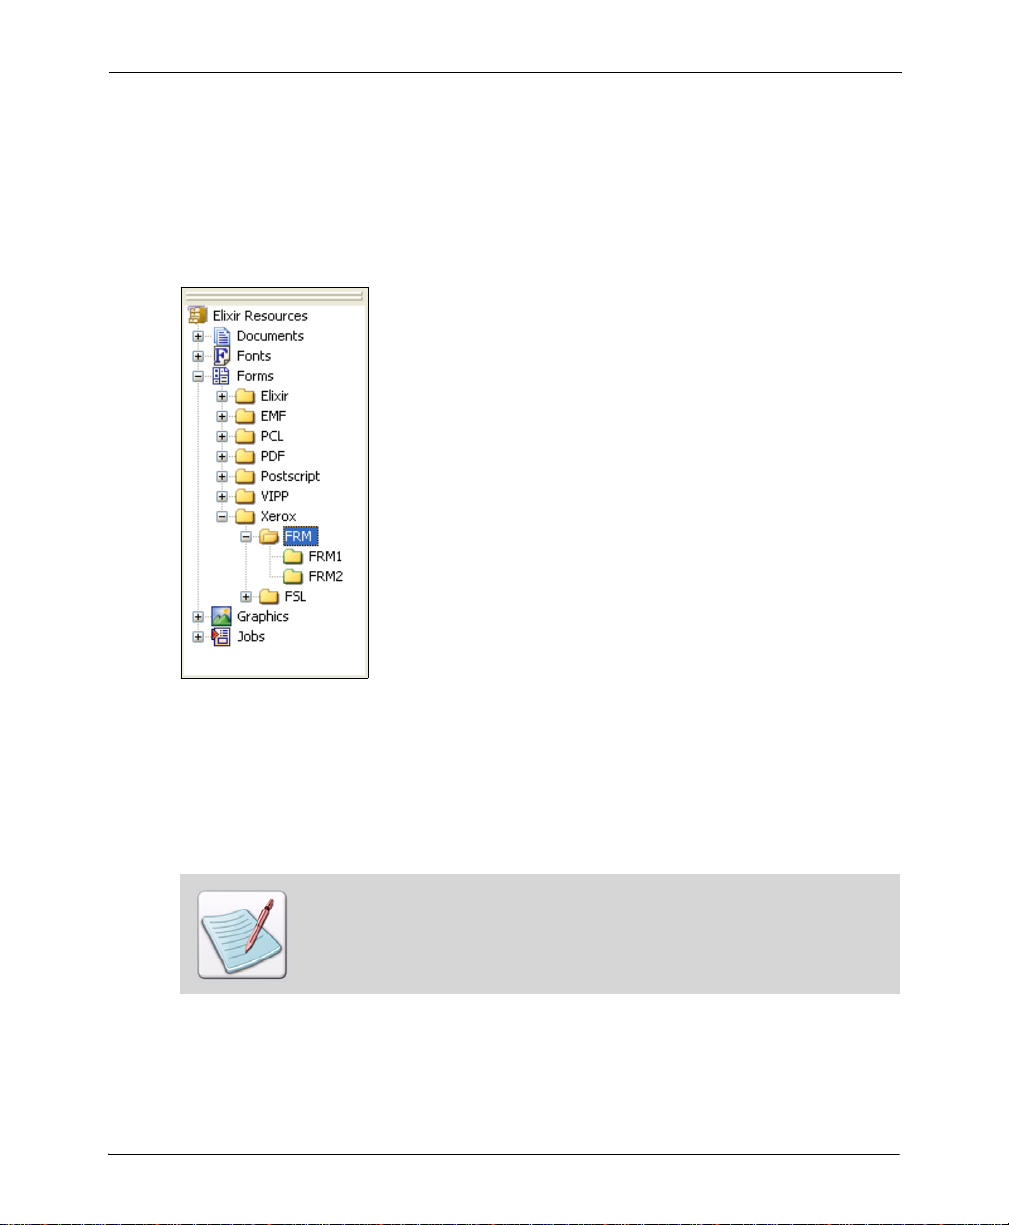
The physical folder is mapped to the virtual folders tree structure and a folder entry
displays under the selected node. The folder is automatically named according to the
selected resource format. For example, if you mapped the new folder on the FRM resource
format, the folder will be named FRM2.
Y ou can rename the recently mapped folder by typing in a new name. To rename the folder
at a later stage, you can right-click the folder and select Rename from the pop-up menu.
A new folder is added to the virtual folders tree.
Changes in the virtual folders are posted as profile entries to the SystemData.ini file, and
multiple profile files can be created to allow custom combinations of resource paths. If
you have multiple customers or projects that require separate collections of resources, you
can create individual profiles for each collection of resources and activate those profiles
during resource editing sessions.
A profile is a part of the SystemData.ini file, which stores your preferences for
using DesignPro Tools. The profile specifically determines where and how
resources are opened, referenced, and saved
Chapter 3: Configuration 85

Removing Virtual Folders
To remove a virtual folder:
1 Right-click a mapped folder and select Unmap Folder from the pop-up menu.
The Unmap Folder dialog confirms your action.
The Unmap Folder message box.
2 Click Yes.
The folder is no longer mapped as a virtual folder.
This action does not delete the folder or any of the folder’s files. Unmapping a
folder only removes the folder reference from the active profile in DesignPro
Tools and removes the selected node from the virtual folder tree
86 DesignPro Tools® for Xerox Getting Started Guide

Chapter 4:
Quick Start
In this chapter...
Understanding the Design
Opening Form Editor
Using PrintDriver to Create Forms
Quick Start is designed to introduce you to key areas of DesignPro Tools, so you can start
building your own forms and resources as soon as possible. This chapter guides you
through building two forms:
A simple marketing letter created using Form Editor.
A loan letter created using PrintDriver.
Once the forms are complete, you will print preview the forms directly on your PC. Then
you can print to a desktop printer, or transfer the files to your Xerox printer for production
printing.
Understanding the Design
Central Commercial Bank (CCB) offers highly personalized banking services to their
clients. Once a month, they send out letters to new clients to introduce their products and
services.
CCB needs a letter containing static text and graphic elements. You will add the static text
and graphic elements to a new form.
To create the first form, a marketing letter for Central Commercial Bank, you will:
Use graphics, drawing objects and text to create a form.
Print preview the design.
Save the resources for transferring to the printer.
87

This form uses many object properties. For information on a specific property or
function, refer to the DesignPro Tools Online Help.
The completed Central Commercial Bank form.
88 DesignPro Tools® for Xerox Getting Started Guide

Opening Form Editor
To create the CCB form, you will use the Form Editor.
From the Start menu, select All Programs, Elixir Applications, DesignPro Tools,
DesignPro Form Editor.
The Form Editor opens:
The Form Editor. 1. Menu bar. 2. Standard toolbar. 3. Zoom toolbar. 4. Position and
Dimension toolbar. 5. Common Attributes toolbar. 6. Filter toolbar. 7. Form template
toolbar. 8.Select toolbox. 9. Tools toolbar. 10. Design Area.
Chapter 4: Quick Start 89

Setting Page Properties
When you launch Form Editor, a new form opens with the Form Editor. Before adding
objects to the page, you will verify the page settings.
1 From the File menu, select Properties.
The Options dialog displays. This dialog can also be opened by selecting Options
from the Tools menu.
2 Scroll down to view the Page sub-categories.
3 Select the Dimensions sub-category and verify the following settings:
Width: 8.50 in
Height: 11.00 in
Orientation: Portrait
Setting Page properties in the Options dialog.
This guide uses inches as the default unit of measurement. If you want to use a
unit of measurement other than the default, select the Ruler category and
select your preference from the Units drop-down list.
4 Click Apply, and then click OK.
Keep the default value for all other settings.
90 DesignPro Tools® for Xerox Getting Started Guide

Adding an Image
Form Editor can insert Xerox images into a form. You can also insert Windows formats,
such as BMPs and TIFFs, directly into the form without any pre-conversion.
If you decide to use an image format other than Xerox, you will need to save the
image to Xerox format before transferring the image to the printer. This can be
done when saving the form to the Xerox format. You do not have to convert
each resource separately.
DesignPro Tools can use native Xerox resources directly in a resource editor. You
can use the Elixir version while editing, then save as Xerox before transferring the
finished resource to the printer.
The first element on the form is the CCB logo. You will insert and position the image on
the page.
You can close the Manage window to create more space in the Design Area.
Chapter 4: Quick Start 91

5 On the Tools toolbar, click .
The Open Resource File dialog displays.
The Open Resource File dialog.
6 In the Files of Type drop-down list, select Xerox IMG & Xerox LGO (*.img,
*.lgo).
The path updates to drive:\Elixir\Pics\Img if the Elixir icon is selected in the left
pane. If the Elixir icon is not selected, you can either click the Elixir icon or browse
to the correct directory path.
When the Elixir icon is selected in the left pane of the dialog, the path
automatically updates to the specified profile’s directory for the selected Files of
type. For example, the default profile lists drive:\Elixir\Pics\Img as the directory
for Xerox IMG & Xerox LGO images.
7 Select CCLOGO.IMG.
8 In the Insert As drop-down list, select Embedded.
This option embeds resources into the form.
92 DesignPro Tools® for Xerox Getting Started Guide

9 Click Open.
A rectangle using the selected image dimensions displays in the Design Area. This
rectangle helps visually place the image.
Rectangle using the selected image dimensions.
Resources can be located anywhere on your local drives or network. You can
use the default directories provided, or build your own directory structure using
virtual folders.
The Xerox architecture allows a maximum of six characters for resource names.
10 Place the image in the upper left corner of the Design Area by clicking once.
A bounding rectangle displays around the CCB Logo. Once you click in the Design
Area, the rectangle is replaced by handles at the top, bottom, and sides of the image.
The position coordinates and the size of the image display on the Position and Dimension
toolbar. These coordinates represent the top-left corner of the image.
The handles around the logo indicate that the image is selected. You can change the
position of the image by clicking and dragging or by entering the exact coordinates in the
Position and Dimension toolbar.
The CCB design has a mockup that includes positioning coordinates.
Throughout this exercise, each object has a position assigned. You can specify
the exact coordinates for each object as provided, or you can create the form by
matching them visually to the form mockup at the beginning of the chapter.
Chapter 4: Quick Start 93

11 In the Position and Dimension toolbar, specify the following:
X: 0.25 in
Y: 0.30 in
Use the Enter key to apply the coordinates. You have repositioned the CCB Logo.
The Position and Dimension toolbar. Type in the entry boxes to change the location
of a selected object. X is the horizontal coordinate, Y is the vertical coordinate, W is
the object width, and H is the object height.
You can move objects incrementally using the arrows on the Positio n and
Dimension toolbar. You can also click and drag to position images.
The CCB logo displays in the Design Area.
94 DesignPro Tools® for Xerox Getting Started Guide

Adding Text
Many Xerox production printers use bitmap fonts. In this exercise, you will use an outline
font and convert it to a Xerox bitmap font when saving the form.
A bitmap font contains pictures or bitmaps of each character.
A bitmap font only contains one family, style and point size per font. For example, Times
New Roman 12 point bold and Times New Roman 10 point bold are two separate fonts.
DesignPro Tools uses the following font types:
True Type fonts
Adobe Type Manager (ATM) fonts
Elixir legacy fonts (for previous Elixir Application Suite users)
Xerox fonts
For the CCB form, you will use the CCB corporate font, Arial 11 point normal. This is the
default font used for Form Editor so you do not need to add a font for this form. You can
start adding text to the form using the default font.
12 On the Tools toolbar, click .
The cursor changes to .
13 Click in the Design Area.
The cursor blinks in the Design Area.
14 Enter Dear.
Chapter 4: Quick Start 95
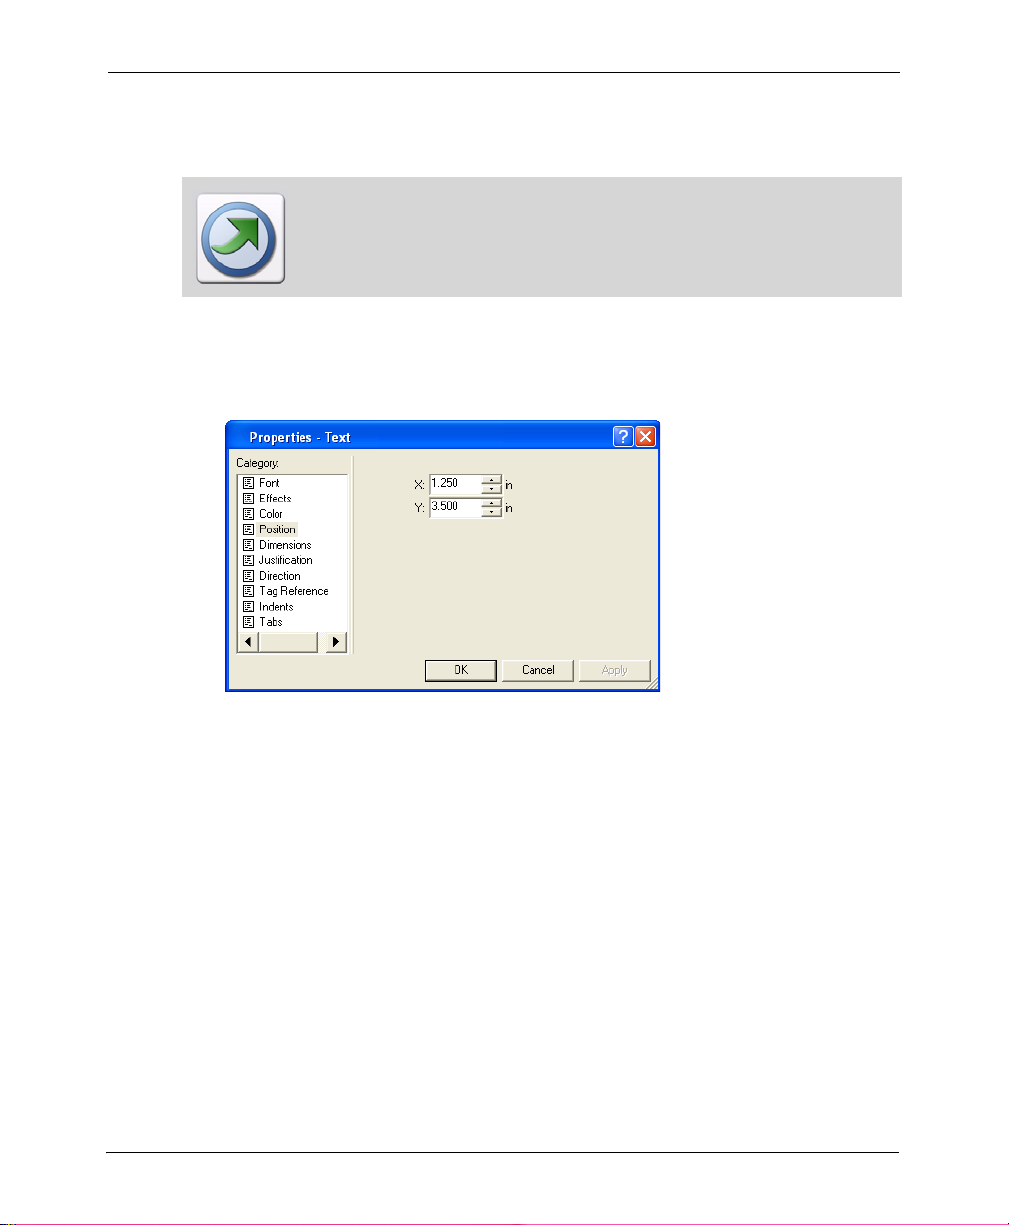
15 Right-click the text in the Design Area, and select Properties from the pop-up menu.
The Properties - Text dialog displays.
The Form Editor provides object-sensitive property dialogs. To access the
property dialog for an object, right-click the object in the Design Area and select
Properties from the pop-up menu.
16 Select the Position category and specify the following:
X: 1.25 in
Y: 3.50 in
Position can be changed in the object’s property dialog from the Position and
Dimension toolbar, or by clicking and dragging the object to a new location in the
Design Area.
96 DesignPro Tools® for Xerox Getting Started Guide
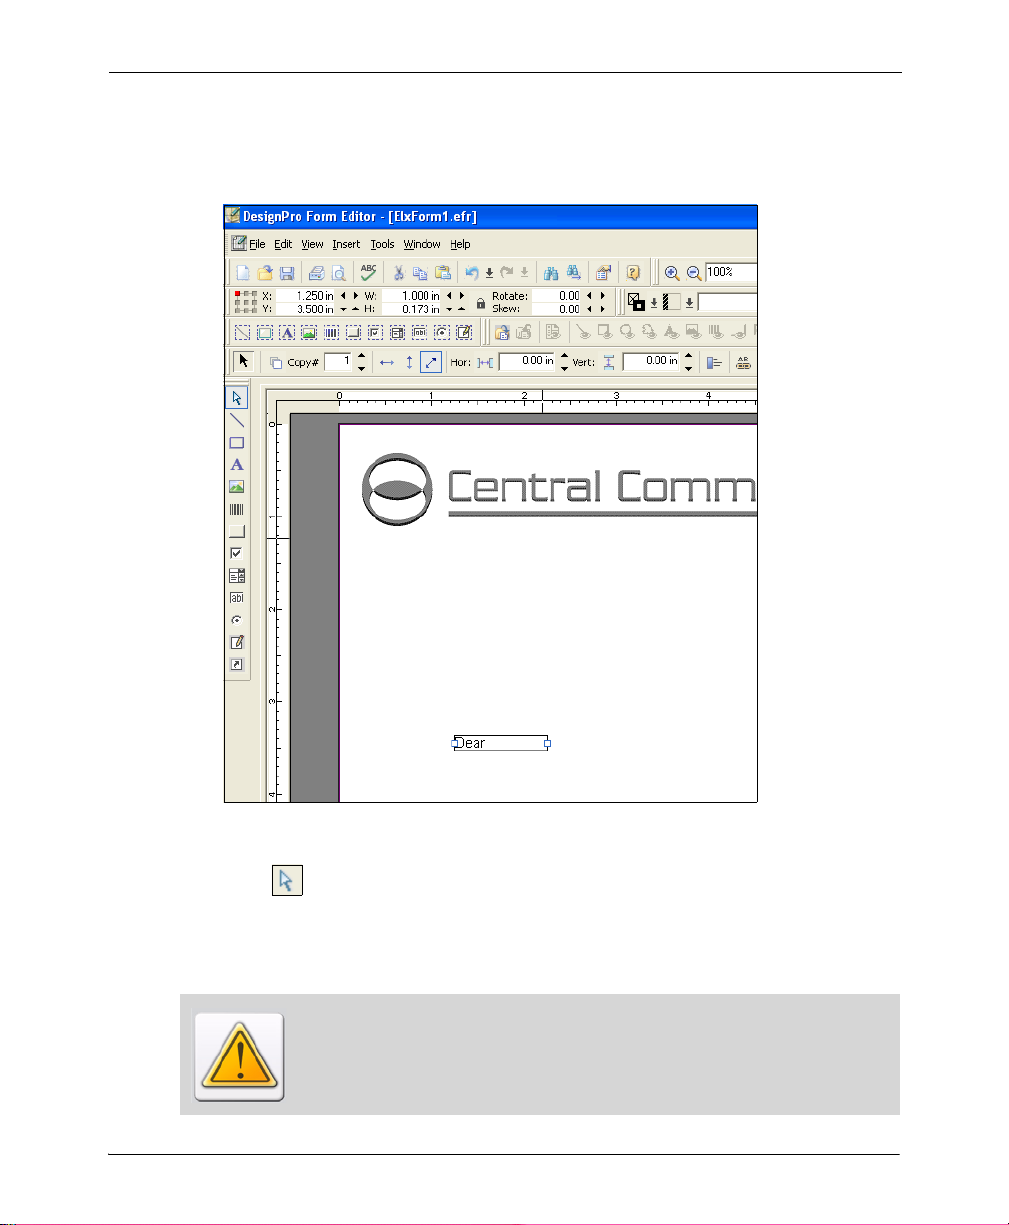
17 Click Apply, and then click OK.
The text moves to the specified location. You have added the first text string to the
Design Area.
The first text object is positioned on the form.
18 Click .
This completes the text object insertion process and exits the text mode. Y ou can also
click in an empty portion of the Design Area, or select any other tool to complete the
text object insertion and to exit text edit mode.
It is important that you exit the text mode when you are finished with a text
object. If you stay in the edit mode, subsequent text that you type will display
with the current selected text object.
Chapter 4: Quick Start 97

Saving as an Elixir Form
It is a good idea to save your work often. You will now, save your form.
You have two options for saving a form: Save and Sa ve As. The Save option saves the
form with its current name, whereas the Save As option enables you to change the name of
the form. Since the form is currently untitled, it does not matter which option you use.
19 From the File menu, select Save.
The Save As dialog opens.
The Save As dialog.
20 In the Save As drop-down list, select Elixir Form (*.efr).
You can also save your form as a source or compiled Xerox form. For this exercise,
you are initially using the Elixir format. The Elixir format is useful for retaining all
formatting elements, as it supports a richer feature set than the Xerox format. You
will save this form to the Xerox Object Format later in this exercise.
21 From the left pane, select Elixir if it is not already selected.
The path automatically updates to drive:\Elixir\Forms\Elixir, the default profile's
directory for Elixir forms.
98 DesignPro Tools® for Xerox Getting Started Guide
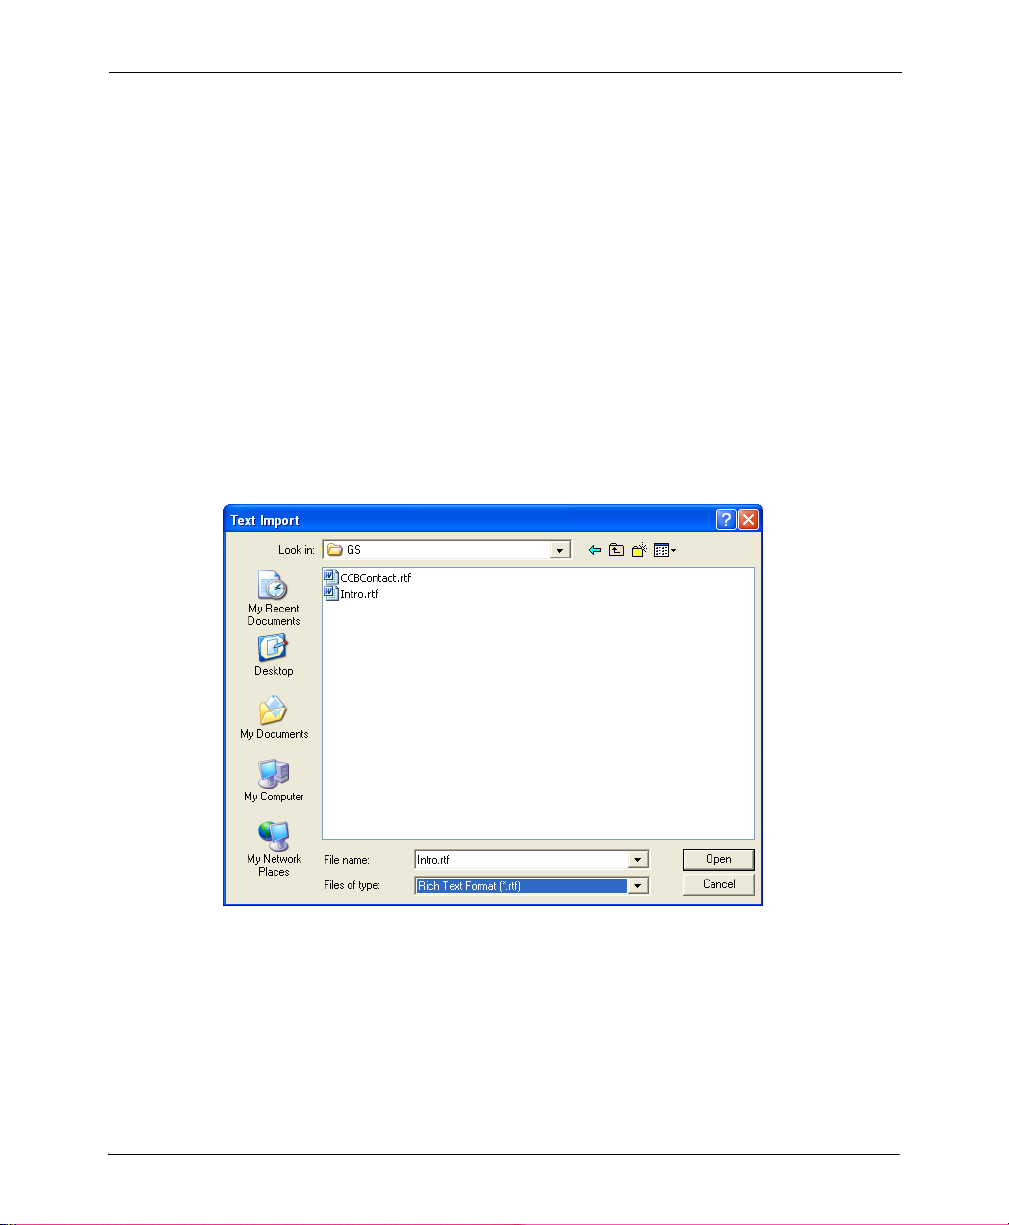
22 In the File Name entry box, enter CCBLET.
23 Click Save to save the form.
Importing Text
Many forms are text-intensive. In order to avoid extensive typing in the Form Editor, you
can create text files using word processing applications such as MS Word, WordPerfect,
Notepad, or any software that can export either a TXT or RTF format file. Form Editor can
import TXT and RTF files and place them in the Design Area.
Now you will import the body of the letter using an RTF file.
24 From the Edit menu, select Import Text.
The Text Import dialog displays.
25 In the Files of Type drop-down list, select Rich Text Format (*.rtf).
The Intro.rtf file selected in the Text Import dialog.
Chapter 4: Quick Start 99

26 Browse to select drive:\Elixir\Gs\Intro.rtf and click Open.
The cursor changes to , with an attached rectangle representing the text area.
27 Position the text rectangle underneath ‘Dear’ in the Design Area and click once to
place the imported text.
The Intro.rtf text displays in the Design Area with a text box around the inserted text.
The fonts and margins of the RTF file import with the text.
You can also draw a text box before typing text, which you can resize later to
match your requirements.
28 In the Position and Dimension toolbar, specify the following coordinates and size:
X: 1.25 in
Y: 3.80 in
W: 6.25 in
Use the Enter key to apply your settings for each coordinate to the text object.
29 On the Tools toolbar, click .
100 DesignPro Tools® for Xerox Getting Started Guide
 Loading...