

Page 1
Xerox CentreWare™
for
Tivoli NetView Users Guide
Version 1.1.8
Page 2

© 2009 by Xerox Corporation. All rights reserved.
Copyright protection claimed includes all forms and
matters of copyright material and information now allowed
by statutory or judicial law or hereinafter granted,
including without limitation, material generated from the
software programs which are displayed on the screen such
as styles, templates, icons, screen displays, looks, etc.
Xerox®, CentreWare® and all Xerox products mentioned
in this publication are trademarks of Xerox Corporation®.
Products and trademarks of other companies are also
acknowledged.
Changes are periodically made to this document. Changes,
technical inaccuracies and typographical errors will be
corrected in subsequent editions. Technical updates will be
included in subsequent editions.
TME 10 NetView Copyright (C) 1997 by IBM - All rights
reserved.
The “Ready for Tivoli” mark is a trademark of IBM and is
used by Developer under license. IBM is not responsible in
any way for and does not warrant the operation of this
Developer’ s Application.
Microsoft, Windows
, and are registered trademarks of
Microsoft Corporation.
Other trademarks and trade names may be used in this
document to refer to either the entities claiming the marks
and names or their products. Xerox Corporation disclaims
any proprietary interest in trademarks and trade names
other than its own.
Published in the United States of America.
2 XEROX CENTREWARE® FOR TIVOLI NETVIEW USER GUIDE
Page 3

Contents
Table of Contents
Xerox CentreWare™ for Tivoli NetView Users Guide .............................................................................1
Table of Contents................................................................................................................................3
Introduction........................................................................................................................................4
How to use this Document.........................................................................................................5
For initial installation.................................................................................................5
For day-to-day tasks.................................................................................................5
Key Benefits and Features .........................................................................................................6
System Requirements................................................................................................................7
NT/2000/XP/2003 Hardware Requirements ................................................................7
AIX/Solaris Hardware Requirements...........................................................................7
NT/2000/XP/2003 Software Requirements .................................................................7
AIX/Solaris Software Requirements...........................................................................7
Before You Start CentreWare® for Tivoli NetView.......................................................................8
CentreWare® for Tivoli NetView ..........................................................................................................9
Software Installation ...........................................................................................................................9
Web Installation........................................................................................................................9
Web Installation......................................................................................................................10
Tivoli Enterprise Console (TEC) event forwarding configuration..................................................11
Using CentreWare® for Tivoli NetView...............................................................................................15
The Tivoli NetView Interface....................................................................................................15
Device Discovery.....................................................................................................................15
Xerox Device Icons .................................................................................................................. 16
Xerox Printers SmartSet........................................................................................................... 16
Xerox Printer Agent.................................................................................................................17
Device Status..........................................................................................................................18
Device Specific Alarms.............................................................................................................19
Launch of CentreWare Internet Services...................................................................................19
Launch of Xerox CentreWareWeb® Server ....................................................................20
Polling Interval........................................................................................................................21
Status Event Modification.........................................................................................................22
Menu Items for Xerox Devices..................................................................................................23
Web Browser Menu Item.........................................................................................23
Xerox Trap Registration Menu Items........................................................................24
Single Trap Selection Menu.....................................................................................25
Register All Devices Menu .......................................................................................25
UnRegister Device Selection Menu...........................................................................26
UnRegister All Devices Menu ...................................................................................26
Confirming SNMP Trap Registration .........................................................................27
SNMP MIB Browser Menu Item................................................................................28
MIB Loaded During Installation................................................................................................29
Troubleshooting................................................................................................................................30
Appendix A – Xerox Installer / Un-Installer ........................................................................................32
Windows NT/2000/ XP/2003 Installer .......................................................................................32
AIX/Solaris Installer.................................................................................................................33
Windows NT/2000/ XP/2003 Uninstaller....................................................................................34
AIX/Solaris Uninstaller.............................................................................................................34
XEROX CENTREWARE® FOR TIVOLI NETVIEW USER GUIDE 3
Page 4

Introduction
Introduction
This User guide describes the installation and features of
Xerox CentreWare® for Tivoli NetView. As an enterprise
network management application, Tivoli NetView provides
the ability to view and centrally manage network resources.
With the addition of the CentreWare® snap-in for Tivoli
NetView, this application can additionally provide the status
of Xerox devices on the network.
When successfully installed, you will be able to view all of
the discovered Xerox network devices under one SmartSet in
Tivoli NetView. CentreWare for Tivoli NetView provides full
integration with the Event Browser, and the choice to
integrate with Tivoli Enterprise Console (TEC).
In addition, CentreWare® for Tivoli NetView enables Tivoli
NetView to:
• Provide the automatic identification of Xerox printers on
your network and present them with recognizable icons.
• Provide special status and notifications to Tivoli NetView
users about Xerox devices.
• Device status will be enhanced by a rich MIB data set.
• Display standard Tivoli NetView color coding for the
Xerox Printer Agent icon.
• Automatically notify the user about Xerox device events
and problems through the use of SNMP event traps.
• Launch CentreWare® Internet Services using a standard
web browser available via web server in certain Xerox
networked devices.
NOTE: this assumes all Xerox networked devices will
include an Embedded Web Server.
4 XEROX CENTREWARE® FOR TIVOLI NETVIEW USER GUIDE
Page 5

How to use this
Document
Introduction
This document assumes that you have a working
knowledge and familiarity with Tivoli NetView. Only
procedures that result from the installation of the
CentreWare® for Tivoli NetView snap-in are described.
You may print all or part of this document at any time
from your Adobe Acrobat reader by clicking the File menu
and then selecting Print. You may then select a single
page, a range of pages, or the entire document for
printing.
For initial installation
Read and follow this section:
CentreWare® for Tivoli NetView Software
Installation
For day-to-day tasks
Read and follow these sections:
Using CentreWare® for Tivoli NetView
Troubleshooting
XEROX CENTREWARE® FOR TIVOLI NETVIEW USER GUIDE 5
Page 6
CentreWare for Tivoli NetView Software Installation
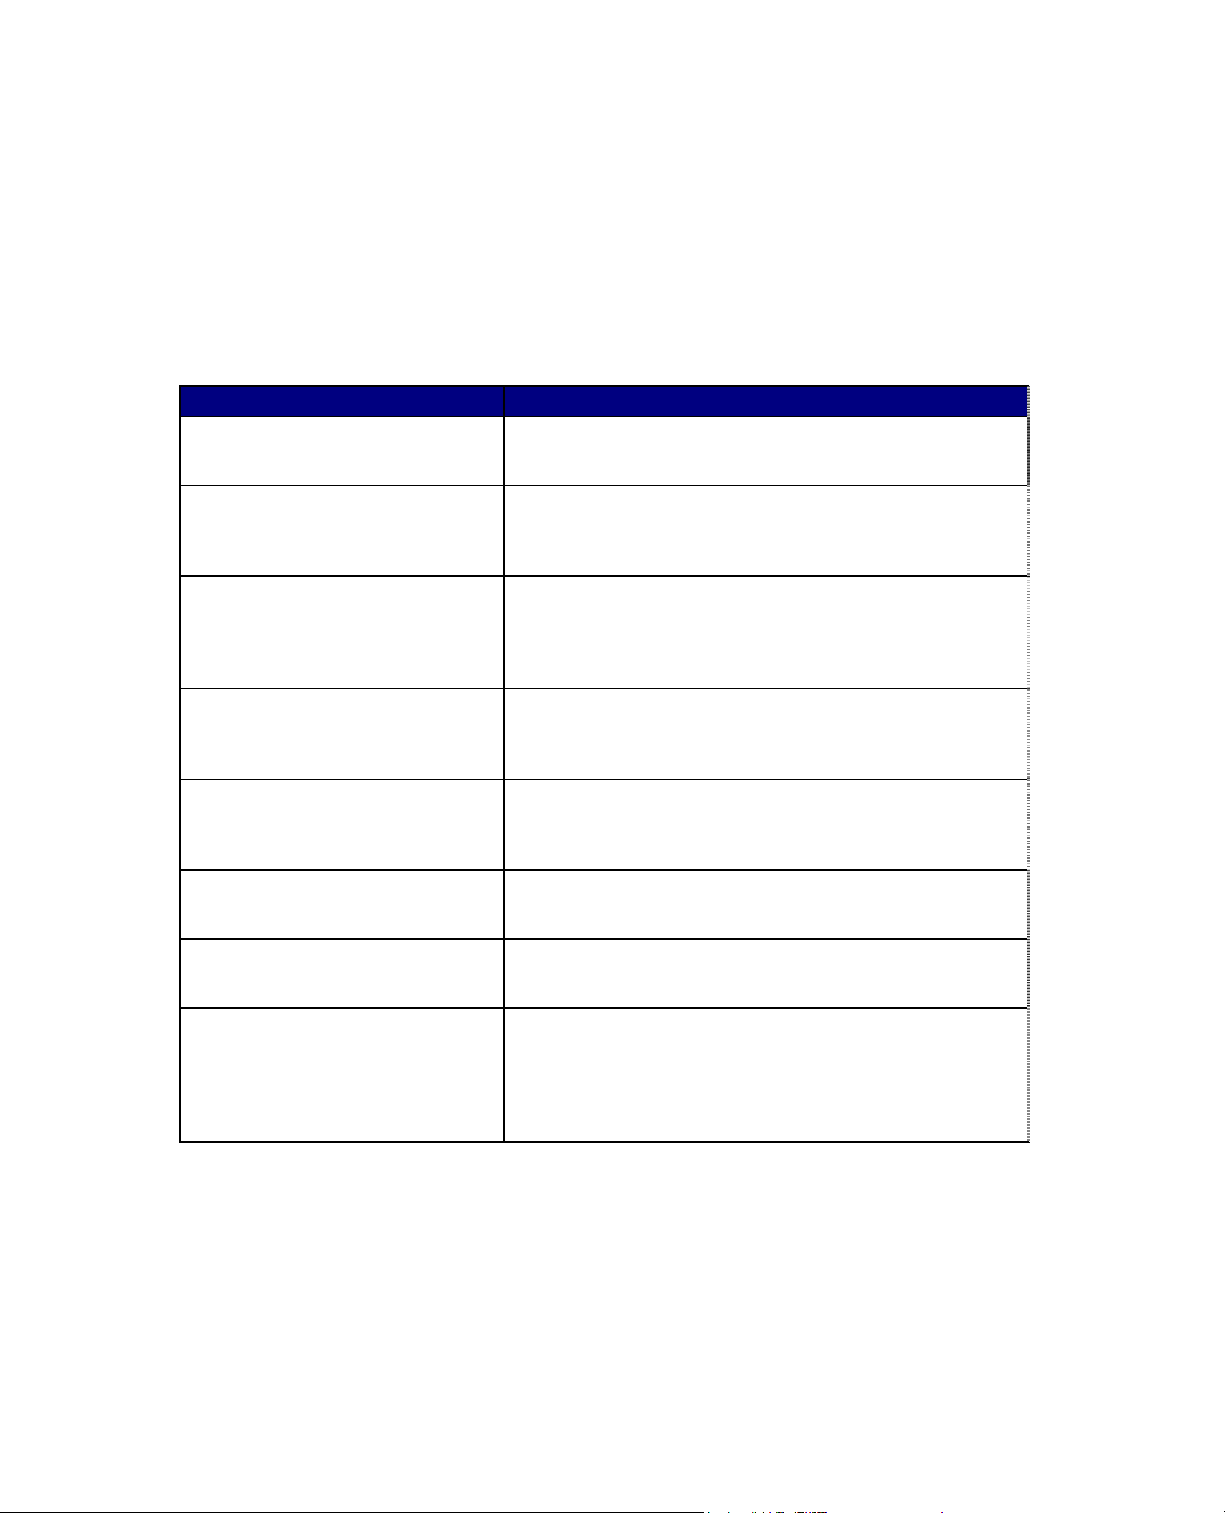
Key Benefits and Features
Feature Benefits
Device Discovery Provides the automatic identification of Xerox devices on
your network and presents them with recognizable icons.
Color-Coded Device Status Automatically changes the color in the device icon to reflect
the device status in the IP map and Xerox printers
SmartSet.
Access to the device embedded web
server, CentreWare® Internet
Services
Custom SmartSet for Xerox Devices Managing the Xerox devices on your network is made much
SNMP Trap Support Provides option for registering with Xerox networked
Integration with Tivoli Enterprise
Console (TEC)
Integration with Event Browser Automate event responses and view events in the Event
Access to Xerox CentreWareWeb ®
Server
If your device contains an embedded web server
(CentreWare® Internet Services), you can easily access it
by selecting Server Home Page under the NetView Tools
menu WEB Device Mgmt menu Home Page selection.
easier by displaying all the discovered Xerox devices in a
single Xerox device SmartSet.
devices for SNMP Traps automatically, without having to
configure each device individually.
By following the step-by-step instructions given in this
document, you can forward printer events to TEC.
Browser.
If you’ve configured access to a Xerox CentreWareWeb®
server using the Tools->Xerox CWW Server->Server
configuration, you can easily launch the server homepage
by using the Tools->Xerox CWW Server->Device
Launch.
6 XEROX CENTREWARE® FOR TIVOLI NETVIEW USER GUIDE
Page 7

System
Requirements
NT/2000/XP/2003
Hardware Requirements
AIX/Solaris Hardware
Requirements
NT/2000/XP/2003
Software Requirements
AIX/Solaris Software
Requirements
Introduction
This solution modifies existing Tivoli NetView files and
adds a few small files to your hard disk. The total
hardware and software requirements are as follows:
• Pentium PC
• Minimum 64 Megabytes RAM
• Minimum 30 Megabytes Free Hard Disk Space
• IBM PowerPC or equivalent/Sun Sparc
• 128 MB memory (256 MB recommended)
• Minimum 30 Megabytes Free Hard Disk Space
• Tivoli NetView version 6.x or 7.x or greater
• Microsoft Windows NT Workstation or Server
Version 4.0 SP6 / Windows 2000 SP2/Windows XP
SP2/Windows 2003 Server
• NT Scheduler Service installed and running.
• Java Virtual Machine V1.2.2 or later
• AIX version 4.3.3 Maintenance Level 4330-02
• Sun Solaris 7 or higher with Sun Microsystems
recommended patches.
• Tivoli NetView version 6.x or 7.x or greater
• The Common Desktop Environment (CDE) X
Windows and OSF/Motif
• Netscape Navigator web browser version 4.6 or
later
• Java Virtual Machine V1.2.2 or later
• GCC libraries for your operating system, libgcc-
3.2-solX-sparc-local.gz or later
XEROX CENTREWARE® FOR TIVOLI NETVIEW USER GUIDE 7
Page 8

CentreWare for Tivoli NetView Software Installation
Before You Start
CentreWare
® for
Connect your device to an active network with
appropriate cabling. Ensure the device has a valid, unique
IP address.
Tivoli NetView
8 XEROX CENTREWARE® FOR TIVOLI NETVIEW USER GUIDE
Page 9

CentreWare® for Tivoli NetView Software Installation
Web Installation
Windows
The latest version of CentreWare® for Tivoli NetView is
available from the Xerox Website at:
http://www.xerox.com
Perform the following steps to install CentreWare® for
Tivoli NetView:
NT-XP-2000
1 After downloading the file to a temporary folder,
double click on the icon to extract the files.
2 Double click on the file
CW4Tivolix.x.xwin.exe.
3 The software will begin the installation process. After
a few moments, the Install Shield Wizard will load.
4 Select Next again to begin. The necessary files in
your Tivoli NetView environment will be modified
and copied to the selected folder along with any
additional files required.
5 The installation process will take some time to
complete. Follow the instructions on your screen.
6 When the install is complete, start Tivoli NetView.
Page 10

CentreWare for Tivoli NetView Software Installation
Web Installation
UNIX
AIX/Solaris
1 After downloading the file to a temporary folder. In
the terminal window go to the directory containing
the install binary "CW4Tivolix.x.x.bin".
2 Execute the binary by using the following command
Solaris: ./CW4Tivolix.x.xSol.bin and click enter.
AIX: ./CW4Tivolix.x.xAix.bin and click enter.
3 The software will begin the installation process. After
a few moments, the Install Wizard will load.
4 Then follow the installation screens until installation
completion.
5 After the installation is complete, the machine must be
rebooted.
10 XEROX CENTREWARE® FOR TIVOLI NETVIEW USER GUIDE
Page 11

Tivoli Enterprise
Console (TEC) event
forwarding
configuration
CentreWare for Tivoli NetView Software Installation
The Tivoli Enterprise Console, or TEC, is a separate
product for concentrating corporate wide events. It also
provides a mechanism for filtering undesired events and
categorizing events so that different network
administrators will receive the most relevant event
messages.
Customization is required of both the NetView process for
forwarding the printer events and the Event Server rule
base to properly display any new events.
After following the directions in the Tivoli documentation
for integration of TME10 NetView and TME10 TEC,
complete the following steps.
Netview customization
Locate the file xrxsniffer.conf
1
2
Open this file and locate the entries for –c, -w, and
–o. Note the trap number for each item. Close the
file.
3 Locate the file xrx_events.cds
4 Open this file in your text editor. For each CLASS
replace the value for $SPECIFIC= with the
corresponding trap number noted above. (-c for
Critical, -w for Warning and -o for Other) Save this
file but do not close it yet.
5 Locate the file tecad_nv6k.cds
6 Copy the text from the file xrx_events.cds and
Paste it into the file tecad_nv6k.cds just before
the IBM_Default_Trap entry. Save and close
both files.
7 Close and restart NetView.
XEROX CENTREWARE® FOR TIVOLI NETVIEW USER GUIDE 11
Page 12

CentreWare for Tivoli NetView Software Installation
12 XEROX CENTREWARE® FOR TIVOLI NETVIEW USER GUIDE
Page 13

Addition of Xerox Rule Base
to TEC
1
Open the TME window and
double click on the
EventServer icon. The
Event Server Rule Bases
window will open.
Select Create then select
2
Rule Base. . .
Enter a name for the new
3
Rule Base. Enter the PATH
to the file
xerox_event.baroc. This
should be located in a folder
named Xerox in the folder
containing your Tivoli files.
CentreWare for Tivoli NetView Software Installation
12 Right click on the icon for the new Rule Base and
select Load.
13 Close this window.
Note: If a TEC database does not exist, create one
following the instructions in your TEC documentation.
14 On the TME server (by opening the start menu
start\programs\Tivoli) create and Administrator
with Username, Label and groupname of NetView.
Select Close and Save.
4
Right click on the icon for
5
the new Rule Base and
select Import.
Click Import Class
6
Definition.
Enter the PATH to the file
7
xerox_event.baroc.
Select Insert After.
8
From the list, select
9
tecad_nv6k.baroc.
10
Select Import and Close.
11
Right click on the icon for
the new Rule Base and
select Compile.
XEROX CENTREWARE® FOR TIVOLI NETVIEW USER GUIDE 13
Page 14

CentreWare for Tivoli NetView Software Installation
15 Edit Login to include:
NetView@hostname_of_machine_running_NetView
16 e event console under the
Create th
NetView administrator.
17 ver icon and
Right click on the EventSer
select Shut down and then Start-up.
14 XEROX CENTREWARE® FOR TIVOLI NETVIEW USER GUIDE
Page 15

Using CentreWare
Using CentreWare® for Tivoli NetView
The Tivoli NetView
Interface
This section describes the features of Tivoli NetView
made available by the installation of CentreWare® for
Tivoli NetView. Only those features of NetView that are
directly related to the CentreWare® functionality will be
described. For additional information on Tivoli NetView,
go to the Tivoli Home page at:
http://www.tivoli.com
An example of the Tivoli NetView User Interface is shown
in the figure below. Note that the standard features of
the application are accessed via the Menu bar at the top
of the display, and the Tool bar situated below it.
® for Tivoli NetView
On this display, there is the IP Internet map and SmartSets.
Device Discovery
Tivoli NetView provides the discovery of Xerox devices.
CentreWare® for Tivoli NetView additionally enables the
identification of these device types as Xerox devices and
the assignment of a unique Xerox icon to them.
XEROX CENTREWARE® FOR TIVOLI NETVIEW USER GUIDE 15
Page 16

Xerox Device Icons
Using CentreWare
CentreWare® for Tivoli NetView uses two icons to
represent individual Xerox devices.
The icons for these devices are:
Xerox Printer - This icon represents those devices that
are printers only. An example might be one of the Xerox
N-Series printers.
Xerox Multifunctional Device - This icon represents
devices that have more than just printing capability. The
features of these devices may include copying, network
scanning, and faxing. An example of this type of device
would be the Xerox Document Centre products.
® for Tivoli NetView
Xerox Printers
SmartSet
After successful installation of CentreWare for Tivoli, the
user will see all the discovered Xerox printers under one
SmartSet. It will also display the current status of all the
discovered Xerox printers. The name of this Smartset is
Xerox Printers.
The printers will now be present in the Xerox SmartSet as
well as the General Printer SmartSet. Printers that contain
an embedded web server will also appear in the Web
SmartSet.
CentreWare for Tivoli will automatically add Xerox
printers to this view as they are attached to the network
and discovered by Tivoli NetView.
XEROX CENTREWARE® FOR TIVOLI NETVIEW USER GUIDE 16
Page 17

Using CentreWare
® for Tivoli NetView
Xerox Printer Agent
When double-clicked, a Xerox Printer icon or Xerox
Multifunctional device icon will display another icon called
the Xerox Printer Agent icon. Like the other icons in Tivoli
NetView, this icon will change when the status of the
device changes. The function of this icon is to monitor
alarms from the Xerox device and report them to Tivoli
NetView.
This icon is created when CentreWare® for Tivoli
NetView is installed. It is the only icon whose color is
controlled by the CentreWare® snap-in.
.
XEROX CENTREWARE® FOR TIVOLI NETVIEW USER GUIDE 17
Page 18

Using CentreWare
® for Tivoli NetView
Device Status
The Xerox Printer Agent icon will be color-coded to
represent the current status of the device in the NetView
topology map.
The Agent icon in the IP map will not affect the status or
coloring of the IP map. Therefore the IP map will
maintain device status as if Xerox CentreWare® for Tivoli
NetView was not installed.
The color of the icon is determined by the return code
from the device. Under the control of Tivoli NetView, the
color will also propagate to the top of the Xerox Printers
SmartSet, providing top level indication of problems that
exist at lower levels in the map structure. This
propagation is controlled by Tivoli NetView,
CentreWare® for Tivoli NetView.
The relation between color-code and the device status is
presented in the following table.
Xerox Printer Agent Color
Critical Red
Warning Yellow
Other or no alert Green
not
NOTE: The default propagation rule set used by TIVOLI
NETVIEW will not propagate the most critical error to the
actual printer icon in the Xerox Printers map.
Xerox
18 XEROX CENTREWARE® FOR TIVOLI NETVIEW USER GUIDE
Page 19

Device Specific
Alarms
Launch of
CentreWare Internet
Services
Using Xerox CentreWare
To view alarms for a specific device in Windows:
Select the device and open it to see the Xerox Agent icon.
Select the Xerox Agent icon.
Select the pull down menu.
Tools->EventBrowser
To view alarms for a specific device in UNIX:
Select the Xerox Device
Select the pull down menu.
® for Tivoli NetView
Monitor->Events->Current or Event History
Many Xerox printers contain embedded web servers.
Tivoli automatically detects whether a printer contains
one and enables the selection of this server home page
though the Home Page menu selection.
There are two web menu items under the menu bar
Tools->Web Device Mgmt
Select the Tools->Web Device Mgmt->Home Page
to access Xerox CentreWare Internet Services.
Xerox CentreWare Internet Service provides a variety of
freatures for configuring and monitoring your printer.
More detail is contained in the CentreWare Internet
Services User Guide.
To access www.xerox.com:
NT: Tools->Web Device Mgmt->Vendor Page
UNIX: Tools->Web Device Mgmt->Management
Page
The Xerox web site provides information, upgrades,
downloads and support information.
XEROX CENTREWARE® FOR TIVOLI NETVIEW USER GUIDE 19
Page 20

Using CentreWare
® for Tivoli NetView
Launch of Xerox
CentreWareWeb
® Server
CentreWare for Tivoli also provides access from each
device to a CentreWare Web server located on your
network. CentreWare web provides additional features
and utilities to manage and configure your Xerox devices,
print queues and reporting.
Configuration – To configure Tivoli Netview to access
the CentreWare Web server.
Select the Xerox Device
Select the pull down menu
Tools->Xerox CWW Server->Server configuration
Configuration of the CentreWare Web server is required
only once and all devices will provide a link to the
centreWare web server.
To access the CentreWare web server when configuration
is complete.
Select the Xerox Device
Select the pull down menu
Tools->Xerox CWW Server->Device Launch
20 XEROX CENTREWARE® FOR TIVOLI NETVIEW USER GUIDE
Page 21

Using Xerox CentreWare
® for Tivoli NetView
Polling Interval
Note:- "at" command entry will
be created for auto scheduling of
"nvsniffer" for Netview version
7.1.3 and above.
NetView contains an event browser that displays all
NetView specific as well as remote object traps and
events. However, the implementation of some Xerox
SNMP agents does not generate traps. The printer status
information must be requested from the printer using a
polling mechanism. Then the desired trap is generated
locally on behalf of the printer.
The polling interval is set at installation to 10 minutes.
That is, every 10 minutes the printers on the network will
be polled for status.
This function is accomplished through the operating
systems scheduler.
To access the scheduler in windows:
Type at at the dos prompt.
You will see a line of the form:
nvsniffer -t 1 c %NV_DRIVE%\usr\ov\conf\xrxsniffer.conf r <polling interval> -s
You can change this polling interval to any value by
removing the event in the at command and running the
nvsniffer command with the new polling interval.
To access the scheduler in UNIX:
At a command prompt use this command
at –l
You will see a list of files in the scheduler queue.
Note the job ID numbers.
For each job number run
at –l -v
Look for the job with the xrxsniffer entry
nvsniffer -t 1 -c /usr/ov/conf/xrxsniffer.conf r <polling interval> -s –t 1 –T 45
You can edit the polling inteval by removing this job and
running the nvsniffer command with the new polling
interval.
XEROX CENTREWARE® FOR TIVOLI NETVIEW USER GUIDE 21
Page 22

Using CentreWare
® for Tivoli NetView
Status Event
Modification
To enable or disable the printer status events for all
Xerox printers, the /usr/OV/conf/xrxsniffer.conf
configuration file can be edited. The second field controls
the options to the xrx_prnStatus.exe program. Valid
options are as follows:
-c event_number
Generate events for critical printer errors.
Uses the provided event number to generate a NetView
enterprise specific event.
-w event_number
Generates events for warning printer errors.
Uses the provided event number to generate a NetView
enterprise specific event.
-o event_number
Generates events for other printer errors.
Uses the provided event number to generate a NetView
enterprise specific event.
-d
Turns on SNMP packet dump for debug purposes.
-l
Turns on logging /usr/OV/log/xrxpslog.txt
Separate options with spaces. If the -c, -w and -o
options are omitted, color coded status will still be
enabled for Xerox printers but without generating
NetView events.
22 XEROX CENTREWARE® FOR TIVOLI NETVIEW USER GUIDE
Page 23

Menu Items for Xerox
Devices
NOTE** If the Server Home Page
is grey, complete the following
steps
Using Xerox CentreWare
There are a series of Tivoli NetView menu items that are
created when CentreWare® for Tivoli NetView is
installed. These menu items reside on the Tools menu on
the NetView Menu bar.
® for Tivoli NetView
Web Browser Menu Item
Many Xerox devices contain embedded web servers.
Tivoli NetView automatically detects whether a device
contains one and launches CentreWare® Internet
Services though the Server Home Page menu selection.
Internet Services provides a variety of features for
configuring and monitoring your device.
Consult the manuals and CDs delivered with your device
for details on Xerox CentreWare® Internet Services. The
Web Browser menu item is used to launch CentreWare®
Internet Services for the selected device. To use this
feature perform the following steps:
1 Select a Xerox device.
2 Select Tools->Web Device Mgmt->Home Page
3 The default web browser for the workstation will be
launched, and CentreWare® Internet Services for the
device will be displayed.
.
1 Right click the Xerox device.
2 Select Object Properties.
3 In Attributes, select General Attributes.
4 Click on the Edit Attributes button.
5 Click on isHTTPSupported
The value should change to True.
6 Click OK.
7 Click OK.
8 Right click on Xerox device.
9 Select Server Home Page.
XEROX CENTREWARE® FOR TIVOLI NETVIEW USER GUIDE 23
Page 24

Using CentreWare
® for Tivoli NetView
Xerox Trap Registration Menu Items
The Xerox Trap Registration and Xerox Trap
UnRegistration menu item will allow the user to select
and enable/disable the type of trap configuration desired
for the managing workstation. Traps are used to provide
an alert the instant an error at the device occurs, rather
than waiting for the next status poll. They also provide
more detailed troubleshooting information when a device
is experiencing a problem.
There are two possible selections for Trap Registration.
With Single Selection, the user selects a specific Xerox
device. Only the device selected will be registered. Any
alerts for that device will be seen in the managing
workstation’s All Alarms Browser.
With the Register All Devices the managing
workstation is registered at all discovered Xerox
networked devices to receive traps. As with Single
Selection, any alerts for the devices are seen in the
managing workstation’s All Alarms Browser.
There are two possible selections for Trap UnRegistration.
With UnRegister Device, the user selects a specific
Xerox device. Only the device selected will be
unregistered. Traps from the device are disabled, status
will still be maintained by polling.
With the Unregister All devices the managing
workstation is removed from all discovered Xerox
networked devices trap send list. As with UnRegister
Device, traps from the device are disabled, status will still
be maintained by polling.
24 XEROX CENTREWARE® FOR TIVOLI NETVIEW USER GUIDE
Page 25

Using Xerox CentreWare
® for Tivoli NetView
Single Trap Selection Menu
This trap configuration registers the selected device. Only
one device can be selected at a time.
To use the Single Selection configuration, perform the
following steps:
1 Select a Xerox device.
2 Select the Tools -> Xerox Trap Registration ->
Single Selection.
3 The status of Trap Registration is shown in the pop-up
message box.
4 The Xerox device will be configured to recognize the
managing workstation.
5 The SNMP information for that device will be captured
and displayed in the All Alarms Browser for the
managing workstation.
Register All Devices Menu
In the Register All Devices, all discovered Xerox devices
are registered.
To use Register All Devices, perform the following steps:
1 Select a Xerox device.
2 Select the Tools menu, Xerox Trap Registration,
and Register All Devices.
3 The status of Trap Registration for all devices is shown
in the pop-up
message box.
4 The managing workstation will be registered at all
discovered Xerox networked devices which are
managed.
5 The SNMP information for that device will be captured
and displayed in the All Alarms Browser for the
managing workstation.
XEROX CENTREWARE® FOR TIVOLI NETVIEW USER GUIDE 25
Page 26

Using CentreWare
® for Tivoli NetView
UnRegister Device Selection Menu
This trap configuration registers the selected device. Only
one device can be selected at a time.
To use the Single Selection configuration, perform the
following steps:
1 Select a Xerox device.
2 Select the Tools -> Xerox Trap UnRegistration ->
Unregister Device.
3 The status of Trap Registration is shown in the pop-up
message box.
4 The Xerox device will be configured to recognize the
managing workstation.
5 The SNMP information for that device will be captured
and displayed in the All Alarms Browser for the
managing workstation.
UnRegister All Devices Menu
Using the UnRegister All Device tool will cause all
discovered Xerox devices to be unregistered for traps.
This will prevent the device from sending traps to the
NetView server.
To use Unregister All Devices, perform the following
steps:
1 Select a Xerox device.
2 Select the Tools menu, Xerox Trap
UnRegistration, and UnRegister All Devices.
3 The status of Trap Registration for all devices is
shown in the pop-up
message box.
4 The managing workstation will be removed from all
discovered and managed Xerox networked devices.
5 Traps will no longer be sent from the print device.
Status will be maintained by polling.
26 XEROX CENTREWARE® FOR TIVOLI NETVIEW USER GUIDE
Page 27

Using Xerox CentreWare
® for Tivoli NetView
Confirming SNMP Trap Registration
To confirm SNMP Trap Registration on a specific Xerox
device, perform the following steps:
1 Right click the Xerox device.
2 Select Tools->Web Device Mgmt->Home Page
3 The default web browser for the workstation will be
launched, and CentreWare® Internet Services for the
device will be displayed
.
4 Select the Properties tab.
5 Select Connectivity, Protocols and SNMP.
6 The screen below is displayed.
NOTE: The procedure and screen may vary between
Xerox devices. If the device supports traps, locate the
SNMP configuration page for your device.
NOTE***If the Server Home Page is not available, see Web Bowser Menu Item section.
XEROX CENTREWARE® FOR TIVOLI NETVIEW USER GUIDE 27
Page 28

Using CentreWare
® for Tivoli NetView
SNMP MIB Browser Menu Item
The Tools -> SNMP MIB Browser selection will display a
MIB browser that allows the user to search for, select,
view, and set values for MIB OIDs.
The MIB Browser is a standard feature of the Tivoli
NetView application, and is not installed with
CentreWare
CentreWare
Xerox networked devices are installed, and can be viewed
with the SNMP MIB Browser.
® for Tivoli NetView. However, when
® for Tivoli NetView is installed, the OIDs for
Using this browser, the user can access any MIB OID in
the configuration. The browser will then allow the user to
view the contents of the OID for evaluation and
troubleshooting.
XEROX CENTREWARE® FOR TIVOLI NETVIEW USER GUIDE 28
Page 29

Using Xerox CentreWare
MIB Loaded During
Installation
In the following table is lists the MIB loaded during
installation of Xerox CentreWare
accompanied by a brief description of the MIB.
NOTE: All Xerox devices support a subset of the included
MIB modules. IETF MIBs are supported by all Xerox
devices.
MIB Name Description
Xerox.mib The single integrated Xerox MIB module
® for Tivoli NetView
® for Tivoli NetView,
XEROX CENTREWARE® FOR TIVOLI NETVIEW USER GUIDE 29
Page 30

Using CentreWare
® for Tivoli NetView
Troubleshooting
If you have problems with Xerox CentreWare
Symptoms Possible Causes Solution
® for Tivoli NetView, consult the table below.
Installation gives a
message box reading
“Tivoli NetView demand
level is not set to All
Levels. Please exit the
setup, set the demand
level
to All Levels from the
NETVIEW
GUI and then proceed
with
s
setup proces
.” and then
exits. NT-2000 ONLY
A Xerox device is not
discovered.
The Demand level of the
NETVIEW
application is not set to the
appropriate value.
The SNMP agent is not
working properly in the node.
There is a problem with the
network connectivity.
The Network in which the
Device exists is unmanaged.
1. Before running the CentreWare
install, open the NETVIEW GUI.
2. From the menu bar, click Map>Properties. It will open a new window
named “Map Properties”
3. Click on the “Applications” tab,
select IP Map from the List Box and
press the button labeled “Configure for
this map”.
4. Highlight the field named OnDemand:
5. Select “All Levels”.
6. Click the “Verify” button, and upon
verification, press the “OK” button.
7. On the “Map Properties” click the
“OK”
button. It performs some
configuration.
8. After the NETVIEW completes
configuration, close the NETVIEW
window.
9. Begin the installation again.
Ping the Xerox device.
Enable SNMP at the device.
Check the filter files and ensure
segment is enabled for discovery.
Ensure topology database is clean with
ovtopofix –a.
Contact the Network Administrator.
A Xerox device is still not
discovered.
Icon on the map is not the
proper Xerox device icon.
30 XEROX CENTREWARE® FOR TIVOLI NETVIEW USER GUIDE
The sysObjectId entry in the
oid_to_sym , or oid_to_type
is missing.
The object’s SysObjectId in
the file oid_to_sym is not
properly entered.
Make the sysObjectId entries in each
file using the proper format.
Make the sysObjectId entries in the
oid_to_sym file in the proper format.
Page 31

Using Xerox CentreWare
“
“
A
g
_
Symptoms Possible Causes Solution
® for Tivoli NetView
The Xerox SmartSet is not The status source for the
displaying the correct
color NT-2000 ONLY
The event adapter
tecas_nv6k during TEC
installation does not start
by entering the
SmartSet is not set to
propagation from children.”
The environment variable
BINDIR is not properly set.
command:
Set the SmartSet status source object
property to
propagation from children”
Set BINDIR to the correct path as
given in the
script setup_env.cmd
ovstart tecad_nv6k
fter successful TEC
configuration, events are
not bein
displayed in the
TEC console.
The Administrator has not
been created with the
proper login name of
NetView (N and V are
capital letters)
Edit the login to include:
NetView@hostname_of_machine
running_NetView_Server
®
NOTE: Most of the errors generated by the CentreWare
for Tivoli NetView are logged in a log
file. For more information, look into the log file ("install directory"\Xrx_Device_log.txt).
XEROX CENTREWARE® FOR TIVOLI NETVIEW USER GUIDE 31
Page 32

Using CentreWare
® for Tivoli NetView
Appendix A – Xerox Installer /
Un-Installer
Windows NT/2000/
XP/2003 Installer
The installer is an Install-Shield application that will
automate the addition of the files and perform the
required configuration.
The installer will copy bitmap images and registration files
into the Tivoli NetView installation directory. It will also
edit several files to enable the identification of Xerox
devices in Tivoli NetView.
In the information below, the installation directory is
given as C:\usr\OV. The installation directory drive is
selectable and may be different for your installation.
The modifications performed by the installer are as
follows. The installer will:
1 Edit the file c:\usr\OV\conf\oid_to_type.
2 Edit the file c:\usr\OV\conf\oid_to_sym.
3 Add new .exes and .dlls under c:\usr\OV\bin
directory.
4 Add new file xrx_fields under c:\usr\OV\fields\C for
Xerox device specific database fields.
5 Add new bitmaps for Xerox devices to the
C:\usr\OV\bitmaps\C folder and register them.
6 Add the new files to the C:\usr\OV\symbols\C folder
to add new Xerox printer device symbol class
definitions.
7 Modify trapd.conf file under C:\usr\OV\conf\, to
enable CentreWare® to log traps received from Xerox
devices.
8 Create the domain Xerox Printers.
9 Copy the Xerox MIB files to
C:\usr\OV\snmp_mibs\vendor\Xerox and load them.
32 XEROX CENTREWARE® FOR TIVOLI NETVIEW USER GUIDE
Page 33

AIX/Solaris Installer
Appendix A – Xerox Installer / Uninstaller
The modifications performed by the installer are as
follows. The installer will:
1 Edit the file /etc/opt/OV/share/conf/oid_to_type.
2 Edit the file /etc/opt/OV/share/conf/oid_to_sym.
3 Adds a new file xrx_fields under /usr/OV/fields/C for
xerox printer specific database fields.
4 Add new bitmaps for Xerox devices to
/usr/OV/bitmaps/C folder and registers them.
5 Add new file xrxsym to the /usr/OV/symbols/C to add
Xerox printer device symbol class definitions.
6 Creates the SmartSet Xerox Printers.
7 Searches the trapd.conf file for three empty event
slots between 1000 and 2000. The three traps are
then registered using the addtrap application.
8 Edits the file xrxsniffer.conf to include the new trap
value and saves it to the /usr/OV/conf folder.
9 Copy Xerox MIB files to /usr/OV/snmp_mibs folder.
Loads the MIB in the bin dir.
XEROX CENTREWARE® FOR TIVOLI NETVIEW USER GUIDE 33
Page 34

Using CentreWare
® for Tivoli NetView
Windows NT/2000/
XP/2003 Uninstaller
AIX/Solaris
Uninstaller
To run the un-installer, use Add/Remove Programs in
the Windows Control Panel. The un-installer will remove
all files copied by the Installer, undo any file changes,
and run the custom executable Xrx_Uninstall.exe. This
will remove the Xerox printer icon, subclass definition,
and the alarm object corresponding to Xerox
CentreWare
It will additionally:
® for Tivoli NetView.
1 Remove the lines added to files during installation.
2 Delete all files copied.
3 Start services by executing ovstart.
Run the custom uninstall executable. Ensure you are not
in the directory when running or all folders cannot be
deleted.
In a terminal window run the following command:
/opt/Xerox/_uninst/CW4TivoliNetView/CW4Tivoli
x.x.xUninstaller.bin
This will remove the Xerox printer icon, subclass
definition, and the alarm object corresponding to
CentreWare
It will additionally:
® for Tivoli NetView.
1 Remove the lines added to files during installation.
2 Delete all files copied.
3 Start services by executing ovstart.
34 XEROX CENTREWARE® FOR TIVOLI NETVIEW USER GUIDE
 Loading...