

Page 1

QMS
3825/3225/2025
Print System
Users Guide
1800366-001B
Page 2
Trademarks
The following are tra dema r ks or registere d trade ma rk s of their respective owner s. Other pro du ct
names mentioned in this manual may also be trademarks or registered trademarks of their
respective owners. Registered trademarks are registered in the United States Patent and Trademark Office; some trademarks may also be registered in other countries. QMS and the QMS logo
are registered trademarks of QMS, Inc., and Crown, the Crown seal, PS Executive Series,
imPRESS, QUIC, and CrownNet are trademarks of QMS, Inc. PostScript is a trademark of Adobe
Systems Incorporated for a page description language and may be registered in certain jurisdictions. Throughout this manual, “PostScript Level 2” is used to refer to a set of capabilities defined
by Adobe Systems for its PostScript Level 2 page descripti on language . These capabi lities,
among others, are implemented in this product through a QMS-developed emulation that is compatible with Adobe's PostScript Level 2 language. Adobe/Ad obe Sy stems Incorpo rated . 3Com,
3+Open/3Com Corporation. Aldus, Aldus PageMaker, Aldus FreeHand/Aldus Corporation. Apple,
AppleTalk, EtherTalk, LaserWriter, LocalTalk, Macintosh, TrueType/Apple Computer, Inc. VINES/
Banyan. Centronics/Contronics Data Computer Corporation. CompuServe /H & R Block. DEC,
DECnet, LN03, VMS/Digital Equipment Corporation. PhoneNET/Farallon Computing, Inc.
Hewlett-Pa ckard, HP, PCL, HP-GL, LaserJet/He wle tt-P ac kard Co. IBM PC, Token-Rin g/Inte rnational Business Machines Corporation. Intel/Intel Corporation. Microsoft, MS-DOS/Microsoft Corporation. Novell and NetWare/Novell, Inc. QuarkXPress/Quark, Inc. TOPS/Sun Microsystems,
Inc. UNIX/UNIX Systems Laboratories. Ethernet/Xerox Corporation.
Proprietary Statement
The digitally encoded software included with your QMS 3825/3225/2025 Print System is Copyrighted 1995 by QMS, Inc. All Rights Reserved. This software may not be reproduced , modified, displayed, transferred, or copied in any form or in any manner or on any media, in whole or
in part, without the express written permission of QMS, Inc.
Copyright Notice
This manual is Copyrighted 1995 by QMS, Inc., One Magnum Pass, Mobile, AL 36618. All
Rights Reserved. This manual may not be copied in whole or in part, nor transferred to any other
media or language , witho ut the expre s s writt en perm is sion of QMS, Inc.
Page 3
Contents
1 Introduction
Introduction .................................................................................. 1-2
About the Documentati on ....................... ...... .............. ....... .........1-3
Standard Product Documentation 1-3
Related Documentation 1-4
About This Manual ....................................................................... 1-5
Typographic Conventions ...........................................................1-6
Printer Features ........ ............. ...... .............. ..... .............. ....... .........1-7
QMS Crown Technology 1-7
PostScript Level 1 and Level 2 Compatibility 1-9
Resident Emulations 1-9
Resident Typefaces, Fonts, and Symbol Sets 1-10
Multiple Resolutions 1-13
Multiple Print Modes - 3825 Only 1-14
Printer-Based Job Accounting 1-14
Resident RAM (Random Access Memory) 1-14
Internal and External Hard Disk Support 1-15
Page 4
Power Save Mode 1-15
Convenient Control Panel Operation 1-15
RISC-Based Controller 1-15
Flexible Document Handling Capabilities 1-16
QMS PS Executive Series Utilities 1-16
Optional Accessories 1-16
2 Daily Operation
Introduction . . .... ... ..... ...... . ....... .... ... ..... ...... . ....... ..... .. ..... ...... ... ..... .. 2-2
Turning on the Prin ter ...... ..... ....... ..... ...... ..... ... ..... ....... ....... ...... ... 2-2
Printing Fi le s ......... ......... ........ ............ ......... ............ ......... ............ 2- 3
Using Application Software 2-3
Using QMS DOC 2-3
Using the Contro l Panel ........ ....... ..... ...... ..... ..... ..... ..... ....... ...... ... 2-4
Control Panel Indicators 2-5
Message Window 2-6
Control Pa nel Keys 2-6
Selecting and Storing Media ...................................................... 2-8
Paper Selection 2-8
Transparencies and Labels 2-9
Media Storage 2-9
Media Sizes 2-10
Selecting a Media Size .............................................................. 2-10
Selecting an Input Bin ............................................................... 2-11
Printin g Dup lex .......... .... . ...... . .... ... .... ... .... . ...... . .... ... .... ... .... . .... ... 2-13
Printin g Mu lti pl e Copies .. .. ... .... ... .. ... .. .... . .... ... .. ... .... ... .. .... . .... ... 2-16
Collating Copies ........................................................................ 2-16
Selecting Resolution ................................................................. 2-18
Selecting Page Orientation ....................................................... 2-20
Number-Up Pri ntin g ....................... ....... ......... ...... ....... ....... ....... 2-22
Adding Paper to the Inpu t Bins .............. ....... ...... ....... ....... ....... 2-22
QMS 3825/3225/2025 Users Guideii
Page 5
Using the Large-Capaci ty Input Tra y . ..... ............ ......... .......... ..2-2 4
Large-Capacity Bin Indicators 2-24
Adding Paper to the Large-Capacity Bin 2-25
Using the Large-Larg e- Capaci ty Input Tray . ............ ....... .......2 -27
Installing the LLCIT 2-27
Moving the Printer 2-27
Large-Large-Capacity Input Tray Indicators 2-28
Selecting a Paper Size 2-28
Adding Paper to the LLCIT 2-29
Selecting an Output Bin . ....... ..... ....... ....... ....... ....... ......... ....... ...2 -30
Using the Side Media Exit ..... ..... ......... ....... ....... ......... ....... ...... ..2 -33
Using the Large-Capaci ty Outp ut Stack er ...............................2-34
3 Periodic Maintenance
Introduction .................................................................................. 3-2
Routine Maintenance ...................................................................3-2
Maintenance You Can Perform — 3825/3225 3-3
Maintenance You Can Perform — 2025 3-4
Maintenance that Requires QMS Service — 3825/3225/2025 3-5
Adding To ner ..... ...... ... .... ... ..... .... . ...... ... ..... .. ... ...... ... .... ... ..... .. ... ....3-6
Keeping the Printer Clean .................................................. .......3 -11
Cleaning the Quenching Lamp 3-11
Cleaning the Separation Pawls 3-12
Cleaning the Transfer Corona Wire 3-15
Replacing the Cleaning Unit .....................................................3-18
Replacing the Charg ers and Shield P late ......................... .... ...3 -2 0
Replacing the Ozone Filter ........................................................3-22
Replacing the Printer Drum .......................................................3-23
Clearing the Main tenan ce Me ssag es . ..... ....... ....... ....... ......... ...3 -27
iii
Page 6
4 Troublesho oting Printer
Problems
Introduction . . .... ... ..... ...... . ....... .... ... ..... ...... . ....... ..... .. ..... ...... ... ..... .. 4-2
Control Panel Messages ............................................................. 4-2
Printer Troub lesh oo tin g ..... ..... ..... ..... ....... ...... ..... ..... ..... ..... ....... .. 4-4
Preventing Jams ...... .............. ....... ............ ......... .......... ........... ..... 4-6
Media Jam Locations ..................................... .......................... ... 4-7
Clearing Media Jams ...... ...... ... ..... .. ... ...... ... .... ... ... .... ... ...... ... .... ... 4-8
Clearing an Upper or Lower Input Bin Jam 4-8
Large-Capacity Input Bin Jam
or Large-Large-Capacity Input Bin Jam (3825/3225 only) 4-9
Transport Area Jam 4-11
Output Area Jam 4-12
Large-Capacity Output Stacker Jam —
3825 Only 4-13
Duplex Jam 4-14
Printing Problems ...................................................................... 4-15
Blank Pages 4-15
Not All Pages Print 4-16
Paper Jam Indicator Stays On 4-16
Print Quality Problems .............................................................. 4-16
Reduced Print Quality 4-17
White or Light Lines or Light Image 4-17
Stains on the Back of the Page 4- 17
Sharp Horizontal Black Lines (Across Feed Direction) 4-17
White Horizontal Shapes on a Black Print 4-18
Image Easily Smears When Rubbed 4-18
Placing a Service Call ............................................................... 4-18
5 Advanced Printer Use
Introduction . . .... ... ..... ...... . ....... .... ... ..... ...... . ....... ..... .. ..... ...... ... ..... .. 5-2
QMS 3825/3225/2025 Users Guideiv
Page 7
Changing Input Bin Size ..............................................................5-2
Changing LLCIT Paper Size ........................................................5-4
Remove and Disassemble the LLCIT 5-4
Set DIP Switches to Mat ch Paper Size 5-9
Adjust Side Rails to Match DIP Switches 5-10
Reassemble the LLCIT 5-17
Attaching the Large-Capac ity Ou tput S tacker ........................5-1 9
A QMS Customer Support
Sources of Supp ort ......... ....... ..... .... ..... ..... ..... ....... ...... ..... ..... ..... . A-2
Your QMS Vendor A-2
Your Application Vendor or Manufacturer A-2
Q-FAX A-2
QMS Corporate Bulletin Board System A-3
CompuServe A-3
Internet A-3
QMS Customer Technical Assurance (CTA) A-4
QMS National Service Telephone Numbers A-4
QMS World-wide Offices ............................................................ A-5
B Technical Specifications
Print Engine Speci ficati on s ... ..... ...... ..... ... ..... ....... ....... ...... ... ..... . B-2
Physical Characteristics ............................................................. B-3
Controller Specifications ............................................................ B-4
Electrical Requirements ................... ... ..... ..... .. ..... ....... .. ..... ..... ... B-5
Environmental Requirements .......... . ....... ..... .. ..... ...... ... ..... ..... .. . B -5
Print Med ia ...................................................................................B-6
Input B-6
Output B-6
Print Media Sizes B-7
Consumable Supplies .................................................................B-7
v
Page 8
Warranty Considerati ons ............. ............ ................... ................B-7
Consumables and Your Warranty B-7
Electrostatic Discharge and Your Warranty B-8
C Document Option
Commands
Introduction . . .... ... ..... ...... . ....... .... ... ..... ...... . ....... ..... .. ..... ...... ... ..... ..C-2
Supported QMS DOC ...................................... ......... .......... .........C -2
Header/Trailer Page Commands C-2
HP-GL Emulation Commands C-3
HP PCL 5 Emulation Comma nds C-3
Lineprinter Emulation Commands C-3
CCITT Groups 3 and 4 Commands C-4
PostScript Commands C-4
Document Formatting C-4
Sessions Command C-5
LN03 Commands C-5
Using New Document Option Commands ................................C-5
CCITT Group 3 and 4 ............. ......... ....... ....... ........ ....... ....... ....... ..C-6
DPI C-6
Lineprinter Em ulatio n ....................... ....... ....... ..... ....... ....... ....... ..C-7
Orientation C-7
Document Formattin g ........... ....... ............ ....... ............ ....... .........C-8
Number-up Printing C-8
Printing Borders C-8
Background C-12
Print Quality C-13
Sessions ....... ...................................... ................................. ....... C-13
What is a Session? C-13
How is a Session Used? C-14
Session Command C-15
Examples C-18
Sessions Document Finishing Terminology C-20
Document Finishing Command C-21
QMS 3825/3225/2025 Users Guidevi
Page 9
PCL 5 Emulati on .... ... .. ..... .. .... ... ... .... ... .. ..... .. ... .... ... .... ... .. .... ... ... . C -23
Terminology C-23
PCL 5 Emulation DOC C-26
D Factory De fault Settings
Installation ................................................................................... D-2
Operator Control ......................................................................... D-2
Administration —Communications ............................................ D-3
Administration —Emulation s ......................... .......................... ... D-4
Administrati on—Special Pages ....... . ...... . ..... .. ..... .. ..... .. ..... .. ... ... D-6
Administration —S tartu p Option s ........................................... ... D-7
Administration—Memory ........................................................... D-7
Administration—Engine ............................................................. D-7
Administrati on—M is cel lan eous . ....... ....... ..... ....... ......... ....... ...... D -8
Administrati on —Di sk Op erations ..... ....... ..... ....... ....... ....... ....... . D-8
E Character Encoding Ta bles
Character Encoding Tables ... ............ ............ ..................... ........ E-2
Standard Fonts Char acter Set .................................... ............ ... E-3
Symbol Encoding ........................................................................ E-4
ITC Zapf Dingbats Encod in g ................................ ....... ....... ..... ... E-5
F Notices
Manual Notice F-2
Laser Safety F-2
Ozone Safety F-2
Electronics Emissions F-2
vii
Page 10
FCC Compliance F-3
Canadian Users F-3
Bescheinigung des Herstellers/Importeurs F-3
Declaration of the Manufacturer or Importer F-3
Installation F-4
Colophon F-4
Glossary
Index
❖
QMS 3825/3225/2025 Users Guideviii
Page 11
1
Introduction
In This Chapter . . .
■ Printer feature s
■ Optional accessories
■ Where to find more information
Page 12

Introduction
Introduction
The QMS 3825/3225/2025 Print System is a powerful but easy to use
departmental laser printer. By reading and following the instructions in
this manual, you should be able to make the most of your printer.
Take the time to review the illustration below for a quick introduct ion
to the parts of your printer.
8
7
6
2
4
5
1 Output bins
2 Control panel
3 Input bins
4 Optional large-capacity input bin
5 Optional duplex printing module
6 Print engi ne
7 Side output bin
8 Output stacker
1
2
➈
➇
➆
3
➅
➀
➁
➂
➄
4
5
1 Output bins
2 Control pa nel
3 Input bins
4 Optional large-large capacity input
bin
5 Optional duplex printing module
6 Optional large-capacity output
stacker
7 Print engine
8 Side output bin
9 Output stacker
➃
QMS 3825/3225/2025 User's Guide1-2
Page 13
About the
Documenta tion
About the Documentation
At least seven pieces of documentation accompany your printe r. If
you’ve ordered any optional accessories or any optional manual,
you’ll have more. This section gives you an idea of how we have
organized information and which document s you’ll probably refer to
the most.
Standard Product Documentation
The following document s are shipped with your printer:
■
QMS 3825/3225/ 2025 Print Sy stem User ’s Guide
You’re looking at it right now. Use this manual to operate your
printer on a daily basis. It covers printing files, adding print media,
selecting input and output bins, duplexin g, collating , and maintaining and troubleshooting the printer. “About This Manual,” later
in this chapter, details the contents of the user’s guide.
QMS 3825/3225/ 2025 P rint System Admini strat or ’s Guide
■
Refer to this manual as you configure the printer initially and when
you change configuration. The instructions guide you through the
steps for setting up default values for many printer features. The
system administrator should get the most use from this manual.
QMS Crown Document Option Com man ds
■
This reference manual lists and explains QMS Document Op tio n
Commands (DOCs), which provide anot her way to control the
printer. DOCs are software codes you insert into documents to
enable printer features that cannot be accessed by your application or your page description language. In most cases, only
advanced users and system administrators need this information.
LN03 Plus Emulation for QMS Printe rs
■
Refer to this manual for informat ion on the f eat ures and capabilities of the LN03 Plus emulation. Users who want to print LN03
Plus files will find this inform at ion hel pful .
Introduction
1-3
Page 14
About the
Documentation
■
QMS Crown Remote Console User’s Guide
Refer to this manual for detailed inf ormat ion on establishing con nections between your printer and a remote console. This connectivity is especially valuable for system admini strat ors who
must monito r multiple printers.
QMS Crown Network Notes
■
This manual offers tips for using your printer on a netwo rk. It discusses 3Com 3+Open, Banyan VINES, LAN Man ager-based
LANs, Novell NetWare, TCP/IP, UNIX, DECnet, and VMS. In
most cases, only advanced netwo rk users and system adm ini strators need this information.
This manual is provided on disk in encapsulated PostScript
(EPS) form. Refer to the RE A DME file for inf orma tio n on prin tin g
a hard copy of the manual.
imPRESS Programming Manual
■
Refer to this manual for detailed inf ormat ion on the QMS
imPRESS programmin g language. Only users of the imPRESS
language need this informat ion.
This manual is provided on disk in encapsulated PostScript
(EPS) form. Refer to the RE A DME file for inf orma tio n on prin tin g
a hard copy of the manual.
Related Documentation
Several other documents are also helpful when using your printer:
■ If you purchased a printer option (for example, a network interface), you may have received separate documentation for it.
■ Don’t forget that yo ur ap plicat ion documentation, your host op erating system documentation, and your network documentation all
contain useful printing informat ion.
■ Further information on QMS printe rs is available through your
modem or fax machine. See appendix A, “QMS Custome r Support,” for details.
QMS 3825/3225/2025 User's Guide1-4
Page 15
About This Manual
This manual explains in detail some of the features of your QMS
printer and how to use them. Use the following summa ry, the table of
contents, and the index to locate the information you may need .
■ Chapter 1, “Introduction,” describe s th e QM S 3825/3225/2025
Print System documentation set, provides an overview of this
manual, and discusses the major feat ures of your QMS printer.
■ Chapter 2, “Daily Operations,” covers the tasks you may
encounter on a day-to-day basis. It discusses such information as
the control panel, supported media types and sizes, selecti ng
input and output bins, printing files, duplexing, and collating jobs.
■ Chapter 3, “Periodi c Main tenan ce, ” guid es you through the
scheduled maintenance tasks that keep your printer operating at
peak performance. It also covers how to turn off the maintenance
message once the mainte nance has been con ducted .
■ Chapter 4, “Troubleshooting Printer Problems,” explains how
to clear paper jams and interpret control panel status messages,
and provides suggestions for resolving printer and print quality
problems.
About This Manua l
■ Appendix A, “QMS Custo mer Su pport, ” lists useful telephone
numbers and describes how to communicate with QMS through
Q-FAX, the QMS Corporate Bulleti n Board, CompuS e rve, and
Customer Technical Support.
■ Appendix B, “Pri nter S peci fic atio ns, ” lists the specificat ions
for the print engine, controller, and print media.
■ Appendix C, “Document Option Commands,” lists the com-
mands supported by your printer and includes detail ed instructions for using new and revised commands.
■ Appendix D, ”Factory Default Settings,” outlines the configura-
tion menus and shows how each choice or value was set at the
factory.
■ Appendix E, “Character Enco di ng Tables,” shows character
locations for the typeface familie s available on your printe r.
Introduction
1-5
Page 16
Typographic Conventions
■ Appendix F, “Notices,” lists compliance information with various
safety and internati onal stan dards, as w ell as notices about this
manual.
■ Glossary defines key te rms.
Typographic Conventions
The following conventions are used throughout this manual:
Mixed-Case
Cour ier
Mixed-Case
Italic
Courier
UPPERCASE
COURIER
Mixed case bold QMS DOC commands
lowercase italic
UPPERCASE File and utility names
Text you type, and messages and information
displayed on the computer monitor
Variable text you type; replace the italicized
word(s) with information specific to your printer
or computer
Information displayed in the printer message
window
Variable information in text
» Note: N otes contain tips, extra informa tion, or important information
that deserves emphasis or reiteration.
Caution:
Cautions present infor mation th a t you n e ed to kn ow to avoid
equipme n t damage or extre m e annoyan c e.
WARNING!
Warnings indicate th e possibility of personal injury if a
specific p r o c ed u re is not performed exactly as described in the
manual.
ACHTUNG!
Bitte halten Sie sic h exakt a n die im Handbuch
beschriebene Vorgenhensweise, da sonst Verletzungsgefahr
bestehen könnte.
QMS 3825/3225/2025 User's Guide1-6
Page 17
Printer Features
The QMS 3825/3225/ 2025 Print System offers a unique combinat ion
of high-performance processing, network/host connectivit y options,
innovative network features, and paper hand ling fe atu res. Your
printer can interface with any IBM PC or compatible and any Macintosh, plus most mainframes and min icom pute rs.
This overview outlines your printer’s major features and their benefits.
Specific chapters contain more information on each featu re. Consult
the index or table of contents for guidance in locating this information.
QMS Crown Technology
QMS Crown is a proprietary multit as king printer opera ting system,
which allows QMS to adapt advanced printer software to the evolving
printing needs of users in many different environme nts.
Crown’s multitasking capability allows your printer to process and print
jobs simultaneously instead of sequentially, by using advanced memory management techniques, such as simultaneous interfacing, emulation sensing processing, input buffers, job spooling, compile-ahead
processing, compressed data formats, error recovery, user-configurable memory clients, context switching, and spooling spillover.
Printer Features
■ Simultaneous Interface Operation (SIO)—Although many other
printers have multiple interface ports and automatically designate
a “hot port,” only one port actively receives data at a time. Your
printer is unique because SIO allows all of its interface ports—
LocalTalk, parallel, serial, and an optional network interface—to
be active at the same time. You can have more than one host
computer printing to the printer. Each interface has an input buffer
that receives data while another interf ace is being used to print.
■ Emulation Se nsing Processo r (ESP) Technology—Most print -
ers can recognize only their native command language. Your
QMS printer, however, has ESP (Emulation Sensing Processor)
technology. Using a form of artificial intelligence, ESP technology
analyzes incoming file data from any of the printer ’s interfaces.
ESP technology, which works with most popular commercially
Introduction
1-7
Page 18
Printer Feat ur es
available applications, selects th e appropriat e emu lation from
those installed on the printer and processes the print job, freeing
you from the need to change printer switch settings or send software commands to accommodate different printer languages.
■ Input Buffers—T he print er has expandable inp ut buffers, which
enable it to receive large amounts of print data over any or all of
its interfaces. This not only increases the printer’s performance,
but it also relieves the central processing unit (CPU) of time-consuming print data transmission tasks.
■ Compile-Ahead Processing—Pioneered by QMS, compile-
ahead technology allows the compiling, rasterizing, and printing to
work independently but simultaneously. This significantly reduces
processing time by increasing printer controller throughput.
■ Compresse d Data Format s—Crown printers convert dat a
received by the input buffers into intermedi ate, co mpressed
blocks until the data is needed for printing. These compressed
blocks of data are designed to be processed rapidly by the
printer, and many more can be stored in memory at one time than
can traditional bitmapped images.
■ Automatic Jam Reco very— Crown technology also provides
automatic jam reco ver y. With most printers, if a media jam
occurs, you must remove the jammed media and then reprint the
job. On a Crown printer, if a media jam occurs, once you clear the
jam, the printer reprints the jammed page and cont inues wit h the
print job. This is possible because compressed data formats
allow more pages to be stored in memory . The printer remembers
the last page printed, pulls the necessary interm ediate blo cks
from memory, and automatically reprints any lost pages.
■ User-Configurable Memory Clients— Printer mem ory is
divided among memory “clients.” You can configure the size of
most memory clients to meet your specific printing, computing,
and network needs best.
■ Context Switching—This feature allows Crown printers to pre-
serve the “state” of a language or emulation — including down loaded fonts, forms, logos, macros, overlay s, and other data —
when you switch from one printer languag e or emulation t o
QMS 3825/3225/2025 User's Guide1-8
Page 19
Printer Features
another. Other printers require repeated downl oading of these
capabilities each time they are needed, consumi ng valuable
input, processing, and printing time.
■ Spooling Overflow—S poo led print jobs can transparently spill
over to the hard disk, so buffers are not limited to RAM capaci ty.
PostScript Level 1 and L evel 2 C om patibility
The QMS 3825/3225/2025 Print System provides PostSc ript Level 1
and Level 2 page description capabilities via QMS-developed emu lations that are compatible with Adobe’s PostScript Level 1 and Level 2
languages while providing additional capabilit ies. PostS cript controls
the appearance of text, geometric shapes, and images at the printer.
It can rotate, scale, clip, and orient graphic objects on all or part of a
page. The printer produces solid blacks and crisp fonts regardless of
the point size.
The PostScript Level 2 emulatio n supports the capabi lities of the second generation of Adobe’s PostScript software. Level 2 consolidat es
extensions to the PostScript language and provides new features and
functionality that expa nd the language’s capabilities and improve
overall performance. PostS cript Level 2 features include device-inde pendent color, improved memory and resource management, built-in
data compression/decompression filters to speed up transmission
times and save disk space, optimized graphics and text operators,
and patterns and forms support, includi ng patt ern and form cach ing.
Resident Emulations
Although your printer ’s primary emula tion is PostScript , it also supports HP PCL 5, HP-GL, CCITT, imPRESS, LN03 Plus, and Lineprinter. The optional QUIC II emulat ion can also be supporte d.
Introduction
1-9
Page 20
Printer Feat ur es
Resident Typefaces, Fonts, and Symbol Sets
Resident PostScript Typefaces
Your printer comes with 39 PostScript typefaces from 12 typefa ce
families. All resident PostS cript type face fami lies have mul tilingua l
character sets.
The fonts in all of these typeface families can be scaled from 4 points
upward, rotated to any angle in 1° increments, pattern filled, halftoned, shaded, shadowed, and cropped, depending on your application software. The following PostScript typefaces are resident on your
QMS printer:
Serif
Typefaces
Times Roman
Times Bold
Times Roman Italic
Times Bold Italic
Courier
Courier Bold
Courier Oblique
Courier Bold Oblique
Palatino
Palatino Bold
Palati no Itali c
Palatino Bold Italic
New Century Schoolbook
New Century Schoolbook Bold
New Century Schoolbook Italic
New Century Schoolbook Bold Italic
ITC Bookm an Lig ht
ITC Bookman Demi
ITC Bookman Light Italic
ITC Bookman Demi Italic
ITC Zapf Chancery Medium Italic
This typeface does not come in any other
but the calligraphic italic style
QMS 3825/3225/2025 User's Guide1-10
Page 21
Printer Features
Sans Serif
Typefaces
Pi or Symbol
Typefaces
Helvetica
Helvetica Bol d
Helvetica Oblique
Helvetica Bol d Obliqu e
Helvetica Narrow
Helvetica Narrow Bol d
Helvetica Narrow Oblique
Helvetica Narrow Bol d Obl ique
Helvetica Condensed
Helvetica Condensed Bold
Helvetica Condensed Oblique
Helvetica Condensed Bold Oblique
ITC Avant Garde Book
ITC Avant Garde Demi
ITC Avant Garde Book Oblique
ITC Avant Garde Demi Oblique
Symbol
! ∀ # ∃ % & ∋ ( ) ∗
∋ + − / Α Β Χ ∆ Ε
Φ Γ Η Ι ϑ Κ Λ Μ Ν Ο Π
Θ Ρ Σ Τ Υ ς Ω Ξ Ψ Ζ
γ ! α β χ δ ε φ
ITC Zapf Dingbats
✁✂✃✄☎✆✇✈✉☛☞✌✍✎✏✐✑✒✓✔
✕✖✗✘✙✚✛✜✝✞✟✠✡✢✣✤✥✦✧★✩✪✫
✱✲✳✴✵✶✷✹✺✻✼✽✾✿❀❁❂❃❄❅❆
●❍■❏❐❑❒▲▼◆❖◗❘❙❚❛❜❝
✃✇☞✍✏✕✓✗✂✈☎✄✝✟✡✥✩
✕✘✑✛✣✙✘➉➊➋➌
↔↕➘ ✕➚➛➜➝➞➟➠➡➢➣➤➥✑✙✘
➯ ➱➲➳➴➵ ➶➷ ➸
All of these typeface families are authent ic; they are license d, they
carry the true name, and they have multilingual character sets.
Introduction
1-11
Page 22
Printer Feat ur es
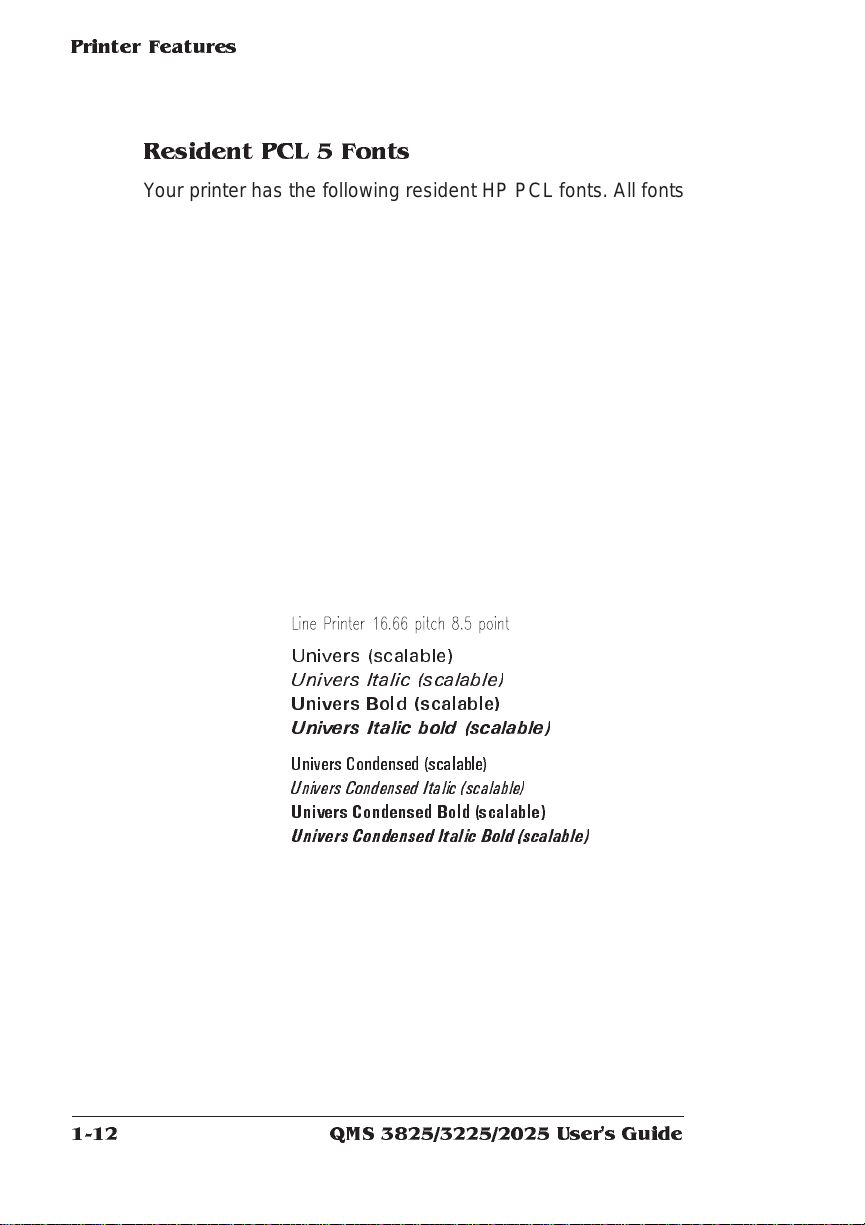
Resident PCL 5 Fonts
Your printer has the following resident HP PCL fonts. All fonts can be
automatically rotated to landscape orientation. Some are fixed in pitch
and point size while others are scalable . Unless otherwise noted,
samples are shown in 10 point size.
Serif Fonts
San Serif Fonts
Courier 12 pitch 10 point
Courier 12 pitch 10 point Italic
Courier 12 pitch 10 point Bold
Courier 10 pitch 12 point
Courier 10 pitch 12 point Italic
Courier 10 pitch 12 point Bold
Times (scalable)
Times Italic (scalable)
Times Bold (scalable)
Times Italic Bold (scalable)
Univers (scalable)
Univers Italic (scalable)
Univers Bold (scalable)
Univers Italic bold (scalable)
Univers Condensed (scalable)
Univers Condensed Italic (scalable)
Univers Condensed Bold (scalable)
Univers Co n d e n se d Italic Bold (scalable)
Pi or Symbol
Font
✤❉■❇❂❁▼▲ (ITC Zapf Dingbat s)
QMS 3825/3225/2025 User's Guide1-12
Page 23
Printer Features
Resident HP-GL Symbol Sets
Your printer has the following resident HP-GL symbol sets. All come
in both fixed- and variable-spaced versions, and all are scal able:
9825 Character Set
ANSI ASCI I
French/German
!SO French
ISO G erma n
ISO IRV (International Reference Version)
ISO Itali an
ISO Norway, Version 1
ISO Norway, Version 2
ISO Portuguese
ISO Spanish
ISO Swedish
ISO Swedish for Names
ISO United Kingdom
JIS ASCII
Katakana
Roman Extensions
Scandinavian
Spanish/Latin American
Special Symbols
Multiple Resolutions
Your printer offers a choice of resolution. You may choose 300 x 300
dots per inch (dpi) resolution for everyday office needs or higher resolution for PostScript and PCL print jobs that require finer detai l, such
as camera-ready copy or for CAD drawings that demand tighter
angles. Available resolutions are:
Print System High Resolution Low Resolution
3825 600 x 600 300 x 300
3225 400 x 400 300 x 300
2025 400 x 400 300 x 300
Introduction
1-13
Page 24
Printer Feat ur es
Multiple Print Modes - 3825 Only
The 3825 Print System offers a choice of print modes — dark, normal
and light — which gives you an additional level of control over output
for graphics, CAD, or everyday use.
Printer-Based Job Acc oun ting
Your QM S printer provides job accounting, which can be used to
extract information such as paper utilization per user, time consumed
servicing print jobs per user, usage of different emulations, connectivity options, frequency of jams, times of peak use, features and
options most commonly used (such as duplexing or finishing options),
and number, complexity, and size of jobs per user. The accounting
feature does not prepare a list but provides the information you need
to assess printer use. The accounting is performed by the printer
rather than a host, and the extracted information can be uploaded to
any host by copying it to a floppy disk or by using the FTP get command (if your host supports this command). This information is useful
for billing, report generation , and site resource plann ing. For furt her
information see the “Accounting” section in chapter 3, “Operator Control Menu,” in your system admi nistrat or’s guide.
Resident RAM (Ran dom Acce ss Me mor y)
Your QM S Print System com es with enough RAM to handle most
printing tasks.
3825 The 3825 Print System comes with 32 MB of resident RAM,
the maximum the printer can use and enough to handle virtually any printing task promptly.
3225/2025 The 3225 and 2025 Print Systems come with 16 MB of
resident RAM, which can be upgraded to 32 MB if you need
more room for font downloading, font caching (tempora ry
storage space in RAM), spooling, or enlarging the printer ’s
buffers (the area where data sent from the comput er is temporarily stored).
QMS 3825/3225/2025 User's Guide1-14
Page 25
Printer Features
Internal and External Hard Disk Support
Your printer comes standard with an internal hard disk of at least 170
MB, upgradable to 2.2 GB, and an internal 1.44 MB floppy disk drive.
You have the option of adding up to 6 external SCSI hard disks up to
2.2 GB in size to store downloaded fonts and emulations.
Specifications are included in Q-FAX document 6502, “QMS -tested
SIMMs and Hard Disks.” This document contains a description of
each approved hard disk, its manufacturers and part numbe rs, and
the QMS products on which it can be used. See appendix A, “QMS
Customer Support,” to find out how to access Q-FAX documents.
Power Sav e Mode
Using the control panel, you can set your printer to switch to lower
power usage during periods of inactivity. You can tai lor the power
saver to your needs by setting the interval before it takes effect.
Conven ient Contr ol Pane l Operation
Use the control panel to configure your printer. The printer also uses
the control panel to communicate with you by providing messages
about its status, including any co ndit ions that require your attent ion.
These messages can be displayed in a user-selectable language
(English, French, Ge rman, or S pani sh ). Se e “The Co ntrol Panel ” section in Chapter 2, “Daily Operation, ” in this manual fo r complet e info rmation on using the control panel.
RISC-Based Controller
Using a RISC-based processor,
3825 the QMS 3825 Print System can deliver print speeds up to 38
pages per minute.
3225 the QMS 3225 Print System can deliver print speeds up to 32
pages per minute.
2025 the QMS 2025 Print system can deliver print speeds up to 20
pages per minute.
Introduction
1-15
Page 26
Printer Feat ur es
Flexible Document Handling Capabilities
Your printer can use paper of almost any size from A5R (5.8" x 8.27";
148 x 210 mm) to Ledger (11" x 17"; 239 x 432 mm). It has two standard paper input bins that accommodat e 250 sheet s each. Optional
input and output bins increase the media capaci ty to 1,500 or 3,000
sheets, as well as giving you duplexing capabilities.
QMS PS Exec utive Series Utilities
Provided in both PC and Macintosh ve rsi ons, the QM S PS Exe cutive
Series Utilities software is an easy-to-use tool for configuring the
printer. For example, you can set or change communication prot o col
between your printer and host compute r, download fonts, change
printer emulations, print screens from your monitor while the printer is
in PostScript-only mode, co nfigure the font cache, change input and
output bins, reconfigure printer buffers and hard disks, and change
the name of the printer. The QMS PS Executive Series Utilities also
provide an easy means for printing PostScript files. The on-li ne help
contains installation and operat ion instructio ns and further explains
the program’s functions.
Optional Accessories
The QMS 3825/3225/2025 Print System offers man y opt ions to
expand its capabilities.
Advanced Paper Handling O ption
The Advanced Paper Handling Option include s a duplex printing
module, a large-capacity input bin which accommodates 1,500
sheets of paper, and a printer supplies storage cabinet.
Large-Large-Capacity Input Tray
3825/3225 Only
This optional tray is an input bin holding up to 2,500 sheets of
print media in sizes up to Ledger.
QMS 3825/3225/2025 User's Guide1-16
Page 27
Printer Features
Large Capacity Output Stacker 3825 Only
The optional stacker holds up to 2,750 sheets of 20 lb
(75 g/m2) paper or 2,400 sheets of 24 lb (90 g/m2) paper in Letter
or A4 size. Paper is stacked faced down.
Hard Disk Expandability Options
A larger internal hard disk and up to 6 external hard disks can be
added to your system for permanent downloadable font and emulation storage and for increased job spooling capability. The system supports disks up to 2.2 GB in capacity.
Printer Memory Upgrade 3225/2025 Only
The QMS 3225 and 2025 Print Systems come wit h 16 MB of
RAM, which can be upgraded to 32 MB to allow your printer to
grow with your needs. Additional RAM can provide room for font
downloading and font caching. Additional RAM also provides better printing performance and exp ands your printing capabilities,
allowing you to send large, graphics-intensive files without tying
up the host computer for long perio ds.
» Note: The QMS 3825 Print System com es with 32 MB of RAM.
Network Interface Options
In addition to the three standard interfaces—parallel, serial, and
LocalTalk— th e QMS 3825/3225 /202 5 Print System supports a
variety of network options.
■ A CrownNet interface allows you to connect simultaneously
to
✓ an Ethernet network running AppleTalk, LAN Manager/
LAN Server, NetWare, and/or TCP/IP protocols, or
✓ a Token-Ring network running LAN Manager/LAN Server,
NetWare, and/or TCP/IPprotocols
Introduction
1-17
Page 28
Printer Feat ur es
■ Basic network interfaces, designed fo r printers operati ng in
only one network protocol at a time, include
✓ a standard Ethernet option which supports both DECnet
✓ a standard Token-Ring opti on which supports TCP / IP or
✓ a standard IBM 3270A/5250 protocol
Remote Console Option
When you use an optional network interface and its accomp anying software, you also have the ability to estab lish a remot e console connection. Printer status messages appear on the rem ote
console as well as the printer’s control panel, so you don’t have to
leave your workstation every time the printer needs attention.
Moreover , y ou’ll know right away if the printer is tied up with a jam
or other simple problem requiring your attent ion .
and TCP/IP, or AppleTalk, or NetWare
NetWare
Instructions for using a remote conso le are included in the
Crown Remote Console User ’s Guide
setting up a remote console session in TCP/IP and DECn et environments. Instructions for opening a remote console session in
all other protocols are included in the
Card System Administrator’s Guide.
manual is shipped with each optional net work interf ac e.
Kanji and Other Font Options
A Kanji upgrade kit, which gives your printer the capability of
printing Japanese fonts, is available for your QMS printer. Other
downloadable fonts for PostScript and HP emulatio ns are also
available. Con tact your QMS vendor for a list of all available
fonts.
❖
QMS 3825/3225/2025 User's Guide1-18
QMS
, along with instructions for
QMS CrownNet Interface
A copy of the appropriate
Page 29
2
Daily Operation
In This Chapter . . .
■ How to turn on the printer
■ How to print files
■ How to use the control panel
■ How to select and store media
■ How to duplex a print job
■ How to collate a print job
■ How to select resolution
■ How to select page orientation
■ How to select input and output bins
■ How to refill input bins
Page 30
Introduction
Introduction
This chapter explains daily printer operat ion. It contains informa tion
about printing on paper, labels, and transparencies; select ing and
storing media; using the control panel; adding paper to the input bins;
duplexing; collating; changi ng re so lution; and selectin g page
orientation.
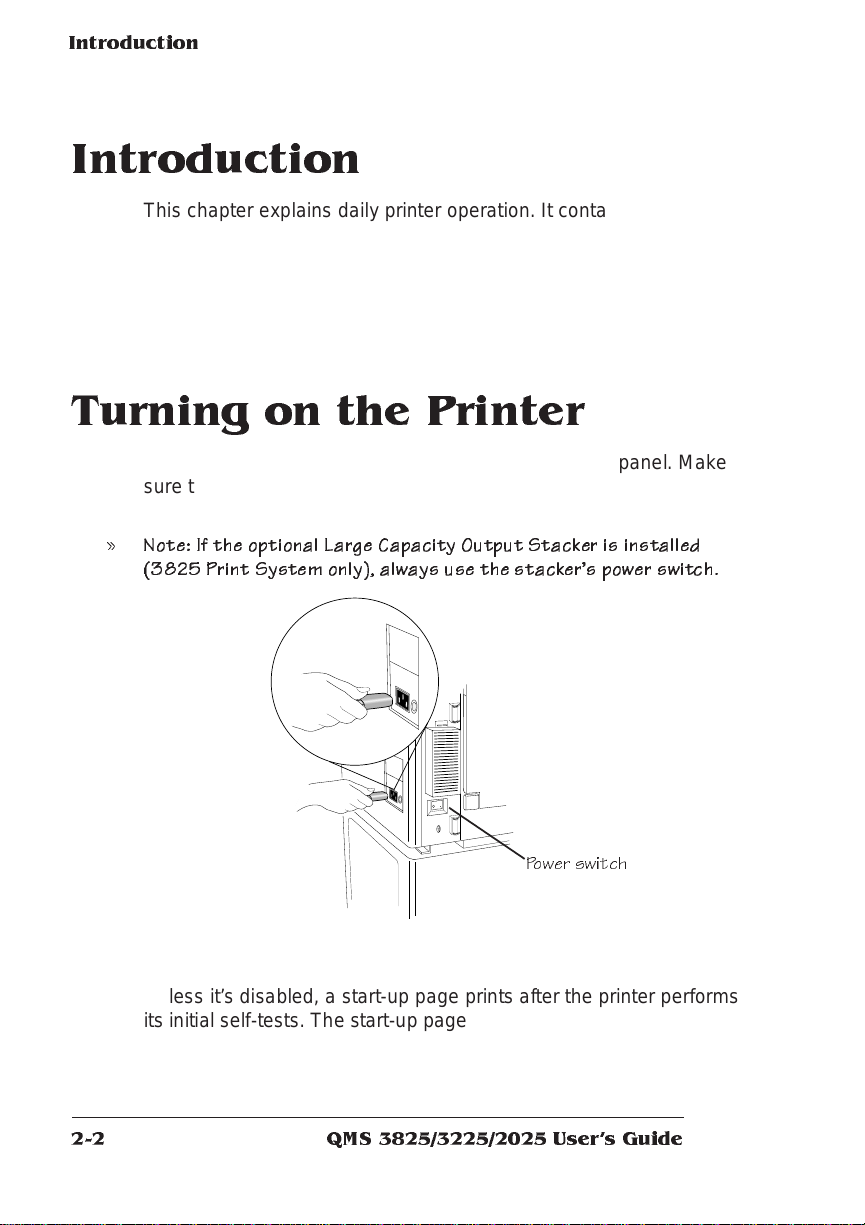
Turning on the Printer
The printer ’s power switch is located on the right rear panel. Make
sure the power cord is properly connected to the printer and to a
grounded outlet before turning on the power switch.
» Note: If the op tional Large Capacity Output Stacker is installed
(3825 Print System only), always use the stackers power switch.
Power s witch
The power indicator on the control panel lights when the printer is on.
Unless it’s disabled, a start-up page prints after the print er perform s
its initial self-tests. The start-up page lists the printer’s name, all available interfaces, and other useful inform atio n.
QMS 3825/3225/2025 Users Guide2-2
Page 31

Printing Files
The QMS 3825/3225/2025 Print System is designed to serve more
than one person. With its ESP and SIO features, your printe r can
directly serve three hosts (via the standard serial, parallel, and AppleTalk interfaces).
In most installation s, the printer will be connect ed to a network of
users through an optional network interface. If you are connected to
the printer over a network, see your system administrator for specific
printing instructions, because man y feature s on your QMS printer
may be customized to the needs of your particular network.
Even with a network connection, you can easily customize your print
jobs. Without ever touching the print e r’s control panel, you can get
just what you need through your application software or through QMS
Document Option Commands.
Using Application Software
If you are using an application to print your files, check for a QMS
3825/3225/2025 printer driver . I f your printer model is supported, your
application may have its own method of selectin g certain document handling features, such as page orient ation, duplex or simplex print ing, and number of copies. If these specific drivers are not ava ilabl e,
you can select a comparable PostScript driver, such as another QMS
driver or a LaserWriter driver. However, comparable drivers may not
allow you to access all of the printer’s features.
Printing Files
Using QMS DOC
Even if you are unable to customize print settings through your application, you can still use the printer featu re s in your own way. For
example, you may want to print a FrameMaker PostS cript file in
duplex mode on letter-size paper, just after a co-worker has printed a
landscape mode job in PCL 5 emulation on ledger paper. QMS Document Option Commands, or QMS DOC, can ac commodat e your
requests without affecting the prin ter configurat ion for ot her use rs.
With QMS DOC, you can add special commands to the beginning of
Daily Opera t ion
2-3
Page 32

Using the Control
Panel
your files that instruct the printer to use specific feat ures. Use QM S
DOC to select an emulation, an inpu t bin or paper size, duplex, orientation, and more. The features you select take effect only for the printing of your file. After it prints, the QMS DOC added to the beginning of
the next file takes effect. If no QMS DOC is p rese nt for the n ext fi le,
the printer returns to its default values. QM S DO C is the key to making your QMS printer a true departmental printer. Your network system administrator may be able to establish a special print queue for
you that adds the QMS DOC you want to the beginning of every file.
QMS Crown Do cu men t Option Com m a nds
The
included with the printer, gives complete information on how to use
the commands.
documentation,
Using the Control Pan el
The control panel on your QMS printer offers a convenient way to
direct the printer’s operatio n. It also displays the current status of the
printer, including any condition that needs your attention.
The control panel consists of the following parts:
■ Six indicator s to provide pri nte r status inf orma tion .
■ A message window to display sta tus and configuration
informa tion .
■ Eight keys to allow you to control the printer.
QMS 3825/3225/2025 Users Guide2-4
Page 33

Control Panel Indicators
The Power light indicates whether the printer’s
power is turned on.
The arrow-shaped light to the left of the Online/
Offline key indicates w hether the printer is on
line. When the printer is on line the green light
shows; when it is off line, the light is out.
The Receiving light shows when the printer is
receiving data.
The Error light shows when the printer requires
operator intervention. This indicator is usually
accompanied by a status message in the
message window.
Using the Control
Panel
Daily Opera t ion
The Duplex light shows when the printer is
processing a double-sided print job. Duplexing is
only possible if the printer has the optional
duplexing unit installed.
The printer icon offers several kinds of
information. Lights indicate
■ Which input bin is selected.
■ Which output bin is selected.
■ Location of any media jams.
2-5
Page 34

Using the Control
Panel
Message Window
The control panel message window is the printer’s chief means of
communicating with the operator . In 2 lines of 16 characters each, the
printer sends messages about its statu s and about errors encountered while printing a job.
When you change printer configuration options, the message window
is your guide through the printer’s menu structure. During configu ration, the top line of the message window typically displays the name
of the menu you are in while the second line displays options wit hin
that menu one at a time.
Control Panel K eys
The eight control panel keys are your chief means of communicating
directly with the printer. Keys are used to switch the printer from on
line to off line status, to cancel and end jobs, to print a status pa ge,
and to navigate through the configu ratio n menus.
The Online/Offline key switches the printer
between on-line and off-line status. When the
printer is on line, the green arrow to the left of the
key is on.
The Cancel key deletes the current job, the one
that is currently printing, from the print queue.
The cancellation process affects only the portion
of the current job that has not yet been
processed for printing, so the printer may not
respond immediately to the cancel request.
If you press the Cancel key by mistake, or if you
decide not to cancel a job after pressing this key,
press the Menu key to “cancel” the Cancel key’s
function.
This key may be used while the printer is on line.
» Note: Turning the printer off to
cancel a job also erases all jobs
spooled in the printer.
QMS 3825/3225/2025 Users Guide2-6
Page 35

Using the Control
Panel
The End Job key se nds an e nd-of-job indicator to
a currently compiling job that does not contain
one.
This key may be used while the printer is on line.
Pressing the Status Page key causes the printer
to print a status page. Using menu choices
described in Chapter 6, “Special Pages and
Startup Options Submenus,” of your system
administrator’s guide, you can tell the printer
whether to print a single page of information or
more detailed information on multiple pages.
This key may be used while the printer is on line.
» Note: The following keys may be used o nly while the printer is
off line. Pressing these keys while the printer is on line could
result in the loss of print jobs.
Press the Menu key to enter the configuration
menu. After you press the Menu key, the
message window displays the following:
CONFIGURATION
OPERATOR CONTROL
The Menu key also has a cancel or abort
function. If you are changing a menu option and
want to cancel that change, press the Menu key
once. Any change you may have made to the
option is immediately canceled, and th e
message window displays the name of the option
you were attempting to change. If you are in a
submenu and want to return to the previous
level, press the Menu key once. Each press of
the Menu key moves up one level in the menu
structure or moves one character or digit back if
you are entering alphanumeric values.
Press the Previous key to display the previous
option in the loop of options for the current level.
You also use the Previous key to move ba ckward
through character choices when setting values
for some options.
Daily Opera t ion
2-7
Page 36

Selecting and
Storing Me dia
Press the Next key to display the next option in
the loop of options for the current level. You also
use the Next key to advance through the
character choices when setting values for some
options.
Press the Select key to move down one level in
the menu structure. The top line of the message
window always displays the current menu level.
You also use the Select key when entering
alphanumeric characters. After using the Next
and Previous keys to change individual
characters, you press the Select key to verify that
character and move to the next. When the entire
value is set, you press the Select key to enter the
new setting.
Selecting and Storing Media
Paper Selection
The quality of your print job depends in large part on the quality of the
paper and storage method you select.
The printer accomm odat es 18 to 24 pound (68 to 90 g/m2) paper.
You may achieve in creased blacks and sharper contrast by using
special laser printer paper . This paper is thicker, smoother, and whiter
than copier paper and gives your page a more professional appearance. Conventional copier paper is suitab le for mo st application s.
Copier paper has a smooth surface, cont roll ed e lectrical prop ertie s,
and heat stability. This ensures satisfactory image transfer without
excessive curl.
You m ay also use special paper for specific appli catio ns. Bond
papers, which are often used for stationery, generally have a watermark and often use cotton rath er than wood fibe r. However , textured
paper may cause uneven results. Colored paper may also be used,
but not paper with a colored coating applied after the paper is made.
QMS 3825/3225/2025 Users Guide2-8
Page 37

Selecting and
Storing Me dia
Transparencies and Labels
You can print transparencies for overhead projectors and sheets of
self-adhesive labels with your QMS printe r. However, these special
materials require some special handling:
■ Turn off the duplex unit before printing labels or transparencies.
■ Always use the upper input bin and the side media exit. This
maintains a straight printing path, which helps assure high quality
output.
Printing on Transparencies
Use only transparencies recommended for use in laser printers. They
should be able to withstand temperatures up to 200° Fahrenheit.
Remove each transparency from the side media exit immediat ely
after printing to prevent jams of subsequent sheets.
Printing on Labels
Adhesive label stock is paper treated with pressure-sensitive adhe sive backing. Use only label stock specifically designed for laser printing. The procedure for feeding labels is almost the same as for
regular paper except that you must use the side media exit and load
the paper cassette print side up.
Format label data within you r application. Try printing your data on a
plain sheet of paper first to check its placement.
Media Storage
The manner in which you store media makes a big diffe rence in print
quality and printer operation. Media that is not properly stored is more
likely to jam. Keep all media in good condit ion by storing it
■ In its wrapper
■ On a flat surface
■ In a closed cabinet
■ In a cool dry area
Daily Opera t ion
2-9
Page 38

Selecting a Media
Size
Media Sizes
The printer supports the following m edia sizes:
Media Media Size Imageable Area Feed
A3
A4
A5R
B4
B5
Executive
Ledger
Legal
Letter
Inches Millimeters Inches Millimeters
11.75 x 16.50 297 x 420 11.38 x 16.22 289 x 412 Short
8.27 x 11.75 210 x 297 7.93 x 11.38 202 x 289 Long
5.83 x 8.27 148 x 210 5.51 x 7.96 140 x 202 Short
9.85 x 12.88 250 x 327 9.53 x 12.57 242 x 319 Short
7.17 x 10.12 182 x 257 6.86 x 9.81 174 x 249 Long
10.50 x 7.50 267 x 190 10.33 x 7.33 262 x 186 Long
11.00 x 17.00 279 x 432 10.67 x 16.67 271 x 424 Short
8.50 x 14.00 216 x 356 8.17 x 13.67 208 x 348 Short
8.50 x 11.00 216 x 279 8.17 x 10.67 208 x 271 Long
Edge
Selecting a Media Size
Input bins for letter and ledger or A3 and A4 sizes are standard. Each
standard input bin has a special metal tab that the printer uses to
sense the media size loaded in the bin. If you modify one of the standard input bins, you must also replace this tab. The optional largelarge capacity input bin can also be modified to accept different paper
sizes. See the instructions for changing an input bin’s media size later
in this chapter.
When you use a media size selection command, the printer searches
the input bins for the matching media size. When it finds a match, it
uses media from that bin to print your file. If you know the printer has
been loaded with a certain media, you can use the media size selection commands to select the input bin containing that media even if
you do not know the input bin number. (See the
ment Option Commands
using DOC in your files.)
manual for complete info rmat ion abou t
QMS 3825/3225/2025 Users Guide2-10
QMS Crown Docu-
Page 39

Selecting an Input Bin
Your print er has two standa rd input bin s and two optional input bins:
■ Upper input bin
■ Lower input bin
■ Large-capacity input bin (optional)
■ Large-large-capacity input bin (optional — 3825/3225 only)
The illustration below show s the locations o f these bins. The inp ut
bins support several types and sizes of media. The optional largecapacity bin expands the printer’s paper capa city to approximately
1,500 sheets of letter or A4 size paper (500 sheets for the upper and
lower bins, and 1,000 sheets for the large- capacity bin). The option al
large-large-capacity bin increases th e printer’s capacity to approximately 3,000 sheets of paper up to ledger size (500 sheets for the
upper and lower bins and 2,500 for the large-large capacity bin).
Selecting an Inp ut
Bin
Upper
Lower
Large-
Capacity
Upper
Lower
Large-Large-
Capacity
The indicators on the control panel printer icon light to show the currently selected input bin. The system admin istrator can use the following procedure to select a default input bin through the control
panel.The printer uses paper from the def ault input bin if your file
does not specify a different paper size or input bin.
Daily Opera t ion
2-11
Page 40

Selecting an
Input Bin
» Note: Select LCIT as th e default to use whic hever large-capacity input
bin yo u have installed, the large-capacity input bin or th e large-large-
capacity input bin.
1 Press the Online/Offline key to take the printer off line.
The indicator light by the key goes out and the message window
continues to display
or
IDLE
2 Press the Menu key to enter the configuration menu.
The message window displays
CONFIGURATION
OPERATOR CONTROL
3 Press the Select key to enter the menu; then press the Next
key until the Inputbin menu appears.
The message window displays
ENERGY SAVER
OPERATOR CONTROL
INPUTBIN
4 Press the Select key; then press the Next key u ntil the input
bin you want appears in the message windo w (in this case
upper). Press the Select key.
The message window momenta rily displays
UPPER
IS SELECTED
and then
OPERATOR CONTROL
INPUTBIN
QMS 3825/3225/2025 Users Guide2-12
Page 41

5 Press the Online/Offline key and the followi ng prom pt
appears:
SAVE CHANGES?
NO
6 Press the Next key until YES appears. Press the Select key
to save changes.
7 Press the Online/Offline key to place the printer back on line,
making it availabl e for the next prin t job.
Printing Du plex
With the optional duplex print ing m odule inst alle d, you can print on
both sides of any size paper (including ledger). The illustration below
shows how to load paper in the input bins for simplex or duplex printing on letterhead. See chapter 8, “Engine, Miscella neous, and Disk
Operations,” in the system administrat o r’s guide for information on
printing combinat ion sim plex and duple x jobs on letterhead or
prepunched paper.
Printing Duplex
QMS
Simplex Duplex
The duplex printing indicator on the control panel ligh ts when a print
job is using the duplex printi ng modu le.
Daily Opera t ion
2-13
Page 42

Printing Duplex
There are two types of two-sided printing: duplex and tumble duplex.
The illustration below show s the difference between t hese two types.
Side 1
Portrait
Side 2
Side 1
Landscape
Side 2
DUPLEX
Side 1
Portrait
Side 2
Side 1 Side 2
Landscape
TUMBLE DUPLEX
Once the optional duplex printing module is installed on your printer,
the Duplex option and Tumble Duplex option appear in the Operator
Control menu. See chapter 3, “Operator Control Menu,” in the system
administrator’s guide for more information on these two options. Use
your application top choose duplexing on a per job basis or the control panel to set duplexing as the default. To select duplex printing
through the control panel, follow these ste p s:
1 Press the Online/Offline key to take the printer off line.
The indicator light by the key goes out and the message window
continues to display
or
IDLE
ENERGY SAVER
2 Press the Menu key to enter the configuration menu.
The message window displays
CONFIGURATION
OPERATOR CONTROL
QMS 3825/3225/2025 Users Guide2-14
Page 43

Printing Multiple
Copies
3 Press the Select key to enter the menu. Press the Next key
until the Duplex menu appears.
The message window displays
OPERATOR CONTROL
DUPLEX
4 Press the Select key. Press the Next key until ON appears in
the message window. Press the Select key.
The message window momenta rily displays
ON
IS SELECTED
and then
OPERATOR CONTROL
DUPLEX
5 Press the Online/Offline key, and the following prom pt
appears:
SAVE CHANGES?
NO
6 Press the Next key until YES appears. Press the Select key
and then press the Onl ine/ Offli ne key to place the printer
back on line, making it available for the next print job.
Printing Multiple Copies
Your QM S printer can print up to 999 copies of your file. It is best to
leave the default as 1 and change the number of copies for each file
through your application. To change the number of copies through the
control panel, refer to the “Alphanumeric Values” section in chapter 1,
“Introduction,” of yo ur system administrator ’s guide.
Daily Opera t ion
2-15
Page 44

Collating Copies
Collating Cop ies
With its unique virtual mem o ry managem ent, your QMS printer can
deliver multiple copie s of your files i n col lated order t o eit her of the
face-down output bins or the optional large-capacity output stacker.
Collated and uncollated stacking for two copies of a four-page document are illustrated below.
4
3
2
1
4
3
2
1
Collated Uncollated
3
2
2
1
1
4
4
3
The default value for collation is On. To change the default for all print
jobs, follow these steps:
1 Press the Online/Offline key to take the printer off line.
The indicator light by the key goes out and the message window
continues to display
or
IDLE
ENERGY SAVER
2 Press the Menu key to enter the configuration menu.
The message window displays
CONFIGURATION
OPERATOR CONTROL
3 Press the Select key to enter the menu. Press the Next key
until the Collation menu app ears.
The message window displays
OPERATOR CONTROL
COLLATION
QMS 3825/3225/2025 Users Guide2-16
Page 45

Selecting
Resolution
4 Press the Select key. Press the Next key until OFF app ears
in the message window. Press the Select key.
The message window momenta rily displays
OFF
IS SELECTED
and then
OPERATOR CONTROL
COLLATION
5 Press the Online/Offline key and the followi ng prom pt
appears:
SAVE CHANGES?
NO
6 Press the Next key until YES appears. Press the Select key
and then press the Onl ine/ Offli ne key to place the printer
back on line, making it available for the next print job.
Selecting Resolution
Your QM S printer gives you a choice of print resolution. That is, you
can choose whether your files are printed with 300 x 300 dots per
inch (dpi) or at a higher resolution:
3825 600x600 dpi
3225 400x400 dpi
2025 400x400 dpi
The lower resolution prints more quickly and uses less toner. It is suitable for many routine office needs, such as interoffice memos and
draft copies of documents. For camera-re ady copy or presentat ion
documents, however, you will probably want the sharpest, clearest
Daily Opera t ion
2-17
Page 46

Selecting
Resolution
image your printer can make, so you will select the higher setting.
Many applications allow you to change resolution on a per job basis.
Use the control panel only if you want to change the default.
The higher setting is the default value. To change the resolution
1 Press the Online/Offline key to take the printer off line.
2 Press the Menu key to enter the configuration menu.
3 Press the Select key to enter the menu. Press the Next key
The indicator light by the key goes out and the message window
continues to display
or
IDLE
The message window displays
CONFIGURATION
OPERATOR CONTROL
until the message window displays
CONFIGURATION
ADMINISTRATION
ENERGY SAVER
4 Press the Select key. Press the Next key until the messag e
window disp lay s
ADMINISTRATION
ENGINE
5 Press the Select key. Press the Next key until the messag e
window disp lay s
ENGINE
DEF. RESOLUTION
6 Press the Select key.
On a 3825 Print System, the message window displ a ys
DEF. RESOLUTION
*600 DPI
QMS 3825/3225/2025 Users Guide2-18
Page 47

Selecting
Resolution
On a 3225 or 2025 Print System, the message window displays
DEF. RESOLUTION
*400 DPI
7 Press the Next key.
The message window displays
DEF. RESOLUTION
300 DPI
8 Press the Select key.
For 1.5 seconds, the message window displays
300 DPI
IS SELECTED
and then
ENGINE
DEF. RESOLUTION
9 Press the Online/Offline key and the followi ng prom pt
appears:
SAVE CHANGES?
NO
10 Press the Next key until YES appears. Press the Select key
to save the change.
11 Press the Online/ Offl in e key agai n to place the prin ter back
on line, making it available for the next print job.
» Note: It takes approximately 12 seconds for a change in resolution to
take effect.
Daily Opera t ion
2-19
Page 48

Selecting P a g e
Orientation
Selecting Page Orientation
You may select either portrait or land sca pe orient ation. There is no
need to load media differently in the input bin s for landscape orient ation. Using letter-size paper as an example, the illustrat ion below
shows both orientations relative to direction of media movement
through the printer.
Portrait
Landscape
Most applications allow you to select page orientation when printin g.
Use the control panel only if you want to change the default setting for
page orientation. To select the page orientation from the control
panel, use the following procedure:
1 Press the Online/Offline key to take the printer off line.
The indicator light by the key goes out and the message window
continues to display
or
IDLE
2 Press the Menu key to enter the configuration menu.
The message window displays
CONFIGURATION
OPERATOR CONTROL
3 Press the Select key to enter the menu. Press the Next key
until the message window displays:
OPERATOR CONTROL
ORIENTATION
ENERGY SAVER
QMS 3825/3225/2025 Users Guide2-20
Page 49

Number-U p Printing
4 Press the Select key. Press the Next key until the orientation
you want appears in the message wi ndo w (in this exam ple ,
landscape). Press the Select key.
The message window momenta rily displays
LANDSCAPE
IS SELECTED
and then
OPERATOR CONTROL
ORIENTATION
5 Press the Online/Offline key and the followi ng prom pt
appears:
SAVE CHANGES?
NO
6 Press the Next key until YES appears. Press the Select key
and then press the Onl ine/ Offli ne key to place the printer
back on line, making it available for the next print job.
Numbe r-Up Printing
Your print er has the capabil ity to do num ber-up, or “n-up,” printi ng
using QMS Document Option Commands. Number-up printing allows
you to print a high volume of pages on less paper at a fraction of the
time. For example, you may choose 2-up (two pages printed on one
side of a page and printed in half the time) or 4-up (four pages printed
on one side of a page and printed in one quarter of the time). Refer to
QMS Crown Document Option Commands
the
information on how to do number-up printing.
Daily Opera t ion
manual for complet e
2-21
Page 50

Adding Paper to the Input Bins
Adding Paper to the Input
Bins
The upper and lower input bins hold up to 250 sheets of paper each.
Follow these steps to load paper into these bins:
1 Grasp the sides
of the bin and lift
it slightly to pull it
away from the
printer. Set the
bin on a level
surface.
2 Raise the bin
cover to its
upright position
and then lift it
from the bin. Set
the cover aside.
QMS 3825/3225/2025 Users Guide2-22
Page 51

Using the Large-
Capa city Input
Tray
3 Gently tap up to
250 sheets of
paper on the side
of the stack to
even them and
then place the
stack in the bin.
» Note: Make sure that the size of paper you add m atches the s ize
selected on the metal page sensing tab located at the front of the
input bin. The printe r jams if the pape r is not matched properl y. Also,
do not load paper past the limit line on the input bin. Overloading
causes jam s.
4 Replace the bin cover and gently but firmly reinse rt the bin
into the printer, being careful not to damage the guide pins.
Limit Line
Using the Large-Cap acity Input Tray
The LCIT holds up to 1,000 sheets of paper or other media in Letter,
Legal, A4, A5R, B4 and B5 sizes.
Large-Capacity Bin In dicators
The optional large-capacity input bin has one button to lower the
Daily Opera t ion
2-23
Page 52

Using the Large-
Capacity Inp u t
Tray
paper tray and three lights to indicate bin status:
Tray Down
Button
Ready
Light
Paper Mis-set
Light
Cover Open
Light
Press this button before adding paper to the largecapacity input bin. The top and front covers of the bin
must be closed.
The Ready Light is inside the Tray Down button. This light
is visible when the large-capacity bin is ready to be used.
The light flashes while the tray is moving up or down. The
light goes out when the bin cannot be used.
This indicator lights if paper is loaded incorrectly or if the
paper size dial is not set properly. The tray automatically
lowers when the mis-set indicator lights. To correct the
problem, open the bin cover, adjust the positioning of the
paper, or set the size dial to the proper setting and close
the bin cover.
This indicator lights when the top and/or front covers of
the bin are open. If either cover is open, the bin cann ot be
used. Close the covers before continuing.
Adding Paper to the Lar ge-Capacity Bin
The optional large-capacity input bin holds up to 1,000 additional
sheets of print media in Letter, Legal, A4, A5R, B4 and B5 sizes. To
load paper into the bin
1 Press the Tray Down button to lower the tray. The Ready light
within the button flashes while the tray is moving down. (If
the bin runs out of paper while a job is printing, the tray lowers automatically.)
QMS 3825/3225/2025 Users Guide2-24
Page 53

Using the Large-
Capa city Input
Tray
2 When the light stops
flashing , open the bin
cover and move the
chain guide out of the
way).
B4
3 If the paper size is correct, simp ly add more pa per. If you
want to change page sizes, you must first rem ove any
existing paper fr om the bin.
4 Set the page size dial to
the required page si ze.
Make sure the dial clicks
8 x14
into place, or the bin
does not rise.
1/2
Larger
Smaller
5 Bo w the pap er slig htly to insert it into the bin an d load the
paper so it is aligned with the inne rmost ed ge of th e bin.
» Note: Make sur e to chec k the pro per feed edge (see the table
on p age 10 of this c hapter ) before loading paper. Paper jams
can oc cur when paper is loaded impr operly .
Daily Opera t ion
2-25
Page 54

Using the Large-
Capacity Inp u t
Tray
6 Reposition the chain
guide into the slo t at the
center edge of the paper
stack. The chain guide
keeps the paper in the
correct positi on and
helps prevent paper
jams. Make sure the
chain guide is not resting
on top of the paper or to
either side of the slot.
7 Close the bin cover. The tray automatically goes up to the
feed positi on when the cover i s closed. If the tray does not
return to feed position, check to make sure the paper size
dial is locked in the correct position.
QMS 3825/3225/2025 Users Guide2-26
Page 55

Using the Large-
Large-Capac ity
Input Tray
Using the Large-Large- Capacity Inp u t Tray
The Large-Large-Capacity Input Tray (LLCIT) for your QMS 3825/
3225 Print System allows you to load 2,500 sheets of paper at a time,
in letter, legal, ledger, A3, A4, and B4 sizes.
Installing the LLCIT
The LLCIT must be installed by a QMS-authorized service representative. See appendix A, “QMS Customer Support ” if you do not know
how to reach your service contact.
Moving the Printer
Because the LLCIT holds a heavy load, it has a metal prop plate at
the back corner for added support. The prop plate helps prevent the
printer from tipping, even when the LLCIT is fully loaded. If you need
to move the printer, you must
■ Remove the paper from the LLCIT
■ Remove the prop plate to avoid damage to the printer or the floo r
To remove the prop plate, simply remove the two screws holding it in
place. The prop plate slips off easily. Reinstall the prop plate as soon
as the printer is in its new location.
Be careful not to tip the printer while moving it.
WARNING!
printer from place to place, yo u must remove the metal prop plate
from under the back corner of the LLCIT. Be c areful not to tip the
printer while mo ving it.
ACHTUNG!
installiert, m üssen Sie d ie Metallstütze unter der h interen Ecke des
LLCIT entfernen. A chten Sie beim Verschieben dar auf, daß das
Druckssytem nicht kipp t.
Daily Opera t ion
Once the LLCIT is installed, if you need to move the
Soll der Druc ker versetzt werden un d der LLCIT ist
2-27
Page 56

Using the Large-
Large-Capacity
Input Tray
Large-Large-Capacity Input Tray Indicators
The Large-Large-Capacity Input Tray (LLCIT) has step-by-step
instruction illustrations, a button to lower the interior tray, and an error
light to alert you to any condition that requires your attention.
Instruction Illustrations Once you know how to load paper from
reading this manual, the step-by-step
illustrations will help you remember in what
order to perform the various steps.
Tray Down Button Press this button to lower the paper tray inside
the LLCIT. The tray must be at the bottom
position before you can load paper.
If the printer runs out of paper, the tray lowers
automatically.
This button lights when the tray is in motion.
Error Light This red light comes on if paper is loaded
incorrectly , if the paper size d oes not match the
tray’s setting, or if the LLCIT door is open.
Selecting a Paper S ize
Changing the paper size for the LLCIT requires special care to avoid
damaging electrical connections. We recommend t hat you
✓ Evaluate your printing ne eds and choose one size for the
LLCIT
✓ Have the service representative set t he LLCIT for that size
during installation
✓ Do not alter the size setting
» Note: Only a qualified QMS service techn ician should cha nge the LLCIT
size settings. Service instructions for changing the p aper size are
included in cha pter 5, Advanced Printer Use. If you damage the
printer or the Large-Large-Capacity Input Tray while chan ging the size
settings, it will affect your warranty.
QMS 3825/3225/2025 Users Guide2-28
Page 57

Using the Large-
Large-Capac ity
Input Tray
Adding Paper to the LLCIT
The LLCIT holds up to 2,500 sheets of paper in letter, legal, ledger,
A3, A4, and B4 sizes. Once the size is set, add paper of the same
size and orientation as the paper that was previously loaded.
» Note: Only a qualified QMS service techn ician should change the LLCIT
paper size. Servic e instructions are included in cha p ter 5, Advanc ed
Printer Use. If you dama g e the printer or the Large-Large-Capacity
Input Tray while changing the size settings, it will affect yo ur
warranty.
To add paper to the LLCIT
1 Remove the upper and lower input bins.
2 Push the Tray Do wn bu tton to lower the interior paper tray.
The tray moves slowly.
3 When the light stops flashing, open the LL CIT doo r and lift
the clear plastic lid.
4 Remove and discard the top and bottom sheets from the new
paper supply.
Top and bottom sheets sometimes have traces of glue which can
cause jams.
5 Follow the paper manufacturer’s instructions as to which
side of the paper sho uld print firs t.
Printing the proper side first helps prevent excessive paper curl,
which is especially important if you are using the optional LargeCapacity Output Stacker. The paper wrapper usually has an
arrow to indicate which side to print first. Load paper so the arrow
points up.
6 Bow the paper slightly to insert it into the bin, and slide it in
until it is aligned with the in ner most edg e of the bin.
» Note: Make sure to use the same size paper in th e same
orientation as you were using before.
7 Close the lid, and shut the door until it snaps.
8 Wai t for the paper tray to reach its uppermos t posi tion.
Daily Opera t ion
2-29
Page 58

Selecting an
Output Bin
Selecting an Output Bin
The QMS 3825/3225/2025 Print System has three stan dard outp ut
bins:
■ The upper bin
■ The lower bin
■ The side bin
An optional large-capacity output stacker is available for the 3825
Print System:
The illustration below show s the locations of these bins. The upper
and lower bins have a combined capacity of 1,500 sheets (stacked
face down). The side bin can hold up to 100 sheets (stacked face up).
The upper and lower bins automatically shif t the pages right or left to
separate print jobs. This “offset stacking” feature helps users find print
jobs quickly. The optional large capacity out put stacker holds up to
2,750 sheets of 20-pound (75 g/m
pound (90 g/m
2
) in Letter/A4 size only.
2
) paper or 2,400 sheets of 24-
Upper
Lower
Side
(folds ou t)
Optional
Large-Capacity
Output
Stacker
The indicators on the control panel light to show the currently
selected output bin. The system admi nistrat or chooses a def ault out-
QMS 3825/3225/2025 Users Guide2-30
Page 59

Selecting an
Output Bin
put bin by using the control panel and the Outputbin selection in the
Operator Control menu. Choose Upper for the upper output bin.
Choose Lower for the lower output bin. Choose Side for the side
any
(face-up) output bin. Choose * for
LCOS, if installed) output bin. Choose LCO S for the optional large capacity stacker, if it is installed.
The LCOS, an option for the 3825 Print System, handles only Lette r/
A4 size paper. If you are using a different paper size and printing from
an application, LCOS will not be a selectable optio n. If you are prin ting without using a printer driver, and you select LCOS, the printer will
automatical ly use a different face -down outp ut bin .
» Note: The side bin displays as a choice only when it is open. The large-
capacity output stacker displays only when it is installed.
For example, follow these steps to select the lowe r output bin:
1 Press the Online/Offline key to take the printer off line.
The indicator light by the key goes out and the message window
continues to display
face-down (upper, lower, or
or
IDLE
2 Press the Menu key to enter the configuration menu.
The message window displays
CONFIGURATION
OPERATOR CONTROL
3 Press the Select key to enter the menu. Press the Next key until
the Outputbin menu appears. The message window displays
OPERATOR CONTROL
OUTPUTBIN
Daily Opera t ion
ENERGY SAVER
2-31
Page 60
Selecting an
Output Bin
4 Press the Select key. Press the Next key until the lower ou t-
put bin appears in the mess age wind ow. Press the Select
key.
The message window momenta rily displays
and then
5 Press the Online/Offline key. The following prom pt app ears:
6 Press the Next key until YES appears. Press the Select key
and then press the Onl ine/ Offli ne key to place the printer
back on line, making it available for the next print job.
LOWER
IS SELECTED
OPERATOR CONTROL
OUTPUTBIN
SAVE CHANGES?
NO
QMS 3825/3225/2025 Users Guide2-32
Page 61

Using th e Side
Media Exit
Using the Side Media Exit
Heavy paper stock, transparencies, and labels wor k best when they
follow the straightest pat h throug h the printe r. Use the side exit and
the upper input bin for the straightest path.
» Note: Jobs using the side media exit are stacked face up, so duplex
jobs require sorting.
To use the side media exit:
1 Pull the side m edi a
exit away from the
printer.
2 Slide the extension
out completely.
» Note: When closing the side media exit, always slide the
extension back into place first.
Daily Opera t ion
2-33
Page 62

Using the Large-
Capacity Outp u t
Stacker
Using the Large-Cap acity Output Stacker
The stacker stacks paper face down, so jobs can be located and separated easily. A clear window on the top of the stacker allows you to
monitor work face up on its way to the stacker.
» Note: For best performa nc e from your stacker, we recommend that
you use Xerox 4024 paper. Th e wrapper on the paper has an arrow to
indicate which side should be printed first. Load p aper with the arrow
pointing up. Usin g proper paper, fed properly, helps reduce curl and
prevent jams.
Once the Large-Capacity Output Stacker is installed, the main power
supply to the printer enters through the stacker.
» Note: Always use the stacke r power switch as the main power switch..
To remove your print jobs from the stacker:
1 Press the Online/Offline key on the printer con tr ol panel to
take the printer off line.
2 Press the Tray Down key on the stacker and wait for the tray
to reach the bottom.
» Note: If t he tr ay is completely full, it is at the bottom and you
do no t n eed to press the Tray Down key.
3 Open the stacker door and remove all the paper from the
stacker.
» Note: Removing all print jobs helps the u nit stack jobs more
neatly and helps prevent pap er jams.
4 Close the stacker door. The tray will rise automatically.
5 Press the Online/Offline key to put the printer back on line.
❖
QMS 3825/3225/2025 Users Guide2-34
Page 63

3
Periodic Maintenance
In This Chapter . . .
■ Routine maintenance s chedule
■ Adding toner
■ Replacing the cleaning unit, ozone filter, chargers, shield plate,
and printer drum
■ Cleaning the quenching lam p, separa tion pawls, and tra n sfer
corona wire
■ Clearing the maintenance me ssage
Page 64

Introduction
Introduction
Routine maintenance is required to keep your printer operating properly. This chapter includes a maintenance schedule and instructions
for all basic maintenance tasks, such as adding toner, replacing disposable printer parts, and cleaning specific areas of the printer.
Routine Maintenance
Depending upon the number of pages printed, your printer requires
replacement of several disposable parts and cleaning of several
areas to ensure excellent print quality.
A maintenance message appears when any of these parts needs to
be replaced or cleaned. The chart on the next page covers maintenance you can perform. It defines what needs to be done when each
maintenance message appears. The second chart covers maintenance which should be performed only by a QMS service representative. Following the two charts are detailed instructi ons for all
maintenance and cleaning you should perform . Once the mainte nance is complete, you must clear the message. Instructions for
clearing the maintenance message are at the end of this chapter.
Printer parts may wear more or less quickly depending on use. The
following factors influence the wear:
■ Print job complexit y
■ Page size and paper orientatio n
■ Duplex printing
QMS 3825/3225/2025 User's Guide3-2
Page 65

Routine M a inten ance
Maintenance You Can Perform 3825/3225
Message Appears at Maintenance Needed Instructions
Toner Out 1 5 ,000
pages
Replace:
■ Toner cartridge
Clean:
■ Quenching lamp
page 3-5
page 3-11
■ Separation pawls
■ Transfer corona
page 3-12
page 3-15
wire
Replace
Cleaner
Maintenance
Due
30,000
pages
100,000
pages
Replace:
■ Cleaning unit
Replace:
■ Main charger
■ Transfer/separation
page 3-18
page 3-20
page 3-20
charger
page 3-20
page 3-22
page 3-23
WARNING!
■ Shield plate
■ Ozone filter
■ OPC Drum
To pr even t personal injury, always turn off the p r inter
before clean ing or replacing prin ter parts.
ACHTUNG!
Um Verletzungen zu vermeiden, sollte der Drucker immer
ausgeschaltet werden, wenn Sie das Gerät reinigen oder Drucker teile
austauschen wollen.
Periodic Maintenance
3-3
Page 66

Routine Ma intenance
Maintenance You Can Perform 2025
Message Appears at Maintenance Needed Instructions
Toner Out 1 0 ,000
pages
Replace:
■ Toner cartridge
Clean:
■ Quenching lamp
page 3-5
page 3-11
■ Separation pawls
■ Transfer corona
page 3-12
page 3-15
wire
Maintenance
Due
20,000
pages
Replace:
■ Main charger
■ Transfer/separation
page 3-20
page 3-20
charger
page 3-22
page 3-18
page 3-23
page 3-20
Replace
Cleaner
30,000
pages
Replace Drum 8 0,00 0
pages
WARNING!
To pr event personal inju ry, always turn off th e printer
■ Ozone filter
Replace:
■ Cleaning unit
Replace:
■ OPC Drum
■ Shield pla te
before clean ing or replac ing printer p arts.
ACHTUNG!
Um Verletzungen zu vermeiden, sollte der Drucker immer
ausgeschaltet werden, wenn Sie das Gerät reinigen oder Drucker teile
austauschen wollen.
QMS 3825/3225/2025 User's Guide3-4
Page 67

Routine M a inten ance
Maintenance that Requires QMS Service
3825/3225/2025
Message Appears at Maintenance Needed
Maintenance2 Due 320,000 pages
on 3825/3225
300,000 pages
on 2025
Maintenance3 Due 2,400,000
pages
Replace:
■ Development unit
■ Fusing unit
■ Paper feed rollers
Clean:
■ Inside of the drawer
■ Registrat ion rollers
and mylar
■ Transport belt
■ Bottom pl a te of the
printer
Replace:
■ Process fan unit
Periodic Maintenance
■ Registrat ion roller unit
3-5
Page 68

Adding Toner
Adding Tone r
The message window indicates when the print er ’s toner is low.
3825 The QMS 3825 Print System uses specially developed
microfine toner to achieve excellent print quality. Always
make sure to use QMS microfine toner when replacing to ne r.
To replenish the tone r supply, follow these directions:
Caution:
the ton er is low. Doing so overfills the toner bin and results in toner
spilling into the internal c omp art ment.
The printer should be off line before to ner is replaced.
Do no t add toner before the message window indicates that
1 Make sure that the printer
is off line. Grasp the sides
of the printer’s front cover
and pull it down to open.
2 P ush up the latch on the
left-hand side of the
printer, and pull out the
internal com partment.
QMS 3825/3225/2025 User's Guide3-6
Page 69

Adding Toner
3 Grasp the toner cover
3825/3225
with one hand so that your
thumb can press against
the release tab. Lift the
cover up and away from
the printer and set it aside.
Be careful not to spill any
toner on other parts of the
printer or on yourself.
2025
4 Rem o ve a toner cartrid ge from i ts box and shake the car-
tridge vigorously for 10 to 15 seconds.
Periodic Maintenance
3-7
Page 70

Adding Toner
5 I nser t the cartrid ge at a
slant so that the round bar
on the cartridge fits into
the groove on the righthand side of the toner unit.
Close the cartridge over
the toner unit so that the
release tab clicks into
place.
3825/3225
2025
QMS 3825/3225/2025 User's Guide3-8
Page 71

Adding Toner
6 Insert the winding handle
supplied wi th the ton er
cartridge into the rectangular notch on the side of
the cartridge.
Turn the handle clockwise
until the red line appears.
This removes the plastic covering from beneath the cartridge and releases the toner
into its compartment .
3825/3225
2025
7 T ap the top of the cartridge to release any toner that may be
sticking to the inside. Rem ove the cartrid ge an d discard it.
Periodic Maintenance
3-9
Page 72

Adding Toner
8 Replace the toner cover.
3825/3225
2025
9 Firmly push the in ternal comp artm en t back into th e printer
so that the latches and levers lock into place.
10 Close the front cover.
QMS 3825/3225/2025 User's Guide3-10
Page 73

Keeping the Printer
Clean
Keeping the Printer Clean
The printer requires cleaning in several areas whenever you add
toner. When it is necessary to clean the inside or outside of your
printer, follow these directions:
■ Always turn off the printer before cleaning to prevent an
injury.
■ Do not use sharp objects to clean the printer.
■ Do not use cleaning solutions to clean the inside of your
printer. To prevent print er damage , use only a waterdampened, lint-free cloth.
Cleaning the Quenching Lam p
The quenching lamp is simple to clean. No special fluid is needed,
and cleaning only takes a few minutes with a water-dampened cloth.
The quenching lamp is visible with the printer cover open and is
located beneath the main charger. To clean the quenching lamp, follow these steps :
1 Open the printer cover.
2 Firmly pull out the
quenc h ing lamp.
Periodic Maintenance
0000119
Quenching lamp
3-11
Page 74

Keeping the Printer
Clean
3 Wip e the top of the
quenching lamp
with a clean waterdampened cl oth.
4 Reinsert the quenching lamp.
» Note: Be sure to insert th e quenching lamp properly since it will
damage the drum if inserted incorrectly. Make sure the slots
on eac h side of the quenching lamp align with the guide trac ks.
5 Leave the front cover open for cleaning the separation pawls.
Cleaning the Separation Pawls
The separation pawls are attached to the fusing unit, which is located
to the left of and beneath t he drum and clean ing unit compartm ent.
WARNING!
and allow the fusing unit to cool for at least 40 minutes before
cleaning. If your prin ting needs do not allow you to let the printer cool
for 40 min utes, u se a piece of thick cloth to p rotect your skin from the
heat while removing the fusin g unit.
ACHTUNG!
oder reinigen wollen, schalten Sie bitte den Drucker aus und lassen Sie
die Fusing Unit mindestens 4 0 Minuten abkühlen. Wen n Ihr
Arbeitsablauf es nicht zuläßt, daß der Drucker 40 Minuten nicht
genutzt werden ka nn , verwenden Sie bitte einen dicke n Stofflappen
oder A rbeitshandsc huhe, um Ihre Haut vor der Hitze zu schütz en,
während S ie die Fusing Unit r einig en oder ausbauen.
The fu sing unit is very hot. You must turn the pr inter off
Die Fusing Unit ist sehr heiß. Wenn Sie diese auswechseln
QMS 3825/3225/2025 User's Guide3-12
Page 75

Keeping the Printer
Clean
To clean the separat ion paw ls, fol low these instructi on s:
1 Push the fusing unit
release lever to the
left and pull the fusing unit ou t until it
stops. Place your
hand beneath the
fusing unit and
push the release
lever to the left once
again to remo ve it
complete ly from the
internal compartment.
3825/3225
2025
2 Place the fusing unit on a level surface so that you can see
all four separation pawls.
Periodic Maintenance
3-13
Page 76
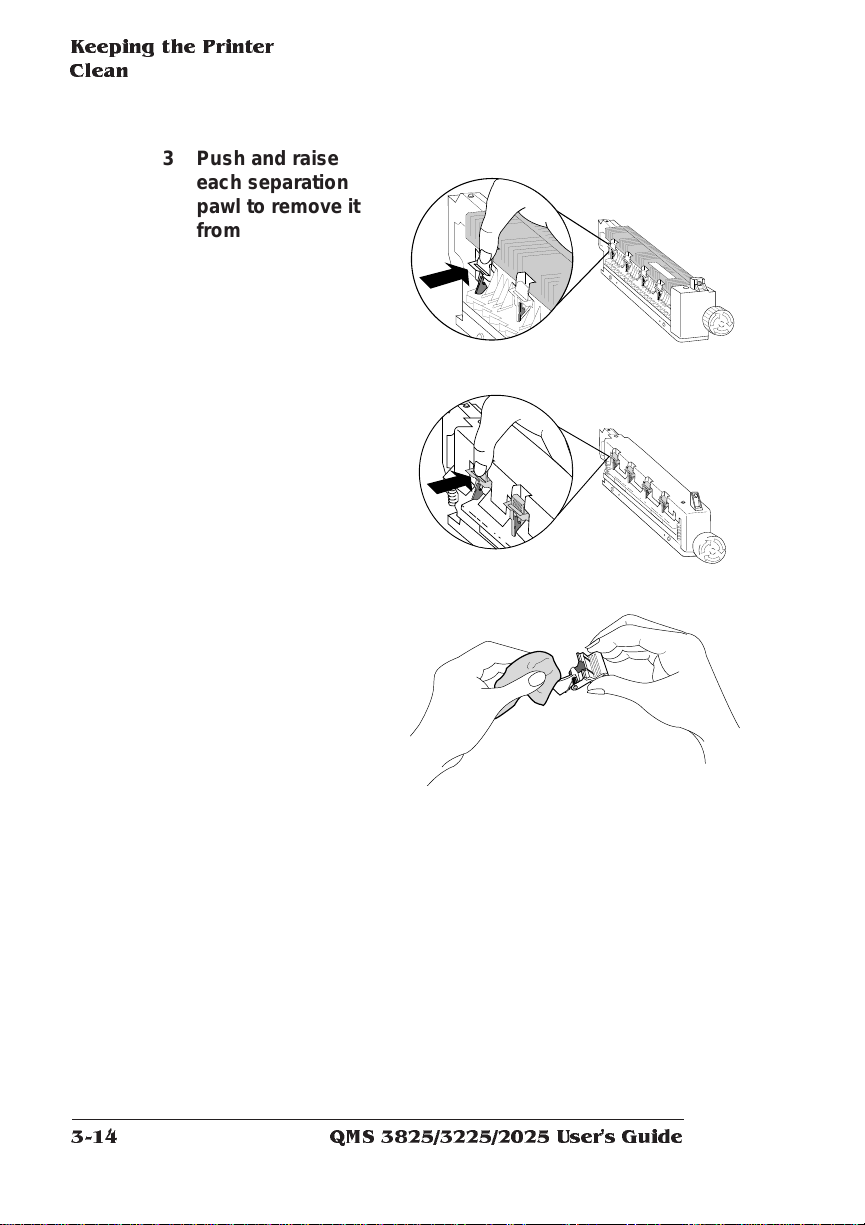
Keeping the Printer
Clean
3 Push and raise
each separation
pawl to remove it
from the fusing unit.
4 Clean each pawl by
wiping it with a
water-dampened
cloth.
You ma y need to use
a little force or a fingernail to remove
any toner that continues to adhere to the
pawl. Never use any
fluid besides water to
clean the separation
pawls.
3825/3225
2025
5 Replace each pawl by angling it slightly to in sert it into a
slot and then pr essi ng down to snap i t in place.
QMS 3825/3225/2025 User's Guide3-14
Page 77

Keeping the Printer
Clean
6 Rein sert the fusi ng unit by align ing it with the rai ls insi de
the internal compar tm ent and firmly push ing the unit un til
it snaps into place.
7 Close th e printer’s
front co v e r.
Cleaning the Transfer Corona Wire
If you have performed preventive maintenance on the printer and
print quality remains low, the transfer corona wire may have toner on
it. Use the following instructions to clean the transfer corona wire:
1 Turn off the printer.
2 Open the printer cabinet
and remove the cleaning
guide from insi de the
cabinet.
» Note: Use a cotton swab to clean the t ransfer corona wire if the
cleaning guide is not available.
Periodic Maintenance
3-15
Page 78

Keeping the Printer
Clean
3 Open the front cover.
4 Pull out the transfer
charger using its tab.
0000119
PULL
A
2
A
1
A
4
B
5 At tach the cl eani ng
guide to the edge of the
transfer charger.
QMS 3825/3225/2025 User's Guide3-16
Page 79
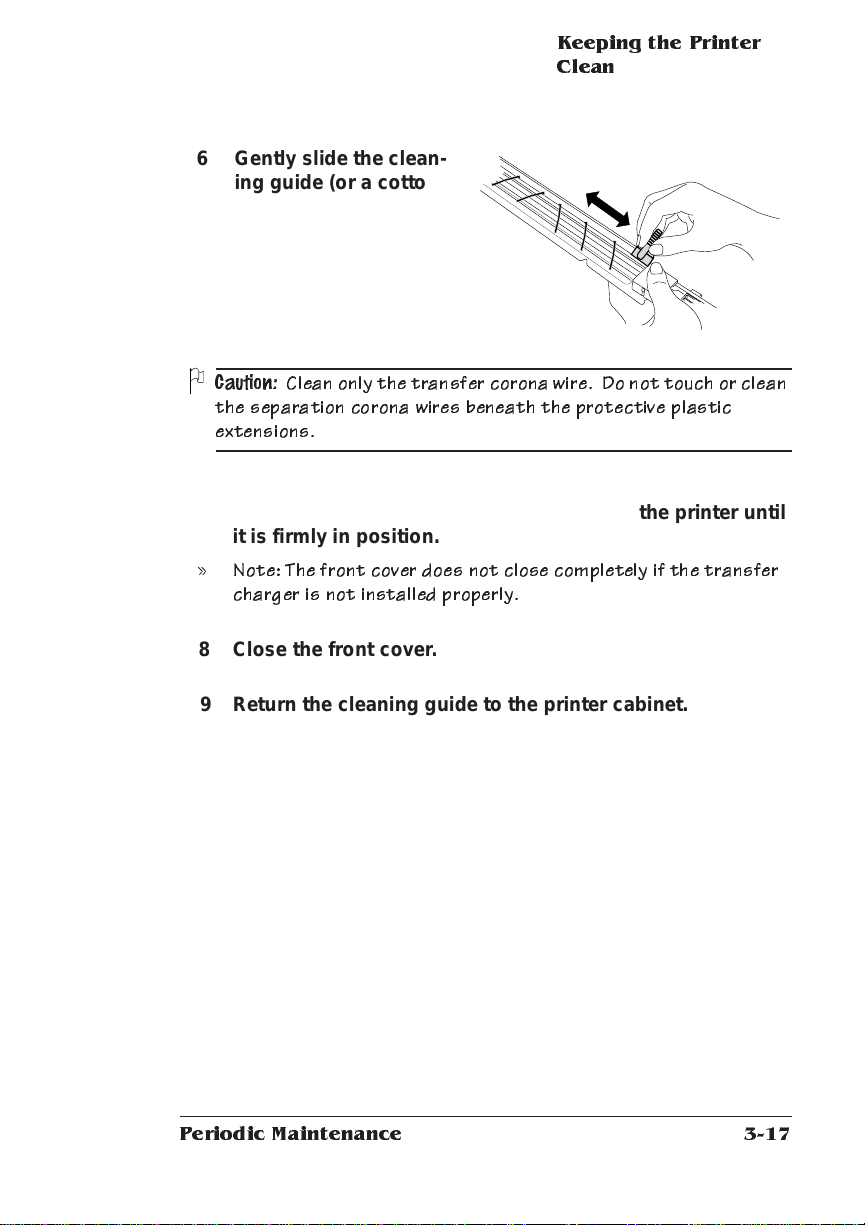
6 Gently slide the clean-
ing guide (or a cotton
swab) back and forth to
clean the corona wire.
Keeping the Printer
Clean
Caution:
Clean only the transfer corona wire. Do n ot touch or clean
the separation corona wires beneath the p rotective plastic
extensions.
7 Carefully reinse rt the transfer ch arger into the printer un til
it is firmly in position.
» Note: The front cover does not c lose comple tely if the transfer
charger is not installed properly.
8 Close the front cover.
9 Return the cleani ng guide to the printer cabinet.
Periodic Maintenance
3-17
Page 80

Replacing the Cleaning Unit
Replacing the Cleaning Unit
The cleaning unit clears loose or excess toner from the page and the
printer’s drum. Replace the cleaning unit every 30,000 pages printed.
To replace the cleaning unit
1 Gras p the sides of the
printer’s front cover and
pull it down to open.
2 Push up the latch on the
left-hand side of the
printer and pull out the
internal compartment.
3 Locate the cleaning unit
release lever. Hold down
the side button on the
lever while turnin g it to
the left. Release the side
button and leave the
lever in the upright
positio n.
QMS 3825/3225/2025 User's Guide3-18
Page 81

Replacing the
Cleaning Unit
4 Cover the drum with a piece of paper to protect it from light
and any handling damage . Remem b er to remove the paper
after installing the new cleani ng unit.
5 Lift up the used cleaning
unit to remove it. If the
cleaning unit does not
easily come out when
lifted, check to make
sure that the release
lever on the outside of
the compartm en t is in
the upright po siti on. Dispose of the used cleaning unit properl y.
WARNING! The blade is sharp . Do not touch the surface of the
cleaning blade on either the used or new c leaning unit
ACHTUNG!
Bitte berühren Sie niemals die Schnittfläche der
Reinigungsklingeweder der gebrauchten noch der neuenda die
Klinge s ehr scharf ist.
6 Place the new cleani ng
unit straight down into
the grooves in the
printer compartment and
ease it into place. The
cleaning unit fits in only
one direction. The cleaning blade and surfaces
face to w a rd the pr i n t
drum.
7 Rotate the lever release to lock the clean ing unit back i nto
positio n.
Periodic Maintenance
3-19
Page 82

Replacing the C hargers
and Shield Pla te
8 Firmly push the internal com partm en t back into the pri nter
so that the latches and levers lock into place.
9 Cl o s e th e front c o v e r.
Replacing the Chargers and Shield Plate
The two chargers and shield plate are visible with the printer cover
open. The chargers are located next to the compartment handle and
the shield plate is located just above the handle. To replace these
parts
1 Make sure the pr inte r is idle and turned off.
2 Grasp the sides of the
printer’s front cover and
pull it down to open.
QMS 3825/3225/2025 User's Guide3-20
Page 83

Replacing the
Chargers an d Shield
Plate
3 F irm ly pu ll out the used
shield plate, and dispose
of it properl y. Insert the
new shiel d plate, an d
click it into place.
0000119
shield plate
Caution:Be carefu l not to touch the clear surface of the shield
since this deteriorates print q uality.
4 Pull out the used main
charger, and dispose of
it properly. Insert a new
main charger, and click it
into place .
0000119
main charger
Caution:Be carefu l not to touch the wire or mesh plate o n the
charger since th is will also im pact print quality.
Periodic Maintenance
3-21
Page 84

Replacing the Ozone
,,,
,,,
,,,
,
Filter
5 Pull out the used
transfer/separation
charger, and dispose of
it properly. Lower the A1
lever, and then insert a
new transfer/se para tion
charger, being careful
0000119
PULL
A
2
A
1
A
4
B
not to touch the clear
plate. Return the lever to
its original position.
A1 lever
6 Close th e fr o nt cov e r.
Replacing the Oz o ne Filter
The ozone filter is located on the left side of the printer behind a
vented covering. To replace the filter
1 Remove the vented
cover by pushing the
latch at the top of the
cover and pulling the
cover up and away from
the printer.
QMS 3825/3225/2025 User's Guide3-22
O
1
Page 85

2 Remove the used ozone
filter from the cover and
dispose of it properl y.
Place a new filter inside
the cover.
Replacing the Printer
Drum
Caution!
Because the filter ischarcoal based, some of the c harc oal
may rub off on your hands. Be careful when handling your pr int job
or touching your c lothing.
3 Reattach the vented
cover to the left side of
the printer and click it in
place.
WARNING!
The ozone filter protects the enviro nment and your
O
1
health from har mful ozone. Never operate the prin ter with the
ozone filter removed since long-term exposure to unfiltered ozone
is hazardou s.
ACHTUNG!
Der O zonfilter schützt Irh e Gesundheit u nd die Um welt
vor s chädlich em Ozonausstoß; benutzen Sie den Drucker deshalb
bitte niem als ohne Ozonfilter.
Replacing the Printer Drum
The printer drum should be replaced after printing approximat ely
100,000 pages on the 3825 and 3225 Print Systems; every 80,000
Periodic Maintenance
3-23
Page 86

Replacing the Printer
Drum
pages on the 2025 Print System. Since the drum is sensitive to light
and fingerprints, remember the followin g tips when replacing the
drum or opening the compartm ent contai ning t he drum:
■ Do not expose the drum to any light brighter than normal
room light.
■ Do not expose the drum to room light for more than five minutes.
■ When opening the compartme nt containin g the drum to
access another printer part, cover the drum with a sheet of
paper to help shield the light.
■ Do not touch the surface of the drum or let the drum rest on
any area that might scratch the surface.
■ Do not remove the protective wrap from the drum unti l
instructed to do so.
Follow these instructions to re place the printer drum :
1 Grasp the sides of the
printer’s front cover
and pull it down to
open.
2 Push up the latch on
the left-hand side of
the printer and extend
the internal compartment.
QMS 3825/3225/2025 User's Guide3-24
Page 87

3 Locate the cleaning
unit release lever. Hold
down the side but ton
on the lever, and turn
the lever to the left.
Release the side
button, and leave the
lever in the upright
position.
4 Locate the develo p-
ment unit release lever.
Move the lever clockwise until it locks in to
place.
Replacing the Printer
Drum
0000119
5 Remove the worn drum by pushing one side forward while
raising the other sid e up and out of its comp artm en t. Dis pose of the worn drum properly.
6 Install a new drum (still
wrapped) by angling it
slightly and fittin g on e
end into the groove at
the right of the printer.
Periodic Maintenance
3-25
Page 88

Replacing the Printer
Drum
7 Remove the protective
wrap by pulling it away
from the drum.
Caution:
Do no t touch the surface of the drum once the pro tec tive
wrap is removed since fing e r p r in ts deteriorate print quality.
8 Reposition the release levers.
9 Firmly push the internal compartment back into the printer
so that the latches and levers lock into place.
10 Close th e fron t cover.
QMS 3825/3225/2025 User's Guide3-26
Page 89

Clearing the
Maintenan ce
Messages
Clearing the Maintenanc e Messages
A maintenance message appears in the printer ’s message window
when routine maintenance is due. After completing the maintenance,
you must use the printer control panel to remove the message. To
clear the maintenance message use this procedure:
1 Press the Online/Offline key to take the printer off line.
2 Press the Menu key. Th e message window displays the
Operator Control menu.
3 Press the Next key until ADMINISTRATION displays on the
second line of the message window.
4 Press the Select key to open the Administratio n menu .
ADMINISTRATION now displays on the first line of the message window.
5 Press the Next key until ENGINE displays on the secon d line.
6 Press the Select key to enter the Engine submen u.
7 Press the Next key until MAINTENANCE DUE displays on the
bott om lin e.
8 Press the Select key. ON appears on the bottom line.
9 Press the Next key until OFF appears on the botto m line.
10 Press the Select key to turn off the maintenance messag e.
11 Press the Online/Offline key to exit the menu. When the mes-
sage window displays SAVE CHANGES?, press the Next key
to change the NO to YES, and then press the Select key.
This clears the maintenance message and resets the internal
maintenance counter when you place the printer back on line.
12 Press the Online/Offl in e key to put the printer back on line.
❖
Periodic Maintenance
3-27
Page 90

Page 91

4
Troubleshooting Printer Problems
In This Chapter . . .
■ Control panel messa ges
■ Printer troubleshooting
■ Preventin g paper jams
■ Paper jam locations
■ Clearing paper jams
■ Printing problems
■ Paper jam indicator problems
■ Print quality problems
■ Placing a service call
Page 92

Introduction
Introduction
This chapter covers printer problems that may occur as a result of
■ Application software
■ Computer hardware
■ Printer hardware
Control Panel Messages
Printer control panel mes sages help you locate many pro blem s.
When the printer needs operator assistance, the message window
displays one of the following messages:
ADJUST LCIT BIN T he large-capacity or large-large-capacity bin is not
inserted correctly.
ADJUST
OUTPUTBIN
ADJUST
CLEANER ABSENT The cleaning unit is not installed.
CLEAR DUPLEXER
JAM
CLEAR PAPER
EJECTION JAM
CLEAR PAPER FEED
JAM
CLEAR PAPER PATH
JAM
CLOSE DUPLEXER
DOOR
CLOSE FRONT DOOR The front door is open and must be closed.
CLOSE SIDE
DOOR(S)
NUMBER
SIZE
The specified output bin is not set, or the bin cover is
open.
BIN Check the specified input bin to make sure it is
inserted correctly and the cover is closed.
Media has jammed while passing through the
duplexer.
Clear jam from output areas.
Clear jam from the paper feed area.
Check the printer icon for location of jam and clear
jammed media from all highlighted locations.
The duplexer door is open and must be closed.
One or more of the side doors is open and must be
closed.
QMS 3825/3225/2025 User's Guide4-2
Page 93

Control Panel
Messages
DEVELOPER
ABSENT
DEVELOP WARNING It is nearly time to replace the developer unit
FUSER ABSENT The fuser is missing from the engine.
LCIT COVER OPEN Close cover on the large-capacity or large-large-
LOW TONER It is nearly time to refill the toner
MAINTENANCE DUE Specific maintenance is due. Refer to chapter 3,
NUMBER
OUTPUTBINFULL
OPC DRUM ABSENT The OPC drum is missing from the engine.
OPC WARNING It is nearly time to replace the OPC drum
OUTPUTBIN
NUMBER
PUT
NUMBER
REPLACE CLEANER The cleaning unit must be replaced
REPLACE OPC DRUM The OPC drum must be replaced
TONER OUT The toner cartridge is empty.
JAM
SIZE
PAPER IN
INPUTBIN
The developer unit is not installed.
capacity input tray.
“Periodic Maintenance” for information about specific
maintenance needed.
The specified output bin is full.
Media has jammed between the printer engine and
the specified output tray.
The specified input bin or cassette needs media of
the specified size.
When the printer requires service, operation stops and the message
window displays CALL FOR SERVICE followed by the location of the
problem and error number. Have this information availab le when you
call for service.
» Note: A service message sometimes occur s as a result of an unusual
combination of events, not becau se of an actual problem . When the
printer stops and a service message displays in the message window,
turn the printer off and back on again. This often clears the message
and printer ope ration res um es. Always try this before making a service
call.
Service calls should be placed to the vendor from whom you purchased the printer. I f the vendor cannot provide service, see appendix
A, “QMS Customer Support.”
Troubleshooting Printer Proble ms
4-3
Page 94

Printer
Troubleshooting
Printer Troubleshooting
The following is a list of possible printer problems and solutions.
Many problems can be corrected as you follow the steps on this list.
1 Does the printer power light come on?
YES - Go to number 2.
NO - Check the following:
■ Is the power cord plugged into both the power outlet and the
printer?
■ Is the printer’s power switch in the ON position (|)?
■ Is the power outlet working? Plug a lamp int o the outlet and
see if it turns on. If not, the outlet may be faulty.
■ Does the line voltage of the power outlet match the print e r’s
power requirements? See appendix B, “Technical Specifications.”
2 Can you print a start-up page?
YES - Go to question 3.
NO - Check the following:
■ Does the currently selected input bin have paper?
■ Are all printer covers closed securely?
■ Is there a paper jam? Jams locations are indicated on the
printer icon on the control panel.
3 Is the printer receiving data from the compu ter?
YES - Go to question 4.
NO - Check the following:
■ Check the status of the Receiving indicator. If it blinks after
the file is sent, the printer is receiving the data.
■ Print a status page from the control panel. If you are using the
serial interface, are the baud rates (speed of data transmis-
QMS 3825/3225/2025 User's Guide4-4
Page 95

Printer
Troubleshooting
sion) of the printer, computer, and the application the same?
See chapter 4, “Administration/Communications Submenu,”
in the system administrator ’s guide.
■ If you still cannot identify the problem, contact your QMS vendor .
4 Is the printer printi ng codes o r not printi ng at all when in
ESP mode (emu la tion sensing processor)?
YES - Check the following:
■ Reconfigure the port to the specific printer emul ati on of the
file you are trying to print. You ca n use the PS Executive
Series Utilities, the control panel , or a remote console to
change emulations.
■ If a PostScript file prints PostScript emulation statements
while in ESP mode, increase the em ulat ion ti me out wit h the
PS Executive Series Util ity or the control panel.
■ If you continue to have problems with the ESP mode, contact
QMS Customer T echnical Assurance. See appendix A, “QMS
Customer Support.”
Troubleshooting Printer Proble ms
4-5
Page 96

Preventing Jams
Preventing Jams
There are several things you can do to reduce the occurrence of
media jams.
■ Your paper, labels, and overhead transparencies must meet
the guidelines set for the printer.
■ If you have problems with paper double feeding, remove it
from the input bin and fan the edges. The sheets may be
sticking together.
Caution:
electricity, which incr eases double feeding and jams.
■ Remove the top and bottom sheets from each package of
paper. The top and bottom sheets some times have traces of
glue which can cause jams.
■ Print media must be stored away from moisture and humidity.
■ Many paper manufacturers place an arrow on the lab el to
indicate which side should be printed first. Place paper so the
guide arrow points up. If you cannot determine which way to
place paper and you have repeated jams, remove the paper
from the input bin, rotate the sta ck a half turn, turn the stack
over, and put it back in the bin. Printing the proper side first
can help prevent excessive curl, which is especially important
if you are using the optional Large Capacity Output Stacker.
■ If none of the above relieves repeated paper jamming, not if y
your QMS vendor.
Do n o t fan transpar e n cies since this causes static
QMS 3825/3225/2025 User's Guide4-6
Page 97

Media Jam Locations
When a media jam occurs, the printer icon on the printer ’s control
panel lights in the area closest to the jam. Frequent jams in any area
indicate that area should be checked, repaired, or cleaned. Repeated
jams may also signal that you are using the wrong weight media.
Media jams can occur in the following areas:
Media Jam
Locations
» Note:
When clearing a media ja m, take special care t o remove all media
without tearing. If the media tears, inspect the medi a path closely before
closing the printer. Small scraps of media left in the media path may not be
sensed by the printers medi a jam indicators . If you experie nce frequent
media jams, check every possibl e location in the printe r for media. Under
some circumst ances, the media scraps may prevent the printing of any job.
Troubleshooting Printer Proble ms
4-7
Page 98

Clearing Media J ams
Clearing Med ia Jams
Clearing an Upper or Lower Input Bin Jam
To clear a jam in the upper or lower input bin
1 Grasp the upper or lower
input bin with both hands
and lift it slightl y to pul l it
out.
2 Pull the jammed media
gently from the media feed
area.
3 Replace the in put bi n.
4 Open and close the pr in ter’s front cover to clear the jam
signal .
QMS 3825/3225/2025 User's Guide4-8
Page 99

Clearing Media
Jams
Large-Capacity Input Bin Jam or Large-Large-Capacity Input Bin Jam (3825/3225 only)
When a jam occurs in the optional large-capacity bin or the optional
large-large-capacity bin, the tray inside the bin automatically moves
down.
1 If the jammed media is not
visible, go to 2. Otherwise,
do this
a Op en the large- or
large-larg e-capacity
bin.
b Large-capacity only:
Move the chain guide
out of the way.
c Remove the jammed
media.
d Large-capacity only:
Reposition the chain
guide.
e Clo se the top and
front covers.
f Open and close front
door to clear jam
message.
large-capacity bin jam
large-large-capacity bin jam
Troubleshooting Printer Proble ms
4-9
Page 100

Clearing Media J ams
2 Open the cabinet door.
3 Turn the knob behind
the door clockwise to
release the jammed
paper.
4 Close the cabinet door.
5 Open the printer’s front
cover.
6 Pull down the jam
release lever (labeled B)
and remove the jammed
media.
The jam release lever
automatically retu rns to
its proper position.
7 Close the front cover.
QMS 3825/3225/2025 User's Guide4-10
 Loading...