Whirlpool WFG320M0BW, WFG320M0BB, WFG320M0BS, AGR5330BAB, AGR5330BAW Installation Instructions
...
INSTALLATION CHECKLIST FOR GAS RANGES
1. Determine if a fuel conversion is needed
Your range will require a fuel conversion if you intend to connect to propane.
NOTE: Propane conversions must be completed by a qualified service technician (see the gas conversion section in the installation instructions that came with your range).
 WARNING
Explosion Hazard
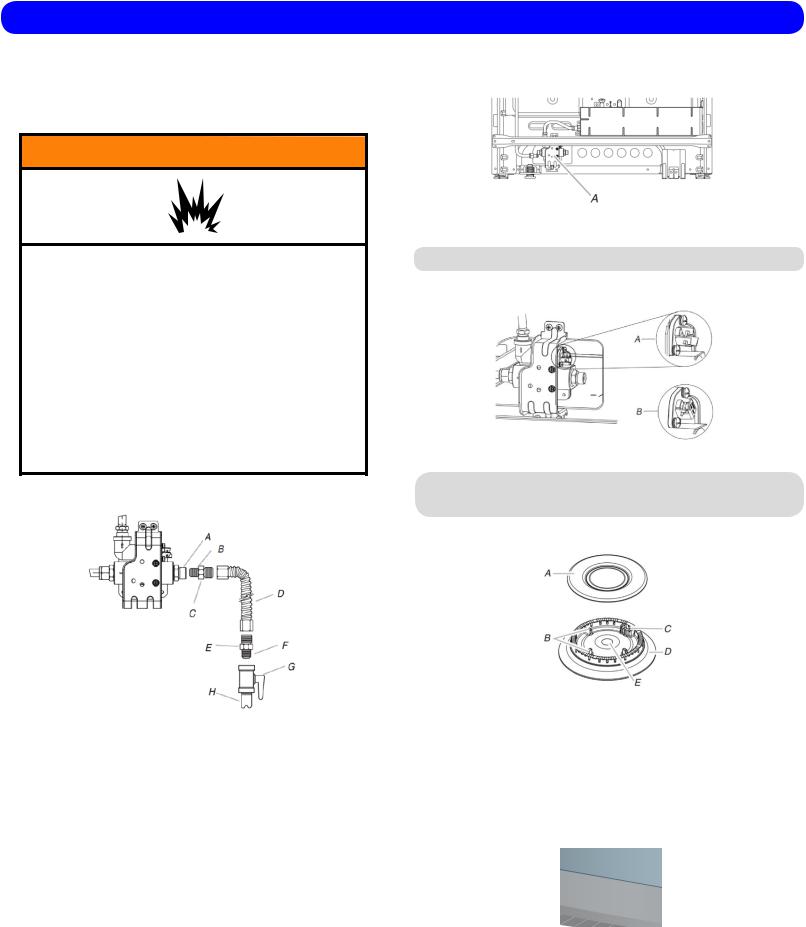
Use a new CSA International approved gas supply line. Install a shut-off valve.
Securely tighten all gas connections.
If connected to propane, have a qualified person make sure gas pressure does not exceed 14" (36 cm) water column.
Examples of a qualified person include:
licensed heating personnel,
authorized gas company personnel, and authorized service personnel.
Failure to do so can result in death, explosion, or fire.
2. Verify properly tightened fuel connections.
A. Pressure regulator |
E. Adapter |
connection fitting |
F. Use pipe-joint compound. |
B. Use Pipe-Joint compound. |
G. Manual shutoff valve |
C. Adapter |
H. 1/2" (1.3 cm) or 3/4" |
D. Flexible connector |
(1.9 cm) gas pipe |
Example of how to make a gas connection.
IMPORTANT: All connections must be wrench-tightened. Do not make connections to the gas regulator too tight. Making the connections too tight may crack the regulator and cause a gas leak. Do not allow the regulator to turn when tightening fittings.
3. Verify the gas regulator is “ON”
1.Locate gas pressure regulator in the back of the range.
Gas pressure regulator location. Rear view of range.
IMPORTANT: Do not remove the gas pressure regulator.
2.Check that the gas pressure regulator shutoff valve is in the“ON” position.
Gas regulator lever position “A. ON” and “B. OFF”
IMPORTANT: The factory default setting is the “ON” position. If the range does not work, verify that the valve is in the “ON” position.
4. Verify surface burner function
A. Burner cap |
E. Burner base |
B. Alignment pins |
F. Gas tube opening |
C. lgniter |
|
Surface gas burner assembly
To ignite burner:
1.Push in and turn knob counter-clockwise to LITE. All surface burners will click. Only the burner with the control knob turned to LITE will produce a flame.
2.Turn knob to anywhere between High and Low. The clicking will stop.
To ignite burner
 Loading...