

Whirlpool SC009, SC012, SC022, SC018 User Manual And Installation Manual

SPLIT TYPE WALL MOUNTED
ON/OFF AIR CONDITIONER
USER MANUAL AND
INSTALLATION MANUAL
MODELS:
SC009
SC012
SC018
SC022


BEFORE USING THE APPLIANCE
To make the most out of your new appliance, please read the user instructions carefully and keep them
handy for future consultation.
SAFETY PRECAUTIONS
• The Installation and service/repair must be
performed by a qualified technician, in
compliance with the producer's instructions and
following local safety norms. Do not repair or
replace any parts of the appliance unless it is
specifically written in the user instructions.
• Do not pull the power supply cord to remove it
from the socket. Do not twist or press the
power supply cord, and make sure it is not
broken.
• Do not touch the power plug, circuit breaker
and emergency button when your hands are
wet.
• Do not insert your fingers or foreign substances
into the air inlet/outlet of indoor&outdoor unit.
• Never block the air inlet or outlet of indoor and
outdoor unit.
• Physically or mentally disabled people, children
and people without any experience with the
product are only allowed to use the appliance if
they have had specific training on how to
operate the appliance by a person responsible
for their security and well-being. The appliance
is not intended for use by disabled people and
very young children without supervision.
• Children should be supervised to ensure that
they do not play with the appliance (including
remote control).
1
AIR CONDITIONER PRECAUTIONS
Please strictly follow the below instructions:
• Long and direct exposure to cool air might be
harmful to health. It is advisable to set the
louvers in order to avoid direct cool air and
deflect it within the room.
• Upon malfunctioning first turn the appliance off
by pressing the ON/OFF button on the remote
control, then disconnect it from power supply.
• Do not switch the appliance on and off too often
as this can damage the appliance.
• Do not place any objects on the outdoor unit.
• Disconnect the air conditioner from the power
supply if it is to be left unused for a long period
of time or during a thunder/lightning storm.
• This product contains Fluorinated Greenhouse
Gases covered by the Kyoto Protocol, the
refrigerant gas being in a hermetically sealed
system. Refrigerant gas: R410a has a Global
Warming Potential (GWP) 1975.
• This appliance has been made of recyclable or
re-usable material. Scrapping must be carried
out in compliance with local waste disposal
regulations. Before scrapping it, make sure to
cut off the mains cord so that the appliance
cannot be re-used.
• For more detailed information on handling and
recycling of this product, contact your local
authorities who deal with the separate collection
of rubbish or the shop where you bought the
appliance.
SCRAPPING OF PACKAGING
• The packaging can be 100% recycled as
confirmed by the recycling symbol . The
various parts of the packaging must not be
dispersed in the environment, but must be
scrapped in line with local authority regulations.
SCRAPPING OF APPLIANCE
• By ensuring that this product is disposed of
correctly, you will help to prevent potentially
negative consequences for the environment and
for human health.
• The symbol on the product or on the
documents accompanying the product indicates
that this appliance should not be treated as
household waste, but must be given to the
appropriate local gathering place where electric
and electronic appliances are stored and
recycled.
SAFEGUARDING THE ENVIRONMENT
2
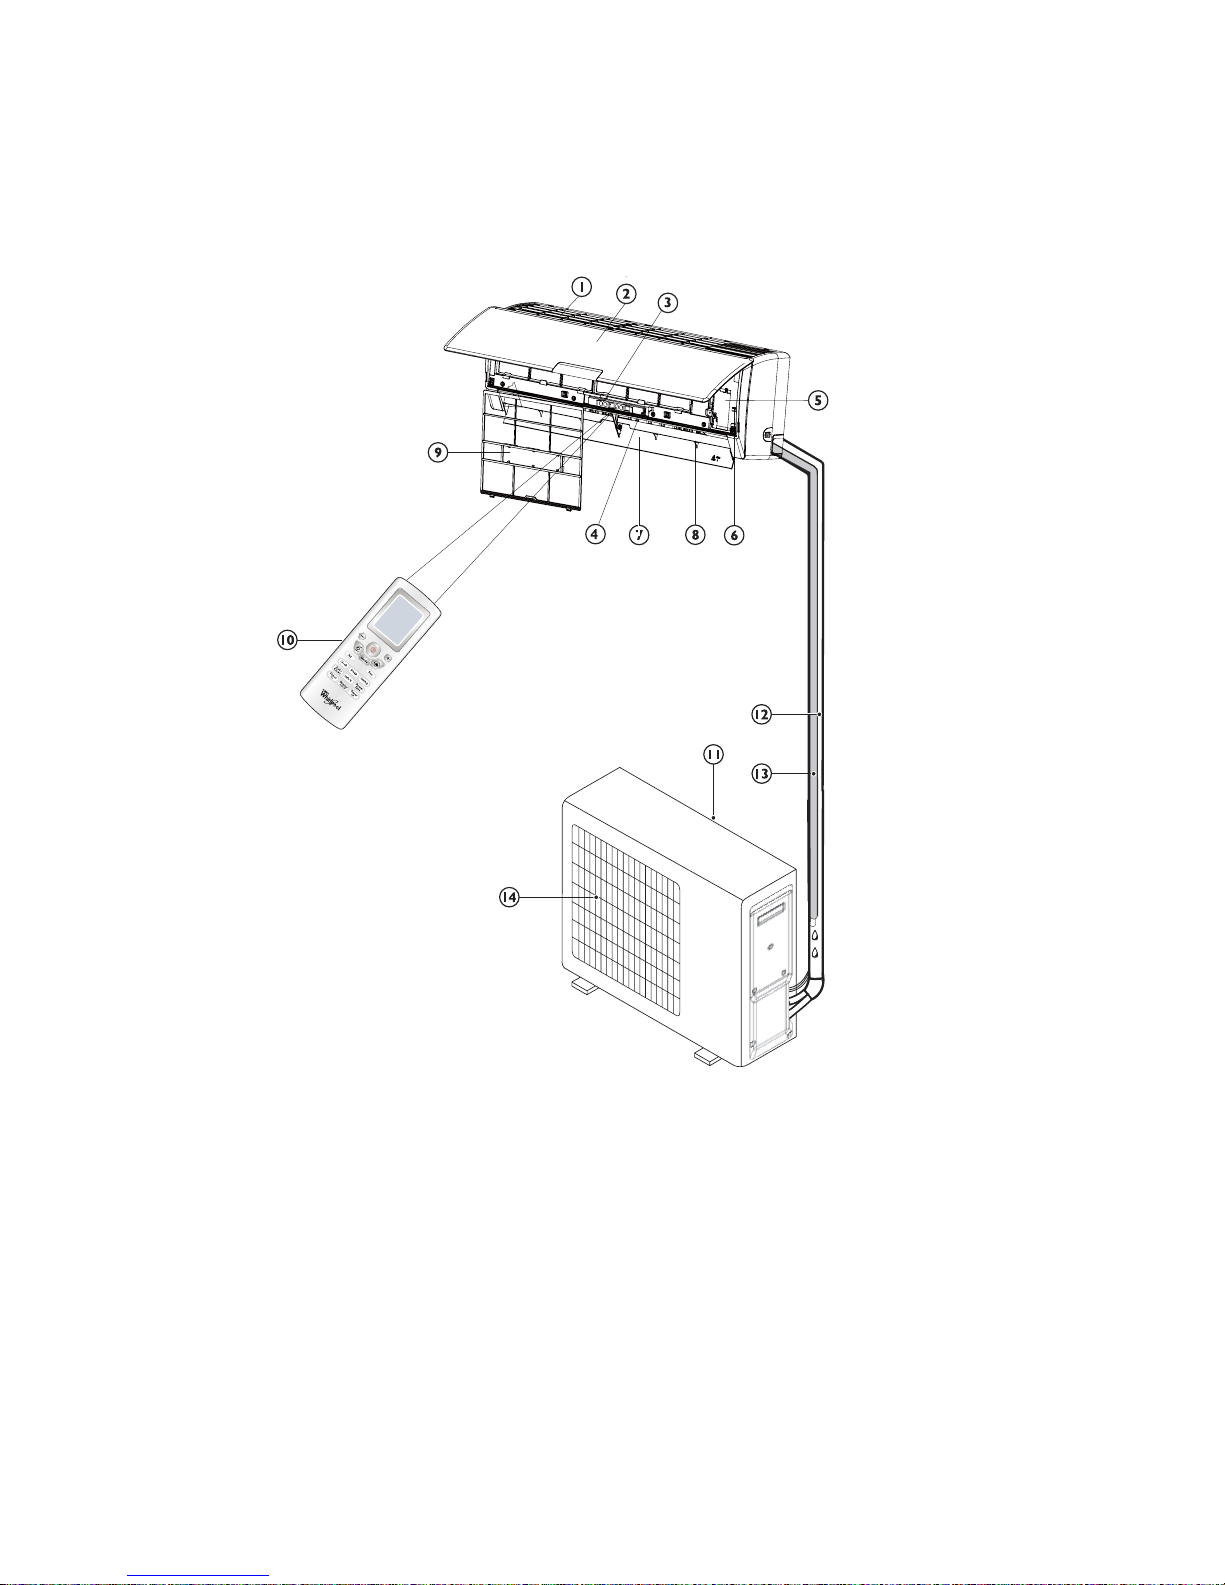
PRODUCT DESCRIPTION
Indoor unit
1. Air Intake
2. Front Panel
3. Display panel
4. Air Outlet
5. Electrical box
6. On/off switch
7. Vertical Adjustment Louver
8. Horizontal Adjustment Louver
9. Air Filter
10. Remote Control
Outdoor unit
11. Air Intake
12. Pipes and Power Connection Cord
13.
14. Air Outlet
Images in the user instructions are based on external views of standard models, shape and design vary
according to the model.
3
Drain Hose (Note: Condensate water drains at
Cooling or DRY operation.)
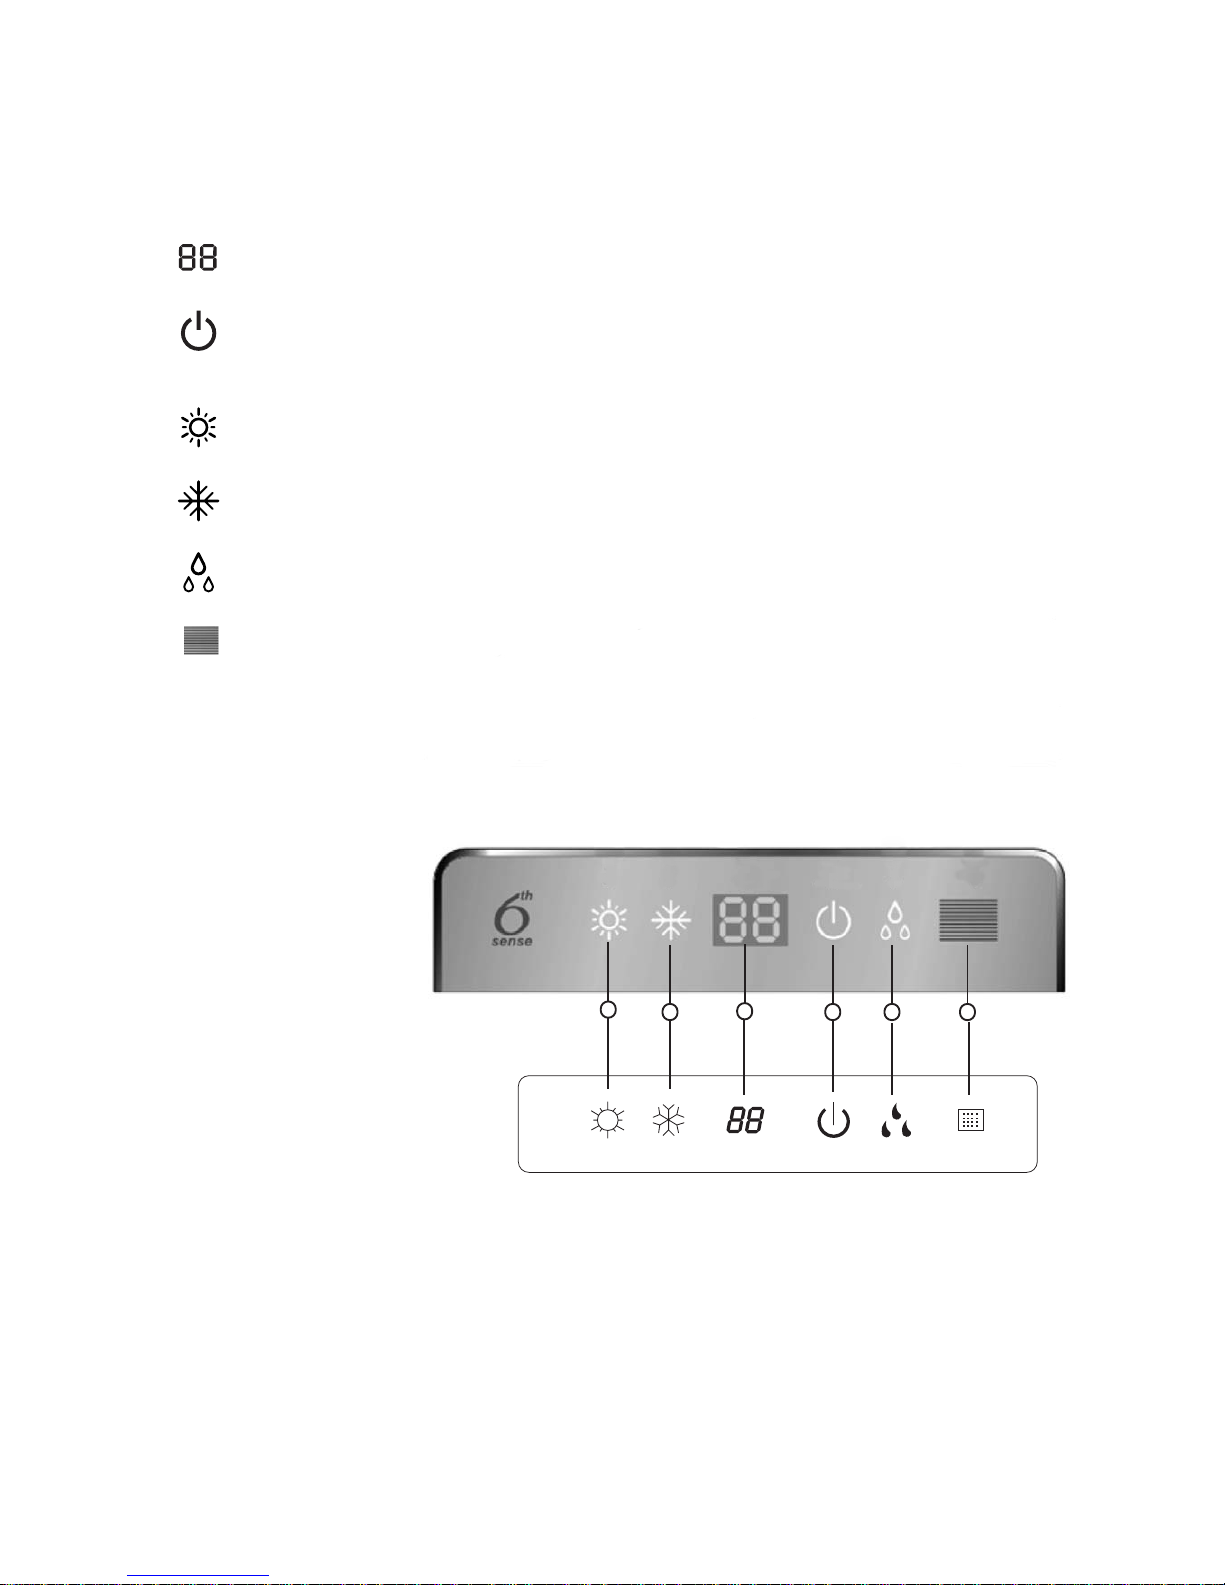
CONTROL PANEL DISPLAY INDICATORS
DESCRIPTION
Temperature indicator (1)
Displays set and room temperature.
Running indicator (2)
It lights up in red when connecting to power supply.
It lights up in white or green during operation.
Heating indicator (3)
It lights up during heating mode.(For heating model only.)
Cooling indicator (4)
It lights up during cooling mode.
Dehumidifying indicator (5)
It lights up during Dehumidifying mode
9K/12K/18K
22K
Signal Receptor (6)
4
3
1
2 54 6
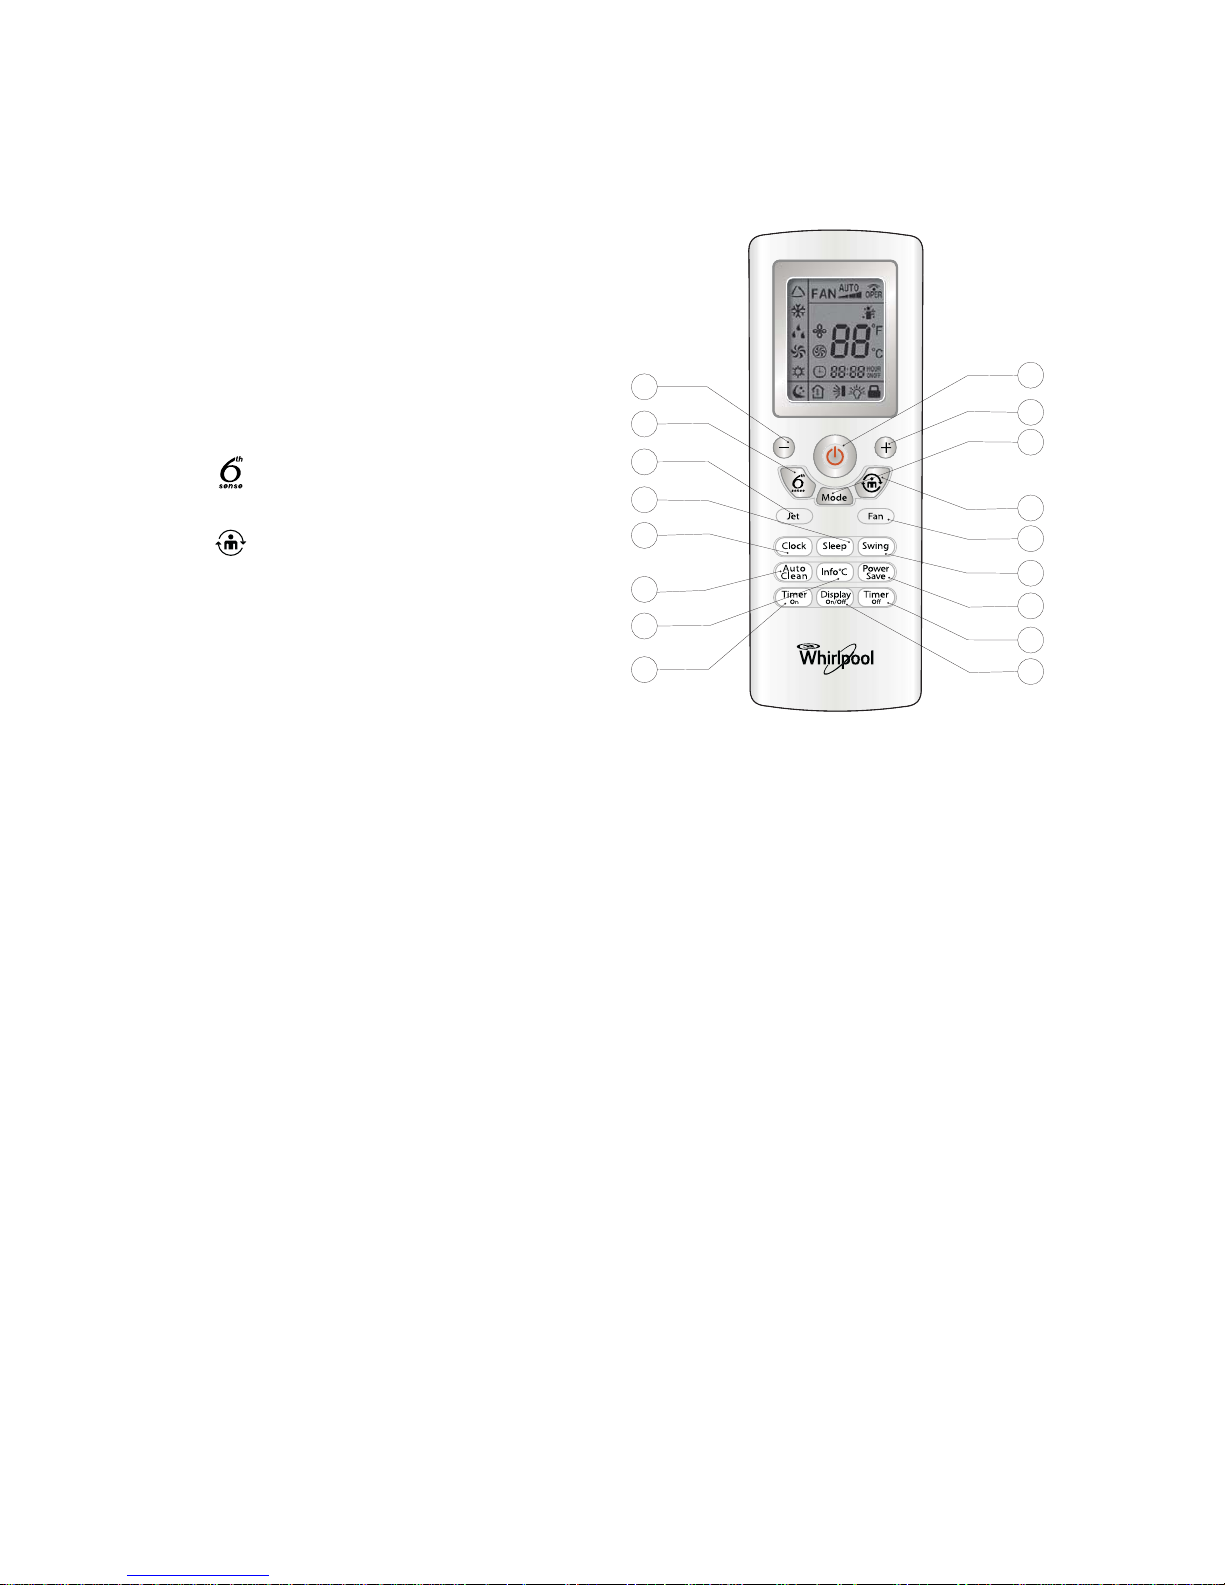
REMOTE CONTROL FUNCTIONS
AND INDICATORS
1. ON/OFF BUTTON
Starts and/or Stops the appliance by pressing
this button.
2-3. TEMPERATURE SETTING BUTTONS
Used to set temperature.
Used to set time for clock.
Used to set time in timer mode.
4. MODE BUTTON
Used to select the operation mode.
5. BUTTON
Used to set or cancel 6th sense operation.
6. BUTTON
Used to set or cancel around U operation.
7. FAN BUTTON
Used to select fan speed in sequence auto,
high, medium or low.
8. SWING BUTTON
Used to stop or start horizontal adjustment
louver swinging and sets the desired up/down
airflow direction.
9. POWER SAVE BUTTON
Used to set or cancel power save operation
10-11. TIMER ON and TIMER OFF BUTTON
Used to set or cancel the timer operation.
12. DISPLAY ON/OFF BUTTON
Used to turn on/off display light on indoor unit.
13. INFO °C BUTTON
Used to display room temperature or set
temperature on indoor unit control panel.
14. AUTO CLEAN BUTTON
Used to set or cancel auto clean operation.
15. CLOCK BUTTON
Used to set the current time.
16. SLEEP BUTTON
Used to set or cancel Sleep operation.
17. JET BUTTON
Used to start or stop the fast cooling operation.
2
5
17
16
15
14
13
11
1
3
4
6
7
8
9
10
12
5
6
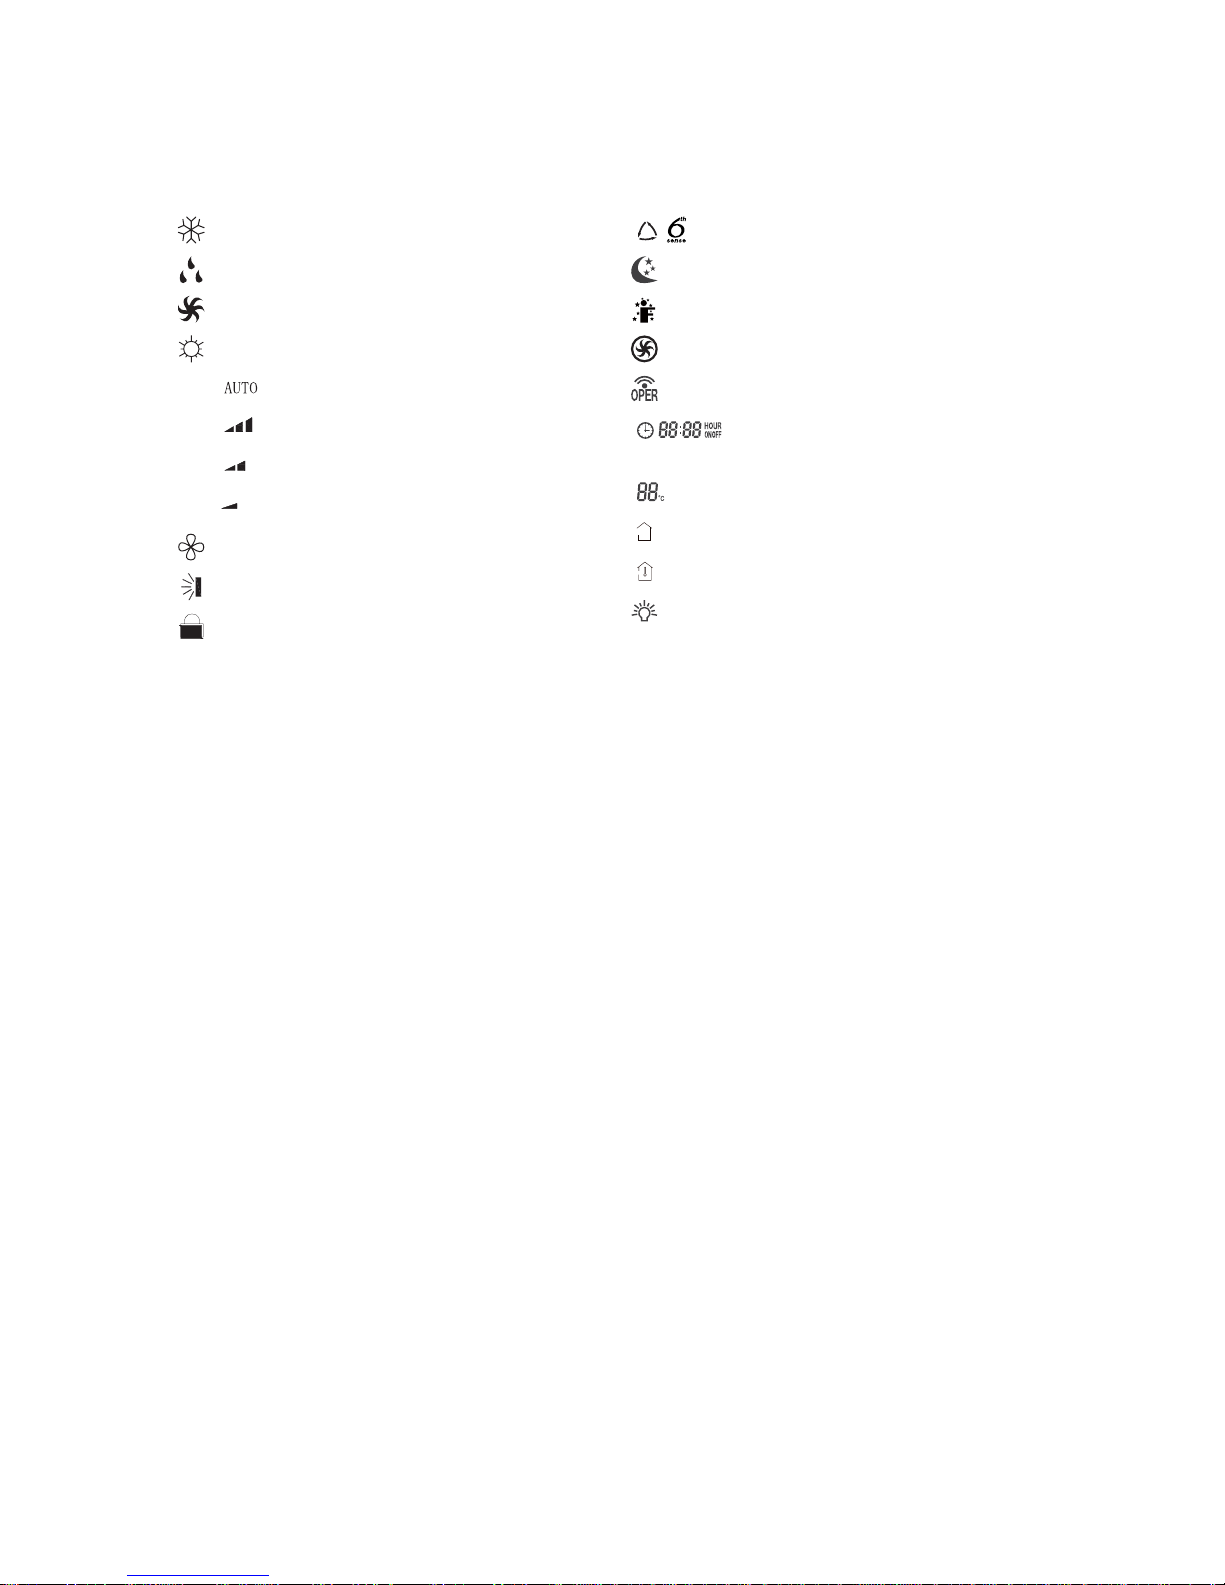
INDICATOR SYMBOLS ON RC DISPLAY
Cooling indicator
Dehumidifying indicator
Fan only indicator
Heating indicator(For heating model only.)
Auto fan speed
High fan speed
Medium fan speed
Low fan speed
Auto clean indicator
Swing indicator
Lock indicator
indicator
Sleep indicator
Around U indicator
Jet indicator
Signal transmission
Display set timer
Display current time
Temperature display
Set temperature dispaly indicator
Room temperature display indicator
Front panel display light on indicator
FAN
°F
FAN
FAN
FAN
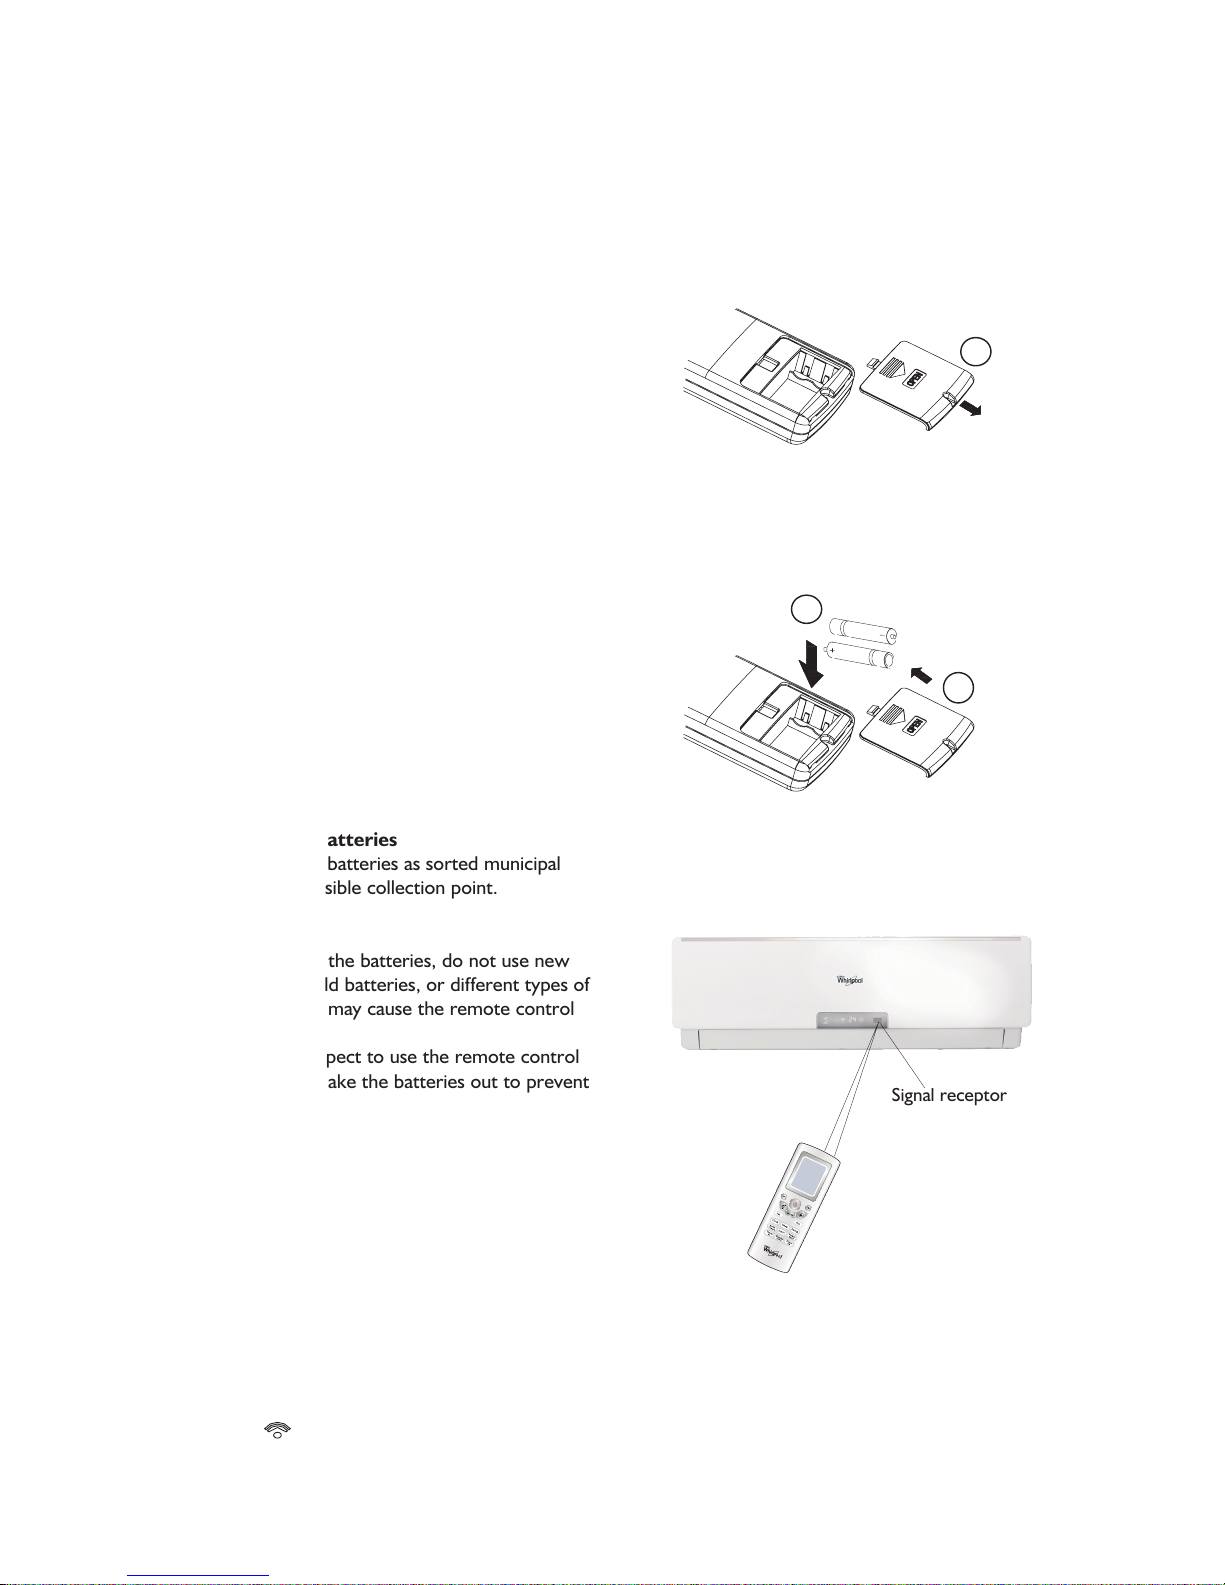
STORAGE AND TIPS FOR USING THE
REMOTE CONTROL
How to insert the batteries
1. Unscrew the screw on the battery cover.
Gently press down on the battery cover and
push in the direction of the arrow to remove, as
shown.
2. Insert 2 AAA batteries (1.5V) into the
compartment.
Ensure that "+" and "-" polarity is correctly
positioned.
3. Close the battery cover on the remote control.
Put back the screw on the remote control and
fasten it tightly.
How to remove the batteries
Unscrew the screw and remove the battery cover
in the direction of the arrow.
Press the positive pole of the battery softly with
your fingers, then draw the batteries out of the
compartment.
children are forbidden to remove the batteries
from the remote control in order to avoid danger
of swallow.
Disposal of the batteries
Please discard the batteries as sorted municipal
waste at the accessible collection point.
Precautions
• When replacing the batteries, do not use new
batteries with old batteries, or different types of
batteries as this may cause the remote control
to malfunction.
• If you do not expect to use the remote control
for some time, take the batteries out to prevent
leakage of battery acid in the remote control.
• Operate the remote control within effective
range. Keep the remote control at least 1 meter
from any TV set or HI-FI equipment.
• If the remote control does not work normally,
take the batteries out and reinstall after 30
seconds. If it still does not work install new
batteries.
• To operate the appliance by remote control,
point the remote control at the receiving device
on the indoor unit, to ensure receiving
sensibility.
• To send a message from remote control, the
symbol will flash for 1 second. On receipt
of the message, the appliance will emit a beep.
• The remote control will operate the air
conditioner at a distance of up to 7m.
• Each time the batteries are replaced in the
remote control, the remote control is pre-set at
6th Sense mode.
Appearance may vary
depending on the model you select
1
2
3
7
Caution: All this should be done by adults,
Signal receptor
 Loading...