

WHIRLPOOL AKP9 7860 NB Daily Reference Guide

Quick guide
EN
THANK YOU FOR BUYING A WHIRLPOOL PRODUCT
In order to receive a more complete assistance, please
register your product on www . whirlpool . eu/ register
PRODUCT DESCRIPTION
1
2
3
5
4
3
4
2
1
5
CONTROL PANEL
Before using the appliance carefully read the Safety
Instruction.
1. Control panel
2. Circular heating element
(non-visible)
3. Fan
6
7
5
4
3
8
2
1
9
4. Shelf guides
(the level is indicated on the front of the
oven)
5. Door
6. Upper heating element/grill
7. Lamp
8. Identication plate
(do not remove)
9. Bottom heating element
(non-visible)
1 2 5 63 2 4
1. SELECTION KNOB
For switching the oven on by selecting a function. Turn to the position
to switch the oven o.
2. - / + BUTTONS
To decrease or increase the value shown on the display.
3. TIME BUTTON
For selecting the various settings: duration, cooking end time, timer.
ACCESSORIES
The number and type of accessories may vary depending on which model
is purchased. Other accessories that are not supplied can be purchased
separately from the After-sales Service.
WIRE SHELF. Use to cook food or as a support
for pans, cake tins and other ovenproof items of
cookware.
DRIP TRAY. Use as an oven tray for cooking
meat, sh, vegetables, focaccia, etc. or position
underneath the wire shelf to collect cooking
juices.
BAKING TRAY. Use for cooking all bread and
pastry products, but also for roasts, sh en
papillotte, etc.
4. DIS PLAY
5. THERMOSTAT KNOB
Turn to select a desired temperature, activating the selected function.
6. LED THERMOSTAT / PREHEATING
Switches on during the heating process. Switches o once the desired
temperature is reached.
Please note: The knobs are retractable. Press the knobs in the middle and
they pop up.
SLIDING RUNNERS.*
To facilitate inserting or removing accessories.
To t the sliding runners, remove the shelf guides and take the protective
plastic o of them. Fasten the upper clip of the runner to the shelf guide
and slide it along as far as it will go (1). Lower other clip into position. To
secure the guide, press the lower portion of the clip rmly against the shelf
guide (2). Make sure that the runners can move freely. Repeat these steps
on the other shelf guide on the same level. The sliding runners can be
tted on any level. Reposition the shelf guides and rest the accessories on
them.
Insert the wire shelf horizontally by sliding it across the shelf guides,
making sure that the side with the raised edge is facing upwards. Other
accessories, such as the drip tray and the baking tray, are inserted
horizontally in the same way as the wire shelf.
* Available only on certain models
1
2
REMOVING AND REFITTING THE SHELF GUIDES
To remove the shelf guides, lift the guides up and then gently pull the
lower part out of its seating: the shelf guides can now be removed.
To ret the shelf guides, rst t them back into their upper seating.
Keeping them held up, slide them into the cooking compartment, then
lower them into position in the lower seating.
FIRST TIME USE
U
O
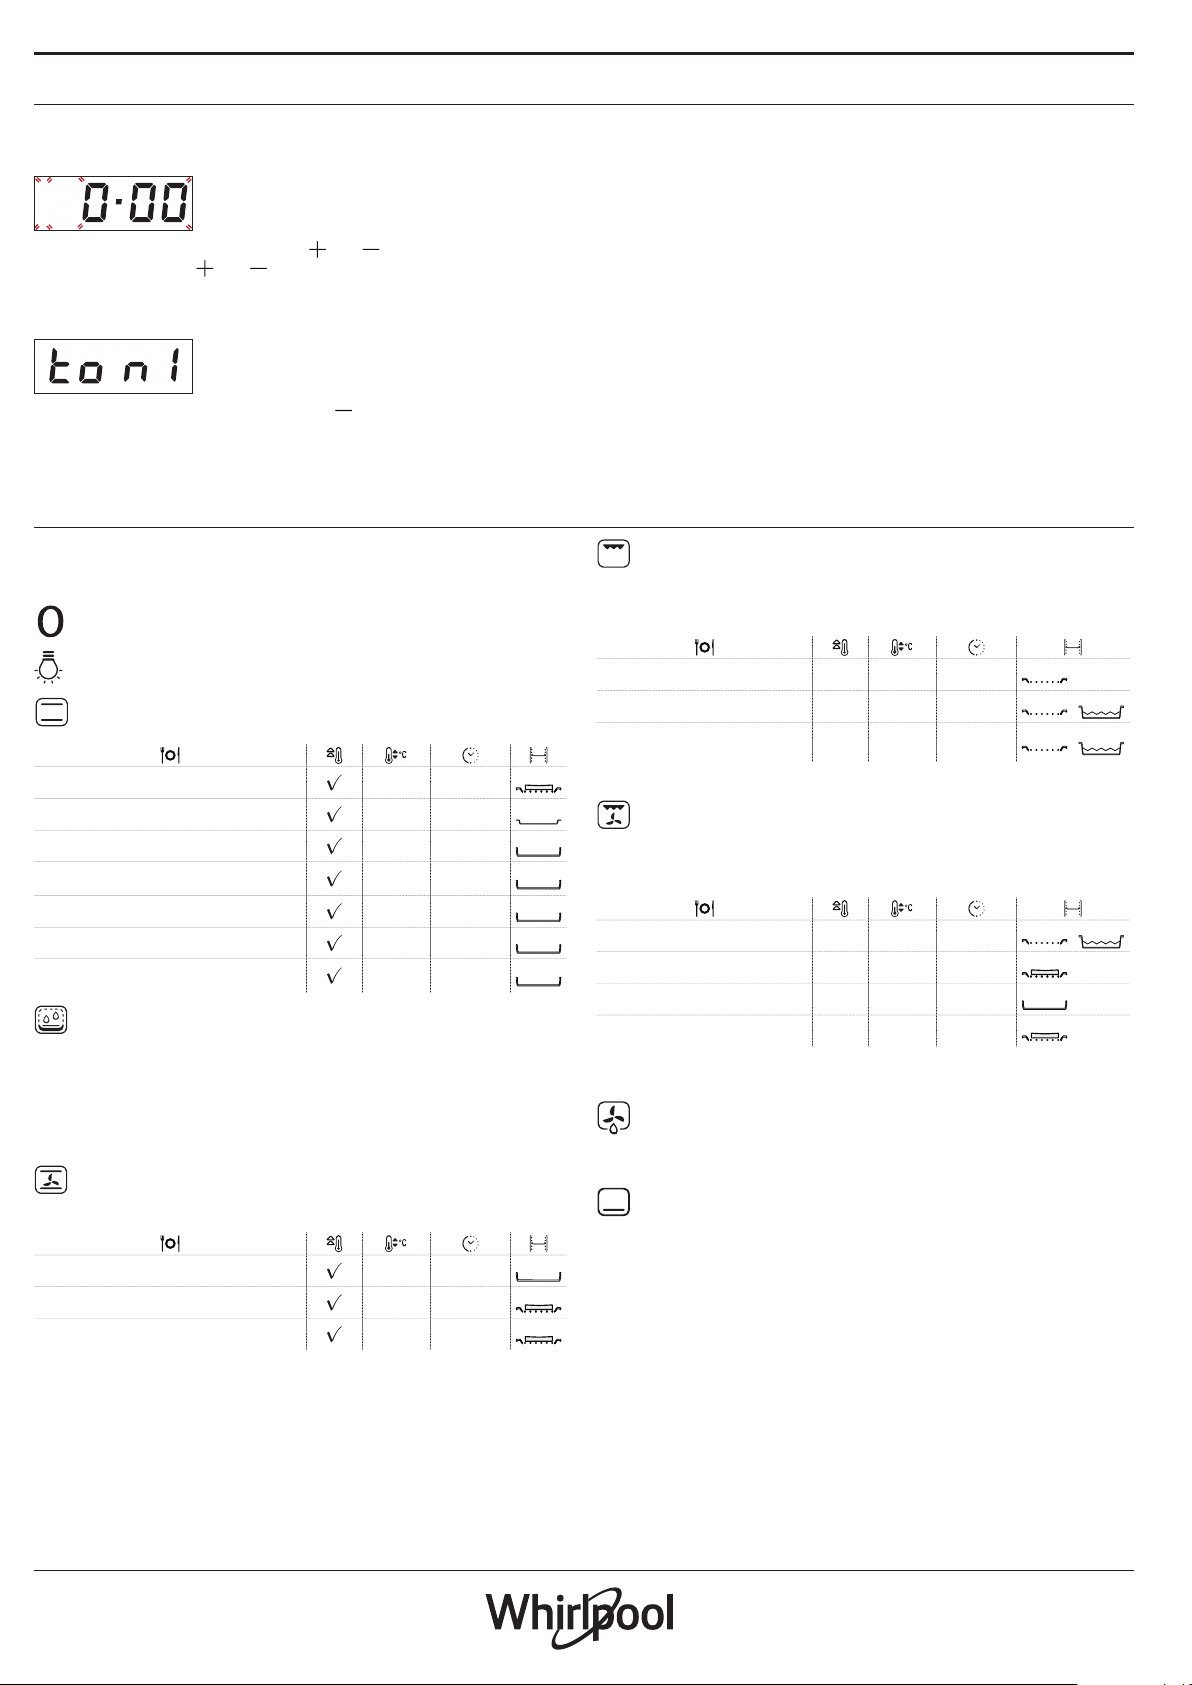
1. SETTING THE TIME
You will need to set the time of the day when you switch on the
appliance for the rst time: “AUTO” and “0.00” ash on the display.
A
U
T
O
To set the time of day, press buttons and at the same time: Set the
time of day using the
and buttons.
Press the time button to conrm.
Having selected the desired time value, it is possible to change the
alarm tone: the display shows “ton 1”.
To select the desired tone, press button , then press the time button
to conrm.
Please note: To change the time of the day afterwards for example
following lengthy power outages, proceed as described above.
FUNCTIONS & DAILY USE
. SELECT A FUNCTION
To select a function, turn the selection knob to the symbol for the
function you require.
OFF
For switching o the oven.
LIGHT
To switch the oven light on.
CONVENTIONAL
For cooking any kind of dish on one shelf only.
Leavened cakes 150 - 175 35 - 90
Biscuits/tartlets 160 - 175 20 - 45
Frozen Pizza 250 10 - 15
Lasagne / baked pasta / canneloni /
ans
Lamb / veal / beef /pork 1 kg 200 80 - 110
Chicken / rabbit / duck 1 kg 200 50 - 100
Baked sh / en papillote 0,5 kg
(llets, whole)
200 45 - 65
175 - 200 40 - 60
SMART CLEAN (Only in some models)
The action of the steam released during this special lowtemperature cleaning cycle allows dirt and food residues to be
removed with ease. This function should be activated only when the
oven is cold and after having poured 200 ml of water into the bottom
of the oven. Set the timer for 30 minutes and the temperature at 90°C.
Once the cycle is nished, wait about 15 minutes before opening the
door.
CONVECTION BAKE
For cooking meat or baking cakes with liquid centre on a single
shelf. This function delivers an even, golden, crisp top and base.
Filled cake 150 - 190 30 - 85
Salty cakes 175 - 200 35 - 55
Stued vegetables 175 - 200 50 - 60
3
3
3
3
3
3
3
3
3
2
2. HEAT THE OVEN
A new oven may release odours that have been left behind during
manufacturing: this is completely normal. Before starting to cook food,
we therefore recommend heating the oven with it empty in order to
remove any possible odours.
Remove any protective cardboard or transparent lm from the oven
and remove any accessories from inside it.
Heat the oven to 250 °C for about one hour. The oven must be empty
during this time. Follow the instructions for setting the function
correctly.
Please note: it is advisable to air the room after using the appliance for the
rst time.
GRILL
For grilling steaks, kebabs and sausages, cooking vegetables au
gratin or toasting bread. When grilling meat, we recommend using a
drip tray to collect the cooking juices: position the tray on any of the
levels below the wire shelf and add 500 ml of drinking water.
Toasted bread 5' 200 2 - 5
Fish llets / slices 5' 200 20 - 30 *
Sausages / kebabs / spare ribs /
hamburgers
5' 200 30 - 40 *
5
4
5 4
3
* Turn food halfway through cooking
TURBO GRILL
For roasting large joints of meat (legs, roast beef, chicken). We
recommend using a drip tray to collect the cooking juices: position
the pan on any of the levels below the wire shelf and add 500 ml of
drinking water.
1
Roast chicken 1-1,3 k g — 200 55 - 70 *
Roast beef rare 1 kg — 200 35 - 45 **
Roast potatoes — 200 45 - 55 **
Vegetable gratin — 200 20 - 30
2
3
3
3
* Turn food halfway through cooking
** Turn food two thirds of the way through cooking (if necessary).
DEFROST
For defrosting food more quickly. Place food on the middle shelf.
Leave food in its packaging in order to prevent it from drying out on
the outside.
BOTTOM HEATING
Use this function after cooking to brown the bottom of the dish.
The function can also be used for slow cooking, such as vegetables and
meat stews.
 Loading...