

Page 1
Software Manual
Data Lifeguard
Diagnostic Utility
Page 2

WD
Data Lifeguard Diagnostic Utility (DLGDIAG)
User Manual
Information furnished by WD is believed to be accurate and reliable; however, no responsibility is assumed by WD for its use nor for
any infringement of patents or other rights of third parties which may result from its use. No license is granted by implication or
otherwise under any patent or patent rights of WD. WD reserves the right to change specifications at any time without notice.
Western Digital is a registered trademark; and WD, the WD logo, and Data Lifeguard Tools are trademarks of Western Digital
Technologies, Inc. Other marks may be mentioned herein that belong to other companies.
© 2006 Western Digital Technologies, Inc. All rights reserved.
2779-701022-A00 July 2006
Page 3

Table of Contents
1 Introduction . . . . . . . . . . . . . . . . . . . . . . . . . . . . . . . . . . . . . . . . . . . 1
DLGDIAG Options . . . . . . . . . . . . . . . . . . . . . . . . . . . . . . . . . . . . . . . . . 1
When to Use DLGDIAG. . . . . . . . . . . . . . . . . . . . . . . . . . . . . . . . . . . . . . 2
Before using DLGDIAG . . . . . . . . . . . . . . . . . . . . . . . . . . . . . . . . . . . . . . 2
2 DLGDIAG for Windows. . . . . . . . . . . . . . . . . . . . . . . . . . . . . . . . . . 3
Supported Products . . . . . . . . . . . . . . . . . . . . . . . . . . . . . . . . . . . . . . . . . . 3
Supported Operating Systems . . . . . . . . . . . . . . . . . . . . . . . . . . . . . . . . . . 3
Installing DLGDIAG for Windows . . . . . . . . . . . . . . . . . . . . . . . . . . . . . 4
Using DLGDIAG for Windows. . . . . . . . . . . . . . . . . . . . . . . . . . . . . . . . . 5
3 DLGDIAG for DOS . . . . . . . . . . . . . . . . . . . . . . . . . . . . . . . . . . . . . 10
Supported Products . . . . . . . . . . . . . . . . . . . . . . . . . . . . . . . . . . . . . . . . . 10
Creating Bootable DLGDIAG for DOS Disks. . . . . . . . . . . . . . . . . . . . . 10
Using DLGDIAG for DOS . . . . . . . . . . . . . . . . . . . . . . . . . . . . . . . . . . 11
Command Line Switches . . . . . . . . . . . . . . . . . . . . . . . . . . . . . . . . . . . . . 14
Error/Status Codes . . . . . . . . . . . . . . . . . . . . . . . . . . . . . . . . . . . . . . . . . 15
4 Service and Support. . . . . . . . . . . . . . . . . . . . . . . . . . . . . . . . . . . 18
TABLE OF CONTENTS – i
Page 4

1
DATA LIFEGUARD DIAGNOSTICS (DLGDIAG)
USER MANUAL
Introduction
The Data Lifeguard diagnostic utility (DLGDIAG) is designed to test WD hard drives
for errors. If DLGDIAG reports errors, you can use the program to attempt to restore
the hard drive to a defect-free status.
DLGDIAG supports WD external and SATA hard drives. It also supports EIDE hard drives
installed on both primary and secondary IDE ports (either the motherboard or a controller
card). DLGDIAG must be run separately to test each WD hard drive in the system.
Depending on your hard drive model and diagnostic requirements, you can use either the
Windows or DOS version of DLGDIAG. Windows and DOS versions of the DLGDIAG
software are available at support.wdc.com/download.
DLGDIAG Options
Windows
Quick Test — performs a quick S.M.A.R.T. self-test to gather and verify the Data
Lifeguard information contained on the drive.
Extended Test — performs a Full Media Scan to detect bad sectors. Test may take several
hours to complete depending on the size of the drive.
Wri te Ze ro s — writes zeros to the drive using the Full Erase or Quick Erase option.
Erases all data on the drive by writing zeros to each sector – file system and data will be
lost.
View Test Results — displays results for the last hard drive tested.
DOS
Select Drive — selects the hard drive to test and displays status for all hard drives.
Quick Test — tests the drive quickly for any major physical problems.
Extended Test — checks the drive thoroughly for any major physical problems.
Write Zeros To Drive — wipes any and all data off the drive. Use this option when your
data is no longer usable or recoverable.
View Test Results — displays results for the last hard drive tested.
Print Test Results — prints results for the last hard drive tested (USB printers not
supported).
Log File Open/Close — stores results for all hard drives tested (DLGDIAG.LOG)
Enter & Print RMA Information — enters and prints RMA information for returning a
hard drive to WD.
Help — brief descriptions of each option and explanations of error codes.
Quit — reboot your system once you have completed the selected tasks.
INTRODUCTION – 1
Page 5

DATA LIFEGUARD DIAGNOSTICS (DLGDIAG)
USER MANUAL
When to Use DLGDIAG
If the hard drive reports errors, if you are unable to access files on the hard drive, or if another
diagnostic utility such as SCANDISK, CHKDISK, DEFRAG, or Norton Utilities reports
errors on the hard drive, run DLGDIAG to determine if they are hard drive-related.
DLGDIAG does not report errors associated with the system BIOS, controller card, or
motherboard of your system.
DLGDIAG can be used at any time to test for hard drive errors. If you experience problems
accessing files or encounter other apparent hard drive errors, you can safely run the Quick
Test option to confirm your hard drive integrity.
DLGDIAG’s Repair Drive feature allows the user to restore any errors found during the
Extended Test scan of your hard drive without destroying all data on the drive.
DLGDIAG does not resolve mechanical damage such as noisy drives or drives that do not
spin up. Contact WD technical support (see “Service and Support” on page 19) if you have a
hard drive that exhibits the above difficulties.
Before using DLGDIAG
If used properly, DLGDIAG does not overwrite data on the hard drive during the scan and
will not result in data loss. However, you should always back up your data before running any
diagnostic utility. Back up all data on your hard drives(s) before using DLGDIAG.
CAUTION: Back up all data on your hard drive(s) before using DLGDIAG. You
will erase all data if the Write Zeros To Drive option is invoked.
INTRODUCTION – 2
Page 6

2
DATA LIFEGUARD DIAGNOSTICS (DLGDIAG)
USER MANUAL
DLGDIAG for Windows
DLGDIAG for Windows is a Windows version of the Data Lifeguard Diagnostics utility. The
utility can perform drive identification, diagnostics, and repairs on a WD FireWire, EIDE, or
USB drive. In addition, it can provide the drive's serial and model numbers.
Supported Products
Internal Hard Drives
WD SATA
WD EIDE
External Hard Drives
WD USB
WD FireWire
WD Combo
®
Supported Operating Systems
Windows XP
Windows 2000
Windows Me
Windows 98SE
DLGDIAG FOR WINDOWS – 3
Page 7
DATA LIFEGUARD DIAGNOSTICS (DLGDIAG)
USER MANUAL
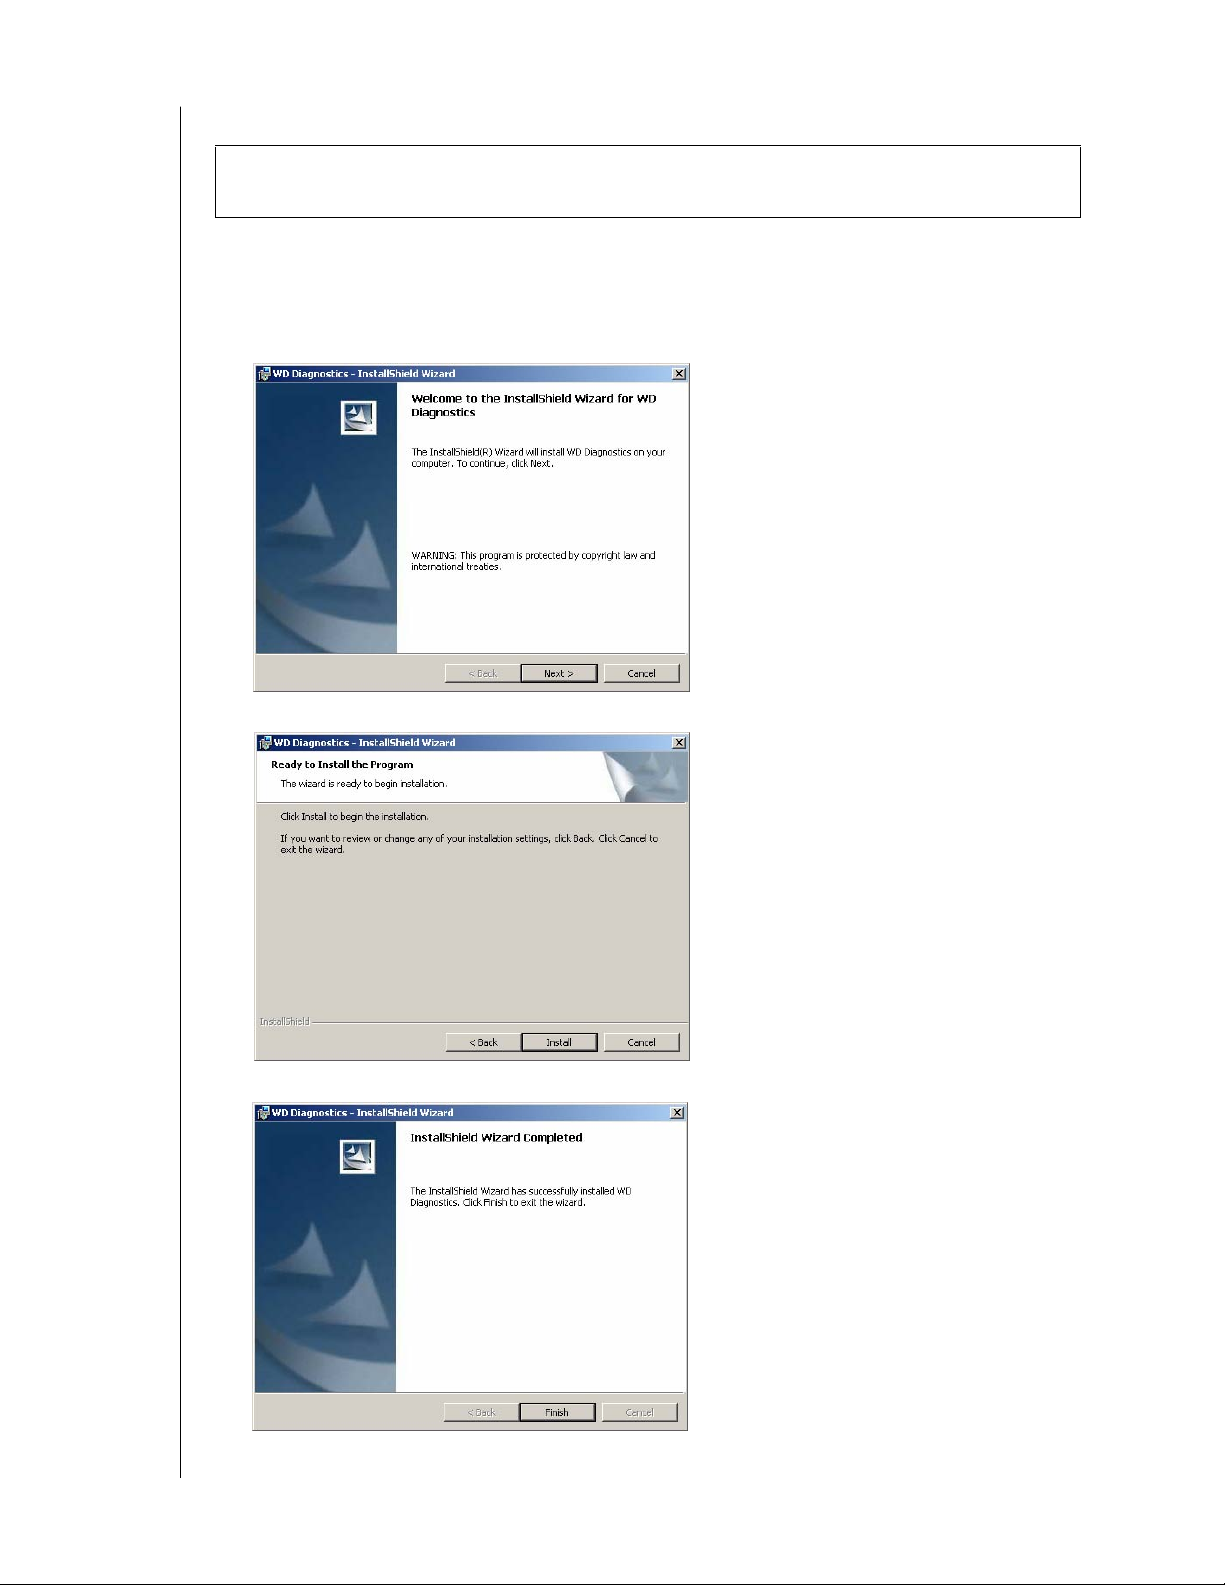
Installing DLGDIAG for Windows
Important: If you have a pop-up blocker installed, you may need to disable it to download
the DLGDIAG software.
1. Go to support.wdc.com/download and download the Data Lifeguard Diagnostics for
Windows program (WinDLG.zip).
2. Extract and run the Setup.exe program.
3. The WD Diagnostics InstallShield Wizard screen appears. Click the Next button.
4. Click Install.
5. Click Finish.
DLGDIAG FOR WINDOWS – 4
Page 8

DATA LIFEGUARD DIAGNOSTICS (DLGDIAG)
USER MANUAL
Using DLGDIAG for Windows
1. Click the Start button and point to Programs --> WD Diagnostics- WD Diagnostics.
2. Click I accept this License Agreement, then click Next.
3. The main program screen displays. The top window shows the drives in your system that
are available for testing. The model number, serial number, and capacity of each drive are
displayed. In the bottom window, the partition information for the selected drive is
displayed. Highlight the drive and double-click the physical drive icon on the top row to
run diagnostic testing.
4. The DLGDIAG - Select an Option window displays the four DLGDIAG for Windows
options.
DLGDIAG FOR WINDOWS – 5
Page 9

DATA LIFEGUARD DIAGNOSTICS (DLGDIAG)
USER MANUAL
Quick Test
Quick Test performs a S.M.A.R.T. drive quick self test to gather and verify Data Lifeguard
information on the drive.
Note: Quick Test will perform a S.M.A.R.T. drive self-test only if it's supported and
accessible by DLGDIAG. Otherwise. it will perform a short media scan. The S.M.A.R.T.
feature is not supported for external hard drives connected to the computer via the FireWire
interface. Some IDE and SATA controllers do not allow S.M.A.R.T. information to be read
from the hard drive. For more information, please contact the manufacturer of the controller
to determine if the controller supports S.M.A.R.T. attribute reading.
1. Click Quick Test, then click Start.
2. Close any open programs to prevent data loss, then click OK.
3. Quick Test begins. The test may take several minutes to complete depending on the size
of the hard drive tested. When the test is complete, click Close.
Extended Test
Extended Test performs a full media scan to detect bad sectors. This test may take up to
several hours to run depending on the size of the drive.
1. Click Extended Test, then click Start.
2. Close any open programs to prevent data loss, then click OK.
DLGDIAG FOR WINDOWS – 6
Page 10

DATA LIFEGUARD DIAGNOSTICS (DLGDIAG)
USER MANUAL
3. Extended Test begins. The test may take several hours to complete depending on the size
of the hard drive tested. When the test is complete, click Close.
Write Zeros
Write Zeros writes zeros to the drive with the option to perform a quick erase or full erase.
Selecting the write zeros option the file system and all data on the drive being tested.
CAUTION: Back up all data on your hard drive(s). You will erase all data if the
Write Zeros option is invoked.
1. Click Extended Test, then click Start.
2. If you are sure that you want to write zeros to the drive, click Yes .
3. Select Quick Erase or Full Erase, then click OK.
4. Write Zeros begins. When Write Zeros is complete, click Close.
DLGDIAG FOR WINDOWS – 7
Page 11

DATA LIFEGUARD DIAGNOSTICS (DLGDIAG)
USER MANUAL
View Test Result
View Test Result displays the results of the most recent test(s) run on your system’s hard
drive(s).
1. Click View Test Result, then click Start.
2. The test results display.
DLGDIAG FOR WINDOWS – 8
Page 12

DATA LIFEGUARD DIAGNOSTICS (DLGDIAG)
USER MANUAL
View S.M.A.R.T. Disk Information
S.M.A.R.T. (Self-Monitoring, Analysis, and Reporting Technology) monitors drive
performance and calibration characteristics, and predicts imminent drive failure. Drive
attributes and their associated values are listed in the SMART Disk Information screen.
Note: S.M.A.R.T. disk information is available only when the S.M.A.R.T. feature is
supported and accessible by DLGDIAG. Under the SMART Status column, a question mark
icon displays if the S.M.A.R.T. feature is not available. A red X icon displays for a specific
attribute if and only if it's value falls below the threshold value and the warranty value is 1.
Some IDE and SATA controllers do not allow S.M.A.R.T. information to be read from the
hard drive. For more information, please contact the manufacturer of the controller to
determine if the controller supports S.M.A.R.T. attribute reading.
1. Highlight the drive and click the S.M.A.R.T. disk info icon on the top row to view
S.M.A.R.T. disk information.
2. The S.M.A.R.T. disk information for the selected drive displays.
DLGDIAG FOR WINDOWS – 9
Page 13

3
DATA LIFEGUARD DIAGNOSTICS (DLGDIAG)
USER MANUAL
DLGDIAG for DOS
DLGDIAG for DOS is a DOS version of the Data Lifeguard Diagnostics utility that
determines the physical condition of a WD hard drive. If you are having computer problems
that you suspect are hard drive related, you can test your drive with this tool. This diagnostic
utility is designed for WD hard drives larger than 8.4 GB with a model number starting with
“WD.”
Supported Products
Internal Hard Drives
WD SATA
WD EIDE
Creating Bootable DLGDIAG for DOS Disks
Important: If you have a pop-up blocker installed, you may need to disable it to download
the DLGDIAG software. A 3.5-inch floppy or CD-RW drive is required to create a
bootable DLGDIAG for DOS disk.
Floppy Disk
1. Go to support.wdc.com/download and download the Data Lifeguard Diagnostics for DOS
(Floppy) program (DlgDiagvXXXx.exe or DlgDiagvXXXx.zip) to your desktop. Extract
the DlgDiagvXXXx.exe file from DlgDiagvXXXx.zip if you download the Zip file.
2. Double-click the DlgDiagvxxx Diskette Creator icon on your desktop, follow the
instructions in each screen to create your DLGDIAG floppy disk.
You can now boot to your DLGDIAG floppy disk. Make sure the boot order in your system
BIOS is set to boot from the floppy drive first.
CD-ROM
1. Go to support.wdc.com/download and download the Data Lifeguard Diagnostics for DOS
(CD) program (DiagXXXxCD.iso or DiagXXXxCD.zip) to your desktop. Extract the
DiagXXXxCD.iso file from DiagXXXxCD.zip if you download the Zip file.
2. Use a CD burning program to burn a CD from the DiagXXXxCD.iso image. Refer to
your CD burning program Help or user manual for details.
You can now boot to your DLGDIAG CD. Make sure the boot order in your system BIOS is
set to boot from the CD-ROM drive first.
DLGDIAG FOR DOS – 10
Page 14

DATA LIFEGUARD DIAGNOSTICS (DLGDIAG)
USER MANUAL
Using DLGDIAG for DOS
CAUTION: Back up all data on your hard drive(s) before using DLGDIAG. This
utility may write to the drive. As with all utilities that write to a drive, it is
recommended that you back up your data before proceeding.
1. Boot your computer to the DLGDIAG for DOS CD or floppy disk (see “Creating
Bootable DLGDIAG for DOS Disks” on page 10.
2. The DLGDIAG license agreement displays. Use the down arrow key to read through the
entire licence. Press Esc.
3. Press Y to start the program.
4. The DLGDIAG main menu displays. Use the up/down arrow keys to navigate the
options and the Enter key to select an option.
Select Drive
The Select Drive option shows a list of all drives installed and the current status of each drive.
1. For each drive that shows a status of 'DRIVE NOT TESTED', select the drive by using
the up/down arrows until the desired drive is highlighted and press Enter.
2. Press Esc to return to the main menu and test the drive.
DLGDIAG FOR DOS – 11
Page 15

DATA LIFEGUARD DIAGNOSTICS (DLGDIAG)
USER MANUAL
Quick Test
The Quick Test is designed to intelligently gather and verify all of the Data Lifeguard
information contained on the drive. The Quick Test can determine with a high level of
confidence that a drive is defect-free in a short amount of time. For maximum confidence, the
Extended Test is recommended. The Quick Test option may not be available on earlier hard
drives.
1. In the Quick Test option screen, press R to run the Quick Test.
2. DLGDIAG reports the status of the hard drive. A status message such as “Test Completed
Without Errors” displays along with a corresponding error/status code. Press Esc to return
to the main menu. See the list of error/status codes on page for more information.
Extended Test
Extended Test checks the drive thoroughly for any major physical problems. For most
computers the Extended Test takes 5-20 minutes to test one drive. Larger drives take longer
to test. The performance of the computer also affects the test time.
1. In the Extended Test option screen, press R to run the Extended Test.
2. DLGDIAG reports the status of the hard drive. A status message such as “Test Completed
Without Errors” displays along with a corresponding error/status code. Press Esc to return
to the main menu. See the list of error/status codes on page for more information.
DLGDIAG FOR DOS – 12
Page 16

DATA LIFEGUARD DIAGNOSTICS (DLGDIAG)
USER MANUAL
Write Zeros To Drive
If you tested the hard drive, checked all hardware in the system, and verified that the BIOS is
correctly set up, and are still experiencing problems, you might want to reinstall the software
on your system. Before reinstalling the software, you can use the Write Zeros To Drive option
to erase the entire hard drive, including the MBR (master boot record), all partition tables,
and all data.
CAUTION: Back up all data on your hard drive(s). You will erase all data if the
Write Zeros To Drive option is invoked.
1. Press F for Full Erase or Q for quick erase.
2. Press Esc to return to the main menu.
View Test Results
View Test Results displays the results of the most recent test run on your currently selected
hard drive including results messages and error/status codes.
Print Test Results
Print Test Results prints the results of the most recent test run on your currently selected hard
drive including results messages and error/status codes. You must have a printer properly
connected to your computer to use this option.
Log File Open/Close
The DLGDIAG.LOG file stores results for all drives tested.
1. To open the log file, select Log File Open/Close from the main menu.
2. Press O to open the log file. To close the log file, select Log File Open/Close from the
main menu and press C.
DLGDIAG FOR DOS – 13
Page 17

DATA LIFEGUARD DIAGNOSTICS (DLGDIAG)
USER MANUAL
Enter & Print RMA Information
If the hard drive is under warranty and DLGDIAG determines that the hard drive is
unrepairable, obtain an RMA (Return Material Authorization) number and instructions for
product return from WD Technical Support at support.wdc.com/warranty.
To complete the RMA information, select Enter and Print RMA Information from the
DLGDIAG main menu, then fill out all fields in the Enter and Print RMA Information
screen. You must have a printer properly connected to your computer to print RMA
information.
Help
1. Select Help from the main menu to access the DLGDIAG.txt Help file.
2. Use the up and down arrow keys to read through the text Help file.
3. Press Esc to return to the main menu.
Quit
1. To close DLGDIAG, select Quit from the main menu. A message displays prompting
you to reset the system to reinitialize the BIOS and hard drive(s).
2. Press Ctrl-Alt-Delete or turn the power off to restart the system.
3. Remove the floppy disk from the drive and reboot the system.
Command Line Switches
DLGDIAG supports the following command line options:
Command Line Description
-A Disable error code for SMART failures
-B Check SMART status without menus
-C Enable output to comma file
-Dx Select drive x only, where x is 0-15 or ? to show drive info
-E Run extended test without menus - with drive repair
-FWRITE Write zeros to the first and last million sectors
-G Show test history on the SMART log area
-H Enable appending of log to history log file
-L Disable output to log file
-Ox Specify log file location, where x is the full path
-Px Access drives at baseport x (hex address) only
-Q Run Quick Test without menus
-R Run performance test without menus
-S Skip rebooting after a run of the program
-V Run extended test without menus - without drive repair
-WRITE Write zeros to the entire drive
DLGDIAG FOR DOS – 14
Page 18

DATA LIFEGUARD DIAGNOSTICS (DLGDIAG)
USER MANUAL
Error/Status Codes
Go to support.wdc.com for further information on many of the error codes listed below as well
as error codes from previous versions of Data Lifeguard Diagnostics.
If you encounter the same error code more than once after restesting, create an RMA
(see “Enter & Print RMA Information” on page 14).
Description Error/Status Code
COMPLETED WITHOUT ERRORS 0
ABORTED BY HOST 1
INTERRUPTED BY DRIVE RESET 2
INCOMPLETE DUE TO ERROR 3
UNKNOWN ELEMENT FAILURE 4
ELECTRICAL ELEMENT FAILURE 5
SERVO/SEEK ELEMENT FAILURE 6
READ ELEMENT FAILURE 7
HANDLING FAILURE 8
UNKNOWN TEST STATUS 9
UNKNOWN TEST STATUS 10
UNKNOWN TEST STATUS 11
UNKNOWN TEST STATUS 12
UNKNOWN TEST STATUS 13
UNKNOWN TEST STATUS 14
TEST IN PROGRESS 15
ERRORS FOUND 100
UNKNOWN ERROR 101
SEEK TIMEOUT 102
WRITE FAULT ERROR 103
DRIVE NOT READY 104
BUSY GLITCH 105
TRACK 0 ERROR 106
CHECK SUM ERROR 107
SEEK NOT COMPLETE 108
DRQ WAS SET 109
DRQ NOT EXPECTED 110
DIAG COMMAND ERROR 111
IRQ TIMEOUT 112
DRIVE TABLE ERROR 113
TRANSFER RATE ERROR 114
ICRC ERROR 115
IDNF ERROR 116
UNCORRECTABLE ECC ERROR 117
DAM ERROR 118
NO MULTI 119
NO DRIVE FOUND 120
SERVO ERROR 121 121
UNKNOWN ERROR 122
UNKNOWN ERROR 123
DLGDIAG FOR DOS – 15
Page 19

DATA LIFEGUARD DIAGNOSTICS (DLGDIAG)
USER MANUAL
Description Error/Status Code
CORRECTED DATA 124
BAD TRACK 125
UNKNOWN ERROR 126
UNKNOWN ERROR 127
BUFFER MISCOMPARE 128
G-LIST ERROR 129
INVALID SERIAL 130
SERIAL RETRY 131
COMMAND ERROR 132
ILLEGAL ID 133
BUSY TIMEOUT 134
DRQ TIMEOUT 135
BAD SECTOR 136
RELOCATED SECTOR 137
STILL BUSY TIMEOUT 138
DRQ NOT EXPECTED 139
DRQ TIMEOUT ECC 140
UNKNOWN ERROR 141
TK-TK SEEK ERROR 142
RANDOM SEEK ERROR 143
THIRD STROKE ERROR 144
FULL STROKE ERROR 145
SEEK OVERHEAD ERROR 146
BAD ID PARAMETERS 147
NOT SELECTED 148
MASTER SLAVE ERROR 149
UNKNOWN ERROR 150
PARK ERROR 151
WRITE PROTECT ERROR 152
MEDIA ERROR 153
MEDIA CHANGE ERROR 154
MEDIA CHANGE REQ ERROR 155
NO MEDIA ERROR 156
SET MAX ERROR 157
Q DMA SERVICE ERROR 158
SMART ERROR 159
UNKNOWN COMMAND 160
RESET SIGNATURE 161
READY EXPECTED 162
UNKNOWN ERROR 163
DRIVE NOT TESTED 200
NON-WD DRIVE 201
DRIVE NOT SUPPORTED 202
WRITE LOG ERROR 203
MISSING LOG FILE 204
ABORTED BY USER 205
MEMORY ALLOCATION ERROR 206
DLGDIAG FOR DOS – 16
Page 20

DATA LIFEGUARD DIAGNOSTICS (DLGDIAG)
USER MANUAL
Description Error/Status Code
CRITICAL RESOURCE ERROR 207
FATAL ERROR 208
SELF TEST FAILED TO RUN 209
SELF TEST INCOMPLETE 210
2-9 UNCORR ECC ERRORS 211
10+ UNCORR ECC ERRORS 212
2-9 DAM ERRORS 213
10+ DAM ERRORS 214
2-9 IDNF ERRORS 215
10+ IDNF ERRORS 216
2-9 SERVO ERRORS 217
10+ SERVO ERRORS 218
DRIVE CABLE ERROR 219
DRIVE IS LOCKED 220
TEST NOT SUPPORTED 221
DRIVE FAILED THE TEST 222
ERRORS REPAIRED 223
ERRORS NOT REPAIRED 224
TOO MANY ERRORS FOUND 225
SECTOR RELOCATION ERROR 226
SMART NOT SUPPORTED 227
DLGDIAG FOR DOS – 17
Page 21

4
DATA LIFEGUARD DIAGNOSTICS (DLGDIAG)
USER MANUAL
Service and Support
If you need additional information or help during installation or normal use of this product,
visit our product support Web site at support.wdc.com or send an e-mail message to WD
Technical Support using the online form.
You may also call the phone numbers listed below. When calling for support, have your WD
hard drive serial number, system hardware, and software versions available.
USA/Canada/Outside USA
(Central Time)
Telephone Numbers 800.ASK.4WDC +31.20.4467651
Monday – Thursday 9:00 am – 7:00 pm 9:30 am – 12:00 noon
Friday 9:00 am – 5:00 pm 9:30 am – 12:00 noon
Saturday 8:00 am – 5:00 pm
(Central European Time)
Europe
1:00 pm – 5:30 pm
1:00 pm – 4:00 pm
SERVICE AND SUPPORT – 18
 Loading...