

Weed Eater WE20VB Instruction Manual

Please do not return product to retailer.
Por favor, no devuelva el producto al lugar de compra.
Veuillez ne pas retourner le produit au détaillant.
1-855-378-6903
www.weedeater.com
Register your product online at:
Registre su producto en línea en:
Enregistrez votre produit en ligneàl’adresse :
Trademark
WARNING:
ADVERTENCIA:
AVERTISSEMENT:
Lire le manuel d’instructions et bien respecter tous les avertissements et toutes les instructions de sécurité. Tout défaut de le faire
pourrait entraîner des blessures graves.
FRANÇAIS
WEED EATER
9335 Harris Corners Parkway
Charlotte, NC 28269
WEED EATER
850 Matheson Blvd. West
Mississauga, Ontario L5V 0B4
Instruction Manual
Manual de Instrucciones
Manuel d’Instructions
Read and follow all Safety Rules and Operating Instructions before
using this product. Failure to do so can result in serious injury.
Lea el manual de instrucciones y siga todas las advertencias e
instrucciones de seguridad. El no hacerlo puede resultar en
lesiones graves.
ESPAÑOLENGLISH
20V Axial Blower
WE20VB
Rev. 00 07/13/15
2
TABLE OF CONTENTS
CONTENTS...................................................................................................................................2
IDENTIFICATION OF SAFETY SYMBOLS......................................................................................2
SPECIFICATIONS........................................................................................................................3
SAFETY RULES............................................................................................................................4
ASSEMBLY .................................................................................................................................. 6
OPERATION.............................................................................................................................7
MAINTENANCE...........................................................................................................................9
TROUBLESHOOTING TABLE.....................................................................................................10
LIMITED WARRANTY.................................................................................................................11
EXPLODED VIEW...............................................................................................................12
PARTS LIST...............................................................................................................................12
IDENTIFICATION OF SAFETY SYMBOLS
Symbol Name Designation/Explanation
V Volts Voltage
A Amperes Current
Hz Hertz Frequency (cycles per second)
W Watts Power
min Minutes Time
Alternating Current Type of current
Direct Current Type or a characteristic of current
/min Per Minute
Revolutions, strokes, surface speed, orbits
etc., per minute
Wet Conditions Alert Do not expose to rain or use in damp locations
Read The Operator’s Manual
To reduce the risk of injury user must read and
understand operator’s manual before using this
product.
Wear Eye Protection
Wear eye protection with side shields that
are marked to comply with ANSI Z87.1 when
operating this equipment.
Safety Alert Precautions that involve your safety.
Long Hair
Failure to keep long hair away from the air inlet
could result in personal injury.
Loose Clothing
Failure to keep loose clothing from being
drawn into air intake could result in personal
injury.
Keep Bystanders Away Keep all bystanders at least 50 ft. away.
Blower Tubes Do not operate without tubes in place.
Impeller Blades
Rotating impeller blades can cause severe
injury.
3
SPECIFICATIONS
IDENTIFICATION OF SAFETY SYMBOLS
The following signal words and meanings are intended to explain the levels of risk associated
with this product.
Symbol Name Designation/Explanation
DANGER
Indicates a hazardous situation that, if not
avoided, will result in death or serious injury.
WARNING
Indicates a hazardous situation that, if not
avoided, could result in death or serious injury.
CAUTION
Indicates a hazardous situation that, if not
avoided, could result in minor or moderate
injury.
CAUTION
(Without Safety Alert Symbol) Indicates a
situation that may result in property damage.
Motor 20V
Air Volume: 265 CFM (7.5 m3/min)
Air Speed (Max): 85 MPH (38 m/s)
Unit Weight (without battery): 3.2 lbs (1.5 kg)
Unit Weight (with battery): 4.2 lbs (1.9 kg)
Charge Time
4 Hours

4
SAFETY RULES
WARNING:
READ ALL SAFETY
WARNINGS AND ALL INSTRUCTIONS.
Failure to follow all instructions listed below
may result in electric shock, re and/or
serious personal injury.
WARNING:
When using this device,
safety precautions must be followed. For your
own safety and that of bystanders, please
read these instructions before operating the
device. Do not use the device without reading
the instruction manual. Save all warnings and
instructions for future reference.
OPERATOR SAFETY
• Keep work area clean and well lit.
Cluttered or dark areas invite accidents.
• Do not operate blower in explosive
atmospheres, such as in the presence of
ammable liquids, gases or dust.
• Do not allow children or untrained
individuals use this unit.
• Do not expose blower to rain or wet
conditions.
• Do not handle plug or tool with wet hands.
• Never allow children to operate the
equipment. Never allow adults to operate
the equipment without proper instruction.
• Always wear safety glasses with side
shields that comply with ANSI Z87.1.
Everyday glasses only have impact
resistant lenses. They are NOT safety
glasses. Following this rule will reduce
the risk of eye injury. Use face mask if
operation is dusty.
• Wear eye protection when operating this
product. Secure long hair above shoulder
level to prevent entanglement in moving
parts.
• Use extra care when cleaning on stairs.
• Do not expose to rain, store indoors.
• Do not use on wet surfaces.
• Keep all parts of your body away from any
moving part.
• Keep hair, loose clothing, ngers and
all body parts away from openings and
moving parts.
• Avoid loose garments and jewelry that
could get caught in moving parts of the
machine or its motor.
• Do not force tool. Use the correct tool
for your application. The correct tool will
do the job better and safer at the rate for
which it is designed.
• Do not operate the equipment while
barefoot or when wearing sandals
or similar lightweight footwear. Wear
protective footwear that will protect your
feet and improve your footing on slippery
surfaces.
• Do not overreach. Keep proper footing and
balance at all times. Proper footing and
balance enable better control of the tool in
unexpected situations.
• Do not allow to be used as a toy. Close
attention is necessary when used by or
near children.
• Do not use tool if switch does not turn it on
or off. Any tool that cannot be controlled
with the switch is dangerous and must be
repaired.
• Keep all bystanders, children, and pets at
least 50 ft. away.
• Do not operate this unit when you are
tired, ill, or under the inuence of alcohol,
drugs, or medication.
• Do not operate in poor lighting.
• Do not put any object into openings.
Do not use with any opening blocked;
keep openings free of dust, lint, hair, and
anything that may reduce air ow.
• Check the work area before each use.
Remove all objects such as rocks, broken
glass, nails, wire, or string which can
be thrown or become entangled in the
machine.
• Use only identical manufacturer’s
replacement parts and accessories. Use
of any other parts may create a hazard or
cause product damage.
• Do not charge battery tool in rain, or wet
location. Following this rule will reduce the
risk of electric shock.
• For household use only.
• Battery tools do not have to be plugged
into an electrical outlet; therefore, they are
always in operating condition. Be aware
of possible hazards when not using your
battery tool or when changing accessories.
Following this rule will reduce the risk of
electric shock, re, or serious personal
injury.
• Remove or disconnect battery before
servicing, cleaning or removing material
from the gardening appliance.
• Store idle appliances - When not in use,
blower should be stored indoors in a dry,
locked place out of the reach of children.
BATTERY AND CHARGER
Do not dispose of the battery in a re. The
cell may explode. Check with local codes for
possible special disposal instructions.
DANGER: To avoid serious injury, risk
of re, explosion and danger of electric shock
or electrocution:
• DO NOT charge the unit outdoors.
• DO NOT probe the charger with conductive
materials. The charging terminals hold
120V.
• If the battery pack case is cracked or
damaged, DO NOT insert into the charger.
Replace the battery pack.
• DO NOT charge these battery packs with
any other type of charger.

5
• DO NOT allow liquid inside the charger.
• DO NOT try to use the charger for any
other purpose than what is presented in
this manual.
WARNING:
Do not charge the battery
pack in rain or in wet conditions. Do not
immerse the tool, battery pack, or charger in
water or other liquid.
• Do not allow the battery pack or charger
to overheat. If they are warm, allow them
to cool down. Recharge only at room
temperature.
• Do not cover the ventilation slots on top of
the charger. Do not set the charger on a
soft surface. Keep the ventilation slots of
the charger clear.
• Do not allow small metal items or material
such as steel wool, aluminum foil, or other
foreign particles into the charger cavity.
• Unplug the charger before cleaning and
when there is no battery pack in the cavity.
• Do not place the battery charger or the
battery pack in the sun or in a warm
environment. Keep at normal room
temperature.
• Do not try to connect two chargers
together.
• The battery pack cells may develop a small
leak under extreme usage or temperature
conditions. If the outer seal is broken and
the leakage gets on your skin:
-Use soap and water to wash immediately
-Neutralize with lemon juice, vinegar, or
other mild acid.
• If battery uids gets in your eyes, ush
immediately with water for at least 15
minutes. Get immediate medical attention.
WARNING
:
READ AND UNDERSTAND
ALL INSTRUCTIONS. Failure to follow safety
rules listed below may result in electric shock,
re, and/or personal injury.
• Do not abuse the cord. Never use the
cord to carry the tool. Never pull on the
cord to remove plug from the outlet. Keep
cords away from heat, oil, sharp edges,
or moving parts. Replace damaged cords
immediately. They may create a re. Do
not use if damaged.
• Do not place the charger where the power
cord might be stepped on, tripped on, or
subjected to damage.
• A battery-operated tool with integral
batteries or a separate battery pack must
be recharged only with the specied
charger for the battery. A charger that may
be suitable for one type of battery may
create a risk of re when used with another
battery.
• Use a battery-operated tool only with the
SAFETY RULES
specically designated battery pack. Use
of any other batteries may create a risk of
re.
WARNING
:
(PROPOSITION 65)
Some dust created by power sanding, sawing,
grinding, drilling, and other construction
activities contains chemicals known to cause
cancer, birth defects or other reproductive
harm. Some examples of these chemicals
are:
• Lead from lead-based paints
• Crystalline silica from bricks and cement
and other masonry products, and
• Arsenic and chromium from chemically
treated lumber.
Your risk of exposure to these chemicals
varies depending on how often you do this
type of work. To reduce your exposure to
these chemicals, work in a well-ventilated
area, and work with approved safety
equipment, such as dust masks that are
specially designed to lter out microscopic
particles.
BATTERY USE AND CARE
• Recharge only with the charger specied
by the manufacturer. A charger that is
suitable for one type of battery pack may
create a risk of re when used with another
battery pack.
• Use blower only with specically
designated battery packs. Use of any other
battery packs may create a risk of injury
and re.
• When battery pack is not in use, keep it
away from other metal objects, like paper
clips, coins, keys, nails, screws, or other
small metal objects, that can make a
connection from one terminal to another.
Shorting the battery terminals together
may cause burns or a re.
• Under abusive conditions, liquid may be
ejected from the battery; avoid contact.
If contact accidentally occurs, ush with
water. If liquid contacts eyes, additionally
seek medical help. Liquid ejected from the
battery may cause irritation or burns.
SERVICE
Tool service must be performed only by
qualied repair personnel using only identical
replacement parts. This will ensure that the
safety of the tool is maintained. Service
or maintenance performed by unqualied
personnel may result in a risk of injury. Please
call 1-855-378-6903 for customer support.
SAVE ALL WARNINGS AND
INSTRUCTIONS FOR FUTURE
REFERENCE

6
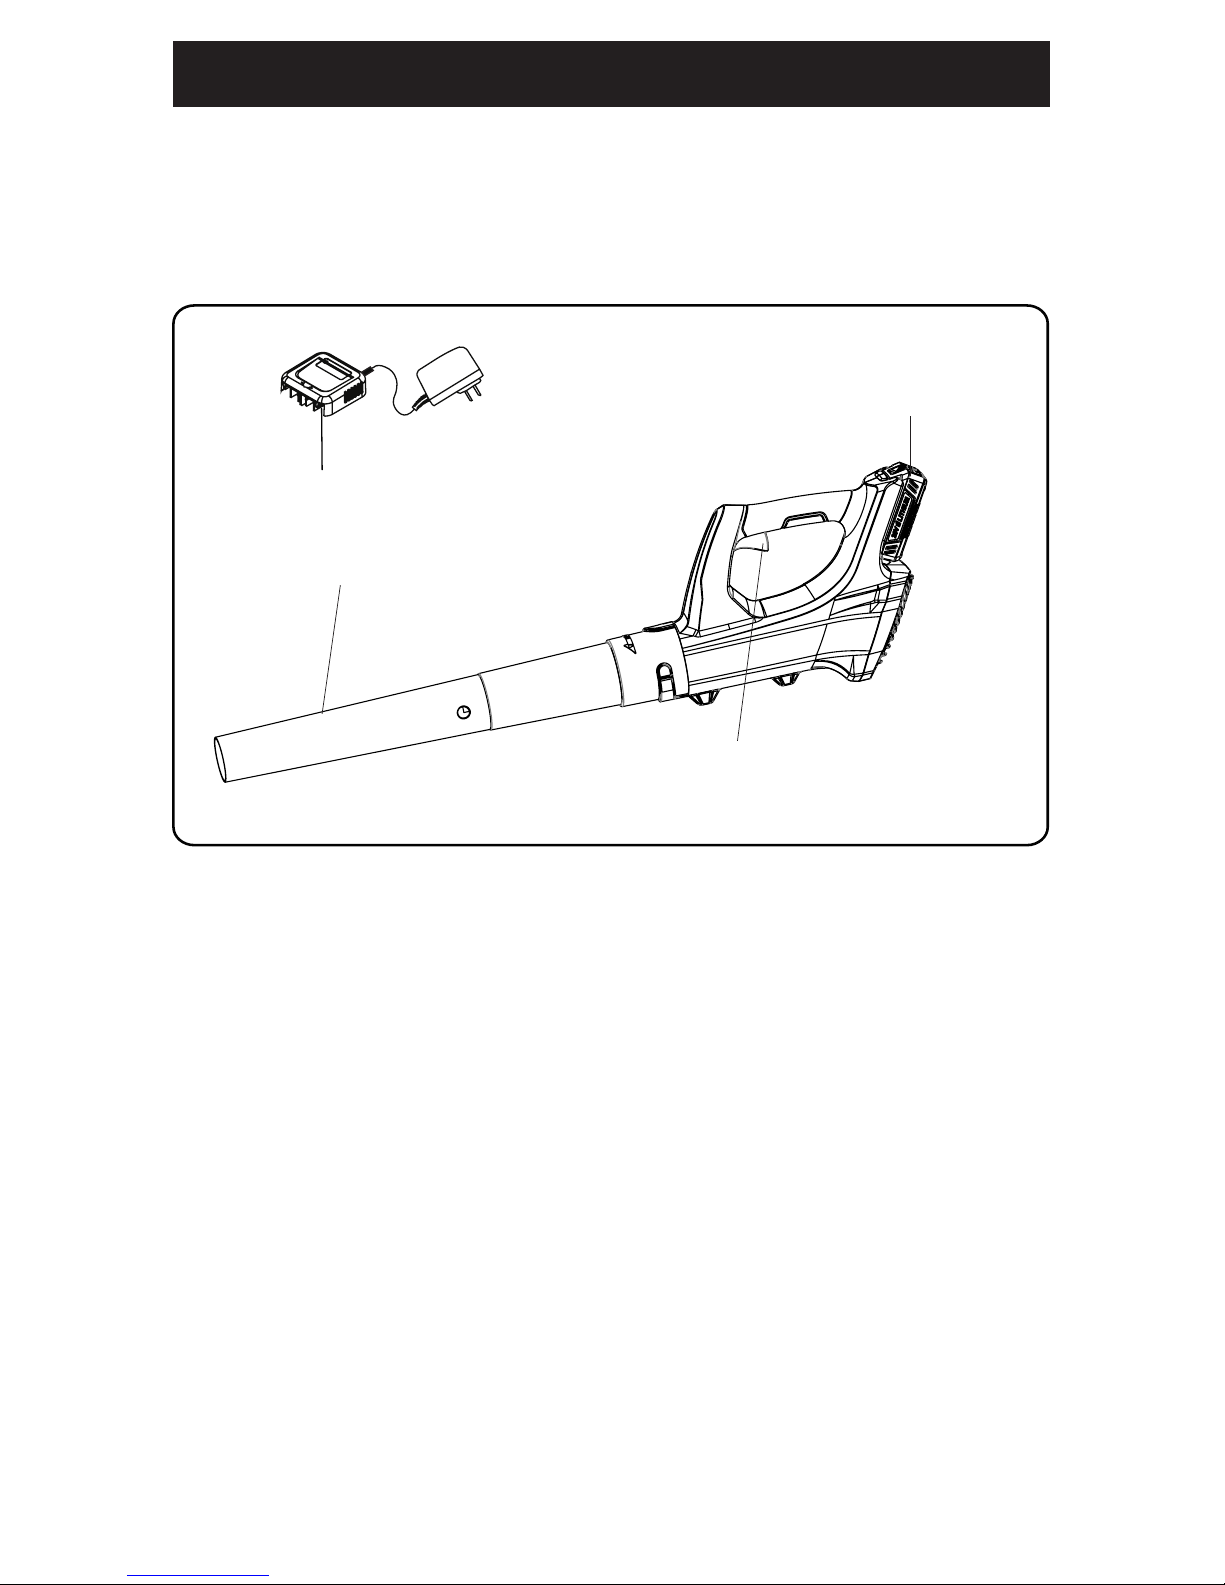
ASSEMBLY
PACKING LIST
• 20V Blower
• Blower Tube
• 20V 2Ah Battery (WE20VRB)
• 20V Charger (WE20VCH)
• Instruction Manual
If any parts are damaged or missing, please
call 1-855-378-6903.
BATTERY REMOVAL
1. Press in and hold the latch button (1)
with rm grip.
2. Grasp the trigger handle (2) rmly. Pull
the battery pack out of the handle.
BATTERY INSTALLATION
1. Align the tongue (3) of the battery pack
with the cavity in the handle housing.
2. Grasp the trigger handle (2) rmly.
3. Push the battery pack into the handle
until both sides lock. The latch button
will click when locked into place.
4. Do not use force when inserting the
battery pack. It should slide into place
and click.
NOTE:
The battery pack ts snugly into the
handle to prevent accidental dislodging. It
may require a strong pull to remove.
IMPORTANT:
The battery is not shipped fully
charged. It is recommended that the battery be
fully charged before initial use. With regular
use, the battery pack will take 4 hours or less
to fully charge. It is recommended that the
battery be charged every 3 months when the
blower is not in use. The battery's run time will
improve after the third or fourth charge.
BLOWER TUBE ASSEMBLY
WARNING
:
To prevent accidental
starting that could cause serious personal
injury, always remove the battery pack from
the tool when assembling parts.
1. Align either of the grooves on the tube
with the tabs on the blower housing.
Push the tube onto the blower housing
until the tab engages the grooves.
2. Turn the tube in the direction of the
arrow until both of the tabs slide into the
lock positions.
3. Install tube A onto tube B and twist
clockwise until the tube locks into
position.
LockUnlock
Lock position
Tube
Tab
Groove
1
2
3
A
B
7
OPERATION
KNOW YOUR AXIAL BLOWER
The safe use of this product requires an understanding of the information in this instruction
manual as well as a knowledge of the project you are attempting. Before use of this product,
familiarize yourself with all operating features and safety rules.
Blower Tube
Trigger
Battery
Charger
BLOWER TUBE
The blower tube can be easily installed on the
blower without any additional tools.
8
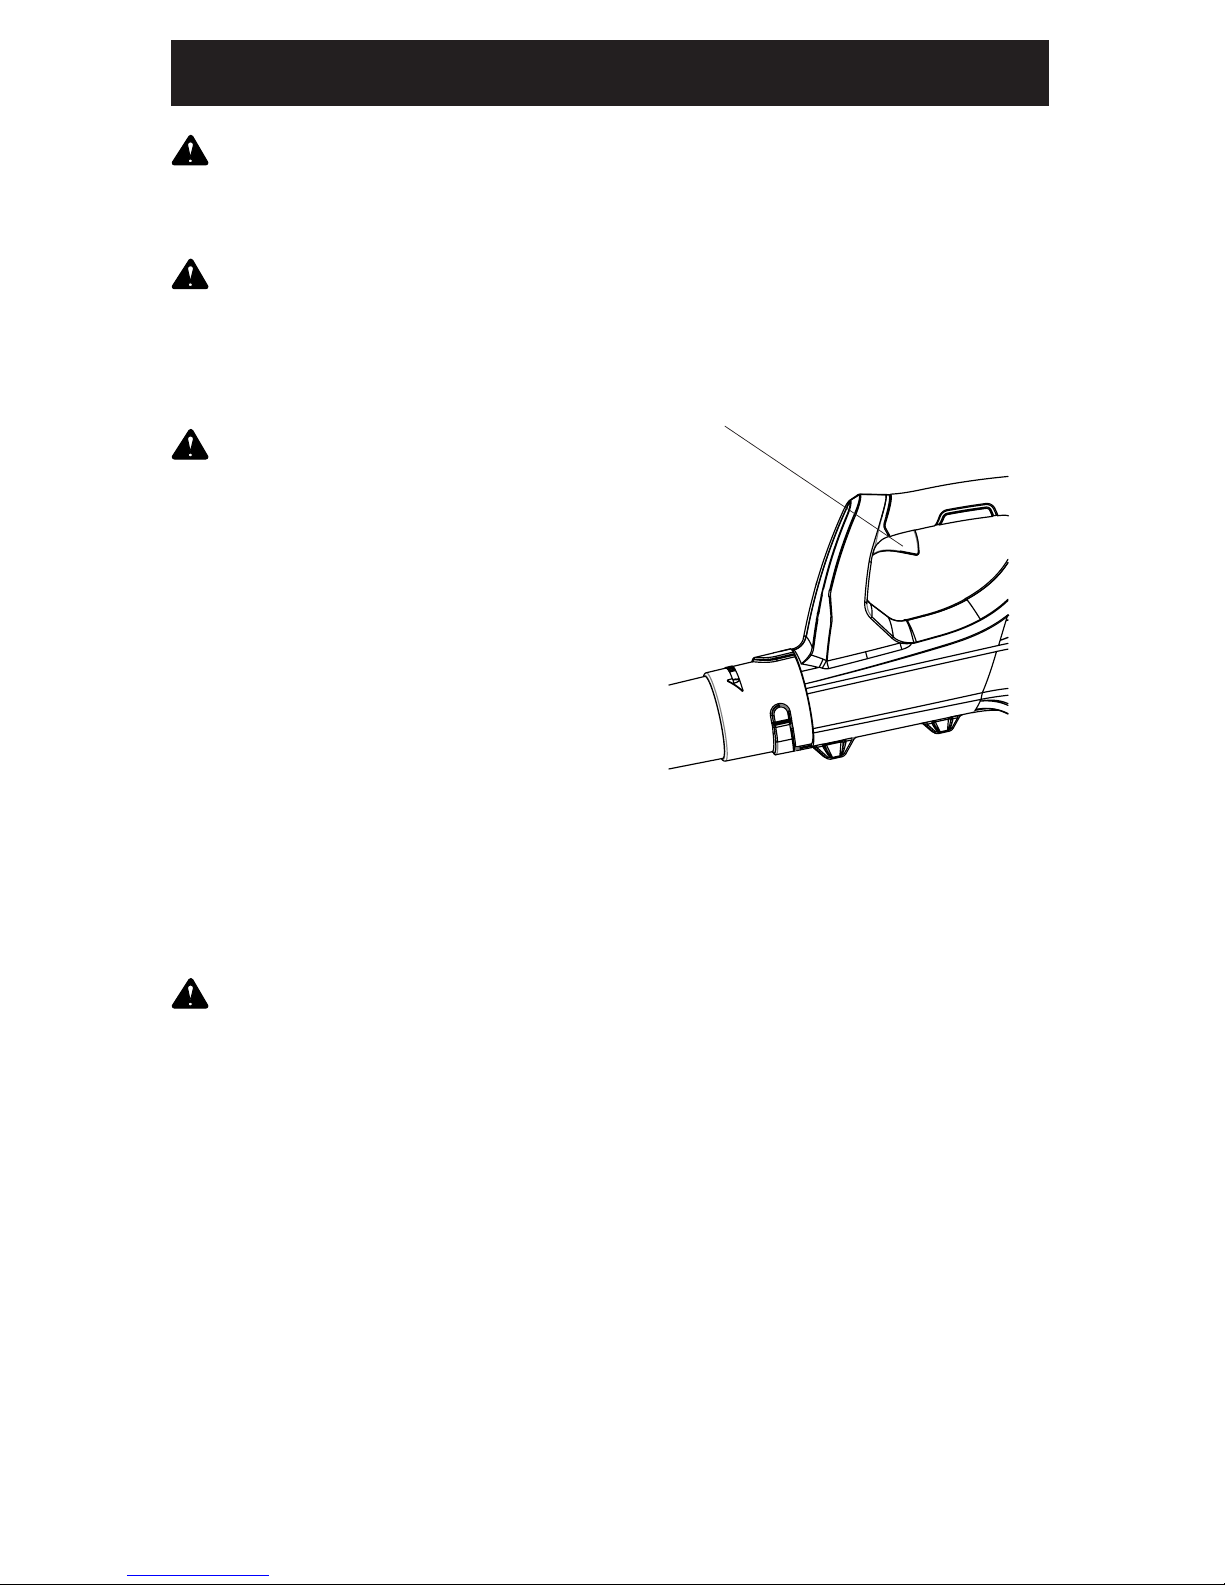
Trigger
OPERATION
WARNING
:
Do not allow familiarity
with this product make you careless.
Remember that a careless fraction of a
second is sufcient to inict serious injury.
WARNING
:
Always wear eye
protection with side shields marked to
comply with ANSI Z87.1, along with hearing
protection. Failure to do so could result in
objects being thrown into your eyes and
other possible serious injuries.
WARNING:
Do not use any attachments or accessories
not recommended by the manufacturer of
this product. The use of attachments or
accessories not recommended can result
in serious personal injury. Before each use,
inspect the entire product for damaged,
missing, or loose parts, such as screws,
nuts, bolts, caps, etc. Securely tighten all
fasteners and caps and do not operate this
product until all missing or damaged parts
are replaced.
APPLICATION
You may use this product for the purposes
listed below:
• Clearing hard surfaces such as
driveways and walkways.
• Keeping decks and driveways free from
leaves and pine needles.
CHARGE BEFORE FIRST USE.
WARNING
:
Always remove battery pack from the
product when you are assembling parts,
making adjustments, cleaning, or when not
in use. Removing battery pack will prevent
accidental starting that could cause serious
personal injury.
STARTING/STOPPING THE BLOWER
• Ensure that the battery is installed in the
blower.
• Squeeze the trigger to start the blower.
• Release the trigger to stop.
OPERATING THE BLOWER
• To keep from scattering debris, blow
around the outer edges of a debris pile.
Never blow directly into the center of a
pile.
• To reduce sound levels, limit the number
of pieces of equipment used at any one
time.
• Use rakes and brooms to loosen debris
before blowing. In dusty conditions,
slightly dampen surfaces when water is
available.
• Watch out for children, pets, open
windows, or freshly washed cars, and
blow debris safely away.
• After using blowers or other equipment,
clean up. Dispose of debris properly.

9
MAINTENANCE
CHARGING PROCEDURE
1. Plug the charger into an AC power
outlet.
2. Slide Charger over Battery Pack
Terminals. Make sure the Charger and
Battery are fully connected.
3. When the battery is charging, the LED
will blink; when the battery is fully
charged, the LED will stop blinking but
will remain illuminated.
Charging/Cargando/En charge
Fully charged/Lleno/Chargé
BATTERY PACK
• Store the battery pack fully charged.
• Once the charging light turns green,
remove the battery from the charger and
disconnect the charger from the outlet.
• After charging, the battery pack may be
stored on the charger, as long as the
charger is not plugged in.
CHECKING BATTERY CAPACITY
Press the Battery Capacity Indicator (BCI)
button. The lights will illuminate according to
the battery’s current power level. See chart
below:
CHARGER MAINTENANCE
• Keep the charger clean and clear of debris.
Do not allow foreign material to get into the
recessed cavity or onto the contacts. Wipe
the charger clean with a dry cloth. Do not
use solvents or water, and do not place the
charger in wet conditions.
• Unplug the charger when there is no
battery pack in it.
• Fully charge the batteries before placing
them in storage.
• Store the charger at normal room
temperature. Do not store it in excessive
heat. Do not use the charger in direct
sunlight. Recharge at temperatures
between 32°F and 104°F (0-40°C). If
battery pack is hot, allow it to cool down
before recharging.
CLEANING
Wipe the outside of the blower with a dry,
soft cloth. Do not hose down or wash with
water.
CAUTION:
Do not use strong solvents or
detergents on the plastic housing or plastic
components. Certain household cleaners may
cause damage and may also cause a shock
hazard.
WARNING:
To avoid risk of re,
electric shock, or electrocution:
• Do not use a damp cloth or detergent on
the battery or battery charger.
• Always remove the battery pack before
cleaning, inspecting, or performing any
maintenance on the blower.
BCI BUTTON
LIGHT METER
BATTERY METER
Lights Capacity
The battery is at 80 –100% capacity
The battery is at 50 – 80% capacity
The battery is at 20 – 50% capacity
3 Green Lights
2 Green Lights
1 Green Light
Lights go out
The battery i s under 10% c apacity and
requires charging immediately
10
ENVIRONMENTALLY SAFE BATTERY
DISPOSAL
The following toxic and corrosive materials
are in the batteries used in this blower battery
pack: Lithium-Ion, a toxic material.
WARNING:
All toxic materials must be
disposed of in a specied manner to prevent
contamination of the environment. Before
disposing of damaged or worn out LithiumIon battery packs, contact your local waste
disposal agency, or the local Environmental
Protection Agency for information and specic
instructions. Take the batteries to a local
recycling and/or disposal center, certied for
lithium-ion disposal.
WARNING:
If the battery pack cracks or breaks, with or
without leaks, do not recharge it and do not
use. Properly dispose of it replace with a new
battery pack. DO NOT ATTEMPT TO REPAIR
IT! To avoid injury and risk of re, explosion,
or electric shock, and to avoid damage to the
environment:
• Cover the battery's terminals with heavy-
duty adhesive tape.
• DO NOT attempt to remove or destroy any
of the battery pack components.
• DO NOT attempt to open the battery pack.
• If a leak develops, the released electrolytes
are corrosive and toxic. DO NOT get the
solution in the eyes or on skin, and do not
swallow it.
• DO NOT place these batteries in your
regular household trash.
• DO NOT incinerate.
• DO NOT place them where they will
become part of any waste landll or
municipal solid waste stream.
• Take them to a certied recycling or
disposal center.
TROUBLESHOOTING TABLE
TROUBLE CAUSE REMEDY
Motor fails to start when
the trigger is depressed.
1. Battery is not secure.
2. Battery is not charged.
1. To secure the battery pack, make
sure the battery is fully secured in the
blower. Refer to the Battery Installation
section in this manual.
2. Charge the battery pack according
to the instructions included with your
model.
Unit will not start. Defective power switch.
Have the power switch replaced by an
authorized service center.
The unit will start, but air will
not ow through the tube.
Blocked tube. Clear the blockage.
MAINTENANCE
WARNING:
Always stop unit and disconnect from the power source before performing all
of the recommended remedies below except remedies that require unit to be operating.

11
LIMITED WARRANTY
WEED EATER
, a division of Husqvarna
Consumer Outdoor Products N.A., Inc.,
hereby warranties this product, to the original
purchaser with proof of purchase, for a period
of four (4) years against defects in materials,
parts, or workmanship.
WEED EATER
, at its own discretion will
repair or replace any and all parts found to be
defective, through normal use, free of charge
to the customer. This warranty is valid only
for units which have been used for personal
use that have not been hired or rented for
industrial/commercial use, and that have
not been maintained in accordance with the
instructions in the owners manual supplied
with the product.
Battery carries a two (2) year warranty against
defects in workmanship and materials.
Batteries must be charged in accordance
with the operator's manuals directions and
regulations in order to be valid.
This warranty is not transferable. This
warranty does not cover damaged parts from
improper handling, commercial use, abuse,
neglect, accident, improper maintenance,
alteration, or the use of accessories and/or
attachments not specically recommended by
WEED EATER
for this product. Additionally,
this warranty does not cover parts that
will wear from normal use, and normal
deterioration of the exterior nish due to use
or exposure. This warranty does not cover
predelivery setup, or normal adjustments
explained in the instruction manual.
Transportation Charges: Transportation
charges for the movement of any power
equipment unit or attachment are the
responsibility of the purchaser. It is
the purchaser’s responsibility to pay
transportation charges for any part submitted
for replacement under this warranty unless
such return is requested in writing by
WEED
EATER.
Should you have any unanswered questions
concerning this warranty, please contact:
WEED EATER
, a division of Husqvarna
Consumer Outdoor Products N.A., Inc.
9335 Harris Corners Parkway
Charlotte, NC 28269
1-855-378-6903
In Canada, contact:
WEED EATER
850 Matheson Blvd. West
Mississauga, Ontario L5V 0B4
Giving the model number, serial number and
date of purchase of your product and the
name and address of the authorized dealer
from whom it was purchased.
THIS WARRANTY GIVES YOU SPECIFIC
LEGAL RIGHTS, AND YOU MAY HAVE
OTHER RIGHTS WHICH VARY FROM
STATE TO STATE.
NO CLAIMS FOR CONSEQUENTIAL OR
OTHER DAMAGES WILL BE ALLOWED,
AND THERE ARE NO OTHER EXPRESS
WARRANTIES EXCEPT THOSE
EXPRESSLY STIPULATED HERIN.
SOME STATES DO NOT ALLOW
LIMITATIONS ON HOW LONG AN IMPLIED
WARRANTY LASTS OR THE EXCLUSION
OR LIMITATIONS OF INCIDENTAL OR
CONSEQUENCIAL DAMAGES, SO THE
ABOVE LIMITATIONS OR EXCLUSION MAY
NOT APPLY TO YOU.
This limited warranty within the meaning of
that term as dened in the Magnuson-Moss
Act of 1975.
The policy of
WEED EATER
is to continuously
improve its products. Therefore,
WEED
EATER
reserves the right to change, modify,
or discontinue models, designs, specications,
and accessories of all products at any time
without notice or obligation to any purchaser.
 Loading...