

Page 1

EZ-Drive Quick I n stallation
WD Caviar Series 3.5-Inch EIDE Hard Drives
EZ-DRIVE SOFTWARE OVERVIEW
If you did not receive the EZ-Drive software, you can downloa d it
from our web site at www .wdc.com.
EZ-Drive software is included with the Western Digital hard drive to
help you:
Quickly and easily partition and format your new hard drive.
Overcom e th e 528 MB barrier .
Overcome th e 2.1 G B barrier.
Partitioning and Formatting
Your WD Caviar drive has been low-level formatted at the factory.
The hard drive is defect-free and ready to set up. You must partition
and high-level format the drive so it can accept files.
There are two ways to format and partition your hard drive.
1. Use the EZ-Drive software that you received with the hard drive.
2. Use the DOS utilities FDI SK a nd FORMAT.
We recommend using E Z- D rive. It is a safe, fast, and an e as y way to
partition an d form at th e ha rd d rive. See the sectio n Using EZ-Drive
Software on page 2 for instructio ns .
For instructions on using FDISK and FORMAT, see your DOS user
manual.
Note: DOS has a 2.1 GB partition limit . If you have a 2.5 GB or larger
hard dri ve , y ou m ust create at lea st tw o partitions to access the full
capacity.
Partition and Form at
If your system supports the full capacity of the hard drive, EZ-Drive
will only parti tio n and format the hard drive. It does not install code
on your boot sector.
528 MB Barri er
Most compu ter sys te ms bui l t befor e August 1994 do not support
hard drives larger than 528 MB unless the BIOS is updated or
third-party software such as EZ-Drive is installed.
2.1 GB Barrier
Some computer systems built before early 1996 do not support hard
drives with more than 4095 cylinders (hard drives larger than 2.1
GB) unless the BIOS is updated or third-party software such as
EZ-Drive is installed.
EZ-Drive Help Files
To access EZ-Drive help files on the installation disk, select
Installati on Help from the EZ-Drive main menu.
Compatibility
You can use EZ-Drive software with D O S 5.0 and above, Win dows
3.1x, Windows for Workgroups, Windows 95, Windows NT, OS/2
2.1X, and OS/2 Warp.
You cannot use EZ-Drive with Novell NetW are or Unix.
Data Compression Software
EZ-Drive is compatible with Stacker, Drivespace, and Doublespace
disk compression utilities. Other data compression software may not
be compatible. Always back up your data before using any data
compression software.
Hard Disk Dev ice Drivers
Products that use thei r own hard disk devic e drivers, such as
third-party disk controllers, may not be compatible with EZ-Drive.
Memory Man agers
EZ-Drive is fully compatible with the standard memory managers
that come with DOS and Windows. However, EZ-Dr ive loads in
conventional memory and may not be compatible with some
third - party memory managers.
Ontrack Disk Manager and EZ-Drive
Ontrack Di s k M anager and EZ-Driv e ca nno t co - exi s t in the same
system. If your existing drive has Ontrack Disk Manager installed
and multipl e partitions, y ou cannot inst al l EZ-Drive. We
recommend u si n g O ntrack Disk Manager to set up the new hard
drive.
If your existing drive has Ontrack Disk Manager installed and only
one partitio n, y ou can either use EZ-Drive to convert the On track
Disk Ma nager partition or use Ontrack Disk Manager to set up the
new drive. During installation, EZ-Drive detects Ontrack Disk
Manager an d pr om p ts y ou to convert the partition to an EZ -Drive
partition. If you do, EZ-Drive converts the Ontrack Disk Manager
partition to an EZ -Drive partition.
Even though EZ-Drive can convert your Ontrack Disk Manager
partition to an EZ-Drive partition without data loss, Western Digital
recommends that you back up your data before selecting this option.
Note: EZ-Dri ve ca n convert single Ontra ck Disk Manager partitions
only. It cannot conve rt mu ltip le O ntrack Disk Mana ge r Partitions.
BEFORE YOU BEGIN
Back up the data on your existing hard drive.
Make sure you have a bootable DOS system disk or Windows 95
Startup d is k , EZ - Drive, DOS, and ope rati n g system software, and
your system manual.
Write down the hard drive type and parameters (cylind er s/
heads/sectors) for the ex isting drive. Do NOT change the
parameters of your existing hard drive.
79-850080-000 S0220 3-97 1
Page 2
DRIVE AC2540 AC2635 AC2700 AC2850 AC21000 AC31000 AC11200 AC21200 AC31200 AC21600
Capacit y ( MB) 540.8 639.9 730.8 853.6 1083.8 1083.8 1281.9 1281.9 1281.9 1624.6
CMOS (MB) 515 610 696 814 1033 1033 1222 1222 1222 1549
CHKDSK (MB) 540.8 639.9 730.8 853.6 1083.8 1083.8 1281.9 1281.9 1281.9 1624.6
DRIVE AC31600 AC22000 AC22100 AC32100 AC22500 AC32500 AC33100 AC33200 AC34000
Capacit y ( MB) 1624.6 2000.3 2111.8 2111.8 2559.8 2559.8 3166.7 3249.3 4000.7
CMOS (MB) 15 49 1907 2035 2035 2441 2441 3020 3098 3815
CHKDSK (MB) 1624. 6 2000.3 2111.8 2111.8 2559.8 2559.8 3166.7 3249.3 4000.7
Table 1. CMOS and CHKDSK Megabytes
CMOS SETUP
Most computer system s prov id e a CMOS setu p progr a m th a t gi ves
you access to information rega rd ing your system c onfiguration. R efe r
to your system manual for CMOS setup instructions.
Note: Each BIOS is different. The information supplied here is not
meant to be followed step-by-step; it is provided as a guideline. Consult
your system manual for details.
Before installing EZ-Drive, go into your CMOS setup and select the
hard d r ive type option.
The following hard drive types are usually offered in CMOS: auto
config, predefined, and user defined.
Auto Config Drive Type
Western Digital recommends selecting the auto config drive type. The
auto config drive type automatically sets up the Western Digital hard
drive para met ers . If y o u en co u nte r p ro bl ems using auto config, try
selecting Type 01.
If you select auto config and have a trans l ating BIOS, EZ-Drive will
not install. You can, however, use EZ-Dri ve to part ition and format
your hard drive.
Note: Even if your BIOS correctly detects the parameters, this doesn ’ t
mean that the BIOS can tran sl at e those param eters. If you are in doubt,
we recommend contacting your system or BIOS manufacturer .
Predefined Drive Type
If you do not have the auto config drive type or if you encounter
problems after selecting auto config, select the Type 01 drive type.
Selecting Type 01 ensures that EZ-Drive will install on your hard
drive.
USING EZ-DRIVE SOFTWARE
Follow these instructions to partition and format the new hard d rive.
If your system does not support the full capacity of your hard drive,
EZ-D r ive insta l ls specia l code in the b o ot sector of the hard drive to
overcome the BIOS limitations.
Note: The steps outlined in this section represent a typical installation.
You instal lation may vary.
If your system does support the full capacity of your hard drive,
EZ-Drive will only partition and format your hard drive. It will not
install code on your boot sector.
CAUTION: Installing EZ-Drive on any drive that contains software
and data will result in the erasure of all software and data on that
drive.
1. After you complete CMOS setup, insert a bootable DOS disk or
Windows 95 startup disk in drive A.
2. Press
CTRL+ALT+DEL
to reboot your system.
3. Insert the EZ-Drive disk in drive A. At the A: prompt, type ez an d
ENTER.
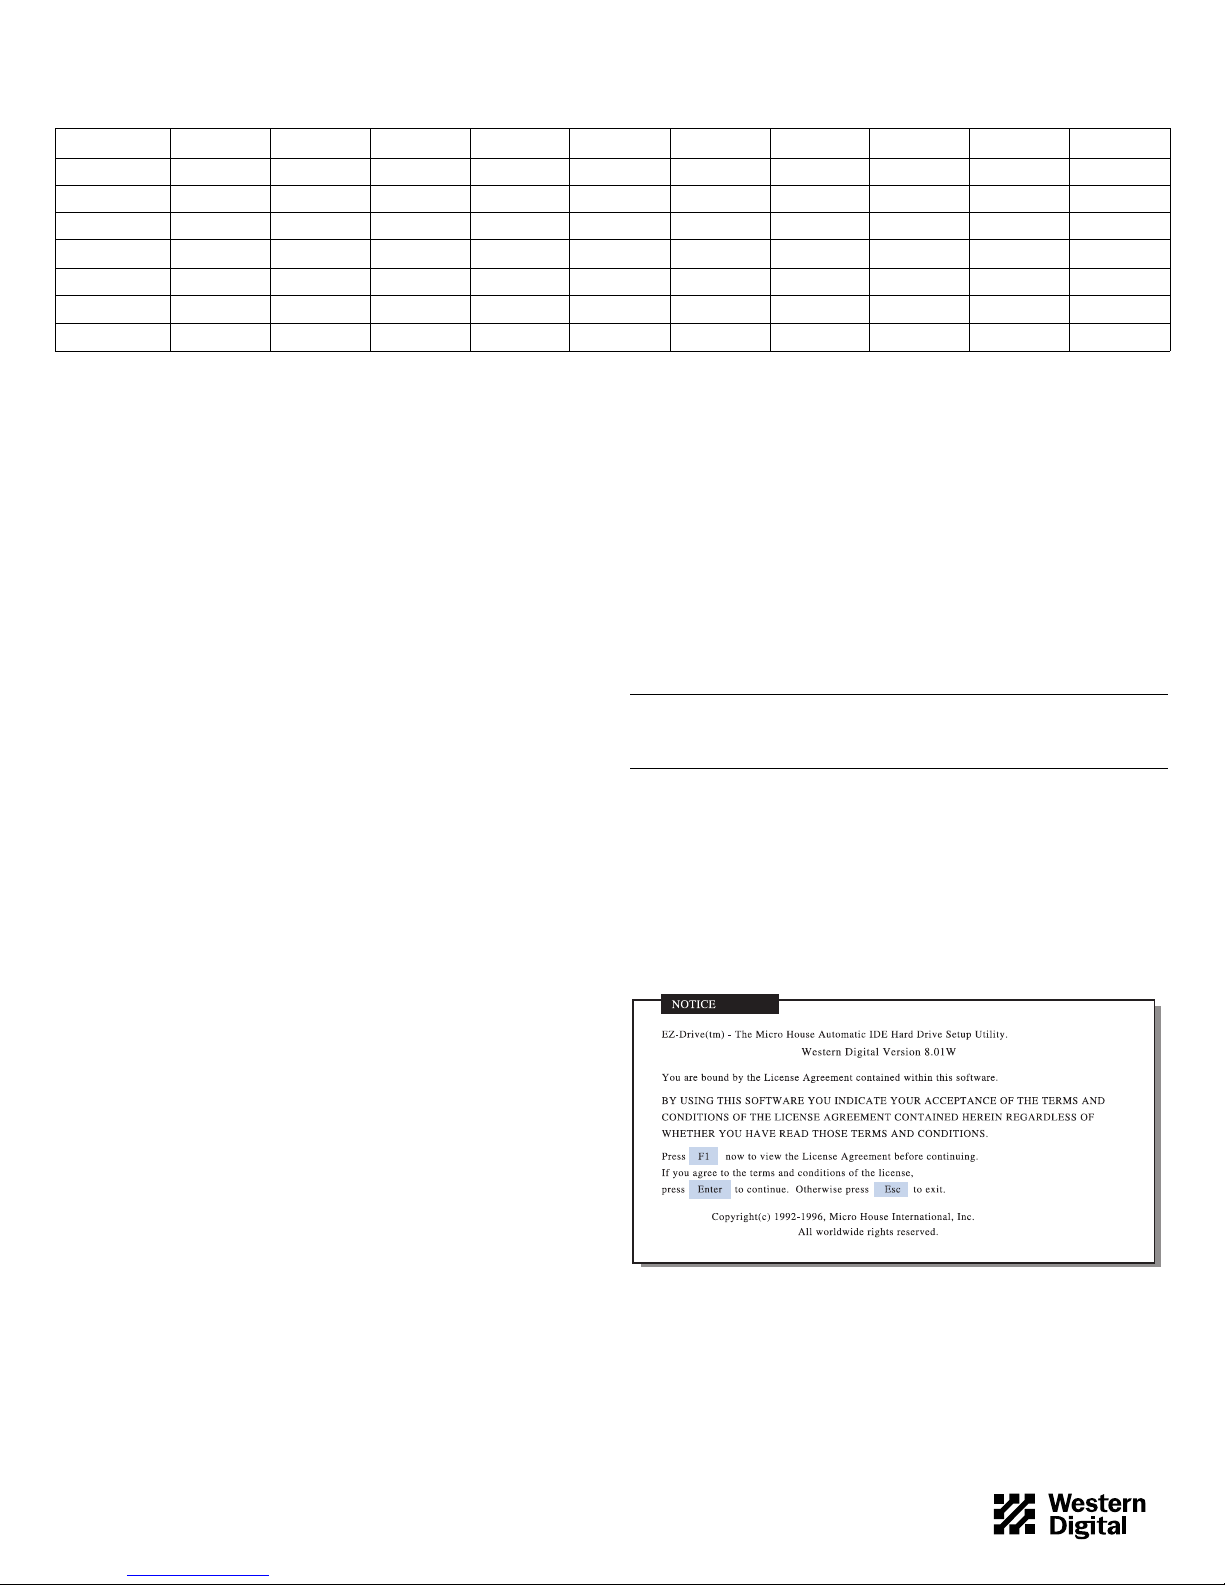
press
4. The Micro Hous e EZ-Driv e license agreement d isplays.
Press ENTER to start the in s talla tion.
User Defined D rive Type
Select user defined if your CMOS Setup does not offer auto config or
Type 01. If you select user def ined, you must enter 1023x16x63 for
your drive p arameters.
79-850080-000 S0220 3-97 2
Page 3

5. At the EZ-Drive Main Menu, select Fully Automatic Installation.
ENTER.
Press
7. EZ-Drive formats the drive now. If your drive is 2.5 GB or larger,
the following screen displays. Press
ENTER to accept the default
part ition siz es.
6. After EZ-Drive detects th e dr ive, the following screen displays if
your system does not support the full capacity of your hard drive.
Press Y to continue ins t al l ation.
Note: DOS has a 2.1 GB partition limit . If you have a 2.5 GB or larger
hard dri ve , y ou m ust create at lea st tw o partitions. Do not cr e ate a
partition lar ge r tha n 2. 1 GB.
8. Follow the instructions onscreen, and when prompted insert a
bootable DOS disk.
79-850080-000 S0220 3-97 3
Page 4

9. EZ-Drive has successfully set up your hard drive. Remove any disk
from your floppy drive. Press
ESC to exit and restart your system.
Your hard drive is now partitio ne d and formatted.
INSTA LLING AN OPERATING SYSTEM FROM DISK
If you installed EZ-Drive on the hard drive, you must follow the
steps below to ins tall DOS 5.0 and above, W ind o w s 3. 1x, W in dows
for Workgroups, Windows 95, Windows NT, OS/2 2.1x, and OS/2
Warp from disk. If you did not install EZ-Drive, or used it only to
partition and form at y o u r har d dr ive , see yo u r DO S manu al fo r
installatio n i n s tru ctions.
Caution: If you do not install DOS exactly as described below, the
DOS setup routine will reformat the hard drive to less than the full
capacity.
1. Remove any disk from the floppy drive.
2. Press
CTRL+ALT+DEL
to reboot the system. The following message
displays if EZ-Drive is installed on your hard drive.
EZ-Drive: Initializing. . .
EZ-Drive: Hold the
CTRL key down for Status Screen or to boot
from a floppy...
CTRL
3. Press and hold down the
key. A status sc r ee n dis p lays.
4. Read the screen pro mp t and ty pe A.
5. Insert the DOS installation disk 1 into drive A. Press
ENTER.
Follow the prompts to co mp l ete the installati on .
Tips
Refer to yo ur operating system manual to install operating
systems other th a n DOS.
See EZ-Dri ve onli ne help for more i nfo rmation.
UNINSTALLING EZ-DRIVE
This option removes EZ-Dri ve, and re turns control of the drive to
your system BIOS.
Note: Before uninstalling EZ-Drive, make sure that you have properly
configured the B IOS to recognize the full drive capa ci ty.
1. Insert the EZ-D rive disk into drive A.
2. From the A: prompt, type ez and press
ENTER.
3. From the EZ-Drive Main Menu, select Other Options. From the
Installation Options screen, select Change Installed Features.
4. Select the drive you want to change.
5. From the Ch ange Installed Features scree n, se lect Co ntro l led by
EZ-Drive. Press
ENTER to toggle the selection to Disabled.
6. From the Ch ange Installed Features screen , se lect Save Changes.
7. Press
ESC to return to the Installation Opt io ns sc reen, and select
Uninsta ll EZ-Drive.
8. A warning message displays. Type Y to remove EZ-Drive.
EZ-Drive is now uninstalled and the BIOS controls this drive.
FREQUENTLY ASKED QUESTIONS
A short list follows with common questions and solutions.
Q: Do I need to run FDI S K and FORMAT?
A: No. EZ-Dri ve i s a faste r, easier way to part ition and format your
hard d r ive.
Q: I don’t see the ful l capacity of my hard drive when installing
DOS.
A: Two issues a f f ect the installati o n of your ha rd drive: 1) some
syst ems do not pr op erly reco gnize har d d rives that have more than
4095 cylinders (dri ves larger than 2.1 GB); 2) most s yst em BI O S
dated before 1994 do n’t recognize drive s g re ate r than 528 MB. To
overcome this limitation, either install EZ-Drive or upgrade your
system BIOS. The following list provides the phone numbers for
common BIOS sources.
-OR
If you installed EZ-Drive and then incorrectly booted to your DOS
installation disks, you may have accidentally used DOS to overwrite
your EZ-Drive partitions. You need to use FDISK to delete your
DOS partitions and then re-install EZ-Drive. Be sure to follow the
instruc t ions outline d in the preceding section Install ing an Op erating
System from Disk.
The following list provides the phone numbers for several BIOS
sources.
79-850080-000 S0220 3-97 4
BIOS Sources:
Micro Firmware
(Phoenix BIOS on ly) (405) 321-8333
Phoenix (617) 551-4000
Unicore (508) 686-6468
Page 5

Q: Will my syste m BI OS support the West ern Digital 2.5 GB or
larger hard drive?
A: With so m e sy stems, the BIO S cannot recognize drive capacities
greater than 2.1 GB . Use the E Z-Drive s o f t ware to ov ercome this
BIOS limitation.
Q: The reported capacity of my hard drive is MUCH smaller than
Table 1 shows it sh ould be.
A: Your system BIOS improperly handles hard drives that report
greater than 1024 cylinders. Us e th e EZ- Drive software to acc es s the
full capacity of your drive.
Q: What will happen if I in st all EZ-Drive on a hard driv e that has
Ontrack Disk Manager?
BULLETIN BOARD SERVICE (BBS) (24 HOUR)
North Ameri ca o nl y: 714-753-1234
Germany: +49-89-92200 6- 60
U.K.: +44-1372-360 387
You may access the Technical Support Bulletin Board if you have a
Hayes-c om patible modem with a 2,400 to 28, 800 baud rate. The
required format is: 8 data bits, 1 stop bit, no parity.
DocuFAX (24 Hour)
North Ameri ca o nl y: 714-932-4300
The Netherl ands only: 020-4467650
Outside Th e Netherlands: +31-20 -4 467650
Use the auto mated FAX system to have produc t information sent
directly to your FAX machine.
A: EZ-Drive and Ontrack Disk Manager cannot coexist in the same
syst em . If the existing hard drive ha s o n ly one part ition and Ontrack
Disk Ma nag er already installed, EZ- D rive converts the Ontra ck Disk
Manager part ition to an EZ-Drive partition. Back up your hard
drive before installing EZ-Drive. If the existing hard drive has
multiple partitions and Ontrack Disk Manager installed, EZ-Drive
will not ins tal l . Use Ontrack D is k Manager to set up the new hard
drive.
Q: How much memory does EZ-Drive use ?
A: 5 KB.
Q: How can I get 32- bit dis k access in Windows?
A: Use the 32-bit disk access driver included on the EZ-Drive disk.
Install the d ri v er by running the EZ-Drive SETUP.EXE pr o g ram.
Q: I have a 2.5 GB or la rger drive. Can I create one partition only?
A: No. DOS has a 2.1 GB partition limitation. You must have at
least two partitions to access the full capacity of your drive.
TECHNICAL SUPPORT
North Ameri ca o nl y: 714-932-4900 or 800-832-47 78
Outside North America: 714-932-5000
Europe only: +31-020-4467 651
If you need additional information or help during installation or
normal use of our products, contact Western Digital Technical
Support. Ou r customer support staff wi l l an sw e r y o ur ins tall ation
questions by phone. When calling for support, please have your
Western Digital hard drive serial number and system hardware
versions avai l able.
RELATED DOCUMENTS
To obtain these reference documents, call Western Digital at
714-932-500 0 or dow nl o ad them fro m th e Western Digital web s ite .
BIOS Barriers Information Sheet (79-88009 9- 000)
The FAT Dilemma Information Sh eet ( 79- 880098-000)
WD Caviar 1.2 GB to 4.0 GB Installation Guide
(79-870027 -002)
Western Digital Qu i ck Installation (AC 2540-AC34000)
(79-850078 -0 00)
Western Digital Qu i ck Installation (AC 280-AC1425)
(79-850079 -0 00)
ONLINE SERVICES
Online s ervices include general produc t an d co ntact informat io n,
installation guides, downloadable drivers, and frequently asked
questions.
Internet:
www.wdc.com
FTP Site :
ftp.wdc.com
America Onlin e:
Keyword: WDC
Western Digital
8105 Irvine Center Dr ive
Irvine, California 92618
Western D igital and Caviar ar e registered tr ademarks and WD Cavia r, Cac heFlow, FIT La b, and The World’s Most Recommended Hard Dri v e ar e trademarks of Western Digital Corporation.
Other mark s m ay be m entioned herein th at belong to other com panies. Product specifications subject to change with out notice. © 1997 Western Digital Corporat ion. All rights reserved.
79-850080-000 S0220 3-97 5
 Loading...