


30-CUP, 55-CUP AND 110-CUP
COFFEE URNS
CAFETERAS PERCOLADORAS
DE 30 TAZAS (4.35 L), 55 TAZAS (7.95 L)
Y 110 TAZAS (15.95 L)
PERCOLATEURS/URNES À CAFÉ DE 30 TASSES (4,35 L), 55 TASSES (7,95 L)
ET 110 TASSES (15,95 L)
WCU30/WCU55/WCU110
For your safety and continued enjoyment of this product, always read the instruction book carefully before using.
Para su seguridad y para disfrutar plenamente de este producto, siempre lea cuidadosamente las instrucciones antes de usarlo.
Afin que votre appareil vous procure en toute sécurité beaucoup de satisfaction, lire attentivement le mode d’emploi avant de l’utiliser.
IMPORTANT SAFEGUARDS
When using electrical appliances, basic safety precautions should always be taken, including the following:
1.READ ALL INSTRUCTIONS.
2.Always unplug from outlet prior to handling or cleaning.
3.Do not touch hot surfaces. Use handles or knobs.
4.This appliance is not intended for use by persons (including
children) with reduced physical, sensory or mental capabilities, or lack of experience and knowledge, unless they are under supervision or have been given instruction concerning use of the appliance by a person responsible for their safety.
5.To protect against fire, electrical hazards, and/or personal injury, do not immerse cord, plugs or base in water or other liquids.
6.Close supervision is necessary when any appliance is used by or near children.
7.Do not operate any appliance with a damaged cord or plug or after the appliance malfunctions or has been dropped or damaged in any manner. Return appliance to the nearest Waring Repair Center for examination, repair, and electrical or mechanical adjustment.
8.The use of accessory attachments not recommended by Waring may cause injuries.
9.Do not use outdoors.
10.Do not let cord hang over edge of table or counter or touch hot surfaces.
11.Use extreme caution in moving coffee urn when it contains hot liquids.
12.Do not place on or near a hot gas or electric burner, or in a heated oven.
13.Do not use appliance for other than its intended use.
14.In replacing the cover, make sure that it is seated all around the rim of the body. To remove, grasp knob, twist, and
lift off.
15.Scalding may occur if the lid is removed during the brewing cycle.
2

16.This coffeemaker is equipped with a 3-prong grounding plug and must be plugged into a correctly polarized 3-prong grounding-type wall receptacle.
SAVE THESE INSTRUCTIONS FOR COMMERCIAL USE ONLY
INTRODUCTION
Thank you for purchasing a Waring™ Commercial Professional Coffee Urn. All three models are built to higher performance standards, and Waring offers users a choice of 30-, 55-, and 110-cup capacities. A dual heater system first brews coffee at a hotter temperature to ensure maximum flavor, then automatically shifts to the second heater to lower the temperature and hold it at the ideal drinking temperature. Shorter brew times, extra-large capacities, and classic stainless styling make these coffee urns perfect for special events and large commercial kitchens.
GROUNDING INSTRUCTIONS
For your protection, Waring™ Commercial Professional Coffee Urns are equipped with a 3-conductor cordset that has a molded 3-prong grounding-type plug, and should be used in combination with a properly connected grounding-type outlet as shown in Figure 1. If a grounding-type outlet is not available, an adapter, shown in Figure 2, may be obtained so that a 2-slot wall outlet can be used with a 3-prong plug. Referring to Figure 3, the adapter must be grounded by attaching its grounding lug under the screw of the outlet cover plate.
CAUTION: Before using an adapter, it must be determined that the outlet cover plate screw is properly grounded. If in doubt, consult a licensed electrician. Never use an adapter unless you are sure it is properly grounded.
Note: Use of an adapter is not permitted in Canada.
3
SHORT CORD INSTRUCTIONS
A short power-supply cord is provided to reduce the risk resulting from becoming entangled in or tripping over a longer cord.
If a longer detachable power-supply cord or extension cord is used, (1) the marked electrical rating of the extension cord should be at least as great as the electrical rating of the appliance, and
(2) the longer cord should be arranged so that it will not drape over the countertop or tabletop where it can be pulled on by children or tripped over unintentionally.
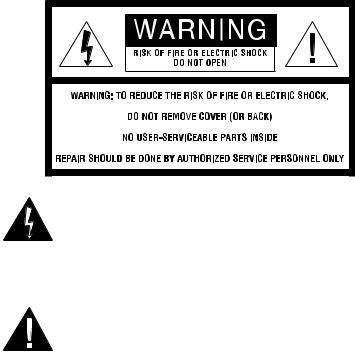
The lightning flash with arrowhead symbol within an equilateral triangle is intended to alert the user to the presence of uninsulated “dangerous voltage” within the product’s enclosure that may be of sufficient magnitude to constitute a risk of fire or electric shock to persons.
The exclamation point within an equilateral triangle is intended to alert the user to the presence of important operating and maintenance (servicing) instructions in the literature accompanying the appliance.
BEFORE FIRST USE
1.Carefully unpack coffee urn and remove all packing materials.
2.Wash the coffee urn thoroughly before brewing for the first time.
NOTE: It is recommended that prior to brewing your first pot of coffee, you run the unit with cold water only (without coffee grounds).
4

PARTS |
13. |
Base cover |
|
1. |
Cover handle |
14. |
Brew basket |
2. |
Cover |
15. |
Coffee brew quantities |
3. |
Locking tabs |
16. |
Pump tube |
4. |
Handles |
17. |
Cord (not shown) |
5. |
Body |
18. |
Cord wrap storage |
6. |
Sight glass cap |
|
(underneath) |
|
|
||
7. |
Coffee level indicator |
|
|
8. |
Removable sight glass |
|
|
9. |
Spigot lever |
|
14. |
|
|
||
10. |
Coffee urn base |
|
15. |
11. |
On/Off power switch |
|
WCU30 |
12. |
Ready indicator light |
|
|
|
|
|
14. |
|
1. |
2. |
|
|
|
3. |
15. |
|
|
WCU55 |
|
|
|
4. |
|
|
|
|
|
|
6. |
|
|
|
7. |
|
|
|
|
|
14. |
|
8. |
5. |
|
|
|
15. |
|
|
|
|
|
|
|
|
WCU110 |
9.
16.
10.
12. |
11. |
|
13.
18.
5
BREWING COFFEE – IMPORTANT STEPS TO FOLLOW
1.Remove cover and brew basket. Check to see that spigot is closed. Use cold, fresh tap water to fill coffee urn. DO NOT OVERFILL OR UNDERFILL. Fill according to markings
on inside of urn for number of cups desired. Use cold tap water – the automatic brewing cycle is timed to begin with a cold-water start.
NOTE: DEPENDING ON MODEL, THE MINIMUM BREW FOR EACH URN IS 10/25/30 CUPS.
2.Wet the coffee basket to help keep small particles of coffee from sifting through. Add desired amount of REGULAR
or PERCOLATOR GRIND COFFEE to basket. Use bottom of measuring cup to smooth out the grounds so you have a flat, even surface. Place basket on the pump tube. The pump tube must be resting correctly in center well in order for the unit to brew properly.
NOTE: Ground coffee quantities are printed on the side of the brew basket and on the following page for added convenience. The number of cups is based on the use of a standard dry measuring cup.
3.Replace the urn cover and secure in position by turning cover clockwise.
4.Plug into standard household 120 volt AC wall outlet. To avoid unnecessary strain on the heating mechanism,
PLUG IN COFFEE URN AFTER THE WATER AND COFFEE ARE ADDED.
5.When coffee brewing is complete, percolating will stop and the green indicator light will come on. The urn automatically switches to the “keep warm” setting to preserve freshtasting coffee at a hot, ready-to-serve temperature.
CAUTION: Keep cover in place during brew cycle because hot water may splash from pump tube.
6. Unplug urn when only 1 or 2 cups of coffee remain.
For best flavor, remove coffee basket and pump tube when brewing is completed.
6

NOTE: Excess coffee will remain under the spigot level. See cleaning section for emptying instructions.
REMOVE PARTS CAREFULLY: COFFEE URN AND PARTS WILL BE HOT!
The following chart suggests amount of coffee to use for medium brew; amounts can be varied to suit personal taste and particular coffees.
Cups to Be |
Amt. of Ground Coffee to Use |
||
Brewed |
Cups* |
Tablespoons |
|
WCU30 |
|
|
|
MIN |
10 |
1 |
16 |
|
|
|
|
|
20 |
2 |
32 |
|
30 |
3 |
48 |
WCU55 |
|
|
|
MIN |
25 |
2½ |
40 |
|
35 |
31 ⁄4 |
52 |
|
45 |
4 |
64 |
|
55 |
43 ⁄4 |
76 |
WCU110 |
|
|
|
MIN |
30 |
3½ |
56 |
|
|
|
|
|
50 |
5 |
80 |
|
70 |
6 |
96 |
|
90 |
7 |
112 |
|
110 |
8 |
128 |
1 cup brewed coffee = 5 fluid ounces * Use standard dry measuring cup
CLEANING & MAINTENANCE
CAUTION: Always remove plug from outlet after each use. Let coffee urn cool. Remove cover, coffee basket and pump tube carefully – grounds and remaining coffee may still be warm. After dispensing, excess coffee will remain under the spigot level. To empty, use handles and carefully tilt the body forward with the spigot open so that excess coffee can drain out into a container. Discard coffee.
7
BEFORE & AFTER EACH USE
Before using for the first time and after each use, wash the brew basket, pump tube and interior of the urn with water and detergent. Never immerse base of urn in liquid. Rinse urn thoroughly. The cover, basket, and pump tube may be washed
on top rack of dishwasher.
SITE GLASS CLEANING
To clean the sight glass tube, remove the sight glass cap and pull out glass tube. Remove the rubber caps from each end.
Fill tube with water and liquid detergent and scrub the tube. This will sanitize the tube and remove any stains that may have built up. Rinse thoroughly.
IMPORTANT: You must replace rubber caps at each end of the tube in order for the unit to continue to brew properly.
CLEANING THE EXTERIOR
Wipe exterior with a damp cloth and dry.
DECALCIFICATION
After repeated use: Accumulation of oil and coffee stains may cause a bitter taste. Remove stains with an all-purpose
coffee cleanser. Follow the directions on the package, filling with water to 1½ inches from top. Rinse well.
NOTE: Any other servicing should be performed by an authorized service representative.
8
9
 Loading...