

Page 1
INSTRUCTION MANUAL
Page 2
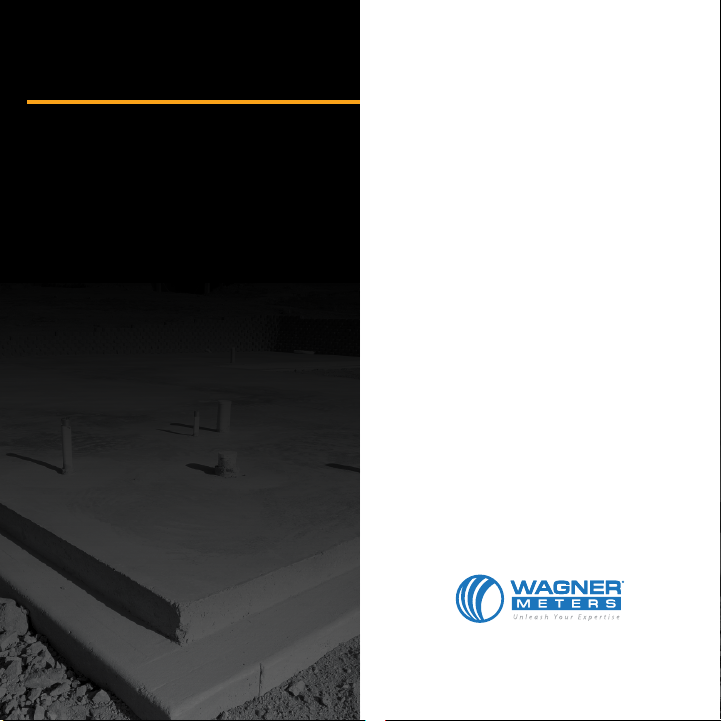
TABLE OF CONTENTS
1 Introduction
3 C555 Parts
4 Quick Start: Basic Use for
Concrete
6 Correct Usage Guidelines for
Your C555 Moisture Meter
8 Function Buttons: Detailed
– ON/HOLD Button
– UP and DOWN Buttons
– MODE Button
• Relative Scale for Moisture
Measurement of Non-Concrete
Building Materials
– AUDIO button
17 Low Battery Alert Indication
17 Auto Shut-Down to Preserve
Battery Life
18 Calibration of Your C555
20 Protective Rubber Boot for
Your C555
22 Summary of C555 Features
23 Specications
24 Changing the Battery
24 Meter Storage
25 Warranty
28 Glossary of Terms
Page 3

INTRODUCTION
About Your Meter
The C555 sensor pad measures 2.0-inch
(50mm) wide by 2.5-inch (63mm) long.
Where appropriate, or when specied, use
further testing as outlined in ASTM F2170.
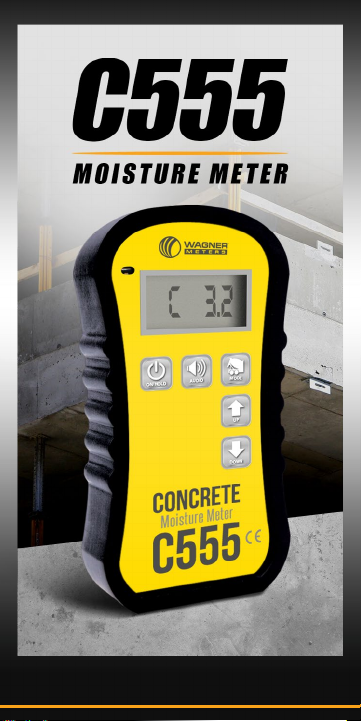
Your Wagner Meters C555 hand-held
concrete moisture meter was designed to
make a fast assessment of concrete slab
drying patterns easy and inexpensive.
Large areas can be surveyed quickly and
easily. Wagner meters are nondestructive.
They do not require drilling or driving
pins into the concrete. Your model C555
has the built-in capability to capture and
record relative humidity and temperature
readings to determine ambient or service
conditions.
The C555 is designed to give an average
moisture indication of the area it is
scanning. However, using readings
from surface concrete moisture meters
should NEVER be the sole factor when
determining if a concrete slab is dry
enough to install a oor covering.
1 2
In the Standard Measurement mode, your
C555 measures moisture within the 1% to
6.9% moisture reading range.
The C555 has an easy-to-read digital
display scaled in 0.1 increments when in
Standard Measurement mode.
Page 4
AMBIENT
RH/TEMP
SENSOR
LCD
ON/ HOLD
BUTTON
AUDIO
BUTTON
C555 PARTS
MODE
BUTTON
UP BUTTON
DOWN
BUTTON
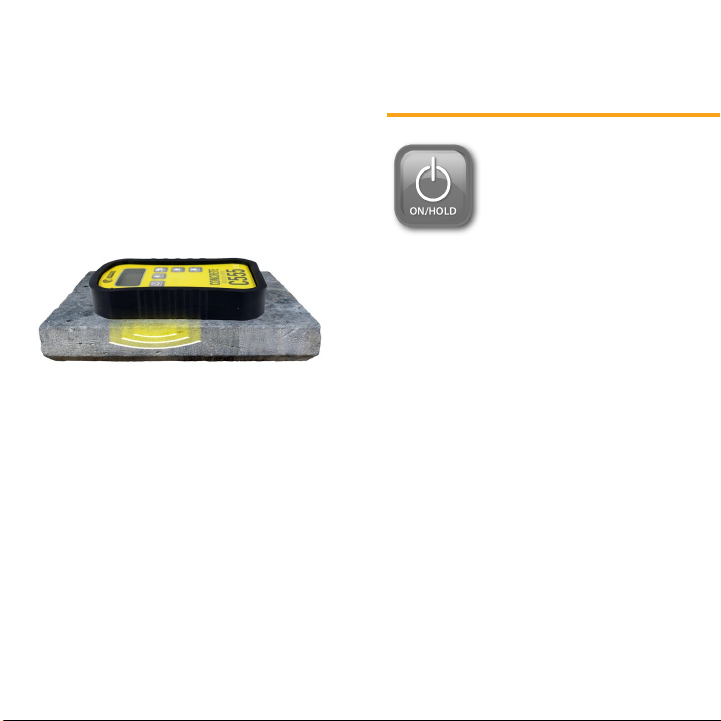
QUICK START
BASIC USE FOR CONCRETE
With your C555 turned
OFF, press and release
the ON/HOLD button.
The meter will turn on and
briey display the model
number, followed by the rmware revision
number. If this is the rst time you are
using your new C555, the meter display
should revert to Standard Measurement
mode for concrete immediately after the
revision number is displayed, with the
display showing C 0.0 when the meter is
held in the air.
BATTERY
COMPART-
MENT
(Meter Serial
Number is
located in this
compartment)
SENSOR
PLATE WITH
ABRASION
RESISTANT
COVERING
ADDED FOR
PROTECTION
Press the MODE button until the display
shows CON, then press the ON/HOLD
button to enter the Concrete Reading
mode. A large C will be displayed while in
Concrete Reading mode.
The next press of the MODE button will
display REL. Press ON/HOLD to select.
This mode will show the relative reading.
3 4
Page 5
The third press of the MODE button shows
CAL and is used for the calibration of the
meter. This mode is used in conjunction
with the included On-Demand Calibrator.
You will place the meter in this mode to
perform your own eld calibration. See
instructions on page 20.
When you are nished taking measurements
and wish to turn the meter off, press the ON/
HOLD button for approximately 2 seconds.
Alternatively, the meter will automatically
shut off after approximately 60 seconds of
no activity.
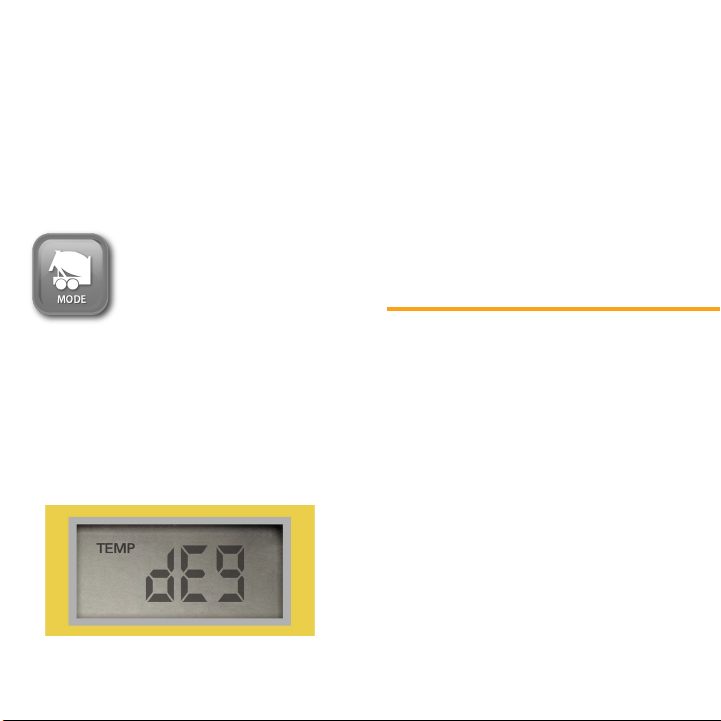
Press the MODE button
four times and the Relative
Humidity mode will display
RH for 3.5 seconds, then
it will display the ambient
relative humidity (e.g., 34.5%). After 3.5
seconds, the mode will change to temperature
and DEG will display, then toggle to the
ambient temperature (e.g., 75.1F). The
temperature display can be changed to
Celsius (e.g., 24.0C) by pressing either the
UP or DOWN arrow key.
5 6
CORRECT USAGE
GUIDELINES FOR YOUR C555
MOISTURE METER
To make sure that you are getting the
most accurate readings from your C555
meter, Wagner Meters recommends that
you pay close attention to the following
guidelines:
1. To prevent high or inaccurate
readings, always ensure there are no
metal objects near or directly under
the moisture meter.
2. The sensor plate is a 2.0-inch
(50mm) wide by 2.5-inch (63.5mm)
long rectangle on the back of the
Page 6
meter (opposite side of the display).
To take a valid measurement, the
sensor plate must be completely
covered with the material you are
measuring. If the sensor plate is not
completely covered, your moisture
reading will be inaccurate.
3. If there is visible moisture or water
on the surface of the concrete to be
tested, wipe off any excess and let
the surface dry out for a few minutes
before taking measurements.
4. Be sure to press down with slight but
rm pressure to ensure good sensor
plate contact with the surface of the
concrete.
FUNCTION BUTTONS:
DETAILED USAGE INSTRUCTIONS
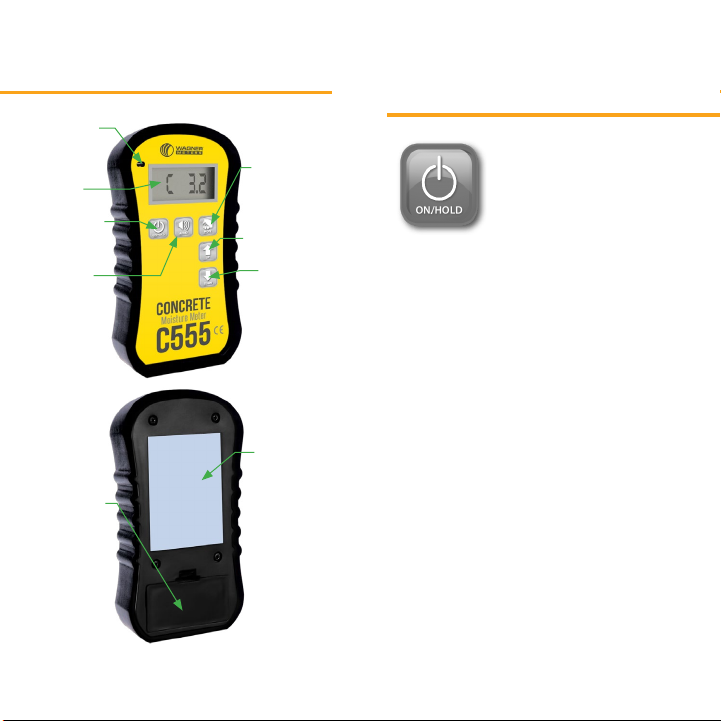
ON/HOLD Button
When the meter is OFF,
pressing and releasing the
ON/HOLD button will
turn the meter ON, with the meter briey
displaying the model number, followed by
the rmware revision number. Immediately
after briey displaying the revision
number, the meter will be in the Standard
Measurement mode. At this point, the meter
is ready to take moisture measurements.
Be assured that any settings that you have
previously programmed/selected will be
active. In other words, turning off the meter
will not cause the meter to revert to factory
default settings, but will retain whatever
settings you programmed it with.
When in the Standard Measurement mode,
pressing and releasing the ON/HOLD button
will freeze whatever reading is showing on
the display. Additionally, the word HOLD
7 8
Page 7

will show in the upper right-hand corner.
This HOLD feature is valuable when there is
a need to document readings.
If the audio function of the meter is turned
on (refer to the AUDIO BUTTON section
on page 15), the meter will emit a short beep
every 4 seconds that the current reading
remains on HOLD.
how these buttons will
function. Settings values will
be increased or decreased
or different functions
activated according to
the specic instructions outlined for each
settings button.
MODE Button
The current reading will remain on the
screen until the ON/HOLD button is briey
pressed again, returning the meter back to
Standard Measurement mode. HOLD will
then disappear from view.
NOTE: The C555 will shut down automatically
after 60 seconds if the meter is left on HOLD
with no measurement activity. Pressing the
ON/HOLD button for 2 seconds will turn the
meter off.
UP and DOWN Buttons
The particular settings
mode that you are in at a
given time will determine
9 10
The MODE button on your
C555 is used to place your
meter into one of three
different modes by pressing the button
until you are in the desired mode. The
available modes are:
1. Concrete Reading Mode. Press the
MODE button until the display shows
CON, then press the ON/HOLD
button to enter the Concrete Reading
mode. C 0.0 will be displayed,
indicating the meter is ready to take
readings. Make sure the surface of the
concrete has been brushed clean of
loose debris and dust. Place the sensor
of the meter on the area of the concrete
Page 8

to be tested and press down slightly
but rmly, making sure the sensor
rests at against the concrete. Take
several readings close to each other.
If the readings vary, use the highest
reading. The moisture readings will
show between 0.0% to a maximum
of 6.9%.
the sensor plate, 0 will be displayed.
While in this mode, REL will show in
the lower-left corner of the display.
Note: This mode is normally used for obtaining
relative measurements, typically for non-concrete
applications (example: relative measurements on
gypsum or drywall).
Note: Moisture readings in concrete may
be affected by the following factors:
• The type of aggregate used in the mix
may contain iron or other metals that
could cause the reading to be high or
read the same value no matter where
you place the meter.
• Any rebar or metal screen too close to
the surface will cause a high reading.
Move the meter to several areas for
more comparisons.
2. Relative Measurement Mode. Press
the MODE button until the display
shows REL, then press the ON/
HOLD button. With nothing under
11 12
3. Meter Calibration Mode. Press the
MODE button three times, CAL will
be displayed. Follow the instructions
printed on page 20 or on the back of
the included On-Demand Calibrator.
4. Relative Humidity and Temperature
Mode. Once in this mode, your meter
will be in a Relative Humidity (RH)
Measurement mode (showing 0-100%)
and Temperature Measurement mode
(showing 32°F to 110°F or 0°C to
43.3°C) for measuring ambient RH
and temperature. Press and release the
MODE button until the display shows
RH. The display will toggle every 3.5
seconds to display the following:
Page 9

• RH with a small RH in the
middle left corner followed by
the ambient RH (e.g., 35.4%).
• DEG with a small TEMP in
the upper left corner followed
by the ambient temperature in
Fahrenheit (e.g., 75.1F). While
the temperature display is active,
the display can be changed to
Celsius (e.g., 24.0C) by pressing
either the UP or DOWN
arrow key.
Relative Scale for Moisture Measurement
of Non-Concrete Building Materials
As mentioned earlier, this mode can
be entered by pressing and releasing
the MODE button until you are in this
mode (display will show REL in lower
left corner). Once in this mode, your
meter will be in a relative measurement
scale (0-100) for measuring non-wood
based materials. Press the ON/HOLD
button to begin measuring in Relative
Measurement mode. To get back to
Standard Measurement mode, press
the MODE button until CON appears
on the display and then press the
ON/HOLD button.
AUDIO Button
Your C555 AUDIO
button allows you to set
a high moisture content
alarm threshold (setting from 0.0 to 6.9)
for material measurement applications,
and also set the volume for the audible
alarm. This feature is useful, for example,
when quickly scanning a section of
concrete or other material, and trying to
locate any higher moisture content areas,
without having to continually look at the
digital display.
13 14
Page 10

Press the AUDIO button and the display
will show the current moisture content
high threshold (e.g., 6.4). The factory default
is 2.0. Each press and release of the UP or
DOWN buttons will adjust the threshold
setting by 0.1.
To get to your desired setting faster, hold
down the UP button for 0.7 seconds; the
alarm threshold setting will increase to
the next setting number (e.g., if the alarm
threshold setting is currently 2.4, the
setting will advance to 3.0). If the DOWN
button is pressed and held for 0.7 seconds,
the setting will decrease to the next number
down (e.g., if the alarm threshold setting
is currently 6.4, the setting will change to
5). Every 0.7 seconds thereafter that the
button is pressed and held, the setting will
change by another number unit (e.g., from
5 to 4). Once the setting has been increased
to the maximum programmable Moisture
Content Percentage (MC%) threshold
(6.9), the setting will wrap around to the
minimum (1) and continue to increase
from there. Similarly, if the setting has
been decreased to the MC% minimum
(1) the setting will wrap around to the
maximum (6.9) and continue to decrease
from there.
Next, press the AUDIO
button again, and you
will be taken to a display
that will show the current
volume setting for audible
sound. Simply use the UP or DOWN
arrow buttons to set the desired audible
level. The volume setting has a range of
OFF to 9, with 9 being the loudest and 1
being the quietest and OFF indicating that
the audible alarm is disabled.
When nished, you can place your meter
back to Standard Measurement mode by
pressing the ON/HOLD button.
15 16
Page 11

Low Battery Alert Indication
Calibration of Your C555
When the battery is low, BAT appears
in the upper right-hand corner of the
display. If ignored for too long, the meter
will ash a larger BAT three times and
then automatically shut down. The 9-volt
battery must be replaced immediately.
This shut-down action is to prevent
inaccurate readings.
Auto Shut-Down to Preserve
Battery Life
Regardless of which mode the meter is
in, if there is no change in measurement
activity over a period of 1 minute, the
meter will automatically turn off.
17 18
If you have reason to believe your C555
may be out of calibration, it can be easily
recalibrated using the provided OnDemand Calibrator. Before calibrating
your meter, please be aware that you must
ONLY calibrate to the correct Calibrator
that came with the meter. Serial numbers
on the Calibrator (found underneath) and
meter (found in the battery compartment)
MUST match for correct calibration. Also,
the sticker must not be damaged, as this
may cause incorrect calibration. Follow
the steps below for proper calibration. The
instructions are also printed on the back of
the Calibrator.
1. Place the Calibrator on its legs on a
non-metallic surface.
2. Turn the meter on, and then use the
MODE button to put your meter in
CAL mode. (Refer to the MODE
button section of the manual.)
3. Place the meter on the Calibrator,
Page 12

correctly seating the meter sensor
pad rmly on the recessed area of the
Calibrator. IMPORTANT: Failure to
correctly and rmly “seat” the sensor
pad in the recessed area will cause an
inaccurate calibration.
4. Apply light downward pressure and
press the AUDIO button three (3) times.
The meter will make a beeping sound
which indicates it is going through
the automatic calibration procedure.
5. When the calibration procedure is
complete, the meter will display the
word LIFT. Immediately remove the
meter from the Calibrator and hold
the meter in the air for approximately
5 seconds until the word DONE
appears on the display. During this
last phase in the air, be sure to keep
your hand and other objects away
from the underside of the meter.
6. Press the ON/HOLD button to return
the meter to Standard Measurement
mode.
If, after recalibrating the C555, there is
still a problem with the meter, please
contact a Wagner representative for further
instructions at our worldwide toll-free
number, (844) 746-3764.
Protective Rubber Boot for
Your C555
In an effort to help avoid damage
resulting from your C555 meter being
dropped or banging the edges against
other hard objects, Wagner Meters has
provided a tted rubber boot which ts
snugly around the perimeter of your
C555 meter.
19 20
Page 13

This protective boot should remain in place
at all times even when calibrating your
meter with the On-Demand Calibrator.* All
function buttons as well as the display screen,
sensing plate, and battery compartment are
accessible without removal of this rubber
guard. The boot will t on the meter only one
way correctly. Failure to correctly place the
boot will result in inaccurate readings.
*Although not recommended, you may
wish to use the meter without the protective
rubber boot. If you choose to do so, make
sure you recalibrate your meter on the
On-Demand Calibrator with the boot off.
SUMMARY OF
C555 FEATURES
• Relative Humidity & Temperature mode
• Moisture content measurement range
for concrete 0% to 6.9% (the display
will show 0 to 6.9)
• Digital display resolution of 0.1% (in
Standard Measurement mode)
• Relative scale for testing non-concrete
building materials
• Large moisture measurement sensor area
• Current reading can be frozen on
display screen, great for note taking
• Low battery alert indication
• Audible alarm for programmable high
moisture content limits
• Programmable audio alert volume
• Can be eld-calibrated with the included
On-Demand Calibrator
• Protective rubber boot
• Hard shell storage case and a 9-volt
battery are included
• 1-year warranty
• Automatic shutoff when not in use
21 22
Page 14

SPECIFICATIONS
CHANGING THE BATTERY
Dimensions with Boot
• Length: 5.75 inches (146mm)
• Width: 3.0 inches (76mm)
• Thickness: 1.0 inches (25mm)
Scanning Area
• 2.0 inches (50mm) x 2.5 inches (63mm)
Weight with Boot
• 7.2 oz. (204g)
Power
• 9-volt battery (Wagner recommends using
non-rechargeable Alkaline or Lithium, or
rechargeable NiMH batteries)
Auto Power Shut-Down
• 60 seconds
Measurement Ranges
• Moisture range for concrete: 0.1 to 6.9
Storage Temperature and Humidity
• +50˚F to +90˚F (+10˚C to +32˚C), Maximum
relative humidity of 95%, non-condensing
Operating Temperature
• +32˚F to +110˚F (+0˚C to +43˚C)
23 24
As indicated earlier in this manual, if
BAT appears on the display, the battery
must be changed immediately or any
further moisture measurements will
be inaccurate. Replace with 9-volt,
non-rechargeable Alkaline or Lithium
or rechargeable NiMH batteries. Be
sure to observe proper battery polarity.
The battery ts very snugly in its
compartment and will not become
dislodged while taking measurements.
Reattach the compartment door carefully
so that it snaps back in place.
METER STORAGE
When meter is not in use, we recommend
that it be stored in the hard shell carrying
case provided with each C555 meter. After
each use, clean the meter case with a soft
rag lightly moistened with water. If the
meter is to be stored for a period longer
than 30 days, remove the 9-volt battery.
Page 15

WARRANTY
Wagner recommends that you register your
moisture meter at www.genuinewagner.com
for faster support and benets.
Register your meter at
www.genuinewagner.com
Wagner Meters’ warranty offers this
product protection against defects in
material and workmanship for one (1)
year from the date of purchase on all C555
moisture meters, subject to the following
terms and conditions:
Wagner Meters’ liability under this
warranty shall be limited, at Wagner
Meters’ option, to the repair or replacement
of this product or any part thereof,
which is demonstrated to be defective.
To exercise this warranty, visit www.
wagnerrepairs.com for instructions. This
limited warranty does not apply if Wagner
Meters determines that the product has
been damaged by accident, negligent
handling, misuse, alteration, damage
during shipment, or improper service not
attributed solely to the actions of Wagner
Meters. Wagner Meters’ liability for any
defect in material or workmanship in this
product shall be limited to the amount of
purchase price of the product.
With proper care and maintenance, the
meter should stay in calibration; however,
because Wagner Meters has no control over
the manner in which the unit will be used, it
makes no guarantee that the meter will stay
in calibration for any specic period of time.
Wagner Meters recommends returning the
unit to the factory for a diagnostic checkup in
the event the meter is dropped or otherwise
damaged. If the meter is suspected to be
inaccurate, using the provided On-Demand
Calibrator and performing a recalibration
will ensure the meter is reading correctly.
25 26
Page 16

If the meter fails to calibrate properly
then it should be sent to the factory for a
diagnostic checkup.
an ofcer of Wagner Meters, do not constitute
warranties and should not be relied upon by
the customer.
When instructed to return a meter,
the meter must be returned with the
Calibrator that matches the serial number
of the meter.
This warranty is in lieu of all other warranties,
whether oral or written, express or implied.
THERE ARE NO WARRANTIES WHICH
EXTEND BEYOND THE DESCRIPTION
OF THE FACE HEREOF. WAGNER
METERS HEREBY DISCLAIMS
ANY IMPLIED WARRANTY OF
MERCHANTABILITY OR FITNESS
FOR A PARTICULAR PURPOSE. Under
no circumstances shall Wagner Meters be
liable for any incidental or consequential
damages. Agents and employees of
Wagner Meters are not authorized to make
modications to this warranty or additional
warranties binding on Wagner Meters.
Accordingly, additional statements, whether
oral or written, except written statements from
27 28
This warranty is personal to the customer
purchasing the product from Wagner Meters
or Wagner Meters’ authorized distributors,
and is not transferable.
Technical Support/Repair Contact
Worldwide Toll-Free: (844) 746-3764
Glossary of Terms
Relative Humidity
The amount of water vapor in the air,
expressed as a percentage of the maximum
amount that the air could hold at the given
temperature.
Temperature
The degree or intensity of heat present
in a substance or object, especially as
expressed according to a comparative scale
and shown by a thermometer or perceived
by touch.
Page 17

500-00555-001 REV NC
Wagner Meters
326 Pine Grove Road
Rogue River, OR 97537
Worldwide Toll-Free:
844-746-3764
WWW.WAGNERMETERS.COM
©Wagner Meters 2019
All rights reserved. No part of this publication may be
reproduced, stored in a retrieval system, or transmitted, in any
form or by any means, electronic, mechanical, photocopying,
recording, or otherwise, without the prior written permission
of the publisher. The information in this document is subject to
change without notice.
32
 Loading...