

Page 1

User’s Manual
© 2003 VTECH
Printed in China
91-02061-000
Page 2

Dear Parent,
At VTech® we know how important the first day of school is for
your child. To help prepare preschoolers for this important event,
VTech® has developed the Ready, Set, School™ series of
interactive toys.
Ready, Set, School ™ features fun characters and inviting school
themes that use technology to capture a child’s attention and teach
important preschool skills like spelling, counting and the alphabet.
These vital skills are taught in a way that’s both fun and highly
engaging to maintain a child’s interest. Children will also be
introduced to fun school subjects such as art class, music class and
even recess! With Ready, Set, School™, learning is fun from
day one!
At VTech® we know that a child has the ability to do great things.
That’s why all of our electronic learning products are uniquely
designed to develop a child’s mind and allow them to learn to the
best of their ability. We thank you for trusting VTech® with the
important job of helping your child learn and grow!
Sincerely,
Your Friends at VTech
To learn more about Ready, Set, School ™ and other VTech® toys, visit
®
www.vtechkids.com
Page 3

INTRODUCTION
Thank you for buying the VTECH® Write & Learn™ Desk learning
toy!
The VTECH® Write & Learn™ Desk learning toy is a fun and interactive
desk. It offers 18 different activities, which include letter and number
activity sheets, simple spelling, silly doodles drawings, coloring, and
other funny pages such as music composer and a maze. So you can
learn how to write letters and numbers, draw pictures and create fun
music.
ACTIVITY BUTTONS LCD SCREEN OFF BUTTON
NUMBER BUTTONS
CRAYON STORAGE
COMPARTMENT
LETTER BUTTONS
TOUCH SENSITIVE
DRAWING SURFACE
STOOL
VOLUME
CONTROL SWITCH
ON BUTTON
FRAME HOLDER
Introduction
2
Page 4

INCLUDED IN THIS PACKAGE
• One Write & Learn™ Desk learning toy
• One stool
• Eight activity sheets for the Funny Pages activities
• Two pieces of blank paper for drawing
• Three crayons (We suggest you use crayons and paper to play on
the desk)
• One instruction manual
• One non-electronic writing stylus
• Desk and stool assembly instructions
WARNING: All packing materials, such as tape, plastic sheets,
wire and tags are not part of this toy and should be
discarded for your children’s safety.
GETTING STARTED
BATTERY INSTALLATION
1. Make sure the unit is turned OFF.
2. Locate the battery cover on the
bottom of the unit. Use a
screwdriver to loosen the screw.
3. Insert 4 new “AA” (UM-3/LR6)
batteries, as illustrated. (The use of
new alkaline batteries is
recommended for maximum
performance.)
4. Replace the battery cover and
tighten the screw to secure the
battery cover.
Instructions
3
Page 5

BATTERY NOTICE
• Install batteries correctly observing the polarity signs (+, -) to avoid
leakage.
• Do not mix old and new batteries.
• Do not use batteries of different types.
• Remove exhausted or new batteries from equipment when the unit
will not be used for an extended period of time.
• Do not dispose of batteries in fire.
• Do not attempt to recharge ordinary batteries.
• The supply terminals are not to be short-circuited.
• Only batteries of the same and equivalent type as recommended
are to be used.
Note: We do not recommend the use of rechargeable batteries.
INSERTING PAPER
1. Remove the plastic transparent sheet
before you play.
2. Insert a piece of paper onto the desk
properly.
Instructions
4
Page 6

3. Secure the piece of paper by pressing
down the sides of the frame holder.
Note: Please put only one piece of paper on the desk at a time.
PRODUCT FEATURES
1. Press this button to turn the unit
on.
2. Press this button to turn the unit
off.
Instructions
5
Page 7

3. NON-ELECTRONIC WRITING STYLUS
The non-electronic writing stylus comes attached to the unit. It
cannot be used as a normal drawing crayon, but you can use it to
trace on the desk and see your pictures appear on the LCD screen.
4. ACTIVITY BUTTONS
There are 11 activity buttons located on both sides of the LCD
screen.
5. Press the GO button to
confirm the selection or to pick
something. Y ou can find the GO button
under the LCD screen.
Instructions
6
Page 8

6. Press these ARROWS to show the
previous or next menu option. The
arrows are on the sides of the LCD
screen.
7. Press the REPEAT button to hear
the last instructions repeated.
8. Press the ERASE button to erase
the current drawing on the LCD screen
and restart the drawing.
9. Press the ABC/abc button to switch
between uppercase and lowercase
letters for the Letter Writer and Spell &
Draw activities.
Instructions
7
Page 9

10. NUMBER BUTTONS
The number buttons are located under the
LCD screen. Use these buttons in the
Number Writer activity to learn how to write
numbers.
11. LETTER BUTTONS
The letters are located on the frame holder
around the desk. They appear in
alphabetical order from left to right. Use
these buttons in the Letter Writer activity to
learn how to write letters.
12. VOLUME CONTROL SWITCH
Adjust the volume by sliding the Volume
Control Switch to the top to raise the volume
and to the bottom to lower the volume.
13. SCREEN SAVER
If there is no input into the Write & Learn™ Desk for about two minutes,
a screen saver will be activated. You will see some objects moving
across the LCD screen to let you know the screen saver is active.
Press any key or draw anything to go back to the previous screen.
Instructions
8
Page 10

14. AUTOMATIC SHUT-OFF
If there is no input into the Write & Learn™ Desk for about three
minutes, the unit will automatically shut off to save power. After the
unit has automatically shut off, you will need to press the On button
again to restart the unit. We recommend that you turn the unit off when
not playing with it. If the desk is not going to be used for an extended
period of time, we recommend removing the batteries.
ACTIVITIES
WE RECOMMEND THAT YOU USE PAPER AND CRAYONS FOR
ALL ACTIVITIES.
Press one of the Activity buttons to get into the following activities:
LETTER WRITER
Press one of the letters around the border
of the desk. The unit will show you how to
write the letter, then it will invite you to write
the letter yourself. After you have written
the letter, it will show you an object on the
LCD screen that begins with that letter.
You can practice both uppercase and
lowercase letters. Press to change the
letter case.
NUMBER WRITER
Press one of the numbers under the LCD
screen to learn how to write that number.
The unit will show you how to write the
number, then it will invite you to write the
number yourself. After you have written
the number, the desk will show you how to
count up to that number.
Activities
9
Page 11

SPELL & DRAW
This activity introduces simple spelling. To
choose a picture from the LCD screen, press
the GO button . To see more
choices, press the left or right arrows.
First, the unit will show you how to spell a
word. It will then ask you to spell the word
by writing the letters. After you have written
the word, press the GO button. Y ou will then
be able to draw anything you’d like on the word to make it fun. When
finished, press the GO button again and see your word and drawing
dance on the LCD screen.
You can practice both uppercase and lowercase letters. Press to
change the letter case.
ANIMALS
This activity shows you how to draw different
kinds of animals. Scroll through the different
animal pictures on the LCD screen by
pressing the left or right arrows. To choose
an animal from the screen, press the GO
button .
Follow the steps shown on the LCD screen
and then see what you drew. After you have
drawn the picture, press the GO button to
see it come to life on the LCD screen.
Activities
10
Page 12

BEACH FUN
This activity shows you how to draw different
objects from the beach. Scroll through the
different beach objects on the LCD screen
by pressing the left or right arrows. To
choose an object from the screen, press the
GO button .
Follow the steps shown on the LCD screen
and then see what you drew. After you have
drawn the picture, press the GO button to
see it come to life on the LCD screen.
HOME
This activity shows you how to draw
different objects from home. Scroll through
the different home objects on the LCD
screen by pressing the left or right arrows.
T o choose an object from the screen, press
the GO button .
Follow the steps shown on the LCD screen
and then see what you drew. After you have
drawn the picture, press the GO button to
see it come to life on the LCD screen.
Activities
11
Page 13

VEHICLES
This activity shows you how to draw different
kinds of vehicles. Scroll through the different
vehicles on the LCD screen by pressing the
left or right arrows. T o choose a vehicle from
the screen, press the GO button .
Follow the steps shown on the LCD screen
and then see what you drew. After you have
drawn the picture, press the GO button to
see it come to life on the LCD screen.
SILLY DOODLES
This activity allows you to make fun, silly
pictures. Follow the instructions that you hear
and you’ll create your own new, silly picture.
After you have drawn the picture, press the
GO button to see it come to life on
the LCD screen.
MUSICAL PICTURES
This activity allows you to listen to your
favorite melodies while drawing along to the
music. Scroll through the different melodies
on the LCD screen by pressing the left or right
arrows. T o choose a melody from the screen,
press the GO button .
Activities
12
Page 14
If you draw faster, the tempo of the song and the animation will speed
up. If you draw slower, the tempo and animation will slow down.
- Freres Jacques - Blue Danube Waltz
- Hey Diddle Diddle - Happy Birthday
- I’ve Been Working
- Itsy Bitsy Spider
on the Railroad
- Sugar Plum Fairy - William Tell Overture
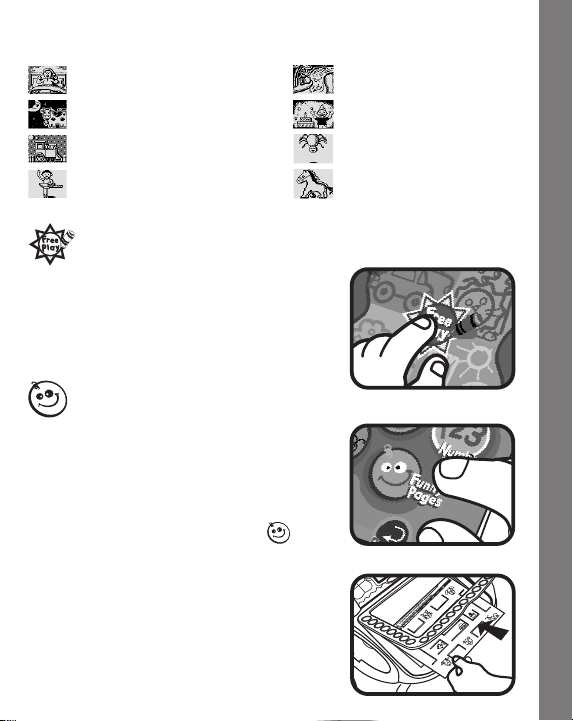
FREE PLAY
This activity allows you to draw anything you’d
like. After you have drawn the picture, press
the GO button to see it come to life on the
LCD screen.
FUNNY PAGES
There are eight Funny Pages for additional
creativity and learning. These contain a music
composer page, a maze page, an alphabet
tracing page, a number and shape tracing
page, and four coloring pages.
1. Press the “Funny Pages” icon on the
desk.
2. Put a funny page on the desk. Make sure
the paper is properly inserted.
Activities
13
Page 15

3. Secure the funny page by pressing down
the sides of the frame holder.
4. Press the white star on the page to
start playing.
Funny Page - Music Composer
This activity sheet contains a piano keyboard
for music composition. You
can select any one of the instruments to
compose your own song. Press the guitar
, flute , trumpet and piano
to choose the instrument.
To listen to the music, press one of the
pictures from the banner .
Funny Page - Maze
This activity sheet contains a maze. You will
be asked to start at a specific location in the
maze and then find your way to an object or
an animal. Use the crayon to draw the path
through the maze.
Activities
14
Page 16

Funny Page - Alphabet Tracing
This activity sheet contains the alphabet to
help you practice writing letters using proper
strokes. Y ou can trace the letters on the page
and then see them appear on the LCD screen
Funny Page - Numbers and Shapes
This activity sheet contains numbers and
shapes to help you practice writing numbers
using proper strokes. You can also have fun
tracing shapes. After you trace them on the
page, you will see them appear on the LCD
screen.
Funny Pages - Coloring
There are four fun activity sheets for coloring.
Place one of the coloring pages on the desk
and color the objects however you’d like. When
you color them in, you’ll also see them come to
life on the LCD screen.
Activities
15
Page 17

CARE & MAINTENANCE
1. Keep the unit clean by wiping it with a slightly damp cloth.
2. Do not draw on the desk surface directly. Use paper and crayons
when playing with the desk.
3. It is not recommended to draw on more than one spot on the desk
at the same time.
4. Remove the batteries when the unit is not in use for a long period
of time.
5. Do not drop the unit on hard surfaces.
6. Do not expose the unit to moisture or water.
7. Do not sit on the desk.
8. Do not use any sharp object to draw or write on the drawing surface
of the desk.
TROUBLESHOOTING
If the program stops working, please follow these steps:
1. Turn the unit OFF.
2. Interrupt the power supply by removing the batteries.
3. Let the unit stand for a few minutes, then replace the batteries.
4. Turn the unit ON. The unit should now be ready to play again.
5. If the product still does not work, replace with an entire set of new
batteries.
If you find that the picture appearing on the LCD screen looks strange:
1. Make sure there is only one area of the desk being touched at any
time.
2. Check if you have put your other hand on the desk while drawing,
or if you are putting too much pressure from your wrist on the desk.
If you find that nothing appears on the LCD screen while you are
drawing:
1. Make sure you have put only one piece of paper onto the desk.
2. Make sure you are drawing on the piece of paper and using a
crayon.
3. Make sure you are applying enough pressure on the paper with
your crayon.
If the problem persists, please call our Consumer Services Department
at 1-800-521-2010 in the U.S. or 1-800-267-7377 in Canada and a
service representative will be happy to help you.
Care & Maintenance / Troubleshooting
16
Page 18

IMPORTANT NOTE:
Creating and developing Ready, Set, School™ products is
accompanied by a responsibility that we at VTECH® take very
seriously. We make every effort to ensure the accuracy of the
information that forms the value of our products. However, errors
sometimes can occur. It is important for you to know that we stand
behind our products and encourage you to call our Consumer
Services Department at 1-800-521-2010 in the U.S. or 1-800-2677377 in Canada with any problems and/or suggestions that you
might have. A service representative will be happy to help you.
NOTE:
This equipment has been tested and found to comply with the limits for
a Class B digital device, pursuant to Part 15 of the FCC Rules. These
limits are designed to provide reasonable protection against harmful
interference in a residential installation. This equipment generates, uses
and can radiate radio frequency energy and, if not installed and used
in accordance with the instructions, may cause harmful interference to
radio communications. However, there is no guarantee that interference
will not occur in a particular installation. If this equipment does cause
harmful interference to radio or television reception, which can be
determined by turning the equipment off and on, the user is encouraged
to try to correct the interference by one or more of the following
measures:
• Reorient or relocate the receiving antenna
• Increase the separation between the equipment and receiver
• Connect the equipment into an outlet on a circuit different from
that to which the receiver is connected
• Consult the dealer or an experienced radio/TV technician for help
Other Information
17
 Loading...