

Page 1
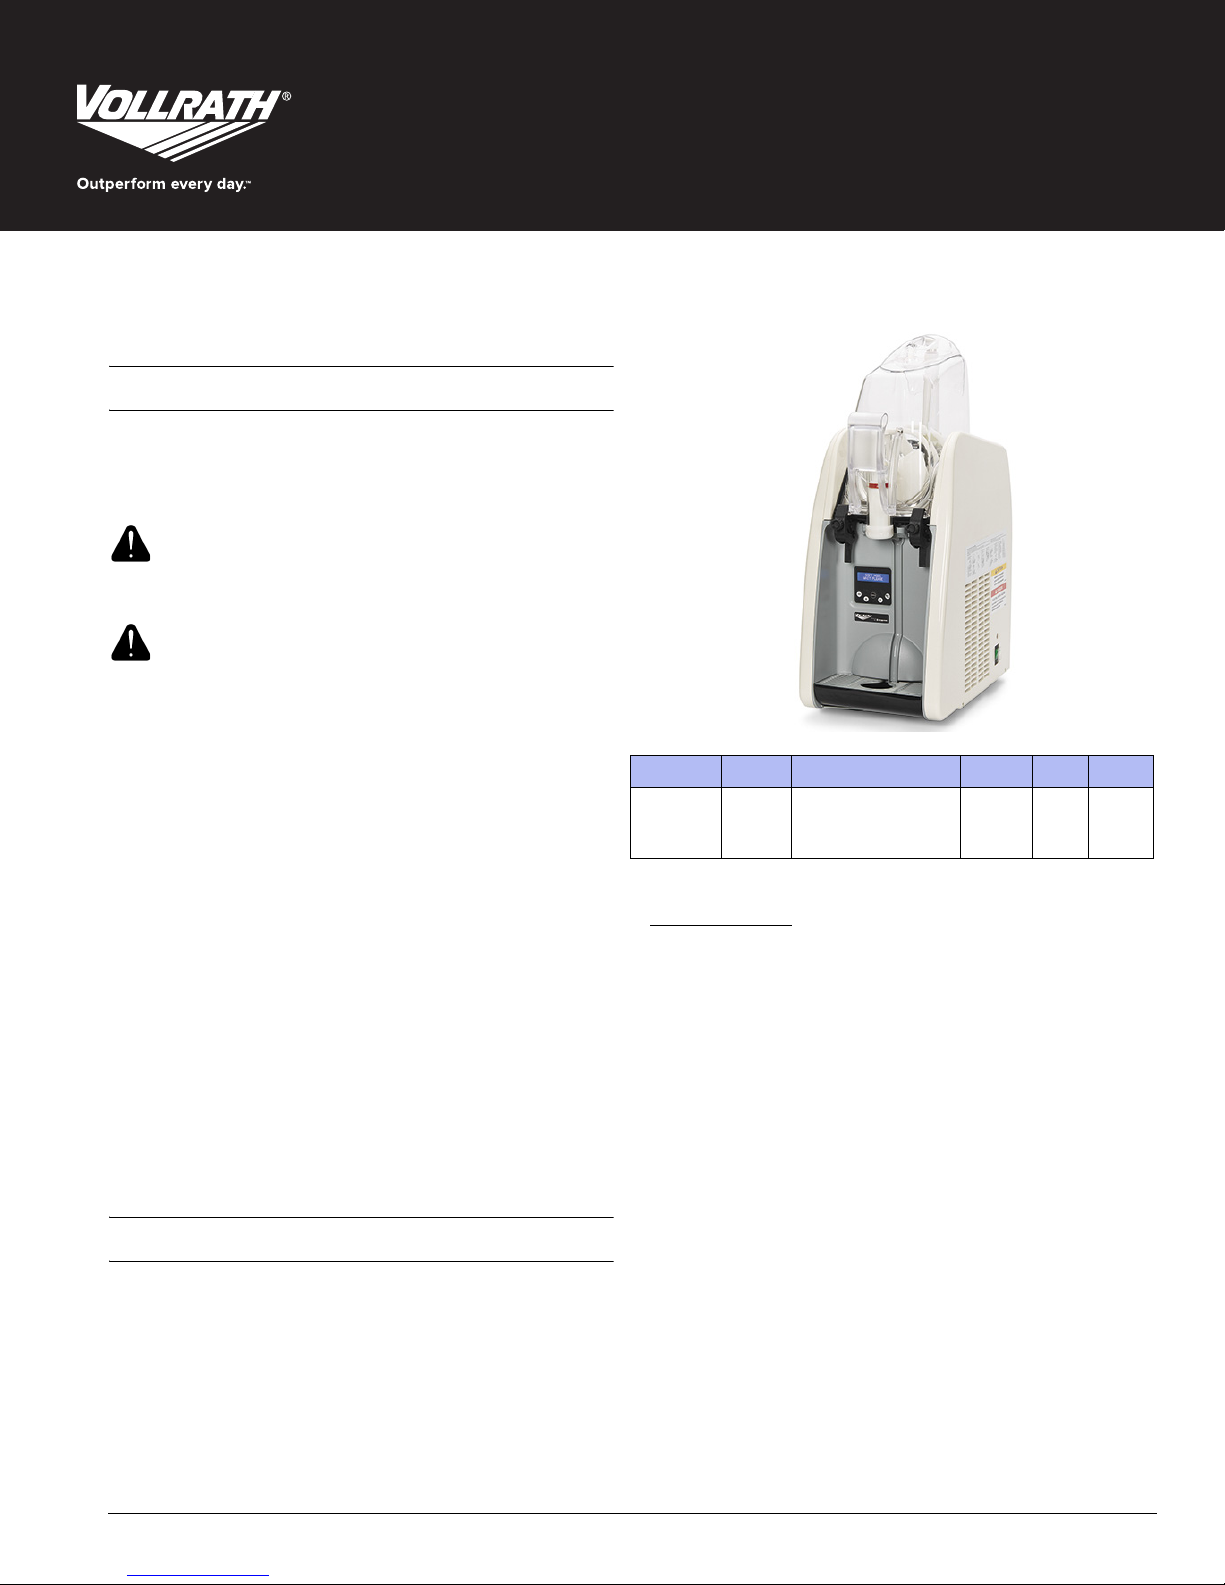
Stoelting® Mini Soft Serve Countertop Freezer
SAFETY PRECAUTIONS
To ensure safe operation, read the following statements and understand
their meaning. This manual contains safety precautions which are
explained below. Please read carefully.
WARNING
Warning is used to indicate the presence of a hazard that will or can
cause severe personal injury or death.
CAUTION
Caution is used to indicate the presence of a hazard that will or can
cause minor or major personal injury if the caution is ignored.
Operator’s Manual
NOTICE: Notice is used to note information that is important but not
hazard-related.
• Know the machine. Read and understand the Operating Instructions.
• Notice all warning labels on the machine.
• Wear proper shoes and clothing. Avoid loose fitting garments, and
remove watches, rings or jewelry that could cause a serious accident. Do not operate with wet hands or feet.
• Plug only into grounded electrical outlets matching the nameplate
voltage. Each unit shall be on a dedicated circuit.
• Do not allow children to use the machine.
• Maintain a clean work area. Avoid accidents by cleaning up the area
and keeping it clean.
• Stay alert at all times. Know which switch, push button or control
you are about to use and what effect it is going to have.
• Unplug the machine before performing maintenance. Never attempt
to repair or perform maintenance on the machine until the main
electrical power has been disconnected. Unplug the machine at the
plug. Do not pull the electrical cord to disconnect the machine from
the power source.
• Do not operate under unsafe operating conditions. Never operate the
machine if unusual or excessive noise or vibration occurs.
FUNCTION AND PURPOSE
The Stoelting® Mini Soft Serve Countertop Freezer is designed to freeze
and serve commercial soft serve or non-dairy mixes, including: ice
milk, ice cream, yogurt, and frozen dietary desserts. This equipment is
not intended for household, industrial or laboratory use. Indoor use
only.
Item No. Model Description
CBB116-37 CBB116
Stoelting
Serve Countertop
Freezer
®
Mini Soft
Voltage Amps Plug
115 10 NEMA
Table of Contents
Features and Controls Overview.................................. page 2
Installation................................................................... page 3
Before First Use............................................................ page 3
Operation..................................................................... page 4
Disassemble and Assemble the Machine..................... page 5
Advanced Settings....................................................... page 6
Maintenance................................................................ page 6
Troubleshooting.......................................................... page 7
5-15P
Please register your product at Vollrath.com
©
2015 The Vollrath Company L.L.C. Part No. 26198-1 10/9/15
Page 2
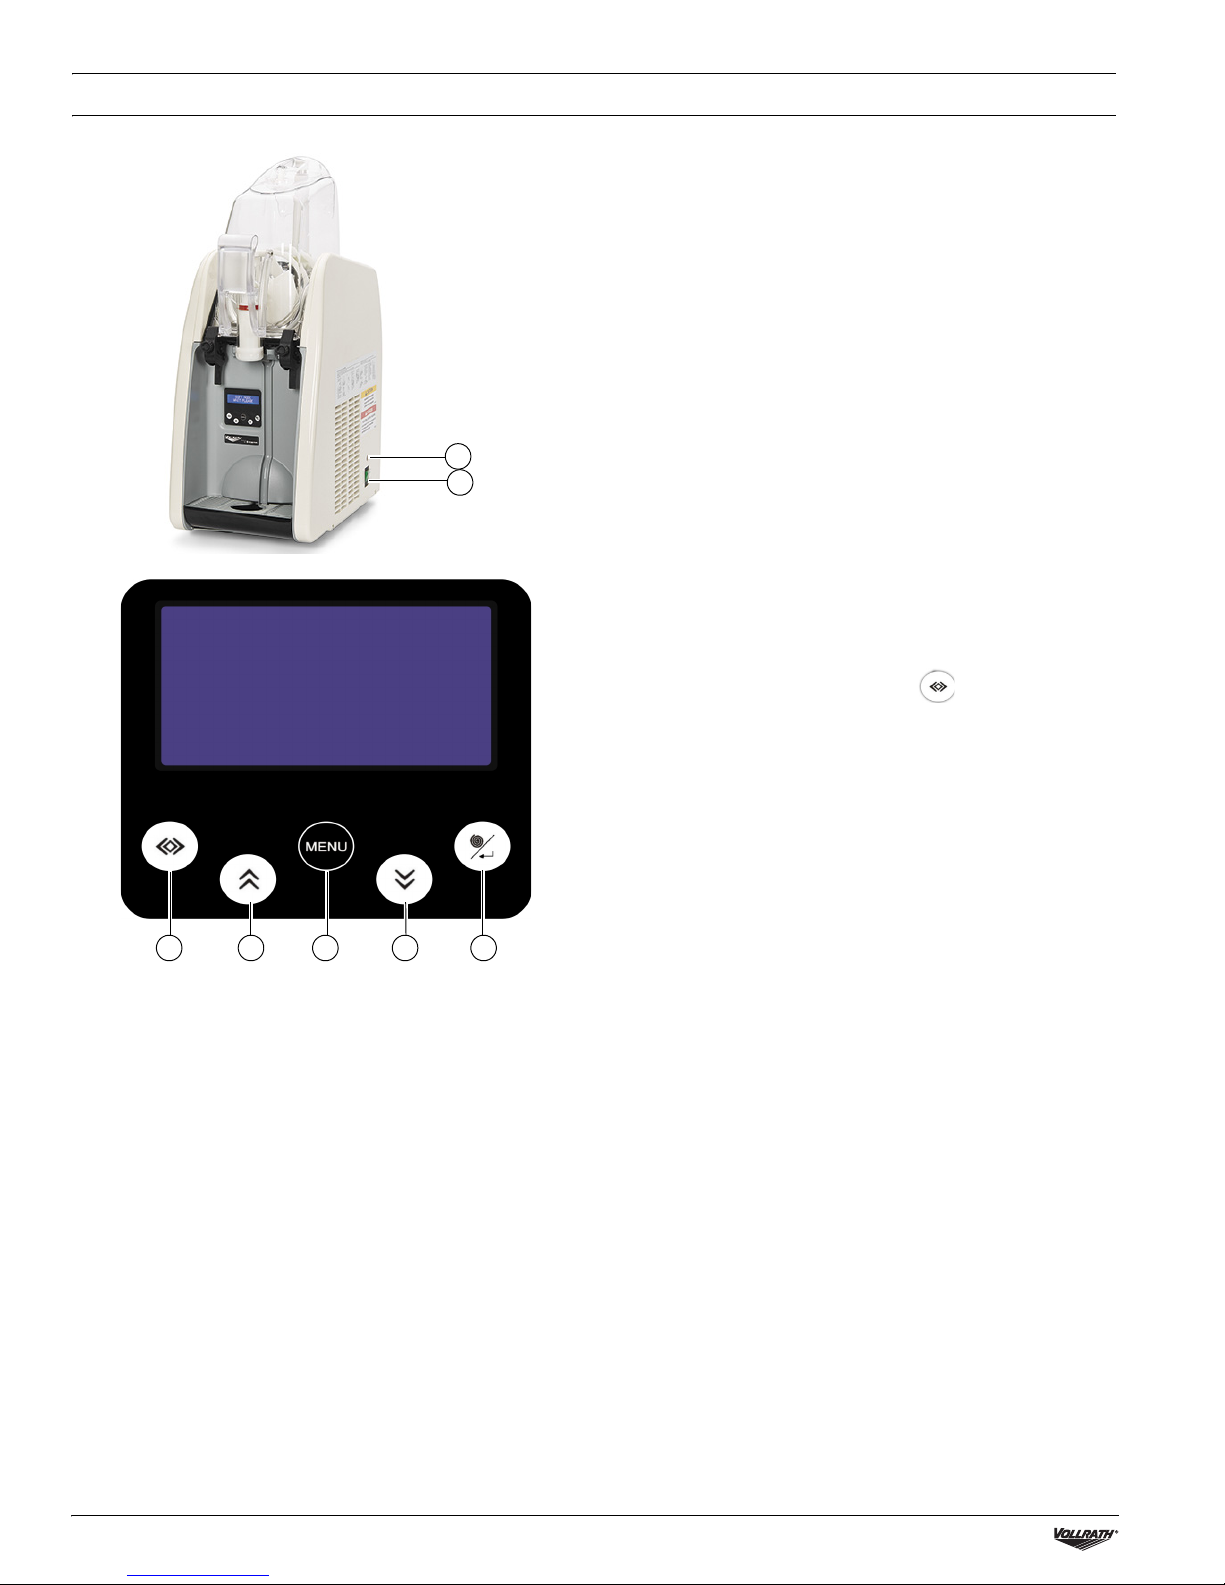
FEATURES AND CONTROLS OVERVIEW
A
B
D DC E F
A High Pressure Indicator Light. Illuminates when airflow is
restricted.
B Power Button. Turns the machine On and Off.
C Mode Button. Selects refrigeration modes.
SOFT. Prepare the mix for serving.
NIGHT MODE MAN. Manually enters the machine into Night
Mode.
MOTOR ON. Turns off refrigeration but keeps the augers turning.
D Navigation Button. Navigate through the menu screens and
change settings.
E Menu Button. Access to the machine settings.
KEYBOARD. Locks the keyboard to prevent accidental changes.
DATE. Sets the current date.
TIME. Sets the local time.
NIGHT MODE (automatic). Automatically enters the machine into
and exits from Night Mode.
TLI. The temperature to which the machine will refrigerate the
product before serving.
DOSE COUNTER. Displays the number of servings dispensed.
The counter records servings only when READY TO SERVE is
shown on the display.
To reset the counter, press and hold until the display
shows 000.
BOWL TEMP. Displays the product temperature reading in the
bowl.
SERVICE. The options under the Service menu are for use by a
qualified technician and include changing the gear motor RPMs,
solenoid settings and serve ready display time.
F Auger/Enter Button. Turns the augers On and Off. The augers
must be rotating to start refrigeration. Also used to confirm
menu setting selections.
.
2 Stoelting® Mini Soft Serve Countertop Freezer Operator’s Manual
Page 3
INSTALLATION
Unpack the Machine
NOTICE: Do not lift the machine by the tank, augers, or handles.
Only lift by grasping the bottom of the machine.
1. Remove all packing material and tape, as well as any protective
plastic from the equipment.
2. Clean any glue residue left over from the plastic or tape.
3. Save the original packaging. Use this packing to ship the product if
repairs are needed.
4. Locate the key for the clear bowl cover, shipped zip-tied to the
electrical cord. Cut the zip-tie and insert the key into the clear bowl
cover.
Clearance and Environment Requirements
• 10" (25.4 cm) on all sides
• Ambient Temperature: up to 85º F (29.4º C). Indoor use only
Set the Default Temperature Mode (optional)
The machine will arrive set to display temperature in Fahrenheit. You
can change the default to Celsius.
1. Make sure the Power is off.
2. Plug the power cord into a grounded electrical outlet that matches
the nameplate rated voltage. Do not turn on the machine.
NOTICE: Using a voltage other than the nameplate rated voltage
will cause damage to the unit. Incorrect voltage,
modification to the power cord or electrical components
can damage the unit and will void the warranty.
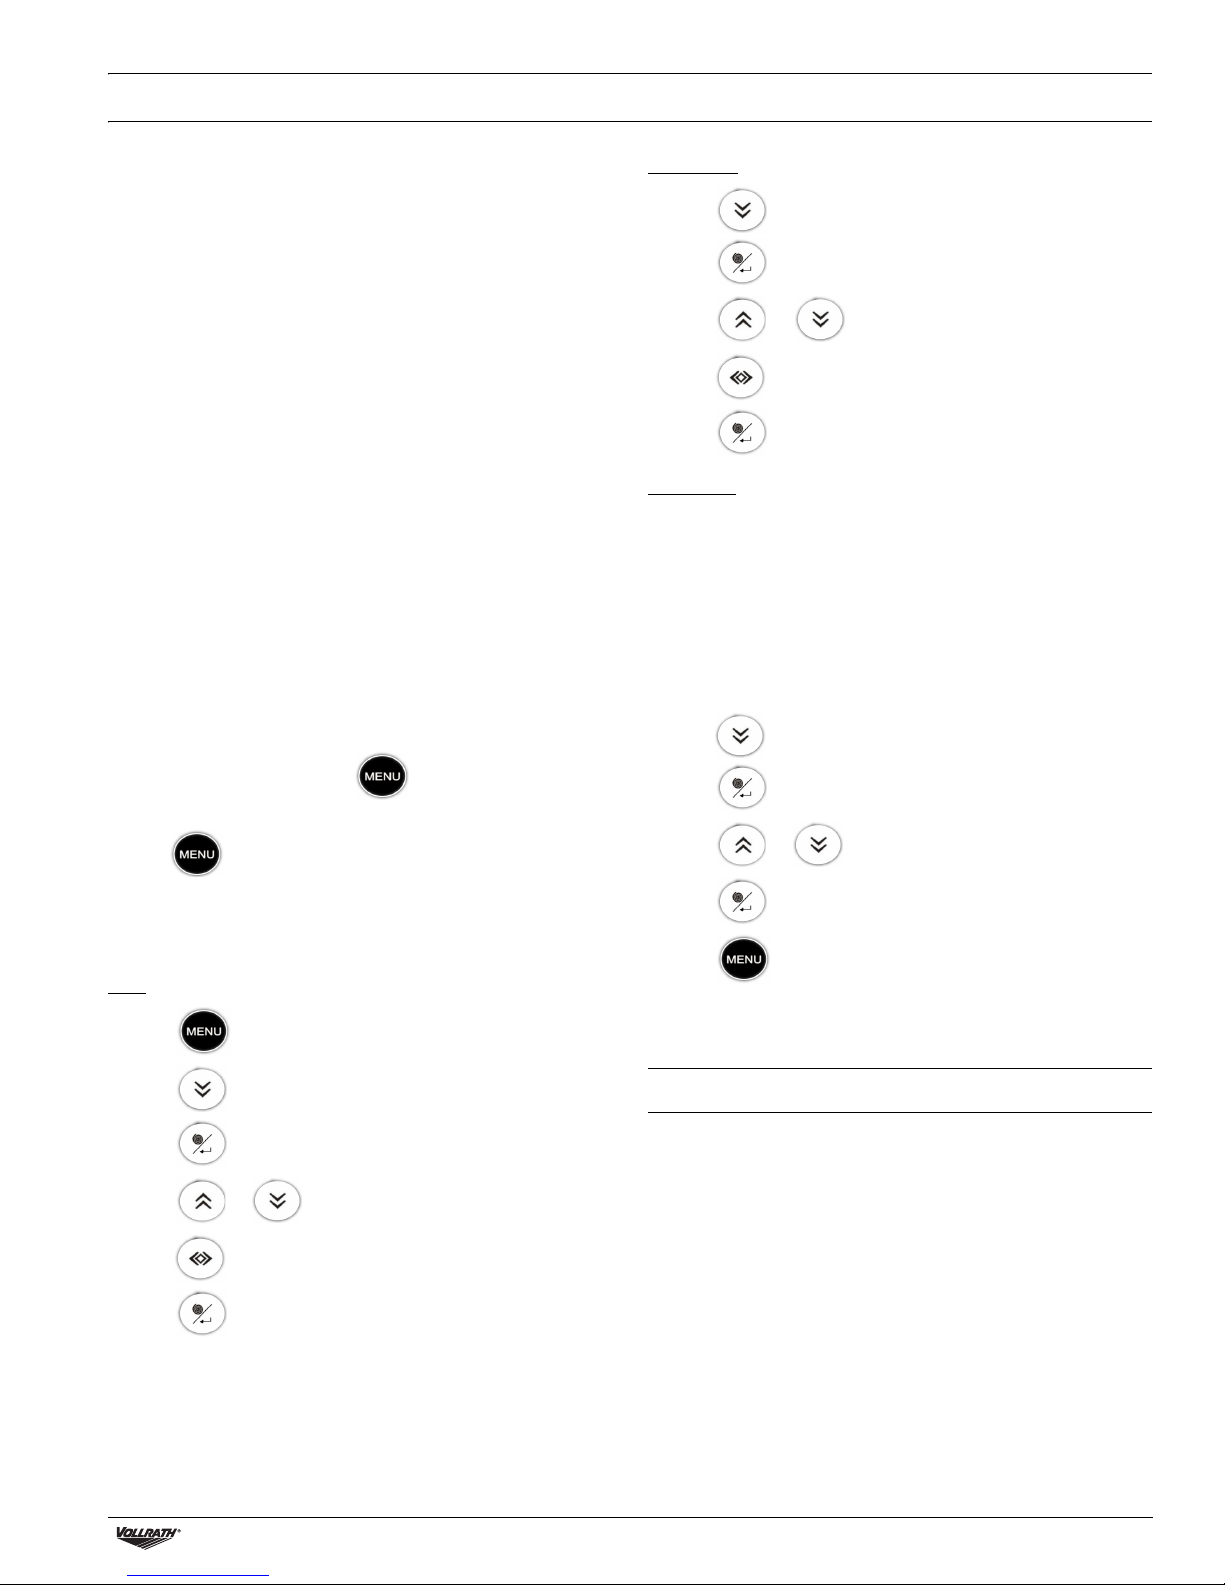
Local Time
1. Press to navigate to TIME.
2. Press to select. The time is displayed in a 24-hour format.
3. Press or to change a value.
4. Press to move the cursor.
5. Press to save the time.
TLI Setting
The Temperature Limit Indicator (TLI) setting is the temperature to
which the machine will attempt to refrigerate the product. Compare the
setting on the machine to the recommended temperature for the mix
you are using. If applicable, change the TLI.
NOTICE: The machine monitors torque and senses when the mix has
reached ideal serving temperature and may not continue to
refrigerate the product to a lower TLI setting. Therefore,
the display may show READY TO SERVE even though the
Bowl Temp is higher than the TLI setting.This feature helps
reduce the chance of an over-torque condition.
1. Press to navigate to TLI.
3. Simultaneously press and hold and press and release the
Power button.
4. Hold for approximately 7 seconds until the temperature is
shown in Celsius.
5. Perform the procedure again to return the default to Fahrenheit.
Set the Date, Time and TLI
Date
1. Press .
2. Press to navigate to DATE.
3. Press to select. The date format is DD/MM/YYYY.
4. Press or to change a value.
5. Press to move the cursor.
6. Press to save the date.
2. Press to select.
3. Press or change to change the setting.
4. Press to save the setting.
5. Press to exit the settings screens.
BEFORE FIRST USE
Before you use the machine for the very first time, Vollrath recommends washing and sanitizing the components in the machine.
1. Disassemble the machine. See page 5.
2. Clean and sanitize the components. See page 4.
3. Re-assemble the machine and lubricate the components. See
page 6.
4. Sanitize the machine. See page 4.
Stoelting® Mini Soft Serve Countertop Freezer Operator’s Manual 3
Page 4

OPERATION
Sanitize the Machine
NOTICE: The United States Department of Agriculture and the Food
and Drug Administration require that all cleaning and
sanitizing solutions used with food processing equipment
be certified for this use.
NOTICE: Refer to local sanitary regulations for applicable codes and
recommended sanitizing products and procedures. The
frequency of sanitizing must comply with local health
regulations.
Sanitizing must be done after the machine is clean and just before the
machine is filled with mix. Sanitizing the night before is not effective.
However, you should always clean the machine and parts after using it.
1. Prepare Stera-Sheen Green Label Sanitizer or equivalent according
to manufacturer’s instructions to provide a 100 ppm strength
solution. Mix the sanitizer in quantities of no less than 2 gallons (7.6
liters) of warm, approximately 90° to 110°F (32° to 43°C) water.
Check the strength of the sanitizing solution. Use a chlorine test strip
and color chart to make sure the solution has 100 ppm. Use the
sanitizer in accordance with the manufacturer’s instructions.
2. Pour the sanitizing solution into the top of the clear bowl. Place the
cover onto the clear bowl and lock the cover.
3. Turn on the machine.
4. Press to start the augers.
NOTICE: Make sure the display reads MOTOR ON, which indicates
refrigeration is Off.
If it does not, press until it does.
5. Monitor the machine for leaks. If sanitizer is leaking, the gasket
under the clear bowl is not installed correctly.
6. After five minutes, place a container under the spigot. Open the
spigot to drain most of the sanitizing solution.
7. Press to stop the augers.
8. Open the spigot to collect the remaining sanitizing solution in a cup
and test the chlorine contents with a new test strip. A reading of 100
ppm or more is acceptable. If the reading is less than 100 ppm,
sanitize the machine again.
NOTICE: If the reading is less than 100 ppm after sanitizing the
second time, disassemble and wash the machine again.
Refrigeration and Serving
1. Make sure the machine is turned off.
2. Pour 1 gallon (3.8 liters) of chilled mix (40° F (4.4° C) or below) into
the clear bowl.
3. Place the cover onto the clear bowl and lock the cover.
4. Turn on the machine.
5. Press to start the augers.
6. Press until the display reads SOFT MODE PLEASE WAIT.
This indicates refrigeration is on.
7. Product will be ready to serve in 40-60 minutes. The time it takes to
be ready is dependent upon many variables including the mix
temperature when poured into the bowl, the amount of sugars and
butterfat in the mix and the TLI setting on the machine.
8. The product is ready when the display reads READY TO SERVE.
9. Pull the spigot handle open to serve.
Manual Night Mode (optional)
At the end of the day or between peak serving times the machine can
manually be put into Night Mode. Night Mode holds the mix in the
machine at a food safe temperature (approximately 28º F (-2.2º C)). If
you want the machine to enter and stay in Night Mode at the same time
every day, see Set Automatic Night Mode on page 6.
NOTICE: Night Mode does not take the place of cleaning and
1. Press .
2. Press to navigate to the NIGHT MODE MAN.
3. Press to select NIGHT MODE MAN. The machine will remain
4. To exit Night Mode, press until the display shows SOFT
sanitizing.
in Night Mode until you manually return the machine to SOFT MODE.
MODE PLEASE WAIT.
Clean the Machine
Drain the Mix
1. Press until the display shows MOTOR ON. This indicates
refrigeration is off.
2. For easier removal, allow the product to thaw.
3. Drain the mix by repeatedly opening and closing the spigot. A
container should be placed under the spigot to collect the liquid mix.
4. When the mix is drained, fill the tank with 1 gallon of cool tap water.
After 30 seconds open the spigot to drain the water out of the
machine.
Clean and Sanitize the Parts
NOTICE: Local and state health codes dictate the procedure
Use mild alkaline cleaner and a soft cloth or sponge to clean the exterior
of the machine.
required. Some health codes require a four-sink process
(pre-wash, wash, rinse, sanitize, and air-dry), while other
codes require a three-sink process (without the pre-wash
step). The following procedures are a general guideline
only. Consult your local and state health codes for
procedures required in your location.
WARNING
Electrical Shock Hazard
Do not spray water or cleaning products. Liquid could contact
the electrical components and cause a short circuit or an
electrical shock.
1. Do not use abrasive materials, scratching cleansers or scouring
pads. These can damage the finish.
2. Disassemble the machine. See page 5.
3. Place all parts in warm, 90° to 110°F (32°C to 43°C) mild detergent
water and wash thoroughly.
4. Rinse all parts with clean 90° to 110°F (32°C to 43°C) water.
5. Place all parts in a sanitizing solution for at least 1 minute.
6. Remove the parts and let air dry completely.
7. Wash the steel tank bottom. Dip a brush into the 90° to 110°F (32°
to 43°C) sanitizing solution. Use the brush to wipe the tank. Wrap
the brush with clean sanitizing cloth and dry the tank.
4 Stoelting® Mini Soft Serve Countertop Freezer Operator’s Manual
Page 5

DISASSEMBLE AND ASSEMBLE THE MACHINE
G
B
B
E
D
F
H
C
A
K
L
M
J
I
O-ring
O-ring
Disassemble the Machine
A Rosette Cap E Clear Bowl
B Bowl Fastening Knob and Clamp F Pivot Arm
C Spigot G Condensation Tray
D Spigot Handle H Drip Tray and Grid
1. Turn off and unplug the machine.
2. Inspect the machine for worn or broken parts. All worn or broken
parts should be replaced to ensure safety to both the operator and
the customer, to maintain good machine performance and a quality
product.
3. Simultaneously pull both pivot arms slightly outward to disengage
them from the handle knobs.
NOTICE: Pull both arms at the same time to prevent them from
twisting and breaking.
4. Lift the spigot assembly to remove it.
I Horizontal Auger L Vertical Auger
J Gear M Gear
K Fastening Nut
8. Remove the horizontal auger and remove the gear from the back of
the auger.
9. Unscrew the fastening nut from the top of the vertical auger and
remove the auger. Remove the gear from the bottom of the auger.
10.Use the tool included with the machine to remove the O-rings.
NOTICE: Use caution when using the tool. Forceful removal may
damage the O-rings.
11.Remove the condensation and drip trays.
5. Remove the spigot handle by tilting it away from the machine and
pulling upward.
6. Remove the rosette cap.
7. Remove the bowl fastening knobs from the bowl clamps. Unclamp
and remove the clear bowl from the machine. Remove the gasket
from the bottom of the clear bowl.
Stoelting® Mini Soft Serve Countertop Freezer Operator’s Manual 5
Page 6

Reassemble the Machine and Lubricate Components
All parts should be cleaned, sanitized and allowed to air dry before
assembling.
NOTICE: Total Blend, Petrol-Gel or equivalent sanitary lubricant
must be used when lubrication of machine parts is
specified.
NOTICE: The United States Department of Agriculture and the Food
and Drug Administration require that lubricants used on
food processing equipment be certified for this use. Use
lubricants only in accordance with the manufacturer’s
instructions.
1. Turn off and unplug the machine.
2. Press the gear into bottom of the vertical auger and lubricate the
gear teeth with sanitary lubricant. Install the auger and secure it to
the machine with the fastening nut.
3. Press the gear onto the back of the horizontal auger. Lubricate the
gear teeth and the front of the auger with sanitary lubricant. Install
the auger.
4. Install the gasket into the bottom groove on the clear bowl. Make
sure the joint of the gasket is placed on one of the rear corners of the
clear bowl.
5. Install the clear bowl onto the machine and secure it with the
clamps. Screw the fastening knobs into the clamps.
6. Install the rosette cap.
7. Install the O-rings onto the spigot assembly and apply a thin film of
sanitary lubricant to the O-rings.
8. Install the spigot handle onto the fastening knobs.
9. Install the spigot assembly.
10.Secure the pivot arms to the spigot to the handle knobs.
NOTICE: Assemble both pivot arms onto the handle knobs at the
same time to prevent the arms from twisting and
breaking.
ADVANCED SETTINGS
Lock the Control Panel
The control panel can be locked to prevent accidental or unauthorized
changes to the machine settings.
1. Press .
2. Press or to navigate to KEYBOARD.
3. Press to select.
4. Press or to select KEYBOARD DISABLE.
5. Press to lock the control panel.
6. Press to exit the settings screens.
7. A triangle in the upper right corner of the display indicates the
control panel is locked. It will remain locked until the machine is
turned off.
Set Automatic Night Mode
Night Mode holds the mix in the machine at a food safe temperature
(approximately 28º F (-2.2º C)) during non-serving times. Automatic
Night Mode will override any manual settings. Therefore, set automatic
Night Mode only if you want the machine to enter and exit Night Mode
at the same times every day.
NOTICE: Night Mode does not take the place of cleaning and
sanitizing.
MAINTENANCE
Monthly
Clean the Filter
NOTICE: Keep the filter clean. A dirty filter will impair refrigeration.
1. Turn off and unplug the machine.
2. Remove the filter. The filter is the back panel of the machine. Press
the tabs down to remove the filter.
3. Remove any large particles trapped behind the filter.
4. Wash the filter in warm, soapy water.
5. Rinse the filter with clean water.
6. Dry the filter and install it on to the machine.
1. Press or to navigate to NIGHT.
2. Press to select NIGHT.
3. Press to ON to set the hour the machine should enter Night
Mode.
4. Press to move the cursor between ON and OFF, and the hour
and minutes for ON and OFF.
5. Press to save the settings.
6 Stoelting® Mini Soft Serve Countertop Freezer Operator’s Manual
Page 7

TROUBLESHOOTING
Problem Might be Caused By Course of Action
Machine does not turn on Machine not connected to power Plug in the machine.
Product is too firm TLI is set too high
Refrigeration problem Contact Vollrath Technical Services.
Product is too soft Improper clearance is restricting airflow See “Clearance and Environment Requirements” on page 3.
Filter is dirty See “Clean the Filter” on page 6.
TLI is set too low
Refrigeration problem Contact Vollrath Technical Services.
Product does not dispense, display
shows a flashing box symbol in the
top left corner and the auger is still
rotating
Product does not dispense, display
shows a flashing box symbol in the
top left corner and the auger has
stopped rotating
Product is leaking from machine Gasket under the clear bowl is not
Light next to the main power switch
is illuminated
Machine is near an over torque condition.
Machine has reached an over torque
condition.
installed correctly
Possible high-pressure condition in the
refrigeration system
1. Check the mix manufacturer’s serving temperature
recommendations.
• Mixes should provide a satisfactory product in the 17°F to
24°F (-8.3 to -4.4 ºC) range.
• Diet and low-carb mixes typically freeze to proper consistency
at higher temperatures.
2. Check the TLI setting. See “TLI Setting” on page 3.
3. Change the TLI setting if it is not within the recommended
temperature range.
1. Check the mix manufacturer’s serving temperature
recommendations.
• Mixes should provide a satisfactory product in the 17°F to
24° F (-8.3 to -4.4º C) range.
• Diet and low-carb mixes typically freeze to proper consistency
at higher temperatures.
2. Check the TLI setting. See “TLI Setting” on page 3.
3. Change the TLI setting if it is not within the recommended
temperature range.
The refrigeration system will turn off for 2 minutes to attempt to
thaw the product before it automatically starts. Consider increasing
the TLI to prevent over torque.
Make sure there is a maximum of 1 gallon of mix in the tank.
The refrigeration system will turn off for 10 minutes to attempt to
thaw the product. After 10 minutes it will automatically restart. Consider increasing the TLI to prevent over torque.
Adjust the gasket so that it is firmly in place.
1. Unplug the machine.
2. Clean the filter. See “Clean the Filter” on page 6.
3. Make sure there is at least 10" (25.4 cm) clearance on all sides of
the machine.
4. Plug in and turn on the machine.
5. Press the pressure reset switch, located on the bottom of the
machine below the power switch.
6. If the problem persists, contact Vollrath Technical Services.
Stoelting® Mini Soft Serve Countertop Freezer Operator’s Manual 7
Page 8

SERVICE AND REPAIR
Serviceable parts are available on Vollrath.com.
To avoid serious injury or damage, never attempt to repair the unit or replace a damaged power cord yourself. Do not send units directly to
The Vollrath Company LLC. Please contact Vollrath Technical Services for instructions.
When contacting Vollrath Technical Services, please be ready with the item number, model number (if applicable), serial number, and proof of
purchase showing the date the unit was purchased.
WARRANTY STATEMENT FOR THE VOLLRATH CO. L.L.C.
This warranty does not apply to products purchased for personal, family or household use, and The Vollrath Company LLC does not offer a written
warranty to purchasers for such uses.
The Vollrath Company LLC warrants the products it manufactures or distributes against defects in materials and workmanship as specifically
described in our full warranty statement. In all cases, the warranty runs from the date of the end user’s original purchase date found on the receipt.
Any damages from improper use, abuse, modification or damage resulting from improper packaging during return shipment for warranty repair will
not be covered under warranty.
For complete warranty information, product registration and new product announcement, visit www.vollrath.com.
The Vollrath Company, L.L.C.
1236 North 18th Street
Sheboygan, WI 53081-3201 U.S.A.
Main Tel: 800.624.2051 or 920.457.4851
Main Fax: 800.752.5620 or 920.459.6573
www.vollrath.com
Customer Service: 800.628.0830
Canada Customer Service: 800.695.8560
Technical Services
techservicereps@vollrathco.com
Induction Products: 800.825.6036
Countertop Warming Products: 800.354.1970
All Other Products: 800.628.0832
©
2015 The Vollrath Company L.L.C. Part No. 26198-1 10/9/15
 Loading...