

ViewSonic VSVPD10000203 Revised Manual

Section 1 GETTING TO KNOW THE BASICS
SECTION 1
GETTING TO KNOW THE BASICS
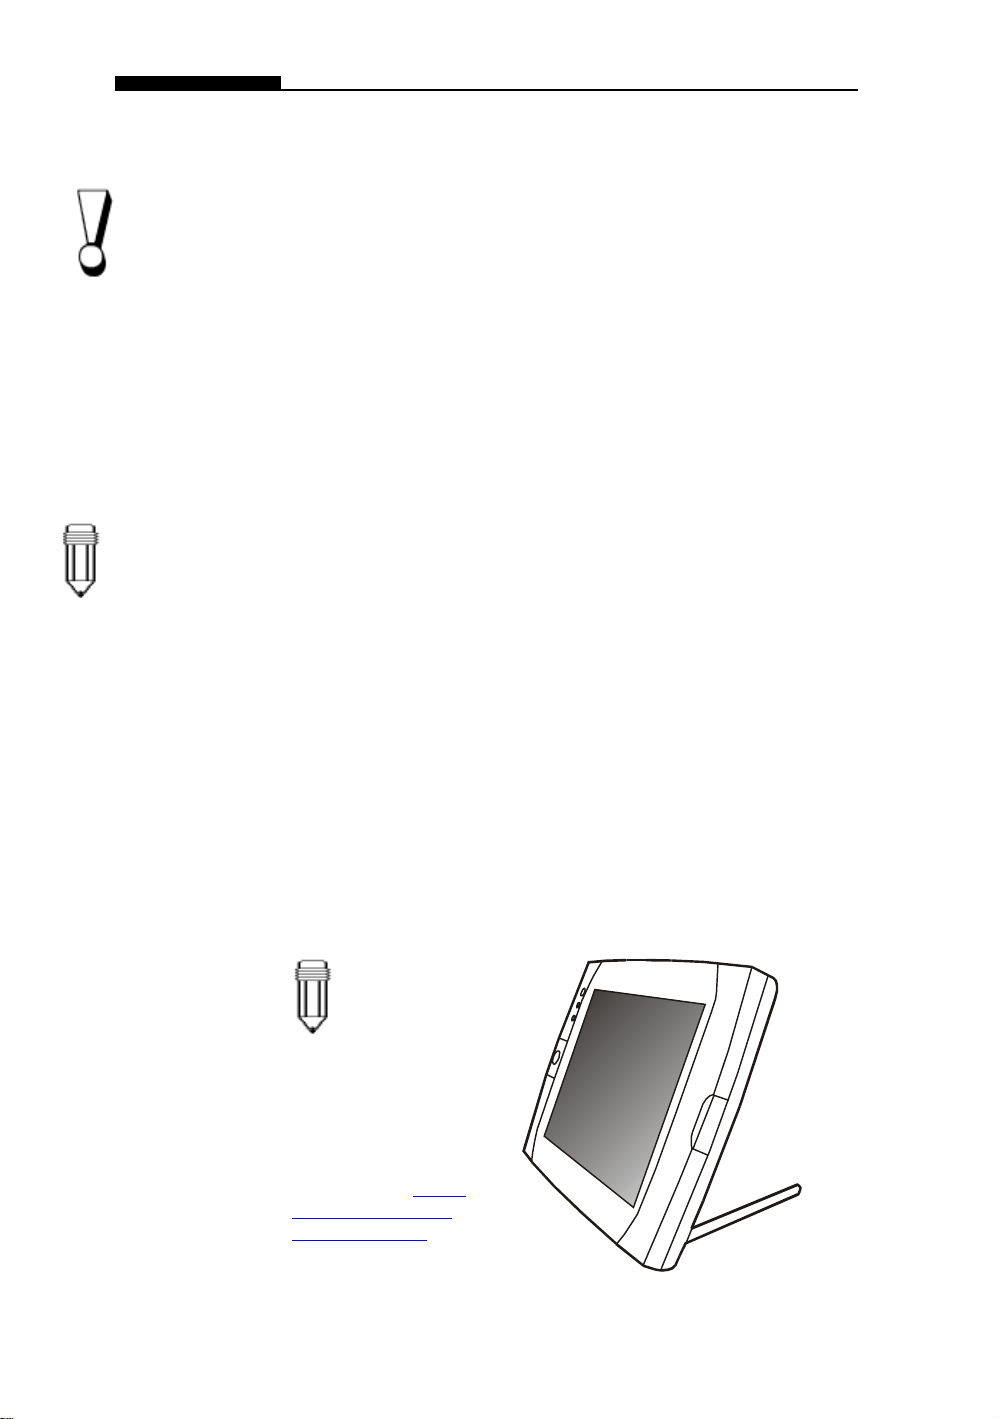
This section introduces the features and components of the tablet PC.
1-1

USER`S MANUAL
Performance Features
n
High Performance Processor
n
Advanced Graphic Engine
n
Upgradability *
The tablet PC is equipped with Intel Celeron processor with 128K L2 cache.
An integrated AGP-bus 2D/3D video processor for
high performance graphics. The video chip also
incorporates a hardware-accelerated playback which
gives you smooth MPEG video playback. 3D graphics
capability also adds realism to PC games.
The system offers additional DRAM slot for expansion,
allowing users to easily increase the system capacity
as the need arises.
Note:
Hard disk drive is
not userupgradable. If you
need to upgrade the
HDD, you need to
return the unit to the
dealer or
manufacturer.
1-2
n
Bright LCD Display
The sytem is equipped with 10.4-inch TFT XGA
display panel for clear text and brilliant colors.
n
Portrait Mode or Landscape Mode
To serve your specific needs, the tablet PC can be
used in Portrait or Landscape mode.
n
Touch Screen Input
The tablet PC has a built-in touch screen input device.
This allows you to easily and quickly maneuver and
create graphic designs or manage field applications.

Section 1 GETTING TO KNOW THE BASICS
Audio Capability
■
The system is equipped with internal audio and record and
playback functions, including 3D (three-dimensional) audio,
64-voices DirectSound channel support, and built-in
hardware wave-table.
Ethernet Adapter and Modem
■
The system provides built-in Ethernet network adapter
and 56K modem for communiction and connection
flexibility.
Built-in Digital Camera
■
The integrated digital camera allows you to take
snapshots or record a video clip.
Wireless LAN
■
The computer may be equipped with Wireless LAN (802.11) to
connect to a wireless network.
Docking Station (Optional)
■
The optional docking station not only provides all the
necessary I/O ports, it also has a built-in CD-ROM or
DVD-ROM for large data access or video disk
playback.
1-3

USER`S MANUAL
System at a Glance
Front View
1-4
1. Stylus
The stylus (touch pen) works like a mouse. Use the tip to
point to an icon on the LCD panel or draw a line in any
graphic application. Tapping an icon twice in a quick session
is similar to double-clicking with a mouse.

Section 1 GETTING TO KNOW THE BASICS
2. Ditigal Camera
The built-in digital camera (up to 640x480 resolution) allows
you to take photos or record a video clip. You must preinstall software that will work with the camera. See Factory
CD-ROM disk for any bundled graphic software. The focus
ring allows you to adjust focal length of the camera lens.
Adjust the ring to for the sharpest focus. Go to
the Digital Camera
3. Battery Status LED
Flashing green light indicates the battery pack is being
charged.... (See the
details.)
4. Power Status LED
The multi-color LED indicates the power status of the tablet
PC. (See the
Section for more details.
LED Status Indicator
LED Status Indicator
Section for details.)
How to Use
Section for
5. WWW Internet Hot Key
The `Internet Hot Key` launches the Internet Explore
automatically . You will need to activate a utility program in
the factory CD to make use of the key. (See side-note for
Quick Keys installation.)
6. Email Hot Key
The `Internet Hot Key` launches the MS Outlook Express.
You will need to activate a utility program in the factory CD
to make use of the key. (See side-note for Quick Keys
installation.)
7. Power/Suspend Button
The power/suspend button turns the system on and off and it
also acts as a system suspend key . This tablet PC uses a
special one-button design. Press momentarily to turn on the
system. Press and hold for at least 3~4 seconds to turn off
the system. In Windows 98 SE, ME, or 2000, how the
power button should behave can be defined in Windows
Power Management utility . Go to [Start > Settings > Control
1-5
USER`S MANUAL
Warning:
Do not place any
heavy objects on
the LCD panel. It
may damage the
display.
Note:
If you encounter
difficulties with
IrDA (infrared port)
operation, go to
Section 5 to learn to
solve the problems.
Panel > Power Management] to access the utility . Go to
Section 2 for more details on system suspend function.
8. LCD Display
The panel is where the system`s data is displayed.
9. Built-in Microphone
The built-in microphone records sound.
10. Consumer Infrared Port (1)
The CIR port is used to link with a CIR-type wireless
keyboard.
11. Built-in Stereo Speakers
The built-in speakers output the sound in stereo.
12. Stand
The stand allows the tablet PC to be positioned vertically
(Portrait Mode) or horizontally (Landscape Mode) on a
desktop.
1-6
13. Rubber Feet
The rubber feet allows the tablet PC to be positioned on its
side on the desk.
Note:
The tablet PC can be
positioned horizontally.
You will need to rotate
the display content 90
degrees via the `Pivot`
software. Go to
Use the T ablet PC in
Landscape Mode Section
to learn more.
How to
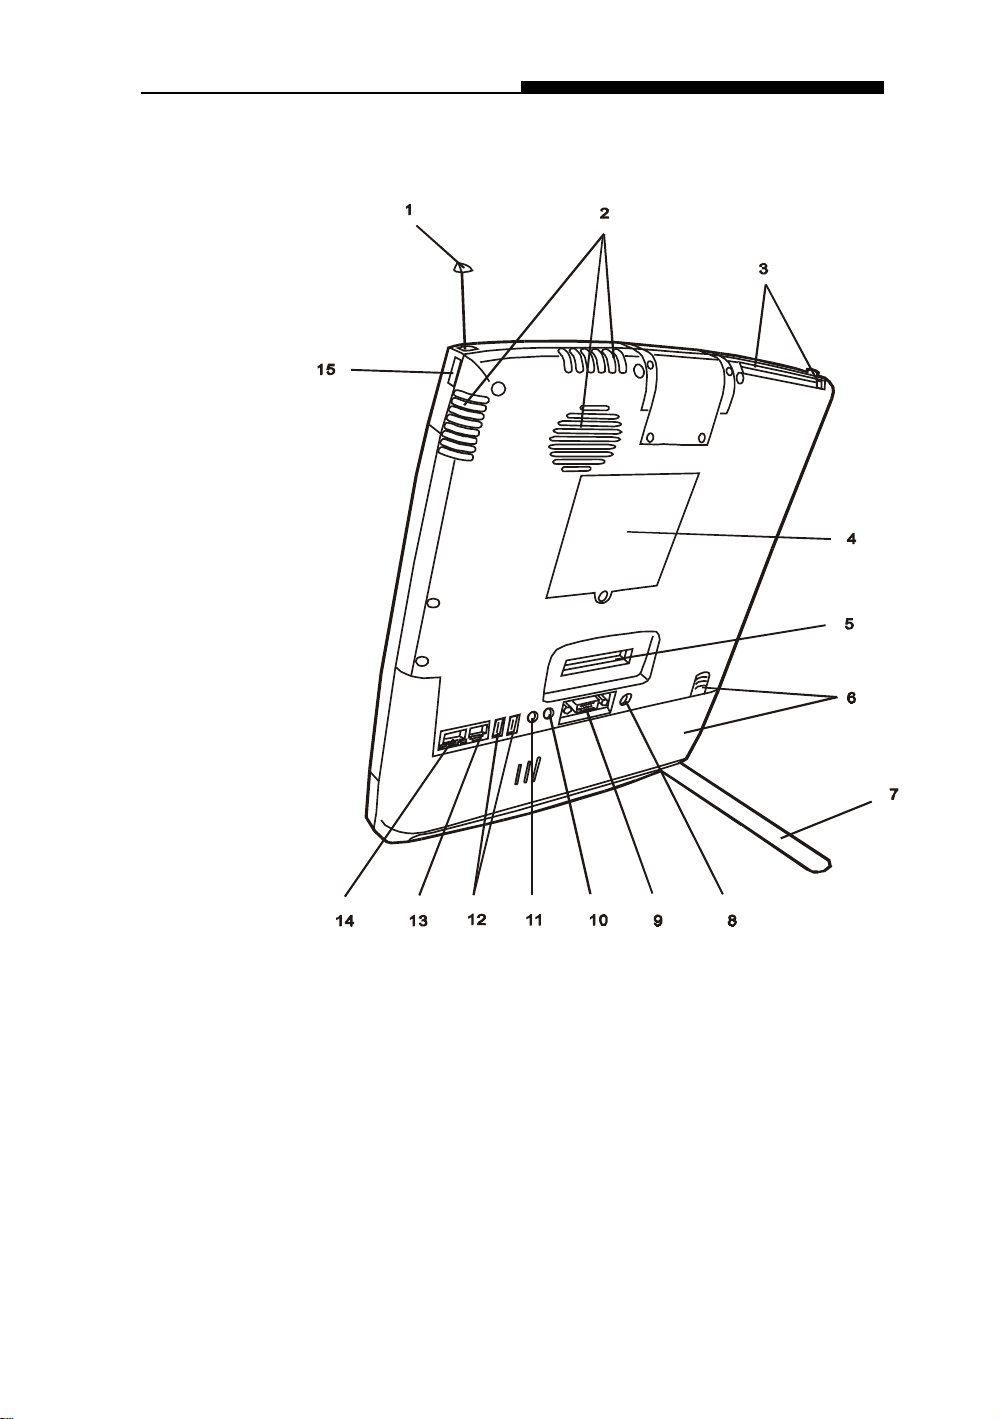
Rear View
Section 1 GETTING TO KNOW THE BASICS
1. Built-in Antenna
The antenna is used to transmit and receive data from
another Bluetooth-enabled device / system. It should be fully
extended for best result. Go to the Bluetooth Help Menu for
operational tips. (
the Factory CD-ROM disk.
2. Ventilation Grills
The fan grills allow the air to circulate through the internal
heat regulation system. Do not block the airway completely .
The Bluetooth application is contained in
)
1-7

USER`S MANUAL
Note:
For the system
running the
Windows NT
platform,USB
function was not
supported.
3. PC Card Slot (PCMCIA) and Card Eject Button
The slot is where PC Card (PCMCIA) is inserted. Press the
eject button to release the PC Card.
4. DIMM (DRAM) Expansion Slot Cover
This is where two DIMM expansion slots are located. One
of the slot may have been occupied by a dealer or manufacturer pre-installed DIMM module.
5. Docking Port
The docking port allows the tablet PC to connect to an
optional docking station. Go to Chapter 5 for more details
on the docking station.
6. Battery Pack and Battery Latch
The battery pack is a built-in power source for the tablet
PC. Pull on the battery latch to release the battery pack.
1-8
7. Stand
The stand allows the tablet PC to be positioned vertically
(Portrait Mode) or horizontally (Landscape Mode) on a
desktop.
8. Power Jack ( DC-in )
This is where the AC Adapter connects to. It allows the
external AC source to power the system and charges its
battery pack.
9. External VGA Port
The 15-pin analog VGA output port connects to the external
CRT monitor or projector.
10. Stereo Headphone Jack
The stereo headphone jack (3.5-mm diameter) is where you
connect the headphones or external speakers.
11. Microphone Jack
The microphone jack (3.5-mm diameter) is where you
connect a microphone.

Section 1 GETTING TO KNOW THE BASICS
12. USB Port
The Universal Serial Bus (USB) port allows you to connect a
wide variety of devices via the USB cable to your tablet PC.
This port conforms to USB plug-and-play standards.
13. Modem Port
This is where you plug the phone jack (RJ-1 1) for fax/
modem functions. The built-in 56kpbs modem is V.90
compatible.
14. Ethernet / LAN Port
The port connects to a network hub via the RJ-45 cable and
also conforms to 100Base-TX transmission protocol.
15. Serial Infrared Port (2)
The SIR port is an Infrared Data Association (IrDA) compliant serial infrared port. It allows cableless data transfer with
IrDA 1.1-compatible external devices.
1-9
USER`S MANUAL
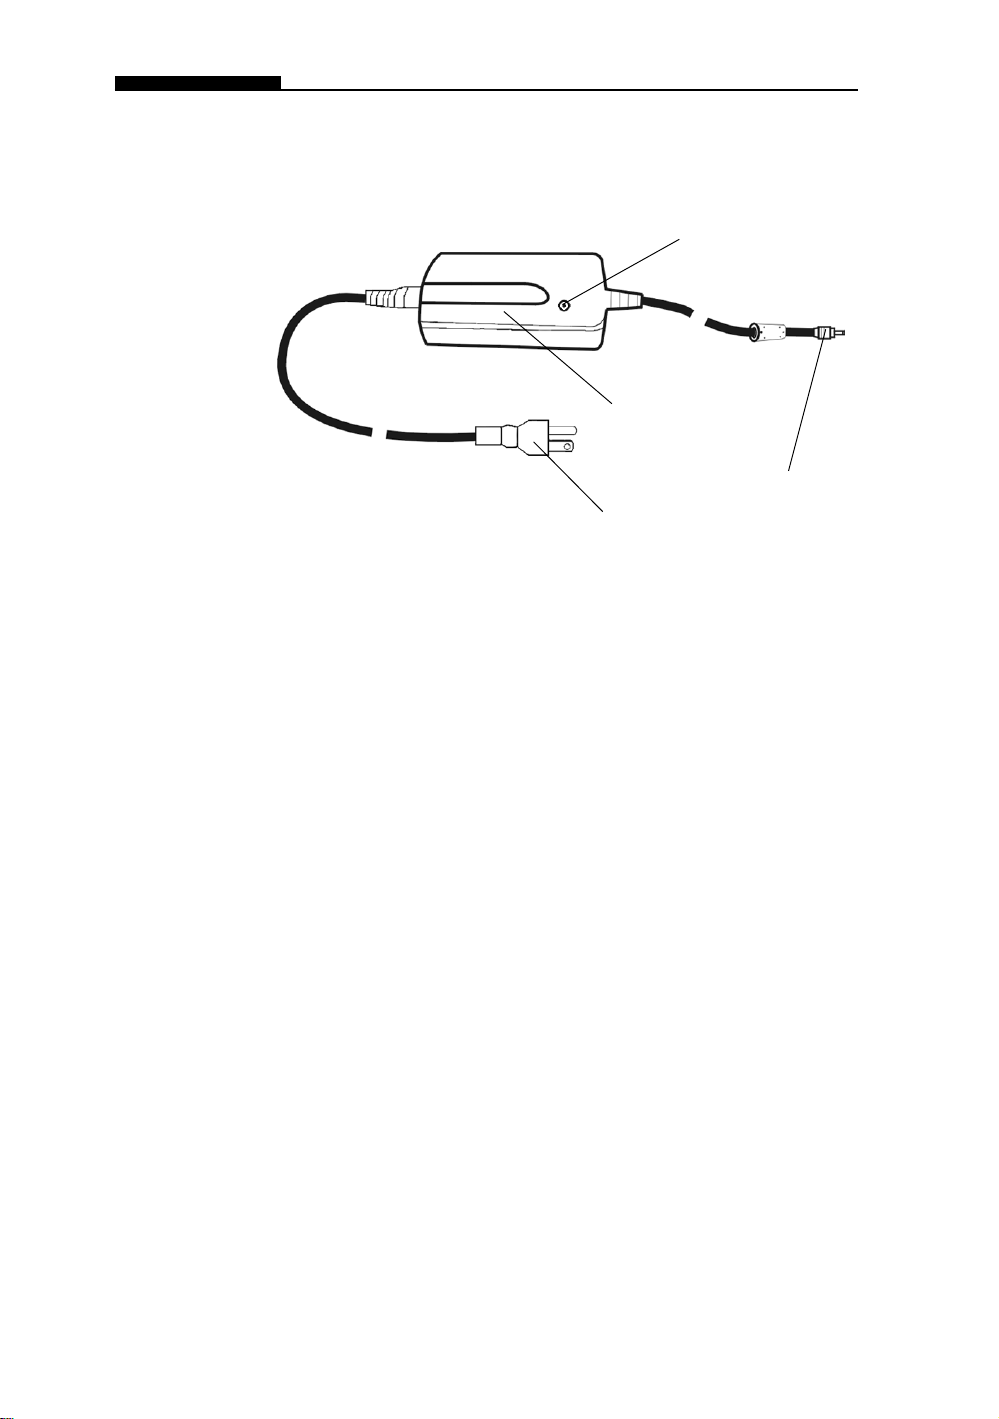
AC Adapter
2
3
1
4
1. DC-In Connector
The DC-out connector docks to the power jack on the tablet
PC.
2. LED Lamp
The LED lamp appears green when the unit is plugged into a
valid AC source.
3. Adapter
The adapter converts alternating current into constant
voltage for the tablet PC.
4. AC Plug
The three-prong AC plug plugs to the AC wall outlet.
1-10
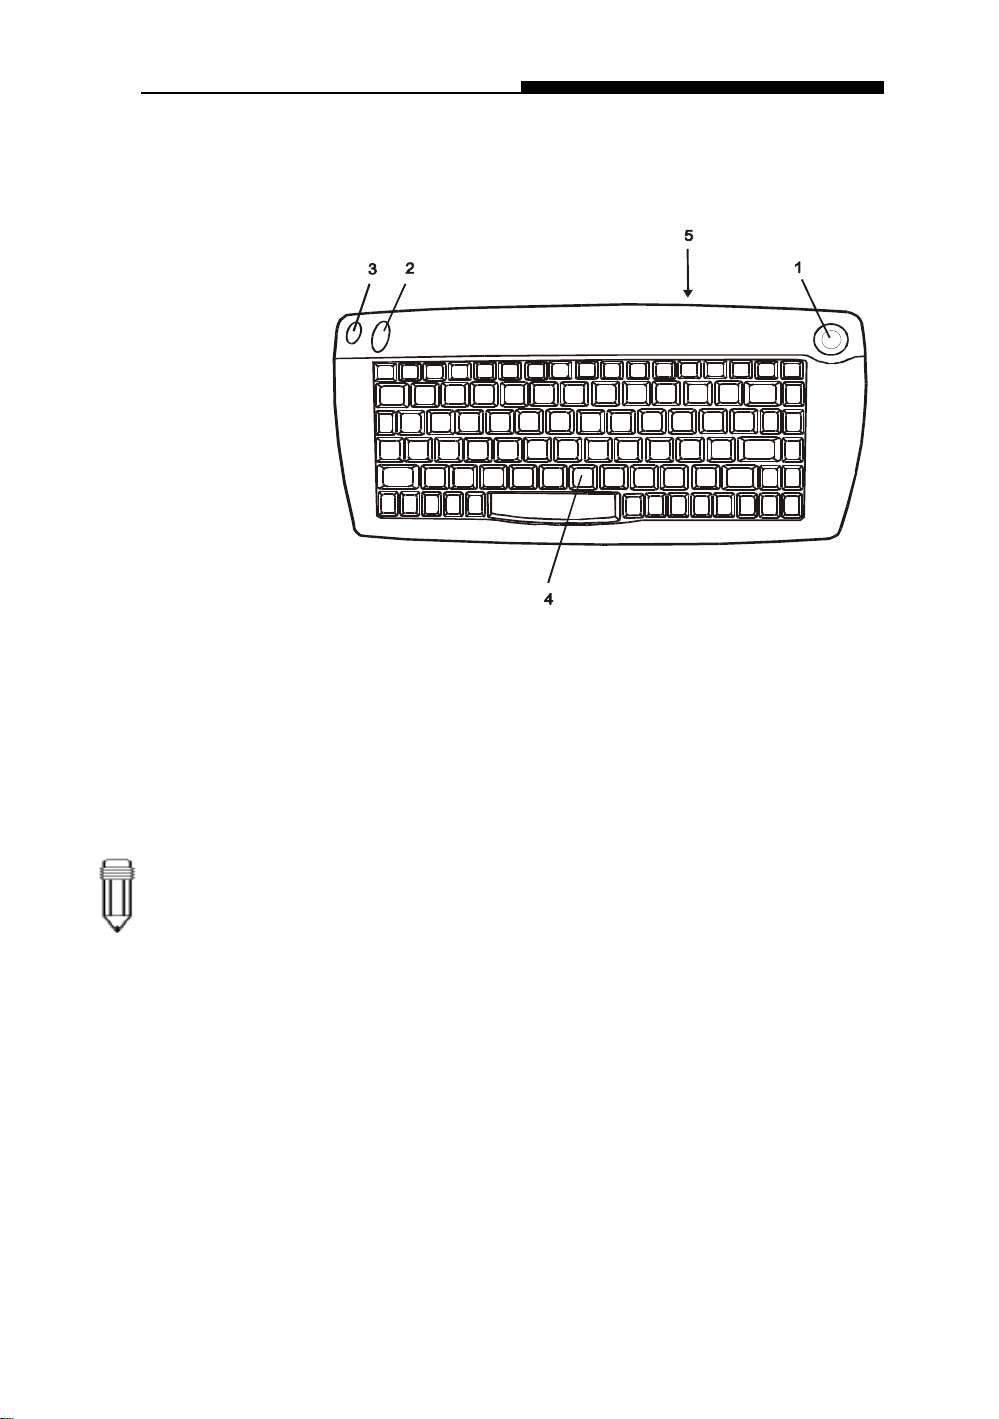
KeyBoard Features
Section 1 GETTING TO KNOW THE BASICS
Note:
Point the CIR
Lens of the
keyboard
straight toward
Consumer
Infrared Port of
the tablet PC.
The effective
range is a few
meters.
1. Mouse Pointer
Move the mouse pointer just as you would with a mouse or
touch pad.
2. Left Click Button
This button works like the left button of a mouse.
3. Right Click Button
This button works like the right button of a mouse.
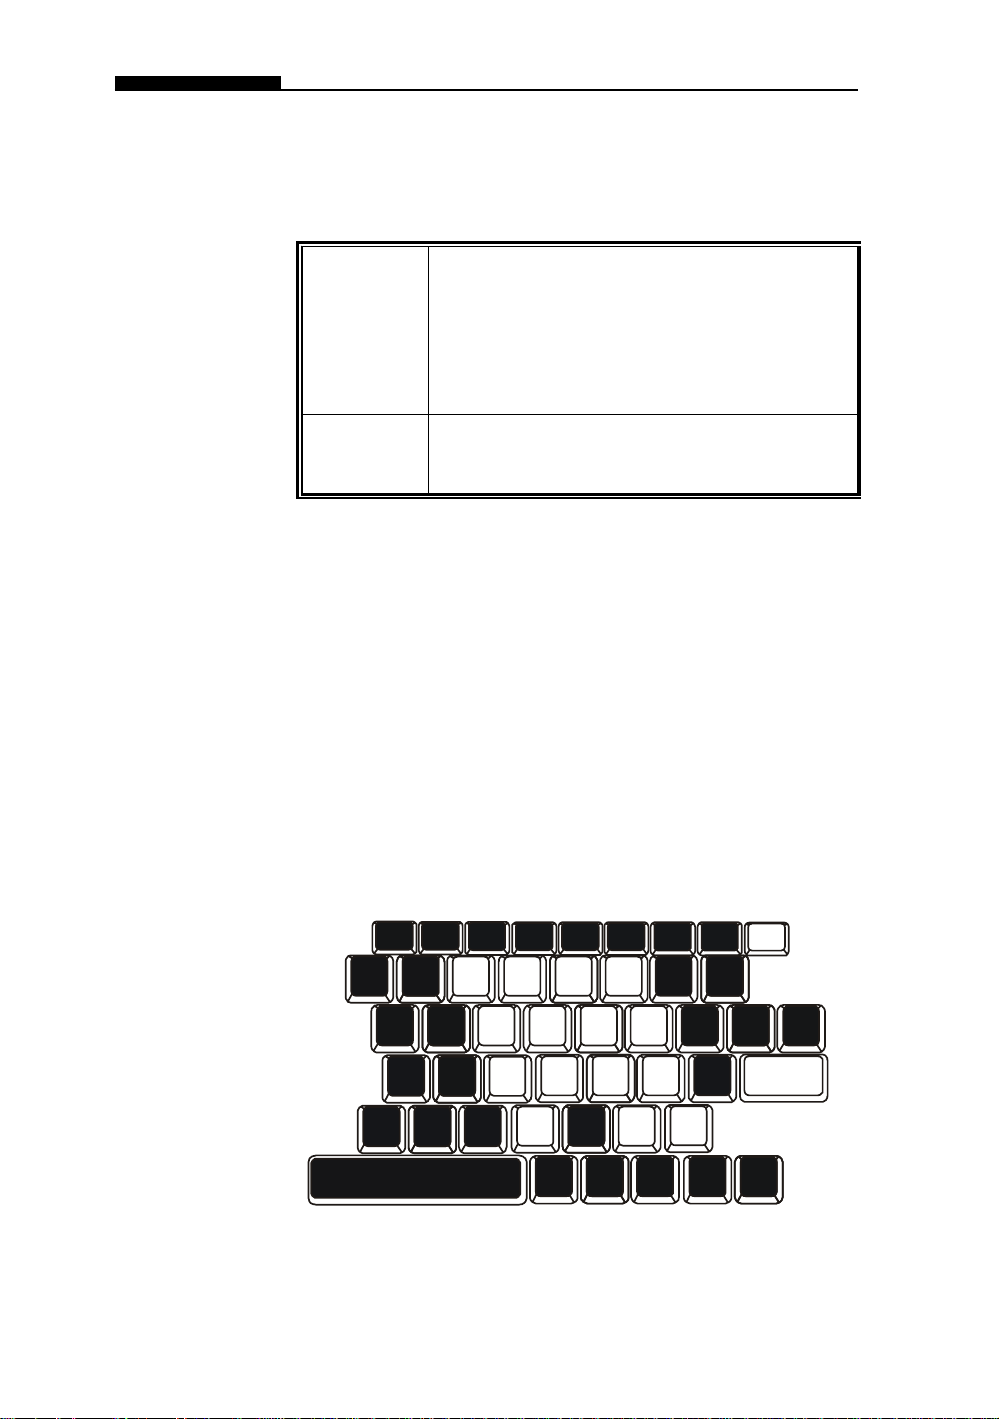
4. Keyboard
The enhanced 87/88-key keyboard is used to enter data. It
has an embedded numeric keypad and cursor control keys.
5. CIR Lens
The IR lens transmits keyboard and cursor input via infrared
beam.
1-11
USER`S MANUAL
Function (Hot) Keys
Num Lock
Scro ll L ock
Enables the embedded ke ypad to wo rk in
nume ric mode. The keys act like num e ric
keypads in a calculator. Use this mode
when you nee d to do a lot of num e ric data
entry. An alternative would be to connect an
external num eric keypad.
Press the ScrLk key and then press ¡ôor ¡õ
to move on e line up or do w n.
Embedded Numeric Key Pad
Press Num Lock to enable the embedded numeric key pad. The
numbers are printed in upper right corner of a key, in a color
different from the alphabets. This key pad is complete with
arithmetic operators (+, -, * , /).
Press Num Lock to revert to normal character keys.
1-12
789
456
123
0
Num
Lock
*
_
+
.
/
Enter
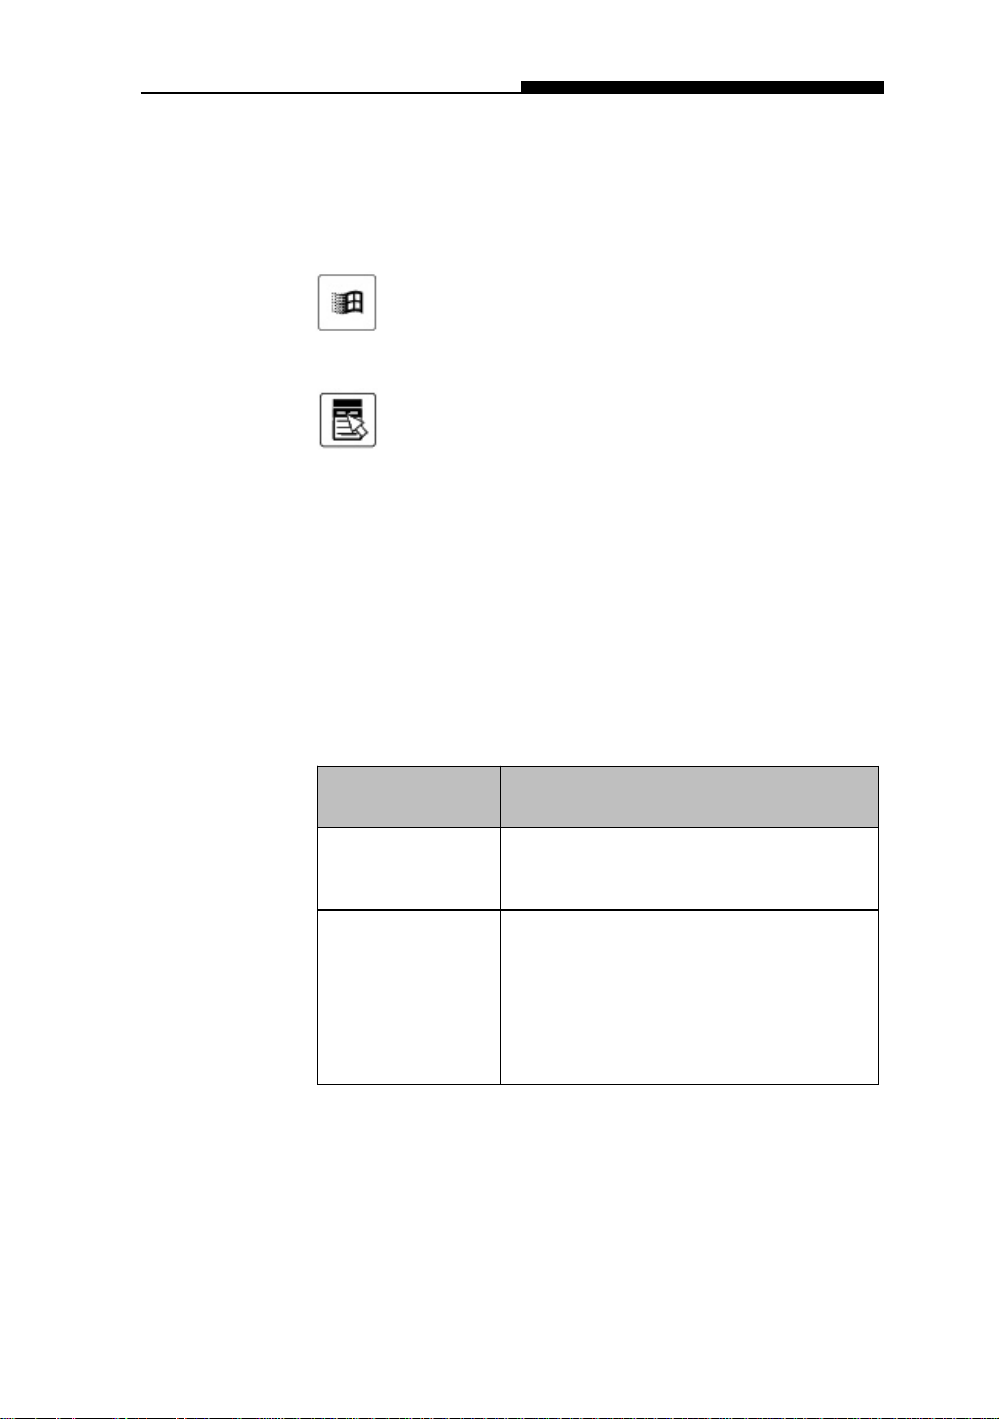
Windows Keys
Y our keyboard also has two Windows keys:
1. Start Key
2. Application Menu Key
LED Status Indicators
Section 1 GETTING TO KNOW THE BASICS
This key allows you to pull up the Windows Start
Menu at the bottom of the taskbar.
This key brings up the popup menu for the
application, similar to a click of the right mouse
botton.
The LED Status Indicator displays the operating status of your
tablet PC. When a certain function is enabled, a LED will light up
or flash intermittently . The following section describes its
indication.
LED Graphic
Symbol
Orange light indicates the battery is
Indication
being charged.
Green light indicates the computer is O N .
Blinking green light indicates the HDD is
being accessed.
Orange light indicates the system is now
in suspend mode.
1-13

USER`S MANUAL
Display
Your tablet PC uses a high performance 10.4-inch active matrix
TFT panel which supports high resolution and multi-million colors
for comfortable viewing. A powerful 2D / 3D integrated graphic
chipset is used for fast graphic performance.
.
Note:
To maximize
your battery
operating
time, set the
brightness to
the lowest
comfortable
setting, so that
the internal
back-light
uses less p
ower.
Adjusting the Display Brightness
The tablet PC uses a special utility software to control
brightness. See Section 2 for instructions.
Extending the Life of the TFT Display Device
Observe the following guidelines to maximize the life of the backlight in the display.
1. Set the brightness to the lowest comfortable setting.
2. Do not disable the suspend time-outs.
3. If you are using AC power and have no external monitor
attached, change to suspend mode when not in use.
1-14

Audio Devices
Adjusting the Volume in W indows
Section 1 GETTING TO KNOW THE BASICS
The Audio in your tablet PC is Sound Blaster Pro-compatible.
1. Click the speaker symbol in the taskbar in Windows.
2. Drag the volume control bar up or down to adjust the
volume.
3. T o temporarily silence the speaker without changing the
volume setting, click Mute.
V oice Recording
You need to use audio processing software to enable the built-in
microphone. For example, you may use Microsoft Sound
Recorder.
When you begin voice recording using the system`s built-in
microphone, be sure that your mouth is within near distance (no
longer than 20 cm) to the microphone. If the record level is too
small, you may also increase the microphone gain via the volume
control panel in Windows.
1-15

USER`S MANUAL
Modem
Warning:
The internal modem is
intended for use on an
analog phone line, also
called a POTS (Plain Old
T elephone Service) line.
This modem cannot be
connected directly to a
digital telephone line,
such as those commonly
found in a business
office. You may either
obtain an analog line or
an analog converter
compatible with the
phone line you’re using.
Your tablet PC comes with a 56K V .90 internal fax/modem and a
phone jack (RJ-1 1), which is located on the right side of your
notebook.
Use a telephone cable to connect the notebook to the telephone
wall outlet.
You may need to re-configure the modem setting if you plan to
use it in a different country. Go to Section 2 for instructions on
how to make the adjustment.
Connecting the Modem
1. Plug one end of the phone line into the modem port
located on the back side of the computer .
2. Plug the other end of the line into the analog phone wall
outlet.
1-16

Network Adapter
Section 1 GETTING TO KNOW THE BASICS
Y our tablet PC is equipped with a 100Base-TX Ethernet network
adapter. Connecting the active LAN cable to the RJ-45 LAN port
located in the back of the system. This allows you to access and
transmit data in the local area network.
Connecting to the Network
Use Unshielded Twisted Pair (UTP) Ethernet cable only.
1. Insert one end of the UTP cable into the network connector until the connector snaps securely into the
receptacle.
2. Either connect the other end of the cable to an RJ-45
jack wall outlet or to an RJ-45 port on a UTP concentrator or hub in the network.
Cabling Restriction for Networks
The following restrictions should be observed for 100BASE-TX
networks:
n The maximum cable run length is 100 meters(m) (328 feet
[ft]).
n For 100-Mbps operation, use Category 5 wiring and
connections.
Consult Windows manual and / or Novell Netware user‘s guide for
the software installation, configuration, operation of the network.
1-17

SECTION 2
USING SOFTWARE
Section 2 Using Software
In this section, you will learn how to use the software
functions of various hardware devices so that you can
work more effectively on your tablet PC.
2-1

USER`S MANUAL
The tablet PC has many unique capabilities such as touch-
sensitive screen, built-in digital camera, vitual keyboard, etc.
However, some of these devices may require you to perform a
one-time setup to enable it to work accurately .
Traditionally, a standard keyboard is built into a PC. However,
due to the lack of a permanently attached keyboard input device,
the tablet PC may require you perform certain adjustment to the
Windows operating system.
Throughout this manual, we will assume that you are using
Windows 2000 has the tablet PC’s operating system.
2-2
T ouch Screen Calibration
Although touch screen calibration may have already been
performed at the factory , there are times that it needs to be recalibration for higher accuracy.
The touch screen is a touch-sensitive device. It is a membrane
on top of the LCD display . It responds to mechanical pressure on
the screen surface. Y ou can navigate the cursor using the stylus
(pen). When you notice the stylus tip does not correspond well
or match point-to-point with the cursor, you then need to recalibrate the touch screen device.
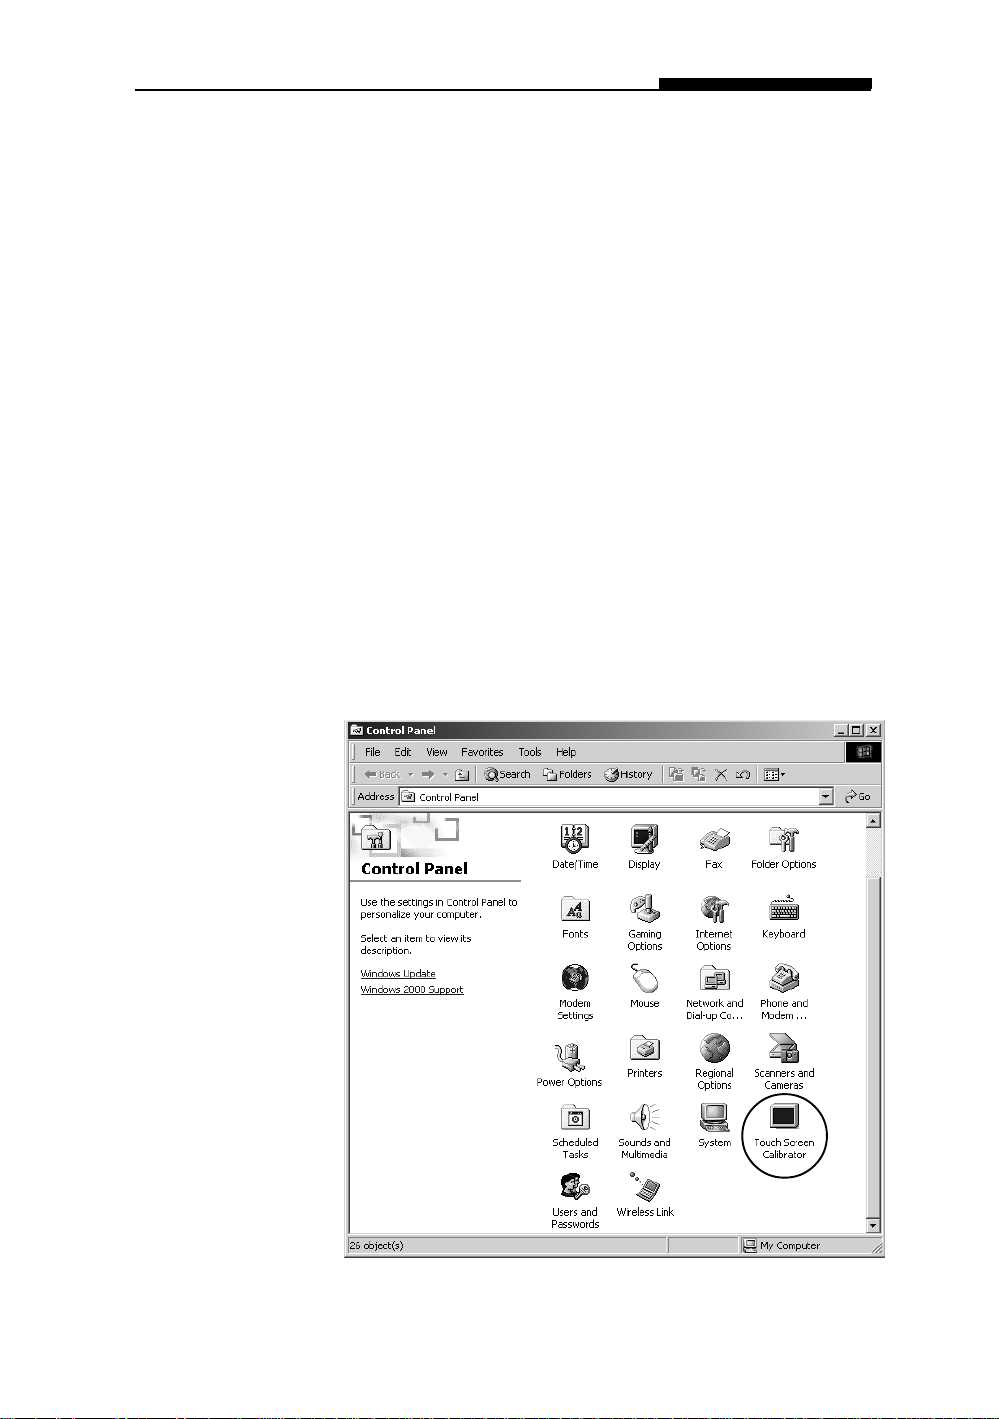
T o calibrate the touch screen, do the following:
Section 2 Using Software
1. To go [Start > Settings > Control Panel] and double-click on
Touch Screen Calibrator icon.
2-3
USER`S MANUAL
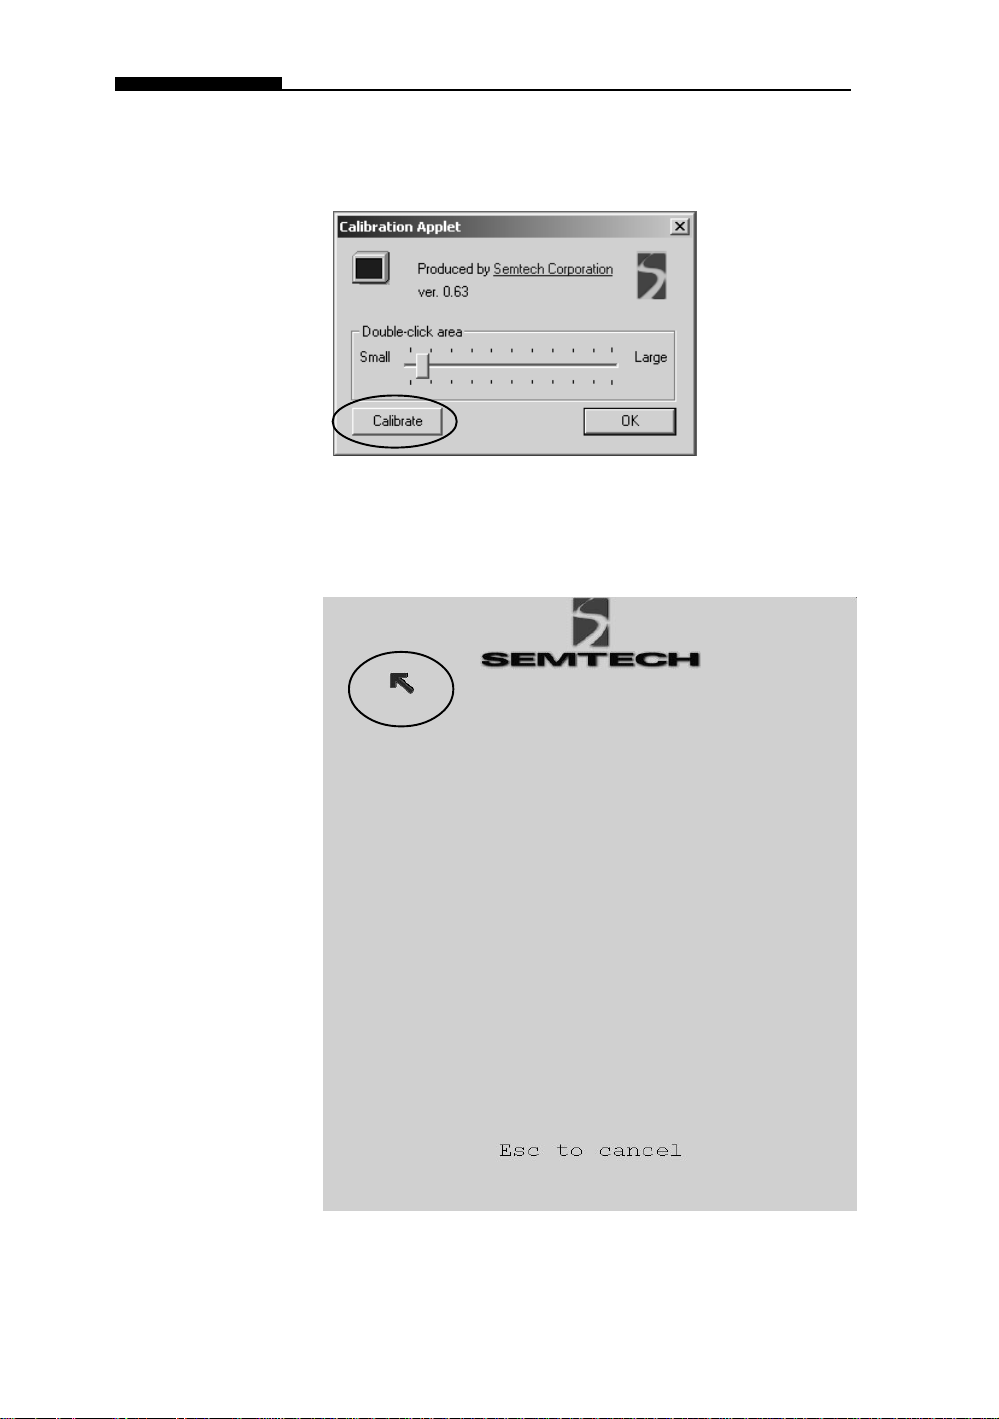
2. Y ou will see the following dialogue box.
3. Click on Calibrate button and you will see the following
display.
2-4

Note:
The calibration
effect takes
place immediately after you
exit the applet.
Section 2 Using Software
4. Use the stylus to point accurately to the tip of the red arrow
on the display. Start by the upper left corner of the display
and you will be asked to repeat the pointing action 4 times.
5. If you wish to change to a larger double click area, you may
do so at the Calibration Applet box by moving up the slider.
(See diagram to the left.) Click on OK to exit the applet.
2-5
USER`S MANUAL
Digital Camera
Note:
The built-in USB camera allows you to take a snap shot and
record it onto the hard disk drive.
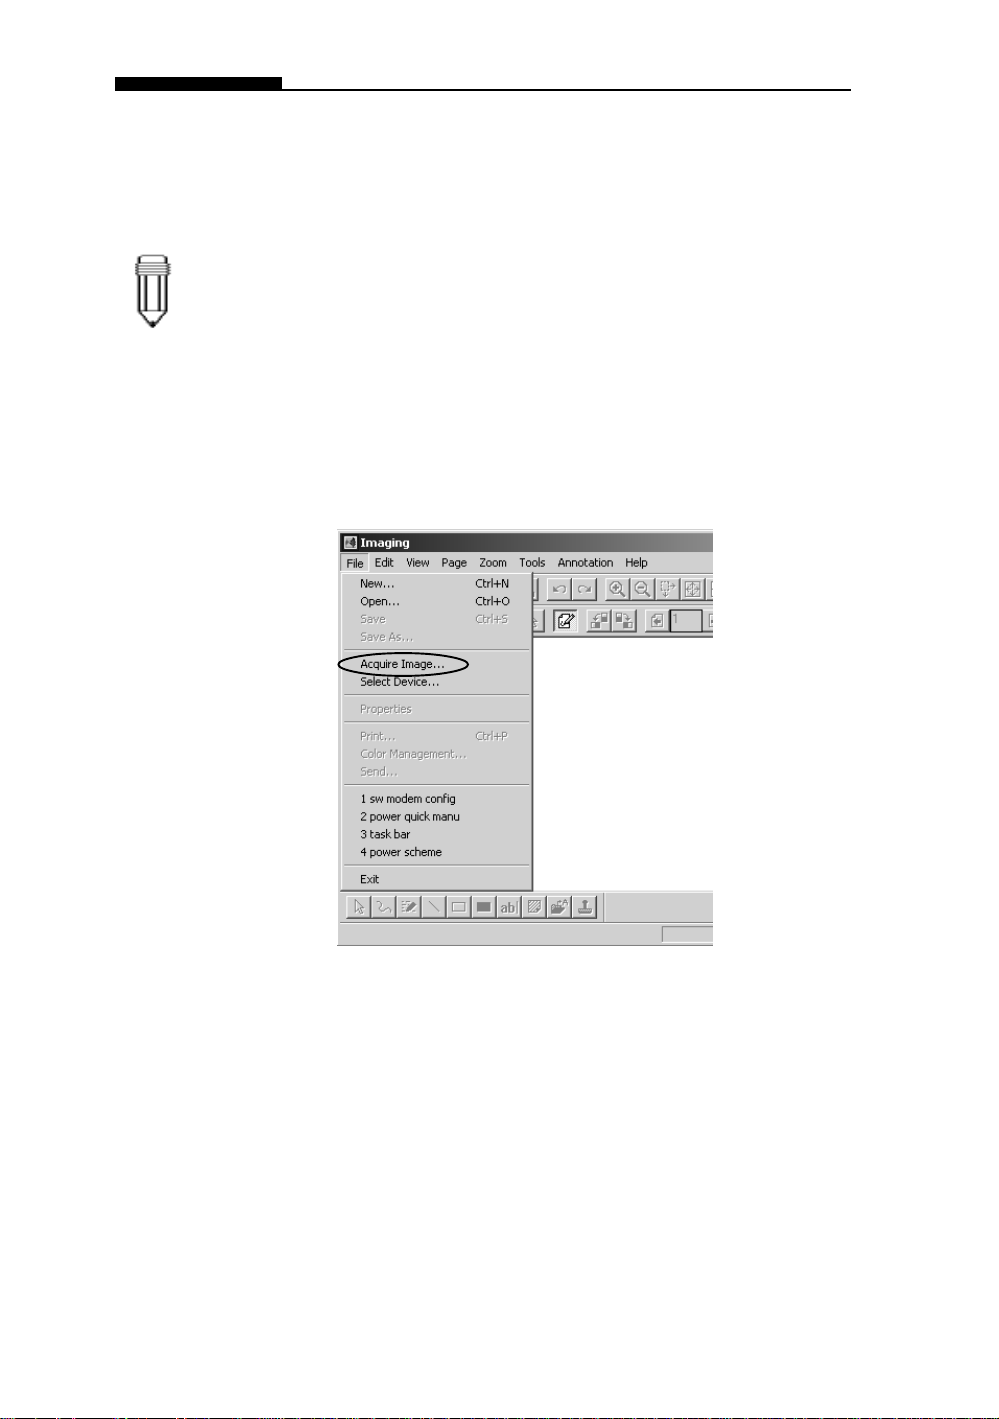
T o capture a picture using Windows Imaging, do the following
1. Go to [Start > Programs > Accessories > Imaging] to start
the Imaging application.
2. Go to [File > Acquire Image...] to launch the camera’s utility
software.
2-6
3. The following diagram appears. Y ou may need to adjust the
focus ring for the sharpest image.
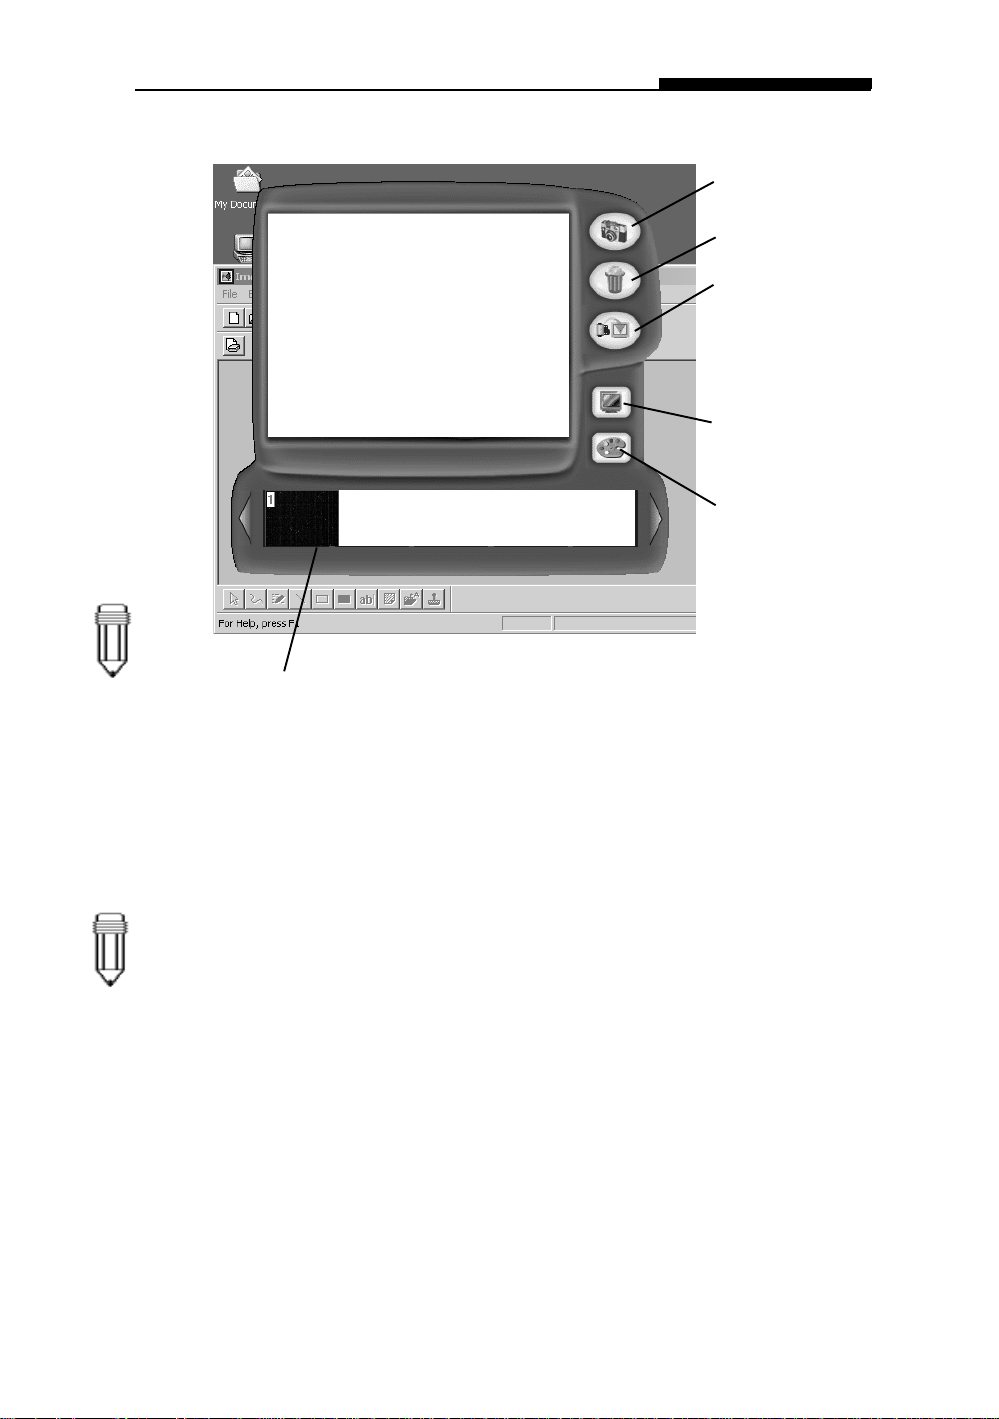
Image is displayed here.
Section 2 Using Software
To take a snapshot
To delete a picture
To exit and transfer
the selected image
to the photo-editing
To adjust camera
To adjust camera hue,
Note:
If you do not
select an
image in the
bottom row, no
image will be
transferred.
Note:
T o change the
resolution
setting, click on
the Adjust
Camera
Resolution icon
shown above.
Selected image to be
transferred is highlighted by the red
4. Click the camera icon on the right to take a snapshot. The
shot you have just taken will be displayed on the bottom row.
5. Select an image in the bottom row by clicking on the image.
Y ou will see red outlining to indicate the particular frame has
been selected for transfer.
6. Click on the Exit and Transfer icon to exit the applet and
transfer the selected image to Windows Imaging application.
Tip on photographing: Always use the best lighting possible.
2-7
USER`S MANUAL
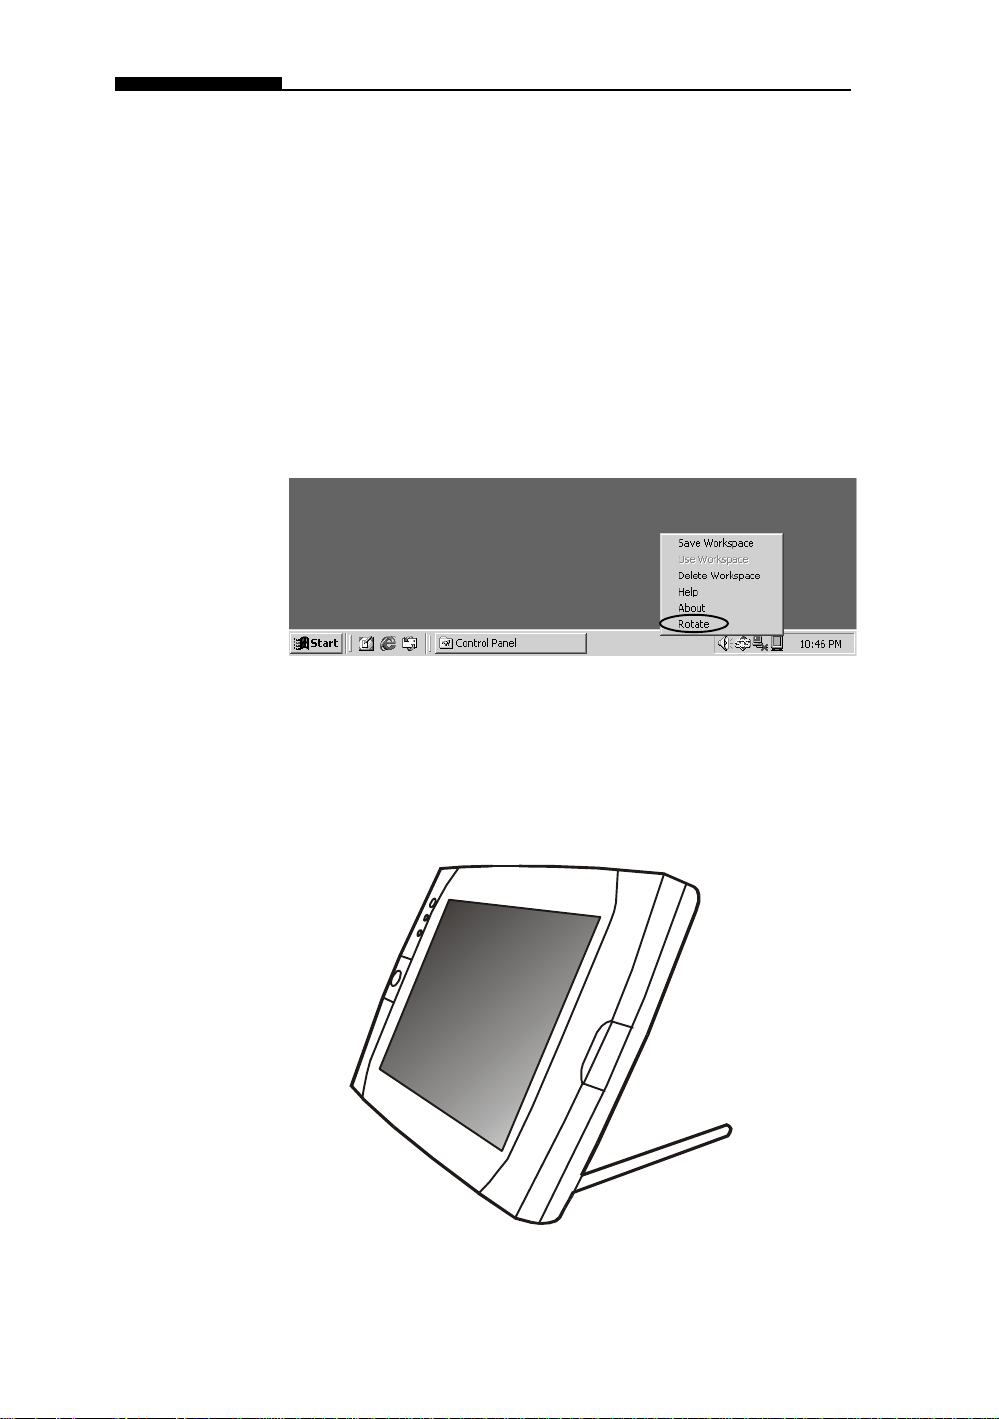
Screen Rotation
A special application - Pivot Software - allows you to use the
tablet PC in portrait mode (vertical) or landscape mode
(horizaontal).
To rotate the screen display, do the following:
1. Click the Pivot icon at the right corner of the task bar.
2. Select Rotate to pivot the display 90 degrees.
Repeat steps 1 and 2 to revert to the original mode.
2-8
 Loading...