


BladderScan® BVI 3000
Bladder Volume Instrument
Operator’s Manual
BladderScan® BVI 3000
Bladder Volume Instrument
Operator’s Manual

Copyright © 2007, 2010 by Verathon Inc
All rights reserved. No part of this Operator’s Manual may be copied or transmitted by any method without the express written consent of Verathon Inc.
BladderScan, Sontac, and Verathon are trademarks of Verathon Inc.
Other products and companies named in this Operator’s Manual may be trademarks of their respective companies.
The BladderScan instrument documented in this manual is protected by U.S. Patent Number 5,235,985. Other international patents pending.
This Operator’s Manual is Verathon Part No. 0900-0383.
Information in this Operator’s Manual may change at any time without notice. Examples described or illustrated in this User’s Guide are fictitious and do not in any way represent real patient or exam data.
Verathon Inc.
20001 North Creek Parkway
Bothell, WA 98011 USA 800.331.2313 (US and Canada only) 425.867.1348
Fax: 425.883.2896
Verathon Medical (Europe) B.V.
Linnaeusweg 11
3401 MS IJsselstein
The Netherlands +31.30.68.70.570 Fax: +31.30.68.70.512
For additional contact information, please visit our web site at www.verathon.com.
0900-0383-11-60

|
Table of Contents |
Important Information.................................................................................................................. |
6 |
BladderScan® BVI 3000 Components......................................................................................... |
7 |
Description of the BladderScan® BVI 3000................................................................................ |
8 |
Preparation For Use..................................................................................................................... |
8 |
Customizing the BladderScan® BVI 3000................................................................................. |
11 |
Operating the BladderScan® BVI 3000..................................................................................... |
13 |
Verifying Aim.............................................................................................................................. |
15 |
Printing Results.......................................................................................................................... |
17 |
Histogram of Cost Savings....................................................................................................... |
18 |
Adding a Patient ID and Notes.................................................................................................. |
19 |
Print Options.............................................................................................................................. |
20 |
Adjusting Preferences............................................................................................................... |
21 |
Additional Features.................................................................................................................... |
23 |
Regular Inspections and Maintenance..................................................................................... |
24 |
Troubleshooting......................................................................................................................... |
25 |
Warranty and Disclaimer Information...................................................................................... |
26 |
Contacting Verathon®................................................................................................................ |
27 |
Safety and Performance Summary........................................................................................... |
28 |
Parts and Accessories............................................................................................................... |
29 |
Technical Description................................................................................................................ |
29 |
Technical Description: Battery Charger................................................................................... |
31 |
Symbol Directory....................................................................................................................... |
33 |
BVI 3000 Operator’s Manual |
Page 5 |

Important Information
Product Description |
The BladderScan® BVI 3000 is a B-mode ultrasonic instrument, portable |
|
and battery operated, intended for the noninvasive measurement of |
|
urinary bladder volume. A mechanical sector scanning transducer |
|
provides cross-sectional images of the bladder from twelve scan planes. |
|
Based on these images, the BladderScan automatically calculates the |
|
estimated bladder volume in milliliters and displays it on a screen. |
Notice to All Operators
The BladderScan BVI 3000 should be used only by individuals who have been trained and authorized by a physician or the institution providing patient care. All operators should read this manual prior to using the BVI 3000. Failure to comply with these instructions may compromise the performance of the instrument.
Biological Safety
Statement of
Prescription
Statement of
Intended Use
To date, exposure to pulsed diagnostic ultrasound has not been shown to produce adverse effects. However, ultrasound should be used only by medical professionals when clinically indicated, using the lowest exposure times possible commensurate with clinical utility.
The ultrasonic output power of the BladderScan BVI 3000 is not useradjustable and is limited to the minimum level necessary for effective performance. Data on acoustic output levels can be found in the section titled “Technical Description,” beginning on page 29.
Caution: United States Federal law restricts this instrument to use by or on the order of a physician.
The BladderScan BVI 3000 projects ultrasound energy through the lower abdomen of the nonpregnant patient to obtain an image of the bladder, which is used to determine bladder volume noninvasively.
Warning: Not intended for fetal use.
Warning: Not intended for use on pregnant patients.
Warning: There is the hazard of possible explosion if the BVI 3000 instrument is used in the presence of flammable anesthetics.
Cautions |
The BVI 3000 should not be used on a patient with open skin or wounds |
|
in the suprapubic region. |
|
The patient should not have a catheter in his/her bladder. This could |
|
affect the accuracy of the instrument. |
|
Use care with suprapubic/pelvic surgery patients. Scar tissue, incisions, |
|
sutures and staples affect ultrasound transmission and reflection. |
|
Accuracy may be affected for patients with ascites or free floating fluid |
|
in the peritoneum. |
Page 6 |
BVI 3000 Operator’s Manual |

BladderScan® BVI 3000 Components
BVI 3000 Operator’s Manual |
Page 7 |

Description of the BladderScan® BVI 3000
The BladderScan BVI 3000 consists of 4 main components: The Scanhead, Control Unit, Rechargeable Battery, and the Battery Charger.
Scanhead
The scanhead transmits and receives ultrasound, automatically moving its internal transducer 360º to scan twelve planes and produce a three-dimensional image of the urinary bladder. The scanhead is connected to the control unit by means of a cable.
Control Unit
The control unit provides all operating controls for the scanning procedure by means of six soft keys. The measured bladder volume and a target-shaped aiming icon are clearly displayed on the LCD screen, helping the operator to achieve accurate measurement results.
Batteries & Charger
Two NiMH rechargeable batteries are included with the BladderScan BVI 3000. One battery can be recharged in the battery charger while the other is being used to power the BVI 3000. This ensures that there is no instrument downtime. The charger brings the battery to a full charge in 6 hours or less.
(See picture and instructions for charging the battery on the following page.)
Preparation For Use
Connecting the
Scanhead
Connect the scanhead to the input socket at the back of the instrument by aligning the tabs on the scanhead plug with the matching slots on the instrument socket. Press the plug straight in until you hear a click.
To remove the plug, grasp the black plastic ring and pull straight out. Do not twist.
Page 8 |
BVI 3000 Operator’s Manual |
Preparation For Use
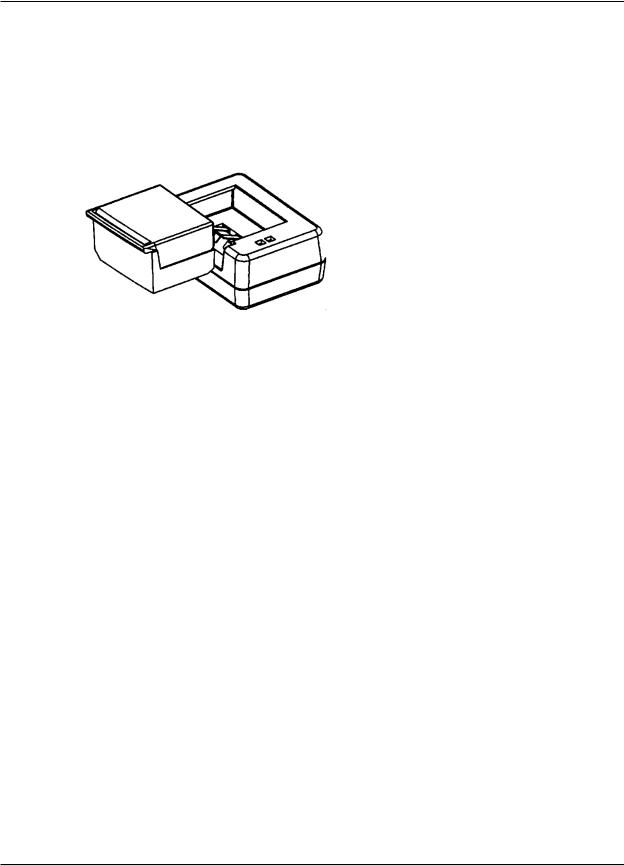
To charge a battery, plug the charger into an electrical outlet. Remove the label covering the battery contacts and slip the battery into the recess on the top of the charger Fully charging the battery may take up to 6 hours.
Batteries may be stored in the charger. There is no danger of overcharging the battery.
Rechargeable Battery and Battery Charger
Check the color indicator lights on top of the battery charger to determine the battery’s power status while charging.
Solid Green: When the battery is low on charge, charging begins in the fast charge mode. During fast charge mode, the green light is solid. For a fully discharged battery, fast charge mode lasts about two to three hours.
Quickly Blinking Green: When the battery reaches 80% of its charge level, the charger starts to “top off” the charge and the green light blinks quickly. At this point, you can use the battery in the BVI 3000 instrument.
Amber Light: In some cases the charger displays an amber light. The amber light means the battery temperature is stabilizing before recharging can begin. This may occur when the battery is taken from a
very cold or warm environment, or if the battery is defective. If the light remains amber for over an hour, the battery is defective and must be replaced.
Slowly Blinking Green Light: If the green light blinks slowly upon inserting a battery, then the battery level is too low for fast charging. The charger trickle charges the battery until the power level is high enough to begin fast charging. At this point, fast charging begins automatically.
When the battery has been properly charged, install it in the BVI 3000 as demonstrated in the illustration below.
Charging the
Batteries
Note: Battery life is extended if you wait for about three hours until the battery is fully charged. Verathon recommends that you store your spare battery in the charger to prevent instrument downtime due to discharged batteries.
Note: Plugging and unplugging the charger while a battery is inserted causes no damage. There is no danger when the charger is plugged in without the battery inserted.
Installing a Battery
BVI 3000 Operator’s Manual |
Page 9 |
Preparation For Use
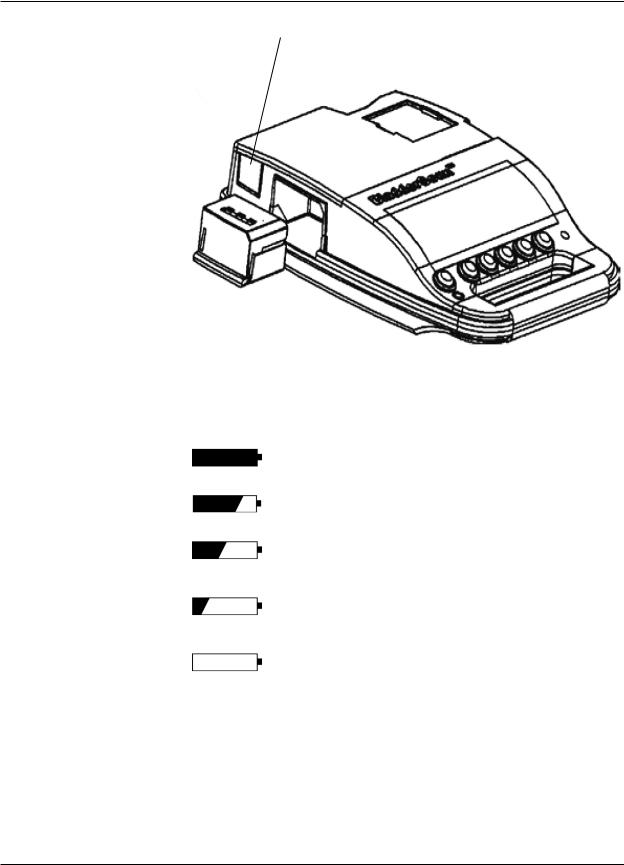
Battery release button. To remove the battery, press the battery release button.
Battery Icon |
The battery icon, located in the upper right corner of the LCD screen, |
|
|
indicates the power status of the battery currently installed in your |
|
|
instrument. Read the battery icon as follows: |
|
|
|
A fully darkened battery icon indicates that the battery is |
|
100% |
fully charged and ready for use. |
|
|
A battery icon that is almost full indicates a partially |
|
75% |
discharged battery. |
|
|
When the battery icon is half-darkened, the battery is |
|
50% |
partially discharged. This is the most common display, |
|
|
shown during the majority of the battery’s charge life. |
|
|
An almost empty battery icon indicates that the battery |
|
25% |
is nearly discharged. While a few more scans can still be |
|
|
performed, the battery should be replaced at this point. |
|
|
When the battery is fully discharged, the battery icon is |
|
0% |
completely clear and the BVI 3000 does not work. The |
|
|
discharged battery must be replaced with a charged one. |
Battery Care |
The BladderScan® BVI 3000 draws very little power when it is turned |
|
off; however, if you do not plan to use your instrument for several weeks, you should remove the battery to prevent it from becoming discharged.
The battery that is not in use should be stored in the charger so it remains fully charged.
Page 10 |
BVI 3000 Operator’s Manual |
Customizing the BladderScan® BVI 3000
You can customize the BladderScan BVI 3000 instrument by entering your facility name and the current date and time. This information will subsequently be included on all printouts of exam results. To customize the BVI 3000:
•Turn the BVI 3000 on by pressing the on/off button 
•On the Main Menu screen, press the ALT button to display the Alternate Menu screen, illustrated below.
Important: If your BVI 3000 came with the PIN code option enabled, you must enter your PIN code before you can access the Alternate Menu. The default PIN code is “0000.” For information about how to personalize the PIN code, see the section titled, “Adjusting Preferences,” on page 21.
•Press the NAME button. The Name Preset screen, with a 4 x 13 grid containing alphabetic, numeric, and punctuation characters, is displayed.
•Use the “arrow right” à and “arrow down” â buttons to highlight the first character you want to enter.
•When the desired character is highlighted, press the SEL button to select it. The character(s) you have selected are displayed below the character grid.
•Continue to use the “arrow right,” “arrow down,” and SEL buttons to enter all the characters in your facility’s name. If you make a mistake, use the ERASE button to delete the last character entered.
•When you are finished, press DONE to return to the Main Menu. The programmed facility name will now be displayed on the Main Menu screen.
Programming the
Facility Name
Note: Diagnostic Ultrasound
Corp. is now called
Verathon Inc.
Note: You may use any combination of up to 27 characters when entering the facility name. For example, you can enter the name of the hospital, clinic, or physician supervising use of the BVI 3000.
Note: You can use the empty character as a space to separate words.
Note: When the arrow buttons are held down, the cursor moves one character a second. When the cursor reaches the end or bottom of the grid of characters, it wraps around to the first character again.
BVI 3000 Operator’s Manual |
Page 11 |
 Loading...