

Venstar INSTEON 2491T1E, INSTEON 2491T7E Owner's Manual

Venstar INSTEON®
Thermostat
Owner’s Ma nual
INSTEON® Remote Control Venstar Thermostat
Model #s - 2491T1E, 2491T7E
Page 1 of 8
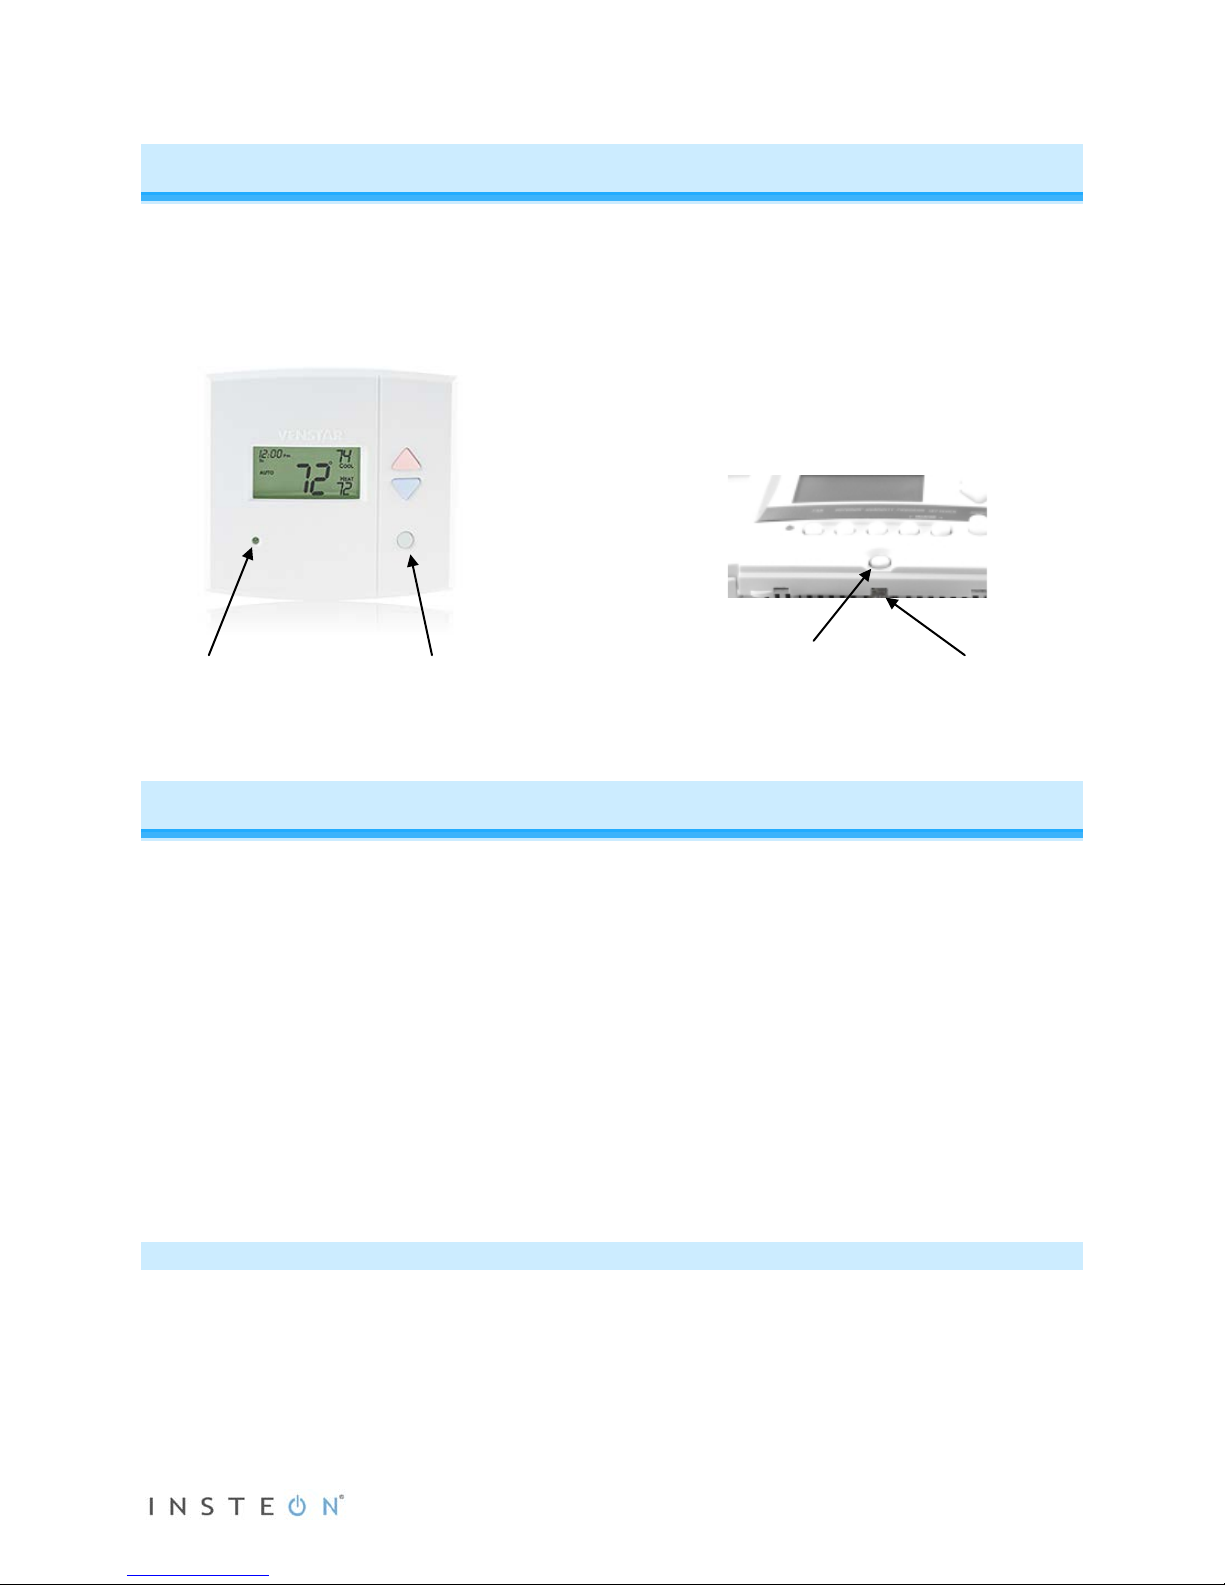
Venstar INSTEON Thermostat
Set Button
INSTEON LED
Mode Button
Status LED
Congratulations on purchasing the Venstar INSTEON thermostat. Now you can use the power of
INSTEON to control the temperature of your home, from anywhere in the house, or the world. Recall
stored setpoints and mode settings from any INSTEON controller to maintain comfort and save energy.
Features and Benefits
- INSTEON compatible – works with all INSTEON products
- Elegant, built-in, clean and professional look for HVAC control
- Powered through your thermostat - no batteries needed
- As an INSTEON responder, can easily recall all settings upon a scene trigger
- As an INSTEON responder, will adjust temperature setpoint(s) up or down one degree upon
receiving a bright or a dim command
- As an INSTEON controller can easily control INSTEON responders when:
o Heat is turned on and/or off
o A/C is turned on and/or off
o Fan mode is switched
- Reports changes in thermostat modes, temperature and humidity to compatible automation
controllers or software
- Repeats all RF INSTEON commands via RF
- All settings saved through power outages
- One-year warranty
What’s in the Box?
- Venstar INSTEON thermostat
- Venstar Owner’s Manual
- Quick Start Guide
Page 2 of 8

Installation
IMPORTANT: If you are not knowledgeab le ab out and c om f or table with electr ica l c irc uitr y or HVAC
installation, you should have a qualified electrician install a compatible thermostat for you.
Install the thermostat by following the enclosed Venstar documentation.
Note: This thermost at is not com patible with Venstar ac cess ories that connec t via the phone-style jack on
bottom of Venstar products.
Setting Up INSTEON Scenes
In a scene, one or more INSTEO N responders respond to an INST EON controller. When the scene is
triggered (turned On), all devices return to the states they were at when the scene was programmed.
Adding Venstar Thermostat as an INSTEON Responder
Thermostat includes a special feature that allows you to link individual commands to the On and Off
buttons on your controller. For example, you can link the heat to turn on when you press the On button
and link the fan to turn on when you press the Off button on your controller.
NOTE: “Scene On” and “Scene Off” mus t be added/linked s eparately. If you onl y add/link to “ Scene On,”
nothing will happen when you trigger a “Scene Off.”
1) Press and hold the scene controller button until it beeps.
Controller’s LED will blink.
2) Adjust the mode, setpoints, etc. on the thermostat to the desired scene settings.
3) If you wish to link to “Scene Off,” double-tap thermostat’s Set button. Otherwise proceed to step 4.
4) Press and hold thermostat’s Set button until it double-beeps.
Thermostat will flash all its LCD characters twice.
Thermostat’s INSTEON LED will flash once and return to green.
3
Controller will double-beep
and its LED will stop blinking.
5) Confirm that scene addition was successful by tapping sending an On (and/or Off) from the
controller’s scene button.
Thermostat’s settings will return to scene settings.
Adding Venstar Thermostat as an INSTEON Controller
Scenes can be triggered when the thermostat beg ins or ends actively heating or cooli ng. Further, it can
trigger/control a scene when the fan mode is switched between always on and auto. This feature is
helpful to control equipment such as booster fans, dampers, etc.
1) Activate the desired controller mode.
a. A/C: Turns responders on when A/C begins cooling (thermostat’s status LE D green) and off
when A/C ends cooling.
i. Tap thermostat mode button until only cool setpoint is displayed.
b. Heat: Turns responders on when Heatin g begins (thermostat’s status LED red) a nd off when
Heating ends.
1
2
1
If the controller does not have a beeper, wait until its LED begins blinking
2
You may need to dim your room lights and/or hold a white piece of paper up to bottom of the thermostat in order to see the LED
3
Most models
Page 3 of 8
 Loading...