

Page 1

DB6
O
D
A
L
R
O
U
A
I
WIRELESS D
DRAADLOZE
SONNETTE S
TIMBRE INA
TRAGBARE D
OR CHIME
EURBEL
NS FIL PORTABLE
MBRICO PORTÁT
AHTLOSE TÜRGLO
L
CKE
USER MANUAL
GEBRUIKERSH
MODE D’EMPL
MANUAL DEL
BEDIENUNGS
ANDLEIDING
I
SUARIO
NLEITUNG
3
8
13
18
23
Page 2
DB6
V. 01 – 17/10/2012 2 ©Velleman nv
Page 3
/
t
n
n
o
r
i
u
o
o
ging
n
n
t
e
mobject
G
epag
m
e
h
y
t
u
a
e
r
6
A
m
o
;
e
a
v
n
m
n
n
n
n
e
e
©
o
a
a
o
s
o
a
o
a
e
e
y
a
e
e
g
e
g
1. Introduc
To all reside
Important e
returned to yo
the local env ir
If in doubt, c
Thank you for
before brin
transit, don't i
2. Safety I
Keep
Chim
rain,
3. General
Refer to the V
es of this
• Keep this d
• Protect this
operating t
• Familiarise
using it.
• All modifica
Damage ca
by the warr
• Only use th
an unautho
V. 01 – 17/10
USER M
ion
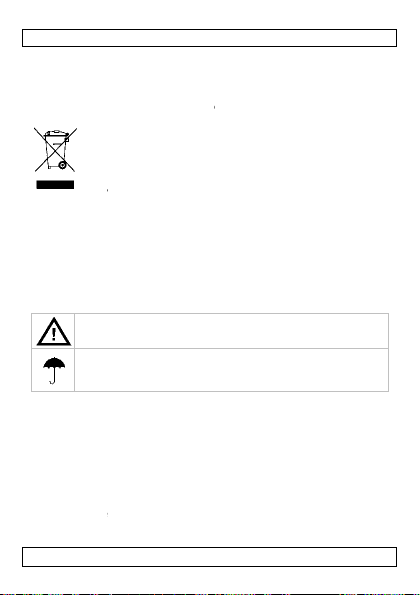
ts of the European
vironmental infor
This
symbol on the device
sal of the device afte
disp
envi
onment. Do not disp
unso
rted municipal waste
alized company for r
spec
r distributor or to a l
nmental rules .
ntact your local w
choosing Velleman! P
this device into ser
stall or use it and co
structions
his device away fro
unit: Indoor use o
oisture, splashing a
s filled with liquids o
uidelines
lleman® Service a
anual.
vice away from dust
device from shocks a
e device.
ourself with the func
ions of the device ar
sed by user modifica
nty.
device for its intend
ised way will void th
2012 3
DB
NUAL
Union
ation about this pr
or the package indic
r its lifecycle could h
se of the unit (or bat
it should be taken t
cycling. This device
ocal recycling service
ste disposal auth
lease read the manu
ice. If the device was
tact your dealer.
children and unauth
ly. Keep the device
d dripping liquids. N
top of or close to th
d Quality Warrant
and extreme temper
nd abuse. Avoid brut
tions of the device b
forbidden for safety
tions to the device is
ed purpose. Usin
warranty.
duct
tes that
rm the
teries) as
a
hould be
. Respect
rities.
l thoroughly
dama
rized users.
way from
ver put
device.
on the last
tures.
force when
fore actually
reasons.
not covered
th
device in
Velleman nv
ed in
Page 4
/
u
e
t
o
g
a
j
v
g
e
b
C
w
u
g
t
c
h
n
g
t
d
r
b
c
6
c
n
f
e
o
r
e
e
3
o
o
e
©
h
e
n
a
g
v
• Damage ca
is not cover
responsibili
• Keep this m
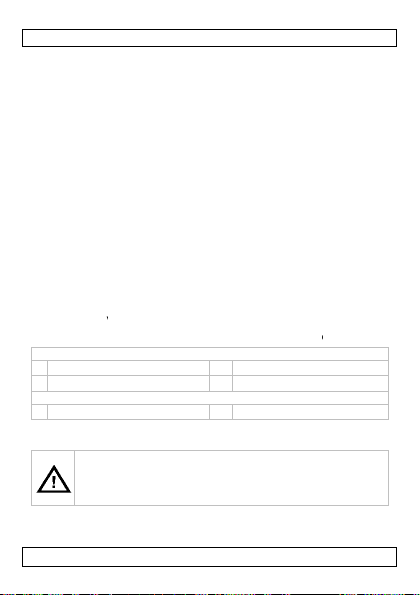
4. Features
• applications
• ideal for: d
• encoded si
• easy install
• 16 different
• ad
ustable
• self-learnin
• contents:
o 1 x chim
o 1 x door
o 1 x 3 VD
5. Overvie
Refer to the ill
chime unit
1
codin
2
chime sele
doorbell pus
5
push butto
6. Installin
Do no
explo
batter
local
Chime Unit
1. Open the
2. Insert 3 x
markings
3. Close the
V. 01 – 17/10
sed by disregard of
d by the warranty a
y for any ensuing de
anual for future refer
: doorbell, pager
mestic use, office, w
nal prevents false ala
tion without cables
chimes: Westminste
olume: up to 6 differ
code: 1 million cod
unit
ell push button
battery (type CR20
strations on page 2
but
on
tion button
button
the Batteries
puncture batteries
e. Do not attempt to
ies (alkaline). Dispos
egulations. Keep batt
attery compartment
AA 1.5 V batteries (n
in the compartment.
ompartment.
2012 4
DB
ertain guidelines in t
d the dealer will not
ects or problems.
nce.
rkshops, reception d
rm
, ding-dong, telepho
nt levels
s
2).
f this manual.
3
volume button
4
foot
6
name plate
r throw them in fire
recharge non-rechar
of batteries in accor
eries away from child
at the back of the de
ot incl.) according to
is manual
accept
sk
e...
s they may
eable
dance with
ren.
ice.
the polarity
Velleman nv
Page 5

DB6
Doorbell Push Button
1. Open the doorbell push button by pushing gently with a small
screwdriver in the notch at the bottom of the casing [8] and
removing the cover.
2. Insert a lithium CR2032 battery (incl.) according to the polarity
markings [9].
3. To place the cover back, first align the top of the cover [7], then
push the bottom [8] until it snaps into place.
Note: If you align the bottom first, the cover will not close
correctly and it may come loose.
7. Installation
The doorbell push button contains a transmitter, that sends a code to
the receiver located in the chime unit. Before installing the push
buttons, you have to make sure that the chime unit recognises the
code of the push button. Proceed as follows:
1. Make sure that batteries are installed in c hime unit and doorbell
push button.
2. Press the push button. The chime unit automatically recognises
the code and produces a chime.
3. Press the chime selection button [2] repeatedly to select th e
desired melody.
4. Press the volume button [3] repeatedly to select the desired
volume level.
5. Place the chime unit and push button in their desired locations.
Note: Do not fix the units in place yet.
You can hang the chime unit from a wall, or you can extend the
foot [4] and stand the unit upright on any surface.
6. With chime unit and push button in position, test the connection
by pressing the push button. If the connection is OK, the chime
unit produces a chime. (If there is no chime, see §9 for
troubleshooting informat ion.)
7. Fix the doorbell push button in the desired location using
double-sided tape at the back [10].
V. 01 – 17/10/2012 5 ©Velleman nv
Page 6
DB6
8. Adding or Replacing Push Buttons
You can use up to 4 push buttons with the same chime unit. If you
want to use a new push button, you need to make sure that the
chime unit recognises the code of the new push button. Proceed as
follows:
1. Install the battery in the push button.
2. Press the coding button [1] on the chime unit.
3. Press the push button.
If the code is set correctly, t he chime unit wi ll produce a chime.
4. You can now install the push button in its desired location.
9. Troubleshooting
• When the sound becomes weak, replace the batteries of the chime
unit (see §6).
• If pushing the push button does not produce a chime:
o Check if the chime unit is located within the specified range
(max. 60 m in open field). If not, bring it closer to the push
button.
o Check if chime unit and doorbell push button are not
surrounded by metal or near a strong magnetic field. In these
cases, move the chime unit and/or doorbell push button to a
more suitable location.
o Replace the push button battery (see §6).
o Create a new code between chime unit and push button
(see §8).
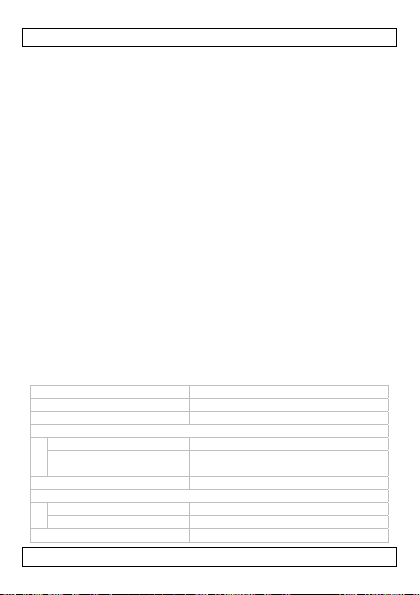
10. Technical Specifications
chime unit free standing or hanging
transmission frequency 433.92 MHz
range max. 60 m (in open field)
power supply
push button (transmitter) 1 x 3 V battery (type CR2032C)
chime unit (receiver) 3 x AA battery 1.5 V (LR6C, not incl.)
push button protection grade IP44
dimensions
push button (transmitter) 32 x 80 x 18 mm
chime unit (receiver) 96 x 140 x 37 mm
transmitting power <= 10 mW
V. 01 – 17/10/2012 6 ©Velleman nv
Page 7
DB6
sound level >= 80 dB (within 0.5 m)
weight 189 g
Use this device with original accessories only. Velleman nv
cannot be held responsible in the event of damage or injury
resulting from (inc orrect) use of this device.
For more info concerning this product and the latest version
of this manual, please visit our website www.velleman.eu.
The information in this manual is subject to change without
prior notice.
© COPYRIGHT NOTICE
The copyright to this manual is owned by Velleman nv. All
worldwide rights reserved. No part of this manual may be copied,
reproduced, translated or reduced to any electronic medium or
otherwise without the prior written consent of the copyright holder.
V. 01 – 17/10/2012 7 ©Velleman nv
Page 8
/
E
gez
m
y
e
d
t
v
a
n
n
e
w
a
d
gen
g
o
e
V
e
e
e
d
ghe
d
6
o
e
s
j
s
e
g
e
t
e
n
v
i
e
e
ge
©
G
g gee
n
j
o
a
r
jd
e
s
o
h
n
n
e
e
b
1. Inleiding
Aan alle in
Belangrijke
terechtkomen
naar een loka
milieuwetgevi
Hebt u vrage
betreffend d
Dank u voor u
toestel in gebr
transport, inst
2. Veilighei
3. Algemen
Raadpleeg de
achteraan dez
• Bescherm t
• Bescherm t
bediening.
• Leer eerst
gebruiken.
• Om veili
Schade doo
niet onder
V. 01 – 17/10
G
BRUIKERSH
etenen van de Eur
ilieu-informatie b
Dit s
mbool op het toestel
als h
t na zijn levenscyclu
scha
e kan toebrengen aa
even
uele batterijen) niet
afval
; het moet bi
oor recyclage. U mo
l recyclagepunt bren
.
, contacteer dan d
verwijdering.
aankoop! Lees dez
uik neemt. Werd het
lleer het dan niet en
sinstructies
Houd
buiten het bereik van
Deurb
el: Gebruik het toest
regen, vochtigheid e
te
een
bjecten gevuld met
richtlijnen
elleman® service-
handleiding.
en stof en extreme
en schokken. Verm
e functies van het to
idsredenen mag u ge
r wijzigingen die de
e garantie.
2012 8
DB
ANDLEIDIN
pese Unie
treffende dit produ
of de verpakkin
wordt weggeworpe
n het milieu. Gooi dit
bi
het gewone huish
een ge
pecialiseerd bedrijf
t dit toestel naar uw
en. Respecteer de pl
e plaatselijke auto
handleiding grondig
oestel beschadigd ti
raadpleeg uw dealer.
kinderen en onbevo
l enkel binnenshui
opspattende vloeist
loeistof op of naast
en kwaliteitsgara
temperaturen.
d brute kracht tijde
stel kennen voor u h
n wijzigingen aanbr
bruiker heeft aange
ct
ft aan dat,
, dit toestel
toestel (en
udelijke
verdeler of
atselijke
iteiten
voor u het
ens het
den.
. Bescherm
ffen. Plaats
et toestel.
tie
s de
t gaat
ngen.
racht valt
Velleman nv
Page 9
/
u
j
n
d
s
e
a
ge
g
s
e
c
r
r
D
jv
a
o
k
n
g
a
k
6
g
d
o
r
rig
d
m
s
0
n
r
r
v
©
j
a
m
ging
e
d
g
w
• Gebruik het
onoordeelk
• De garantie
nen i
richtli
verantwoor
rechtstreek
• Bewaar dez
4. Eigensch
• toepassin
• ideaal voor:
•
ecodeerd
• eenvoudige
• 16 verschill
• instelbaar v
• zelflerende
• inhoud:
o 1 x: deu
o 1 x: deu
o 1 x: 3 V
5. Omschri
Raadpleeg de
deurbel
1
codeknop
2
melodiekn
deurbeldruk
5
drukknop
6. Batterije
U ma
Herla
de pla
berei
toestel enkel waarvo
ndig gebruik vervalt
eldt niet voor scha
deze handleiding en
elijkheid afwijzen vo
verband mee houde
handleiding voor ve
ppen
n: deurbel, pieper
huis, kantoo
naal voorkomt vals
installatie zonder be
nde beltonen: West
olume: tot 6 verschill
ode: 1 miljoen code
bel
beldrukknop
C-batterij (type CR2
, atelie
ing
fbeeldingen op pagi
p
nop
plaatsen
batterijen nooit doo
d geen alkalinebatte
atselijke milieuwetge
van kinderen.
DB
or het gemaakt is. Bi
de garantie.
e door het negeren v
uw dealer zal de
r defecten of proble
n.
rdere raadple
en receptie
alarm
rading
inster, dingdong, tel
ende volumeniveaus
.
32).
a 2 van deze handlei
3
volumeknop
4
voetsteun
6
naamplaatje
boren of in het vuur
ijen. Gooi batterijen
ing. Houd batterijen
.
n bepaalde
en die hier
foon...
ing.
ooien.
eg volgens
uit het
V. 01 – 17/10
2012 9
Velleman nv
Page 10

DB6
Deurbel
1. Open het batterijvak aan de achterkant van het toestel.
2. Plaats 3 x AA 1.5 V batterijen (niet meegelev.) conform de
polariteitsymbolen aangegeven binnenin het batterijvak.
3. Sluit het batterijvak.
Deurbeldrukknop
1. Open de drukknop door met een kleine, platte schroevendraaier
voorzichtig in de uitsparing onderaan te duwen [8].
2. Plaats een CR2032 lithiumbatterij (meegeleverd) conform de
polariteitsymbolen aangegeven binnenin het batterijvak [9].
3. Om het klepje terug te plaatsen, plaats eerst de bovenkant van
het klepje [7], druk daarna het klepje naar beneden [8] tot het
vastklikt.
Omerking: Indien u eerst de onderkant plaatst, dan is het
batterijvak niet correct afgesloten en kan het klepje loskomen.
7. Installatie
De deurbeldrukknop is voorzien van een zender die een code stuurt
naar de ontvanger in de deurbel. Voor de installatie van de
drukknoppen, moet u ervoor zorgen dat de deurbel de code van de
drukknop herkent. Ga als volgt te werk:
1. Zorg ervoor dat er batterijen geplaatst zijn in de deurbel en de
drukknop.
2. Druk op de knop. De deurbel herkent de code automatisch en u
hoort een melodie.
3. Druk meermaals op de melodieknop [2] om de gewenste
melodie te selecteren.
4. Druk meermaals op de volumeknop [3] om het gewenste
volumeniveau te selecteren.
5. Plaats de deurbel en drukknop op de gewenste plaats.
Opmerking: Installeer deze nog niet.
U kunt de deurbel bevestigen aan een muur, of gebruik de
voetsteun [4] en zet het toestel ergens rechtop.
6. Na het plaatsen van de deurbel en drukknop, test de verbinding
door de drukknop in te drukken. Bij een correcte verbinding,
hoort u een melodie. (Indien u geen melodie hoort, zie §9
probleemoplossing.)
7. Bevestig de deurbelknop op de gewenste plaats met
dubbelzijdige tape aan de achterkant [10].
V. 01 – 17/10/2012 10 ©Velleman nv
Page 11
DB6
8. Drukknoppen toevoegen of vervangen
U kunt tot 4 drukknoppen gebruiken met dezelfde deurbel. Indien u
een nieuwe drukknop wil gebruiken, moet u ervoor zorgen dat de
deurbel de code van de nieuwe drukknop herkent. Ga als volgt te
werk:
1. Plaats de batterij in de drukknop.
2. Druk op de codeknop [1] op de deurbel.
3. Druk op de drukknop.
Bij een correcte instelling van de code, hoort u een melodie.
4. U kunt nu de deurbel installeren op de gewenste plaats.
9. Problemen en oplossingen
• Vervang de batterijen in de deurbel van zodra het geluidsignaal
verzwakt (zie §6).
• Indien u geen melodie hoort:
o Zorg ervoor dat de deurbel en de drukknop binnen het
maximale bereik van 60 m (zonder obstakels) van elkaar zijn
verwijderd.
o Controleer of de deurbel en drukknop(en) omringd zijn door
metaal of onderhevig aan magnetische velden. Kies een andere
installatieplaats voor de deurbel en/of de drukknop indien
nodig.
o V erv a ng de ba tter ij in de dr uk kno p (z ie §6).
o C reëer een nieuwe code tussen deurbel en drukknop (zie §8).
10. Technische specificaties
deurbel vrijstaand of wandmontage
zendfrequentie 433.92 MHz
bereik max. 60 m (zonder obstakels)
voeding
drukknop (zender) 1 x 3V-batterij (type CR2032C)
deurbel (ontvanger) 3 x 1.5 V AA-batterij 1.5V (LR6C, niet
beschermingsgraad drukknop IP44
afmetingen
drukknop (zender) 32 x 80 x 18 mm
deurbel (ontvanger) 96 x 140 x 37 mm
zendvermogen <= 10 mW
V. 01 – 17/10/2012 11 ©Velleman nv
meegelev.)
Page 12
DB6
geluidsniveau >= 80 dB (tot op 0.5 m afstand)
gewicht 189 g
Gebruik dit toestel enkel met originele accessoires. Velleman
nv is niet aansprakelijk voor sc hade of kwetsuren bij
(verkeerd) gebruik van dit toestel.
Voor meer informatie over dit product en de laatste versie van
deze handleiding, zie www.velleman.eu.
De informatie in deze handleiding kan te allen tijde worden
gewijzigd zonder voorafgaande kennisgeving.
© AUTEURSRECHT
Velleman nv heeft het auteursrecht voor deze handleiding.
Alle wereldwijde rechten voorbehouden. Het is niet toegestaan
om deze handleiding of gedeelten ervan over te nemen, te kopiëren,
te vertalen, te bewerken en op te slaan op een elektronisch medium
zonder voorafgaande schriftelijke toestemming van de
rechthebbende.
V. 01 – 17/10/2012 12 ©Velleman nv
Page 13
/
t
s
i
y
m
i
e
e
s
m
e
m
g
u
e
s
e
g
m
s
g
n
n
s
6
3
E
e
t
o
je
é
t
s
e
a
v
r
e
u
n
g
e
t
a
©
e
r
s
u
o
l
o
a
t
r
u
1. Introduc
Aux résident
Des informat
ce produit
usagés à votr
convient de re
de l’environne
En cas de qu
élimination.
Nous vous re
attentivement
été endomma
votre revende
2. Consign
Garde
autori
Sonn
Proté
Ne ja
3. Directive
Se référer à la
fin de notice.
• Proté
• Protéger co
l’opération.
• Se familiari
V. 01 – 17/10
MODE D’
ion
de l'Union europé
ons environnemen
mbole sur l'appareil
Ce s
l’éli
ination d’un appareil
l'env
ironnement. Ne pas
ronique (et des piles
élect
cipaux non sujets au
mun
trait
ra l’appareil en ques
fournisseur ou à un
pecter la réglementa
ent.
stions, contacter l
ercions de votre ach
avant la mise en ser
é pendant le transpo
r.
s de sécurité
r hors de la portée d
ées.
tte : Utiliser cet appa
er de la pluie, de l’h
ais placer d’objet co
générales
arantie de servic
er co
tre la poussière. Pro
tre les chocs et le tr
er avec le fonctionne
2012 1
DB
MPLOI
nne
ales importantes c
u l'emballage indiqu
en fin de vie peut pol
ter un appareil élect
ventuelles) parmi le
tri sélectif ; une déch
ion. Renvoyer les éq
ervice de recyclage l
tion locale relative à
s autorités locales
t ! Lire la présente n
ice de l’appareil. Si l’
t, ne pas l’installer e
s enfants et des pers
reil uniquement à l'
midité et des projecti
tenant un liquide su
et de qualité Velle
éger contre la chale
iter avec circonspect
ment avant l’emploi.
oncernant
que
luer
ique ou
déchets
èterie
ipements
cal. Il
a protection
pour
tice
ppareil a
consulter
onnes non
intérieur.
ons d’eau.
l’appareil.
man® en
r extrême.
ion pendant
Velleman nv
Page 14

DB6
• Toute modification est interdite pour des raisons de sécurité. Les
dommages occasionnés par des modifications par le client ne
tombent pas sous la garantie.
• N’utiliser qu’à sa fonction prévue. Un usage impropre annule
d'office la garantie.
• La garantie ne s’applique pas aux dommages survenus en
négligeant certaines directives de cette notice et votre revendeur
déclinera toute responsabilité pour les problèmes et les défauts
qui en résultent.
• Garder cette notice pour toute référence ultérieure.
4. Caractéristiques
• applications : sonnette, biper
• convient pour : maison, bureau, atelier et réception
• signal encodé prévient les fausses alertes
• installation facile sans câblage
• 16 tonalités différentes : Westminster, ding-dong, téléphone...
• volume réglable : jusqu'à 6 différents niveaux de volume
• auto-apprentissage du code : 1 million de codes
• contenu :
o 1 x : sonnette
o 1 x : bouton de sonnette
o 1 x : pile de 3 VCC (type CR2032).
5. Description
Se référer aux illustrations en page 2 de cette notice.
sonnette
1
bouton de code
2
bouton de tonalité
bouton de sonnette
5
bouton-poussoir
3
bouton de volume
4
pied
6
étiquette
V. 01 – 17/10/2012 14 ©Velleman nv
Page 15

/
m
j
s
e
c
e
o
p
b
n
e
e
s
s
b
q
o
p
p
6
5
a
m
e
a
A
e
s
s
0
e
p
u
g
r
r
n
n
c
n
r
é
m
©
u
s
t
h
c
g
d
u
n
a
p
p
6. Installer
Ne ja
amai
piles
prote
porté
Sonnette
1. Ouvrir le l
2. Insérer 3
polarité in
3. Fermer le
Bouton de so
1. Ouvrir le
l’entaille a
2. Insérer u
polarité in
3. Pour rem
supérieur
inférieure
Remarqu
couvercle
détacher.
7. Installati
Le bouton de
récepteur qui
boutons-pouss
envoyé par le
1. S'assurer
bouton-p
2. Appuyer s
automatiq
3. Appuyer
sélectionn
4. Appuyer
sélectionn
les piles
ais perforer les piles
recharger des piles
n respectant la régle
tion de l’environnem
des enfants.
ement de piles à l’
iles 1.5 V du type A
diquée dans le logem
logement de piles.
nnette
oîtier du bouton-pou
vec un petit tournevi
e pile au lithium CR2
diquée dans le logem
ttre le couvercle en
du couvercle [7], p
[8] jusqu'au déclic.
nant d'abo
e : En ali
ne se fermera pas co
on
onnette comprend u
e trouve dans la son
oirs, s'assurer que la
outon-poussoir. Pro
ue des piles soient i
ussoir.
ur le bouton-poussoi
uement le code et un
lusieurs fois sur le bo
er la tonalité souhait
lusieurs fois sur le bo
er le niveau de volu
DB
et ne pas les jeter a
lcalines. Se débarra
entation locale rela
nt. Garder les piles
rrière de l’appareil.
(pas incl.) en respe
nt.
soir en enfonçant lé
à lame plate [8].
32 (incl.) en respect
nt [9].
lace, aligner d'abord
is appuyer sur la par
d la partie inférieure,
rectement et risque
émetteur envoyant
ette. Avant d'installe
sonnette reconnaisse
éder comme suite :
stallées dans la son
. La sonnette reconn
e tonalité retentit.
uton de tonalité [2]
e.
uton de volume [3]
e souhaité.
feu. Ne
ser des
ive à la
ors de la
tant la
èrement
ant la
la partie
tie
le
e se
n code au
r les
le code
ette et le
it
our
our
V. 01 – 17/10
2012 1
Velleman nv
Page 16

DB6
5. Positionner la sonnette et le bouton-poussoir à l'emplacement
souhaité.
Remarque : Ne pas encore installer.
Il est possible de monter la sonnette au mur, ou d'utiliser le
support [4] et poser l'unité en position verticale.
6. Après le positionnement de la sonnette et le bouton-poussoir,
tester la connexion en appuyant sur le bouton-poussoir. Si la
connexion est correcte, une tonalité retentit. (Si aucune tonalité
ne retentit, voir §9 problèmes et solutions.)
7. Installer le bouton-poussoir à l'emplacement souhaité avec du
ruban adhésif double face sur le dos [10].
8. Ajouter ou remplacer des boutons-poussoirs
Il est possible d'utiliser jusqu'à 4 boutons-poussoirs avec la même
sonnette. En cas d'usage d'un nouveau bouton-poussoir, s'assurer
que la sonnette reconnaisse le code envoyé par le nouveau boutonpoussoir. Procéder comme suite :
1. Installer la pile dans le bo uton-poussoir.
2. Appuyer sur le bouton de code [1] sur la sonnette.
3. Appuyer sur le bouton-poussoir.
Si le code est réglé correctement, une tonalité retentit.
4. Il est maintenant possible d'installer le bouton-poussoir à
l'emplacement souhaité.
9. Problèmes et solutions
• Remplacer les piles dans la sonnette dès que la tonalité s’affaiblit
(voir §6).
• L’actionnement du bouton-poussoir ne produit aucune tonalité :
o Vérifier la distance entre la sonnette et le bouton-poussoir : elle
ne peut pas dépasser la portée maximale de 60 m (champ
libre).
o S’assurer que la sonnette et le bouton-poussoir soient protégés
contre des champs magnétiques et qu’ils ne soient pas installés
à proximité d’objets métalliques.
o R em pla cer la pile da ns le bou to n-po usso ir (vo ir §6).
o C réer un nouveau code entre la sonnette et le bouton-poussoir
(voir §8).
V. 01 – 17/10/2012 16 ©Velleman nv
Page 17

DB6
10. Spécifications techniques
sonnette pose libre ou montage mural
fréquence d'émission 433.92 MHz
plage max. 60 m (champ libre)
alimentation
bouton-poussoir
(émetteur)
sonnette (récepteur) 3 piles de 1.5V type R6 (LR6C, non
degré de protection du
bouton-poussoir
dimensions
bouton-poussoir
(émetteur)
sonnette (récepteur) 96 x 140 x 37 mm
puissance d'émission <= 10 mW
niveau sonore >= 80 dB (jusqu'à 0.5 m)
poids 189 g
N’employer cet appareil qu’avec des accessoires d’origine. La
SA Velleman ne peut, dans la mesure conforme au droit
applicable être tenue responsable des d ommages ou lésions
(directs ou indirects) pouvant résulter de l’utilisation de cet
appareil.
Pour plus d’information concernant cet article et la dernière
version de cette notice, visiter notre site web
www.velleman.eu.
Toutes les informations présentées dans cette notice peuvent
être modifiées sans notification préalable.
© DROITS D’AUTEUR
SA Velleman est l’ayant droit des droits d’auteur pour cette
notice. Tous droits mondiaux réservés. Toute reproduction,
traduction, copie ou diffusion, intégrale ou partielle, du contenu de
cette notice par quelque procédé ou sur tout support électronique
que se soit est interdite sans l’accord préalable écrit de l’ayant droit.
V. 01 – 17/10/2012 17 ©Velleman nv
1 x pile de 3 V (type CR2032C)
incl.)
IP44
32 x 80 x 18 mm
Page 18

/
c
a
i
u
c
c
t
a
d
.
o
i
e
a
t
g
n
e
a
a
c
6
8
L
r
r
r
r
6
g
d
d
a
x
n
©
t
i
m
)
o
a
s
a
a
o
a
o
e
a
e
1. Introduc
A los ciudad
Importantes
concerniente
unidad de reci
medio ambien
Si tiene duda
residuos.
¡Gracias por h
instrucciones
algún daño en
su distribuidor
2. Instrucci
Mante
capac
Timbr
este e
salpic
apara
3. Normas
Véase la Gara
este manual d
• No exponga
temperatur
• No agite el
y la instala
• Familiaríces
V. 01 – 17/10
MANUAL DE
ión
nos de la Unión Eu
informaciones sob
a este producto
símbolo en este apa
Este
as muestras inservibl
tira l
iente.
amb
re este aparato (ni la
No t
bas
ra doméstica; debe i
reci
laje. Devuelva este a
laje local. Respete la
e.
s, contacte con las
ber comprado el DB
el manual antes de u
el transporte no lo in
nes de seguridad
n
a el aparato lejos
tadas y niños.
: Utilice el aparato s
quipo a lluvia, hume
dura o goteo. Nunca
o.
enerales
tía de servicio y c
l usuario.
este equipo a polvo.
s extremas.
parato. Evite usar e
ión.
e con el funcionamie
2012 1
DB
USUARIO
opea
e el medio ambien
ato o el embalaje ind
es, podrían dañar el
s pilas, si las hubiera
a una empresa espe
parato a su distribuid
s leyes locales en rel
autoridades locale
! Lea atentamente l
sarlo. Si el aparato h
stale y póngase en c
el alcance de person
ólo en interiores. N
ad ni a ningún tipo d
ponga un objeto con
lidad Velleman ®
No exponga este equ
cesiva fuerza durant
to del aparato antes
e
ca que, si
edio
en la
cializada en
r o a la
ción con el
para
s
sufrido
ntacto con
s no
exponga
líquido en el
l final de
ipo a
el manejo
de utilizarlo.
Velleman nv
Page 19
DB6
• Por razones de seguridad, las modificaciones no autorizadas del
aparato están prohibidas. Los daños causados por modificaciones
no autorizadas, no están cubiertos por la garantía.
• Utilice sólo el aparato para las aplicaciones descritas en este
manual. Su uso incorrecto anula la garantía completamente.
• Los daños causados por descuido de las instrucciones de
seguridad de este manual invalidarán su garantía y su distribuidor
no será responsable de ningún daño u otros problemas
resultantes.
• Guarde este manual del usuario para cuando necesite consultarlo.
4. Características
• aplicaciones: timbre, pager
• ideal para e l uso en: casa, oficina, taller, recepción
• una señal codificada evita las falsas alarmas
• fácil instalación sin cables
• 16 diferentes melodías: Westminster, ding-dong, teléfono, etc.
• volumen ajustable: máx. 6 niveles
• código con capacidad de autoaprendizaje: 1 millón de códigos
• incluye:
o 1 x: timbre (receptor)
o 1 x: pulsador (emisor)
o 1 x: pila de 3 VDC (tipo CR2032).
5. Descripción
Véase las figuras en la página 2 de este manual del usuario.
Timbre (receptor)
1
botón para el código
2
botón para la melodía
Pulsador (emisor)
5
botón
3
botón para el ajuste del
volumen
4
pie
6
placa para el nombre
V. 01 – 17/10/2012 19 ©Velleman nv
Page 20

/
a
a
g
j
d
a
j
ñ
a
e
c
r
ó
d
s
e
e
o
a
o
a
o
l
c
s
4
6
0
o
s
s
a
e
p
g
a
r
f
e
n
u
t
o
[
o
n
©
u
s
g
a
a
a
e
e
l
d
c
g
g
6. Colocar l
Nunc
recar
con el
le
os
Timbre
1. Abra el co
2. Introduzc
3. Cierre el c
Pulsador
1. Abra la ca
un peque
2. Introduzc
polaridad
3. Para volv
la tapa [7
encaje.
Observa
cierra cor
7. Instalaci
El pulsador inc
timbre. Antes
código del pul
1. Asegúres
como en
2. Pulse el b
automátic
3. Pulse el b
la melodí
4. Pulse el b
selecciona
5. Coloque e
Observa
El timbre
soporte [
s pilas
perfore las pilas y n
ue pilas alcalinas. Re
medio ambiente al ti
el alcance de niños.
mpartimiento de pila
3 x pila AA de 1.5 V
ompartimiento de pil
a del pulsador al apr
o destornillador con
una pila de litio CR2
[9].
r a colocar la tapa, al
o, apriete la p
]. Lue
ión: al alinear prime
ectamente y puede a
n
luye un emisor, que
e instalarlo , asegúre
ador. Haga lo siguie
de que las ha introd
l pulsador.
tón del pulsador. El
mente y emite un s
tón para la melodía
deseada.
tón para ajustar el v
r el nivel de volumen
timbre y el pulsador
ión: todavía no los i
e puede colgar de la
].
DB
las eche al fuego. N
pete las leyes locale
rar las pilas. Manten
.
(no incl.). Respete la
s.
tar ligeramente la le
unta plana [8].
032 (incl.). Respete l
inee primero la parte
rte inferior [8] hast
o la parte inferior, la
lojarse si alinea la p
nvía un código al rec
se de que el timbre r
te:
cido pilas tanto en e
imbre reconoce el có
nido.
2] varias veces para
lumen [3] varias ve
deseado.
ar deseado.
en el lu
stala.
pared o utilizar con e
nca
en relación
a las pilas
polaridad.
n
üeta con
superior de
que se
tapa no se
rte inferior.
ptor del
conozca el
timbre
igo
seleccionar
es para
l
V. 01 – 17/10
2012 2
Velleman nv
Page 21

DB6
6. Después de haber colocado los aparatos en el lugar deseado,
pruebe la conexión al pulsar el pulsador. El timbre emite un tono
en caso de una buena conexión. (Si no suena, consulte §9.)
7. Instale el pulsador en el lugar deseado. Utilice cinta de doble
cara en la parte trasera del pulsador [10].
8. Añadir o reemplazar pulsadores
Es posible utilizar hasta 4 pulsadores con el timbre. Asegúrese de
que el timbre reconozca el código del nuevo pulsador. Haga lo
siguiente:
1. Introduzca la pila en el pulsador.
2. Pulse el botón para el código [1] del timbre.
3. Pulse el botón del pulsador.
El timbre emite un sonido si el código es correcto.
4. Ahora, puede instalar el pulsador en el lugar deseado.
9. Solución de problemas
• Reemplace las pilas del timbre en cuanto la intensidad sonora
disminuya (véase §6).
• Al pulsar un pulsador no se produce ningún tono:
o Controle la distancia entre el timbre y los pulsadores: no puede
sobrepasar el alcance máx. de 60 m (al aire libre).
o Asegúrese de que el timbre y los dos pulsadores estén
protegidos contra los campos magnéticos y no estén instalados
cerca de objetos metálicos.
o Reemplace la pila del pulsador (véase §6).
o Cree un nuevo código entre el timbre y el pulsador (véase §8).
10. Especificaciones
timbre se puede colgar de la pared o utilizar
frecuencia de transmisión 433.92 MHz
alcance máx. 60 m (al aire libre)
alimentación
pulsador (emisor) 1 x pila de 3 V (tipo CR2032C)
timbre (receptor) 3 x pila AA de 1.5 V (LR6C, no incl.)
grado de protección do
pulsador
V. 01 – 17/10/2012 21 ©Velleman nv
con el soporte para sobremesa
IP44
Page 22

DB6
dimensiones
pulsador (emisor) 32 x 80 x 18 mm
timbre (receptor) 96 x 140 x 37 mm
potencia de transmisión <= 10 mW
nivel sonoro >= 80 dB (dentro de 0.5m)
peso 189 g
Utilice este aparato sólo con los accesorios originales.
Velleman NV no será responsable de daños ni lesiones
causados por un uso (indebido) de este aparato.
Para más información sobre este producto y la versión más
reciente de este manual del usuario, visite nuestra página
www.velleman.eu.
Se pueden modificar las especificaciones y el contenido de
este manual sin previo aviso.
© DERECHOS DE AUTOR
Velleman NV dispone de los derechos de autor para este
manual del usuario. Todos los derechos mundiales
reservados. Está estrictamente prohibido r eproducir, tr aducir,
copiar, editar y guardar este manual del usuario o partes de ello sin
previo permiso escrito del derecho habiente .
V. 01 – 17/10/2012 22 ©Velleman nv
Page 23
/
B
n
o
w
e
a
n
i
r
s
e
c
e
gungsr
g
e
e
i
n
glo
z
n
a
e
S
6
3
S
c
ü
o
S
e
s
s
t
n
S
ö
g
a
e
t
e
d
g
Qu
b
V
d
©
t
c
s
n
c
d
r
s
e
h
e
n
g
d
G
g
1. Einführu
An alle Einw
Wichtige Um
Batterien müs
entsorgt werd
örtliches Recy
Sie die örtlich
Falls Zweifel
Entsor
Wir bedanken
Bedienun
Überprüfen Si
sein, verwend
Händler.
2. Sicherhe
3. Allgemei
Siehe Vellem
Bedienungsanl
• Schützen Si
extremen T
• Vermeiden
während de
V. 01 – 17/10
EDIENUNG
hner der Europäis
eltinformationen
Dies
s Symbol auf dem Pr
an, d
ss die Entsorgung di
Lebe
szyklus der Umwelt
Sie d
e Einheit (oder verw
unso
tiertes Hausmüll; die
en von einer speziali
n. Diese Einheit mus
ling-Unternehmen re
n Umweltvorschrifte
bestehen, wenden
ichtlinien an Ihre
uns für den Kauf des
sanl
vor Inbetriebn
eitun
, ob Transportschäd
n Sie das Gerät nich
tshinweise
Halte
Sie Kinder und Unb
cke: Verwenden Sie
Tür
Schüt
en Sie das Gerät vor
keine
mit Flüssi
e Richtlinien
n® Service- und
eitung.
e das Gerät vor Stau
mperaturen.
ie Erschütterungen.
r Installation und Be
2012 2
DB
keit befüllt
ANLEITUNG
hen Union
ber dieses Produk
dukt oder der Verpa
eses Produktes nach
chaden zufügen kan
ndeten Batterien) ni
Einheit oder verwen
ierten Firma zwecks
an den Händler ode
ourniert werden. Re
.
ie sich für
rtliche Behörde.
DB6! Lesen Sie dies
hme sorgfältig durc
n vorliegen. Sollte di
und wenden Sie sich
fugte vom Gerät fern
as Gerät nur im In
Regen und Feuchte.
enstände auf
en Ge
alitätsgarantie am
. Schützen Sie das G
ermeiden Sie rohe
ienung des Gerätes.
kung zeigt
einem
. Entsorgen
ht als
eten
Recyclin
ein
pektieren
.
s der Fall
an Ihren
.
enbereich.
Stellen Sie
as Gerät.
Ende dieser
erät vor
ewalt
Velleman nv
Page 24

DB6
• Nehmen Sie das Gerät erst in Betrieb, nachdem Sie sich mit
seinen Funktionen vertraut gemacht haben.
• Eigenmächtige Veränderungen sind aus Sicherheitsgründen
verboten. Bei Schäden verursacht durch eigenmächtige
Änderungen erlischt der Garantieanspruch.
• Verwenden Sie das Gerät nur für Anwendungen beschrieben in
dieser Bedienungsanleitung sonst kann dies zu Schäden am
Produkt führen und erlischt der Garantieanspruch.
• Bei Schäden, die durch Nichtbeachtung der Bedienungsanleitung
verursacht werden, erlischt der Garantieanspruch. Für daraus
resultierende Folgeschäden übernimmt der Hersteller keine
Haftung.
• Bewahren Sie diese Bedienungsanleitung für künftige
Einsichtnahme auf.
4. Eigenschaften
• Applikationen: Türklingel, Funkrufempfänger
• sehr geeignet für: Haus, Büro, Werkstatt, Firma und Rezeption
• das codierte Signal sorgt dafür, dass die Klingel nicht von
externen Signalen aktiviert wird
• einfach zu installieren / keine Verkabelung notwendig
• 16 verschiedene Klingeltöne: Westminster, Ding-Dong, Telefon,
usw.
• regelbare Lautstärke: max. 6 Pegel
• Selbstlerncode: 1 Million Codes
• Lieferumfang:
o 1 x: Türklingel (Empfänger)
o 1 x: Klingeltaste (Sender)
o 1 x: 3 VDC-Batterie (Typ CR2032)
5. Umschreibung
Siehe Abbildungen, Seite 2 dieser Bedienungsanleitung.
Türglocke (Empfänger)
1
Code-Taste
2
Melodie-Taste
Klingeltaste (Sender)
5
Druckknopf
3
Lautstärke-Taste
4
Fuß
6
Namensschild
V. 01 – 17/10/2012 24 ©Velleman nv
Page 25

/
n
t
r
m
e
f
c
g
(
e
a
c
e
e
g
e
glo
S
t
S
e
S
g
t
S
g
t
6
5
t
A
r
a
e
g
r
t
s
a
u
k
e
t
e
e
e
[
e
t
a
©
e
e
e
A
m
g
r
g
s
h
s
s
E
s
e
a
e
,
a
g
6. Batterie
Durch
ins Fe
die ör
Batte
Türglocke (E
1. Öffnen Si
2. Legen Sie
hierbei au
Batteriefa
3. Schließen
Klin
eltaste
1. Öffnen Si
kleinen, fl
2. Legen Sie
Sie hierbe
Batteriefa
3. Um den D
oberen Te
unteren T
Bemerku
schließt d
7. Installati
eltast
Die Klin
lokalisiert. Bea
dass die Tür
folgt vor:
1. Beachten
Klingeltas
2. Drücken
erkennt d
3. Drücken
ewünsch
4. Drücken
ewünsch
einlegen
bohren Sie nie die Ba
uer. Laden Sie keine
lichen Umweltvorsch
ien. Halten Sie die B
pfänger)
das Batteriefach.
3 x AA-Batterien ein
die richtige Polarität
h).
Sie das Batteriefach.
Sender)
den Druckknopf ind
chen Schraubendreh
eine CR2032 Lithium
i auf die richti
h) [9].
eckel wieder aufzuse
il des Deckels [7] au
il [8] bis dieser einr
ng: Richten Sie den
r Deckel nicht korre
on
enthält einen Send
chten Sie vor der Ins
cke den Code der Kli
ie, dass Sie die Batt
e und der Türglocke
ie den Druckknopf d
n Code automatisch
ie die Melodie-Taste
e Melodie auszuwähl
ie die Lautstärke-Tas
en Lautstärkepegel
e Pola
DB
terien und werfen Si
lkalibatterien. Resp
iften beim Entsorgen
tterien von Kindern f
(nicht mitgeliefert).
(siehe Markierung i
m Sie die Lasche mit
er vorsichti
batterie (mitgeliefert)
ität (siehe Markierun
zen, richten Sie zuer
. Drücken Sie danac
stet.
nteren Teil zuerst au
t und kann es sich lö
r, der den Code des
allation der Klingelta
ngeltaste erkennt. G
rien in das Batterief
ingelegt haben.
r Klingeltaste. Die Tü
und es ertönt eine M
2] verschieden Male
n.
e [3] verschieden M
uszuwählen.
hineind
diese nicht
ktieren Sie
der
rn.
chten Sie
einem
ücken [8].
ein. Achten
im
t den
den
, dann
en.
mpfängers
te darauf,
hen Sie wie
ch der
locke
r
lodie.
um die
le, um den
V. 01 – 17/10
2012 2
Velleman nv
Page 26

DB6
5. Installieren Sie die Türglocke und die Klingeltaste am
gewünschten Ort.
Bemerkung: Befestigen Sie die Geräte im Moment noch nicht
definitiv.
Die Türglocke eignet sich für Wandmontage oder
Tischaufstellung über den Fuß [4].
6. Nach Installation der Türglocke und der Klingeltaste, testen Sie
die Verbindung, indem Sie die Klingeltaste drücken. Ist die
Verbindung OK, dann ertönt eine Melodie. (siehe §9 wenn keine
Melodie ertönt.)
7. Befestigen Sie die Klingeltaste mit doppelseitigem Klebeband auf
der Rückseite [10] am gewünschten Ort.
8. Klingeltasten ersetzen oder hinzufügen
Sie können max. 4 Klingeltasten mit einer Türglocke verwenden.
Möchten Sie eine neue Klingeltaste hinzufügen, so stellen Sie sicher,
dass die Türglocke den Code der neuen Klingeltaste erkennt. Gehen
Sie wie folgt vor:
1. Legen Sie eine Batterie in das Batteriefach der Klingeltaste ein.
2. Drücken Sie die Code-Taste [1] der Türglocke.
3. Drücken Sie den Druckknopf der Klingeltaste.
Ist der Code korrekt, dann ertönt eine Melodie.
4. Nun können Sie die Klingeltaste am gewünschten Ort
installieren.
9. Problemlösungen
• Ersetzen Sie die Batterien der Türklingel wenn den Schallpegel
abnimmt (siehe §6).
• Wenn keine Melodie ertönt:
o Beachten Sie, dass die Türklingel und der Druckknopf innerhalb
des max. Bereichs von 60 m (im FreiFeld) voneinander entfernt
sind.
o Überprüfen Sie, ob sich die Türglocke und die Klingeltaste nicht
in der Nähe von Metall oder einem Magnetfeld befinden.
Wählen Sie einen anderen Installationsort für die Türklingel
und/oder der Druckknopf aus wenn nötig.
o Erse tzen Sie die Batterie des Druckknopfs (siehe §6).
o Kreieren Sie einen neuen Code zwischen der Türglocke und der
Klingeltaste (siehe §8).
V. 01 – 17/10/2012 26 ©Velleman nv
Page 27

DB6
10. Technische Daten
Türglocke Wandmontage oder Tischaufstellung
Sendefrequenz 433.92 MHz
Reichweite max. 60 m (im FreiFeld)
Stromversorgung
Klingeltaste (Sender) 1 x 3 V-Batterie (Typ CR2032C)
Türglocke (Empfänger) 3 x AA-Batterie 1.5 V (LR6C, nicht
Schutzart IP44
Abmessungen
Klingeltaste (Sender) 32 x 80 x 18 mm
Türglocke (Empfänger) 96 x 140 x 37 mm
Sendeleistung <= 10 mW
Schallpegel >= 80 dB (innerhalb von 0.5m)
Gewicht 189 g
Verwenden Sie dieses Gerät nur mit originellen Zubehörteilen.
Velleman NV übernimmt keine Haftung für Schaden oder
Verletzungen bei (falscher) Anwendung dieses Ger ätes. Für
mehr Informationen zu diesem Produkt und die neueste
Version dieser Bedienungsanleitung, siehe www.velleman.eu.
Alle Änderungen ohne vorherige Ankündigung vorbehalten.
© URHEBERRECHT
Velleman NV besitzt das Urheberrecht für diese
Bedienungsanleitung. Alle weltweiten Rechte vorbehalten.
Ohne vorherige schriftliche Genehmigung des Urhebers ist es nicht
gestattet, diese Bedienungsanleitung ganz oder in Teilen zu
reproduzieren, zu kopieren, zu übersetzen, zu bearbeiten oder zu
speichern.
V. 01 – 17/10/2012 27 ©Velleman nv
mitgeliefert)
Page 28
Page 29

Page 30

Velleman® Service and Quality Warranty
Since its foundation in 1972, Velleman®
acquired extensive experience in the
electronics world and currently distributes its
products in over 85 countries.
All our products fulfil strict quality
requirements and legal stipulations in the
EU. In order to ensure the quality, our
products regularly go through an extra
quality check, both by an internal quality
department and by specialized external
organisations. If, all precautionary measures
notwithstanding, problems should occur,
please make appeal to our warranty (see
guarantee conditions).
General Warranty Conditions Concerning
Consumer Products (for EU):
• All consumer products are subject to a 24-
month warranty on production flaws and
defective material as from the original date of
purchase.
• Velleman® can decide to replace an article
with an equivalent article, or to refund the
retail value totally or partially when the
complaint is valid and a free repair or
replacement of the article is impossible, or if
the expenses are out of proportion.
You will be delivered a replacing article or a
refund at the value of 100% of the purchase
price in case of a flaw occurred in the first
year after the date of purchase and delivery,
or a replacing article at 50% of the purchase
price or a refund at the value of 50% of the
retail value in case of a flaw occurred in the
second year after the date of purchase and
delivery.
• Not covered by warranty:
- all direct or indirect damage caused after
delivery to the article (e.g. by oxidation,
shocks, falls, dust, dirt, humidity...), and by
the article, as well as its contents (e.g. data
loss), compensation for loss of profits;
- consumable goods, parts or accessories
that are subject to an aging process during
normal use, such as batteries (rechargeable,
non-rechargeable, built-in or replaceable),
lamps, rubber parts, drive belts... (unlimited
list);
- flaws resulting from fire, water damage,
lightning, accident, natural disaster, etc.…;
- flaws caused deliberately, negligently or
resulting from improper handling, negligent
maintenance, abusive use or use contrary to
the manufacturer’s instructions;
- damage caused by a commercial,
professional or collective use of the article
(the warranty validity will be reduced to six
(6) months when the article is used
professionally);
- damage resulting from an inappropriate
packing and shipping of the article;
- all damage caused by modification, repair
or alteration performed by a third party
without written permission by Velleman®.
• Articles to be repaired must be delivered to
your Velleman® dealer, solidly packed
(preferably in the original packaging), and be
completed with the original receipt of
purchase and a clear flaw description.
• Hint: In order to save on cost and time,
please reread the manual and check if the
flaw is caused by obvious causes prior to
presenting the article for repair. Note that
returning a non-defective article can also
involve handling costs.
• Repairs occurring after warranty expiration
are subject to shipping costs.
• The above conditions are without prejudice
to all commercial warranties.
The above enumeration is subject to
modification according to the article (see
article’s manual).
Velleman® service- en kwaliteitsgarantie
Velleman® heeft sinds zijn oprichting in 1972
een ruime ervaring opgebouwd in de
elektronicawereld en verdeelt op dit moment
producten in meer dan 85 landen. Al onze
producten beantwoorden aan strikte
kwaliteitseisen en aan de wettelijke
bepalingen geldig in de EU. Om de kwaliteit
te waarborgen, ondergaan onze producten
op regelmatige tijdstippen een extra
kwaliteitscontrole, zowel door onze eigen
kwaliteitsafdeling als door externe
gespecialiseerde organisaties. Mocht er
ondanks deze voorzorgen toch een
probleem optreden, dan kunt u steeds een
beroep doen op onze waarborg (zie
waarborgvoorwaarden).
Page 31

Algemene waarborgvoorwaarden
consumentengoederen (voor Europese
Unie):
• Op alle consumentengoederen geldt een
garantieperiode van 24 maanden op
productie- en materiaalfouten en dit vanaf de
oorspronkelijke aankoopdatum.
• Indien de klacht gegrond is en een gratis
reparatie of vervanging van een artikel
onmogelijk is of indien de kosten hiervoor
buiten verhouding zijn, kan Velleman®
beslissen het desbetreffende artikel te
vervangen door een gelijkwaardig artikel of
de aankoopsom van het artikel gedeeltelijk of
volledig terug te betalen. In dat geval krijgt u
een vervangend product of terugbetaling ter
waarde van 100% van de aankoopsom bij
ontdekking van een gebrek tot één jaar na
aankoop en levering, of een vervangend
product tegen 50% van de kostprijs of
terugbetaling van 50 % bij ontdekking na één
jaar tot 2 jaar.
• Valt niet onder waarborg:
- alle rechtstreekse of onrechtstreekse
schade na de levering veroorzaakt aan het
toestel (bv. door oxidatie, schokken, val, stof,
vuil, vocht...), en door het toestel, alsook zijn
inhoud (bv. verlies van data), vergoeding
voor eventuele winstderving.
- verbruiksgoederen, onderdelen of
hulpstukken die onderhevig zijn aan
veroudering door normaal gebruik zoals bv.
batterijen (zowel oplaadbare als nietoplaadbare, ingebouwd of vervangbaar),
lampen, rubberen onderdelen,
aandrijfriemen... (onbeperkte lijst).
- defecten ten gevolge van brand,
waterschade, bliksem, ongevallen,
natuurrampen, enz.
- defecten veroorzaakt door opzet,
nalatigheid of door een onoordeelkundige
behandeling, slecht onderhoud of abnormaal
gebruik of gebruik van het toestel strijdig met
de voorschriften van de fabrikant.
- schade ten gevolge van een commercieel,
professioneel of collectief gebruik van het
apparaat (bij professioneel gebruik wordt de
garantieperiode herleid tot 6 maand).
- schade veroorzaakt door onvoldoende
bescherming bij transport van het apparaat.
- alle schade door wijzigingen, reparaties of
modificaties uitgevoerd door derden zonder
toestemming van Velleman®.
• Toestellen dienen ter reparatie aangeboden
te worden bij uw Velleman®-verdeler. Het
toestel dient vergezeld te zijn van het
oorspronkelijke aankoopbewijs. Zorg voor
een degelijke verpakking (bij voorkeur de
originele verpakking) en voeg een duidelijke
foutomschrijving bij.
• Tip: alvorens het toestel voor reparatie aan
te bieden, kijk nog eens na of er geen voor
de hand liggende reden is waarom het
toestel niet naar behoren werkt (zie
handleiding). Op deze wijze kunt u kosten en
tijd besparen. Denk eraan dat er ook voor
niet-defecte toestellen een kost voor controle
aangerekend kan worden.
• Bij reparaties buiten de waarborgperiode
zullen transportkosten aangerekend worden.
• Elke commerciële garantie laat deze
rechten onverminderd.
Bovenstaande opsomming kan eventueel
aangepast worden naargelang de aard
van het product (zie handleiding van het
betreffende product).
Garantie de service et de qualité
Velleman®
Depuis 1972, Velleman® a gagné une vaste
expérience dans le secteur de l’électronique
et est actuellement distributeur dans plus de
85 pays.
Tous nos produits répondent à des
exigences de qualité rigoureuses et à des
dispositions légales en vigueur dans l’UE.
Afin de garantir la qualité, nous soumettons
régulièrement nos produits à des contrôles
de qualité supplémentaires, tant par notre
propre service qualité que par un service
qualité externe. Dans le cas improbable d’un
défaut malgré toutes les précautions, il est
possible d’invoquer notre garantie (voir les
conditions de garantie).
Conditions générales concernant la
garantie sur les produits grand public
(pour l’UE) :
• tout produit grand public est garanti 24
mois contre tout vice de production ou de
matériaux à dater du jour d’acquisition
effective ;
• si la plainte est justifiée et que la réparation
ou le remplacement d’un article est jugé
Page 32

impossible, ou lorsque les coûts s’avèrent
disproportionnés, Velleman® s’autorise à
remplacer ledit article par un article
équivalent ou à rembourser la totalité ou une
partie du prix d’achat. Le cas échéant, il vous
sera consenti un article de remplacement ou
le remboursement complet du prix d’achat
lors d’un défaut dans un délai de 1 an après
l’achat et la livraison, ou un article de
remplacement moyennant 50% du prix
d’achat ou le remboursement de 50% du prix
d’achat lors d’un défaut après 1 à 2 ans.
• sont par conséquent exclus :
- tout dommage direct ou indirect survenu à
l’article après livraison (p.ex. dommage lié à
l’oxydation, choc, chute, poussière, sable,
impureté…) et provoqué par l’appareil, ainsi
que son contenu (p.ex. perte de données) et
une indemnisation éventuelle pour perte de
revenus ;
- toute pièce ou accessoire nécessitant un
remplacement causé par un usage normal
comme p.ex. piles (rechargeables comme
non rechargeables, intégrées ou
remplaçables), ampoules, pièces en
caoutchouc, courroies… (liste illimitée) ;
- tout dommage qui résulte d’un incendie, de
la foudre, d’un accident, d’une catastrophe
naturelle, etc. ;
- out dommage provoqué par une
négligence, volontaire ou non, une utilisation
ou un entretien incorrect, ou une utilisation
de l’appareil contraire aux prescriptions du
fabricant ;
- tout dommage à cause d’une utilisation
commerciale, professionnelle ou collective
de l’appareil (la période de garantie sera
réduite à 6 mois lors d’une utilisation
professionnelle) ;
- tout dommage à l’appareil qui résulte d’une
utilisation incorrecte ou différente que celle
pour laquelle il a été initialement prévu
comme décrit dans la notice ;
- tout dommage engendré par un retour de
l’appareil emballé dans un conditionnement
non ou insuffisamment protégé.
- toute réparation ou modification effectuée
par une tierce personne sans l’autorisation
explicite de SA Velleman® ; - frais de
transport de et vers Velleman® si l’appareil
n’est plus couvert sous la garantie.
• toute réparation sera fournie par l’endroit
de l’achat. L’appareil doit nécessairement
être accompagné du bon d’achat d’origine et
être dûment conditionné (de préférence dans
l’emballage d’origine avec mention du
défaut) ;
• tuyau : il est conseillé de consulter la notice
et de contrôler câbles, piles, etc. avant de
retourner l’appareil. Un appareil retourné
jugé défectueux qui s’avère en bon état de
marche pourra faire l’objet d’une note de
frais à charge du consommateur ;
• une réparation effectuée en-dehors de la
période de garantie fera l’objet de frais de
transport ;
• toute garantie commerciale ne porte pas
atteinte aux conditions susmentionnées.
La liste susmentionnée peut être sujette à
une complémentation selon le type de
l’article et être mentionnée dans la notice
d’emploi.
Garantía de servicio y calidad Velleman®
Desde su fundación en 1972 Velleman® ha
adquirido una amplia experiencia como
distribuidor en el sector de la electrónica en
más de 85 países. Todos nuestros productos
responden a normas de calidad rigurosas y
disposiciones legales vigentes en la UE.
Para garantizar la calidad, sometemos
nuestros productos regularmente a controles
de calidad adicionales, tanto a través de
nuestro propio servicio de calidad como de
un servicio de calidad externo. En el caso
improbable de que surgieran problemas a
pesar de todas las precauciones, es posible
recurrir a nuestra garantía (véase las
condiciones de garantía).
Condiciones generales referentes a la
garantía sobre productos de venta al
público (para la Unión Europea):
• Todos los productos de venta al público
tienen un período de garantía de 24 meses
contra errores de producción o errores en
materiales desde la adquisición original;
• Si la queja está fundada y si la reparación o
sustitución de un artículo no es posible, o si
los gastos son desproporcionados,
Velleman® autoriza reemplazar el artículo
por un artículo equivalente o reembolsar la
totalidad o una parte del precio de compra.
En este caso, usted recibirá un artículo de
Page 33

recambio o el reembolso completo del precio
de compra si encuentra algún fallo hasta un
año después de la compra y entrega, o un
artículo de recambio al 50% del precio de
compra o el reembolso del 50% del precio
de compra si encuentra un fallo después de
1 año y hasta los 2 años después de la
compra y entrega.
Por consiguiente, están excluidos entre
otras cosas:
- todos los daños causados directa o
indirectamente al aparato (p.ej. por
oxidación, choques, caída,...) y a su
contenido (p.ej. pérdida de datos) después
de la entrega y causados por el aparato, y
cualquier indemnización por posible pérdida
de ganancias;
- partes o accesorios, que estén expuestos
al desgaste causado por un uso normal,
como por ejemplo baterías (tanto
recargables como no recargables,
incorporadas o reemplazables), bombillas,
partes de goma, etc. (lista ilimitada);
- defectos causados por un incendio, daños
causados por el agua, rayos, accidentes,
catástrofes naturales, etc.;
- defectos causados a conciencia, descuido
o por malos tratos, un mantenimiento
inapropiado o un uso anormal del aparato
contrario a las instrucciones del fabricante;
- daños causados por un uso comercial,
profesional o colectivo del aparato (el
período de garantía se reducirá a 6 meses
con uso profesional);
- daños causados por un uso incorrecto o un
uso ajeno al que está previsto el producto
inicialmente como está descrito en el manual
del usuario;
- daños causados por una protección
insuficiente al transportar el aparato.
- daños causados por reparaciones o
modificaciones efectuadas por una tercera
persona sin la autorización explícita de
Velleman®;
- se calcula gastos de transporte de y a
Velleman® si el aparato ya no está cubierto
por la garantía.
• Cualquier artículo que tenga que ser
reparado tendrá que ser devuelto a su
distribuidor Velleman®. Devuelva el aparato
con la factura de compra original y
transpórtelo en un embalaje sólido
(preferentemente el embalaje original).
Incluya también una buena descripción del
fallo;
• Consejo: Lea el manual del usuario y
controle los cables, las pilas, etc. antes de
devolver el aparato. Si no se encuentra un
defecto en el artículo los gastos podrían
correr a cargo del cliente;
• Los gastos de transporte correrán a carga
del cliente para una reparación efectuada
fuera del período de garantía.
• Cualquier gesto comercial no disminuye
estos derechos.
La lista previamente mencionada puede
ser adaptada según el tipo de artículo
(véase el manual del usuario del artículo
en cuestión).
Velleman® Service- und Qualitätsgarantie
Seit der Gründung in 1972 hat Velleman®
sehr viel Erfahrung als Verteiler in der
Elektronikwelt in über 85 Ländern aufgebaut.
Alle Produkte entsprechen den strengen
Qualitätsforderungen und gesetzlichen
Anforderungen in der EU. Um die Qualität zu
gewährleisten werden unsere Produkte
regelmäßig einer zusätzlichen
Qualitätskontrolle unterworfen, sowohl von
unserer eigenen Qualitätsabteilung als auch
von externen spezialisierten Organisationen.
Sollten, trotz aller Vorsichtsmaßnahmen,
Probleme auftreten, nehmen Sie bitte die
Garantie in Anspruch (siehe
Garantiebedingungen).
Allgemeine Garantiebedingungen in
Bezug auf Konsumgüter (für die
Europäische Union):
• Alle Produkte haben für Material- oder
Herstellungsfehler eine Garantieperiode von
24 Monaten ab Verkaufsdatum.
• Wenn die Klage berechtigt ist und falls eine
kostenlose Reparatur oder ein Austausch
des Gerätes unmöglich ist, oder wenn die
Kosten dafür unverhältnismäßig sind, kann
Velleman® sich darüber entscheiden, dieses
Produkt durch ein gleiches Produkt zu
ersetzen oder die Kaufsumme ganz oder
teilweise zurückzuzahlen. In diesem Fall
erhalten Sie ein Ersatzprodukt oder eine
Rückzahlung im Werte von 100% der
Kaufsumme im Falle eines Defektes bis zu
Page 34

1 Jahr nach Kauf oder Lieferung, oder Sie
bekommen ein Ersatzprodukt im Werte von
50% der Kaufsumme oder eine Rückzahlung
im Werte von 50 % im Falle eines Defektes
im zweiten Jahr.
• Von der Garantie ausgeschlossen sind:
- alle direkten oder indirekten Schäden, die
nach Lieferung am Gerät und durch das
Gerät verursacht werden (z.B. Oxidation,
Stöße, Fall, Staub, Schmutz, Feuchtigkeit,
...), sowie auch der Inhalt (z.B. Datenverlust),
Entschädigung für eventuellen
Gewinnausfall.
- Verbrauchsgüter, Teile oder Zubehörteile,
die durch normalen Gebrauch dem
Verschleiß ausgesetzt sind, wie z.B.
Batterien (nicht nur aufladbare, sondern
auch nicht aufladbare, eingebaute oder
ersetzbare), Lampen, Gummiteile,
Treibriemen, usw. (unbeschränkte Liste).
- Schäden verursacht durch Brandschaden,
Wasserschaden, Blitz, Unfälle,
Naturkatastrophen, usw.
- Schäden verursacht durch absichtliche,
nachlässige oder unsachgemäße
Anwendung, schlechte Wartung,
zweckentfremdete Anwendung oder
Nichtbeachtung von Benutzerhinweisen in
der Bedienungsanleitung.
- Schäden infolge einer kommerziellen,
professionellen oder kollektiven Anwendung
des Gerätes (bei gewerblicher Anwendung
wird die Garantieperiode auf 6 Monate
zurückgeführt).
- Schäden verursacht durch eine
unsachgemäße Verpackung und
unsachgemäßen Transport des Gerätes.
- alle Schäden verursacht durch
unautorisierte Änderungen, Reparaturen
oder Modifikationen, die von einem Dritten
ohne Erlaubnis von Velleman®
vorgenommen werden.
• Im Fall einer Reparatur, wenden Sie sich
an Ihren Velleman®-Verteiler. Legen Sie das
Produkt ordnungsgemäß verpackt
(vorzugsweise die Originalverpackung) und
mit dem Original-Kaufbeleg vor. Fügen Sie
eine deutliche Fehlerbeschreibung hinzu.
• Hinweis: Um Kosten und Zeit zu sparen,
lesen Sie die Bedienungsanleitung nochmals
und überprüfen Sie, ob es keinen auf de
Hand liegenden Grund gibt, ehe Sie das
Gerät zur Reparatur zurückschicken. Stellt
sich bei der Überprüfung des Gerätes
heraus, dass kein Geräteschaden vorliegt,
könnte dem Kunden eine
Untersuchungspauschale berechnet.
• Für Reparaturen nach Ablauf der
Garantiefrist werden Transportkosten
berechnet.
• Jede kommerzielle Garantie lässt diese
Rechte unberührt.
Die oben stehende Aufzählung kann
eventuell angepasst werden gemäß der
Art des Produktes (siehe
Bedienungsanleitung des Gerätes).
Legen Heirweg 33, 9890 Gavere, Belgium
Made in PRC
Imported by Velleman nv
www.velleman.eu
 Loading...