

Page 1
C
ÉDE
EUGNM
BIS
5
E
U
R
E
T
N
E
D
N
R
R
É
T
R
A
I
S1
M
ETAL D
M
ETAALD
D
TECTE
TECTO
M
ETALLD
C
RCAME
0N
TECTO
ETECTO
R DE M
DE ME
TEKTO
ALLI
TAUX
ALES
SER MA
EBRUIK
OTICE D
ANUAL
EDIENU
TRUZIO
UAL
RSHAND
’EMPLOI
EL USU
GSANLE
NI
LEIDING
RIO
TUNG
3
9
15
22
28
34
Page 2
/
Table 1
H
I
G
n
A
B
CS150N
C
D
E
L
F
M
J
N
K
06
09/2011
S
P
2
Q
T
R
U
© Vellema
nv
Page 3
/
.
oImIf Th
eWiThThEaVu3-tarAd
oNo
.3.
e
u
e
e
y
u
e
s
o
S
n
'
a
f
S
e
m
I
e
i
Emacon
V
e
e
c
a
e
m
i
p
e
d
p
e
e
h
e
r
o
a
c
e
u
y
m
s
o
s
t
i
a
b
C
n
l
®
o
w
h
f
o
o
c
e
c
r
e
d
u
w
d
d
y
t
e
o
s
o
o
s
r
p
g
I
t
a
a
m
r
d
e
a
w
o
d
o
r
e
b
c
o
p
d
t
r
m
c
b
n
p
r
v
t
u
h
n
s
y
s
u
e
f
CS150N
n
p
o
h
a
t
l
e
p
e
u
n
u
e
.
O
o
n
t
o
e
y
t
n
y
g
p
p
l
h
n
h
t
b
e
r
o
u
t
d
s
d
L
e
c
m
u
t
c
b
t
a
e
j
o
o
L
w
o
n
e
r
a
s
h
s
a
a
t
o
S
i
n
c
e
s
n
g
f
h
n
s
1
Introd
T
all resid
portant
in doubt,
ank you fo
se
rvice. If th
used by di
ca
aler will n
d
th your C
e Discrimi
e detector
rphone J
-meter –
Tone Aud
get identi
justable
W
aterproof
te: The s
N
te: Your
ction
nts of th
nvironm
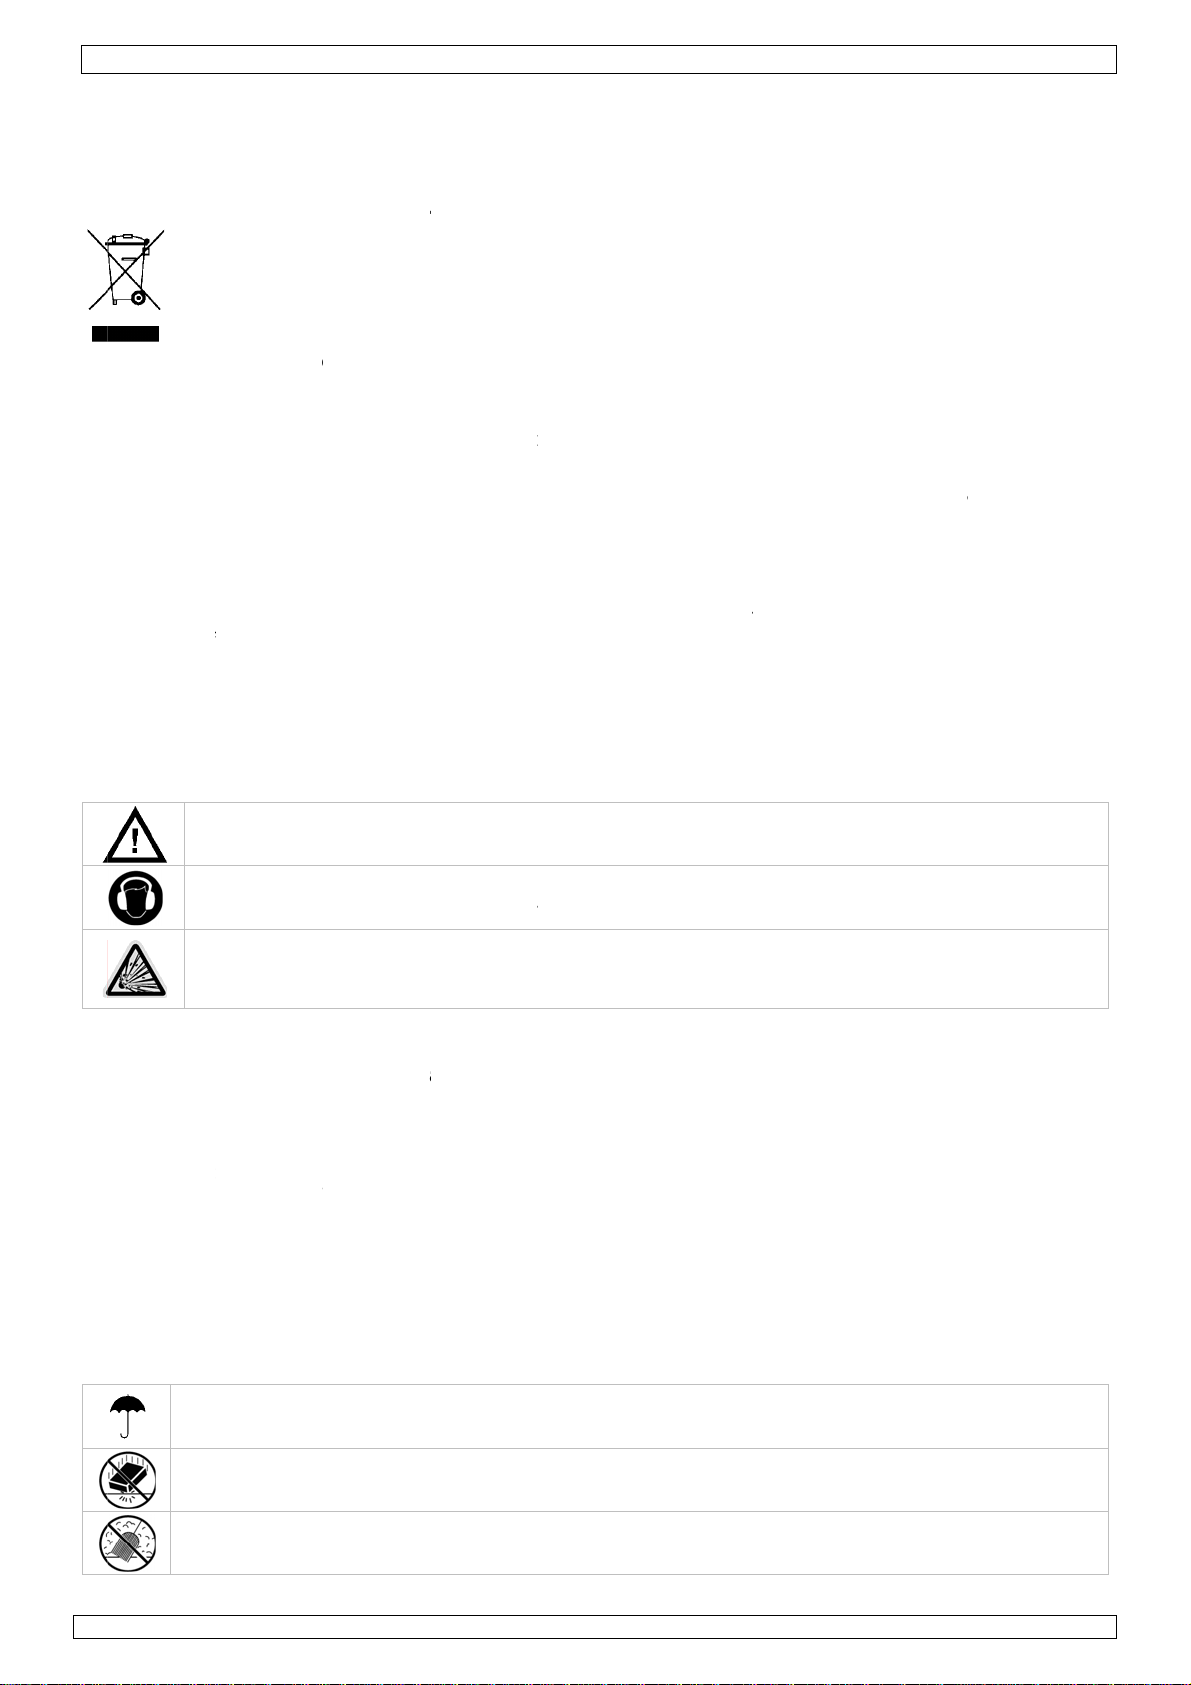
This
symbol on
cle could
lifec
mun
icipal wast
ld be retu
sho
envi
ronmental
contact y
r choosing
device w
regard of
t accept r
150N, yo
ator Metal
s features
ck - lets
indicates t
io Discri
ication eas
Search C
arch coil i
etal detec
tem - let
Europea
ntal info
the devic
arm the e
; it shoul
ned to yo
rules.
ur local
Velleman!
s damage
ertain gui
sponsibilit
can hunt
Detector i
include:
ou connec
he probabl
inator - s
ier.
you adju
il - lets y
waterpro
or require
Us
n Union
mation a
or the pa
nvironmen
be taken
r distribut
aste dis
Please rea
in transit,
elines in
for any e
for coins,
s versatile
earphone
type of
unds disti
t the dete
u use the
f, but the
three 9V-
r ma
out this
kage indic
t. Do not d
to a specia
r or to a l
osal aut
the manu
do not ins
his manua
nsuing def
elics, jewe
and easy t
s (not sup
etal being
nctive ton
tor's lengt
search coil
control ho
atteries (
ual
roduct
ates that d
ispose of t
lized comp
cal recycli
orities.
l thoroug
all or use i
is not cov
cts or pro
llery, gold
o use.
lied) to th
detected.
s for diffe
h for comf
even if yo
sing is no
ot supplie
isposal of
e unit (or
any for re
g service.
ly before
and cont
ered by th
lems.
and silver
detector.
ent types
rtable use
must put
waterpro
).
he device
batteries)
ycling. Thi
Respect t
ringing thi
ct your de
warranty
ust about
f metals,
.
it under w
f.
fter its
as unsorte
device
e local
device int
ler. Dama
and the
nywhere.
o make
ater.
d
o
e
2
Safety
Genera
R
fer to the
•
Protect thi
•
Protect th
Familiaris
•
All modifi
•
Only use t
•
warranty.
•
Damage c
and the d
•
The warra
•
Always
If the dev
•
serious da
Ke
Ca
no
N
nstruct
p the dev
ution: we
se or audi
VER TOU
rk the fi
tact the
l Guideli
elleman
s device fr
device ag
yourself
ations of t
he device
used by d
aler will n
nty does n
ake sure t
ce is not u
mage.
ions
ce away f
ring head
le warnin
H AMUN
ding loca
ocal auth
nes
Service
m shocks
ainst extre
ith the fun
e device a
or its inten
isregard of
t accept r
t cover d
o comply
sed for a l
om childre
hones in
signals a
TION OR
ion – ha
orities at
nd Quali
nd abuse.
e heat, d
ctions of t
e forbidde
ed purpo
certain gui
sponsibilit
mage cau
ith local r
ng time, r
and una
ublic plac
e subdued
OTHER P
e someb
once.
y Warra
Avoid bru
st and m
e device b
for safet
e. Using th
delines in
for any e
ed by salt
les and re
move the
thorised u
s may lea
TENTIAL
dy guard
ty on the l
e force wh
isture.
fore actua
reasons.
e device in
his manual
suing defe
environ
ulations.
batteries.
ers.
to hazard
Y LETHA
the site
ast pages
n operati
lly using it.
an unauth
is not cov
ts or prob
ents.
Leaking ba
ous situati
OBJECT
hen poss
f this ma
g the devi
orised way
red by th
lems.
tteries can
ns as traf
. Clearly
ble - and
ual.
e.
will void t
warranty
cause
ic
e
Kee
the meta
min
Han
and
can cause
Kee
rals that
le the det
the dete
06
09/2011
l detector
orrode the
ctor gentl
the detect
tor away f
ry. If it ge
electronic
y and care
r to not w
om dust a
ts wet, wi
circuits.
ully. Drop
ork proper
nd dirt, wh
3
e it dry im
ing it can
y.
ich can ca
mediately.
damage ci
se premat
Liquids mi
cuit board
ure wear o
ght contai
and case
f parts.
© Vellema
nv
Page 4

/
4
.
lfol
.
e
s
a
e
t
R
a
e
u
u
h
h
n
d
f
g
i
y
s
o
s
h
e
s
a
o
t
e
r
e
g
x
o
e
v
+
h
t
s
e
e
e
g
o
n
i
s
v
n
y
d
s
e
o
i
n
e
u
p
t
e
h
e
r
n
r
y
t
y
o
e
n
m
r
e
g
e
y
s
a
a
n
2
t
a
w
u
o
h
o
n
o
t
l
c
c
i
a
r
e
)
U
b
d
a
m
o
c
g
d
f
i
e
n
F
o
a
e
u
b
r
a
m
e
n
e
o
u
o
e
z
n
r
m
v
s
p
i
e
t
e
d
o
s
r
a
A
r
a
e
n
[
e
t
t
u
e
o
o
s
n
g
e
e
e
n
a
s
1
d
h
k
e
p
u
s
h
v
t
e
d
w
b
h
a
r
o
b
t
a
u
r
g
a
c
h
a
o
e
t
s
a
t
e
o
g
o
g
p
k
r
k
o
n
n
o
t
m
a
h
r
Treas
Al
treasure
low:
•
Always ge
•
Respect t
Observe a
•
Never des
•
found, co
Leave the
•
Use your
•
Dispose o
•
to find.
5
Settin
Use
extr
plas
WA
not
batt
reg
and store
mes can
ic parts.
NING: m
ttempt to
ries in fir
lations. K
re Hunt
unters mi
t permissi
e rights a
ll national,
troy histor
tact a mu
land and
etector o
any junk
up the
he detect
horten th
alfunction
recharge
as they
ep batte
r’s Cod
ht be jud
n before s
d propert
state, and
cal or arch
eum or hi
egetation
ly in safe
ou find, o
etector
r only in n
life of ele
may occur
on-rechar
ight explo
ies away
of Eth
ed by the
arching a
of others.
local laws
aeological
torical soc
s it was.
reas.
ly in appr
CS150N
rmal tem
tronic dev
if the pow
eable bat
e. Dispos
rom chil
cs
xample y
y site.
while trea
treasures.
iety in you
ill in any h
ved areas
erature e
ces, dama
r is on wh
eries, do n
of batteri
ren.
u set. Her
ure hunti
If you are
area.
oles you di
. Do not le
vironment
e batterie
n the bat
ot punctur
s in accor
are a fe
g.
not sure a
g.
ve it for t
s. Temper
s, and dist
eries are r
or do no
ance with
basic rule
out an obj
e next tre
ture
rt or melt
placed. D
throw
local
you shou
ect you ha
asure hun
ld
ve
er
R
fer to the
a.
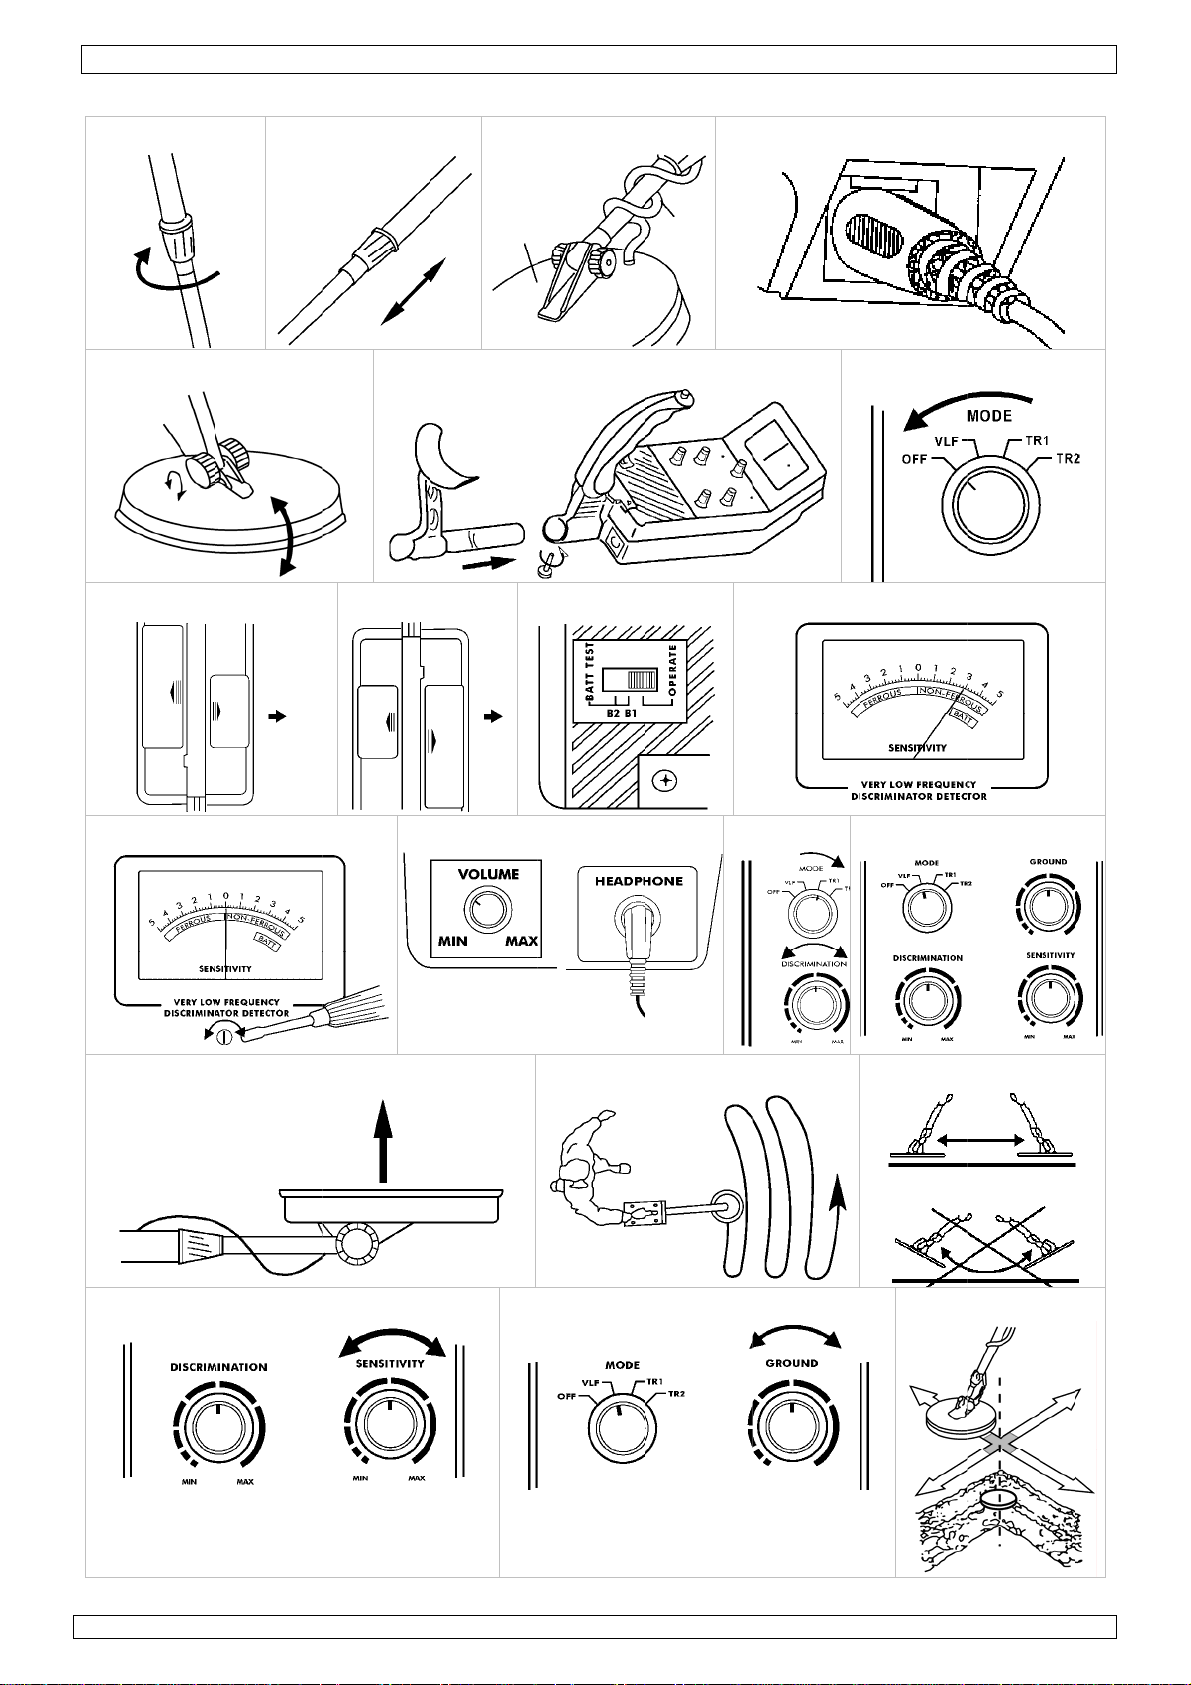
Assembli
sembling
A
1.
Turn the
Lengthen
2.
search coi
relaxed at
3.
Turn the
Unscrew t
4.
align the
tighten th
Wind the
5.
search coi
Insert the
6.
the pins o
Caution:
• The se
could d
• To disc
connec
Loosen th
7.
search coi
coil from
Caution:
Loosen th
8.
Installin
b.
ution:
C
•
Use only f
•
Do not mi
batteries
If the det
1.
Press the
2.
arrow [H]
3.
Place a 9-
symbols (
4.
Replace t
5.
Press the
[I].
llustration
ng the m
our detect
tem's lock
r shorten
l is level w
your side
tem's lock
he knob o
oles on th
knob [C]
earch coil
l when yo
search coi
n the plug
rch coil's
amage it.
nnect the
or. Never
knob at t
l should b
otating or
Do not tig
knob at t
the batt
resh batte
old and
f different
ctor is on,
right batte
.
olt batter
and -) m
e right ba
left batter
on page
tal detec
r is easy
nut clock
the stem s
th the gro
[B].
nut anticl
the searc
search c
.
cable arou
are hunti
l's plug int
align with
lug fits int
search coi
ug at the
he search
parallel w
wobbling [
ten the se
he base of
ries
ies of the
ew batteri
capacities
turn VOL
y compart
into the
arked insi
tery comp
compart
of this m
or
nd requir
ise until it
o when yo
nd and a
ckwise to l
coil and
il bracket
nd the ste
g on unev
the searc
he holes i
o the conn
's cable fr
able.
oil's end a
th the gro
E].
rch coil t
the handl
equired si
s, differe
.
ME (on th
ment cove
attery co
e.
rtment co
ent cover'
nual.
s no speci
loosens [
stand up
out 1/2 to
ock it in pl
emove the
nd the st
. Leave e
n ground
h coil jack
the jack
ctor in on
m the det
nd adjust
nd). Tigh
o hard or
, insert th
e and rec
t types of
e control h
's tab and
partment
er.
tab and
l tools. Ju
].
ight with t
2 inches (
ce.
knobs an
m. Push t
ough slac
[C].
on the det
D].
ly one way
ctor, gras
he search
en the kno
se tools s
arm supp
mmended
batteries (
ousing) to
slide the c
n top of t
lide the co
t follow th
he detecto
to 5cm)
connecto
e connect
in the ca
ctor's con
. Do not fo
the plug
coil to the
b just eno
ch as plie
ort, and ti
type.
tandard,
OFF (the
over off in
e ribbon,
er off in t
ese steps.
r in your h
bove it wi
. Insert th
r through
le to let y
rol housin
rce the plu
nd pull it
desired an
gh to kee
s to tighte
hten the
lkaline or
ontrol clic
the directi
matching t
e directio
nd, the
h your ar
stem and
the holes
u adjust t
. Be sure
g or you
ut of the
le. (The
the searc
it.
nob [F].
echargeab
s) [G].
n of the
he polarity
of the ar
nd
e
h
le
ow
06
09/2011
4
© Vellema
nv
Page 5

CS150N
6. Place two 9-volt batteries into the battery compartment on top of the ribbons, matching the
polarity symbols (+ and -) marked.
7. Replace the left battery compartment cover.
Caution:
• Always remove old or weak batteries. They can leak chemicals that can destroy electronic parts.
• If you do not plan on using the detector for a week or more, remove the batteries.
• Dispose of old batteries promptly and properly.
You can extend battery life by using earphones, which require less power than the speaker.
c. Testing the Batteries
If the detector does not turn on, has weak volume, will not t une properly, has erratic operation or
drifts,test the battery power.
• Set MODE to VLF (very low frequency). To test the batteries in the left battery compartment, set
BATT TEST to B1. To test the batteries in the right battery compartment, set BATT TEST to B2
[J]. If the pointer on the VU-meter is between 3 and 5 (green area), the batteries are OK. If the
pointer is not in the green area, replace them.
d. Adjusting the Meter
• Set MODE to OFF, use a screwdriver to adjust the pointer to line up with 0 on the scale [K, L].
e. Using Earphones
Using stereo earphones (not supplied) allows you to listen privately. It also saves battery power and
eases identifying subtle sound changes for better results.
• To connect headphones to the detector, insert the earphones' 1/8-inch plug into the HEAPHONE
jack [M].
• Control the volume with volume knob [M].
Note: The detector's internal speaker disconnects when you connect earphones.
f. Listening Safely
To protect your hearing, follow these guidelines when you use earphones.
• Set the volume to the lowest setting before you begin. Adjust the volume to a comfortable level
while listening.
• Do not listen at very high volume levels. Extended high-volume listening can lead to permanent
loss of hearing.
• Once you set the volume, do not increase it. Over time, your ears adapt to the volume level, so a
volume level that does not cause discomfort might still damage your hearing.
g. Traffic Safety
Do not wear earphones while operating your detector near high-traffic areas. Even though some
earphones are designed to let you hear outside noise when listening at normal volume levels, they
still can present a traffic hazard.
6. Operation
Your Velleman metal detector distinguishes between ferrous ( c ontain iron) and non-ferrous (do not)
metals. When the detector senses a metallic object, the meter reading changes, the NON-FERROUS
or FERROUS indicator turns on or off, and the detector sounds one of three tones. The higher the
tone pitch, the stronger the detection.
a. Preparing the detector
1. Set BATT TEST to OPERATE.
2. Hold the detector in a comfortable position, then rotate MODE to the desired position. Set it to
VLF to test battery power and adjust TUNE and GROUND. (See "Fine-tuning the detector" and
"Adjusting GROUND"). Set it to TR1 to detect extreme differences in metals, such as between in
metals, such as between iron and gold. The difference between iron and gold shows on the meter
(iron in the ferrous section, gold in the non-ferrous section). Set it to TR2 to detect finer
distinctions between metals, for example between aluminium and gold (see "Adjusting
DISCRIMINATION") [N].
Follow these steps to set TUNE [O]:
1. Rotate VOLUME to the 10 o'clock position.
2. Set MODE to VLF.
3. Set DISCRIMINATION, GROUND and SENSITIVITY to their midpoint.
4. Hold the search coil about 1 foot (30cm) away from the ground and any metal object. While
pressing the red button on the handle, slowly position TUNE until the pointer on the vu-meter
rests at 0. Release the red button.
As you search, you can fine-tune the detector using the other controls (see "Fine-Tuning the
Detector")
06/09/2011 © Velleman nv
5
Page 6

CS150N
Note: Press the red button on the handle at any time during operation to automatically return the
pointer to 0.
b. Indoor testing
To learn how the detector reacts to different metals, you should test it before you use it the first
time. You can test the detector indoors or outdoors. You need to fine-tune the detector before every
use (see “Fine-tuning the Detector”).
1. Remove any watches, rings, or other metal jewellery you are wearing and place the detector on a
wooden or plastic table.
2. Adjust the search coil's angle so the flat part faces the ceiling [P].
Note: Never test the detector on a floor inside a building. Most buildings have metal of some kind
in the floor, which might interfere with the objects you are testing or mask the signal completely.
3. Set MODE to TR1.
4. Move a sample of the material you want the detector to find (such as a gold ring or coin) about 2
inches (± 5cm) above the search coil.
Notes:
• The search coil will not detect without motion. You must move the object since you are not
sweeping with the detector at this time.
• If you are using a coin, the detector detects it more easily if you ho ld it so a f lat side (not the
edge) is parallel with the flat side of the search coil.
• If the detector detects the material, the NON-FERROUS and FERROUS indicators flash and the
pointer moves to FERROUS or NON-FERROUS while the detector determines the type of metal it is
detecting. If it detects non-ferrous metal, it also sounds a tone.
• If the detector does not detect the material, check the battery power and verify that the search
coil is properly connected.
c. Outdoor testing and use
1. Find an area on the ground outside where there is no metal.
2. Place a sample of the material you want the detector to find (such as a gold ring or a coin) on the
ground. (If you are using a valuable metal such as gold to test the detector, mark the area where
you placed the item, to help you find it later. Do not place it in t a ll grass or weeds).
3. Set MODE to TR1.
4. While holding the search coil level and about 1-2 inches above the ground, slowly move the search
coil over the area where you place the sample, sweeping the search coil in a side-to-side mo tion
[Q].
5. Try finding other metal in the area.
When you find a metal item, wait a few seconds after the tone stops before continuing, to allow
the detector time to reset (or, press the red button on the handle to return the pointer to the
centre of the vu-meter.
d. Search coil sweeping hints:
• Never sweep the search coil as if it were a pendulum. Raising the search coil while sweeping or at
the end of a sweep causes false readings [R].
• Sweep slowly - hurrying makes you miss targets.
• If the detector detects the material, it sounds a tone and the pointer moves to the type of
material if found. Set MODE to TR2 to determine the quality of the metal.
• If the detector does not detect the material, make sure you are moving the search coil correctly.
Notes:
• The detector responds with a strong signal when it detects most valuable metal objects. If a
signal does not repeat after you sweep the search coil over the target a few times, the target is
probably junk metal.
• False signals can be caused by trashy ground, electrical interference or large irregular pieces of
junk metal. False signals are usually broken or non-repeatable.
e. Fine-tuning the detector
When you become familiar with how your detector works, fine-tune it to make it more selective
in what it finds.
1) Adjusting SENSITIVITY [S]
To adjust the search coil's ability to detect objects at different depths in the soil, rotate
SENSITIVITY between MIN and MAX. For maximum detection depth, leave SENSITIVITY set
as high as possible. If the detector makes a "chattering" noise, decrease SENSITIVITY until
the "chatter" stops.
06/09/2011 © Velleman nv
6
Page 7

CS150N
2) Adjusting GROUND [T]
Setting GROUND takes a little time, but is critical for accurate operation. GROUND tunes out
false signals from mineralised soil.
1. Set MODE to VLF and lower the search coil to 1/2 to 2 inches (1 to 4cm) above the
ground.
2. If the pointer swi ng s to the ri g ht , t urn G RO U N D to the left. If the pointer swings to the left,
turn GROUND to the right.
3. Raise the search coil about 1 foot (30cm) from the ground and press the red button on
the handle. The pointer returns to the centre.
4. Repeat Steps 1-3 until the pointer stays close to the centre each time you lower the
search coil to the ground.
After you set GROUND, the detector is set for the soil type of that particular site. Do not reset
it until you use the detector at a different site.
3) Adjusting DISCRIMINATION
Discrimination is the detector's ability to differentiate between types of metal. The
detector's DISCRIMINATION setting determines whether the detector will distinguish
between different types of ferrous and non-ferrous metals.
If MODE is set to TR2, start with DISCRIMINATION set to mid-range. While you use the
detector, adjust DISCRIMINATION to the best position. As you set DISCRIMINATION
higher, the detector becomes more sensitive to the differences between large aluminium
and gold pieces, for example, but some small valuable pieces, such as coins and small
rings, might be overlooked. As you set DISCRIMINATION to higher levels, the detector first
does not detect small pieces of silver paper, then thick foil, and finally metal objects like
pull tabs from aluminium cans.
Note: Each time you use the detector in a different area, you must adjust
DISCRIMINATION. Each search location presents new challenges.
f. False signals
Because your detector is extremely sensitive, trash-induced signals and other sources of
interference might cause signals that seem confusing. The key to handling these types of signals is
to dig for only those targets that emit a strong, repeatable signal. As you sweep the search coil back
and forth over the ground, learn to recognise the difference between signals that occur at random
and signals that are stable and repeatable.
To reduce false signals when searching very trashy ground, only scan a small area at a time using
slow, short overlapping sweeps.
g. Detection hints
No detector is 100 percent accurate. Various conditions influence metal detection. The detector's
reaction depends on a number of things:
• The angle at which the object rests in the ground.
• The depth of the object.
• The amount of iron in the object.
• The size of the object.
h. Pinpointing a target
Accurately pinpointing a target makes digging it up easier.
Accurate pinpointing takes practice, and we suggest you practice finding and digging up small metal
objects on your own property before you search other locations.
Sometimes, targets are difficult to accurately locate due to the sweep direction. Try changing your
sweep direction to pinpoint a target.
Follow these steps to pinpoint a target.
1. When the detector detects a buried target, continue sweeping the search coil over the target in a
narrowing side-to-side motion.
2. Make a visual note of the exact spot on the ground where the detector beeps.
3. Stop the search coil directly over this spot on the ground. Then move the search coil straight
forward away from you and straight back toward you a couple of times.
Make a visual note of the exact spot on the ground where the detector beeps.
4. Repeat Steps 1-3 at a right-angle to the original search line, making an "X" pattern. The target
will be directly below the "X" at the point of the loudest response [U].
Notes:
• If trash in an area is so heavy that you get false signals, slow your sweep and use shorter
sweeps.
• Recently buried coins might not respond the same as coins buried for a long period of time
because of oxidation.
06/09/2011 © Velleman nv
7
Page 8

CS150N
• Some nails, nuts, bolts, and other iron objects (such as old bottle caps) oxidise and create a
"halo" effect. A halo effect is caused by a mixture of natural elements in the ground and the
oxidation created by different metals. Because of the metal mixtures, target signals might not be
in a "fixed" position. This effect makes these objects very hard to detect accurately. (See "FineTuning the Detector").
7. Care and maintenance
Wipe the detector with a damp cloth occasionally to keep it looking new. Do not use harsh
chemicals, cleaning solvents or strong detergents to clean the detector.
• Modifying or tampering with the detector's internal parts can cause a malfunction and might
invalidate its warranty.
• The search coil supplied with the detector is waterproof and can be submerged in either fresh or
salt water. However, do not let water enter the detector's control housing. After using the search
coil in salt water, rinse it with fresh water to prevent corrosion of the metal parts.
8. Troubleshooting
If your detector is not working as it should, follow these suggestions to see if you can eliminate the
problem.
PROBLEM SUGGESTION
The detector displays or
sounds false signals
The detector might sound a false signal if it detects heavily oxidised
The display does not show the
correct metal type when the
detector finds a target or the
detector sounds more than
one type of tone when it finds
a target.
You might be sweeping the detector's search coil too fast or at the
wrong angle. Sweep the search coil more slowly and hold the
detector correctly. See "Testing and Using the Detector" and
"Pinpointing a Target".
metals. Try pinpointing the target from several different angles (see
"Pinpointing a Target"). If the detector does not display and sound
the same signal each time, the target is probably heavily oxidised
metal.
There might be more than one target in the area you are searching.
The target might be a type of metal that the detector does not
recognise.
If the target is heavily oxidised, the detector might not display the
correct metal type. This is not a malfunction.
9. Technical specifications
power supply 3 x 9V-battery (not incl.)
frequency 15KHz ±2KHz
sensitivity 16cm for a € 2 coin (Ø 25mm, in 'all metal' mode)
low 400Hz + 60Hz
3-tone audio discrimination
operating temperature 0°C ~ 40°C
dimensions (LxWxH) 92~121 x 20 x 18.5cm
weight ±1.26kg
Use this device with original accessories only. Velleman nv cannot be held responsible in
the event of damage or injury resulted from (incorrect) use of this device.
For more info concerning this product and the latest version of this user manual, please
visit our website www.velleman.eu
The information in this manual is subject to change without prior notice.
© COPYRIGHT NOTICE
This manual is copyrighted. The copyright to this manual is owned by Velleman nv. All
worldwide rights reserved. No part of this manual may be copied, reproduced, translated or reduced
to any electronic medium or otherwise without the prior written consent of the copyright holder.
medium 700Hz + 105Hz
high 1500Hz + 225Hz
.
06/09/2011 © Velleman nv
8
Page 9

/
1
.
aBeHeDahegadeveMeDeEigHoVuDrgeRe
pOp
.3.
a
n
g
s
d
n
p
r
e
d
e
5
d
e
o
u
s
e
e
d
o
A
a
m
e
e
h
e
o
o
a
d
n
u
f
o
e
l
c
o
t
o
u
C
i
i
g
n
e
a
r
e
a
a
d
n
s
e
g
e
g
e
a
a
s
e
u
b
r
p
z
e
k
v
k
k
w
a
e
e
e
g
v
a
r
m
e
d
e
o
e
n
d
p
a
w
n
e
d
e
v
u
d
t
o
v
d
f
a
n
e
u
R
n
r
i
j
n
e
s
c
o
e
n
d
e
e
c
c
o
h
e
e
k
u
o
t
g
3
o
d
e
S
t
n
o
B
n
s
n
c
t
a
o
a
b
e
e
w
e
v
n
o
p
h
r
r
g
L
e
r
d
e
e
j
a
e
m
s
m
d
n
h
d
s
p
t
m
h
h
h
e
h
e
n
t
n
w
w
n
a
l
o
m
t
r
A
w
o
v
i
a
n
e
r
u
e
e
Inleidi
A
n alle in
langrijke
bt u vrag
nk u voor
t toestel b
rantie gel
aler zal de
rband me
t uw CS1
ze metaal
enschapp
ofdtelef
-meter -
ietoon A
vonden is
gelbare
W
aterdicht
merking:
O
merking:
ezetenen
milieu-in
ymbool op
Dit
wor
t weggew
eve
tuele batt
ges
ecialiseerd
naa
een lokaa
en, conta
uw aanko
t niet voor
verantwo
houden.
0N kunt
etector is
n van de
onaanslu
om aan te
dio Discr
laten een
teel: de i
zoekspo
alleen de
uw meta
schadigd
G
van de E
ormatie
het toeste
rpen, dit t
rijen) niet
bedrijf te
recyclage
teer dan
p! Lees de
ijdens het
schade do
rdelijkheid
haast ove
veelzijdig
S150N:
ting - om
geven wel
minator:
emakkelij
stelbare le
l - om oo
zoekspoel
ldetector
bruik
ropese U
etreffen
l of de ver
oestel sch
bij het ge
echtkome
unt breng
de plaats
e handlei
transport,
or het neg
afwijzen
ral muntst
n eenvou
een hoofd
e metaals
erschillen
ere identi
ngte van d
onder w
is waterdic
erkt uitslu
CS150N
rsha
ie
e dit pro
akking ge
de kan to
one huish
voor recy
en. Respe
lijke aut
ing grondi
installeer
ren van b
oor defect
kken, reli
ig in gebr
elefoon (ni
ort verm
e geluids
icatie toe.
e steel zor
ter metale
ht; de rest
itend met
dleidi
uct
ft aan dat
brengen a
udelijke a
lage. U m
teer de pl
riteiten
g voor u h
et dan nie
paalde ric
n of probl
wieën, ju
ik.
et meegel
edelijk ge
onen afha
t voor gr
n voorwer
van de be
9V-batte
ng
, als het n
n het mili
fval; het
et dit toe
atselijke
etreffen
t toestel i
t en raadpl
htlijnen in
men die
elen, gou
verd) aan
onden is..
kelijk van
ot gebruik
en op te s
uizing nie
ijen (niet
zijn leve
u. Gooi di
oet bij ee
tel naar u
ilieuwetge
e de ver
gebruik
eeg uw de
deze hand
ier rechtst
en zilver
te sluiten.
het soort
gemak.
oren.
.
eegeleve
scyclus
toestel (
verdeler
ving.
ijdering.
eemt. We
ler. De
eiding en
reeks
psporen.
etaal dat
d).
n
of
d
w
2
Veiligh
Algem
R
adpleeg d
•
Bescherm
•
Bescherm
Leer eerst
•
Om veilig
•
Gebruik h
•
garantie.
Schade d
•
garantie.
•
De garant
•
Leef de l
Verwijder
•
kunnen g
Hou
Let
erv
RA
loc
on
idsinst
buiten h
op: Het dr
or dat u al
K NOOIT
tie af – l
iddellijk
ne richt
Vellema
dit toestel t
dit toestel
de functie
eidsredene
t toestel
or wijzigin
ie geldt ni
cale wet
de batterij
an lekken
ucties
t bereik v
gen van
le waarsch
MUNITIE
at eventu
e plaats
lijnen
®
service
egen schok
tegen extr
van het t
n mag de
nkel waar
en die de
t voor sch
eving zo
n uit de
en het int
n kindere
en hoofdt
uwingsgel
OF ANDE
eel iema
lijke ove
- en kwal
ken. Vermi
me tempe
oestel ken
ebruiker g
oor het ge
gebruiker
de wegen
gvuldig n
etaaldete
rne circuit
en onbev
lefoon op
iden en h
E LEVEN
d de loca
heid.
teitsgara
d brute kra
raturen, st
en voor u
en wijzigin
maakt is.
heeft aang
gebruik i
a.
tor indien
ernstig be
egden.
e openba
t verkeer
GEVAAR
ie bewak
tie achte
cht tijdens
f en vocht
het gaat g
gen aanbr
ij onoord
ebracht aa
zoute om
u hem een
chadigen.
e weg kan
oed kunt
IJKE OBJ
n – en w
aan deze
e bedienin
igheid.
ebruiken.
ngen aan
elkundig g
n het toest
gevingen.
lange tijd
gevaarlijk
oren.
ECTEN A
aarschu
andleiding
g van dit t
et toestel.
bruik ver
el vallen n
niet gebrui
zijn. Zorg
N. Baken
.
estel.
alt de
et onder d
kt. Batterij
de
en
de meta
Hou
kun
Sch
en miner
d het toe
06
09/2011
ldetector
len bevatt
tel niet do
roog of dr
n die het i
reen en v
og hem o
nterne cir
rmijd bru
9
middellijk
uit kunnen
e kracht ti
af indien
aantasten
dens de b
ij nat is. V
.
diening v
loeistoffen
n dit toest
© Vellema
l.
nv
Page 10

/
4
.
eba
.
a
eins
e
e
c
r
p
i
h
d
d
b
r
g
g
o
w
n
o
e
g
m
n
g
d
e
a
k
e
d
p
h
h
k
a
n
a
k
v
e
s
e
m
w
k
e
d
v
v
e
e
w
e
g
h
p
e
e
o
e
o
d
j
d
v
r
n
e
h
a
p
d
e
e
c
e
t
e
a
a
e
o
t
e
o
e
o
w
o
z
e
e
k
h
e
r
e
w
w
e
n
a
t
s
o
r
b
l
r
g
a
a
n
e
e
g
a
h
z
v
d
m
g
.
E
e
p
o
a
e
b
e
e
e
e
o
o
t
e
e
o
h
o
j
n
s
o
s
e
e
g
n
k
g
w
o
k
a
m
r
v
p
e
e
e
e
n
n
a
n
e
w
a
t
o
a
m
n
d
a
t
a
u
u
s
L
e
w
r
e
e
b
d
k
v
e
a
e
n
e
b
d
u
o
m
t
e
e
e
V
t
m
t
i
e
b
e
r
z
e
m
n
g
d
c
o
w
e
o
n
C
n
d
a
Ethisc
D
nk eraan
sisregels:
•
Vraag altij
Houd hier
•
Houd ook
•
tot het sch
Vernietig
•
oorsprong
verenigin
Laat de d
•
steeds we
•
Gebruik u
•
Laat gevo
de eerstv
Bes
Geb
tem
LET
stor
ze n
herm de
uik en be
eraturen
OP: Bij h
ngen voor
iet in het
e code
at u in uw
om toest
ij altijd re
ekening m
atgraven.
een voor
van een g
bij u in d
orzochte
er op.
detector
den afval
lgende sc
etaaldete
aar de m
unnen he
t vervang
oen. Herl
uur. Houd
oor sch
gedrag all
mming vo
kening me
t mogelijk
erpen van
evonden v
buurt.
rond en d
slechts op
uitsluitend
atgraver.
tor tegen
taaldetect
interne ci
n van de
ad geen a
de batte
ttenja
schatenj
r u een pl
anderma
nationale,
historisch
orwerp, n
begroeiin
veilige pla
achter op
CS150N
tof en vuil
r onder n
cuit, de b
atterij van
kalinebatt
ij uit de
ers
gers vert
ats doorzo
s rechten
regionale
of archeo
em dan c
achter in
tsen.
daartoe v
.
rmale om
tterijen of
een nog i
rijen. Doo
uurt van
genwoordi
kt met u
n eigend
n plaatselij
logische w
ntact op
hun oorsp
orziene af
evingste
de behuizi
geschakel
rboor de b
inderen.
t. Respec
detector.
m.
e wetsbep
arde. Als
et een m
onkelijke
albelten.
peraturen.
g bescha
toestel k
tterijen n
eer daaro
lingen me
twijfels h
seum of e
taat. Vul
aat het ni
Extreme
igen.
nnen zich
oit en goo
deze
betrekkin
eeft over
n historis
en kuil
t achter v
i
e
he
or
5
Voorbe
R
adpleeg d
a.
Montage
detector i
D
tructies:
1.
Draai de
Regel de
2.
u uw ar
grond ha
Draai de
3.
Schroef
4.
op de zo
tegenove
behulp v
Wind de
5.
de kabel
6.
Sluit de s
erop dat
L
t op:
•
De zoeks
daarmee
•
Trek bij
vast ter
7.
Draai de
ervoor d
de spoel
L
t op: Dra
8.
Draai de
de knop
b.
Batterij
•
Let op:
•
Gebruik
Meng ge
•
verschille
reiding
figuren o
van de d
s gemakk
rendelkn
lengte van
ontspann
gt [B].
rendelkn
e knop op
kspoel zo
r elkaar ko
n de knop
abel van
n de steel
tekker van
e pinnen
oelstekke
loopt u ka
et loskopp
oogte van
nop aan
t de zoeks
iet gaat k
i de zoeks
nop aan
ervolgens
n plaatse
lechts ong
n nieuwe
nde capaci
pagina 2
tector
lijk zelf te
p van de s
de staaf z
n langs u
p dicht (te
de zoeksp
at de voor
men te sta
es [C].
e zoekspo
zodat u d
de zoeksp
an de ste
past prec
s op besc
len van d
de stekke
et uiteind
poel even
ntelen of
oel niet t
e onderka
weer vast
n
bruikte b
n oude ba
teit.
van deze
monteren
teel los (in
dat als u
zijde laat
genwijzerz
el los en
iene open
an. Steek
l losjes o
zoekspoe
oel aan op
ker in de
ies in de ja
adigingen
zoekspoe
.
van de zo
ijdig loopt
iebelen [
hard aan
t van het
[F].
tterijen va
terijen, o
andleiding
onder geb
wijzerzin)
recht staa
hangen, d
in) zodra d
erwijder d
ingen in d
e connect
de steel
l zelfs op
zoekspoel
aatjes va
ck. Probee
lkabel dus
ekspoel lo
met de gr
].
n gebruik
handvat lo
n de aanb
laadbare
.
ruik van s
[A].
en de det
e zoekspo
e gewenst
knopjes
steel en i
r door de
een. Laat
neffen gro
ack op de
de jack p
r daarom
nooit op d
om de ge
nd). Dra
ook geen
, steek de
volen gro
n niet-opl
eciaal ger
ctor in u
l ongevee
lengte b
n de conn
de steun
openingen
hierbij vol
d gemak
behuizing
ssen [D].
ooit de st
kabel, m
enste ho
i de knop
ang e.d.
armsteun
tte en typ
adbare of
edschap.
hand vas
1 tot 5 c
reikt is.
ctor. Mon
eugel van
en bevest
oende sp
elijk kunt
an de det
kker te fo
ar pak de
k in te ste
et hard g
in de open
.
atterijen
olg deze
houdt ter
boven de
eer de ste
de zoeksp
g die met
ling tusse
ewegen [
ctor. Let
ceren, wa
e steeds
llen. (zorg
noeg aan
ing en dra
et
ijl
l
el
].
t
at
i
06
09/2011
10
© Vellema
nv
Page 11

CS150N
1. Als de detector nog aan staat, zet u de MODE-knop op OFF [G].
2. Druk op het deksel van het rechterbatterijvakje en schuif het deksel open in de richting van de
pijl [H].
3. Plaats een 9-volt batterij op het lint. Let hierbij op de polariteitsymbolen (+ en -).
4. Schuif het deksel van het rechterbatterijvakje terug op zijn plaats.
5. Druk op het deksel van het linkerbatterijvakje en schuif het deksel open in de richting van de pijl
[I].
6. Plaats de twee resterende 9-volt batterijen op de linten. Let hierbij op de polariteitsymbolen (+
en -).
7. Schuif het deksel van het linkerbatterijvakje terug op zijn plaats.
Let op:
• Verwijder altijd oude of zwakke batterijen; deze kunnen chemicaliën lekken die de elektronica
beschadigen.
• Haal de batterijen uit de detector indien u denkt deze een week of langer niet te gebruiken.
• Gooi oude batterijen onmiddellijk weg op een daartoe voorziene plek.
U kunt uw batterijen langer doen meegaan door een hoofdtelefoon te gebruiken ipv de ingebouwde
luidspreker.
c. Batterijen testen
De detector doet het niet of het volume is te zwak of valt moeilijk te regelen, of het apparaat werkt
niet goed of wijkt af: ga in dit geval eerst na of de batterijen niet ontladen zijn.
• Zet de MODE-knop op VLF (very low frequency). Zet BATT TEST op B1 om de batterijen in het
linkervak te testen; voor de batterijen in het rechtervak zet u BATT TEST op B2 [J].
• Zolang de wijzer van de vu-meter zich in de groene cijfers van de BATT-meter bevindt, zijn de
batterijen nog voldoende geladen. Zodra de wijzer zich buiten de groene cijfers bevindt, dient u
de batterijen te vervangen.
d. De meter bijregelen
• Zet de MODE-knop op OFF. Met een schroevendraaier kunt u nu de meter zodanig instellen dat
de wijzer op de schaalverdeling op 0 wijst [K, L].
e. Een hoofdtelefoon gebruiken
Met een stereo hoofdtelefoon (niet meegeleverd) kunt u ongestoord zoeken. Zo spaart u de
batterijen en hoort u ook beter kleine geluidsverschillen, w at leidt tot betere resultaten.
• Sluit de hoofdtelefoon (3,5 mm-stekker) aan op de daarvoor voorziene HEADPHONE-jack [M].
• Regel het volume met de volumeknop [M].
Opmerking: Bij gebruik van een hoofdtelefoon, wordt de interne luidspreker uitgeschakeld.
f. Luisterveiligheid
Om uw gehoor te sparen, raden we u aan de volgende regels na te leven:
Stel het volume in op een minimum voordat u begint te luisteren ; regel daarna het volume op
•
een voor u comfortabel niveau nadat u de hoofdtelefoon op uw oren geplaatst heeft.
• Vermijd extreem hoge volumeniveaus: deze kunnen blijvende gehoorstoornissen veroorzaken.
• Verhoog het volume niet meer na de initiële regeling. Het oor went aan het gekozen
volumeniveau, met als gevolg dat een voor het oor aanvaardbaar volumeniveau alsnog
schadelijk kan zijn.
g. Verkeersveiligheid
Draag geen hoofdtelefoon terwijl u zich in de verkeersdrukte bevindt. Hoewel sommige modellen
van hoofdtelefoons u tot in zekere mate ook het externe geluid laten horen (als u het volume op een
normaal niveau houdt), blijft het gevaarlijk om ze in het verkeer te gebruiken.
6. Werking
Uw CS150N maakt het onderscheid tussen ijzerhoudende en niet-ijzerhoudende metalen.
Voorbeelden van niet-ijzerhoudende metalen zijn goud, zilver, koper, platina, aluminium, lood en
zink.
Zodra de detector een metalen voorwerp opspoort, verandert de meterverwijzing, de NON-FERROUS
(non-ferro) of FERROUS (ferro) indicator gaat aan of uit, terwijl één van de drie tonen afgaat. De
detector reageert telkens anders afhankelijk van het soort metaal dat gevonden is. Hoe hoger de
toon klinkt, hoe sterker de detectie.
a. De detector klaarmaken
1. Zet OPERATE/BATT TEST op OPERATE.
2. Houd de detector in een comfortabele positie en zet de MODE-knop in de gewenste stand:
Selecteer VLF om de batterijstroomtoevoer te testen en regel vervolgens TUNE en GROUND. (Zie
ook “De detector fijn afstellen” en “De GROUND regelen”). Zet nu de knop op stand TR1 om
extreme verschillen tussen metalen, zoals tussen ijzer en goud, op te sporen. Het verschil tussen
06/09/2011 © Velleman nv
11
Page 12

CS150N
ijzer en goud is duidelijk zichtbaar op de meter (de wijzer wijst op “ferrous” i.g.v. ijzer en op
“non-ferrous” i.g.v. goud). Schakel vervolgens over naar TR2 voor een fijnere analyse zodat het
verschil tussen aluminium en goud bijvoorbeeld duidelijk hoorbaar wordt. (Zie ook
“DISCRIMINATIE regelen”) [N].
Volg de hieronder omschreven stappen om TUNE te regelen [O]:
1. Draai de VOLUME-regelaar in de “10 uur”- positie.
2. Zet de MODEknop op VLF.
3. Zet DISCRIMINATION, GROUND en SENSITIVITY in de middenstand.
4. Houd de zoekspoel op ongeveer 30 cm van het grondoppervlak en het metalen voorwerp
vandaan, terwijl u de rode knop op het handvat ingedrukt houdt en de TUNE-knop langzaam naar
links en naar rechts draait totdat de vu-wijzer (ongeveer) de nulstand bereikt. Laat dan de rode
knop los.
Tijdens het zoeken kunt u de detector fijnafstellen met de DISCRIMINATION-knop (zie “De detector
fijn afstellen”).
Opmerking: U kunt tijdens het zoeken altijd op de rode knop drukken om de wijzer terug op 0 te
zetten.
b. De detector testen en gebruiken
We raden u aan de detector vooraf uit te proberen op verschillende metaalsoorten om te leren hoe
de detector erop reageert. U kunt de detector zowel binnen als buiten uitproberen. Bij elk gebruik
dient de detector afgesteld te worden (zie “De detector fijn afstellen”).
1. Verwijder alle mogelijke metalen juwelen die u draagt zoals horloges, ringen enz. en plaats de
detector op een houten of plastic tafel.
2. Let de zoekspoel met de vlakke kant naar het plafond.
Opmerking: Test de detector binnenshuis nooit op een vloer, aangezien die in de meeste
gebouwen metaal bevat, wat het signaal van de geteste voorwerpen kan storen of overstemmen.
3. Zet MODE op TR1.
4. Beweeg een staal van het materiaal (zoals een gouden ring of een muntstuk) dat u met de
detector wilt opsporen op ongeveer 5 cm hoogte boven de zoekspoel heen en weer.
Opmerkingen:
• Zonder beweging vindt de zoekspoel niets. Beweeg dus het voorwerp aangezien de detector hier
stil ligt.
• Indien u de test met behulp van een muntstuk uitvoert, zal het gemakkelijker gevonden worden
indien u het met de vlakke kant evenwijdig aan de zoekspoel houdt.
• Zodra de detector het voorwerp gevonden heeft, lichten de NON-FERROUS en FERROUS
indicatoren op en beweegt de wijzer richting FERROUS of NON-FERROUS afhankelijk van de
opgespoorde metaalsoort. Ook bij niet-ijzerhoudende metalen klinkt een toon.
• Indien de detector geen metaal vindt, ga dan eerst even na of de batterijen opgeladen zijn en of
de zoekspoel behoorlijk is aangesloten.
c. Buiten testen en zoeken
1. Probeer buiten op de grond een plek vrij van metaal te vinden.
2. Plaats een staal van het testmateriaal (bv. gouden ring, muntstuk) op de grond. (Als u van plan
bent waardevol metaal zoals goud voor de test te gebruiken, markeer dan de plek waar u het
voorwerp legt op de een of andere manier, zodat u het later gemakkelijk terugvindt. Vermijd dan
ook plaatsen met hoog gras of onkruid).
3. Zet de MODE-knop op TR1.
4. Houd de zoekspoel in de horizontale stand op ongeveer 2 à 5 cm afstand van de grond en
onderzoek langzaam de plek waar u het metalen voorwerp heeft achtergelaten dmv een
zijdelingse, slingerende beweging [Q].
5. Dezelfde plek op meerdere metalen voorwerpen doorzoeken.
Heeft u metaal gevonden, wacht dan enkele seconden na het signaal vooraleer verder te zoeken
om de detector toe te laten terug te keren naar de nulstand. (Of druk op de rode knop van het
handvat om de wijzer weer naar het midden van de vu-meter te brengen).
d. Slingertips:
• Hou de zoekspoel evenwijdig met de bodem en zwaai hem niet als een slinger: dit kan aanleiding
geven tot foutieve interpretaties [R].
• Maak een langzame slingerbeweging - haast doet u voorwerpen missen.
• Bij een detectie klinkt een toon en de wijzer geeft het soort metaal aan.
Als de detector metaal gevonden heeft, schakel MODE TR1 over naar TR2 om de kwaliteit van
het gevonden metaal nader te kunnen bepalen.
• Het lukt de detector niet het staaltje te identificeren: u houdt de zoekspoel waarschijnlijk niet in
de juiste positie.
06/09/2011 © Velleman nv
12
Page 13

CS150N
Opmerkingen:
• Wanneer u waardevolle metalen voorwerpen vindt, klinkt een intens signaal. Wordt het signaal
niet herhaald, ook niet nadat u de zoekspoel enkele keren over en weer boven het doel heeft
laten gaan, dan is de vondst waarschijnlijk waardeloos.
• Vervuilde grond, elektrische interferenties of grote, grove stukken afvalmetaal kunnen
misleidende signalen veroorzaken. Deze herkent u meestal aan de gebroken of niet
reproduceerbare signalen die vanuit de detector afgaan.
e. De detector fijn afstellen
Wanneer u met uw detector vertrouwd bent geraakt, kunt u hem fijnregelen om selectiever te gaan
zoeken.
1) SENSITIVITY regelen [S]
Door de SENSITIVITY (gevoeligheid) op MIN. of MAX. of er tussenin te regelen, zorgt u ervoor
dat de zoekspoel ook voorwerpen kan opsporen die op verschillende dieptes in de grond liggen.
Zet SENSITIVITY op het maximum om de grond zo diep mogelijk te kunnen doorzoeken. Begint
de detector te “ratelen”, dan kunt u dit geluid stoppen door de gevoeligheid (SENSITIVITY) een
eind terug te draaien.
2) GROUND regelen [T]
Het zal even duren voor u de regeling van de GROUND-regelaar onder de knie hebt, maar het is
voor de precisie wel heel belangrijk.De GROUND-regelaar schakelt immers valse signalen door
ertshoudende grond uit.
1. Schakel over naar MODE VLF en breng de zoekspoel tot op ongeveer 1 à 4 cm van de
grond.
2. Wijkt de wijzer naar rechts uit, draai dan GROUND naar links. Gaat de wijzer naar links,
draai GROUND naar rechts.
3. Breng de zoekspoel tot op 30 cm van de grond en druk op de rode knop op het handvat.
De wijzer komt weer in het midden te staan.
4. Herhaal stappen 1 - 3 tot de wijzer in het midden blijft telkens als u de zoekspoel dichter
bij de grond brengt.
Als GROUND eenmaal is afgesteld, is de detector afgestemd op de grondeigenschappen van deze
locatie. U hoeft dit niet meer te regelen, tenzij u besluit een andere plek te onderzoeken.
3) DISCRIMINTATIE regelen
Discriminatie slaat op het vermogen om verschillende soorten metaal te onderscheiden. Met de
DISCRIMINATION-knop bepaalt u in hoeverre de detector het onderscheid maakt tussen soorten
ijzer- en niet-ijzerhoudende metalen.
Als de MODE-knop op stand TR2 staat, begin dan met de DISCRIMINATION-knop in het midden.
Pas de positie van de knop aan terwijl u zoekt. Hoe hoger de DISCRIMINATION, hoe beter het
onderscheid tussen bijvoorbeeld grote stukken aluminium en goud. Maar kleinere, waardevolle
voorwerpen, zoals muntstukken of ringen, zouden wel eens overzien kunnen worden. Naarmate
u DISCRIMINATION hoger zet zal de detector - in deze volgorde - stukjes zilverpapier, dikkere
folio’s en metalen voorwerpen zoals treklipjes afkomstig van aluminium blikjes negeren.
Opmerking: U dient DISCRIMINATION wel telkens opnieuw af te stellen als u van plaats
verandert, want elke locatie biedt nieuwe uitdagingen.
f. Misleidende signalen
De grote gevoeligheid van uw detector kan soms aanleiding geven tot misleidende interferenties met
afvalmateriaal en andere bronnen. De beste manier om aan dit soort misleidende signalen het hoofd
te bieden, is alleen te graven naar doelwitten die een sterk, herhaald signaal uitzenden terwijl u de
zoekspoel heen en weer zwaait boven de grond. De ervaring zal u leren hoe u toevallige signalen
van vaste, reproduceerbare signalen kunt onderscheiden.
U kunt dit soort problemen sterk reduceren door slechts kleine oppervlakten tegelijkertijd te
onderzoeken. Voer hierbij trage en korte, elkaar overlappende zwaaibewegingen uit.
g. Zoektips
Geen enkele metaaldetector is 100% betrouwbaar. Talrijke factoren kunnen de reacties van de
detector bij het opsporen van metaal beïnvloeden, zoals:
• De hoek waarin het voorwerp zich in de grond bevindt.
• De diepte waarop het voorwerp zich bevindt.
• Het aandeel aan ijzer dat het voorwerp bevat.
• De omvang van het voorwerp.
h. Een doelwit bepalen
Door uw doelwit zo precies mogelijk te bepalen, maakt u het opgraven makkelijker.
Een precieze bepaling vergt enige ervaring. We raden dan ook deze praktijkervaring op te doen door
te zoeken en opgravingen te doen op uw eigendom voor u andere plekken gaat ontdekken.
06/09/2011 © Velleman nv
13
Page 14

CS150N
Soms wordt de precieze bepaling van het doelwit bemoeilijkt door de slingerrichting. Om het doelwit
preciezer te kunnen bepalen, kunt u proberen de richting van de slingerbeweging te veranderen.
Volg de volgende stappen om het doelwit te bepalen.
1. Wanneer de detector een begraven doelwit ontdekt, blijf de zoekspoel dan over het doel
bewegen met steeds kleinere zijdelingse slingerbewegingen.
2. Markeer de exacte plek op de grond waar de detector een geluidssignaal geeft.
3. Houd de zoekspoel onmiddellijk stil boven deze plek. Beweeg de zoekspoel vervolgens in een
voorwaartse beweging van u vandaan en keer dan terug. Herhaal dit een aantal keren.
Markeer terug de exacte plek waar de detector een geluidssignaal laat horen.
4. Herhaal stappen 1 tot en met 3 nu in een hoek van 90° ten opzichte van de oorspronkelijke
zoekrichting, waardoor u een patroon in de vorm van een X beschrijft. Het doelwit zal zich
onmiddellijk onder de X bevinden daar waar het signaal het luidst klinkt [U].
Opmerkingen:
• Indien een plek zoveel afval bevat dat dit aanleiding geeft tot misleidende signalen, vertraag en
verkort dan de slingerbewegingen.
• Recent begraven muntstukken kunnen anders reageren dan reeds langer begraven muntstukken
omwille van de oxidatie bij deze laatste.
• Bepaalde soorten spijkers, schroeven, bouten en andere ijzeren voorwerpen (zoals oude
flesdoppen) oxideren en creëren een “kringlicht”-effect. Dit “kringlicht”-effect wordt veroorzaakt
door een mengeling van natuurlijke stoffen in de grond en van de oxidatie van verschillende
metalen. Door deze mengeling van metalen kan het voorkomen dat signalen niet op een ‘vaste’
plaats weerklinken. Dit effect maakt het dan ook bijzonder moeilijk om dergelijke voorwerpen
precies te situeren. (Zie “De detector fijnafstellen”).
7. Zorg en onderhoud
Maak de detector af en toe schoon met een vochtige doek zodat hij er ni euw bl ijft uitzien.
Gebruik geen bijtende chemische producten, reinigingsoplossingen of sterke detergenten
om de detector te reinigen.
• Wijziging van of geknoei met interne onderdelen van de detector kunnen een slechte werking
van de detector veroorzaken en het recht op garantie doen vervallen.
• De meegeleverde zoekspoel is waterdicht en kan gedompeld worden in zowel zoet als zout
water. Zorg ervoor dat er geen water in de behuizing van de detector komt. Indien u de
zoekspoel gebruikt in zout water, dient u de zoekspoel achteraf te reinigen met zoet water om
corrosie van de metalen onderdelen tegen te gaan.
8. Storingen verhelpen
Indien uw detector niet naar behoren functioneert, volg dan onderstaande suggesties om de
problemen te verhelpen.
PROBLEEM SUGGESTIE
De detector toont of laat een
verkeerd signaal horen
De detector kan valse signalen geven als hij geoxideerde metalen
Wanneer de detector het
doelwit ontdekt, toont de
detector niet de juiste
metaalsoort op het scherm,
of laat hij meer dan een
soort toon horen.
Misschien beweegt u de zoekspoel te snel of niet in de juiste positie.
Maak tragere slingerbewegingen en houd de zoekspoel in de juiste
positie. Zie “De detector testen en gebruiken” en “Het doelwit
bepalen”.
vindt. Probeer het doelwit vanuit verschil lende zoekhoeken (zie “Het
doelwit bepalen”) nader te bepalen. Indien de detector niet elke keer
hetzelfde signaal toont en laat horen, dan bestaat het doelwit
waarschijnlijk uit zeer zwaar geoxideerd metaal.
Er kunnen zich meerdere doelwitten bevinden op de plek die u
doorzoekt.
Het doelwit kan gemaakt zijn uit een metaal dat de detector niet
kent.
Indien het doelwit erg geoxideerd is, kan het gebeuren dat de
detector niet de juiste metaalsoort weergeeft. Dit is geen foutieve
werking van de detector.
06/09/2011 © Velleman nv
14
Page 15

/
9
.
escVoha
e
o© VeAllervme
.
uDe
oEn
o
o
vpa
rVuSé
iTu
oNo
s
e
vhoo
mgew
w
g
t
d
S
v
i
e
d
u
n
a
y
e
e
u
e
a
t
e
t
S
e
n
u
b
r
q
c
t
L
n
e
w
e
g
n
e
g
n
v
r
n
e
e
c
c
d
e
c
o
e
e
y
c
e
a
d
s
o
e
n
r
o
r
p
e
o
e
e
t
h
a
a
e
s
e
-
a
r
r
a
d
r
c
e
r
n
e
c
p
s
m
o
t
i
a
m
a
r
r
m
v
u
s
3
b
±
o
i
+
+
g
s
m
d
n
g
r
g
m
e
x
u
t
c
e
n
d
s
o
n
d
c
é
î
(
e
a
m
c
m
c
e
a
m
o
e
a
m
e
v
e
d
d
p
d
d
u
e
v
n
e
.
u
é
d
a
e
g
u
s
a
é
e
n
v
u
Techni
G
bruik dit
hade of k
or meer i
ndleidin
D
informa
v
orafgaan
AUTEUR
lleman n
e wereldw
an over t
dium zon
che spe
vo
ding
fre
quentie
ge
oeligheid
rbare dis
(3
tonen)
we
rktempera
af
etingen (
icht
toestel e
etsuren
nformati
, zie ww
ie in dez
e kennis
RECHT
heeft he
jde rechte
nemen, t
er vooraf
cificatie
riminatie
uur
x B x H)
kel met
bij (verk
omtrent
.vellema
handleid
eving.
t auteurs
voorbeh
kopiëren,
aande sch
laag
gemiddel
hoog
riginele a
erd) geb
dit produ
.eu.
ing kan t
echt voo
uden. Het
te vertale
iftelijke to
CS150N
3 x 9V15KHz
16cm v
25mm,
400Hz
700Hz
1500Hz
0°C ~ 4
92~121
±1.26k
ccessoire
uik van d
t en de
allen tij
deze ha
is niet toe
, te bewe
stemmin
atterij (ni
2KHz
or een mu
n 'all meta
60Hz
105Hz
+ 225Hz
0°C
x 20 x 18.
. Vellem
it toestel.
eest rece
e worden
dleiding.
estaan o
ken en op
van de re
t meegele
ntstuk van
l'-modus)
5cm
n nv is ni
nte versi
gewijzig
deze han
te slaan o
hthebben
.)
€ 2 (Ø
et aanspr
van dez
zonder
leiding of
een elekt
e.
kelijk vo
edeelten
ronisch
or
1
Introd
A
x réside
s inform
pr
tection d
cas de q
N
us vous r
se
rvice de l’
nsulter vo
co
rtaines dir
ce
blèmes e
pr
A
ec votre C
rtout. Le d
Le
détecteur
ise écout
P
mètre - i
lection a
af
n de facilit
be régla
Di
sque che
te: Le dis
N
te: Votre
Ce s
peut
piles
trait
servi
ction
ts de l'U
tions en
mbole su
polluer l'e
éventuell
ra l’appar
ce de recy
l’environn
estions,
mercions
ppareil. Si
re revend
ctives de
les défaut
150N, v
étecteur d
possède l
ur - perm
dique le t
dio trois
er l'identifi
le - perm
cheur ét
ue cherch
détecteur
ion euro
ironnem
l'appareil
vironnem
s) parmi l
il en ques
lage local.
ement.
ontacter
e votre ac
l’appareil
ur. La gar
ette notic
s qui en ré
us pouvez
métaux s
s caractéri
et la conn
pe probab
tonalités
ation de l
t d'adapte
nche - pe
eur est ét
e métaux
Noti
éenne
ntales im
u l'emball
nt. Ne pa
s déchets
ion. Renv
Il convien
les autor
at ! Lire l
été endo
ntie ne s’
et votre
sultent.
recherche
électif est
tiques sui
xion d'éco
le de méta
émet des
cible.
la longue
met l'utilis
nche, mai
nécessite
e d’e
ortantes
age indiqu
jeter un a
unicipau
yer les éq
de respe
tés local
présente
magé pe
pplique pa
evendeur
les pièce
ultifoncti
antes:
uteurs (no
l détecté.
tonalités
r du déte
ation du d
pas le bo
piles 9V
ploi
concerna
que l’éli
ppareil éle
non sujet
ipements
ter la régl
s pour éli
notice atte
dant le tr
s aux dom
éclinera t
, reliques,
ns et facil
fournis)
istinctes p
teur pour
tecteur so
tier de co
non fourni
nt ce pro
ination d’
trique ou
s au tri sél
usagés à v
mentation
mination.
ntivement
nsport, ne
ages sur
ute respo
bijoux, or
à utiliser
u détecte
our les diff
le confort
us l'eau.
mande.
s).
uit
n appareil
électroniq
ctif ; une
otre fourni
locale rel
avant la m
pas l’insta
enus en n
sabilité po
t argent à
r.
rents typ
'utilisation
en fin de
e (et des
déchèterie
seur ou à
tive à la
ise en
ller et
gligeant
ur les
peu près
s de méta
.
ie
un
x,
06
09/2011
15
© Vellema
nv
Page 16

/
2
.3.
e
.
oà s
.
e
ade
gn
d
e
JDAN
p
v
e
n
r
d
e
m
s
d
d
m
ê
é
T
f
a
d
t
z
s
e
o
o
a
l
e
é
[
é
c
u
t
O
é
e
e
e
m
s
s
é
c
n
c
v
c
c
e
e
e
d
z
e
n
x
d
d
N
s
c
e
d
n
s
r
r
n
i
é
d
b
d
r
a
é
s
t
t
o
é
s
o
m
d
é
u
e
e
x
I
e
u
t
f
o
e
a
u
q
e
e
é
s
s
u
n
d
e
n
d
U
r
a
s
o
o
n
e
d
m
s
a
d
e
v
r
o
u
a
t
n
p
d
m
J
d
a
o
s
u
e
s
e
a
s
é
r
p
é
s
e
e
p
é
c
t
h
N
i
n
c
E
e
t
u
c
o
a
n
m
m
p
.
à
q
t
ê
e
o
v
e
s
M
e
m
r
n
r
e
e
s
a
m
s
e
è
r
r
h
é
e
n
e
s
e
s
s
Consi
Gar
Att
Veill
NE
au
es de s
er le déte
ntion : L’
er à être a
AMAIS T
GEREUX.
lus vite.
curité
teur hors
tilisation
tentif au t
UCHER
Marquer
e la porté
’un casqu
rafic et au
I MUNIT
oigneus
CS150N
des enfa
d’écoute
signaux d
ON NI A
ment l’en
ts et des
ans un en
’avertisse
TRES OB
droit de
ersonnes
roit publi
ents.
ETS POT
écouvert
on autori
peut être
NTIELLE
et notifi
ées.
dangereus
ENT
r la polic
e.
Directi
S
référer à l
•
Protéger l
l’opératio
•
Tenir le th
•
Se familia
Toute mo
•
N’utiliser l
•
circuits, d
•
Les dom
garantie.
La garanti
•
Respecter
•
Retirer le
•
intérieur.
Gar
liqui
Man
boîti
Gar
pré
N'ut
extr
et d
AT
s’ef
Ne j
es gén
a garanti
thermom
.
ermomètr
iser avec l
ification d
e thermo
s brûlure
ages occa
e ne s’appl
les lois et
piles du d
ez le déte
des peuve
iez le déte
ers et pro
ez le déte
aturée de
ilisez et ne
mes peuv
former ou
ENTION :
ectue tand
mais per
rales
de servi
ètre contr
à l’écart
e fonction
l’appareil
ètre qu’à
, des élect
ionnés pa
ique pas e
la régleme
tecteur s’
teur de m
t contenir
teur avec
oquer un
teur à l'a
s pièces.
rangez le
ent diminu
faire fond
Des affich
is que le d
er des pile
e et de q
les chocs
e la pouss
ement de
est interdi
a fonction
ochocs, e
des modi
cas de d
ntation en
l n’est pas
taux au s
des minér
douceur et
ysfonction
ri de la po
étecteur
er la duré
e les parti
ges erron
tecteur es
et ne pa
alité Vell
et le traite
ière, l’hum
l’appareil
te pour de
prévue. T
c. Un usag
ications à l
mmages
vigueur.
utilisé. L’a
c. S'il est
ux provoq
précautio
nement d
ssière et
u'à des te
de vie de
s en plast
s peuvent
t encore al
les jeter
eman® à l
avec circ
idité et de
vant de l’
raisons d
ut autre u
e impropr
’appareil p
ccasionné
cide des pi
mouillé, s
uant la co
. Le jeter
l'appareil.
e la salet
pérature
pièces él
ique.
apparaîtr
lumé. Ne
u feu. Ten
fin de ce
nspection
températ
tiliser.
sécurité.
age peut
annule d'
r le client
par un us
les peut e
chez-le im
rosion des
eut endo
, pouvant
normales
ctroniques
lorsque le
as recharg
ir la pile
te notice.
pendant l’i
res extrê
auser des
ffice la ga
ne tombe
ge en mili
dommage
médiatem
circuits él
mager le
rovoquer
Des temp
, endomm
remplace
er des pile
l’écart d
nstallation
es.
courts-
antie.
t pas sous
eu salé.
le circuit
nt. Les
ctronique
circuits et
une usure
ératures
ger les pil
ent
alcalines.
s enfant
et
la
.
s
.
4
Code
V
tre condui
uivre/
•
Demande
Respectez
•
Respectez
•
Ne détrui
•
l'objet qu
Laissez la
•
Utilisez v
•
Ne jetez t
•
trésors su
5
Prépar
S
référer à
a.
Assembl
ssemblag
L'
ssous:
1.
Tournez l'
desserre
06
09/2011
e Bonn
e influenc
toujours l
les droits
les lois na
ez jamais
vous ave
campagne
tre détect
ut déchet
ivant.
tion
’illustratio
age
du détect
crou de fi
A].
Condui
la réputa
a permissi
t la propri
tionales, f
es trésor
trouvé, c
et la flore
ur unique
que dans
à la page
eur est ais
ation du t
e de Ch
ion de tou
n avant d'
été d'autr
dérales et
historique
ntactez u
dans l'état
ent dans
es endroit
2 de cette
et ne req
be dans l
asseur
les chass
effectuer
i.
locales du
s ou arché
musée o
où elle ét
es endroi
s prévus à
notice.
uiert aucu
sens des
16
e Tréso
urs de tr
os recherc
ant votre
logiques.
une socié
it. Rebouc
s sûrs.
cet effet.
outil part
aiguilles d'
rs
sor. Voici
hes sur un
hasse au
Si vous n'
é d'histoir
ez tout tr
e le laisse
culier. Sui
une montr
uelques r
site.
résor.
tes pas ce
dans vot
u que vou
z pas au c
ez la proc
jusqu'à c
gles de ba
tain de
e région.
s creusez.
asseur de
dure ci qu'il se
© Vellema
e
nv
Page 17

CS150N
2. Allongez ou raccourcissez le tube de façon à ce que lorsque vous vous tenez debout muni de
votre détecteur, le disque chercheur se trouve à une distance d'environ 1 à 5 cm (1/2 à 2 pouces)
au-dessus du niveau du sol lorsque votre bras est détendu le long du corps [B].
3. Tournez l'écrou de fixation du tube dans le sens inverse à celui des aiguilles d'une montre pour le
fixer en place.
4. Dévissez le bouton sur le disque chercheur et retirez les boutons et le connecteur. Insérez le tube
et alignez les trous sur le support du disque chercheur et sur le tube. Enfoncez le connecteur
dans les trous et serrez le bouton`[C].
5. Enroulez le câble du disque chercheur autour du tube. Laissez suffisamment de mou dans le câble
pour vous permettre de régler le disque lorsque vous procédez à des recherches sur des terrains
irréguliers [C].
6. Insérez la fiche du disque chercheur dans la prise du disque chercheur sur le boîtier de
commande du détecteur. Veillez à ce que les contacts de la fiche correspondent bien aux trous de
la prise [D].
Précautions:
• La fiche du disque chercheur ne s'adapte que d'une seule façon dans le connecteur. Ne forcez
pas la fiche, car vous risqueriez de l'endommager.
• Pour déconnecter le câble du disque chercheur du détecteur, saisissez la fiche et retirez-la du
connecteur. Ne tirez jamais sur le câble.
7. Desserrez les boutons à l'extrémité du disque chercheur, puis réglez le disque chercheur à l'angle
souhaité. (Le disque chercheur doit être parallèle au sol). Resserrez les boutons, juste assez pour
empêcher le disque chercheur de pivoter ou de branler [E].
Précaution: Ne serrez pas excessivement le disque chercheur et n'utilisez pas d'outils comme
par exemple des tenailles pour le serrer.
8. Desserrez le bouton de la base de la poignée, insérez le support pour bras et resserrez le bouton
[F].
b. Installer les piles
Attention:
• N'utilisez que des piles neuves aux dimensions requises et du type recomman d é.
• Ne mélangez pas de batteries neuves et usagées, ni de types différents de batteries (batteries
standard, alcalines ou rechargeables de différentes capacités).
1. Si le détecteur est allumé, placez-le en MODE OFF. (éteint) [G].
2. Enfoncez le couvercle du compartiment batteries de droite et retirez-le en le glissant dans la
direction de la flèche [H].
3. Placez une batterie 9 volt dans le compartiment des batteries au-dessus du ruban, en respectant
les symboles de polarité (+ et -) indiqués à l'intérieur.
4. Replacez le couvercle du compartiment batteries de droite.
5. Enfoncez le couvercle du compartiment batteries de gauche et retirez-le en le glissant dans la
direction de la flèche [I].
6. Placez deux batteries 9 volt dans le compartiment des batteries au-dessus des rubans, en
respectant les symboles de polarité (+ et -) indiqués à l'intérieur.
7. Replacez le couvercle du compartiment batteries de gauche.
Précautions:
• Retirez toujours les piles plates ou presque plates; les piles peuvent faire couler des agents
chimiques pouvant détruire les pièces électroniques.
• Si vous n'avez pas l'intention d'utiliser votre détecteur pendant plus d'une semaine, retirez les
piles.
• Débarrassez-vous rapidement et correctement des piles usagées.
Vous allongerez la vie des piles en utilisant des écouteurs, qu i consomment moins que l’haut-parleur
intégré.
c. Test des Piles
Si le détecteur ne s'allume pas, émet un volume faible,ne se règle pas correctement, fonctionne de
manière irrégulière ou se décale, testez les piles.
• Positionnez l'appareil en MODE VLF (very low frequency: très basse fréquence). Pour tester les
piles du compartiment gauche, mettez BATT TEST sur B1. Pour tester les piles du compartiment
droit, sélectionnez B2 [J]. Si le pointeur se met entre 3 et 5 (zone verte), les piles sont
suffisamment puissantes. Sinon, remplacez-les.
d. Réglage du VUmètre
• En MODE OFF, utilisez un tournevis pour aligner le pointeur au 0 de l'échelle [K, L].
06/09/2011 © Velleman nv
17
Page 18

CS150N
e. Utiliser un casque
Connectez des écouteurs stéréo (non fournis) au détecteur pour l'écouter en privé. L'utilisation
d'écouteurs économise également les piles et facilite l'identification de changements sonores subtils,
donnant ainsi de meilleurs résultats de détection.
• Pour connecter des écoute urs a u détecte ur, insér ez la fic he éco uteur s 1/8 de po uce da ns la prise
HEADPHONE [M].
• Réglez le niveau de volume avec le réglage de volume [M].
Note: Le microphone intégré du dé tecteur se dé conne cte lorsque vous connec tez de s écou teurs.
f. Ecouter en sécurité
Pour protéger votre écoute, suivez les directives ci-dessous lorsque vous utilisez des écouteurs:
• Instaurez le volume au plus bas avant de commencer l'écoute et réglez-le ensuite à un niveau
confortable.
• N'instaurez pas de niveaux de volume trop élevés. Une écoute prolongée à haut niveau sonore
risque de provoquer des lésions auditives irréversibles.
• Une fois le volume réglé, ne l'augmentez plus. Vos oreilles s'adaptent au niveau du volume de
sorte qu'une augmentation du volume ne provoque pas d'inconfort mais endommage cependant
votre capacité auditive.
g. Sécurité routière
N'utilisez pas vos écouteurs lorsque vous procédez à des recherches à proximité de zones de trafic
intense. Bien que certains écouteurs aient été conçus pour laisser passer certains sons extérieurs
lorsque des niveaux de volume normaux sont instaurés, le danger du trafic subsiste toujours.
6. Fonctionnement
Votre CS150N fait la distinction entre les métaux ferreux et non ferreux. Lorsque le détecteur capte
un objet métallique, l'affichage du vumètre est modifié, l'indicateur NON FERREUX ou FERREUX
s'allume ou s'éteint, et une des trois tonalités est produite. La réponse dépend du type de métal
détecté. Plus la tonalité est aiguë, plus la détection est forte.
a. Préparer le détecteur
1. Mettez OPERATE/BATT TEST sur OPERATE.
2. Tenez le détecteur confortablement et puis mettez le bouton MODE dans la position souhaitée.
Sélectionnez VLF pour tester l'état des batteries et réglez TUNE et GROUND. (Voir "Affinage du
réglage" et "Réglage du terrain"). Sélectionnez TR1 pour détecter des différences extrêmes dans
les métaux, comme entre le fer et l'or. La différence entre le fer et l'or est indiquée sur le
vumètre (fer dans la section ferreux, or dans la section non ferreux). Sélectionnez TR2 pour
détecter des différences plus subtiles entre les métaux, comme par exemple entre l'aluminium et
l'or (voir "Réglage de la DISCRIMINATION") [N].
Suivez la procédure ci-dessous pour le réglage du détecteur (TUNE) [O].
1. Tournez le VOLUME en position 10 heures.
2. Mettez DISCRIMINATION en position moyenne.
3. Maintenez le disque chercheur à environ 30 cm (1 pied) du sol et de tout objet métallique,
maintenez le bouton rouge de la poignée enfoncé et tournez lentement le bouton TUNE de gauche
à droite jusqu'à ce que le pointeur du vumètre reste sur ou proche de 0, puis relâchez le bouton.
Pendant la recherche, vous pouvez affiner le réglage du détecteur au moyen des autres boutons.
Note: Enfoncez le bouton rouge de la poignée à n'importe quel moment pour remettre le pointeur à
0.
b. Tester et utiliser le détecteur
Pour vous familiariser aux réactions du détecteur en présence de métaux différents, il est conseillé
de le tester avant de l'utiliser pour la première fois. Vous pouvez effectuer ce test soit à l'intérieur,
soit à l'extérieur. Il faudra cependant affiner le réglage du détecteur avant chaque usage (voir
“Affinage dur réglage”).
1. Otez tous objets métalliques (montres, bagues…) et mettez le détecteur sur une table en bois ou
en plastique.
2. Réglez l'angle du disque chercheur de façon à ce que la partie plane soit dirigée vers le plafond
[P].
Note: Ne testez jamais le détecteur sur un plancher à l'intérieur d'un bâtiment à étages
multiples. La plupart de ces bâtiments comportent une armature métallique dans le plancher, qui
peut interférer avec les objets que vous testez ou masquer complètement le signal.
3. Placez le bouton MODE sur TR1.
4. Secouez un échantillon du matériau que vous souhaitez trouver au moyen du détecteur (par
exemple une bague en or ou une pièce) à environ 5 cm (2 pouces) au-dessus du disque
chercheur.
06/09/2011 © Velleman nv
18
Page 19

CS150N
Notes:
• Le disque chercheur ne détecte rien sans mouvement. Vous devez bouger l'objet, puisque vous
n'effectuez pour l'instant aucun balayage avec le détecteur.
• Si vous utilisez une pièce, le détecteur la détectera plus facilement si vous la présentez côté plat
(pas le bord) parallèle au côté plat du disque chercheur.
• Si le détecteur détecte le matériau, les indicateurs NON FERREUX et FERREUX clignotent et le
pointeur se positionne sur FERREUX ou NON FERREUX tandis que le détecteur détermine le type
de métal détecté. S'il détecte un métal non ferreux, il émet également une tonalité.
• Si le détecteur ne détecte pas le matériau, vérifiez l'état des piles et la connexion du disque
chercheur.
c. Test à l’extérieur et Utilisation
1. Trouvez un endroit à l'extérieur où le sol est dépourvu de métal.
2. Placez un échantillon du matériau que vous souhaitez trouv er au moyen du détecteur (par
exemple une bague en or ou une pièce) sur le sol. (Si vous utilisez un objet de valeur, marquez
l'endroit où vous le placez de façon à pouvoir le retrouver par la suite. Ne le placez pas dans les
hautes ou mauvaises herbes).
3. Mettez MODE sur TR1.
4. En maintenant le disque chercheur à environ 2 à 5 cm (1-2 pouces) au-dessus du sol, déplacez
lentement le disque chercheur dans la zone où vous avez placé l'échant illon, en effectuant un
mouvement de balayage latéral [Q].
5. Essayez de trouver d'autres métaux dans la zone.
Lorsque vous trouvez un objet métallique, attendez quelques secondes après l'arrêt de la tonalité
avant de continuer, afin de permettre la remise à zéro du détecteur (ou enfoncez le bouton rouge
de la poignée pour repositionner le pointeur au centre du vumètre).
d. Astuces concernant le balayage avec le disque chercheur:
• N'utilisez jamais le disque chercheur comme un pendule. Si vous le soulevez pendant ou à la fin
d'un balayage, des indications fausses sont possibles [R].
• Procédez lentement - si vous vous dépêchez, vous manquerez des cibles.
• Si le détecteur détecte l'objet, il émet une tonalité et le pointeur indique le type de métal trouvé.
Passez en MODE TR1 ou TR2 pour déterminer la qualité du métal.
• Si le détecteur ne détecte pas le matériau, assurez-vous que vous effectuez un mouvement
correct avec le disque chercheur.
Notes:
• Le détecteur répond par un signal intense lorsqu'il détecte des objets métalliques de très grande
valeur. Si le signal n'est pas répété lorsque vous passez plusieurs fois au-dessus de la cible, il s'agit
probablement d'un objet sans valeur.
• Des signaux erronés peuvent être provoqués par des terrains pleins de déchets, des interférences
électriques ou des objets métalliques volumineux, irréguliers et sans valeur. Ces signaux erronés
sont généralement des signaux intermittents ou non répétés.
e. Affinage du réglage
Quand vous avez compris le fonctionnement de votre détecteur, affinez le réglage pour améliorer
vos trouvailles.
1) Réglage de la sensibilité (SENSITIVITY) [S]
Pour régler la capacité du disque chercheur à détecter des objets à différentes profondeurs
dans le sol, positionnez le bouton SENSITIVITY entre MIN ET MAX. Pour une profondeur de
détection maximum, mettez le bouton. Si le détecteur émet un bruit de "bavardage", réduisez
la sensibilité jusqu'à ce que ce "bavardage" s'arrête.
2) Réglage du terrain (GROUND) [T]
Le réglage du terrain (GROUND) prend un certain temps, mais il est primordial pour un
fonctionnement exact. GROUND évite les signaux erronés provenant de terrains minéralisés.
1. Mettez MODE sur VLF et abaissez le disque chercheur à 1 à 4 cm (1/2 à 2 pouces) au-dessus
du niveau du sol.
2. Si le pointeur va vers la droite, tournez GROUND vers la gauche et vice versa.
3. Relevez le disque chercheur à environ 30 cm (1 pied) du sol et enfoncez le bouton rouge de
la poignée. Le pointeur se remet au centre.
4. Répétez les points 1 à 3 jusqu'à ce que le pointeur reste au milieu quand vous baissez le
disque chercheur.
Une fois GROUND réglé, le détecteur est adapté au type de sol du site spécifique. Ne modifiez
le réglage que si vous vous rendez sur un site différent.
06/09/2011 © Velleman nv
19
Page 20

CS150N
3) Réglage de DISCRIMINATION
La discrimination est la capacité du détecteur de différencier les types de métaux. Le réglage
de DISCRIMINATION du détecteur détermine si le détecteur fait la différence entre différents
types de métaux ferreux et non ferreux.
Vous pouvez régler DISCRIMINATION au minimum (à fond dans le sens inverse à celui des
aiguilles d'une montre), au maximum (à fond dans le sens des aiguilles d'une montre), ou à
un niveau intermédiaire. Au fur et à mesure que vous augmentez le niveau, le détecteur
commence par ne pas détecter les petits objets en papier aluminium, ensuite les films épais,
et finalement les objets métalliques comme les ouvertures de canettes en aluminium.
Note: Chaque fois que vous utilisez le détecteur dans une zone différen te, vous devez refaire
un réglage de la DISCRIMINATION. Chaque site de recherche présente de nouveaux
challenges.
f. Signaux erronés
Etant donné que votre détecteur est extrêmement sensible, des déchets et autres sources
d'interférence peuvent provoquer des signaux confus. La solution pour ce type de signaux est de ne
creuser qu'en cas de cibles émettant un signal fort, répétitif. Lorsque vous déplacez le disque
chercheur d'avant en arrière au-dessus du sol, apprenez à reconnaître la différence entre les signaux
émis au hasard et les signaux stables et répétitifs.
Pour réduire les signaux erronés lorsque vous cherchez sur des terrains munis de nombreux
déchets, ne parcourez que des petites zones à la fois en effectuant un balayage lent, avec de brefs
chevauchements.
g. Astuces pour la détection
Aucun détecteur n'est sûr à 100%. Différentes situations influencent la détection de métaux. La
réaction du détecteur dépend d'un nombre de choses:
• L'angle de l'objet dans le sol.
• La profondeur de l'objet.
• La quantité de fer dans l'objet.
• La taille de l'objet.
h. Localiser une cible
La localisation précise d'une cible facilite le creusage. La localisation précise requiert de
l'entraînement, nous vous suggérons de vous entraîner à rechercher et déterrer de petits objets
métalliques vous appartenant avant d'entamer des recherches en d'autres endroits. Certaines cibles
sont difficiles à localiser avec précision en raison de la direction du balayage. Essayez de changer la
direction du balayage pour localiser une cible.
Suivez la procédure ci-dessous pour localiser une cible.
1. Lorsque le détecteur détecte une cible enterrée, poursuivez le balayage au moyen du disque
chercheur au-dessus de la cible suivant un mouvement latéral rétrécissant.
2. Notez visuellement l'endroit exact du terrain où le détecteur émet un signal sonore.
3. Arrêtez le disque chercheur directement au-dessus de cet endroit. Eloignez-le ensuite de vous
vers l'avant, puis ramenez-le vers vous et répétez ce mouvement un certain nombre de fois.
Notez visuellement l'endroit exact du terrain où le détecteur émet un signal sonore.
4. Répétez les points 1 à 3 à angle droit par rapport à la ligne de recherche initiale, en formant un
"X". La cible se situera directement sous le "X" au point où la réponse est la plus forte [U].
Remarque:
• Si la zone recherchée comporte tellement de déchets que vous obtenez des signaux erronés,
effectuez un balayage plus lent et plus court.
• Il se peut que les pièces enterrées récemment ne produisent pas la même réponse que celles
enterrées depuis longtemps en raison du phénomène d'oxydation.
• Certains clous, écrous, boulons et autres objets en fer (comme les anciennes capsules de
bouteilles) s'oxydent et créent un effet "halo". Un effet halo est provoqué par un mélange
d'éléments naturels présents dans le sol et l'oxydation causée par différents métaux. En raison de
ces mélanges de métaux, les signaux cibles peuvent ne pas avoir une position "fixe". Cet effet
rend ces objets très difficiles à détecter avec précision. (Voir "Affinage du réglage du détecteur").
7. Soin et entretien
Nettoyez de temps en temps le détecteur au moyen d'un chiffon humide pour qu'il garde un
aspect neuf. N'utilisez pas d'agents chimiques agressifs, de solvants ni de détergents
puissants pour nettoyer le détecteur.
• Si vous modifiez ou touchez les parties internes du détecteur, vous risquez de provoquer un
mauvais fonctionnement de celui-ci et d'annuler la garantie.
06/09/2011 © Velleman nv
20
Page 21

CS150N
• Le disque chercheur fourni avec le détecteur est étanche et peut être immergé dans l'eau douce
ou salée. Cependant, ne laissez pas d'eau pénétrer dans le boîtier de commande du détecteur.
Après avoir utilisé le disque chercheur dans l'eau salée, rincez-le à l'eau douce pour empêcher la
corrosion des parties métalliques.
8. Problèmes et solutions
Si votre détecteur ne fonctionne pas correctement, lisez les suggestions ci-dessous pour essayer de
résoudre le problème.
PROBLEM SUGGESTION
Le détecteur affiche ou émet des
signaux erronés
L’écran n’indique pas le type de métal
correct lorsque le détecteur trouve une
cible. Ou bien le détecteur émet plus
d’un type de tonalité lorsqu’il trouve
une cible.
Il se peut que vous déplaciez le disque chercheur du
détecteur trop rapidement ou à un mauvais angle.
Effectuez un balayage plus lent et tenez le détecteur
correctement. Voir "Test et utilisation du détecteur" et
"Localisation d'une cible".
Il se peut que le détecteur émette un signal erroné s'il
détecte des métaux fortement oxydés. Essayez de
localiser la cible à partir de plusieurs angles différents
(voir "Localisation d'une cible"). Si le détecteur n'affiche
pas et n'émet pas le même signal à chaque fois, il s'agit
probablement d'un métal fortement oxydé.
La zone de recherche peut contenir plus d'une cible.
La cible peut être constituée d'un type de métal non
reconnu par le détecteur.
La cible est fortement oxydée, il se peut que le détecteur
n'affiche pas le type de métal correct. Il ne s'agit pas d'un
mauvais fonctionnement.
9. Spécifications techniques
alimentation 3 x pile de 9V (non incl.)
fréquence 15KHz ±2KHz
sensibilité
bas 400Hz + 60Hz
discrimination audible (3 tons)
moyen 700Hz + 105Hz
élevé 1500Hz + 225Hz
température de travail 0°C ~ 40°C
dimensions (Lo x La x H) 92~121 x 20 x 18.5cm
poids ±1.26kg
N’employer cet appareil qu’avec des accessoires d’origine. SA Velleman ne sera
aucunement responsable de dommages ou lésions surve nus à un usage (incorrect ) de cet
appareil.
Pour plus d’information concernant cet article et la version la plus récente de cette notice,
visitez notre site web www.velleman.eu
Toutes les informations présentées dans cette notice peuvent être modifiées sans
notification préalable.
© DROITS D’AUTEUR
SA Velleman est l’ayant droit des droits d’auteur pour cette notice.
Tous droits mondiaux réservés. Toute reproduction, traduction, copie ou diffusion, intégrale ou
partielle, du contenu de cette notice par quelque procédé ou sur tout support électronique que se
soit est interdite sans l’accord préalable écrit de l’ayant droit.
16cm pour une pièce de monnaie de € 2 (Ø 25mm, en
mode 'all metal')
.
06/09/2011 © Velleman nv
21
Page 22
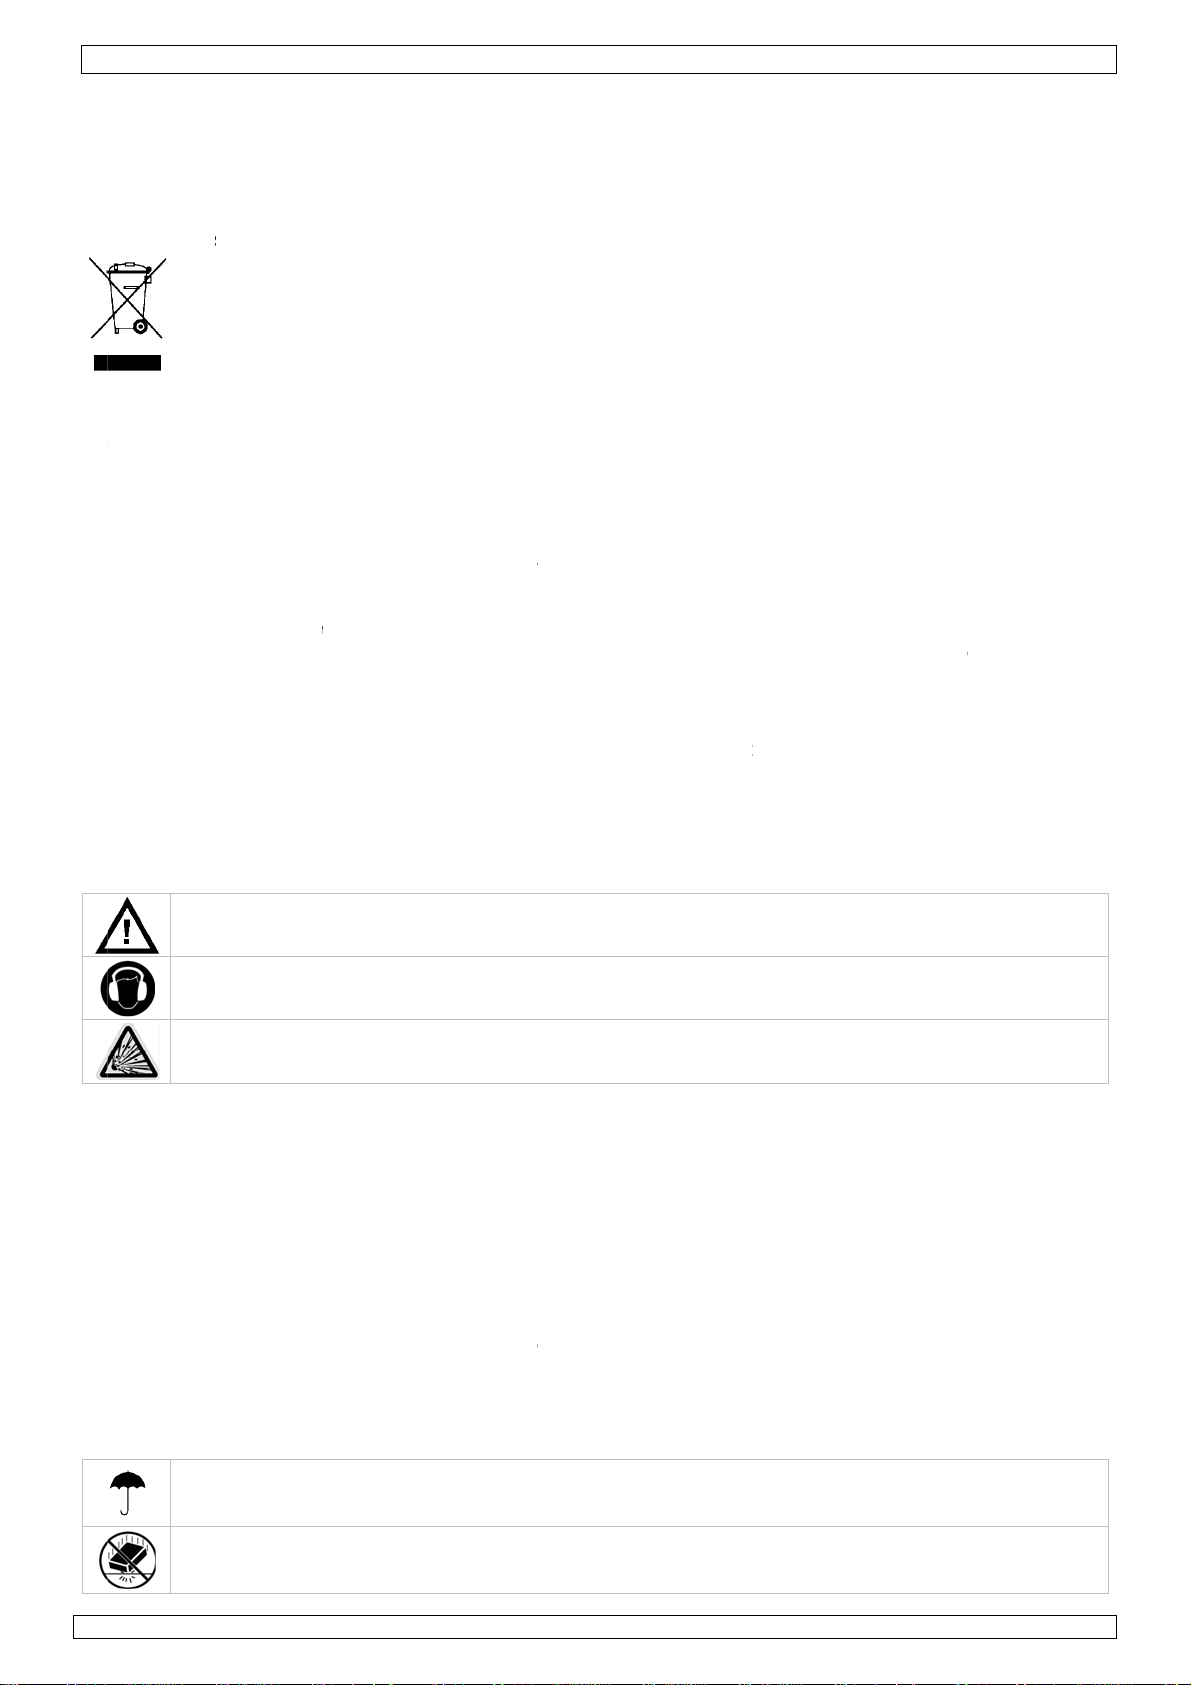
/
.
m
rus
vresCo
aSaVÚav
cCaBa¡O¡O
.
.
é
u
d
s
e
r
u
d
d
h
a
o
t
s
a
a
i
q
c
a
d
a
e
c
o
e
N
s
e
c
n
l
c
s
t
t
s
n
c
s
c
n
e
o
t
c
p
c
a
s
c
e
a
l
s
e
d
p
e
l
s
u
t
t
p
c
d
e
n
t
m
M
u
b
r
m
r
s
S
g
o
b
0
u
n
a
n
b
b
s
o
c
m
i
o
s
m
m
s
a
d
m
c
a
a
n
o
e
v
u
d
,
n
c
e
e
u
p
e
n
o
s
c
t
CS150N
u
n
e
l
e
o
t
s
e
a
u
u
o
n
a
e
e
s
e
m
z
e
i
o
r
l
t
m
m
:
o
e
t
a
p
E
p
e
e
x
a
e
m
r
o
o
j
s
c
e
u
d
ó
a
a
s
O
a
s
e
t
a
o
e
s
u
e
e
e
c
o
y
o
p
c
e
r
e
a
a
s
o
n
a
n
n
o
a
1
Introd
A
los ciuda
portante
I
Si
tiene du
acias por
G
arlo. Si el
su
distribuid
alidarán s
in
ultantes.
n el detec
ca
si todos lo
racterístic
C
lida para
metro e
isa si hay
Di
scrimina
il identific
fá
bezal de
rra regul
jo!: sólo e
jo!: el det
cción
anos de l
informa
Est
símbolo e
pod
ían dañar
bas
ra domést
a su
distribuid
io ambien
me
as, conta
aber com
parato ha
r. Daños
u garantía
or de met
tipos de
s del dete
uricular
ndicador:
ue cambi
ión audib
ción.
ble: longi
l cabezal e
ctor de m
etección
a Unión E
iones so
este apa
l medio a
ica; debe i
r o a la un
e.
te con la
rado el C
sufrido al
ausados p
y su distri
les CS15
uelos. Es
tor de me
s: para co
les enseñ
r las pilas.
e de 3 to
estanco:
tud ajusta
tá a prue
tal sólo fu
anu
ropea
re el me
ato o el e
biente. N
a una em
idad de re
autorid
150N! Le
ún daño e
r descuid
uidor no s
N de Velle
n dispositi
tales con d
ectar auric
que tipo
os: difere
le permite
le, lo que
a de agua
nciona co
l del
io ambie
balaje ind
o tire este
presa esp
iclaje loca
des local
atentame
el transp
de las ins
rá respon
man pued
o versátil
iscriminaci
lares (no i
e metal h
ntes tonos
también b
facilita el
no la caja
juegos de
suari
te conce
ica que, si
aparato (n
cializada e
. Respete
s para re
nte las ins
rte no lo i
rucciones
able de ni
detectar
y fácil de
ón audible
ncluidos).
sido enc
para difer
scar obje
so.
.
3 x pilas
niente a
tira las m
i las pilas,
n reciclaje.
as leyes lo
siduos.
rucciones
nstale y p
de segurid
ngún daño
onedas, j
anejar.
ntrado. El
ntes tipos
os bajo el
lcalinas de
ste prod
estras ins
si las hubi
Devuelva
cales en r
el manual
ngase en
d de este
u otros pr
oyas, oro
VÚmetro c
de metal
gua.
9V (no in
cto
rvibles,
ra) en la
este apara
lación con
antes de
ontacto co
manual
blemas
plata en
n pantall
ermiten u
luidas).
to
el
n
le
a
2
Instru
3
Norma
V
ase la Gar
•
No agite
No expon
•
Familiarí
•
Por razo
•
Utilice só
•
garantía
Los daño
•
su garan
La garan
•
Respete l
•
Saque la
•
circuito i
Man
¡Oj
oír
NU
clar
ciones
tenga el a
! Puede s
l tráfico y
CA TOQU
amente y
genera
antía de
l aparato.
ga este ap
ese con el
es de seg
o el apara
ompletam
causados
ía y su dis
ía no se a
as leyes lo
pilas del
terior.
e segur
arato lejo
r peligros
as señales
E NI MUN
contacte
les
ervicio y
Evite usar
arato a pol
funcionam
ridad, las
o para las
ente.
por descu
ribuidor n
lica en ca
ales en re
etector de
idad
del alcan
utilizar au
de advert
ICIÓN NI
con la pol
alidad V
excesiva f
vo, humed
iento del a
odificacio
aplicacion
do de las i
será resp
o de daño
lación con
metales si
e de pers
riculares e
ncia.
OTROS O
icía lo má
lleman ®
erza dura
ad y temp
arato ant
nes no aut
s descrita
struccion
nsable de
causados
el medio a
no lo utili
nas no ca
un lugar
BJETOS P
s rápido
l final de
nte el man
raturas e
s de utiliz
rizadas d
en este
s de segu
ningún da
por un us
biente.
a. El ácid
acitadas y
público. A
LIGROS
osible.
ste manu
jo y la in
tremas.
rlo.
l aparato
anual. Su
idad de es
ño u otros
en un am
de las pil
niños.
egúrese d
S. Marqu
l del usua
talación.
stán prohi
uso incorr
e manual
problemas
biente sala
s puede d
que pued
e el lugar
io.
bidas.
cto anula l
invalidará
resultante
do.
ñar el
a
a
s.
Man
tenga el d
líqui
Man
sus
dos podría
ipule el de
ircuitos i
06
09/2011
tector de
contener
ector de
presos y
etales se
minerales
etales con
er el resul
o. Si se ll
que podría
mucho cu
ado de un
22
gara a mo
n dañar lo
dado. Las
funcionam
ar, séquel
circuitos
aídas y lo
iento inapr
inmediat
lectrónico
golpes p
opiado.
mente. L
.
drían dañ
© Vellema
s
r
nv
Page 23

/
4
.
oPo
.
é
o
O
e
p
o
O
g
e
m
t
u
a
v
a
d
h
e
a
e
e
e
e
c
a
m
s
n
a
l
e
e
c
n
a
a
a
e
e
g
e
r
b
n
e
o
n
z
i
e
e
c
e
ó
m
N
a
]
t
a
a
n
n
a
o
n
e
v
n
o
9
a
o
s
m
t
p
o
v
a
a
r
o
n
o
o
e
n
p
e
e
a
c
c
o
x
a
z
A
g
m
d
m
e
m
e
o
o
v
r
e
o
e
o
e
o
o
a
b
a
o
c
o
r
a
n
z
[
c
u
a
z
d
b
n
i
n
o
n
a
r
o
a
r
p
e
m
p
a
ó
T
o
r
t
a
c
l
j
.
e
g
s
e
e
o
a
n
d
a
e
s
r
p
.
l
m
n
s
t
o
s
d
s
a
j
d
m
u
t
p
j
e
s
u
d
e
z
i
s
c
a
a
p
n
r
e
u
u
q
u
l
s
e
n
o
o
u
j
o
r
r
e
o
a
f
o
a
ó
d
e
o
n
n
e
y
y
r
j
s
o
.
m
n
a
+
n
s
o
r
e
n
Código
N
olvide qu
r ello, siga
•
Pida sie
Intente n
•
Observe
•
Nunca de
•
objeto en
•
Deje el s
Utilice su
•
La basur
•
residuos
Man
el d
Use
tem
def
¡OJ
está
fue
tenga el d
sgaste pr
y manten
eraturas
rmar o de
! Es posi
activado.
o. Mante
ético d
su comp
las siguie
pre autori
o causar n
odas las l
struya obj
contrado,
elo y la v
detector s
debe eli
igentes.
tector de
maturo de
a el detec
xtremas,
retir sus c
le que se
Nunca rec
ga las pil
los bus
rtamiento
tes reglas
ación al p
ngún dañ
yes nacio
tos de val
ontacte c
getación e
lo en terr
inarse ate
o la deje
etales al
sus comp
or sólo baj
odrían ac
mponente
isualicen
rgue bate
s lejos d
cadores
sirve com
de base al
opietario a
cuando s
ales, regio
r históric
n un mus
n el estad
nos segur
diendo a l
ara otros
CS150N
jado de p
nentes.
o condicio
rtar la vid
s de mate
alores inc
ías alcalin
l alcance
de teso
ejemplo
usar su d
ntes de co
trate de
nales y loc
o arqueol
o o una as
original.
s.
s corresp
uscadores
lvo y gras
es normal
útil de lo
ial plástico
rrectos al
s. Nunca
de niños
os
ara todos
tector de
enzar co
ropiedade
les duran
gico. Si n
ociación hi
ape bien s
ndientes
de tesoro
s. Estos el
s de tem
compone
.
eemplaza
erfore bat
os otros b
etales.
sus búsq
de otros.
e sus bús
está seg
tórica en
us agujero
isposicion
.
ementos p
eratura. L
tes electr
las pilas s
rías y no l
scadores
edas.
uedas.
ro del orig
os alreded
.
s de elimi
drían cau
s
nicos y
i el detect
as eche al
e tesoros.
n de un
res.
ación de
ar
r
5
Prepar
V
ase la figu
a.
Montaje
necesita
N
1.
Gire la tu
Alargue o
2.
relajados
encima d
Gire la tu
3.
longitud d
4.
Desatornil
agujeros
[C].
5.
Enrolle el
para pode
6.
Conecte la
de la toma
Adverten
• La tom
• Tire sie
7.
Afloje el b
cabezal e
pueda co
Adverten
8.
Afloje el b
después [
b.
Colocar l
¡
jo!
•
Instale só
No mezcl
•
recargabl
Si el dete
1.
Apriete la
2.
Coloque u
3.
Cierre la t
4.
Apriete la
5.
Coloque l
6.
Cierre la t
7.
ción
ra en la pá
el detect
erramient
rca de seg
acorte la b
l lado del
l suelo [B
rca de seg
seada.
le el botón
n el sopor
able del c
r mover el
toma del c
encajen e
cia:
del cabeza
pre del e
otón al fin
té paralel
tinuar osci
cia: No te
otón debaj
F].
s pilas
o pilas nu
pilas nue
s con una
tor está e
tapa del c
a pila de
pa desliz
tapa del c
s dos pila
pa desliza
gina 2 de
or
s especial
uridad de l
arra hasta
cuerpo. El
.
uridad en
del cabez
e del cabe
bezal alre
cabezal fá
bezal al ja
los agujer
l encaja e
chufe par
l del cabe
al suelo.
lando [E].
se el cabe
o del man
vas del ta
as, agota
capacidad
cendido, c
mpartimie
V en el co
ndo del co
mpartimie
de 9V en
ndo del co
ste manu
es para m
a barra en
que esté d
cabezal tie
l sentido
l y quite l
zal y la ba
dedor de l
ilmente, i
k del cabe
s del jack
actamente
descone
al para aj
hora, puls
zal demasi
o, introdu
año y del
as y pilas
diferente).
oloque el
nto derech
partimien
mpartimie
nto izquier
l compart
partimie
l del usua
ntar el de
el sentido
erecha. M
ne que en
ontrario al
s botones
ra. Pase e
barra. De
cluso en s
al de la caj
D].
en el jack
tar el cabl
star el án
e el botón
do y no u
ca el sopo
tipo requ
e diferent
otón MOD
o y ábrala
to de pilas
to derech
do y ábrel
miento co
to izquier
io.
ector. Sig
de las agu
ntenga el
ontrarse
de las ag
y el conec
conector
e bastant
uelos queb
a. Asegúre
Nunca int
de red, n
ulo desea
pero procu
e herrami
rte del bra
rido.
s tipos (p
E en la po
en la direc
controland
de pilas
en la dire
trolando l
o de pilas
sólo las si
as del relo
etector e
ás o men
jas del rel
or. Introd
or los agu
espacio e
rados [C].
e de que l
ente forza
nca del p
o. Asegúr
rando que
ntas com
o en el ag
las estánd
ición OFF
ión de la
o la polarid
su lugar.
cción de la
polaridad
a su lugar.
guientes i
j hasta qu
su mano
s entre 1
j para alca
zca la bar
eros y pul
ntre el cab
s pins
la, para n
opio cable
se de que
el cabezal
, por eje
ujero y te
r, alcalina
[G].
lecha [H].
ad correct
flecha [I]
correcta (
struccione
se suelte
los brazo
5 cm
nzar la
a y alinee
e el botón
le y la bar
dañarla.
el
plo, alicat
se el botó
s o
(+ y -).
y -).
s.
[A]
s
los
a
s.
06
09/2011
23
© Vellema
nv
Page 24

CS150N
Advertencias:
• Tire siempre las pilas usadas o descargadas porque las fugas podrían causar daños en los
componentes electrónicos de su detector.
• Si no usa el detector durante una semana o más, quite las pilas.
• Las baterías agotadas deben tirarse en los correspondientes depósitos de eliminación de residuos.
Alargue la duración de la vida de la batería usando auriculares. No consumen tanto como el altavoz
incorporado. Véase también “Conectar los auriculares”.
c. Probar las pilas
Si el detector no se enciende, tiene un volumen demasiado débil, se ajusta difícilmente o el
dispositivo no funciona o deriva: pruebe las pilas para ver si no están agotadas.
• Coloque el regulador MODE en la posición VLF (frecuencia muy baja). Pruebe las pilas del
compartimiento izquierdo colocando BATT TEST en la posición B1. Pruebe las pilas del
compartimiento derecho colocando BATT TEST en la posición B2 [J]. Si la aguja del VÚmetro se
encuentra en las cifras verdes del medidor BATT, las pilas están bastante cargadas. Si la aguja
no se encuentre en las cifras verdes, cambie las pilas.
d. Instalar el VÚmetro
• Apague el detector: coloque el regulador MODE en la posición OFF. Ajuste el metro con un
destornillador hasta que la aguja se encuentre en la posición cero [K, L].
e. Conectar los auriculares
Es posible conectar auriculares (no incluidos) al detector para poder escucharlo en privado. El uso de
auriculares no sólo ahorra la energía sino permite también identificar hasta las señales más débiles.
• Conecte el conector de 3,5mm de los auriculares al jack HEADPHONE previsto al lado de la caja
de control, si Ud. quiere conectar los conectores al detector [M].
• Ajuste el volumen con el control del volumen [M].
¡Ojo! Usando auriculares, se apaga el altavoz interno automáticamente
f. Escucha en toda seguridad
Para no dañar el oído, siga las siguientes líneas directrices.
• Antes de escuchar, ajuste el volumen al mínimo. Ajuste el volumen a un nivel cómodo
sólo después de haber puesto los auriculares.
• Evite niveles de volumen muy altos. Estos volúmenes elevados podrían cau s ar la pérdida de la
capacidad auditiva.
• No aumente el volumen si ya ha alcanzado el nivel de volumen deseado. El oído se adapta
después de algún tiempo al nivel del volumen elegido. Por lo tanto, un nivel de volumen
agradable todavía puede causar daños.
g. Seguridad en la carretera
No lleve auriculares al usar el detector en el tráfico. Aunque algunos modelos de auriculares hayan
sido diseñados para oír los r uidos d el exteri or (si no pong a el vol ume n dema siado alto ), es peligro so
para usarlos en el tráfico.
6. Operación
Su detector de metales Velleman diferencia metales seg ún la ferrosidad. Metales férreos contienen
hierro, mientras que metales no férreos como oro, plata, cobre, platino, aluminio, plomo y cinc no
contienen hierro. Al detectar un objeto, la aguja indicadora se desplaza según la naturaleza del metal
y el indicador NON-FERROUS (no férreo) o FERROUS (férreo) se enciende o se apaga, mientras que
uno de los tres tonos suena. El detector emite unos sonidos graves o agudos según sea el tipo de
metal. Cuanto más alta la señal, más fácil la identificación.
a. Preparar el detector para el uso
1. Coloque el regulador BATT TEST en la posición OPERATE.
2. Mantenga el detector en una posición cómoda. Ajuste el regulador MODE en la posición deseada.
Coloque MODE en la posición VLF para probar las pilas y ajuste después TUNE y GROUND.
(Véase también “Ajuste fino del detector” y “El regulador GROUND”) . Ahora, coloque el regulador
en la posición TR1 para detectar diferencias extremas entre metales, como entre hierro y oro. La
diferencia entre hierro y oro se visualiza en el VÚmetro (la aguja se desplaza hacia “ferrous” para
hierro y hacia “non-ferrous” para oro).Coloque el regulador en la posición TR2 para un análisis
más fino, es decir, hacer una diferencia entre por ejemplo aluminio y oro. (Véase también el
regulador “DISCRIMINACIÓN”) [N].
Siga los pasos siguientes para ajustar TUNE [O]:
1. Gire el regulador VOLUME hasta la posición “10 horas”.
2. Coloque el regulador MODE en la posición VLF.
3. Coloque GROUN D, DISCRIMINATION y SENSITIVITY en el medio.
06/09/2011 © Velleman nv
24
Page 25

CS150N
4. Mantenga el cabezal a una distancia de mín. 30cm del suelo y del objeto metálico, manteniendo
pulsado el botón rojo del mango y girando el regulador TUNE lentamente hasta que la aguja del
VÚmetro alcance la posición cero.
Es posible ajustar el detector muy fino durante la búsqueda de objetos metálicos mediante otros
botones de control (Véase también “Ajuste fino del detector”).
Observación: Pulse el botón rojo del mango para hacer volver la aguja automáticamente al medio del
VÚmetro.
b. Probar y usar el detector en el interior
Someta el detector a prueba antes de usarlo por primera vez para aprender cómo reacciona a los
diferentes tipos de metales. Puede probarlo tanto en el interior como al aire libre. Ajuste el detector
de manera fina antes de cada uso (véase “Ajuste fino del detector”).
1. Quítese cualquier objeto como relojes, anillos etc. y coloque el detector en una mesa de madera o
de plástico.
2. Coloque el cabezal de manera que la parte plana del cabezal esté a ras del techo [P].
Observación: Nunca pruebe el detector sobre el suelo dentro de un edificio ya que se usa algún
tipo de metal en la mayoría de los edificios. Esto puede causar interferencias con los objetos a
prueba o puede cubrir la señal completamente.
3. Coloque el regulador MODE en la posición TR1.
4. Mueva el objeto (como un anillo de oro o una moneda) a una altura de más o menos 5cm encima
del cabezal.
Observaciones:
• Sin movimiento, el cabezal no encontrará nada. Ya que el detector está quieto, mueva el objeto.
• El detector detectará la moneda más fácilmente si se muestra el anverso o reverso de ésta (no el
canto) a ras del cabezal.
• Si el detector detecta el objeto, se iluminan los indicadores NON-FERROUS y FERROUS y se
mueve la aguja en la dirección de FERROUS o NON-FERROUS, dependiendo del tipo de metal
encontrado. Se produce también una señal sonora para metales no férreos.
• Si no encuentra ningún metal, verifique si las baterías están cargadas y si el cabezal ha sido
conectado correctamente.
c. Probar y usar el detector al aire libre
1. Busque un lugar libre de metal.
2. Coloque el objeto (como un anillo de oro o una moneda) en el suelo (si usa un material valioso
como oro, marque el sitio para no olvidárselo. Evite hierbas altas o malas hierbas).
3. Coloque el regulador MODE en la posición TR1.
4. Ponga el cabezal horizontalmente a una altura entre 2 y 5 cm del suelo y mueva el cabezal lentamente
de un lado a otro sobre el lugar donde se encuentra el objeto metálico [Q].
5. Intentando detectar otros metales en la misma zona: Espe re alguno s segundos ante s de continuar
buscando si ha encontrado un metal . Éste e s el tiempo que necesita el detector para r egresar a
posición cero. (O pulse el botón rojo para hacer volver la aguja del Vúmetro automáticamente al
medio).
d. Consejos
• Nunca use el detector como si fuera un péndulo. Levantar el detector durante el vaivén lateral
podría causar interpretaciones falsas [R].
• Mueva el cabezal lentamente de un lado a otro – ¡No lo haga de prisa! Esto podría hacerle perder
objetos.
• Al encontrar el objeto, suena un tono y la aguja indica el tipo de metal. Si el detector ha
encontrado metal, cambie de MODE TR1 a TR2 para poder identificar la calidad del metal
detectado.
• El detector no detecta el objeto: asegúrese de que mueva el cabezal correctamente
Observaciones:
• Al detectar un objeto valioso el nivel de la señal sonora se intensifica. Si al contrario se trata de un
objeto sin valor se atenúa la señal, incluso después de haber movido el cabezal varias veces
encima del objeto.
• Un suelo contaminado, interferencias eléctricas o grandes piezas de metal pueden causar señales
falsas. Las reconocerá porque aquellas señales están rotas o no se repiten.
e. Ajuste fino del detector
Una vez familiarizado con el funcionamiento de su detector, puede ajustarlo más fino, no sólo para
hacerlo menos sensible para interferencias sino también para hacerlo más selectivo en relación con
objetos.
1) Ajuste de SENSITIVITY [S]
Coloque SENSITIVITY (sensibilidad) en la posición MIN., MAX. o entre los dos para ajustar
la capacidad del cabezal de buscar objetos a diferentes profundidades. Coloque SENSITIVITY
06/09/2011 © Velleman nv
25
Page 26

CS150N
en la posición máxima para poder detectar el suelo lo más profundo posible. Si el detector
hace un "chirrido", disminuya SENSITIVITY hasta que este ruido deje de producirse.
2) Ajuste de GROUND [T]
La primera vez, es posible que no logre ajustar el regulador GROUND pero es muy importante
para una operación exacta. Es decir, el regulador GROUND elimina señalas falsas causadas
por suelo mineralizado.
1. Coloque MODE en la posición VLF y ponga el cabezal más o menos entre 1 y 4 cm del
suelo.
2. Si la agu ja gira a la izquierda, gire el botón GROUND a la izquierda. Si la aguja gira a la
derecha, gire el botón GROUND a la derecha.
3. Levante el cabezal hasta 30cm del suelo y pulse el botón rojo del mango. La aguja vuelve al
medio.
4. Repite los pasos 1 - 3 hasta que la aguja quede en el medio cada vez que baje el cabezal
hacia el suelo.
Después de haber puesto GROUND, el detector está ajustado para este lugar en particular. No
lo reajuste, salvo que decida detectar otro sitio.
3) Ajuste de DISCRIMINTATION
La función discriminación permite diferenciar entre los objet os valiosos y los no valiosos. El
regulador DISCRI-MINATION determina si el detector debe diferenciar entre los diferentes
tipos de metales férreos y no férreos.
Si el regulador MODE se encuentra en la posición TR2, empiece a girar el regulador
DISCRIMINATION hacia el medio. Ajuste el botón hacia la mejora posición. Cuanto más
aumente el regulador DISCRIMINATION del detector, más diferencia habrá entre por
ejemplo gran piezas de aluminio y de oro. Sin embargo, de esa manera es posible no darse
cuenta de pequeños objetos valiosos como monedas o anillos.
Al colocar DISCRIMINATION en una posición más elevada, el detector no encontrará – en
este orden – pequeñas piezas de papel de aluminio, papel de aluminio más gordo y objetos
metálicos.
Observación: Hay que ajustar DISCRIMINATION cada vez que cambia de lugar, ya que
cada lugar ofrece nuevos desafíos.
f. Señales falsas
La extrema sensibilidad del detector puede causar interferencias falsas con basura y otras fuentes.
La mejor manera de evitar este tipo de señales, es sólo buscar objetos que emiten una señal fuerte
y repetitiva. Moviendo el cabezal de un lado a otro encima del suelo, aprenda a reconocer la
diferencia entre señales aleatorias y señales fijas y repetitivas.
Reduzca estos problemas, explorando sólo pequeñas superficies a la vez. Mueva el cabezal al mismo
tiempo lentamente y con movimientos oscilatorios.
g. Consejos de uso
Ningún detector de metales es 100% preciso. Su reacción depende de muchos factores:
• El ángulo en el que el objeto se encuentra en el suelo.
• La profundidad del objeto.
• La parte de hierro en el objeto.
El tamaño del objeto.
•
h. Localizar el objeto
Una localización exacta del objeto facilita el desenterramiento. Una localización precisa exige alguna
práctica. Aconsejamos practicar, buscando y desenterrando pequeños objetos en su propiedad antes
de empezar a detectar otros lugares.
A veces, es difícil localizar el objeto a causa de la dirección del movimiento oscilatorio. Para una
localización más precisa, puede intentar cambiar la dirección del movimiento oscil ante.
Siga los siguientes pasos para localizar el objeto.
1. Al detectar un objeto, continúe moviendo el cabezal encima del objeto disminuyendo poco a poco
los movimientos oscilatorios y laterales.
2. Marque el lugar exacto donde el detector produzca una señal sonora.
3. Pare el cabezal inmediatamente encima del lugar. Mueva el cabezal en un movimiento hacia adelante
ida y vuelta. Repita este movimiento algunas veces. Vuelva a marcar el lugar exacto donde se oye la
señal sonora.
4. Repita los pasos 1 a 3 en un ángulo de 90° con respecto a la dirección de la búsqueda original.
Haga una figura en forma de X. El objeto se encuentra directamente debajo de la X donde la señal
sonora es lo más intensiva [U].
Observaciones:
• Si hay muchas señales falsas a causa de la basura, reduzca la velocidad y corte la distancia de los
movimientos oscilatorios.
06/09/2011 © Velleman nv
26
Page 27

CS150N
• Monedas recientemente enterradas pueden reaccionar de manera diferente en comparación con
monedas enterradas hace mucho tiempo a causa de la oxidación.
• Algunos clavos, tornillos, tuercas y otros objetos de hierro (como tapas de botellas) se oxidan y
crean un efecto de “nimbo”. Una mezcla de elementos naturales en el suelo y la oxidación de
diferentes metales causan el efecto de “nimbo”. Por ello, es posible que las señales sonoras no se
encuentren en una posición “fija”. Este efecto hace muy difícil la localización de este tipo de
objetos con precisión. (Véase “Ajuste fino del detector”).
7. Mantenimiento
Limpie, ocasionalmente, el detector de metales con un paño húmedo. Evite el uso de
químicos abrasivos, disolventes para limpieza o detergentes concentrados.
• Modificar o alterar los componentes internos del detector de metales, podría ser la causa del
funcionamiento inapropiado del mismo, e invalidar su garantía limitada.
• Entregado con cabezal estanco es sumergible en agua dulce y agua salada. No obstante,
asegúrese de que no entre agua en la caja del detector. Limpie el cabezal con agua dulce después
de haberlo usado en agua salada para evitar la corrosión de las partes metálicas.
8. Solución de problemas
Si su detector no funciona normalmente, siga las siguientes sugerencias para eliminar los
problemas.
PROBLEMA SOLUCIÓN
El detector muestra o deja
oír una señal falsa
Al detectar el objeto, el
detector no indica el buen
tipo de metal en la pantalla
o deja oír varios
Puede ser que haya puesta la sensibilidad demasiado alta.
Ajústela mediante el regulador SENSITIVITY
Puede ser que esté moviendo el cabezal demasiado rápido o en un
ángulo falso. Mueva el cabezal más lentamente y manténgalo en la
buena posición. Véase “Probar y usar el detector” y “Localizar el
objeto”.
Puede ser que el detector emita señales falsas si detecta metales
oxidados. Intente localizar el objeto desde varios ángulos (véase
“Localizar el objeto”). Si el detector no siempre muestra la misma
señal, el objeto es probablemente un metal muy oxidado.
Puede ser que se encuentren más objetos en el lugar detectado.
El objeto puede ser hecho de un metal que el detector no conoce.
Puede ser que el detector no indique el buen tipo de metal si el
objeto está muy oxidado. No se trata de un mal funcionamiento del
detector.
Puede ser que haya puesto la sensibilidad demasiado alta.
Ajústela mediante el botón SENSITIVITY
9. Especificaciones
alimentación 3 x pila de 9V (no incl.)
frecuencia 15KHz ±2KHz
sensibilidad
discriminación audible
de 3 tonos
temperatura de funcionamiento 0°C ~ 40°C
dimensiones (L x An x Al) 92~121 x 20 x 18.5cm
peso ±1.26kg
Utilice este aparato sólo con los accesorios originales. Velleman Spain SL no será
responsable de daños ni lesiones causados por un uso (indebido) de este aparato.
Para más información sobre este producto y la versión más reciente de este manual del
usuario, visite nuestra página www.velleman.eu
Se pueden modificar las especificaciones y el contenido de este manual sin previo aviso.
06/09/2011 © Velleman nv
bajo 400Hz + 60Hz
medio 700Hz + 105Hz
alto 1500Hz + 225Hz
16cm para una moneda de € 2 (Ø 25mm,
en el modo 'all metal')
.
27
Page 28

/
eToedha
.
n
tFa
e
i
uFü
eKoVU3-einEin
eBe
.
.
e
O
V
r
r
r
w
m
s
d
h
w
d
w
e
n
e
e
S
t
n
u
o
e
e
e
h
e
H
c
RGEG
e
m
n
e
S
S
h
n
e
n
e
e
T
n
r
h
v
B
s
e
t
d
e
D
k
a
u
w
d
d
I
D
S
h
v
r
ä
n
G
n
ü
c
c
e
u
s
n
P
e
m
u
S
n
Ü
u
ä
s
t
K
r
s
c
s
a
b
f
l
U
e
d
Q
V
r
B
ü
u
a
e
e
e
s
a
u
o
s
e
u
n
i
n
(
L
a
r
m
n
O
h
g
e
c
u
u
e
d
t
e
r
m
l
n
a
w
d
w
r
e
a
H
e
e
e
V
r
o
e
l
e
m
e
S
s
r
c
n
u
g
a
h
n
g
e
F
f
h
i
n
k
v
s
N
e
d
N
e
F
i
r
n
n
c
u
o
e
s
c
c
n
e
d
n
d
v
z
s
e
n
R
e
a
c
r
e
d
r
n
n
c
e
S
i
b
u
a
k
n
e
d
t
e
e
n
h
s
e
©
DERECH
V
lleman N
dos los de
itar y gua
biente.
1
Einfüh
A
alle Ein
W
ichtige U
re
ourniert
lls Zweif
B
hörde.
W
r bedanke
In
betriebnah
rch Nichtb
d
r daraus r
Mi
t Ihrem C
r Metallde
D
pfhörera
-Meter:
Ton Audi
e einfach
stellbar
W
asserfest
merkung
B
merkung
S DE AU
dispone
echos mu
dar este m
ung
ohner de
weltinfo
Die
es Symbol
Pro
uktes nac
Ein
eit (oder
ver
endeten
wer
en. Diese
erden. Re
l bestehe
uns für d
me sorgfäl
achtung
sultierend
150N kön
ektor mit
schluss:
m anzuzei
Diskrimi
re Identifi
r Stiel: d
Suchsp
: nur die S
: der Metal
OR
de los de
diales res
anual del
B
r Europäi
matione
auf dem
seinem L
erwendete
atterien
Einheit m
pektieren
n, wende
n Kauf de
ig durch.
er Bedien
Folgesch
nen Sie fa
iskrimina
um einen
gen, welch
nator: ve
ation.
nk der ein
le: um au
uchspule i
ldetektor
rechos d
rvados. E
suario o p
edien
chen Uni
über die
rodukt od
benszykl
n Batterie
üssen von
ss an den
ie die örtl
Sie sich
s CS150N
berprüfen
ngsanleitu
den über
t überall n
or ist viels
opfhörer
e Metallart
schiedene
tellbaren
h unter W
t wasserfe
rbeitet nu
CS150N
autor pa
tá estricta
rtes de el
ngsa
n
es Produ
r der Verp
s der Um
) nicht als
einer spez
Händler o
chen Um
für Entso
! Lesen Si
Sie, ob Tr
ng verursa
immt der
ach Münze
eitig und e
nicht mitg
Sie vermu
Tonhöhen,
änge ist d
sser nach
st, die and
mit 3 x 9
a este m
ente pro
o sin previ
leitu
kt
ckung zei
elt Schade
unsortiert
ialisierten
er ein örtli
eltvorschri
gungsric
diese Bed
nsportsch
cht werde
ersteller
n, Relikten
infach zu
liefert) an
tlich gefun
für z.B. Ei
r CS150
Metallgeg
ren Teile
-Alkalineb
nual del
ibido repr
o permiso
g
t an, das
n zufügen
s Hausmü
irma zwe
ches Recy
ten.
tlinien a
enungsanl
äden vorli
, erlischt
eine Haftu
, Juwelen,
erwenden:
zuschließe
den haben
en und E
leicht zu
nständen
es Gehäu
atterien (n
suario.
ducir, tra
scrito del
die Entso
kann. Ents
ll; die Einh
ks Recycli
ling-Unter
Ihre örtl
eitung vor
gen. Bei S
er Garanti
ng.
Gold und
.
.
elmetallen
erwenden
zu suchen.
es nicht.
icht mitgel
ucir, copia
derecho
gung dies
rgen Sie
eit oder
g entsorg
ehmen
iche
häden, di
anspruch.
ilber such
, erlauben
.
efert).
r,
s
ie
n.
2
Sicher
3
Allgem
Si
he Velle
•
Vermeide
des Gerät
•
Schützen
•
Nehmen
haben.
•
Eigenmäc
•
Verwende
kann dies
•
Bei Schäd
Garantiea
Haftung.
•
Bei Schäd
•
Bei Schäd
06
09/2011
Halt
AC
Bea
BE
und
eitshin
n Sie Kin
TUNG: Es
hten Sie,
ÜHREN S
ENSTÄN
warnen
ine Ric
an® Ser
Sie Erschü
s.
ie das Ge
ie das Ger
tige Verä
Sie das
zu Schäde
n, die dur
spruch. F
n verursa
n verursa
eise
er und Un
könnte ge
ass Sie al
E NIE M
E. Grenz
ie sofort
tlinien
ice- und
tterungen.
ät vor ext
t erst in
derungen
erät nur f
am Prod
ch Nichtbe
r daraus r
ht durch
ht durch
efugte vo
ährlich sei
e Warnsig
NITION
n Sie den
ie örtlic
ualitäts
ermeiden
eme Temp
etrieb, na
sind aus Si
r Anwend
kt führen
chtung d
esultieren
igenmäch
ine salzig
Gerät fe
n, einen K
ale und d
DER AND
Ort ab –
e Behörd
arantie a
Sie rohe G
raturen,
hdem Sie
cherheitsg
ngen bes
nd erlisch
r Bedienu
e Folgesch
ige Änder
Umgebun
28
n.
pfhörer in
n Verkehr
ERE LEBE
assen Si
.
Ende die
walt währe
taub und
ich mit se
ünden ve
hrieben in
t der Gara
gsanleitun
äden über
ngen erlis
erlischt d
öffentlich
hören kön
SGEFÄH
den Ort
ser Bedien
nd der Inst
euchte.
nen Funkti
boten.
dieser Bed
tieanspru
g verursac
immt der
ht der Ga
er Garanti
n Orten zu
en.
LICHEN
ventuell
ungsanleit
llation und
onen vertr
ienungsanl
h.
ht werden,
Hersteller
antieanspr
anspruch.
verwende
ewache
ng.
Bedienung
ut gemac
eitung son
erlischt d
eine
uch.
© Vellema
n.
–
t
t
r
nv
Page 29

/
•
.
esic
.
ena
e
e
c
u
w
H
c
c
h
d
o
S
S
n
e
a
e
e
n
e
e
e
e
e
h
b
e
S
S
m
n
e
e
n
e
E
S
e
s
n
t
e
ö
S
n
s
m
m
e
D
n
ü
s
e
g
e
e
g
K
n
e
b
C
S
d
p
a
d
n
o
d
h
f
k
e
S
a
t
l
c
ö
e
n
d
e
u
u
t
S
d
s
a
c
d
t
e
h
e
d
S
i
c
d
e
e
c
d
e
u
s
e
a
d
r
d
u
d
t
c
c
w
r
n
z
e
d
u
n
ü
e
n
s
d
n
r
u
v
e
k
d
e
L
i
s
n
d
a
t
e
d
e
k
U
u
i
W
e
n
S
u
c
n
e
m
B
n
o
c
k
n
k
c
t
e
e
o
c
g
m
n
s
s
m
c
u
a
e
)
g
n
o
h
p
n
t
W
e
a
M
n
b
B
d
h
l
S
e
e
W
S
c
e
e
e
t
n
o
n
t
e
n
r
n
n
o
e
g
o
s
m
d
u
o
c
n
g
e
S
d
t
e
p
c
s
c
c
e
Beachten
•
Bei länger
4
Ethisc
D
nken Sie
h an die f
•
Bitten Sie
Rechnen
•
Rechnen
•
Bestimmu
Vernichte
•
eines Obj
Gesellsch
Lassen Si
•
Loch wied
Verwende
•
Lassen Si
•
Lassen Si
Vor
Min
Geh
bes
Von
ver
Ver
Tem
und
AC
dur
Dur
von
Sie, dass
em Nichtg
Feuchte sc
ralien, die
n Sie vor
hädigen u
Staub und
rsachen.
enden Sie
peraturen
Kunststoff
TUNG: W
hführen, k
hbohren
Batterie
er Kode
aran, das
lgenden G
immer um
ie immer
ie immer
ngen in Be
Sie keine
ktes nicht
ft in Ihrer
das geort
r.
Sie den
den gefu
es nicht f
ie immer
brauch, e
hützen. So
die elektr
ichtig mit
d dazu fü
Schmutz
den Dete
können di
eile verfor
nn Sie ein
nnen da
ie keine B
fern.
zuguns
Ihr Verha
rundregeln
Erlaubnis,
it den Re
it den m
zug auf di
Gegenstä
sicher sin
Nähe in V
te Gebiet
etektor n
denen Me
r andere
en örtlich
tfernen Si
llte das Ge
nischen S
em Gerät
ren, dass
ernhalten.
tor nur in
Lebensda
men oder
en Batteri
törungen
tterien un
en alle
ten als Bei
wenn Sie
ehe Sie z
hten und
glichen na
Schatzsu
de geschi
, setzen Si
rbindung.
nd die Be
r an siche
allschrott
chatzsuch
CS150N
n Umwelt
die Batte
rät nass w
haltungen
um. Fälle
er Metall
Staub und
iner norm
er elektro
chmelzen
wechsel b
uftreten.
werfen S
Schatz
spiel für a
en Metall
orten anf
em Eigen
ionalen, r
he.
htlichen o
e sich mit
achsung in
en Orten.
ur an den
er zurück.
orschrifte
rien.
rden, sof
korrodiere
önnen die
etektor ni
Schmutz
alen Umge
nischer Ge
lassen.
i einem ei
aden Sie
e diese ni
ucher
dere Scha
etektor b
ngen.
um ander
gionalen u
er archäol
inem Mus
ursprüngli
dafür vor
nachkom
rt trockne
n können,
Leitungen
ht mehr k
önnen frü
bungstem
räte kürze
geschalte
eine Alkali
ht ins Feu
zsucher di
nutzen.
r Leute.
nd lokalen
gischen
eum oder
hem Zust
esehenen
men.
. Flüssigk
enthalten.
und das G
rrekt funk
zeitigen V
eratur. Ex
, Batterie
en Detekt
nebatterie
er. Halten
enen könn
gesetzlich
ertes. We
iner histo
nd zurück.
üllplätze
iten könnt
häuse
tioniert..
rschleiß
reme
beschädi
r
auf.
Sie Kind
e. Halten
n
n Sie sich
ischen
Füllen Sie
zurück.
en
en
r
ie
as
5
Vorber
a.
Zusamm
r Detektor
D
chfolgend
1.
Drehen S
2.
Regeln Si
wenn Sie
3.
Drehen S
erreicht
4.
Schraube
Steckver
vorgeseh
Stechen
[C].
5.
Wickeln
Spielrau
bewegen
6.
Verbinde
Achten Si
Wichtige
• Der St
einzust
• Ziehen
an, we
7.
Drehen Si
(Sorgen S
fest, aber
werden [
06
09/2011
itung
nbau de
lässt sich
Hinweise:
ie den Rie
e die Läng
gerade st
ie den Rie
aben.
n Sie den
inder. Mo
nen Öffnu
ie den St
ie das Ka
zwischen
können [
Sie den
e darauf,
Hinweise
cker passt
cken, son
Sie nie an
n Sie das
den Kno
ie dafür, d
nicht zu st
].
Detektor
infach un
elhebel de
des Stiel
hen und l
elhebel di
nopf auf
tieren Sie
ngen im S
ckverbind
el der Suc
Kabel und
].
tecker der
ass die St
:
genau in
st können
der Netzle
Kabel vom
f am Ende
ss die Su
raff damit
s
ohne spe
s Gestäng
so, dass
ssen Sie d
ht (gegen
er Suchsp
den Stiel i
iel und St
r durch di
spule lock
Stiel, dam
Suchspule
ckerhülse
ie Buchse.
ie ihn be
tung, son
Netz tren
der Suchs
hspule pa
ie Dreh-
ielles Wer
s los (im
ie Suchsp
ie Armen e
den Uhrze
le los und
solcher
tzbügel d
Öffnunge
er um den
it Sie die
mit der S
in die Lö
Versuche
chädigen.
ern fassen
en möcht
pule los, u
allel zum
nd Schwin
29
zeug zusa
hrzeigersi
le etwa 1
ntspannen
gersinn),
entfernen
eise auf di
r Suchspul
und befe
Stiel heru
uchspule a
chspulebu
her der B
Sie desh
Sie den N
n.
den gew
oden läuft
gbewegun
menbaue
n) [A].
bis 5 cm ü
hängen [
obald Sie
Sie danac
e Suchspu
e gegenüb
tigen Sie i
. Lassen
uch auf un
hse am G
chse pass
lb nie, den
tzstecker
ünschten
. Drehen
en der Su
: beachte
er dem B
].
ie gewüns
die Knöpf
le, dass di
er einande
hn mit Hilf
ie jedoch
ebenem B
häuse de
n [D].
Stecker
immer an
inkel einz
ie den Kn
hspule ni
Sie
den häng
chte Läng
e und den
r stehen.
e der Knö
enügend
den einfa
Detektor
it aller Ma
er Griffflä
stellen.
pf wieder
ht verhind
© Vellema
,
fe
h
.
ht
he
rt
nv
Page 30

CS150N
Wichtige Hinweise: Drehen Sie die Suchspule nicht zu straff fest und verwenden Sie dabei auch
keine Werkzeuge, wie z.B. eine Zange.
8. Drehen Sie den Knopf an der Unterseite des Griffes los, stecken Sie die Armstütze in die Öffnung
und drehen Sie den Knopf danach wieder fest.
b. Batterien einlegen
Der Detektor funktioniert mit 3 Alkalinebatterien von 9 Volt.
Wichtige Hinweise:
• Verwenden Sie nur neue Batterien empfohlenen Typs und Größe.
• Verwenden Sie neue und verbrauchte Batterien oder Batterien verschiedener Typen nicht
durcheinander (Standard-, Alkalinebatterien oder Batterien verschiedener Kapazität).
1. Stellen Sie den MODE-Schalter auf OFF, wenn der Detektor noch eingeschaltet ist [G].
2. Drücken Sie den Deckel des rechten Batteriefachs und öffnen Sie ihn in Richtung des Pfeils [H].
3. Legen Sie die 9V-Batterie ein. Beachten Sie dabei die richtige Polarität (+ und -).
4. Schließen Sie den Deckel des rechten Batteriefachs wieder ab.
5. Drücken Sie den Deckel des linken Batteriefachs und öffnen Sie ihn in Richtung des Pfeils [I].
6. Legen Sie die übrigen 9V-Batterien ein. Beachten Sie dabei die richtige Polarität (+ und -).
7. Schließen Sie den Deckel des linken Batteriefachs wieder ab.
Wichtige Hinweise:
• Ersetzen Sie verbrauchte oder abgeschwächte Batterien sofort; Batterien enthalten nämlich
Chemikalien, die die elektronischen Teile des Detektors beschädigen können.
• Entladen Sie den Detektor bei längerem Nichtgebrauch.
• Werfen Sie verbrauchte Batterien sofort weg.
Sie können die Lebensdauer der Batterien verlängern, durch den Kopfhörer, der weniger Strom als
den eingebauten Lautsprecher verbraucht, zu verwenden. Siehe auch “Anschluss des Kopfhörers”.
c. Prüfung der Batterien
Der Detektor funktioniert nicht, die Lautstärke ist zu schwach, das Gerät funktioniert nicht gut oder
weicht ab: Überprüfen Sie die Batterien.
• Stellen Sie den MODE-Schalter auf VLF (very low frequency). Um die Batterien im linken Fach zu
prüfen, stellen Sie BATT TEST auf B1. Um die Batterien im rechten Fach zu prüfen, stellen Sie
BATT TEST auf B2 [J]. Solange der Zeiger des VU-Meters sich in den grünen Ziffern des BATTMeters befindet, sind die Batterien noch genügend geladen. Sobald der Zeiger sich nicht mehr in
den grünen Ziffern befindet, müssen Sie die Batterien ersetzen.
d. Einstellung des Meters
Detektor ausschalten: Stellen Sie den MODE-Schalter auf OFF. Mit einem Schraubendreher können
Sie das Meter so einstellen, dass der Zeiger 0 auf die Skale anzeigt [K, L].
e. Anschluss des Kopfhörers
Der Detektor hat einen Anschluss für Stereokopfhörer (nicht mitgeliefert), so dass Sie zuhören
können, ohne andere zu stören. Durch die Anwendung eines Kopfhörers sparen Sie nicht nur die
Batterie, sondern Sie können mit dem Köpfhörer auch die verschiedensten Geräusche identifizieren,
was zu besseren Ergebnissen führt.
• Anschluss: Verbinden Sie den 3,5 mm-Stecker des Kopfhörers mit der vorgesehenen
HEADPHONE-Buchse [M].
• Regeln Sie die Lautstärke mit dem Lautstärkeregler [M].
Bemerkung: bei Verwendung des Kopfhörers wird der interne Lautsprecher automatisch
ausgeschaltet.
f. Hörsicherheit
Beachten Sie nachfolgende Hinweise, um das Gehör zu sparen:
• Stellen Sie die Lautstärke auf das Minimum, ehe anzufangen. Stellen Sie die Lautstärke erst ein,
nachdem Sie den Kopfhörer aufgesetzt haben.
• Vermeiden Sie extrem hohe Schallpegel, da solche Lärmexposition bleibender Hörschaden
verursachen kann.
• Erhöhen Sie die Lautstärke nicht, wenn Sie den gewünschten Schallpegel schon erreicht haben.
Das Gehör passt sich nach einiger Zeit an das gewählte Schallpegel an, mit als Folge, dass ein für
das Ohr angenehmer Schallpegel nachträglich schädlich sein kann.
g. Verkehrssicherheit
Tragen Sie keinen Kopfhörer wenn Sie den Detektor in der Nähe von regem Verkehr verwenden. Obwohl
es Kopfhörer gibt, die manche Außengeräusche bei normaler La utstärke einsickern lassen, si nd sie noch
immer gefährlich im Verkehr.
06/09/2011 © Velleman nv
30
Page 31

CS150N
6. Bedienung
Der Velleman Metalldetektor macht den Unterschied zwischen eisenhaltigen Metallen und nichteisenhaltigen Metallen, wie Gold, Silber, Kupf er, Platin, Aluminium, Blei und Zink. Sobald der
Detektor ein Metallobjekt ortet, ändert sich die Meteranzeige. Der NON-FERROUS- (Nicht-Eisen)
oder FERROUS- (Eisen) Indikator geht an oder aus, und es ertönt 1 der drei Töne. Je höher der Ton,
desto einfacher die Erkennung.
a. Inbetriebnahme des Detektors
1. Stellen Sie die BATT TEST-Schalter auf OPERATE.
2. Nehmen Sie eine bequeme Haltung an ; Regeln Sie danach die MODE-Funktion. Stellen Sie den
MODE-Schalter auf VLF, um den Batteriestromzufuhr zu überprüfen. Regeln Sie anschließend
TUNE und GROUND. (Siehe auch “Einstellung des Detektors” und “GROUND-Schalter”). Stellen
Sie den Schalter nun auf TR1 um extreme Unterschiede, wie zwischen Eisen und Gold,
aufzuspüren. Der Unterschied zwischen Eisen und Gold wird deutlich angezeigt (der Zeiger zeigt
“ferrous” für Eisen und “non-ferrous” für Gold an). Stellen Sie den Schalter auf TR2 um eine
feinere Analyse durchzuführen. So bekommen Sie einen deutlichen Unterschied zwischen z.B.
Aluminium und Gold. (Siehe auch “DISCRIMINAT ION-Schalter”) [N].
Beachten Sie folgende Schritte um TUNE zu regeln [O]:
1. Stellen Sie den VOLUME-Schalter auf “10 Uhr”.
2. Stellen Sie den MODE-Schalter auf VLF.
3. Stellen Sie GROUND, DISCRIMINATION und SENSITIVITY in den mittleren Stand.
4. Halten Sie die Suchspule in mindestens 30 cm Abstand der Bodenfläche und des Metallobjekts
entfernt. Halten Sie den roten Schalter am Griff dabei gedrückt und drehen Sie den TUNESchalter langsam, bis der VU-Zeiger (ungefähr) den Nullstand erreicht hat.
Während der Suche können Sie den Detektor auch mittels anderer Schalter einstellen (Siehe
“Feineinstellung des Detektors”).
Bemerkung: Wenn Sie den roten Schalter des Griffs drücken, kehrt der Zeiger automatisch wieder
zu 0 zurück.
b. Überprüfung im Haus
Probieren Sie den Detektor vor der Inbetriebnahme erst an verschiedenen Metallarten aus, damit Sie
erfahren können, wie der Detektor darauf reagiert. Sie können den Detektor sowohl im Haus als
außer Haus ausprobieren. Sie müssen den Detektor vor jedem Gebrauch feinabstimmen (siehe
"Feineinstellung des Detektors").
1. Entfernen Sie alle möglichen Juwelen, wie Uhren, Ringen usw. und stellen Sie den Detektor auf
einen Holz- oder Plastiktisch.
2. Stellen Sie die Suchspule so, dass die flache Seite der Suchspule parallel zur Decke läuft [P].
Bemerkung: Überprüfen Sie den Detektor im Haus nie auf den Boden, weil beim Legen eines
Fußbodens gewöhnlich Metall verwendet wird. Dies könnte Interferenzen mit den Gegenständen,
denen Sie prüfen, verursachen oder das Signal sogar völlig abdecken.
3. Stellen Sie den Schalter auf M O DE TR1.
4. Bewegen Sie ein Muster (z.B. einen Goldring oder eine Münze) in etwa 5 cm Höhe über die
Suchspule hin und her.
Bemerkungen:
• Ohne Bewegung wird die Suchspule nichts finden. Sie müssen das Objekt bewegen, da der
Detektor in diesem Fall an derselben Stelle stehen bleibt.
• Wenn Sie den Test mit einer Münze ausführen, wird der Detektor sie leichter detektieren wenn
Sie die flache Seite der Münze parallel zur Suchspule halten.
• Sobald der Detektor den Gegenstand gefunden hat, leuchten die NON-FERROUS- und FERROUS-
Indikatoren und bewegt der Zeiger sich, abhängig von der georteten Metallart, Richtung
FERROUS oder NON-FERROUS. Auch bei nichteisenmetallen ertönt ein Geräusch.
• Wenn der Detektor kein Metall findet, überprüfen Sie dann zuerst, ob die Batterien aufgeladen
sind und, ob die Suchspule gut angeschlossen wurde.
c. Überprüfung und Gebrauch außer Haus
1. Versuchen Sie, draußen eine metallfreie Bodenfläche zu finden.
2. Legen Sie ein Muster (wie z.B. einen Goldring oder eine Münze) auf den Boden. (Sollten Sie
wertvolles Metall wie Gold verwenden, vergessen Sie dann nicht, wo Sie den Gegenstand gelegt
haben. Markieren Sie es auf eine oder andere Weise, damit Sie ihn später einfach zurückfinden
können. Vermeiden Sie gras- oder unkrautbedeckte Orte).
3. Stellen Sie den Schalter auf M O DE TR1.
4. Halten Sie die Suchspule horizontal in etwa 2 bis 5 cm Abstand des Bodens und untersuchen Sie
langsam die Stelle, an der Sie das Metallobjekt gelegt haben. Machen Sie hierbe i seitliche,
schwingende Bewegungen [Q].
06/09/2011 © Velleman nv
31
Page 32

CS150N
5. Dieselbe Stelle auf mehrere Metallgegenstände durchsuchen
Wenn Sie Metall gefunden haben, müssen Sie nach dem Signal einige Sekunden warten, ehe Sie
weiter suchen können. Der Detektor braucht diese Zeit, um wieder zum Nullstand
zurückzukehren. (Oder drücken Sie den roten Schalter am Griff, um den Zeiger des VU-Meters
wieder zur Mitte zu bringen).
d. Hinweise:
• Anders als z.B. bei einem Pendel dürfen Sie den Detektor beim Schwingen oder gleich danach
nicht aufheben. Dies könnte nämlich zu Fehlinterpretationen führen [R].
• Schwingen Sie langsam – Wenn Sie sich beeilen, verfehlen Sie das Ziel.
• Beim Finden eines Objekts, erklingt ein Ton und der Zeiger zeigt an, um welches Metall es sich
handelt. Wenn der Detektor Metall gefunden hat, stellen Sie den Schalter von MODE TR1 auf TR2
um die Qualität des Fundes besser bestimmen zu können.
• Der Detektor kann das Muster nicht identifizi eren: Sie halten die Suchspule wahrschei nlich nicht in der
richtigen Position.
Bemerkungen:
• Wenn Sie ein wertvolles Metallobjekt finden, ertönt ein intensives Signal. Wenn das Signal nicht
wiederholt wird, nach-d em Sie di e S pule einige Male über den Fund hi n und her be wegt haben , da nn
ist der Fund wahrscheinli ch wertlos .
• Verschmutzter Boden, elektrische Interferenzen oder große, grobe Abfallstücke können
Fehlsignale auslösen. Diese Signale erkennen Sie meistens als gebrochene oder nicht
reproduzierbare Signale.
e. Feineinstellung des Detektors
Sobald Sie sich mit dem Funktionieren des Detektors vertraut gemacht haben, können Sie den
Detektor so fein einstellen, dass er weniger empfindlich für Interferenzen und selektiver gegenüber
Funden wird.
1) Einstellung SENSITIVITY [S]
Wenn Sie SENSITIVITY (Empfindlichkeit) auf MIN. oder MAX. oder zwischendrin stellen,
regeln Sie die Suchtiefe. Stellen Sie SENSITIVITY auf das Maximum für hohe
Tiefenmessungen. Fängt der Detektor an, zu “rasseln”, dann können Sie dies stoppen, indem
Sie die Empfindlichkeit (SENSITIVITY) etwas verringern.
2) Einstellung GROUND [T]
Es wird Ihnen das erste Mal vielleicht nicht gel ingen, den GRO UND-Schalter sofort gut ei nzustellen.
Es ist aber sehr wichtig, dies zu tun, weil der GROUND-Schalter Fehlsi gnale, verursacht durch
Böden mit hohem Mineralgehalt, ausblendet.
1. Stellen Sie den Schalter auf MODE VLF und halten Sie die Suchspule bis auf etwa 1 bis 4
cm vom Boden.
2. Schwenkt der Zeiger nach rechts, dann müssen Sie den GROUND-Schalter nach links
drehen. Schwenkt der Zeiger nach rechts, dann müssen Sie den GROUND-Schalter nach
rechts drehen.
3. Halten Sie die Suchspule bis auf 30 cm vom Boden und drücken Sie den roten Schalter am
Griff. Der Zeiger geht wieder zur Mitte.
4. Wiederholen Sie Schritte 1 - 3 bis der Zeiger in der Nähe der Mitte stehen bleibt jedesmal,
wenn Sie die Suchspule dichter beim Boden bringen.
Nach Einstellung von GROUND, ist der Detektor abgestimmt auf die Eigenschaften dieses
Bodens. Normalerweise brauchen Sie dies nicht mehr zu regeln, es sei denn, dass Sie einen
anderen Ort untersuchen möchten.
3) Einstellung DISCRIMINTATION
Discrimination ermöglicht es, unterschiedliche Metalle zu identifizieren. Mit dem
DISCRIMINATION-Schalter können Sie wählen, ob der Detektor den Unterschied zwischen
verschiedenen eisenhaltigen und nicht-eisenhaltigen Metallen machen muss. Wenn der
MODE-Schalter auf TR2 steht, drehen Sie den DISCRIMINATION-Schalter zuerst in Richtung
der Mitte. Passen Sie die Position des Schalters an. Je höher Sie DISCRIMINATION einstellen,
desto besser macht der Detektor den Unterscheid zwischen z.B. große Aluminiumteile und
Gold. Es wäre aber möglich, dass kleinere, wertvolle Gegenstände, wie z.B. Münzen oder
kleine Ringen, vergessen werden. Mit dem DISCRIMINATION-Schalter in einem hohen Stand,
reagiert der Detektor nicht auf (in dieser Reihenfolge) kleine Stücke Silberpapier, Alufolie und
Metallobjekte wie z.B. Ziehlaschen.
Bemerkung: DISCRIMINATION müssen Sie, jedes Mal wenn Sie einen anderen Ort
untersuchen, wieder einstellen, denn jeder Ort bietet neue Herausforderungen.
f. Fehlsignale
Die Überempfindlichkeit ihres Detektors kann manchmal irreführende Interferenzen mit Abfall und
anderen Quellen verursachen. Die beste Weise um diese Fehlsignale zu beseitigen, ist nur nach
06/09/2011 © Velleman nv
32
Page 33

CS150N
Gegenständen zu graben, die ein starkes, wiederholtes Signal aussenden, während Sie die
Suchspule über den Boden hin und her schwingen. Sie werden allmählich erfahren, wie Sie zufällige
Signale von festen, reproduzierbaren Signalen unterscheiden können.
Diese Art Probleme können Sie stark reduzieren, indem Sie nur kleine Oberflächen gleichzeitig
untersuchen. Führen Sie hierbei langsame und kurze, einander überlappende schwingende
Bewegungen aus.
g. Anwendungshinweise
Kein einziger Metalldetektor ist 100% zuverlässig. Zahlreiche Faktoren können die Reaktionen des
Detektors beeinflussen, wie:
• Der Winkel, in dem das Objekt im Boden liegt.
• Die Tiefe, in der das Objekt liegt.
• Der Eisengehalt des Objekts.
• Die Größe des Objekts.
h. Lokaliesierung des Objekts
Ein Objekt haargenau orten, vereinfacht das Aufgraben wesentlich. Eine genaue Punktortung
erfordert einige Erfahrung. Diese praktischen Erfahrungen sammeln Sie am Besten durch Objekte in
ihrem Garten zu suchen. Manchmal erschwert die Schwingbewegung eine genaue Lokalisierung.
Ändern Sie die Richtung der Schwingbewegung, um eine genauere Lokalisierung zu bekommen.
Folgen Sie unterstehenden Schritten:
1. Wenn der Detektor ein Objekt entdeckt, bleiben Sie die Suchspule dann mit immer kleineren,
seitlichen Schwingbewegungen über das Objekt bewegen.
2. Markieren Sie die genaue Stelle am Boden.
3. Halten Sie die Suchspule sofort über dieser Stelle. Bewegen Sie die Suchspule anschließend
vorwärts von Ihnen weg und kehren Sie dann zurück. Wiederholen Sie dies einzige Male.
Markieren Sie die genaue Stelle wieder am Boden wo der Detektor ein Signal hören lässt.
4. Wiederholen Sie Schritte 1 bis 3 jetzt in einem Winkel von 90° (in Bezug auf die ursprüngliche
Suchrichtung), wodurch Sie ein Muster in Form eines X beschreiben. Das Objekt wird sich unter
dem X befinden, dort wo das Signal am lautest klingt [U].
Bemerkungen:
• Wenn an einem Ort soviel Abfall liegt, dass dadurch Fehlsignale entstehen, müssen Sie die
Schwingbewegungen verlangsamen und verkürzen.
• Vor kurzem begrabene Münzen können anders als schon länger begrabene und mehr oxidierte
Münzen reagieren.
• Bestimmte Speicher, Schrauben, Bolzen und andere eiserne Gegenstände (wie z.B. alte
Flaschendeckel) oxidieren und verursachen ein “Kreisl i c ht”-Effekt. Eine Mischung von natürlichen
Bodenstoffen und die Oxidation verschiedener Metalle verursachen diesen Effekt. Durch diese
Mischung kann es vorkommen, dass Signale nicht an einem ‘festen’ Ort erklingen. Dieser Effekt
erschwert es dann auch sehr, um solche Gegenstände genau zu lokalisieren. (Siehe
“Feineinstellung des Detektors”).
7. Pflege und Wartung
Reinigen Sie den Detektor manchmal mit einem feuchten Tuch. So sieht er immer neu aus.
Verwenden Sie keine Chemikalien, Lösungsmittel oder starke Reinigungsmittel.
• Eigenmächtige Anpassungen oder Änderungen können Störungen verursachen und erlischen der
Garantieanspruch.
• Die mitgelieferte Suchspule ist wasserdicht und kann in Salz- und Süßwasser untergetaucht
werden. Schützen Sie die Bedienungskonsole aber vor Wasser! Spülen Sie die Suchspule nach
Gebrauch in Salzwasser mit klarem Wasser. So vermeiden Sie Korrosion der Metallteile.
8. Fehlersuche
Beachten Sie nachfolgende Hinweise, wenn der Detektor nicht gut funktioniert.
PROBLEM HINWEIS
Der Detektor zeigt oder
lässt ein falsches Signal
hören
06/09/2011 © Velleman nv
Die Empfindlichkeit wurde vielleicht zu hoch eingestellt.
Passen Sie sie mit dem SENSITIVITY-Schalter an.
Vielleicht bewegen Sie die Suchspule zu schnell oder nicht in die
genaue Position. Machen Sie langsamere Schwingbewegungen und
halten Sie die Suchspule in der genauen Position. Siehe
“Überprüfung und Gebrauch des Detektors” und “Lokalisierung des
Objekts”.
Bei oxidierten Metallen kann der Detektor falsche Signale geben.
Versuchen Sie, das Objekt von verschiedenen Ecken zu orten (Siehe
33
Page 34

/
BeD
Mlä
.
ekeFüBe
VeAllnicüb
.
ml’uè s
e
adaveTramoL’aPrVu
ei der Lok
a
t
n
s
m
u
f
n
e
e
c
n
s
R
V
e
e
z
u
i
s
d
f
m
t
m
a
n
r
q
o
u
t
e
e
n
k
a
s
h
n
e
d
v
e
t
o
o
m
s
s
c
r
t
n
i
d
e
e
c
n
e
b
t
e
m
n
u
e
e
w
g
b
n
a
r
e
s
m
e
o
i
n
è
a
i
e
i
u
m
t
e
n
e
i
m
g
u
m
d
ü
a
.
s
t
e
o
a
c
m
p
s
n
m
”
r
j
M
D
v
N
V
z
e
z
z
H
~
2
6
u
r
e
h
o
s
b
e
n
o
g
A
n
m
a
i
v
e
a
d
O
n
n
S
ü
s
z
1
)
e
s
e
r
t
n
u
t
p
n
c
e
r
e
o
e
g
m
u
g
g
r
è
e
o
a
p
e
e
r
p
o
e
m
k
t
k
m
b
s
p
m
v
a
c
e
o
n
m
.
n
.
v
e
u
t
a
ines Objek
etektor ei
etallart an
sst mehre
h
ören.
9
Techni
lisierung
s, zeigt d
e andere
oder er
re Töne
che Dat
r
n
“ Loka
gleich
wahrs
Es kö
befind
Das O
kennt.
Wenn
Detek
falsch
Die E
Passe
lisierung d
Signal ze
heinlich a
nen sich
n.
jekt kann
das Objek
or nicht di
s Funktio
pfindlichk
Sie sie m
CS150N
s Objekts
gt und hö
s sehr sch
ehrere Ob
aus einem
stark oxid
richtige
ieren des
it wurde
t dem SE
). Wenn d
en lässt, d
werem oxi
ekte am
Metall bes
iert ist, ka
etallart a
etektors.
ielleicht zu
SITIVITY-
r Detekto
nn besteh
iertem M
rt, den Sie
tehen, das
n es vork
zeigt. Dies
hoch eing
chalter an
nicht im
t das Obje
tall.
untersuch
der Detek
mmen, da
bedeutet
stellt.
.
er das
t
en,
or nicht
ss der
ein
V
rwenden
ine Haftu
r mehr I
dienung
Al
le Änderu
URHEBE
©
lleman N
e weltweit
ht gestatt
ersetzen,
Stro
Freq
Emp
3-To
Betri
Abm
Gewi
versorgu
enz
indlichkeit
-Audiodis
bstemper
ssungen (
ht
Sie diese
ng für Sc
formatio
anleitung
ngen ohn
RECHT
besitzt
n Rechte
t, diese B
u bearbei
g
riminator
tur
L x B x H)
Gerät n
aden od
en zu di
, siehe w
vorheri
as Urhe
orbehalte
dienungs
en oder zu
niedrig
mediu
hoch
r mit ori
r Verletz
sem Prod
w.velle
e Ankün
errecht f
. Ohne vo
nleitung g
speichern
3 x 9
15KH
16cm
'All m
400H
700H
1500
0°C
92~1
±1.2
inellen Z
ngen bei
ukt und d
an.eu.
igung vo
r diese B
rherige sc
nz oder in
-Batterien
±2KHz
für eine M
tal'-Modu
+ 60Hz
+ 105Hz
z + 225H
40°C
1 x 20 x
kg
behörteil
(falscher
ie neuest
behalten.
dienung
riftliche G
Teilen zu
(nicht mit
nze von €
)
8.5cm
en. Velle
Anwend
Version
anleitun
nehmigun
eproduzie
eliefert)
2 (Ø 25m
an NV ü
ng diese
dieser
.
des Urhe
en, zu ko
, im
ernimmt
Gerätes
bers ist es
ieren, zu
1
Introd
A
tutti i res
portanti
I
fficio co
tato effe
La
ringrazia
l presente
n
d
nneggiato
ll’inosserv
nditore no
mite il ce
nete, reli
pparecchi
esa per c
-meter -
denti dell
informazi
Que
pro
otto nell’a
l’am
biente ste
ferenziato;
indi
Per
informazi
tuato l’a
manuale p
durante il
nza delle i
ca metalli
uie, monil
per indicar
zione e
to simbol
unale, il
o per ave
sarà rite
è dotato
ffia - per
caratte
’Unione E
ni ambi
riportato
biente al
so. Non s
dovrebbe
oni più d
ervizio l
quisto.
scelto Vel
rima di util
rasporto;
ndicazioni
uto respo
CS150N,
d’oro e d’
i:
poter colle
il probab
I
istiche
uropea
ntali rela
ul prodott
termine d
altire il pr
essere sm
ttagliate
cale di s
leman! Si
izzare il di
n tale eve
fornite nel
sabile di e
possibile
rgento. Il
gare una c
le tipo di
truzi
ive a que
o o sull’im
l suo ciclo
dotto (o l
ltito da u
irca il ric
altiment
rega di le
positivo.
ienza, co
presente
ventuali d
rilevare do
dispositivo
uffia (non
etallo rile
ni
to prodo
allaggio, i
vitale in q
pile, se u
’impresa s
iclaggio d
rifiuti o
gere atte
ssicurarsi
tattare il p
anuale no
nni cagion
vunque la
è versatil
nclusa) al
ato
to
dica che
anto può
ilizzate) c
pecializzat
i questo
pure il n
tamente l
he l’appa
roprio forn
n sono co
ati a cose
presenza d
e semplic
dispositivo
vietato s
ssere noci
me rifiuto
nel ricicl
rodotto,
gozio pr
informazi
ecchio non
itore. I da
erti da gar
persone.
i oggetti
da usare
altire il
o per
urbano
ggio.
ontattar
sso il qua
ni conten
sia stato
ni derivan
anzia; il
etallici qu
le
te
i
li
06
09/2011
34
© Vellema
nv
Page 35

/
Di
eAsSoNoNo
.3.
a
m
.
o
f
b
n
s
v
e
e
e
N
i
scom
n
r
r
e
e
z
z
r
e
m
t
e
z
p
m
T
f
a
obam
e
e
u
r
m
n
d
e
c
s
a
s
r
i
n
t
t
s
v
l
p
e
e
o
d
a
s
o
:
e
e
e
d
g
d
l
g
t
a
m
i
e
e
t
a
n
a
d
g
t
u
c
u
u
z
e
o
t
o
e
p
o
o
o
n
c
n
i
o
s
o
O
n
e
r
v
p
t
c
d
o
a
e
d
t
E
o
e
c
p
T
s
v
t
o
f
e
t
n
O
o
e
V
e
q
o
b
r
a
n
o
r
c
o
t
o
t
e
e
t
n
e
o
a
V
z
n
P
a
®
e
t
r
t
a
g
c
p
a
t
e
c
r
o
d
r
o
t
d
o
n
L
p
t
t
c
t
e
L
b
o
e
a
u
o
e
n
m
o
a
à
a
t
s
t
t
e
a
e
u
a
o
g
n
n
z
t
e
scriminat
vato per
ril
ta regola
nda a te
ta 1: il co
ta 2: il di
2
Per la
Ten
Att
perc
NO
Del
per
re audio
acilitare la
ile - per
uta stag
ntenitore
positivo p
ostra si
re il dispo
nzione: l’
zione dei
TOCCAR
mitare in
ona a so
petenti.
a tre toni
ricerca.
ette di re
a - perme
ell’unità di
r funzion
urezza
itivo lonta
uricolare n
uoni dell’a
E MAI MU
modo vis
vegliare i
- vengon
olare la lu
te di ricer
controllo
re, necess
no dalla p
on deve es
biente circ
NIZIONI
bile il pu
l luogo –
CS150N
emessi di
ghezza d
are oggett
on è a ten
ta di 3 bat
rtata di ba
ere in alcu
stante può
ALTRI
to di ritr
avvertir
ferenti su
l cercamet
i anche in
uta stagna
erie da 9
mbini e di
modo utili
costituire u
GGETTI
vamento
immedi
ni a secon
alli per un
cqua.
.
tipo (non
persone n
zato nei ca
a situazio
OTENZIA
– se poss
tamente
a del tipo
uso più co
incluse).
n qualifica
si in cui la
e di pericol
MENTE L
ibile lasci
le autorit
di metallo
fortevole.
te.
ancata
.
ETALI.
re una
Regole
Fa
re riferime
nuale.
m
•
Protegge
Protegge
•
Familiariz
•
Per ovvie
•
Utilizzare
•
utilizzo d
I danni d
•
da garan
persone.
La garan
•
sale.
•
Osserva
uovere l
Ri
so
stanze chi
Man
Alcu
Man
con
Ten
Utili
tem
ele
AT
mal
gett
sec
eneral
to alle co
e il disposi
e il disposi
zare con le
ragioni di
il dispositi
termina la
rivanti dal
ia; il vendi
ia non co
e sempr
batterie s
iche dalle
tenere il di
ni liquidi p
eggiare il
enitore, d
re il dispo
zare e sto
eratura p
enti in pla
ENZIONE
unzionam
re le batt
ndo le vig
bini.
dizioni di
ivo dagli u
ivo da ecc
funzioni d
icurezza è
o solamen
decadenz
’inosserva
tore non s
re i danni
tutte le le
il disposi
batterie p
spositivo a
ssono con
ispositivo
nni al circ
itivo lonta
ccare il dis
ssono rid
stica.
la sostitu
nti. Non t
rie nel fu
nti norma
garanzia
rti. Evitare
ssivo calo
l dispositi
vietato ap
e per lo s
della gara
za delle in
rà ritenut
erivanti d
gi locali e
ivo non vi
ò creare
sciutto. In
tenere sos
on cura.
ito intern
no da polv
positivo in
rre la vita
ione delle
ntare di ri
co poiché
ive locali.
e qualità
di scuoter
e, polvere
o prima di
ortare dell
opo per il
nzia.
icazioni f
responsa
ll’utilizzo i
nazionali
ne utilizza
anni seri
caso di co
anze corr
ventuali u
o malfunz
re e spor
ambienti c
del disposi
batterie c
aricare ba
otrebbero
enere le
elleman
violentem
e umidità.
utilizzarlo.
e modifich
uale è sta
rnite nel p
ile di even
n ambienti
elative all
to per lun
ll’apparec
tatto con l
sive
ti violenti
ionamenti.
izia per ev
n temper
ivo, dann
n apparec
terie non
esplodere.
batterie l
riportate
ente il dis
al disposi
o progetta
esente ma
uali danni
con eleva
ricerca d
o tempo.
hio.
iquidi, asci
ossono pr
itare un’us
ture norm
ggiare le
hio acces
icaricabili,
Smaltire l
ntano d
nell’ultima
ositivo dur
ivo.
o. Ogni al
nuale non
agionati a
a concentr
i tesori.
a fuoriusci
ugare imm
ovocare ro
ura prema
ali. Valori
atterie o s
può caus
non forar
batterie
lla portat
pagina de
nte l'utiliz
ro tipo di
ono coper
cose o
azione di
ta di
ediatamen
ture del
ura.
stremi di
ciogliere gl
re
o non
sate
dei
l
o
i
te.
i
4
Codice
Di
seguito so
•
Richieder
Rispettar
•
Osservare
•
Non distr
•
ritrovati,
Lasciare il
•
scavate.
06
09/2011
etico de
no riportat
sempre il
sempre i
tutte le le
ggere mai
ivolgersi a
terreno e
l cercat
e alcune r
permesso
iritti e la
gi locali e
tesori stor
un muse
a vegetazi
re di te
gole che u
prima di s
roprietà al
nazionali r
ici o arche
o ad una
ne nello s
ori
n cercator
olgere op
rui.
elative alla
logici. Se
società ch
tato in cui
35
di tesori
razioni di
ricerca di
on si con
si occupa
sono stati
ovrebbe o
icerca in q
tesori.
scono i pa
di beni st
rovati. Ri
sservare:
ualsiasi lu
rticolari de
rici.
mpire eve
go.
li oggetti
tuali buch
© Vellema
nv
Page 36

CS150N
• Utilizzare il cercametalli in aree sicure.
• Smaltire in modo appropriato eventuali rifiuti ritrovat i.
5. Preparazione
Fare riferimento all’illustrazione riportata a pagina 2 del presente manuale.
a. Montaggio del cercametalli
Il montaggio del dispositivo è molto semplice e non richiede l’utiliz zo di un’attrezzatura particolare.
Seguire la procedura di seguito descritta.
1. Allentare la ghiera di serraggio asta ruotandola in senso orario [A].
2. Regolare la lunghezza dell’asta in modo tale che, quando si util izza il dispositivo stando in piedi e
con braccio disteso, la sonda rimanga sollevata dal terreno circa 1/2 - 2 pollici [B].
3. Stringere la ghiera per bloccare l’asta.
4. Rimuovere il sistema di fissaggio della sonda (vite e dado). Inserire l’asta nella relativa sede
allineando i fori presenti su di essa con quelli presenti sulla sonda. Inserire la vite nei fori e
stringere il dado a manopola [C].
5. Avvolgere il cavo della sonda sull’asta lasciando un po’ di gioco [C].
6. Inserire il connettore nella relativa presa presente sul contenit ore dell’unità principale [D].
Attenzione:
• Il connettore può essere inserito nella presa solo in un senso; non forzare la spina per evitare
di danneggiarla.
• Per scollegare il cavo della sonda dall’unità principale, afferrare saldamente il connettore,
quindi tirare. Non tirare mai il cavo per staccare il connettore!
7. Allentare la manopola di fissaggio della sonda per regolarne l’angolo a proprio piacimento;
Stringere le manopole quanto basta per mantenere stabile l’elemento sensibile [E].
Attenzione: Non stringere eccessivamente la manopola. Non utilizzare pinze per eseguire
l’operazione.
8. Collocare il bracciolo sulla parte terminale dell’asta; stringere la vite di fissaggio presente nella
parte posteriore del sistema di controllo [F].
b. Installazione delle batterie
Attenzione:
• Utilizzare solamente batterie nuove di tipo e formato richiesto.
• Si raccomanda di non utilizzare batterie nuove miste a vecchie o batterie di tipo differente
(standard, alcaline o ricaricabili con differenti capacità).
1. Spegnere il dispositivo posizionando la manopola MODE su OFF [G].
2. Far scorrere nel senso della freccia il coperchio del vano porta batterie destro presente sul retro
del contenitore dell’unità principale [H].
3. Inserire una batteria da 9 V nell’alloggiamento prestando attenzione alla polarità e tenendo sotto
la batterie il nastrino d’estrazione.
4. Riposizionare il coperchio del vano porta batterie destro.
5. Far scorrere nel senso della freccia il coperchio del vano porta batterie sinistro [I].
6. Inserire due batterie da 9 V nell’alloggiamento prestando attenzione alla polarità e tenendo sotto
la batterie il nastrino d’estrazione.
7. Riposizionare il coperchio del vano sinistro.
Attenzione:
• Sostituire sempre le batterie vecchie o con basso livello di carica.
• Se si prevede di non utilizzare il dispositivo per una settimana o più, rimuovere le batterie
perchè da esse potrebbero fuoriuscire prodotti chimici in grado di danneggiare i componenti
elettronici.
• Smaltire le vecchie batterie secondo le norme vigenti; non bruciarle o seppellirle.
Per aumentare la durata delle batterie si consiglia di utilizzare l’auricolare in quanto ha un consumo
nettamente inferiore a quello dell’altoparlante.
c. Test delle batterie
Se il dispositivo non si accende, non funziona correttamente o se il volume è troppo basso, è
necessario verificare il livello di carica delle batterie.
• Ruotare la manopola MODE nella posizione VLF (Very Low Frequency). Per testare le batt erie del
compartimento sinistro posizionare il deviatore BATT TEST su B1. Per testare le batterie del
compartimento destro posizionare il deviatore BATT TEST (posto sul pannello frontale) su B2 [J].
Se la lancetta del Vu-meter indica un valore compreso tra 3 e 5 (zona verde), significa che il
livello delle batterie è buono, altrimenti provvedere alla sostitu zione delle stesse.
06/09/2011 © Velleman nv
36
Page 37

CS150N
d. Taratura del Vu-meter
• Posizionare la manopola MODE su OFF; utilizzare un cacciavit e per allineare la lancetta dello
strumento con lo zero a centro scala [K, L].
e. Utilizzo della cuffia
È possibile collegare al dispositivo un auricolare stereo (non incluso) per un ascolto individuale.
L’utilizzo di una cuffia, permette di ottenere un risparmio energetico ed anche di apprezzare le più
lievi variazioni del suono, ottenendo così migliori risultati.
• La spina jack da 3,5 mm della cuffia deve essere inserita nella presa HEADPHONE [M] posta
nella parte posteriore del dispositivo.
• Regolare il volume con il controllo del volume [M].
Nota: Quando si utilizza una cuffia, l’altoparlante interno viene automaticamente disattivato.
f. Ascolto in sicurezza
Per proteggere il proprio udito, seguire attentamente le indicazioni di seguito riportate:
• Impostare il volume ad un livello basso prima di ascoltare; successivamente regolarlo a proprio
piacimento.
• Non tenere il volume troppo alto!! Un ascolto prolungato con livello di volu me eccessivo, può
provocare seri danni all’udito.
• Non aumentare il volume impostato. Dopo un breve periodo di tempo, le vostre orecch ie si
adattano al livello del volume; in questo modo si evita di arrecare danno all’udito.
g. Norme relative alla sicurezza
L’auricolare non deve essere in alcun modo utilizzato in tutti quei casi dove la mancata percezione
dei suoni dell’ambiente circostante può costituire una situazione di pericolo.
6. Funzionamento
Il cercametalli Velleman è in grado di distinguere metalli ferrosi (contenenti ferro) da quelli non
ferrosi (come oro, argento, rame, platino, alluminio, esclusi piombo e zinco). Quando il cercametalli
rileva un oggetto metallico, l’indicazione dello st rumento subisce una variazione, gli indicatori NONFERROUS o FERROUS si accendono o si spengono e il dispositivo emette uno o tre toni. Maggiore è
la frequenza dei toni emessi maggiore è l’intensità del segnale rileva to.
a. Preparazione del dispositivo
1. Posizionare il selettore BATT TEST su OPERATE.
2. Tenere il cercametalli in posizione confortevole quindi ruotare la manopola M ODE nella posizione
desiderata. Posizionarla su VLF per eseguire il test della batterie) e regolare la manopola TUNE e
GROUND (vedere “Sintonizzazione fine del cercametalli” e Regolazion e GROUND"). Posizionarla su
TR1 per ottenere un’indicazione, mediante lancetta, circa la natura del metallo rilevato (metallo di
tipo ferroso per ferro e materiale di tipo non ferroso per oro).
Posizionarla su TR2 per ottenere un’indicazione più precisa circa il tipo di metallo rilevato (es.
alluminio, oro, ecc... vedere "Regolazione del discriminator e”) [N].
Seguire la procedura di seguito riportata per regolare il TUNE [O]:
1. Posizionare la manopola TUNE a ore 10.
2. Posizionare la manopola MODE su VLF.
3. Posizionare a metà corsa le manopole DISCRIMINATION, GROUND e SENSITIVITY.
4. Tenere la sonda del cercametalli a 30 cm di distanza dal terreno o da qualsiasi oggetto metallico.
Tenere premuto il pulsante rosso presente sull’impugnatura, quin di regolare lentamente la
manopola TUNE per posizionare al centro la lancetta dello strumento (0).
Rilasciare il pulsante rosso. Durante la ricerca è possibile effettuare una regolazione fine dello
strumento mediante gli altri controlli disponibili (vedere “Sintonizzazione fine del cercametalli”).
Nota: premere il pulsante rosso sull’impugnatura per far tornare la lancetta a centro scala in
qualsiasi momento.
b. Test ed utilizzo in ambienti INTERNI
Al fine di capire come il rilevatore reagisce in presenza di differenti metalli, è necessario eseguire
delle prove che possono essere condotte in ambienti interni o esterni. Prima di ogn i u tilizzo
effettuare la regolazione fine dello strumento (vedere “Sintonizzazione fine del
cercametalli”).
1. Togliere tutti gli oggetti metallici indossati (come anell i, orologi, gioielli ecc.) e collocare il
dispositivo su di un tavolo in legno o in plastica.
2. Regolare l’inclinazione della sonda tenendo la parte piatta rivolta verso l’alto [P].
Nota: non eseguire mai il test del rilevatore su di una pavimentaz ione all’interno di un edificio in
quanto la maggior parte di questi presentano al loro interno degli elementi metallici che
potrebbero mascherare completamente il segnale o interferire con gli oggetti che si stanno
esaminando.
06/09/2011 © Velleman nv
37
Page 38

CS150N
3. Posizionare la manopola MODE su TR1.
4. Collocare ad una distanza di circa 5 cm dalla sonda un oggetto realizzato con il metallo che si
vuole ricercare (ad esempio un anello d’oro o una moneta) e muoverlo.
Note:
• La sonda non riesce a rilevare un oggetto se questo non è in movimento per cui, durante questa
prova, essendo la sonda fissa (appoggiata su di un tavolo), è necessario muovere l’oggetto di
fronte al sensore.
• Se l’oggetto è una moneta, questa verrà rilevata più facilmente se la relativa faccia risulta
parallela alla superficie del sensore.
• Mentre lo strumento individua il tipo di metallo rilevato, gli indicatori NON-FERROUS e FERROUS
lampeggiano e la lancetta dello strumento si muove sul settore FERROUS o NON-FERROUS. Se il
metallo rilevato non è di tipo ferroso, lo strumento emette un tono.
• Nel caso in cui lo strumento non dovesse rilevare alcun materiale, verificare il livello di carica
delle batterie e il corretto collegamento della sonda all’unità principal e.
c. Test ed utilizzo in ambienti ESTERNI
1. Individuare un’area di terreno in cui no n è presente del metallo.
2. Posizionare sul terreno un campione del materiale che si desidera rilevare (come ad esempio un
anello d’oro o una moneta). Se viene utilizzato un oggetto di valore per testare il dispositivo,
contrassegnare l’esatto punto di collocazione per un semplice recupero (non collocarlo su terreno
con erba alta o con sterpaglia).
3. Posizionare il selettore MODE su TR1.
4. Passare la sonda, con un lento movimento a zig zag, sopra la zona dove è stato collocato
l’oggetto campione tenendola distanziata dal terreno circa 1-2 pollici [Q].
5. Provare ad effettuare la ricerca di altri materiali nell’ area. Quando viene rilevato un oggetto
metallico, attendere alcuni secondi (terminato il tono acustico) per permettere allo strumento di
resettarsi (o premere il pulsante rosso sull’impugnatura per portare la lan c etta dello strumento a
centro scala).
d. Suggerimenti relativi all’utilizzo della sonda
• La sonda non deve essere fatta oscillare come se fosse un pendolo poiché tale movimento
comporterebbe false rilevazioni [R].
• Effettuare dei movimenti lenti. Un passaggio troppo veloce non permette l’individuazione di
eventuali oggetti.
• Il dispositivo emette un suono quando rileva un oggetto metallico e contemporaneamente la
lancetta dello strumento devia con uno spostamento legato al tipo di metallo rilevato.
• Posizionare la manopola MODE su TR2 per determinare il tipo di metallo ri levato.
• Se l’apparecchio non rileva alcun metallo assicurarsi che si stia conducendo correttamente la
ricerca.
Note:
• Il rilevatore emette un intenso segnale quando rileva un qualsiasi oggetto realizzato in metallo.
Se un segnale non viene ripetuto dopo che la sonda viene ripassata diverse volte sopra
l’obiettivo, significa che probabilmente l’ogget to è semplicemente un detrito metallico.
• I falsi segnali, possono essere generati da terreno con detriti metallici, da in terferenze elettriche o
da parti metalliche irregolari di rifiuti aventi rilevanti dimensioni. Questi falsi segnali, sono
solitamente casuali ed irripetibili.
e. Sintonizzazione fine del cerca metalli
Dopo aver preso familiarità con il funzionamento del dispositivo, è possibile passare all’utilizzo della
sintonizzazione fine dello strumento che permette di effettuare una ricerca più selettiva.
1) Regolazione della sensibilità [S]
Tramite la manopola SENSITIVITY è possibile effettuare la regolazione di questo parametro.
Per ottenere la massima profondità di rilevazione, impostare la manopola SENSITIVITY sul
massimo valore. Se lo strumento dovesse entrare in oscillazione, ridurre il valore della
sensibilità (SENSITIVITY) quanto basta per eliminare l’inconveniente.
2) Regolazione GROUND [T]
Questa operazione richiede un po’ di tempo ma è fondamentale per il corretto funzionamento
dello strumento in quanto permette di escludere i falsi segn ali generati da terreni
mineralizzati.
1. Posizionare la manopola MODE su VLF quindi posizionare la sonda ad una distanza di circa
1 - 4 cm dal terreno.
2. Se l'indicatore si sposta verso destra, ruotare la manopola GROUND verso sinistra e
viceversa.
3. Sollevare di circa 30 cm dal terreno la sonda quindi premere il tasto rosso. La lancetta si
riposiziona a centro scala.
06/09/2011 © Velleman nv
38
Page 39

CS150N
4. Ripet ere i passi 1-3 fino ad ottenere il minimo spostamento della lancetta (rispetto alla
posizione centrale) quando la sonda viene avvicinata al terreno. Terminata la regolazione il
dispositivo è calibrato per eseguire i rilevamenti su quel determinato tipo di terreno.
Reimpostare il valore solo quando si devono eseguire delle rilevazioni su un altro tipo di
terreno.
3) Regolazione della discriminazione
La discriminazione è la capacità dello strumento di riconoscere i metalli rileva ti. Tramite
l’impostazione DISCRIMINATION, è possibile distin guere i metalli ferrosi da quelli non ferrosi.
Se il selettore MODE è posizionato su TR2, cominciare con la regolazione DISCRIMINATION a
metà corsa. Durante la rilevazione regolare la manopola per ottenere un risultato ottimale. La
regolazione massima della discriminazione, non consente di rilevare piccoli pezzi di carta
argentata, lamierini e linguette di apertura delle lattine.
Nota: ogni volta che il dispositivo viene usato in zone differenti, è necessario regolare la
discriminazione! Ogni zona di ricerca possiede caratteristiche diverse.
f. Falsi segnali
Poiché lo strumento è estremamente sensibile, detriti meta llici o altre fonti di interferenza
potrebbero causare falsi segnali. Si consiglia pertanto di scavare solamente se il segnale emesso
dallo strumento è intenso e ripetibile. Passando sul terreno con movimento a zig zag, si è in grado di
distinguere i segnali generati da interferenze da quelli reali. Per ridurre al minimo i falsi segnali
quando viene esaminato un terreno molto “sporco”, si consiglia d i esplorare aree limitate con
escursioni della sonda ridotte e lente.
g. Fattori che influenzano la rilevazione
È difficile ottenere una rilevazione precisa al 100%. In molti casi, la rilevazione è influenzata dai
seguenti fattori:
• L’angolo d’inclinazione dell’oggetto interrato
• La profondità alla quale si trova l’oggetto
• Il livello di ossidazione dell’oggetto
• La dimensione dell’oggetto
• L’interferenza elettromagnetica che circonda l’oggetto.
h. Individuazione di un oggetto metallico
Un’individuazione precisa del punto in cui l’oggetto è interrato, permette di eseguire uno scavo a
colpo sicuro. Per raggiungere una certa precisione, è necessario fare della pratica, magari ricercando
degli oggetti sotterrati nel proprio terreno prima di procedere con ispezioni di altre zone. A volte,
l’individuazione esatta di alcuni oggetti può risultare difficile a causa della modalità di “spazzolata”
del sensore sul terreno. In questi casi, provare a variare la direzione di ricerca.
Per individuare la posizione di un oggetto metallico seguire le indicazioni di seguito riportate:
1. Quando il rilevatore individua un oggetto sepolto, continuare a muovere la sonda sulla zona
individuata riducendo man mano le deviazioni di movimento.
2. Prendere nota visiva del punto esatto sul terreno in corrispondenza del quale il disposit ivo emette
il suono.
3. Fermare la sonda direttamente sopra al punto individuato sul terreno. Spostarla quindi in vanti e
indietro un paio di volte. Prendere nota visiva del punto esatto sul terreno in corrispondenza del
quale il dispositivo emette il suono.
4. Ripetere i passi 1-3 con movimento perpendicolare al precedente realizzando una sorta di “X”.
L'obiettivo sarà posizionato esattamente sotto la “X„ coincidente con il punto in cui il dispositivo
emette un suono più intenso [U].
Note:
• Se il terreno analizzato è ricco di detriti metallici che provocano falsi segnali, ridurre la velocità e
l’ampiezza del movimento.
• La rilevazione di monete recentemente interrate può essere differente da quelle sepolte da molto
tempo a causa dell’ossidazione.
• Alcuni chiodi, dadi, bulloni ed altri oggetti in ferro (come tappi di bottiglia) soggetti ad ossidazione
possono generare un effetto “alone”. Questo effetto è causato dall’unione di elementi naturali
presenti nel terreno con gli ossidi generati da differenti tipi di metallo. A causa della presenza di
tali miscele, i segnali generati dal dispositivo non corrispondono ad un punto fisso e ben preciso
sul terreno; questo rende difficile la rilevazione di oggetti metallici.
7. Cura e manutenzione
Pulire regolarmente il dispositivo con un panno umido per mantenerlo come nuovo. Non
usare prodotti chimici, solventi o detersivi aggressivi.
06/09/2011 © Velleman nv
39
Page 40

CS150N
Modifiche o manomissioni effettuate sul dispositivo, possono provocare malfunzionamenti e
determinano la decadenza della garanzia. La sonda del dispositivo, può essere immerso in acqu a
dolce o salata. Si raccomanda di non bagnare il contenitore dell’unità di controllo poichè non è a
tenuta stagna. Dopo l’utilizzo della sonda in acqua salata, risciacquarla abbondantemente con acqua
dolce per evitare la corrosione delle parti metalliche.
8. Analisi guasti
Se il dispositivo non funziona correttamente, segu ire i suggerimenti riportati nella seguente tabella
per tentare di risolvere il problema:
PROBLEMA SUGGERIMENTO
Il dispositivo fornisce false
indicazioni.
Lo strumento non fornisce una
corretta indicazione del tipo di
metallo rilevato o il dispositivo
emette diversi toni quando viene
individuato un obiettivo.
Sensibilità troppo elevata.
L’inclinazione della sonda è errata o il movimento è troppo
veloce. Tenere la sonda parallela al terreno e ispezionare il
terreno più lentamente. Vedere paragrafo “Test ed utilizzo
del rilevatore” e “Individuazione di un oggetto metallico”.
Il dispositivo potrebbe fornire falsi segnali in presenza di
metalli pesanti ossidati. Provare ad individuare l’obiett ivo
procedendo da diverse angolazioni (vedere “Individuazione
di un oggetto metallico”). Se il punto individuato non è mai
lo stesso, molto probabilmente l’oggetto interrato è
realizzato in metallo pesante ossidato.
Ci potrebbe essere più di un oggetto nella zona che si sta
esaminando.
L'obiettivo potrebbe essere realizzato con un tipo di
metallo che il rilevatore non riconosce.
Se l'obiettivo è molto ossidato, il rilevatore potrebbe non
riconoscere correttamente il tipo di metallo. Ciò non è un
malfunzionamento.
Sensibilità troppo elevata.
9. Specifiche tecniche
alimentazione 3 batterie 9V (non incluse)
frequenza 15KHz ±2KHz
sensibilità
basso 400Hz + 60Hz
discriminatore audio
a 3 toni
medio 700Hz + 105Hz
alto 1500Hz + 225Hz
temperatura operativa 0°C ~ 40°C
dimensioni (LxWxH) 92~121 x 20 x 18.5cm
peso ±1.26kg
Utilizzare questo dispositivo solo con accessori originali. In nessun caso Velleman nv ed i
suoi rivenditori possono essere ritenuti responsabili di danni o lesioni derivanti da un uso
improprio od errato di questo dispositivo.
Per ulteriori informazioni relative a questo prodotto e l’ultima versione di questo manuale
utente, vi preghiamo di visitare il nostro sito www.velleman.eu
Le informazioni contenute in questo manuale possono essere soggette a modific he senza
alcun preavviso.
© NOTA LEGALE
Questo manuale è protetto dai diritti di proprietà intellettuale di Velleman nv. Non è
possibile riprodurre, duplicare e distribuire liberamente questo manuale indipendentemente o come
parte di un pacchetto in formato elettronico e/o stampato senza l'autorizzazion e esplicita di
Velleman nv.
16cm per una moneta da 2€ (Ø 25mm, in
modalità “all metal”)
06/09/2011 © Velleman nv
40
Page 41

Velleman® Service and Quality Warranty
Velleman® has over 35 years of experience in the electronics world and
distributes its products in more than 85 countries.
All our products fulfil strict quality requirements and legal stipulations in
the EU. In order to ensure the quality, our products regularly go through an
extra quality check, both by an internal quality department and by
specialized external organisations. If, all precautionary measures
notwithstanding, problems should occur, please make appeal to our
warranty (see guarantee conditions).
General Warranty Conditions Concerning Consumer Products (for
EU):
• All consumer products are subject to a 24-month warranty on production
flaws and defective material as from the original date of purchase.
• Velleman® can decide to replace an article with an equivalent article, or
to refund the retail value totally or partially when the complaint is valid and
a free repair or replacement of the article is impossible, or if the expenses
are out of proportion.
You will be delivered a replacing article or a refund at the value of 100% of
the purchase price in case of a flaw occurred in the first year after the date
of purchase and delivery, or a replacing article at 50% of the purchase
price or a refund at the value of 50% of the retail value in case of a flaw
occurred in the second year after the date of purchase and delivery.
• Not covered by warranty:
- all direct or indirect damage caused after delivery to the article (e.g. by
oxidation, shocks, falls, dust, dirt, humidity...), and by the article, as well
as its contents (e.g. data loss), compensation for loss of profits;
- frequently replaced consumable goods, parts or accessories such as
batteries, lamps, rubber parts, drive belts... (unlimited list);
- flaws resulting from fire, water damage, lightning, accident, natural
disaster, etc. …;
- flaws caused deliberately, negligently or resulting from improper
handling, negligent maintenance, abusive use or use contrary to the
manufacturer’s instructions;
- damage caused by a commercial, professi onal or collective use of the
article (the warranty validity will be reduced to six (6) months when the
article is used professionally);
- damage resulting from an inappropriate packing and shipping of the
article;
- all damage caused by modification, repair or alteration performed by a
third party without written permission by Velleman®.
• Articles to be repaired must be delivered to your Velleman® dealer,
solidly packed (preferably in the original packaging), and be completed with
the original receipt of purchase and a clear flaw description.
• Hint: In order to save on cost and time, please reread the manual and
check if the flaw is caused by obvious causes prior to presenting the article
for repair. Note that returning a non-defective article can also involve
handling costs.
• Repairs occurring after warranty expiration are subject to shipping costs.
• The above conditions are without prejudice to all commercial warranties.
The above enumeration is subject to modification according to the
article (see article’s manual).
Velleman® service- en kwaliteitsgarantie
Velleman® heeft ruim 35 jaar ervaring in de elektronicawereld en verdeelt
in meer dan 85 landen.
Al onze producten beantwoorden aan strikte kwaliteitseisen en aan de
wettelijke bepalingen geldig in de EU. Om de kwaliteit te waarborgen,
ondergaan onze producten op regel matige tijdstippen een extra
kwaliteitscontrole, zowel door onze eigen kwaliteitsafdeling als door externe
gespecialiseerde organisaties. Mocht er ondanks deze voorzorgen toch een
probleem optreden, dan kunt u steeds een beroep doen op onze waarborg
(zie waarborgvoorwaarden).
Algemene waarborgvoorwaarden consumentengoederen (voor
Europese Unie):
• Op alle consumentengoederen geldt een garantieperiode van 24 maanden
op productie- en materiaalfouten en dit vanaf de oorspronkelijke
aankoopdatum.
• Indien de klacht gegrond is en een gratis reparatie of vervanging van een
artikel onmogelijk is of indien de kosten hiervoor buiten verhouding zijn,
kan Velleman® beslissen het desbetreffende artikel te vervangen door een
gelijkwaardig artikel of de aankoopsom van het artikel gedeeltelijk of
volledig terug te betalen. In dat geval krijgt u een vervangend product of
terugbetaling ter waarde van 100% van de aankoopsom bij ontdekking van
een gebrek tot één jaar na aankoop en levering, of een vervangend product
tegen 50% van de kostprijs of terugbetaling van 50 % bij ontdekking na
één jaar tot 2 jaar.
• Valt niet onder waarborg:
- alle rechtstreekse of onrechtstreekse schade na de levering veroorzaakt
aan het toestel (bv. door oxidatie, schokken, val, stof, vuil, vocht...), en
door het toestel, alsook zijn inhoud (bv. verlies van data), vergoeding voor
eventuele winstderving.
- verbruiksgoederen, onderdelen of hulpstukken die regelmatig dienen te
worden vervangen, zoals bv. batterijen, lampen, rubberen onderdelen,
aandrijfriemen... (onbeperkte lijst).
- defecten ten gevolge van brand, waterschade, bliksem, ongevallen,
natuurrampen, enz.
- defecten veroorzaakt door opzet, nalatigheid of door een
onoordeelkundige behandeling, slecht onderhoud of abnormaal gebruik of
gebruik van het toestel strijdig met de voorschriften van de fabrikant.
- schade ten gevolge van een commercieel, professioneel of collectief
gebruik van het apparaat (bij professioneel gebruik wordt de
garantieperiode herleid tot 6 maand).
- schade veroorzaakt door onvoldoende bescherming bij transport van het
apparaat.
- alle schade door wijzigingen, reparaties of modificaties uitgevoerd door
derden zonder toestemming van Vellema n®.
• Toestellen dienen ter reparatie aangeboden te worden bij uw Velleman®verdeler. Het toestel dient vergezeld te zijn van het oorspronkelijke
aankoopbewijs. Zorg voor een degelijke verpakking (bij voorkeur de
originele verpakking) en voeg een duidelijke foutomschrijving bij.
• Tip: alvorens het toestel voor reparatie aan te bieden, kijk nog eens na of
er geen voor de hand liggende reden is waarom het toestel niet naar
behoren werkt (zie handleiding). Op deze wijze kunt u kosten en tijd
besparen. Denk eraan dat er ook voor niet-defecte toestellen een kost voor
controle aangerekend kan worden.
• Bij reparaties buiten de waarborgperiode zullen transportkosten
aangerekend worden.
• Elke commerciële garantie laat deze rechten onverminderd.
Bovenstaande opsomming kan eventueel aangepast worden
naargelang de aard van het product (zie handleiding van het
betreffende product).
Garantie de service et de qualité Velleman®
Velleman® jouit d’une expérience de plus de 35 ans dans le monde de
l’électronique avec une distribution dans plus de 85 pays.
Tous nos produits répondent à des exigences de qualité rigoureuses et à
des dispositions légales en vigueur dans l’UE. Afin de garantir la qualité,
nous soumettons régulièrement nos produits à des contrôles de qualité
supplémentaires, tant par notre propre service qualité que par un service
qualité externe. Dans le cas improbable d’un défaut malgré toutes les
précautions, il est possible d’invoquer notre garantie (voir les conditions de
garantie).
Conditions générales concernant la garantie sur les produits grand
public (pour l’UE) :
• tout produit grand public est garanti 24 mois contre tout vice de
production ou de matériaux à dater du jour d’acquisition effective ;
• si la plainte est justifiée et que la réparation ou le remplacement d’un
article est jugé impossible, ou lorsque les coûts s’avèrent disproportionnés,
Velleman® s’autorise à remplacer ledit article par un article équivalent ou à
rembourser la totalité ou une partie du prix d’achat. Le cas échéant, il vous
sera consenti un article de remplacement ou le remboursement complet du
prix d’achat lors d’un défaut dans un délai de 1 an après l’achat et la
livraison, ou un article de remplacement moyennant 50% du prix d’achat
ou le remboursement de 50% du prix d’achat lors d’un défaut après 1 à 2
ans.
• sont par conséquent exclus :
- tout dommage direct ou indirect survenu à l’article après livraison (p.ex.
dommage lié à l’oxydation, choc, chute, poussière, sable, impureté…) et
provoqué par l’appareil, ainsi que son contenu (p.ex. perte de données) et
une indemnisation éventuelle pour perte de revenus ;
- tout bien de consommation ou accessoire, ou pièce qui nécessite un
remplacement régulier comme p.ex. piles, ampoules, pièces en caoutchouc,
courroies… (liste illimitée) ;
- tout dommage qui résulte d’un incendie, de la foudre, d’un accident,
d’une catastrophe naturelle, etc. ;
- out dommage provoqué par une négligence, volontaire ou non, une
utilisation ou un entretien incorrects, ou une utilisation de l’appareil
contraire aux prescriptions du fabricant ;
- tout dommage à cause d’une utilisation commerciale, professionnelle ou
collective de l’appareil (la période de garantie sera réduite à 6 mois lors
d’une utilisation professionnelle) ;
- tout dommage à l’appareil qui résulte d’une utilisation incorrecte ou
différente que celle pour laquelle il a été initialement prévu comme décrit
dans la notice ;
- tout dommage engendré par un retour de l’appareil emballé dans un
conditionnement non ou insuffisamment protégé.
- toute réparation ou modification effectuée par une tierce personne sans
l’autorisation explicite de SA Velleman® ; - frais de transport de et vers
Velleman® si l’appareil n’est plus couvert sous la garantie.
• toute réparation sera fournie par l’endroit de l’achat. L’appareil doit
nécessairement être accompagné du bon d’achat d’origine et être dûment
conditionné (de préférence dans l’emballage d’origine avec mention du
défaut) ;
• tuyau : il est conseillé de consulter la notice et de contrôler câbles, piles,
etc. avant de retourner l’appareil. Un appareil retourné jugé défectueux qui
s’avère en bon état de marche pourra faire l’objet d’une note de frais à
charge du consommateur ;
• une réparation effectuée en-dehors de la période de garantie fera l’objet
de frais de transport ;
• toute garantie commerciale ne porte pas atteinte aux conditions
susmentionnées.
La liste susmentionnée peut être sujette à une complémentation
selon le type de l’article et être mentionnée dans la notice d’emploi.
Velleman® Service- und Qualitätsgarantie
Velleman® hat gut 35 Jahre Erfahrung in der Elektronikwelt und vertreibt
seine Produkte in über 85 Ländern.
Alle Produkte entsprechen den strengen Qualitätsforderungen und
gesetzlichen Anforderungen in der EU. Um die Qualität zu gewährleisten
werden unsere Produkte regelmäßig einer zusätzlichen Qualitätskontrolle
unterworfen, sowohl von unserer eigenen Qualitätsabteilung als auch von
externen spezialisierten Organisationen. Sollten, trotz aller
Vorsichtsmaßnahmen, Probleme auftreten, nehmen Sie bitte die Garantie in
Anspruch (siehe Garantiebedingungen).
Page 42

Allgemeine Garantiebedingungen in Bezug auf Konsumgüter (für
die Europäische Union):
• Alle Produkte haben für Material- oder Herstellungsfehler eine
Garantieperiode von 24 Monaten ab Verkaufsdatum.
• Wenn die Klage berechtigt ist und falls eine kostenlose Reparatur oder ein
Austausch des Gerätes unmöglicht ist, oder wenn die Kosten dafür
unverhältnismäßig sind, kann V elleman® sich darüber entscheiden, dieses
Produkt durch ein gleiches Produkt zu ersetzen oder die Kaufsumme ganz
oder teilweise zurückzuzahlen. In diesem Fall erhalten Sie ein
Ersatzprodukt oder eine Rückzahlung im Werte von 100% der Kaufsumme
im Falle eines Defektes bis zu 1 Jahr nach Kauf oder Lieferung, oder Sie
bekommen ein Ersatzprodukt im Werte von 50% der Kaufsumme oder eine
Rückzahlung im Werte von 50 % im Falle eines Defektes im zweiten Jahr.
• Von der Garantie ausgeschlossen sind:
- alle direkten oder indirekten Schäden, die nach Lieferung am Gerät und
durch das Gerät verursacht werden (z.B. Oxidation, Stöße, Fall, Staub,
Schmutz, Feuchtigkeit, ...), sowie auch der Inhalt (z.B. Datenverlust),
Entschädigung für eventuellen Gewinnausfall.
- Verbrauchsgüter, Teile oder Zubehörteile, die regelmäßig ausgewechselt
werden, wie z.B. Batterien, Lampen, Gummiteile, Treibriemen, usw.
(unbeschränkte Liste).
- Schäden verursacht durch Brandschaden, Wasserschaden, Blitz, Unfälle,
Naturkatastrophen, usw.
- Schäden verursacht durch absichtliche, nachlässige oder unsachgemäße
Anwendung, schlechte Wartung, zweckentfremdete Anwendung oder
Nichtbeachtung von Benutzerhinweisen in der Bedienungsanleitung.
- Schäden infolge einer kommerziellen, professionellen oder kollektiven
Anwendung des Gerätes (bei gewerblicher Anwendung wird die
Garantieperiode auf 6 Monate zurückgeführt).
- Schäden verursacht durch eine unsachgemäße Verpackung und
unsachgemäßen Transport des Gerätes.
- alle Schäden verursacht durch unautorisierte Änderungen, Reparaturen
oder Modifikationen, die von einem Dritten ohne Erlaubnis von Velleman®
vorgenommen werden.
• Im Fall einer Reparatur, wenden Sie sich an Ihren Velleman®-Verteiler.
Legen Sie das Produkt ordnungsgemäß verpackt (vorzugsweise die
Originalverpackung) und mit dem Original-Kaufbeleg vor. Fügen Sie eine
deutliche Fehlerumschreibu ng hinzu.
• Hinweis: Um Kosten und Zeit zu sparen, lesen Sie die
Bedienungsanleitung nochmals und überprüfen Sie, ob es keinen auf de
Hand liegenden Grund gibt, ehe Sie das Gerät zur Reparatur
zurückschicken. Stellt sich bei der Überprüfung des Geräts heraus, dass
kein Geräteschaden vorliegt, könnte dem Kunden eine
Untersuchungspauschale berechnet.
• Für Reparaturen nach Ablauf der Garantiefrist werden Transportkosten
berechnet.
• Jede kommerzielle Garantie lässt diese Rechte unberührt.
Die oben stehende Aufzählung kann eventuell angepasst werden
gemäß der Art des Produktes (siehe Bedienungsanleitung des
Gerätes).
Garantía de servicio y calidad Velleman®
Velleman® disfruta de una experiencia de más de 35 años en el mundo de
la electrónica con una distribución en más de 85 países.
Todos nuestros productos responden a normas de calidad rigurosas y
disposiciones legales vigentes en la UE. Para garantizar la calidad,
sometimos nuestros productos regularment e a control es de cali dad
adicionales, tanto por nuestro propio servicio de calidad como por un
servicio de calidad externo. En el caso improbable de que surgieran
problemas a pesar de todas las precauciones, es posible apelar a nuestra
garantía (véase las condiciones de garantía).
Condiciones generales referentes a la garantía sobre productos de
venta al público (para la Unión Europea):
• Todos los productos de venta al público tienen un período de garantía de
24 meses contra errores de producción o errores en materiales desde la
adquisición original;
• Si la queja está fundada y si la reparación o la sustitución de un artículo
es imposible, o si los gastos son desproporcionados, Velleman® autoriza
reemplazar el artículo por un artículo equivalente o reembolsar la totalidad
o una parte del precio de compra. En este caso, recibirá un artículo de
recambio o el reembolso completo del precio de compra al descubrir un
defecto hasta un año después de la compra y la entrega, o un artículo de
recambio al 50% del precio de compra o la sustitución de un 50% del
precio de compra al descubrir un defecto después de 1 a 2 años.
• Por consiguiente, están excluidos entre otras cosas:
- todos los daños causados directamente o indirectamente al aparato y su
contenido después de la entrega (p.ej. por oxidación, choques, caída,...) y
causados por el aparato, al igual que el contenido (p.ej. pérdida de datos) y
una indemnización eventual para falta de ganancias;
- partes o accesorios que deban ser reemplazados regularmente, como por
ejemplo baterías, lámparas, partes de goma, ... (lista ilimitada)
- defectos causados por un incendio, daños causados por el agua, rayos,
accidentes, catástrofes naturales, etc. ;
- defectos causados a conciencia , descuido o por malos tratos, un
mantenimiento inapropiado o un uso anormal del aparato contrario a las
instrucciones del fabricante;
- daños causados por un uso comercial, profesional o colectivo del aparato
(el período de garantía se reducirá a 6 meses con uso profesional) ;
- daños causados por un uso incorrecto o un uso ajeno al que est está
previsto el producto inicialmente como está descrito en el manual del
usuario ;
- daños causados por una protección insuficiente al transportar el aparato.
- daños causados por reparaciones o modificaciones efectuadas por una
tercera persona sin la autorización explicita de SA Velleman® ;
- se calcula gastos de transporte de y a Velleman® si el aparato ya no está
cubierto por la garantía.
• Cualquier reparación se efectuará por el lugar de compra. Devuelva el
aparato con la factura de compra original y transpórtelo en un embalaje
sólido (preferentemente el embalaje original). Incluya también una buena
descripción del defecto ;
• Consejo: Lea el manual del usuario y controle los cables, las pilas, etc.
antes de devolver el aparato. Si no se encuentra un defecto en el artículo
los gastos podrían correr a cargo del cliente;
• Los gastos de transporte correrán a carga del cliente para una reparación
efectuada fuera del periode de garantía.
• Cualquier gesto comercial no disminuye estos derechos.
La lista previamente mencionada puede ser adaptada según el tipo
de artículo (véase el manual del usuario del artículo en cuestión)
Garanzia di Qualità Velleman®
®
Velleman
distribuisce i suoi prodotti in oltre 85 paesi. Tutti i nostri prodotti soddisfano
rigorosi requisiti di qualità e rispettano le disposizioni giuridiche dell'Unione
europea. Al fine di garantire la massima qualità, i nostri prodotti vengono
regolarmente sottoposti ad ulteriori controlli, effettuati sia da un reparto
interno di qualità che da organizzazioni esterne specializzate. Se,
nonostante tutti questi accorgimenti, dovessero sorgere dei problemi, si
prega di fare appello alla garanzia prevista (vedi condizioni generali di
garanzia).
Condizioni generali di garanzia per i prodotti di consumo:
• Questo prodotto è garantito per il periodo stabilito dalle vigenti norme
legislative, a decorrere dalla data di acquisto, contro i difetti di materiale o
di fabbricazione. La garanzia è valida solamente se l’unità è accompagnata
dal documento d’acquisto originale.
• Futura Elettronica provvederà, in conformità con la presente garanzia
(fatto salvo quanto previsto dalla legge applicabile), a eliminare i difetti
mediante la riparazione o, qualora Futura Elettronica lo ritenesse
necessario, alla sostituzione dei componenti difettosi o del prodotto stesso
con un altro avente identiche caratteristiche.
• Le spese di spedizione o riconsegna del prodotto sono a carico del cliente.
• La garanzia decade nel caso di uso improprio, manomissione o
installazione non corretta dell’apparecchio o se il difetto di conformità non
viene denunciato entro un termine di 2 mesi dalla data in cui si è scoperto il
difetto.
• Il venditore non è ritenuto responsabile dei danni derivanti dall’uso
improprio del dispositivo.
• L’apparecchio deve essere rispedito con l’imballaggio originale; non si
assumono responsabilità per danni derivanti dal trasporto.
• Il prodotto deve essere accompagnato da un’etichetta riportante i propri
dati personali e un recapito telefonico; è necessario inoltre allegare copia
dello scontrino fiscale o della fattura attestante la data dell’acquisto.
L’eventuale riparazione sarà a pagamento se:
• Sono scaduti i tempi previsti.
• Non viene fornito un documento comprovante la data d’acquisto.
• Non è visibile sull’apparecchio il numero di serie.
• L’unità è stata usata oltre i limiti consentiti, è stata modificata, installata
impropriamente, è stata aperta o manomessa.
ha oltre 35 anni di esperienza nel mondo dell'elettronica e
Page 43

R&TTE Declaration of Conformity
R&TTE Verklaring van overeenstemming
éclaration de conformité
R&TTE Konformitätserklärung
Declaración de conformidad R&TTE
Declare on our own responsibility that the finished product(s) :
Verklaren op eigen verantwoordelijkheid dat het afgewerkte product :
Déclarons sous notre propre responsabilité que le
Erklären voll verantwortlich dass nachfolgendes Produkt
bajo nuestra sola responsabilidad que el producto mencionado a continuaci
Brand / merk / marque / Marke / marca
/ handelsnaam / denomination
METAL DETECTOR type 100
Type or model / type of model / type ou modèle / Typ oder Modell / tipo o modelo :
constituting the subject of this declaration, conforms with the essential requirements and
other relevant stipulations of the R&TTE Directive (1999/5/EC).
die het voorwerp uitmaakt van deze verklaring, voldoet aan de
andere relevante bepalingen van de R&TTE Richtlijn (1999/5/EC).
faisant l’objet de la présente déclaration, satisfait aux exigences essentielles et toute autre
stipulation pertinente de la directive R&TTE Directive (1999/5/EC).
das sich diese Erklärung bezieht, den grundlegenden Anforderungen und anderen
relevanten Vereinbarungen der R&TTE
umple los requisitos esenciales y las otras estipulaciones relevantes de la Directiva
commerciale / Markenname / denominación
essentiële vereisten en
D
We / wij / nous / Wir / Nostros
Velleman NV
Legen Heirweg, 33
9890 Gavere (België)
Declaramos
Trade name
R&TTE
produit fini :
:
VELLEMAN
commercial :
CS100N & CS150N
:
& type 150
ón :
auf
-Richtlinie (1999/5/EC) entspricht.
c
R&TTE (1999/5/EC).
Page 44

The product conforms to the following norm(s) and/or one or several other normative documents:
Het product voldoet aan de volgende norm(en) en/of meerdere andere normgevende documenten:
Le produit est conforme à la norme suivante / aux normes suivantes et/ou à plusieurs autres
documents normatifs:
Das Produkt entspricht den folgenden Normen und/oder anderen normativen Dokumenten:
Es conforme a la(s) siguiente(s) norma(s) y/o a uno o varios otros documentos normativos:
R&TTE
EN 301 489-03 V1.4.1
EN 301 489-01 V1.8.1
EN 300 330-2 V1.5.1
Technical data are available and can be obtained from :
Les données techniques sont disponibles et peuvent être obtenues chez :
Technische gegevens zijn beschikbaar en kunnen worden aangevraagd bij :
Die technische Dokumentation zu den oben gennanten Produkten wird geführt bei:
Los datos técnicos están disponibles y pueden ser solicitados a:
Velleman NV
Legen Heirweg, 33
9890 Gavere (België)
Place and date of issue / Plaats en datum van uitgifte / Place et date d’émission / Ort und Datum
der Ausstellung / Lugar y fecha de emisión :
Gavere, August 2nd, 2011
Authorised signatory for the company / Bevoegde ondertekenaar voor de firma / Signataire
autorisé(e) de la société / bevollmächtigte Person/ Respabonsle de la empresa:
Vince Van Balberghe - Quality Manager
 Loading...