

Velleman CCTVPROM8 Quick Installation Manual
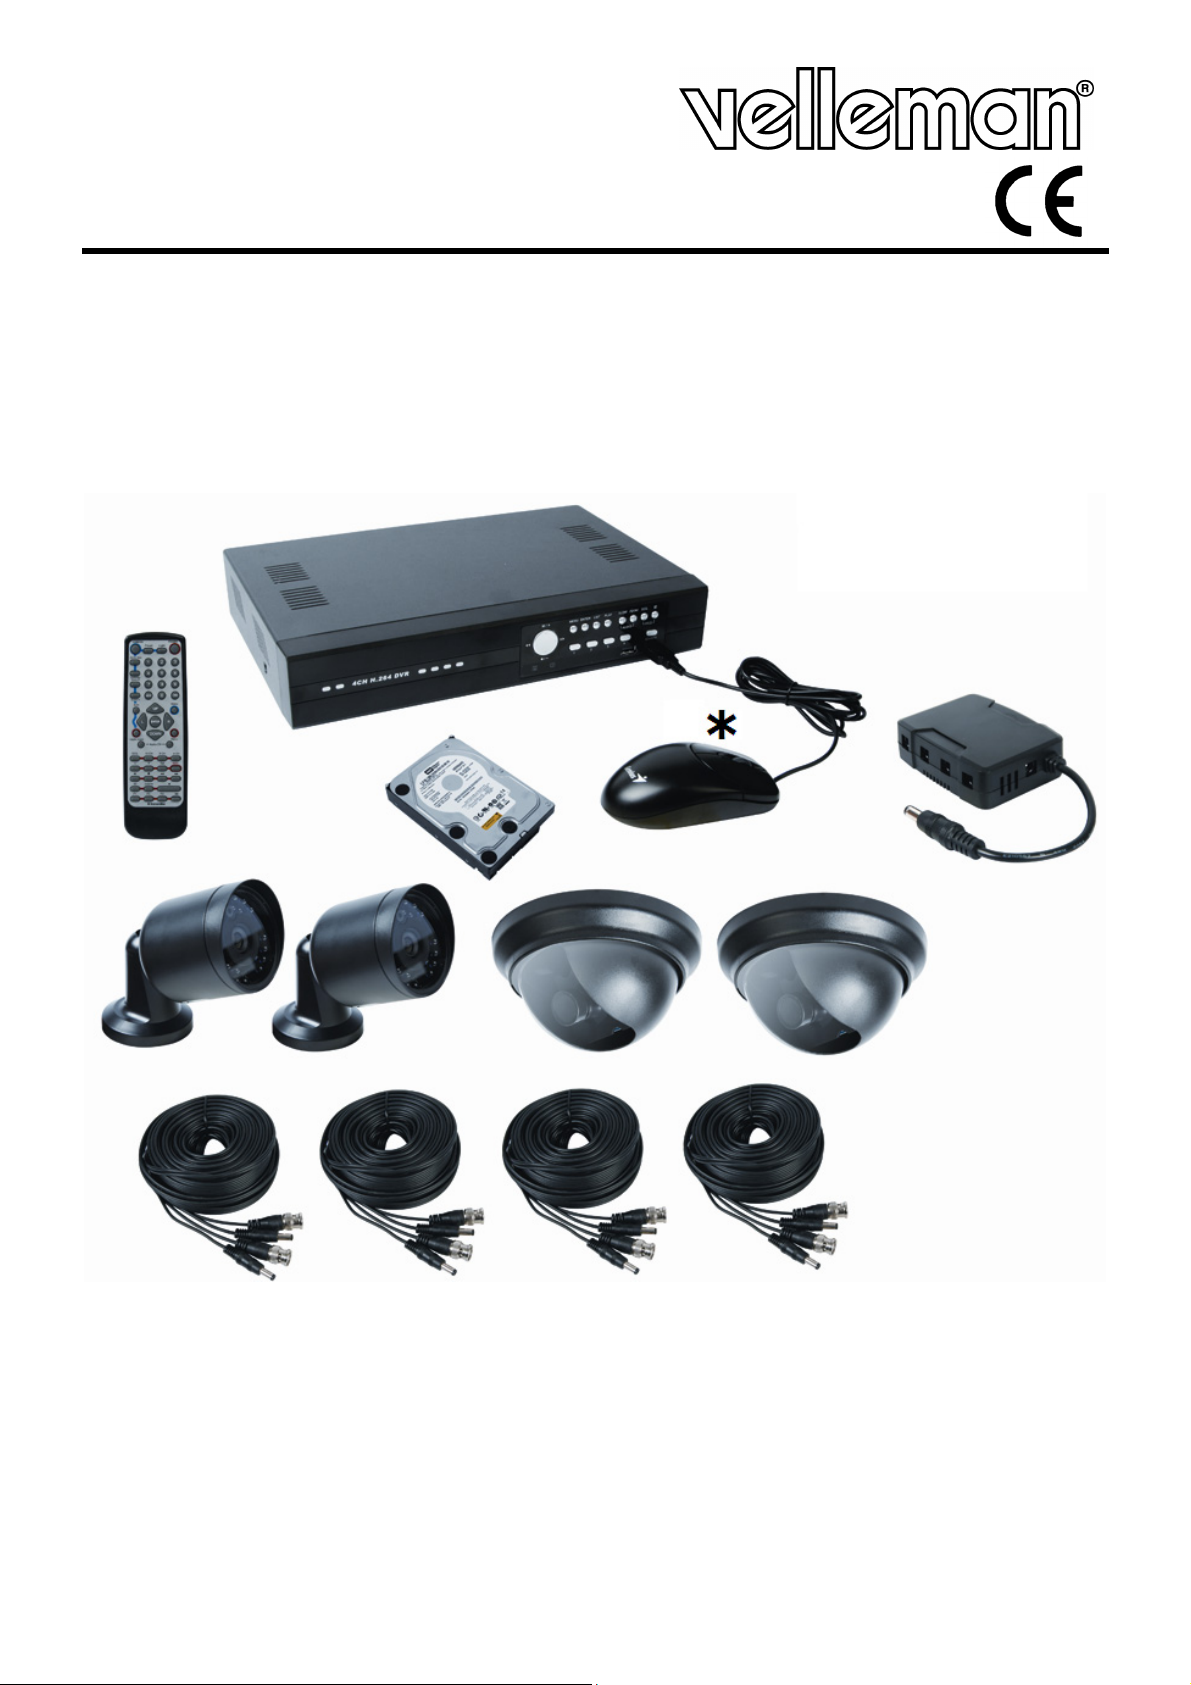
CCTVPROM8
ALL-ROUND SECURITY SET
MULTIFUNCTIONELE BEVEILIGINGSSET
ENSEMBLE VIDÉOSURVEILLANCE MULTIFONCTIONNEL
JUEGO DE VIDEOVIGILANCIA MULTIFUNCIÓN
UNIVERSELLER ÜBERWACHUNGSSATZ
* not incl. – niet meegelev. – non incl. – nicht mitgeliefert – no incl.
QUICK INSTALLATION GUIDE 4
BEKNOPTE INSTALLATIEHANDLEIDING 10
GUIDE D’INSTALLATION RAPIDE 16
GUÍA RÁPIDA 22
SCHNELLEINSTIEG 28
CCTVPROM8
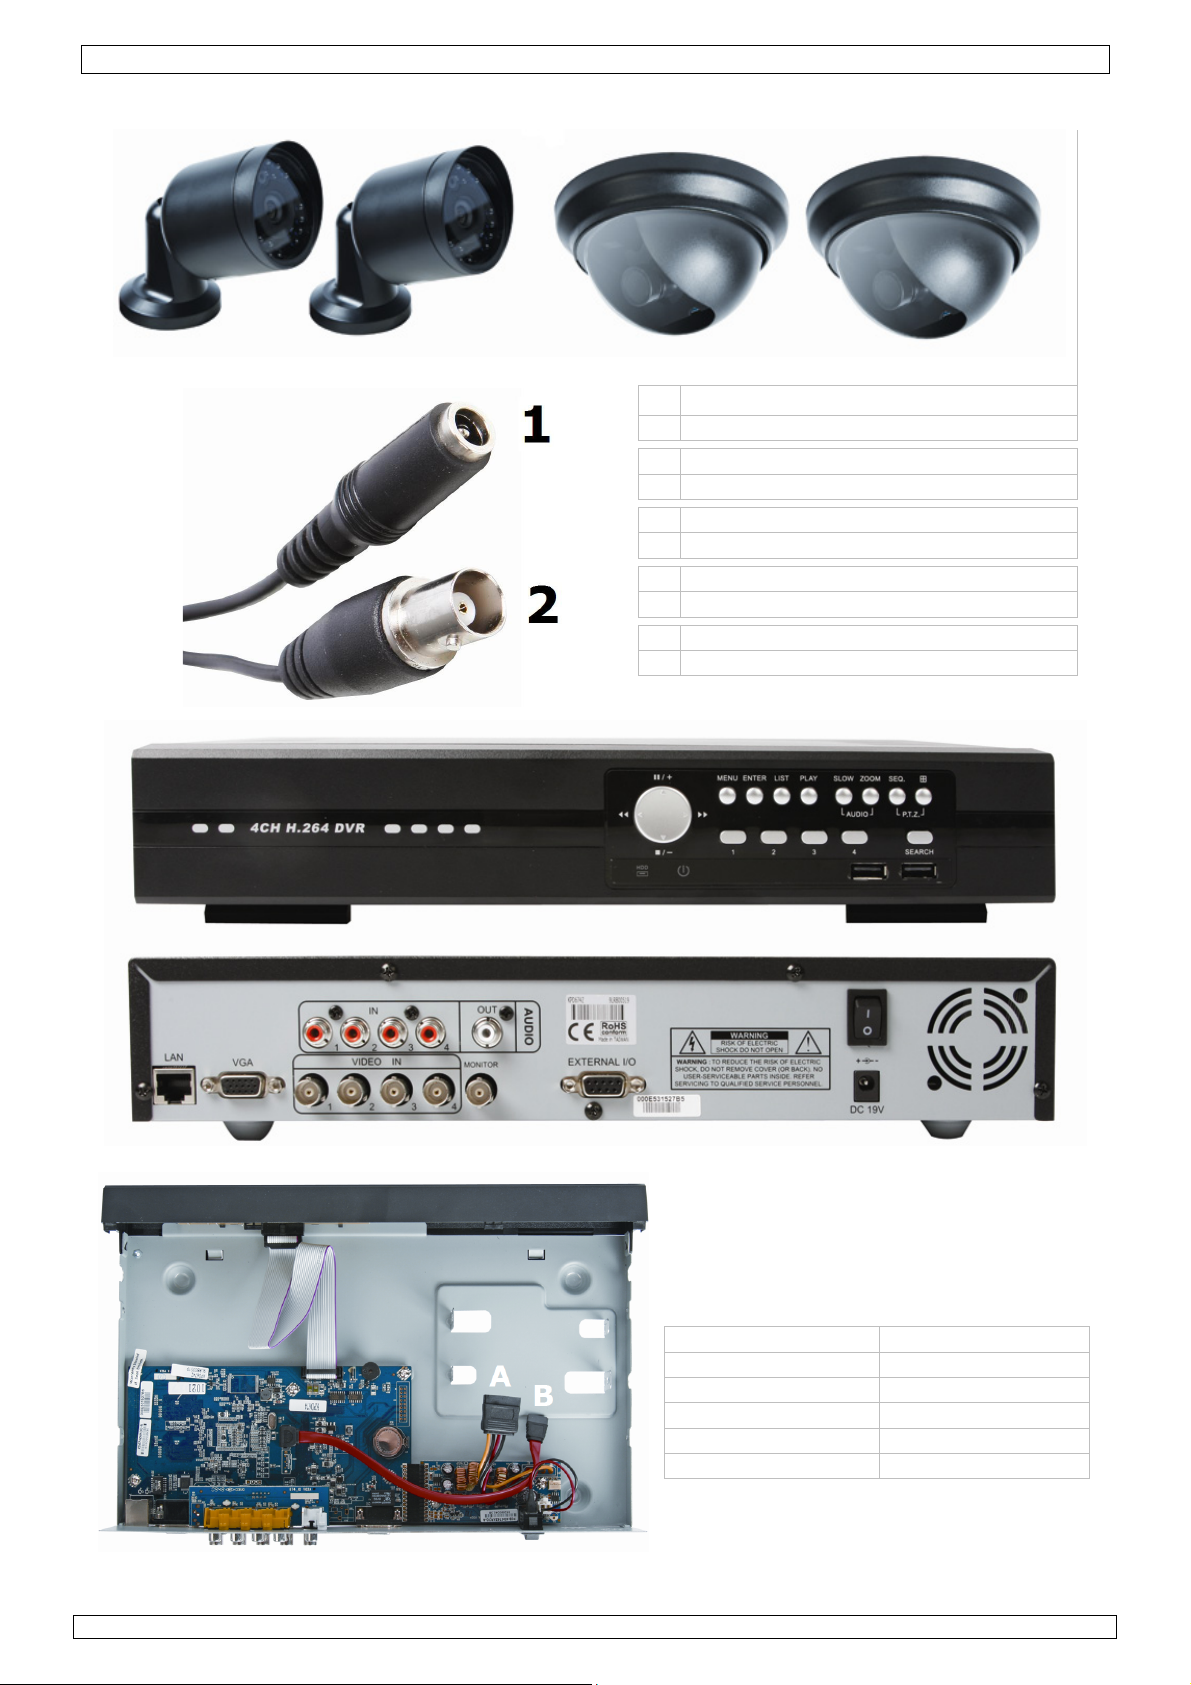
1 DC 12V input terminal
2 Video output connector
1 DC 12V ingangsaansluiting
2 Video-uitgangsaansluiting
1 Connexion d’entrée CC 12V
2 Connexion de sortie vidéo
1 DC 12V-Eingangsanschluss
2 Video-Ausgangsanschluss
1 Conexión de entrada CC 12V
2 Conexión de salida de vídeo
A B (SATA)
power supply data bus
voeding databus
alimentation bus de données
alimentación bus de datos
Stromversorgung Datenbus
07/07/2010 ©Velleman nv
2

CCTVPROM8
* not incl.
*niet meegelev.
*non incl.
*no incl.
*nicht mitgeliefert
07/07/2010 ©Velleman nv
** El software está disponible en
** Die Software ist verfügbar auf
** software available on
** software beschikbaar op
** logiciel disponible sur
3
www.eagleeyescctv.com

CCTVPROM8
Quick installation guide
1. Introduction
To all residents of the European Union
Important environmental information about this product
This symbol on the device or the package indicates that disposal of the device after its lifecycle could
harm the environment. Do not dispose of the unit (or batteries) as unsorted municipal waste; it should
be taken to a specialized company for recycling. This device should be returned to your distributor or
to a local recycling service. Respect the local environmental rules.
If in doubt, contact your local waste disposal authorities.
Thank you for choosing Velleman! Please read the manual thoroughly before bringing this device into service. If
the device was damaged in transit, do not install or use it and contact your dealer. Damage caused by
disregard of certain guidelines in this manual is not covered by the warranty and the dealer will not accept
responsibility for any ensuing defects or problems.
NOTICE:
This document is a Quick installation guide. For more details, refer to the full user manual which can be
found on the included CD-ROM.
Package content:
• 1 x DVR with built-in SATA connection (DVR4L5)
• 1 x Hard Disk 500GB (built-in)
• 2 x IR bullet colour cameras
• 2 x dome colour cameras
• 4 x 20m camera cables
• 1 x 19V PSU
• 1 x high-efficiency DC-DC converter for DVR and 4 cameras
• 1x CD-ROM containing the full user manual (DVR4L5)
Optional (not incl.):
• composite video & VGA monitor: MONSCA3, MONSCA6
• VGA & DVI monitor: MONSCA4, MONSCA5
• Router: PCRT1
2. Safety Instructions
Keep the device away from children and unauthorised users.
Risk of electroshock when opening the cover. Touching live wires can cause life-threatening
electroshocks.
Always disconnect mains power when the device is not in use or when servicing or maintenance
activities are performed. Handle the power cord by the plug only.
3. General Guidelines
Refer to the Velleman® Service and Quality Warranty on the last pages of this manual.
Indoor use only
• Familiarise yourself with the functions of the device before actually using it.
• All modifications of the device are forbidden for safety reasons.
• Only use the device for its intended purpose. Using the device in an unauthorised way will void the warranty.
• Damage caused by disregard of certain guidelines in this manual is not covered by the warranty and the
dealer will not accept responsibility for any ensuing defects or problems.
• Do not use this product to violate privacy laws or perform other illegal activities.
Keep this device away form rain, moisture, splashing and dripping liquids. Never put object
filled with liquid on top.
Keep this device away from dust.
Keep this device away from extreme heat. Make sure the ventilation openings are clear at all
times. For sufficient air circulation, leave at least 1” (±2.5 cm) in front of the openings.
Protect this device from shocks and abuse. Avoid brute force when operating the device.
07/07/2010 ©Velleman nv
4

CCTVPROM8
4. Features
• GUI (Graphical User Interface) display and USB mouse control
• Gmail integration supports notification through Google mail server and any other mail support
• local and remote control completely independent
• H.264 video compression technology
o highly improves video quality for live viewing and recording
o recording file size is minimized for longest recording time
o lower bit rate required for fastest network transfer
• multiplex: allows live display, recording, playback, and backup at the same time
• VGA interface built-in with output resolution up to 1600 x 1200
• backup function: supports USB 2.0 flash drive backup
• remote surveillance on mobile phone via 3G/GPRS or on PC through internet connection
• intelligent motion trigger recording
o advanced motion detection
o scheduled motion detection recording (with 1 adjustable parameter)
o quick search function (time/motion/alarm)
o only the channel with an event will be recorded to effectively save a significant amount of hard
disc space
• multi-language OSD: English, French, Dutch, German, Portuguese, Spanish, Czech, Hungarian, Greek, Italian,
Arabic, Polish, Vietnamese and Chinese
• A/V support: supports 4 audio inputs and 1 audio output for sound recording
• full user manual: English, French, German, Spanish
• supports SATA HDD
• PTZ control: supports PELCO-D protocol
• alarm I/O: 4 inputs, 1 output
• supports daylight-saving function
• supports manual / timer / motion / network recording functions
• system auto recovery after power reconnected
• hard disks in option: 500GB (HD500GB/S) or 750GB (HD750GB/S) (not included)
• supports TCP/IP, PPPoE, DHCP and DDNS network connection
• optional monitor (not incl.): MONSCA4, MONSCA5
• 2x IR bullet colour cameras
• 2 x dome colour cameras
• mobile phone applications: EagleEyes (www.eagleeyescctv.com)
5. Overview
Refer to the illustrations on page 2 of this manual.
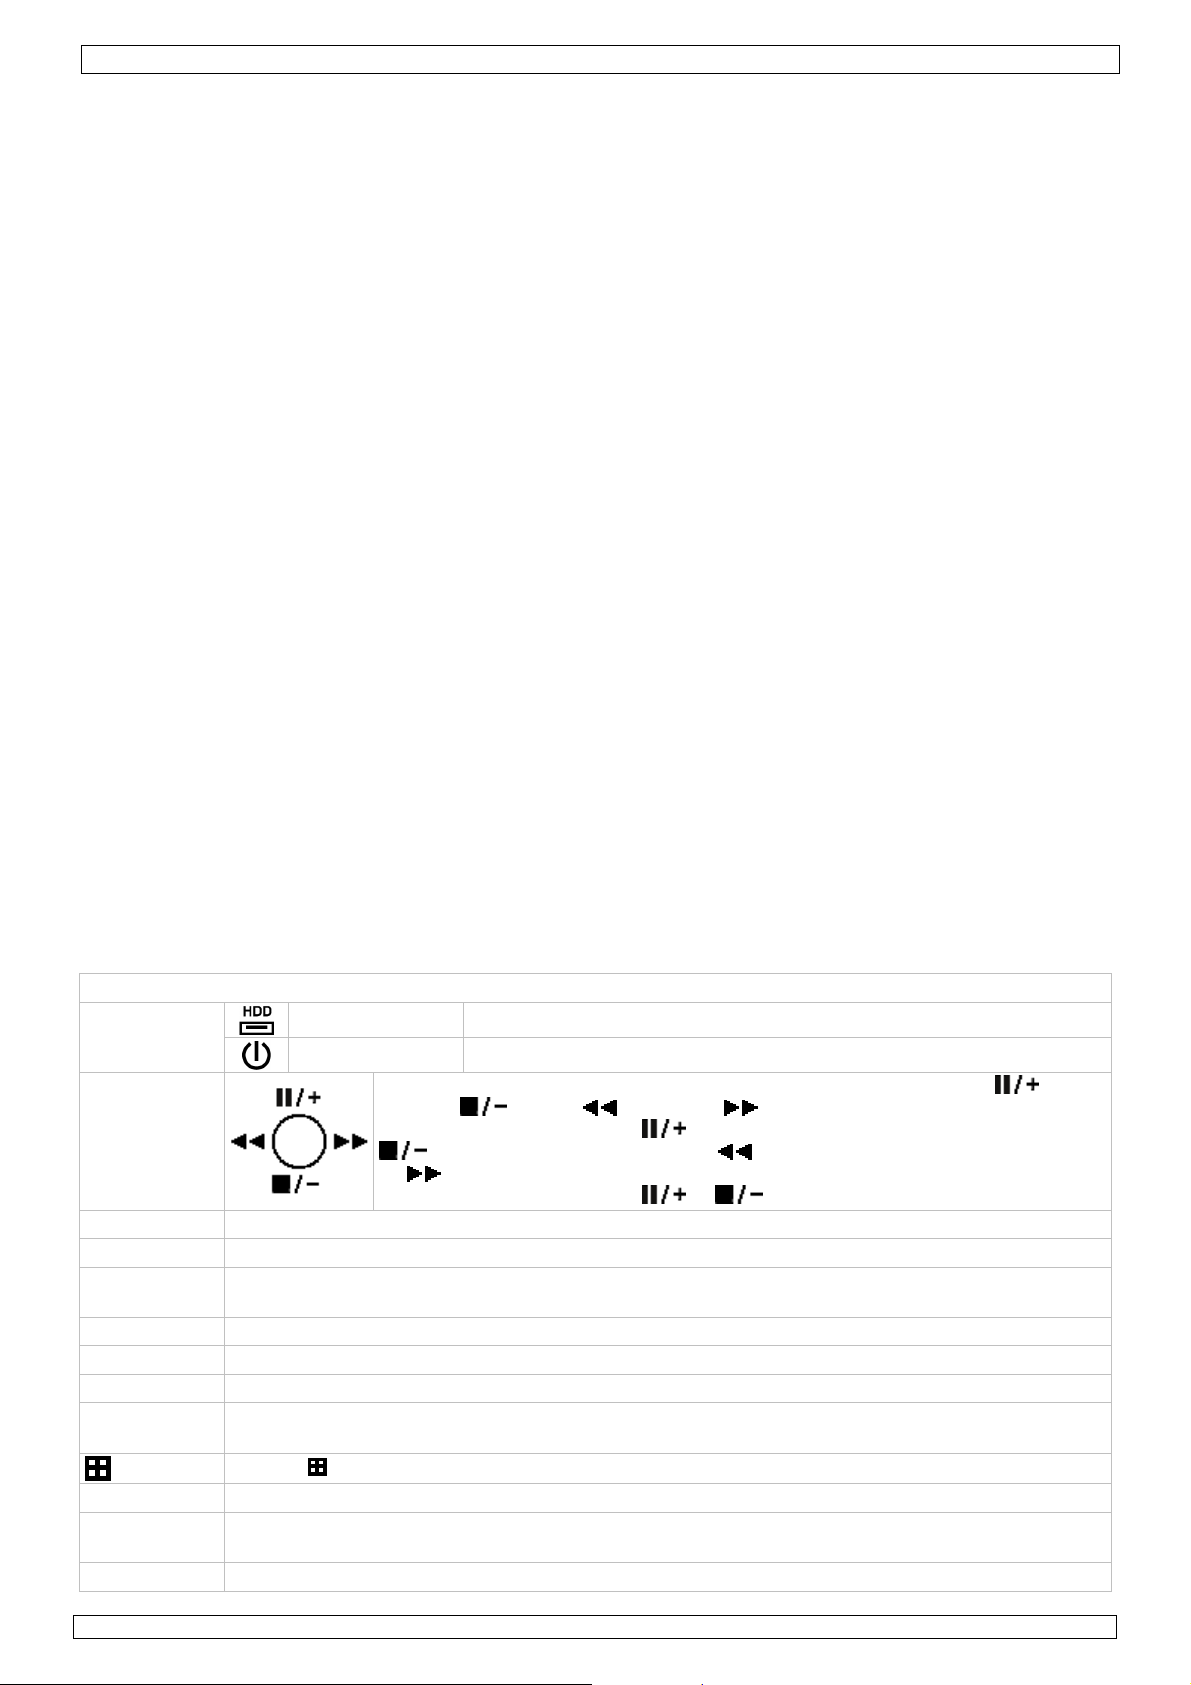
Front panel
LED
indications
NAVIGATE
MENU Press to enter the main menu.
ENTER Press to confirm settings
LIST
PLAY Press to play the recorded video.
SLOW In playback mode, press to play the recorded file slowly.
ZOOM In live or playback mode, press to enlarge the image of the selected channel.
SEQ Press to show all screens sequentially in full screen mode. Press again to quit.
1 ~4 Press a button to select the corresponding channel.
SEARCH Enter time search mode. Set time range and press START to see all recordings within the time
POWER Press and holt to switch off the DVR.
AUDIO = SLOW + ZOOM
List the information of the recorded files.
QUICK SEARCH / RECORD / MOTION / ALARM / TIMER / FULL LIST
4CH: Press to show the 4 channel display mode.
range.
HDD reading or recording activities on the hard disk
POWER DVR power is on
Press one of the four positions on the navigate button to move the cursor up
), down ( ), left ( ) or right ( ).
(
In play-back mode, press the buttons to play/pause (
rewind ( ) or fast forward ( ) the play-back file.
In setting mode, press the up (
setting in the menu.
) or down ( ) button to change the
), stop ( ), fast
07/07/2010 ©Velleman nv
5
CCTVPROM8
Press SLOW and ZOOM simultaneous to select live or play-back sounds.
P.T.Z.
USB port
(2x)
rear panel
LAN port Connect the DVR to a local network by plugging a network cable into this port.
VGA connector for video monitor
AUDIO IN 4 audio input channels to connect four external audio sources e.g. from cameras with audio.
AUDIO OUT 1 audio output to connect to an audio device, e.g. a speaker (mono).
VIDEO IN 4 video input channels to connect 4 external video sources e.g. cameras.
VIDEO OUT 1 video output channel to connect the DVR to the main monitor.
MONITOR connect a CRT monitor to this output
EXTERNAL I/O use a 9 pin DSUB connector to connect external signals e.g. alarm, PTZ, ...
19V DC Power supply input.
= SLOW +
Press SLOW and
Connect a USB flash drive for video backup to one USB port; connect a USB mouse to the other.
Note: do not connect two USB flash drives or USB mice at the same time.
power switch
simultaneous to enter or exit PTZ control mode.
6. Hardware setup
Connecting a video monitor
• Obtain a suitable monitor (not included) and connect it to the BNC or VGA video output port on the back of
the DVR.
Connecting the power supply
• Plug the DC output connector of the included power adaptor into the 19VDC power input at the back of the
DVR.
WARNING: only use the included adaptor.
• Plug the included power cable into the adaptor input connector and plug the other end into the mains. Do not
switch the DVR on yet.
Connecting a camera
• Connect the video output of the camera to either video input at the back of the DVR. The number next to the
input connectors represents the channel number. Connector type is BNC.
Connecting audio
• The DVR supports four audio inputs. Connect the audio output of an audio source to an audio input of the
DVR. Make sure to connect the audio channel to the corresponding video channel. Connector type is RCA.
• There is also an audio output connector. Connect an audio device e.g. a speaker to this connector when
desired. Connector type is RCA.
Connecting Local Area Network (LAN)
• Connect the DVR to a local network by plugging a network cable into the LAN port at the back of the DVR.
Connector type is 8P8C (RJ45). Setup is done through the OSD.
7. Preliminary settings
• Make sure the connected cameras are on and set the power switch at the rear of the device to the on-
position. It takes about 15 to 30 seconds to start up.
Menu overview
• Press the MENU button and enter the password to go into the menu list.
Note: default admin password is “0000” (4 times zero).
For more details, refer to the full user manual.
Setting date and time
• Before using the DVR the time and date should be set to get a valid time stamp.
• Press the MENU button and enter the admin password to go into the menu list.
• Select the QUICK START menu item.
• Use the NAVIGATION button to move to the TIME SETUP menu item. Select it to set date and time.
Note: once recording started, do not change date or time as this will make it very difficult to find back
the recorded files.
Note: when using the DVR for the first time and the correct time is set, leave it on for at least 48
hours.
Password setting
• Press the MENU button and enter the password to go into the menu list.
• Select the SYSTEM menu item.
• Go to TOOLS, select ADMIN PASSWORD (or OPERATOR PASSWORD) and press the ENTER button to set the
password.
07/07/2010 ©Velleman nv
6
CCTVPROM8
Note: an operator can not access the main menu, only the quick menu bar (see below).
• Press the cursor up (
) or down ( ) button to select the value of the first number and press enter to
save and go to the next character, or use the mouse to select the desired value. Repeat this for all four
password numbers.
Note: default admin password is “0000” (4 times zero).
Record settings
• Press the MENU button and enter the password to go into the menu list.
• Select the QUICK START menu item.
• Select the GENERAL menu item using the NAVIGATION button.
• Set the image size, image quality and images per second for recording.
• Refer to the full user manual on the included CD-ROM for more details.
Audio playback
• Press the SLOW and ZOOM button simultaneously to select the desired audio channel or use the quick menu
bar (see below). The current audio channel is indicated in the status bar.
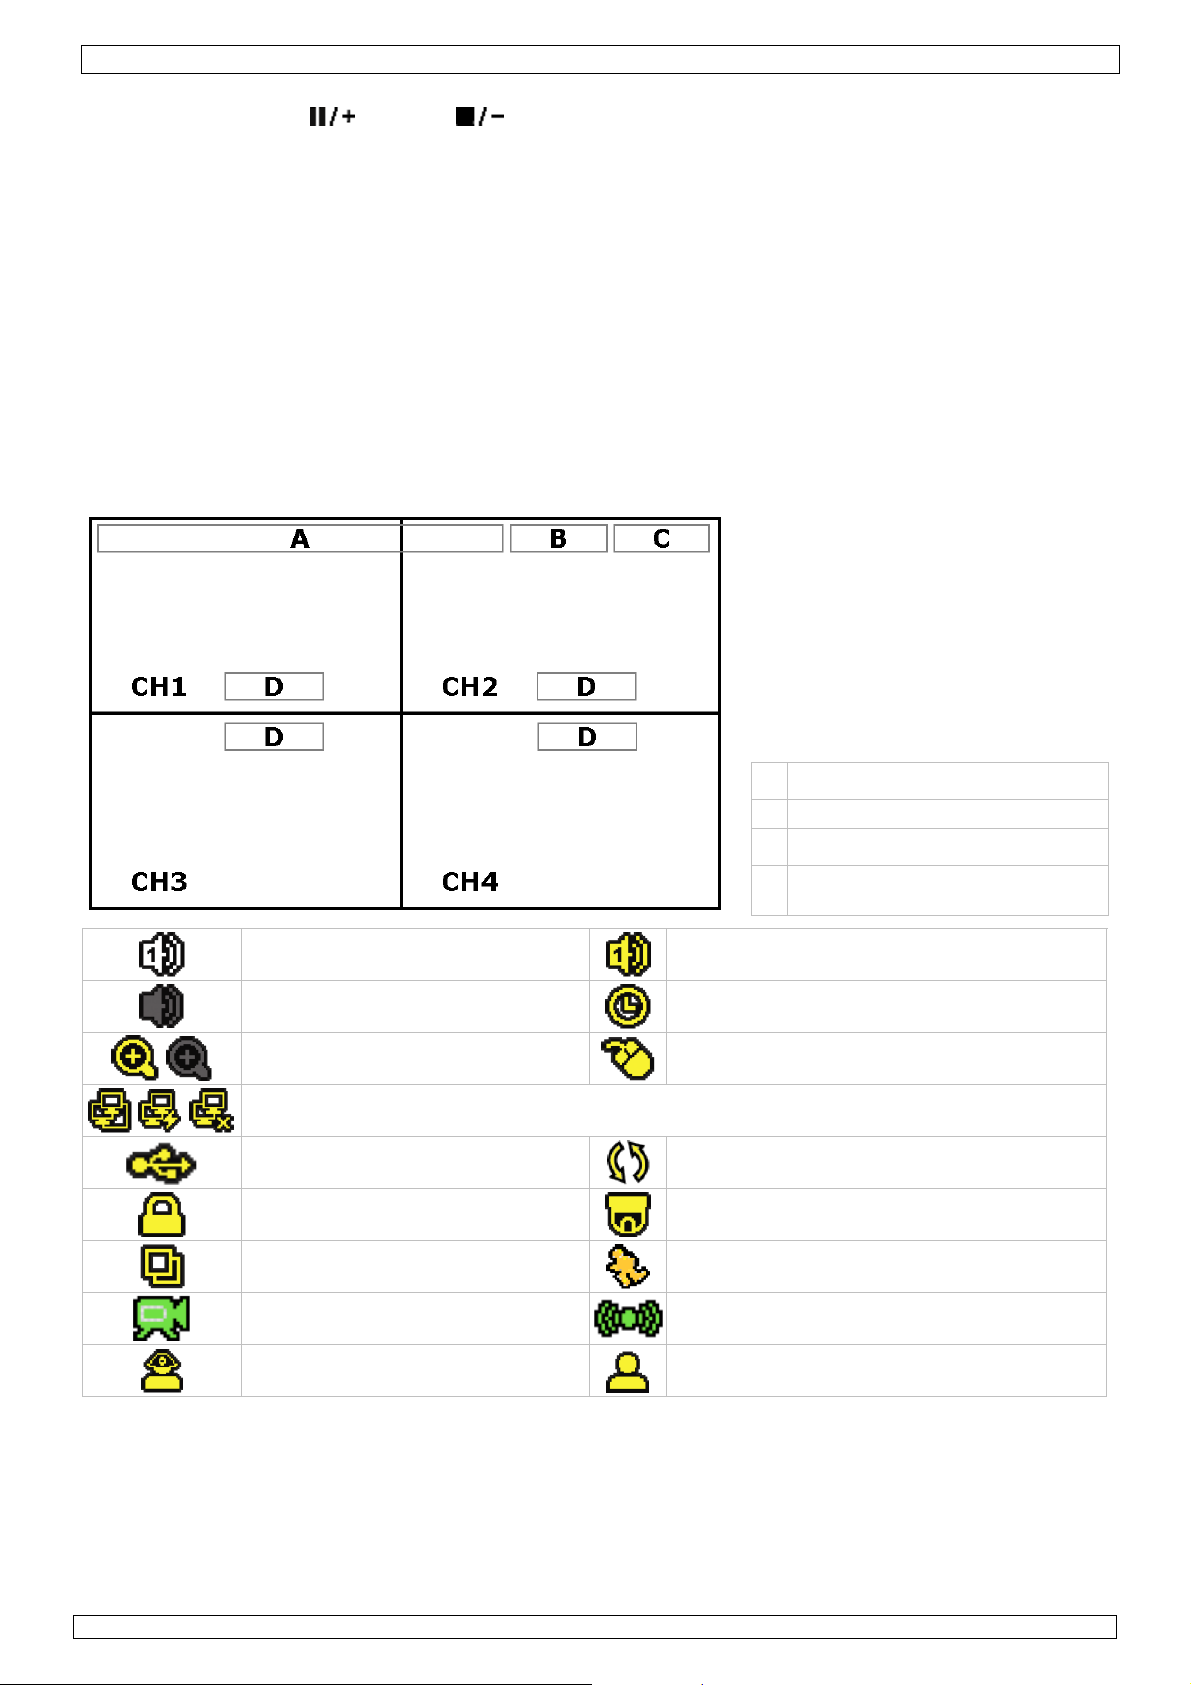
8. Operation
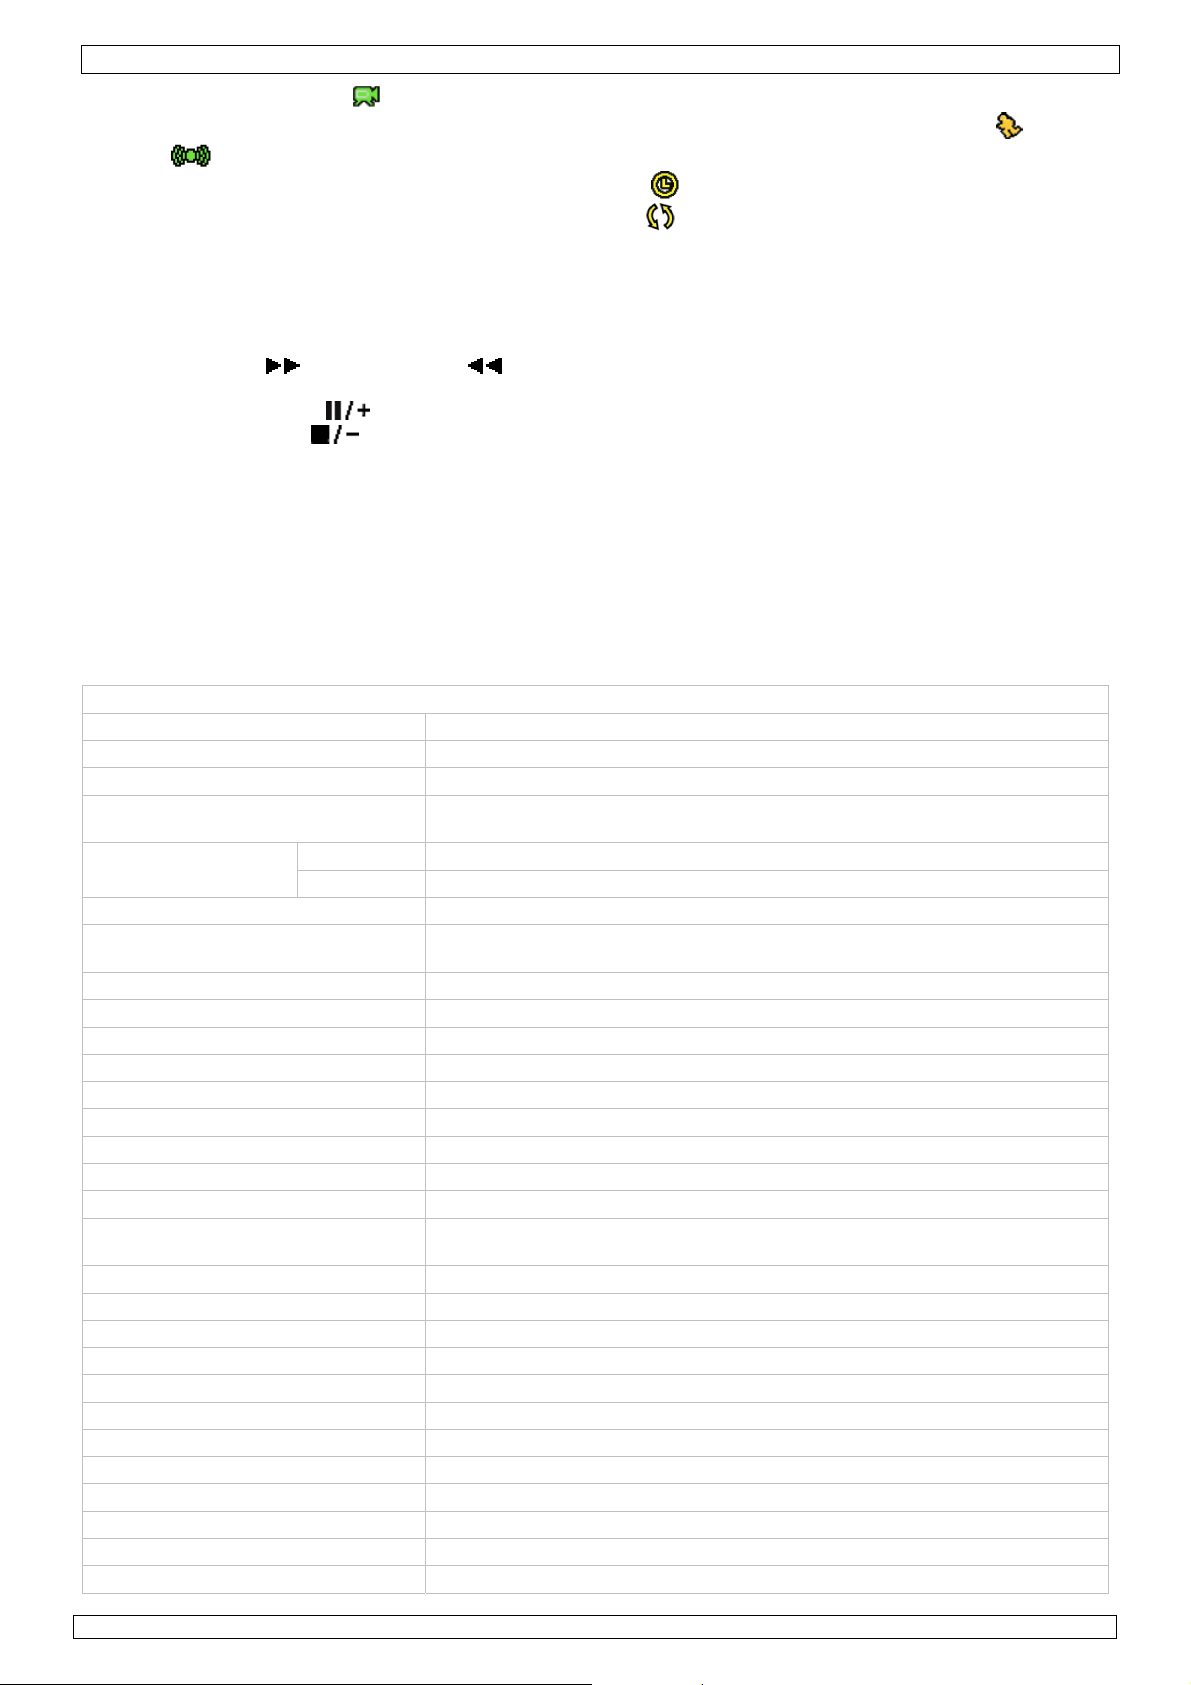
Display
The following image shows the screen layout.
A system date and time
B general system status
C available HDD capacity
D channel status
playback audio channel 1 .. 4 enabled (yellow)
timer recording
USB mouse connected
live audio channel 1 .. 4 enabled
audio channel disabled
digital zoom on (yellow) / off
LAN connected / Internet connected / no network connection
USB flash drive connected
key lock on
sequence mode
recording mode
Hard disk overwrite (default)
PTZ mode
motion mode
alarm mode
administrator logged on
operator logged on
Note that actual screen icons might differ slightly from the ones shown above.
Quick menu bar
Note: only available when USB mouse is connected.
• Move the pointer towards the left of the monitor to open the quick menu bar.
Recording
• Check whether the camera(s) is (are) properly connected and a HDD is present inside the device.
• When the auto-recording and pre-alarm functions are enabled, the device will start recording images.
07/07/2010 ©Velleman nv
7
CCTVPROM8
• Default the recording icon ( ) is shown.
• In case the motion or alarm detection is activated and a motion or alarm is detected, the motion ( ) resp.
alarm (
) icon is shown.
• When timed recording is enabled, the timed recording icon ( ) is showed and the timed recording LED is on.
• Default, the device is in HDD overwrite mode and the icon ( ) is shown.
Play-back
• Make sure the control panel is not locked and press the PLAY button on the control panel or use the quick
menu bar to open the playback control panel.
Note: play-back needs at least 8192 recorded images to work properly (e.g. with IPS=30, the recording must
be at least 273 seconds long).
• The fast forward ( ) and fast rewind ( ) buttons will increase resp. decrease the play-back speed.
Repeatedly pressing the button will increase/decrease speed to 4x, 8x 16x or 32x (max.).
• Press the pause button ( ) to temporary suspend video play-back.
• Press the stop button ( ) to return to live monitoring.
• Press the SLOW button once to set play-back speed to 1/4
Search
th
and twice for 1/8th.
• There are four ways to search recorded files: by record list, motion list, alarm list or by timer list.
• To search an event, press the LIST button on the front panel (make sure the control panel is not locked). An
overview of the recorded file types (ALARM, MANUAL, MOTION, SYSTEM and FULL LIST) is shown.
• Select the desired list and recording from the list.
• Press ENTER to start play-back.
Note: the recorded files can also be searched via the included Video Viewer software.
9. Technical specifications
DVR4L5
video system PAL
video compression H.264 (CIF)
video input 4 channels, composite video signal 1Vpp / 75 ohms BNC
video output composite video signal 1Vpp / 75 ohms BNC
VGA – max. 1600 x 1200 pixels
maximum recording
rate (PAL)
image quality setting best - high - normal - basic
hard disk storage built-in SATA type, support 1x HDD, support HDD capacity over 1TB (HDD
recording mode manual / timer / motion / network / alarm controlled
refresh rate 100 IPS for PAL
audio I/O 4x audio in, 1x audio out (mono)
motion detection area 16 x 12 grids per channel
motion detection sensitivity 4 adjustable parameters for accurate detection
pre-alarm recording 8MB
backup device USB 2.0 flash drive (for backup and firmware updates)
web transmitting / compression format H.264
Ethernet 10/100 Base-T, supports network control and LiveView via Ethernet
web interface supports licensed “video viewer” software / Internet Explorer or Mozilla Firefox
network connection supports TCP/IP, PPPoE, DHCP and DDNS function
digital zoom 2x (live & playback)
key lock yes
video loss detection yes
camera title up to 6 characters
video adjustments hue / colour / contrast / brightness
date display format YY/MM/DD, DD/MM/YY, MM/DD/YY, and off
power source 19VDC
power consumption < 42W
operating temperature 10°C ~ 40°C (50°F ~ 104°F)
system recovery system auto recovery after power reconnected
dimensions 343 x 223 x 59mm
frame 704 x 576 pixels with 25 IPS (PAL)
CIF 352 x 288 pixels with 100 IPS (PAL)
not incl)
web browser / Quick Time player
07/07/2010 ©Velleman nv
8

CCTVPROM8
IR BULLET COLOUR CAMERAS
pick-up element
number of pixels
Resolution
min. Illumination
S/N ratio > 48dB (AGC off)
electronic shutter 1/50 to 1/100000 sec.
white balance automatic
AGC yes
standard board lens f3.6mm / F2.0
lens angle 92.6°
video output 1.0Vpp composite, 75 ohm
power supply DC 12V ± 10%
current consumption 70mA (IR off), 200mA (IR on)
water-resistance IP67
IR LEDs 14
IR range 15m
Dimensions
Weight
DOME COLOUR CAMERAS
pick-up element
number of pixels
Resolution
min. Illumination
S/N ratio > 48dB (AGC off)
electronic shutter 1/50 to 1/100000 sec.
white balance automatic
AGC yes
standard board lens f3.6mm / F2.0
lens angle 92.6°
video output 1.0Vpp composite, 75 ohm
power supply DC 12V ± 10%
current consumption 70mA
Dimensions
Weight
Use this device with original accessories only. Velleman nv cannot be held responsible in the event
of damage or injury resulted from (incorrect) use of this device.
For more info concerning this product and the latest version of this user manual, please visit our
website www.velleman.eu.
The information in this manual is subject to change without prior notice.
© COPYRIGHT NOTICE
The copyright to this manual is owned by Velleman nv. All worldwide rights reserved.
No part of this manual or may be copied, reproduced, translated or reduced to any electronic medium or
otherwise without the prior written consent of the copyright holder.
1/3" colour CCD image sensor
712(H) x 582(V) - PAL -
420 TV lines
0.05 Lux (F2.0); 0 Lux (IR on)
Ø60 x 91mm
250g (including bracket)
1/3" colour CCD image sensor
512(H) x 582(V) - PAL 420 TV lines
0.05 Lux (F2.0)
Ø100 x 60mm
100g
07/07/2010 ©Velleman nv
9

CCTVPROM8
Beknopte installatiehandleiding
1. Inleiding
Aan alle ingezetenen van de Europese Unie
Belangrijke milieu-informatie betreffende dit product
Dit symbool op het toestel of de verpakking geeft aan dat, als het na zijn levenscyclus wordt
weggeworpen, dit toestel schade kan toebrengen aan het milieu. Gooi dit toestel (en eventuele
batterijen) niet bij het gewone huishoudelijke afval; het moet bij een gespecialiseerd bedrijf
terechtkomen voor recyclage. U moet dit toestel naar uw verdeler of naar een lokaal recyclagepunt
brengen. Respecteer de plaatselijke milieuwetgeving.
Hebt u vragen, contacteer dan de plaatselijke autoriteiten betreffende de verwijdering.
Dank u voor uw aankoop! Lees deze handleiding grondig voor u het toestel in gebruik neemt. Werd het toestel
beschadigd tijdens het transport, installeer het dan niet en raadpleeg uw dealer.
OPMERKING:
Dit document is een beknopte installatiehandleiding. Raadpleeg de volledige handleiding op de cd-rom voor
meer informatie (enkel beschikbaar in het Engels, Frans, Duits en Spaans).
Inhoud:
• 1 x DVR met ingebouwde SATA-aansluiting (DVR4L5)
• 1 x harde schijf 500GB (intern)
• 2x IR kleurencamera
• 2x kleuren dome camera
• 4 x camerakabels van 20m
• 1 x 19V voedingsadapter
• 1 x high-efficiency DC-DC converter voor de DVR en de 4 camera's
• 1x cd-rom met volledige handleiding (DVR4L5)
Optioneel (niet meegelev.):
• composiet video en VGA-monitor: MONSCA3, MONSCA6
• VGA- en DVI-monitor: MONSCA4, MONSCA5
• optionele router: PCRT1
2. Veiligheidsinstructies
Houd buiten het bereik van kinderen en onbevoegden.
Elektrocutiegevaar bij het openen van het toestel. Raak geen kabels aan die onder stroom staan
om dodelijke elektroshocks te vermijden.
Trek de stekker uit het stopcontact (trek niet aan de kabel!) voordat u het toestel reinigt en als u
het niet gebruikt.
3. Algemene richtlijnen
Raadpleeg de Velleman® service- en kwaliteitsgarantie achteraan de handleiding.
Enkel voor gebruik binnenshuis.
• Leer eerst de functies van het toestel kennen voor u het gaat gebruiken.
• Om veiligheidsredenen mag u geen wijzigingen aanbrengen.
• Gebruik het toestel enkel waarvoor het gemaakt is. Bij onoordeelkundig gebruik vervalt de garantie.
• De garantie geldt niet voor schade door het negeren van bepaalde richtlijnen in deze handleiding en uw
dealer zal de verantwoordelijkheid afwijzen voor defecten of problemen die hier rechtstreeks verband mee
houden.
• Leef bij gebruik van dit toestel de wetgeving betreffende de privacy na.
Bescherm dit toestel tegen regen, vochtigheid en opspattende vloeistoffen. Plaats geen object
gevuld met vloeistof op het toestel.
Bescherm tegen stof.
Bescherm tegen extreme hitte. Zorg dat de verluchtingsopeningen niet verstopt geraken.
Voorzie een ruimte van minstens 2,5 cm tussen het toestel en elk ander object.
Bescherm tegen schokken. Vermijd brute kracht tijdens de bediening.
07/07/2010 ©Velleman nv
10
CCTVPROM8
4. Eigenschappen
• GUI-display (Graphical User Interface) en bediening via USB-muis
• berichtgeving via Google mailserver zoals Gmail of andere mailservice
• afzonderlijke lokale en afstandsbediening
• videocompressie H.264
o verbeterde videokwaliteit voor monitoring en opnames
o langere opnameduur dankzij een verminderde bestandgrootte
o snellere transfer via netwerk met lagere bitsnelheid
• multiplexing: simultane liveweergave, opname, playback en back-up
• ingebouwde VGA-interface met een uitgangsresolutie tot 1600 x 1200
• back-upfunctie: ondersteunt back-up via USB 2.0 flash drive
• monitoring op afstand vanaf mobiele telefoon via 3G/GPRS of vanaf uw pc via een internetaansluiting
• opname door bewegingswaarneming
o geavanceerde opname door bewegingswaarneming
o opname door bewegingswaarneming met geprogrammeerde starttijd (1 instelbare parameter)
o snelzoekfunctie (tijdstip/bewegingswaarneming/alarm)
o de opname start enkel op het kanaal met de gebeurtenis om het geheugen op de harde schijf
op de meest doeltreffende manier te benutten
• meertalige OSD: Engels, Frans, Nederlands, Duits, Portugees, Spaans, Tsjechisch, Hongaars, Grieks,
Italiaans, Arabisch, Pools, Vietnamees en Chinees
• audio/video: opname met geluid langs 4 audio-ingangen en 1 audio-uitgang
• uitgebreide handleiding: Engels, Frans, Duits, Spaans
• ondersteunt SATA harde schijven
• PTZ-besturing: ondersteunt PELCO-D protocol
• alarmin-/uitgang: 4 ingangen/1 uitgang
• overschakeling naar zomer- of wintertijd
• opnamemodi: manueel / timer / beweging / via netwerk
• automatisch herstel van het systeem nadat de voeding opnieuw is aangesloten
• harde schijven in optie: 500 GB (HD500GB/S) of 750 GB (HD750GB/S) (niet meegeleverd)
• ondersteunt TCP/IP, PPPoE, DHCP en DDNS netwerkaansluiting
• optionele monitor (niet meegelev.): MONSCA4, MONSCA5
• 2x IR kleurencamera
• 2x kleuren dome camera
• applicaties voor mobiele telefoon: EagleEyes (www.eagleeyescctv.com)
5. Omschrijving
Raadpleeg de figuren op pagina 2 van deze handleiding.
Frontpaneel
HDD De harde schijf leest of neemt data op.
Leds
NAVIGATIE
MENU Druk op MENU om het menu weer te geven.
ENTER Druk op ENTER om te bevestigen.
LIST
PLAY Druk op PLAY om de opname af te spelen.
SLOW Druk op SLOW om het afgespeelde bestand traag af te spelen.
ZOOM Druk op ZOOM om het beeld in het geselecteerde kanaal te vergroten.
SEQ Druk op SEQ om alle kanalen achtereenvolgens op het volledige scherm weer te geven. Druk
1 ~ 4 Druk op een cijfertoets om het desbetreffende kanaal te selecteren.
SEARCH Druk op SEARCH om de zoekfunctie in te schakelen. Geef de tijdruimte in en druk op START om
POWER Houd POWER ingedrukt om de DVR uit te schakelen.
POWER De DVR is ingeschakeld.
Druk op een van de toetsen om de cursor te verplaatsen: omhoog (
omlaag (
Druk tijdens het afspelen op
om het bestand te stoppen, op om het bestand terug te spoelen of
op
Druk tijdens het instellen op
Lijst van de opnamebestanden.
QUICK SEARCH / RECORD / MOTION / ALARM / TIMER / FULL LIST
opnieuw om de functie te verlaten.
Druk op
alle opnames in die tijdruimte weer te geven.
om de 4-kanaals display weer te geven.
om het bestand verder te spoelen.
), links ( ) of rechts ( ).
om het bestand af te spelen/te pauzeren, op
of om de instellingen te wijzigen.
),
07/07/2010 ©Velleman nv
11
 Loading...