

Page 1

M211667EN-G
User Guide
Vaisala Radiosonde
RS41-SG and RS41-SGP
Page 2

PUBLISHED BY
Vaisala Oyj
Street address: Vanha Nurmijärventie 21, FI-01670 Vantaa, Finland
Mailing address: P.O. Box 26, FI-00421 Helsinki, Finland
Phone: +358 9 8949 1
Visit our Internet pages at www.vaisala.com.
© Vaisala 2018
No part of this manual may be reproduced,
published or publicly displayed in any form or by
any means, electronic or mechanical (including
photocopying), nor may its contents be modified,
translated, adapted, sold or disclosed to a third
party without prior written permission of the
copyright holder. Translated manuals and
translated portions of multilingual documents are
based on the original English versions. In
ambiguous cases, the English versions are
applicable, not the translations.
The contents of this manual are subject to change
without prior notice.
Local rules and regulations may vary and they
shall take precedence over the information
contained in this manual. Vaisala makes no
representations on this manual’s compliance with
the local rules and regulations applicable at any
given time, and hereby disclaims any and all
responsibilities related thereto.
This manual does not create any legally binding
obligations for Vaisala towards customers or end
users. All legally binding obligations and
agreements are included exclusively in the
applicable supply contract or the General
Conditions of Sale and General Conditions of
Service of Vaisala.
Page 3

Table of Contents
1. About This Document..................................................................................... 5
1.1 Version Information............................................................................................. 5
1.2 Related Manuals...................................................................................................5
1.3 Documentation Conventions............................................................................. 6
1.4 Trademarks...........................................................................................................6
1.5 Regulatory Compliances.....................................................................................6
2. Product Overview............................................................................................. 9
2.1 Introduction to Vaisala Radiosonde RS41.........................................................9
2.2 Unwinder.............................................................................................................10
2.3 Packing................................................................................................................. 11
2.4 Product-Related Safety Precautions............................................................... 12
2.5 ESD Protection................................................................................................... 12
2.6 Lithium Battery-Related Precautions.............................................................. 13
3. Operation............................................................................................................ 15
3.1 Preparing the Sounding.................................................................................... 15
3.2 Preparing the Radiosonde Balloon..................................................................15
3.2.1 Handling the Balloon...................................................................................15
3.2.2 Filling the Balloon........................................................................................16
3.3 Preparing Optional Sounding Accessories.................................................... 20
3.3.1 Totex Parachute 5710-5...............................................................................21
3.3.2 Non-Totex Parachute...................................................................................21
3.4 Preparing RS41 Unwinder.................................................................................22
3.4.1 Detaching Unwinder Stick.........................................................................22
3.4.2 Handling the Unwinder String...................................................................23
3.4.3 Attaching the Unwinder to the Balloon...................................................24
3.5 Preparing the Radiosonde with Ground Check Device RI41........................ 25
3.6 Preparing RS41 Sensor Boom.......................................................................... 29
3.7 Checking the LED Light................................................................................... 30
Table of Contents
4. Storage and Transportation.........................................................................31
4.1 Storage................................................................................................................ 31
4.2 Transportation.................................................................................................... 31
4.2.1 Transporting RS41 Radiosondes with Lithium Batteries.........................31
Appendix A:
Appendix B: Radiosonde Warranty................................................................... 35
Technical Support...................................................................................................... 37
Recycling....................................................................................................................... 37
Safety Instructions for Balloon Operators........................... 33
1
Page 4

RS41-SG and RS41-SGP User Guide M211667EN-G
List of Figures
Figure 1 Vaisala Radiosonde RS41 with Unwinder...................................................... 10
Figure 2 RS41 Unwinder.......................................................................................................11
Figure 3 Radiosonde RS41 Optional Accessories....................................................... 20
Figure 4 RS41 Unwinder Details.......................................................................................23
Figure 5 Unwinder Clip Is Level with the Unwinder Bottom Plate......................... 24
Figure 6 Ground Check Device RI41................................................................................26
Figure 7 Lithium Battery Handling Label...................................................................... 32
2
Page 5

List of Tables
Table 1 Manual Versions....................................................................................................... 5
Table 2 Related Manuals....................................................................................................... 5
Table 3 Unwinder Properties............................................................................................. 10
Table 4 RS41 LED Lights.....................................................................................................30
List of Tables
3
Page 6

RS41-SG and RS41-SGP User Guide M211667EN-G
4
Page 7

Chapter 1 – About This Document
1. About This Document
1.1 Version Information
This document provides information for operating Vaisala Radiosonde RS41-SG and RS41SGP, referred to as RS41 in this manual. For information on the sounding software, see the
appropriate sounding system documentation.
In this manual, RS41 refers to Radiosonde RS41-SG and RS41-SGP, unless otherwise
mentioned. RI41 refers to both RI41 and RI41-B, unless otherwise mentioned.
Table 1 Manual Versions
Manual Code Description
M211667EN-G May 2018. Updated images for the improved cover version of RS41.
M211667EN-F June 2017. Updated for the improved cover version of RS41.
M211667EN-E November 2016. Updated with the new Vaisala User Guide template.
M211667EN-D December 2015. Updated information on radiosonde LED light functionality.
Updated instructions for handling the balloon and the unwinder.
M211667EN-C March 2015. Updated for MW41 software release 2.3. Information on handling the
unwinder updated.
1.2 Related Manuals
Table 2 Related Manuals
Manual Code Description
DOC231720 Vaisala RS41 Unwinder Quick Guide
M211367EN Vaisala Guide to Sounding Preparations Technical Reference
M211429EN Vaisala DigiCORAâ Sounding System MW41 Getting Started Guide
- On-line help for Vaisala DigiCORAâ Sounding System MW41, available in the
sounding software user interface
Visit www.vaisala.com/RS41 to watch short videos on how to use the RS41 unwinder.
5
Page 8
RS41-SG and RS41-SGP User Guide M211667EN-G
1.3 Documentation Conventions
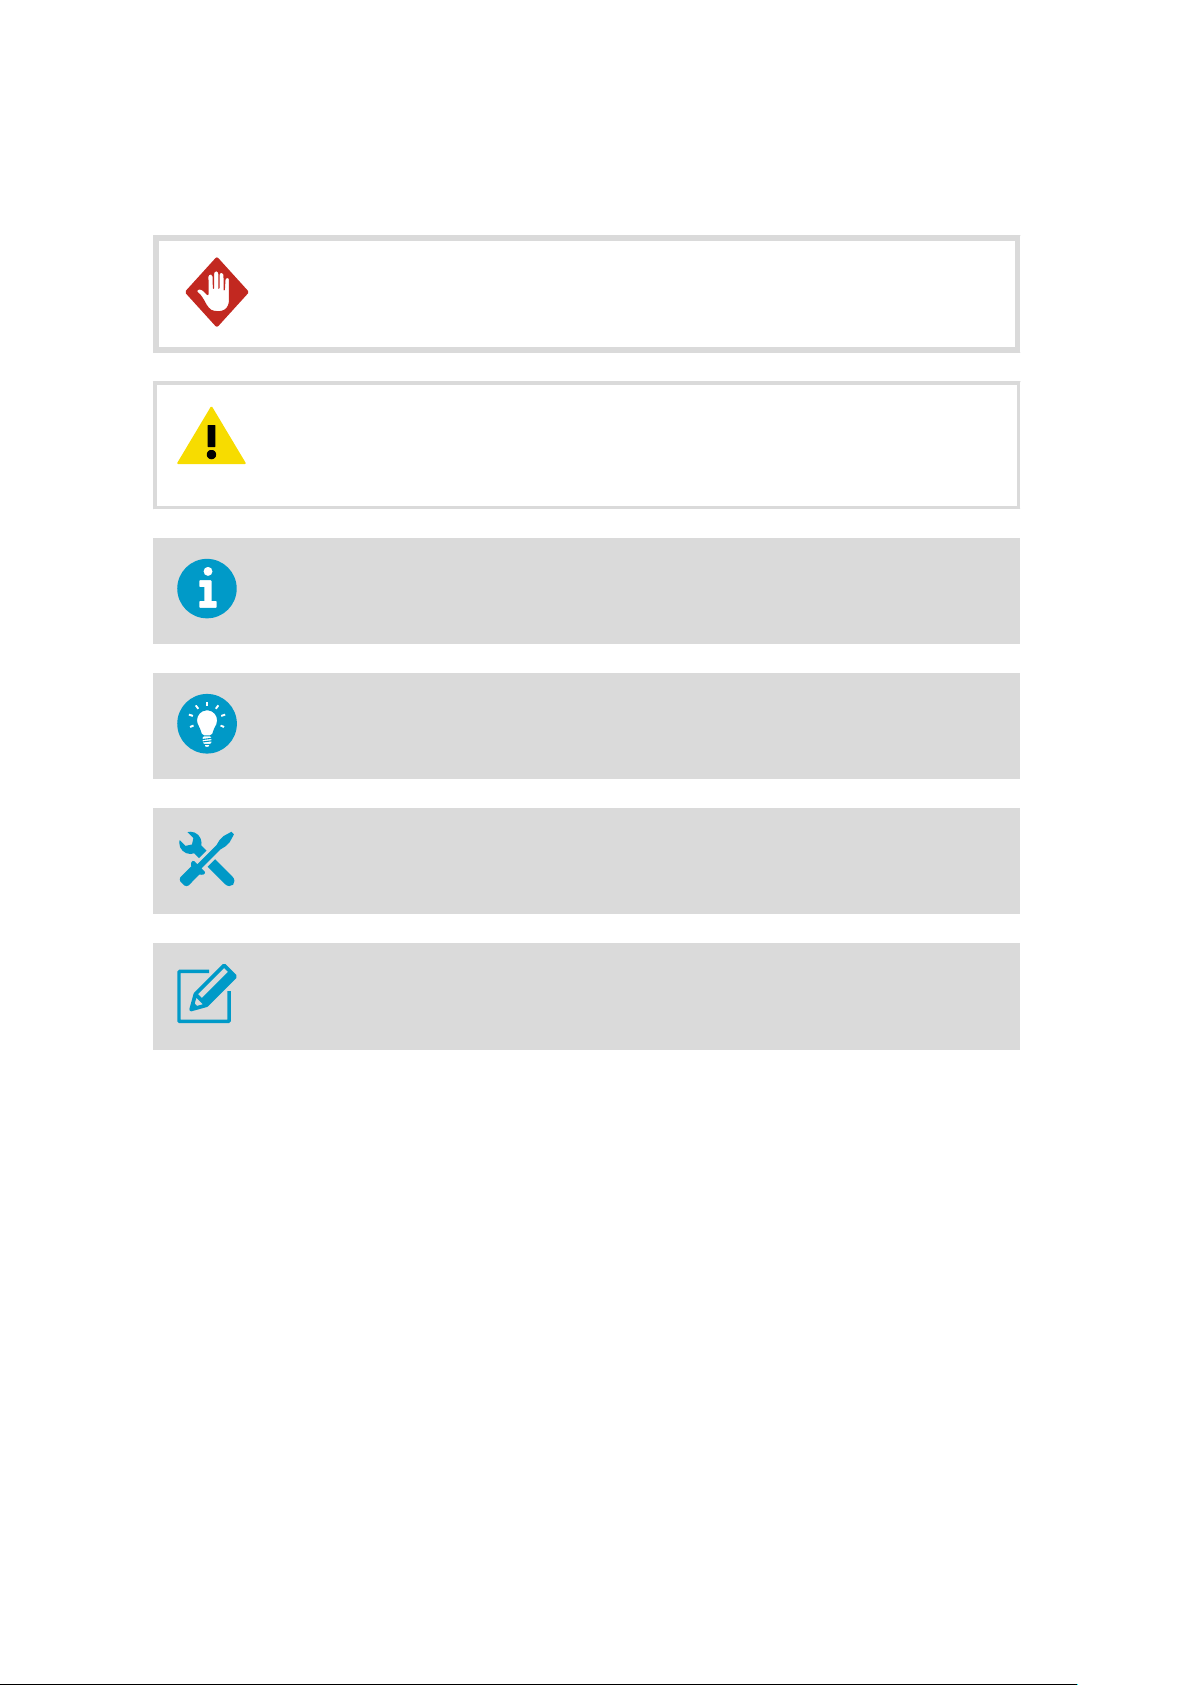
WARNING!
instructions carefully at this point, there is a risk of injury or even death.
CAUTION!
instructions carefully at this point, the product could be damaged or important data
could be lost.
Note highlights important information on using the product.
Tip gives information for using the product more eciently.
Lists tools needed to perform the task.
Warning alerts you to a serious hazard. If you do not read and follow
Caution warns you of a potential hazard. If you do not read and follow
Indicates that you need to take some notes during the task.
1.4 Trademarks
DigiCORAâ and MARWINâ are registered trademarks of Vaisala Oyj.
1.5
Regulatory Compliances
Vaisala Radiosonde RS41 complies with the following performance and environmental test
standards:
• 2004/108/EC Electromagnetic Compliance: EN 61000-4-2, EN 61000-4-3 and EN
55022 / EN 302 054-2
• ERM Electromagnetic Compatibility and Radio Spectrum Matters: ETSI EN 302054-1
and ETSI EN 302054-2
6
Page 9

• RoHS compliance: RoHS Directive (2011/65/EC)
Chapter 1 – About This Document
7
Page 10

RS41-SG and RS41-SGP User Guide M211667EN-G
8
Page 11

Chapter 2 – Product Overview
2. Product Overview
2.1 Introduction to Vaisala Radiosonde RS41
Vaisala Radiosonde RS41 oers excellent data availability and accuracy of humidity,
temperature, pressure, and wind measurement. The radiosonde is fast and stable with
individual, SI-standard traceable calibration.
Vaisala Radiosonde RS41 temperature sensor utilizes linear resistive platinum technology.
The small size of the sensor results in low solar radiation error and guarantees fast response.
Wind data, height and pressure are derived from Vaisala Radiosonde RS41 GPS data
combined with
Robust design, Physical Zero Humidity Check and In-built Functional Temperature Check
ensure reliable performance in every situation. The radiosonde is also easy to use. For
example, there is no need for the user to connect the batteries to the radiosonde to activate
it. The radiosonde is automatically activated when placed on the ground check device. To
make it easier to check the status of the radiosonde, the radiosonde has LED light indicators
visible on the cover.
dierential corrected GPS data from the ground station.
To further improve the design of Radiosonde RS41, the radiosonde now has EPS covers
with plastic fasteners. This makes the radiosonde's look and feel slightly
before, but the radiosonde performance is still on the same high level. The plastic covers
have been removed to decrease the total plastic amount of RS41.
dierent from
9
Page 12

RS41-SG and RS41-SGP User Guide M211667EN-G
Figure 1 Vaisala Radiosonde RS41 with Unwinder
1 Sensor boom
2 Power switch
3 Additional sensor interface connector
4 Antenna
5 LED light
6 Unwinder
7 Unwinder stick
2.2 Unwinder
The unwinder is specifically designed for use with Radiosonde RS41. The unwinder is
installed to the radiosonde so that it bends the sensor boom to the correct sounding
position, ensuring repeatable results in the soundings.
Table 3 Unwinder Properties
Object Property
Material of the string Non-UV treated polypropylene
Tenacity <115 N
10
Page 13

Chapter 2 – Product Overview
Object Property
Length of the string 55 m
Unwinder weight with stick 29 g
The unwinders are shipped in the radiosonde package, packed separately from the
radiosondes. This allows the operator to prepare the balloon and the unwinder at a time that
is most convenient.
Figure 2 RS41 Unwinder
2.3
Radiosonde RS41 is shipped in a box with 40 radiosondes. The shipping box has been tested
following the standards to tolerate the mechanical and environmental transportation
conditions. Inside the shipping box, the radiosondes are packed in their own handling
packages.
Unwinders are packed in a separate cardboard box and shipped in the same box with the
radiosondes. The unwinder box contains 20 unwinders.
Packing
• The shipping box size is 740 x 400 x 320 mm (length x width x height), and it weights
10.9 kg.
• The unwinder box size is 375 x 300 x 70 (length x width x height), and it weights 0.8
kg.
11
Page 14

RS41-SG and RS41-SGP User Guide M211667EN-G
2.4 Product-Related Safety Precautions
WARNING!
applicable restrictions and regulations.
WARNING!
obstructions overhead. Make sure that you check the area for such obstructions before
using the radiosonde.
WARNING!
local and other applicable aviation authorities.
WARNING!
applicable restrictions.
Conduct soundings in a safe environment and in accordance with all
Do not use the radiosonde in an area with power lines or other
Do not use the radiosonde without consultation and cooperation with
Vaisala recommends the use of a parachute even if it is not required by
CAUTION!
lead to malfunction.
Do not modify the unit. Improper modification can damage the product or
Do not use the radiosonde for any purpose other than for soundings.CAUTION!
2.5 ESD Protection
Electrostatic Discharge (ESD) can damage electronic circuits. Vaisala products are
adequately protected against ESD for their intended use. However, it is possible to damage
the product by delivering electrostatic discharges when touching, removing, or inserting any
objects in the equipment housing.
To avoid delivering high static voltages to the product:
• Handle ESD-sensitive components on a properly grounded and protected ESD
workbench or by grounding yourself to the equipment chassis with a wrist strap and a
resistive connection cord.
12
Page 15

Chapter 2 – Product Overview
• If you are unable to take either precaution, touch a conductive part of the equipment
chassis with your other hand before touching ESD-sensitive components.
• Hold component boards by the edges and avoid touching component contacts.
2.6 Lithium Battery-Related Precautions
CAUTION!
• Do not place the lithium battery in fire or apply heat to the battery.
• Do not pierce the battery with nails, strike the battery with a hammer, step on the
battery, or otherwise damage the outer casing.
• Do not subject the battery pack to strong impacts or shocks.
• Do not expose the battery to water or salt water, or allow the battery to get wet.
• Do not disassemble or modify the battery. The battery contains safety and protection
devices which, if damaged, may cause the battery to generate heat, rupture or ignite.
• Do not leave the battery in direct sunlight, or use or store the battery inside cars in
hot weather. Doing so may cause the battery to generate heat, rupture, or ignite.
Using the battery in this manner may also result in shortened life expectancy and loss
of performance.
• Never short circuit, reverse polarity, disassemble, damage, or heat the battery over
100 ºC (212 ºF). If an exposed lithium battery does not start on
more violently if it comes into contact with water or even moisture in the air.
• DO NOT SPILL WATER ON A BURNING BATTERY. A fire extinguisher must be used.
Take the following precautions when handling lithium batteries:
fire, it will burn even
13
Page 16

RS41-SG and RS41-SGP User Guide M211667EN-G
14
Page 17

Chapter 3 – Operation
3. Operation
3.1 Preparing the Sounding
You must carry out the pre-launch steps as instructed and always in the same way. The
workorder for a sounding is listed below. See the following sections for details.
1. Unpack and
2. Unpack the radiosonde and the unwinder. Attach the unwinder to the balloon. See RS41
Unwinder Quick Guide for illustrations.
3. Prepare the radiosonde with the ground check device.
4. Attach the radiosonde to the unwinder.
5. Launch the radiosonde balloon.
6. Monitor the sounding with the sounding system. See the sounding system
documentation for more information.
The following sections include information on preparing the radiosonde for the sounding
with Ground Check Device RI41. Radiosonde RS41 can also be prepared with Ground Check
Device MWH322. For further instructions, see the appropriate sounding system
documentation.
3.2
Preparing the Radiosonde Balloon
fill the balloon. Prepare the optional sounding accessories.
WARNING!
(page 33) before proceeding. Normally the balloon-lifting gas (hydrogen or helium) is
supplied in gas bottles, but hydrogen can also be produced with a hydrogen generator.
Carefully study the operation and safety instructions for the gas bottle facilities or the
hydrogen generator.
Take extreme caution when handling the inflated balloon.
Read the safety instructions in Safety Instructions for Balloon Operators
3.2.1 Handling the Balloon
WARNING!
balloon-filling shed must be well ventilated so that possible gas leaks do not remain
The
inside the shed, even in situations when there is no electricity.
It is recommended that the balloon be prepared in a balloon-filling shed.
15
Page 18

RS41-SG and RS41-SGP User Guide M211667EN-G
When handling the balloon, use protective gloves to avoid damaging the balloon surface.
Even minor grease stains can damage the balloon, causing premature balloon burst.
1. Open the balloon package carefully. To avoid damaging the balloon, do not use a knife
or other sharp objects to open the package.
2. Check visually that the balloon is structurally sound and has no perforations or other
apparent defects in the nozzle section.
3.2.2 Filling the Balloon
1. Connect the side tube of the filling balance to the pressure reducing valve on the gas
cylinder (or hydrogen generator) with a flexible plastic hose.
2. Select the nozzle which best fits into the neck of the balloon.
3. Load the additional weights that are needed to obtain the required lift, for example,
Vaisala Filling Balance FB13 weights as in the
figure below.
16
Page 19

Chapter 3 – Operation
4. Secure the neck of the balloon to the balance nozzle with a clamp as shown in the
figure below. Look out for sharp objects near the filling balance so that no damage is
caused to the relaxed balloon.
5. Turn on the gas from the pressure reducing valve. Let the gas flow slowly into the
balloon. Do not leave the balloon-filling shed while inflating the balloon. Follow the
balloon manufacturer's instructions when
inflating the balloon.
17
Page 20

RS41-SG and RS41-SGP User Guide M211667EN-G
6. When the balloon is suciently filled, in other words, the balloon just raises the gas
nozzle, close the gas valve.
7. Before removing the balloon from the gas nozzle, tie the neck of the balloon tightly
above the balance nozzle with approximately 0.5 m (2 ft) bit of string.
18
Page 21

8. Remove the balloon from the gas nozzle.
Chapter 3 – Operation
9. Fold the neck of the balloon over and secure firmly. Cut o any extra string. The figure
below shows an example of a secured balloon neck. In the figure, the balloon is
attached to a balloon holder hook.
10. When the balloon is ready, make sure it does not touch anything. Hold the inflated
balloon by the neck.
19
Page 22

RS41-SG and RS41-SGP User Guide M211667EN-G
3.3 Preparing Optional Sounding Accessories
The unwinder is designed to be attached directly to the folded balloon neck, but in case you
cannot attach the unwinder to the balloon, the unwinder can also be used with optional
sounding accessories which provide the necessary support during the sounding. The
sounding accessories are needed to restrict the movement of the unwinder. In this section,
optional sounding accessories refer to a hanger board or a parachute.
The unwinder must always be attached to a relatively
the unwinder twist freely, or otherwise the suspension string might unwind at too high a
speed and the radiosonde hit the ground during the launch. However, the unwinder must be
able to swing slightly during the sounding.
Similar to the balloon, the unwinder and the optional sounding accessories must be
prepared before launching the radiosonde. See Figure 3 (page 20) for the
options.
firm support. The support must not let
dierent
Figure 3 Radiosonde RS41 Optional Accessories
20
Page 23

Chapter 3 – Operation
CAUTION!
(230 N). Knots in the strings weaken the strength to the minimum of 45 % of the original
string strength. This results in a string strength of 10 kp (100 N) which is
soundings with Radiosonde RS41.
The strength of all the strings used during soundings must not exceed 23 kp
sucient for
Attach all optional sounding accessories next to the balloon, otherwise they disturb the
measuring environment of the radiosonde and no proper temperature and humidity
measurements can be made.
Visit www.vaisala.com/RS41 to watch short videos on how to make a hanger board and
how to attach the unwinder to the hanger board, and how to attach the unwinder to the
parachute.
3.3.1 Totex Parachute 5710-5
The recommended parachute is Totex type 5710-5 (Vaisala code 15045). See option 1 in
Figure 3 (page 20).
Totex parachute 5710-5 has an elastic ribbon loop below the spreader. Attach the unwinder
to the loop by pushing the hook out the other side in the same fashion as with the folded
balloon neck.
3.3.2
Non-Totex Parachute
If you are using a parachute that has no firm objects to prevent the unwinder from twisting,
use a hanger board. The hanger board provides more stability during the sounding. See
option 3 in Figure 3 (page 20).
3.3.2.1 Making a Hanger Board
The string used with the hanger board must have a diameter of > 1.5 mm and the strength
must be 250 … 350 N.
See the steps below for instructions on how to make a hanger board out of the radiosonde
cardboard package. See also the video in www.vaisala.com/RS41.
To make the hanger board, you need the following items:
• Radiosonde handling box cardboard package
• Scissors
• Some string
1. Cut the radiosonde cardboard package to one whole piece that is big enough to make a
hanger board.
2. Make one hole at one end of the hanger board, four holes at the other. Make the four
holes so that two holes are on top of each other.
21
Page 24

RS41-SG and RS41-SGP User Guide M211667EN-G
3. Tie a string on the unwinder hook.
4. Thread the string through the four holes so that the unwinder is firmly attached to the
other end of the hanger board.
5. Pull the same string through the hole at the other end of the hanger board and attach
the string to the parachute. The string now runs across the hanger board.
3.4 Preparing RS41 Unwinder
When you perform a sounding with no optional accessories, the radiosonde unwinder is
attached directly to the balloon. See option 2 in Figure 3 (page 20).
Visit www.vaisala.com/RS41 to watch a short video on how to attach the unwinder to the
balloon.
It is very important to prepare the unwinder carefully, following the instructions below.
Correct handling of the unwinder ensures a successful sounding.
3.4.1 Detaching Unwinder Stick
To start using the RS41 unwinder, you must first detach the unwinder stick from the
unwinder body.
1. The unwinder stick (number 1 in Figure 4 (page 23)) is attached between two plastic
clips in the unwinder hook (number 2). Detach the stick from between the plastic clips
and pull it out from the unwinder bottom plate (3).
If the unwinder stick is tightly attached to the bottom plate, it is a good idea to
slightly twist the unwinder stick before pulling it out.
22
Page 25

Chapter 3 – Operation
2. When you pull the unwinder stick out, make sure that the string unwinds and that it is
not tangled.
Figure 4 RS41 Unwinder Details
1 Unwinder stick
2 Unwinder hook
3 Unwinder bottom plate
4 Unwinder clip
3.4.2 Handling the Unwinder String
In the unwinder body, the unwinder string runs under a round plastic clip (number 4 in
Figure 4 (page 23)) on the bottom plate. This keeps the string attached to the unwinder, and
the radiosonde attached to the balloon.
1. To prevent the string from getting tangled in the clip during the sounding, make sure
the round plastic clip is level with the unwinder bottom plate.
23
Page 26

RS41-SG and RS41-SGP User Guide M211667EN-G
2. If the clip is bent up, bend it gently back to level position as shown in Figure 5
(page 24).
Figure 5 Unwinder Clip Is Level with the Unwinder Bottom Plate
3.4.3
Attaching the Unwinder to the Balloon
The unwinder must be attached firmly, so that it is not able to twist freely, or the suspension
string might unwind at too high a speed and the radiosonde hit the ground during the
launch. However, the unwinder must be able to swing slightly during the sounding. Follow
the steps and
figures below to attach and align the unwinder correctly when it is attached
directly to the balloon.
1. Pass the unwinder hook through the loop created by the tied balloon neck.
2. Make sure the hook comes out the other side as shown in the figure below. The
unwinder is now
firmly attached to the balloon.
24
Page 27

Chapter 3 – Operation
3. Align the unwinder so that it points directly downwards from the balloon neck, as
illustrated in the figure below.
CAUTION!
downwards from the balloon neck.
To ensure a successful sounding, align the unwinder so that it points
3.5 Preparing the Radiosonde with Ground Check Device RI41
In the sounding preparations, RI41 is connected to the sounding software computer via a
USB cable and operated with the help of the sounding software. RI41 is switched on by
connecting it to the sounding system and turning on the computer.
For information on configuring RI41 as the ground check option in the sounding software,
see the MW41 on-line help. The on-line help also provides information on other options for
preparing the radiosonde for the sounding.
25
Page 28

RS41-SG and RS41-SGP User Guide M211667EN-G
Figure 6 Ground Check Device RI41
CAUTION!
contaminated.
During radiosonde regeneration, the temperature of the sensor boom is about 150 °C for
three (3) minutes.
Do not touch the radiosonde sensors, they are fragile and can be easily
26
Page 29

Chapter 3 – Operation
Follow the steps below to prepare the radiosonde for a sounding with RI41:
1. Open the radiosonde package and remove the radiosonde from the package.
The foil bag contains illustrated instructions for preparing the radiosonde.
2. Place the radiosonde on RI41 carefully. The radiosonde is automatically switched on
when placed on RI41. Make sure that the radiosonde sensor boom does not hit the
support plate on RI41 as this might damage the sensor boom.
3. The sounding software automatically detects the radiosonde and begins the sounding
preparations.
27
Page 30

RS41-SG and RS41-SGP User Guide M211667EN-G
4. During the radiosonde pre-flight preparation phase, several steps are carried out. These
consist of ground check procedures for sensors, as well as optional features for setting
the radiosonde in-flight operation parameters, such as a timer for turning the
radiosonde power o after a desired time, pressure, or altitude. In this phase, you can
also set the radiosonde transmitter frequency or, alternatively, apply the station’s
default frequency. Use the sounding software to modify the settings. The pre-flight
procedure depends on the radiosonde and ground check device model.
• RS41-SG with RI41:
• T check: The radiosonde performs an in-built functional temperature check.
• Reconditioning: Preparation of humidity sensor. Cooling after reconditioning
• U check: The radiosonde performs a physical zero humidity check.
• Updating radiosonde: The parameters and preparation results are updated to the
radiosonde.
• RS41-SGP with RI41 or RI41-B:
• T check: The radiosonde performs an in-built functional temperature check.
• Reconditioning: Preparation of humidity sensor.
• Cooling after reconditioning
• U check: The radiosonde performs a physical zero humidity check.
• Stabilizing: Waiting for the pressure sensor to stabilize. Enter the pressure
reference value from your own reference source or, with RI41-B, retrieve the
pressure reference value automatically from the barometer module in RI41-B.
• Ground check: Once the conditions have stabilized, that is, the PTU values are
steady, ground check is performed.
• Updating radiosonde: The parameters and preparation results are updated to the
radiosonde.
5. After the ground check is
finished, the sounding software indicates the results with a
message. Remove the radiosonde from the ground check device.
6. Before the radiosonde is launched, you can return to the preparation phase anytime by
replacing the radiosonde on RI41. The sounding software automatically returns to the
ground check phase. If there is any delay in starting the sounding, for example, if you
must wait before launching the sounding balloon, you can switch the radiosonde
o by
pressing the power switch. When you are ready to launch the balloon, switch the
radiosonde back on.
28
Page 31

Chapter 3 – Operation
3.6 Preparing RS41 Sensor Boom
Before launching the radiosonde, bend the sensor boom to the correct sounding position
using the unwinder stick. This also attaches the radiosonde to the unwinder and the balloon.
1. Push the unwinder stick to its position at the end of the radiosonde.
2. As you push, the unwinder stick pushes the sensor boom to the bent position and the
unwinder snap lock clicks into place.
29
Page 32

RS41-SG and RS41-SGP User Guide M211667EN-G
3. Make sure that the unwinder is firmly attached to the radiosonde.
3.7 Checking the LED Light
After preparing the radiosonde for the sounding, check the radiosonde status by checking
the LED light on the radiosonde cover. When the green LED light is steady, the radiosonde is
ready for the release. The LED light will switch
table below for more detailed information.
Table 4 RS41 LED Lights
LED Light Meaning
Green LED is blinking. When the green LED is blinking, the reconditioning of the humidity sensor and
sensor checks are in progress and/or the radiosonde is not receiving GPS signal. To
receive the GPS signal, take the radiosonde outside with line of sight to GPS
satellites.
Green LED is steadily lit. 1. The radiosonde is ready and works fine, determined by the radiosonde in-built
diagnostics. The diagnostics cover, for example, temperature and humidity
sensors.
2. GPS satellites are detected. Once GPS signal has been found after radiosonde
start up, the LED light becomes steady green. The LED may start blinking
again due to possible GPS blind spots (for example, inside a balloon shelter),
indicating that the radiosonde should be taken outside with line of sight to
GPS satellites before launch.
3. The steady green LED indicates that the telemetry from RS41 is working.
o automatically after the launch. See the
Red LED is lit. Error. Check the sounding software for any error messages.
30
Page 33

Chapter 4 – Storage and Transportation
4. Storage and Transportation
4.1 Storage
Radiosondes must be stored and used in accordance with applicable instructions, the User
Guide, and
Radiosondes must be kept in their original packaging (unopened vacuum envelopes) in a
dry, ventilated indoor storage space, and within the following key environmental limits (ref.
IEC 60721-3-1 class 1K2):
• Temperature +5 °C to +40°C
• Relative humidity below 85%
specifications issued by Vaisala.
CAUTION!
the unwinders in their original unopened packages.
The unwinder string is not resistant to prolonged exposure to sunlight. Store
4.2 Transportation
Vaisala radiosondes must be transported in their original shipping packages.These packages
are designed and built to survive and protect their contents in the environmental conditions
described herein with the terminology and standards per standard IEC 60721-3-2. The
transportation of radiosondes requires climatic conditions 2K2 and mechanical conditions
2M1 of this standard:
• Transportation in weather-protected conditions.
• Transportation using conventional means (car, truck, and / or aircraft),with free fall not
exceeding 0.25 m in any circumstances.
• Following additional markings on packaging.
4.2.1
RS41 radiosondes with lithium batteries are classified as:
Transporting RS41 Radiosondes with Lithium Batteries
• UN 3091 Lithium metal batteries contained in equipment
Consignments must be packed, labeled, and documented according to the IATA packing
instructions.
When transporting the radiosondes with lithium batteries, take the following requirements
into account:
• The package must display a lithium battery handling label, similar to the one shown in
the following example. The original radiosonde shipping package must be used for
transport, and it already has the lithium battery handling label.
31
Page 34

RS41-SG and RS41-SGP User Guide M211667EN-G
• The consignment must include a document indicating the lithium content, describing
proper handling and procedures for damaged packages, and a telephone number for
additional information.
Figure 7 Lithium Battery Handling Label
If the lithium battery is faulty, do not transport it.
32
Page 35

Appendix A – Safety Instructions for Balloon Operators
Appendix A. Safety Instructions for Balloon Operators
Photocopy these instructions and place the list in clear view in the balloon filling shed and in
the sounding compartment.
WARNING!
generator and for the correct method of
1. No smoking or naked flame allowed.
2. If possible, avoid wearing clothing made of nylon or other synthetic
build-up of static charges. Do not wear shoes with rubber soles.
3. Wear protective glasses.
4. Regularly check that the gas tube
and to the balloon inflation nozzle.
5. Take care to prevent a gas leak in the shed when interrupting
cylinder.
6. Never use a repaired balloon.
7. Should a leak develop in the balloon during
balloon inside the shed if possible. Instead, release the defective balloon without load.
It is not advisable to
8. Do not touch the balloon with bare hands except when holding it by the neck. Wear
soft cotton gloves.
New operator! Carefully study the instructions for using the hydrogen
inflation.
fibers to prevent a
fits securely to the gas cylinder or generator nozzle
inflation to replace a gas
inflation, do not let gas escape from the
deflate the balloon, even outside the shed.
9. Ensure that there are no pointed objects in the shed. Nails, hooks, hinges, padlocks,
etc., are dangerous as they might scratch the
0.05 ... 0.1 mm thick upon launch; the slightest scratch could cause the balloon to burst
prematurely.
10. Keep the doors of the shed shut while
ensure that the shed is properly ventilated.
11. No unauthorized person shall be allowed admittance to the shed while the hydrogen
generator is in operation or balloon
12. Ensure that all tools and other implements not essential for balloon
removed from the shed.
13. Do not take any electrical devices (cell phone etc.) to the balloon
the balloon inflated with hydrogen. Safe distance when outdoors is typically 1.5 meters.
inflating the balloon on a windy day. However,
inflation is going on.
inflated balloon. The balloon film is only
inflation have been
filling shed or close to
33
Page 36

RS41-SG and RS41-SGP User Guide M211667EN-G
14. Always keep the radiosonde at least 50 cm below the level of the gas nozzle and the
inflated balloon, and at least 1.5 meters away from the gas cylinder/hydrogen generator,
connectors, and tubing. Avoid taking the radiosonde inside the balloon filling shed, if
possible.
15. Follow all regulations concerning hydrogen safety.
34
Page 37

Appendix B – Radiosonde Warranty
Appendix B. Radiosonde Warranty
35
Page 38

RS41-SG and RS41-SGP User Guide M211667EN-G
36
Page 39

Technical Support
Contact Vaisala technical support at helpdesk@vaisala.com. Provide at least the following
supporting information:
• Product name, model, and serial number
• Name and location of the installation site
• Name and contact information of a technical person who can provide further
information on the problem
For more information, see www.vaisala.com/support.
Recycling
Recycle all applicable material.
Follow the statutory regulations for disposing of the product and packaging.
37
Page 40

RS41-SG and RS41-SGP User Guide M211667EN-G
38
Page 41

Page 42

www.vaisala.com
 Loading...