

Page 1
M212167EN-A
Technical Note
Adjustment of Relative Humidity and
Temperature
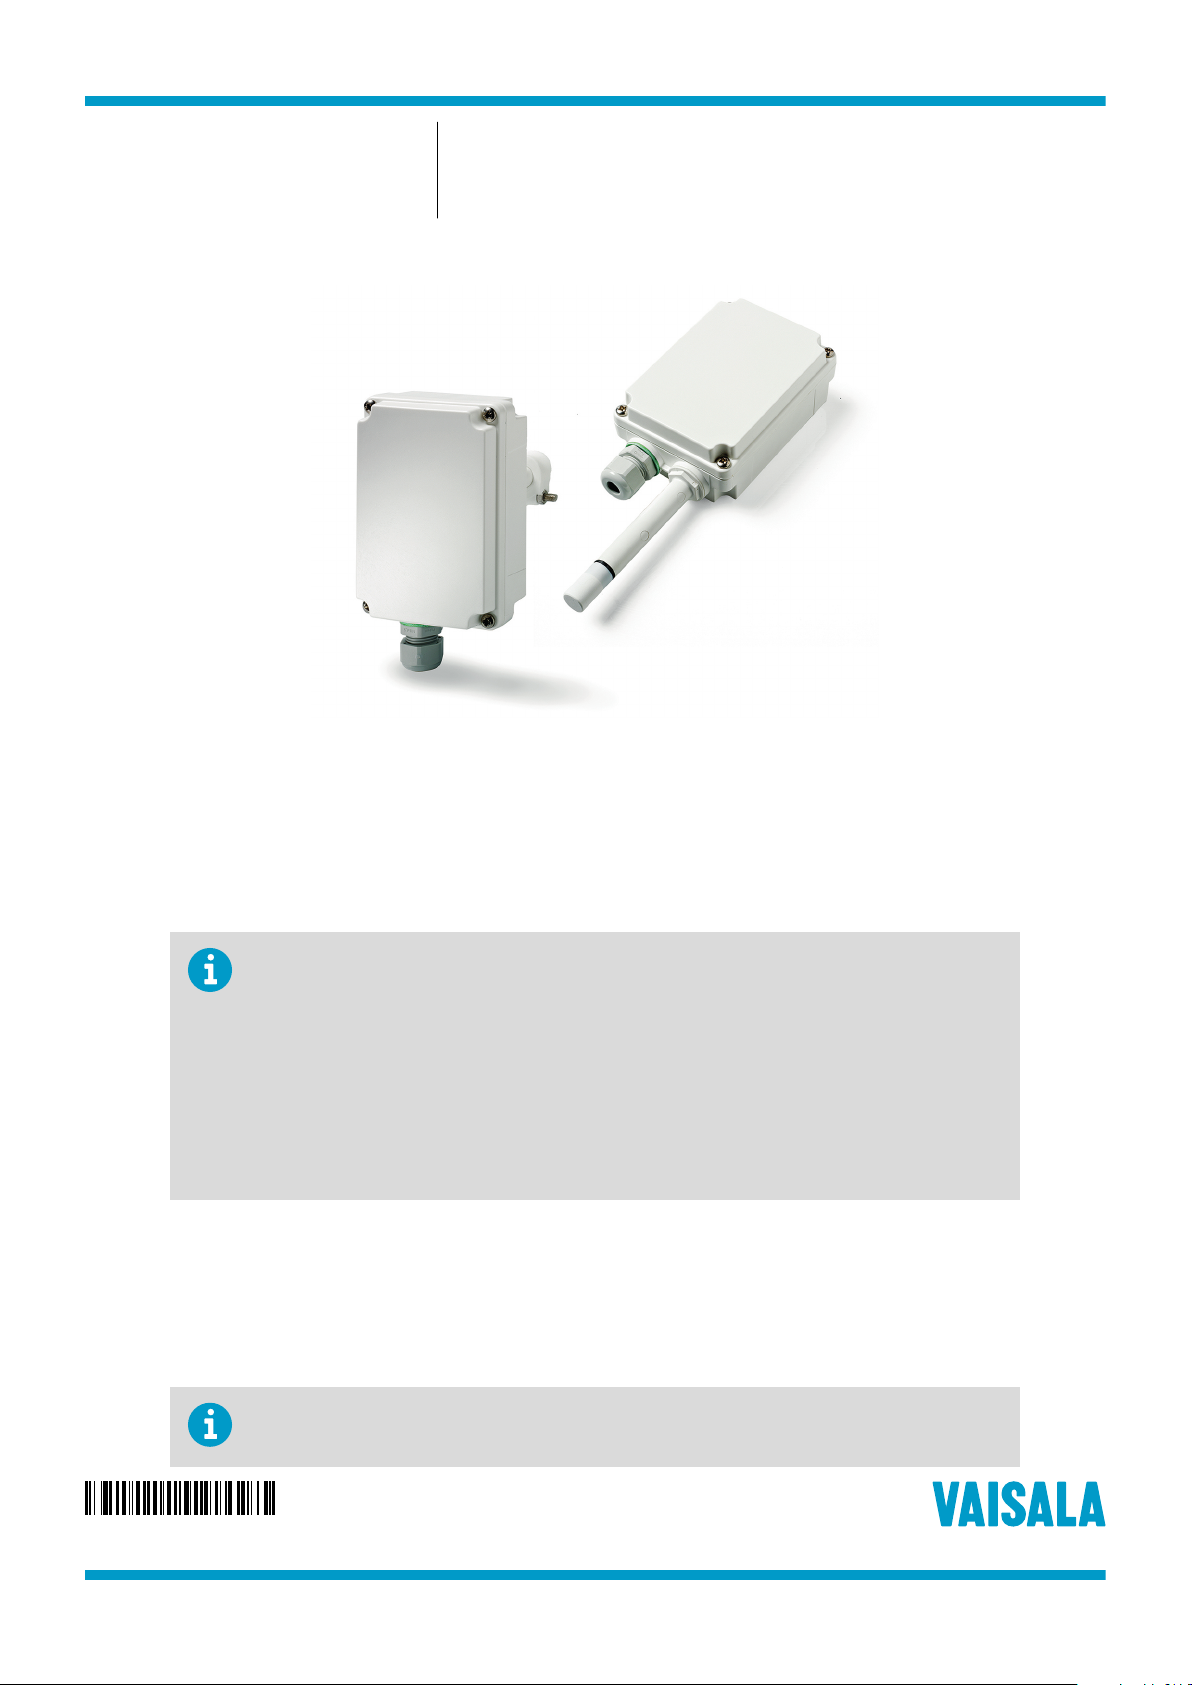
HMD82M and HMW88M Transmitters
Overview
This document provides instructions for adjustment of relative humidity and temperature in Vaisala
HMD82M and HMW88M humidity and temperature transmitters.
For the adjustment procedure, you will need the following:
• USB service cable (order code ASM212800)
• Computer with:
• Windows operating system
• Free USB port
• Driver for the USB service cable installed. See Taking USB Service Cable into Use
(page 2).
• Terminal application (for example PuTTy). See Connecting to HMD82M/HMW88M
(page 2).
• Medium-size crosshead screwdriver (Pozidriv) for the screws on the cover
• Small slotted screwdriver for the screw terminals
Using Service Port
The HMD82M and HMW88M transmitters have a serial interface on the component board for user
adjustment. You can connect to it through the 4-pin M8 service port connector on the transmitter.
Vaisala
your PC.
oers an optional USB service cable (order code ASM212800) for connecting the transmitter to
The service port is intended for short-term use such as adjustment. For permanent installation, use the
analog output.
PUBLISHED BY
Vaisala Oyj
Vanha Nurmijärventie 21
FI-01670 Vantaa, Finland
Phone:+358 9 8949 1
© Vaisala 2018
All rights reserved. Any logos and/or product names are trademarks of Vaisala or its individual partners.
Any reproduction, transfer, distribution or storage of information contained in this document is strictly
prohibited. All specifications — technical included — are subject to change without notice.
Page 2

Technical Note M212167EN-A
If you have not used the HMD82M/HMW88M USB service cable before, install first the driver for the
cable. See Taking USB Service Cable into Use (page 2).
Taking USB Service Cable into Use
Before taking the USB service cable into use, you must install the USB driver on your PC. The following
instructions are for PCs with Windowsâ operating system.
1. Check that the USB service cable is not connected. Disconnect the cable if you have already
connected it.
2. Download the driver from http://www.ftdichip.com/Drivers/VCP.htm.
3. Execute the USB driver installation program (setup.exe), and accept the installation defaults. The
installation of the driver may take several minutes.
4. After the driver has been installed, connect the USB service cable to a USB port on your PC.
Windows will detect the new device, and use the driver automatically.
5. The installation has reserved a COM port for the USB service cable. Remember to use the correct
port in the settings of your terminal program.
To check the reserved COM port number:
a. Open Control Panel from the Windowsâ Start menu. Search for "devices and printers" in
the Control Panel application.
b. Locate the USB cable 'TTL232R-3V3' in the list of devices.
c. Right-click to select Properties, then select Hardware. The COM port number is given in
brackets in the Properties dialog of the cable.
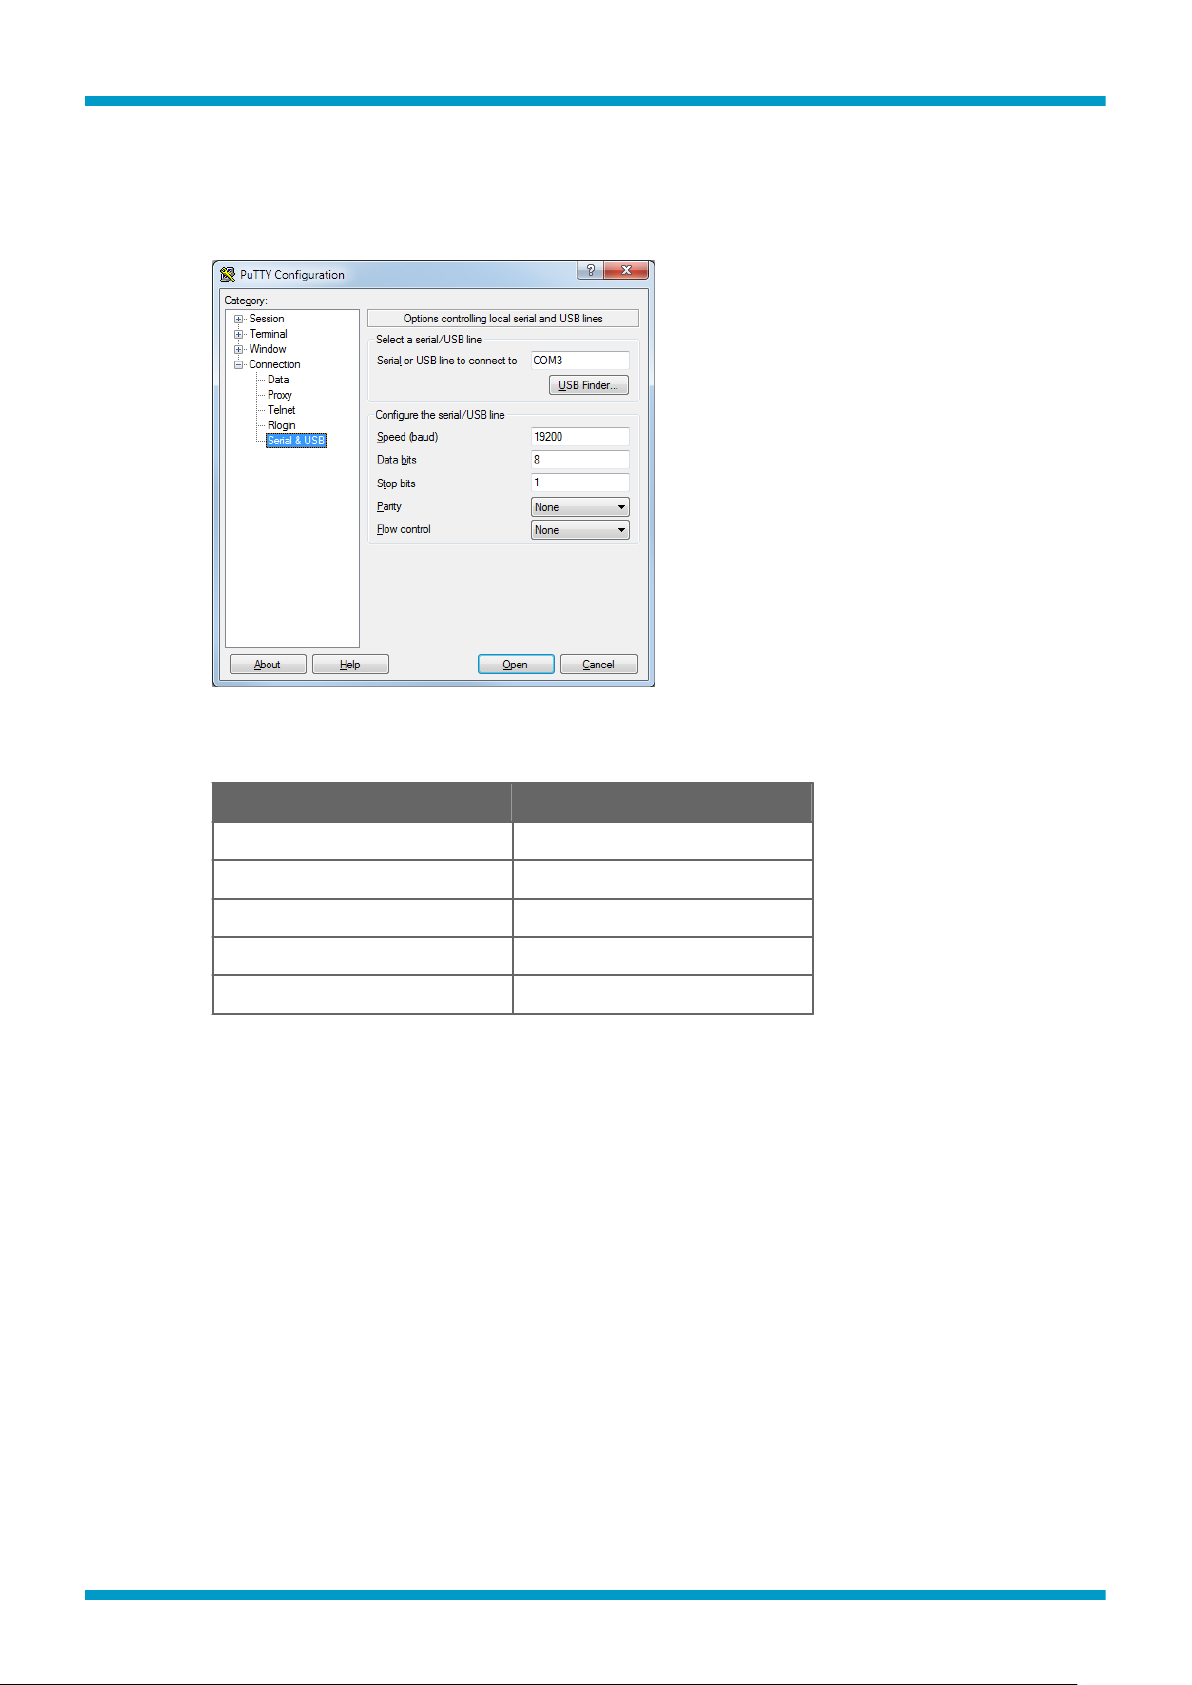
Connecting to HMD82M/HMW88M
The following steps describe how to connect to the HMD82M/HMW88M transmitter using a USB
service cable and PuTTY terminal application for Windows (available for download at
www.vaisala.com/en/search/download).
For the default serial interface settings, see Table 1 (page 3).
Connecting the USB service cable to the transmitter may distort the readings from the
analog outputs on the module component board due to ground loop.
1. Connect the USB cable between your PC and the service port of the transmitter.
2. Start the PuTTY application.
3. Select the Serial & USB settings category, and check that the correct COM port is selected in the
Serial or USB line to connect to
4. Check that the other serial settings are correct for your connection, and change if necessary.
Flow control should be set to None unless you have a reason to change it.
5. Select Open to open the connection window and start using the serial line.
If PuTTY is unable to open the serial port you selected, it will show you an error message instead.
If this happens, restart PuTTY and check the settings.
field.
HUM and T
2 (8)
Page 3
Technical Note M212167EN-A
6. You may need to adjust the Local echo setting in the Terminal category to see what you are
typing on the serial line. To access the configuration screen while a session is running, click the
right mouse button over the session window, and select Change Settings... from the pop-up
menu.
Figure 1 PuTTY Terminal Application
Table 1 HMD82M and HMW88M Default Serial Interface Settings
Property Description / Value
Baud rate 19200
Parity None
Data bits 8
Stop bits 1
Flow control None
3 (8)
Page 4

Technical Note
Adjustment of Relative Humidity and
Temperature in HMD82M and HMW88M
The following procedure describes relative humidity (RH) and temperature (T) adjustment using serial
line commands. You can use the procedure to do a one-point adjustment (oset) or a two-point
adjustment (oset and gain).
Prerequisites
For best results, note the following recommendations:
• For one-point humidity adjustment, a < 50 %RH reference is recommended.
• Two-point humidity adjustment requires an additional reference, with preferably > 50 %RH value.
• Two-point temperature adjustment requires a second reference point that is at least 20 °C
As a reference instrument, you can use, for example, Vaisala Humidity Calibrator HMK15 or the Vaisala
HUMICAPâ Handheld Humidity and Temperature Meter HM70. For more information on the HMK15
and the HM70, see the respective User's Guides in www.vaisala.com.
There should be over 30 %RH
warmer than the
first point.
M212167EN-A
dierence between the two points.
Performing an accurate adjustment takes some time and preparation. Check the following before
starting any adjustment procedure:
• Always wait for measurement instruments to stabilize in the ambient temperature.
Temperature
• Check that there are no heat or moisture sources near the transmitter.
• Check that the transmitter is not in direct sunlight or close to the discharge of the supply air
ducts.
• Check that there is no moisture on the probe. If the sensor has become wet, you must allow it
to dry before you can measure.
dierences are a major source of measurement error.
List of Serial Commands
Command
Adjustment Commands
L Show current user adjustment parameters
LI Set user adjustment parameters
SEND Output the measurement reading once
Other Commands
ASEL Show or set analog output parameters and scaling
Description
4 (8)
All commands can be issued either in uppercase or lowercase. In the command examples, the
keyboard input by the user is in bold type.
The notation <cr> refers to the carriage return control character, which you can send in a terminal
application by pressing enter on your keyboard. Before entering commands, send a <cr> to clear the
command
buer.
Page 5

Technical Note
Adjustment of Relative Humidity and Temperature
1. Prepare the HMD82M/HMW88M transmitter for a service port connection, as instructed in Using
2. With the USB service cable connected, issue the L serial line command and write down the
M212167EN-A
Service Port (page 1) and Connecting to HMD82M/HMW88M (page 2).
current adjustment values, so that you can restore them manually if necessary.
Syntax:
L<cr>
The output values are as follows:
Output Name
URHO RH oset 0
URHG RH gain 1
UTO Temperature oset 0
UTG Temperature gain 1
Description Default Value
Example:
l
URHO : 0.200000
URHG : 1.030000
UTO : 0.100000
UTG : 1.010000
3. Using the LI command, set RH and T
oset to 0 and gain to 1 (= default values):
Syntax:
LI<cr>
Example:
li
URHO : 0.200000 ? 0
URHO : 0.000000
URHG : 1.030000 ? 1
URHG : 1.000000
UTO : 0.100000 ? 0
UTO : 0.000000
UTG : 1.010000 ? 1
UTG : 1.000000
4. If you are using a reference instrument, such as a humidity calibrator, insert the probe in the
reference environment and wait for 20 ... 40 minutes for the reading to stabilize.
5 (8)
Page 6

Technical Note
5. Use the SEND command to monitor the stabilization of the measurement reading.
M212167EN-A
Syntax:
SEND<cr>
Example:
send
RH= 40.10 % T= 22.36 'C
send
RH= 41.40 % T= 23.66 'C
send
RH= 42.70 % T= 24.96 'C
6. If you only want to perform a one-point adjustment, calculate the
oset correction using the
measured values and the following formula, where "Ref" equals the reference value and "Meas"
the measured value:
=
= 1
7. If you want to perform a two-point adjustment, repeat step 4 and step 5 in the second reference
environment, and calculate gain and oset using the following formulas:
Meas2 Meas1
= 1 1 *
Ref2 Ref1
=
8. Using the LI command, set oset and gain, as calculated in step 6 and step 7.
Syntax:
LI<cr>
After entering the command, enter each new value one at a time. Press ENTER without giving a
value to move to the next parameter.
Example:
6 (8)
li
URHO : 0.000000 ? 0.1
URHO : 0.100000
URHG : 1.000000 ? 1.1
URHG : 1.100000
UTO : 0.000000 ? 0.2
UTO : 0.200000
UTG : 1.000000 ? 1.2
UTG : 1.200000
Page 7

Technical Note
9. Use the SEND command to output a single measurement reading. You can use the command to
Analog Output Settings
The ASEL command can be used to show or select the analog output measurement parameters
("quantities"), and the scaling that is used.
M212167EN-A
monitor the stabilization of the reading and to verify the adjustment.
Syntax:
SEND<cr>
Example:
send
RH= 42.70 % T= 24.96 'C
You must always connect the humidity measurement current loop (HUM) to power the transmitter.
Connecting the temperature measurement current loop is optional.
Syntax:
ASEL [output# quantity lo_value hi_value]<cr>
output# in the syntax refers to the HUM (output 1) and T (output 2) outputs on the module
component board.
Accepted values and ranges for quantity:
• T (-40 - 60)
• RH (0 - 100)
• Td (-40 - 60)
• Tdf (-40 - 60)
• Tw (-40 – 60)
• h (-40 – 460)
Example (show current settings):
asel
Analog output 1:
Quantity : Td
Level Lo : -40.000000
Level Hi : 60.000000
Analog output 2:
Quantity : RH
Level Lo : 0.000000
Level Hi : 100.000000
7 (8)
Page 8

Technical Note M212167EN-A
Example (change output to T, low limit to -10 and high limit to +60):
asel 1 T -10 60
Analog output 1:
Quantity : T
Level Lo : -10.000000
Level Hi : 60.000000
8 (8)
 Loading...