

United office ULG 300 A1 User Manual [el]
7
A3 Laminator ULG 300 A1
KOMPERNASS GMBH
BURGSTRASSE 21 · D-44867 BOCHUM
www.kompernass.com
ID-Nr.: ULG300A1-04/10-V2
IAN: 61862
A3 Laminator
Operating instructions
R
Aparat de laminat A3
Instrucţiunile
ΣΣυυσσκκεευυήή ππλλαασσττιικκοοπποοίίηησσηηςς AA33
Οδηγίες χρήσης
Plastifikator A3
Upute za upotrebu
Уред за ламиниране A3
Ръководство за експлоатация
Laminiergerät A3
Bedienungsanleitung
ULG 300 A1
w
q
1
5
2
3
4
6
0
89
7

CONTENT PAGE
1. Intended use 2
2. Items supplied 2
3. Appliance description 2
4. Technical Data 2
5. Safety instructions 3
6. Suitable laminating pouches 4
7. Operating levels 4
8. Preparing for hot lamination 5
9. Preparing for cold lamination 6
10. Lamination process 6
11. Anti-Blocking Switch (ABS) 7
12. Trimming function 7
13. Cleaning and care 7
14. Storage 8
15. Disposal 8
16. Warranty and Service 8
17. Importer 9
Read the operating instructions carefully before using the device for the first time and preserve this booklet
for later reference. Pass this manual on to whoever might acquire the device at a future date.
- 1 -
A3 Laminator
1. Intended use
This laminator is intended exclusively for use in private households and for the hot and cold lamination
of documents printed on paper or cardboard.
Additionally, the documents can be trimmed.
It is NOT intended for use with any other materials.
It is also NOT intended for commercial or industrial
applications.
The warranty does not provide compensation for
damage caused by improper use of the appliance!
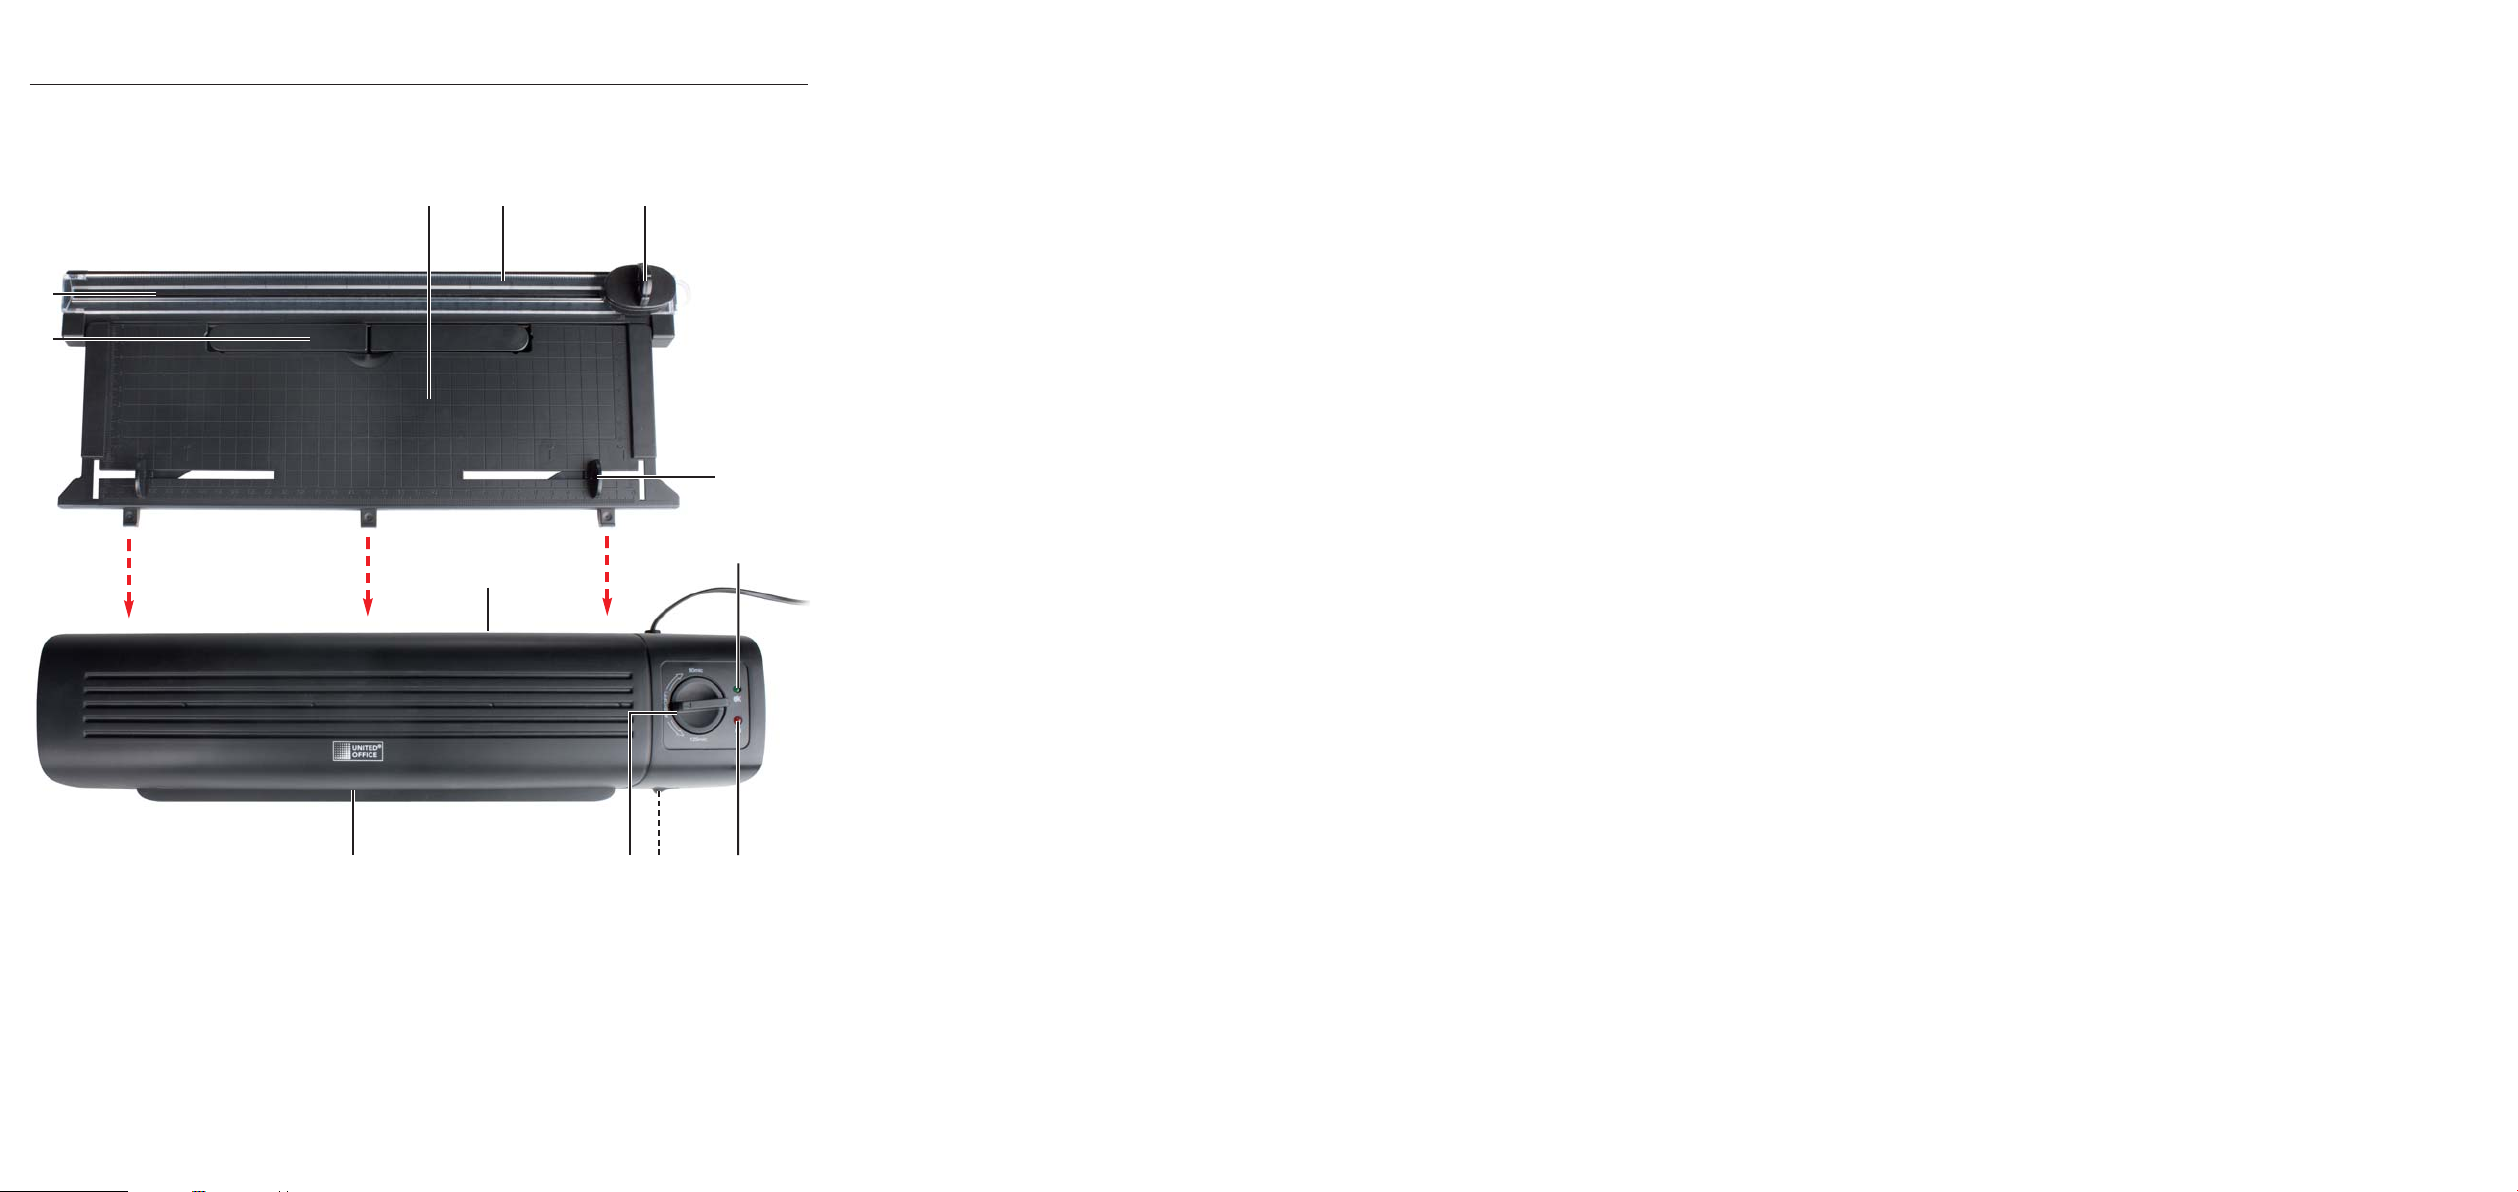
3. Appliance description
Foil guide rails (rear)
q
Cutting rail
w
Cutting head
e
Foil format restraint
r
Slot for manual foil feed
t
Indicator lamp "Ready"
y
ON/OFF Indicator lamp
u
Selector switch for hot and cold lamination
i
(HOT and COLD)
Anti-blockage switch and foil thickness switch
o
Foil slot (front)
a
Document support
s
Cutter attachment
d
2. Items supplied
1x Laminator with pluggable cutter attachment
8x DIN A3 size Laminating pouches for hot lamina-
tion (80 microns)
1x Operating instructions
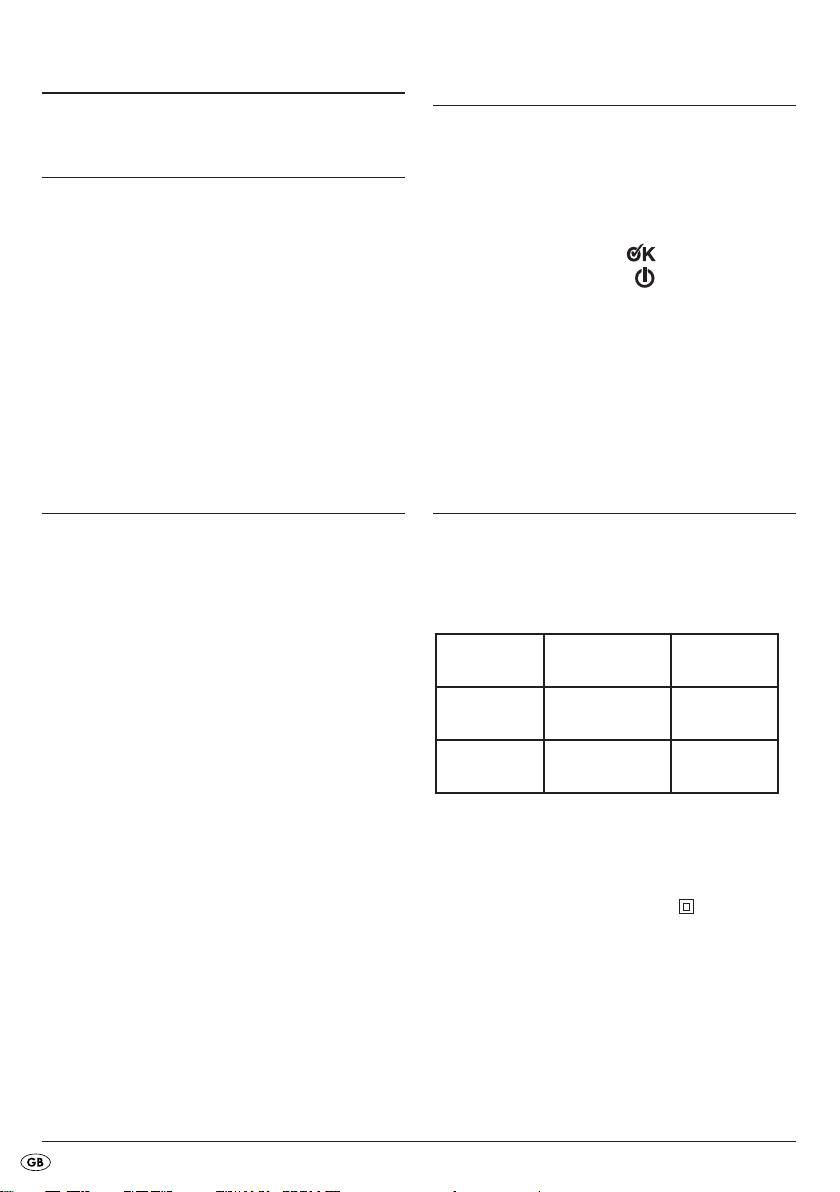
4. Technical Data
Rated voltage: 220 - 240 V~50 Hz
Current consumption: 1.4 A
Power consumption: 300 W
Lamination speed:
Sheet size 80 Micron 125 Micron
A4 approx. 52 s approx. 70 s
A3 approx. 75 s approx. 105 s
Foil width: max. 320 mm
Foil thickness hot lamination: max. 125 Mikron
Foil thickness cold lamination: max. 200 Mikron
Protection class: II/
Continuous use period: 2 hours
Cooling period:
After 2 hours of operation the appliance must be
allowed to cool for at least 1/2hour.
Cutting capacity of the cutter attachment
max. 3 Sheets of 80g/m
(80 micron).
1
/2hour
:
2
or a laminated document
d
- 2 -

CO Time
The C.O. Time (Continuous Operation) details how
long an appliance may be used without the motor
overheating and being damaged. After the appliance
has run for this period it must be switched off until
the motor has cooled itself down.
5. Safety instructions
• This appliance is not intended for use by individuals
(including children) with restricted physical, physiological or intellectual abilities or deficiences in
experience and/or knowledge unless they are
supervised by a person responsible for their safety
or receive from this person instruction in how the
appliance is to be used.
• Children should be supervised to ensure that they
do not play with the appliance.
• Unplug the power cable after every use and before cleaning, so as to prevent the appliance from
inadvertently switching itself on.
• Check the appliance and all parts for visible
damages. The safety concept can work only if
the appliance is in a faultless condition.
• Never perform hot lamination on flammable,
heat-sensitive and/or meltable materials and do
not laminate drawings on temperature-sensitive
paper or material that will undergo changes in
colour or quality when subjected to heat.
• Never laminate valuable or unique documents.
Although the laminator satisfies all predominant
safety norms and standards, errors can never be
completely discounted - as with all electrical appliances. Errors with the laminator can result in
damage to the document being laminated.
• Do NOT laminate any document which, together
with the laminating pouch, would have a thickness
of more than 1,0 mm. Should you do so, the laminating pouch could cant itself inside the laminating
appliance. This would damage the laminating pouch,
the document being laminated as well as the
laminator.
• Do not use an extension cable. Place the appliance
where the mains power socket is easily accessible,
so that in the event of an emergency the plug can
be quickly withdrawn.
• Do not use an external timing switch or a separate
remote control system to operate the appliance.
• Place the appliance where the power wall socket
is easily accessible, so that in the event of an
emergency the plug can be quickly withdrawn.
Risk of electrical shock!
• Connect the appliance to a mains power socket
with a mains voltage of 220-240 V ~50 Hz.
• Do not take the appliance into use if the power
cable or the plug is damaged.
• Arrange for defective power plugs and/or cables
to be replaced at once by qualified technicians
or our Customer Service Department.
• NEVER immerse the appliance in water.
Wipe it only with a damp cloth.
• Do not expose the appliance to rain and never
use it in a humid or wet environment.
• Ensure that the power cable never becomes wet
during operation.
• Unplug the appliance immediately after use.
The appliance is free of electricity only when you
remove the plug from the mains power socket.
• Do not open the housing or attempt to repair the
appliance yourself. Should you do so, device safety
can no longer be assured and the warranty will
become void.
- 3 -
Risk of fire!
• Do not use the appliance in the vicinity of hot
surfaces.
• Do not place the appliance at locations exposed
to direct sunlight.
This could lead to overheating and cause irreparable damage.
• Do not leave the appliance unattended when in
use.
• NEVER cover the ventilation slits on the top of the
appliance while it is switched on.
Risk of injury!
•
Keep children away from the connecting cable and
the appliance. Children frequently underestimate the
dangers of electrical devices.
• Ensure that the appliance stands with a safe and
secure positioning.
• Do not operate the appliance if it has sustained
a fall or is damaged. Arrange for the appliance
to be checked and, if necessary, repaired by a
qualified expert.
• Some parts of the appliance become very hot
during operation. To avoid burns, do not touch
these parts.
6. Suitable laminating pouches
• For hot lamination you can use pouches with a
width of up to 230 mm and a maximum thickness
of 125 micron.
• Please note that each laminating pouch may only
be used once.
For hot lamination, use only laminating
pouches that are expressly designated
for hot lamination.
For cold lamination, use only laminating
pouches that are expressly designated
for cold lamination.
Take note that the laminating pouches in-
cluded with the laminator are intended
exclusively for hot lamination.
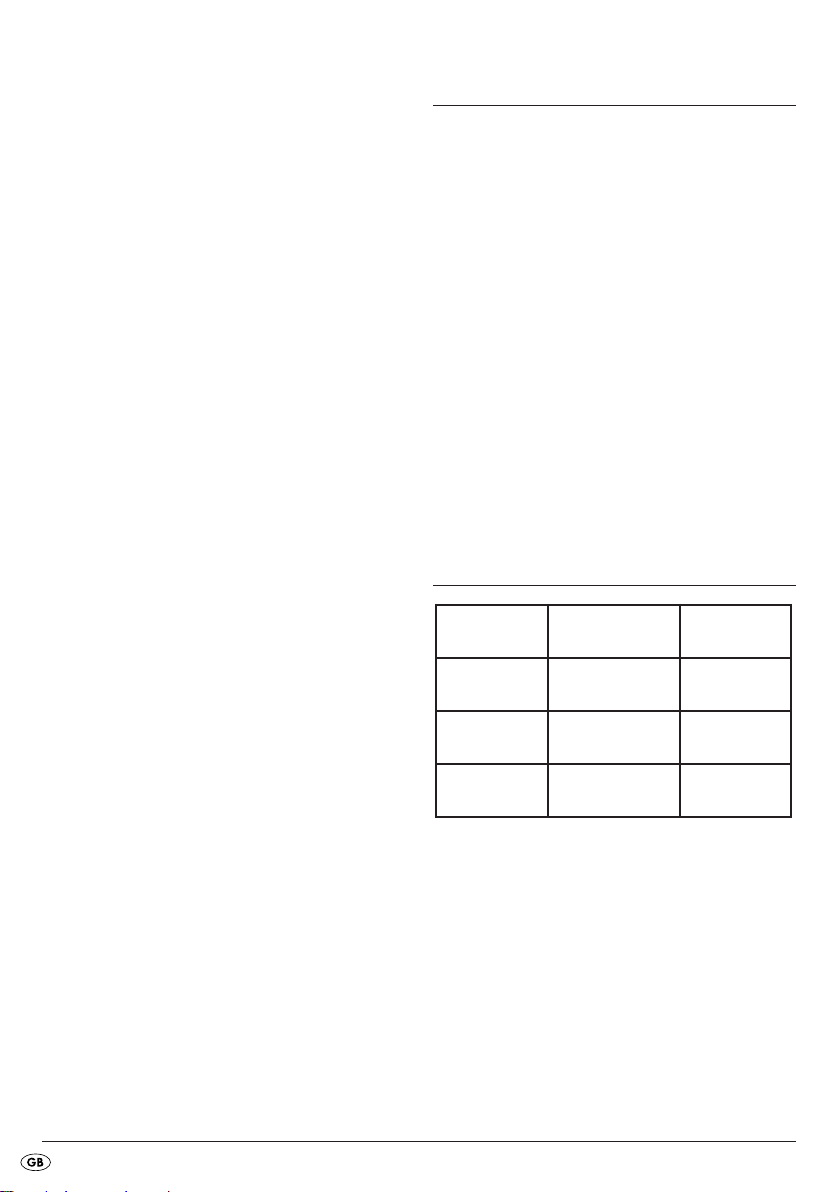
7. Operating levels
Position of
selector switch
i
HOT 80 > 60 - 80
Position of
pouch thickness
switch
o
Laminating foil
thickness
HOT 125 85 - 125
Cold 12 5 to 200
Tip: For high-gloss photos, you should select the switch
position “125” as well as the appropriate
pouch thickness.
- 4 -
8. Preparing for hot lamination
➩ Insert the foil guide rails
holes on the rear of the laminator.
➩ Fold out the document supports
documents can be pulled in straight into the slot
for manual foil feed
➩ Insert the plug of the laminator into a mains
power socket.
➩ Provide a firm location for the appliance.
➩ Set the selector switch for hot and cold lamina-
tion
to "HOT ".
i
➩ Set the foil thickness switch
thickness (80 or 125 microns). The red ON/OFF
indicator lamp
nator heats itself up to its operating temperature.
• As soon as the green indicator lamp "Ready"
glows, the laminator has reached its
y
operating temperature.
in the designated
q
, so that the
s
.
t
to the desired foil
o
will now glow. The lami-
u
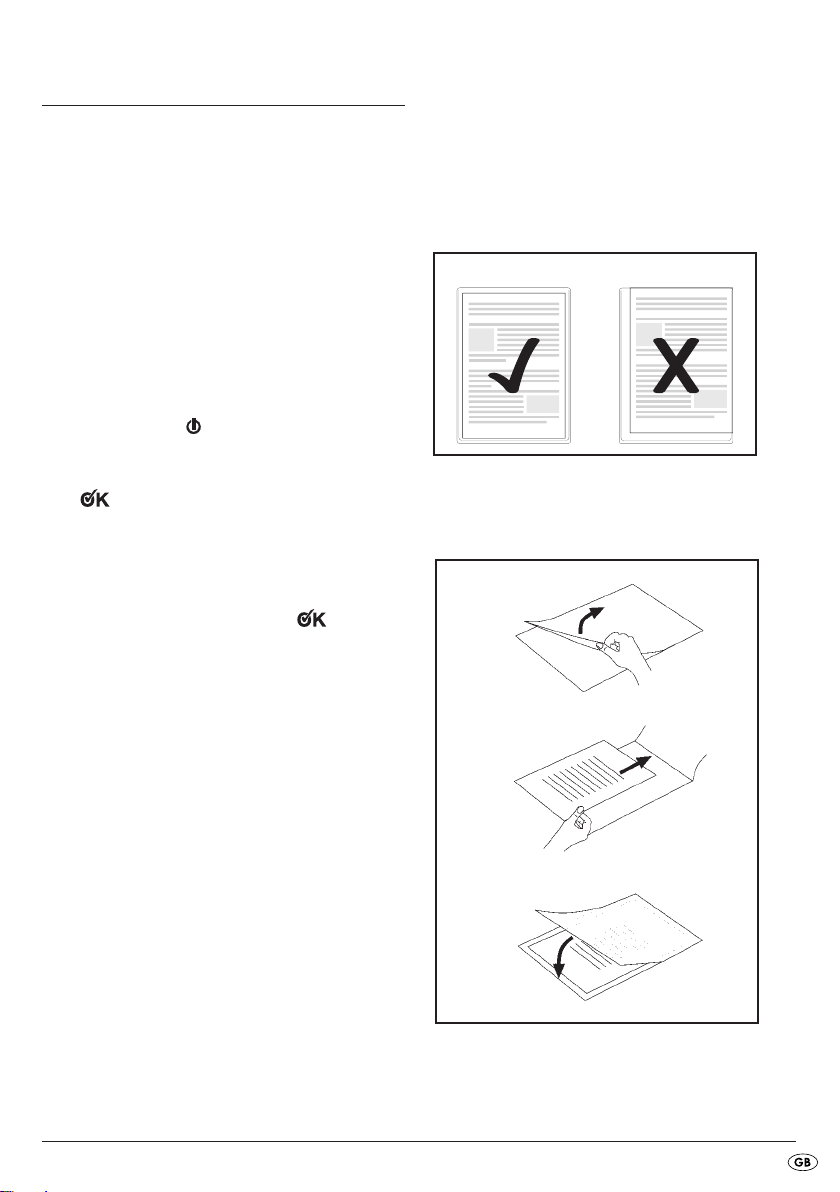
Make certain that all corners of the docu-
ment have at least two millimetres of space
to the edge of the laminating pouch, as
shown in Fig. 1. Make certain that you use
only one pouch for laminating. First open
it up, as shown in Fig. 2.
Fig. 1
For information about the lamination
process, please read section 10.
Attainment of the operating temperature
is indicated by the lighting up of the green
LED indicator lamp "Ready"
more uniform laminating result we recommend, especially for thinner foils (below
125 Micron) and after adjustment to a different foil thickness, to first wait an additional 2-3 minutes before beginning with
lamination.
y
. For a
➩ Lay the document to be laminated into a lami-
nating pouch of the appropriate size.
Fig. 2
- 5 -

9. Preparing for cold lamination
10. Lamination process
If you have previously performed hot lami-
nation:
After hot laminating, allow the laminator
to cool down completely before beginning
with cold lamination. Remember, the rollers
inside the laminator will still be hot. These
can damage the laminating pouch and the
document to be laminated!
➩ Insert the foil guide rails
holes on the rear of the laminator.
➩ Pull out the document supports
documents can be pulled in straight into the slot
for manual foil feed
in the designated
q
.
t
so that the
s
➩ Insert the plug of the laminator into a mains
power socket.
➩ Provide a firm location for the appliance.
➩ Set the selector switch for hot and cold lamina-
tion
to "COLD".
i
Take note: For cold lamination, ALWAYS place
the foil thickness switch
The red ON/OFF indicator lamp
the green indicator lamp "Ready"
now glow.
at 125 microns.
o
u
and
y
➩ Place the document to be laminated into a
laminating pouch of the matching size.
Make certain that all corners of the docu-
ment have at least two millimetres of space
to the edge of the laminating pouch, as
shown in Fig. 1.
Make certain that you use only one pouch
for laminating. First open it up, as shown
in Fig. 2.
For information about the lamination pro-
cess, please read section 10.
➩Lay the laminating pouch onto the pouch guide
Lay the right or left edge of the laminating pouch
against the pouch format lock
leading). Slide the pouch format lock
until the selected format size is reached. This prevents the laminating pouch from being pulled in
at an angle.
(closed side
r
r
q
together
Should the laminating pouch be pulled in
at an angle, use the "Anti-Blocking Funktion" as described in chapter 11.
➩Now slide the laminating pouch slowly into the
slot for manual pouch input
t
.
➩When you have slid the laminating pouch several
centimetres into the slot
in automatically. Release the laminating pouch
as soon as you notice it being pulled in automatically.
, it will start to be pulled
t
Ensure there is at least 45 cm of open space
in front of the laminator. If you do not, the
laminating pouch will not be completely
ejected from the laminator after lamination. This could damage the laminated
pouch.
➩The finished laminated pocket is now ejected
from the foil slot
Only after hot lamination:
of the laminator.
a
➩Remove them immediately from the appliance,
as hot foil pockets can still be easily deformed.
Place them on a flat surface to cool down.
To improve the lamination result, you can
weigh down the still hot foil bag with a
book, a file folder or other heavy, smooth
object. This will give it a smooth and flawless surface.
.
- 6 -

➩If you do not want to start another lamination
process, turn the foil thickness switch
(OFF) and withdraw the plug from the mains
power socket.
o
to ABS
11. Anti-Blocking Switch (ABS)
At the start of the lamination process, the pouch
may be pulled in at an angle or jam itself inside the
appliance.
➩ Turn the anti-blocking switch (ABS)
position ABS.
• The laminate pouch is not pulled any further in.
o
to the
➩ Remove the laminate pouch.
➩ Turn the anti-blocking switch (ABS)
the desired foil thickness.
o
back to
➩ Re-start the lamination process.
12. Trimming function
Should you wish to use the trimming function on the
pouch guide
, dismantle the pouch guide q.
q
➩ Hold the paper in a secure position with your
left hand.
➩ To trim, press the cutting head
the right hand and then slide it with one pull or
push over the document.
down with
e
13. Cleaning and care
Potentially fatal electrical shock:
• Never open the appliance housing. There
are no user-serviceable elements inside.
• Never submerse the appliance into water
or other liquids!
Cleaning the housing:
Clean the surface of the housing with a
slightly moistened cleaning cloth.
➩ First remove the plug.
➩ Allow the appliance to cool down completely.
➩ Ensure that no moisture can permeate into the
appliance.
Cleaning the interior of the appliance:
➩ If necessary, fold the documents supports
down.
➩ Adjust the cutter attachment
a straight face with the foil guide rails
➩ Slide the cutting head
cutting head
cutting rail
w
e
).
➩ Flap the cutting rail
grip and position the document on the pouch
guide
pouch format locks
both sides of the document.
. Restrain the document by sliding the
q
e
can be slid to both ends of the
upwards with the rounded
w
r
so that it forms
d
to the end stop (the
together until they touch
q
s
.
➩ Use the markings on the measurement table to
align the document precisely.
➩ Flap the cutting rail
engages.
downwards so that it
w
With every lamination, contaminants are deposited
on the rollers inside the laminator. Over time, this reduces the performance of the laminator. You should
therefore clean the rollers inside the laminator after
use.
➩ Prepare the appliance as described in Chapter
8 "Preparing for hot lamination", up to the point
where the green indicator lamp "Ready"
glows.
y
- 7 -

➩ Then run a sheet of DIN A3 paper, folded in
the middle (maximum thickness 1.0 mm) …
• without a laminating pouch and
• with the fold first
… slowly into the slot for manual pouch input t.
➩ Release the sheet as soon as you notice it
being pulled in automatically.
• The contaminants on the rollers inside the laminator now firmly attach themselves to the sheet
of paper. The paper is discharged from the foil
slot
of the laminator.
a
➩ Repeat this cleaning process several times.
Use a fresh clean sheet of paper each time.
When you no longer see any contaminants on
the paper, the rollers inside the laminator are
clean.
14. Storage
Allow the appliance to cool down completely
before putting it into storage.
Do not store the laminator in damp loca-
tions where moisture could enter inside
the appliance (e.g. cellars)!
15. Disposal
Do not dispose of the appliance with
your normal domestic waste. This
product is subject to the provisions of
European Directive 2002/96/EC.
Dispose of the appliance through an approved waste
disposal centre or at your community waste facility.
Observe the currently applicable regulations.
In case of doubt, please contact your waste disposal
centre.
Dispose of all packaging materials in an
environmentally friendly manner.
16. Warranty and Service
The warranty for this appliance is for 3 years from
the date of purchase. The appliance has been manufactured with care and meticulously examined before delivery. Please retain your receipt as proof of
purchase. In the event of a warranty claim, please
make contact by telephone with our Service Department. Only in this way can a post-free despatch for
your goods be assured.
The warranty covers only claims for material and
maufacturing defects, but not for transport damage,
for wearing parts or for damage to fragile components, e.g. buttons or batteries. This product is for
private use only and is not intended for commercial
use. The warranty is void in the case of abusive and
improper handling, use of force and internal tampering not carried out by our authorized service
branch. Your statutory rights are not restricted in
any way by this warranty.
The warranty period will not be extended by repairs
made under warranty. This applies also to replaced
and repaired parts. Any damage and defects extant
on purchase must be reported immediately after unpacking the appliance, at the latest, two days after
the purchase date. Repairs made after the expiration of the warranty period are subject to payment.
- 8 -

DES UK LTD
Tel.: 0871 5000 700
(£ 0.10 / minute)
e-mail: support.uk@kompernass.com
Kompernass Service Ireland
Tel.: 1850 930 412 (0,082 EUR/Min.)
Standard call rates apply. Mobile operators may vary.
e-mail: support.ie@kompernass.com
CY
Kompernass Service Cyprus
Tel.: 800 9 44 01
e-mail: support.cy@kompernass.com
17. Importer
KOMPERNASS GMBH
BURGSTRASSE 21
D-44867 BOCHUM, GERMANY
www.kompernass.com
- 9 -

- 10 -

SADRŽAJ STRANA
1. Uporabna namjena 12
2. Obim isporuke 12
3. Opis uređaja 12
4. Tehnički podaci 12
5. Sigurnosne napomene 13
6. Prikladne taške od folije 14
7. Stupnjevi regulacije 14
8. Priprema vrućeg laminiranja 15
9. Priprema hladnog laminiranja 16
10. Postupak laminiranja 16
11. Antiblokirna funkcija (ABS) 17
12. Funkcija rezanja 17
13. Čišćenje i održavanje 17
14. Čuvanje 18
15. Zbrinjavanje 18
16. Jamstvo i servis 18
17. Uvoznik 18
Upute za rukovanje prije prve upotrebe pažljivo pročitajte i sačuvajte ih za kasnije korištenje. Ukoliko uređaj
dajete trećim osobama, priložite i ove upute.
- 11 -
Plastifikator A3
1. Uporabna namjena
Plastifikator isključivo je predviđen za toplo i hladno
laminiranje dokumenata od papira ili kartona u privatnim domaćinstvima. Osim toga možete vršiti rezanje
dokumenata.
Uređaj nije predviđen za obradu drugih vrsta materijala.
Takođe nije predviđen za uporabu u gospodarskim
ili industrijskim područjima.
Za štete, koje nastaju uslijed nenamjenske uporabe
uređaja, ne preuzima se nikakvo jamstvo!
3. Opis uređaja
Šina vodilica za foliju (natrag)
q
Rezna šina
w
Rezna glava
e
Blokada formata folije
r
Otvor za ručno dodavanje folije
t
Indikacijska svjetiljka "Pripravan za pogon"
y
UKLJ-/ISKLJ-Indikacijska svjetiljka
u
Prekidač za odabir vrućeg i hladnog laminiranja
i
(HOT i COLD)
Antiblokirni prekidač i prekidač za debljinu folije
o
Otvor za foliju (naprijed)
a
Oslonac za dokument
s
Rezni nastavak
d
2. Obim isporuke
1x Uređaj za laminiranje sa nastavkom za
rezanje
8x Depovi folije DIN A3 za vruće laminiranje
(80 mikrona)
1x Upute za rukovanje
4. Tehnički podaci
Nominalni napon: 220 - 240 V ~50 Hz
Snaga struje: 1,4 A
Jačina struje: 300 W
Brzina laminiranja:
Veličina folije 80 mikrona 125 mikrona
A4 ca. 52 s ca. 70 s
A3 ca. 75 s ca. 105 s
Širina folije: maks. 320 mm
Debljina folije za vruće
laminiranje: maks. 125 mikrona
Debljina folije za hladno
laminiranje: maks. 200 mikrona
Zaštitna klasa: II/
KB-vrijeme: 2 sata
Vrijeme hlađenja:
Izjava o sukladnosti za ovaj proizvod dostupna je
na internet stranici www.lidl.hr.
1
/2sat
- 12 -

Nakon 2 sata pogona uređaj se mora najmanje
1
/2sat hladiti.
Kapacitet rezanja reznog nastavka
maks. 3 lista 80g/m
(80 mikrona).
KB-vrijeme
KB-vrijeme (vrijeme kratkotrajnog pogona) označava,
koliko dugo uređaj može biti u pogonu, bez da se
motor pregrije i pretrpi oštećenje. Nakon navedenog
KB-vremena uređaj morate isključiti toliko dugo, dok
se motor ne ohladi.
2
ili jedan laminirani dokument
d
:
5. Sigurnosne napomene
• Ovaj uređaj nije namijenjen da bude korišten od
strane osoba (uključujući djecu) sa ograničenim
fizičkim, senzoričnim i mentalnim osobinama
i nedostatkom iskustva ili znanja, osim ako ove
osobe stoje pod nadzorom druge osobe zadužene
za njihovu sigurnost, ili ako su od nje primili upute
za ispravno korištenje uređaja.
• Djeca bi trebala biti pod nadzorom, čime treba
biti osigurano da se ne mogu igrati ovim uređajem.
• Nakon svake uporabe i prije čišćenja izvucite mrežni
utikač, kako biste spriječili nehotično uključivanje
uređaja.
• Prekontrolirajte uređaj i sve njegove dijelove na
vidljiva oštećenja. Sigurnosni koncept uređaja
može funkcionirati samo u besprijekornom stanju.
• Postupkom toplog laminiranja principijelno ne
laminirajte zapaljive materijale, materijale osjetljive
na visoke temperature i/ili topljive materijale, niti
crteže na papiru osjetljivom na visoke temperature
ili na materijalu, čija boja ili kvaliteta se mijenjaju
pod utjecajem visokih temperatura.
• Principijelno ne laminirajte vrijedne, jedinstvene
dokumente. Premda uređaj za laminiranje odgovara
svim uobičajenim sigurnosnim normama/standardima, funkcionalne smetnje - kao kod svih električnih
uređaja – nikada ne mogu potpuno biti isključene.
Funkcionalne smetnje uređaja za laminiranje mogu
dovesti do oštećenja dokumenta koji je predmet
laminiranja.
• Ne laminirajte dokumente, koji zajedno sa folijom
za laminiranje imaju jačinu veću od 1,0 mm.
U protivnom se folijska taška može zaglaviti
u unutrašnjosti uređaja za laminiranje. Na taj
način mogu biti oštećeni taška od folije, dokument
koji treba biti laminiran i sam uređaj za laminiranje.
• Ne koristite produžne kablove. Postavite uređaj
tako, da mrežna utičnica bude lako dostupna,
kako biste uređaj u slučaju opasnosti brzo mogli
odvojiti od strujne mreže.
• Ne koristite eksterni rasklopni sat ili odvojeni
daljinski sustav za rad sa uređajem.
• Uređaj postavite tako, da mrežna utičnica bude
lako dostupna i da uređaj u slučaju opasnosti
brzo možete odvojiti od strujne mreže.
Opasnost od strujnog udara!
• Priključite ovaj uređaj na utičnicu sa naponom
od 220-240 V ~50 Hz.
• Ne radite sa uređajem, ako je oštećen njegov
priključni vod ili mrežni utikač.
• Dajte oštećene mrežne utikače ili mrežni kabel
odmah zamijeniti od strane autoriziranog stručnog
osoblja, kako biste izbjegli opasnosti.
• Uređaj nikada ne uronite u vodu.
Samo ga prebrišite sa vlažnom krpom.
• Uređaj ne izložite kiši i ne koristite ga u vlažnom
ili mokrom okruženju.
• Obratite pažnju na to, da priključni vod za vrijeme
pogona uređaja nikada ne bude mokar ili vlažan.
• Uređaj odmah nakon uporabe odvojite od strujne
mreže. Samo kada utikač izvućete iz strujne mreže,
uređaj više neće biti pod naponom.
• Kućište uređaja ne smijete otvarati ili popravljati.
U tom slučaju sigurnost nije garantirana i jamstvo
prestaje važiti.
- 13 -
Opasnost od požara!
• Uređaj ne upotrebljavajte u blizini vrućih površina.
• Uređaj ne postavljajte na mjestima izloženim
neposrednom utjecaju sunčeve svjetlosti.
U protivnom može doći do pregrijavanja, a uređaj
može biti nepopravljivo oštećen.
• Uređaj nikada ne ostavite bez nadzora, dok je
u pogonu.
• Nikada ne prekrijte ventilacijske otvore na gornjoj
strani uređaja, dok je isti uključen.
Opasnost od ozljeđivanja!
•
Djecu držite podalje od priključnog kabela i uređaja.
Djeca često potcjenjuju opasnosti od električnih
uređaja.
• Osigurajte, da uređaj bude sigurno postavljen.
• Ukoliko je uređaj pao ili je oštećen, ne smijete ga
više stavljati u pogon. Uređaj dajte kvalificiranom
stručnom osoblju na kontrolu i eventualno na
popravak.
• Određeni dijelovi uređaja se za vrijeme rada jako
zagrijavaju. Ne dirajte ove uređaje, da se ne biste
opekli.
6. Prikladne taške od folije
• Za toplo laminiranje možete koristiti folijske taške
širine do 230 mm i jačine od maksimalno 125
mikrona.
• Obratite pažnju na to, da svaka taška od folije
može samo jednom biti upotrebljena za laminiranje.
Za toplo laminiranje koristite isključivo
folijske taške, koje su izričito predviđene
za namjenu toplog laminiranja.
Za hladno laminiranje koristite isključivo
taške od folije, koje su izričito predviđene
za hladno laminiranje.
Obratite pažnju na to, da su taške od folije
sadržane u obimu isporuke prikladne
isključivo za postupak toplog laminiranja.
7. Stupnjevi regulacije
Položaj
Odabirni prekidač
Prekidač za odabir
i
jačine folije
Položaj
o
Jačina folije
za laminiranje
HOT 80 > 60 - 80
HOT 125 85 - 125
COLD 125 do 200
Savjet: Kod visokosjajnih fotografija trebate odabrati
položaj prekidača “125”, kao i odgovarajuću
jačinu folije za laminiranje.
- 14 -
8. Priprema vrućeg laminiranja
➩ Utaknite šinu za vođenje folije
viđene otvore na stražnjoj strani uređaja za
laminiranje.
➩ Isklopite oslonce za dokumente
tako da dokumenti budu ravno uvučeni u otvor
za ručno dodavanje folije
➩ Mrežni utikač uređaja za laminiranje ponovo
utaknite u mrežnu utičnicu.
➩ Osigurajte čvrst oslonac uređaja.
➩ Prebacite odabirni prekidač za vruće i hladno
laminiranje
na položaj „HOT“.
i
➩ Postavite prekidač za debljinu folije
jačinu folije (80 ili 125 mikrona). Crvena indikacijska svjetiljka UKLJ/ISKLJ
Uređaj za laminiranje sada se zagrijava i dostiže
radnu temperaturu.
• Čim zelena indikacijska svjetiljka "Pripravan za
pogon"
je dostiglo svoju radnu temperaturu.
svijetli, uređaj za laminiranje
y
Dostizanje pogonske temperature je ozna-
čeno svijetljenjem zelene indikacijske svjetiljke "Pripreman za pogon"
Za ravnomjeran rezultat laminiranja preporučujemo da posebno kod tanjih folija
(ispod 125 mikrona) i prilikom podešavanja
druge jačine folije sa postupkom laminiranja
započnete tek nakon proteka vremena od
2-3 minute.
t
q
s
.
u za to pred-
prema vani,
na željenu
o
sada svijetli.
u
.
y
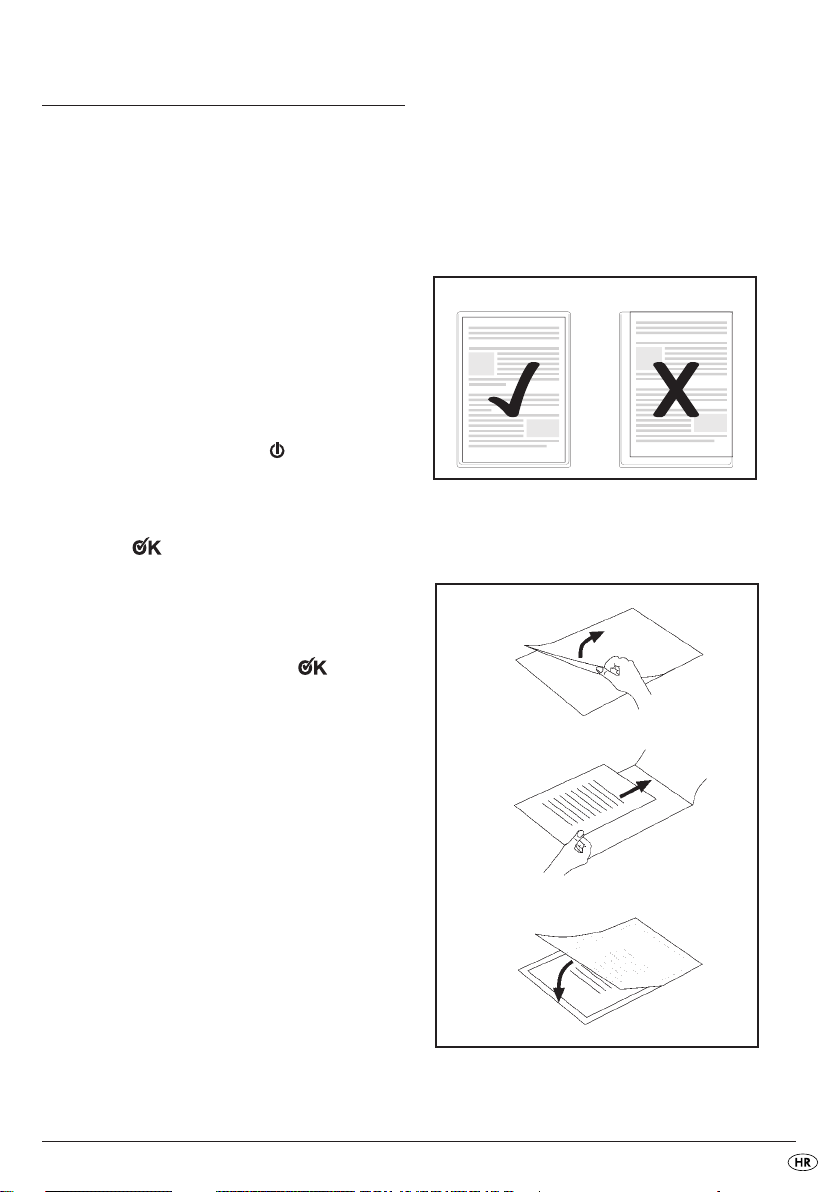
Obratite pažnju na to, da svi rubovi doku-
menta moraju imati najmanje dva milimetra
rastojanja od ruba taške od folije, kao što
je prikazano na slici 1. Obratite pažnju na
to, da za laminiranje koristite samo jednu
foliju. Istu prethodno rasklopite na način
prikazan na slici 2.
Slika 1
Za informacije o postupku laminiranja na-
stavite čitati poglavlje 10.
Slika 2
➩ Dokument, koji želite laminirati, umetnite u tašku
od folije prikladne veličine.
- 15 -

9. Priprema hladnog
laminiranja
Ukoliko ste prethodno vršili postupak
toplog laminiranja:
Ostavite uređaj za laminiranje nakon toplog
laminiranja da se prvo kompletno rashladi,
prije nego što započnete sa hladnim laminiranjem. U protivnom su valjci u unutrašnjosti
uređaja za laminiranje još vrući. Na taj način
taška od folije i dokument, koji laminirate,
mogu pretrpjeti oštećenja!
➩ Utaknite šinu za vođenje folije
viđene otvore na stražnjoj strani uređaja za
laminiranje.
➩ Izvucite oslonac za dokumente
tako da dokumenti budu ravno uvučeni u otvor
za ručno dodavanje folije
➩ Mrežni utikač uređaja za laminiranje ponovo
utaknite u mrežnu utičnicu.
➩ Osigurajte čvrst oslonac uređaja.
➩ Postavite odabirni prekidač za vruće i hladno
laminiranje
na položaj „COLD“.
i
Napomena: Za hladno laminiranje postavite
prekidač za debljinu folije
125 mic. Crvena indikacijska svjetiljka UKLJ/
ISKLJ
"Pripravan za pogon"
i zelena indikacijska svjetiljka
u
➩ Umetnite dokument koji treba biti laminiran
u đep folije odgovarajuće veličine.
Obratite pažnju na to, da svi rubovi doku-
menta moraju imati najmanje dva milimetra
rastojanja od ruba taške od folije, kao što
je prikazano na slici 1.
Obratite pažnju na to, da za laminiranje
koristite samo jednu foliju. Istu prethodno
rasklopite na način prikazan na slici 2.
Za informacije o postupku laminiranja
nastavite čitati poglavlje 10.
u za to pred-
q
prema vani,
s
.
t
uvijek na vrijednost
o
sada svijetle.
y
10. Postupak laminiranja
➩Postavite tašku od folije na šinu za vođenje folije
Postavite desnu ili lijevu ivicu taške od folije na
blokadu formata folije
naprijed). Guranjem blokadu formata folije
spojite toliko, dok ne dostignete odabrani format.
Na taj način spriječiti ćete, da taška od folije
bude koso uvućena.
(zatvorena strana prema
r
Ukoliko će folija ipak biti koso uvučena,
koristite "Anti-blokirnu funkciju" na način
opisan u poglavlju 11.
➩Sada tašku od folije polako gurnite u otvor za
ručno prinašanje folije
t
.
➩Kada ste tašku od folije nekoliko centimetara
gurnuli u otvor
uvučena. Pustite tašku od folije u tom trenutku,
kada primijetite da se ona automatski dalje
uvlači.
, ona će automatski biti dalje
t
Osigurajte, da ispred uređaja za laminiranje
ostane najmanje 45 cm prostora. U protivnom
taška od folije nakon laminiranja ne može
biti potpuno izbačena iz uređaja za laminiranje. Laminirana taška od folije može
pretrpjeti oštećenje.
➩Gotovo laminirana đep folije sada izlazi iz
otvora za foliju
Samo nakon vrućeg laminiranja:
uređaja za laminiranje.
a
➩Odmah je izvadite iz uređaja, jer se vrući đepovi
folije još lako mogu deformirati. Polegnite je za
hlađenje na ravnu površinu.
Da biste poboljšali rezultat laminiranja, na
još vruć đep folije možete staviti knjigu ili
drugi ravan i težak predmet. Na taj način
đep će poprimiti glatku i besprijekornu
površinu.
q
r
.
- 16 -
 Loading...