

United Office UAV 220 A2 User Manual [en, cs, pl, de]
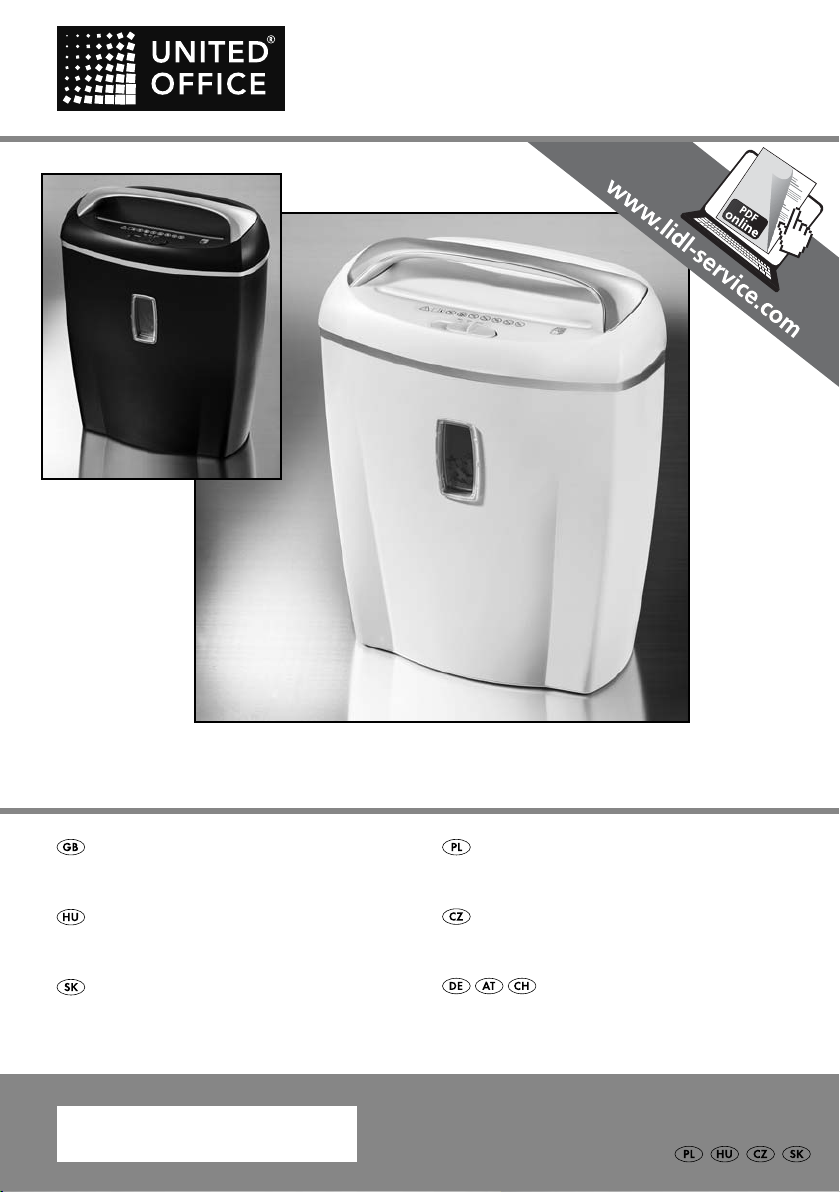
CROSS CUT SHREDDER UAV 220 A2
CROSS CUT SHREDDER
Operating instructions
IRATMEGSEMMISÍTŐ
Használati utasítás
SKARTOVAČKA
Návod na obsluhu
IAN 104034
NISZCZARKA DO DOKUMENTÓW
Instrukcja obsługi
SKARTOVAČKA
Návod k obsluze
AKTENVERNICHTER
Bedienungsanleitung
Before reading, unfold the page containing the illustrations and familiarise yourself with all functions of
the device.
Przed przeczytaniem proszę rozłożyć stronę z ilustracjami, a następnie proszę zapoznać się z wszystkimi
funkcjami urządzenia.
Olvasás előtt kattintson az ábrát tartalmazó oldalra és végezetül ismerje meg a készülék mindegyik
funkcióját.
Před čtením si otevřete stranu s obrázky a potom se seznamte se všemi funkcemi přístroje.
Pred čítaním si odklopte stranu s obrázkami a potom sa oboznámte so všetkými funkciami prístroja.
Klappen Sie vor dem Lesen die Seite mit den Abbildungen aus und machen Sie sich anschließend mit allen
Funktionen des Gerätes vertraut.
GB Operating instructions Page 1
PL Instrukcja obsługi Strona 9
HU Használati utasítás Oldal 17
CZ Návod k obsluze Strana 25
SK Návod na obsluhu Strana 33
DE / AT / CH Bedienungsanleitung Seite 41

A
B

Content Page
Introduction 2
Intended Application 2
Items supplied 2
Appliance description 2
Technical details 2
Overheating protection 2
Important safety instructions 3
Commissioning 4
Operation 4
Emptying the waste containers 5
Cleaning 5
Non-functionality 6
Disposal 6
Warranty and Service 7
Importer 7
Read the operating instructions carefully before using the device for the first time and preserve
this booklet for later reference.
- 1 -
Cross Cut Shredder
Introduction
Congratulations on the purchase of your new appliance.
You have clearly decided in favour of a quality
product. These operating instructions are a part of
this product. They contain important information in
regard to safety, use and disposal. Before using the
product, familiarise yourself with all of these operating and safety instructions. Use the product only as
described and only for the specified areas of application. Retain these instructions for future reference.
In addition, pass these documents on, together with
the product, to any future owner.
Intended Application
This appliance is only suitable for shredding paper,
credit cards, CDs/DVDs and small staples (sizes:
24/6 and 23/6 (11.5 x 6mm), B-8 (11.5 x 7mm),
No10 (8.4 x 5mm)) and paper clips (up to 25 mm)
in private households. All other usages or modifications are regarded as improper and carry a significant
risk of accidents. Do not use this appliance for commercial purposes.
Figure B:
Cutter opening for CDs/credit cards
t
Cutter opening for paper
y
Switch
u
Technical details
Input voltage: 220 - 240 V~, 50 Hz
Rated current : approx. 1.0 A
Nominal power: 220 W
Protection class: II
Large waste container: 21 litres
Cutting process for
paper: Cross-cut,
4 x 18 mm particles
Safety level 4
Working width: 220 mm
Cutting capacity: 8 sheets (80 g/m
2
)
Overheating protection
This appliance is fitted with overheating protection.
If the motor overheats due to overloading, the appliance switches itself off automatically. If this occurs,
proceed as follows:
Items supplied
Cross Cut Shredder
(Cutter attachment, waste container large/small)
Operating instructions
Appliance description
Figure A:
Cutter attachment
q
Small waste container
w
Viewing window
e
Large waste container
r
Caution:
Remove the power plug from the wall socket to avoid
unintended starting of the appliance
• Switch the appliance off by moving the switch
to the middle position "OFF".
• Empty the waste containers
• Allow the appliance to cool down.
• Put the plug back into the socket.
• Switch the appliance on by moving the switch
to the "AUTO" position.
We recommend that you let the appliance cool down
for about 30 minutes after 3 minutes of operation.
- 2 -
w/r
.
u
u
Important safety instructions
The following safety instructions must always be
complied with when using electrical appliances:
• Do not place the appliance in close vicinity to
sources of heat and water sources. There would
be the risk of fire and of receiving an electric
shock!
• Do not use the appliance close to inflammable
or explosive materials and/or ignitable gases or
in dusty environments. Risk of explosion!
• Do not use the appliance outdoors. The appliance
could be irreparably damaged!
To avoid potentially fatal electric
shocks:
• Should the power cable or the plug become
damaged, arrange for it/them to be repaired
by authorised specialists or Customer Services
as soon as possible.
• Arrange for damaged or malfunctioning appliances
to be inspected and/or repaired by a qualified
specialist or the Customer Service Department
as soon as possible.
• Do not expose the appliance to rain and never
use it in a humid or wet environment.
• Ensure that the power cable never becomes moist
or wet during operation.
To avoid the risk of injury:
• This shredder should be used by only one
person at a time.
• Never leave the appliance unattended whilst in
use.
Keep loose clothing, long hair, jewellery, etc. well
away from the cutter opening.
NEVER insert your fingers into the cutter opening.
Keep children away from the appliance. They could
hurt themselves.
• NEVER insert your fingers into the central hole of
a CD when you are feeding it into the appliance.
• Keep pets away from the appliance. They could
injure themselves.
• This appliance is not intended for use by individuals
(including children) with restricted physical, physiological or intellectual abilities or deficiences in
experience and/or knowledge unless they are
supervised by a person responsible for their safety
or receive from this person instruction in how the
appliance is to be used.
• The packaging material can be a source of danger
for children. Dispose of the material immediately
after unpacking or keep it in a safe place not accessible to children.
• Lay the power cable in such a way that no one
can tread on or trip over it.
Tips for safety:
• Place the appliance in the immediate vicinity of an
electrical power socket. Do not use an extension
cable. Ensure that the appliance and the power
socket are easily and quickly accessible in the
event of an emergency.
• Never overburden the appliance. This shredder
is designed for brief operating periods only.
• In cases of danger, immediately remove the electrical plug from the socket.
• NEVER use this shredder for tasks for which it
was not designed.
• Always be attentive! Always pay attention to
what you are doing and act with common sense.
Never use the appliance when you are distracted
or don’t feel well.
- 3 -
Commissioning
Take note: As every paper shredder is tested
for functionality after manufacture, it could happen that paper remnants may be found in the
cutters.
• Push the small waste container
inside the large waste container
• Place the cutter attachment
waste container
out to the rear.
• Insert the plug into a mains power socket.
so that the mains cable sticks
r
onto the rails
w
.
r
onto the large
q
Operation
Note: Regularly remove any residue left in the
cutting blades with a suitable tool, e.g. a pair
of tweezers. Ensure that the appliance is unplugged before doing this!
Inserting credit cards:
• Insert the credit card from above into the middle
of the CD/credit card cutter opening
only shred one credit card at a time. ALWAYS insert
these into the CD/credit card cutter opening
with the wide side first. If you do not, the magnetic
strip will not be destroyed.
. You can
t
t
Note: Always insert the credit card into the
middle of the CD/credit card cutter opening
Otherwise, the shredding process will not start!
t
.
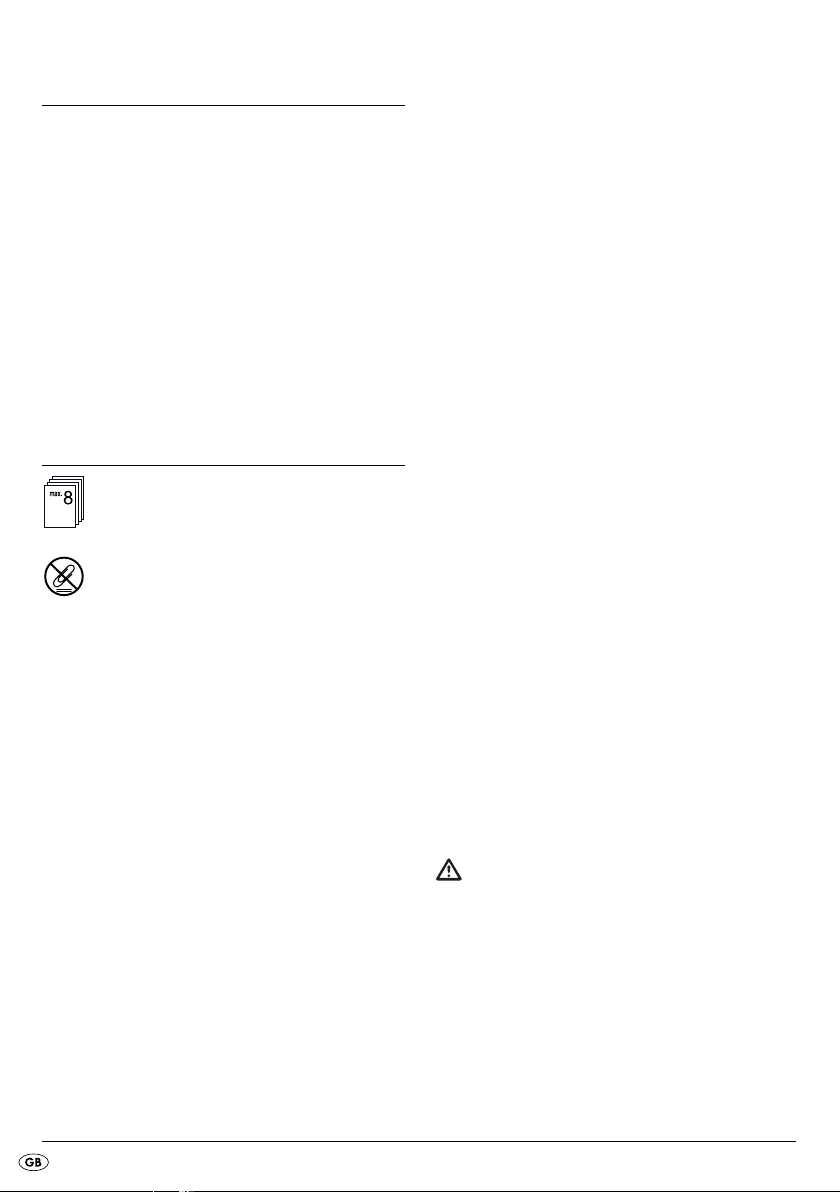
You can shred up to 8 sheets (80g/m2paper) at the same time.
Caution:
Never feed paper into the cutter opening if it still
has paper clips larger than 25 mm attached.
These could damage the cutting blades.
Switching the appliance on:
• Move the switch
start shredding.
Inserting paper:
• Insert paper from above and in portrait format
into the cutter opening for paper
The motor starts automatically and switches itself
off automatically if no further paper is inserted.
You can shred up to 8 sheets (80 g/m
the same time.
to the position "AUTO" to
u
.
y
2
paper) at
Note: If the shredding process does not start
when you insert the credit card, carefully push
the credit card further into the CD/credit card
cutter
opening with a flat object.
t
Note: If you want to ensure that the information
on the magnetic strip is irrevocably destroyed,
insert the credit card into the middle of the cutter
opening for paper
Note that the residue will then fall into the large
waste container
forehand in order to keep paper and plastic
waste separate.
Inserting a CD:
Warning!
NEVER insert your finger into the central hole of
a CD when you are feeding it into the appliance.
• Insert the CD from above into the middle of the
CD/credit card cutter opening
shred one CD at a time.
.
y
. if necessary, empty this be-
r
. You can only
t
- 4 -
Clearing a material blockage:
• Move the switch
position if the material being shredded causes
a blockage.
The appliance now goes into reverse and the
material that is being shredded is ejected.
• Move the switch
soon as the jammed material has been ejected.
Switching the appliance off:
• Switch the appliance off by moving the switch
to the "OFF" position.
to the "REV" ("reverse")
u
to the "OFF" position as
u
u
Emptying the waste containers
• Empty the waste containers w/rregularly.
• Empty the large waste container
when paper is visible in the viewing window
• Dispose of the waste material in an environmentally responsible manner.
Emptying the large waste container
Caution:
Remove the power plug from the wall socket to avoid
unintentional starting of the appliance
• Remove the cutter attachment qfrom the large
waste container
• Pull the small waste container
the large waste container
• Empty the large waste container
assemble the components.
r
.
r
at the latest
r
e
upwards out of
w
on the guide rails.
and then re-
r
Emptying the small waste container
• Remove the cutter attachment
waste container
• Pull the small waste container
the large waste container
so that you can empty it.
• Empty the small waste container
reassemble the components.
r
.
from the large
q
upwards out of
w
on the guide rails
r
w
Cleaning
Danger!
Always remove the power plug before cleaning the
appliance. There is a risk of receiving an electric
shock!
Warning!
.
The cutters in the appliance are very sharp! Injury
hazard!
Attention:
Do not spray any oil or other lubricants into the cutter openings
ge the appliance!
• Remove any residue left in the cutting openings
t/ y
e.g. a pair of tweezers. Ensure that the plug has
been disconnected.
• Clean the appliance with a lightly moistened
cloth. For stubborn soiling use a mild detergent
on the cloth.
. These would irreparably dama-
t/y
or cutting blades with a suitable tool,
and then
- 5 -
Non-functionality
If the material to be shredded jams:
This means that you have inserted too much paper
into the appliance (max. 8 Sheets 80g/m
• Slide the switch 7 into the position "REV" should
the paper to be shredded jam. The appliance
now goes into reverse and the material to be
shredded is returned.
• Pull the paper to be shredded out of the appliance
and then place the switch 7 at "AUTO".
• The appliance is now once again ready for
operation.
If the appliance suddenly ceases operation:
This means that the appliance is overheated and
the automatic safety cut-out has activated itself.
Attention:
Remove the plug from the mains power socket to
avoid an unintended starting of the appliance.
• Set the switch 7 to the "OFF" position.
• Allow the device to cool down.
• Insert the plug back into the socket.
• Switch the device on by setting the switch 7
to the "AUTO" position.
2
).
Attention:
Remove the plug from the mains power socket to
avoid an unintended starting of the appliance.
• Set the switch 7 to the "OFF" position.
• Allow the device to cool down.
• Insert the plug back into the socket.
• Switch the device on by setting the switch 7 to
the "AUTO" position.
Disposal
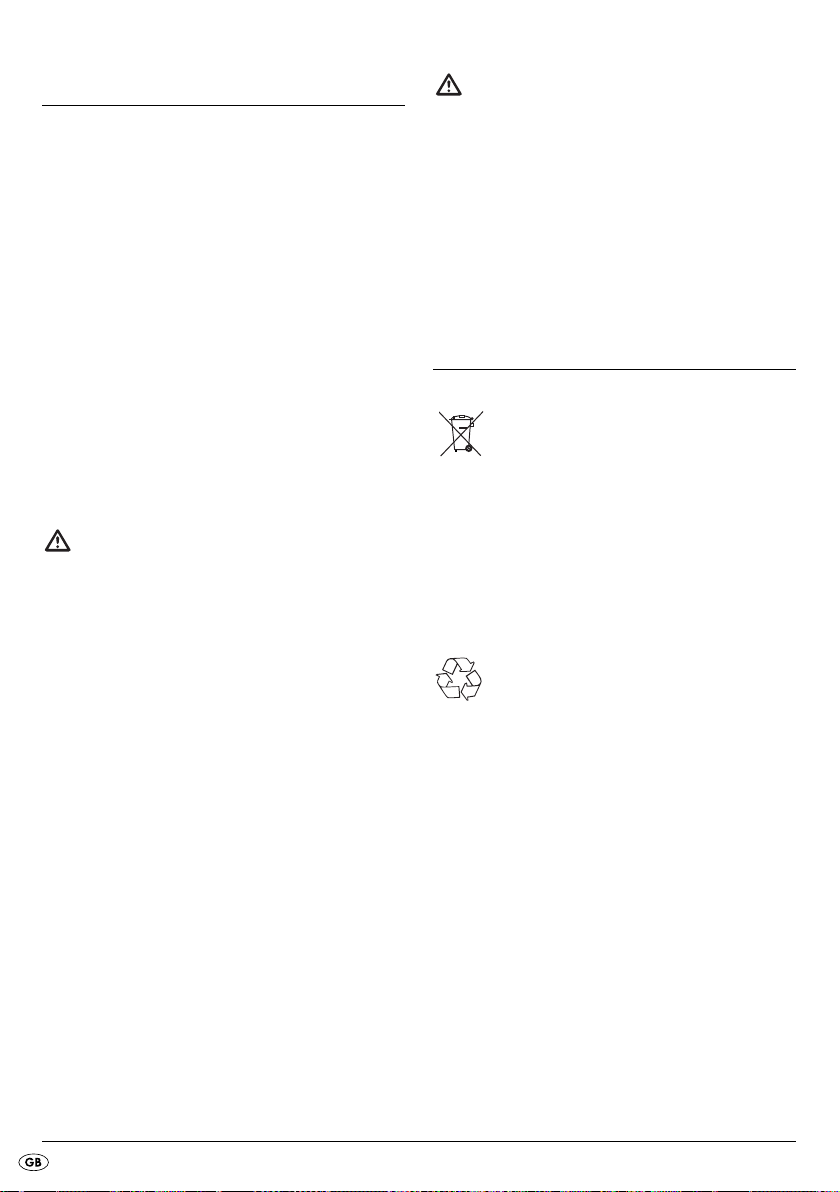
Do not dispose of the appliance in your
normal domestic waste. This product is
subject to the European guideline
2012/19/EU.
Dispose of the appliance through an approved disposal centre or at your community waste facility.
Observe the currently applicable regulations.
In case of doubt, please contact your waste disposal
centre.
Dispose of packaging materials in an
environmentally responsible manner.
If the appliance doesn`t allow itself to be
switched on:
• Check that the plug is correctly connected to
a mains power socket.
• Try out a different mains power socket.
• The appliance is probably defective. Have the
appliance checked by qualified specialists.
• The appliance has overheated and triggered the
automatic safety switch-off. For this, proceed as
follows:
- 6 -
Warranty and Service
Importer
The warranty for this appliance is for 3 years from
the date of purchase. The appliance has been manufactured with care and meticulously examined
before delivery.
Please retain your receipt as proof of purchase. In
the event of a warranty claim, please make contact
by telephone with our Service Department. Only in
this way can a post-free despatch for your goods be
assured.
The warranty covers only claims for material and
manufacturing defects, but not for transport damage,
for wearing parts or for damage to fragile components, e.g. buttons or batteries. This product is for private use only and is not intended for commercial use.
The warranty is void in the case of abusive and improper handling, use of force and internal tampering
not carried out by our authorized service branch.
Your statutory rights are not restricted in any way by
this warranty.
The warranty period will not be extended by repairs
made under warranty. This applies also to replaced
and repaired parts. Any damage and defects extant
on purchase must be reported immediately after unpacking the appliance, at the latest, two days after
the purchase date. Repairs made after the expiration
of the warranty period are subject to payment.
KOMPERNASS HANDELS GMBH
BURGSTRASSE 21
44867 BOCHUM
GERMANY
www.kompernass.com
Service Great Britain
Tel.: 0871 5000 720 (£ 0.10/Min.)
E-Mail: kompernass@lidl.co.uk
IAN 104034
Hotline availability:
Monday to Friday 08:00 - 20:00 (CET)
- 7 -

- 8 -

Spis treści Strona
Wstęp 10
Użycie zgodne z przeznaczeniem 10
Zakres dostawy 10
Opis urządzania 10
Dane techniczne 10
System ochrony przed przegrzaniem 10
Ważne wskazówki bezpie-czeństwa 11
Uruchomienie 12
Obsługa 12
Opróżnianie pojemnika 13
Czyszczenie 13
Postępowanie w przypadku usterki 14
Utylizacja 14
Gwarancja i serwis 15
Importer 15
Przed pierwszym użyciem urządzenia należy dokładnie przeczytać niniejszą instrukcję obsługi i
zachować ją na przyszłość.
- 9 -
Niszczarka dokumentów
Wstęp
Serdecznie gratulujemy zakupu nowego urządzenia.
Wybrany produkt charakteryzuje się wysoką jakością.
Instrukcja obsługi stanowi element składowy produktu.
Zawiera ona ważne wskazówki na temat bezpieczeństwa, użytkowania i utylizacji. Przed przystąpieniem do eksploatacji produktu należy zapoznać
się ze wszystkimi wskazówkami dotyczącymi obsługi
i bezpieczeństwa. Produkt należy użytkować wyłącznie zgodnie z zamieszczonym tu opisem oraz
w podanym zakresie zastosowań. W przypadku
przekazania urządzenia następnej osobie, nie
zapomnij dołączyć również instrukcji obsługi.
Użycie zgodne
z przeznaczeniem
To urządzenie służy wyłącznie do rozdrabniania
papieru, kart kredytowych, płyt CD/DVD oraz małych spinaczy (rozmiary: 24/6 i 23/6 (11,5 x 6
mm), B-8 (11,5 x 7 mm), No10 (8,4 x 5 mm)) i spinaczy biurowych (do 25 mm) w prywatnych gospodarstwach domowych. Jakiekolwiek inne użycie lub
zmiany dokonywane w urządzenia uważane
są za niezgodne z przeznaczeniem i mogą być
przyczyną poważnych wypadków. Urządzenie nie
jest przeznaczone do użytku profesjonalnego.
Zakres dostawy
Niszczarka dokumentów
(zespół tnący, pojemniki na ścinki duży/mały)
Instrukcja obsługi
Opis urządzania
Rysunek A:
Zespół tnący
q
Mały pojemnik na ścinki
w
Okienko kontrolne
e
Duży pojemnik na ścinki
r
Rysunek B:
Otwór do cięcia płyt CD/kart kredytowych
t
Otwór do cięcia papieru
y
Przełącznik
u
Dane techniczne
Napięcie sieciowe: 220 - 240 V~, 50 Hz
Prąd znamionowy : ok. 1,0 A
Moc znamionowa: 220 W
Stopień ochrony: II
Duży pojemnik na ścinki: 21 litrów
Metoda cięcia papieru: Cięcie krzyżowe,
ścinki 4 x 18 mm
Poziom bezpieczeństwa 4
Szerokość robocza: 220 mm
Wydajność cięcia: 8 kartek (80g/m
2
)
System ochrony przed
przegrzaniem
Urządzenie jest wyposażone w system zabezpieczający przed przegrzaniem. Gdy silnik ulegnie
przegrzaniu na skutek przeciążenia, urządzenie
wyłącza się automatycznie. W takim przypadku
należy postąpić w następujący sposób:
Uwaga:
Wyciągnij wtyczkę z gniazdka, aby nie dopuścić
do niezamierzonego włączenia urządzenia.
• Wyłącz urządzenie, ustawiając przełącznik
w położeniu środkowym „OFF”.
• Opróżnij pojemniki na ścinki
• Odczekaj do ostygnięcia urządzenia.
• Włóż ponownie wtyczkę do gniazdka zasilania.
• Włącz urządzenie, ustawiając przełącznik
w położenie „AUTO”.
Zalecamy schłodzenie urządzenia przez ok.
30 minut po każdych 3 godzinach pracy.
w/r
u
.
u
- 10 -
Ważne wskazówki bezpieczeństwa
Podczas każdego użycia urządzeń elektrycznych należy przestrzegać następujących zasad
bezpieczeństwa:
• Nigdy nie stawiaj urządzenia w pobliżu źródeł
ciepła lub wody. W przeciwnym wypadku powstaje zagrożenie wybuchu pożaru i porażenia
prądem elektrycznym!
• Nie używaj urządzenia w miejscach zapylonych
lub zagrożonych wybuchem (łatwopalne gazy
i opary, opary rozpuszczalników organicznych)
Niebezpieczeństwo wybuchu!
• Nie używaj urządzenia na zewnątrz! Grozi to
nieodwracalnym uszkodzeniem urządzenia!
Aby uniknąć porażenia
prądem elektrycznym:
• Aby uniknąć zagrożeń, uszkodzony kabel sieciowy lub wtyczkę naprawiaj wyłącznie w autoryzowanym zakładzie naprawczym lub w punkcie
serwisowym.
• Urządzenia niesprawne lub uszkodzone natychmiast oddaj do serwisu w celu dokonania przeglądu i naprawy.
• Nigdy nie używaj urządzenia w mokrym lub wilgotnym otoczeniu. Nie narażaj urządzenia na
działanie deszczu.
• Uważaj, aby podczas używania urządzenia
kabel sieciowy był zawsze suchy.
Aby uniknąć ryzyka obrażeń:
• Niszczarkę może obsługiwać tylko jedna osoba.
• Pracującego urządzenia nigdy nie pozostawiaj
bez nadzoru.
Luźne ubrania, długie włosy, biżuterię itp. należy
trzymać z dala od otworów zespołu tnącego.
Nigdy nie wkładaj palców w otwory zespołu tnącego.
Urządzenie trzymaj z dala od dzieci. Mogą one
odnieść obrażenia.
• Wkładając płytę CD w centralną część otworu
do niszczenia, palce należy trzymać jak najdalej
od otworu.
• Nie dopuszczaj zwierząt do urządzenia. Mogą
one odnieść obrażenia.
• Urządzenie nie jest przeznaczone do użytkowania przez osoby (w tym dzieci) o ograniczonej
sprawności fizycznej, ruchowej bądź umysłowej,
lub nieposiadające doświadczenia i/ lub wiedzy na temat obsługi urządzenia, chyba że będą
one przebywały pod opieką osoby odpowiedzialnej za ich bezpieczeństwo lub uzyskają od niej
wskazówki dotyczące właściwego używania
urządzenia.
• Części opakowania stanowią zagrożenie dla
dzieci. Wszystkie części opakowania należy
usunąć zaraz po rozpakowaniu lub przechowywać je z dala od dzieci.
• Kabel sieciowy należy ułożyć tak, aby nikt nie
mógł po nim deptać, ani potknąć się o niego.
Zasady bezpiecznego użytkowania:
• Urządzenie należy ustawiać w bezpośrednim
pobliżu gniazdka sieciowego. Nie używaj przedłużacza. Uważaj, aby urządzenie i wtyczka
były łatwo dostępne, umożliwiając szybkie wyłączenie urządzenia w sytuacji awaryjnej.
• Nie przeciążaj zbytnio urządzenia. Niszczarka
do dokumentów może pracować jednorazowo
przez krótki czas.
• W przypadku zagrożenia natychmiast wyciągnij
wtyczkę z gniazdka sieciowego.
• Nigdy nie używaj niszczarki w sposób niezgodny
z jej przeznaczeniem.
• Zawsze zachowuj ostrożność! Zawsze koncentruj
się na tym, co robisz i postępuj rozsądnie.
Nigdy nie używaj urządzenia, gdy masz trudności
z koncentracją lub źle się czujesz.
- 11 -
Uruchomienie
Uwaga: Ponieważ każda niszczarka jest na
końcu procesu produkcji poddawana kontroli
działania, może się zdarzyć, że w zespole
tnącym pozostaną resztki papieru.
r
w
.
na szyny
• Nasuń mały pojemnik na ścinki
wewnątrz dużego pojemnika
• Załóż zespół tnący
ścinki
z tyłu.
• Podłącz wtyk do gniazda zasilania.
tak, aby kabel zasilający wystawał
r
na duży pojemnik na
q
Uwaga: Ewentualne pozostałości znajdujące
się na nożach należy regularnie usuwać za
pomocą odpowiedniego przedmiotu, na przykład pęsety. Wcześniej upewnić się, czy wtyczka jest wyciągnięta z gniazdka zasilania.
Wkładanie kart kredytowych:
• Kartę kredytową wprowadzić od góry w środek
otworu do cięcia płyt CD/kart kredytowych
Jednorazowo można niszczyć tylko jedną kartę
kredytową. Kartę należy wprowadzać zawsze
szerszą stroną do otworu do cięcia płyt CD/kart
kredytowych
zostanie zniszczony pasek magnetyczny.
. Przy innym położeniu karty nie
t
t
.
Obsługa
Równocześnie można ciąć do 8 stron
(papier 80g/m
Uwaga:
Nigdy nie wkładaj do otworu tnącego papieru,
w którym znajdują się jeszcze spinacze biurowe
większe niż 25 mm! Mogą one uszkodzić noże
tnące.
Włączanie urządzenia:
• W celu wykonania cięcia przełącznik
w położenie „AUTO”.
Wkładanie papieru:
• Papier ułożony pionowo wkładać od góry do
otworu zespołu tnącego
Silnik uruchamia się automatycznie, a następnie,
jeśli nie zostanie przystawiona kolejna kartka
papieru, automatycznie się wyłącza. Możemy
ciąć równocześnie do 8 stron (papier 80g/m
2
).
ustawić
u
.
y
2
).
Uwaga: Kartę kredytową wprowadzać zawsze
w środek otworu do cięcia płyt CD/kart kredytowych
. W przeciwnym razie cięcie nie roz-
t
pocznie się!
Uwaga: Jeśli podczas wkładania karty kredy-
towej proces cięcia się nie aktywuje, płaskim
przedmiotem ostrożnie popchnąć kartę głębiej
do otworu do cięcia płyt CD/kart kredytowych
.
t
Uwaga: Jeśli chcemy być pewni, że dane
zapisane na pasku magnetycznym zostaną
nieodwracalnie zniszczone, kartę kredytową
wprowadzić w środek otworu do cięcia papieru
.
y
Proszę pamiętać, że ścinki spadną wówczas
do dużego pojemnika
wcześniej opróżnij pojemnik, aby móc potem
łatwiej oddzielić ścinki papierowe i plastikowe.
Wkładanie płyt CD:
Ostrzeżenie!
Wkładając płytę CD w centralny otwór do niszczenia
płyt, palce należy trzymać jak najdalej od otworu.
. W razie potrzeby
r
- 12 -
• Płytę CD wprowadzić od góry w środek otworu
do cięcia płyt CD/kart kredytowych
zowo można niszczyć tylko jedną płytę CD.
Usuwanie zatoru:
• Jeśli ścinki zablokują się w zespole tnącym,
przełącznik
(„reverse” (angielski) = wstecz).
Napęd działa wstecz powodując wysunięcie
niszczonych materiałów.
• Po odblokowaniu ścinek przełącznik
w położenie „OFF”.
Wyłączanie urządzenia:
• Wyłączyć urządzenie ustawiając przełącznik
w położenie „OFF”.
ustawić w położenie „REV”
u
. Jednora-
t
ustawić
u
u
Opróżnianie pojemnika
• Regularnie opróżniaj pojemniki na ścinki w/r.
• Duży pojemnik na ścinki
w momencie, kiedy zobaczysz papier w okienku
kontrolnym
• Odpady utylizuj zgodnie z przepisami ochrony
środowiska.
Opróżnianie dużego pojemnika na ścinki
e
.
Uwaga:
Wyciągnij wtyczkę z gniazdka, aby nie dopuścić
do niezamierzonego włączenia urządzenia.
• Zdejmij zespół tnący qz dużego pojemnika
na ścinki
• Wyciągnij z szyn mały pojemnik
i wyjmij go z dużego pojemnika
• Opróżnij duży pojemnik
wszystkie części.
r
.
opróżnij najpóźniej
r
do góry
w
.
r
i ponownie zamontuj
r
Opróżnianie małego pojemnika na ścinki
• Zdejmij zespół tnący
na ścinki
• Wyciągnij z szyn mały pojemnik
i wyjmij go z dużego pojemnika
opróżnienia.
• Opróżnij mały pojemnik
wszystkie części.
r
.
z dużego pojemnika
q
do góry
w
, w celu
r
i ponownie zamontuj
w
Czyszczenie
Niebezpieczeństwo!
Przed rozpoczęciem czyszczenia wyciągnij wtyczkę
z gniazdka. Istnieje niebezpieczeństwo porażenia
prądem elektrycznym!
Ostrzeżenie!
Noże tnące są bardzo ostre!
Ryzyko odniesienia obrażeń!
Uwaga:
Nie spryskuj otworów tnących t/yolejem ani
żadnymi innymi środkami smarnymi. Spowodowałoby
to nieodwracalne uszkodzenie urządzenia.
• Ewentualne pozostałości materiału znajdujące
się w otworach tnących
regularnie za pomocą odpowiedniego przedmiotu, na przykład pęsety. Wcześniej upewnij
się, czy wtyczka jest wyciągnięta z gniazdka
zasilania.
• Urządzenie czyścić tylko wilgotną ściereczką.
Do oczyszczenia przyschniętych zabrudzeń
nanieś na szmatkę delikatny środek do mycia
naczyń.
lub nożach usuwaj
t/y
- 13 -
 Loading...