

ULTIMATE SPEED ULG 12 A2, 277071 Operation And Safety Notes Translation Of Original Operation Manual
Page 1

CAR BATTERY CHARGER WITH JUMP START
FUNCTION ULG 12 A2
IAN 277071
AUTONABÍJAČKA S POMOCNÝM
ŠTARTOVANÍM
Pokyny pre obsluhu a bezpečnostné pokyny
Preklad originálneho návodu na obsluhu
KFZ-LADEGERÄT MIT
STARTHILFEFUNKTION
Bedienungs- und Sicherheitshinweise
Originalbetriebsanleitung
POLNILNIK ZA AKUMULATORJE MOTORNIH
VOZIL S FUNKCIJO ZAGONA VOZILA
Navodila za upravljanje in varnostna opozorila
Prevod originalnega navodila za uporabo
AUTONABÍJEČKA S FUNKCÍ
POMOCNÉHO STARTU
Pokyny pro obsluhu a bezpečnostní pokyny
Překlad originálního provozního návodu
CAR BATTERY CHARGER WITH JUMP
START FUNCTION
Operation and Safety Notes
Translation of the original instructions
AKKUMULÁTORTÖLTŐ
INDÍTÓFUNKCIÓVAL
Kezelési és biztonsági utalások
Az originál használati utasítás fordítása
Page 2

GB Operation and Safety Notes Page 5
HU Kezelési és biztonsági utalások Oldal 15
SI Navodila za upravljanje in varnostna opozorila Stran 27
CZ Pokyny pro obsluhu a bezpečnostní pokyny Strana 39
SK Pokyny pre obsluhu a bezpečnostné pokyny Strana 49
DE / AT / CH Bedienungs- und Sicherheitshinweise Seite 61
Before reading, unfold the page containing the illustrations and familiarise yourself with all functions of the
device.
Olvasás előtt kattintson az ábrát tartalmazó oldalra és végezetül ismerje meg a készülék mindegyik
funkcióját.
Pred branjem odprite stran s slikami in se nato seznanite z vsemi funkcijami naprave.
Před čtením si otevřete stranu s obrázky a potom se seznamte se všemi funkcemi přístroje.
Pred čítaním si odklopte stranu s obrázkami a potom sa oboznámte so všetkými funkciami prístroja.
Klappen Sie vor dem Lesen die Seite mit den Abbildungen aus und machen Sie sich anschließend mit allen
Funktionen des Gerätes vertraut.
Page 3

10
1 2 3
6
9
7
8
4 5
Page 4

Page 5

5 GB
Table of contents
Introduction ................................................................................................................................... Page 6
Intended use ........................................................................................................................................ Page 6
Parts description .................................................................................................................................. Page 6
Technical Data ....................................................................................................................................Page 6
Scope of delivery ................................................................................................................................ Page 6
Safety notices ..............................................................................................................................Page 7
Operation .......................................................................................................................................Page 10
Product properties ............................................................................................................................... Page 10
Connecting ..........................................................................................................................................Page 10
Disconnecting ...................................................................................................................................... Page 10
Selecting the charging mode .............................................................................................................Page 10
Jump starting ........................................................................................................................................Page 11
Replacing the fuse ............................................................................................................................... Page 12
Maintenance and care .........................................................................................................Page 12
Warranty and service information ...........................................................................Page 12
Warranty terms ...................................................................................................................................Page 12
Extent of warranty ............................................................................................................................... Page 13
Processing of warranty claims ............................................................................................................ Page 13
Environmental instructions and disposal information ..............................Page 13
Declaration of Conformity ................................................................................................Page 14
Page 6

6 GB
Introduction
Car battery charger with jump
start function ULG 12 A2
Introduction
Congratulations!
You have chosen high-quality device
by our company. Familiarise yourself
with the product before using it for the first time.
Carefully read the following original operating instructions and safety notices. Initial operation of this
tool must be performed by trained personnel.
Intended use
The Ultimate Speed ULG 12 A2 is a car charger with
impulse trickle charge (Chip Software) suitable for
charging and trickle charging the following 6 V or
12 V rechargeable lead batteries with electrolyte
solution, AGM batteries, lead-acid batteries, deep
cycle (marine batteries), or gel batteries:
• For automotive and motorcycle batteries with
12 V / 6 V and 8–180 Ah capacity
You can also regenerate drained batteries (depending on battery type). The car charger features a
protective circuit against sparking and overheating.
Any improper or incorrect use will void the warranty.
The manufacturer is not liable for damage caused by
improper use. The device is not intended for commercial use.
Note: The car charger is not suitable for charging
electric vehicles with built-in rechargeable battery.
Parts description
1
Digital display button
2
Battery type button
3
Charge Start button
4
Fuse with cover
5
“+“ Terminal connection cable (red)
6
“–“ Terminal clamp (black)
7
“+“ Terminal clamp (red)
8
“–“ Terminal connection cable (black)
9
Mains cable
10
Digital display
Technical Data
Input voltage: 230 V∼ 50 Hz
Reverse current*: < 5 mA (no AC input)
Rated output voltage: 6 V / 12 V
Charging current: 2 A, 6 A, 12 A ± 10 %
Battery type with: 12 V / 6 V and
8–180 Ah capacity
Housing protection type: IP 20
* = Reverse current is the battery current the charger
uses when not connected to power.
Scope of delivery
Check the contents and device along with
all parts for damage immediately after
unpacking. Do not use if the device or
parts are damaged.
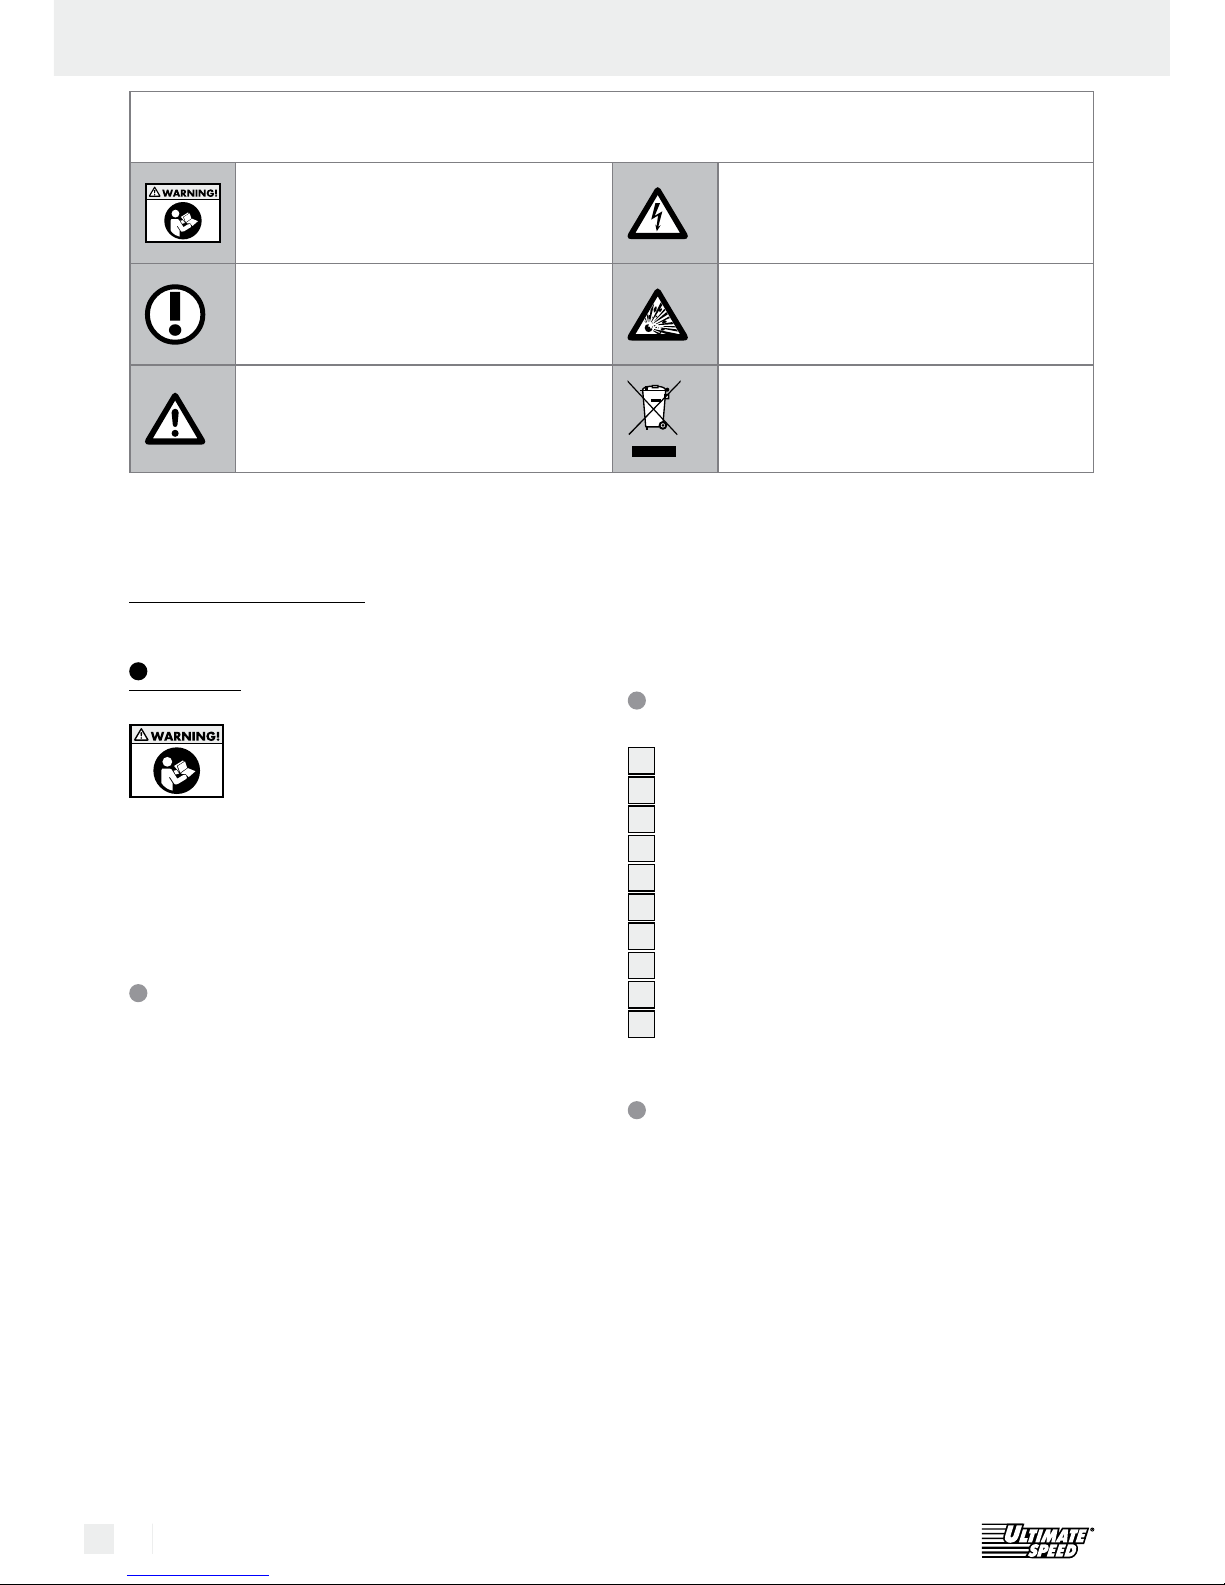
These original operating instructions / the device uses the following pictograms:
Read original operating instructions! Caution! Risk of electric shock!
Note Caution! Explosion hazard!
Observe the warning and safety
instructions!
Dispose of packaging and device in
an environmentally-friendly way!
Page 7
7 GB
Introduction / Safety notices
1 Charger Ultimate Speed ULG 12 A2
2 Alligator clips (1 red, 1 black)
1 Original operating instructions
Safety notices
KEEP OUT OF THE REACH OF
CHILDREN!
DANGER! Avoid a danger to
life and the risk of injuries due to
improper use!
CAUTION! Do not operate the
device if the cables, the mains
cable or plug are damaged. A
damaged mains cable indicates
a life-threatening danger due to
electric shock.
Only have a damaged power
cable repaired by authorised and
trained professionals! In the event
a repair is required, please contact the service centre for your
country!
DANGER OF ELECTRIC
SHOCK! For batteries
permanently mounted in a vehi-
cle, verify the vehicle is switched
off! Switch off the ignition und
put the vehicle in park with the
handbrake engaged (e.g. car)
or fixed rope (e.g. electric boat)!
DANGER OF ELECTRIC
SHOCK! Disconnect the
car charger from the mains be-
fore connecting or removing the
connectors to / from the battery.
First connect the clamp not con-
nected to the car body.
Connect the other clamp to the
car body, away from the battery
and the petrol pipe.
Only then connect the car
charger to the power supply.
Disconnect the car charger from
the power supply after charging.
Only then remove the clamp
from the car body. Following
this, remove the clamp from the
battery.
DANGER OF ELECTRIC
SHOCK! Only touch the
terminal connection cables (“–“
and “+“) in the insulated area!
DANGER OF ELECTRIC
SHOCK! Establish the
connection to the battery and
the mains current socket completely protected from moisture!
DANGER OF ELECTRIC
SHOCK! Only assemb
le,
maintain and care for the car
charger whilst disconnected from
the mains!
DANGER OF ELECTRIC
SHOCK! Once the
charging and discharge process
is completed, on batteries per-
Page 8

8 GB
Safety notices
manently installed in vehicles
first disconnect the charger‘s
negative terminal connection cable (black) from the battery‘s
negative terminal.
Do not leave toddlers or children
unsupervised with the car charger!
Children are not yet able to assess
potential dangers in handling
electric appliances. Always supervise children to ensure they
do not play with the tool.
This device may be used by chil-
dren age 8 years and up, as well
as by persons with reduced physical, sensory or mental capacities,
or lacking experience and / or
knowledge, so long as they are
supervised or instructed in the s
afe
use of the device and understand
the associated risks. Children
should not be allowed to play
with the device. Cleaning and
user maintenance should not be
performed by children without
supervision.
E
XPLOSION HAZARD!
Protect yourself from a
highly explosive hydrogen-oxy-
gen reaction! The battery may
emit gaseous hydrogen during
charging and trickle charging.
Oxyhydrogen is an explosive
mix of gaseous hydrogen and
oxygen. Contact with open fire
(flames, embers or sparks) will
cause the so-called oxyhydrogen
reaction! Perform charging and
trickle charging in a well ventilated room protected from the
weather. Be sure there is no open
fire (flames, embers or spark) during charging and maintenance
charging!
DANGER OF EXPLOSION
AND FIRE HAZARD! Ensure
that there is no possibility of ignition of explosive or flammable
materials, such as petrol or solvents, while using the charger!
EXPLOSIVE GASSES! Avoid
flames and sparks!
Ensure adequate ventilation whilst
charging.
Place the battery on a well venti-
lated surface whilst charging. Ignoring this advice may damage
the device.
EXPLOSION HAZARD!
Ensure the positive termin
al
connection cable does not come
into contact with fuel lines (e.g.
petrol pipe)!
DANGER OF CHEMICAL
BURNS! Protect your eyes and
skin against corrosion from acids
(sulphuric acid) when coming
into contact with the battery!
Page 9

9 GB
Safety notices
Use acid-proof goggles, clothing
and gloves! If eyes or skin has
come into contact with sulphuric
acid, rinse the affected body region off with a plenty of clean
water and consult a doctor
straight away!
Avoid electric short-circuits when
connecting the car charger to the
battery. Only connect the negative terminal connection cable to
the negative battery terminal or
the car body. Only connect the
positive terminal connection cable
to the positive battery terminal!
Before connecting to the mains,
verify the mains power has the
required 230 V∼ 50 Hz, neutral
lead, a 16 A fuse and an ELCB
switch (earth leakage circuit
breaker)! Ignoring this advice
may damage the device.
Do not place the charger close to
fire, heat and prolonged temperatures over 50 °C! The output
power of the car charger automatically drops In higher temperatures.
Only use the car charger with the
included original parts!
Do not cover the car charger with
objects! Ignoring this advice may
damage the device.
P
rotect the surfaces of the batter
y‘s
electrical contacts from short circuiting!
Only use the car charger for
charging and maintenance
charging undamaged 6 V- / 12 V
lead-acid batteries (with electrolyte solution or gel)! Otherwise
material damage could occur.
Do not use the car charger for
charging or trickle charging nonrechargeable batteries. Otherwise
material damage could occur.
D not use the car charger to
charge or trickle charge a damaged or frozen battery! Otherw
ise
material damage could occur.
Before connecting the charger,
refer to the battery‘s original operating instructions for battery
maintenance information! Otherwise there is a risk of injury and /
or damaging the device.
Before connecting the charger to
a battery permanently connected
to a vehicle, refer to the vehicle‘s
operating instructions for information about maintaining electrical
safety and maintenance! Otherwise there is a risk of injury and /
or property damage.
Also disconnect the car charger
from the mains when not in use
for environmental reasons! Re-
Page 10

10 GB
Safety notices / Operation
member standby operation also
consumes electricity.
Always be alert and always be
careful what you do. Always
proceed with caution and do not
operate the car charger when
unfocused or feel unwell.
Operation
Remove the mains plug from the mains socket before
performing any work on the car charger.
RISK OF ELECTRIC SHOCK!
DANGER OF DAMAGE TO PROPERTY!
RISK OF INJURY!
Product properties
This device is designed to charge a variety of SLA
batteries (sealed lead-acid batteries) primarily used
in cars, motorcycles and some other vehicles. These
can be e.g. WET- (with liquid electrolyte), GEL- (with
gelified electrolyte) or AGM batteries (with electrolyte
absorbent glass mat). The special design of the device
(also referred to as “three-level charging strategy“)
allows the battery to be charged to nearly 100 %
of
its capacity. The charger can further be connected
to the battery for extended periods to keep it in optimal condition.
Connecting
Before charging and trickle charging a battery
permanently connected to the vehicle, first disconnect the battery‘s negative terminal connection cable (black) from the negative battery terminal. The negative battery terminal is typically
connected to the car body.
Then disconnect the vehicle‘s positive terminal
connection cable (red) from the positive battery
terminal.
Only then connect the battery charger‘s “+“
crocodile clamp (red)
7
to the “+“ battery
terminal.
Connect the “-“ crocodile clamp (black) 6 to
the “–“ battery terminal. Plug the car charger‘s
mains cable
9
into the mains socket.
Note: If the connector clamps are correctly conn
ected, the display will show the voltage and “connected“ will light up. If the poles are reversed, the display will read 0.0 and “connected“ will not light
up.
Disconnecting
Disconnect the device from the mains.
Remove the “–“ crocodile clamp (black) 6 from
the “–“ battery terminal.
Remove the “+“ crocodile clamp (red) 7 from
the “+“ battery terminal.
Reconnect the vehicle‘s positive connection cable
to the positive battery terminal.
R
econnect the vehicle‘s negative connection cab
le
to the negative battery terminal.
Selecting the charging mode
You can charge a variety of batteries at different
ambient temperatures using different charging mo
des.
Compared to conventional car chargers, this device
features a special function for reusing a drained battery / rechargeable battery. You can recharge a
completely drained battery / rechargeable battery.
The safe charging process protects against faulty co
nnection and short-circuits. The integrated electronics
do not switch the car charger on immediately after
being connected, but only after selecting a charging
mode.
If the connector clamps connected to the battery
and the device is connected to power, the digital
display
10
will read “Connected“. After selecting a
charging mode, the display will read “Charging“.
Once charging is complete, the display will read
“Charged“.
A continuously lit display with the battery not yet fully
charged indicate a fault.
Page 11

11 GB
Operation
In this event, verify the connection clamps 6,
7
are correctly connected to the battery and
the correct battery type is selected. If the display
is still continuously lit, the battery may be defective.
Digital Display button
1
: Use to switch between the digital display of voltage and charging
progress in percent (Battery %). Use this button to
switch between the following displays:
– Battery %: indicates the charging progress for
the connected battery in percent.
– Voltage: indicates the voltage of the connected
battery.
– Alternator %: output power in percent
Battery Type button
2
: Use this button to set
the battery type to be charged. You can choose from
battery types. The battery type must absolutely be
correctly selected before starting the charging process:
–
12 V Regular: these batteries (lead-acid batteries
)
are typically used in cars, lorries and motorcycles.
They have vent caps and are often labelled
“low-maintenance“ or “maintenance-free“. This
battery type is designed to quickly transfer energy (e.g. starting an engine). “Regular“ batteries
should not be used for “Deep Cycle“ applications.
– 12 V Deep Cycle: These batteries are commonly
also labelled “Deep Cycle“ or “Marine“. This
type of battery is typically larger than other
battery types. It delivers less short-term energy
but transmit energy longer. These batteries withstand numerous discharge cycles.
– 12 V AGM / Gel: The AGM battery type is typi-
cally a good Deep Cycle battery. They provide
the best “life“ when recharged before being
drained more than 50 %. When fully discharged
they withstand about 300 charging cycles. The
GEL battery type is similar to AGM. The charging voltage is lower than for other lead-acid
batteries. Using the wrong charger for a Gel
battery will result in a reduction in power or a
shorter life.
– 6 V Regular: Select this mode for conventional
6 V batteries.
Charge Start button
3
: Use this button to switch
between the following options
– Fast Charge: charges quickly (recommended in
low outdoor temperatures / winter)
– Normal Charge: normal charging process (nor-
mal speed)
–
Start: briefly delivers 75 ampere to bridge a w
eak
or drained battery to jump start an engine
Attention: This mode can only be exited by unp
lug-
ging the mains plug
9
.
Jump starting
Always make all the connections
as described and in the correct order. The vehicle‘s
electronics may otherwise be damaged.
Proceed against the specifications at your own risk
and responsibility.
Attention: This function is not suitable for batteries
below 45 Ah. This function could damage batteries
below 45 Ah.
Diesel vehicles and large-volume engines in part require amperages above 75 A for jump starting.
Note: The charger features an analysis program
to protect the battery from damage (e.g. sulphation
or rapid voltage drops), particularly during jump
starting. The device will not switch on the jump starter with severely drained or heavily stressed batteries
to protect the battery. During this process the battery
is already being charged with lower currents (Charging lights up). The display continues to read “0“. In
this event the jump start function cannot be used. This
will protect the battery from damage. You should
then first charge the battery. You may also use the
“Fast Charge“ or “Normal Charge“ function for
this purpose.
Connect the car charger‘s mains cable 9 to
power.
Connect the red connector clamp 7 to the
positive battery terminal. (The positive terminal
is marked with a “+“ symbol and a red mark.)
Page 12

12 GB
Warranty and service ... / Environmental instructions and disposal information
Operation / Maintenance and care / Warranty and service information
Connect the black connector clamp 6 to the
negative battery terminal. (The negative terminal
is marked with a “-“ symbol and a black mark.)
If the connector clamps are connected correctly,
the car charger will automatically select the correct battery type. You may review it in the “Battery Type“ option field and if necessary change
it by pressing the battery type button
2
.
Now select the “Start“ function using the Charge
Start button
3
. The cart charger will now analyse the battery‘s charge level. The display will
now read “0“.
Start the vehicle‘s ignition. The display will now
show a 5 second countdown (of which 2 second
priming / analysis function and 3 second jump
start function at 75 A) when needing the car
charger for jump starting (previously analysed
by the car charger). During this countdown the
car charger will briefly deliver 75 A to bridge
the battery to start the car. This is followed by
a 180 second pause to protect the battery. The
cycle will now restart (2 second priming / analysis function and 3 second jump starting at
75 A / 180 second pause).
To disconnect the device, first remove the termi-
nal clamps (
6
/ 7) and unplug the power
cord
9
.
Note: If the battery is completely drained, the 75 A
will not be sufficient to start all engines (e.g. diesel
vehicles).
In this case, please select the “Fast Charge“
option using the Charge Start button
3
and
charge the battery 60 % (preheating of diesel
engines draws power from the battery. This requires 60 % after preheating).
You can monitor the charging process in the display
by selecting the “Battery %“ option using the digital
display button
1
.
Once 60 % has been reached, jump start again.
Attention: Exit the mode by unplugging the
mains cable
9
.
Replacing the fuse
The car charger fuse can be damaged by e.g. hardware failure, overload, etc.
Unplug the power cord 9 before replacing
the fuse.
Remove the fuse 4 cover by slightly pressing
in the side.
Unscrew the fuse 4 with a fitting open-end
spanner and secure the new fuse.
Then screw it tight and replace the cover 4.
Note: If you need a new fuse, please contact
our service department (see chapter Warranty
and Service Information).
Maintenance and care
A
lways unplug the power cord 9 from the mains
socket before working on the car charger.
The device is maintenance-free. Switch off the
device. Clean the device‘s metal and plastic with
a dry cloth.
Never use solvents or other abrasive cleaners.
Warranty and service
information
Creative Marketing Consulting GmbH
warranty
Dear customer,
the warranty for this device is 3 years from the date
of purchase. In the event of product defects, you
have legal rights against the retailer of this product.
Your statutory rights are not limited in any way by
our warranty detailed below.
Warranty terms
The warranty period begins on the date of purchase.
Please retain the original receipt safely.
This document is required as your proof of purchase.
Should this device show any defect in materials or
Page 13

13 GB
Warranty and service ... / Environmental instructions and disposal information
manufacture within 3 years from the date of purchase,
we will repair or replace it - at our discretion - free
of charge. This warranty is conditional on the defective device and the receipt of purchase being presented within the 3 year warranty period including
a brief written description of the nature of the defect
and of the date it arose.
If the defect is covered by our warranty, we will return the repaired device or replacement thereof. A
repair or exchange of the device does not extend a
new warranty period.
Extent of warranty
The device has been manufactured to strict quality
gui
delines and meticulously examined before delivery.
The warranty applies to faults in material or manufacture. This warranty does not apply to product
parts subject to normal wear and tear and which
can therefore be considered as wear items, or to
damage to fragile parts, e.g. switches, storage batteries or glass parts. This warranty becomes void if
the device has been damaged or improperly used
or maintained. Strictly observe only the instructions
within the original operating instructions for proper
product use. Absolutely avoid any applications and
actions the original operating instructions advise
against.
This product is intended for private, non-commercial
use only. Any incorrect or improper use of the device,
use of force and changes not performed by our authorized service branch will void the warranty.
Processing of warranty claims
Please follow the instructions below to ensure your
claim is processed quickly:
When inquiring about your product please have your
receipt and product number (e.g. IAN) ready as
your proof of purchase. The item number can be
found on the type plate, engraving, the cover page
of your instructions (bottom left) or the decal at the
back or bottom. In the event of malfunctions or other
defects, please first contact the service department
below by phone or e-mail.
A product recorded as defective, along with the proof
of purchase (sales receipt) and a description of the
defect and when it occurred, can then be returned fr
ee
of charge to you to the service address provided.
Notice:
Visit www.lidl-service.com to download
this and many other manuals, product
videos and software.
How to contact us:
GB
Name: C. M. C. GmbH
Website: www.cmc-creative.de
E-mail: service.gb@cmc-creative.de
Phone: 0-808-189-0652
(standard German landline
rates apply)
Fax: 0-808-189-0652
Registered office: Germany
IAN 277071
Please note that the following address is not a service address.
Please first contact the service point named above.
Address:
C. M. C. GmbH
Katharina-Loth-Str. 15
DE-66386 St. Ingbert
GERMANY
Environmental instructions
and disposal information
Don‘t waste, recycle!
Device, accessories and packaging
should be recycled in an environmentally
friendly manner.
Page 14
14 GB
Environmental instructions and disposal information / Declaration of Conformity
Do not throw the car charger into household rubbish,
fire or into water. If possible, non-operational devices should be recycled. Contact your local retailer for
information.
As the consumer you are legally obligated
(Battery Ordinance) to return any used
batteries. Batteries containing hazardous
substances are marked with these symbols,
indicating the ban on disposal through
household rubbish. The designations of
the determining heavy metal are: Cd =
cadmium, Hg = mercury, Pb = lead.
Return used batteries through your municipal or community disposal facilities or the retailer. This satisfies
your legal obligations and you are greatly contributing to protecting the environment.
Declaration of Conformity
We,
C. M. C. GmbH
Responsible for documentation: Andre Scheer
Katharina-Loth-Str. 15
66386 St. Ingbert
declare in our sole responsibility the product
Car battery charger with jump start function
Year of manufacture: 2016 / 43
IAN: 277071
Year of CE mark: 15
Model: CAR BATTERY CHARGER WITH
JUMP START FUNCTION ULG 12 A2
meets the basic safety requirements of European
Directives
EC Low Voltage Directive
2014 / 35 / EU
EC Electromagnetic Compatibility Directive
2014 / 30 / EU
RoHS Directive
2011 / 65 / EU
The object of the declaration described above meets
the requirements of Directive 2011 / 65 / EU of the
European Parliament and Council dated 08 June
2011 restricting the use of certain hazardous substances in electrical appliances and electronics.
The conformity assessment is based on the following
harmonised standards:
EN 60335-2-29:2004/A2:2010
EN 60335-1:2012/A11:2014
EN 62233:2008
EN 50498:2010
EN 55014-1:2006/A2:2011
EN 55014-2:1997/A2:2008
EN 61000-3-2:2014
EN 61000-3-3:2013
AfPS GS 2014:01 PAK
St. Ingbert, 31.08.2016
p.p. Andre Scheer
- Quality Control Manager -
Page 15

15 HU
Tartalomjegyzék
Bevezető .........................................................................................................................................Oldal 16
Rendeltetésszerű használat ...............................................................................................................Oldal 16
Alkatrészleírás ....................................................................................................................................Oldal 16
Műszaki adatok .................................................................................................................................Oldal 16
A csomag tartalma .............................................................................................................................Oldal 17
Biztonsági tudnivalók .........................................................................................................Oldal 17
Használat .......................................................................................................................................Oldal 20
Terméktulajdonságok .........................................................................................................................Oldal 20
Csatlakoztatás ....................................................................................................................................Oldal 20
Leválasztás .........................................................................................................................................Oldal 20
Töltésmód kiválasztása ......................................................................................................................Oldal 21
Indítási segédfunkció használata ......................................................................................................Oldal 22
Biztosíték cseréje ................................................................................................................................Oldal 22
Karbantartás és ápolás .....................................................................................................Oldal 23
Tudnivalók a garanciával és a szervizeléssel kapcsolatban ............Oldal 23
Garanciális feltételek .........................................................................................................................Oldal 23
A garancia terjedelme .......................................................................................................................Oldal 23
Garanciális ügyek lebonyolítása ......................................................................................................Oldal 23
Környezetvédelmi tudnivalók és megsemmisítési adatok .................Oldal 24
EK- megfelelőségi nyilatkozat .....................................................................................Oldal 24
Page 16

16 HU
Bevezető / Biztonsági tudnivalók
Bevezető
Akkumulátortöltő indítófunkcióval
ULG 12 A2
Bevezető
Szívből gratulálunk!
Cégünk értékes terméke mellett döntött.
Az első üzembevétel előtt ismerkedjen
a készülékkel. Ehhez olvassa el figyelmesen a következő eredeti üzemeltetési útmutatót és a biztonsági
előírásokat. Ezen termék használatbavétele csak
erre kiképzett személy által történhet.
Rendeltetésszerű használat
AzUltimate Speed ULG 12 A2 egy autós töltőberendezés pulzálás-megtartó töltéssel (chip-szoftver),
amely a következő 6- és 12 V-os elektrolit- oldatos
ólomakkuk (elemek), AGM-elemek, sav-ólom-elemek,
Deep Cycle akuk (hajóakkuk), vagy zselés elemek
töltésére alkalmas.
• 12 V / 6 V-os és 8–180 Ah kapacitású autó- és
motorkerékpár- akkukhoz
Emellett a lemerült elemet felújíthatja (az elem
típusától függően). Az autós töltőberendezés védőkapcsolóval van felszerelve szikraképződés és túlmelegedés ellen. Minden nem rendeltetésszerű, vagy
szakszerűtlen használat a garancia elveszítéséhez
vezet. A rendeletetésétől eltérő használatból eredő
károkért a gyártó nem felel. A készülék nem közületi alkalmazásra készült.
Tanács: Az autós töltőberendezéssel beépített
akkuval rendelkeő jármű nem tölthető
Alkatrészleírás
1
Digitális kijelző-gomb
2
Elemtípus-gomb
3
Töltésindító-gomb
4
Biztosítás fedéllel
5
„+“-pólus-csatlakozóvezeték (piros)
6
„-“-pólus csatlakozócsipesz (fekete)
7
„+“-pólus csatlakozócsipesz (piros)
8
„-“-pólus-csatlakozóvezeték (fekete)
9
Hálózati vezeték
10
Digitális kijelző
Műszaki adatok
Bemeneti feszültség: 230 V∼ 50 Hz
Vissz-áram*: < 5 mA (nem AC-
bemenet)
Névleges kimeneti
feszültség : 6 V / 12 V
Töltőáram: 2 A, 6 A, 12 A ± 10 %
Elemtípus: 12 V / 6 V és 8–180 Ah
kapacitással
Burkolat védelmi jellege: IP 20
* = A vissz-áram az az áram, amelyet az elem
hesznál fel akkor, amikor nincsen csatlakoztatva a hálózatra.
Ebben az Eredet- üzemeltetési utasításban / a készüléken a következő
piktogrammokat használtuk:
Olvassa el az eredeti üzemeltetési
útmutatót!
Vigyázat! Áramütés veszélye!
Tudnivaló Vigyázat! Robbanásveszély!
Tartsa be a figyelmeztető és a
biztonsági tudnivalókat!
A csomagolást és a készüléket
környezetbarát módon semmisítse
meg!
Page 17

17 HU
A csomag tartalma
A készülék kicsomagolását követően
azonnal ellenőrizze a csomag tartalmát,
valamint minden alkatrészt sérülések
tekintetében. Sérült készüléket, vagy alkatrészeket
ne üzemeltessen.
1 Ultimate Speed ULG 12 A2 töltőberendezés
2 Csatlakozócsipesz gyorskontakt (1 piros,
1 fekete)
1 eredeti üzemeltetési útmutató
Biztonsági tudnivalók
NE ENGEDJE, HOGY GYERMEKEK KEZÉBE KERÜLJÖN!
VESZÉLY! Kerülje el a szaksze-
rűtlen használat általi élet- és
sérülésveszélyt!
VIGYÁZAT! Ne üzemeltesse a
készüléket sérült kábellel, vagy
sérült hálózati csatlakozó dugóval. A sérült hálózati kábelek áramütés általi életveszélyt rejtenek.
A sérült hálózati vezetéket csak
engedéllyel rendelkező és képzett szakemberrel javíttassa!
Javítás esetén vegye fel a kapcsolatot országa szervizével.
ÁRAMÜTÉS VESZÉ-
LYE! A járműbe beépített
kku esetén bizonyosodjon meg
róla, hogy a jármű üzemen kívül
van helyezve! Kapcsolja le a
gyújtást és állítsa a járművet par-
kolási módba, húzza be a kéziféket (pl. szgk), vagy rögzítse a
behúzózsinórt (pl. elektromos
csónak)!
ÁRAMÜTÉS VESZÉ-
LYE! Válassza le az autós
töltőberendezést a hálózatról,
mielőtt a csatlakozócsipeszt az
akkura teszi, vagy arról leveszi.
Először azt a csipeszt csatlakoz-
tassa, amelyik nincs a karosszériához kapcsolva.
A másik csipeszt az akkutól és a
benzincsőtől távol csatlakoztassa
a karosszériához.
Csak ezt követően csatlakoztassa
az autós töltőberendezést az
elektromos hálózathoz.
A töltés végeztével válassza le
az autós töltőkészüléket a hálózatról.
Ezután távolítsa el a csipeszt a
karosszériáról. Majd távolítsa el
az akkuról is a csipeszt.
ÁRAMÜTÉS VESZÉ-
LYE! A pólus-csatlakozó-
vezetéket („–“ és„+“) kizárólag
a szigetelt területen fogja meg!
ÁRAMÜTÉS VESZÉ-
LYE! Az akkuhoz és a
hálózathoz való csatlakozást
nedvességtől teljesen védve
végezze el!
Page 18

18 HU
Biztonsági tudnivalók
ÁRAMÜTÉS VESZÉ-
LYE! Az autós töltőbe-
rendezés szerelését, karbantartá-
sát és ápolását csak a hálózatról
leválasztva végezze!
ÁRAMÜTÉS VESZÉLYE!
A töltés,
vagy a járműbe
épített akku - felújítási folyamat
befejezésekor először az autós
töltőberendezés negatív pólusú
csatlakozóját (fekete) vegye le
az akku negatív pólusáról.
Ne hagyja a gyermekeket felügye-
let nélkül az autós töltőberendezéssel!
A gyerekek nem ismerik fel azokat
a veszélyeket, melyek az elektromos készülékek szakszerűtlen
kezelése során keletkezhetnek. A
gyerekekre felügyelni kell annak
a biztosítására, hogy a készülékkel ne játsszanak.
A készüléket 8 éves kor feletti
gyermekek, valamint korlátozott
fizikai, érzékszervi vagy szellemi
képességgel élő vagy nem megfelelő tapasztalattal és tudással
rendelkező személyek csak felügyelet mellett, illetve a készülék
biztonságos használatára vonatkozó felvilágosítás és a lehetséges
veszélyek megértése után használhatják A gyermekek nem
játszhatnak a készülékkel. A tisz-
títást és a felhasználó általi karbantartást gyermekek felügyelet
nélkül nem végezhetik.
ROBBANÁSVESZÉLY!
Védje magát a robbanó-
gáz- reakcióitól! Gáz halmazál-
lapotú hidrogén léphet ki az
akkuból a töltés és felújítás folyamata alatt. A robbanógáz gáz
halmazállapotú hidrogén és
oxigén robbanékony keveréke.
Nyílt lánhhal (lánggal, parázzsal,
vagy szikrával) való érintkezés
esetén úgynevezett robbanógázreakció következik be. A töltő-,
vagy fenntartó-töltő folyamatot az
időjárástól védett, jó szellőzésűhelyiségben végezze. Bizonyosodjon meg róla, hogy a töltés
alatt ne legyen semmilyen nyílt
láng (tűz, parázs, vagy szikra)!
ROBBANÁS- ÉS TŰZVE-
SZÉLY! Bizonyosodjon meg róla,
hogy a töltőkészülék használata
során nem gyulladhatnak meg
robbanékony, vagy éghető
anyagok!
ROBBANÉKONY GÁZOK!
Kerülje a lángot és szikrát!
A töltés során gondoskodjon a
kielégítő szellőzésről.
A töltés idejére helyezze az
akkut egy jól szellőző felületre.
Egyébként a készülék károsodhat.
Page 19
19 HU
Biztonsági tudnivalók
ROBBANÁSVESZÉLY!
- Bizonyosodjon meg
róla, hogy a pozitív pólusú
csatlakozókábel nem érintkezik
üzemanyag- csővel (pl. benzincsővel)!
MARÁSVESZÉLY! Védje sze-
mét és bőrét a savak (kénsav)
általi marástól az azzal való
érintkezés során!
Viseljen saválló védőszemüveget,
-ruházatot és -kesztyűt! Ha a
kénsav a szembe, vagy a bőrre
jut, öblítse le az érintett helyet bő,
tiszta vízzel és haladéktalanul
forduljon orvoshoz!
A töltőberendezés akkumulátor-
hoz való csatlakoztatásakor kerülje
el a rövidzárlatot. A negatív pólust kizárólag az akku negatív
pólusához, ill. a karosszériához
csatlakoztassa. A pozitív pólust
kizárólag az akku pozitív pólusához csatlakoztassa.
A hálózathoz való csatlakozás
előtt bizonyosodjon meg róla,
hogy a hálózati áram az előírásoknak megfelelően 230 V∼
50 Hz, rendelkezik földelt nullvezetékkel, egy 16 A-os biztosítékkal
és FI- relével ( áramhiba- védőkapcsoló)! Egyébként a készülék
károsodhat.
Ne tegye ki az autós töltőkészü-
léket tűznek, hőnek, vagy 50 °C
feletti hőmérsékletnek! Magasabb
hőmérsékleten automatikusan
csökken az autós töltőkészülék
kimeneti teljesítménye.
Csak a mellékelt eredeti alkatré-
szekkel üzemeltesse az autós
töltőkészüléket!
Ne takarja le tárgyakkal az au-
tós töltőkészüléket! Egyébként a
készülék károsodhat.
Védje az akku elektromos érint-
kezőit a rövidzárlattól!
Kizárólag sérülésmentes 6 V- /
12 V-os (elektrolit-oldatot, vagy zselét tartalmazó) ólomakkumulátorok töltéséhez használja az
autós töltőberendezést. Ellenkező
esetben anyagi kár következhet
be.
Ne használja a töltőberendezést
nem tölthető akkuk töltésére és
felújítására. Ellenkező esetben
anyagi kár következhet be.
Ne használja az autós töltőbe-
rendezést sérült, vagy befagyott
akkumulátor töltéséhez. Ellenkező
esetben anyagi kár következhet
be.
A töltőberendezés csatlakoztatá-
sa előtt tájékozódjon az akku
karbantartásáról annak használati útmutatójából. Ellenkező
esetben sérülésveszély, vagy a
Page 20

20 HU
Biztonsági tudnivalók / Használat
észülék károsodásának veszélye
áll fenn.
A töltőberendezés járműbe rög-
zített akkuhoz való csatlakoztatása előtt tájékozódjon az elektromos bitonság betartásáró és az
akku karbantartásáról a jármű
használati útmutatójából. Ellenkező esetben sérülésveszély, vagy
anyagi károsodás veszélye áll
fenn.
Környezetvédelmi okokból ha nem
használja a készüléket, válassza
le a hálózatról! Gondoljon arra,
hogy a készenléti üzemmód is
igényel áramot.
Ügyeljen arra, amit tesz és min-
dig legyen óvatos. Mindig felelősen járjon el és semmiképpen
se használja a készüléket, ha szétszórt vagy rosszul érzi magát.
Használat
Mielőtt bármilyen munkát végez az autós töltőberendezésen, húzza ki a hálózati csatlakozódugót a
konnektorból.
Áramütés veszélye!
TÁRGYI KÁROSODÁSOK VESZÉLYE!
SÉRÜLÉSVESZÉLY!
Terméktulajdonságok
Ez a készülék sokféle SLA-akku (lepecsételt ólomsav
akkuk) töltésére lett tervezve, amelyek leginkább
szgk-ban, motorkerékpárban és néhány más jármű-
ben használatosak. Ezek lehetnek pl. WET- (folyékony elektrolitos), GEL- (zselé-állagú elektrolitos),
vagy AGB-akkuk (elektrolit abszorbáló lapokkal
ellátott akkuk). A készülék speciális tervezése („háromfokozatú töltőstratégia“ -ként is nevezik) lehetővé teszi az akkuk kapacitásának csaknem 100%-ra
történő újratöltését. Ezen felül az akkura történő
hosszútávú csatlakoztatásával azt lehetőség szerint
folyamatosan optimális állapotban tartja.
Csatlakoztatás
A töltés, vagy a járműbe épített akku - felújítási
folyamat befejezésekor először az jármű negatív pólusú csatlakozóját (fekete) vegye le az
akku negatív pólusáról. Az akku negatív pólusa
általában a jármű karosszériájával van összekötve.
Végül válassza le a pozitív pólusú csatlakozó-
vezetéket az akku pozitív pólusáról.
Kösse először az autós töltőberendezés gyors-
csatlakoztató csipeszének „+“-pólusát (piros)
7
az akku „+“-pólusához.
Kösse a készülék csipeszének „-“-pólusát (fekete)
6
az akku „-“-pólusához. Csatlakoztassa az
autós töltőberendezés vezetékét
9
a konnek-
torhoz.
Tanács: Ha a csatlakozócsipeszek megfelelően
vannak bekötve, a kijelzőn „connected“ (=csatlakoztatva) felirat villan fel. Hibás pólusválasztáskor
a kijelzőn 0.0 látszik és a „connected“ kijelző nem
világít.
Leválasztás
Válassza le a készüléket a hálózatról.
Vegye le a készülék csatlakozó-csipeszének
„-“-pólusát (fekete)
6
az akku „-“-pólusáról.
Vegye le a készülék csatlakozó-csipeszének
„+“-pólusát (fekete)
7
az akku „+“-pólusáról.
A jármű pozitív pólusú csatlakozóvezetékét
kizárólag az akku pozitív pólusához csatlakoztassa.
A jármű negatív pólusú csatlakozóvezetékét
Page 21

21 HU
Használat
kizárólag az akku negatív pólusához csatlakoztassa.
Töltésmód kiválasztása
A különböző akkuk különböző környezeti hőmérséklet melletti töltéséhez különféle töltésmódok közül
választhat. A hagyományos autós töltőberendezésekkel összehasonlítva ez a készülék rendelkezik az
üres akkuk újbóli felhasználásának funkciójával.
Újratöltheti a teljesen lemerült akkukat. A hibás
csatlakozás és a rövidzárlat elleni védelem biztonságos töltési folyamatot biztosít. A beépített elektronika
révén az autós töltőberendezés nem áll üzembe
közvetlenül a csatlakoztatást követően, hanem csak
a töltésmód kiválasztását követően.
Tanács: Ha a csatlakozócsipeszek megfelelően
vannak bekötve és a készülék csatlakozik az áramhálózatra, a digitális kijelzőn
10
„connected“
(= csatlakoztatva) felirat villan fel. Miután kiválasztottuk a töltésmódot, felvillan a „Charging“ (= töltés)
- felirat. Ha a töltési folyamat véget ért, a „Charged“
(=feltöltve) felirat látszik.
Ha az akku teljes feltöltése előtt folyton felvillan a
kijelző, akkor hiba áll fenn.
Ebben az esetben ellenőrizze újra, hogy a
csatlakozócsipeszek
6, 7
helyesen lettek-e
feltéve az akkura és hogy az akku típusa megfelelően lett-e kiválasztva. Ha a kijelző enne
ellenére folyamatosan világít, valószínűleg az
akku hibája áll fenn.
Digitális kijelző-gomb
1
: Lehetővé teszi a
feszültség és a töltés előrehaladtának (akku %)
digitális kijelzései közötti váltást. Ezt a gombot
használja a következő kijelzők közötti váltáshoz:
– Akku %: megmutatja a csatlakoztatott akku
töltésének előrehaladtát szzalékban.
– Feszültség: megmutatja a csatlakoztatott akku
feszültségét.
– Alternátor %: kimeneti teljesítmény százalékban
Akkutípus-gomb
2
: Ezt a gombot használja
a töltendő akku típusának beállításához. Itt választhat az akkutípusok között. Az akku típusát helyesen
be kell állítani, mielőtt a töltési folyamat elindul:
– 12 V szokványos: ezeket az akkukat (ólomsavas
akkuk) használjá általában a szgk-ban, tgk-ban
és motorkerékpárokban. Ezek szellőztetőszeleppel vannak ellátva és gyakran „karbantartást
nem génylő“-nek nevezik őket. Az akkutípus
gyors energialeadásra szolgál (pl. egy motor
indításához). A „szokványos“ akkukat nem
szabad „Deep Cycle“ (=mély áramkör) alkalmazásra használni.
– 12 V Deep Cycle: Ezeket az akkukat „Deep
Cycle“ vagy „Marine“ névvel illetik. Az ilyen
típusú akkuk rendszerint nagyobbak a más
típusoknál. Kevesebb rövidtávú energiát szolgáltatnak, inkább hosszú távon adjá át az
energiát. Ezek az akkuk több kisülési ciklust
állnak ki.
– 12 V AGM / Gel: Az AGM típusú akkuk rend-
szerint jó Deep Cycle akkuk. Leghosszabb élettartamukat úgy érhetjük el, ha többször feltöltjük
őket, mielőtt 50%-nál nagyobb mértékben lemerülnek. Teljes kisülés esetén ezek kb. 300 töltési
ciklust állnak ki. A GEL (=zselé) típusok az
AGM-hez hasonlóak. Az újratöltéskori feszültség
alacsonyabb, mint más ólomsavv akuk esetén.
HA egy zselés akkutípushoz hibásan választ
töltőberendezést, az csökkent teljesítményt és
élettartam-rövidülést eredményez.
– 6 V szokványos: Ezt a módot válassza a kere-
kedelemben szokványos 6 V-os akkukhoz.
Charge-Start-(=töltés-indítás) gomb
3
:
Ezt a gombot használja a következő opciók közötti
váltáshoz:
– Fast Charge: gyorstöltés (alacsony külső
hőmérsékleten / télen ajánlott)
– Normal Charge: normál töltési folyamat
(normál sebesség)
– Start: rövid idő alatt 75 Ampert szolgáltat, hogy
a gyenge, vagy lemerült akkut áthidalva beindítsa a motort.
Page 22

22 HU
Használat
Figyelem: a mód csak a hálózati vezeték 9
kihúzásával állítható le.
Indítási segédfunkció
használata
Feltétlenül minden csatlakozást a leírtak szerint és a helyes sorrendben alakítson ki. Különben a jármű elektronikája károsodhat.
A leírtakkal ellentétes eljárás esetén saját felelősségére jár el.
Figyelem: Ez a funkció nem alkalmas 45 Ah-nál
kisebb akkukhoz. A 45 Ah-nál kisebb akukat ez a
funkció károsíthatja.
Dízel-járművek és nagy térfogatú benzinmotorok
részben 75 A-nál nagyobb áramerősséget igényelnek az indításhoz.
Tanács: A töltőberendezés analizáló-programmal
van ellátva, amely különösen az inditási segédfunkció
során vádi az akkut a károsodástól (pl. kénesedés,
a feszültség erős csökkenése). Erősen lemerült, vagy
elhasználódott akkuk esetén a készülék az akku védelmében nem kapcsolja be az indítási segédet. A
folyamat során az akkut alacsonyabb áramlások
töltil (a Charging-töltés felvillan) A kijelző ekkor „0“-án
marad Ilyen esetben az indítási segédfunkció nem
lehetséges. Ez védi az akkut a sérüléstől. Az akkut
először fel kell tölteni. Ehhez a „Fast Charge“ vagy
„Normal Charge“ funkciók bármelyike használható.
Csatlakoztassa az autós töltőberendezés veze-
tékét
9
a konnektorhoz.
Rögzítse a piros csatlakozót 7 az akku pozitív
pólusára. (A pozitív pólust egy „+“ és a piros
jelzés jelöli)
Rögzítse a fekete csatlakozót 6 az akku ne-
gatív pólusára. (A negatív pólust egy „-“ és a
fekete jelzés jelöli)
Ha a csatlakozó-helyesen van felhelyezve, az
utós töltőberendezés automatikusan kiválasztja
a megfelelő akkutípust. Ezt a „Battery Typ“
(=akkutípus) opciós mezőn ellenőrizheti és
adott esetben az elemtípus gomb
2
megnyo-
másával változtathatja.
Válassza a Charge-Start-gombbal 3 a „Start“
funkciót. Az autós töltőberendezés ekkor megvizsgálja az akku töltöttségi állapotát. A kijelzőn
ekkor „0“ látható.
Indítsa el a jármű gyútását. A kijelzőn 5 másod-
percről visszaszámlálás indul (ebből 2 másodperc az előzetes-, ill. analizáló funkció és 3
másodperc a 75 A-os indítássegítő funkció),
amennyiben az indítás autós töltőberendezés
általi segítése szükséges (ezt megelőzően az
autós töltőberendezés előzetesen analizál). A
visszaszámlálás alatt az autós töltőberendezés
rövid idő alatt 75 Ampert szolgáltat, hogy az
akkut áthidalva beindítsa a motort.
Ezután az akku kímélete miatt 180 másodperces
szünet következik. Ezután a ciklus újra indul
(2 másodpercig előzetes-, ill. analizáló funkció
és 3 másodperc a 75 A/-os indítássegítő funkció / 180 másodperces szünet).
A készülék leválasztásához először távolítsa el
a csatlakozókapcsokat (
6
/ 7) majd húzza
ki a vezetéket
9
.
Tanács: Ha az akku teljesen lemerült, a 75 A nem
minden járműnél elegendő a motor beindításához
(pl. dízel-járművek).
Ebben az esetben a Charge-Start-gombbal 3
válassza ki a „Fast Charge“ funkciót és töltse
fel az akkut 60%-ig (dízelmotoroknál az izzítás
használja az akku energiáját. Ebben az esetben
a 60%-nak az izzítást követően rendelkezésre
kell állnia).
A töltés előrehaladtát a kijelzőn követheti, ha a Digital-Display-gombbal
1
kiválasztja az „Akku %“
opciót.
Ha elérte a 60 %-ot, ismételje meg az indítás-
segítő funkciót.
Figyelem: a hálózati vezeték
9
kihúzásával
állítsa le a módot.
Biztosíték cseréje
Az autós töltőberendezés biztosítéka pl. a készülék
hibája, túlterhelés, stb. miatt károsodhat.
Nielőtt kicseréli a biztosítékot, először húzza ki
a vezetéket
9
.
Távolítsa el a biztosíték-fedelet 4 úgy, hogy
azt enyhén oldalra nyomja.
Page 23

23 HU
Használat / Karbantartás és ápolás / Tudnivalók a garanciával és a ...
Egy megfelelő szerszámkulccsal csavarja le a
biztosítékot
4
és rögzítse az új biztosítékot.
Végezetül csavarja be szorosan és tegye visz-
sza a fedelet
4
.
Tanács: Ha új biztosítékra van szüksége, kér-
jük, vegye fel a kapcsolatot szervizünkkel (lásd
a Garanciára és szervizszolgáltatásokra vonatkozó fejezet utasításait).
Karbantartás és ápolás
Mielőtt bármilyen munkát végez az autós töltő-
berendezésen, húzza ki a hálózati vezetéket
9
a konnektorból.
A készülék nem igényel karbantartást. Kapcsol-
ja ki a készüléket. Egy száraz kendővel tisztítsa
le a készülék fém- és műanyag részeit.
Semmiképpen ne használjon erre a célra oldó-
szert, vagy agresszív tisztítószereket.
Tudnivalók a garanciával és a
szervizeléssel kapcsolatban
A Creative Marketing Consulting Kft.
garanciája
Tisztelt Ügyfelünk, Ön erre a készülékre a vásárlás
időpontjától számított 3 év garanciát kap. Ha a
készüléken hiányosságot tapasztal, akkor a termék
eladójával szemben törvényes jogok illetik meg Önt.
Ezeket a törvényes jogokat a következőkben ismertetett garancia vállalásunk nem korlátozza.
Garanciális feltételek
A garanciális idő a vásárlás dátumával kezdődik.
Kérjük, jól őrizze meg a pénztári blokkot.
Ez a bizonylat szükséges a vásárlás tényének az
igazolásához. Ha a készülék vásárlásától számított
3 éven belül anyag- vagy gyártási hiba merül fel,
akkor a választásunk szerint a készüléket ingyen
megjavítjuk vagy kicseréljük. Garanciális szolgáltatásunk előfeltétele, hogy Ön ezen a 3 éves határidőn
belül a meghibásodott készüléket és a vásárlás iga-
zolását bizonyító számlát (pénztári blokkot) részünkre
bemutassa és írásban röviden ismertesse a hibát és
a hiba felléptének időpontját.
Ha garanciánk kiterjed erre a hibára, akkor visszakapja a megjavított terméket vagy egy új terméket
kap vissza. Javításkor vagy a termék kicserélésekor
nem indul újra a garanciális idő.
A garancia terjedelme
A készüléket szigorú minőségi előírások betartásával
gondosan gyártottuk, és szállítás előtt lelkiismeretesen ellenőriztük.
A garancia az anyag- vagy gyártáshibákra vonatkozik. A garancia nem terjed ki azokra a termékrészekre, melyek normál kopásnak vannak kitéve és
ezért azok fogyóeszköznek tekinthetők, illetve a
törékeny részekre, pl. kapcsolók, akkuk, vagy üvegből készült részek. A garancia megszűnik, ha a
terméket megrongálták, nem szakszerűen kezelték
vagy karbantartották. A termékék szakszerű használatához pontosan be kell tartani a kezelési utasításban megadott útmutatásokat. Azokat az alkalmazási célokat és cselekményeket, melyeket a kezelési
utasítás nem javasol vagy melyektől az óva int,
felétlenül el kell kerülni.
A termék kizárólag magánhasználatra, nem ipari
használatra készült. A garancia érvényét veszti viszszaélésszerű vagy szakavatatlan kezelés, erőszak
alkalmazása vagy olyan beavatkozások esetén,
amelyeket az engedélyünkkel nem rendelkező
szervizekkel végeztettek.
Garanciális ügyek lebonyolítása
Ügyének gyors elintézhetősége céljából, kérjük
kövesse az alábbi útmutatást:
Kérjük, hogy minden ügyintézéskor tartsa kéznél a
pénztári blokkot és a cikkszámot (pl. IAN) a vásárlás tényének az igazolására. A cikkszámot megtalálja az adattáblán, a begravírozásban vagy az
utasítás címlapján (lásd lent balra) vagy pedig a
készülék hát- vagy alsó oldalán lévő címkén. Ha
Page 24

24 HU
Környezetvédelmi tudnivalók és megsemmisítési adatok
Tudnivalók a garanciával és a ... / Környezetvédelmi tudnivalók és ...
működési hiba vagy egyéb hiányosság lépne fel,
akkor először telefonon vegye fel a kapcsolatot a
következőkben megnevezett szervizosztállyal vagy
küldjön e-mailt.
Ha a szóban forgó termék meghibásodott, akkor a
vásárlási bizonylat (pénztári blokk) mellékelésével,
a hiba leírásával és keletkezési idejének megadásával, portómentesen elküldheti az Önnek megadott
szerviz címére.
Tudnivaló:
A www.lidl-service.com címen letölthetik
ezt és még sok más kézikönyvet,
termékvideót és szoftvert.
Elérhetőségünk:
HU
Név: Europa Kft.
Internetcím: www.cmc-creative.de
E-Mail: service.hu@cmc-creative.de;
info@europa-kft.de
Telefon: 06-85-550 660 (normál tarifás
vonalas telefon)
Székhely: Németország
IAN 277071
Kérjük vegye figyelembe, hogy a következő cím
nem szerviz cím.
Először vegye fel a kapcsolatot a fent megnevezett
szervizzel.
Cím:
C. M. C. Kft.
Katharina-Loth-Str. 15
DE-66386 St. Ingbert
NÉMETORSZÁG
Környezetvédelmi tudnivalók
és megsemmisítési adatok
Nyersanyag visszanyerése
hulladékkezelés helyett!
Az eszközt, a tartozékot és a csomagolást környezetvédelmi újrahasznosításba
kell juttatni.
Ne dobja az autós töltőberendezést a házi szemetesbe, tűzbe, vagy vízbe. Ha lehetséges, az üzemképtelen készülékeket újra kell hasznosítani. Kérjen
segítséget helyi kereskedőjétől.
Önt végfelhasználóként törvény (akumulátorokra vonatkozó rendelet) kötelezi a
használt elemek visszaszolgáltatására.
A káros anyagokat tartalmazó elemek a
mellékelt ábrákkal vnnak jelölve, melyek
a háztartási hulladékként történő megsemmisítést tilalmára utalnak A mérvadó
nehézfémek jelölései: Cd = kadmium,
Hg = higany, Pb = ólom.
Juttassa el az Ön által elhasznált elemeket lakóhelye
egy megsemmisítő-telepére, vagy a kereskedőhöz
Ezáltal teljesíti törvényi kötelezettségét és jelentősen
hozzájárul a környezetvédelemhez.
EK- megfelelőségi nyilatkozat
Mi, a
C. M. C. Kft.
Iratfelelős: Andre Scheer
Katharina-Loth-Str. 15
66386 St. Ingbert
egyedüli felelősségünk tudatában kijelentjük, hogy
az alábbi termék:
Autós töltőberendezés inditás-segítőfuncióval
Gyártási év: 2016 / 43
IAN: 277071
Page 25

25 HU
A CE-jelölés éve: 15
MODELL: ULG 12 A2 AUTÓS TÖLTŐBERENDEZÉS INDITÁS-SEGÍTŐ-FUNCIÓVAL
az alábbi európai irányelvekben meghatározott
jelentősebb védelmi elvárásainak felel meg
EK-alacsonyfeszültség-irányelv
2014 / 35 / EU
EK-irányelv az elektromágneses összeférhetőségről
2014 / 30 / EU
RoHS irányelv
2011 / 65 / EU
A magyarázat fent leírt tárgya megfelel az Európai
Parlament és a -Tanács 2011 / 65 / EU számú, 2011
június 8-i, az elektromos és elektronikai készülékekben történő hasznosításáról szóló rendelet előírásainak.
A megfelelőségi értékeléshez az alábbi harmonizált
jogszabályokat alkalmaztuk:
EN 60335-2-29:2004/A2:2010
EN 60335-1:2012/A11:2014
EN 62233:2008
EN 50498:2010
EN 55014-1:2006/A2:2011
EN 55014-2:1997/A2:2008
EN 61000-3-2:2014
EN 61000-3-3:2013
AfPS GS 2014:01 PAK
St. Ingbert, 2016.08.31.
Andre Scheer nevében
- Minőségbiztosítási Vezető -
Page 26

26
Page 27

27 SI
Kazalo
Uvod ................................................................................................................................................... Stran 28
Predvidena uporaba .......................................................................................................................... Stran 28
Opis delov .......................................................................................................................................... Stran 28
Tehnični podatki ................................................................................................................................. Stran 28
Obseg dobave ................................................................................................................................... Stran 29
Varnostni napotki ................................................................................................................... Stran 29
Uporaba .......................................................................................................................................... Stran 32
Lastnosti izdelka ................................................................................................................................. Stran 32
Priključitev ........................................................................................................................................... Stran 32
Odklop................................................................................................................................................ Stran 33
Izbira načina polnjenja ...................................................................................................................... Stran 33
Uporaba funkcije pomoči pri zagonu .............................................................................................. Stran 34
Zamenjava varovalke ........................................................................................................................ Stran 35
Vzdrževanje in nega ............................................................................................................ Stran 35
Napotki v zvezi z garancijo in potekom servisa .......................................... Stran 35
Garancijski pogoji .............................................................................................................................. Stran 35
Obseg garancije ................................................................................................................................ Stran 35
Postopek pri uveljavljanju garancije ................................................................................................. Stran 36
Okoljevarstveni napotki in navodila za odlaganje .................................. Stran 36
ES izjava o skladnosti .......................................................................................................... Stran 37
Garancijski list ........................................................................................................................... Stran 38
Page 28
28 SI
Uvod / Varnostni napotki
Uvod
Polnilnik za akumulatorje
motornih vozil s funkcijo zagona
vozila ULG 12 A2
Uvod
Iskrene čestitke!
Odločili ste se za kakovosten izdelek
iz naše hiše. Pred prvo uporabo se
seznanite z izdelkom. V ta namen natančno preberite spodnji prevod originalnih navodil za uporabo
in varnostne napotke. Uporaba tega izdelka je dovoljena le usposobljenim osebam.
Predvidena uporaba
Ultimate Speed ULG 12 A2 je avtomobilski polnilnik
z impulznim vzdrževalnim polnjenjem (Chip-Software),
ki je primeren za polnjenje in vzdrževalno polnjenje
naslednjih 6 ali 12-voltnih svinčenih akumulatorjev
(baterij) z elektrolitsko raztopino, akumulatorjev AGM,
svinčeno-kislinskih baterij, Deep Cycle (avtomobilski
akumulatorji) ali gel akumulatorjev:
• Za akumulatorje osebnih vozil in motornih koles
s kapaciteto 12 V / 6 V in 8–180 Ah
Poleg tega lahko izpraznjen akumulator regenerirate
(odvisno od vrste akumulatorja). Avtomobilski polnilnik ima zaščitno vezavo proti nastanku isker in
pregretju. Vsakršna nepravilna ali nestrokovna uporaba pomeni izgubo garancije. Za poškodbe, nastale zaradi nepredvidene uporabe, proizvajalec
ne prevzema odgovornosti. Naprava ni namenjena
za profesionalno uporabo.
Napotek: Z avtomobilskim polnilnikom ne morete
polniti električnih vozil z vgrajenim akumulatorjem.
Opis delov
1
Tipka za digitalni zaslon
2
Tipka za vrsto akumulatorja
3
Tipka za začetek polnjenja
4
Varovalka s pokrovom
5
„+“ pozitivni priključni kabel (rdeči)
6
„-“ negativna priključna sponka (črna)
7
„+“ pozitivna priključna sponka (rdeča)
8
„–“ negativni priključni kabel (črni)
9
Omrežni kabel
10
Digitalni prikazovalnik
Tehnični podatki
Vhodna napetost: 230 V∼ 50 Hz
Povratni tok*: < 5 mA (brez vhoda AC)
Nazivna izhodna
napetost: 6 V / 12 V
Polnilni tok: 2 A, 6 A, 12 A ± 10 %
Vrsta akumulatorja s: zmogljivostjo 12 V / 6 V
in 8–180 Ah
Vrsta zaščite ohišja: IP 20
* = Povratni tok označuje tok, ki ga polnilnik porabi
iz akumulatorja, kadar ni priključen na omrežje.
V tem originalnem navodilu za upravljanje / na napravi so uporabljeni naslednji
piktogrami:
Preberite originalna navodila za
uporabo!
Previdno! Nevarnost električnega
udara!
Napotek Previdno! Nevarnost eksplozije!
Upoštevajte opozorila in varnostne
napotke!
Embalažo in napravo odstranite na
okolju primeren način!
Page 29

29 SI
Obseg dobave
Takoj po razpakiranju preverite obseg
dobave in napravo ter vse dele, ali so
morebiti poškodovani. Okvarjene napra-
ve ali delov ne uporabljajte.
1 polnilnik Ultimate Speed ULG 12 A2
2 priključni sponki s hitrim stikom (1 rdeča, 1 črna)
1 originalna navodila za uporabo
Varnostni napotki
NE SME PRITI V ROKE OTROK!
NEVARNOST! Preprečite smrtno
nevarnost in nevarnost poškodb
zaradi nepravilne uporabe!
PREVIDNO! Naprave ne upo-
rabljajte, če je poškodovan kabel,
omrežni kabel ali omrežni vtič.
Poškodovan omrežni kabel predstavlja smrtno nevarnost zaradi
udara električnega toka.
Omrežni kabel sme v primeru
poškodbe popraviti le pooblaščeno in usposobljeno strokovno
osebje! V primeru popravila se
obrnite na servis v svoji državi!
NEVARNOST UDARA
ELEKTRIČNEGA
TOKA! Pri fiksno nameščenem
akumulatorju v vozilu se prepričajte, ali je vozilo izklopljeno!
Ugasnite vozilo in ga prestavite
v parkirni položaj ter zategnite
parkirno zavoro (npr. osebni avtomobil) ali privezano žično vrv
(npr. Elektroboot)!
NEVARNOST UDARA
ELEKTRIČNEGA
TOKA! Avtomobilski polnilnik
ločite z omrežja, preden priključite priključni sponki na akumulator oziroma ju odstranite.
Najprej priključite priključno
sponko, ki ni priključena na
karoserijo.
Drugo priključno sponko priključite
na karoserijo stran od akumulatorja in napeljave za gorivo.
Šele nato priključite avtomobilski
polnilnik na napajanje.
Po polnjenju odklopite avtomo-
bilski polnilnik z napajanja.
Šele nato odstranite priključno
sponko s karoserije. Zdaj lahko
odklopite priključno sponko z
akumulatorja.
NEVARNOST UDARA
ELEKTRIČNEGA
TOKA! Priključne kable („–“ in
„+“) prijemajte izključno za izolirane dele!
NEVARNOST UDARA
ELEKTRIČNEGA
TOKA! Izvedite priključek na
akumulator in v vtičnico za omrežni tok povsem zaščiteno pred
vlago!
Page 30

30 SI
Varnostni napotki
NEVARNOST UDA-
RA ELEKTRIČNEGA
TOKA! Izvedite montažo, vzdrže-
vanje in nego avtomobilskega
polnilnika le, kadar je omrežni
tok izklopljen!
NEVARNOST UDARA
ELEKTRIČNEGA
TOKA! Po koncu postopka pol-
njenja in vzdrževalnega polnjenja
pri stalno priključenem akumulatorju najprej ločite priključni kabel
z negativnim polom (črn) avtomobilskega polnilnika od negativnega pola akumulatorja.
Malčkov in otrok ne puščajte brez
nadzora v bližini avtomobilskega
polnilnika!
Otroci še ne morejo oceniti mo-
rebitnih nevarnosti pri rokovanju
z električnimi napravami. Otroke
je treba nadzorovati, da se prepričate, da se ne igrajo z napravo.
To napravo lahko uporabljajo ot-
roci od 8. leta naprej ter osebe z
zmanjšanimi fizičnimi, čutilnimi
ali duševnimi sposobnostmi ali
osebe s pomanjkanjem izkušenj
in/ali znanja, če so pod nadzorom ali če so bili poučeni o varni
uporabi naprave in razumejo nevarnosti, do katerih lahko pride
med uporabo. Otroci se ne smejo
igrati z napravo. Otroci ne sme-
jo brez nadzora izvajati čiščenja
in vzdrževanja.
NEVARNOST EK-
SPLOZIJE! Zaščitite se
pred visoko eksplozivno reakcijo
plina! Med postopkom polnjenja
in vzdrževalnega polnjenja se
lahko iz akumulatorja sprošča
vodik v plinastem stanju. Pokalni
plin je eksplozivna zmes vodika
v plinastem stanju in kisika. Ob
stiku z odprtim ognjem (plameni,
žerjavica ali iskre) pride do tako
imenovane reakcije pokalnega
plina! Postopka polnjenja in
vzdrževalnega polnjenja izvajajte
v prostoru, zaščitenem pred vremenskimi vplivi in z dobrim prezračevanjem. Zagotovite, da pri
polnjenju in vzdrževalnem polnjenju ni prisoten odprt ogenj
(plameni, žerjavica ali iskre)!
NEVARNOST EKSPLOZIJE
IN POŽARA! Zagotovite, da
se eksplozivne ali gorljive snovi,
kot so bencin ali topila, med
uporabo avtomobilskega polnilnika ne morejo vneti!
EKSPLOZIVNI PLINI! Prepre-
čite plamene in iskre!
Med polnjenjem poskrbite za
zadostno prezračevanje.
Akumulator med polnjenjem
postavite na dobro prezračeno
Page 31

31 SI
Varnostni napotki
površino. V nasprotnem primeru
se naprava lahko poškoduje.
NEVARNOST EK-
SPLOZIJE! Zagotovite,
da pozitivni priključni kabel nima
stika z napeljavo za gorivo (npr.
napeljavo za bencin)!
NEVARNOST RAZJED! Za-
ščitite svoje oči in kožo pred razjedami zaradi kisline (žveplova
kislina) pri stiku z akumulatorjem!
Uporabljajte zaščitna očala, ob-
lačila in rokavice, odporna na
kisline! Če pride žveplova kislina
v stik z očmi ali s kožo, sperite
prizadet del telesa z obilico tekoče, čiste vode in takoj poiščite
zdravniško pomoč!
Pri priključitvi avtomobilskega
polnilnika na akumulator se izogibajte povzročitvi kratkega stika.
Negativni pol priključnega kabla
priključite izključno na negativni
pol akumulatorja oz. na karoserijo. Pozitivni pol priključnega
kabla priključite izključno na
pozitivni pol akumulatorja!
Pred priključitvijo na električno
omrežje zagotovite, da je omrežni
tok opremljen po predpisih z
230 V∼ 50 Hz, ozemljenim nevtralnim vodnikom, s 16 A varovalko in FID stikalom (zaščitnim
tokovnim stikalom)! V naspro-
tnem primeru se naprava lahko
poškoduje.
Avtomobilskega polnilnika ne
izpostavljajte ognju, vročini in
dolgotrajnemu učinkovanju temperature nad 50 °C! Pri višjih temperaturah se samodejno zmanjša
izhodna moč avtomobilskega polnilnika.
Avtomobilski polnilnik uporabljaj-
te le s priloženimi originalnimi
deli!
Avtomobilskega polnilnika ne
pokrivajte s predmeti! V nasprotnem primeru se naprava lahko
poškoduje.
Zaščitite površine električnih kon-
taktov akumulatorja pred kratkim
stikom!
Avtomobilski polnilnik uporabljajte
izključno za polnjenje in vzdrževalno polnjenje nepoškodovanih
6 V / 12 V svinčenih akumulatorjev (z elektrolitsko raztopino ali
gelom)! V nasprotnem primeru
lahko pride do povzročitve materialne škode.
Avtomobilskega polnilnika ne
uporabljajte za polnjenje in vzdrževalno
polnjenje akumulatorjev, ki
jih ni mogoče znova polniti. V
nasprotnem primeru lahko pride
do povzročitve materialne škode.
Avtomobilskega polnilnika ne
Page 32

32 SI
Varnostni napotki / Uporaba
uporabljajte za polnjenje in
vzdrževalno polnjenje poškodovanega ali zmrznjenega akumulatorja! V nasprotnem primeru
lahko pride do povzročitve materialne škode.
Pred priklopom polnilnika prebe-
rite originalna navodila za uporabo glede vzdrževanja akumu
latorja! V nasprotnem primeru
obstaja nevarnost poškodb in / ali
nevarnost poškodbe naprave.
Pred priklopom polnilnika na
akumulator, ki je trajno nameščen
v vozilu, v originalnih navodilih
za uporabo vozila preberite poglavja glede upoštevanja električne varnosti in vzdrževanja! V
nasprotnem primeru obstaja nevarnost poškodb in / ali nevarnost
materialne škode.
Avtomobilski polnilnik zaradi
varovanja okolja odklopite z
električnega omrežja, če ga ne
uporabljate! Upoštevajte, da tudi
v stanju pripravljenosti porablja
tok.
Vedno bodite pozorni in pazite,
kaj delate. Vedno delajte pametno in avtomobilskega polnilnika
ne uporabljajte, če niste osredotočeni ali se ne počutite dobro.
Uporaba
Vedno izvlecite omrežni vtič iz vtičnice, preden
izvajate dela na avtomobilskem polnilniku.
NEVARNOST UDARA ELEKTRIČNEGA TOKA!
NEVARNOST POVZROČITVE MATERIALNE
ŠKODE!
NEVARNOST TELESNIH POŠKODB!
Lastnosti izdelka
Naprava je zasnovana za polnjenje različnih
akumulatorjev SLA (svinčevo-kislinski akumulatorji v
zaprtem ohišju), ki se najpogosteje uporabljajo v
osebnih avtomobilih, motornih kolesih in nekaterih
drugih vozilih. To so lahko npr. akumulatorji WET(s tekočim elektrolitom), GEL (z elektrolitom v obliki
gela) ali AGM (z blazinicami za absorpcijo elektrolita). Posebna zasnova naprave (imenovana turi
„tristopenjska strategija polnjenja“) omogoča ponovno polnjenje akumulatorja do skoraj 100 %
zmogljivosti. Poleg tega lahko izvedete dolgotrajno
priključenost akumulatorja na avtomobilski polnilnik,
da bo ta skoraj vedno v optimalnem stanju.
Priključitev
Pred postopkom polnjenja in vzdrževalnega
polnjenja pri stalno priključenem akumulatorju
najprej ločite priključni kabel z negativnim polom (črn) vozila od negativnega pola akumulatorja. Negativni pol akumulatorja je praviloma
povezan s karoserijo vozila.
Pozitivni pol priključnega kabla (rdeči) vozila
nato ločite s pozitivnega pola akumulatorja.
Šele nato pritrdite „+“ pozitivno priključno
sponko s hitrim stikom (rdeča)
7
avtomobilskega
polnilnika na „+“ pozitivni pol akumulatorja.
Pritrdite „-“ negativno priključno sponko s hitrim
stikom (črna)
6
polnilnika na „-“ negativni pol
akumulatorja. Priključite omrežni kabel
9
av-
tomobilskega polnilnika v vtičnico.
Napotek: Če sta priključni sponki pravilno priključeni, se na zaslonu prikaže napetost in na prikazo-
Page 33

33 SI
Uporaba
valniku se zasveti „connected“. Če sta pola
zamenjana, je na zaslonu prikazano 0.0 in na
prikazovalniku ne zasveti „connected“.
Odklop
Odklopite napravo z omrežnega toka.
Snemite „-“ negativno priključno sponko s hitrim
stikom (črna)
6
z „-“ negativnega pola aku-
mulatorja.
Snemite „+“ pozitivno priključno sponko s hitrim
stikom (črna)
7
s „+“ pozitivnega pola aku-
mulatorja.
Pozitivni pol priključnega kabla vozila znova
priključite na pozitivni pol akumulatorja.
Negativni pol priključnega kabla vozila znova
priključite na negativni pol akumulatorja.
Izbira načina polnjenja
Za polnjenje različnih akumulatorjev pri različni
temperaturi okolice lahko izberete različne načine
polnjenja. V primerjavi z običajnimi avtomobilskimi
polnilniki ima ta naprava posebno funkcijo za ponovno uporabo praznega akumulatorja. Povsem
izpraznjen akumulator lahko znova napolnite. Zaščita pred napačnim priklopom in kratkim stikom
zagotavlja varen postopek polnjenja. Prek vgrajene
elektronike se avtomobilski polnilnik ne zažene neposredno po priklopu na akumulator, ampak šele,
ko izberete način polnjenja.
Če sta priključni sponki povezani z akumulatorjem
in je naprava priključena na omrežni tok, zasveti
na digitalnem prikazovalniku
10
„Connected“. Ko
izberete način polnjenja, zasveti „Charging“ (polnjenje). Ko je postopek polnjenja končan, zasveti
„Charged“ (napolnjeno).
Če digitalni zaslon trajno sveti, preden je akumulator
povsem napolnjen, je prišlo do napake.
V tem primeru še enkrat preverite, ali sta priključni
sponki
6, 7
pravilno priključeni na akumulator
in ali je bila izbrana pravilna vrsta akumulatorja. Če je zaslon še vedno osvetljen, je mogoče
napaka v akumulatorju.
Tipka Digital Display
1
: Omogoča preklop
digitalnega prikaza napetosti in napredka polnjenja
v odstotkih (Battery %). To tipko uporabite za
preklop med naslednjimi prikazi:
– % akumulatorja: prikazuje napredek polnjenja
priključenega akumulatorja v odstotkih.
– Napetost: prikazuje napetost priključenega
akumulatorja.
– % alternatorja: izhodna moč v odstotkih
Tipka Battery Type
2
: To tipko uporabite za
nastavitev vrste akumulatorja, ki ga boste polnili.
Tukaj lahko izbirate med vrstami akumulatorjev.
Vrsta akumulatorja mora biti obvezno pravilno
nastavljena, preden se začne postopek polnjenja:
– 12 V Regular: Ti akumulatorji (svinčevo-kislinski
akumulatorji) se praviloma uporabljajo v osebnih avtomobilih, tovornjakih in motornih kolesih.
Ti imajo odzračevalne kapice in so pogosto
označeni kot „z malo vzdrževanja“ ali „brez
vzdrževanja“. Vrsta akumulatorja je nastavljena
za hiter prenos energije (npr. zagon motorja).
Akumulatorjev „Regular“ ni dovoljeno uporabljati za vrste uporabe „Deep Cycle“.
– 12 V Deep Cycle: Ti akumulatorji so običajno
označeni tudi kot „Deep Cycle“ ali „Marine“.
Akumulatorji te vrste so praviloma večji od drugih vrst akumulatorjev. Ta daje manj kratkotrajne
energije, vendar dolgotrajnejši prenos energije.
Ti akumulatorji prestanejo številne cikle praznjenja.
– 12 V AGM / Gel: Vrste akumulatorjev AGM so
praviloma dobri akumulatorji za Deep Cycle.
Imajo najdaljšo „življenjsko dobo“, če jih znova napolnite, preden se izpraznijo za več kot
50 %. V primeru popolnega izpraznjenja prestanejo približno 300 ciklov polnjenja. Vrsta
akumulatorja GEL je podobna vrsti akumulatorja AGM. Napetost je pri ponovnem polnjenju
nižja kot pri drugih svinčevo-kislinskih akumulatorji. Če za akumulator z gelom uporabite napačen polnilnik, lahko pričakujete zmanjšano
zmogljivost oz. krajšo življenjsko dobo.
– 6 V Regular: Ta način izberite za običajne
6-voltne akumulatorje.
Page 34

34 SI
Uporaba / Vzdrževanje in nega / Napotki v zvezi z garancijo in potekom servisa
Uporaba
Tipka Charge-Start 3: To tipko uporabite za
izbiro med naslednjimi možnostmi:
– Fast Charge: hitro polnjenje (priporočeno pri
nižjih temperaturah okolice / pozimi)
– Normal Charge: običajno polnjenje (običajna
hitrost)
– Start: daje kratkotrajnih 75 amperov, da pre-
mosti slabo napolnjen ali prazen akumulator
za namen zagona motorja
Pozor: Način lahko prekinete le tako, da izvlečete
omrežni kabel
9
.
Uporaba funkcije pomoči
pri zagonu
Obvezno izvedite vse priključke
,
kot je opisano in v pravem zaporedju. V nasprotnem
primeru se lahko elektronika vozila poškoduje.
Če postopate obratno, kot je opisano, delate na
lastno tveganje in odgovornost.
Pozor: Ta funkcija ni primerna za akumulatorje z
manj kot 45 Ah. Pri akumulatorjih z manj kot 45 Ah
bi lahko ta funkcija povzročila poškodovanje akumulatorja.
Pri dizelskih vozilih in bencinskih motorjih z veliko
prostornino so delno potrebne večje jakosti toka
kot 75 A za zagon.
Napotek: Polnilnik ima program za analizo, ki
ščiti akumulator zlasti pri funkciji pomoči pri zagonu
(npr. sulfatizacija, prevelik padec napetosti). Pri
močno izpraznjenih ali močno obremenjenih akumulatorjih naprava zaradi zaščite akumulatorja ne
vklopi pomoči pri zagonu. Med tem postopkom se
akumulator že polni z nižjimi tokovi (zasveti Charging). Na zaslonu ostane prikazano „0“. V tem primeru funkcija za pomoč pri zagonu ni mogoča. Ta
ščiti akumulator pred poškodbami. Šele nato lahko
napolnite akumulator. Tukaj lahko uporabite tudi
funkcijo „Fast Charge“ ali „Normal Charge“.
Priključite omrežni kabel 9 avtomobilskega
polnilnika v vtičnico.
Pritrdite rdečo priključno sponko 7 na pozitivni
pol akumulatorja. (Pozitivni pol je označen s
„+“ in rdečo oznako.)
Pritrdite črno priključno sponko 6 na negativni
pol akumulatorja. (Negativni pol je označen z
„-“ in črno oznako.)
Če sta priključni sponki pravilno priključeni, av-
tomobilski polnilnik samodejno izbere pravilno
vrsto akumulatorja. To lahko preverite v polju
za izbiro „Battery-Type“ in po potrebi spremenite s pritiskom na tipko Battery-Type
2
.
Zdaj s tipko Charge-Start 3 izberite funkcijo
„Start“. Avtomobilski polnilnik analizira zdaj
stanje napolnjenosti akumulatorja. Na zaslonu
je prikazano „0“.
Zdaj dajte vozilu kontakt. Na zaslonu se zdaj
začne odštevanje 5 sekund (od tega 2 sekundi
funkcija predteka oz. analize in 3 sekunde za
funkcijo pomoči pri zagonu s 75 A), če je potrebna pomoč pri zagonu prek avtomobilskega
polnilnika (to pred tem analizira avtomobilski
polnilnik). Med tem odštevanjem daje avtomobilski polnilnik kratkotrajnih 75 A, da premosti
akumulator za namene zagona motorja.
Nato sledi za ohranjanje zmogljivosti akumula-
torja 180 sekund premora. Zdaj se začne cikel
znova (2 sekundi funkcije predteka oz. analize
in 3 sekunde funkcije pomoči pri zagonu s
75 A / 180 sekund premora).
Za ločitev naprave najprej odstranite priključni
sponki (
6
/ 7) in nato izvlecite omrežni ka-
bel
9
.
Napotek: Če je akumulator povsem izpraznjen,
75 A ne zadostuje pri vseh vozilih za zagon motorja
(npr. pri dizelskih vozilih).
V tem primeru izberite s tipko Charge-Start 3
možnost „Fast Charge“ in napolnite akumulator
do 60 % (pri dizelskih motorjih odvzame energijo razžarjanje akumulatorja. Tukaj mora ostati 60 % po razžarjanju).
Napredku polnjenja lahko sledite na zaslonu, tako
da s tipko Digital Display
1
izberete možnost
„Batterie %“.
Ko je doseženih 60 %, znova uporabite funkcijo
za pomoč pri zagonu.
Pozor: Način končajte tako, da izvlečete omrežni
kabel
9
.
Page 35

35 SI
Zamenjava varovalke
Varovalka avtomobilskega polnilnika se lahko poškoduje zaradi npr. napake naprave, preobremenitve
itd.
Pred zamenjavo varovalke izvlecite omrežni
kabel
9
.
Odstranite pokrov varovalke 4, tako da ga
rahlo pritisnete od strani.
Z ustreznim viličastim ključem odvijte varovalko
4
in privijte novo.
Na koncu jo trdno zategnite in znova namestite
pokrov
4
.
Napotek: Če potrebujete novo varovalko, se
obrnite na naš servis (glejte poglavje Napotki
v zvezi z garancijo in potekom servisa).
Vzdrževanje in nega
Vedno izvlecite omrežni kabel 9 iz vtičnice,
preden izvajate dela na avtomobilskem polnilniku.
Naprava ne zahteva vzdrževanja. Izklopite na-
pravo. Površine iz kovine in umetne mase napra-
ve očistite s suho krpo.
V nobenem primeru ne uporabljajte topil ali
drugih agresivnih čistil.
Napotki v zvezi z garancijo
in potekom servisa
Garancija podjetja Creative Marketing
Consulting GmbH
Spoštovana stranka, za to napravo prejmete 3 leta
garancije od datuma nakupa. V primeru pomanjkljivosti tega izdelka, lahko do prodajalca izdelka
uveljavljate svoje zakonsko določene pravice. Teh
zakonskih pravic pa naša garancija, navedena
spodaj, ne omejuje.
Garancijski pogoji
Garancijski rok začne veljati od datuma nakupa.
Prosimo, da originalni blagajniški račun skrbno
shranite.
Ta dokument potrebujete kot dokazilo o nakupu. Če
se v roku treh let od datuma nakupa izdelka pojavi
napaka pri materialu ali izdelavi, bomo vaš izdelek
‒ po svoji lastni izbiri ‒ brezplačno popravili ali ga
zamenjali. Pogoj za uveljavljanje te garancijske storitve je, da nam pred potekom teh treh let predložite
okvarjeno napravo in blagajniški račun (blagajniški
izpisek) ter nam pisno na kratko opišete, katere
pomanjkljivosti naprava ima in kdaj so se pojavile.
Če naša garancija vašo okvaro pokriva, boste od
nas prejeli popravljen ali nov izdelek. S popravilom
ali zamenjavo izdelka pa ne začne teči novo garancijsko obdobje.
Obseg garancije
Naprava je bila izdelana skrbno, v skladu s strogimi
pravili o kakovosti in pred dobavo natančno preverjena.
Garancijska storitev velja za napake pri materialu
ali izdelavi. Ta garancija ne zajema delov izdelka,
ki so izpostavljeni normalni obrabi in ki se zato
lahko dojemajo kot obrabni deli, ali za poškodbe
lomljivih delov, npr. stikal, baterij ali delov, ki so izdelani iz stekla. Garancija preneha veljati, če je bil
izdelek poškodovan ali ni bil strokovno uporabljen
ali vzdrževan. Za ustrezno uporabo izdelka je potrebno natančno upoštevati vse napotke v originalnih
navodilih za uporabo. Obvezno se je treba izogibati namenom uporabe in načinom ravnanja, ki jih
originalna navodila za uporabo odsvetujejo ali
pred katerimi svarijo.
Izdelek je namenjen izključno za zasebno in ne za
poslovno uporabo. V primeru zlorabe ali nepravilnega ravnanja, pri uporabi sile ter pri posegih, ki jih
ni izvedla naša pooblaščena servisna poslovalnica,
garancija preneha veljati.
Page 36

36 SI
Napotki v zvezi z garancijo ... / Okoljevarstveni napotki in navodila za odlaganje
Postopek pri uveljavljanju
garancije
Za zagotovitev hitre obdelave vašega primera vas
prosimo, da sledite naslednjim napotkom:
Prosimo, da za vsa vprašanja pripravite blagajniški
račun in številko izdelka (npr. IAN) kot dokazilo o
nakupu. Številko artikla poiščite na tipski ploščici, na
gravuri, na prvi strani vaših navodil (levo spodaj) ali
na nalepki na zadnji ali spodnji strani. Če bi prišlo
do napak v delovanju ali drugih pomanjkljivosti, se
najprej po telefonu ali po elektronski pošti obrnite
na spodaj navedeni oddelek servisne službe.
Izdelek, za katerega se ugotovi, da je okvarjen, lahko
potem skupaj z dokazilom o nakupu (blagajniškim
računom) in navedbo o tem, katero pomanjkljivost
ima in kdaj je do nje prišlo, z brezplačno pošiljko
pošljete na naslov servisa, ki ga boste prejeli.
Opozorilo:
S strani www.lidl-service.com si lahko
naložite ta in mnoge druge priročnike,
videoposnetke izdelkov in programsko
opremo.
Dosegljivi smo tako:
SI
Ime: C.M.C. Creative Marketing &
Consulting GmbH
Servis in informacije
Media-Impeks d.o.o
Spletna stran: www.cmc-creative.de
E-pošta: service.si@cmc-creative.de
Telefon: 00386 2 796 3511
(normalna tarifa nem. tel. omrežja)
Sedež: Nemčija
IAN 277071
Upoštevajte, da spodnji naslov ni naslov servisa.
Najprej se obrnite na zgoraj navedeno servisno
službo.
Naslov:
C. M. C. GmbH
Katharina-Loth-Str. 15
DE-66386 St. Ingbert
NEMČIJA
Okoljevarstveni napotki in
navodila za odlaganje
Recikliranje surovin namesto
odlaganja smeti!
Napravo, dodatno opremo in embalažo
oddajte na okolju prijazno mesto za
recikliranje.
Avtomobilskega polnilnika ne odvrzite med gospodinjske odpadke, v ogenj ali v vodo. Če je mogoče,
je treba nedelujoče naprave reciklirati. Za pomoč
vprašajte svojega lokalnega prodajalca.
Kot končni uporabnik ste zakonsko
(Uredba o akumulatorjih) dolžni vrniti
vse izrabljene akumulatorje. Akumulatorji, ki vsebujejo škodljive snovi, so označeni
s sosednjimi simboli, ki opozarjajo na
prepoved odstranjevanje skupaj z gospodinjskimi odpadki. Oznake za odločilne težke kovine so: Cd = kadmij, Hg =
živo srebro, Pb = svinec.
Izrabljene akumulatorje odpeljite v obrat za recikliranje v svojem mestu ali skupnosti ali pa jih vrnite
prodajalcu. S tem boste izpolnili zakonske dolžnosti
in pomembno prispevali k varovanju okolja.
Page 37

37 SI
ES izjava o skladnosti
ES izjava o skladnosti
Mi,
C. M. C. GmbH
Odgovoren za dokument: Andre Scheer
Katharina-Loth-Str. 15
66386 St. Ingbert
z izključno odgovornostjo izjavljamo, da izdelek
Avtomobilski polnilnik s funkcijo pomoči
pri zagonu
Leto izdelave: 2016 / 43
IAN: 277071
Leto oznake s CE: 15
Model: POLNILNIK ZA AKUMULATORJE
MOTORNIH VOZIL S FUNKCIJO ZAGONA
VOZILA ULG 12 A2
zadovoljuje bistvene varnostne zahteve, ki so
določene v evropskih direktivah
ES direktiva o nizkonapetostni električni
opremi
2014 / 35 / ES
ES direktiva o elektromagnetni združljivosti
2014 / 30 / ES
Direktiva RoHS
2011 / 65 / ES
Zgoraj opisani predmet izjave izpolnjuje predpise
Direktive 2011 / 65 / EU Evropskega parlamenta
in Sveta z dne 8. junija 2011 o omejitvi uporabe
določenih nevarnih snovi v električnih in elektronskih
napravah
Za ocenitev skladnosti so bile uporabljeni naslednji
usklajeni standardi:
EN 60335-2-29:2004/A2:2010
EN 60335-1:2012/A11:2014
EN 62233:2008
EN 50498:2010
EN 55014-1:2006/A2:2011
EN 55014-2:1997/A2:2008
EN 61000-3-2:2014
EN 61000-3-3:2013
AfPS GS 2014:01 PAK
St. Ingbert, 31.8.2016
po naročilu. Andre Scheer
- Vodja zagotavljanja kakovosti -
Page 38

38 SI
Garancijski list
1. S tem garancijskim listom jamčimo C.M.C
GmbH, da bo izdelek v garancijskem roku ob
normalni in pravilni uporabi brezhibno deloval
in se zavezujemo, da bomo ob izpolnjenih spodaj navedenih pogojih odpravili morebitne pomanjkljivosti in okvare zaradi napak v materialu
ali izdelavi oz. po svoji presoji izdelek zamenjali
ali vrnili kupnino.
2. Garancija je veljavna na ozemlju Republike
Slovenije.
3. Garancijski rok za proizvod je 3 leta od dneva
izročitve balga. Dan izročitve blaga je enak
dnevom prodaje, ki je razviden iz računa.
4. Kupec je dolžan okvaro javiti pooblaščenemu
servisu oz. se informirati o nadaljnjih postopkih
na zgoraj navedeni telefonski številki. Svetujem
o
vam, da pred tem natančno preberete navodila
o sestavi in uporabi izdelka.
5. Kupec je dolžan pooblaščenemu servisu predložiti garancijski list in račun, kot potrdilo in
dokazilo o nakupu.
6. V primeru, da proizvod popravlja nepooblaščeni servis ali oseba, kupec ne more uveljavljati
zahtevkov iz te garancije.
7. Vzroki za okvaro oz. nedelovanje izdelka morajo biti lastnosti stvari same, in ne vzroki, ki so
zunaj proizvajalčeve oz. prodajalčeve sfere. Kupe
c ne more uveljavljati zahtevkov iz te garancije
,
če se ni držal priloženih navodil za sestavo in
uporabo izdelka ali, če je izdelek kakorkoli
spremenjen ali nepravilno vzdrževan.
8. Jamčimo servisiranje in rezervne dele za minimalno dobo, ki je zahtevana s strani zakonodaje.
9. Obrabni deli oz. potrošni material so izvzeti iz
garancije.
10. Vsi potrebni podatki za uveljavljanje garancije
se nahajajo na dveh ločenih dokumentih (gar
an-
cijski list, račun).
11. Ta garancija proizvajalca ne izključuje pravic
potrošnika, ki izhajajo iz odgovornosti prodajalca za napake na blagu.
C. M. C. GmbH
Katharina-Loth-Str. 15
DE-66386 St. Ingbert
NEMČIJA
00386 (0) 80 28 60
Garancijski list
Prodajalec:
Lidl d.o.o.k.d., Pod lipami 1, SI-1218 Komenda
Page 39

39 CZ
Seznam obsahu
Úvod ................................................................................................................................................. Strana 40
Používání v souladu s určením ........................................................................................................ Strana 40
Popis dílů ..........................................................................................................................................Strana 40
Technické údaje ...............................................................................................................................Strana 40
Obsah dodávky ............................................................................................................................... Strana 41
Bezpečnostní pokyny ........................................................................................................ Strana 41
Obsluha ......................................................................................................................................... Strana 44
Vlastnosti výrobku ............................................................................................................................ Strana 44
Připojení ............................................................................................................................................ Strana 44
Odpojení ..........................................................................................................................................Strana 44
Volba nabíjecího režimu ..................................................................................................................Strana 44
Použití funkce pomocného startování ............................................................................................. Strana 45
Výměna pojistky ............................................................................................................................... Strana 46
Údržba a ošetřování ..........................................................................................................Strana 46
Pokyny kzáruce a provádění servisu ................................................................Strana 46
Záruční podmínky ............................................................................................................................ Strana 47
Rozsah záruky ..................................................................................................................................Strana 47
Postup v případě uplatňování záruky ............................................................................................. Strana 47
Ekologické pokyny a informace pro odstranění do odpadu .......... Strana 48
EG prohlášení o konformitě ......................................................................................... Strana 48
Page 40

40 CZ
Úvod
Autonabíječka s funkcí
pomocného startu ULG 12 A2
Úvod
Srdečně blahopřejeme!
Rozhodli jste se pro kvalitní výrobek
naší firmy. Před prvním uvedením do
provozu se seznamte s výrobkem. Přečtěte si k tomu
pozorně n
ásledující originální návod k montáži a
bezpečnostn
í pokyny. Tento výrobek mohou do pro-
vozu uvádět pouze zaškolené osoby.
Používání v souladu s určením
Ultimate Speed ULG 12 A2 je nabíječka baterií
motorových vozidel s pulzním udržovacím nabíjením
(Chip-Software), vhodná k nabíjení a udržovacímu
nabíjení následujících olovnatých akumulátorů (baterií) s napětím 6 nebo 12 V s elektrolytickým roztokem, AGM baterií, kyselino-olovnatých baterií, Deep
Cycle (člunových baterií) nebo gelových baterií:
• Pro automobilové a motocyklové baterie s napě-
tím 12 V / 6 V a kapacitou 8–180 Ah
Mimo to můžete vybité baterie regenerovat (v závislosti na typu baterie). Nabíječka je vybavena
ochranným zapojením proti jiskření a přehřátí. Každé neodborné použití a jiné použití než ke stanovenému účelu vede ke ztrátě záruky. Za škody vzniklé
při použití k jinému než ke stanovenému účelu nepřevezme výrobce ručení. Přístroj není určen ke komerčnímu použití.
Upozornění: Nabíječkou není možné nabíjet
elektrická vozidla s vestavěnými akumulátorovými
bateriemi.
Popis dílů
1
Tlačítko digitálního displeje
2
Tlačítko typu baterie
3
Tlačítko startu nabíjení
4
Pojistka s krytem
5
„+“-připojovací kabel (červený)
6
Svorka „–“ pól (černá)
7
Svorka „+“ pól (červená)
8
„–“-připojovací kabel (černý)
9
Síťový kabel
10
Digitální displej
Technické údaje
Vstupní napětí: 230 V∼ 50 Hz
Zpětný proud*: < 5 mA (žádný AC vstup)
Jmenovité výstupní napětí: 6 V / 12 V
Nabíjecí proud: 2 A, 6 A, 12 A ± 10 %
Typ baterie s: 12 V / 6 V a kapacitou
8–180 Ah
Druh ochrany tělesa: IP 20
* = Zpětný proud je proud, který spotřebovává na-
bíječka z baterie, když není připojená na síť s
elektrickým proudem.
V tomto originálním návodu k provozu a na přístroji jsou použity následující
piktogramy:
Číst návod k provozu!
Pozor! Nebezpečí zásahu
elektrickým proudem!
Upozornění Pozor! Nebezpečí výbuchu!
Dbejte na výstrahy a řiďte se
bezpečnostními pokyny!
Obal i výrobek odstraňujte do odpadu
ekologicky!
Page 41
41 CZ
Úvod / Bezpečnostní pokyny
Obsah dodávky
Ihned po rozbalení zkontrolujte obsah
dodávky, přístroj a všechny díly, jestli nejsou poškozené. Vadný přístroj nebo díly
neuvádějte do provozu.
1 nabíječka Ultimate Speed ULG 12 A2
2 připojovací svorky (1 červená, 1 černá)
1 originální návod k provozu
Bezpečnostní pokyny
VÝROBEK SE NESMÍ DOSTAT
DO RUKOU DĚTÍ!
NEBEZPEČÍ! Zabraňte nebez-
pečí ohrožení života nebo zranění neodborným použiváním!
POZOR! Nepoužívejte nabíječku
s poškozeným kabelem, síťovým
kabelem nebo s poškozenou zástrčkou. Poškozené síťové kabely
znamenají nebezpečí ohrožení
života úrazem elektrickým proudem.
Poškozený síťový kabel nechte
opravit jen autorizovaným a školeným odborným personálem!
V případě potřebné opravy se
obraťte na servis ve Vaší zemi!
NEBEZPEČÍ ZÁSAHU
ELEKTRICKÝM
PROUDEM! U pevně namonto-
vané baterie zajistěte, aby nebylo
vozidlo v provozu! Zaparkujte
vozidlo, vypněte zapalování,
zatáhněte ruční brzdu (např. u
automobilu) nebo zajistěte lanem
(např. elektrický člun)!
NEBEZPEČÍ ZÁSAHU
ELEKTRICKÝM
PROUDEM! Odpojte nabíječku
od přívodu elektrického proudu.,
dříve než připojíte nebo odpojíte
připojovací svorky od baterie.
Připojte nejdříve svorku, která
není připojená na karoserii.
Připojte druhou svorku na karo-
serii, pokud možno co nejdále
od baterie a rozvodu paliva.
Teprve potom připojte nabíječku
na přívod elektrického proudu.
Po nabíjení odpojte nabíječku
od přívodu elektrického proudu.
Potom odpojte svorku od karoserie.
Nakonec odpojte svorku od
baterie.
NEBEZPEČÍ ZÁSAHU
ELEKTRICKÝM
PROUDEM! Dotýkejte se při-
pojovacího kabelu („–“ und
„+“) jen na izolovaných místech!
NEBEZPEČÍ ZÁSAHU
ELEKTRICKÝM
PROUDEM! Proveďte připojení
na baterii a do zásuvky s elektrickým proudem plně chráněné
před vlhkostí!
Page 42

42 CZ
Bezpečnostní pokyny
NEBEZPEČÍ ZÁSAHU
ELEKTRICKÝM
PROUDEM! Neprovádějte
montáž, údržbu nebo ošetřování
nabíječky pod proudem!
NEBEZPEČÍ ZÁSAHU
ELEKTRICKÝM
PROUDEM! Po ukončeném
nabíjení a udržovacím nabíjení
baterie pevně vestavěné ve vozidle odpojujte vždy nejdříve záporný připojovací kabel (černý)
nabíječky od záporného pólu
baterie.
Nenechávejte malé děti s nabí-
ječkou bez dohledu!
Děti nemohou odhadnout možná
nebezpečí při zacházení s elektrickými přístroji. Děti mají být
pod dozorem, aby si sartiklem
nehrály.
Tento přístroj mohou používat děti
starší osmi let, osoby se sníženými
fyzickými, smyslovými nebo duševními schopnosti nebo s nedostatečn
ými zkušenostmi a znalost-
mi, jestliže budou po
d dohledem
nebo byly poučeny o bezpečném
používání přístroje a chápou nebezpečí, která z jeho používání
vyplývají. S přístrojem si nesmějí
hrát děti. Děti nesmí provádět
čištění a údržbu bez dohledu.
NEBEZPEČÍ VÝBU-
CHU! Chraňte se před
výbuchem vysoce výbušného ply-
nu z baterie! Při nabíjení a udržovacím nabíjením baterií může
unikat plynný vodík. Oxyhydrogen
je výbušná směs plynného vodíku
a kyslíku. Při kontaktu s otevřeným
ohněm (plameny, žhavé uhlí nebo
jiskry) dojde k takzvané třaskavé
výbušné reakci! Provádějte nabíjení a udržovací nabíjení v dobře
větrané místnosti, chráněné před
povětrnostními vlivy. Zajistěte, aby
se při nabíjení nebo udržovacím
nabíjení nenacházel v blízkosti
otevřený oheň (plameny, žhnoucí
hmota nebo jiskry)!
NEBEZPEČÍ VÝBUCHU A
POŽÁRU! Zajistěte, aby se při
použití nabíječky nemohly vznítit
výbušné a hořlavé látky, např.
benzín nebo rozpouštědla!
VÝBUŠNÉ PLYNY! Vyloučit
plameny a jiskry!
Během nabíjení zajistit dostatečné
větrání.
Před nabíjením postavte baterii
na dobře větranou plochu. Jinak
se váha může poškodit.
NEBEZPEČÍ VÝBUCHU!
Zajistěte, aby se nedostal
kabel kladného pólu do kontaktu
Page 43

43 CZ
Bezpečnostní pokyny
s rozvodem paliva (např. benzínovou trubkou)!
NEBEZPEČÍ POLEPTÁNÍ!
Chraňte Vaše oči a pokožku při
zacházení s baterií před poleptáním kyselinou (kyselinou sýrovou)!
Noste ochranné brýle, oblečení
a rukavice odolávající kyselině!
Při kontaktu očí nebo pokožky s
kyselinou baterií ihned omyjte
postižená místa dostatečným
množstvím čisté vody a okamžitě
vyhledejte lékařskou pomoc!
Zabraňte zkratu při připojování
nabíječky na baterii. Připojujte
kabel záporného pólu jen na záporný pól baterie nebo na karoserii. Připojujte kabel kladného
pólu jen na kladný pól baterie!
Před připojením na přívod elek-
trického proudu 230 V∼ 50 Hz
zkontrolujte, jestli je rozvod vybavený uzemněním, pojistkou 16 A
a FI jističem! Jinak se váha může
poškodit.
Nevystavujte nabíječku vlivu tep-
la ohně, žáru nebo trvalé teplotě
přes 50 °C! Při vyšších teplotách
automaticky klesá výstupní výkon
nabíječky.
Používejte nabíječku jen s doda-
nými, originálními díly!
Nezakrývejte nabíječku žádnými
předměty! Jinak se váha může
poškodit.
Chraňte kontakty baterie před
zkratem!
Používejte nabíječku na nabíjení
nebo udržovací nabíjení jen nepoškozených olovnatých baterií
s napětím 6 resp. 12 V. (s elektrolytem nebo gelem)! Vopačném
případě hrozí nebezpečí poškození věcí.
Nepoužívejte nabíječku k nabíjení
a udržovácímu nabíjení nenabíjecích baterií. Vopačném případě hrozí nebezpečí poškození
věcí.
Nepoužívejte nabíječku k nabí-
jení a udržovácímu nabíjení poškozených nebo zmrzlých baterií!
Vopačném případě hrozí nebezpečí poškození věcí.
Informujte se o připojení nabíječ-
ky a ošetřování baterie v originálním návodu k provozu! Jinak
hrozí nebezpečí zranění nebo
poškození přístroje.
Informujte se o připojení nabíječ-
ky na baterii, která je trvale připojená ve vozidle, v zájmu dodržení elektrické bezpečnosti a
správné údržby pomocí originálního návodu k provozu! Jinak
hrozí nebezpečí zranění nebo
věcných škod.
Page 44
44 CZ
Bezpečnostní pokyny / Obsluha
Nepoužívanou nabíječku odpojte,
z důvodu ochrany životního
prostředí, od sítě! Vezměte na
vědomí, že i standby režim
spotřebovává proud.
Dávejte pozor co děláte a buďte
stále opatrní. Postupujte rozumně,
neuvádějte nabíječku do provozu,
jestliže jste nekoncentrovaní nebo
se necítíte dobře.
Obsluha
Před prácí na přístroji nejdříve vytáhněte zástrčku
ze zásuvky.
NEBEZPEČÍ ZÁSAHU ELEKTRICKÝM
PROUDEM!
NEBEZPEČÍ VĚCNÉ ŠKODY!
NEBEZPEČÍ ZRANĚNÍ!
Vlastnosti výrobku
Tento přístroj je koncipovaný pro nabíjení různorodých SLA baterií (zapečetěné kyselino-olovnaté
baterie), které jsou převážně používané v osobních
automobilech, motocyklech a jiných vozidlech. Mohou to být např. WET baterie (s tekutým elektrolytem),
gelové baterie (s gelovým elektrolytem) nebo AMG
baterie (s materiály pohlcujícími elektrolyt). Speciální
koncepce přístroje (jmenovaná také třístupňová strategie nabíjení) umožňuje nabití baterie až skoro na
100 % její kapacity. Kromě toho je možné baterii
připojit na nabíječku na delší dobu a tím ji udržovat
v optimálním stavu.
Připojení
Před nabíjením a udržovacím nabíjením baterie
pevně vestavěné ve vozidle odpojujte vždy nejdříve záporný připojovací kabel (černý) nabíječky od záporného pólu baterie. Záporný pól
baterie je zpravidla spojený s karoserií vozidla.
Nakonec odpojte kladný připojovací kabel
(červený) vozidla od záporného pólu baterie.
P
řipojte nejdříve kladnou svorku „+“ (červená) 7
nabíječky na kladný pól baterie „+“.
Připojte zápornou svorku „-“ (černá) 6 nabíječ-
ky na záporný pól baterie „-“. Připojte nabíječku kabelem
9
do zásuvky elektrického proudu.
Upozornění: Jestliže jsou svorky správně připojené, ukáže displej hodnotu napětí a objeví se nápis
„connected“. Při neprávném připojení pólů ukáže
displej 0.0 a nápis „connected“ se neobjeví.
Odpojení
Odpojte nabíječku od přívodu elektrického proudu
.
Odpojte zápornou svorku „-“ (černá) 6 nabí-
ječky od záporného pólu baterie „-“.
Odpojte kladnou svorku „+“ (červená) 7 na-
bíječky od kladného pólu baterie „+“.
Připojte zase připojovací kabel kladného pólu
vozidla na kladný pól baterie.
Připojte zase připojovací kabel záporného pólu
vozidla na záporný pól baterie.
Volba nabíjecího režimu
Můžete navolit různé režimy nabíjení pro nabíjení
různých baterií při rozdílných teplotách okolního
prostředí. Ve srovnání s běžnými nabíječkami má
tento přístroj navíc speciální funkci pro nové použití
vybité baterie nebo akumulátoru. Můžete znovu nabít i úplně vybitou baterii nebo akumulátor. Ochrana
proti chybnému zapojení a zkratu zajišťuje bezpečné nabíjení. Vestavěná elektronika nezapíná nabíječku ihned po připojení baterie, ale teprve až se
navolí nabíjecí režim.
Při spojení svorek s baterií a připojení přístroje na
proud svítí na digitálním displeji
10
nápis „Connec-
Page 45

45 CZ
Obsluha
ted“. Po navolení nabíjecího režimu svítí „Charging“.
Po ukončeném nabíjení svítí „Charged“.
Jestliže digitální displej neustále svítí, ještě než je baterie úplně nabitá, znamená to že došlo k poruše.
V tomto případě ještě jednou zkontrolujte kontakt
svorek
6, 7
s baterií a jestli jste zvolili správný typ baterie. Jestliže i nadále displej svítí, pak
je pravděpodobně vadná baterie.
Tlačítko digitálního displeje
1
: Umožňuje
volbu mezi digitálním zobrazením napětí a průběhu
nabíjení v procentech (Battery %). Použijte toto tlačítko pro volbu následujících zobrazení:
– baterie %: ukazuje stav nabíjení připojené
baterie v procentech.
– napětí: ukazuje napětí připojené baterie.
– alternátor %: výstupní výkon v procentech
Tlačítko typu baterie
2
: toto tlačítko použijte
pro nastavení typu baterie, kterou chcete nabíjet.
Zde můžete volit mezi typy baterií. Před nabíjením
je nezbytně nutné nastavit správný typ baterie:
– 12 V Regular: Tyto baterie (kyselino-olovnaté
baterie) jsou používány zpravidla v osobních a
nákladních automobilech i motocyklech. Mají
odvzdušňovací víčka a jsou často označovány
jako „nenáročné na údržbu“ nebo „bezúdržbové“. Tento typ baterie je koncipovaný pro rychlý
přenos energie (např. při startu motoru). „Regular“ baterie se nemají používat pro „Deep Cycle“.
– 12 V Deep Cycle: Tyto baterie jsou značeny jako
„Deep Cycle“ nebo „Marine“. Baterie tohoto
typu jsou zpravidla větší než ostatní typy baterií.
Tyto baterie dodávají nižší krátkodobou energii,
ale zajišťují dlouhodobější přenos energie. Tyto
baterie vydrží mnoho vybíjecích cyklů.
– 12 V AGM / Gel: Baterie typu AMG jsou zpra-
vidla dobré Deep Cycle baterie. Mají nejlepší
„životnost“, jestliže se vždy znovu nabíjí dříve,
než se vybijí na více než 50 %. Při úplném vybíjení vydrží asi 300 nabíjecích cyklů. Baterie
typu GEL je podobná jako baterie typu AGM.
Při nabití je její napětí nižší než u ostatních kyselino-olovnatých baterií. Jestliže použijete pro
GEL baterii nesprávnou nabíječku, pak má
baterie nižší výkon resp. zkrácenou životnost.
– 6 V Regular: Tento režim zvolte pro běžné
baterie s napětím 6 V.
Tlačítko startu nabíjení
3
: Použijte toto tlačítko
pro volbu následujících nabíjení:
– Fast Charge: rychlé nabíjení (doporučené při
nízkých venkovních teplotách / v zimě)
– Normal Charge: normální nabíjení (normální
rychlost)
– Start: dodává Vám krátkodobě 75 A, pro pře-
mostění slabě nabité nebo vybité baterie při
startu motoru
Pozor: Režim je možné ukončit vytáhnutím síťového
kabelu 9.
Použití funkce
pomocného startování
Provádějte všechna připojení jak
bylo popsáno a ve správném pořadí. Jinak může dojít k poškození elektroniky vozidla.
Při opačném než popsaném postupu jednáte na
vlastní nebezpečí a zodpovědnost.
Pozor: Tato funkce není vhodná pro baterie menší
než 45 Ah. Baterie menší než 45 Ah může tato funkce poškodit.
Naftová a velkoobsahová vozidla potřebují při startu vyšší proud než 75 Ah.
Poznámka: Nabíječka je vybavena analyzujícím
programem, který chrání baterii, obzvlášť při fukci
pomocného startování, před poškozením (např. sulfatace, přílišný pokles napětí). Přístroj nezapne pomocné startování, jestliže je baterie silně vybitá
nebo namáhaná. Během tohoto postupu se nabíjí
baterie již nizkými proudy (rozsvítí se Charging). Na
displeji zůstává „0“. V tomto případě není funkce
pomocného startování možná. Toto chrání baterii
před poškozením. Baterie se musí potom nejdříve
nabít. K tomu je také možné použít funkci „Fast
Charge“ nebo „Normal Charge“.
Připojte nabíječku kabelem 9 do zásuvky elek-
trického proudu.
Page 46

46 CZ
Obsluha / Údržba a ošetřování / Pokyny kzáruce a provádění servisu
Připevněte červenou svorku 7 na kladný pól
Vaší baterie. (Kladný pól je označený „+“ a
červeně).
Připevněte černou svorku 6 na záporný pól
Vaší baterie. (Záporný pól je označený „-“ a
černou barvou).
Jestliže jsou svorky správně připojené zvolí na-
bíječka automaticky i správný typ baterie. Volbu
typu baterie můžete zkontrolovat v políčku „Battery-Type“ a popřípadě změnit tlačítkem pro typ
baterie
2
.
Nyní zvolte tlačítkem Charge-Start 3 funkci
„Start“. Nabíječka začne analyzovat stav baterie. Displej ukáže „0“.
Nyní zapněte zapalování vozidla. Na displeji
se rozeběhne 5 vteřinový countdown, (z toho
2 vteřiny náběhová resp. analyzující funkce a
3 vteřiny funkce pomocného startování s 75 A),
jestliže je zapotřebí podpora startování nabíječkou (tato je nabíječkou předem analyzováno).
Během Countdowns dodává nabíječka krátkodobě 75 A pro přemostění baterie při startování
motoru. Potom následuje přestávka po dobu 180
vteřin pro šetření baterie. Nyní začíná cyklus od
začátku (2 vteřinny náběhová a analyzující funkce, 3 vteřiny funkce pomocného startování s
75 A / 180 vteřin přestávka).
Pro odpojení přístroje sejměte nejdříve svorky
(
6
/ 7) a nakonec vytáhněte síťový kabel 9.
Poznámka: Jestliže je baterie úplně vybitá nestačí
75 A u všech vozidel ke startu motoru (např. u naftových motorů).
V tomto případě, prosíme, navolte tlačítkem star-
tu nabíjení
3
opci „Fast Charge“ a nabijte
baterii na 60 % ( u naftových motorů spotřebovává předžhavení energie z baterie). Zde je
zapotřebí kapacita 60 % po předžhavení).
Průběh nabíjení můžete sledovat na displeji, po navolení „Baterie %“ na displeji pomocí tlačítka pro
digitální displej
1
.
Po dosažení kapacity 60 % zaveďte znovu
fuknci pomcného startování.
Pozor: Ukončete režim vytažením síťového kabelu
9
.
Výměna pojistky
Pojistka nabíječky může být poškozena např. poruchou přístroje, přetížením, atd.
Dříve než začnete vyměňovat pojistku vytáhněte
síťový kabel
9
.
Sejměte kryt pojistky 4 mírným zatlačením na
stranách.
Odšroubujte vhodným otevřeným klíčem pojistku
4
a nasaďte novou pojistku.
Nakonec ji pevně zašroubujte a nasaďte zpátky
kryt
4
.
Poznámka: V případě, že potřebujete novou
pojistku, prosíme, obraťte se na náš servis (viz
kapitola s pokyny k záruce a provádění servisu).
Údržba a ošetřování
Před prací na nabíječce vždy vytáhněte síťový
kabel
9
ze zásuvky.
Přístroj nevyžaduje údržbu. Vypněte přístroj.
Kovové a umělohmotné povrchy přístroje čistěte
suchým hadrem.
V žádném případě nepoužívejte prostředky
obsahující rozpouštědla nebo žíravé čisticí prostředky.
Pokyny kzáruce
a provádění servisu
Záruka od Creative Marketing
Consulting GmbH
Vážená zákaznice,
vážený zákazníku, na tento výrobek dostáváte 3 ro
ky
záruku ode dne zakoupení. V případě závad máte
možnost uplatnění zákonných práv vůči prodejci.
Vaše práva ze zákona nejsou omezena naší níže
uvedenou zárukou.
Page 47

47 CZ
Pokyny kzáruce a provádění servisu
Záruční podmínky
Záruční lhůta začíná běžet od data zakoupení.
Uschovejte si dobře originál pokladní stvrzenky.
Tuto stvrzenku budete potřebovat jako doklad o
zakoupení. Pokud se do 3 let od data zakoupení tohoto výrobku vyskytne vada materiálu nebo výrobní
vada, výrobek vám – podle našeho rozhodnutí –
bezplatně opravíme nebo vyměníme. Předpokladem pro poskytnutí záruky je předložení vadného
výrobku a pokladní stvrzenky během 3 let záruky a
písemný popis závady s dobou, kdy se vyskytla.
Pokud vada spadá do naší záruky, obdržíte od nás
opravený nebo nový výrobek. Opravou ani výměnou
výrobku nezačíná nová záruční lhůta.
Rozsah záruky
Výrobek byl vyroben snejvyšší pečlivostí podle přísných kvalitativních směrnic a před odesláním prošel
výstupní kontrolou.
Záruka platí na vady materiálu a výrobní vady.
Tato záruka se nevztahuje na části výrobku, které
jsou vystaveny běžnému opotřebení a které lze proto chápat jako rychle opotřebitelné součásti, nevztahuje se na poškození rozbitných částí, např. spínačů,
baterií nebo takových, které jsou zhotoveny ze skla.
Tato záruka zaniká, jestliže se výrobek poškodí, neodborně použil nebo neobdržel pravidelnou údržbu
.
K odbornému používání výrobku je zapotřebí přesně dodržovat pokyny uvedené v originálním návodu
k provozu. Je bezpodmínečně nutné vyhnout se účelům použití a jednáním, od kterých se v návodu k
obsluze odrazuje nebo před kterými návod k obsluze varuje.
Výrobek je určen pouze pro soukromé, nikoliv komerční použití. Vpřípadě nesprávného a neodborného zacházení, použití násilí a zásahů, které nebyly
provedeny našimi autorizovanými servisními provozovnami, záruční nároky zanikají.
Postup v případě
uplatňování záruky
Pro zajištění rychlého zpracování Vašeho případu
se řiďte následujícími pokyny:
Pro všechny Vaše požadavky si připravte pokladní
stvrzenku a číslo výrobku (např. IAN) jako doklad
o zakoupení. Číslo výrobku naleznete na typovém
štítku, rytině, na titulním stránce návodu (vlevo dole)
nebo na nálepce na zadní nebo spodní straně. Pokud se vyskytnou funkční vady, kontaktujte nejprve
telefonicky nebo e-mailem níže uvedený servis.
Výrobek s registrovanou závadou pak můžete, spolu s pokladní stvrzenkou, popisem závady a údajem
kdy se vyskytla nezplatně zaslat na adresu servisu,
kterou vám sdělilo servisní oddělení.
Upozornění:
Na www.lidl-service.com si můžete stáhnout tento a ostatní manuály, videa výrobku a software.
Takto nás můžete kontaktovat:
CZ
Název: C.M.C. Creative Marketing &
Consulting GmbH Service CZ
Internetová adresa:
www.cmc-creative.de
E-mail: info@bohemian-dragomans.com
Telefon: +49 (0) 6894 9989752
(běžný tarif německé pevné sítě)
Sídlo: Německo
IAN 277071
Vezměte laskavě na vědomí, že následující adresa
není adresa servisu.
Nejprve kontaktujte výše uvedené servisní středisko.
Adresa:
C. M. C. GmbH
Katharina-Loth-Str. 15
DE-66386 St. Ingbert
NĚMECKO
Page 48

48 CZ
Ekologické pokyny a informace pro ... / EG prohlášení o konformitě
Ekologické pokyny a informace
pro odstranění do odpadu
Recyklace surovin místo
odhození do odpadu!
Výrobek, příslušenství a obal
mají být recyklovány.
Neodhazujte nabíječku do domovního odpadu, ohně
nebo do vody. Pokud je to možné, měly by být vadné
nebo nepotřebné výrobky recyklovány. Požádejte o
pomoc Vašeho místního prodejce.
Jako spotřebitel jste podle zákona povinný
(ustanovení k bateriím) všechny upotřebené baterie odevzdávat. Baterie obsahující
škodlivé látky jsou označeny vedle uvedeným symbolem, upozorňujícím na zákaz
jejich odstranění do domácího odpadu.
Označení pro dotyčné těžké kovy jsou:
Cd = kadmium, Hg = rtuť, Pb = olovo.
Odevzdejte použité baterie do sběrny ve Vašem
městě nebo obci anebo je vraťte prodejci. Splníte
tím povinnost ze zákona a přispějete k ochraně životního prostředí.
EG prohlášení o konformitě
My, firma
C. M. C. GmbH
Za dokumentaci zodpovědný pracovník:
Andre Scheer
Katharina-Loth-Str. 15
66386 St. Ingbert
prohlašujeme na vlastní zodpovědnost, že výrobek
Autonabíječka s funkcí pomocného startu
Rok výroby: 2016 / 43
IAN: 277071
Rok značení zkratkou CE: 15
Model: AUTONABÍJEČKA S FUNKCÍ
POMOCNÉHO STARTU ULG 12 A2
odpovídá podstatným ochranným požadavkům,
které jsou stanoveny v evropské směrnici
ES Směrnice o nízkém napětí
2014 / 35 / EU
EG směrnice k elektromagnetické
snášenlivosti
2014 / 30 / EU
RoHS směrnice
2011 / 65 / EU
Výše popsaný předmět prohlášení splňuje předpisy
ve směrnici 2011 / 65 / EU Evropského parlamentu
a Rady z 08. června 2011 o omezení použití určitých nebezpečných látek v elektrických a elektronických přístrojích
které jsou v obsahu stanoveny.
K posouzení shody byly použité následující
harmonizující normy:
EN 60335-2-29:2004/A2:2010
EN 60335-1:2012/A11:2014
EN 62233:2008
EN 50498:2010
EN 55014-1:2006/A2:2011
EN 55014-2:1997/A2:2008
EN 61000-3-2:2014
EN 61000-3-3:2013
AfPS GS 2014:01 PAK
St. Ingbert, 31.08.2016
pověřen Andre Scheer
- vedoucí kontroly kvality -
Page 49

49 SK
Zoznam obsahu
Úvod ................................................................................................................................................. Strana 50
Používanie v súlade s určeným účelom .......................................................................................... Strana 50
Popis častí ......................................................................................................................................... Strana 50
Technické údaje ...............................................................................................................................Strana 50
Obsah dodávky ............................................................................................................................... Strana 51
Bezpečnostné upozornenia .......................................................................................... Strana 51
Obsluha ......................................................................................................................................... Strana 54
Vlastnosti produktu ...........................................................................................................................Strana 54
Pripojenie .......................................................................................................................................... Strana 54
Odpojenie ........................................................................................................................................ Strana 55
Výber nabíjacieho režimu ...............................................................................................................Strana 55
Používanie funkcie pomocného štartovania ................................................................................... Strana 56
Výmena poistky ................................................................................................................................ Strana 57
Údržba a starostlivosť ...................................................................................................... Strana 57
Informácie týkajúce sa záruky a servisu ..........................................................Strana 57
Záručné podmienky ......................................................................................................................... Strana 57
Rozsah záruky ..................................................................................................................................Strana 57
Postup v prípade poškodenia v záruke .......................................................................................... Strana 58
Ekologické pokyny a údaje týkajúce sa likvidácie ..................................Strana 58
EG-Konformitné vyhlásenie ..........................................................................................Strana 58
Page 50

50 SK
Úvod
Autonabíjačka s pomocným
štartovaním ULG 12 A2
Úvod
Blahoželáme!
Rozhodli ste sa pre veľmi kvalitný vý-
robok od našej spoločnosti. Pred prvým
uvedením do prevádzky sa oboznámte s výrobkom.
Prečítajte si k tomu pozorne nasledujúci originálny
návod na používanie a bezpečnostné pokyny. Uvedenie výrobku do prevádzky môžu realizovať iba
poučené osoby.
Používanie v súlade
s určeným účelom
Ultimate Speed ULG 12 A2 je nabíjačka autobatérií
s impulzným udržiavacím nabíjaním (Chip-Software),
ktorá je vhodná pre nabíjanie a udržiavacie nabíjanie
nasledujúcich 6 V alebo 12 V olovených akumulátorových batérií (batérií) s elektrolytom, AGM batérií, kyselino-olovených batérií, Deep Cycle (trakčných
batérií) alebo gelových batérií:
• Pre autobatérie osobných vozidiel a motocyklov
s 12 V / 6 V a 8-180 Ah kapacitou
Okrem toho môžete regenerovať vybité batérie (závisle od typu batérií). Nabíjačka autobatérií dispo
nuje
ochranným spínačom proti tvorbe iskier a prehriatiu.
Každé používanie, ktoré nie je v súlade s určeným
účelom, alebo neodborné používanie vedie k strate
garančného nároku. Výrobca nepreberá ručenie
za škody vzniknuté používaním, ktoré je v rozpore s
určeným účelom. Zariadenie nie je určené na komerčné používanie.
Poznámka: Pomocou nabíjačky autobatérií nemôžu byť nabíjané elektrovozidlá so zabudovanou
akumulátorovou batériou.
Popis častí
1
Tlačidlo digitálny displej
2
Tlačidlo typ batérie
3
Tlačidlo Charge-Start
4
Poistka s krytom
5
„+“-pólový pripojovací kábel (červený)
6
„–“-pólová pripojovacia svorka (čierna)
7
„+“-pólová pripojovacia svorka (červená)
8
„–“-pólový pripojovací kábel (čierny)
9
Sieťový kábel
10
Digitálny displej
Technické údaje
Vstupné napätie: 230 V∼ 50 Hz
Spätný prúd*: < 5 mA (žiadny AC-
vstup)
Menovité výstupné napätie: 6 V / 12 V
Nabíjací prúd: 2 A, 6 A, 12 A ± 10 %
Typ batérie s: 12 V / 6 V a 8–180 Ah
kapacitou
Druh ochrany schránky: IP 20
V tomto originálnom návode na obsluhu / na prístroji sú používané nasledujúce
piktogramy:
Prečítajte si originálny návod na
používanie!
Pozor! Nebezpečenstvo zásahu elektrickým prúdom!
Upozornenie Pozor! Nebezpečenstvo explózie!
Rešpektujte výstražné a bezpečnostné
upozornenia!
Obal a zariadenie ekologicky zlikvidujte!
Page 51
51 SK
Úvod / Bezpečnostné upozornenia
* = Spätný prúd je označenie pre prúd, ktorý nabí-
jačka spotrebuje z batérie, keď nie je zapojený
sieťový prúd.
Obsah dodávky
Bezprostredne po vybalení prístroja
skontrolujte obsah dodávky a prístroj
ako aj všetky časti ohľadom poškodení.
Defektný prístroj neuvádzajte do prevádzky.
1 nabíjačka Ultimate Speed ULG 12 A2
2 pripojovacie svorky s rýchlym kontaktom
(1 červená, 1 čierna)
1 originálny návod na používanie
Bezpečnostné
upozornenia
PRODUKT SA NESMIE DOSTAŤ
DO RÚK DEŤO
M!
NEBEZPEČENSTVO! Zabráňte
nebezpečenstvu ohrozenia života
a poranenia v dôsledku neodborného používania!
POZOR! Prístroj neprevádzkujte
s poškodeným káblom, sieťovým
káblom alebo sieťovou zástrčkou.
Poškodené sieťové káble predstavujú nebezpečenstvo ohrozenia života zásahom elektrickým
prúdom.
Sieťový kábel nechajte v prípade
poškodenia opraviť iba autorizovaným a školeným odborným
personálom! V prípade potrebnej
opravy kontaktujte autorizovaný
servis vo Vašom kraji!
NEBEZPEČENSTVO
ZÁSAHU ELEKTRIC-
KÝM PRÚDOM! V prípade
batérie pevne namontovanej vo
vozidle zabezpečte, aby vozidlo
nebolo v prevádzke! Vypnite zapaľovanie a umiestnite vozidlo
do parkovacej polohy, so zatiahnutou parkovacou brzdou (napr.
osobný automobil) alebo upevneným lanom (napr. elektročln)!
NEBEZPEČENSTVO
ZÁSAHU ELEKTRIC-
KÝM PRÚDOM! Predtým, ako
pripojíte pripojovacie svorky na
batériu alebo ich odpojíte, odpojte
nabíjačku autobatérií zo siete.
Najskôr zapojte pripojovaciu
svorku, ktorá nie je zapojená na
karosérii.
Pripojte druhú pripojovaciu svorku
vzdialenú od batérie a benzínového rozvodu na karosériu.
Až potom zapojte nabíjačku
autobatérií do elektrickej siete.
Po nabíjaní odpojte nabíjačku
autobatérií od elektrickej siete.
Až potom odpojte pripojovaciu
svorku z karosérie. Následne
odpojte pripojovaciu svorku z
batérie.
Page 52

52 SK
Bezpečnostné upozornenia
NEBEZPEČENSTVO
ZÁSAHU ELEKTRIC-
KÝM PRÚDOM! Pólové
pripojovacie káble („–“ a „+“)
uchopujte výlučne na izolovaných oblastiach!
NEBEZPEČENSTVO
ZÁSAHU ELEKTRIC-
KÝM PRÚDOM! Zapojenie na
batériu a do zásuvky sieťového
prúdu uskutočnite úplne chránene
pred vlhkosťou.
NEBEZPEČENSTVO
ZÁSAHU ELEKTRIC-
KÝM PRÚDOM! Montáž,
údržbu a starostlivosť o nabíjačku autobatérií vykonávajte bez
sieťového prúdu!
NEBEZPEČENSTVO
ZÁSAHU ELEKTRIC-
KÝM PRÚDOM! Po ukončení
procesu nabíjania a udržiavacieho nabíjania, v prípade batérie stále zapojenej vo vozidle,
najskôr odpojte mínusový pól
pripojovacieho kábla (čierny)
nabíjačky autobatérií z mínusového pólu batérie.
Nikdy nenechávajte malé deti
a deti bez dozoru s nabíjačkou
autobatérií!
Deti ešte nedokážu rozoznať
možné nebezpečenstvá pri kontakte s elektroprístrojmi. Deti by
mali byť pod dozorom, aby bolo
zabezpečené, že sa s prístrojom
nebudú hrať.
Tento prístroj môžu používať deti
od 8 rokov, ako aj osoby so zníženými psychickými, senzorickými
alebo duševnými schopnosťami
alebo s nedostatkom skúseností
a vedomostí, ak sú pod dozorom,
alebo ak boli poučené ohľadom
bezpečného používania prístroja,
a ak porozumeli nebezpečenstvám spojeným s jeho používaním. Deti sa s prístrojom nesmú
hrať. Čistenie a údržbu nesmú
vykonávať deti bez dozoru.
NEBEZPEČENSTVO
EXPLÓZIE! Chráňte sa
pred vysokovýbušnou reakciou
výbušného plynu! Pri nabíjaní a
udržiavacom nabíjaní môže z
batérie prúdiť plynný vodík. Výbušný plyn je explozívna zmes
plynného vodíka a kyslíka. Pri
kontakte s otvoreným ohňom
(plamene, žiara alebo iskry) nasleduje takzvaná výbušná reakcia!
Proces nabíjania a udržiavacieho
nabíjania uskutočnite v miestnosti chránenej pred poveternostnými vplyvmi a s dobrým vetraním.
Zabezpečte, aby pri procese nabíjania a udržiavacieho nabíjania
nebolo prítomné žiadne otvorené
Page 53

53 SK
Bezpečnostné upozornenia
svetlo (plameňe, žiara alebo iskry)!
NEBEZPEČENSTVO EXPLÓ-
ZIE A POŽIARU! Zabezpečte,
aby pri používaní vozidlovej nabíjačky nemohlo dôjsť k zapáleniu výbušných a horľavých látok,
napr. benzínu alebo rozpúšťadiel!
EXPLOZÍVNE PLYNY! Za-
bráňte vzniku plameňov a iskier!
Počas nabíjania zabezpečte
dostatočné vetran
ie.
Počas procesu nabíjania postavte
batériu na dobre vetranú plochu.
V opačnom prípade sa môže
prístroj poškodiť.
NEBEZPEČENSTVO
EXPLÓZIE! Zabezpečte,
aby plus-pólový pripojovací ká-
bel nebol v kontakte s rozvodom
pohonných látok (napr. rozvod
benzínu)!
NEBEZPEČENSTVO PORA-
NENIA! Pri kontakte s batériou
chráňte Vaše oči a pokožku pred
poleptaním kyselinou (kyselina
sírová)!
Používajte: kyselinovzdorné
okuliare, odev a rukavice! Ak sa
oči alebo pokožka dostanú do
kontaktu s kyselinou sírovou,
vypláchnite postihnuté miesta
väčším množstvom tečúcej, čistej
vody a okamžite vyhľadajte lekára!
Zabráňte elektrickému skratu pri
zapojovaní nabíjačky na batériu.
Mínusový pripojovací kábel zapájajte výlučne na mínusový pól
batérie príp. na karosériu. Plusový pripojovací kábel zapájajte
výlučne na plusový pól batérie!
Pred zapojením do elektrickej
siete sa uistite, že je sieťový prúd
podľa predpisov vybavený s
230 V∼ 50 Hz, uzemneným nulovým vodičom, 16 A poistkou a
FI-spínačom (ochranný spínač
chybný prúd)! V opačnom prípade sa môže prístroj poškodiť.
Nevystavujte nabíjačku autoba-
térií blízkosti ohňa, horúčavy a
dlhotrvajúcemu pôsobeniu teploty
nad 50 °C! Pri vysokých teplotách automaticky klesá výstupný
výkon automobilovej batérie.
Automobilovú nabíjačku použí-
vajte iba s dodanými originálnymi
dielmi!
Neprikrývajte automobilovú na-
bíjačku predmetmi! V opačnom
prípade sa môže prístroj poškodiť.
Chráňte elektrické kontaktné
plochy batérie pred skratom!
Automobilovú nabíjačku použí-
vajte výlučne na nabíjanie a udržiavacie nabíjanie nepoškodených
6 V- / 12 V-olovených batérií (s
elektrolytom alebo gelom)! Inak
Page 54

54 SK
Bezpečnostné upozornenia / Obsluha
môže dôjsť k vecnému poškodeniu.
Nabíjačku
autobatérií nepoužívajte na nabíjanie a udržiavacie
nabíjanie nedobíjateľných batérií.
Inak môže dôjsť k vecnému poškodeniu.
Nabíjačku autobatérií nepouží-
vajte na nabíjanie a udržiavacie
nabíjanie poškodenej alebo
zamrznutej batérie! Inak môže
dôjsť k vecnému poškodeniu.
Pred zapojením nabíjačky sa in-
formujte o údržbe batérie na
základe originálneho návodu na
používanie! V opačnom prípade
vzniká nebezpečenstvo poranenia a / alebo nebezpečenstvo,
že sa produkt poškodí.
Pred zapojením nabíjačky na
batériu, ktorá je neustále zapojená vo vozidle, sa informujte o
dodržiavaní elektrickej bezpečnosti a údržbe batérie na základe
originálneho návodu na používanie vozidla! V opačnom prípade vzniká nebezpečenstvo
poranenia a / alebo nebezpečenstvo, že vzniknú vecné škody.
V prípade nepoužívania odpojte
aj z ekologických dôvodov nabíjačku autobatérií z elektrickej
siete! Myslite na to, že i Standby-prevádzka spotrebováva prúd.
Dávajte vždy pozor na to, čo
robíte a buďte neustále opatrný.
Vždy postupujte rozumne a neuvádzajte nabíjačku autobatérií
do prevádzky, keď ste nesústredený alebo sa necítite dobre.
Obsluha
Pred vykonaním prác na automobilovej nabíjačke
vytiahnite sieťovú zástrčku zo zásuvky.
NEBEZPEČENSTVO ZÁSAHU ELEKTRICKÝM
PRÚDOM!
NEBEZPEČENSTVO VECNÝCH ŠKÔD!
NEBEZPEČENSTVO PORANENIA!
Vlastnosti produktu
Tento prístroj je koncipovaný pre množstvo SLA-batérií (zapečatené olovo-kyselinové batérie), ktoré sú
najrozšírenejšie používané v osobných vozidlách,
motocykloch a iných vozidlách. Môžu to byť napr.
WET- (s tekutým elektrolytom), GELOVÉ (s gelovým
elektrolytom) alebo AGM-batérie (s podložkami
absorbujúcimi elektrolyt). Špeciálna koncepcia prístroja (nazývaná aj „trojstupňová nabíjacia stratégia“) umožňuje znovunabíjanie batérie na takmer
100 % jej kapacity. Ďalej môže nasledovať dlhodobé zapojenie batérie na nabíjačku autobatérií,
aby bola batéria pokiaľ možno vždy udržiavaná v
optimálnom stave.
Pripojenie
Pred procesom nabíjania a udržiavacieho na-
bíjania v prípade batérie stále zapojenej vo
vozidle najskôr odpojte mínusový pól pripojovacieho kábla (čierny) vozidla z mínusového
pólu batérie. Mínusový pól batérie je spravidla
spojený s karosériou vozidla.
Následne odpojte plusový pripojovací kábel
(červený) vozidla od plusového pólu batérie.
Najskôr zapojte „+“-pólovú batériovú svorku s
Page 55

55 SK
Obsluha
rýchlym kontaktom (červená) 7 automobilovej
nabíjačky na „+“-pól batérie.
Zapojte „-“-pólovú batériovú svorku s rýchlym
kontaktom (čierna)
6
na „-“-pól batérie. Zapoj-
te sieťový kábel
9
automobilovej nabíjačky
do zástrčky.
Poznámka: Ak sú pripojovacie svorky zapojené
správne, zobrazuje displej napätie a svieti zobrazenie „connected“. Pri prepólovaní ukazuje displej
0.0 a zobrazenie „connected“ nesvieti.
Odpojenie
Odpojte prístroj od sieťového prúdu.
Odpojte „-“-pólovú batériovú svorku s rýchlym
kontaktom (čierna)
6
od „-“-pólu batérie.
Odpojte „+“-pólovú batériovú svorku s rýchlym
kontaktom (červená)
7
od „+“-pólu batérie.
Plusový pripojovací kábel vozidla opäť zapojte
na plusový pól batérie.
Mínusový pripojovací kábel vozidla opäť za-
pojte na mínusový pól batérie.
Výber nabíjacieho režimu
Pre nabíjanie rôznych batérií pri rôznych teplotách
okolia si môžete vybrať z rozličných nabíjacích režimov. Pri porovnaní s bežnými nabíjačkami autobatérií disponuje tento prístroj špeciálnou funkciou pre
nové použitie prázdnej batérie / akumulátorovej batérie. Úplne vybitú batériu / akumulátorovú batériu
môžete opäť nabiť. Ochrana pred chybným zapojením a skratom zaručuje bezpečný nabíjací proces.
Vďaka zabudovanej elektronike sa nabíjačka autobatérií neuvedie do prevádzky bezprostredne po
zapojení batérie, ale až potom, keď je zvolený nabíjací modus.
Ak sú pripojovacie svorky spojené s batériou a prístroj je zapojený do prúdovej siete, rozsvieti sa na
digitálnom displeji
10
zobrazenie „Connected“. Po
vybraní nabíjacieho režimu sa rozsvieti zobrazenie
„Charging“. Keď je proces nabíjania ukončený,
rozsvieti sa zobrazenie „Charged“.
Keď sa digitálny displej stále rozsviecuje predtým,
ako je batéria úplne nabitá, došlo k chybe.
V takom prípade znova skontrolujte, či sú pri-
pojovacie svorky
6, 7
správne umiestnené
na batérii a či bol zvolený správny typ batérie.
Ak displej napriek tomu ešte stále svieti, ide
pravdepodobne o defekt batérie.
Tlačidlo digitálny displej
1
: Umožňuje striedanie digitálneho zobrazenia napätia a nabíjacieho
procesu v percentách (Battery %). Zvoľte toto tlačidlo
pre striedanie medzi nasledujúcimi zobrazeniami:
– Batéria %: zobrazuje pokrok nabíjania zapoje-
nej batérie v percentách.
– Napätie: zobrazuje napätie zapojenej batérie.
– Alternátor %: Výstupné napätie v percentách
Tlačidlo typ batérie
2
: Použite toto tlačidlo
pre nastavenie typu nabíjanej batérie. Tu môžete
vyberať medzi typmi batérií. Predtým, ako začne
proces nabíjania, musí byť nutne správne nastavený typ batérie:
– 12 V regular: Tieto batérie (olovo-kyselinové
batérie) sú spravidla používané v osobných a
nákladných vozidlách a motocykloch. Tieto majú
vetracie uzávery a sú často označované ako
„nenáročné na údržbu“ alebo „bezúdržbové“.
Tento týp batérií je určený na to, aby rýchlo
prenášal energiu (napr. štartovanie motora).
„Regular“ batérie by nemali byť používané pre
„Deep Cycle“ aplikácie.
– 12 V Deep Cycle: Tieto batérie sú bežne ozna-
čované i ako „Deep Cycle“ alebo „Marine“.
Batérie tohto typu sú spravidla väčšie ako iné
typy batérií. Tieto dodávajú menej krátkodobej
energie, zato však dlhodobý prenos energie.
Batérie vydržia mnoho vybíjacích cyklov.
– 12 V AGM / gel: Typ batérie AGM sú spravidla
dobré Deep Cycle batérie. Najlepšiu „životnosť“
majú vtedy, keď sú znova nabité predtým, ako
sa vybili o viac ako 50 %. Pri úplnom vybití vydržia tieto približne 300 nabíjacích cyklov. Typ
batérií GEL je podobný typu AGM. Napätie
pri znovunabití je nižšie ako pri iných olovo-kyselinových batériach. Keď pre gelovú batériu
Page 56

56 SK
Obsluha
použijete nesprávny typ nabíjačky, treba očakávať znížený výkon resp. zníženie životnosti.
– 6 V regular: Tento modus zvoľte pre bežné 6 V
batérie.
Tlačidlo Charge-Start
3
: Toto tlačidlo použite
pre voľbu medzi nasledujúcimi možnosťami:
– Fast Charge: rýchle nabíjanie (odporúča sa pri
nízkych vonkajších teplotách / v zime)
– Normal Charge: normálny nabíjací režim (nor-
málna rýchlosť)
– Start: krátkodobo Vám dodá 75 Ampere, aby
pomohla slabo nabitej alebo prázdnej batérii
naštartovať motor
Pozor: Modus môžete ukončiť vytiahnutím sieťového kábla
9
.
Používanie funkcie
pomocného štartovania
Vykonajte všetky pripojenia
podľa popisu a v správnom poradí. Inak sa môže
elektronika vozidla poškodiť.
Pri postupe odporujúcom uvedeným nariadenia konáte na vlastné nebezpečenstvo a zodpovednosť.
Pozor: Táto funkcia nie je vhodná pre batérie
menšie ako 45 Ah. Pri batériach menších ako 45 Ah
môže táto funkcia viesť k poškodeniu batérie.
Pri dieslových vozidlách a benzínových motoroch s
väčším objemom je pre štartovací proces sčasti potrebný silnejší prúd ako 75 A.
Poznámka: Nabíjačka disponuje analyzačným
programom, ktorý chráni batériu pred poškodením
najmä pri funkcii pomocného štartovania (napr. sulfatácia, príliš silný pokles napätia). V prípade silno
vybitých alebo silno preťažených batérií prístroj z
dôvodu ochrany batérie štartovaciu pomoc vôbec
nezapne. Počas tohto procesu je už batéria nabíjaná slabými prúdmi (svieti Charging). Displej potom
ostane stáť na „0“. V tomto prípade nie je funkcia
pomocného štartovania možná. Chráni to batériu
pred poškodeniami. Batériu by ste potom mali najskôr nabiť. Na tento účel možno použiť i funkciu
„Fast Charge“ alebo „Normal Charge“.
Zapojte sieťový kábel 9 automobilovej nabí-
jačky do zástrčky.
Upevnite červenú pripojovaciu svorku 7 na plu-
sovom póle Vašej batérie. (Plusový pól je označený znamienkom „+“ a červenou značkou.)
Upevnite čiernu pripojovaciu svorku 6 na mí-
nusovom póle Vašej batérie. (Mínusový pól je
označený znamienkom „-“ a čiernou značkou.)
Ak sú pripojovacie svorky správne zapojené,
nabíjačka autobatérii automaticky zvolí správny
typ batérie. Môžte ho skontrolovať v políčku
„Battery-Type“ a prípadne zmeniť stlačením tlačidla Battery-Type
2
.
Teraz zvoľte pomocou tlačidla Charge-Start 3
funkciu „štart“. Nabíjačka autobatérií teraz
analyzuje stav nabitia batérie. Displej práve
zobrazuje „0“.
Teraz aktivujte zapaľovanie vozidla. Na disple-
ji sa teraz spustí spätné počítanie 5 sekúnd (z
toho 2 sekundy rozbeh resp. analyzačná funkcia
a 3 sekundy funkcia pomocného štartovania s
75 A), ak je potrebná podpora štartovania pomocou nabíjačky autobatérií (toto predtým vyhodnotí nabíjačka autobatérií). Počas spätného
odpočítavania Vám nabíjačka autobatérií krátkodobo dodáva 75 A, aby pomohla batérii naštartovať motor. Pre šetrenie batérie potom nasleduje prestávka 180 sekúnd. Teraz začne
cyklus odznova (2 sekundy rozbeh resp. analyzačná funkcia a 3 sekundy funkcia pomocného
štartovania s 75 A / 180 sekúnd prestávka).
Pre odpojenie prístroja najskôr odpojte pripojo-
vacie svorky (
6
/ 7) a následne vytiahnite
sieťový kábel
9
.
Poznámka: Ak je batéria úplne vybitá, nepostačuje 75 A pre naštartovanie motora u všetkých vozidiel (napr. dieslové vozidlá).
V takom prípade zvoľte prosím pomocou tlačidla
Charge-Start
3
možnosť „Fast Charge“ a nabite batériu na 60 % (pri dieslových motoroch
predhrievanie odčerpáva batérii energiu. Tu
musí byť 60 % prítomných po procese rozžhavenia).
Nabíjací pokrok môžete sledovať na displeji tak,
že tlačidlom digitálny displej
1
zvolíte možnosť
„Batéria %“.
Page 57

57 SK
Obsluha / Údržba a starostlivosť / Informácie týkajúce sa záruky a servisu
Keď je dosiahnutých 60 %, znova vykonajte
funkciu pomocného štartovania.
Pozor: Ukončite modus vytiahnutím sieťového
kábla
9
.
Výmena poistky
Poistka nabíjačky autobatérií sa môže poškodiť
napr. v dôsledku chyby prístroja, preťaženia atď.
Pred výmenou poistky najskôr vytiahnite sieťový
kábel
9
.
Odstráňte kryt poistky 4 tak, že ho zboku
zľahka zatlačíte.
Pomocou vhodného otvoreného kľúča odšró-
bujte poistku
4
a upevnite novú poistku.
Následne ju pevne prišróbujte a znovu pripev-
nite kryt
4
.
Poznámka: Ak potrebujete novú poistku,
kontaktujte prosím naše servisné pracovisko
(pozri kapitolu Pokyny týkajúce sa záruky a
servisného odbavenia).
Údržba a starostlivosť
Pred vykonaním prác na nabíjačke autobatérií
vždy vytiahnite sieťovú zástrčku
9
zo zásuvky.
Prístroj si nevyžaduje údržbu. Vypnite prístroj.
Kovové a umelohmotné povrchy prístroja čistite
suchou handričkou.
V žiadnom prípade nepoužívajte rozpúšťadlá
alebo iné agresívne čistiace prostriedky.
Informácie týkajúce
sa záruky a servisu
Záruka od Creative Marketing
Consulting GmbH
Vážená zákazníčka, vážený zákazník,
na toto zariadenie máte 3 roky záruku od dátumu
nákupu. V prípade nedostatkov tohto výrobku Vám
prináležia zákonné práva voči predajcovi produktu.
Tieto zákonné práva nie sú našou nižšie uvedenou
zárukou obmedzené.
Záručné podmienky
Záručná doba začína plynúť dátumom kúpy. Starostlivo si prosím uschovajte originálny pokladničný lístok.
Tento doklad je potrebný ako dôkaz o kúpe. Ak sa
vrámci 3rokov od dátumu kúpy tohto zariadenia
vyskytne chyba materiálu alebo výrobná chyba, zariadenie Vám bezplatne opravíme alebo vymeníme
- podľa nášho výberu. Podmienkou poskytnutia tohto garančného výkonu je, že vrámci 3-ročnej lehoty
predložíte defektné zariadenie a doklad o kúpe (pokladničný lístok) a písomnou formou stručne opíšete,
v čom pozostáva nedostatok a kedy sa vyskytol.
Ak je chyba krytá našou zárukou, dostanete naspäť
opravený alebo nový produkt. Opravou alebo výmenou produktu nezačína plynúť nová záručná doba.
Rozsah záruky
Toto zariadenie bolo dôkladne vyrobené podľa
prísnych smerníc kvality a pred dodaním svedomito
otestované.
Poskytnutie záruky sa vzťahuje na chyby materiálu a
výrobné chyby. Táto záruka sa nevzťahuje na časti
produktu, ktoré sú vystavené normálnemu opotrebovaniu, a preto ich je možné považovať za opotrebovateľné diely, ani na poškodenia na rozbitných
dieloch, napr. spínačoch, akumulátorových batériach
alebo častiach, ktoré sú zhotovené zo skla. Táto
záruka zaniká, ak bol prístroj poškodený, neodborne používaný alebo neodborne udržiavaný. Pre
správne používanie prístroja je nutné presne dodržiavať iba pokyny uvedené v originálnom návode na
používanie. Je potrebné bezpodmienečne zabrániť
účelom použitia a konaniam, od ktorých originálny
návod na obsluhu odrádza alebo pred ktorými varuje.
Výrobok je určený výlučne na súkromné používanie
a nie na komerčné účely. Záruka zaniká pri zaobchádzaní nezodpovedajúcom účelu, pri neprimeranom
zaobchádzaní, pri používaní násilia a pri zásahoch,
ktoré nevykonal nami autorizovaný servis.
Page 58

58
... / Ekologické pokyny a údaje týkajúce sa likvidácie / EG-Konformitné vyhlásenie
SK
Postup v prípade
poškodenia v záruke
Pre zaručenie rýchleho spracovania Vašej požiadavky dodržte prosím nasledujúce pokyny:
Pre všetky otázky majte pripravený pokladničný doklad a číslo výrobku (napr. IAN) ako dôkaz o kúpe.
Číslo výrobku si prosím vyhľadajte na typovom štítku, na gravúre, na titulnej strane Vášho návodu (dole
vľavo) alebo na nálepke na zadnej alebo dolnej
strane. Ak by sa vyskytli chyby funkcie alebo iné
nedostatky, kontaktujte najskôr telefonicky alebo
e-mailom následne uvedené servisné oddelenie.
Výrobok označený ako defektný môžete potom
odoslať oslobodený od platby poštovného na Vám
oznámenú adresu servisu s priloženým pokladničným dokladom (pokladničný lístok) a s uvedením,
v čom spočíva nedostatok a kedy sa vyskytol.
Upozornenie:
Na www.lidl-service.com si môžete
stiahnuť túto a mnohé ďalšie príručky,
videá o produkte a software.
Takto nás zastihnete:
SK
Názov: C. M. C. GmbH
Internetová adresa: www.cmc-creative.de
E-mail: service.sk@cmc-creative.de
Telefón: +49 (0) 6894 9989752
(bežný tarif nemecká pevná
linka)
Sídlo: Nemecko
IAN 277071
Myslite prosím na to, že nasledujúca adresa nie je
adresou servisného pracoviska.
Najskôr kontaktujte hore uvedený servis.
Adresa:
C. M. C. GmbH
Katharina-Loth-Str. 15
DE-66386 St. Ingbert
NEMECKO
Ekologické pokyny a údaje
týkajúce sa likvidácie
Obnovovanie surovín
namiesto likvidácie odpadu!
Prístroj, príslušenstvo a balenie je potrebné odovzdať na ekologickú recykláciu.
Nabíjačku autobatérií neodhadzujte do domového
odpadu, ohňa alebo vody. Pokiaľ je to možné, nemali by byť recyklované funkčné prístroje. Požiadajte
o pomoc Vášho miestneho predajcu.
Vy ako konečný spotrebiteľ ste zákonne
(nariadenie o batériach) povinný odov
zdať
všetky opotrebované batérie. Batérie
obsahujúce škodlivé látky sú zboku označené symbolmi, ktoré upozorňujú na zákaz likvidácie prostredníctvom domového
odpadu. Označenie pre smerodatné ťažké kovy sú: Cd = kadmium, Hg = ortuť,
Pb = olovo.
Opotrebované batérie odovzdajte v likvidačnom
zariadení vo Vašom meste alebo obci, alebo odošlite naspäť výrobcovi. Týmto splníte zákonné povinnosti a podstatne prispejete k ochrane životného
prostredia.
EG-Konformitné vyhlásenie
My,
C. M. C. GmbH
Zodpovedný za dokumenty: Andre Scheer
Katharina-Loth-Str. 15
66386 St. Ingbert
zodpovedne prehlasujeme, že prístroj
Autonabíjačka s pomocným štartovaním
Page 59

59 SK
EG-Konformitné vyhlásenie
Rok výroby: 2016 / 43
IAN: 277071
Rok CE-označenia: 15
Model: AUTONABÍJAČKA S POMOCNÝM
ŠTARTOVANÍM ULG 12 A2
spĺňa podstatné ochranné požiadavky, ktoré sú stanovené v Európskych smerniciach
Smernica ES o nízkom napätí
2014 / 35 / EU
ES smernica o elektromagnetickej
znášanlivosti
2014 / 30 / EU
RoHS smernica
2011 / 65 / EU
Hore popísaný predmet prehlásenia spĺňa predpisy
smernice 2011 / 65 / EU Európskeho parlamentu a
Rady z 08. júna 2011 pre obmedzenie používania
určitých nebezpečných látok v elektro- a elektronických
prístrojoch.
Pre konformitné hodnotenie boli použité nasledujúce
harmonizované normy:
EN 60335-2-29:2004/A2:2010
EN 60335-1:2012/A11:2014
EN 62233:2008
EN 50498:2010
EN 55014-1:2006/A2:2011
EN 55014-2:1997/A2:2008
EN 61000-3-2:2014
EN 61000-3-3:2013
AfPS GS 2014:01 PAK
St. Ingbert, 31.08.2016
v poverení Andre Scheer
- Vedúci zabezpečenia kvality -
Page 60

60
Page 61

61 DE/AT/CH
Einleitung ......................................................................................................................................... Seite 62
Bestimmungsgemäße Verwendung ....................................................................................................Seite 62
Teilebeschreibung ...............................................................................................................................Seite 62
Technische Daten ................................................................................................................................ Seite 62
Lieferumfang ........................................................................................................................................ Seite 63
Sicherheitshinweise ................................................................................................................ Seite 63
Bedienung ......................................................................................................................................Seite 66
Produkteigenschaften .......................................................................................................................... Seite 66
Anschließen ......................................................................................................................................... Seite 67
Trennen ................................................................................................................................................ Seite 67
Lademodus auswählen .......................................................................................................................Seite 67
Starthilfefunktion verwenden ..............................................................................................................Seite 68
Sicherung wechseln ............................................................................................................................Seite 69
Wartung und Pflege ............................................................................................................... Seite 69
Hinweise zu Garantie und Serviceabwicklung ..............................................Seite 69
Garantiebedingungen ........................................................................................................................Seite 69
Garantieumfang .................................................................................................................................. Seite 70
Abwicklung im Garantiefall ................................................................................................................ Seite 70
Umwelthinweise und Entsorgungsangaben ..................................................... Seite 71
EG-Konformitätserklärung ............................................................................................... Seite 71
Inhaltsverzeichnis
Page 62

62 DE/AT/CH
Einleitung
Kfz-Ladegerät mit
Starthilfefunktion ULG 12 A2
Einleitung
Herzlichen Glückwunsch!
Sie haben sich für ein hochwertiges
Produkt aus unserem Haus entschieden.
Machen Sie sich vor der ersten Inbetriebnahme mit
dem Produkt vertraut. Lesen Sie hierzu aufmerksam
die nachfolgende Originalbetriebsanleitung und die
Sicherheitshinweise. Die Inbetriebnahme dieses Produktes darf nur durch unterwiesene Personen erfolgen.
Bestimmungsgemäße
Verwendung
Das Ultimate Speed ULG 12 A2 ist ein Kfz-Ladegerät
mit Pulserhaltungsladung (Chip-Software), das zur
Aufladung und Erhaltungsladung von folgenden 6 Voder 12 V-Blei-Akkus (Batterien) mit Elektrolyt-Lösung,
AGM-Batterien, Säure-Blei-Batterien, Deep Cycle
(Bootsbatterien) oder Gel-Batterien geeignet ist:
• Für Pkw- und Motorradbatterien mit 12 V / 6 V-
und 8–180 Ah Kapazität
Außerdem können Sie entladene Batterien regenerieren
(abhängig vom Batterietyp). Das Kfz-Ladegerät verfügt über eine Schutzschaltung gegen Funkenbil
dung
und Überhitzung. Jeder nicht bestimmungsge
mäße
oder unsachgemäße Gebrauch führt zum Garantieverlust. Für aus bestimmungswidriger Verwendung entstandene Schäden übernimmt der Hersteller
keine Haftung. Das Gerät ist nicht für den gewerblichen Einsatz bestimmt.
Hinweis: Mit dem Kfz-Ladegerät können keine
Elektrofahrzeuge mit eingebautem Akku geladen
werden.
Teilebeschreibung
1
Digital-Display-Taste
2
Battery-Type-Taste
3
Charge-Start-Taste
4
Sicherung mit Abdeckung
5
„+“-Pol-Anschlusskabel (rot)
6
„–“-Pol-Anschlussklemme (schwarz)
7
„+“-Pol-Anschlussklemme (rot)
8
„
–“-Pol-Anschlusskabel (schwarz)
9
Netzkabel
10
digitale Anzeige
Technische Daten
Eingangsspannung: 230 V∼ 50 Hz
Rückstrom*:
< 5 mA (kein AC-Eingang)
Nennausgangsspannung: 6 V / 12 V
Ladestrom: 2 A, 6 A, 12 A ± 10 %
Batterietyp mit: 12 V / 6 V und
8–180 Ah Kapazität
Gehäuseschutzart: IP 20
* = Rückstrom bezeichnet den Strom, den das
Ladegerät aus der Batterie verbraucht, wenn
kein Netzstrom angeschlossen ist.
In dieser Originalbetriebsanleitung / am Gerät werden folgende
Piktogramme verwendet:
Originalbetriebsanleitung lesen! Vorsicht! Stromschlaggefahr!
Hinweis Vorsicht! Explosionsgefahr!
Warn- und Sicherheitshinweise
beachten!
Entsorgen Sie Verpackung und
Gerät umweltgerecht!
Page 63

63 DE/AT/CH
Einleitung / Sicherheitshinweise
Lieferumfang
Kontrollieren Sie unmittelbar nach dem
Auspacken den Lieferumfang und das
Gerät sowie alle Teile auf Beschädigungen.
Nehmen Sie ein defektes Gerät oder Teile nicht in
Betrieb.
1 Ladegerät Ultimate Speed ULG 12 A2
2 Schnellkontakt-Anschlussklemmen
(1 rot, 1 schwarz)
1 Originalbetriebsanleitung
Sicherheitshinweise
NICHT IN DIE HÄNDE VON
KINDERN KOMMEN LASSEN!
GEFAHR! Vermeiden Sie Lebens-
und Verletzungsgefahr durch unsachgemäßen Gebrauch!
VORSICHT! Betreiben Sie das
Gerät nicht mit beschädigtem Kabel, Netzkabel oder Netzstecker.
Beschädigte Netzkabel bedeuten
Lebensgefahr durch elektrischen
Schlag.
Lassen Sie das Netzkabel im
Beschädigungsfall nur von autorisiertem und geschultem Fachpersonal reparieren! Setzen Sie
sich im Reparaturfall mit der Servicestelle Ihres Landes in Verbindung!
STROMSCHLAGGE-
FAHR! Stellen Sie bei
einer fest im Fahrzeug montierten
Batterie sicher, dass das Fahrzeug
außer Betrieb ist! Schalten Sie
die Zündung aus und bringen Sie
das Fahrzeug in Parkposition, mit
angezogener Feststellbremse
(z.B. PKW) oder festgemachtem
Seil (z.B. Elektroboot)!
STROMSCHLAGGE-
FAHR! Trennen Sie das
Kfz-Ladegerät vom Netz, bevor
Sie die Anschlussklemmen an der
Batterie anbringen oder diese
entfernen.
Schließen Sie die Anschlussklem-
me, die nicht an die Karosserie
angeschlossen ist, zuerst an.
Schließen Sie die andere An-
schlussklemme entfernt von der
Batterie und der Benzinleitung
an die Karosserie an.
Schließen Sie das Kfz-Ladegerät
erst danach an das Versorgungsnetz an.
Trennen Sie das Kfz-Ladegerät
nach dem Laden vom Versorgungsnetz.
Entfernen Sie erst danach die
Anschlussklemme von der Karosserie. Entfernen Sie im Anschluss
daran die Anschlussklemme von
der Batterie.
STROMSCHLAGGE-
FAHR! Fassen Sie die
Page 64

64 DE/AT/CH
Pol-Anschlusskabel („–“ und „+“)
ausschließlich am isolierten Bereich an!
STROMSCHLAGGE-
FAHR! Führen Sie den
Anschluss an die Batterie und an
die Steckdose des Netzstroms
vollkommen geschützt vor Feuchtigkeit durch!
STROMSCHLAGGE-
FAHR! Führen Sie die
Montage, die Wartung und die
Pflege des Kfz-Ladegerätes nur
frei vom Netzstrom durch!
STROMSCHLAGGE-
FAHR! Trennen Sie nach
Beendigung des Auflade- und
Erhaltungsladevorgangs, bei einer
ständig im Fahrzeug angeschlossenen Batterie, zuerst das MinusPol-Anschlusskabel (schwarz) des
Kfz-Ladegeräts vom Minus-Pol der
Batterie.
Lassen Sie Kleinkinder und Kinder
nicht unbeaufsichtigt mit dem
Kfz-Ladegerät!
Kinder können mögliche Gefahren
im Umgang mit Elektrogeräten
noch nicht einschätzen. Kinder
sollten beaufsichtigt werden, um
sicherzustellen, dass sie nicht mit
dem Gerät spielen.
Dieses Gerät kann von Kindern
ab 8 Jahren und darüber sowie
von Personen mit verringerten physischen, sensorischen oder mentalen Fähigkeiten oder Mangel
an Erfahrung und Wissen benutzt
werden, wenn sie beaufsichtigt
oder bezüglich des sicheren Gebrauchs des Gerätes unterwiesen
wurden und die daraus resultierenden Gefahren verstehen. Kinder dürfen nicht mit dem Gerät
spielen. Reinigung und Benutzerwartung dürfen nicht von Kindern
ohne Beaufsichtigung durchgeführt werden.
EXPLOSIONSGE-
FAHR! Schützen Sie sich
vor einer hochexplosiven Knall-
gasreaktion! Gasförmiger Wasserstoff kann beim Aufladen und
Erhaltungsladevorgang von der
Batterie ausströmen. Knallgas ist
eine explosionsfähige Mischung
von gasförmigem Wasserstoff und
Sauerstoff. Beim Kontakt mit offenem Feuer (Flammen, Glut oder
Funken) erfolgt die so genannte
Knallgasreaktion! Führen Sie den
Auflade- und Erhaltungsladevorgang in einem witterungsgeschützten Raum mit guter Belüftung durch.
Stellen Sie sicher, dass beim Auflade- und Erhaltungsladevorgang
kein offenes Licht (Flammen, Glut
oder Funken) vorhanden ist!
Sicherheitshinweise
Page 65

65 DE/AT/CH
EXPLOSIONS- UND
BRANDGEFAHR! Stellen Sie
sicher, dass explosive oder brennbare Stoffe z.B. Benzin oder Lösungsmittel beim Gebrauch des
Kfz-Ladegerätes nicht entzündet
werden können!
EXPLOSIVE GASE! Flammen
und Funken vermeiden!
Während des Ladens für ausrei-
chende Belüftung sorgen.
Stellen Sie die Batterie während
des Ladevorgangs auf eine gut
belüftete Fläche. Andernfalls kann
das Gerät beschädigt werden.
EXPLOSIONSGE-
FAHR! Stellen Sie sicher,
dass das Plus-Pol-Anschlusskabel
keinen Kontakt zu einer Treibstoffleitung (z.B. Benzinleitung) hat!
VERÄTZUNGSGEFAHR!
Schützen Sie Ihre Augen und
Haut vor Verätzung durch Säure
(Schwefelsäure) beim Kontakt
mit der Batterie!
Verwenden Sie: säurefeste
Schutzbrille, -bekleidung und
-handschuhe! Wenn Augen oder
Haut mit der Schwefelsäure in
Kontakt geraten sind, spülen Sie
die betroffene Körperregion mit
viel fließendem, klarem Wasser
ab und suchen Sie umgehend einen Arzt auf!
Vermeiden Sie elektrischen
Kurzschluss beim Anschluss des
Kfz-Ladegerätes an die Batterie.
Schließen Sie das Minus-Pol-Anschlusskabel ausschließlich an
den Minuspol der Batterie bzw.
an die Karosserie. Schließen Sie
das Plus-Pol-Anschlusskabel ausschließlich an den Plus-Pol der
Batterie!
Stellen Sie vor dem Netzstrom-
anschluss sicher, dass der Netzstrom vorschriftsmäßig mit 230 V∼
50 Hz, geerdetem Nullleiter, einer 16 A Sicherung und einem
FI-Schalter (Fehlerstromschutzschalter) ausgestattet ist! Andernfalls kann das Gerät beschädigt
werden.
Setzen Sie das Kfz-Ladegerät
nicht der Nähe von Feuer, Hitze
und lang andauernder Temperatureinwirkung über 50 °C aus!
Bei höheren Temperaturen sinkt
automatisch die Ausgangsleistung
des Kfz-Ladegerätes.
Verwenden Sie das Kfz-Ladege-
rät nur mit den gelieferten Originalteilen!
Decken Sie das Kfz-Ladegerät
nicht mit Gegenständen ab!
Andernfalls kann das Gerät beschädigt werden.
Schützen Sie die Elektrokontakt-
Sicherheitshinweise
Page 66

66 DE/AT/CH
flächen der Batterie vor Kurzschluss!
Verwenden Sie das Kfz-Ladege-
rät ausschließlich zum Aufladeund Erhaltungsladevorgang von
unbeschädigten 6 V- / 12 V-BleiBatterien (mit Elektrolyt-Lösung
oder -Gel)! Andernfalls kann
Sachbeschädigung die Folge sei
n.
Verwenden Sie das Kfz-Ladegerät
nicht zum Auflade- und Erhaltungsvorgang von nicht wiederaufladbaren Batterien. Andernfalls kann
Sachbeschädigung die Folge sein.
Verwenden Sie das Kfz-Ladegerät
nicht zum Auflade- und Erhalt
ungsladevorgang einer beschädigten
oder eingefrorenen Batterie! Andernfalls kann Sachbeschädigung
die Folge sein.
Informieren Sie sich vor dem An-
schluss des Ladegerätes über die
Wartung der Batterie anhand
deren Originalbetriebsanleitung!
Andernfalls besteht eine Verletzungsgefahr und / oder die Gefahr, dass das Gerät beschädigt
wird.
Informieren Sie sich vor dem An-
schluss des Ladegerätes an eine
Batterie, die ständig in einem
Fahrzeug angeschlossen ist, über
die Einhaltung der elektrischen
Sicherheit und Wartung anhand
der Originalbetriebsanleitung des
Fahrzeugs! Andernfalls besteht
eine Verletzungsgefahr und /
oder die Gefahr, dass Sachschäden entstehen.
Trennen Sie das Kfz-Ladegerät
auch aus umweltschutzgründen
bei Nichtgebrauch vom Netzstrom! Bedenken Sie, dass auch
der Standby-Betrieb Strom verbraucht.
Seien Sie stets aufmerksam und
achten Sie immer darauf was
Sie tun. Gehen Sie stets mit Vernunft vor und nehmen Sie das
Kfz-Ladegerät nicht in Betrieb,
wenn Sie unkonzentriert sind,
oder sich unwohl fühlen.
Bedienung
Ziehen Sie den Netzstecker immer aus der Steckdose,
bevor Sie Arbeiten am Kfz-Ladegerät durchführen.
STROMSCHLAGGEFAHR!
GEFAHR EINES SACHSCHADENS!
VERLETZUNGSGEFAHR!
Produkteigenschaften
Dieses Gerät ist zum Laden einer Vielfalt von SLABatterien (versiegelter Bleisäure-Batterien) konzipiert,
welche weitestgehend in PKWs, Motorrädern und
einigen anderen Fahrzeugen verwendet werden.
Diese können z.B. WET- (mit flüssigem Elektrolyt),
GEL- (mit gelförmigem Elektrolyt) oder AGM-Batterien
(mit Elektrolyt absorbierenden Matten) sein. Eine
s
pezielle Konzeption des Gerätes (auch „Drei-Stufen
-
Lade-Strategie“ genannt) ermöglicht ein Wiederauf-
Sicherheitshinweise / Bedienung
Page 67

67 DE/AT/CH
laden der Batterie bis auf fast 100 % ihrer Kapazität.
Ferner kann ein Langzeitanschluss der Batterie mit
dem Kfz-Ladegerät erfolgen, um diese möglichst
immer in optimalem Zustand zu halten.
Anschließen
Trennen Sie vor dem Auflade- und Erhaltungs-
ladevorgang, bei einer ständig im Fahrzeug
angeschlossenen Batterie, zuerst das MinusPol-Anschlusskabel (schwarz) des Fahrzeugs
vom Minus-Pol der Batterie. Der Minus-Pol der
Batterie ist in der Regel mit der Karosserie des
Fahrzeugs verbunden.
Trennen Sie anschließend das Plus-Pol-Anschluss-
kabel (rot) des Fahrzeugs vom Plus-Pol der Batterie.
Klemmen Sie erst dann die „+“-Pol Schnellkonta
kt-
Anschlussklemme (rot)
7
des Kfz-Ladegeräts
an den „+“-Pol der Batterie.
Klemmen Sie die „–“-Pol-Schnellkontakt-An-
schlussklemme (schwarz)
6
an den „–“-Pol der
Batterie. Schließen Sie das Netzkabel
9
des
Kfz-Ladegeräts an die Steckdose an.
Hinweis: Sind die Anschlussklemmen korrekt angeschlossen, zeigt das Display die Spannung an und
die Anzeige „connected“ leuchtet auf. Bei einer
Verpolung zeigt das Display 0.0 und die Anzeige
„connected“ leuchtet nicht auf.
Trennen
Trennen Sie das Gerät vom Netzstrom.
Nehmen Sie die „–“-Pol-Schnellkontakt-Anschluss-
klemme (schwarz)
6
vom „–“-Pol der Batterie.
Nehmen Sie die „+“-Pol-Schnellkontakt-An-
schlussklemme (rot)
7
vom „+“-Pol der Batterie.
Schließen Sie das Plus-Pol-Anschlusskabel des
Fahrzeugs wieder an den Plus-Pol der Batterie an.
Schließen Sie das Minus-Pol-Anschlusskabel
des Fahrzeugs wieder an den Minus-Pol der
Batterie an.
Lademodus auswählen
Sie können zum Laden verschiedener Batterien bei
unterschiedlicher Umgebungstemperatur aus verschiedenen Lademodi auswählen. Im Vergleich zu
herkömmlichen Kfz-Ladegeräten verfügt dieses Gerät
über eine spezielle Funktion zum erneuten Verwenden einer leeren Batterie / eines Akkus. Sie können
eine vollständig entladene Batterie / einen Akku
wieder aufladen. Ein Schutz gegen Fehlanschluss
und Kurzschluss gewährleistet den sicheren Ladevorgang. Durch die eingebaute Elektronik setzt sich
das Kfz-Ladegerät nicht unmittelbar nach Anschluss
der Batterie in Betrieb, sondern erst, nachdem ein
Lademodus ausgewählt wurde.
Sind die Anschlussklemmen mit der Batterie verbunden und ist das Gerät am Netzstrom angeschlossen,
leuchtet auf der digitalen Anzeige
10
die Anzeige
„Connected“ auf. Nachdem der Lademodus gewählt wurde, leuchtet die Anzeige „Charging“ auf.
Ist der Ladevorgang abgeschlossen, leuchtet die
Anzeige „Charged“ auf.
Wenn das digitale Display ständig aufleuchtet, bevor die Batterie komplett geladen ist, besteht ein
Fehler.
Überprüfen Sie in diesem Fall nochmals, ob die
Anschlussklemmen
6, 7
korrekt an der Batterie angebracht sind und ob der Batterietyp
richtig ausgewählt wurde. Sollte das Display
dennoch ständig aufleuchten, liegt womöglich
ein Defekt der Batterie vor.
Digital-Display-Taste
1
: Ermöglicht das Wechseln der digitalen Anzeige der Spannung und des
Ladefortschritts in Prozent (Battery %). Verwenden
Sie diese Taste, um zwischen den folgenden Anzeigen zu wechseln:
– Batterie %: zeigt den Ladefortschritt der ange-
schlossenen Batterie in Prozent an.
– Spannung: zeigt die Spannung der angeschlos-
senen Batterie an.
– Alternator %: Ausgangsleistung in Prozent
Bedienung
Page 68

68 DE/AT/CH
Bedienung
Battery-Type-Taste 2: Verwenden Sie diese
Taste, um den Typ der zu ladenden Batterie einzustellen. Sie können hier zwischen Batterietypen
wählen. Der Batterietyp muss zwingend korrekt eingestellt werden, bevor der Ladevorgang beginnt:
– 12 V Regular: Diese Batterien (Blei-Säure Batte-
rien) werden in der Regel in PKW, LKW und
Motorrädern verwendet. Diese haben Entlüftungskappen und sind oft als „wartungsarm“
oder „wartungsfrei“ gekennzeichnet. Der Batterietyp ist dafür ausgelegt, schnell Energie zu übertragen (z.B. Starten eines Motors). „Regular“
Batterien sollten nicht für „Deep Cycle“ Anwendungen benutzt werden.
– 12 V Deep Cycle: Diese Batterien sind normaler-
weise auch als „Deep Cycle“ oder „Marine“
gekennzeichnet. Batterien dieses Typs sind in
der Regel größer als andere Batterietypen.
Diese liefert weniger kurzfristige Energie, aber
dafür eine langfristigere Energieübertragung.
Diese Batterien überstehen eine Vielzahl von
Entladezyklen.
– 12 V AGM / Gel: Die Batterietypen AGM sind
in der Regel gute Deep Cycle Batterien. Sie haben
die beste „Lebensdauer“, wenn sie wieder aufgeladen werden, bevor diese mehr als 50 %
entladen wurden. Bei vollständiger Entladung,
übersteht diese etwa 300 Ladezyklen. Der Batterietyp GEL ist ähnlich dem Batterietyp AGM.
Die Spannung beim Wiederaufladen ist niedriger
als bei anderen Blei-Säure Batterien. Wenn Sie
für eine Gel-Batterie das falsche Ladegerät verwenden, ist eine verringerte Leistung bzw. eine
Verkürzung der Lebenszeit zu erwarten.
– 6 V Regular: Diesen Modus wählen Sie für han-
delsübliche 6 V Batterien.
Charge-Start-Taste 3: Verwenden Sie diese Taste,
um zwischen den folgenden Optionen zu wählen:
– Fast Charge: schnelles Laden (empfohlen bei
niedrigen Außentemperaturen / Winter)
– Normal Charge: normaler Ladevorgang
(normale Geschwindigkeit)
– Start: liefert Ihnen kurzfristig 75 Ampere, um
eine schwach geladene oder leere Batterie zum
Zwecke des Motorstarts zu überbrücken
Achtung: Modus kann nur durch Ziehen des Netzkabels
9
beendet werden.
Starthilfefunktion verwenden
Führen Sie zwingend alle Anschlüsse wie beschrieben und in der richtigen Reihenfolge durch. Andernfalls kann die Elektronik des
Fahrzeugs beschädigt werden.
Bei einer Vorgehensweise entgegengesetzt der
beschriebenen Vorgaben, handeln Sie auf eigene
Gefahr und Verantwortung.
Achtung: Diese Funktion ist nicht für Batterien kleiner
45 Ah geeignet. Bei Batterien kleiner 45 Ah könnte
diese Funktion zur Beschädigung der Batterie führen.
Bei Dieselfahrzeugen und großvolumigen Benzinmotoren werden teilweise höhere Stromstärken als
75 A für den Startvorgang benötigt.
Hinweis: Das Ladegerät verfügt über ein Analyseprogramm, welches insbesondere in der Starthilfefunktion die Batterie vor Beschädigungen schützt
(z.B. Sulfatisierung, zu starkes Abfallen der Spannung).
Bei sehr stark entladenen oder stark strapazierten
Batterien, schaltet das Gerät zum Schutz der Batterie
die Starthilfe nicht ein. Während dieses Vorgangs
wird die Batterie bereits mit niedrigen Strömen geladen (Charging leuchtet auf). Das Display bleibt
dann auf „0“ stehen. In diesem Fall ist die Starthilfefunktion nicht möglich. Dies schützt die Batterie vor
Beschädigungen. Die Batterie sollte dann erst gelade
n
werden. Hierzu kann auch die Funktion „Fast Charge
“
oder „Normal Charge“ genutzt werden.
Schließen Sie das Netzkabel 9 des Kfz-Lade-
geräts an die Steckdose an.
Befestigen Sie die rote Anschlussklemme 7 am
Pluspol Ihrer Batterie. (Der Pluspol ist durch ein
„+“ und eine rote Markierung gekennzeichnet.)
Befestigen Sie die schwarze Anschlussklemme 6
am Minuspol Ihrer Batterie. (Der Minuspol ist
durch ein „-“ und eine schwarze Markierung
gekennzeichnet.)
Sind die Anschlussklemmen korrekt angeschlos-
sen, wählt das Kfz-Ladegerät automatisch den
richtigen Batterietyp. Diesen können Sie im Optionsfeld „Battery-Type“ kontrollieren und ggf.
durch Drücken der Battery-Type-Taste
2
ändern.
Wählen Sie nun mit der Charge-Start-Taste 3
Bedienung / Wartung und Pflege /Hinweise zu Garantie und Serviceabwicklung
Page 69

69 DE/AT/CH
Bedienung / Wartung und Pflege /Hinweise zu Garantie und Serviceabwicklung
die Funktion „Start“. Das Kfz-Ladegerät analysiert nun den Ladezustand der Batterie. Das
Display zeigt nun „0“ an.
Betätigen Sie nun die Zündung des Fahrzeugs.
Auf dem Display startet nun ein Countdown
von 5 Sekunden (davon 2 Sekunden Vorlaufbzw. Analysefunktion und 3 Sekunden Starthilfefunktion mit 75 A), wenn eine Startunterstützung durch das Kfz-Ladegerät notwendig ist
(dies wird vorab vom Kfz-Ladegerät analysiert).
Während dieses Countdowns liefert Ihnen das
Kfz-Ladegerät kurzfristig 75 A, um die Batterie
zum Zwecke des Motorstarts zu überbrücken.
Danach folgt zur Schonung der Batterie eine
Pause von 180 Sekunden. Nun beginnt der
Zyklus von neuem (2 Sekunden Vorlauf- bzw.
Analysefunktion und 3 Sekunden Starthilfefunktion mit 75 A / 180 Sekunden Pause).
Zum Trennen des Gerätes entfernen Sie
zunächst die Anschlussklemmen (
6
/ 7) und
ziehen Sie anschließend das Netzkabel
9
.
Hinweis: Ist die Batterie komplett entladen, reichen
die 75 A nicht bei allen Fahrzeugen zum Start des
Motors aus (z. B. Dieselfahrzeuge).
In diesem Fall wählen Sie bitte mit der Charge-
Start-Taste
3
die Option „Fast Charge“ und
laden Sie die Batterie bis 60 % auf (bei Dieselmotoren entzieht die Vorglühung der Batterie
Energie. Hier müssen die 60 % nach dem Glühvorgang anliegen).
Den Ladefortschritt können Sie am Display ver
folgen,
indem Sie mit der Digital Display-Taste
1
die Option
„Batterie %“ wählen.
Sind die 60 % erreicht, führen Sie die Starthilfe-
funktion erneut durch.
Achtung: Beenden Sie den Modus durch Ziehen
des Netzkabels
9
.
Sicherung wechseln
Die Sicherung des Kfz-Ladegerätes kann z.B. durch
einen Gerätefehler, Überlast etc. beschädigt werden.
Bevor Sie die Sicherung wechseln, ziehen Sie
zunächst das Netzkabel
9
.
Entfernen Sie die Abdeckung der Sicherung 4,
indem Sie diese seitlich leicht eindrücken.
Schrauben Sie mit einem passenden Maul-
schlüssel die Sicherung
4
ab und befestigen
Sie die neue Sicherung.
Im Anschluss schrauben Sie diese fest und
bringen die Abdeckung
4
wieder an.
Hinweis: Falls Sie eine neue Sicherung
benötigen, kontaktieren Sie bitte unseren Service (siehe Kapitel Hinweise zu Garantie und
Serviceabwicklung).
Wartung und Pflege
Ziehen Sie das Netzkabel 9 immer aus der
Steckdose, bevor Sie Arbeiten am Kfz-Ladegerät durchführen.
Das Gerät ist wartungsfrei. Schalten Sie das Gerät
aus. Reinigen Sie die Metall- und Kunststoffoberflächen des Gerätes mit einem trockenen Tuch.
Verwenden Sie keinesfalls Lösungsmittel oder
andere aggressive Reinigungsmittel.
Hinweise zu Garantie und
Serviceabwicklung
Garantie der Creative Marketing
Consulting GmbH
Sehr geehrte Kundin, sehr geehrter Kunde,
Sie erhalten auf dieses Gerät 3 Jahre Garantie ab
Kaufdatum. Im Falle von Mängeln dieses Produkts
stehen Ihnen gegen den Verkäufer des Produkts gesetzliche Rechte zu. Diese gesetzlichen Rechte werden durch unsere im Folgenden dargestellte Garantie nicht eingeschränkt.
Garantiebedingungen
Die Garantiefrist beginnt mit dem Kaufdatum. Bitte
bewahren Sie den Original Kassenbon gut auf.
Diese Unterlage wird als Nachweis für den Kauf benötigt. Tritt innerhalb von 3 Jahren ab dem Kaufdatu
m
dieses Produkts ein Material- oder Fabrikationsfehler
auf, wird das Produkt von uns – nach unserer Wahl
Page 70

70 DE/AT/CH
Hinweise zu Garantie und Serviceabwicklung
– für Sie kostenlos repariert oder ersetzt. Diese
Garantieleistung setzt voraus, dass innerhalb der
3-Jahres-Frist das defekte Gerät und der Kaufbeleg
(Kassenbon) vorgelegt und schriftlich kurz beschrieben wird, worin der Mangel besteht und wann er
aufgetreten ist.
Wenn der Defekt von unserer Garantie gedeckt ist,
erhalten Sie das reparierte oder ein neues Produkt
zurück. Mit Reparatur oder Austausch des Produkts
beginnt kein neuer Garantiezeitraum.
Garantieumfang
Das Gerät wurde nach strengen Qualitätsrichtlinien
sorgfältig produziert und vor Anlieferung gewissenhaft geprüft.
Die Garantieleistung gilt für Material- oder Fabrikationsfehler. Diese Garantie erstreckt sich nicht auf
Produktteile, die normaler Abnutzung ausgesetzt sind
und daher als Verschleißteile angesehen werden
können oder für Beschädigungen an zerbrechlichen
Teilen, z.B. Schalter, Akkus oder solchen, die aus
Glas gefertigt sind. Diese Garantie verfällt, wenn
das Produkt beschädigt, nicht sachgemäß benutzt
oder gewartet wurde. Für eine sachgemäße Benutzung des Produkts sind allein die in der Originalbetriebsanleitung aufgeführten Anweisungen genau
einzuhalten. Verwendungszwecke und Handlungen,
von denen in der Originalbetriebsanleitung abgeraten oder vor denen gewarnt wird, sind unbedingt
zu vermeiden.
Das Produkt ist lediglich für den privaten und nicht
für den gewerblichen Gebrauch bestimmt. Bei missbräuchlicher und unsachgemäßer Behandlung, Gewaltanwendung und bei Eingriffen, die nicht von
unserer autorisierten Service-Niederlassung vorgenommen wurden, erlischt die Garantie.
Abwicklung im Garantiefall
Um eine schnelle Bearbeitung Ihres Anliegens zu
gewährleisten, folgen Sie bitte den folgenden Hinweisen:
Bitte halten Sie für alle Anfragen den Kassenbon
und die Artikelnummer (z.B. IAN) als Nachweis für
den Kauf bereit. Die Artikelnummer entnehmen Sie
bitte dem Typenschild, einer Gravur, dem Titelblatt
Ihrer Anleitung (unten links) oder dem Aufkleber auf
der Rück- oder Unterseite. Sollten Funktionsfehler oder
sonstige Mängel auftreten, kontaktieren Sie zunächst
die nachfolgend benannte Serviceabteilung telefonisch oder per E-Mail.
Ein als defekt erfasstes Produkt können Sie dann
unter Beifügung des Kaufbelegs (Kassenbon) und der
Angabe, worin der Mangel besteht und wann er
aufgetreten ist, für Sie portofrei an die Ihnen mitgeteilte Service Anschrift übersenden.
Hinweis:
Auf www.lidl-service.com können Sie d
iese
und viele weitere Handbücher, Produktvideos und Software herunterladen.
So erreichen Sie uns:
DE, AT, CH
Name: C. M. C. GmbH
Internetadresse: www.cmc-creative.de
E-Mail: service.de@cmc-creative.de
service.at@cmc-creative.de
service.ch@cmc-creative.de
Telefon: +49 (0) 6894 9989751
(Normal-Tarif dt. Festnetz)
Fax: +49 (0) 6894 9989729
Sitz: Deutschland
IAN 277071
Bitte beachten Sie, dass die folgende Anschrift
keine Serviceanschrift ist.
Kontaktieren Sie zunächst die oben benannte
Servicestelle.
Page 71

71 DE/AT/CH
Adresse:
C. M. C. GmbH
Katharina-Loth-Str. 15
DE-66386 St. Ingbert
DEUTSCHLAND
Umwelthinweise und
Entsorgungsangaben
Rohstoffrückgewinnung statt
Müllentsorgung!
138180
Gerät, Zubehör und Verpackung sollten
einer umweltgerechten Wiederverwertung
zugeführt werden.
Werfen Sie das Kfz-Ladegerät nicht in den Hausmüll,
ins Feuer oder ins Wasser. Wenn möglich, sollten
nicht mehr funktionstüchtige Geräte recycelt werden.
Fragen Sie Ihren lokalen Händler um Hilfe.
Sie als Endverbraucher sind gesetzlich
(Batterieverordnung) zur Rückgabe aller
gebrauchten Batterien verpflichtet. Schadstoffhaltige Batterien sind mit nebenstehenden Symbolen gekennzeichnet, die auf da
s
Verbot der Entsorgung über den Hausmüll
hinweisen. Die Bezeichnungen für das ausschlaggebende Schwermetall sind: Cd =
Cadmium, Hg = Quecksilber, Pb = Blei.
Befördern Sie verbrauchte Batterien zu einer Enstorgungseinrichtung in Ihrer Stadt oder Gemeinde, oder
zurück zum Händler. Sie erfüllen damit die gesetzlichen Verpflichtungen und leisten einen wichtigen
Beitrag zum Unweltschutz.
EG-Konformitätserklärung
Wir, die
C. M. C. GmbH
Dokumentenverantwortlicher: Andre Scheer
Katharina-Loth-Str. 15
66386 St. Ingbert
erklären in alleiniger Verantwortung, dass das
Produkt
Kfz-Ladegerät mit Starthilfefunktion
Herstellungsjahr: 2016 / 43
IAN: 277071
Jahr der CE Kennzeichnung: 15
Modell: KFZ-LADEGERÄT MIT STARTHILFE-
FUNKTION ULG 12 A2
den wesentlichen Schutzanforderungen genügt, die
in den Europäischen Richtlinien
EG-Niederspannungsrichtlinie
2014 / 35 / EU
EG-Richtlinie Elektromagnetische
Vertraglichkeit
2014 / 30 / EU
RoHS Richtlinie
2011 / 65 / EU
Der oben beschriebene Gegenstand der Erklärung
erfüllt die Vorschriften der Richtlinie 2011 / 65 / EU
des Europäischen Parlaments und des Rates vom
08. Juni 2011 zur Beschränkung der Verwendung
bestimmter gefährlicher Stoffe in Elektro- und Elektronikgeräten.
festgelegt sind.
Für die Konformitätsbewertung wurden folgende
harmonisierte Normen herangezogen:
EN 60335-2-29:2004/A2:2010
EN 60335-1:2012/A11:2014
EN 62233:2008
EN 50498:2010
EN 55014-1:2006/A2:2011
EN 55014-2:1997/A2:2008
EN 61000-3-2:2014
... / Umwelthinweise und Entsorgungsangaben / EG-Konformitätserklärung
Page 72

72 DE/AT/CH
EG-Konformitätserklärung
EN 61000-3-3:2013
AfPS GS 2014:01 PAK
St. Ingbert, 31.08.2016
i. A. Andre Scheer
- Leiter Qualitätssicherung -
Page 73

C. M. C. GmbH
Katharina-Loth-Str. 15
DE-66386 St. Ingbert
GERMANY
Last Information Update · Információk állása
Stanje informacij · Stav informací · Stav
informácií · Stand der Informationen:
08 / 2016 · Ident.-No.: ULG12A2082016-4
IAN 277071
 Loading...