

Page 1

PAK 44G
PLASMA GOUGING SYSTEM
August 25, 1998
Operating Manual
Manual No. 0-2686
Page 2

Page 3
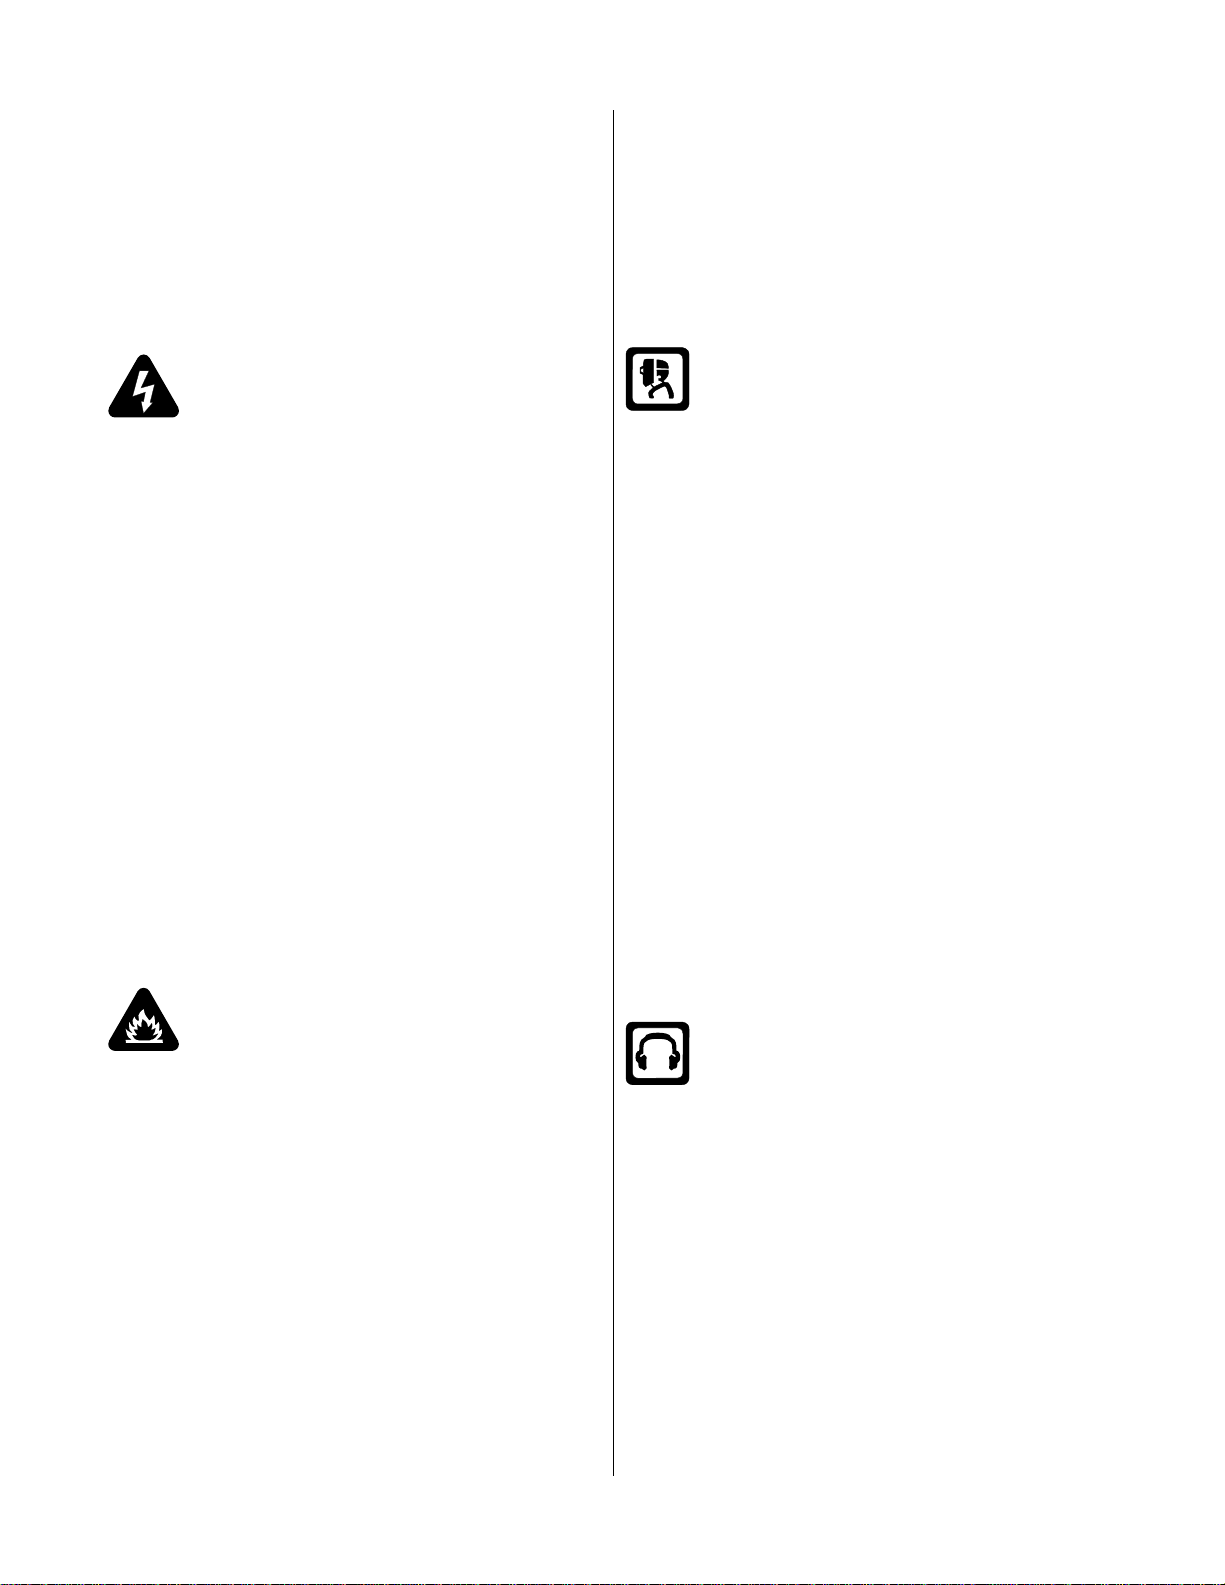
WARNING
WARNING
Read and understand this entire Operating Manual and your
employer’s safety practices before installing, operating, or
servicing the equipment.
While the information contained in this manual represents our
best judgement, Thermal Dynamics Corporation assumes no
liability for its use.
Pak 44G Plasma Gouging System
Operating Manual Number 0-2686
Published by:
Thermal Dynamics Corporation
Industrial Park No. 2
West Lebanon, New Hampshire, USA 03784
(603) 298-5711
Copyright 1998
Thermal Dynamics Corporation
All rights reserved.
Reproduction of this work, in whole or in part, without written
permission of the publisher is prohibited.
The publisher does not assume and hereby disclaims any liabil-
ity to any party for any loss or damage caused by any error or
omission in the Pak 44G Plasma Gouging System Operating
Manual, whether such error results from negligence, accident, or
any other cause.
August 25, 1998
Page 4

TABLE OF CONTENTS
SECTION 1:
GENERAL INFORMATION .................................................................................................. 1
1.01 Notes, Cautions and Warnings .................................................................... 1
1.02 Important Safety Precautions ...................................................................... 1
1.03 Publications................................................................................................. 2
1.04 Note, Attention et Avertissement ................................................................. 3
1.05 Precautions De Securite Importantes.......................................................... 3
1.06 Documents De Reference........................................................................... 5
1.07 Declaration of Conformity............................................................................ 6
1.08 Statement of W arr anty................................................................................. 7
SECTION 2:
INTRODUCTION & DESCRIPTION..................................................................................... 9
2.01 Scope of Manual ......................................................................................... 9
2.02 General Description ..................................................................................... 9
2.03 Specifications & Design Features................................................................ 9
2.04 Pow er Supply Options and Accessories..................................................... 10
SECTION 3:
INST ALLATION PROCEDURES ........................................................................................ 11
3.01 Introduction ............................................................................................... 11
3.02 Site Selection ............................................................................................ 11
3.03 Unpacking ................................................................................................. 11
3.04 Removing Skid .......................................................................................... 11
3.05 Installation Of Optional Running Gear ....................................................... 12
3.06 Input Pow er Connections .......................................................................... 12
3.07 Primary V oltage Selection ......................................................................... 13
3.08 Primary Power Cable Connections............................................................ 13
3.09 W ork Cable And Ground Connections....................................................... 15
3.10 Plasma and Secondary Gas Connections................................................. 15
3.11 Connecting Torch Leads............................................................................ 16
3.12 Filling Pow er Supply Coolant..................................................................... 16
3.13 Initial Start-Up Of System.......................................................................... 16
SECTION 4:
OPERA TION ...................................................................................................................... 19
4.01 Introduction ............................................................................................... 19
4.02 Functional Overview.................................................................................. 19
4.03 Operating Control Descriptions ................................................................. 19
4.04 Getting Started .......................................................................................... 21
4.05 Gouging Operation.................................................................................... 21
SECTION 5:
CUSTOMER/OPERATOR SER VICE.................................................................................. 23
5.01 Introduction ............................................................................................... 23
5.02 General Po wer Supply Maintenance ......................................................... 23
5.03 Common Operating Faults ........................................................................ 24
5.04 Troubleshooting Guide............................................................................... 25
5.05 Gas Pressure Regulators.......................................................................... 28
Page 5

TABLE OF CONTENTS (continued)
SECTION 6:
PARTS LISTS.....................................................................................................................29
6.01 Introduction ............................................................................................... 29
6.02 Ordering Information ................................................................................. 29
6.03 Pow er Supply Remote Aer a Spare P a rts Kit.............................................. 30
6.04 Pow er Supply Options and Accessories.................................................... 32
APPENDIX I: INPUT WIRING REQ UIREMENTS ...................................................................... 33
APPENDIX II: SEQUENCE OF OPERATION BLOCK DIAGRAM.............................................. 34
APPENDIX III: TIMING CHART ................................................................................................. 35
APPENDIX IV: SYSTEM BLOCK DIA GRAM ............................................................................. 36
APPENDIX V : RECOMMENDED ROUTINE MAINTENANCE SCHEDULE
FOR WATER COOLED PLASMA CUTTING SYSTEMS .................................................... 37
APPENDIX VI: SYSTEM SCHEMATIC ...................................................................................... 38
Page 6

Page 7
SECTION 1:
GENERAL INFORMATION
1.01 Notes, Cautions and Warnings
Throughout this manual, notes, cautions, and warnings
are used to highlight important information. These highlights are categorized as follows:
NOTE
An operation, procedure, or backgr ound information which requires additional emphasis or is helpful in efficient operation of the system.
CAUTION
A procedure which, if not properly followed, may
cause damage to the equipment.
W ARNING
A procedure which, if not properly followed, may
cause injury to the operator or others in the operating area.
1.02 Important Safety Precautions
• Use an air-supplied respirator if ventilation is not
adequate to remove all fumes and gases.
• The kinds of fumes and gases from the plasma arc
depend on the kind of metal being used, coatings
on the metal, and the different processes. Y ou must
be very careful when cutting or welding any metals which may contain one or more of the following:
Antimony Chromium Mercury
Arsenic Cobalt Nickel
Barium Copper Selenium
Beryllium Lead Silver
Cadmium Manganese Vanadium
• Always read the Material Safety Data Sheets (MSDS)
that should be supplied with the material you are
using. These MSDSs will give you the information
regarding the kind and amount of fumes and gases
that may be dangerous to your health.
• For information on how to test for fumes and gases
in your workplace, refer to item 1 in Subsection
1.03, Publications in this manual.
• Use special equipment, such as water or down draft
cutting tables, to capture fumes and gases.
• Do not use the plasma torch in an area where combustible or explosive gases or materials are located.
• Phosgene, a toxic gas, is generated from the vapors
of chlorinated solvents and cleansers. Remove all
sources of these vapors.
WARNING
OPERATION AND MAINTENANCE OF
PLASMA ARC EQUIPMENT CAN BE DANGEROUS AND HAZARDOUS TO YOUR
HEALTH.
To prevent possible injury, read, understand and
follow all warnings, safety precautions and instructions before using the equipment. Call 1-603298-5711 or your local distributor if you have any
questions.
GASES AND FUMES
Gases and fumes produced during the plasma cutting
process can be dangerous and hazardous to your health.
• Keep all fumes and gases from the breathing area.
Keep your head out of the welding fume plume.
ELECTRIC SHOCK
Electric Shock can injure or kill. The plasma arc process
uses and produces high voltage electrical energy. This
electric energy can cause severe or fatal shock to the operator or others in the workplace.
• Never touch any parts that are electrically “live” or
“hot.”
• W ear dry gloves and clothing. Insulate yourself from
the work piece or other parts of the welding circuit.
• Repair or replace all worn or damaged parts.
• Extra care must be taken when the workplace is
moist or damp.
• Install and maintain equipment according to NEC
code, refer to item 9 in Subsection 1.03, Publications.
• Disconnect power source before performing any service or repairs.
• Read and follow all the instructions in the Operating Manual.
1 GENERAL INFORMATION
Page 8
FIRE AND EXPLOSION
Fire and explosion can be caused by hot slag, sparks, or
the plasma arc.
• Be sure there is no combustible or flammable material in the workplace. Any material that cannot be
removed must be protected.
• Ventilate all flammable or explosive vapors from
the workplace.
• Do not cut or weld on containers that may have held
combustibles.
• Provide a fire watch when working in an area wher e
fire hazards may exist.
• Hydrogen gas may be formed and trapped under
aluminum workpieces when they are cut underwater or while using a water table. DO NOT cut
aluminum alloys underwater or on a water table
unless the hydrogen gas can be eliminated or dissipated. T rapped hydr ogen gas that is ignited will
cause an explosion.
NOISE
Noise can cause permanent hearing loss. Plasma arc processes can cause noise levels to exceed safe limits. You
must protect your ears from loud noise to prevent permanent loss of hearing.
• T o pr otect your hearing fr om loud noise, wear protective ear plugs and/or ear muffs. Protect others
in the workplace.
• Noise levels should be measured to be sure the decibels (sound) do not exceed safe levels.
• For information on how to test for noise, see item 1
in Subsection 1.03, Publications, in this manual.
PLASMA ARC RAYS
Plasma Arc Rays can injure your eyes and burn your skin.
The plasma arc process produces very bright ultra violet
and infra red light. These arc rays will damage your
eyes and burn your skin if you are not properly pr otected.
• To protect your eyes, always wear a welding helmet or shield. Also always wear safety glasses with
side shields, goggles or other protective eye wear.
• Wear welding gloves and suitable clothing to protect your skin from the arc rays and sparks.
• Keep helmet and safety glasses in good condition.
Replace lenses when cracked, chipped or dirty.
• Protect others in the work area from the arc rays.
Use protective booths, screens or shields.
• Use the shade of lens as recommended in Subsection 1.03, item 4.
1.03 Publications
Refer to the following standards or their latest revisions
for more information:
1. OSHA, SAFETY AND HEALTH STANDARDS,
29CFR 1910, obtainable from the Superintendent of
Documents, U.S. Government Printing Office, W ashington, D.C. 20402
2. ANSI Standard Z49.1, SAFETY IN WELDING AND
CUTTING, obtainable from the American Welding
Society, 550 N.W. LeJeune Rd, Miami, FL 33126
3. NIOSH, SAFETY AND HEALTH IN ARC WELDING AND GAS WELDING AND CUTTING, obtainable from the Superintendent of Documents, U.S.
Government Printing Office, W ashington, D.C. 20402
4. ANSI Standard Z87.1, SAFE PRACTICES FOR OCCUP ATION AND EDUCA TIONAL EYE AND F ACE
PROTECTION, obtainable from American National
Standards Institute, 1430 Broadway, New York, NY
10018
5. ANSI Standard Z41.1, STANDARD FOR MEN’S
SAFETY-TOE FOOTWEAR, obtainable from the
American National Standards Institute, 1430 Broadway, New York, NY 10018
6. ANSI Standard Z49.2, FIRE PREVENTION IN THE
USE OF CUTTING AND WELDING PROCESSES,
obtainable from American National Standar ds Institute, 1430 Broadway, New York, NY 10018
7. AWS Standard A6.0, WELDING AND CUTTING
CONTAINERS WHICH HAVE HELD COMBUSTIBLES, obtainable from American Welding Society,
550 N.W. LeJeune Rd, Miami, FL 33126
8. NFPA Standard 51, OXYGEN-FUEL GAS SYSTEMS
FOR WELDING, CUTTING AND ALLIED PROCESSES, obtainable from the National Fire Protection Association, Batterymarch Park, Quincy, MA
02269
9. NFPA Standard 70, NATIONAL ELECTRICAL
CODE, obtainable from the National Fire Protection
Association, Batterymarch Park, Quincy, MA 02269
10. NFPA Standard 51B, CUTTING AND WELDING
PROCESSES, obtainable from the National Fire Protection Association, Batterymarch Park, Quincy, MA
02269
11. CGA Pamphlet P-1, SAFE HANDLING OF COMPRESSED GASES IN CYLINDERS, obtainable from
the Compressed Gas Association, 1235 Jefferson
Davis Highway, Suite 501, Arlington, VA 22202
GENERAL INFORMATION 2
Page 9
12. CSA Standard W117.2, CODE FOR SAFETY IN
WELDING AND CUTTING, obtainable from the Canadian Standards Association, Standards Sales, 178
Rexdale Boulevard, Rexdale, Ontario, Canada M9W
1R3
13. NWSA booklet, WELDING SAFETY BIBLIOGRAPHY obtainable from the National Welding Supply
Association, 1900 Arch Street, Philadelphia, PA 19103
14. American W elding Society Standard A WSF4.1, RECOMMENDED SAFE PRACTICES FOR THE PREP ARA TION FOR WELDING AND CUTTING OF CONTAINERS AND PIPING THAT HAVE HELD
HAZARDOUS SUBSTANCES, obtainable from the
American Welding Society, 550 N.W. LeJeune Rd,
Miami, FL 33126
15. ANSI Standard Z88.2, PRACTICE FOR RESPIRATORY PROTECTION, obtainable from American
National Standards Institute, 1430 Broadway, New
York, NY 10018
1.04 Note, Attention et Avertissement
Dans ce manuel, les mots “note,” “attention,” et
“avertissement” sont utilisés pour mettre en relief des
informations à caractère important. Ces mises en relief
sont classifiées comme suit :
1.05 Precautions De Securite Importantes
AVERTISSEMENT
L’OPÉRATION ET LA MAINTENANCE DU
MATÉRIEL DE SOUDAGE À L’ARC AU JET
DE PLASMA PEUVENT PRÉSENTER DES
RISQUES ET DES DANGERS DE SANTÉ.
Il faut communiquer aux opérateurs et au personnel TOUS les dangers possibles. Afin d’éviter les
blessures possibles, lisez, comprenez et suivez tous
les avertissements, toutes les précautions de
sécurité et toutes les consignes avant d’utiliser le
matériel. Composez le + 603-298-5711 ou votre
distributeur local si vous avez des questions.
FUMÉE et GAZ
La fumée et les gaz produits par le procédé de jet de
plasma peuvent présenter des risques et des dangers de
santé.
NOTE
Toute opération, procédure ou renseignement
général sur lequel il importe d’insister davantage
ou qui contribue à l’efficacité de fonctionnement
du système.
ATTENTION
Toute procédure pouvant r ésulter
l’endommagement du matériel en cas de nonrespect de la procédur e en question.
A VERTISSEMENT
Toute procédure pouvant provoquer des blessures
de l’opérateur ou des autres personnes se trouvant
dans la zone de travail en cas de non-respect de la
procédure en question.
• Eloignez toute fumée et gaz de votre zone de respiration. Gardez votre tête hors de la plume de fumée
provenant du chalumeau.
• Utilisez un appareil respiratoire à alimentation en
air si l’aération fournie ne permet pas d’éliminer la
fumée et les gaz.
• Les sortes de gaz et de fumée provenant de l’arc de
plasma dépendent du genre de métal utilisé, des
revêtements se trouvant sur le métal et des différ ents
procédés. Vous devez prendre soin lorsque vous
coupez ou soudez tout métal pouvant contenir un
ou plusieurs des éléments suivants:
antimoine cadmium mercure
argent chrome nickel
arsenic cobalt plomb
baryum cuivre sélénium
béryllium manganèse vanadium
• Lisez toujours les fiches de données sur la sécurité
des matières (sigle américain “MSDS”); celles-ci
devraient être fournies avec le matériel que vous
utilisez. Les MSDS contiennent des renseignements
quant à la quantité et la nature de la fumée et des
gaz pouvant poser des dangers de santé.
• Pour des informations sur la manière de tester la
fumée et les gaz de votre lieu de travail, consultez
l’article 1 et les documents cités à la page 5.
3 GENERAL INFORMATION
Page 10
• Utilisez un équipement spécial tel que des tables de
coupe à débit d’eau ou à courant descendant pour
capter la fumée et les gaz.
• N’utilisez pas le chalumeau au jet de plasma dans
une zone où se trouvent des matières ou des gaz
combustibles ou explosifs.
• Le phosgène, un gaz toxique, est généré par la fumée
provenant des solvants et des produits de nettoyage
chlorés. Eliminez toute source de telle fumée.
• Prévoyez une veille d’incendie lors de tout travail
dans une zone présentant des dangers d’incendie.
• Le gas hydrogène peut se former ou s’accumuler
sous les pièces de travail en aluminium lorsqu’elles
sont coupées sous l’eau ou sur une table d’eau. NE
P AS couper les alliages en aluminium sous l’eau ou
sur une table d’eau à moins que le gas hydrogène
peut s’échapper ou se dissiper. Le gas hydrogène
accumulé explosera si enflammé.
CHOC ELECTRIQUE
Les chocs électriques peuvent blesser ou même tuer. Le
procédé au jet de plasma requiert et produit de l’éner gie
électrique haute tension. Cette énergie électrique peut
produire des chocs graves, voire mortels, pour l’opérateur
et les autres personnes sur le lieu de travail.
• Ne touchez jamais une pièce “sous tension” ou
“vive”; portez des gants et des vêtements secs.
Isolez-vous de la pièce de travail ou des autres parties du circuit de soudage.
• Réparez ou remplacez toute pièce usée ou
endommagée.
• Prenez des soins particuliers lorsque la zone de travail est humide ou moite.
• Montez et maintenez le matériel conformément au
Code électrique national des Etats-Unis. (Voir la
page 5, article 9.)
• Débranchez l’alimentation électrique avant tout travail d’entretien ou de réparation.
• Lisez et respectez toutes les consignes du Manuel
de consignes.
INCENDIE ET EXPLOSION
RAYONS D’ARC DE PLASMA
Les rayons provenant de l’arc de plasma peuvent blesser
vos yeux et brûler votre peau. Le procédé à l’arc de plasma
produit une lumière infra-rouge et des rayons ultra-violets très forts. Ces rayons d’arc nuiront à vos yeux et
brûleront votre peau si vous ne vous protégez pas
correctement.
• Pour protéger vos yeux, portez toujours un casque
ou un écran de soudeur. Portez toujours des lunettes
de sécurité munies de parois latérales ou des lunettes de protection ou une autre sorte de protection oculaire.
• Portez des gants de soudeur et un vêtement
protecteur approprié pour protéger votre peau
contre les étincelles et les rayons de l’arc.
• Maintenez votre casque et vos lunettes de protection en bon état. Remplacez toute lentille sale ou
comportant fissure ou rognure.
• Protégez les autres personnes se trouvant sur la zone
de travail contre les rayons de l’arc en fournissant
des cabines ou des écrans de protection.
• Respectez le teint de lentille recommandé dans le
article 4, page 5.
Les incendies et les explosions peuvent résulter des scories
chaudes, des étincelles ou de l’arc de plasma. Le procédé
à l’arc de plasma produit du métal, des étincelles, des
scories chaudes pouvant mettre le feu aux matières combustibles ou provoquer l’explosion de fumées
inflammables.
• Soyez certain qu’aucune matière combustible ou inflammable ne se trouve sur le lieu de travail.
Protégez toute telle matière qu’il est impossible de
retirer de la zone de travail.
• Procurez une bonne aération de toutes les fumées
inflammables ou explosives.
• Ne coupez pas et ne soudez pas les conteneurs ayant
pu renfermer des matières combustibles.
GENERAL INFORMATION 4
BRUIT
Le bruit peut provoquer une perte permanente de l’ouïe.
Les procédés de soudage à l’arc de plasma peuvent
provoquer des niveaux sonores supérieurs aux limites
normalement acceptables. Vous dú4ez vous protéger les
oreilles contre les bruits forts afin d’éviter une perte
permanente de l’ouïe.
• Pour protéger votre ouïe contre les bruits forts, portez
des tampons protecteurs et/ou des protections
auriculaires. Protégez également les autres
personnes se trouvant sur le lieu de travail.
• Il faut mesurer les niveaux sonores afin d’assurer
que les décibels (le bruit) ne dépassent pas les
niveaux sûrs.
Page 11

• Pour des renseignements sur la manière de tester le
bruit, consultez l’article 1, page 5.
1.06 Documents De Reference
Consultez les normes suivantes ou les révisions les plus
récentes ayant été faites à celles-ci pour de plus amples
renseignements :
1. OSHA, NORMES DE SÉCURITÉ DU TRAVAIL ET
DE PROTECTION DE LA SANTÉ, 29CFR 1910,
disponible auprès du Superintendent of Documents, U.S. Government Printing Office, Washington, D.C. 20402
2. Norme ANSI Z49.1, LA SÉCURITÉ DES
OPÉRATIONS DE COUPE ET DE SOUDAGE,
disponible auprès de la Société Américaine de
Soudage (American Welding Society), 550 N.W.
LeJeune Rd., Miami, FL 33126
3. NIOSH, LA SÉCURITÉ ET LA SANTÉ LORS DES
OPÉRATIONS DE COUPE ET DE SOUDAGE À
L ’ARC ET AU GAZ, disponible aupr ès du Superintendent of Documents, U.S. Government Printing
Office, Washington, D.C. 20402
4. Norme ANSI Z87.1, PRA TIQUES SURES POUR LA
PROTECTION DES YEUX ET DU VISAGE AU
TRAVAIL ET DANS LES ECOLES, disponible de
l’Institut Américain des Normes Nationales (American National Standards Institute), 1430 Broadway,
New Y ork, NY 10018
5. Norme ANSI Z41.1, NORMES POUR LES
CHAUSSURES PROTECTRICES, disponible auprès
de l’American National Standards Institute, 1430
Broadway, New York, NY 10018
6. Norme ANSI Z49.2, PRÉVENTION DES
INCENDIES LORS DE L ’EMPLOI DE PROCÉDÉS
DE COUPE ET DE SOUDAGE, disponible auprès
de l’American National Standards Institute, 1430
Broadway, New York, NY 10018
7. Norme A6.0 de l’Association Américaine du
Soudage (A WS), LE SOUDAGE ET LA COUPE DE
CONTENEURS AYANT RENFERMÉ DES
PRODUITS COMBUSTIBLES, disponible auprès de
la American W elding Society, 550 N.W . LeJeune Rd.,
Miami, FL 33126
8. Norme 51 de l’Association Américaine pour la Protection contre les Incendies (NFP A), LES SYSTEMES
À GAZ AVEC ALIMENTATION EN OXYGENE
POUR LE SOUDAGE, LA COUPE ET LES
PROCÉDÉS ASSOCIÉS, disponible auprès de la
National Fire Protection Association, Batterymarch
Park, Quincy, MA 02269
9. Norme 70 de la NFPA, CODE ELECTRIQUE NATIONAL, disponible auprès de la National Fire Protection Association, Batterymarch Park, Quincy, MA
02269
10. Norme 51B de la NFPA, LES PROCÉDÉS DE
COUPE ET DE SOUDAGE, disponible auprès de
la National Fire Protection Association,
Batterymarch Park, Quincy, MA 02269
11. Brochure GCA P-1, LA MANIPULATION SANS
RISQUE DES GAZ COMPRIMÉS EN CYLINDRES,
disponible auprès de l’Association des Gaz
Comprimés (Compressed Gas Association), 1235
Jefferson Davis Highway, Suite 501, Arlington, VA
22202
12. Norme CSA W1 17.2, CODE DE SÉCURITÉ POUR
LE SOUDAGE ET LA COUPE, disponible auprès
de l’Association des Normes Canadiennes, Standards Sales, 178 Rexdale Boulevard, Rexdale,
Ontario, Canada, M9W 1R3
13. ivret NWSA, BIBLIOGRAPHIE SUR LA SÉCURITÉ
DU SOUDAGE, disponible auprès de l’Association
Nationale de Fournitures de Soudage (National
Welding Supply Association), 1900 Arch Street,
Philadelphia, PA 19103
14. Norme AWSF4.1 de l’Association Américaine de
Soudage, RECOMMANDATIONS DE PRA TIQUES
SURES POUR LA PRÉPARATION À LA COUPE
ET AU SOUDAGE DE CONTENEURS ET TUY AUX
AYANT RENFERMÉ DES PRODUITS
DANGEREUX , disponible auprès de la American
Welding Society, 550 N.W. LeJeune Rd., Miami, FL
33126
15. Norme ANSI Z88.2, PRATIQUES DE PROTECTION RESPIRATOIRE, disponible auprès de
l’American National Standards Institute, 1430
Broadway, New York, NY 10018
5 GENERAL INFORMATION
Page 12

1.07 Declaration of Conformity
Manufacturer: Thermal Dynamics Corporation
Address: Industrial Park #2
W est Lebanon, New Hampshire 03784
USA
The equipment described in this manual conforms to all applicable aspects and regulations of the ‘Low Voltage Directive’ (European Council Directive 73/23/EEC as amended by Council Directive 93/68/EEC) and to the National legislation for the enforcement of this Directive.
The equipment described in this manual conforms to all applicable aspects and regulations of the "EMC Directive"
(European Council Directive 89/336/EEC) and to the National legislation for the enforcement of this Directive.
Serial numbers are unique with each individual piece of equipment and details description, parts used to manufacture
a unit and date of manufacture.
National Standard and Technical Specifications
The product is designed and manufactured to a number of standards and technical requirements among them ar e:
* CSA (Canadian Standards Association) standard C22.2 number 60 for Arc welding equipment.
* UL (Underwriters Laboratory) rating 94VO flammability testing for all printed-circuit boards used.
* CENELEC EN50199 EMC Product Standard for Arc Welding Equipment.
* ISO/IEC 60974-1 (BS 638-PT10) (EN 60 974-1) applicable to welding equipment and associated accessories.
* Extensive product design verification is conducted at the manufacturing facility as part of the routine design and
manufacturing process. This is to ensure the product is safe, when used according to instr uctions in this manual and
related industry standards, and performs as specified. Rigorous testing is incorporated into the manufacturing
process to ensure the manufactured product meets or exceeds all design specifications.
Thermal Dynamics has been manufacturing products for more than 30 years, and will continue to achieve excellence in our
area of manufacture.
Manufacturers responsible representative: David Ashworth
Vice Pr esident & Managing Director
Thermadyne Europe
Chorley England.
GENERAL INFORMATION 6
Page 13

1.08 Statement of Warranty
LIMITED WARRANTY: Thermal Dynamics® Corporation (hereinafter “Thermal”) warrants that its products will be free of
defects in workmanship or material. Should any failure to conform to this warranty appear within the time period applicable to
the Thermal products as stated below, Thermal shall, upon notification thereof and substantiation that the product has been
stored, installed, operated, and maintained in accordance with Thermal’s specifications, instructions, recommendations and
recognized standard industry practice, and not subject to misuse, repair, neglect, alteration, or accident, correct such defects by
suitable repair or replacement, at Thermal’s sole option, of any components or parts of the product determined by Thermal to be
defective.
THIS W ARRANTY IS EXCLUSIVE AND IS IN LIEU OF ANY WARRANTY OF MERCHANTABILITY OR FITNESS FOR A
P AR TICULAR PURPOSE.
LIMITATION OF LIABILITY: Thermal shall not under any circumstances be liable for special or consequential damages, such
as, but not limited to, damage or loss of purchased or replacement goods, or claims of customers of distributor (hereinafter
“Purchaser”) for service interruption. The remedies of the Purchaser set forth herein are exclusive and the liability of Thermal
with respect to any contract, or anything done in connection therewith such as the performance or breach thereof, or from the
manufacture, sale, delivery, resale, or use of any goods covered by or furnished by Thermal whether arising out of contract,
negligence, strict tort, or under any warranty , or otherwise, shall not, except as expr essly pr ovided herein, exceed the price of the
goods upon which such liability is based.
THIS W ARRANTY BECOMES INVALID IF REPLACEMENT PAR TS OR ACCESSORIES ARE USED WHICH MA Y IMP AIR
THE SAFETY OR PERFORMANCE OF ANY THERMAL PRODUCT.
THIS W ARRANTY IS INVALID IF THE PRODUCT IS SOLD BY NON-AUTHORIZED PERSONS.
The limited warranty periods for Thermal products shall be as follows (with the exception of ST AK PAK II and DRAG-GUN): A
maximum of three (3) years from date of sale to an authorized distributor and a maximum of two (2) years from date of sale by
such distributor to the Purchaser, and with the further limitations on such two (2) year period (see chart below).
The limited warranty period for STAK PAK II shall be as follows: A maximum of four (4) years from date of sale to an
authorized distributor and a maximum of three (3) years from date of sale by such distributor to the Purchaser, and with
the further limitations on such three (3) year period (see chart below).
The limited warranty period for DRAG-GUN shall be as follows: A maximum of two (2) years from date of sale to an
authorized distributor and a maximum of one (1) year from date of sale by such distributor to the Purchaser, and with the
further limitations on such two (2) year period (see chart below).
PARTS PARTS PARTS
PAK UNITS, POWER SUPPLIES STAK P AK II DRAG-GUN All OTHERS LABOR
Main Power Magnetics 3 Years 1 Year 2 Years 1 Year
Original Main Power Rectifier 3 Years 1 Year 2 Years 1 Year
Control PC Board 3 Years 1 Year 2 Years 1 Year
All Other Circuits And Components Including, 1 Year 1 Year 1 Year 1 Year
But Not Limited To, Starting Circuit,
Contactors, Relays, Solenoids, Pumps,
Power Switching Semi-Conductors
CONSOLES, CONTROL EQUIPMENT, HEAT 1 Year 1 Year 1 Year
EXCHANGES, AND ACCESSORY EQUIPMENT
TORCH AND LEADS
Maximizer 300 Torch N/A 1 Year 1 Year
All Other Torches 180 Days 180 Days 180 Days 180 Days
REPAIR/REPLACEMENT PARTS 90 Days 90 Days 90 Days None
Warranty repairs or replacement claims under this limited warranty must be submitted by an authorized Thermal Dynamics®
repair facility within thirty (30) days of the repair. No transportation costs of any kind will be paid under this warranty.
T ransportation char ges to send pr oducts to an authorized warranty repair facility shall be the r esponsibility of the customer. All
returned goods shall be at the customer’s risk and expense. This warranty supersedes all previous Thermal warranties.
Effective May 19, 1998
7 GENERAL INFORMATION
Page 14

GENERAL INFORMATION 8
Page 15

SECTION 2:
INTRODUCTION &
DESCRIPTION
2.03 Specifications & Design Features
The following apply to the Power Supply only:
1. Power Input
2.01 Scope of Manual
This manual contains descriptions, operating instructions
and maintenance procedures for the Pak 44G Plasma
Gouging System. Service of this equipment is restricted
to properly trained personnel; unqualified personnel are
strictly cautioned against attempting repairs or adjustments not covered in this manual, at the risk of voiding
the Warranty.
Read this manual thoroughly. A complete understanding of the characteristics and capabilities of this equipment will assure the dependable operation for which it
was designed.
2.02 General Description
A complete PAK 44G Gouging System includes a PGH145G hand torch with leads, a spare parts kit, a PAK 44G
Gouging Power Supply, gas supply pressure regulators,
10 foot (3 m) gas supply hoses and a 25 foot (7.6 m) work
cable with clamp.
Two PGH-145G hand torch configurations are available
as follows with 25 ft (7.62 m), 50 ft (15.24 m), 75 ft (22.9
m) or 100 ft (30.5 m) leads:
• PGH-145G 90° Hand Torch
• PGH-145G 70° Hand Torch
An initial supply of torch consumable parts are in a spar e
parts kit.
A-02096
Gas Hoses
Pak 44G
80 KVA, 50/60 Hertz, three-phase in the following
standard voltage/amperage combinations:
Input Voltage (VAC) Amperage (Amps)
208/230/ 460 Unit s
208 220
230 200
460 100
230/460/ 575 Unit s
230 200
460 100
575 80
380/415/ 460 Unit s
380 120
415 110
460 100
380/460/ 500 Unit s
380 120
460 100
500 90
220/380/ 400/ 500 Unit s
220 200
380 120
400 100
500 90
180/200/ 220 Unit s
180 250
220 225
220 200
Certain other special voltage combinations are available on request.
2. Rated Output
Gas
Regulators
Spare Parts
Kit
Work Cable
Torch and Leads
400 amperes DC (limited duty cycle), 300 amperes
(continuous)
3. Current Control (see Note)
50 to 400 amps continuously adjusted feedback circuit
NOTE
Figure 2-1 System Components
The Pak 44G current output should be limited to
350 amperes.
Manual 0-2686 9 INTRODUCTION & DESCRIPTION
Page 16

4. Control Circuit
24 volt AC
5. Plasma and Secondary Gas Pressures
Controlled by pressure regulator at gas supply
6. W eight
1080 lbs. (490 kg)
7. Dimensions
Width: 26.5 inches (67.4 cm)
Depth: 42 inches (106.7 cm)
Height: 33 inches (83.8 cm)
2.04 Power Supply Options and Accessories
NOTE
Refer to Section 6, Parts Lists, for part numbers
and ordering information.
The only Power Supply Options and Accessories available is a running Gear . The running gear holds the Power
supply and up to three gas cylinders.
INTRODUCTION & DESCRIPTION 10 Manual 0-2686
Page 17

SECTION 3:
3.03 Unpacking
INSTALLATION
PROCEDURES
3.01 Introduction
This Section describes installation of the Pak 44G Power
Supply and selected Options. These instructions apply
to the Power Supply and selected Options only; installation procedures for the Torch, other Options and Accessories are given in Manuals specifically provided for those
units.
The complete installation consists of:
1. Site selection
2. Unpacking
3. Installing Selected Options
4. Connections to Power Supply
a. Input power
b. Internal power selection
Each component of the system is packaged separately and
protected with a carton and packing material to prevent
damage during shipping.
1. Unpack each item and remove all packing material.
2. Locate the packing list(s) and use the list to identify and account for each item.
3. Inspect each item for possible shipping damage. If
damage is evident, contact your distributor before
proceeding with installation.
3.04 Removing Skid
The base of the Power Supply is secured to the skid with
bolts and hex nuts. Remove the Power Supply from the
skid per the following procedure:
1. Turn the supplied lifting eye bolt all the way into the
threaded socket on top of the unit and tighten it securely.
c. Work cable
b. Gas connections
d. T o rch Connection
5. Grounding
6. Operator training
3.02 Site Selection
Select a clean, dry location with good ventilation and adequate working space around all components.
CAUTION
Operation without proper air flow will inhibit
proper cooling and reduce duty cycle.
The Power Supply is cooled by air flow into the unit
through the bottom and side panels. The fan moves the
air through the unit forcing the air out the back panel.
Air flow must not be obstructed. At least 2 feet (0.61 m)
of clearance should be provided on all sides.
A sour ce of three-phase power and a source of gases with
pressure regulators ar e r equir ed.
Review the safety precautions in the front of this manual
to be sure that the location meets all safety requirements.
Lifting Eye
Bolt
A-02097
Figure 3-1 Lifting Eye Bolt Installation
2. Using a lift or crane of the proper capacity , lift the Power
Supply to gain access to the skid mounting bolts and
nuts. If no crane or hoist is available for lifting, a fork
lift or jack may be used.
Manual 0-2686 11 INST ALLATION PROCEDURES
Page 18

3. Remove the four bolts and hex nuts securing the skid
to the Base Assembly of the Power Supply.
CAUTION
4. The Pak 44G is ready to be placed in its proper location. Lower the Power Supply back down to the floor .
If the Optional Running Gear is to be used then install per Section 3.05.
3.05 Installation Of Optional
Running Gear
This Sub-Section describes the installation of the Optional
Running Gear. If this option was ordered then proceed
with the following to install the Running Gear:
1. Disassemble the rear frame/cylinder rack assembly
by removing the four bolts that hold the axle so that
the axle/wheel assembly can be removed to gain access to the bolt holes.
NOTE
There are two mounting positions for the rear frame.
The forward position should be used except on Pak
44G units that are fitted with a Lo-Amp Resistor
Assembly, in which case the rear mounting position is required to clear the Resistor Assembly.
3/8-16 x 1"
Bolt
3/8-16 x 1"
Bolt
Do not lift the Pak 44G with the lifting eye when
gas cylinders are on the Running Gear.
Pak 44G
A-02098
Running Gear
Figure 3-3 Pak 44G Mounted on Running Gear
3.06 Input Power Connections
8 inches
(20.3 mm)
Axle/Wheel
Assembly
Base
A-01882
Figure 3-2 Rear Running Gear Installation
2. Mount the rear frame/cylinder rack assembly to the
bottom of the base using four 3/8"-16 x 1" long bolts
inserted from the bottom up. Install the lock washers
and nuts, then replace axle/wheel assembly.
3. Mount the front assembly using the remaining four 3/
8"-16 x 1" long bolts, lock washers and nuts.
4. Using the Lifting Eye Bolt on the Power Supply lower
the Power Supply onto the Running Gear . The Power
Supply and gas cylinders can now be transported using the running gear .
A. Electrical Connections
The power source must conform to local electric code and
the recommended circuit protection and wiring r equirements shown in Appendix I.
B. Opening Power Supply Enclosure
WARNING
Disconnect primary power at the source before assembling or disassembling power supply, torch
parts, or torch and leads assemblies.
To connect the unit, follow this step-by-step procedure:
1. Remove the top of the unit as follows:
a. Remove the screws holding the cover.
b. Remove the lifting eye.
c. Open the lead connection access door.
d. Lift off the cover of the unit.
INST ALLATION PROCEDURES 12 Manual 0-2686
Page 19

3.07 Primary Voltage Selection
The following Link Diagrams for 208/230/460, 230/460/
575, and 220/380/440/500 volt transformers are shown
below . For 380/415/460, 380/460/500, and 180/200/220
volt transformers the connection points are marked with
the appropriate voltage. If the unit is set up for a different set of voltages, the link positions will be shown on
the link panel or on the inside of the cover of the machine.
208 V AC
L2
1
1
7
10 9
13
10 9
2
11
14
4
L2
7
2
11
L3
8
3
5
230 V AC
L3
8
3
12
15
12
L1
1
6
L1
1
220 V AC
L2
1
7
4
10
1
7
4
10
NOTE:
Install Jumpers 'A' and 'B' for 380 VAC input.
Jumpers are shipped tie-wrapped to the frame
inside near the Reservoir.
8
2
13
L2
8
2
13
Jumper 'A' Jumper 'B'
L2
L3
3
L3
L3
9
14
3
9
14
5
11 12
380 V AC
5
11 12
440 V AC
L1
1
6
L1
1
6
L1
15
15
14
4
13
L2
1
1
1
1
7
10 9
13
10
7
10
7
10
7
2
14
4
L2
4
2
L2
4
2
L2
4
2
5
460 V AC
8
11
5
230 V AC
5
11 12
8
460 V AC
5
11 12
8
575 V AC
5
11 12
8
L3
L3
L3
3
3
3
L3
1
7
15
6
L1
12
3
15
6
A-01896
1
1
4
10
7
4
10
2
L2
2
8
13
8
13
3
L3
9
6
14
3
9
6
14
5
11 12
500 V AC
5
11 12
1
15
L1
1
15
A-01934
Figure 3-4 Input Voltage Links
L1
1
6
9
L1
1
6
3.08 Primary Power Cable
Connections
WARNING
Disconnect primary power at the source before con-
9
necting the primary power cable to the power supply.
L1
1
6
9
1. The paper band stapled around the main terminal
board states the voltage and frequency of input current for which the unit is connected. If a different input voltage is to be used see Section 3.08 for instructions to change to desired input voltage. Discard the
A-01898
paper band.
Manual 0-2686 13 INST ALLATION PROCEDURES
Page 20

This unit connected for ______ volts
Refer to Instruction manual for other voltage conncts.
Discard this label
after connecting input lines.
Paper Band
A-01884
Figure 3-5 Internal Packing Material
2. Check for possible loose connections and damage that
may have occurred during shipment.
3. The leads are fed through the “INPUT” fitting in the
back of the unit.
Input AC Cable
Strain Relief
HI - FLOW WATER SHIELD
6FU
5FU
INPUT
SECONDARY
GAS WATER SHIELD
PLASMA
GAS
FAN
ROTATION
A-02099
4FU
15A
15A
15A
ON
OFF
CAUTION
Input voltage of the available three phase power
source must correspond to the operating voltage of
the Pak 44G.
Internal
Pow er Transformer
Terminal Board
Power Leads
Figure 3-7 Rear Panel Connections
4. With the primary power disconnect switch open, connect the electrical ground and primary power leads
to the terminals on the upper right hand side (facing
the unit from the front.) Recommended wire sizes
are shown in Appendix I.
Input AC
Terminal Board
A-01886
Pow er Transformer
A-01885
(T1)
Figure 3-8 Input Terminal Board
Figure 3-6 Main Terminal Board and Power
Transformer Connections (208/230/460 Volt
Transformer Shown)
5. The leads are attached to terminals L1, L2, L3.
6. A proper ground connection must be made to the brass
stud.
INST ALLATION PROCEDURES 14 Manual 0-2686
Page 21

• Secondary Gas Requirements
This unit connected for ______ volts
Refer to Instruction manual for other voltage conncts.
Discard this label
after connecting input lines.
Input AC
Ground Connection
A-01888
Figure 3-9 Input Ground Connection
3.09 Work Cable And Ground Connections
The work cable is equipped with a cam-loc plug on one
end and a work clamp on the other . The plug fits into the
work receptacle on the front of the unit and the clamp
attaches to the workpiece.
3.10 Plasma and Secondary Gas Connections
The following are the plasma and secondary gas requirements for the Pak 44G System:
• Plasma Gas Requirements
Secondary Gas
Compressed Air , Carbon Dioxide (CO2), or Nitr ogen (N2)
Pressure
70 psi (4.8 bar)
CAUTION
Maximum input gas pressure must not exceed 125
psi (8.6 BAR)
Flow
235 scfh (111 lpm)
NOTE
A typical 50 lb CO2 cylinder is capable of delivering 35 SCFH on a continuous basis. Therefore,
the manifolding of several CO2 cylinders may be
necessary to obtain the required torch flow rate,
depending on application and duty cycle.
1. Examine each cylinder valve and ensure that it is clean
and free of oil, grease and other foreign matter. Momentarily open each cylinder valve to blow out any
dust which may be present.
WARNING
Plasma Gas
Helium (He), Argon (Ar), Nitrogen (N2), or Argon/Hydrogen (ArH2), Compressed Air
Pressure
60 psi (3.4 bar)
CAUTION
Maximum input gas pressure must not exceed 125
psi (8.6 BAR)
Hot Flow
22 - 43 scfh (10.4 - 20.3 lpm)
NOTE
Hot flow is measured with the main arc activated.
When pressure is set correctly the plasma gas flow
rate is significantly higher until the arc is initiated.
Do not Stand in Front of the Valve Outlet during
this Operation.
2. Connect the appropriate regulator to each cylinder
valve. The gas supplies must be equipped with adjustable pressure regulators capable of being set between 0 and 70 psi (4.8 BAR) and of delivering 22
SCFH (10.4 lpm) to 235 SCFH (111 lpm) depending
on the plasma and secondary gas used.
Pressure regulators for use with Pak units and specifically calibrated for use with nitrogen (Cat. No. 9-
2722) and carbon dioxide (Cat. No. 9-2759) are supplied when a Pak SYSTEM is ordered. They are also
available from Thermal Dynamics as an accessory as
are regulators for argon/hydrogen (Cat. No. 9-3053)
and compressed air (Cat. No. 9-3022).
3. Connect gas supplies to the fittings on the rear panel
of the Pak unit.
Manual 0-2686 15 INST ALLATION PROCEDURES
Page 22

3.11 Connecting Torch Leads
3.13 Initial Start-Up Of System
1. Check the torch to confirm that it is properly assembled
(Refer to Manual supplied with the Torch).
2. Pass the torch leads and control wire thr ough the bushing on the front panel and connect them to the appropriate fittings.
A-02100
PLASMA Gas
(+) Fitting
CONTROL
Connector
REMOTE CURRENT
CONTROL Connection
SEC (Secondary)
Gas Fitting
Coolant Supply
(-) Fitting
Coolant Return
Fitting
Torch Leads
Insulating Boot
1. T urn on the main power at the main disconnect switch.
2. Place the ON/OFF switch on the Front Panel to ON.
Check the direction of rotation of the motor against
the arrow on top of the motor. If it is incorrect, remove AC input power and reverse any two of the AC
input lines (see NOTE).
NOTE
On units manufactured before 1997 just switch
the FAN ROTA TION switch on the Rear Panel.
When the pump starts, the coolant pressure will come
up to approximately 120 psi (8.3 BAR). As the coolant
circulates, trapped air will come out of the torch leads.
More coolant must be added to the reservoir to maintain the coolant level. Let the coolant circulate for
about five minutes to get all of the air out.
WARNING
Do not let the pump run without adequate coolant
in the reservoir.
Figure 3-10 Torch Leads Connection
WARNING
Be careful working around the unit when power is
on and cover is not in place.
3.12 Filling Power Supply Coolant
1. Remove the yellow plastic cover from the coolant reservoir .
2. Fill the reservoir to the crosswires in the round neck
with Coolant supplied.
NOTE:
It is helpful to make a “splash guard” out of the
yellow cover by cutting a small hole in the center
of it. Replace the yellow cover in the top of the reservoir . This will avoid splashing coolant out of the
unit later on when removing air from the system.
3. While the coolant is circulating, check for leaks before
replacing the cover of the unit.
WARNING
Do not tighten fittings, etc. inside the unit unless
the primary power is turned off at the source.
4. Remove the plastic cover from the reservoir and replace
the cover of the unit (the leads access door must be
open). Start the sheet metal screws but do not tighten
them until the cover is lined up.
5. Carefully close the leads access door , making sure that
the switch actuator enters its slot and activates the
interlock switch. When the cover is properly positioned, tighten the screws. Replace and tighten the
lifting eye.
3. Reinstall the yellow plastic cover .
INST ALLATION PROCEDURES 16 Manual 0-2686
Page 23

Leads Access Cover
A-01889
Interlock Switch
Actuator
Figure 3-11 Access Cover and Interlock
6. Install the reservoir/cap cartridge assembly into the
reservoir neck. Install the lifting eye. Both are
packaged in a separate box.
WARNING
Do not operate the unit unless all parts of the enclosure are in place. This is important for proper
cooling as well as safety.
The unit is now ready for operation.
Manual 0-2686 17 INST ALLATION PROCEDURES
Page 24

INST ALLATION PROCEDURES 18 Manual 0-2686
Page 25

SECTION 4:
OPERATION
4.01 Introduction
This Section provides a description of the Pak 44G Power
Supply operating controls and procedures. Identification
of the Panel Controls is followed by operating procedures.
4.02 Functional Overview
The main components of the Pak 44G Plasma Gouging
System are and their functions are summarized below.
NOTE
Refer to Appendix V for a System Block Diagram.
A. Torch Connections
• Plasma gas, high frequency, and positive (+) power
for the pilot arc flow to the torch through the black
lead.
• Secondary gas (or water) flows to the torch through
the yellow lead.
• Torch coolant and negative (-) power flow to the
torch through the green water cooled lead.
• Coolant return flows through the red and blue wa-
ter cooled lead.
speed. This circuit changes the saturating current in
the reactor and the amount of AC power supplied to
the main bridge rectifier.
4.03 Operating Control Descriptions
This sub-section provides specific functional descriptions
of the Power Supply operating controls, indicators and
connections. The Power Supply has a Front Panel, Access Panel and Rear Panel. Each panel is described in
this sub-section as to the functions of the connections,
switches, and indicators.
A. Front Panel
16
15
14
3
5
7
2
1
9
10
13
4 8
6
A-02101
11
12
B. Pilot Arc
When the torch is started an arc is established between
the electrode and gouging tip. The pilot arc makes a
path for transferring the main arc to the work.
C. High Frequency
A high voltage, high frequency current is superimposed on the direct current to establish and maintain
the pilot arc.
D. Gouging Arc
The main bridge rectifier converts three-phase AC
power to DC for the pilot and main gouging arcs. The
negative output is connected to the electrode through
the torch lead. The positive output is connected to
the workpiece (via the work cable).
E. Current Control
The desired Gouging current is set on the CURRENT
ADJUST knob. A control circuit stabilized gouging
current against fluctuations due to changes in line
voltages, material thickness, torch standoff and travel
Figure 4-1 Front Panel Description
1. Current Adjust Knob
Adjust knob until desired current is indicated on
Ammeter .
2. Ammeter (AM)
Indicates amperage supplied to torch.
3. Ready Indicator (LT3)
Amber light indicates that the ON/OFF switch is
ON, that lead connections access door is closed
and that pump is running.
4. AC POWER Indicator (L T1)
Red light indicates that primary AC power is being supplied to the system.
5. PLASMA GAS
Indicates pressure at which plasma gas is being
supplied to the torch.
Manual 0-2686 19 OPERA TION
Page 26

6. SECONDARY GAS
Indicates pressure at which secondary gas is being supplied to the torch.
Disables the control circuit when Access Cover is
open.
3. Remote CONTROL Connection
7. RUN/SET Switch (SW2)
Move up to RUN position for torch operation.
Move down to SET position for purging gas lines
and setting gas pressures with external regulators.
8. DC POWER Indicator (L T2)
Red light indicates that main contactor (W) has
closed to supply current to the main bridge rectifier and that gouging current is available.
9. ON/OFF Switch (SW1)
Move up to ON position to turn on pump and fan.
Move down to OFF position to turn off pump and
fan.
10. COOLANT
Indicates pressure at which coolant system is being run.
11. Torch Leads Insulating Boot
Insulates the torch leads from the sheet metal preventing chafing of the leads.
12. REMOTE CURRENT CONTROL Connection
Connection for remote control of the output current.
Connection for remote control switch. Contact
closure activates gas and power circuits.
4. PLASMA (+) Gas Fitting
Connection used for the plasma, high frequency
and positive power for pilot leads of the torch.
5. SEC (Secondary) Gas Fitting
Connection used for the secondary lead of the
torch.
6. Coolant Return Fitting
Connection used for the coolant return lead of the
torch.
7. Coolant Supply (-) Fitting
Connection used for the negative (-)/coolant supply lead of the torch.
6. Positive (+) Fitting
Connection used for the positive (+)/coolant return/high frequency lead of the torch.
7. Negative (-) Fitting
Connection used for the negative (-)/coolant supply lead of the torch.
13. WORK Cable Connection
Plug type connection for the work cable.
14. Fuse 1FU
Fuse for the Pilot Arc cir cuit. This fuse is rated at
20 amps.
15. Fuse 2FU
Fuse for the current control bridge circuit. This
fuse is rated at 20 amps.
16. Fuse 3FU
Fuse for the 120 V AC r elay logic circuit. This fuse
is rated at 5 amps.
B. Access Panel
1. Access Cover
Cover with interlock lever which allows access to
the T or ch connections.
2. Interlock Lever
4
2
3
6
Figure 4-2 Access Panel Area
1
5
7
A-02102
OPERA TION 20 Manual 0-2686
Page 27

C. Rear Panel
1. INPUT Cable Bushing (Strain Relief)
A strain relief supplied to secure the customer
supplied primary input power cable to the power
supply. The input AC power cable is routed
through the strain relief and is connected to the
power input terminals inside the unit.
2. PLASMA GAS Connection Fitting
1/4" NPT inert B adapter gas fitting used to supply the plasma gas to the system.
3. SECONDARY GAS Connection Fitting
1/4" NPT inert B adapter gas fitting used to supply the secondary gas to the system.
WARNING
Check to be sure main disconnect switch is open.
1. Check the torch to be sure that it has the proper
components and is adjusted correctly (refer to Section 5.07).
2. Close the main disconnect switch supplying threephase power to the unit.
3. Move the ON/OFF switch to ON. The fan and
pump will start. The amber “Ready” light will
come on (if the gas supply is on, the gases will
flow for two seconds).
4. Fuse 4FU
Fuse for one line of the Fan Motor. This fuse is
rated at 8 amps.
5. Fuse 5FU
Fuse for one line of the Fan Motor. This fuse is
rated at 8 amps.
6. Fuse 6FU
Fuse for one line of the Fan Motor. This fuse is
rated at 8 amps.
4
FAN
1
GAS WATER SHIELD
3
PLASMA
ROTATION
INPUT
SECONDARY
GAS
2
6
5
HI - FLOW WATER SHIELD
6FU
5FU
4FU
15A
15A
15A
ON
OFF
4. Select plasma gas pressure for type of gouging per
Appendix III. Move the RUN/SET switch to the
SET position. Open the plasma gas supply valve
at the source. Adjust the pressur e regulator on the
gas supply until the plasma gas pressure selected
from the table is obtained.
5. Purge for approximately three minutes by letting
the plasma gas run. This will remove any condensation of moisture that may have accumulated in
the torch while it was shut down.
NOTE
Only the plasma gas line needs to be purged.
6. Open the secondary gas supply valve at the source.
Adjust the pressure regulator at the gas supply
until pressure reads 40 psi (2.8 BAR), or turn on
the secondary water if water shield gouging.
7. Return the RUN/SET switch to the RUN position.
8. Set the current adjust knob to the desired amperage level.
The system is now ready for operation. The torch is controlled by the switch mounted on the torch handle or the
remote control switch for a machine mounted torch.
NOTE
A-02103
Refer to Appendix II for detailed block diagram of
the Sequence Of Operation.
Figure 4-3 Rear Panel
4.05 Gouging Operation
4.04 Getting Started
This procedure should be followed at the beginning of
each shift:
Manual 0-2686 21 OPERA TION
A. General Instructions
The suggestions listed below should be followed in all
operations:
Page 28

1. Wait five minutes before turning off the fan and
pump and opening the main disconnect switch to
shut down.
main on until the main gouging arc is established,
at which point the pilot arc circuit switches off
automatically.
2. For maximum parts life, do not operate the pilot
arc any longer than necessary.
3. Remember that gouging current can be adjusted at
any time. Adjust the current output to provide a
comfortable working speed for the particular material being gouged.
4. Use care in handling torch leads and protect them
from damage.
5. In continuous gouging applications, it is often necessary to manifold four to six cylinders together
to maintain pressure at 40 psi (2.8 BAR) for secondary gas.
W ARNINGS
FREQUENTLY REVIEW THE SAFETY PRECAUTIONS GIVEN AT THE FRONT OF THIS
MANUAL.
It is not enough to simply move the ON/OFF
switch on the unit to its OFF position when gouging operations have been completed. Always open
the power supply disconnect switch five minutes
after the last cut is made.
3. The gouging arc will remain on as long as the control switch is held down unless the torch is withdrawn from the work or the torch motion is too
slow. If the gouging arc is interrupted when the
control switch is held down the pilot arc will come
on again. It will remain on until the gouging arc is
again established or the control switch is released.
4. Gouge with the torch about 1/4" to 1/2" (6.4-12.7
mm) from the workpiece. For best quality of gouge
and longest tip life hold the torch at 25° to the work.
B. Hand Torch Operation
WARNING
Be sure the operator is equipped with proper gloves,
clothing, eye and ear protection and that all precautions at the front of this manual have been followed.
1. Hold the torch comfortably . One hand should be close
to the torch body and the other hand back so that the
thumb can conveniently operate the control switch.
Position the torch over the workpiece, resting the fr ont
of the cup on the edge of the workpiece at the point
where the gouging is to start. This will positively locate the line of the gouge.
2. Lower the welding helmet and lift the torch about
1/4" (6.4 mm) from the workpiece. Press and hold
the control switch on the torch. After a two second gas purge, the pilot arc will come on and re-
OPERA TION 22 Manual 0-2686
Page 29

SECTION 5:
CUSTOMER/OPERATOR
W ARNING
SERVICE
5.01 Introduction
This Section describes basic maintenance procedures performable by operating personnel. No other adjustments
or repairs are to be attempted by other than properly
trained personnel.
W ARNINGS
Disconnect primary power at the source before disassembling the torch or torch leads.
Frequently review the Important Safety Precautions (page 1). Be sure the operator is equipped with
proper gloves, clothing, eye and ear protection.
Make sure no part of the operator’s body comes into
contact with the workpiece while the torch is activated.
Disconnect primary power at the source before assembling or disassembling power supply, torch
parts, or torch and leads assemblies.
Remove the T op Enclosure of the Power Supply and blow
out any accumulated dirt and dust with compressed air.
The unit should also be wiped clean. If necessary, solvents that are recommended for cleaning electrical apparatus may be used.
While the unit is open, inspect the wiring in the unit. Look
for any frayed wires or loose connections that should be
corrected.
Particular attention should be given to the area around
the high frequency spark gap points since accumulated
dirt in that area can weaken the high frequency starting
current.
Parts in the Pak 44G cooling system require routine maintenance. The coolant level should be checked daily and
Thermal Arc coolant added to keep the level at the marker
at the bottom of the cylindrical section. If Thermal Arc
coolant is not available, distilled or deionized water may
be used. The resistivity of the water must measure above
0.1 megohm per cm.
CAUTION
Sparks from the gouging process can cause damage to coated, painted, and other surfaces such as
glass, plastic and metal.
NOTE
Handle torch leads with care and protect them fr om
damage.
5.02 General Power Supply
Maintenance
A. Routine Maintenance
NOTE
Refer to Appendix VI for a recommended maintenance schedule for water cooled plasma cutting
systems.
Routine maintenance for the Power Supply should include an occasional thorough cleaning and inspection. The
frequency depends on the usage and the operating environment.
CAUTION
Do not use tap water. Its use could cause severe
damage to the torch.
The pump is factory set to operate at 120 psi (8.27 bar)
and should not require adjustment. If adjustment is required, remove the acorn nut on the top of the pump.
This exposes the adjusting screw. Turn the screw as required to achieve the 120 psi (8.27 bar). The acorn nut
must be securely fastened before operating to prevent
drawing of air into the system.
WARNING
Do not try to adjust pump with unit running.
B. Coolant Level and Conductivity
1. Coolant Level
The coolant level should be checked every day at
the reservoir filler tube. If the coolant in the filler
tube is below the bottom of the filler tube then
Manual 0-2686 23 CUSTOMER/OPERATOR SER VICE
Page 30

add T or ch Coolant. If the coolant gets too low, 40
psi (2.76 bar) or lower, the coolant interlock will
open.
10. Reinstall the T op Enclosur e on the Power Supply.
5.03 Common Operating Faults
2. Coolant Conductivity
The reservoir contains a cap/cartridge assembly
which includes a small cartridge of deionizing
resin to maintain the resistivity of the coolant.
Check the condition of the deionizer cartridge in
the reservoir basket. If the cartridge has changed
from a gray color to yellowish brown (straw color)
then drain the old coolant from the Power Supply
and torch leads. Replace with new coolant and
deionizer cartridge.
The coolant filter located on the pump/fan assembly has
a reusable screen that should be removed and cleaned
once every six months or at any time the coolant pressure drops.
C. Draining Coolant
The easiest way to drain the coolant from the reservoir is
to pump it out through the filler tube. Using an external
pump and hose, pump the coolant into an acceptable container .
If an external pump is not available then remove the old
coolant from the Power Supply reservoir per the following procedure:
1. Remove the T op Enclosure fr om the Power Supply .
2. Locate the coolant hose connected to the bottom of
the coolant reservoir.
The following lists the more common cutting faults and
what is the possible cause:
1. Insufficient Penetration
a. Gouging speed too fast
b. Torch angle incorrect
c. Metal too thick
d. Worn torch parts
e. Gouging current too low
f. Non-Genuine Thermal Dynamics Parts
2. Main Arc Extinguishes
a. Gouging speed too slow
b. Torch standoff too high from workpiece
c. Work cable disconnected
d. Worn torch parts
e. Non-Genuine Thermal Dynamics Parts
3. Excessive Dross Formation
a. Improper gas pressure or mixture
b. Gouging speed too slow
c. Torch standoff too high from workpiece
3. Disconnect this coolant hose at it's lowest point
being careful not to lose the coolant out of the end
of the hose.
4. Carefully move the end of the hose out the side of
the Power Supply and drain the coolant into an
acceptable container .
CAUTION
Handle and dispose of the used coolant per recommended procedures.
5. Reconnect the coolant hose.
6. Disconnect the Torch Leads from the Power Sup-
ply.
7. Remove the coolant from the leads using clean,
dry, compressed air.
8. Reconnect the leads to the Power Supply.
9. Install new coolant and deionizer cartridge.
d. Worn torch parts
e. Improper gouging current
f. Non-Genuine Thermal Dynamics Parts
4. Short Torch Parts Life
a. Oil or moisture in air source
b. Exceeding system capability (material too thick)
c. Excessive pilot arc time
d. Gas flow too low (incorrect pressure)
e. Improperly assembled torch
f. Output current too high
g. Torch tip contacting workpiece
h. Damaged or loose torch head components
i. Non-Genuine Thermal Dynamics Parts
5. Poor Pilot Starting
a. Non-Genuine Thermal Dynamics Parts
CUSTOMER/OPERATOR SERVICE 24 Manual 0-2686
Page 31

b. High coolant conductivity
Main Power Problems
5.04 Troubleshooting Guide
A. Basic Troubleshooting
This Sub-Section covers basic troubleshooting that requires no disassembly or electronic measurements. It is
helpful for solving many of the common problems that
can arise with this system. Since the malfunction may be
due to a faulty connection rather than a faulty component, be sure to check all connections to a component that
appears to be malfunctioning.
NOTE
For more advanced troubleshooting and service
instructions refer to the Service Manual 0-2687.
The troubleshooting is arranged in the normal operating
sequence of the unit for easy reference. Each problem
has listed next to it the possible causes and the remedy.
NOTE
The diagram in Appendix IV shows the timing sequence of the Pak unit as a gouge is made with one
interruption as the torch passes over a hole in the
workpiece.
B. How to use this Guide
The following information is a guide to help the Customer/Operator determine the most likely causes for
various symptoms.
This guide is set up in the following manner:
Major Problem Area based on normal
operation
1. Close the external input power switch to supply AC
voltage to the Power Supply.
• Red AC POWER indicator comes ON
2. Place the Power Supply ON/OFF power switch to ON
• Amber READY indicator comes ON
• Gases flow for 2 seconds.
If this does not happen, check as follows:
A. No AC POWER indicator
1. Blown fuse or open circuit breaker at primary
a. Replace fuse or reset breaker
B. No READY indicator
1. Front Panel ON/OFF (SWl) is turned OFF
a. Place switch to ON position
2. Leads Door Interlock Switch (SW3) not actuated
a. Check switch and actuator tab for alignment
3. Blow Fuse 3FU
a. Check fuse
4. Coolant Pressure Interlock PSl open; pr essure below 40
psi (2.8 kg/cm2)
a. Check coolant level
b. Clean pump filter screen
5. Pressure Switch (PSl) not satisfied
a. Adjust input pressur e (120 psi)
Any special instruction, setup and normal function
X. Symptom (Bold Type)
Any Other Special Instructions (Text Type)
1. Cause (Italic Type)
a. Check/Remedy (T ext Type)
Locate your symptom, check the causes (easiest listed first)
then remedies. Repair as needed being sure to verify that
the unit is fully operational after any repairs.
WARNING
Voltages in Plasma Gouging equipment are high
enough to cause serious injury. Use particular care
around equipment when covers are not in place.
Manual 0-2686 25 CUSTOMER/OPERATOR SER VICE
6. Transformer overheated
a. Allow unit to cool down
C. Fan/Pump will not start
1. Blown Motor Circuit Fuse 4FU, 5FU & 6FU
a. Replace Fuses
2. Rotation Switch SW6 OFF (See NOTE)
a. Switch to proper position
NOTE
Fan Rotation Switch was removed from units
manufactured after 1996.
3. Broken or Loose Fan Belt
a. Replace or tighten
Page 32

4. Faulty Power Supply
a. Isolate and replace component(s) per Service
Manual
a. Check plasma gas pressure settings (Minimum
of 15 psi)
2. Pressure switch PS3 not satisfied
D. Surging coolant
1. Air in System
a. Add coolant and run pump to remove air fr om
lines. Check for and correct leaks in coolant
system.
E. Gases do not flow when READY indicator is ON
1. Gas supply not on
a. Open valve
2. Faulty Power Supply
a. Isolate and replace component(s) per Service
Manual
F. Gases flow more than 2 seconds
1. RUN/SET switch in SET
a. Switch to RUN
2. Faulty Power Supply
a. Isolate and replace component(s) per Service
Manual
G. Can not set desired gas pressure
1. Empty gas cylinder
a. Replace
2. Faulty Regulator
a. Replace
3. Faulty Power Supply
a. Isolate and replace component(s) per Service
Manual
H. Gas does not flow when Torch Switch is pressed
1. Torch switch not connected
a. Check wires to plug, switch & receptacle
2. Torch switch not closing
a. Check for continuity when pressed
3. Faulty Power Supply
a. Isolate and replace component(s) per Service
Manual
I. No red DC POWER indicator
1. Pressure switch PS2 not satisfied
a. Check secondary gas pressure setting (Minimum
30 psi)
3. Faulty Power Supply
a. Isolate and replace component(s) per Service
Manual
Pilot Arc Problems
The Pilot Arc should start 2 seconds after the red DC
POWER indicator comes ON. If it does not, check the
torch parts to make sure they are in good condition and
properly assembled. Check to see if:
• There is any click sound inside the unit at the time
the pilot arc should start (2 seconds after pressing
switch).
• There is any indication on the ammeter.
• There is any light visible inside the torch.
A. No click sound inside the unit 2 seconds after
torch switch pressed
1. Faulty Power Supply
a. Isolate and replace component(s) per Service
Manual
B. No Pilot Arc (or intermittent)
1. Damaged (defective) torch parts
a. Replace
2. Dirty (wet) plasma gas
a. Purge
b. Check for leaks on hoses and fittings
c. Replace gas cylinder
C. Pilot pops and goes back inside torch
1. Blown pilot fuse (lFU)
a. Replace, check for shorted tip or electrode
D. No spark can be seen in torch
1. Faulty Power Supply
a. Isolate and replace component(s) per Service
Manual
E. Spark in Torch but no pilot (Ammeter indicates '0')
1. Broken conductor in torch lead
a. Replace lead
CUSTOMER/OPERATOR SERVICE 26 Manual 0-2686
Page 33

2. Loose connection
a. Repair
3. Faulty Power Supply
a. Isolate and replace component(s) per Service
Manual
F. No gouging arc
1. Work cable not connected
a. Connect
2. One leg of three-phase primary out
a. Check all three input phases for voltage
3. Faulty Power Supply
a. Isolate and replace component(s) per Service
Manual
Main gouging Arc Problems
Once the gouging arc is established, the gouging current
should be equal to the setting of the CURRENT adjust
knob (unless the remote current control is in use). If it is
not, there is a problem in the current r egulating circuit as
follows:
A. Unit only puts out minimum current (150 A)
1. Fuse 2FU Blown
a. Replace
2. Fuse blows again
a. Refer to Service Manual
3. Relay CSR not closing (pilot arc remains on during
cut)
b. Loose wire on toroid (T4) - tighten
4. Faulty Power Supply
a. Isolate and replace component(s) per Service
Manual
Cut Quality begins OK but deteriorated during
the gouging process.
A. Deteriorating Cut Quality
1. Frozen CO2 Regulator
a. Add heater
b. Replace with High Flow Regulator
2. Cylinder not delivering
a. Manifold several gas cylinders together
If the torch parts life is short, check:
A. Short Torch Parts Life
1. Misuse of torch
a. Use torch with ratings for current and work
thickness
2. Incorrect gas pressure
a. Check and correct
3. Inadequate Coolant Flow
a. Clean Filter
4. Faulty Power Supply
a. Isolate and replace component(s) per Service
Manual
B. Discolored Electrode
1. Contaminated gas
a. Check plasma gas system for leaks
2. Gas hoses switched
a. Check
1. Faulty Power Supply
a. Isolate and replace component(s) per Service
Manual
B. Unit only puts out maximum current (400 + A)
1. Faulty Power Supply
a. Isolate and replace component(s) per Service
Manual
C. Unit can only put out about 275 amperes maxi-
mum current
1. Faulty Power Supply
a. Isolate and replace component(s) per Service
Manual
Manual 0-2686 27 CUSTOMER/OPERATOR SER VICE
Page 34

5.05 Gas Pressure Regulators
Components of the Gas Pressure Regulators are as follows:
1. Inlet connection
2. Inlet pressure gage
3. Safety valve
4. Working pressure gage
5. Hose connection
6. Adjusting knob
CAUTION
Do not attempt to remove the sintered metal filter
in the inlet connection. This is not a serviceable
item.
2
1
A-01894
3
4
5
6
Figure 5-1 Components of Gas Pressure Regulator
The gas pressure regulators provide a means of conveniently selecting and maintaining the required working
pressures of the gases. The regulator will hold this pressure constant. Inlet pressure is r educed in one step to the
working pressure by means of a pressur e balanced poppet valve controlled by a spring loaded piston in a low
pressure chamber . A large adjusting spring knob (6) provides for adjusting spring pressure against its piston. A
sintered stainless steel filter, in the inlet connector (1),
prevents dirt from entering the regulator mechanism.
No regular maintenance of the gas pressure r egulators is
required, except an occasional lubrication of the adjusting screw thread and on its end, where it contacts the
adjusting spring. Lubricant is available from Thermal
Dynamics for this purpose (Catalog No. 9-2871).
Replaceable parts in the regulator include the pressure
gages, the O-ring seals on the piston and above the poppet valve, and the poppet valve. Refer to Section 6 for
replacement parts.
CUSTOMER/OPERATOR SERVICE 28 Manual 0-2686
Page 35

SECTION 6:
PARTS LISTS
6.01 Introduction
A. Parts List Breakdown
The parts list provides a breakdown of all replaceable
components. The parts lists are arranged as follows:
Section 6.03: Power Supply Spare Parts Kit
Section 6.04: Power Supply Options and Accessories
NOTE
Parts listed without item numbers are not illustrated, but may be ordered by the catalog numbers
shown.
B. Returns
If a Thermal Dynamics product must be returned for service, contact your Thermal Dynamics distributor . Materials returned to Thermal Dynamics without proper authorization will not be accepted.
6.02 Ordering Information
Order replacement parts by catalog number and complete
description of the part or assembly, as listed in the description column of the Parts List. Also include the model
and serial number of the Power Supply and the operating voltages as given on the data tag attached to the front
of the Power Supply and Control Unit. Address all inquiries to your authorized Thermal Dynamics distributor.
Manual 0-2686 29 P A RTS LISTS
Page 36

6.03 Power Supply Remote Area Spare Parts Kit
Qty Description Catalog #
P AK 44G SPARE PARTS KIT Includes: 5-4810
1 PC BOARD & CONTROL ASSY 9-2688
1 THERMOST A T Includes: 8-1382
1 180 DEG. F THERMAL SWITCH 9-4170
2V PAD
1 REPLACEMENT PK'G. 8-0001
1 SOLENOID VALVE,REPLACEMENT KIT Includes: 8-1786
1 SOLENOID ASSY 9-4169
2 1/8 NPT CLOSE NIPPLE 8-0354
1 #10GA H .F. COIL 8-1538
1 THERMAL OVERLOAD (TRANS) 9-3639
6 FUSE, 8A, 500V - TIME DELAY 9-3641
1 CONTROL TRANSFORMER ASSY (PAK44)
2 40 AMP S.C.RECTIFIER WAS 8X180A 9-3273
1 POTENTIOMETER 9-3707
2 RESISTOR ASSY 9-3996
1 500 AMP AMMETER 8-1904
1 V ARISTOR ASSY . 9-4028
1 24V TRANSFORMER RETROFIT KIT 7-2994
1 PRESSURE SWITCH 8-1741
1 LIMIT SWITCH SPDT 9-2335
1 TOGGLE SWITCH DPDT -2 POS. 9-3427
1 TOGGLE SWITCH DPDT -3 POS. 8-1777
1 TOGGLE SWITCH 3PDT -2 POS. 8-1778
1 P ANEL LIGHT - RED 8-1885
1 P ANEL LIGHT - AMBER 8-1886
5 0 .25 MFD CAPACITOR 8-1951
1 2100 MFD CAPACITOR 8-1392
1 1400 MFD CAPACITOR 8-1310
3 300A DIODE (STR) 9-2246
3 300A DIODE (REV) 9-2247
3 40 AMP DIODE 8-1562
1 0.002 MFD CAPACITOR 9-2847
1 2500 OHM RESISTOR-W.W./FIXED 9-2390
1 27K OHM RESISTOR 9-2537
1 RESISTOR,6.8 OHM,AIR COOLED-POWR-RIB 9-6712
1 10K OHM RES 9-2691
1 3 PH CONT ACTOR 8-1373
PARTS LISTS 30 Manual 0-2686
Page 37

Qty Description Catalog #
1 CONT ACTOR COIL 8-1987
1 3 PH CONT ACTOR 8-1304
1 RELAY, DPDT, 12VDC COIL(CLEAR CASE) 9-5164
1 TIME DELAY RELAY 9-2694
1 RELA Y 9-2790
1 TOROID TRANSFORMER 9-2545
2 PRESSURE GAUGE 9-2851
1 PRESSURE GAGE 9-2629
1 CONTROL JACK 8-0246
1 FUSE HOLDER FOR 1/4X1"FUSE 9-2936
1 FUSE HOLDER,BUSS.HPS 9-2937
6 20 AMP FUSE 8-1335
3 5 AMP FUSE,MTH5(250V) 8-1025
1 FIL TER SCREEN 8-1002
1 PUMP-PROCON TYPE 2507XH 8-1328
2 PILLOW BLOCK 8-1344
1 PULLEY, 1/2" BORE, 3.2 PD, 3.45 OD, (BR. AS34) 8-1346
1 CARTRIDGE 9-2219
1 ASSY, 114X245 TIP SAVER PC BOARD 9-6713
Manual 0-2686 31 P A RTS LISTS
Page 38

6.04 Power Supply Options and Accessories
Item # Qty Description Catalog #
1 Gas Regulators
1 REGULA TOR, HIGH PRESSURE, ARGON/NITROGEN, CGA 580 9-2722
1 REGULA T OR, HIGH PRESSURE, CARBON DIOXIDE, CGA 320 9-2759
1 AIR GAS REGULA T OR ASSY 9-3022
1 REGULA TOR, HIGH PRESSURE, HYDROGEN, CGA 350 178 9-3053
2 1 P AK44 RUNNING GEAR 7-2965
1
2
A-02104
PARTS LISTS 32 Manual 0-2686
Page 39

APPENDIX I: INPUT WIRING REQUIREMENTS
Power Input Powe r Input Current Sugg e sted Si ze s (See N o te s )
Transformer Voltage Freq. 3-Ph 3-Ph Max . Fuse (Am ps ) Min. Wire (AWG)
(T1) (Volts) (Hz) (kVA) (Amps) 3-Ph 3-Ph 3-Ph
208 50/60 80 220 300 4/0 120
1 230 50/60 80 200 250 3/0 85
460 50/60 80 100 125 2 35
230 50/60 80 200 250 3/0 85
2 460 50/60 80 100 125 2 35
575 50/60 80 80 100 4 25
380 50/60 80 120 150 1 50
3 415 50/60 80 110 150 2 35
460 50/60 80 100 125 2 35
380 50/60 80 120 150 1 50
4 460 50/60 80 100 125 2 35
Min. W i re (mm
2
)
500 50/60 80 90 110 2 35
220 50/60 80 200 250 3/0 85
5
6 200 50/60 80 225 300 4/0 120
380 50/60 80 120 150 1 50
440 50/60 80 100 125 2 35
500 50/60 80 90 110 2 35
180 50/60 80 250 300 250 MCM 150
220 50/60 80 200 250 3/0 85
Line Voltages with Suggested Circuit Protection and Wire Sizes
Based on National Electric Code and Canadian Electrical Code
NOTES
Refer to Local and National Codes or local authority having jurisdiction for proper wiring requirements.
Cable size is de-rated based on the Duty Cycle of the equipment.
The suggested sizes are based on flexible power cable with power plug installations. For hard-wired installations
refer to local or national codes.
Cable conductor temperature used is 167° F (75° C).
An energy limiting fuse UL Class RK-1 (examples: BUSS LPS/LPN-RK or Gould-Shawmut AZK-A6K) should be
used to minimize damage to Plasma Cutting, Welding or power distribution equipment.
NEVER use replaceable element fuses like UL Class H, or "one-time" fuses like UL Class K5.
Larger wires may be required if the input wiring length exceeds 25 feet (7.6 m).) or greater .
Manual 0-2686 33 APPENDIX
Page 40

APPENDIX II: SEQUENCE OF OPERATION BLOCK
DIAGRAM
System OFF
ACTION
1. Close external disconnect switch.
Red AC POWER indicator ON.
2. ON/OFF switch to ON.
RESULT
1. Amber ready indicator ON.
2. Coolant pressure switch closes.
3. Gases flow.
After two seconds:
4. Gas flow stops.
ACTION
1. RUN/SET switch to SET.
RESULT
1. Gas valves open, gases flow to
purge system and allow setting
of pressures.
2. Power circuits disabled.
ACTION
1. Lower helmet and close control switch on torch (or remote
control assembly).
RESULT
1. Gases flow and gas pressure switches close.
2. Main contactor closes. Red DC indicator ON.
After two seconds:
3. High frequency ON
4. Pilot arc relay closes.
5. Pilot arc comes ON.
System READY
ACTION
1. RUN/SET switch to RUN.
2. Select cutting amps with
CURRENT knob.
RESULT
1. Gas flow stops.
2. Power circuits ready.
ACTION
1. Torch moved away from workpiece,
or workpiece burns away under
torch.
RESULT
1. Gouging Arc stops.
2. Current sensing circuit turns ON high
frequency and pilot arc.
A-02105
PILOT ARC
ACTION
1. Torch brought close (within 1/2 inch)
to workpiece.
RESULT
1. Arc transfers to workpiece to
establish Gouging Arc.
2. Current sensing circuit turns OFF
pilot arc and high frequency.
Gouging Arc
NOTE:
To shut down system, allow fan and pump to run for
five minutes and then move On/OFF switch to OFF. Be
sure to open external disconnect switch.
ACTION
1. Open control switch on torch (or
remote control assembly)
RESULT
1. Red DC power indicator OFF.
2. Pilot arc stops.
After two seconds:
3. Gas flow stops.
System READY
APPENDIX 34 Manual 0-2686
Page 41

APPENDIX III: TIMING CHART
Coolant Flow
Gas Flow
DC Power
High Frequency
Pilot Relay
Cutting Arc
ON/OFF
Switch
ON
2 Sec
A
RUN/SET
Switch
SET RUN
A Coolant Pressure Closes PS1
B Gas Pressure Closes PS2
C Torch, Running Pilot, Is Brought Close To Workpiece
D Torch Passes Over Hole In Workpiece
Torch
Switch
Pressed
2 Sec 2 Sec
B
C D
Torch
Switch
Released
ON/OFF
Switch
OFF
A-01895
Manual 0-2686 35 APPENDIX
Page 42

Pressure
Regulators
APPENDIX IV: SYSTEM BLOCK DIAGRAM
Plasma
Solenoid
Valves
Reservoir
Gas
Pressure
Interlock
Pump
Gas
Press.
Gas
Press.
Secondary
CO
N2
2
Deionizer
Three
Phase
Power
Filter
Transformer
Coolant
Pressure
Radiator
SCR
Bridge
DC
Saturable
Core
Reactor
Coolant
Pressure
Interlock
Rectifier
High
Freq.
Air
Cooled
Resistor
Pilot
Relay
Amperage
Selector Pot
PC Board
Comparator
AMPS
Shunt
+
Current
Sensing
Coil
Workpiece
A-02106
APPENDIX 36 Manual 0-2686
Page 43

APPENDIX V: RECOMMENDED ROUTINE MAINTENANCE
SCHEDULE FOR WATER COOLED PLASMA CUTTING
SYSTEMS
This schedule applies to all types of water cooled plasma cutting systems. Some systems will not have all the parts
listed and those checks need not be performed.
NOTE
The actual frequency of maintenance
may need to be adjusted according to
the operating environment.
Daily Operational Checks or Every Six Arc Hours:
1. Check torch parts, replace if damaged.
2. Check plasma and secondary supply and pressure/flow.
3. Purge plasma gas line to remove any moisture build-up.
4. Check deionizer bag/cartridge, replace if color is predominantly yellow.
5. Check coolant pressure (100 - 120 psi).
Weekly or Every 30 Arc Hours:
1. Blow or vacuum dust and dirt out of the entire machine.
Six Months or Every 720 Arc Hours:
1. Remove and clean in-line filter screens.
2. Check cables and hoses for leaks or cracks, replace if necessary.
3. Check all contactor points for severe arcing or pits, replace if necessary.
4. Check all pillow blocks and bearings, clean and lubricate if necessary.
5. Check fan, pump and pulley belts for wear or cracking, replace if necessary.
Twelve Months or Every 1500 Arc Hours:
1. Drain coolant, fill with distilled water, turn on main power switch and let machine run for approximately 30
minutes.
WARNING
DO NOT energize the Torch.
Drain distilled water and replace with Thermal Ar c Coolant. Use Standard Mix Coolant (Catalog # 7-2850) or
Super Mix Coolant (Catalog # 7-2959) for environments below +10° F (-12° C).
2. Check radiator fins, clean and comb out if necessary.
3. Repeat six month maintenance.
Manual 0-2686 37 APPENDIX
Page 44

APPENDIX VI: SYSTEM SCHEMATIC
A-02107
APPENDIX 38 Manual 0-2686
Page 45

A-02107
Manual 0-2686 39 APPENDIX
Page 46

 Loading...