

Page 1

r®
m n ,mr mum
perator's Manual
Model TB24HT or
IMPORTANT: READ SAFETY RULES AND INSTRUCTIONS CAREFULLY
Page 2

r :_
Content Page
Calling Customer Support ............................................... 2
Rules for Safe Operation ..................................................... 3
Z,now Your Unit ....................................................... 5
Assembly Instruet=ons ............................................ 6
Operating Instructions ....................................................... 8
Maintenance and Repair Instructions .......................................... 10
Cleaning and Storage ....................................................... 10
Troubleshooting Chart ...................................................... 11
Warranty Information ....................................................... 12
This operator's manual is an important part of your new trimmer. It will help you assemble, prepare and maintain the unit
for best performance. Please read and understand what it says.
Before you start assembling your new equipment, please locate the model plate on the equipment and copy the
information from it in the space provided below. This information is very important if you need help from our Customer
Support Department or an authorized dealer.
You can locate the model number on the unit. A sample model plate is explained below. For future reference,
please copy the model number and the serial number of the equipment in the space below.
If you have difficulty assembling this product or have any questions regarding the controls, operation or
maintenance of this unit, please call the Customer Support Department.
SeriaJHumber Model Humber
Patent Pert Humber
copy the model and parent
part numbe r here:
IllllllllllllllBHIIIIIIIIllllllllllcop,theso.o,oomborhoro:
T
If you have difficulty assembling this product or have any questions regarding the controls, operation or maintenance of
this unit, please call the Customer Support Department.
@ Call 1-800-520-5520 to reach a Customer Support representative. Please have your unit's model number
and serial number ready when you call. See previous section to locate this information. You will be asked to
enter the serial number in order to process your call.
2
Page 3
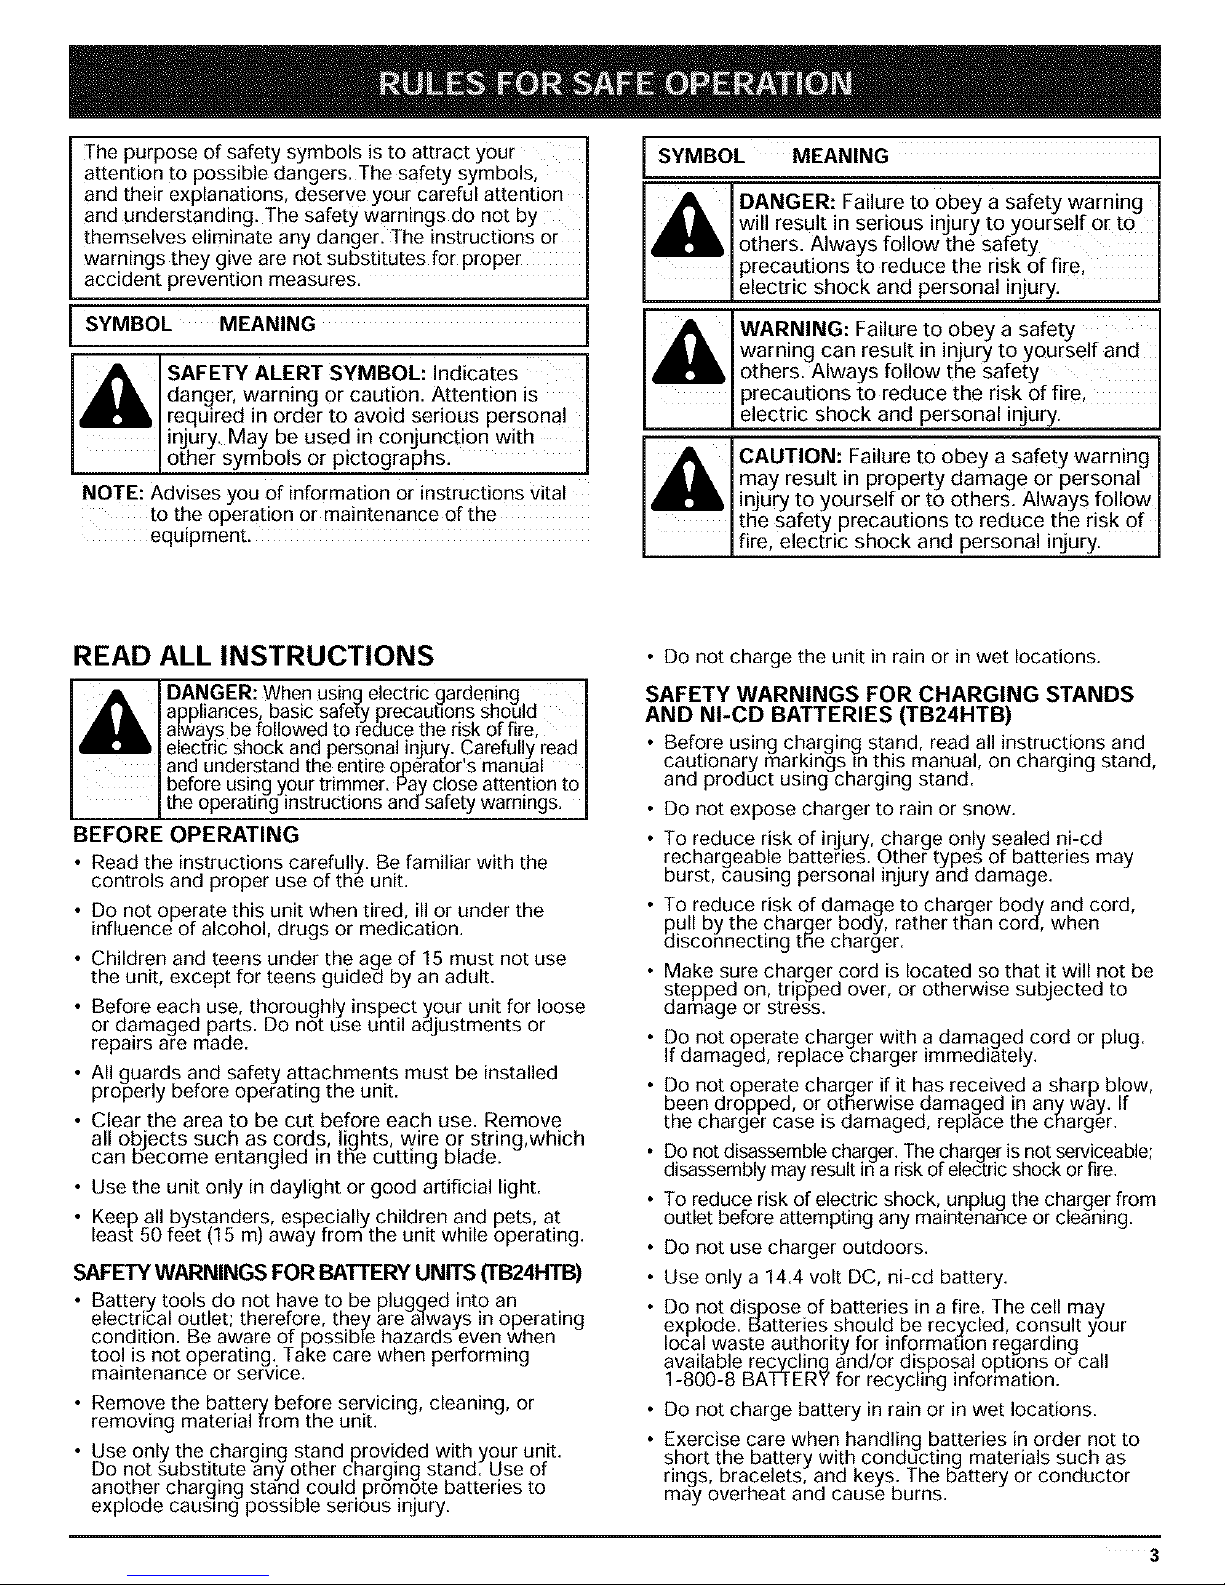
The purpose of safety symbols is to attract your
attention to possible dangers. The safety symbols,
and their explanations, deserve your careful attention
and understanding. The safety warnings do not by
themselves eliminate any danger. The instructions or
warnings they give are not substitutes for proper
accident prevention measures.
SYMBOL MEANING
i_1 i, SAFETY ALERT SYMBOL: Indicates
L
danger, warning or caution. Attention is
required in order to avoid serious personal
injury. May be used in conjunction with
other symbols or pictographs.
NOTE: Advises you Of information or instructions Vital
to the operation or maintenance of the
equipment.
SYMBOL MEANING
DANGER: Failure to obey a safety warning
i_i_ ' will result in serious injury to yourself or to
others. Always follow the safety
precautions to reduce the risk of fire,
electric shock and personal injury.
'_'i WARNING: Failure to obey a Safety
warning can result in injury to yourself and
others. Always follow the safety
precautions to reduce the risk of fire,
electric shock and personal injury.
I_il CAUTION: Failure to obeya safety warning
may result in property damage or personal
injury to yourself or to others. Always follow
the safety precautions to reduce the risk of
fire, electric shock and personal injury.
READ ALL INSTRUCTIONS
Am' DANGER: When usingelectric gardening
,]_ appliances, basic safe_y precautions should
always be followed to reduce the risk of fire,
electric shock and personal injury.Carefully read
and understand the entire operator's manual
before using your trimmer. Pay close attention to
the operatinginstructionsana safety warnings.
BEFORE OPERATING
• Read the instructions carefully. Be familiar with the
controls and proper use of the unit.
• Do not operate this unit when tired, ill or under the
influence of alcohol, drugs or medication.
• Children and teens under the age of 15 must not use
the unit, except for teens guided by an adult.
• Before each use, thoroughly inspect your unit for loose
or damaged parts. Do not use until aajustments or
repairs are made.
• All guards and safety attachments must be installed
properly before operating the unit.
• Clear the area to be cut before each use. Remove
all objects such as cords, lights, wire or string,which
can become entangle(] in tt_e cutting Dlade.
• Use the unit only in daylight or good artificial light.
• Keep all bystanders, especially children and pets, at
least 50 feet (15 m) away from the unit while operating.
SAFETY WARNINGS FOR BATTERY UNITS (TB24HTB)
• Battery tools do not have to be plugged into an
electrical outlet; therefore, they are always in operating
condition. Be aware of possible hazards even when
too! is not operating. Take care when performing
maintenance or servtce.
• Remove the battery before servicing, cleaning, or
removing material from the unit.
• Use only the charging stand provided with your unit.
Do not substitute any other charging stand. Use of
another charging stand could promote batteries to
explode causing possible serious injury.
• Do not charge the unit in rain or in wet locations.
SAFETY WARNINGS FOR CHARGING STANDS
AND NI-CD BATTERIES (TB24HTB)
• Before using charging stand, read all instructions and
cautionary markings mthis manual, on charging stand,
and product using charging stand.
• Do not expose charger to rain or snow.
• To reduce risk of injury, charge only sealed ni-cd
rechargeable batteries. Other types of batteries may
burst, causing personal injury and damage.
• To reduce risk of damage to charger body and cord,
pull by the charger body, rather ttian cord, when
disconnecting the charger.
• Make sure charger cord is located so that it will not be
stepped on, tripped over, or otherwise subjected to
damage or stress.
• Do not operate charger with a damaged cord or plug.
If damaged, replace charger immediately.
• Do not operate charger if it has received a sharp blow,
been dropped, or otherwise damaged in any way. If
the charger case is damaged, replace the charger.
• Do not disassemble charger. Thecharger is not serviceable;
disassembly may result in a risk of electric shock or fire.
• To reduce risk of electric shock, unplug the charger from
outlet before attempting any maintenance or cleaning.
• Do not use charger outdoors.
• Use only a 14.4 volt DC, ni-cd battery.
• Do not dispose of batteries in afire. The cell may
explode. Batteries should be recycled, consult your
local waste authority for informatton regarding
available recycling and/or disposal options or call
1-800-8 BATTER7 for recycling information.
• Do not charge battery in rain or in wet locations.
• Exercise care when handling batteries in order not to
short the battery with conducting materials such as
rings, bracelets, and keys. The battery or conductor
may overheat and cause burns.
3
Page 4

• Chargethebatteryinalocationwherethetemperature
ismorethan50F(10C)butlessthan100°F(38"C).
• Donotopenormutilatethebattery.Released
electrolyteiscorrosiveandmaycausedamagetothe
eyesorskin:Itmaybetoxicifswallowed.
ELECTRICALSAFETYWARNINGS(TB24HT)
• Sincethetoolisdouble-insulated,a2-wireextension
cord(anextensioncordwithoutaground)maybe
used.A 3-wireextensioncord(anextensioncordwith
aground)thatusesaNEMAtypeconnector(parallel
blade,Uground)isrecommended.Extensioncords
areavailablefromyourlocalretailer.Useonlyround:
jacketedextensioncordsapprovedfo[outdooruse.
• Thistoolisdouble-insulated.Repairorreplacedamaged
cords.
• Toreducetheriskofelectricalshock,thisunithasa
polarizedplug(onebladeiswiderthantheother).This
unitwillfitwithapolarizedpluginonewayonly.Ifthe
plug does not fit fully into the unit, reverse the plug. If
_tsttll does not fit, use a cord with the correct
connection. Do not modify the unit in any way.
I_IWARNING: To reduce the risk of electrical 1
shock, use only SW-A, SOW-A, STW-A, I
STOW-A, SJW-A, SJOW-A, SJTW-W or
SJTOW-A Cord types. J
MINIMUM WIRE SIZE FOR EXTENSION CORDS FOR
I 120 VOLTAPPLIANCES USING 0-12 AMPS*
Cord length (ft.) 25 50 100 150
Wire size (AWG)* 16 16_ __16
*The wire size (AWG) for appliances using 12 to 16
amps is 14 AWG for 25 feet, 12 AWG for 50 feet, and
not recommended for 100 or 150 feet.
• CORD SETS: Make sure your cord set is in good
condition, w!th a cord that is heavy enough to carry
the current that your unit will draw. An uneersizea cord
set will cause a _trop in line voltage resulting in a loss
of power, as well as overheating. The table shown
above illustrates the correct size to use depending on
the cord length and nameplate amperage rating. If in
doubt, use tf_e next heavier size line gauge. The
smaller the gauge number, the heavier the cord. To
prevent the cord from disconnecting from the unit, use
the cord hook shown in the Operating Instructions.
• Do not abuse the power cord. Do not pull or carry the
unit by the cord, use the cord as a handle, close a
door on the cord, or pull the cord around sharp edges
or corners. Keep the cord away from heated surfaces,
oil and sharp eages.
• Ground Fault Circuit Interrupter (GFCI) prote(:tion
should be provided on the circuit s) or outlet(s) that will
be used for the un t. Use receptac es w th bu t- n
GFCI protection for an extra measure of safety.
• A nameplate on your unit indicates the voltage used.
Never connect the unit to an AC voltage that differs
from this voltage.
• Inspect all extension cords and the unit power connection
periodically. Look closely for deterioration, cuts or cracks
_nthe insulation. Also inspect the connections for damage.
Repair or replace the cords if any defects appear.
• Avoid dangerous environments. Never operate your unit
in damp or wet conditions. Moisture is a shockf_azard.
• Do not use the unit in the rain.
• Do not handle the plug or the unit with wet hands.
WHILE OPERATING
• Wear safetyglasses or goggles that are marked as
meeting AKISqZ87.1-1989 standards. Also wear
ear/hearing protection when operating this unit. Wear
a face or oust mask if the operation is dusty. Long
sleeve shirts are recommended.
• Wear heavy, long pants, boots and gloves. Do not
wear loose clothing,jewelry, short pants, sandals or
go barefoot. Securenair above shoulder level.
• The unitposes a risk of cut. Keep hands away from the
blades. Keep both hands on handles when power is on.
• Do not attempt to remove cut material or hold material to
be cut when b!ades are moving. Make sure unit isunplugged
and the switcn is off when clearingjammeo matenal from
blades. Do not grasp the exposeacutting blades or
cutt ng edges wnen p ck ng up or hod ng the un t.
• Take caution: Blades coast after unit is turned off.
• Avoid accidental starting. Do not carry around a unit
that is plugged in with your finger on the trigger
switch. Be sure the switch is in the off position when
plugging in the unit.
• Use the rignt tool. Only use this tool for the purpose
_ntended.
• Do not overreach. Always keep proper footing and
balance. Do not operate from unstable surfaces like
Ladders trees, slopes or rooftops.
• When operating the hedge trimmer, always hold the
unit with both Hands. Keep a firm grip on both the
housing grip and front handle. Never grip the unit by
the guard or use the guard as a handle.
• Always stop the motor when cutting is delayed or
when wa k ng from one cutt ng ocat on to another.
• If you strike or become entangled with a foreign
object, stop the motor immediately and checl{ for
damage. Do not operate before repairing damage. Do
not operate the unit with loose or damaged parts.
• Stop and switch the unit to off and unplug it during
maintenance, repair or replacement.
• Keep the unit clean of vegetation and other materials
They may become lodged between the cutting
attachment and shield.
OTHER SAFETY WARNINGS
• Be sure to secure the unit while transporting.
• Store the unit in a dry area, ocked up to prevent
unauthorized use or damage, and stored in a high
place out of the reach of children.
• Never douse or squirt the unit with water or any other
liquid. Keep handles dry, clean and free from debris. Clean
after each use. See the Cleaning and Storage instructions.
• Keep these instructions. Refer to them often and use
them to instruct other users. If you loan someone this
unit. also loan them these instructions.
SAVE THESE INSTRUCTIONS
4
Page 5

SAFETY AND INTERNATIONAL SYMBOLS
This operator's manual describes safety and international symbols and pictographs that may appear on this product.
Read the operator's manual for complete safety, assembly, operating and maintenance and repair information.
SYMBOL MEANING SYMBOL MEANING
@
• SAFETY ALERT SYMBOL
Indicates danger, warning or caution.
May be used in conjunction with other
symbols or pictographs.
• WARNING - READ
OPERATOR'S MANUAL
Read the operator's manual(s) and follow
all warnings and safety instructions.
Failureto do so can result in serious injury
to the operator and/or bystanders.
• WEAR EYE AND HEARING
PROTECTION
WARNING: Thrown objects and loud
noise can cause severe eye injury and
hearing loss. Wear eye protection
meeting ANSI Z87.1 standards and ear
_jrotection when operating this unit.
sea full face shield when needed.
• KEEP HANDS AWAY FROM
BLADES
WARNING: Moving blades can
cause severe injury. Do not touch the
blades when starting or while
operating the unit.
• KEEP BYSTANDERS AWAY
WARNING: Keep all bystanders,
especially children and pets, at least
50 feet (15 m) from the operating area.
APPLICATION
This unit is intended for household use only.
Use the Hedge Trimmer for:
Trimming and forming hedges, shrubs and
bushes with a branch diameter of up to 3/8 inch 14.4 Volt Battery
(TB24HTB only)
!
Blade Sheath
Safety Guard
'\
\
\
Safety Switch
\
\
\
\
\
\
Battery Release
Latch
(TB24HTB only)
_- Trigger
Switch
\
Cutting Blade
Extension Cord Retainer
(TB24HT only)
5
Page 6

INSTALLING THE SAFETY GUARD
After removing your hedge trimmer from its carton,
remove the contents from the plastic bag. Install the
safety guard as follows:
l_] WARNING: To prevent serious personal
enjury, never operate the trimmer without
the safety guard in place.
1. Place the safety guard on the trimmer at the base of
the cutting blade (Fig. 1).
{ \
\
3. Slide the charger onto the battery, from the battery's
square end (Fig. 2).
4. Push hard to snap the battery into place. Be sure the
contacts on the battery engage properly with the
contacts on the charger (Fig. 2).
NOTE: The red light wi!l go On when the battery is
charging.
5. Charge the unit for a minimum of 8 hours before the
first use.
6. The battery should be charged for a minimum of 8
hours between each use. The unit operating time
and the life of the battery will be shortened if you
donlt fOllOw this procedure.
NOTE: The battery will become slightly warm to the
touch while charging. This is normal and does
not indicate a problem.
Barrel
Connector Input
\
_L
Screw _(_
Fig. 1
2. Align the screw holes in the guard with the holes in
the trimmer .',Fig.1).
3. Insert a screw on each end of the safety guard, using
a Phillips screwdriver. Do not over-tighten,
CHARGING THE BATTERY (TB24HTB only)
The battery for this unit has been shipped in a low
charge condition to prevent possible problems.
Therefore you should charge the batter_, for at least 8
hours before using.
NOTE: Batteries will not reach full charge the first time
the)/are charged. Allow several cycles (trimming
followed by recharging) for batteries to be fully
charged
1. Charge battery only with the 14.4V charger provided.
2.
Plug [he 14.4V charger into the wall outlet and its
barrel connector into the battery charger (Fig. 3).
Make sure the wall outlet is normal house voltage,
120 volts 60 Hz. AC only.
NOTE: Do not place charging stand in an area of
extreme heat or cold. It will work best at norma
room temperature.
/
ii ZZZZZZZZZZZZI
Charger
Contacts
Fig. 2
Allk WARNING: To reduce the risk of injury,
,, charge only original equipment nickel-
cadmium rechargeable batteries. Other
Jtypes of batteries may burst, causing J
[ Jpersona njury or damage. ]
Wall Outlet
Indicator Barrel
Light Connector
I
I I
II
Charger
Fig. 3
6
Page 7

7. Aftercharging,disconnectthe14.4Vchargerfrom
thewalloutletandremovethebatteryfromthe
chargingstand(Fig.3).
RedIndicator Light
Whentheredlight(Fig.4)ison.thebatteryisbeing
charged.
Ifthelightfailstoturno_ checkthefollowing:
a. Barrel connector has been properly installed into the
charging stand.
a. 14.4V charger has been plugged into the wall outlet.
c. Battery is firmly seated in the charging stand.
d. Power is on at the wall outlet.
NOTE: If the wall outlet is operated by a switch, be sure
[he switch is ON.
,j_ WARNING: To prevent serious personal
"L injury, if the wall outlet is not working
properly, have the wall outlet checked by a
qua fed eectr can.
The red light will go off when the battery is fully charged.
Battery Charger
ight:
Battery is
Charging
Fig, 4
Charging Tips for Maximum Performance
• Store and charge the unit where temperatures are
between 50 F (10"C) and 100" F (38 C). Storing the
unit or batteries above 100: F (38 C) wi!l reduce
battery life.
• storage below 50: F (10" C) will not reduce battery
life, but may require a longer charging time.
NOTE: The charging indicator light will remain lit when
the battery is properly installed in the charging
stand.
Temperature Effects on Charging Time
• 50 F (10 C) to 100 F (38 C) - Battery will be
charged within 24 hours,
• 40 F (4"C) to 50 F(10 C)- Battery will require up to
48 hours for a full charge.
• Below 40" F(4 :C) - Battery wi!l not reach full charge,
NOTE: Unit run time will be reduced when the battery is
not fully charged.
INSTALLING AND REMOVING THE BATTERY
(TB24HTB only)
CAUTION: When placing a battery in your
unit, be sure the battery ridges slide in the I
housing channel, and that the battery snaps
into place. Improper assembly can case
damage to internal components.
1. Align the ridges on both sides of the battery's center
platform with the channel on the rear of the unit
housing (Fig. 5).
2. Slide the battery along this channel until the battery
and latch snap into place. Make sure the battery is
secured in the unit before beginning operation.
To remove the battery, locate the latch on the end of the
battery. Ho!d the unit securely, then push down on the
latch with your thumb and slide out the battery (Fig. 6).
7
Page 8

Battery
Ridge
Battery
Platform
Unit _ _o_
Housing
Fig. 5
Safety Switch
Trigger Switch
Fig.7
The trimmer will stop if you release either the trigger or
safety switch.
To start the unit:
1. Make sure the power cord is plugged in (TB24HT) or
the battery is securely inserted (TB24HTB')
2. With the blade facing away hold the unit by the front
and rear handles (Fig. 8).
3. Start the unit in a pos_hon where the blades will not
bind with the hedge to be trimmed.
Battery Latch
Fig. 6
STARTING/STOPPING INSTRUCTIONS
Your hedge trimmer is equipped with a safety switch, Fig.8
that reduces the possibility of accidental starting. The
safety switch is located on the front handle (Fig 7). EXTENSION CORD RETAINER (TB24HT only)
You must press both the safety switch and trigger switch There is an extension cord retainer to prevent the
in order to start the unit. extension cord from disconnecting during use. It is
A TWARNING: Battery tools do not have to be I located on the end of the power cord (Fig. 9).
To secure both cords, form a loop with the extension
.]k |plugged in; they are always in operating I cord and push it into the retainer clips.
_|condition. Avoid unintentional starting,
[never carry unit with a finger on the trigger. I Cord Retainer
i
Fig. 9
8
Page 9

USING THE HEDGE TRIMMER
Use the hedge trimmer for trimming and forming hedges,
shrubs and bushes that have a branch diameter of up to
3/8 of an inch.
WARNING: Do not operate your trimmer 1
until any missing, damaged, or broken J
parts have been replaced. Failure to do so J
could result in serious personal injury. 1
A WARNING: To prevent serious personal
.. injury, always use both the front handle and
rear handle to hold the hedge trimmer
dur ng operat on.
For your protection, there is a blade guard between the
front handle and the blade.
WARNING: Never use guard as a handle
Never grasp the unit by the guard. Failure
to heed this warning can result in serious
personal _njury.
I A JWARNING: Clear the area to be cut before
"" I each use. Remove all objects like cords,
lights, wire, or string which can become
I entangled in the cutting E)lade
Follow these general trimming techniques:
• Keep from trimming too much at one time. This can
cause the blades to bind and slow. reducing [he
cutting efficiency.
• Do not force the unit through dense growth. If the
blades slow down reduce your pace.
• Use hedge trimmer properly. Before starting hedge
trimmer, hold the unit with both hands and face the
cutting blade awaY from you.
• Always keep the cord behind the hedge trimmer when
in use. Do not place it over the hedge where it may be
cut by the blade.
DANGER: If the blade jams on any electrical
cord or line, DO NOT TOUCH THEBLADE. !T
CAN BECOME ELECTRICALLY LIVE AND
VERY DANGEROUS. Continue to hold your
trimmer by the insulated handles and
immediately disconnect the damaged
electrical cord or line from the power source.
Failure to heed this warning will result in
serious or fatal personal injury.
• If desired, you can use a string to help cut your hedge
level. Decide how high you want the hedge. Then,
stretch a piece of string along the hedge at this height,
Trim the hedge just above this guide line of string. Trim
the side of a hedge so that it will be slightly narrower at
the top (Fig. 10). More of the hedge will be exposed
when shaped this way, and it will be more uniform.
• Wear gloves when trimming thorny or prickly growth.
When trimming new growth, use a wide sweeping
action, so that the stems are fed directly into the
cutting blade. Older growth will have thicker stems and
will be trimmed easies t by using a sawing movement.
• Do not try to cut stems that are larger than 3/8 inch
thick, or those obviously too large to feed into the
cutting blade. Use a non-powered hand saw or
pruning saw to trim large stems.
WARNING: Toprevent serious personal
injury, keep hands away from blades. Do not
attempt to remove cut material or hold material
to be cut when blades are moving. Make sure
unit is unplugged and the switch is off when
clearing jammed material from blades. Do not
grasp the exposed cutting blades or cutting
edges when picking up or holding the unit.
Fig. 10
9
Page 10

[_WARNING: To avoid serious personal injury, 1
always turn your trimmer off and unplug it I
before you clean or service it.
|
SERVICING DOUBLE INSULATED UNITS
This unit is double-insulated. In a double-insulated unit,
two systems of insulation are provided instead of
grounding. There is no grounding provided and no
means of grounding should be added to this unit.
Extreme care and knowledge of the system is required
when servicing a double-insulated unit. Service should
be performed by qualified service personnel only.
Replacement parts for a double-insulated unit must be
identical to the parts they replace. Refer any repair to an
authorized service dealer. A double-insulated unit is
marked with the words "double insulation, or ,double
insulated."
CLEANING
Switch off the unit and disconnect it from the power
source. Use a small brush to clean off the outside of the
unit. Do not use strong detergents. Household cleaners
that contain aromatic oils such as pine and lemon, and
solvents such as kerosene, can damage plastic housing
or handle. Wipe off any moisture with a soft cloth. Also
keep the air vents free of obstructions.
INSPECT EXTENSION CORDS
Inspect all extension cords. Look closely for deterioration,
cuts or cracks in the insulation. Inspect the connectors for
damage. Replace a damaged or defective cord.
STORAGE
• Allow the unit to col before storing.
• Lock the unit to prevent unauthorized use or damage.
• Store the unit in a dry, well-ventilated area.
• Store the unit out of the reach of children.
CHECK FOR DAMAGED/WORN PARTS
Before each use, check for damaged partsl Before
further use of the unit, a guard or Other part that is
damaged should be carefully checked to determine that
it will operate properly and perform its intended function.
Check for alignment of moving parts, binding of moving
parts, breakage of parts, mounting, and any other
condition that may effect the units operation. A guard or
other part that is damaged should be properly repaired
or replaced by an authorized service dealer unless
indicated elsewhere in this manual.
WARNING: You will need to Connect the 1
unit to power during these procedures. To I
avoid serious personal injury, be sure to I
pay attention to the instructions and
DISCONNECT the power when stated. J
SHARPENING THE BLADE
1. Allow your hedge trimmer to come to a stop with the
cutter blade and guard positioned as shown in
Figure 11. This will allow clearance for the file
between cutter teeth and guard teeth.
2. Disconnect the hedge trimmer from the power supply.
3.
Clamp the blade assembly in a wse and file the
exposed cutting surface of each blade tooth with an
8 inch fine round file with a 1/4 or 7/32 inch
diameter. Be sure to retain the tooth's original angle
when filing.
4. Remove the hedge trimmer from the vise restart _t
and stop it so that the unsharpened edges of the
blade teeth are exposed.
5. Disconnect the tool and repeat the sharpening pro-
cedure as described above.
Cutting Blade Blade Guard
Fig. 11
LUBRICATING THE BLADE
To lubricate the cutting blade, disconnect the hedge
trimmer from the power supply.
For easier operation and longer blade life, lubricate the
hedge trimmer blade before and after each use. Before
lubricating, be sure the unit is off and disconnected from
the power supply. Apply light machine oil along the edge
of the top strap (Fig. 12).
_l_ CAUTION: Some spray-on lubricants
AI, contain solvents and will cause some types I
of grease to break-down, To prevent I
damage to the unit, only use a quality
mach ne o .
Occasionally stop, disconnect, and oil your trimmer
during use.
©
Fig. 12
10
Page 11

TO RECYCLE BATTERIES (TB24HTB)
WARNING: To prevent serious personal injury,
exercise care when handling batteries in order
not to short the battery with conducting
materials such as rings, bracelets, and keys.
The battery or conductor may overheat and
cause burns. Upon removal, cover the battery
terminals with heavy duty electrical tape.
I _11_ IWARNING: To prevent serious personal
.IL I injury, do not open or mutilate the battery.
Released electrolyte is corrosive and may
cause damage to the eyes or skin. It may
be tox c f swa owed.
The EPA Certified RBRC® Battery
Recycling Seal on the nicke!:cadmium
(Ni-Cd) battery contained in our
product indicates that Troy-Bilt is
voluntarily participating in an industry
program to collect and recycle these
batteries at the end of their useful life,
when taken out of service in the
United States and Canada. The RBRC® program
provides a convenient alternative to placing used Ni-Cd
batteries into the trash or municipal waste stream, which
may be illegalin your area. Please call 1-800-8-BATTERY TM
for information on NFCd battery recycling and disposal
bans/restrictions in your area. Troy-Bilt's involvement in
this program is part of our commitment to preserving our
environment and conserving our natural resources.
CAUSE
Battery is not charged
ACTION
Charge the battery
CAUSE
No power to charger or battery
Battery has failed
ACTION
Check the charger and charging station
Replace the battery
11
Page 12

MANUFACTURER'S LIMITED WARRANTY FOR:
O TROII BIIT"
The limited warranty set forth below is given by Troy-Bilt
LLC with respect to new merchandise purchasedand used
in the United States, its possessions and territories.
Troy-Bilt LLC warrants this product against defects in
material and workmanship for a period of two (2) years
commencing on the date of original purchase and will, at its
option, repair or replace, free of charge, any part found to
be defective in material or workmanship. This limited
warranty shall only apply if this product has been operated
and maintained in accordance with the Operator's Manual
furnished with the product, and has not been subject to
misuse, abuse, commercial use, neglect, accident,
improper maintenance, alteration, vandalism, theft, fire,
water or damage because of other peril or natural disaster.
Damage resulting from the installation or use of any
accessory or attachment not approved by Troy-Bilt LLC for
use with the product(s) covered by this manual will void
your warranty as to any resulting damage. This warranty is
limited to ninety (90) days from the date of original retail
purchase for any Troy-Bilt product that is used for rental or
commercial purposes, or any other income-producing
purpose.
HOW TO OBTAIN SERVICE: Warranty service is
available, WITH PROOF OF PURCHASE THROUGH
YOUR LOCAL AUTHORIZED SERVICE DEALER. To locate
the dealer in your area, visit our website at www.troybilt.com,
check for a listing in the Yellow Pages, call 1 1-800-520-
5520 or write to P.O. Box 361131, Cleveland, OH 44136-
0019.
This limited warranty does not provide coverage in
the following cases:
A. Tune-ups - Spark Plugs, Carburetor Adjustments,
Filters
B. Wear items - Bump Knobs, Outer Spools, Cutting
Line, Inner Reels, Starter Pulley, Starter Ropes, Drive
Belts
C. Troy-Bilt LLC does not extend any warranty for
products sold or exported outside of the United
States of America, its possessions and territories,
except those sold through Troy-Bilt's authorized
channels of export distribution.
Troy-Bilt LLC reserves the right to change or improve the
design of any Troy-Bilt Product without assuming any
obligation to modify any product previously manufactured.
No implied warranty, including any implied warranty of
merchantability or fitness for a particular purpose,
applies after the applicable period of express written
warranty above as to the parts as identified. No other
express warranty or guaranty, whether written or oral,
except as mentioned above, given by any person or
entity, including a dealer or retailer, with respect to any
product shall bind Troy-Bilt LLC During the period of
the Warranty, the exclusive remedy is repair or
replacement of the product as set forth above. (Some
states do not allow limitations on how long an implied
warranty lasts, so the above limitation may not apply to
you.)
The provisions as set forth in this Warranty provide the
sole and exclusive remedy arising from the sales. Troy-
Bilt LLC shall not be liable for incidental or
consequential loss or damages including, without
limitation, expenses incurred for substitute or
replacement lawn care services, for transportation or
for related expenses, or for rental expenses to
temporarily replace a warranted product. (Some states
do not allow limitations on how long an implied warranty
lasts, so the above limitation may not apply to you.)
In no event shall recovery of any kind be greater than the
amount of the purchase price of the product sold.
Alteration of the safety features of the product shall void
this Warranty. You assume the risk and liability for loss,
damage, or injury to you and your property and/or to
others and their property arising out of the use or misuse
or inability to use the product.
This limited warranty shall not extend to anyone other than
the original purchaser, original lessee or the person for
whom it was purchased as a gift.
How State Law Relates to this Warranty: This warranty
gives you specific legal rights, and you may also have
other rights which vary from state to state.
To locate your nearest service dealer dial 1-800-520-5520.
Troy-Bilt LLC
RO. Box 361131
Cleveland, OH 44136-0019
12
 Loading...