

Trio Motion Technology Uniplay HMI User Manual
UNIPLAY HMI
QUICK CONNECTION GUIDE
Quick Start Guides
1
USING UNIPLAY
UN IP L AY HMI’s work with the Trio 4xx Motion Coordinator range. Motion Perfect 3 is used to create
operator HMI screens which are transferred to the UN IP L AY HMI by the Motio n Coordinator at runtime.
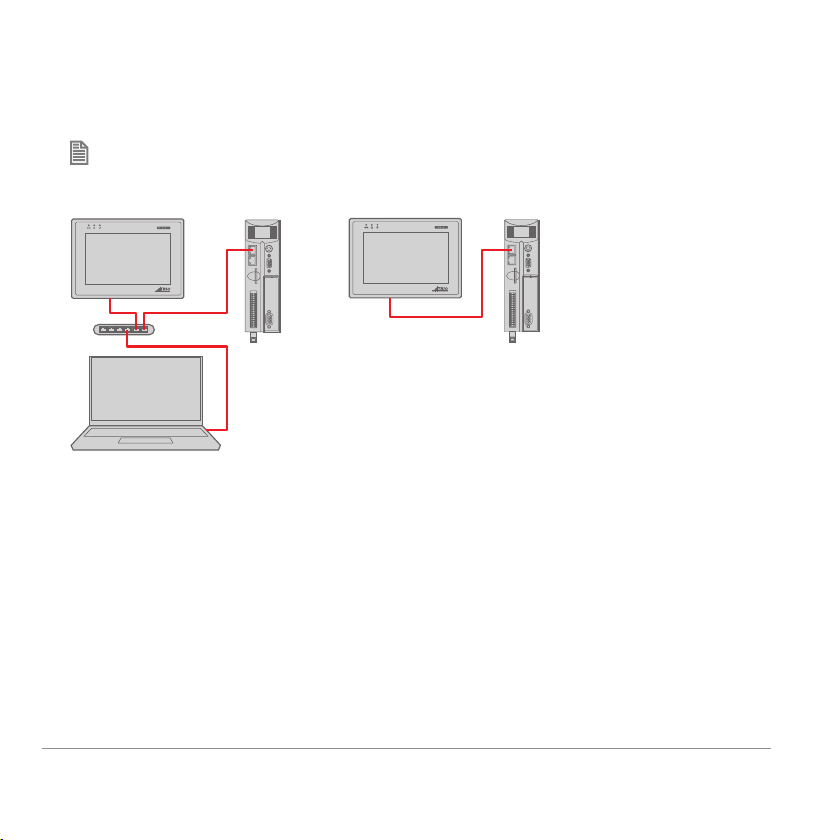
Trio recommend using a USB powered switch
CONFIGURATION RUNNING
To allow a laptop PC
to be connected to the
Motion Coordinator at the
same time as the HMI, an
Ethernet switch / hub is
required.
INTRODUCTION
UN IP L AY HMI is a whole new way of creating and
storing HMI screens. HMI screens can be created
and linked to programs directly inside MPv3. The
HMI screens are stored with and loaded with the
machine project on the Motion Coordinator.
2
Quick Start Guides
REQUIREMENTS
The following versions are required:
1 Trio Motion Technology Motion P erfec t v3
version greater than 3.1.0.5544.
2 UN IP L AY 7 or U NI PL AY 10 HMI panel.
3 MC4XX Motion Coordinator with system
software 2.0199 or higher.
INSTALLATION
1 The Motion Coordinator default IP address is
19 2.1 68 .0 .2 50
2 The UN IP L AY panel default IP address is
192.168.0.251
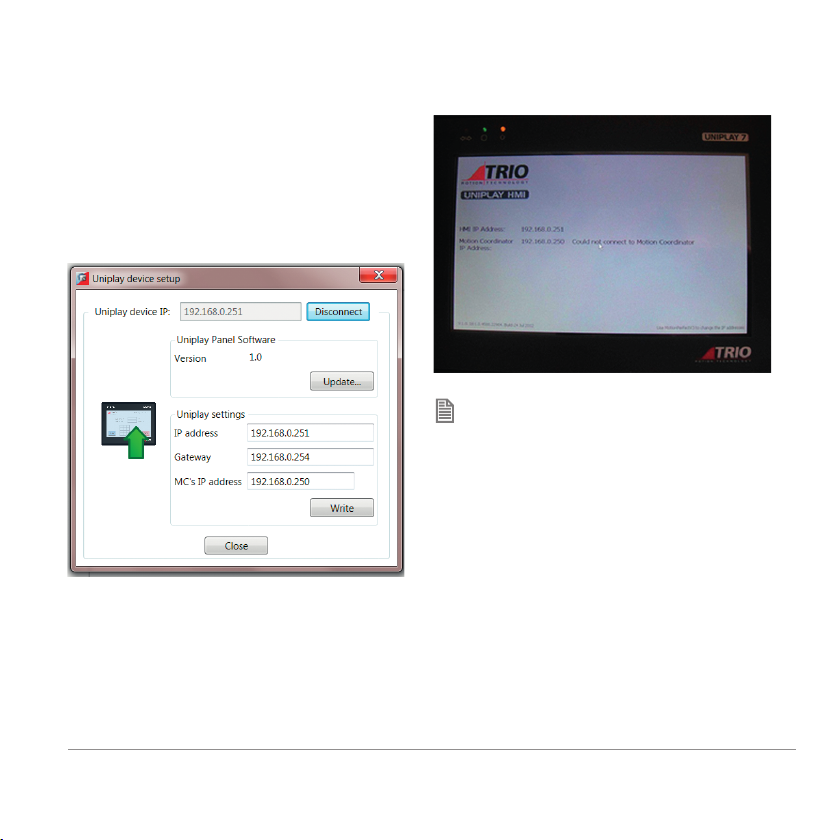
3 The HMI panel must be aware of the Motion
Coordinator IP address. If this is not at default
use MPv3 Tools->Setup U NI PL AY HMI device
screen to store the Motio n Coordinator IP
address into the panel.
4. Whilst attempting to connect to the Motion
Coordinator the panel displays a page:
If no HMI page exists, the U NI PL AY panel
will display”invalid HMI page”.
Quick Start Guides
3
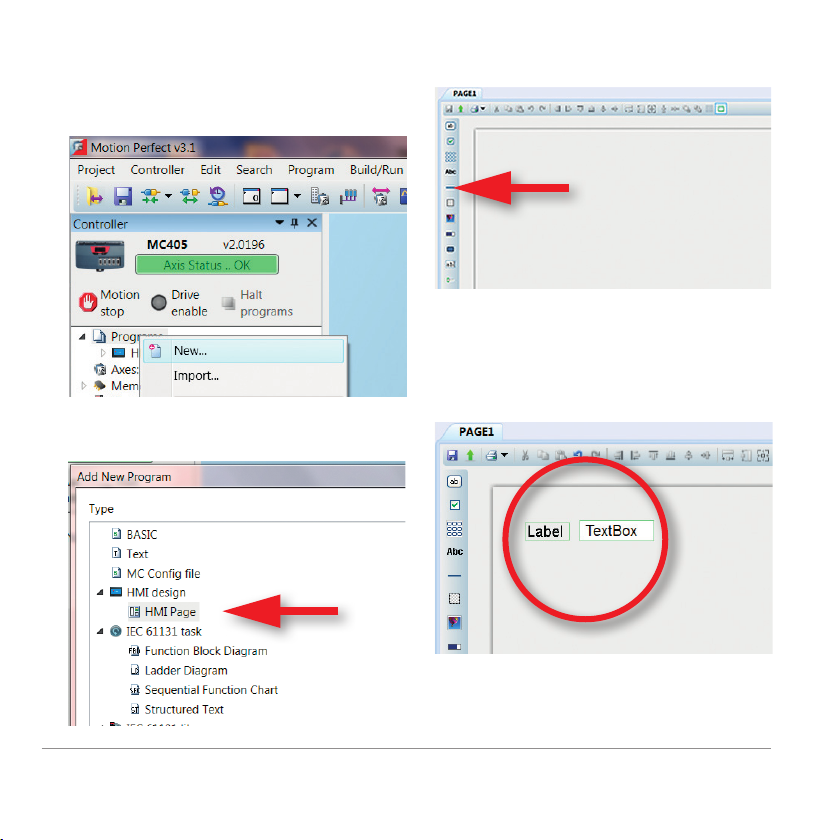
CREATING AN HMI PAGE
Right mouse click on “Programs” or use
Program->New on the menu
Select HMI Page under “Add New Program”, and
give the page a name:
The new blank page will open in the editor:
The components on the left hand column can be
dragged and dropped on the page. The top
border tools are used to edit and align pages. In
the simple example below a “Label” and a
“TextBox” component have been dragged onto
the HMI page:
4
Quick Start Guides
 Loading...