

Page 1

USER GUIDE
FM-1000™ Integrated Display
Version 9.25
Revision B
October 2015
1
Page 2

Corporate Office
Trimble Navigation Limited
935 S tewartDrive
Sunnyvale, CA 94085
USA
www.trimble.com
Agriculture
10368 Westmoor Drive
Westminster, Colorado 80021
USA
800-361-1249 (tollfree in USA)
+1-937-245-5154 Phone
+1-937-233-9441 Fax
www.trimble.com
Email: trimble_support@trimble.com
Legal Notices
© 2015 Trimble Navigation Limited. Allrights reserved.
Trimble, the Globe & Triangle logo, EZ-Boom, EZ-Guide, EZ-Pilot,EZ Steer, FarmWorks Software, FmX, GreenSeeker, OmniSTAR,Trimble
Ready, Tru CountAirClutch,and WM-Drainare trademarks of Trimble
Navigation Limited, registered in the United S tates and in other
countries.
Autopilot, AutoSense, CenterPoint, CFX-750, ConnectedFarm, EZRemote, FarmWorks, Farm Works Mapping, Farm Works Software,
Field-IQ, F ieldLevel,FM-750, FM-1000, FreeForm, LiquiBlock,
NextSwath, Rawson,RTX,T3, TM X-2050, TrueGuide,TrueTracker,VRS
Now,VRS, WM-Topo,XCN-2050,xFill,and Zephyr are trademarks of
Trimble Navigation Limited.
For STL support,the software uses the MoscowCenterfor SPARC
Technology adaptation of the S GI Standard Template Library. Copyright
© 1994 Hewlett-PackardCompany, Copyright © 1996,97 S ilicon
Graphics ComputerSystems, Inc., Copyright © 1997 Moscow Centerfor
SPARC Technology.
Portions Copyright© 2009 Nokia Corporation and/orits subsidiary(-ies).
Portions Copyright© 2003, Bitstream Inc.
All other trademarks are the property of theirrespective owners.
Release Notice
This is theOctober2015 release (Revision B ) of the F M-1000 integrated
display documentation. It applies to version 9.25 of the display
software.
Legal Notices
The following limited warranties give you specific legal rights. Youmay
have others,whichvary from state/jurisdictionto state/jurisdiction.
Product Limited Warranty
Trimble warrants that this Trimble product and its internalcomponents
(the 'Product") shall be free from defects in materials and workmanship
and will substantially conform to Trimble's applicable published
specifications for the Product for a period of one (1)year, starting from
the earlierof (i) the date of installation,or (ii) six (6) months from the
date of original Product shipmentfrom Trimble. This warranty applies
only to the Productif installed by Trimble or a dealer authorized by
Trimble to perform Product installation services.
Software Components
All Product software components (sometimes hereinafteralso referred
to as "Software") are licensedsolely for use as an integral part of the
Productand are not sold. Any software accompaniedby a separate end
user license agreement("EULA") shall be governedby the terms,
conditions, restrictions and limited warranty terms of such EULA
notwithstanding the preceding paragraph.
During the limited warranty period you will be entitled to receive such
Fixes to the Product software that Trimble releases and makes
commercially available and for which it does not charge separately,
subject to the procedures for delivery to purchasers ofTrimble products
generally. If y ou hav e purchased the Product from an authorized
Trimble dealer ratherthan from Trimble directly, Trimble may , at its
option,forward the software Fixto the Trimble dealer for final
distributionto you. MinorUpdates, M ajor Upgrades,new products,or
substantially new software releases, as identified by Trimble, are
expressly excluded from this update process and limited warranty.
Receipt of software Fixes or other enhancements shallnotserve to
extendthe limited warranty period.
For purposes of this warranty the following definitions shallapply: (1)
"Fix(es)' means an errorcorrection or otherupdate created to fix a
previous software version that does not substantially conform to its
Trimble specifications; (2) "MinorUpdate" occurs when enhancements
are made to current features in a software program; and(3) "M ajor
Upgrade"occurs when significantnew features are added to software,
or when a new product containing new features replaces the further
developmentof a currentproductline. Trimble reserves the right to
determine,in its sole discretion,what constitutes a Fix, Minor Update,or
Major Upgrade.
Gson components licensed under the Apache 2.0 License. The source is
available from http://code.google.com/p/google-gson/. Google
MVELcomponents licensed under the Apache 2.0 Llicense. The source is
available from http://code.google.com/p/mvel.codehause.org. Google
Guava components listed underthe Apache 2.0 License. The source is
available from http://code.google.com/p/guava-libraries. MapQuest
content licensed underthe Open Data Commons Database License
(DbCL). The source is available from http://developer.mapquest.com.
APACELICENSE(Version 2. 0, January 2004)
http://www.apache.org/licenses/
TERMSANDCONDITIONSFO RUSE,
REPRODUCTION,ANDDISTRIBUTION
1. Definitions
"License" shallmean the terms andconditions for use, reproduction,and
distributionas defined by Sections 1 through S ection 9 of this document.
""Licensor " shall mean the copyright owner or entity authorizedby the
copyright owner that is granting the License.
"Legal Entity" shall mean the union of the acting entity andall other
entities that control,are controlled by, or are under common control with
that entity. For the purposes of this definition,"control" means (i) the
power, director indirect,to cause the direction or management of such
entity, whether by contractor otherwise, or (ii) ownershipof fifty percent
(50%) or more of the outstanding shares, or (iii) beneficial ownership of
such entity.
"You" (or "Your") shall mean an individual or Legal Entity exercising
permissions granted by this License.
"Source" form shall mean the preferred form for making modifications,
including but not limited to software source code, documentationsource,
and configuration files.
"Object" form shall mean any form resulting from mechanical
transformation or translation of a Source form, including but not limited
to compiled object code, generated documentation, and conversions to
othermedia types.
"Work" shall mean the work of authorship, whetherin Source or Object
form,made available under the License, as indicated by a copyright
notice that is included in or attached to the work (an example is provided
in the Appendix below).
"Derivative Works" shall mean any work, whetherin Source or O bject
form,that is based on(orderived from) the Work andfor whichthe
editorialrevisions, annotations, elaborations, or othermodifications
represent,as a whole, an originalwork of authorship. Forthe purposes
of this License, Derivative Works shallnot include works that remain
separable from,or merely link (or bind by name) to the interfaces of, the
Work and Derivative Works thereof.
"Contribution" shall mean any work of authorship,including the original
version of the Work and any modifications or additions to that Work or
Derivative Works thereof,that is intentionally submittedto Licensorfor
inclusionin the Work by the copyright owneror by an individual or Legal
Entity authorized to submit on behalf of the copyrightowner. For the
purposes of this definition, "submitted" means any form of electronic,
verbal, or written communication sent to the Licensor or its
representatives, including but not limited to communication on electronic
mailing lists, source code control systems, and issue tracking systems
that are managed by, oron behalf of, the Licensor for the purpose of
discussing andimproving the Work, but excluding communicationthat is
conspicuously marked or otherwise designated in writing by the
copyright owner as "Nota Contribution."
"Contributor" shall mean Licensorand any individual or Legal Entity on
behalf of whom a Contribution has been received by Licensorand
subsequently incorporatedwithin the Work.
2. Grant of CopyrightLicense. Subject to the terms andconditions of this
License, each Contributorhereby grants to You a perpetual,worldwide,
non-exclusive, no-charge, royalty-free,irrevocable copyrightlicense to
reproduce, prepare Derivative Works of, publicly display, publicly
perform,sublicense, and distribute the Work and such Derivative Works
in Source or O bjectform.
2 FM-1000 Integrated Display User Guide Version 9.25, Revision B
Page 3

3. Grant of Patent License. Subject to the terms andconditions of this
License, each Contributorhereby grants to You a perpetual,worldwide,
non-exclusive, no-charge, royalty-free,irrevocable (except as stated in
this section) patent license to make, have made, use, offer to sell, sell,
import,and otherwise transferthe Work, where such license applies only
to those patent claims licensable by suchContributor that are necessarily
infringed by theirContribution(s) alone or by combination of their
Contribution(s) with the Work to which such Contribution(s) was
submitted. If You institute patent litigation against any entity (including
a cross-claim or counterclaim in a lawsuit) alleging that the Work or a
Contribution incorporated within the Work constitutes director
contributory patent infringement, then any patent licenses granted to
You under this License for that Work shallterminate as of the datesuch
litigation is filed.
4. Redistribution. You may reproduce and distribute copies of the Work
or Derivative Works thereofin any medium,withor without
modifications, and in S ource or Objectform, provided that You meetthe
following conditions:
You must give any other recipients of the Work orDerivative Works a
copy of this License; and
You must cause any modified files to carry prominentnotices stating
that You changed the files; and
You must retain,in the Source form of any Derivative Works that You
distribute, all copyright,patent, trademark, and attribution notices from
the Source form of the Work, excluding those notices that do not pertain
to any part of the Derivative Works; and
If the Work includes a "NOTI CE" text file as part of its distribution,then
any Derivative Works that You distribute must include a readable copy
of the attribution notices contained within such NOTICE file, excluding
those notices that do not pertainto any part of the Derivative Works, in
at least one of the following places: withina NOTICE text file distributed
as part of the Derivative Works; within the S ource form or
documentation,if provided along with the Derivative Works; or,within a
display generated by the Derivative Works, if and wherever such thirdparty notices normally appear. The contents of the NOTI CE file are for
informational purposes only anddo not modify the License. You may
add Your own attribution notices within Derivative Works that You
distribute, alongside or as an addendum to the NOTICE textfrom the
Work, providedthat such additional attributionnotices cannot be
construedas modifying the License.
You may add Your own copyrightstatementto Your modifications and
may provide additional or differentlicense terms and conditions foruse,
reproduction, or distribution of Your modifications,or for any such
Derivative Works as a whole, providedYouruse, reproduction,and
distributionof the Work otherwise complies with the conditions stated in
this License.
5. Submission of Contributions. Unless You explicitly state otherwise, any
Contribution intentionally submitted for inclusion in the Work by You to
the Licensorshall be underthe terms and conditions of this License,
without any additionalterms or conditions. Notwithstanding the above,
nothing herein shall supersede or modify the terms of any separate
license agreementyou may have executed with Licensor regarding such
Contributions.
6. Trademarks. This License does not grant permission to use the trade
names, trademarks, service marks, or product names of the Licensor,
exceptas required for reasonable and customary use in describing the
origin of the Work and reproducing the contentof the NOTICE file.
7. Disclaimer of Warranty. Unless required by applicable law or agreed
to in writing, Licensor provides the Work (and each Contributorprovides
its Contributions) on an "AS IS" BASIS, WITHOUT WARRANTIES OR
CONDITIONS O F ANY KIND,either express or implied, including, without
limitation, any warranties or conditions of TITLE, NON-INFRINGEMENT,
MERCHANTABILITY, or FITNESS FOR A PARTICULARPURPOSE. You are
solely responsible for determining the appropriateness of using or
redistributing the Work and assume any risks associated with Your
exercise of permissions underthis License.
8. Limitation of Liability. In no event andunderno legal theory, whether
in tort(including negligence), contract,or otherwise, unless required by
applicable law (suchas deliberate andgrossly negligentacts) or agreed
to in writing, shall any Contributor be liable to Youfordamages, including
any direct,indirect, special,incidental, or consequential damages of any
character arising as a result of this License or out of the use or inability to
use the Work (including but not limitedto damages for loss of goodwill,
work stoppage, computer failure or malfunction, or any and all other
commercial damages or losses), ev en if such Contributor has been
advised of the possibility ofsuch damages.
LWGL LICENSE
ODC DATABASE CONTENTS LICENSE
SGI FREE SOFTWARE LICENSE B (Version 2.0, Sept. 18, 2008)
Copyright © 2013 SiliconGraphics,Inc. All Rights Reserved.
Permission is hereby granted, free of charge, to any person obtaining a
copy of this software andassociated documentation files (the
"Software"),to deal in the Software withoutrestriction, including without
limitationthe rights to use, copy, modify, merge, publish, distribute,
sublicense, and/or sell copies of the Software, and to permit persons to
whom the S oftware is furnished to do so,subject to the following
conditions:
The above copyright notice including the dates of first publication and
eitherthis permission notice or a reference to
http://oss.sgi.com/projects/FreeB/ shallbe includedin all copies or
substantial portions of the Software.
THE SOFTWARE IS PROVIDED "AS IS", WI THOUT WARRANTY OF ANY
KIND, EXPRESS OR IMPLIED, INCLUDING BUT NOT LIMITED TO THE
WARRANTIES OF MERCHANTABILITY, FITNESS FOR A PARTICULAR
PURPOSE AND NONINFRINGEMENT. IN NO EVENT SHALL SILICON
GRAPHICS, INC. BE LIABLE FOR ANY CLAIM, DAMAGES OR OTHER
LIABILITY, WHETHER IN AN ACTION O F CONTRACT, TORT OR
OTHERWISE, ARIS ING FROM, OUT OF OR IN CONNECTION WITH THE
SOF TWARE OR THE USE O R O THER DEALINGS I N THE S OFTWARE.
Exceptas containedin this notice,the name of Silicon Graphics, Inc. shall
notbe used in advertising orotherwise to promotethe sale, use orother
dealings in this Software withoutprior written authorizationfrom Silicon
Graphics,Inc.
MAPQUEST PLATFORM TERMS OF USE (Last Updated: November 1,
2011)
Community Edition License Agreement
INTRODUCTION. MapQuest has been helping people find places and
get maps and directions for over 40 years. We mak e the MapQuest
APIs, our Open Services (as described at
http://open.mapquestapi.com/),Community Accounts and other
developerservices (in short,the "MapQuest Services"),along with the
maps, driving directions and other content delivered through the
MapQuest Services (the "MapQuest Content"), availablewithout
charge to encourage developers to use these services and contentin
developing their applications and websites. We want y ou to be creative
and build awesome applications and websites that thrilly our users. All
we ask is that youcomply with the terms that are included in these
Terms of Use.
We will provide the developercommunity at-large with supportin
various forms, such as forums,blog posts or FAQs. Since we're providing
the MapQuest Services for free, we don't provide individual technical
support or warranties for the Community Services,butif y ou want to
receive technical support and warranties, we have a product for y ou.
Please check out our MapQuest Platform Services Enterprise Edition and
learn more about the services we willprovide for reasonable fees.
If you choose to use any of the MapQuest S ervices or if you set up a
Community Account,you are agreeing to abide by these Terms of Use
and are forming an agreementbetween yourself and MapQuest,Inc.
("MapQuest"). If you do not want to abide by these Terms of Use, then
don't use the MapQuest Services.
LICENSES FROM MAPQUEST TO YOU.
2.1. MapQuest Services License. MapQuest grants you a non-exclusive,
non-assignable, non-sublicensable,revocable limited license to use the
MapQuest Services during the Term of these Terms of Use as provided
by MapQuest in the mannerpermitted in these Terms of Use.
2.2. MapQuest ContentLicense. MapQuest grants y ou a non-exclusive,
non-assignable, non-sublicensable,revocable limited license access, use,
publicly perform and publicly display the MapQuest Content as the
MapQuest Contentis provided through the M apQuest Services and in
the manner permitted by these Terms of Use.
GENERAL RESTRICTIONS, ADDITIO NAL LEGAL NOTICE, RESERVATION
OF RIGHTS.
3.1. Restrictions. Except as expressly authorized by MapQuest, You
must not:
decompile,disassemble,reverse engineer, or otherwise attempt to
derive any source code from the MapQuest S ervices or MapQuest
Content,other than the Open Services;
interfere or disrupt M apQuest servers or networks, ordisobey any
network access orsecurity requirements, policies, procedures or
regulations of MapQuest (including the enabling of any viruses, Trojan
horses, trap doors, back doors,worms, time bombs, cancelbots, adware,
spyware or other computer programming routines designed orintended
to damage, detrimentally interfere with, surreptitiously intercept or
expropriate any system, data or personal information);
use the MapQuest Services as a means to engage in conduct that
reflects poorly upon, disparages or devalues MapQuest's reputation or
goodwill,as determined in MapQuest's sole discretion;
Version 9.25, Revision B FM-1000 Integrated Display User Guide 3
Page 4

use the MapQuest Services, otherthan the Open Services,in
conjunctionwithany commercial application not publicly available
without charge (other than mobile applications for whichusers pay a fee
to download/installthe application). I f yourapplicationdoes notfit this
criteria and you would like to discuss additional options for using the
MapQuest Services please contact info@mapquest.com;
use the MapQuest Services, otherthan the Open Services,to process or
generate data forany thirdparty (other than for end users as expressly
permitted hereunder);
use the MapQuest Services with any contentor product that falsely
expresses orimplies that such contentor product is sponsored or
endorsed by MapQuest;
use the MapQuest Services in conjunction with a site or application
which contains or displays adultcontent or promotes illegal activities,
gambling, or the sale of tobacco or alcohol to persons under twenty-one
(21) y ears of age;
3.2. Additional Legal Requirements. In addition to the restrictions set
forth in Section 3.1, youruse of the MapQuest Services and MapQuest
Content is subjectto the AdditionalLegal Requirements which are
incorporated and made a part of these Terms of Use. Please read the
Additional Legal Requirements carefully as they include usage limits and
additional restrictions that may impacty our plans for development.
3.3. Reservationof Rights. MapQuest reserves all rights not expressly
granted in these Terms of Use and you may not use the MapQuest
Services or MapQuest Contentin any manner not expressly authorized
in these Terms of Use.
LICENSE FROM YOU TO MAPQUEST. If you upload any data, feedback,
ideas, suggestions, content, points of interest (including any points of
interest that include Trademarks) or other material to M apQuest
(collectively "YourContent"),y ou hereby grantM apQuest a perpetual,
worldwide, non-exclusive, royalty-free license to access,archive,
reproduce, publicly display, translate,modify the format or the display
of, distribute, transmit, stream, cache, overlay, seam, perform,
sublicense, and otherwise use YourContent withor without attribution
and withoutfinancial obligation, in whole or in part, via any method for
any purpose. M apQuest makes no assertion of ownership over Your
Content,and you retain all intellectual property rights to YourContent,
subject to the license y ou grant to MapQuest above.
MODI FICATIONS TO THESE TERMS OF USE AND THE SERVICES.
MapQuest reserves the right to change ormodify these Terms ofUse,
the MapQuest Services and/or the MapQuest Content. Please check
these Terms of Use, including the Additional Legal Requirements
periodically forchanges. Your continued use ofthe MapQuest Services
or MapQuest Content following the posting of any changes to the Terms
of Use constitutes acceptance of those changes.
TERMINATI ON. MapQuest may terminate these Terms of Use and/or
the provisionof the MapQuest Services orMapQuest Content at any
time,forany reason, with or withoutnotice.
PRIVACY POLICY AND END USER TERMS .
7.1. Privacy Policy. MapQuest's collectionand use of personally
identifiable information is governed by the AOL Network Privacy Policy,
available at http://about.aol.com/aolnetwork/aol_pp.
7.2. End User Terms. End users shall only be entitled to use the
MapQuest Services and MapQuest Contentif they acceptthe then
currentend user Terms of Use located at
http://info.mapquest.com/terms-of-use/. MapQuest reserves the right
to amend and/or replace these terms and the form and mannerof
presentation. You must provide a hypertext link at the bottom of each
page inyour website or application where the M apQuest Services or
MapQuest Contentcan be viewed or accessed, or within the terms of
use of your application or website,to the end user terms of use.
ACCESS AND USAGE DATA.
8.1. Credentials. M apQuest, at its discretion,may require youto create
an accountand obtain an access key and otherrelatedcredentials
(collectively "Credentials") to use the MapQuest Services or certain
aspects of the MapQuest Services. You are responsible for maintaining
the confidentiality of yourCredentials andforany usage orabuse of the
MapQuest Services or M apQuest Content by anyone using y our
Credentials.
8.2. Usage Data. MapQuest's servers record information when y ou v isit
MapQuest websites or when applications and/orCredentials call or
invoke the M apQuest Services. This information may include, without
limitation, the URL, IP address,browser type, Credential and access times
and dates. MapQuest may use this information to promote,operate,
and improve MapQuest services, products and properties.
PROPRIETARY RIGHTS. You acknowledge and agree the MapQuest
Services andMapQuest Content are works for purposes of copyright
law, and embody valuable, confidential,trade secret information of
MapQuest, the development of which required the expenditure of
substantial time andmoney. As between MapQuest and You,
MapQuest retains exclusive ownershipof any and all rights, title and
interest (including all intellectualproperty rights) in the MapQuest
Services andMapQuest Content, and you shall not acquire any rights,
express orimplied,in the foregoing by virtue of these Terms of Use other
than otherwise expressly set forth. For purposes of these Terms of Use,
the term "Trademarks" means all trademarks, trade names, service
marks, logos, domain names, along with any other distinctive brand
features of M apQuest or its suppliers. All use by You of Trademarks
shall inure to the benefit of M apQuest. Further,You shall not (a) display
a Trademark as the mostprominentelement on any page of Your
website, application or paper map; (b) display a Trademark in a manner
that is misleading,defamatory, infringing, libelous, disparaging,obscene
or otherwise objectionableto MapQuest as determined by MapQuest in
its sole discretion; or(c) remove, distort or alter any element of a
Trademark.
DISCLAIMER OF WARRANTIES. THE MAPQUEST SERVICES AND
MAPQUEST CONTENT ARE PROVI DED ON AN "AS IS" AND "AS
AVAI LABLE" BASIS. MAPQUEST DISCLAIM S ANY AND ALL
WARRANTIES, WHETHER EXPRESS OR IM PLIED, I NCLUDING BUT NOT
LIMI TED TO ANY WARRANTIES OF MERCHANTABILITY, FITNESS FOR A
PARTICULARPURPOSE, ACCURACY OR NON-INFRINGEMENT.
MAPQUEST DOES NOT REPRESENT OR WARRANT THAT THE
MAPQUEST SERVICES OR CONTENT, OR ANY PORTION THEREOF, IS OR
WILL BE FREE OF DEFECTS OR ERRORS (OR THAT ANY SUCHDEFECTS
OR ERRORS WILL BE CORRECTED),VIRUS FREE, ABLE TO OPERATE ON
AN UNINTERRUPTED BASIS, M EET YOUR REQUIREMENTS, OR CAPABLE
OF BEING INTEGRATED INTO OR WITH YOUR COMPUTER SYSTEM,
APPLICATIONS OR NETWORK. FURTHER, MAPQUEST DOES NOT
WARRANT OR MAKE ANY REPRESENTATIONS REGARDINGTHE USE OR
THE RESULTS OF THE USE OF THE MAPQUEST SERVICES, OR ANY
PORTION THEREOF, IN TERMS OF ITS CORRECTNESS, ACCURACY,
QUALITY, RELIABILITY, OR OTHERWISE. THIS DIS CLAIMER
CONSTITUTES AN ESSENTIAL PART OF THESE TERMS OF USE. IF THIS
EXCLUSION I S HELD UNENFORCEABLE, THEN ALL EXPRESS AND
IMPLIED WARRANTIES SHALL BE LIMITED IN DURATION TO A PERIOD
OF FIFTEEN (15) DAYS AFTER THE EFFECTI VE DATE, AND NO
WARRANTIES SHALL APPLY AFTER THAT PERIOD.
LIMI TATI ON ON LIABILITY. NEITHER M APQUEST NOR ITS AFFI LIATES
NOR ANY OF THEIR SUPPLIERS S HALL BE LIABLE TO YOU OR ANY
OTHER THIRDPARTY FOR ANY DIRECT,INDIRECT, SPECIAL, INCIDENTAL
OR CONSEQUENTIAL DAMAGES OF ANY NATURE ARISING O UT O F THE
POSSESSION OF, ACCESS TO, USE OF, OR INABILITY TO ACCESS OR
USE THE MAPQUEST SERVICES OR MAPQUEST CONTENT, OR ANY
PORTION, I NCLUDING,WITHOUT LIMITATIO N, LOST PROFITS, DATA
LOSS, COST OF PROCUREMENT FOR SUBSTITUTE GOODS, OR
COMPUTER F AILURE ORMALFUNCTION, EVEN IF MAPQUEST HAS
BEEN ADVI SED OF THE POSSI BILITY OF SUCH DAM AGES, AND
REGARDLESS OF WHETHER THE CLAIM OR LIABILITY IS BASED UPON
ANY CONTRACT, TO RT, BREACH OF WARRANTY O R O THER LEGAL OR
EQUITABLE THEORY. IN NO EVENT S HALL M APQUEST'S TOTAL
AGGREGATE LIABILITY UNDERTHESE TERMS OF USE EXCEED THE
LESSER OF (A) THE TOTAL AMOUNT OF FEES PAID BY YOU TO
MAPQUEST UNDERTHESE TERMS OF USEFOR THE TWELVE (12)
MONTHS PRECEDINGTHE DATE OF THE EVENT GIVING RISE TO SUCH
CLAIM; OR (B) FIVE HUNDRED DOLLARS ($500).
YOU EXPRESSLY ACKNOWLEDGE ANDAGREE THAT THE
PARTICIPATION IN AND USE OF THE MAPQUEST SERVICES AND
MAPQUEST CONTENT I S DONE AT YOUROWN RISK AND THAT YOU
ARE SOLELY RESPONSIBLE AND LIABLE FOR ANY DAM AGE SUSTAINED
TO YOUR COMPUTER SYSTEM, NETWORK OR DATA RESULTING FROM
SUCH PARTICIPATION OR USE.
SOM E JURISDICTI ONS DO NOT ALLOW THE EXCLUSION OF CERTAIN
WARRANTIES OR THE LIMITATION OR EXCLUSION OF LIABILITY FOR
INCIDENTAL O R CONSEQUENTIAL DAMAGES.
INDEMNITY. You agree to indemnify, defend and hold MapQuest and
its affiliates, and each of their officers, directors,employees, agents,cobranders or other partners (as well as each oftheirsuppliers), successors
and permitted assigns ("Indemnified Parties") harmless from and
against any thirdparty claim or action,including any liability, cost,losses,
damages, expenses, and attorney's fees, arising from or in any way
relatedto Your access, use or participation in the MapQuest S ervices
(including claims related to Your Contentand any use of the MapQuest
Services with software,data, content, systems, or other technology not
provided by MapQuest),any violation of these Terms of Use, or any
alleged infringement of a patent,copyright,trademark, trade secret,or
otherintellectual property right. MapQuest shall use good faithefforts
4 FM-1000 Integrated Display User Guide Version 9.25, Revision B
Page 5

to provide you with promptnotice of any such claim or action; provided
however,you agree that, upon MapQuest's written request, MapQuest
shall control the defense orsettlement of any such claim or action and
you shall provide reasonable cooperation to MapQuest. You may not
settle an indemnifiable claim without obtain MapQuest's prior written
consent.
EXPORT RESTRICTIONS. You agree to comply with all exportand import
laws and restrictions and regulations of the United States orany foreign
agency orauthority, andnot to exportor re-export MapQuest Services
or any direct product thereof in v iolation of any such restrictions,laws or
regulations,or without all necessary approvals.
NOTICES AND TRANSACTING ELECTRONICALLY. Youunderstand and
agree that MapQuest is an online service andthat you are transacting
withMapQuest electronically. MapQuest shallprovide electronic
notices by posting them on this website and/or by sending an email to
any account associated with yourCredentials.
GENERAL PROVISIONS.
15.1. Entire Agreement. These Terms of Use constitute the entire
agreement between MapQuest and You with respect to the subject
matterof these Terms of Use, and supersedes all prioragreements,
understandings and communications between MapQuest and Youwith
respectto suchsubject matter. No modification or amendmentto these
Terms of Use shall be effective unless inwriting by MapQuest.
15.2. Choice of Law; Jurisdiction. These Terms of Use are made under
and shall be governed by and construed in accordance with the laws of
the Commonwealth of Virginia (except for its conflicts of laws principles)
and specifically excluding f the United Nations Conventionon Contracts
for the International S ale ofGoods. MapQuest andYou expressly agree
that exclusive jurisdiction for any claim or dispute relating to or arising
outof these Terms of Use resides in the state courts inLoudoun County,
Virginia and the federal courts of the EasternDistrictof Virginia
(Alexandria Division) and further ag ree and expressly consent to the
exercise of personal jurisdiction in such state and federal courts of
Virginia inconnection with any such dispute.
15.3. Severability; Waiver. I f any provision in these Terms ofUse should
be held illegal or unenforceable by a court having jurisdiction, such
provision shall be modifiedto the extent necessary to renderit
enforceable without losing its intent,or severed from these Terms of Use
if no such modification is possible,and other provisions of these Terms of
Use shall remain in full force and effect. A waiver by eitherM apQuest or
You (as applicable) of any term or condition of these Terms of Use or any
breachthereof, in any one instance, shall not waive such term or
condition or any subsequent breach thereof.
15.4. Public Statements. You acknowledge andagree that MapQuest
may make any publicstatements regarding the existence of these
Terms of Use or the relationshipdescribed herein,withoutYourconsent.
15.5. Survival. Any term or condition of these Terms of Use that by its
nature wouldlogically survive termination or expiration of these Terms
of Use, including but not limited to protections of proprietary rights,
indemnifications,and limitations of liability, shall survive such
termination or expiration.
15.6. Independent Contractors. The parties to these Terms of Use are
independentcontractors. Neither party is an agent,representative or
partner of the other party. Neither party shall have any right,poweror
authority to enter intoany agreement for or on behalf of, or incurany
obligation or liability of,or otherwise to bind,the other party.
15.7. Equitable Remedies. You acknowledge and agree that monetary
damages may be insufficient to compensate M apQuest for an actualor
anticipated breach of these Terms of Use by you. Youagree that in such
circumstances MapQuest shall be entitled to seek equitable remedies
(including preliminary andpermanent injunctions), in addition to any
otherremedies available to MapQuest at law orhereunder.
15.8. Statute of Limitations. You agree that regardless of any statute or
law to the contrary, any claim orcause of action arising out of orrelated
to use of the MapQuest S ervices or these Terms of Use must be filed by
you within one (1) year after such claim or cause of action arose or be
forever barred.
15.9. Consent to FurtherContacts. Youagree that MapQuest may
contact You with respect to these Terms of Use, any otherM apQuest
products andservices, and in relationto any marketing relatedpurposes.
ODC O pen Database License (ODbL)
The OpenDatabase License (ODbL) is a license agreement intended to
allow users to freely share, modify, and use this Database while
maintaining this same freedom for others. Many databases are covered
by copyright,and therefore this document licenses these rights. S ome
jurisdictions, mainly inthe European Union, have specificrights that
cover databases, andso the ODbL addresses these rights,too. Finally,
the ODbL is also an agreement in contract for users ofthis Database to
act in certainways in return for accessing this Database.
Databases cancontain a wide variety of types of content (images,
audiovisualmaterial,and sounds all in the same database, forexample),
and so the ODbL only governs the rights over the Database, and not the
contents of the Database individually. Licensors should use the ODbL
togetherwith another license for the contents, if the contents have a
single set of rights that uniformly covers allof the contents. If the
contents have multiple sets of different rights, Licensors should describe
what rights govern what contents together in the individual record or in
some other way that clarifies what rights apply.
Sometimes the contents of a database, or the database itself, can be
covered by other rights not addressed here (such as private contracts,
trade mark over the name, orprivacy rights / data protectionrights over
information in the contents), and soyou are advised that you may have
to consultother documents or clear other rights before doing activities
notcovered by this License.
The Licensor (as definedbelow) and You (as defined below) agree as
follows:
1.0 Definitions of CapitalisedWords
"Collective Database" – Means this Database in unmodified form as part
of a collection of independent databases in themselves that together are
assembled into a collective whole. A work that constitutes a Collective
Database will not be considered a Derivative Database.
"Convey" – As a verb,means Using the Database, a Derivative
Database, or the Database as part of a Collective Database inany way
that enables a Person to mak e orreceive copies of the Database ora
Derivative Database. Conveying does not include interactionwitha user
through a computer network, or creating and Using a Produced Work,
where no transfer of a copy ofthe Database ora Derivative Database
occurs.
"Contents" – The contents of this Database, whichincludes the
information, independent works, or other material collected into the
Database. For example, the contents ofthe Database could be factual
data or works such as images, audiovisual material,text, or sounds.
"Database" – A collection of material (the Contents) arranged in a
systematic or methodical way and individually accessible by electronic
or othermeans offered underthe terms of this License.
"Database Directive" – Means Directive 96/9/EC of the European
Parliament and of the Councilof 11 March 1996 on the legal protection
of databases, as amended or succeeded.
"Database Right" – Means rights resulting from the Chapter III
("suigeneris") rights in the Database Directive (as amended andas
transposed by member states), which includes the Extraction and Reutilisation of the whole or a Substantialpart of the Contents, as well as
any similar rights available in the relevant jurisdiction under Section
10.4.
"Derivative Database" – Means a database based upon the Database,
and includes any translation, adaptation,arrangement, modification, or
any other alteration of the Database orof a Substantial part of the
Contents. This includes, but is notlimited to, Extracting or Re-utilising the
whole or a Substantial part of the Contents in a new Database.
"Extraction" – Means the permanentor temporary transfer of all or a
Substantial part of the Contents to another medium by any means or in
any form.
"License" – Means this license agreementand is both a license of rights
such as copyright and Database Rights and an agreementin contract.
"Licensor" – Means the Person that offers the Database under the terms
of this License.
"Person" – Means a natural or legal person or a body of persons
corporate or incorporate.
"Produced Work" – a work (suchas an image, audiovisual material,text,
or sounds) resulting from using the whole or a Substantial part of the
Contents (via a search or otherquery) from this Database, a Derivative
Database, or this Database as part of a Collective Database.
"Publicly" – means to Persons other than You or under Your control by
eithermore than 50% ownershipor by the power to directtheiractivities
(such as contracting with an independent consultant).
"Re-utilisation" – means any form of making available to the public all or
a Substantial part of the Contents by the distribution of copies,by
renting, by online or other forms of transmission.
"Substantial" – Means substantial in terms of quantity orquality or a
combination of both. The repeated and systematicExtraction or Reutilisation of insubstantial parts of the Contents may amount to the
Extractionor Re-utilisation of a S ubstantial part of the Contents.
"Use" – As a v erb,means doing any act that is restricted by copyrightor
Database Rights whetherin the original medium or any other; and
includes without limitation distributing, copying, publicly performing,
Version 9.25, Revision B FM-1000 Integrated Display User Guide 5
Page 6

publicly displaying, and preparing derivative works of the Database, as
well as modifying the Database as may be technically necessary touse
it in a different mode orformat.
"You" – Means a Person exercising rights under this License who has not
previously violated the terms of this License with respect to the
Database, or who has received express permissionfrom the Licensor to
exercise rights underthis License despite a previous violation.
Words inthe singular include the plural and vice versa.
2.0 What this License covers
2.1. Legal effectof this document. This License is:
a. A license of applicable copyrightand neighbouring rights;
b. A license of the Database Right; and
c. An agreementin contract between You and the Licensor.
2.2 Legal rights covered. This License covers the legal rights in the
Database, including:
a. Copyright. Any copyright or neighbouring rights in the Database. The
copyright licensed includes any individual elements of the Database, but
does not cover the copyrightover the Contents independent of this
Database. See Section 2.4 for details. Copyrightlaw varies between
jurisdictions, but is likely to cover: the Database modelor schema, which
is the structure,arrangement, and organization of the Database, andcan
also include the Database tables and table indexes; the data entry and
output sheets; and the Field names of Contents stored in the Database;
b. Database Rights. Database Rights only extend to the Extraction and
Re-utilisation of the whole or a Substantial part of the Contents.
Database Rights can apply even when there is nocopyright over the
Database. Database Rights can also apply whenthe Contents are
removed from the Database and are elected and arranged in a way that
would not infringe any applicable copyright; and
c. Contract. This is an agreement between You and the Licensorfor
access to the Database. In returny ou agree to certain conditions of use
on this access as outlined in this License.
2.3 Rights not covered.
a. This License does not apply to computer programs used inthe making
or operation of the Database;
b. This License does not cover any patents over the Contents orthe
Database; and
c. This License does not cover any trademarks associatedwiththe
Database.
2.4 Relationship to Contents in the Database. The individual items of the
Contents contained in this Database may be covered by other rights,
including copyright,patent, data protection, privacy, or personality rights,
and this License does not cover any rights (other than Database Rights
or in contract) in individualContents contained in the Database. For
example,if used ona Database of images (the Contents),this License
would not apply to copyright over individualimages, whichcould hav e
theirown separate licenses, or one single license covering all of the
rights over the images.
3.0 Rights granted
3.1 Subject to the terms andconditions of this License, the Licensor
grants to You a worldwide, royalty-free, non-exclusive, terminable (but
only under Section 9) license to Use the Database for the duration of any
applicable copyright and Database Rights. These rights explicitly include
commercial use, anddo not exclude any field of endeavour. Tothe
extentpossible in the relevant jurisdiction,these rights may be exercised
in all media andformats whethernow knownor created in the future.
The rights granted cover, for example:
a. Extraction and Re-utilisation of the whole or a Substantial part of the
Contents;
b. Creation of Derivative Databases;
c. Creation of Collective Databases;
d. Creation of temporary or permanentreproductions by any means and
in any form,in whole or in part, including of any Derivative Databases or
as a part of Collective Databases; and
e. Distribution, communication, display, lending, making available, or
performance to the public by any means and inany form, in whole or in
part,including of any Derivative Database or as a part of Collective
Databases.
3.2 Compulsory license schemes. For the avoidance of doubt:
a. Non-waivable compulsory license schemes. In those jurisdictions in
which the right to collect royalties through any statutory or compulsory
licensing scheme cannot be waived,the Licensorreserves the exclusive
rightto collect such royalties for any exercise by You of the rights
granted underthis License;
b. Waivable compulsory license schemes. In those jurisdictions in which
the right to collectroyalties through any statutory orcompulsory
licensing scheme can be waived, the Licensorwaives the exclusive right
to collect suchroyalties for any exercise by You of the rights granted
underthis License; and,
c. Voluntary license schemes. The Licensorwaives the right to collect
royalties, whether individually or,in the event that the Licensor is a
member of a collecting society that administers voluntary licensing
schemes, via that society, from any exercise by You of the rights granted
underthis License.
3.3 The right to release the Database under differentterms, or to stop
distributing or making available the Database, is reserved. Note that this
Database may be multiple-licensed,and so You may have the choice of
using alternative licenses for this Database. Subject to S ection10.4, all
otherrights not expressly granted by Licensor are reserved.
4.0 Conditions of Use
4.1 The rights granted in Section 3 above are expressly made subjectto
Yourcomplying with the following conditions of use. These are
importantconditions of this License,and if Youfail to followthem,You
willbe in material breach of its terms.
4.2 Notices. If You Publicly Convey this Database, any Derivative
Database, or the Database as part of a Collective Database, then You
must:
a. Do so only under the terms of this License or anotherlicense
permitted underSection4.4;
b. Include a copy of this License (or, as applicable,a license permitted
underS ection 4. 4) orits Uniform Resource Identifier(URI) with the
Database or Derivative Database,including both in the Database or
Derivative Database andin any relevant documentation; and
c. Keepintactany copyright or Database Right notices and notices that
referto this License.
d. If it is not possible to put the requirednotices in a particular file due to
its structure,then You must include the notices in a location (such as a
relevant directory) where users would be likely tolook for it.
4.3 Notice for using output(Contents). Creating and Using a Produced
Work does notrequire the notice in Section 4.2. However, if you Publicly
Use a Produced Work, You mustinclude a notice associated with the
Produced Work reasonably calculated to make any Person that uses,
views, accesses, interacts with,or is otherwise exposed to the Produced
Work aware that Contentwas obtainedfrom the Database, Derivative
Database, or the Database as part of a Collective Database, andthat itis
available under this License.
a. Example notice. The following text will satisfy notice under
Section4.3: Contains information from DATABASE NAME, which is
made available here under the Open Database License (ODbL).
DATABASE NAME should be replaced with the name of the Database
and a hyperlink tothe URI of the Database. "Open Database License"
should contain a hyperlink to the URI of the text of this License. If
hyperlinks are not possible,You shouldinclude the plain text of the
requiredURI's with the above notice.
4.4 Share alike.
a. Any Derivative Database that You Publicly Use mustbe only under
the terms of:
i. This License;
ii. A later version of this License similar in spirit to this License; or
iii. A compatible license.
If You license the Derivative Database under one of the licenses
mentioned in (iii),You must comply with the terms of that license.
b. Forthe av oidance of doubt,Extraction or Re-utilisation of the whole or
a Substantial part of the Contents into a new database is a Derivative
Database andmust comply with Section 4.4.
c. Derivative Databases and Produced Works. A Derivative Database is
Publicly Used and so must comply with Section 4.4. if a ProducedWork
createdfrom the Derivative Database is Publicly Used.
d. Share Alike and additional Contents. For the avoidance of doubt, You
must not add Contents to Derivative Databases under Section 4.4 a that
are incompatible with the rights granted under this License.
e. Compatible licenses. Licensors may authorise a proxy to determine
compatible licenses under Section 4.4 a iii. If they do so, the authorised
proxy's public statementof acceptance of a compatible license grants
You permissionto use the compatible license.
4.5 Limits of Share Alike. The requirements of Section 4.4 do not apply
in the following:
a. For the avoidance of doubt, You are not required to license Collective
Databases under this License if Youincorporate this Database or a
Derivative Database in the collection,but this License still applies to this
Database or a Derivative Database as a partof the Collective Database;
b. Using this Database, a Derivative Database, or this Database as part
of a Collective Database to create a ProducedWork does not create a
Derivative Database for purposes of Section 4.4; and
6 FM-1000 Integrated Display User Guide Version 9.25, Revision B
Page 7

c. Use of a Derivative Database internally withinan organisation is not to
the public andtherefore does not fall underthe requirements of Section
4.4.
4.6 Access to Derivative Databases. If You Publicly Use a
DerivativeDatabase or a Produced Work from a Derivative Database,
You must alsooffer to recipients of the Derivative Database orProduced
Work a copy in a machine readable form of:
a. The entire Derivative Database; or
b. A file containing all of the alterations made to the Database orthe
methodof mak ing the alterations to the Database (suchas an
algorithm),including any additional Contents, that make up all the
differences between the Database and the Derivative Database. The
Derivative Database (undera.) or alteration file (under b.) must be
available at no more than a reasonable production cost for physical
distributions andfree of charge if distributed over the internet.
4.7 Technological measures andadditional terms
a. This License does not allowYou to impose (except subjectto Section
4.7 b.) any terms or any technological measures on the Database, a
Derivative Database, or the whole or a Substantialpart of the Contents
that alter or restrict the terms of this License, or any rights granted under
it,or have the effectorintent of restricting the ability of any person to
exercise those rights.
b. Parallel distribution. You may impose terms or technological
measures on the Database, a Derivative Database, or the whole or a
Substantial part of the Contents (a "Restricted Database") in
contravention of Section 4. 74 a. only if You also make a copy of the
Database or a Derivative Database available to the recipient of the
Restricted Database:
i. That is available without additional fee;
ii. That is available in a medium that does not alter or restrict the terms
of this License, or any rights granted under it, or have the effect or intent
of restricting the ability of any person to exercise those rights (an
"Unrestricted Database"); and
iii. The UnrestrictedDatabase is atleast as accessible to the recipient as
a practical matteras the RestrictedDatabase.
c. For the av oidance of doubt,You may place this Database ora
Derivative Database in an authenticated environment, behind a
password, or within a similar access control scheme provided that You do
notalter or restrict the terms ofthis License or any rights granted under it
or have the effect or intentof restricting the ability of any personto
exercise those rights.
4.8 Licensing of others. You may not sublicense the Database. Each time
You communicate the Database, the whole or Substantial part of the
Contents,orany Derivative Database to anyone else inany way, the
Licensor offers to the recipient a license to the Database onthe same
terms and conditions as this License. You are not responsible for
enforcing compliance by third parties with this License,but You may
enforce any rights that You have over a Derivative Database. You are
solely responsible for any modifications of a Derivative Database made
by Youor anotherPersonat Your direction. You may notimpose any
further restrictions on the exercise of the rights granted or affirmed
underthis License.
5.0 Moral rights
5.1 Moral rights. This section covers moral rights,including any rights to
be identified as the author of the Database or to object to treatment that
would otherwise prejudice the author's honourand reputation,or any
otherderogatory treatment:
a. For jurisdictions allowing waiver of moral rights,Licensor waives all
moral rights that Licensor may have in the Database to the fullest extent
possible by the law of the relevant jurisdictionunderSection10.4;
b. If waiver of moral rights under Section 5.1 a in the relevant jurisdiction
is not possible, Licensoragrees not to assertany moral rights over the
Database andwaives all claims in moral rights to the fullest extent
possible by the law of the relevant jurisdictionunderSection10.4; and
c. For jurisdictions not allowing waiver oran agreement not to assert
moral rights under Section 5.1 a andb, the author may retain theirmoral
rights over certainaspects of the Database. Please note that some
jurisdictions do not allow for the waiver of moral rights,and so moral
rights may still subsist over the Database in some jurisdictions.
6.0 Fair dealing, Database exceptions, and otherrights not affected
6.1 This License does not affect any rights that You or anyone else may
independently have underany applicable law to make any use of this
Database, including withoutlimitation:
a. Exceptions to the Database Right including: Extraction of Contents
from non-electronic Databases forprivate purposes, Extraction for
purposes of illustrationfor teaching orscientificresearch, and Extraction
or Re-utilisation for public security oran administrative orjudicial
procedure.
b. Fair dealing, fair use, or any otherlegally recognisedlimitationor
exception to infringement of copyright or other applicable laws.
6.2 This License does not affect any rights of lawful users toExtract and
Re-utilise insubstantial parts of the Contents,evaluated quantitatively or
qualitatively, for any purposes whatsoever, including creating a
Derivative Database (subjectto otherrights over the Contents, see
Section2.4). The repeated and systematicExtraction or Re-utilisation of
insubstantialparts of the Contents may however amountto the
Extractionor Re-utilisation of a S ubstantial part of the Contents.
7.0 Warranties and Disclaimer7.1 The Database is licensed by the
Licensor "as is" and without any warranty of any kind, eitherexpress,
implied, or arising by statute,custom, course of dealing,or trade usage.
Licensor specifically disclaims any andall implied warranties or
conditions of title,non-infringement,accuracy orcompleteness, the
presence or absence oferrors,fitness for a particular purpose,
merchantability, or otherwise.
Some jurisdictions do not allow the exclusion of implied warranties, so
this exclusion may not apply toYou.
8.0 Limitation of liability
8.1 Subject to any liability that may not be excluded or limitedby law,
the Licensoris notliable for, and expressly excludes,all liability for loss or
damage however and whenever caused to anyone by any use under
this License,whether by You or by anyone else,and whethercaused by
any faulton the part of the Licensoror not. This exclusion of liability
includes,but is not limitedto,any special, incidental,consequential,
punitive, or exemplary damages such as loss of revenue,data,
anticipated profits, and lost business. This exclusion applies even if the
Licensor has been advised of the possibility of such damag es.
8.2 If liability may not be excludedby law, it is limitedto actual and
direct financial loss to the extentit is causedby proved negligence onthe
partof the Licensor.
9.0 Terminationof Yourrights underthis License
9.1 Any breach by You of the terms andconditions of this License
automatically terminates this License with immediate effect and without
notice to You. For the avoidance of doubt, Persons who have received
the Database, the whole or a Substantial part of the Contents, Derivative
Databases, or the Database as part of a Collective Database from You
underthis License will not have theirlicenses terminated provided their
use is in full compliance with this License or a license granted under
Section4.8 of this License. Sections 1, 2,7, 8,9 and 10 willsurvive any
termination of this License.
9.2 If Youare not in breach of the terms of this License, the Licensor will
notterminate Your rights under it.
9.3 Unless terminated under Section 9.1, this License is granted to You
for the duration of applicable rights in the Database.
9.4 Reinstatementof rights. If you cease any breach of the terms and
conditions of this License,thenyour full rights under this License will be
reinstated:
a. Provisionally and subject to permanent termination until the 60th day
after cessation of breach;
b. Permanently on the 60th day after cessation of breach unless
otherwise reasonably notified by the Licensor; or
c. Permanently if reasonably notified by the Licensorof the violation, this
is the first time You have received notice ofviolation of this License from
the Licensor, and Youcure the v iolation priorto 30 days after your
receipt of the notice.
Persons subjectto permanentterminationof rights are not eligible to be
a recipient and receive a license under Section 4.8.
9.5 Notwithstanding the above, Licensorreserves therightto release the
Database underdifferent license terms or to stop distributing or making
available the Database. Releasing the Database underdifferentlicense
terms or stopping the distribution of the Database will not withdraw this
License (orany otherlicense that has been, or is required to be, granted
underthe terms of this License),and this License will continue in full force
and effect unless terminatedas statedabove.
10.0 General
10.1 If any provisionof this License is held to be invalid or
unenforceable, that must not affect the v alidity orenforceability of the
remainder of the terms and conditions of this License and each
remaining provision of this License shall be valid and enforced to the
fullestextent permitted by law.
10.2 This License is the entire agreementbetween the parties with
respectto the rights granted here over the Database. It replaces any
earlierunderstandings, agreements or representations with respect to
the Database.
10.3 If You are in breach of the terms of this License, You will not be
entitled to rely on the terms of this License or to complainof any breach
by the Licensor.
Version 9.25, Revision B FM-1000 Integrated Display User Guide 7
Page 8

10.4 Choice of law. This License takes effect in andwillbe governed by
the laws of the relevant jurisdiction in which the License terms are
sought to be enforced. I f the standard suite of rights granted under
applicable copyright law andDatabase Rights in the relevant jurisdiction
includes additional rights not granted under this License,these additional
rights are granted in this License in orderto meet the terms ofthis
License.
Warranty Remedies
Trimble's sole liability and your exclusive remedy under the warranties
set forth above shall be, at Trimble's option, to repair or replace any
Productthat fails to conformto such warranty ('Nonconforming
Product"), and/or issue a cash refund up to the purchase price paid by
you for any such Nonconforming Product, excluding costs ofinstallation,
uponyour return of the Nonconforming Productto Trimble in accordance
withTrimble's product returnprocedures than in effect. Such remedy
may include reimbursement of the cost of repairs for damage to thirdparty equipmentontowhich the Product is installed,if suchdamage is
foundto be directly caused by the Product as reasonably determined by
Trimble following a rootcause analysis.
Warranty Exclusions and Disclaimer
These warranties shall be applied only inthe event and to the extent
that (a) the Products and Software are properly and correctly installed,
configured,interfaced,maintained,stored, and operatedin accordance
withTrimble's relevant operator's manual andspecifications, and; (b)
the Products and Software are not modifiedor misused. The preceding
warranties shall not apply to, and Trimble shall not be responsible for
defects or performance problems resulting from (i) the combination or
utilization of the Product or Software with hardware or software
products, information,data, systems, interfaces ordevices not made,
supplied or specified by Trimble; (ii) the operation of the Product or
Software underany specification other than, or in addition to, Trimble's
standardspecifications for its products; (iii) the unauthorized, installation,
modification, or use of the Product or Software; (iv) damage causedby
accident, lightning or otherelectrical discharge, fresh or salt water
immersion or spray (outside of Product specifications); or (v) normal
wear and tearon consumable parts (e.g., batteries). Trimble does not
warrant or guarantee the results obtainedthrough the use of the Product
or that software components will operate errorfree.
THE WARRANTIES ABOVE STATE TRIMBLE'S ENTIRE LIABILITY, AND
YOUR EXCLUSIVE REMEDIES, RELATI NG TO THE PRODUCTS AND
SOF TWARE. EXCEPT AS OTHERWISE EXPRESSLY PROVIDED HEREIN,
THE PRODUCTS, SOFTWARE,AND ACCOMPANYING DOCUMENTATION
AND MATERIALS ARE PROVIDED "AS IS" AND WITHOUT EXPRESS OR
IMPLIED WARRANTY O F ANY KIND BY EITHER TRIM BLE NAVI GATION
LIMI TED OR ANYONE WHO HAS BEEN INVOLVED IN ITS CREATIO N,
PRODUCTION,INSTALLATI ON, OR DIS TRIBUTION INCLUDING,BUT NOT
LIMI TED TO, THE IMPLIED WARRANTIES OF MERCHANTABILITY AND
FITNESS FOR A PARTICULAR PURPOSE, TITLE, AND
NONINFRINGEMENT. THE STATED EXPRESS WARRANTIES ARE IN LIEU
OF ALL O BLIGATIONS ORLIABILITIES ON THE PART OF TRIMBLE
ARISI NG OUT OF, OR IN CONNECTION WITH, ANY PRODUCTS OR
SOF TWARE. BECAUSE SOME STATES AND JURISDICTIONS DO NOT
ALLOW LIMITATIONS ON DURATION OR THE EXCLUSION OF AN
IMPLIED WARRANTY, THE ABOVE LIMITATION MAY NOT APPLY OR
FULLY APPLY TO YOU.
NOTICE R EGARDING PRODUCTS EQUIPPED WITH TECHNOLOGY
CAPABLE OF TRACKING SATELLITE SIGNALS F ROM SATELLITE BASED
AUGMENTATION SYSTEMS (SBAS) (WAAS/EGNOS, AND MSAS),
OMNISTAR, GPS, MODERNIZED GPS OR GLONASS SATELLITES, OR
FROM IALA BEACON SOURCES: TRIMBLE IS NOT RESPONSIBLE
FOR THE OPERATION OR FAILURE OF OPERATION OF ANY
SATELLITE BASED POSITIONING SYSTEM OR THE AVAILABILITY
OF ANY SATELLITE BASED POSITIONING SIGNALS.
Lim itation or L iability
TRIMBLE'S ENTIRE LIABILITY UNDER ANY PROVISI ON HEREIN SHALL BE
LIMI TED TO THE AMOUNT PAID BY YOU FOR THE PRODUCT OR
SOF TWARE LICENSE. TO THE MAXIMUM EXTENT PERMI TTED BY
APPLICABLE LAW, IN NO EVENT S HALL TRIMBLE ORITS SUPPLIERS BE
LIABLE FOR ANY INDIRECT,SPECIAL, INCIDENTAL OR CONSEQUENTIAL
DAMAGES WHATSO EVER UNDER ANY CIRCUMSTANCE OR LEGAL
THEORY RELATING IN ANY WAY TO THE PRODUCTS, SOFTWARE AND
ACCOMPANYING DOCUMENTATION AND MATERIALS, (INCLUDING,
WITHOUT LIMITATION, DAMAGES FOR LOSS OF BUSINESS PROFITS,
BUSINESS INTERRUPTION, LOSS OF BUSINESS INFORMATION, ORANY
OTHER PECUNIARY LOSS), REGARDLESS WHETHER TRIMBLE HAS BEEN
ADVISED OF THE POS SIBILITY OF ANY S UCH LOSS AND REGARDLESS
OF THE COURSE OF DEALINGWHICH DEV ELOPS OR HAS DEVELOPED
BETWEEN YO U AND TRIMBLE. BECAUSE SOME STATES AND
JURISDICTIONS DO NOT ALLOW THE EXCLUSION OR LIM ITATION OF
LIABILITY FOR CONSEQUENTIAL OR INCIDENTAL DAMAGES, THE
ABOVE LIMITATION MAY NOT APPLY OR FULLY APPLY TO YOU.
PLEASE NOTE: THE ABOVE TRIMBLE LIMITED WARRANTY
PROVISIONS WILL NOT APPLY TO PRODUCTS PURCHASED IN
THOSE JURISDIC TIONS (E.G., MEMBER STATES OF THE
EUROPEAN ECONOMIC AREA) IN WHICH PRODUCT
WARRANTIES ARE THE RESPONSIBILITY OF THE LOCAL DEALER
FROM WHOM THE PRODUCTS ARE ACQUIRED. IN SUCH A
CASE, PLEASE CONTACT YOUR TRIMBLE DEALER FOR
APPLIC ABLE WARRANTY INFORMATION.
Official L anguage
THE OFFICIAL LANGUAGE OF THESE TERMS AND CONDITI ONS IS
ENGLISH. IN THE EVENT OF A CONFLICT BETWEEN ENGLISH AND
OTHER LANGUAGE VERSIONS, THE ENGLISH LANGUAGE SHALL
CONTROL.
Registration
To receive information regarding updates and new products,please
contact yourlocal dealer or visit the Trimble website at
www.trimble.com/register. Upon registrationyou may select the
newsletter,upgrade or new product informationyou desire.
Notices
This equipmenthas beentestedand found to comply with the limits for
a Class A digital device,pursuant to Part15 of the FCC rules. These limits
are designed to provide reasonable protection against harmful
interference when the equipment is operated in a commercial
environment. This equipment generates,uses, and can radiate radio
frequency energy and,if not installed and used in accordance with the
instruction manual, may cause harmful interference to radio
communications. Operation of this equipmentin a residential area is
likely to cause harmful interference,in which case the user will be
requiredto correct the interference at his own expense.
Properly shielded and groundedcables and connectors must be used in
order to meetFCC emission limits. TRIMBLE is not responsible for any
radioortelevisioninterference caused by using other than
recommended cables andconnectors or by unauthorized changes or
modifications to this equipment. Unauthorized changes or modifications
could v oid the user's authority to operate the equipment.
This device complies with Part 15 of the FCCrules. Operation is subject
to the following two conditions: (1) this device may not cause harmful
interference, and (2) this device mustacceptany interference received,
including interference that may cause undesired operation. Responsible
Party:
Trimble Navigation
935 S tewartDrive
Sunnyvale CA 94085
Telephone: 1-408 481 8000
Canada
This Class A digital apparatus complies with Canadian I CES-003.
Cet appareil numérique de la classe A est conforme à la norme NMB-003
du Canada.
This apparatus complies with Canadian RSS -GEN.
Cet appareil est conforme à la norme CNR-GEN du Canada.
Europe
The product covered by this guide are intended to be
used in allEU member countries,Norway, and
Switzerland. Products been tested and found to comply
withthe requirements for a Class B device pursuant to
European Council Directive 89/336/EEC on EM C, thereby satisfying the
requirements for CE Marking and sale within the European Economic
Area (EEA). Contains a Bluetoothradiomodule. These requirements are
designed to provide reasonable protectionagainst harmful interference
when the equipment is operatedin a residentialor commercial
environment. The 450 MHZ (PMR) bands and 2.4 GHz are nonharmonized throughout Europe.
CE Declaration of Conformi ty
8 FM-1000 Integrated Display User Guide Version 9.25, Revision B
Page 9

Hereby, Trimble Navigation,declares that the GPS receivers are in
compliance with the essentialrequirements andotherrelevant
provisions of Directive 1999/5/EC.
Australia and New Zealand
This product conforms with the regulatory requirements of
the Australian Communications andM edia Authority
(ACMA) EMC framework,thus satisfying the requirements
for C-Tick M arking and sale withinAustralia andNew
Zealand.
Restriction of Use of Certain Hazardous Substances in Electrical
and Electronic Equipment (RoHS)
Trimble products in this guide comply inall material respects with
DIRECTIVE 2002/95/EC OF THE EUROPEAN PARLIAMENT AND OF THE
COUNCIL of27 January 2003 on the restriction of the use of certain
hazardous substances in electrical and electronic equipment (RoHS
Directive) and Amendment 2005/618/EC filed under C(2005) 3143, with
exemptions for lead insolderpursuant to Paragraph 7 of the Annexto
the RoHS Directive applied.
Waste Electrical and Electronic Equipment (WEEE)
For product recycling instructions andmore information, please
go to www.trimb le.com/ev.shtml.
Recycling inEurope: To recycle Trimble WEEE (Waste Electrical
and Electronic Equipment, products that run on electrical power.), Call
+31 497 53 24 30, and ask for the “WEEE Associate”. Or, mail a request
for recycling instructions to:
Trimble Europe BV
c/o Menlo Worldwide Logistics
Meerheide 45
5521 DZ Eersel, NL
Unlicensed radios in products
This device complies with part 15 of the F CC Rules.
Operation is subject to the following two conditions:
(1) This device may not cause harmful interference,and
(2) This device mustaccept any interference received, including
interference that may cause undesiredoperation.
Licensed radios in products
This device complies with part 15 of the F CC Rules.
Operation is subject to the condition that this device may not cause
harmfulinterference.
Version 9.25, Revision B FM-1000 Integrated Display User Guide 9
Page 10

Contents
1 Introduction 21
About the FM-1000 integrated display 22
Optional features 22
Compatibility 22
Installation 23
Changes to this document 24
2 Display basics 25
Display power on/off 26
Power on 26
Power off 26
Main screens 27
Home screen 28
Configuration Selection screen 29
Field Selection screen 33
Configuration screen 34
Run screen 36
Help screen 38
Passwords 39
Access password 39
Change administration password 39
Optional features/plugins 40
Vehicle guidance 40
Features for application 40
ISOBUS 40
Implement control 41
Connectivity 41
Water Management 41
Harvest 41
Screen shots 42
Contents
3 Basic settings 43
Unlocks and upgrades 44
Unlock features / plugins 45
Upgrade FM-1000 integrated display firmware 46
Activate features/plugins for use 47
Basic system settings 48
CAN bus settings 50
Data dictionary 51
Data Files 52
EZ-Remote Joystick 53
Field feature mapping settings 55
10 FM-1000 Integrated Display User Guide Version 9.25, Revision B
Page 11

Contents
Guidance settings 56
Language, measurements, keyboard layout 58
Map settings 59
Lightbar settings 63
Power management 66
Restore default settings 67
Signal input module for OEM switch 68
Sounds 69
Status items 70
Time setup 83
4 Data management 85
Managing data 86
Transfer data 86
Data Files screen 87
Display to USB 88
USBto computer 89
Delete data 90
Data storage structure 92
ABLines folder 92
Archives folder 93
Autopilot folder 93
Data folder 93
Data Dictionary folder 100
Diagnostics folder 100
Prescriptions folder 101
Summaries folder 102
Task Data folder 103
Data Dictionary categories 103
Default data entry categories 103
Edit data entry categories 104
Create / load a data dictionary 105
5 Connectivity settings 107
GPS receiver settings 108
AgRemote Interface 109
Basic correction settings 110
CenterPoint RTK 111
CenterPoint RTX (fs) 113
CenterPoint RTX (sc) 115
CenterPoint RTX (ss) 116
OmniSTAR HP/XP/G2 - VBS 118
OmniSTAR HP/XP/G2 120
OmniSTAR VBS 122
Version 9.25, Revision B FM-1000 Integrated Display User Guide 11
Page 12

Contents
RangePointRTX 123
Frequencies and baud rate 124
GPSoutput settings 125
Serial NMEA messages 126
NMEA messages 128
CANGPS messages 128
Remote Output setup 130
Remote Output settings 131
Calibrate implement lead time 133
Serial Data Input 136
Ag3000 modem 137
Modem activation 137
Modem setup 137
DCM-300 Modem 138
Unlock the modem 138
Service activation 138
Modem setup 139
6 Field feature mapping setup 141
Field feature mapping settings 142
Access Feature Mapping settings 142
Assign feature buttons 143
Create a field feature 143
Edit a field feature 144
Mapping location setting 145
Recording with coverage 146
Field area feature settings 146
Line feature settings 147
Boundary feature settings 148
Point feature settings 150
7 Implement setup 151
Implement setup 152
Create an implement 153
Select an implement 154
Import an implement 154
Edit implement settings 155
Implement Type 155
Measurements 156
Geometry 158
Overlap 159
Extras 160
Delete an implement 162
12 FM-1000 Integrated Display User Guide Version 9.25, Revision B
Page 13

Contents
8 Vehicle guidance setup 163
Guidance settings 164
Manual guidance 164
Autopilot system 166
Begin setup 166
Autopilot calibration 171
Row Guidance 188
Save vehicle profile 190
EZ-Pilot assisted steering system 191
Vehicle settings for EZ-Pilot system 191
Steering settings for EZ-Pilot system 192
Engage settings for EZ-Pilot system 193
EZ-Pilot system calibration 195
EZ-Steer assisted steering system 199
Engage settings for EZ-Steer 201
Advanced settings for EZ-Pilot 202
EZ-Steer system calibration 203
9 Field-IQ system setup 207
Field-IQ system functionality 208
General setup information 209
Field-IQ system setup 210
Material setup 210
Alarms tab 211
Operation tab 212
Coefficent tab 213
Control setup 214
Material tab 215
Layout 217
Section Control tab 219
Material linking 219
Automatic SectionControl 220
Rate control tab 223
Valve Setup tab 224
Row monitoring 226
Sensor tab 227
Equipment calibration for Field-IQ 229
Air Seeder calibration 229
Anhydrous calibration 230
Planter calibration 232
Sprayer calibration 236
Spreader calibration 237
Upgrade Field-IQ system firmware 242
Upgrade steps 242
Version 9.25, Revision B FM-1000 Integrated Display User Guide 13
Page 14

Contents
10 GreenSeeker setup 243
GreenSeeker functionality 244
Care and maintenance 244
Field preparations for nitrogen application 245
Field setup 246
Field preparations for user defined rate 247
Field calibration 247
Delivery system and liquid control 247
Select a nozzle 248
11 ISOBUS setup 249
ISOBUSsettings 250
Virtual Terminal setup 250
Task Controller setup 251
GPS output settings 252
Equipment setup 253
12 Serial Rate Control setup 255
Supported variable rate controllers 256
Variable rate controller setup 257
Amazone Amatron + 258
Bogballe Calibrator 258
Controller setup 258
Flex-Air setup 258
Operation 259
Application width 259
Hardi 5500 and 6500 259
LH5000 260
Raven 260
Configure the controller 261
Rawson and New Leader 262
Using the controller 262
Non-GPS mode 263
Loss of communication 263
Special note on using a Rawson Accu-Rate controller 263
Vaderstad Control Station 264
Additional controller setup 265
Alarms 265
Coverage mapping 265
Prescriptions 265
Target and applied rates 265
Units 266
14 FM-1000 Integrated Display User Guide Version 9.25, Revision B
Page 15

Contents
13 TrueGuide setup 267
TrueGuide system 268
Benefits 268
Requirements 269
Implement setup and selection 270
TrueGuide setup 271
System aggressiveness settings 271
TrueGuide calibration 272
14 TrueTracker setup 273
TrueTracker 274
Requirements 275
Setup process 275
Implement controller setup for TrueTracker system 276
Vehicle settings for TrueTracker system 276
Engage settings for TrueTracker system 279
Steering settings for TrueTracker system 280
Implement calibration for TrueTracker system 281
Controller orientation setup 281
Proportional Steering Gain calibration 282
Implement Steering Sensor calibration 284
Implement Automated Deadzone calibration 285
Antenna position and roll offset correction 287
Line Acquisition Aggressiveness calibration 290
15 Vehicle Sync setup 291
Vehicle Sync 292
Requirements 292
Setup steps 292
16 Water Management setup 295
Water Management features 296
Requirements 296
FieldLevel II Survey/Design 297
Benchmarks 297
Rebenching 297
Settings 297
FieldLevel II Leveling 300
Requirements 300
Setup process 300
Leveling models 301
Target height 301
GPS receiver setup 302
FieldLevel IIsettings 302
Version 9.25, Revision B FM-1000 Integrated Display User Guide 15
Page 16

Contents
Valve module calibration 306
Tandem / dual scraper setup 307
Tandem scraper 307
Dual scraper 307
Set up 307
Implement setup 308
Prepare connections 308
Primary receiver setup 308
Secondary receiver setup 308
Tandem / Dual settings 308
Tandem / dual calibration 310
WM-Drain setup 311
Implement control settings 312
Valve settings 314
Limit and increment settings 314
Relative heights settings 315
Operation settings 315
Calibrate WM-Drain for cantilever plow 317
Calibrate the valve 321
17 Yield Monitoring setup 323
Yield Monitoring functionality 324
Yield Monitoring best practices 325
Installation 325
Tare calibration 325
Flow calibration 326
Pitch/Roll calibration 326
Test weight 327
Calibrating and operating conditions 327
Yield Monitoring settings 328
Before setup 328
Setup steps 328
Operation settings 329
Crop settings 330
Map settings 331
Sensor output settings 331
Options settings 332
Yield sensor / moisture sensor calibration 333
Calibration steps 333
Speed method 334
Cut width method 335
Third-party display instructions 336
Claas Cebis Quantimeter setup 336
Claas Cebis Quantimeter calibration 337
16 FM-1000 Integrated Display User Guide Version 9.25, Revision B
Page 17

Contents
Claas Cebis Auto Pilot calibration 338
Greenstar Monitor:Stop Head Height setup 338
Greenstar Monitor calibrations 339
Command Center (70 Series Combines) 340
18 Operations 343
Operations overview 344
Operation basics 344
Main buttons 344
Operational view 347
Feature panels 348
Engage button 351
Coverage button for logging 352
GNSS status 352
On-screen lightbar for vehicle 352
On-screen lightbar for implement 352
Fields 353
Field creation / selection 353
Implement selection 354
Vehicle selection 355
Event summary adjustment 355
Close a field 355
Field feature use 356
Add field features 356
Guidance pattern use 357
Creating patterns 357
Access paths 357
Existing patterns 357
Guidance mapping controls 358
Swaths Management screen 359
Straight guidance pattern 361
Curved pattern 363
Headland pattern 364
Pivot pattern 367
FreeForm pattern 369
Pause recording 371
Access paths 372
Switch to the next pattern 373
Import AB Lines or boundaries 373
Load a pattern 374
Rename a swath 376
Delete a swath 377
Switch to the next pattern 377
Shift a swath 378
Version 9.25, Revision B FM-1000 Integrated Display User Guide 17
Page 18

Contents
Skip a swath 379
Coverage logging 381
Log coverage for varieties 382
Set up variety logging 383
Field-IQ operation 385
Field-IQpanel 386
Field-IQ master switch box functions 390
Field-IQ 12-section switch box (optional) 392
Material assignment 392
Enable sections 393
Enter values manually 393
Prescriptions 394
Manual guidance operation 397
Autopilot system operation 398
Adjust Autopilot guidance 399
Disengage Autopilot system 400
EZ-Pilot system operation 401
Disengage EZ-Pilot system 402
Adjust EZ-Pilot guidance 403
EZ-Steer system operation 404
Disengage EZ-Steer system 405
Adjust EZ-Steer guidance 406
GreenSeeker operation 407
Best practice 407
Variable rate setup 408
Create a custom table 408
Calibrate GreenSeeker 409
ISOBUS operation 412
Task Controller operation 412
Virtual Terminal operation 413
Remote Output operation 414
Distance-based pulse operation 415
Within range limits 415
Outside range limits 416
Crossing a line feature operation 416
Change trigger limits during operation 417
Manually output a pulse 418
Row Guidance operation 419
Use row sensors 420
Shift or skip guidance line 421
Row Guidance adjustments 422
TrueTracker operation 423
TrueTracker controls 423
Engage button 423
18 FM-1000 Integrated Display User Guide Version 9.25, Revision B
Page 19

Contents
Implement status 424
Implement on-screen lightbar 425
TrueGuide operation 426
Using TrueGuide 427
Vehicle Sync operation 428
Common uses 428
Benefits 428
Using Vehicle Sync 428
Guidance lines with Vehicle Sync 429
Coverage 429
Water Management functionality 432
Create a survey 432
Design 434
Leveling 436
WM-Drain operation 451
Yield Monitoring operation 470
Yield Monitoring panel 470
Variety tracking 471
Load tracking 472
19 Diagnostics 473
System diagnostics 474
Advanced system diagnostics 474
CAN Bus data 475
Configuration data 475
Network diagnostics 475
Serial Comms 476
Autopilot diagnostics 476
Controls 476
Guidance tab 477
Steering tab 477
Details tab 478
Autopilot Faults screen 478
Warning screen 478
EZ-Pilot diagnostics 479
EZ-Steer diagnostics 480
Field-IQ diagnostics 480
Operations tab 480
Hardware tab 481
Row Monitor tab 481
Field-IQ faults and troubleshooting 482
AnhydrousRate Control troubleshooting 495
Any Implement Section Control troubleshooting 496
Any Implement Sensor troubleshooting 497
Version 9.25, Revision B FM-1000 Integrated Display User Guide 19
Page 20

Contents
Planter Rate Control troubleshooting 498
Planter Seed Sensor troubleshooting 500
Sprayer/Liquid Strip TillRate Control troubleshooting 500
Spreader Rate Control troubleshooting 502
FieldLevel II diagnostics valve test 503
GPS status 503
GreenSeeker diagnostics 504
Incorrect data 504
Error conditions 504
Row-Guidance diagnostics 505
Vehicle Sync diagnostics 506
Yield Monitoring diagnostics 507
Status tab 507
Yield Monitor error messages 508
Yield Monitor troubleshooting 510
Yield Monitoring warning messages 511
20 Glossary 515
A 515
B 515
C 516
D 517
E 518
F 518
G 518
H 519
I 519
L 520
M 520
N 520
O 521
P 521
R 522
S 522
T 523
V 524
W 524
20 FM-1000 Integrated Display User Guide Version 9.25, Revision B
Page 21

Introduction
In this chapter:
About the FM-1000 integrated display 22
Changes to this document 24
CHAPTER
1
This user guide includes information on
setting up and using the FM-1000™
integrated display. For installation
information, see FM-1000 Integrated Display
Cabling Guide.
Version 9.25, Revision B FM-1000 Integrated Display User Guide 21
Page 22

About the FM-1000 integrated display 1 Introduction
About the FM-1000 integrated display
With the FM-1000™ integrated display, you can perform:
l Field definition and mapping
l Feature mapping
l Guidance to predefined field patterns
l Logging of coverage data
l Variable rate control
l Boom/Row switching
l Logging of topographic mapping data
l Output of information for analysis in office-based Geographic Information System (GIS)
software
l Seed, Liquid, Granular, and Anhydrous Ammonia control
l Seed monitoring
Optional features
The FM-1000 integrated display has a number of optional features /plugins you can install to expand
its functionality.
Most of these features require additional hardware. For installation information, see the FM-1000
Integrated Display Cabling Guide.
Note – Some configuration settings are unavailable when a field is open in the Run screen. To access these
settings, return to the Run screen and then tap the Home button. When prompted to close the field, tap Yes.
Also see Optional features/plugins (page 40), Unlock features / plugins (page 45) and Activate
features/plugins for use (page 47).
Compatibility
The following are compatible with the FM-1000 integrated display:
l Trimble Autopilot™ automated steering system
l Trimble EZ-Steer® assisted steering system
l Trimble EZ-Pilot® steering system
l Trimble TrueTracker™ implement steering system
l Trimble TrueGuide™ implement guidance system
l Trimble FieldLevel™ II
22 FM-1000 Integrated Display User Guide Version 9.25, Revision B
Page 23

1 Introduction About the FM-1000 integrated display
l Trimble WM-Drain® farm drainage system
l Trimble Rawson™ drive
l Trimble Field-IQ™ crop input control system
l Trimble RangePoint™ RTX™
l Trimble CenterPoint™ RTX and CenterPoint VRS™
l Trimble VRSNow™
l Trimble FarmWorks Software®
l Trimble GreenSeeker®
l Trimble TruCount AirClutch®
l Trimble AutoSense™
l Trimble T2™ terrain compensation technology
l Trimble T3™ roll compensation
l OmniSTAR® wide-area differential GPSservice
Installation
To install the display and required cabling for your configuration, see the FM-1000 Integrated
Display Cabling Guide.
Version 9.25, Revision B FM-1000 Integrated Display User Guide 23
Page 24

Changes to this document 1 Introduction
Changes to this document
The changes for the FM-1000 integrated display firmware version 9.25 are:
l Remote Output: Crossing a Line Feature has been added. See Remote Output settings (page
131) and Remote Output operation (page 414).
l WM Drain:Changes to the Run screen and added features, including clipping/deleting a section
line and adding fixed points during design. See WM-Drain operation (page 451).
l Serial NMEA messages:10Hz has been added as an output. See Serial NMEA messages (page
126).
The changes for the user guide for FM-1000 integrated display (version 9.25, revision B) are:
l Correction to the number of PWM drives (from 4 to 6) that can be used for planters using Field-
IQ. See Field-IQ system functionality (page 208).
24 FM-1000 Integrated Display User Guide Version 9.25, Revision B
Page 25

Display basics
In this chapter:
Display power on/off 26
Main screens 27
Passwords 39
Optional features/plugins 40
CHAPTER
2
The FM-1000 integrated display has five main
screens you use for setup and operations.
You can also access on-screen help.
Optional features (plugins) are available to
add to the display.
Screen shots 42
Version 9.25, Revision B FM-1000 Integrated Display User Guide 25
Page 26

Display power on/off 2 Display basics
Display power on/off
Note – The display must be correctly installed before powering on. For more information, see FM-1000
Integrated Display Cabling Guide.
Power on
Briefly hold down the power button (for approximately half a second). The display turns on, and
after a pause the Home screen displays.
Power off
1.
Close all fields before you power off the system. See Close a field (page 355).
Note – If you fail to close before rebooting or shutdown, you may experience a loss of data.
2.
Either return to the Home screen and tap Shutdown, or turn off the display manually by
holding the power button down for about two seconds.
Note – Sometimes after you press the power button and tap Shutdown, the display does not
immediately turnoff. This is because the FM-1000 integrated display is saving settings. The display will
power off after all settings are saved.
26 FM-1000 Integrated Display User Guide Version 9.25, Revision B
Page 27

2 Display basics Main screens
Main screens
The FM-1000 integrated display has the following main screens:
l Home screen (page 28):The first screen that displays when you open
l Run screen (page 36):For performing operations
l Configuration Selection screen (page 29):For switching and editing selections for system,
vehicle and implement
l Configuration screen (page 34) (and subsequent setup screens): For setting up the system and
features
l Field Selection screen (page 33):For choosing which field to work in
Version 9.25, Revision B FM-1000 Integrated Display User Guide 27
Page 28

Main screens 2 Display basics
Home screen
The Home screen lists the following information about the configuration:
l The display build date, firmware and hardware version
l All optional features/plugins loaded on the application
l The automatic steering system (if applicable)
l The GPSreceiver version, correction source and subscription information
l The selected vehicle make and model
The Home screen has three tabs:
l Support tab, containing the buttons:
ll Data Files: Tap to display the Data Files screen where you can transfer files between the
display and a USBdrive. See Managing data (page 86).
l Upg rade:Tap to display the FirmwareUpgrade screen, where you can upgrade firmware.
See Upgrade FM-1000 integrated display firmware (page 46).
l Unlo cks: Tap to display the Advanced Functionality Access screen and unlock enhanced
features / plugins. See Unlock features / plugins (page 45).
l System Information tab, listing about the configuration:
ll Display firmware build date, firmware, and hardware version
l Optional features/plugins loaded on the application
l Vehicle and implement automatic steering controller version, date, and serial number (if
applicable)
l GPS receiver version, correction source, and subscription information
l Selected vehicle make and model
28 FM-1000 Integrated Display User Guide Version 9.25, Revision B
Page 29
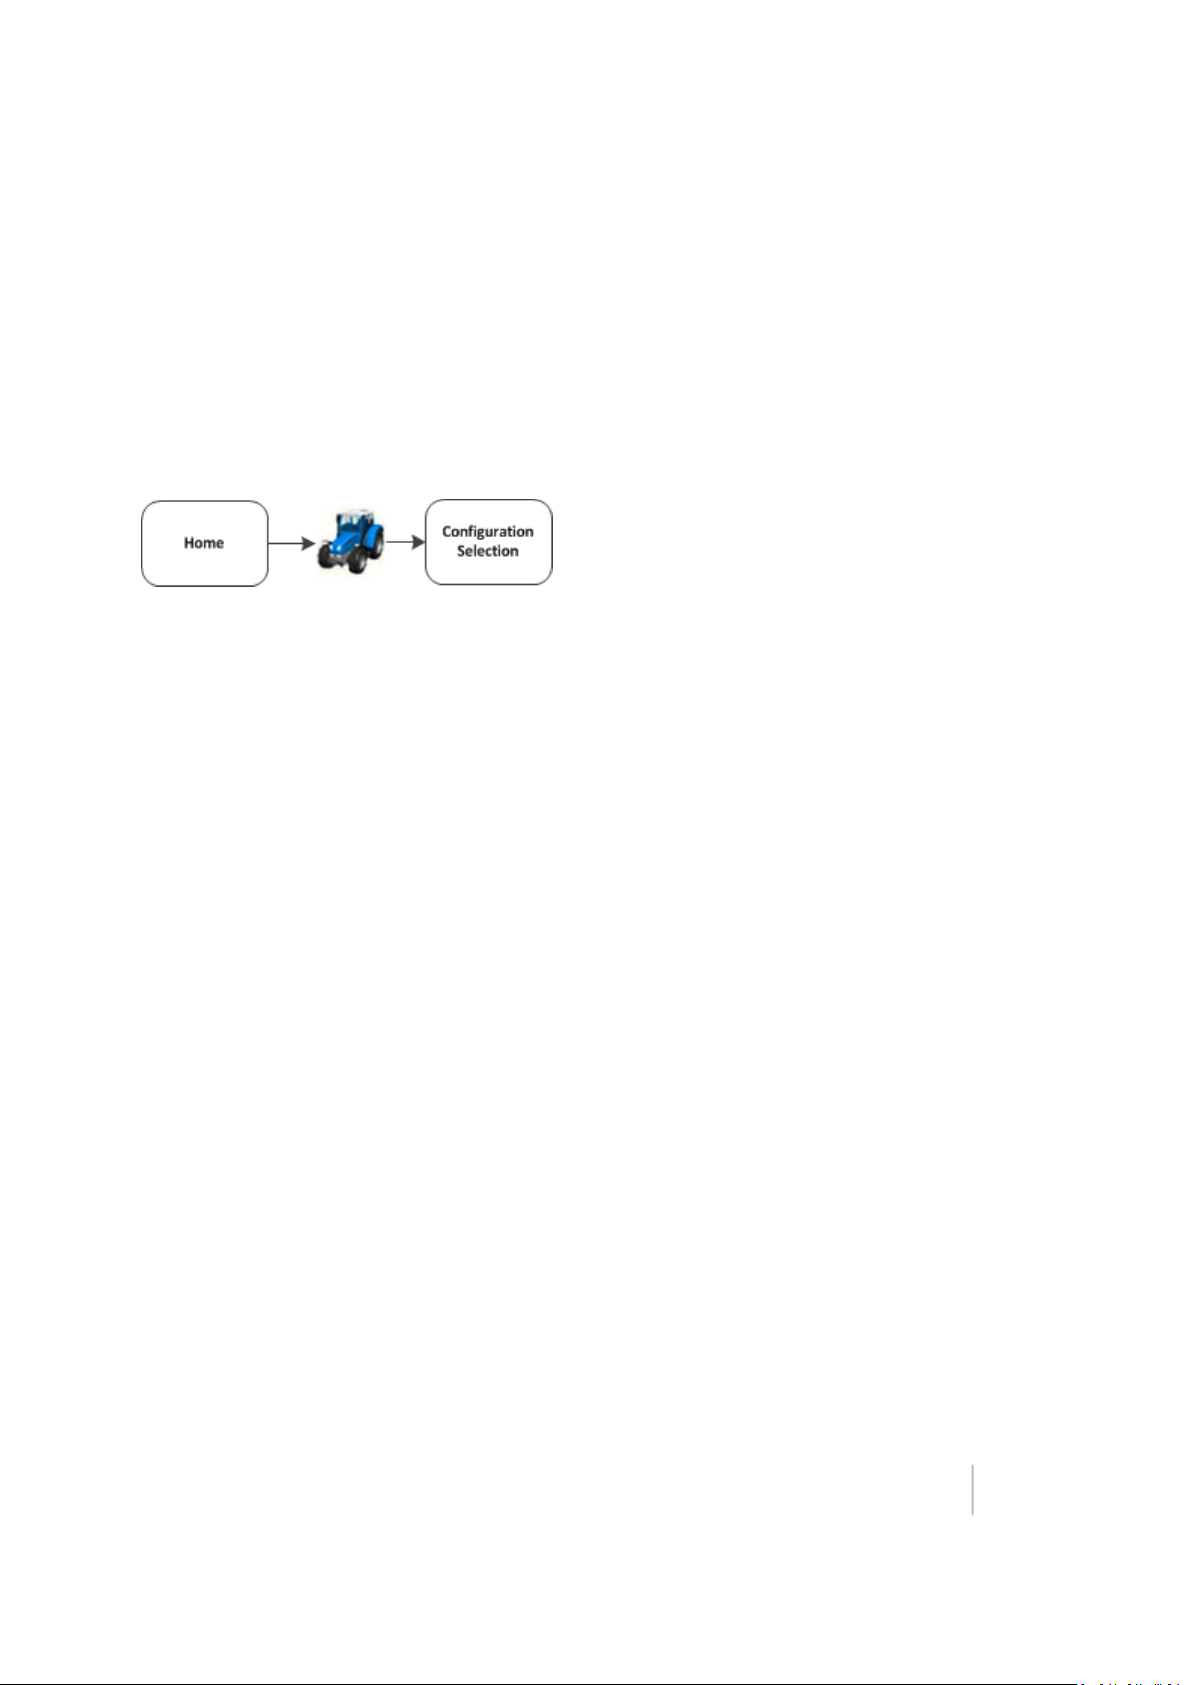
2 Display basics Main screens
Configuration Selection screen
Before you enter the Run screen, the Configuration Selection screen shows the current
configuration selected for the:
l System
l Vehicle
l Implement
Access the Configuration Selection screen from the Home screen.
For each of these you can:
l Switch to another system, vehicle or implement
l Edit settings
The Configuration Selection screen shows the current configuration selected for the:
l System
l Vehicle
l Implement
Version 9.25, Revision B FM-1000 Integrated Display User Guide 29
Page 30
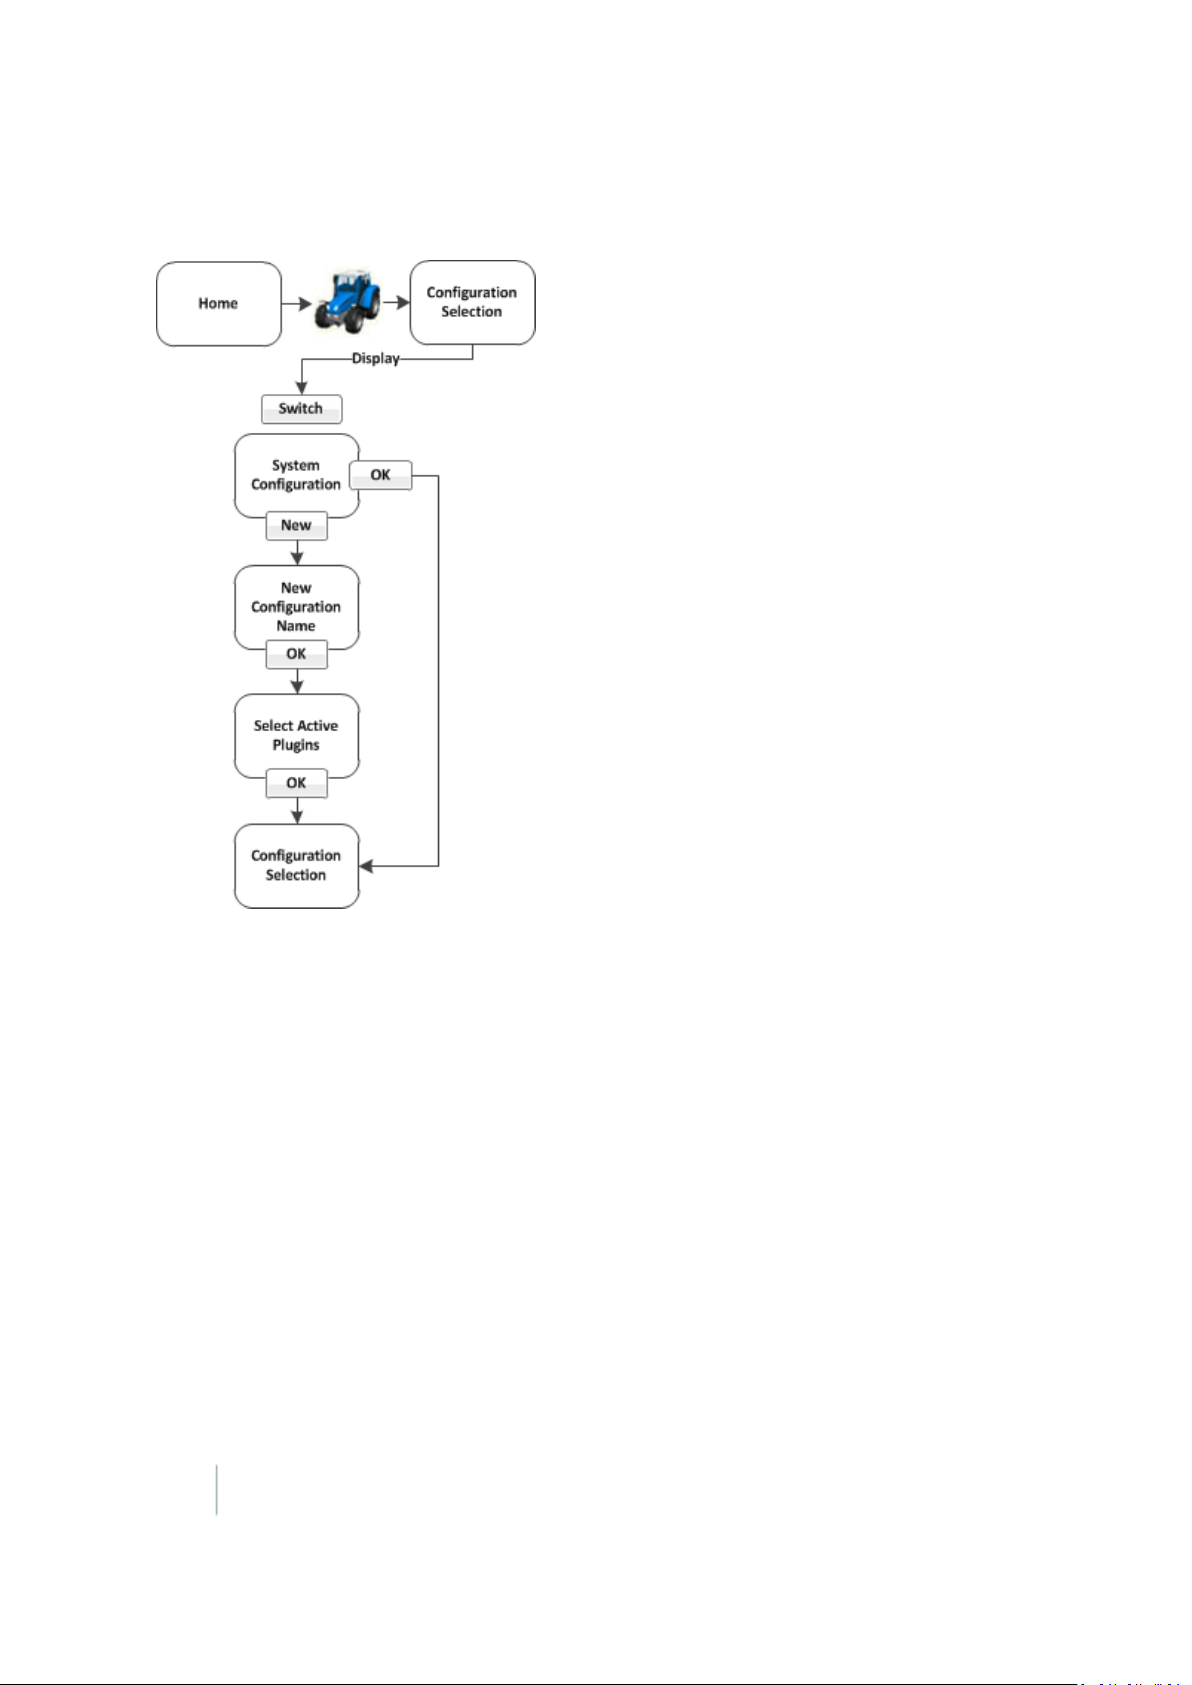
Main screens 2 Display basics
System configuration switching
30 FM-1000 Integrated Display User Guide Version 9.25, Revision B
Page 31

2 Display basics Main screens
Vehicle configuration switching
Version 9.25, Revision B FM-1000 Integrated Display User Guide 31
Page 32

Main screens 2 Display basics
Implement configuration switching
32 FM-1000 Integrated Display User Guide Version 9.25, Revision B
Page 33

2 Display basics Main screens
Field Selection screen
1.
When you want to go to a field to begin work in the Run screen, tap at the Home screen.
2. If the system, vehicle and implement at the Configuration Screen are what you want to use,
tap OK.
3. At the Field Selection screen, you can:
ll Choose existing fields you have created in the system
l Create a new field (as well as the client, farm and event associated with it)
For more information, see Field creation / selection (page 353).
Version 9.25, Revision B FM-1000 Integrated Display User Guide 33
Page 34

Main screens 2 Display basics
Configuration screen
You can access the Configuration screen from the Home or Run screen.
Note – Some configuration settings are unavailable when a field is open in the Run screen. To access these
settings, return to the Run screen and then tap . When prompted to close the field, tap Clo se. Then tap to
access the Configuration screen.
For each item shown in the configuration list on the Configuration screen, you can:
l Change settings
l View diagnostics
l Save the configuration
l Switch the selected configuration
You can also add or remove features/plugins to perform different operations. See Activate
features/plugins for use (page 47).
34 FM-1000 Integrated Display User Guide Version 9.25, Revision B
Page 35

2 Display basics Main screens
Version 9.25, Revision B FM-1000 Integrated Display User Guide 35
Page 36

Main screens 2 Display basics
Run screen
You access the Run screen from the Home screen.
You can also move between the Run screen and the Configuration screen in some cases.
The Run screen is used during operations and shows your guidance lines and an on-screen
representation of your vehicle in the field. The areas of the Run screen include:
l Operational view (page 347)
l Main buttons (page 344)
l On-screen lightbar for vehicle (page 352)
l Optional features/plugins (page 40)
l Coverage button and information. See Coverage button for logging (page 352).
l Engage button (page 351) , if applicable
You can navigate from the Run screen to the Configuration screen to:
l Change settings
l View diagnostics
l Save configuration (in some cases)
36 FM-1000 Integrated Display User Guide Version 9.25, Revision B
Page 37

2 Display basics Main screens
Version 9.25, Revision B FM-1000 Integrated Display User Guide 37
Page 38

Main screens 2 Display basics
Help screen
The FM-1000 integrated display has on-screen help that provide details and helpful information
about the current screen.
1.
To access help, tap . A Help screen displays.
2. To exit the Help screen and return to the previous screen, tap OK.
38 FM-1000 Integrated Display User Guide Version 9.25, Revision B
Page 39

2 Display basics Passwords
Passwords
The access and administration passwords apply to the FM-1000 integrated display.
Access password
Any Setu p or Calibrate button marked with a padlock icon is protected by two passwords:
l Administration password: Your password.
l Master password: A backup password in case you lose the Administration password. If you
need the Master password, contact your local reseller.
The password screen displays the first time that you tap a Setup or Calibrate button after you turn on
the FM-1000 integrated display. Use the on-screen keyboard to enter the administration password
and then tap OK.
Note – Passwords are case sensitive.
Change administration password
Note – To change the Administration password, you need the Master password. If you do not know it,
contact your local reseller.
1. If you have not entered the password during the current session, at the Configuration screen
tap Setup or Calibrate .
2. If you have already entered the password during this session, tap button and then tap Lock
Con fig uration. On the Configuration screen tap Setup or Calibrate.
3. The Enter Administration Password screen displays.
4. Enter an incorrect password. The Wrong Password screen displays.
5. Tap Enter Master Password.
6. Enter the master password and then tap OK. The Change Administration Password screen
displays.
7. Enter your new administration password in both fields. The new administration password is
now active.
Version 9.25, Revision B FM-1000 Integrated Display User Guide 39
Page 40

Optional features/plugins 2 Display basics
Optional features/plugins
The FM-1000 integrated display has a number of optional features (plugins) you can install to
expand its functionality. Most of these features require additional hardware. You must:
1. Purchase the feature.
2. Install any hardware required by the feature.
3. Unlock the feature. See Unlock features / plugins (page 45).
4. Activate the feature for use. See Activate features/plugins for use (page 47).
5. Configure the feature.
Vehicle guidance
l Trimble Autopilot™ automated steering system: See Autopilot system (page 166).
l Trimble EZ-Pilot™ assisted steering system: See EZ-Pilot assisted steering system (page 191).
l Trimble EZ-Steer® assisted steering system:See EZ-Steer assisted steering system (page 199).
l RG-100 Row Guidance system:Works with the Autopilot system to center the combine on the
rows. See Row Guidance (page 188).
Features for application
l Trimble Field-IQ™ crop input control system:Control sections and vary application rates. See
Field-IQ system setup (page 210) and Field-IQ operation (page 385).
l GreenSeeker®: Vary fertilizer rate in real-time using crop vigor measurements. See GreenSeeker
functionality (page 244) and GreenSeeker operation (page 407).
l Serial Rate Controller: Use a variable rate controller. See Additional controller setup (page 265).
ISOBUS
l Virtual Terminal: View and use Virtual Terminal. See Virtual Terminal setup (page 250) and
Virtual Terminal operation (page 413).
l Task Controller: Use Task Controller. See Task Controller setup (page 251) and Task Controller
operation (page 412).
40 FM-1000 Integrated Display User Guide Version 9.25, Revision B
Page 41

2 Display basics Optional features/plugins
Implement control
l Trimble TrueGuide™ implement guidance system: Use guidance on the implement for greater
accuracy. See TrueGuide system (page 268) and TrueGuide operation (page 426).
l Trimble TrueTracker™ implement steering system: Automatically steer the implement for
greater accuracy. See TrueTracker (page 274) and TrueTracker operation (page 423).
Connectivity
l Ag3000 modem:Receive cellular RTKcorrections. See Ag3000 modem (page 137).
l DCM-300 modem: Receive RTKcorrections from a VRS
a CORS. See DCM-300 Modem (page 138).
l Vehicle Sync:Transmit data between vehicles. See Vehicle Sync (page 292).
l Serial Data Input:Enable data input from an external serial device. See Serial Data Input (page
136).
l Remote Output: Enable remote data output to an external device. See Remote Output setup
(page 130).
™
network, a third-party RTK provider or
l EZ-Remote™ Joystick: Control a variety of display functions remotely. See EZ-Remote Joystick
(page 53).
Water Management
l Survey and design: Survey a field and then create a design. See Survey the field (page 433) and
Create / save a design (page 435).
l FieldLevel™ II:
ll Level the field to a design, install subsurface drainage or surface ditches. See FieldLevel II
Leveling (page 300).
l Control leveling with two GPS receivers, in one of two possible scraper configurations. See
Tandem / dual scraper setup (page 307), Dual scraper controls (page 449), and Tandem
scraper controls (page 450).
l WM-Drain® farm drainage solution: For subsurface drainage. See WM-Drain setup (page 311)
and WM-Drain operation (page 451).
Harvest
l Yield Monitoring: Display yield monitoring data. See Yield Monitoring settings (page 328) and
Yield Monitoring operation (page 470).
Version 9.25, Revision B FM-1000 Integrated Display User Guide 41
Page 42

Screen shots 2 Display basics
Screen shots
To save an image in the Run screen, tap .
The image is stored in the folder: AgGPS\Diagnostics\Screenshots.
l In the Data Dictionary under Diagnostics \ Screenshots
42 FM-1000 Integrated Display User Guide Version 9.25, Revision B
Page 43

Basic settings
In this chapter:
CHAPTER
3
Basic settings include:
Unlocks and upgrades 44
Activate features/plugins for use 47
Basic system settings 48
l Upgrades: Upgrading the system
firmware or features you have
purchased and activated
l Unlocks:Features you purchase are
included with a passcode so that you
can unlock them on your system.
l Activation for use:After you have
unlocked a feature, you can activate it
for use for your operation. You can also
deactivate features in order to activate
other features for use.
Version 9.25, Revision B FM-1000 Integrated Display User Guide 43
Page 44

Unlocks and upgrades 3 Basic settings
Unlocks and upgrades
Unlocks are passcodes you enter to activate a feature or service on the display after you have
purchase it.
Upgrades are firmware updates to the existing firmware or feature that you have already activated.
Note – If you are using the XCN-2050 display for the first time, you must first obtain a GPSposition for
unlocks to become active. If the display was installed indoors, you must move the equipment with the display
outside to gain satellite access.
44 FM-1000 Integrated Display User Guide Version 9.25, Revision B
Page 45

3 Basic settings Unlocks and upgrades
Unlock features / plugins
To unlock / activate some plugins, you must enter the activation password (or unlock). If you do not
have an activation password, contact your local reseller. You can activate a plugin using:
l A text file
l The display
Note – If you are using the XCN-2050 display for the first time, you must first obtain a GPSposition for
unlocks to become active. If the display was installed indoors, you must move the equipment with the display
outside to gain satellite access.
Unlock a plugin using a text file
Note – This method of unlocking a plugin is faster than the manual method.
1. Insert the USB drive from the FM-1000 integrated display into a computer.
2. Rename the text file.
3.
Delete the label of the name following the password number. For example:
Password 4850576341 FMX 2DGPSto2GLONASS.TXT
becomes
Password 4850576341.TXT
4. Copy the password text file from the computer into the \AgGPS\Firmware\ folder on the USBdrive.
5. Insert the USB drive in the display and turn on the display. The feature/plugin is automatically
unlocked.
Unlock feature/plugin manually
1. Turn on the display.
2. At the Home screen on the Support tab, tap Unlo cks. The Advanced Functionality Access screen
displays.
3. Select the feature/plugin and then tap Unlock. The on-screen keyboard displays.
Version 9.25, Revision B FM-1000 Integrated Display User Guide 45
Page 46

Unlocks and upgrades 3 Basic settings
4. Enter the password that your local reseller provided and then tap OK. If you entered:
a. A correct password, an Enabled message displays. The plugin is now unlocked.
b. An invalid password, an error message displays. Enter the password again. If it still does
not work, contact your local reseller.
Upgrade FM-1000 integrated display firmware
1. Transfer the new firmware file from www.trimble.com to your computer.
2. Connect a USB drive to your computer.
3. Unzip the firmware file. Save it to the root folder of the USB drive.
4. Insert the USB drive into the USB socket on the rear of the FM-1000 integrated display.
5. Press the power button on the rear of the display to turn on the display and then wait for the
Home screen to appear.
6. Tap Upgrade. The Firmware Upgrade screen displays.
7. Select a firmware file from the Firmware list and tap Upgrade.
8. After the upgrade is complete, tap OK. The system restarts.
46 FM-1000 Integrated Display User Guide Version 9.25, Revision B
Page 47

3 Basic settings Activate features/plugins for use
Activate features/plugins for use
All features that have been unlocked must be activated (or "added") for use before you can set up
or use them.
1. Open the FM-1000 integrated display if you are not already in it.
2.
At the Home screen, tap .
Note – To add or remove features/plugins, you must access the Configuration screen only from the
Home screen.
3. At the Configuration screen, tap Add/Remove. The Select Active Plugins screen displays.
4. To use a feature, select it from the Inactive Plugins list and tap Add >.
5. To stop using a feature, select it from the Active Plugins list and tap <Remove.
6. When you are finished with your choices, tap OK. The system returns you to the Configuration
screen.
Version 9.25, Revision B FM-1000 Integrated Display User Guide 47
Page 48

Basic system settings 3 Basic settings
Basic system settings
At the Configuration screen, select the System option and then tap Setup. The Display Setup screen
displays.
If required, enter the administrator password. See Passwords (page 39).
1.
At the Configuration screen, tap System in the list, then tap Setu p.
2. If necessary, enter the administrator password. See Passwords (page 39).
3. The Display Setup screen displays.
At the Display Setup screen, you can navigate to and edit:
l CAN bus settings (page 50)
l Data dictionary (page 51)
l EZ-Remote Joystick (page 53)
l Field feature mapping settings (page 55)
l Guidance settings (page 56)
l Language, measurements, keyboard layout (page 58)
l Lightbar settings (page 63)
l Map settings (page 59)
48 FM-1000 Integrated Display User Guide Version 9.25, Revision B
Page 49

3 Basic settings Basic system settings
l Power management (page 66)
l Signal input module for OEM switch (page 68)
l Sounds (page 69)
l Status items (page 70) that display on the Run screen
l Time setup (page 83)
You can also return the display to its default settings. See Restore default settings (page 67).
Version 9.25, Revision B FM-1000 Integrated Display User Guide 49
Page 50

Basic system settings 3 Basic settings
CAN bus settings
Note – These settings are very advanced. Use them only under the direct advice of Technical Support.
At the CANBus Settings screen, complete the settings and tap OK.
Setting Explanation
CAN A Termination
CAN B Termination
If the either CAN buses do not have a physical terminator, enable the CAN
Termination option for that bus.
l Early hardware revisions of the FM-1000 integrated display will
terminate ports A and B.
l Later revisions will terminate B or D.
CAN Driver
Strength
Enable this setting to control the strength of the edges on the CAN bus.
Note –
It is recommended that you set the CAN driver Strength to Full.
50 FM-1000 Integrated Display User Guide Version 9.25, Revision B
Page 51

3 Basic settings Basic system settings
Data dictionary
For information about data management, see:
l Managing data (page 86)
l Data Dictionary categories (page 103)
l Create / load a data dictionary (page 105)
Version 9.25, Revision B FM-1000 Integrated Display User Guide 51
Page 52

Basic system settings 3 Basic settings
Data Files
At the Data Files screen, you can transfer data. See Transfer data (page 86).
You can access the Data Files screen from the Display Setup screen as well as from the Home screen.
52 FM-1000 Integrated Display User Guide Version 9.25, Revision B
Page 53

3 Basic settings Basic system settings
EZ-Remote Joystick
For installation information, see the EZ-Remote Joystick Quick Reference Card.
If you use the EZ-Remote joystick, you do not need to tap buttons on the display. This improves
your accuracy when you select buttons, and gives you faster reaction times. You can program the
EZ-Remote joystick to controls the functions of the FM-1000 integrated display.
Note – The functions available to assign to each button depend on which optional features (plugins) are
activated on the display.
1. Connect the EZ-Remote joystick into into Port B on the back of the display. An EZ-Remote
joystick icon automatically displays on the Configuration screen.
2.
At the Configuration screen, select EZ-Remote and then tap Setu p. The EZ-Remote Assignment
screen displays.
Configure each key for the function you want to control remotely. You can also adjust the
brightness of the LED joystick buttons.
3. On the EZ-Remote joystick, press the first button you wish to program. The Function
Assignment screen displays.
4. Tap the feature that you want to program into that button on the control joystick.
5. Tap Set and then tap OK. The Keypad Assignment screen displays again.
Version 9.25, Revision B FM-1000 Integrated Display User Guide 53
Page 54

Basic system settings 3 Basic settings
6. Repeat steps 2 through 5 to program more buttons as required.
7. When completed, tap OK.
Note – You can configure the EZ-Remote control joystick while operating in a field. From the Run screen, tap
and then follow the previous steps.
54 FM-1000 Integrated Display User Guide Version 9.25, Revision B
Page 55

3 Basic settings Basic system settings
Field feature mapping settings
A field feature is an item you designate on the display while your in your field to indicate lines (such
as fences), areas (such as areas to exclude) and points (such as rocks).
The field feature mapping settings determine:
l What buttons are available on the Mapping Guidance panel of the Run screen for creating
features in the field
l The reference point for creating field features (center, left or right of the boom)
l If a path should be recorded when you begin logging coverage
l The types of warnings that can trigger when entering a feature or area
l When to restrict remote output
l How a boundary is recorded
For detailed information, see Field feature mapping settings (page 142).
Version 9.25, Revision B FM-1000 Integrated Display User Guide 55
Page 56

Basic system settings 3 Basic settings
Guidance settings
Note – If you are setting up the system for the first time, you should not need to adjust these settings.
Setting Explanation
Limit Field Selection Limits the number of fields that display when you are selecting
a field.
l Yes: Enables Limit Field Selection. The displayed fields are
within the set radius of the vehicle's current location,
based on the vehicle's GPS position.
l No:Disables Limit Field Selection
l Selection Radius: Fields that fall within this radius will display.
To exclude:
ll More fields, enter a smaller number
l Fewer fields, enter a larger number
Auto Steering Lockout
Disables engagement of an automated guidance system until
you enable guidance in the Run screen.
56 FM-1000 Integrated Display User Guide Version 9.25, Revision B
Page 57

3 Basic settings Basic system settings
Setting Explanation
l Yes: System functions as normal. Auto Guidance Enabled
on/off is still allowed.
l No: System cannot engage. The Engage button shows as
red.
Version 9.25, Revision B FM-1000 Integrated Display User Guide 57
Page 58

Basic system settings 3 Basic settings
Language, measurements, keyboard layout
Setting Explanation
Language
Can be changed if you have chosen FM-1000Only for the Language
Selection.
If you change the language, a message warns that the display will
turn off so that the change can take effect.
Display Units
Keyboard Layout
Select the unit of measure for the display:
l Metric
l Feet and Inches (default)
l Decimal Feet
The FM-1000 integrated display uses an on-screen keyboard on the
touchscreen. Options for layout:
l ABCDEF:Letters appear in alphabetical order
l QWERTY:Layout the same as a computer keyboard (default)
58 FM-1000 Integrated Display User Guide Version 9.25, Revision B
Page 59

3 Basic settings Basic system settings
Map settings
At the Mapping screen, you can complete settings on these tabs:
l Main
l Track Logging
Version 9.25, Revision B FM-1000 Integrated Display User Guide 59
Page 60

Basic system settings 3 Basic settings
Main tab
Note – For a new toolbar orientation to take effect, restart the display.
Setting Explanation
Map orientation
Controls the direction that the screen follows the position of the
vehicle.
l
North Up: When you perform a turn, the field remains stationary
and the vehicle turns.
l
Vehicle Up: When you perform a turn, the field rotates but the
vehicle remains pointing up.
Note –
arrow.
To change the map orientation from the Run screen, tap the north
Color scheme
l Default mode:For use during the day
l
Night-mode:For use at night
The night-mode color theme uses darker color themes to cause
less eye strain in low light conditions.
Save summaries
l On: The display creates a saved file for your work.
l Off: The display does not create a saved file for your work.
Track Logging tab
On the Track Logging tab, you can configure the display to record the vehicle track at either a set time
or a set distance. Points along the track are logged at the greater of the two values (either logging
time or logging distance).
To always log a point based on either of the two values, set the other value to zero. To disable track
logging, set both values to zero.
60 FM-1000 Integrated Display User Guide Version 9.25, Revision B
Page 61

3 Basic settings Basic system settings
Setting Track logging is...
Distance = 0, Time = 0 Turned off
Distance = 1+, Time = 0 Recorded by distance (m)
Distance = 0, Time = >1+ Recorded by time (s)
Distance = >1+, Time = >1+ Recorded by whichever setting is higher
Track logging files
Track logging files are created whenever you open an event. The track file records points at the rate
set on the Track Logging tab. At each point, a number of attributes are recorded.
Note – The data stored in the track logging file (Track3D_<date time>.dbf) is in metric units.
The information stored for each point in the track logging file is listed in the following table.
Column Description Units
Along_Line Along line distance from start of
meters
swath.
Attribute Not Populated
Ant_HAE Antenna height above ellipsoid.
meters
Attribute Not Populated.
Ant_Lat Antenna latitude (WGS-84). DD.dddddddd
Ant_Long Antenna longitude (WGS-84). DD.dddddddd
Appln_Wdth Application width. meters
As_Applied Applied rate. Attribute Not Populated –
Auto_Steer Auto-Steer flag (1=on, 0=off). On or off
Corct_Age DGPS signal correction age. seconds
Field_Name The name of the field. –
GPS_Status GPS status value (NMEA). 1, 2, 5, 4
Ground_HAE Ground height above ellipsoid.
meters
Attribute Not Populated
HDOP Horizontal Dilution of Precision – A
–
measure of the quality of positions
based on satellite geometry.
Heading Direction of travel with respect to decimal degrees
Version 9.25, Revision B FM-1000 Integrated Display User Guide 61
Page 62

Basic system settings 3 Basic settings
Column Description Units
true North.
Height Mean sea level height of ground. meters
Local_Time Local time. hh:mm:ss.s
Logging_On Coverage logging flag (1=on, 0=off). On or off
Num_Stats Number of GPS satellites. –
Offline Offline distance from swath center
line.
Pitch The pitch. Attribute Not Populated –
Relative_Height Height. meters
Roll The roll. Attribute Not Populated –
Speed GPS-derived ground speed. kph
Status_Text GPS status description. –
Swath_Num Current swath/headland number.
Swath_Wdth Swath width. meters
Target The target rate at the current
position.
Total_Qty Total volume of material as applied
for the current field. Only supported
for the Aerial Flow Controller, Autocal
Flow controller, and Crophawk Flow
Meter.
meters
–
–
Units Units.
Attribute Not Populated
UTC_Date Point creation date. YYYYMMDD
UTC_Time UTC time. hh:mm:ss.s
Version Track attribute file version. –
Yaw The yaw. Attribute Not Populated –
62 FM-1000 Integrated Display User Guide Version 9.25, Revision B
metric
Page 63

3 Basic settings Basic system settings
Lightbar settings
The display has two lightbar options:
l The on-screen lightbar that displays at the top of the Run screen
l One or more external lightbars
On-screen lightbar
You can edit the default settings for the on-screen (virtual) lightbar.
1. At the Display Setup screen, select Lightbar.
2. Tap Setup. The Lightbar Configuration screen displays.
3. Tap Virtual Lightbar and tap Setup.
4.
Complete the settings as appropriate.
Version 9.25, Revision B FM-1000 Integrated Display User Guide 63
Page 64

Basic system settings 3 Basic settings
Setting Explanation
LED spacing
Display Mode How the LEDs respond to offline distances. When “Show
The distance represented by each LED on the lightbar.
a. Tap the appropriate number field.
b. Enter the required values.
Default: 3 cm per LED/1" per LED
error” is selected, the display shows the direction that you
need to move in. When Show correction is selected, the display
shows your current distance offline.
a. From the list, tap the appropriate option.
b. Enter the virtual lightbar settings, then tapOK.
c. At the
Default:show error (chase mode)
Lightbars Configuration
screen, tapOK.
64 FM-1000 Integrated Display User Guide Version 9.25, Revision B
Page 65

3 Basic settings Basic system settings
External lightbar
To set up the external lightbar:
1. Connect the LB25 lightbar to port B on the back of the FM-1000 integrated display.
2. At the Display Setup screen, tap Lightbar.
3. Tap Setup. The Lightbar Configuration screen displays.
4. Tap Lightbar and tap Setup.
5.
Complete the settings as appropriate.
Setting Explanation
Name Name and serial number of the lightbar
Orientation Choose the orientation of the lightbar
Brightness Setting for how bright the lightbar displays
LED Spacing
Lightbar Purpose
Look ahead time
The distance represented by each LED on the lightbar.
a. Tap the appropriate number field.
b. Enter the required values.
Default: 3 cm per LED/1" per LED
Choose the purpose of the lightbar
The distance ahead of the vehicle that the lightbar will use
for LED guidance and offline distance.
Default:0 seconds
Version 9.25, Revision B FM-1000 Integrated Display User Guide 65
Page 66

Basic system settings 3 Basic settings
Power management
To manage power, you can set the display to dim the backlight or turn off the display after a pre-set
period of inactivity.
Setting Explanation
Turn Off Backlight Length of time before the backlight turns off.
Turn Off System Length of time before system turns off.
66 FM-1000 Integrated Display User Guide Version 9.25, Revision B
Page 67

3 Basic settings Basic system settings
Restore default settings
You can reset the FM-1000 integrated display to its default values. This can be useful if:
l You made changes to the display settings. The results are poor, but you cannot determine
which setting was the cause.
l You move the display from one vehicle to another.
Note – If you restore the defaults, the Autopilot vehicle setup information is not reset.
To restore the default settings:
1.
At the Configuration screen, select the System option and then tap Setup. The Display Setup
screen displays.
2. Tap Default. A confirmation screen displays.
3. Tap Yes. The default settings are restored.
Version 9.25, Revision B FM-1000 Integrated Display User Guide 67
Page 68

Basic system settings 3 Basic settings
Signal input module for OEM switch
The signal input module (SIM) can interface with existing equipment inputs to control on-screen
buttons and features. A SIM must be connected to assign features to the buttons.
1. To assign the buttons, highlight the action in the Actions list.
2. Tap <--Set to set the action to the specified input.
68 FM-1000 Integrated Display User Guide Version 9.25, Revision B
Page 69

3 Basic settings Basic system settings
Sounds
The ways sounds can be produced are:
l Through the internal speaker of the FM-1000 integrated display
l
If Autopilot is part of your configration, you can use an exernal Sonalert
1. At the Display Setup screen, select Sounds and tap setup.
2.
Complete the settings and tap OK.
Setting Explanation
Alarm
Warning
Off, External Speaker, AP Sonalert.
Note –
Sonalert works only with Autopilot.
Off, External Speaker, APSonalert.
Note –
Sonalert works only with Autopilot.
Track Logging Off, External Speaker
Touch Screen Both high, Off, External low
Version 9.25, Revision B FM-1000 Integrated Display User Guide 69
Page 70

Basic system settings 3 Basic settings
Status items
The status items are features you have activated for use. See Activate features/plugins for use (page
47). If a feature is deactivated, the status items associated with it are no longer available.
The Select Status Items screen has two tabs where you can configure various display options for the
status text items.
Run screen slide-out status
On the Run Screen tab, you can set what items display on the Run screen in the status slide-out panel
when you tap the edge of the panel. The status text items appropriate for the features/plugins you
are currently using display in the Info Items list.
70 FM-1000 Integrated Display User Guide Version 9.25, Revision B
Page 71

3 Basic settings Basic system settings
1. Set the upper left status text item:
a. From the Info Items list, tap the item you want to use.
b. Tap the left ^ Set Item button. The information displays in the upper left field.
2. Set the upper right status text item:
a. From the Info Items list, tap the item you want to use.
b. Tap the right ^ Set Item button. The information displays in the upper right field.
3. From the Timeout list, select a time. This is how long the tab remains on-screen before retracting.
To have the tab extended until you close it manually, select Never.
4. To add status items to the slide-out tab:
a.
Tap the position on the tab that you want to fill. For example, to add an item to the first
position on the list, tap at the location shown.
b. From the Info Items list, tap the item you want to use.
c. Tap <- Set Item.
5. To save the configuration, tap OK.
Info screen
On the Info Screen tab, you can determine which items will be displayed on the Info panel when you
tap .
The status text items appropriate for the features/plugins you are currently using display in the Info
Screen list.
1. Set the left Info text items:
a. From the Info Items list, tap the item you want to use.
b. Tap the left ^ Set Item button.
Version 9.25, Revision B FM-1000 Integrated Display User Guide 71
Page 72

Basic system settings 3 Basic settings
c. Repeat steps a and b until you have all the items you want, or the list is full. The
information displays in the left field.
2. Set the right Info text items:
a. From the Info Items list, tap the item you want to use.
b. Tap the right ^ Set Item button.
c. Repeat steps a and b until you have all the items you require, or the list is full. The
information displays in the right field.
3. To save the configuration, tap OK.
Status option list
The following list shows the status items you can choose to display on the Run screen. The status
items available depend on the optional features/plugins that are currently activated.
In the Display Setup screen, select Status Items and then tap Setup.
Status Item Explanation
(blank) Status text item is not shown
Along Track Error
Altitude Current height of the vehicle
Applied Rate Current application rate
Area to Empty Area that can still be applied before the tank is empty
Auxiliary Valve Current status of the auxiliary valve
Available Memory Amount of free space on the display's internal memory
Average Population Average rate across all rows
Avg Seed Spacing Average distance between seeds based on the average sample size
Blade Height Current height of the blade
Boot Depth Depth of the boot when installing tiles or the depth of the blade
when cleaning surface ditches (used with the Autoslope leveling
model)
CH1 - CH4 Product Level Current level of the products that are in channels 1-4
Client Name Name of the current client
CMR Percent Percentage of radio CMR packets received over the last 100 seconds
Control Speed Speed reported to the multi-application controller
72 FM-1000 Integrated Display User Guide Version 9.25, Revision B
Page 73

3 Basic settings Basic system settings
Status Item Explanation
Correction Age Length of time since the last correction was received
Correction Type Correction type that is being used
Coverage Percent Percentage of the field area that is covered area
Current Flow Current flow of material
Cut/Fill Difference between the Blade Height and the Target Height:
l When Cut is shown, the current ground height is above the
target height. The height adjustment indicator shows a red
down arrow, which means that the blade needs to move down
to reach the Target Height.
l When Fill is shown, the current ground height is below the
target height. The height adjustment indicator shows a red up
arrow, which means that the blade needs to move up to reach
the Target Height.
Design Height Height the blade will attempt to reach. This is the Design Height ±
the Offset. When the blade reaches the Target Height, the arrows
turn green.
Design Slope When using the Autoslope leveling model, this displays the design
slope with respect to the current location along the section line.
Dist to Feature Distance to the nearest feature
Dist to Pause Distance to the pause position
East Distance that the vehicle is to the east of the field origin point (a
negative number means the vehicle is to the west of the field origin
point)
Engaged Time Length of time that the system has been engaged
Event Coverage Area Area that has been logged during the current event
Event Coverage Distance Distance covered while logging during the current event
Event Coverage Time Length of time that coverage logging has been engaged during the
current event
Event Name Name of the current event
Farm Name Name of the current farm
Field Area Field area within a pivot or headland boundary
Version 9.25, Revision B FM-1000 Integrated Display User Guide 73
Page 74

Basic system settings 3 Basic settings
Status Item Explanation
Field Name Name of the current field
Free External Storage Amount of free space on the USB drive
Free Internal Storage Amount of free space on the display's internal memory
GMT Time Current Greenwich Mean Time
GPS Position Spacing
GPS Status GPS correction type that the GPS receiver is currently using
H Error Horizontal error:An estimation of the level of precision of the GPS
position in 2 dimensions
Heading Current heading of the vehicle, in degrees, from direct north
Heading to Feature Vehicle location relative to the nearest feature (feature is directly
ahead = 0°; directly behind = 180°)
Heading to Pause Direction vehicle is facing relative to the paused vehicle position
(directly ahead = 0°; directly behind = 180°)
Impl. Altitude Current height of the implement
Impl. CMR Percent Percentage of radio CMR packets received by the implement GPS
receiver over the last 100 seconds
Impl. Correction Age Age of the corrections used by the implement receiver
Impl. Correction Type Correction type used by the implement receiver
Impl. East Distance that the implement is to the east of the field origin point (a
negative number means the implement is to the west of the field
origin point)
Impl. Engaged Time Time that the implement has been engaged
Impl. GPS Status The status of the GPS correction used for the implement
Impl. H Error Implement horizontal error: An estimation of the level of precision
of the implement GPS position in 2 dimensions
Impl. HDOP Horizontal Dilution of Precision of the implement receiver: A
measure of accuracy based on the geometry of the satellites in the
sky.
If the satellites are near each other in the sky, the HDOP is higher
(lower is better).
Impl. Heading Current heading of the implement, in degrees, from direct north
74 FM-1000 Integrated Display User Guide Version 9.25, Revision B
Page 75

3 Basic settings Basic system settings
Status Item Explanation
Impl. Latitude Implement's current latitude
Impl. Long-Term XTE Implement Cross Track Error (XTE) when passes occur more than
one hour apart
Impl. Longitude Implement's current longitude
Impl. Network ID RTK network ID of the implement receiver's corrections
Impl. North Distance that the implement is to the north of the field origin point
(a negative number means the implement is to the south of the
field origin point)
Impl. Nudge/Trim Amount of nudge or trim currently applied to the implement
position
Impl. Offline Dist Distance away from the guidance line
Impl. Satellites Number of satellites the implement receiver is reading
Impl. Short-term XTE Implement pass-to-pass Cross Track Error (XTE) when passes occur
within less than 15 minutes
Impl. Speed Current implement speed
Impl. Steering Angle Steering angle of the implement
Impl. Up Vertical height of the implement relative to the field origin point (a
negative number means the implement is lower than the field origin
point)
Impl. Vehicle Model Implement profile name
Implement Name of the current implement
Implement F/B Offset Distance of front to back offset
Implement L/R Offset Distance of left to right offset
Implement Width Width of the implement
Latitude Vehicle's current latitude
Line Feature Length Length of the current line feature
Local Time Current local time
Long-term XTE Vehicle Cross Track Error (XTE) when passes occur more than one
hour apart.
Longitude Vehicle's current longitude
Version 9.25, Revision B FM-1000 Integrated Display User Guide 75
Page 76

Basic system settings 3 Basic settings
Status Item Explanation
Longitude Vehicle's current longitude
NDVI Normalized Difference Vegetation Index
Nearest Point Name Bame of the nearest point feature
Network ID RTK network ID of the GPS receiver's corrections
Network Status Current status of the wireless cellular network
North Distance that the vehicle is to the north of the field origin point (a
negative number means the vehicle is to the south of the field origin
point)
Nudge Amount of nudge currently applied
Nudge/Trim Amount of nudge or trim currently applied
Offline Dist. Distance away from the guidance line
Offset X Relative Position X offset from the master benchmark
Offset Y Relative Position Y offset from the master benchmark
P Altitude Current height of the vehicle as reported by the primary blade GPS
receiver
P Blade Height Current height of the primary blade
P Boot Depth Depth of the boot when installing tiles or the depth of the blade
when cleaning surface ditches (used with the Autoslope leveling
model)
P CMR Percent Percentage of radio CMR packets received over the last 100 seconds
by the primary blade GPS receiver
P Correction Age Time since the GPS corrections were last received from the primary
FieldLevel™ GPS receiver
P Correction Type Correction type used by the primary blade receiver
P Cut/Fill Difference between the Primary Blade Height and the Primary
Target Height:
l When Cut is shown, the current ground height is above the
target height. The height adjustment indicator shows a red
down arrow, which means that the blade needs to move down
to reach the Target Height.
l When fill is shown, the current ground height is below the
target height. The height adjustment indicator shows a red up
76 FM-1000 Integrated Display User Guide Version 9.25, Revision B
Page 77

3 Basic settings Basic system settings
Status Item Explanation
arrow, which means that the blade needs to move up to reach
the Target Height.
P Design Height Height the primary blade will attempt to reach. This is the Design
Height ± the Offset. When the blade reaches the Target Height, the
arrows turn green.
P Design Slope When using the Autoslope leveling model, this displays the design
slope with respect to the current location along the section line.
P Distance Traveled Distance traveled since Auto mode was enabled. (For use with
FieldLevel II Point to Slope mode). The d
P East Distance that the primary blade receiver is to the east of the field
origin point (a negative number means the receiver is to the west of
the field origin point)
P GPS Status GPS correction type that the primary blade GPS receiver is currently
using
P H Error (Horizontal error) An estimation of the level of precision of the
primary blade GPS position in 2 dimensions
P HDOP Horizontal Dilution of Precision of the primary blade receiver: A
measure of accuracy based on the geometry of the satellites in the
sky. If the satellites are near each other in the sky, the HDOP is
higher (lower is better).
P Heading Current heading of the primary blade, in degrees, from direct north
P Latitude Primary blade's current latitude
P Longitude Primary blade's current longitude
P Network ID RTK network ID of the primary blade receiver's corrections
P North Distance that the primary blade receiver is to the north of the field
origin point (a negative number means the receiver is to the south
of the field origin point)
P Offset Separate plane that is parallel to the design plane. The offset if
defined by a single measurement, which is the height that the offset
plane is from the design plane.
P Offset X Relative Position X offset from the master benchmark
P Offset Y Relative Position Y offset from the master benchmark
P Satellites Number of satellites the system is currently being received by the
FieldLevel II GPS receiver
Version 9.25, Revision B FM-1000 Integrated Display User Guide 77
Page 78

Basic system settings 3 Basic settings
Status Item Explanation
P Section Line Number Line number of the primary blade
P Speed Speed of the vehicle as reported by the primary blade GPS receiver
P Target Height Height the primary blade will attempt to reach. This is the Design
Height ± the Offset. When the blade reaches the Target Height, the
arrows turn green.
P Up Height of the primary blade receiver relative to the field origin point
(a negative number means the blade is lower than the field origin
point)
P VDOP Vertical Dilution of Precision of the FieldLevel II GPS receiver: A
measure of accuracy based on the geometry of the satellites in the
sky. If the satellites are near each other in the sky, the VDOP is
higher (lower is better).
P Vertical Error Estimate Current estimate of error in the height calculated by the FieldLevel II
GPS receiver
Pressure Current pressure as reported by the primary pressure sensor
Productive Area Area of Area Features that are designated as "productive"
Radio Signal Strength DCM-300 wireless signal strength
S Altitude Current height of the vehicle as reported by the secondary blade
GPS receiver
S Blade Height Current height of the secondary blade
S CMR Percent Percentage of radio CMR packets received over the last 100 seconds
by the secondary blade GPS receiver
S Correction Age Time since the GPS corrections were last received from the
secondary FieldLEvel GPS receiver
S Correction Type Correction type used by the secondary blade receiver
S Cut/Fill Difference between the Secondary Blade Height and the Secondary
Target Height:
l When Cut is shown, the current ground height is above the
target height. The height adjustment indicator shows a red
down arrow, which means that the blade needs to move down
to reach the Target Height.
l When Fill is shown, the current ground height is below the
target height. The height adjustment indicator shows a red up
arrow, which means that the blade needs to move up to reach
78 FM-1000 Integrated Display User Guide Version 9.25, Revision B
Page 79

3 Basic settings Basic system settings
Status Item Explanation
the Target Height.
S Design Height Height the secondary blade will attempt to reach. This is the Design
Height ± the Offset. When the blade reaches the Target Height, the
arrows turn green.
S Distance Traveled Distance traveled since Auto mode was enabled (for use with
FieldLevel II Point to Slope mode)
S East Distance that the secondary blade receiver is to the east of the field
origin point (a negative number means the receiver is to the west of
the field origin point)
S GPS Status GPS correction type that the secondary blade GPS receiver is
currently using
S H Error (Horizontal error) Estimation of the level of precision of the
secondary blade GPS position in 2 dimensions
S HDOP Horizontal Dilution of Precision of the secondary blade receiver: A
measure of accuracy based on the geometry of the satellites in the
sky. If the satellites are near each other in the sky, the HDOP is
higher (lower is better).
S Heading Current heading of the secondary blade, in degrees, from direct
north
S Latitude Secondary blade's current latitude
S Longitude Secondary blade's current longitude
S Network ID RTK network ID of the secondary blade receiver's corrections
S North Distance that the secondary blade receiver is to the north of the
field origin point (a negative number means the receiver is to the
south of the field origin point)
S Offset Separate plane that is parallel to the design plane. The offset if
defined by a single measurement, which is the height that the offset
plane is from the design plane.
S Offset X Relative Position X offset from the master benchmark
S Offset Y Relative Position Y offset from the master benchmark
S Satellites Number of satellites the system is currently being received by the
FieldLevel II GPS receiver
S Section Line Number Line number of the secondary blade
Version 9.25, Revision B FM-1000 Integrated Display User Guide 79
Page 80

Basic system settings 3 Basic settings
Status Item Explanation
S Speed Speed of the vehicle as reported by the secondary blade GPS
receiver
S Target Height Height the secondary blade will attempt to reach. This is the Design
Height ± the Offset. When the blade reaches the Target Height, the
arrows turn green.
S Up Height of the secondary blade receiver relative to the field origin
point (a negative number means the blade is lower than the field
origin point)
S VDOP Vertical Dilution of Precision of the FieldLevel II GPS receiver: A
measure of accuracy based on the geometry of the satellites in the
sky. If the satellites are near each other in the sky, the VDOP is
higher (lower is better).
S Vertical Error Estimate Current estimate of error in the height calculated by the FieldLevel II
GPS receiver
Satellites Number of satellites the system is currently receiving
Secondary Pressure Current pressure, as reported by the secondary pressure sensor
Section Line Number Number of the current section line
Seed Mults % Percentage of time an more than one seed is placed for every
intended drop
Seed Population Amount of seed planted per acre/hectare
Seed Singulation Percentage of time an individual seed is placed for every intended
drop
Seed Skips % Percentage of seed that has not been planted
Seed Spacing Percentage of seed that has been applied in the specified spacing
Session Coverage Area Area that has been logged during the current session
Session Coverage Dist Distance covered while logging during the current session
Session Coverage Time Length of time that coverage logging has been engaged during the
current session
Session Time Length of the current field session
Short-term XTE Vehicle pass-to-pass Cross Track Error (XTE) when passes occur
within less than 15 minutes
Speed Current vehicle speed
80 FM-1000 Integrated Display User Guide Version 9.25, Revision B
Page 81

3 Basic settings Basic system settings
Status Item Explanation
Steering Angle Angle reported by the rotary potentiomenter or the AutoSense™
device
Survey Area Total area of the current survey
Survey Cut/Fill Difference between the Blade Height and the Target Height:
l When Cut is shown, the current ground height is above the
target height. The height adjustment indicator shows a red
down arrow, which means that the blade needs to move down
to reach the Target Height.
l When Fill is shown, the current ground height is below the
target height. The height adjustment indicator shows a red up
arrow, which means that the blade needs to move up to reach
the Target Height.
Survey Points Number of survey points that have been created
Swath Length Length of the current guidance line
Note –
Length value is not appropriate for FreeForm curves.
FreeForm™ curves are made up of line segments, so the Swath
Swath Number Swath number (L = left, R = right)
Note –
Number value is not appropriate for FreeForm curves.
FreeForm curves are made up of line segments, so the Swath
Swath Points The number of points that define the current line.
Tank Level Current level of the tank
Tank Level N Level of nitrogen currently in the tank
Tank Level NH3 Level of anhydrous ammonia currently in the tank
Tank/Bin Level Current level of the tank or bin
Target Rate Application target rate
Total Boundaries Area Total area between the current boundaries
Total Seed Rate Total seed rate that is currently being applied
Total Vol Applied Total volume of material applied
Total Vol Applied N Total volume of nitrogen applied
Total Vol Applied NH3 Total volume of anhydrous ammonia applied
Transfer Status Connected Farm™ transfer activity
Version 9.25, Revision B FM-1000 Integrated Display User Guide 81
Page 82

Basic system settings 3 Basic settings
Status Item Explanation
TrueGuide Roll Roll corrections in degrees that are applied
TrueGuide Trim Distance from the guidance line that the vehicle has been shifted
Up Vertical height of the vehicle relative to the field origin point (a
negative number means the vehicle is lower than the field origin
point)
VDOP Vertical Dilution of Precision of the FieldLevel II GPS receiver: A
measure of accuracy based on the geometry of the satellites in the
sky.
If the satellites are near each other in the sky, the VDOP is higher
(lower is better).
Vehicle Model Model of vehicle that is configured
Vehicle Type Type of vehicle that is configured
Vertical Error Estimate Current estimate of error in the height calculated by the FieldLevel II
GPS receiver
82 FM-1000 Integrated Display User Guide Version 9.25, Revision B
Page 83

3 Basic settings Basic system settings
Time setup
Note – When you configure the time zone, multiple warning messages may display. Do not be concerned by
this.
To synchronize the system time to the GPS signals:
1. From the Display Setup screen, tap Timezone.
2. Tap Setup. If the time is not correct, tap the - or + button to change the time by 1-hour
increments.
Version 9.25, Revision B FM-1000 Integrated Display User Guide 83
Page 84

Basic system settings 3 Basic settings
84 FM-1000 Integrated Display User Guide Version 9.25, Revision B
Page 85

Data management
In this chapter:
CHAPTER
4
This chapter explains:
Managing data 86
Transfer data 86
Delete data 90
Data storage structure 92
Data Dictionary categories 103
l How to transfer data between a USB
drive and the display
l The structure of data on the USB and
computer
l The Data Dictionary
Version 9.25, Revision B FM-1000 Integrated Display User Guide 85
Page 86

Managing data 4 Data management
Managing data
As part of data management, you can:
l Transfer files. See Transfer data (page 86).
l Delete files. See Delete data (page 90).
l Edit and add to the data entry categories by editing the data dictionary. See Data Dictionary
categories (page 103).
l Create or load a data dictionary. See Create / load a data dictionary (page 105).
l View a PDFfile of an event summary. See Event subfolder (page 96).
l Import an AB line or boundary. See Import AB Lines or boundaries (page 373).
l Save an Autopilot system vehicle configuration file (.vdb). See Save vehicle profile (page 190).
Files generated by the FM-1000 integrated display are saved in a specific structure on the USBdrive.
See Data storage structure (page 92).
Transfer data
At the Data Files screen, you can:
l Transfer data between a USBdrive and the display's internal storage. See Display to USB (page
88) or Transfer from USB (page 89).
l Transfer data between a USBdrive and a computer. See USBto computer (page 89).
l Delete data from a USB drive or the display's internal storage. See Delete data (page 90).
86 FM-1000 Integrated Display User Guide Version 9.25, Revision B
Page 87

4 Data management Transfer data
Data Files screen
You can access the Data Files screen from either:
l The Home screen:Tap Data Files.
l The Configuration screen:
a.
At the Home screen, tap .
b.
At the Configuration screen, tap System and then tap Setu p.
c. If necessary, enter the administration password and then tap OK.
d. Select Data Files from the list and then tap Manage. The Data Files screen displays.
Data File categories
The categories available on the Data Files screen are:
Category Subcategories and data
Summary Files PDF summary files listed under client name
Diagnostics
Screen shots:Folder containing screen captures
System logs
Version 9.25, Revision B FM-1000 Integrated Display User Guide 87
Page 88

Transfer data 4 Data management
Category Subcategories and data
Configuration
Features:
Implements:
System Archive:
Varieties:
Vehicle Archive:
Data Dictionary Data dictionary. See
Field Data
Data for all activities in the field. Data is structured as:
Data Dictionary categories (page 103)
Client / Farm / Field / Event
Display to USB
CAUTION – Do not remove the USB drive from the socket while the application is copying data. This will corrupt
the data.
CAUTION – POTENTIALLOSSOFDATA!
If you copy files from:
- An to another or to an FM-1000 integrated display.
- An physical FM-1000 integrated display to another or to an FM-1000 integrated display
First make sure you have created a subfolder labeled with the display serial number for your files. Transfer your
files to this subfolder. Otherwise, you will overwrite files when you copy and you will corrupt your data.
.
1.
At the Data Files screen from the display's Inter nal Storage list, tap the item to copy. You can:
ll Select all files in the category: Select the entire category by tapping the category name.
l
Select individual files: See files within a category by tapping . The arrow changes to a
down arrow and shows the files stored under the category.Then select the file or files
you want.
l Select all files: Select Everything.
2.
Tap Copy >.The item is copied to the USB list.
88 FM-1000 Integrated Display User Guide Version 9.25, Revision B
Page 89

4 Data management Transfer data
Transfer from USB
CAUTION – Do not remove the USB drive from the socket while the application is copying data. This will corrupt
the data.
CAUTION – POTENTIALLOSSOFDATA!
If you copy files from:
- An to another or to an FM-1000 integrated display.
- An physical FM-1000 integrated display to another or to an FM-1000 integrated display
First make sure you have created a subfolder labeled with the display serial number for your files. Transfer your
files to this subfolder. Otherwise, you will overwrite files when you copy and you will corrupt your data.
1.
At the Data Files screen from the USB list, tap the item to copy. You can:
ll Select all files in the category: Select the entire category by tapping the category name.
l
Select individual files: See files within a category by tapping . The arrow changes to a
down arrow and shows the files stored under the category.Then select the file or files
you want.
l Select all files: Select Everything.
2.
Tap Copy >. The item is copied to the Internal Storage list.
USBto computer
After you have transferred data from the display to the USB:
1. Remove the USB drive from the display.
2.
Insert the USB drive into your computer.
If you place the files in a series of folders, the combined filename and folder path may become
too long and the operating system may not allow you to open the files. To avoid this, it is
recommended that you place data in your computer’s C:\ folder.
3.
Copy the appropriate folder to the office computer using an application such as Windows
Explorer. This copies all the sub-folders and files in the folder.
Note – When you copy or move files using Windows Explorer, you must keep all the shape-files (.dbf,
.shp, and .shx) together so that office software can open the theme file. To ensure that the files stay
together, always copy the entire folder rather than just the individual files.
4. If you create a new event in a field, and you already have the\Field\ folder containing any
previous events on the office computer, you should still copy the \Field\ folder so that the new
EventHistory information is copied.
®
Version 9.25, Revision B FM-1000 Integrated Display User Guide 89
Page 90

Delete data 4 Data management
Delete data
CAUTION – Deleting data is permanent. You cannot undo the deletion or restore the data.
If you need to create more space, you can use the FM-1000 integrated display to delete from the
internal memory or the USB drive:
l Clients
l Farms
l Fields
l Events
Note – You cannot undo data deletion or restore the data.
1. At the Data Files screen, tap Delete Data. The Delete Data Storage screen displays.
2.
If you want to delete from:
ll
The internal memory of the display: Tap the Internal tab.
l
The USBdrive: Tap the USBDrive tab.
90 FM-1000 Integrated Display User Guide Version 9.25, Revision B
Page 91

4 Data management Delete data
3. To delete a specific item:
a. In the lists for Client, Farm, Field or Event, tap the item you want to delete.
b. Tap Delete.
c. To exit the Delete Data Storage screen, tap OK.
4. To delete all materials:
5. To delete all events:
a. Tap Delete All Events.
b. Enter the administration password.
6. To delete all files on the display:
a. Tap Delete EVERYTHING.
b. Enter the administration password.
7. The system displays a message asking you to confirm the deletion. If you want to proceed, tap
Yes.
Version 9.25, Revision B FM-1000 Integrated Display User Guide 91
Page 92

Data storage structure 4 Data management
Data storage structure
The FM-1000 integrated display stores client, farm, field, and event data in a specific structure on
the computer and USB drive. The first level folder is AgGPS.
Depending on your system configuration and the operations you perform, the top level folders of
the structure are:
l ABLines folder (page 92)
l Archives folder (page 93)
l Autopilot folder (page 93)
l Data folder (page 93)
l Data Dictionary folder (page 100)
l Diagnostics folder (page 100)
l Prescriptions folder (page 101)
l Summaries folder (page 102)
l Task Data folder (page 103)
ABLines folder
There is one set of boundary and AB Line shapes for each field:
l Boundary.* - Fields with boundaries include a boundary polygon stored in the boundary.shp
file. Fields without boundaries do not contain a boundary file.
l Swath.* - For fields with boundaries, ABpolylines are stored in the swath.shp file.
Note – Units are always metric in files created by the display.
The following is stored in the boundary and AB line attribute files.
Column Field Description Format
Area Field area (Boundary area) ha
Date Date the field was created YYYYMMDD
Dist1
Dist2
ID AB Line number ID
Length Length of the AB Line meters
92 FM-1000 Integrated Display User Guide Version 9.25, Revision B
Page 93

4 Data management Data storage structure
Column Field Description Format
Name Name assigned to the AB Line
Perimeter Field perimeter distance
(Boundary only)
The size of the field is not defined unless a field has a boundary. Therefore, the %_Complete in the
EventHistory.dbf file is always zero for fields without boundaries
Note – If you browse the .dbf files using an Excel spreadsheet, date fields may appear in a different format,
depending on your local settings.Unless a field has a boundary, the size of the field is not defined. Therefore,
for fields without boundaries the %_Complete in the EventHistory.dbf file is always zero.
meters
Archives folder
When the ProgramLog.txt file becomes larger than 1024KB, it is backed up to a file named
ProgramLog.old and stored in the Archives folder.
Autopilot folder
The Autopilot folder contains the following subfolders:
l Configuration
l Custom Vehicle Configurations
l VDB
l Vehicle Database
Data folder
The data folder contains the client subfolder and all subsequent subfolders related to the client.
Client subfolder
The client is the customer for whom the work is being done. This folder contains at least one Farm
subfolder for each client.
Farm subfolder
A farm is a collection of fields. This folder contains at least one Field subfolder related to each farm.
Field subfolder
You create an on-screen field to represent an actual field, part of an actual field, or a group of more
than one actual fields.
Version 9.25, Revision B FM-1000 Integrated Display User Guide 93
Page 94

Data storage structure 4 Data management
This folder contains an Event subfolder for each event performed on the field as well as the following
files:
Data Explanation Files
Field AB Line Boundary and/or AB Line
polylines
Field Boundary Polygon (Only available if the
field is a headland field and
therefore has a boundary)
Coordinates Contains coordinates of the field
boundary file
Paused Files Information regarding guidance
being paused
Event history Information about each event
carried out in the field
Point features Attribute ID and latitude,
longitude, and height
Swaths.shp
Swaths.dbf
Swaths.shx
Boundary.shp
Boundary.dbf
Boundary.shx
<Latitude Longitude
Altitude>.pos
EventHistory.dbf
Version / Client / Farm / Field /
Event/ Operator / Material /
Date Open / Time Open /
Date Close/ Time Close /
Duration / Primary AB / ABLine /
Cover Area / Cover Distance /
Cover Time / Engage Time
PointFeature.shp
PointFeature.dbf
PointFeature.shx
Line features Line with attribute ID LineFeature.shp
LineFeature.dbf
LineFeature.shx
Area features Area polygons with attribute ID AreaFeature.shp
AreaFeature.dbf
AreaFeature.shx
Event History file
The EventHistory.dbf file contains information on every event carried out in the field.
94 FM-1000 Integrated Display User Guide Version 9.25, Revision B
Page 95

4 Data management Data storage structure
Data Explanation
ABLine Guidance line used
Client Client name
Cover area Area covered
Cover distance Distance covered
Cover time Total time to cover the covered area
Date close Date the field was closed
Date open Date the field was opened
Duration Length of time that the field was open (seconds)
Engage time Time engaged
Event Event name
Farm Farm name
Field Field name
Material Material name
Operator Operator name
PrimaryAB Number of the primary AB Line
Time close Time the field was closed
Time open Time the field was opened
Version FM-1000 integrated display firmware version
Data in features file
One row of data is stored in the <type>.dbf file for each feature of that feature type recorded in the
field.
Data Explanation Format / Notes
Area
Date
Dist1
Field area (Area only) ha
Date the feature was created. yyyy/mm/dd
Dist2
Version 9.25, Revision B FM-1000 Integrated Display User Guide 95
Page 96

Data storage structure 4 Data management
Data Explanation Format / Notes
ID
Length
Name
Perimeter
Feature ID
Length of the AB Line. meters
Feature name
Field perimeter distance (Area only) meters
PrefWeight
SwathsIn
Time
Time the feature was recorded. hh:mm:ss.s
Version Features attribute file version.
The following data is only recorded in point features.
Data Explanation Format / Notes
AlarmRad
Height
Alarm radius meters
Ground mean sea level height at antenna
meters
position. If you are mapping on a slope, the
height may be wrong.
Latitude
Longitude
Status_Txt
WarningRad
Antenna latitude decimal degrees
Antenna longitude decimal degrees
GPS status meters
Warning radius meters
Event subfolder
An event is a precision agriculture application or activity on a particular field. For example:
l Planting of seed
l Application of fertilizer or lime
l Spraying with fungicide, herbicide, or insecticide
96 FM-1000 Integrated Display User Guide Version 9.25, Revision B
Page 97

4 Data management Data storage structure
Files stored in this folder are:
Data Explanation Files
Coverage Graphical files containing
polygons
Track Graphical files containing a series
of 3D points with attributes
Free Form Guidance Graphical files containing paths
for free form guidance
Coverage.shp
Coverage.dbf
Coverage.shx
Track3D_<date time>.shp
Track3D_<date time>.dbf
Track3D_<date time>.shx
Swaths.shp
Swaths.shx
Swaths.dbf
Coverage logging file
The display creates a coverage logging file when any application coverage is recorded. For each
coverage polygon, the following information is saved to the coverage logging file.
Data Field Description
AppType Application type ID
AppliedRate Applied rate reported by the variable rate controller
DateClosed Date the polygon was closed
GPS_Status Numeric GPS status value
Height Height in meters
Speed Average GPS ground speed for the polygon (in meters per
second)
Status_Txt GPS status description
Swath The current swath number when coverage was recorded
TimeClosed Time the polygon was closed
Version Coverage attribute file version
XTE Implement Cross Track Error (in meters)
Track logging file
A track logging file is created whenever the event is opened. At each point, a number of attributes
are recorded.
Version 9.25, Revision B FM-1000 Integrated Display User Guide 97
Page 98

Data storage structure 4 Data management
The units stored in the track attribute file (Track3D_<date time>.dbf) are in metric units.
Also see:Map settings (page 59).
Data Field Description Format / Notes
Along_Line Along Line distance from start of swath meters
Ant_HAE Antenna height above ellipsoid meters
Ant_Lat Antenna latitude (WGS-84) DD.dddddddd
Ant_Long Antenna longitude (WGS-84) DD.dddddddd
Appln_Wdth Application width meters
As applied The actual rate applied by the rate control
system when serial rate control, TAC or the
Field-IQ system are used
Auto_Steer Auto-Steer Flag (1=on, 0=off) On or off
Corct_Age DGPS signal correction age seconds
DOP Horizontal Dilution of Precision – a measure of
the quality of positions based on satellite
geometry
Field_Name Name of the field –
GPS_Status GPS status value 1 to 12
Ground_HAE Ground height above ellipsoid meters
Heading Direction of travel with respect to true North. decimal degrees
Height Mean sea level height of ground meters
Local_Time Local time hh:mm:ss.s
Logging_On Coverage logging Flag (1=on, 0=off) On or off
NDVI The NDVI values recorded when using the
GreenSeeker plugin (not currently
implemented)
Num_Stats Number of GPS satellites –
Offline Offline distance from swath center line meters
Pitch The pitch –
–
Relative_Height Height meters
98 FM-1000 Integrated Display User Guide Version 9.25, Revision B
Page 99

4 Data management Data storage structure
Data Field Description Format / Notes
Roll The roll –
Speed GPS derived ground speed kph
Status_Text GPS status description –
Swath_Num Current swath/headland number
Swath_wdth Swath width meters
Target Target rate at the current position –
Target Target application rate when serial rate control,
TAC or the Field-IQ system are used
Total_Qty Total volume of material as applied for the
–
current field
Only supported for the:
l Aerial Flow Controller
l Autocal Flow controller
l Crophawk Flow Meter
TRACK_ID Date and time stamp –
Units Units metric
UTC_Date Point creation date YYYYMMDD
UTC_Time UTC time hh:mm:ss.s
Version Track attribute file version –
Yaw The yaw –
Graphical data formats
The FM-1000 integrated display uses the Environmental Systems Research Institute (ESRI) 3D shapefile format for storing the layers of graphical information collected in the field (for example, spray
coverage, track logging points, and features). The three files in a shapefile set are:
l <filename>.dbf file: Contains the feature attributes
l <filename>.shp file:Contains position information
l <filename>.shx file: An index file that links the position information with its attributes
The term shapefile is used to refer to these three files collectively.
The display records all latitude, longitude, and height data in decimal degrees.
Version 9.25, Revision B FM-1000 Integrated Display User Guide 99
Page 100

Data storage structure 4 Data management
Note – The display reads and writes ESRI ArcView version 2.0 or 3.1 3D polylines, polygons, and points. The M
and Z entity types introduced in ArcView 3.1 can be generated in the track logging files, but cannot be read by
the display. For more information, visit the ESRI website (www.esri.com).
Graphical file editing
ESRI shape (.shp) and attribute (.dbf) files can be used in many other software packages that can
import or use .shp and .dbf formats.
The Farm Works Software® is recommended. For more information, go to www.farmworks.com.
Data collected by the display can be opened directly into the Farm Works software. You can make
changes to the files and save them on an office computer.
The Microsoft Excel®spreadsheet software and most database software also let you open and view
the data in the attribute (.dbf) file.
The display can load files that you created in office software. Save Shapefile or Agfile (.gdx)
prescriptions to the \AgGPS\Prescriptions\ folder on the USBdrive to send rates to a variable rate
controller.
Data Dictionary folder
The Data Dictionary folder contains text files you can add to customize the data dictionary. See Data
Dictionary categories (page 103) and Create / load a data dictionary (page 105).
Diagnostics folder
Diagnostic logs are stored for the FM-1000 integrated display and activities. Logs are useful for
Trimble Support to troubleshoot system operation issues.
The ProgramLog.txt file is saved in the Diagnostics folder and can be useful for troubleshooting. This
file contains data from checks performed by the FM-1000 integrated display:
l When the display is turned on or off
l Periodically, while running
The file can be read with a text editor such as Notepad.
When this file becomes larger than 1024KB, it is backed up to a file named ProgramLog.old and
stored in the Archives folder. See Archives folder (page 93).
The Diagnostics folder contains the following subfolders:
l Autopilot (if you are using the Autopilot system)
l Preferences: System settings stored in the <Preferences>.xml file
l Screenshots:Screenshot files automatically numbered Screenshot_<num>.png
l gps
100 FM-1000 Integrated Display User Guide Version 9.25, Revision B
 Loading...