

Page 1

USER GUIDE
Trimble Nomad 5
Handheld
Version 1.0
Revisi on A
June 2018
Page 2

Trimble Nomad 5 Handheld User Guide | 2
Corporate Office
Trimble Inc.
935 Stewart Drive
Sunnyvale , CA 94085
www.trimble.com
USA
Global tec hnical support
To request detailed technical assistance for Trimble solutions,
contact: trimble_support@trimble.com
Recycl ing infor m ation
You should dispose of the device and accessories properly according
to local laws and regulations. Because the device
electronic components, it must be disposed of
household waste. When the device reaches
local Trimble reseller to learn about
your area.
disposal and recycling options for
Recycling in E u rope
contains
separately from
its end of life, contact your
Copyright and trademarks
© 201 8, T rimble In c. All ri ghts r eser ved.
Trimble and the Globe & Triangle logo and Nomad are
trademarks of Trimble Inc., registered in the United States
in other countries. Access is a trademark of Trimble Inc.
The Bluetooth word mark and logos are owned by the
Bluetooth SIG, Inc. and any use of such marks by Trimble Inc.
under license.
All other trademarks are the property of their respective
owners.
Release Notice
This is the June 2018 release (Revision A) of the Trimble
5 handheld documentation.
and
is
Nomad
The symbol at right means that according to local laws and
regulations your product and/or its battery
separately from household
of life, take it to a
separate
the time of disposal will help conserve natural resources and ensure
that it is recycled in a manner that protects human
environment.
For information about recycling Trimble WEEE (Waste
Electronic Equipment) products that run on
http://www.trimble.com/corporate/about_WEEE_ROHS_
initiatives.aspx.
To recycle Trimble WEEE products call +31 497 53 24 30, and ask for the
"WEEE Associate". or mail a request for recycling
Trimble Europe B.V. WEEE Recycling
Gate 19 to 26
Meerheide 43
5521 DZ
collection point designated by local authorities. The
collection and recycling of your product and/or its battery at
waste. When this product reaches its end
shall be disposed of
health and the
Electrical and
electrical power go t o
instructions to:
C/O Menlo logistics
Eersel
The Netherlan ds
Taiwan – Battery Recycling Requirements
The prod u ct c o ntai n s a Li thium-io n b at ter y.
regulations require that waste batteries
廢電池請回收
are recy cled.
Taiwanese
China Recycling Requirements
[Insert China Hazardous Substances declaration table]
Page 3
Trimble Nomad 5 Handheld User Guide | 3
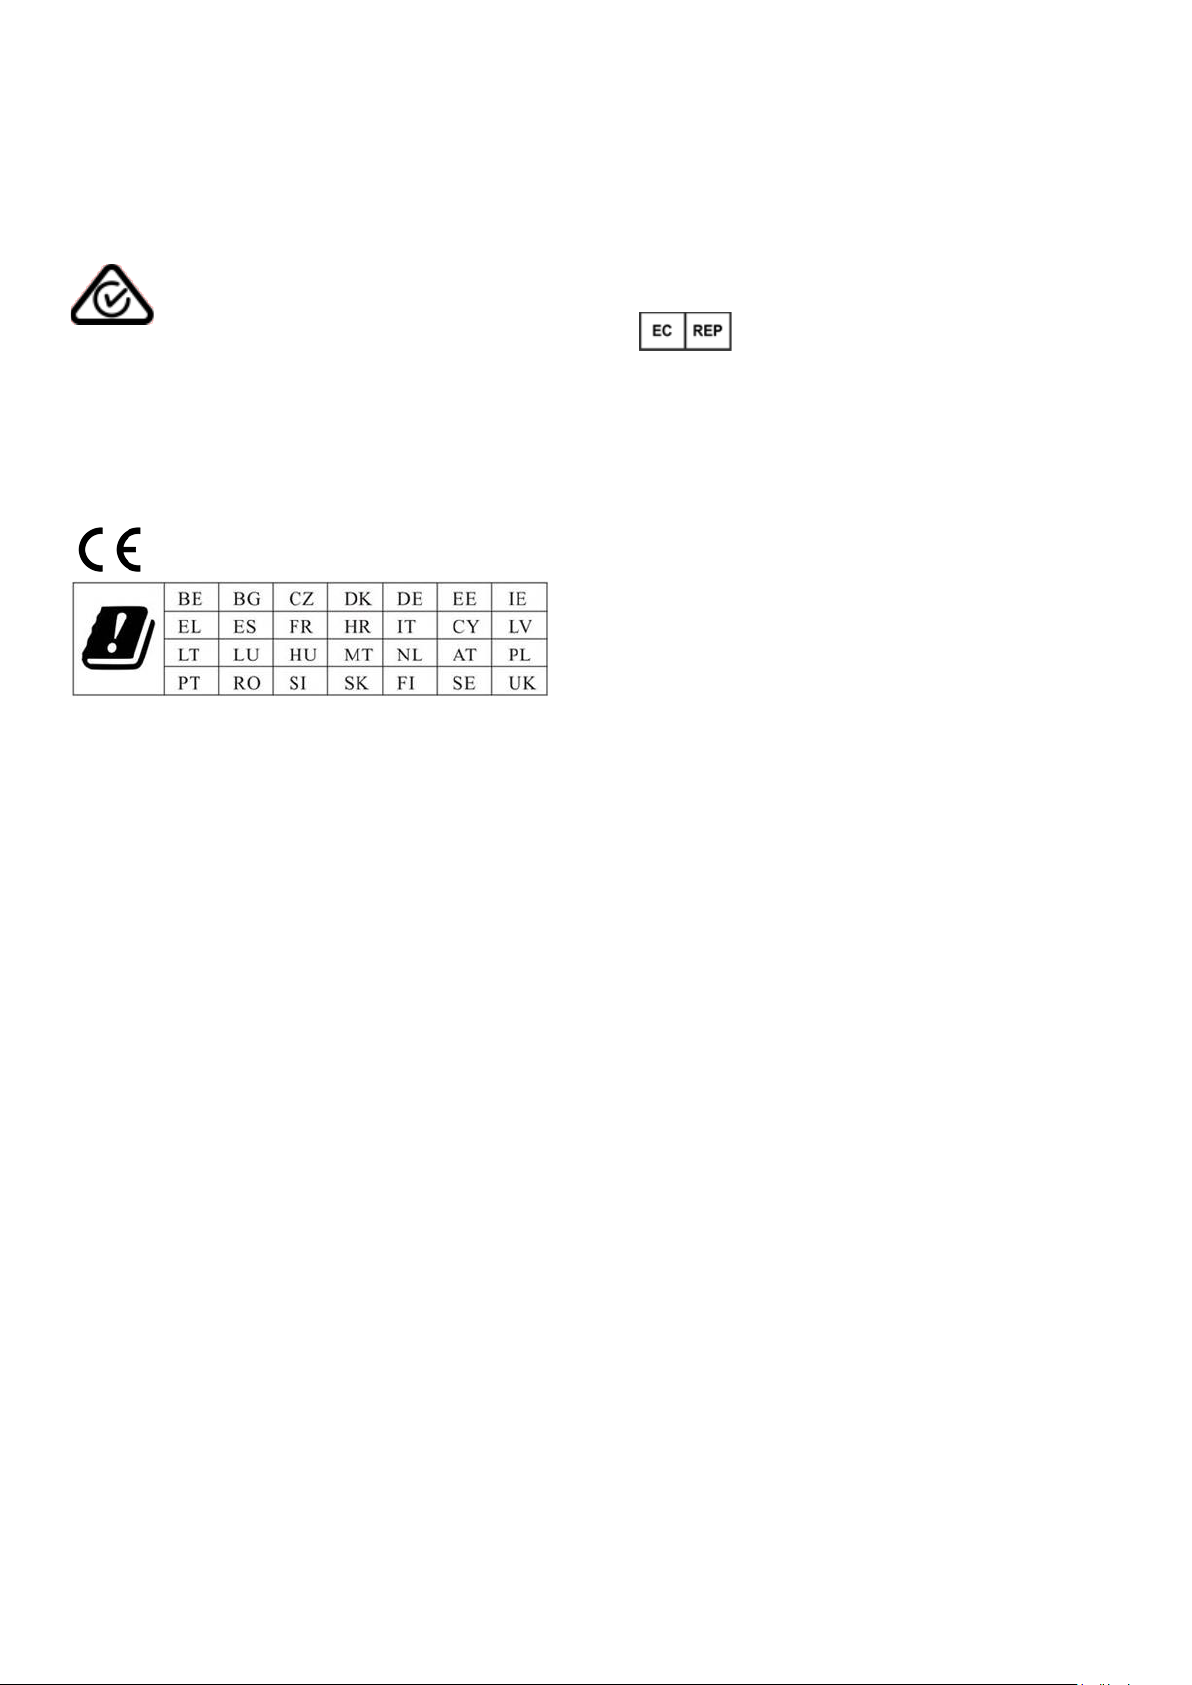
Regional compliance
Australia and New Zealand
This product conforms with the regulatory
requirements of the Australian Communications and Media
Authority (ACMA) Telecommunications, Radio
communications and EMC Labelling Notices, thus satisfying
the requirements for RCM marking and sale within Australia
and New Zealand.
Europe
European declaration of conformity
According to ISO / IEC Guide 22 and EN 450 14
Manufacturer’s Name: Trimble Inc..
Manufacturer’s Address: 935 Stewart Drive, Sunnyvale CA
94085, USA
Declares, under our sole responsibility, that the product:
Product Name: Nomad 5
Model Number: 121500
Conforms to the following Product Specifications:
- RED 2014/53/EU LVD 2014/35/EU EMC 2014/53/EU RED
- ETSI EN 300 328
- ETSI EN 300 893
- ETSI EN 303 413
- ETSI EN 301 489-1
- ETSI EN 301 489-3
- ETSI EN 301 489-17
- EN 55032: 2012+AC: 2013
- EN 55024: 2010+A1:2015
- EN 60950-1:2006/A11:2009/A1:2010/
- EN 62368-1:2014
Supplementary information
In addition, the product is battery powered and the power
supply provided with this product has been certified to IEC
60950: 2005 2nd editi on +Am1:2009+Am2: 2013/ IE C 62368-1:
2014. As manufacturer, we declare under our sole
responsibility that the equipment follows the
Standards stated above.
Importer of Record
provisions of the
Trimble European Regional Fulfillment Center
Meerheide 45
Trimble EC
65479 Raunheim
Germany
55521DZ Eersel
Trimble Germany Am Princ Parc 11
Netherlands.
CAUTION - Only approved accessories may be used with this
equipment. In ge n eral, al l cabl es must be high qual ity,
correctly terminated and normally restricted to two
Power supplies approved for this product emplo y special provisions to
avoid radio interference and
Unapproved
these instructions for use may void authorization by the authorities
operate the equipment.
This Trimble product has been tested and found to comply with all
requirements for CE Marking and sale within the European Economic
Area (EEA). The device has Bluetooth and wireless LAN approval and
satisfies the requirements for Radio and Telecommunication Terminal
Equipment specified by European Council Directive 2014/53/EU. These
requirements provide reasonable protection against harmful
interference when the equipment is operated appropriately in a
residential or commercial environment.
The device is intended for connection to European Networks
Caution:
Risk of explosion if battery replaced by an incorrect type.
Dispose of used batteries according to the instructions.
Make sure the temperature for adapter will not be higher than
40 ˚C.
Canada
Contains IC ID: 5817A-EM7455/ 5817A-QCNFA324
This digital apparatus does not exceed the Class B limits for radio
noise emissions from digital apparatu s as set out in the radio
interference regulations of the Canadian Department of
Communications.
Le présent appareil numérique n'émet pas de bruits
radioélectrique s dépassant le s limites applicab le s aux appareils
numériques de Classe B prescrites dans le règlement sur le
brouillage radioélectrique édicté par le Ministère des
Communications du Canada.
Changes and modifications not expressly approved by the
manufacturer or registrant of this equipmen t can void your
authority to operate this equipment under Industry Canada rules.
Les changements et modifications non expressément approuvés
par le fabricant ou le détenteur de cet
modifications or operations beyond or in conflict with
should not be altered or substituted.
Logistics Manager
shielded,
meters in length.
to
Page 4

Trimble Nomad 5 Handheld User Guide | 4
équipement peuvent annuler votre droit à utiliser cet
appareil en vertu des règles d'Industrie Canada.
Antenna Statement
Under Industry Canada regulations, this radio transmitter
may only operate using an antenna of a type and maximum
(or lesser) gain approved for the transmitter by Industry
Canada. To reduce potential radio interference to other
users, the antenna type and its gain should be so chosen
that the equivalent isotropically radiated power (e.i.r.p.) is
not more than that necessary for successful
communication.
SAR is measured with the device at 0 mm to the extremity, while
transmitting at the highest certified output power level in all
frequency bands of the device.
The maximum SAR value is 0.58 (WLAN) / 3.34 (WWAN) W/kg
(extremity) averaged over 10 gram of tissue.
This equipment should be installed and operated with a minimum
distance of 0 cm between the radiator and your extremity. This
device and its antenna(s) must not be co-located or operating in
conjunction with any other antenna or transmitter. The County
Code Selection feature is disabled for products marketed in the
US/Canada.
Conformément à la réglementation d'Industrie Canada, le
présent émetteur radio peut fonctionner avec une antenne
d'un type et d'un gain maximal (ou inférieur) approuvé pour
l'émetteur par Industrie Canada. Dans le but de réduire les
risques de brouillage radioélectrique à l'intention des
autres utilisateurs, il faut choisir le type d'antenne et son
gain de sorte que la puissance isotrope rayonnée
équivalente (p.i.r.e. ) ne dépasse pas l'intens ité néces saire
à l' établ i ssement d'une communication satisfaisante.
Licence exempt
This device complies with Industry Canada licence-
exempt RSS standard(s). Operation is subject to the
following two conditions:
1.
this device may not cause interference, and
2.
this device must accept any interference, including
interference that may cause undesired operation of
the device.
Le présent appareil est conforme aux CNR d'Industrie
Canada applicables aux appareils radio exempts de
licence. L'exploitation est autorisée aux deux conditions
suivantes :
1.
l'appareil ne doit pas produire de brouillage, et
2.
l'utilisateur de l'appareil doit accepter tout brouil lage
radioélectrique subi, même si le brouillage est
susceptible d'en compromettre le fonctionnement.
This Class B digital apparatus complies with Canadian
ICES- 003.
Cet appareil numérique de la classe B est conforme à la
norme NMB-003 du Canada.
This Category II radio communication device complies
with Industry Canada Standard RSS-310.
Ce dispositif de radiocommunication de catégorie II
respecte la norme CNR-310 d’Industrie Canada.
IC S AR wa rning
Radio Frequency (RF) Exposure Informat ion
The radiated output power of the Wireless Device is below the
Industry Canada (IC) radio frequency exposure limits. The Wireless
Device should be used in such a manner such that the potential
for human contact during normal operation is minimized.
This device has been evaluated for and shown compliant with the
IC Specific Absorption Rate (“SAR”) limits whe n installed in
specific host products operated in portable exposure conditions.
Informations concernan t l'expos it ion aux fréquences radio (RF)
La puissance de sortie émise par l’appareil de sans fil est
inférieure à la limite d'exposition aux fréquences radio d'Industry
Canada (IC). Utilisez l’appare il de sans fil de façon à minimiser les
contacts humains lors du fonctionnement normal.
Ce périphérique a été évalué et démontré conforme aux limites
SAR (Specific Absorption Rate – Ta ux d'absor ption sp écifique) d'IC
lorsqu'il est installé dans des produits hôtes particuliers qui
fonctionnent dans des conditions d'exposition à des appareils
portables.
The device could automatically discontinue transmission in case
of absen ce of i nformation to t ransmit, or operational failure. Note
that this is not intended to prohibit transmission of control or
signaling information or the use of repetitive codes where required
by the technology.
The device for the band 5150-5250 MHz is only for indoor usage to
reduce potential for harmful inter ference to co- channel mobile
satellite systems; the maximum antenna gain permitted (for
devices in the bands 5250-5350 MHz and 5470-5725 MHz) to
comply with the e.i.r.p. limit; and The maximum antenna gain
permitted (for devices in the band 5725-5850 MHz) to comply with
the e .i.r.p. limits spec ified for poin t -to-point and non-point-to-point
operation as appropriate, as stated in section A9.2(3). In addition,
High- power radars are allocated as primary users (meaning they
hav e priority) of the band 5250-5350 MHz and this radar could
cause interference and/or damage to LE-LAN devices.
IMPORTANT NOTE: IC Radiation Exposure Statement
This EUT is compliant with SAR for general
population/uncontrolled exposure limits in IC RSS-102 and
had been tested in accordance with the measurement
methods and procedures specified in IEEE 1528.
U.S.
Contain FCC ID: S9E-EM7455/ S9E-QCNFA324
FCC Compliance Statement
Page 5

Trimble Nomad 5 Handheld User Guide | 5
This equipment has been tested and found to comply
with the limits for a Cl a s s B digi tal de vice p ur sua n t t o
Part 15 of the FCC Rules. Operation is subject to the
following two conditions: (1) this device may not cause
harmful interference, and (2) this device must accept
any interference received, including interference that
may cause undesired operation.
This equipment generates, uses, and can radiate radio
frequency energy and, if not installed and used in
accordance with the instructions may cause harmful
interference to radio communication. However, there is
no guarantee that interference will not occur in a
particular installation. If this equipment does cause
harmful interference to radio or television reception,
which can be determined by turning the equipment off
and on, the user is encouraged to try to correct the
interference by one or more of the following measures:
–
Reorient or relocate the receiving antenna.
Increase the separation between the equipment
–
and the receiver.
Connect the equipment into an outlet on a circuit
–
different from that to which the receiver is
connected.
–
Consult the dealer or an experienced radio/TV
tec h nici a n for help.
Changes and modifications not expressly approved by
the manufacturer or registrant of this equipment can
void your authority to operate this equipment under
Federal Communications Commission rules.
The radios in this device have been designed and
manufactured to not exceed stipulated emission limits
for exposure to radio frequency (RF) energy as required
by the Federal Communications Commission of the U.S.
Gov e rnmen t 4 7 C.F.R . § 2.10 9 1 and 2.1093.
Operation on the 5.15-5.25GHz frequency band is
restricted to indoor use only. The FCC requires indoor
use f or t h e 5.15- 5.25GHz band to reduce the potential
for h armf ul interferenc e to c o-channel Mobile Satellite
Systems.
Therefore, it will only transmit on the 5.25-5.3 5 G Hz ,
5.47- 5.725 GHz and 5.725 –5.850 GHz band when
ass ociated wi t h an acc e s s p oint (AP).
FCC Radiation Exposure Statement
SAR is measured with the device at 0 mm to the extremity,
while transmitting at the highest certified output power
level in all frequency bands of the device.
The maximum SAR value is 0.58 (WLAN) / 3.34 (WWAN)
W/kg (extremity) averaged over 10 gram of tissue.
extremity. Thi s device and its antenna (s) must not be co-located
or operating in conjunction with any other antenna or transmitter.
The County Code Selection feature is disabled for products
marketed in the US/Canada.
Limited Warranty Terms and Conditions
Product Li mite d Wa rra nty
Subject to the terms and conditions set forth herein, Trimble Inc.
(“Trimble”) warrants that for a period of two (2) years from
purchase this Trimble product (the “Product”) will substantially
conform to Trimble's publicly available
Product and that the hardware and any
of the Product will be
workmanship.
substantially free from defects in materials and
specifications for the
storage media components
date of
Accessing Labels
You can find E-label at below location
Settings->System->About tablet->Regulatory information
This equipment should be installed and operated wi th a
minimum distance of 0 cm between the radiator and your
Page 6

Trimble Nomad 5 Handheld User Guide | 6
Product Software
Product software, whether built into hardware circuitry as
firmware, provided as a standalone computer software
product, embedded in flash memory, or stored on magnetic or
other media, is licensed solely for use with or as an integ ral part
of the Product and is not sold. The terms of the end user
license agreement, as included below, govern the use of the
Product Software, including any differing limited warranty
terms, exclusions and limitations, which shall control over the
terms and conditions set forth in the limited Product
warranty.
Warranty Remedies
If the Trimble Product fails during the warranty period for
reasons covered by this limited warranty and you notify
Trimble of such failure during the warranty period, Trimble will
repair OR replace the nonconforming Product with new,
equivalent to new, or reconditioned parts or Product, OR
refund the Product purchase price paid by you, at Trimble’s
option, upon your return of the Product in accordance with
Trimble's product return procedures then in effect.
How to O bta in War ra nt y Servic e
To obtain warranty service for the Product, it is
recommended you contact your Trimble dealer. Alternatively,
you may contact Trimble to request warranty service by
emailing Repair_Services@Trimble.com. Please be prepared
to provide:
–
–
–
–
The customer service representative may need additional
information from you depending on the nature of the
problem.
your name, address, and telephone numbers;
product name, part number and serial number;
proof of purchase;
an explanation of the problem.
Warranty Exclusions and Disclaimer
This Product limited warranty shall only apply in the event and
to the extent that (i) the Product is properly and correctly
installed, configured, interfaced, maintained, stored, and
operated in accordance with Trimble's applicable operator's
manual and specifications, and; (ii) the Product is not modified
or misused. This Product limited warranty shall not apply to,
and Trimble shall not be responsible for, defects or
performance problems resulting from (i) the combination or
utilization of the Product with hardware or software products,
information, data, systems, interfaces, or devices not made,
supplied, or specified by Trimble; (ii) the operation of the
Product under any specification other than, or in addition to,
Trimble's standard specifications for its products; (iii) the
unauthorized installation, modification, or use of the Product;
(iv) damage caused by: accident, lightning or other electrical
discharge, fresh or salt water immersion or spray (outside of
Product specifications ); or exposure to environmental conditions for
which the Product is not intended; (v) normal wear and tear on
consumable parts (e.g., batteries); or (vi) cosmetic damage. Trimble
does not warrant or guarantee
of the Product or
free.
error
NOTICE REGARDING PRODUCTS EQUIPPED WITH
TECHNOLOGY CAPABLE OF TR ACKING SATELLITE SIGNALS FROM
SATELLITE BA SED AUGMENTATION SYSTEMS (SBAS)
EGN OS , GAGA N, MSAS AND LUCH), OMNISTAR,
GALILEO OR GLONASS SATELLITES, OR FROM IALA BEACON
SOURCES: TRIMBLE IS NOT RESPONSIBLE FOR
OR FAILURE OF OPERATION OF ANY SATELLITE BASED
POSITIONING SYSTEM OR THE
SATELLITE BASED POSITIONING
THE FOREGOING LIMITED WARRANTY TERMS STATE TRIMBLE’S
ENTIRE LI A BILITY, AND YOUR E XCLU S IVE
TO THE TRIMBLE PRODUCT. EXCEPT
PROVIDED HEREIN, THE PRODUCT, AND ACCOMPANYING
DOCUMENTATION AND
WITHOUT EXPRESS OR IMPLIED WARRANTY OF ANY KIND, BY EITHER
TRIMBLE
PRODUCTION, INSTALLATION, OR DIST RIBUT IO N, INC LUD I N G,
BUT NO T LIMI T E D TO, THE IMPLIED
MERCHANTABILITY AND FITNESS FOR A PARTICULAR PURPOSE,
TITLE, AND NONINFRINGEMENT.
WARRANTIES ARE IN LIEU OF ALL OBLIGATIONS OR LIABILITIES ON
THE PART OF TRIMBLE
WITH, ANY
DO NOT ALLOW LIMITATIONS ON DURATION OR THE EXCLUSION
OF AN IMPLIED WARRANTY, THE ABOVE LIMI TAT IO N MAY NOT
APPLY TO YOU.
Software, or that software components will operate
OR ANYONE WHO HAS BEEN INVOLVED IN ITS CREATION,
PRODUCT. BECAUSE SOME STATES AND JURISDICTIONS
the results obtained through the use
(WAAS,
BEIDOU, GPS,
THE OPERATION
AVAILABILITY OF ANY
SIGNALS.
AS OTHERWISE EXPRESSLY
MATERIALS ARE PROVIDED “AS-IS” AND
THE STATED EXPRESS
ARISING OUT OF, OR IN CONNECTION
REMEDIES, RELATING
WARRANTIES OF
Limita tion of L iability
TRIMBL E' S ENTIRE LI A BILITY UNDER ANY PROVISION HEREIN
SHALL BE LIMITED TO THE AMOUNT PAID BY YOU
TO THE MAXIMUM EXTENT PERMITTED
EVENT SHALL TRIMBLE OR ITS
INDIRECT, SPECIAL,
WHATSOEVER UNDER ANY CIRCUMSTANCE OR LEGAL THEORY
RELATING
ACCOMPANYING DOCUMENTATION AND MATERIALS,
(INCLUDING, WITHOUT LIMITATION, DAMAGES FOR LOSS
BUSINESS PROFITS, BUSINESS INTERRUPTION, LOSS OF DATA, OR
ANY OTHER PECUN IARY LOSS), REGA RDLESS OF
TRIMB L E HA S BEE N AD V IS ED OF THE
LOSS AND REGARDLESS OF THE
DEVE LOP S OR H AS
BECAUSE SOME
IN ANYWAY T O THE PRODUCTS, SOFTWARE AND
INCIDENTAL, OR CONSEQUENTIAL DAMAGE
DEVELOPED BETWEEN YOU AND TRIMBLE.
BY APPLICABLE LAW, IN NO
SUPPLIERS BE LIABLE FOR ANY
POSSIBILITY OF ANY SUCH
COUR SE O F DEA L I N G WHICH
FOR THE PRODUCT.
OF
WHETHER
Page 7

Trimble Nomad 5 Handheld User Guide | 7
STATES AND JURISDICTIONS DO NOT ALLOW TH
E
EXCLUSION OR LIMITA T I ON OF LIABILI TY FOR
CONSEQUENTIAL OR INCIDENTAL DAMAGES, THE ABOVE
LIMITATI ON MAY N OT A P PLY TO Y O U.
NOTE: THE ABO VE TRI MB LE LIMI TED WARRA NTY
PROVISIONS WILL NOT APPLY TO PRODUCTS PURCHASED IN
THOSE JURISDICTIONS (E.G., MEMBER STATES OF TH
E
EUROPEAN ECONOMIC AREA) IN WHICH PRODUCT
WARRANTIES ARE THE RESPONSIBILITY OF THE LOCAL
DEALER FROM WHOM THE PRODUCTS ARE ACQUIRED. IN
SUCH A CASE, PLEASE CONTACT YOUR TRIMBLE DEALER
FOR APPLICABLE WARRANTY INFORMATION.
Notice to Australian Purchasers - The Australian
Consu mer Law
Our goods come with guarantees that cannot be excluded
under the Australian Consumer Law. You are entitled to a
replacement or refund for a major failure and for
compensation for any other reasonably foreseeable loss or
damage. You are also entitled to have the goods repaired or
replaced if the goods fail to be of acceptable quality and the
failure does not amount to a major failure.
Trimble's warranty, as set out in the user manual
accompanying this statement, or as described in the
warranty card accompanying the Product you purchased, is in
addition to any mandatory rights and remedies that you may
have under the Australian Consumer Law.
Official Language
THE OFFICIAL LANGUAGE OF THESE TERMS AND
CONDITIONS IS ENGLISH. IN THE EVENT OF A CONF LICT
BETWEEN ENGLISH A ND OTHER LANGUAGE VERSIONS,
ENGLISH LANGUAGE SHALL CONTROL
THE
End User License Agreement for Product
Software
IMPORTANT, READ CAREFULLY. THIS END USER LICENSE
AGREEMENT (“EULA”) IS A LEGAL AGREEMENT BETWEEN
YOU AND Trimble Inc. (“Trimble”) and applies to the computer
software provided with the Trimble product purchased by you
(whether built into hardware circuitry as firmware, embedded
in flash memory, or stored on magnetic or other media), or
provided as a stand-alone computer software product, and
includes any accompanying written materials such as a user's
guide or product manual, as well as any "online" or electronic
documentation ("Software" or “Product Software”). This EULA
will also apply to any Software error corrections, updates and
upgrades subsequently furnished by Trimble, unless such are
accompanied by different license terms and conditions, which
will govern their use. You have acquired a Trimble Product
("Device") that includes Software, some of which was licensed
by Trimble from Microsoft Corp o ration or its af filiate s
(colle ct i vely " M icrosoft"). T h e S o f tware licensed from
Microsoft, as well as associated updates, supplements,
internet-based services and support services, media, printed
mat e r i als, a n d "online" or elect ronic do c u m e ntation
Software") , are protecte d under this EULA. The
protected by copyright l aws and
international copyright treaties, as
("Microsoft
Software is also
well as other intellectual property laws and treaties. The Software is
licensed, not sold.
BY USING THE SOFTWARE, INCLUDING USE ON THIS DEVICE,
YOU ACCEPT THESE TERMS. IF YOU DO NOT
NOT USE THE DEVICE OR SOFTWARE.
FOR A REFUND OR CREDIT. As
INSTEAD CONTACT TRIMBLE
ACCEPT THEM, DO
described below, using some features also operates as y our consent to
the transmission of certain standard computer
Internet-based services.
WARNING - If t h e S oftw are co nt ains voice
information for
operated
technologies, then operating this Software requires user attention.
Diverting attention away from the road while driving can possibly cause
an accident or other serious consequence. Even occasional, short
diversions of attention can be dangerous if your
diverted away from your driving task at a
Microsoft make no
representations, warranties or other
critical time. Trimble and
attention is
determination s that ANY use of this Software is legal, safe, or in any
manner recommended or intended while driving or ot her wi se
operating a motor vehicle.
1
SOFTWARE
1.1
LIMITED WARRANTY FOR TRIMBLE PRODUCT
Limited Warranty. Trimble warrants that the Software,
exclusive of the Microsoft Software, will perform substantially
in
accordance with the accompanying written materials for a period of
twelve (12) months from the date of purchase. This limited warranty
gives you specific legal rights; you may have
state/jurisdiction to state/jurisdiction.
does not apply to Fixes, Minor
Updates, or Major Upgrades of the
others, which vary from
The above limited warranty
Software after expiration of the twelve (12) month limited warranty
period, all of which are provided “AS IS” and without warranty unless
otherwise
specified in writing by Trimble. Because the Software is
inherently complex and m ay not be completely fre e of
nonconformities, defects or errors, you are advised to verify your work.
Trimble does not warrant that the Software will operate error free or
uninterrupted, will meet your needs or
nonconformities c a n or will be corrected.
1.2
Software Fixes. During the limited warranty period
expectations, or that all
described in section 1.1 above, you will be entitled to receive such
Fixes to the Product Software that Trimble releases and
commercially available and for which it does not
subject to the procedures for delivery to
products generally. If you have
purchasers of Trimble
purchased the Product from an
makes
charge separately,
authorized Trimble dealer rather than from Trimble directly, Trimble
may, at its option,
Page 8

Trimble Nomad 5 Handheld User Guide | 8
forward the software Fix to the Trimble dealer for final
distribution to you. Minor Updates, Major Upgrades, new
products, or substantially new software releases, as identified
by Trimble, are expressly excluded from this update process
and limited warranty. Receipt of Software Fixes or other
enhancements shall not serve to extend the limited warranty
period.
For purposes of this warranty the following definitions shall
apply : (1) "Fix(es)" means an error correction or other update
created to fix a previous software version that does not
substantially conform to its Trimble s pecific ations ; (2) "Minor
Update" occurs when enhancements are made to current
features in a software program; and (3) "Major Upgrade"
occurs when significant new features are added to software,
or when a new product containing new features replaces the
further development of a current product line. Trimble
reserves the right to determine, in its sole discretion, what
constitutes a Fix, Minor Update, or Major Upgrade.
1.3
Customer Remedies. Trimble’s and its suppliers’
entire liability, and your sole remedy, with respect to the
Software sh al l be either, at Trimble’s option, (a) repair or
replacement
paid for any
warranty. This
has resulted
misapplication; (2)
of the Software, or (b) return of the license fee
Software that does not meet Trimble’s limited
limited warranty is void if failure of the Software
from (1) accident, misuse, abuse, or
alteration or modification of the Software
without Trimble’s authorization; (3) interaction with software
or hardware not
improper,
maintenance or
this EULA. Any
supplied or supported by Trimble; (4) your
inadequate or unauthorized installation,
storage; or (5) if you violate the terms of
replacement Software will be warranted for
the remainder of the original warranty period or thirty (30) days,
whichever is
1.4
EXTENT
AND ITS
longer.
NO OTHER WARRANTIES. TO THE MAXIMUM
PERMITTED BY APPLICABLE LAW, TRIMBLE
SUPPLIERS DISCLAIM ALL OTHER WARRANTIES,
TERMS AND CONDITIONS, EIT H ER EXPRESS O R IMPLIED, BY
STATUTE,
COMMON LAW OR OTHERWISE, INCLUDING
BUT NOT LIMITED T O, I M P LI ED WA RR A N T IE S, TE RMS
AND
CONDITIONS OF MERCHANTABILITY AND FITNESS
FOR A PARTICULAR PURPOSE, TITLE, AND
NONINFRINGEMENT WITH REGARD TO THE SOFTWARE,
ITS SATISFACTORY
FAILURE TO PROVIDE
EXTENT ALLOWED BY
WARRANTIES, TERMS AND
ARE LIMITED TO NINETY
QUALITY AND THE PROVISION OF OR
SUPP OR T SER V I CE S. TO THE
APPLICABLE LAW, IMPLIED
CONDITIONS ON THE SOFTWARE
(90) DAYS. Y0U MAY HAVE OTHER LEGAL RIGHTS WHICH
VARY FROM STATE/JURISDICTION TO STATE/JURISDICTION.
NO WARRANTIES FOR THE MICROSOFT SOFTWARE. THE
MICROSOFT SOFTWARE is provided “AS IS” and with all faults,
AND TRIMBLE PROVIDES NO WARRANTY WITH RESPECT
THERETO. THE ENTIRE RISK AS TO SATISFACTORY QUALITY,
PERFORMANCE,
ACCURACY AND EFFORT (IN C LUDI N G LACK OF
FOR THE MICROSOFT SOFTWARE IS WITH
NO WARRANTY AGAINST
INT
ERFERENCE WITH YOUR ENJOYMENT
YO U. ALSO, THERE I S
OF THE MICR OS OF T SOFTWAR E OR AGAINST INFRINGEMEN T.
1.5
PLEASE NOTE: THE FOREGOING TRIMBLE LIMITED
WARRANTY PROVISIONS MAY NOT APPLY TO SOFTWARE
LICENSES PURCHASED IN THOSE
JURISDICTIONS (SUCH AS
NEGLIGENCE)
PRODUCT
COUNTRIES OF THE EUROPEAN UNION) IN WHICH PRODUCT
WARRANTIES ARE OBTAINED
SUCH CASES, PLEASE
APPLICABLE WARRANTY INFORMATION.
2
2.1
TRIMBLE LIMITATION OF LIABILITY
LIMITATION OF LIABILITY. TO THE MAXIMUM EXTENT
PERMITTED BY APPLICABLE LAW, IN NO EVENT SHALL
OR ITS SUPPLIERS BE LIABLE FOR ANY SPECIAL,
FROM THE LOCAL DISTRIBUTOR. IN
CONTACT YOUR TRIMBLE DEALER FOR
TRIMBLE
INCIDENTAL,
INDIRECT, CONSEQUENTIAL OR PUN I TIVE DAMAGES HOWEVER
CAUSED AND REGARDLESS OF THE
(INCLUDING, WITHOUT LIMITATION,
BUSINESS PROFITS, BUSINESS
INFORMATION, OR ANY
THE USE OR
OF
OR FAILURE TO PROVIDE SUPPORT SERVICES, EV EN IF
INABILITY TO USE THE SOFTWARE, OR THE PROVISION
OTHER PECUNIARY LOSS) ARISING OUT OF
THEORY OF LIABILITY
DAMAGES FOR LOSS OF
INTERRUPTION, LOSS OF BUSINESS
TRIMBLE HAS BEEN ADVISED OF THE POSSIBILITY OF SUCH
DAMAGES AND NOTWITHSTANDING ANY FAILURE OF
ESSENTIAL PURPOSE OF ANY EXCLUSIVE REMEDY PROVIDED
IN THIS EULA.
IN NO EVENT SHALL THE TOTAL CUMULATIVE LIABILITY OF
AND ITS SUPPLIERS IN CONNECTION WITH THIS
SOFTWARE, WHETHER BASED ON CONTRACT,
(INCLUDING NEGL IG EN CE), STRICT
TRIMBLE
EULA OR THE
WARRANTY, TORT
LIABILITY OR OTHERWISE,
EXCEED THE ACTUA L AMOUNT PAID TO TRIMBLE FOR THE SOFTWARE
LICENSE GIVING RISE
AND
JURISDICTIONS DO NOT ALLOW THE EXCLUSION OR
TO THE CLAIM. B E CAUSE SO ME STA T ES
LIMITATION OF LIABILITY FOR CONSEQUENTIAL OR
INCIDENTAL DAMAGES, THE ABOVE LIMITATION MAY NOT
TO YOU.
3
3.1
GENERAL
This EULA shall be governed by the laws of the State of
California and applicable United States Federal law without
to “conflict of laws” principles or provisions. The
United N ation s
APPLY
reference
Convention on Contracts for th e I nter n at ional Sale of Goods will
not apply to this EULA.
action arising
from or related to this EULA or the Software shall lie
Jurisdiction and venue of any dispute or c
ourt
exclusively in or be transferred to the courts the County of Sant a Clara,
California, and/or the United States District Court for the Northern
District of California. You hereby consent and agree not to contest,
such jurisdiction, venue
and governing law.
Page 9

Trimble Nomad 5 Handheld User Guide | 9
3.2
Section 3.1 notwithstanding, if you acquired this
product in Canada, this EULA is governed by the laws of the
Province of Ontario, Canada. In such case each of the parties to
this EULA irrevocably attorns to the jurisdiction of the courts of
the Province of Ontario and further agrees to commence any
litigation that may arise under this EULA in the courts located in
the Jud
icial District of York, Province of Ontario. If y
this product in the European Union, this EULA is
ou
acquired
governed by
the laws of The Netherlands, excluding its rules governing
conflicts of laws and excluding the United Nations Convention on
the International Sale of Goods. In such case each of the parties
to this EULA irrevocably attorns to the
of The Netherlands and further
litigation that may arise under this
Hague, The Netherlands.
3.3
EULA.
this
3.4
and of
Trimble reserves all rights not expressly granted by
Official Language. The official language of this EULA
any documents relating thereto is English. For purposes
jurisdiction of the courts
agrees to commence any
EULA in the courts of The
of interpretation, or in the event of a conflict between English
and versions of this EULA or related documents in any other
language, the English language version shall be controlling.
Page 10

Trimble Nomad 5 Handheld User Guide |
Safety information
12
1 Introduction
19
Parts of the Nomad 5 handheld
22
2 Basic setup and operation
24
Waking and unlocking the device
30
Contents
Battery safety
Power supply safety
Touchscreen glass
Service safety
Safe environments of use
Distraction
Telecommunications & Internet Association (TIA)
SAR
Caring for your device
Cleaning
Touchscreen care
Battery care
Product specifications
12
13
13
14
14
14
14
15
15
15
15
16
17
Registration
Configuration options
In the box
Replacement and spare or optional accessories
20
20
20
20
Installing and removing a battery
Install ing a battery
Removing a battery
Inserting SD and SIM cards
Tet h er ing t h e stylus
Install ing a screen protector
Attaching the handstrap
Setting up your Nomad 5 handheld for the first time
Charging and power modes
Charging the battery
LED charging status
Turning the device on
About Sleep state
24
25
25
25
26
27
28
28
29
29
30
30
30
Page 11

Contents
Trimble Nomad 5 Handheld User Guide | 10
Restarting the device
31
Display settings: auto rotation
36
3 Using the Android operating system
37
Navigation and the status bar
39
Airplane mode
43
5 Using accessories and connecting to other devices
45
Turning off the device
Checking the battery level
Making your battery last longer
Interacting with the device
Using the touchscreen
Using the onscreen keypad
Using the stylus
USB mouse and keyboards
Display settings: adjusting the backlight
31
31
32
33
33
35
35
35
35
Using Accounts
Using the Home screens
Adding apps to a Home screen
Removing apps from a Home screen
Using Apps
37
38
38
38
39
4 Using wireless networks
Working with Wi-Fi networks
Connecting to Wi-Fi
Disconnecting from Wi-Fi
Forgetting a Wi-Fi network
Advanced Wi-Fi settings
Working with mobile broadband
Using mobile data
Locating the device's IMEI number
40
40
40
41
41
41
42
42
43
Using t he charging cradle
Connecting to USB accessories
Using Bluetooth wireless technology
Turning Bluetooth on or off
Pairing and connecting a Bluetooth device with the Nomad 5 handheld
Transferring data between your Nomad 5 handheld and another computer
Transferring data using a micro USB Cable
Using EMPOWER modules
45
45
46
46
46
47
47
48
Page 12

Contents
Trimble Nomad 5 Handheld User Guide | 11
Install ing EMP O WE R modules
49
6 Using the cameras
50
Viewing photos and videos
51
Getting more apps
54
8 Troubleshooting, downloading updates, and repair
55
Repairing your device
61
Ta king p h ot os and videos
Changing camera settings
Advanced camera settings
50
51
51
7 Using the p re-in stalled app s
Trimble EMPOWER Hub
Trimble GNSS Status utility
Bundled Google apps
52
52
52
53
Troubleshooting
Performance issues
EMPOWER module issues
Wireless connectivity issues
Power and battery issues
Restartin g or resetting the operating system
Operating system and software updates
Android 8.1 updates
Software downloads and updates
55
55
57
57
58
59
60
60
61
Page 13

Trimble Nomad 5 Handheld User Guide | 12
1
Safety information
Batter y saf ety
Power supply safety
Touchscreen glass
Service safety
Safe environments of use
Distraction
Teleco m mu nic at io ns & Int er n et Association (TIA)
SAR
Caring for y our devi ce
Read this guide for important safety and health information and the terms of the Limited
Warranty that apply to the Trimble
printed guides for future reference. Failure to follow instructions and properly set up, use,
and care for this product can increase the risk of serious injury or death, or damage the
device or devices.
®
Nomad 5 handheld that you have purchased. Keep all
Battery safety
Lithium-Ion batteries are classified by the U. S. Federal Government as non-hazardous
waste and are safe for disposal in the normal municipal waste stream. These batteries
contain recyclable materials and are accepted for recycling. Dispose of used batteries in
accordance with local regulations.
WARNING – Non-approved batteries will not function in the device. Use only the
battery for the system for which it was specified. Only use the battery with a charging
system that has been qualified with the system per this standard. Use of an unqualified
battery or charger may present a risk of fire, explosion, leakage, or other hazard.
Page 14

Trimble Nomad 5 Handheld User Guide | 13
Safety i nformation
WARNING – There are no user-serviceable parts in the batteries. Do not
disassemble or open, crush, bend or deform, puncture, or shred the battery. Do not
modify or remanufacture, attempt to insert foreign objects into the battery, immerse or
expose to water or other liquids, or expose to fire, explosion, or other hazard. Do not
expose to temperatures above +70 °C (+158 °F).
WARNING – Improper battery use may result in a fire, explosion, or other hazard.
Do not short circuit a battery or allow metallic or conductive objects to contact the
battery terminals.
Avoid dropping the device or battery. If dropped, especially on a hard surface, and
the user suspects damage to the battery, take it to a service center for inspection.
In the event of a battery leak, do not allow the liquid to come in contact with the skin
or eyes. If contact has been made, wash the affected area with large amounts of
water and seek medical advice.
Battery usage by children should be supervised.
Power suppl y safety
WARNING – Use only AC and vehicle adapters intended for the device. Other
external power sources may damage your product and void the warranty.
Ensure the input voltage on the adapter matches the voltage in your location.
Ensure the adapter has prongs compatible with your outlets.
The AC power supply is designed for indoor use only. Avoid using the AC power
supply in wet areas.
Unplug the power supply from power when not in use.
Do not short the output connector.
Touchscreen glass
CAUTION – The touchscreen on this device is made of glass. This glass could break
if the device is dropped on a hard surface or receives a significant impact. If the glass
chips or cracks, do not touch or attempt to remove the broken glass. Cracked or
chipped glass due to misuse or abuse is not covered under the product’s limited
warranty.
Page 15

Trimble Nomad 5 Handheld User Guide | 14
Safety i nformation
WARNING – Do not attempt to take apart, open, service, or modify the product,
accessories, or power supply. Doing so could present the risk of electric shock or other
hazard. Any evidence of any attempt to open and/or modify this device, including any
peeling, puncturing, or removal of any of the labels, will void the Limited Warranty.
Safe environments of use
Service safety
WARNING – Areas with potentially explosive atmospheres are often, but not
always, posted and can include fueling areas, such as below decks on boats, fuel or
chemical transfer or storage facilities, or areas where the air contains chemicals or
particles, such as grain dust, or metal powders. When you are in such an area, turn off
your mobile device, and do not remove or install battery chargers, AC adapters, or any
other accessory. In such areas, sparks can occur and cause an explosion or fire.
Distraction
WARNING – Using the device in some circumstances can distract you and may
cause a dangerous situation. Observe rules that prohibit or restrict the use of mobile
devices (for example, avoid operating the device while driving a vehicle).
Telecommunications & Internet A ssociation (TIA)
Hearing Aids: Some digital wireless phones may interfere with some hearing aids. In the
event of such interference, you may want to consult your service provider, or call the
customer service line to discuss alternatives.
Pacemakers and Other Medical Devices: The Health Industry Manufacturers Association
recommends a minimum separation of six inches be maintained between a handheld
wireless phone and a pacemaker to avoid potential interference with the pacemaker.
These recommendati ons are consistent with the independent research by and
recommendations of Wireless Technology Research. Persons with pacemakers should use
the ear opposite the pacemaker to minimize the potential for interference. If you have any
reason to suspect that interference is taking place, turn the phone OFF immediately.
If you use any other personal medical device, consult the manufacturer of your device to
determine if they are adequately shielded from external RF energy. Your physician may be
able to assist you in obtaining this information.
Page 16

Trimble Nomad 5 Handheld User Guide | 15
Safety i nformation
Turn the phone OFF in health care facilities when any regulations posted in these areas
instruct you to do so. Hospitals or health care facilities may be using equipment that could
be sensitive to external RF energy.
SAR
This device complies with FCC and CE standards when used as designed.
Caring for your device
Cleaning
Turn off the device, and disconnect it from external power. Use a soft, dampened cloth
with either water or a diluted mild detergent. If a mild detergent is used, ensure all soap
residue is removed. Do not use chemical cleaners.
Touchscre en care
The Nomad 5 handheld is extremely rugged, and is designed to withstand extreme
conditions and harsh treatment, however taking proper care of the touchscreen will
prolong the life and ensure optimal display performance of the touchscreen of this
product. Excessive or prolonged exposure to abrasives, oil, dust, chemicals, and ultraviolet
light can affect the performance of your touchscreen over time.
To hel p protect the screen:
Clean it frequently. Use a soft, lint-free cloth to wipe the screen. You can dampen the
cloth with water or an eyeglass cleaner. If the display is very dirty, it can be washed off
under a gently running tap.
WARNING – Make sure that all ports and doors are fully closed, and that the
device is not connected to an external power supply. Do not use chemical or
abrasive cleaners.
Keep it covered when not in use. Store the Nomad 5 handheld in a carry case or
pouch while you are in transit or not using it.
Keep it out of the sun when not in use. Do not store the Nomad 5 handheld in direct
sunlight for a long time unnecessarily. Ultraviolet light and excessive heat from sunloading heat can damage the display.
Use proper touchscreen tools. Use either fingers or the Nomad 5 handheld's stylus
pen, or other devices specifically designed for use with capacitive touchscreens to
operate the touchscreen of this device. The use of ballpoint pens, metal tools or other
Page 17

Trimble Nomad 5 Handheld User Guide | 16
Safety i nformation
sharp objects to operate the touchscreen may scratch and/or damage the surface of
the touchscreen.
Avoid drops, tumbles, and abrasives. The Nomad 5 handheld is designed to resist
damage for drops up to 122 cm (4 feet). However, you should protect the display from
impact, pressure, and abrasive substances that can scratch it or crack it. The device
should not be dropped unnecessarily. Use the scr een protectors to keep the
touchscreen clean and protected, following the instructions provided on the screen
protector packaging.
Battery care
Use and storage temperature: Lithium-ion batteries are sensitive to high temperatures,
so keep the device's batteries out of direct sun for long periods, and do not leave batteries
in a hot car, especial l y on a dashboard in full sun or other environments where
temperatures can exceed +70 °C (+158 °F) Battery life can be shortened if stored or
operated outside of these temperature ranges. Recommended storage temperature is at
room temperature (~ +20 °C / +68 °F). When you are using the device or charging the
batteries, it is normal for the device and batteries to get warm.
If the interior temperature of the device exceeds normal operating temperatures (for
example, in a hot car or in direct sunlight for extended periods of time), you may
experience the following as it attempts to regulate its temperature automatically:
The device stops charging.
If the device cannot regulate its internal temperature, it may go into a Sleep state until it
cools.
Move the device to a cooler location out of direct sunlight and wait a few minutes before
trying to use the device again.
Charging: Recharge the battery any time; the battery does not need to be empty or low
before you recharge it. However, it is best to let the battery run to below 10 percent at least
once a month before you recharge it . B at t ery r e ch argi n g is supported at temperatures
between 0 °C and +45 °C (+32 °F and +113 °F). Use only the manufacturer designated
charging accessories to recharge the batteries.
Other environmental conditions: The batteries are sealed from water and dust, and are
tested for protection from drops from heights up to 122 cm (4 feet). However to prolong
the life of the battery, dry it off with a cloth if it becomes wet, do not intentionally submerge
the battery, and take care to avoid unnecessary drops, mechanical shocks, and vibrations.
The Nomad 5 handheld is designed to work in ambient temperatures between -30 °C and
+60 °C (-22 °F and +140 °F) and to be stored in temperatures between -40 °C and +70 °C (40 °F and +148 °F). Avoid exposing the device to dramatic changes in temperature or
humidity.
Page 18

Trimble Nomad 5 Handheld User Guide | 17
Safety i nformation
Product specifications
Operating System
Processor
Graphics
RAM
User storage
Display
Batter y & Power
Android 8.1 (Oreo)
Qualcomm® SnapDragonTM 820 (APQ8096)
Kyro CPU, quad core, 64 -bit ARM V8, 2.2GHz,
w/PMIC PM8996+PMI8996 & Audio Codec WCD9335
Intel HD Graphics
4 GB
UFS 32 GB, expandable via microSD card up to 32 GB
5”
1280x720 pi xels
830 nit s ma x, sunlight readabl e
3200mA / 10.8 V (35 Whr)
Full charge time: < 4 hours; Fast charge (80%): 1.6 hours
I/O Charger / DC power input
USB 3 'Type C' Host/Client (data only)
Audio
Speaker
Microphone
3.5 mm mini-jack headset connector
Bluetooth
BT 2.1 + EDR, BT 4.1
10 metre effective range
Support s al l def ault Android 8.1 Bluetooth profile
Wi-Fi
802.11 a/b/ g/n/ac
Mobile broadband /
WWAN (optional)
Worldwide LTE in regions where it is available, and
compatible with 3G/2G networks.
AT&T certified (Verizon by exception if possible)
GNSS
Ubl o x N EO-M8T chipset
SBAS
GPS, GLONASS, Beidou.
Supports raw-data output for postprocessing.
Page 19

Trimble Nomad 5 Handheld User Guide | 18
Safety i nformation
Camera
Sensors
Environmental
Support s external antenna (MM CX connector, 3.3 V)
Front: 8 MP
Rear: 16 MP, LED Flash
Orient ati o n: 3-axis accelerometer, Magnetic sensor,
Gyroscope.
Touch: V ib ration motor.
Display: Ambient light sensor.
IEC: Independently tested and certified for:
Water and Dust Ingress Protection: IP65 & IP68 (IEC
standard 60529)
MIL-STD-810G. Ind ependently tested and certified for:
Operating temperature: -30 °C to +60 °C (-22 °F to +140
°F)
Storage temperature: -40 °C to +70 °C (-40 °F to +158 °F)
Humid environment storage and operation: 0%-95%
non-condensing conditions
High altitude storage 12192 m / 40,000 ft; and operation
4572 m / 15,000 ft.
Drop shock protection: 122 cm / 4 feet.
Page 20

Trimble Nomad 5 Handheld User Guide | 19
1
Introduction
Registration
Configuration options
In the box
Replacement and spare or optional accessories
Parts of the Nomad 5 handheld
This user guide describes how to configure and use the Trimble Nomad 5 handheld
powered by the Android
supplements the information in the Quick Start Guide, which you receive in the box with
the device.
®
8.1 Pro operating system. The information in this guide
Even if you have used other Trimble® handheld or field computers before, Trimble
recommends that you spend some time reading this guide to learn about the special
features of the product.
WARNING – Before you use this product, make sure that you have read and
understood all safety requirements. Failure to follow these safety instructions could
result in fire, electric shock, or other injury, or damage to the device and/or other
property. For more information refer to Safety information, page 12 of this guide.
Page 21

Trimble Nomad 5 Handheld User Guide | 20
1 Introduction
Registration
To receive information regarding updates and new products, contact your local dealer or
visit the Trimble customer registration website at www.trimble.com/register. When you
have registered, you can select the newsletter, upgrade, or new product information.
To register your device, you will need the serial number. The serial number is a unique
number for your Nomad 5 handheld and is located on a label inside the battery cavity.
Configuration opti ons
The Nomad 5 handheld is powered by the Android 8.01operating system, and is available
in the following main configurations:
Wi-Fi, Bluetooth® wireless technology, and 4G LTE Cellular data configurations
Wi-Fi and Bluetooth wireless technology configurations
For a full list of product features and their specifications, refer to the Product specifications,
page 17, or see you local Trimble reseller for information.
In the box
A standard pack-out has the following items:
A Nomad 5 handheld
A battery
Screen protector
AC power adaptor with cable and internation plugs
Accessory screwdriver, Allen key
Sty lus w ith tether
USB type C data cable
Handstrap kit
Replacement and spare or optional accessories
A wide range of replacement and optional accessories are available to purchase for the
Nomad 5 handheld, including:
AC Power Adapter (International)
Heavy Duty DC Vehicle Charger (10-32V)
Office Charging Dock
Page 22

Trimble Nomad 5 Handheld User Guide | 21
1 Introduction
Shoulder Sling
External GNSS Antenna
Tempered Glass Screen Protector (1-pack)
Spare Battery Pack
Quick Release Pole Mount
Quick Release Vehicle Soft Mount
Quick Release Vehicle Hard Mount
Handstrap
Fabric Car ry Case
Capacitive Stylus and Tether
Module Bay Cover
Docking I/O Module
Trimble EMPOWER modules
EMPOWER module
Trimble EM120 2.4GHz Module
Trimble EM100 GNSS Modu l e
P/N
Trimble EM111 1D/2D Barcode Imager & UHF 902-928 MHz RFID – NA 110236-00-1
Trimble EM111 1D/2D Barcode Imager & UHF 865.6-867.6 MHz RFID – EU 111974-00-1
The following Trimble EMPOWER modules are also available:
110238-00-1
110221-00-1
Page 23

Trimble Nomad 5 Handheld User Guide | 22
1 Front camer a
8
GNSS antenna
14 Module bay
7 Speaker
14
Battery release latches
20
1 Introduction
Parts of the Nomad 5 handhel d
2 Light sensor
3 Powe r LED
4 Powe r key
5 Keypad
6 Microphone
connector
9 Headset connector 15 Rear camera
10 USB co nnector
11 Dockin g con ne ct o r
(charging)
12 Power connector
13 Battery
16 Camera flash
17 Accessory mount s
18 SIM socket (under the
module bay)
19 microSD card socket
(under the module
bay)
Page 24

Trimble Nomad 5 Handheld User Guide | 23
1
4
1 Introduction
2
3
5
Page 25

Trimble Nomad 5 Handheld User Guide | 24
2
Basic setup and operation
Installing and removing a battery
Inserting SD and SIM cards
Tethering the stylus
Tetherin g the stylus
Attaching the handstrap
Setting up your Nomad 5 handheld for the first time
Charging and power modes
Interacting with the device
Display settings: adjusting the backlight
Displa y sett i ngs: auto ro tation
This section tells you how to get started using your Nomad 5 handheld and explains some
basic operating system features.
When you start your Nomad 5 handheld for the first time, the Android operating system
will take you through some basic set-up steps; follow the instructions on the screen.
Installing and removing a batter y
The battery in the Nomad 5 handheld can be charged inside the device using the
AC Adaptor and charging port or using the Charging Dock accessory (part number
xxxxxx-xx).
Page 26

Trimble Nomad 5 Handheld User Guide | 25
2 Basic setup and operation
Installing a battery
1. Insert the battery as shown; it automatically latches into place.
2. Slide the locking clip to the Locked position to lock the battery in place.
Removing a battery
1. Before replacing the battery, either plug the device into a power source or shut the
device down to prevent loss of data.
2. Slide the battery locking clip to the Unlocked position.
3. Slide the battery latch across, then eject the battery by lifting it up and out.
NOTE –
The Nomad 5 handheld consumes power even when the device is off. Depending on how
your system is configured, if the battery is fully charged, it will fully discharge in approximately the
following period of time:
When power is off - xx days
In Sleep mode - xx days
In Hibernation mode - xx days
Inserting SD and SIM cards
The device includes 32 GB of onboard storage. To expand the storage, use a microSD card.
SD cards up to up to 32 GB are supported.
If your Nomad 5 handheld is equipped with a 4G LTE modem, you will require a data plan
and microSIM card from your local cellular service provider to use cellular data. If you are
Page 27

Trimble Nomad 5 Handheld User Guide | 26
2 Basic setup and operation
unsure, check with your mobile operator. See Working with mobile broadband, page 42 for
CAUTION – The SD/SIM card door can be damaged if handled carelessly. Take care
not to twist or warp the door when opening or closing it.
more information.
1. If the device is on, turn it off; press and hold the Power key, then tap Power off.
2. Using a Phillips screwdriver, loosen the screws to remove the module bay cover from
the back of the device.
NOTE – If you are using an EMPOWER module, remove it in the same way.
3. Using a screwdriver, open the SD/SIM bay splash cover.
4. Slide the microSD card and the microSIM card into their respective slots, ensuring they
are correctly orientated.
5. Close the SD/SIM bay splash cover.
6. Replace the module bay cover, or if using a module, re-attach it. See Using EMPOWER
modules, page 48.
Tethering the stylus
Attach the stylus to the device to prevent accidentally dropping the stylus. The stylus is
supplied with one end of the tether cord pre-looped to the stylus. You can attach the
stylus to the left or the right side of the device. To tether the stylus to the device:
1. Take the loose end of the tether cord and push it through the tether point.
2. Feed the stylus through the loop and pull tight. If the handstrap accessory is fitted, slide
the stylus through the stylus loop on the hand strap.
Page 28

Trimble Nomad 5 Handheld User Guide | 27
2 Basic setup and operation
Installing a scr een protector
The Nomad 5 handheld is fitted with a chemically strengthened glass touchscreen which is
highly resistant to abrasion and impact damage. However to ensure maximum protection,
it is recommended that you use a Trimble-approved toughened glass Nomad 5 handheld
screen protector.
To ins tall a screen protector:
1. Place the device on a clean, flat surface. Make sure your hands are clean.
2. Clean the touchscreen with an alcohol wipe, clean damp cloth, or similar.
3. Polish and dry the screen to remove any dust with the lint-free cleaning cloth supplied.
4. Remove the protective film from the screen protector.
5. Align the screen protector with the top of the glass display. Use the edge of the keypad
as a guide. The screen protector should line up evenly with the edge of the keypad and
the edges of the device.
6. Carefully lay the screen protector down on the screen. If you make a mistake and the
glass looks off-center, you can gently lift it up and realign it. Then, once the protector is
on the screen, give it a soft press in the center and allow the adhesive surface to grip to
the screen naturally
7. If there are any bubbles remaining, use the cloth provided to gently smooth them
toward the edges of the screen protector.
For more information on where to purchase the correct screen protector for your device,
contact your local Trimble reseller.
Page 29

Trimble Nomad 5 Handheld User Guide | 28
2 Basic setup and operation
Attaching the handstrap
Attach one end of the handstrap to the bottom of the device, and the other end to the left
or the right side of the device, according to your personal preference.
It is easier to attach the handstrap to the mounting clip before you attach the mounting
clip to the Nomad 5 handheld.
1. Thread the handstrap ribbon through the handstrap mounting clip and tighten
securely.
2. Use an Allen key to attach the mounting clip to the Nomad 5 handheld on the left or
the right side, according to personal preference.
NOTE – You can atta ch a mo un t ing clip to both s ides of t h e Nomad 5 handheld if requi red.
3. Thread the other handstrap ribbon through the handstrap slot on the bottom of the
device and tighten securely.
Setting up your Nomad 5 handheld for the first time
The first time you use your Nomad 5 handheld, the Android operating system will guide
you through some basic setup steps.
Press the Powe r button to turn on th e handhel d. You’ll be prompte d to select a:
Language
Wi-Fi network
Google Account to use with your device.
You can sig n up for a Google Acco unt or use one that you already hav e.
Page 30

Trimble Nomad 5 Handheld User Guide | 29
2 Basic setup and operation
You already have a Google Account if you use an email address to sign in to any Google
product, for example:
Gmail
YouTube
Google Apps
Any other Google product
When you sign in with your Google Account, you'll have access to your email, contacts,
calendar events, and other data associated with that account. If you have multiple Google
Accounts, you can add the others later.
Charging a nd power modes
It takes approximately 4.5 hours to charge the Nomad 5 handheld battery from an empty
state. It may take longer if you are using your device for power-intensive activities, for
example using GNSS or processing a lot of data while you are charging it.
Charging the battery
You can charge the battery with the Nomad 5 handheld in the Charging Dock accessory, or
using the charging port directly on the Nomad 5 handheld.
To charge the battery using t he C hargin g D ock accessory:
1. Connect the appropriate international plug adapter for your region to the AC adapter.
2. Connect the power cord to the charging port on the Charging Dock accessory.
3. Plug the power supply into an electrical outlet.
4. Place the Nomad 5 handheld into the Charging Dock.
IMAGE
To charge the battery using the charging port on the Nomad 5 handheld:
1. Connect the appropriate international plug adapter for your region to the AC adapter.
2. Connect the power cord to the charging port on the device.
Page 31

Trimble Nomad 5 Handheld User Guide | 30
2 Basic setup and operation
3. Plug the power supply into an electrical outlet.
LED charging status
The charging status is shown with an LED on the front of the display.
☀ Red: charging error
☀
Orange: Nomad 5 handheld is charging.
☀
Green: Nomad 5 handheld is fully charged.
☀
Green - Flashing: Nomad 5 handheld is in Sleep state. - CHECK
Turning the device on
To turn on the device, press and hold the Power key until the
screen appears. Swipe up on the touchscreen to enter a PIN or password, if one has been
set.
Powered by Android
boot
About Sleep state
If you don’t use the Nomad 5 handheld for a few minutes, the screen turns off and the
device goes into a power-saving Sleep state. Sleep allows your device to resume quickly
when you want to start working again.
To force your device to Sl eep, briefly press th e P ower key.
Waking and unlocking the device
To wake the screen when it has turned off, press any key or swipe the screen.
To wake your device from Sleep state:
Page 32

Trimble Nomad 5 Handheld User Guide | 31
2 Basic setup and operation
1. Press the Power key, then swipe up from the bottom edge of the screen with your
finger.
2. Depending on your security settings, your device may be locked. To unlock it, at the
sign-in screen, enter your password, PIN, or unlcok pattern.
Restarting the device
To restart your device, press and hold the Power key until the Power menu appears, then
tap Restart.
Turning off the device
To turn off the device, press and hold the Power key until the Power menu appears, then
tap Power Off.
Checking the battery level
You ca n check the battery level :
on the Status bar. The battery status appears in the top-right corner of the Status bar.
To access the detailed battery level from the lock screen, swipe down from the top of
the display.
on the battery. For a spare battery, or a battery removed from the device, press and
hold the button on the battery to check the battery charge level.
Page 33

Trimble Nomad 5 Handheld User Guide | 32
2 Basic setup and operation
The LEDs on the battery will show one of the following:
= Empt y battery
= < 25 % charged
= 25 % - 50 % charged
= 50 % - 75 % charged
= 75 % - 100 % charged
Making your battery last longer
The Android 8.1 operating system includes a number of features to help you get the
maximum run time out of your battery. Here are some practical suggestions that you can
do to maximize the operating time of your Nomad 5 handheld:
Use battery saver mode. Battery saver mode can help make your Nomad 5 battery last
longer when it is running low. This mode reduces system performance and limits
vibration, location services, and most background data use.
NOTE – Battery saver turns off automatically when your device is charging.
Keep battery optimization on. To have apps use your device’s battery only when they
need to, keep battery optimization on for all apps. Battery optimization is on by default.
Stretch a low battery’s power. To help a dying battery last until you can plug in your
phone or tablet, first turn on battery saver mode. Often, battery saver is all you’ll need
for a low battery’s power to last until you can get to a charger. Stretch your remaining
Page 34

Trimble Nomad 5 Handheld User Guide | 33
2 Basic setup and operation
battery power with temporary changes to your settings/usage.
TIP – You'll want to turn y our features back o n w hen you rec harge.
Avoid high-drain activities (for example, heavy screen use, heavy data processing).
Limit connectivity (for example, turn on Airplane mode, turn off Bluetooth). See
Using wireless networks, page 40.
Limit location data (for example, turn on GPS battery saving mode, turn off
Location services).
Limit automatic syncing (for example, turn off auto-sync for your Google account,
turn off auto-sync for certain Google apps).
Unplug USB devices. Many USB devices use power just by being connected. If you use
a USB flash drive, unplug it when you are not using it.
Turn off EMPOWER modules if you will not be using them for a prolonged period.
Refer to the mod ule docum entation ava i l able he re:
www.trimble.com/empowermodules.
Turn off the handheld computer when you are not using it. See Turning off the
device, page 31.
For more information on making your battery last longer, refer to the help topic Get the
most life from your battery on the support site on google.com.
Interacting wit h the device
Your Nomad 5 handheld can be easily operated with the touchscreen, an onscreen
keypad, or a USB keyboard and/or mouse. You can easily switch between these input
methods.
Using the touchscreen
You can use your fingers or a stylus on the touchscreen, the same as you would on a
smartphone. The table below describes the main touchscreen input gestures and
functions supported on this device.
Tap
Tap once on
something.
Tap to type.
Select or start something on your device.
To enter text, tap where you want to type; the
onscreen keypa d displays.
Press and
hold
Press and hold your
finger or the stylus
Shows a menu with options related to what you’re
doing (like right-clicking with a mouse). On the pop-
Page 35

Trimble Nomad 5 Handheld User Guide | 34
2 Basic setup and operation
Slide / swipe
Drag
down for a few
seconds.
Slide / swipe your
finger or the stylus
across the screen.
Drag your finger or
the stylus across the
screen.
up menu that appears, tap the action you want to
perform.
Scrolls through what’s on the screen. Quickly move
your finger across the surf ace of the screen,
without pausing when you first touch it, to scroll a
page or a list up or down. Scrolls vertically or
horizontally.
Swipe a Home screen left or right to see your other
Home screens.
Hold your finger or the stylus on an item for a
moment and then, without lifting your finger/the
sylus, move across the screen until you reach the
target position.
Drag in a list to select multiple items.
Drag items on the screen to reposition them.
Pin ch /
stretch
Rotate
Swipe from
top
Pinch your thumb
and forefinger
together or move
them apart.
Put two or more
fingers on an item
and then turn your
hand.
Swi p e d ow n f r o m t h e
top of the s creen.
Zooms in or out of a website, map, or picture.
Displays the Notifications bar.
Page 36

Trimble Nomad 5 Handheld User Guide | 35
2 Basic setup and operation
Using the onscreen keypad
You can type on the device using the touchscreen keypad. To access the onscreen keypad,
tap in a text field. To hide the keypad, tap anywhere out of the text field.
Using the stylus
Take notes, draw, navigate, and mark up documents in your apps using the stylus that
comes with your device. To make a selection, tap the screen once on the item you want to
select. To display a right-click menu, tap and hold an item on the screen, then tap the
require d m enu item.
NOTE –
Trimble recommends that you use the Trimble Nomad 5 handheld stylus accessory. There
are many other capacitive touch styli available that will work with the Nomad 5 handheld as long as
they have a rubber tip; however the stylus available as an accessory is tuned for the Nomad 5
handheld display and it fits into the stylus holder. Trimble offers no guarantee that other styli will
work.
USB mouse and keyboards
You can attach a physical keyboard, mouse and other peripherals to your Nomad 5
handheld via USB. For more information Using accessories and connecting to other
devices, page 45.
Display settings: adjusting the backl ight
The Nomad 5 handheld is equipped with a high brightness outdoor readable display. You
can easily increase the brightness of the display to increase the readability of the device in
bright sunlight conditions, or turn down the brightness to help conserve battery power
when working indoors or in dull conditions. You can also have the device automatically
adjust the backlight power depending on the ambient light conditions.
To quickly adjust the backlight setting:
1. Swipe down from the top edge of the screen to open the Quick Settings bar.
2. Slide the backlight slider
To manually or automatically adjust the backlight setting:
1. Open the Settings app
2. Under Device, tap Display.
3. Tap the setting that you want to change.
left or right to adjust the brightness.
.
Page 37

Trimble Nomad 5 Handheld User Guide | 36
2 Basic setup and operation
Using Adapt i v e brightness :
To automatically fit your screen's brightness to the light around you, use Adaptive
brightness. Adaptive brightness is on by default. You can adjust your brightness level while
adaptive brightness is on.
Display settings: auto rotation
The Nomad 5 handheld is equipped with orientation sensors that can detect if your device
is in portrait or landscape orientation. The operating system can automatically adjust the
display to match your device orientation, or you can lock the orientation.
To adjust the auto rotate setting, swipe down from the top of the screen to display the
Quick Settings bar, then tap the auto-rotate icon
to turn it on or off.
Page 38

Trimble Nomad 5 Handheld User Guide | 37
3
Using the Android operating system
Using Accounts
Using the Home screens
Using Apps
Navigation and the status bar
This section introduces some basic information on using the Android 8.1 operating system
on the Nomad 5 handheld. For comprehensive information, see the Android Quick Start
Guide, Android 8.1 (Oreo) on the Google Play Store.
Using Accounts
When you set up your Nomad 5 handheld, you will need to set up a new or use an
existing Google Account.
An email address used for any of the following Google services counts as a Google
Account:
Gmail
YouTube
Google Play
AdWords
Any other Google product
When prompted, sign in with your Google Account, or create a new one. Signing in lets you
imm e diat el y a c c es s e v eryt hi n g a s s o ciat ed with your Googl e Acco unt , like Gmail and
Calendar.
Page 39

Trimble Nomad 5 Handheld User Guide | 38
3 Using the Android operating system
When you sign in, you can easily get all the apps you’ve purchased on Google Play onto
your new device. All the email, contacts, calendar events and other data associated with
that account are automatically synced with the device.
WARNING – Make sure you remember the password you use to sign into your
device or else you won’t be able to access it. Even if you do a factory reset, you will be
required to enter the password you used to sign into this device.
If you have multiple accounts, you can add other accounts from the device's settings; go to
Settings / Personal / Accounts.
You can also add guest users; go to Settings / Device / Users.
Using the H om e screens
When you have finished setting up your device for the first time, the main Home screen
appears. Here you can add app icons and widgets (an at-a-glance view of the app's most
important information) to your Home screens.
[Home screen screen shot]
To move between Home screens, swipe left or right.
To see notifications, swipe down from the top of the screen with one finger.
To open Quick Settings (frequently used to settings), swipe down from the top of the
screen twice with one finger, or once with two fingers.
To open Settings swipe down from the top of any screen with two fingers, then touch
the settings icon at the top right.
On the Home screen, tap Google at the top of the screen or say
send messages, ask for directions, or give other instructions.
Adding apps to a Home screen
OK Google
to search,
1. Go to the Home screen where you want to place the app, and tap the Apps icon .
2. Swipe down or from left to right to find the app you want.
3. Touch-hold the app until the Home screen appears, then slide the app icon to where
you want to place it, and lift your finger off the screen.
Removing apps from a Home screen
To remove an app icon from the Home screen without removing it permanently from your
device, touch-hold it, then slide your finger toward the top of the screen, and drop the app
over Remove in the top left.
Page 40

Trimble Nomad 5 Handheld User Guide | 39
3 Using the Android operating system
To uninstall an app permanently from your device, touch-hold it, then slide your finger
towards the top of the screen and drop the app over the uninstall icon at the top right.
Using Apps
To see all your apps, including those that come with your device and those you
downloaded from Google Play, tap the Apps icon
From the Apps screen, you can:
Explorer apps. Swipe up / down, left / right on the Apps screen.
Open an app. Tap its icon to open an app.
Search apps. Enter the name of the app you are looking for in the Search apps… bar.
Place an app icon on a Home screen. See Using the Home screens, page 38.
Get more apps. Tap the Google Play icon in the list of app icons.
.
Navigation and the status bar
[Status bar scree n snap]
The status bar is at the very top of the screen. On the right, it shows the Wi-Fi and mobile
signal strength, how much battery power is left, and the time. On the left, it shows which
apps have sent you notifications.
The Android navigation buttons are at the bottom of the screen:
Back. Returns to the previous screen you were working in, even if it was in a different
app. Once you back up to the Home screen, you can't go back any further.
Home. Returns to the Home screen. To get suggestions based on the screen you're
currently viewing, tap and hold this button.
Overview. Opens a list of thumbnail images of screens you've worked with recently. To
open one, tap it. To remove a screen, swipe it left or right or tap x in its top right corner.
Some apps that run in full screen hide these navigation buttons temporarily or fade them
to small dots in the same position. To bring them back, touch the dots, touch the screen
bottom center, or swipe up from the bottom of the screen.
Many screens in apps and settings include a Menu icon at the top right of the screen.
Tap it to explore additional options, including help and feedback.
Page 41

Trimble Nomad 5 Handheld User Guide | 40
4
Using wireless networks
Working with Wi-Fi netwo rks
Working with mobile broadband
Airplan e m ode
Some models of the Nomad 5 handheld support wireless connectivity; connect to wireless
networks using the built-in Wi -Fi r a dio (al s o s o m etime s c al led Wi r eless LAN, WLAN, or
802.11), or the built-in mobile broadband data (also called Wireless WAN, WWAN, or cellular
data) capability.
This section describes how to get online with your Nomad 5 handheld using these wireless
networking capabilities.
Working with Wi-Fi networks
Usi n g Wi -Fi you can connect to a wireless network and browse the Internet, download
apps, send email messages, access online services, or access other computers and devices
on you r networ k.
Before you can send and receive data over Wi-Fi, you need to turn on Wi-Fi on your Nomad
5 handheld and connect to a wireless network.
Connecting to Wi-Fi
1. Open the Settings app
2. Tap Wi-Fi.
3. At the top of the screen, tap the On/Off switch to turn on Wi-Fi.
4. A list of available wireless networks appears. Tap the Wi-Fi network you want to
connect to. If the network is secured and you need a password, you'll see the Wi-Fi lock
icon .
.
Page 42

Trimble Nomad 5 Handheld User Guide | 41
4 Using wireless networks
Once you are connected:
Connected shows under the network name.
The Wi-Fi network is a Saved network. When in range, your device automatically
connects to it.
Disconnecting from Wi-Fi
1. Open the Settings app
2. Tap Wi-Fi.
3. At the top of the screen, tap the On/Off switch to turn off Wi-Fi.
.
Forgetting a Wi-Fi network
If you do not want your device to automatically connect to a saved Wi-Fi network, you can
forget that network.
To forget a wir el ess network so it no l onge r appears i n your list of networks:
1. Open the Settings app
.
2. Tap Wi-Fi.
3. At the top of the screen, make sure the On/Off switch is On.
4. Tap the network you want to forget, then tap Forget.
Advanced Wi-Fi settings
You ca n change the advanced Wi-Fi settings on your device.
1. Open the Settings app
2. Tap Wi-Fi.
3. Tap More, then tap Advanced.
4. Tap an available setting option:
Network notification. Get a notification when your device finds a Wi-Fi network to
which it can connect.
Keep Wi-Fi on during sleep. Choose how your device handles Wi-Fi when it's
asleep.
Install certificates. Digital certificates can identify your device for many purposes,
including VPN or Wi-Fi network access.
.
Page 43

Trimble Nomad 5 Handheld User Guide | 42
Wi-Fi Direct. Let your device connect with other Wi-Fi Direct-capable devices
without a network.
WPS Push Button. Turn on Wi-Fi protected setup (WPS) for a WPS-capable network.
WPS Pin Entry. Enter the Wi-Fi protected setup (WPS) personal identification
number (PIN).
4 Using wireless networks
Configure proxy settings
To connect to a Wi-Fi net work via a pr oxy:
1. Open the Settings app
2. Tap Wi-Fi.
3. Tap-hold the Wi-Fi network name.
4. Tap Modify network.
5. Tap the Advanced options dropdown menu.
6. Tap the Proxy dropdown menu, and select the required option:
None
Manual
Proxy Auto-Config
7. If necessary, enter the proxy settings.
8. Tap Save.
Proxy settings must be set up separately for each Wi-Fi networ k.
.
Working with mobile broadband
If your model of the Nomad 5 handheld has an integrated cellular modem, you can
connect to a mobile broadband network.
Before you can send and receive data over mobile broadband, you must have a
MicroSIM card in the device (see Inserting SD and SIM cards, page 25). You must then turn
on Cellular data on theNomad 5 handheld and configure the connection.
Using mobile data
You can adjust how your device uses mobile data by changing your cellular network
settings.
Page 44

Trimble Nomad 5 Handheld User Guide | 43
4 Using wireless networks
Depending on your carrier and s ervi c e plan, your device may connect automatically to
your carrier’s fastest available data network. Or you may need to choose settings and use a
SIM card for a specific carrier.
To adjust cellular network settings:
1. Open the Settings app
.
2. Under Wireless & networks, tap More / Cellular networks.
3. Adjust the settings as required:
Data roaming. Let your device transmit data over other carriers’ networks when
you leave an area covered by your own carrier’s networks.
Preferred network type. Select your preferred network type from options, like LTE,
3G, and 2G.
Access point names. Help your carrier identify the right IP address for your device
and connect your device securely.
Network operators. Choose your network operator from available networks.
Enhanced 4G LTE mode. Improve voice and other communications.
Locating the devic e's IMEI number
The IMEI number is a unique 15-digit number that identifies the cellular module installed
on your device. Your mobile broadband operator may need to know the IMEI number of
your device in order to register the device with the network and activate your mobile
broadband data plan.
If your Nomad 5 handheld is mobile broadband enabled, the IMEI number will be printed
on the serial number label under the battery.
Alternatively, to check the IMEI number in the operating system:
1. Open the Settings app
2. Under System, tap About tablet.
3. Tap Status / IMEI information.
.
If you cannot find the IMEI number for your device, or you do not have the device with you,
contact your reseller.
Airplane m ode
If you are travelling on an airplane, or don’t need to use wireless functions on the Nomad 5
handheld for a while, use Airplane mode to turn on or off all wireless radios with
Page 45

Trimble Nomad 5 Handheld User Guide | 44
4 Using wireless networks
transmitting features built into the Nomad 5 handheld, including Bluetooth, Wi-Fi, Cellular
LTE, or GNSS, as well as any wireless radios connected to the Nomad 5 handheld such as
EMPOWER modules.
To turn Airplane mo de on or off :
1. Swipe down from the top edge of the screen to open the Quick Settings bar.
2. Tap Airplane mode to turn it on .
Page 46

Trimble Nomad 5 Handheld User Guide | 45
5
Using accessories and connecting to other devices
Using the charging cradle
Connecting to USB accessories
Using Bluetooth wireless technology
Transferring data between your Nomad 5 handheld and another computer
Using EMPOWER modules
You can connect monitors, accessories, and other devices directly to your Nomad 5
handheld using USB. You can also connect a Bluetooth headset.
Using the charging cradle
The charging cradle provides a convenient way to charge the battery in the Nomad 5
handheld in the office. The charging cradle can also charge a separate battery outside the
Nomad 5 handheld at the same time.
1. Plug the AC end of the charging cradle power cord into an electrical outlet or power
strip, and plug the other end into the power port on the charging cradle.
2. Place the Nomad 5 handheld in the cradle. Take care to make sure that the Nomad 5
handheld is seated properly in the cradle.
3. To charge a spare battery, place it in the cradle's battery charger slot.
Connect ing to USB accessories
The Nomad 5 handheld has a USB port for connecting USB devices, such as a flash drive,
scanner, printer, keyboard, and mouse. The Nomad 5 handheld has built-in support for
mass storage devices and human interface devices.
Other types of USB device s may re qu ire dri ver s.
Page 47

Trimble Nomad 5 Handheld User Guide | 46
5 Using accessories and connecting to other devices
To connect a USB device, plug the device cable into the USB A-type port on the bottom of
the Nomad 5 handheld.
Using Bl uetooth wireless technology
The Nomad 5 handheld has embedded Bluetooth wireless technology—a sh ort -range
wireless communication technology that allows wireless data transfer and communication
between devices over a distance of up to 10 meters (30 feet).
You can use Bluetooth wireless technology to connect the Nomad 5 handheld to a
Bluetooth headset.
Turning Bluetooth on or off
1. Open the Settings app
2. Under Wireless & networks, tap Bluetooth.
3. Tap to switch Bluetooth On or Off.
At the top of the screen, a B l uetooth ico n shows w hen Bluetoo t h is turned on.
.
TIP – To save battery, turn off Bluetooth when you are not using it. Bluetooth is off in
Airplane mode.
Pairing and connecting a Bluetooth device with the Nomad 5 handheld
Before you can transfer data or communicate between your Nomad 5 handheld and
another Bluetooth enabled device, you must pair the Nomad 5 handheld and the device.
Step 1: P air with a Bluetooth devi ce
1. Open the Settings app .
2. Under Wireless & networks, tap Bluetooth.
3. Make sure Bluetooth is On, and the Nomad 5 handheld is set to visible.
4. The Nomad 5 handheld scans for and displays all available Bluetooth devices in range
under Available devices. If your Bluetooth device isn't showing in the list, tap
then Refresh.
5. Tap the name of the Bluetooth device you want to pair with.
and
Page 48

Trimble Nomad 5 Handheld User Guide | 47
5 Using accessories and connecting to other devices
6. Follow the on-screen steps.
If the pairing is successful, the Nomad 5 handheld connects to the device.
If you are asked to enter a passcode, try entering 0000 or 1234 (the most common
passcodes), or see the documentation that came with your Bluetooth device.
Step 2: Connect to a Bluetooth device
After pairing with a Bluetooth device, you can connect to it manually—for example, to
switch devices or to reconnect after a device comes back in range.
1. Open the Settings app .
2. Under Wireless & networks, tap Bluetooth.
3. Make sure Bluetooth is On.
4. In the list of paired devices, tap a paired but unconnected device.
5. When the Nomad 5 handheld and the Bluetooth device are connected, the device is
displayed in the list as connected.
Transferring data between your N om ad 5 handheld and another computer
You can transfer data or files between your Nomad 5 handheld and another device. There
are a number of ways you can do this, including:
using a USB data transfer cable . See Transferring data using a micro USB Cable, page
47
using USB memory stick; see Connecting to USB accessories, page 45
via Wireless LAN; see Working with Wi-Fi networks, page 40
Using cloud-based file sync services, such as Dropbox, Microsoft OneDrive, Google
Drive over Wi-Fi or 4G
Transferring data using a micro USB Cable
You can transfer data to a computer powered by a Windows operating system or to a Mac
computer using a micro USB data cable.
Page 49

Trimble Nomad 5 Handheld User Guide | 48
5 Using accessories and connecting to other devices
For the W in dows operating syst em:
1. Unlock the screen on the Nomad 5 handheld.
2. Use a microUSB data transfer cable to connect the Nomad 5 handheld to the Windows
computer.
3. Swipe down from the top of the Nomad 5 handheld screen to see your notifications.
4. Tap the USB for... notification. Then tap Transfer files (MTP).
5. A File Transfer window opens on the Windows computer. Use it to drag and drop files,
just like with other external devices and storage.
6. When you are done, eject the Nomad 5 handheld from the Windows computer.
7. Unplug the USB cable.
For a MacOS device:
To transfer files, you must have Android File Transfer installed on your computer. Android
File Transfer is compatible with Mac OS X 10.5 or later and Android 3.0 or later.
1. Download and install Android File Transfer on your computer.
2. Open Android File Transfer. (The next time that you connect your device, it should
open automatically.)
3. Unlock the screen on the Nomad 5 handheld.
4. Use a microUSB data transfer cable to connect the Nomad 5 handheld to the Mac
computer.
5. Swipe down from the top of the Nomad 5 handheld screen to see your notifications.
6. Tap the USB for... notification. Then tap Transfer files (MTP).
7. An Android File Transfer window opens on the MacOS computer. Use it to drag and
drop files.
8. When you are done, unplug the USB cable.
Using EMPOWER modules
EMPOWER modules can be used to extend or expand the basic capabilities of your device.
Each EMPOWER module can be installed, removed, or moved from one EMPOWERenabled device to another.
The Nomad 5 handheld allows one EMPOWER module to be installed at a time.
For more information about using EMPOWER modules, refer to the module
documentation available here: www.trimble.com/empowermodules.
Page 50

Trimble Nomad 5 Handheld User Guide | 49
5 Using accessories and connecting to other devices
Installing EMPOWER modules
1. Make sure your device is turned off or in Sleep state. For more information, see
Charging and power modes, page 29.
2. Turn the device over, and using a Phillips #1 screwdriver, loosen the 2 screws on the
EMPOWER module bay cover to remove it.
Store the EMPO W E R mod ule bay cover somew here safe for potential future use.
NOTE –
Before you remove a module from the device, make sure the device is powered off.
Reattach the module bay cover when no module is attached.
3. Hook the EMPOWER module onto the device, ensuring that the slots on the top of the
device line up with those on the EMPOWER module.
4. Tighten the 2 captive screws at the bottom of the EMPOWER module using a Phillips #1
screwdriver. Do not overtighten the screws.
5. Turn on the device and start the EMPOWER Hub (found under Start / EMPOWER /
EMPOWER Hub). The EMPOWER Hub is a centralized location for managing and
monitoring your EMPOWER modules.
NOTE – Some modules may require that additional drivers and/or supporting applications be
installed before the base device recognizes the module. These files can be downloaded from:
www.trimble.com/empowermodules.
Page 51

Trimble Nomad 5 Handheld User Guide | 50
6
Using the cameras
Taking photos and videos
Changing camera settings
Enable the Camera app to access your location to geo-tag photos
Viewing photos and videos
The Nomad 5 handheld is fitted with two cameras; a 2MP camera on the front of the
device, and an 8MP camera with LED flash on the rear. Both cameras are accessible by the
camera application.
NOTE – The device may be shipped with a protective film covering the rear camera and
flash windows. Remove the film before first use to ensure proper focus and exposure of
your photos and videos.
Taking phot os and vide os
By default, the built-in Camera app is ready to take photos, but you can switch easily
between photo and video mode.
To take a photo or record a video:
1. Launch the Camera app by doing one of the following:
Double-tap the Power button.
On the lock screen, swipe away from the camera icon.
Tap the Google Camera app icon.
Say OK Google, take a picture.
2. Select the camera mode you want to use:
Swipe from the left to display the capture mode choices.
Select Camera for still images.
Select Video for videos.
Page 52

Trimble Nomad 5 Handheld User Guide | 51
6 Using the cameras
3. Take a photo or video.
Poi nt the came ra and wait f or it to autofocus .
To zoom in, pinch open on your screen. To zoom out, pinch closed on your screen.
To focus on and expose for the subject of the photo, tap it on your screen.
Tap Capture.
4. To see the photos you’ve saved, tap the thumbnail image in the corner of the screen.
Changing c am era settings
To change how photos or videos are captured, tap the
icons to change basic capture modes:
Switch between the front and rear camera
Set a timer (3 seconds, 10 seconds, or Off)
Display a grid to help compose your images
icon. Use the capture mode
Use the camera flash
Advanced camera settings
To access advanced camera settings, with the Camera app open, swipe from the left side of
the device, then tap the settings cog icon. Under advanced settings, you can:
Set image and video resolution and quality
Turn on or off Geotagging
Turn on or off manual exposure control
Viewing ph otos and videos
By default, your photos and videos are saved to the Camera roll on the Nomad 5
handheld. There are several ways to look through your photos and videos:
Camera app: tap the thumbnail in the botton right corner of the screen to open the
Photos app and then do any of the following:
select S ee all photos
swipe right or left to scroll through other photos / videos in your collection.
Photos app: open the Photos app from the Windows Start menu.
File Explorer or OneDrive app: Go to your Pictures library and open your Camera
roll.
Page 53

Trimble Nomad 5 Handheld User Guide | 52
7
Using the pr e-i nstalle d ap ps
Trimble EMPOWER Hub
Trimble GNSS Status utility
Bundled Google apps
Getting more apps
The Nomad 5 handheld comes with a range of useful pre-installed software. This section
describes the most important pre-installed applications you should know about, and
summarises what they can be used for.
Trimble EMPOWER Hub
Control and manage Trimble EMPOWER modules from one convenient, easy-to-use
application. For more information, refer to the module documentation available here:
www.trimble.com/empowermodules.
Trimbl e GN S S S tatus uti lity
The Trimble GNSS Status utility enables you to view accuracy information for the currently
selected GNSS source. For receivers that support these function, use the GNSS Status
utility to:
For more information, refer to the
www.trimble.com.
set up correction sources
apply licensing options
configure NMEA output
Trimble GNSS Status Utility User Guide
on
Page 54

Trimble Nomad 5 Handheld User Guide | 53
7 Using the pre-installed apps
Bundled Google apps
Here are some of the useful productivity applications that come bundled with your Nomad
5 handheld powered by the Android 8.1 operating system.
OneNote. Use the OneNote app on your device to take notes and store them in the cloud.
For more info, see www.onenote.com.
Google.
GMail. Use GMail to manage your email. You can add multiple accounts and access
them through this single point.
Calendar. Use Calendar to manage your schedule.
Google+. Use Google+ to build a social network with contacts from your Google
account(s).
Contacts. The Contacts app brings all your contacts together in a single space. See
each contact’s email address, phone number, website, and other information at a
glance.
Maps.
Camera. The Camera app lets you take regular photos or video using either the front
or back camera on the device.
Photos. Edit and organize your photos using the Photos app. Crop, enhance, and add
effects to your images.
Hangouts. Use Google Hangouts for messaging, video chat, SMS and VOIP.
Drive. Store files, photos, drawings, recordings, videos and much more in Google Drive;
you can then access your files stored in Drive from any smartphone, tablet, or
computer.
Docs.
Sheets.
Slides.
Keep. Use Google Keep to take notes, including text, lists, images, and audio.
Play Music.
Play Movies.
Android Pay.
Calculator.
Messenger.
Page 55

Trimble Nomad 5 Handheld User Guide | 54
YouTube. News brings you the latest breaking stories as well as more in-depth
7 Using the pre-installed apps
coverage. You can customize the coverage to add more local information or highlight
the topics you choose.
News & Weather. The Weather app offers hourly, daily, and 10-day forecasts as well as
historical information and annual weather trends.
Downloads.
Getting m ore apps
You can get apps, games, and digital content for your device using the Google Play™ Store
app.
The Google Play Store app is pre-installed on your Nomad 5 handheld:
1. Open Apps and tap the Play Store app.
2. Use the Google Play Store to search and browse for content to download.
Page 56

Trimble Nomad 5 Handheld User Guide | 55
8
Troubleshooting, downloading
updates,
and repair
Troubleshooting
Operating system and software updates
Repairing your device
Troubleshooting
Thi s s e ct i o n c o nt ains answers to some common troubleshooting questions. If you
encounter problems when using your Nomad 5 handheld, try the following
troubleshooting tips to detect and solve the problem. If problems persist, contact your
local distributor for support.
Performance issues
Device restarts or crashes frequently
If your device keeps rebooting itself, or crashing without restarting, one of the steps below
may fix the issue. After following the steps for each recommended solution, check whether
it fixed the issue.
Check for Android updates
System updates can bring improvements that may fix your issue. To check for and install
system updates:
1. Open the Settings app
2. Scroll to the bottom and tap About tablet System updates.
3. The update status displays. Follow any on-screen instructions.
.
Page 57

Trimble Nomad 5 Handheld User Guide | 56
8 Troubleshooting, downloading updates, and repair
Check storage and f ree up space
You may see issues if the device's internal storage is full or almost full. To free up space that
the device needs to work properly, you can remove unnecessary files and clear cached
data.
To check how much storage the device has:
1. Open the Settings app
2. Under Device, tap Storage.
.
3. See how much storage you have available. The device can start having issues when less
than 10% of storage is free.
Check for app updates
App updates can bring improvements that may fix your issue. To see and get updates for
your apps:
1. Open the Play Store app .
2. At the top left, tap Menu.
3. Tap My apps & games.
4. Apps with available updates are labeled
Update. If multiple updates are available, tap Update all.
Close apps that you are not using
Update
. If an update is available, tap the app
In general, you don't need to close apps; Android automatically manages the memory that
apps use. But to completely shut down an app, including any background services that it
may be using:
1. Open the Settings app
2. Tap Apps, then select the app from the list and tap Force stop.
.
TIP – To help identify apps that cause problems, make a list of which apps you have
manually force-stopped.
See if an app is causing the issue
The issue may be caused by an app that you downloaded. To see whether a downloaded
app is causing the issue, you can reboot your device in safe mode. Safe mode temporarily
disables all downloaded apps.
1. To reboot the device in safe mode, follow the instructions here
(https://support.google.com/android/answer/7665064?visit_id=1636628110244432672-3485170295&rd=1).
Page 58

Trimble Nomad 5 Handheld User Guide | 57
8 Troubleshooting, downloading updates, and repair
2. Once in safe mode, wait to see if the problem goes away.
If the issue isn't resolved in safe mode, a downloaded app is most likely not causing
the issue. Restart the device and try other troubeshooting solutions.
If the issue is resolved in safe mode, a downloaded app is most likely causing the
issue. To find out which app it is:
a. Restart the device to exit safe mode.
b. One by one, uninstall recently downloaded apps. After each removal, restart
the device and check if the issue is resolved.
c. When you have identified and removed the app that was causing the problem,
you can reinstall the other apps that you removed.
EMPOWER module issues
My field software doesn’t recognize my EMPOWER module
Check module contacts and attachment
It is possible the contacts between the module and the device are dirty, or that the
module is not attached correctly. Ensure that the module contacts are clean and that
the screws are tightened correctly.
Your field software is not configured to communicate with the EMPOWER module
Check that your field software supports the EMPOWER module directly and that the
field software is configured to talk to the EMPOWER module directly or through the
correct COM port.
Refer to the Trimble EMPOWER modules documentation here
www.trimble.com/empowermodules for more information.
The EMPOWER Hub doesn’t show my module
Wireless connectivity issues
Wi-Fi speed is slow
Your network is running slow for all devices.
You should first check to see whether your network is slow on another device. Can you
connect to your wireless network and browse the web at normal speeds from another
Page 59

Trimble Nomad 5 Handheld User Guide | 58
8 Troubleshooting, downloading updates, and repair
device? Try running a Network Speed Test to ensure your Internet connection is
functioning normally.
Your Wi-Fi signal is weak.
Look at the wireless network Wireless network icon icon in the taskbar.
This icon
shows your current signal strength. If the icon is partially dimmed, move
your device closer to your wireless router to see if the signal improves. If your router is
broadcasting on both a 2.4GHz and 5GHz frequency, try connecting to a different
frequency. In general, a network operating on the 5GHz frequency will be faster and
less susceptible to interference, but will have a shorter range than a 2.4GHz network.
Power and battery issues
Battery will not charge
The battery is overheated, or too cold.
The battery will charge between 0 °C and 45 °C (32 °F and 113 °F). If you have been
using or storing the battery and/or device in a particularly hot or cold environment, the
battery may be outside the safe charging temperature range. Sensors in the battery
will prevent the battery from charging until its temperature returns to a normal level.
The battery is not installed correctly.
If the battery is not installed correctly in the device or the battery charger, it may not
have a proper connection and will not charge.
The battery terminals are dirty or corroded.
If the terminals of the battery are dirty or corroded, it may not have a proper
connection and will not charge.
Device will not start up
The battery does not have enough charge to power the device.
Remove the battery from the device, and press-hold the charge indicator button on
the battery. At least one charge LED must be lit up to indicate that a battery has
enough power for the device to start on battery power. If no LEDs light up on a battery,
attach the device to an external power source, or swap the battery for a charged
battery, then try again.
The battery is not correctly installed.
Page 60

Trimble Nomad 5 Handheld User Guide | 59
8 Troubleshooting, downloading updates, and repair
The device may not be receiving power from the battery if it is not installed properly.
Remove the battery, then replace it correctly, pressing down on both corners until it
clicks into place. Slide the battery lock to the lock position (down)
Device s uddenly tur ned off dur in g use
Make sure you are not accidentally pressing the Power key.
The Power key is located in the top left side of the device. Make sure that while gripping
the device you are not accidentally pressing the Power key, which places the device in
suspend mode.
The device may have run out of power and gone into critical suspend mode.
If the battery charge level gets too low, the device will automatically go into a hibernate
mode to prevent loss of data. Remove the battery from the device, and check the
battery level by pressing-holding the battery level button on the battery. If the battery
charge is too low, connect the device to external power, or swap the battery for a
charged battery.
If you regularly run out of battery power while in the field, consider carrying a spare
battery with you. The device supports hot-swapping of the battery, which means that
the device will keep running for a few minutes while you remove the battery and
replace it with another.
Device shut-down when hot-swapping the battery
Hot-swap battery is not sufficiently charged. The hot-swap back-up battery allows you
to change the main device battery for a charged one without shutting the device down.
To function correctly, the hot-swap battery needs at least X minutes of charging time
before it can work properly. If you attempt multiple hot-swaps without allowing the
back-up battery to recharge, your device may shut-down when the battery is removed.
Restarting or resetting the operating system
If your device becomes unresponsive, and the troubleshooting guide does not resolve the
problem, you need to restart or reset your device.
Restarting your (unresponsive) device
If your device is no longer responding to touchscreen or keyboard input, you may need to
force it to restart by removing power from the system.
NOTE –
unsaved files and settings will be lost.
Restarting the system by holding down the Power key removes power to the CPU. Any
Page 61

Trimble Nomad 5 Handheld User Guide | 60
8 Troubleshooting, downloading updates, and repair
To force your device to restart, press and hold the Power key until the device shuts down
(~15 seconds), then restart your device by pressing the Power key.
Resetting your device
If restarting your device does not resolve the issue that you are seeing, resetting it might
help.
You ca n remove all data from your device by res etting it to factory set tings .
WARNING – A factory reset wipes all data from the device. While any data stored in
your Google Account will be restored, all apps and their associated data will be
uninstalled.
WARNING – Your device is protected to prevent other people from using it if it's
been reset to factory settings. To ensure that it's really you doing the reset, you'll need
to enter a Google username and password associated with the device after factory
reset. If you don't have this information, you won't be able to finish the setup process
and use the device at all after factory reset.
Erasing your data may take some time, so make sure that you plug your device into a
power source before you start.
1. Open the Settings app
.
2. Go to Settings / Backup & reset. You may need to enter your unlock pattern, PIN, or
password.
3. Tap Factory data reset.
4. Tap Reset.
5. If you have a screen lock, you'll need to enter your pattern, PIN, or password.
6. Tap Erase everything to confirm you want to reset the device to factory settings.
7. When the device has finished erasing, select the option to reboot your device.
Operating system and software updates
Periodi cally, oper a ti n g system and sof tw ar e ap pl i cation upd at e s wil l be av ai lable for your
device.
Android 8.1 updates
Page 62

Trimble Nomad 5 Handheld User Guide | 61
8 Troubleshooting, downloading updates, and repair
Software do wnl o ads an d upd ate s
The latest versions of software including drivers, firmware updates, and software utilities,
are av ai lable on the te chnical support pages on www.trimble.com.
Repairing your device
Before you send your Nomad 5 handheld for repair, check the troubleshooting guide in
this document. If you can’t solve the problem with troubleshooting, contact your local
Trimble dealer for further support.
Repair of this product should only be performed by an authorised service provider. Any
attempt to disassemble this product by a non-authorised service provider will void the
warranty.
For more informatio n, contact your local Tri m bl e dealer.
Page 63

 Loading...