


Traeger BBQ 100 Owner's Manual

TRAEGER
®
OWNER’S MANUAL
BBQ 100
RESIDENTIAL PELLET GRILL
This Grill Protected Under Patent Number: 4,823,684
FOR OUTDOOR USE ONLY!
WARNING!
DO NOT STORE OR USE NEAR GASOLINE OR
OTHER FLAMMABLE OR COMBUSTIBLE LIQUIDS
IN THE VICINITY OF THIS APPLIANCE! USE ONLY
TRAEGER BRAND HARDWOOD BBQ PELLETS IN
THE OPERATION OF THIS UNIT

INTRODUCTION
Congratulations on your purchase of this Traeger Wood Pellet Grill, Model BBQ100
Deluxe. With the proper set-up, operation, and maintenance, this grill will provide years
of cooking enjoyment!
SECTION ONE: ASSEMBLY INSTRUCTIONS
Your BBQ100 is almost completely assembled. You will need to complete the assembly
process by:
1) Mount the storage box to the right hand side of the barbecue body.
2) Install the four caster wheels to the bottom of the barbecue.
3) Install handle on the barbecue lid
5) Position the U-shaped firepot cover over the firepot
6) Cover and position the angled drip pan
NOTE: The component diagram on the previous page will help you become familiar
with the various parts of the barbecue which you will need during the
assembly process.
When you un-box your new grill, make sure you have, and can identify the following parts:
(1) bag of nuts, washers, and bolts.
(1) storage box assembly
(1) porcelain coated cooking grill
(1) U-shaped firepot cover
(1) angled drip pan
(1) grease bucket
Follow the step-by-step instructions and you’ll be cooking in no time!
TOOLS REQUIRED FOR ASSEMBLY:
¼” socket set and/or driver
7/16
Phillips screwdriver
th
open-end wrench or crescent wrench
Un-boxing Your Grill:
Carefully remove the staples from around the sides of the box. With one other person,
lift the box up and over the barbecue.
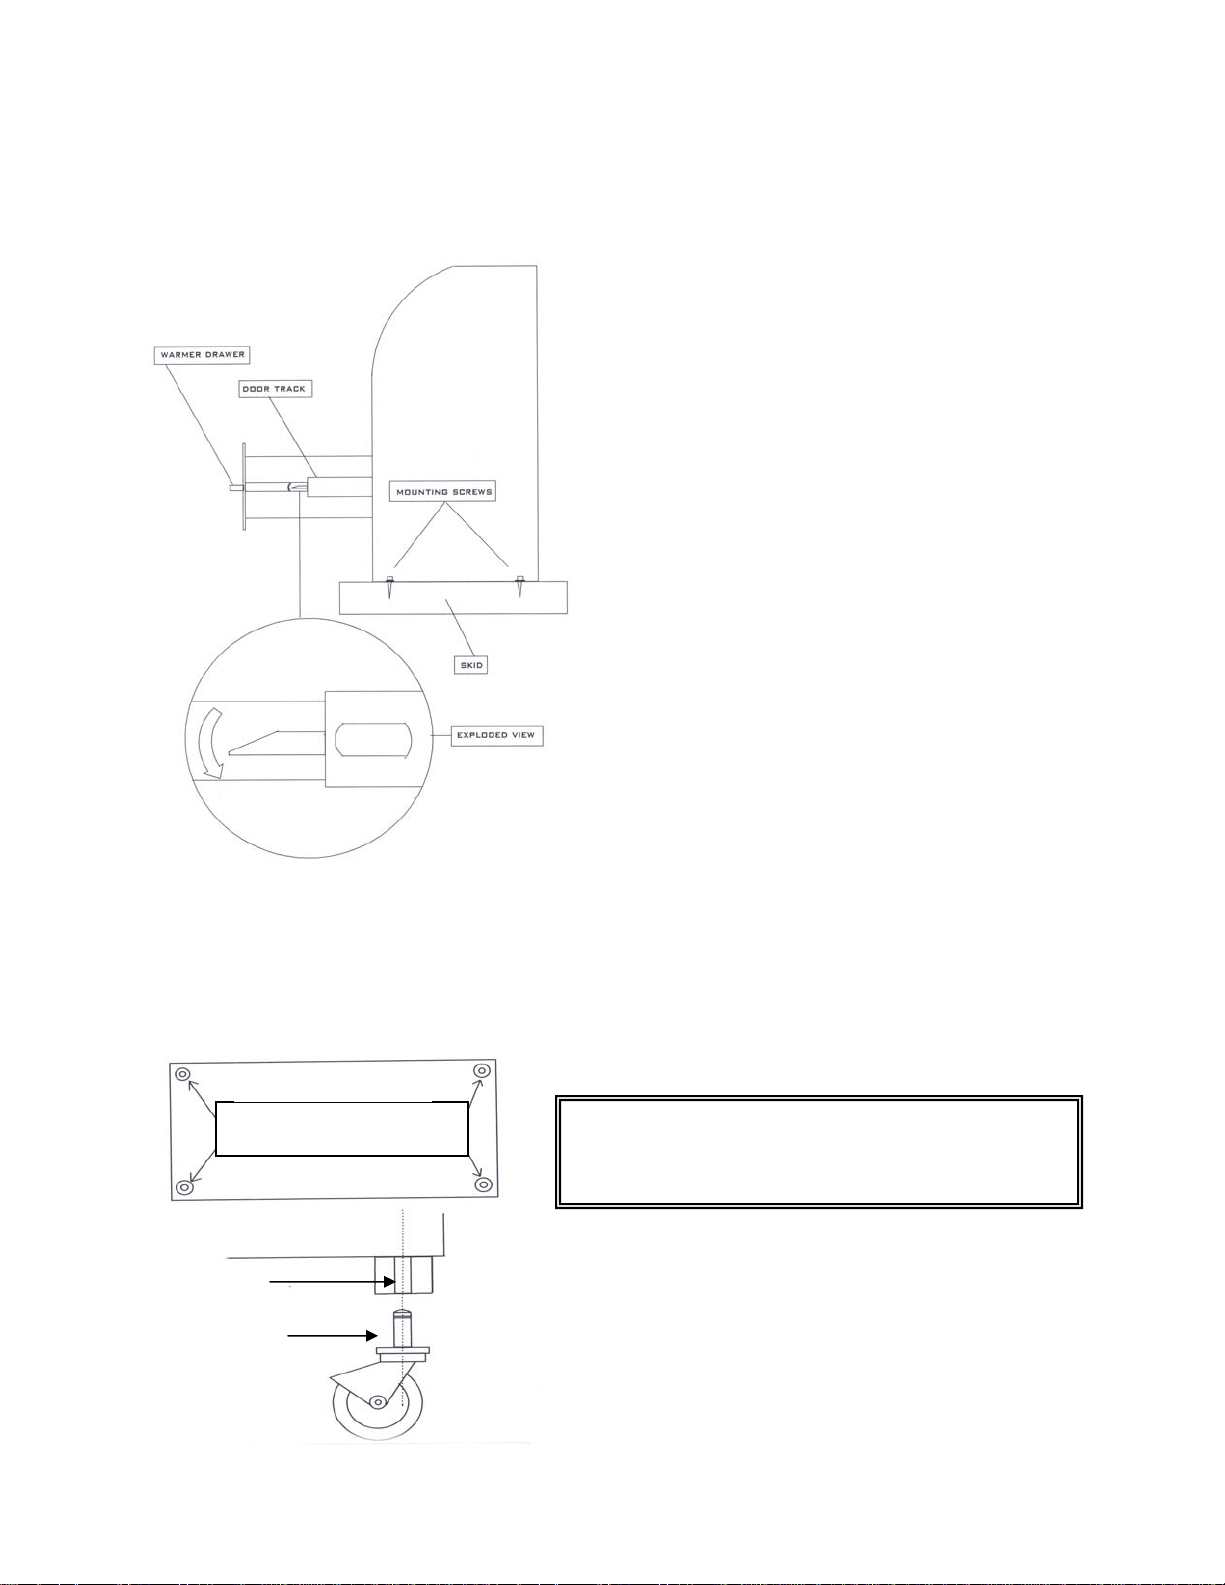
Removing The Barbecue From the Wooden Skid:
Removing The Barbecue From The Skid
Note: This task requires TWO people
1) Following the diagram, pull the Warmer
Drawer all the way open.
2) On the left and right sides of the drawer,
you will see the door tracks which the
drawer slides on. Per the drawing, find
the release lever on each side of the
drawer.
3) Push the lever in the direction of the
indicator arrow. The left side lever goes
up, the right side lever goes down.
4) Hold the levers in the direction indicated
and pull the drawer all the way out of the
barbecue.
5) Looking inside the barbecue through the
drawer opening locate the four ¼ inch
hex bolts that hold the barbecue to the
skid. Remove with ¼ inch socket driver.
6) With one person on each side of the
barbecue, carefully remove the barbecue
off the skid and place on a level surface.
Installing The Casters:
Lay the barbecue on its back. A clean piece of cardboard or blanket should be placed
under the barbecue to prevent scratching the finish. install the four casters following the
diagram below:
Receptacle
Caster Pin
Caster Receptacles
IMPORTANT NOTE!
Make sure you install the 2 LOCKING
casters on the front of the unit.